15 minute read
TECH: VFC MP7 REDEMPTION


THE ROAD TO REDEMPTION
FEW AEG RELEASES IN RECENT HISTORY HAVE BEEN AS TUMULTUOUS AS THAT OF THE VFC MP7 AEG JUST ILLUSTRATING THAT, REGRETTABLY, EVEN OUR FAVOURITE MANUFACTURERS DIDN’T GET IT RIGHT EVERY TIME! MANY OF US DROOLED OVER THE MP7, BUT THE VFC MODEL SEEMED BESET WITH ISSUES FROM THE GET GO. OUR US-BASED RED CELL MEMBER, DAN, WANTED TO MAKE THIS MODEL THE BEST THAT IT COULD BE THOUGH AND NOW DETAILS HIS QUEST OF CREATING A LITTLE DIAMOND FROM THE ROUGH!

From the very beginning when early access release photos of VFC’s MP7 started trickling through the internet revealing key design details criticism seemed quick to follow. Despite heavy marketing hype and the promise of this being a true “AEG” with 1:1 dimensions, what was ultimately revealed proved to be little better than a glorified AEP with beefed up internals stuffed into the best approximation of a 1:1 shell we’ve had yet.
This would have been a forgivable lapse of marketing had the platform actually, you know… worked. What followed, however, was an epic disaster as numerous early and eager adopters of this new MP7 quickly found their guns dying straight away on game day. Not just in single digits or randomized samples of one, either, but in droves. I’ve seen it reported that some users had their guns RMA’d upwards of NINE times and still the issues were not fixed. On my end, it was apparent that this was no isolated issue after legions of these started showing up for repair; the gun was barely a month fresh on the retail market, no less! And finally, after hounding one of the sales reps at Elite Force here in the USA for spare parts and hearing him casually remark that they had piles of boneyard MP7’s stacked up, it became clear that there were serious design deficits at play.
Broken tappet plates. Broken or dented air nozzles. Shattered delayer chips. Piston rack cave-in. Broken microswitches. Jammed magazines. The list of symptoms was extensive and typically manifested themselves as a cascade of failures. What is known now is that most of these failures usually stem from the magazine first, and reveal the design defects next.
Starting with the magazine; the relatively long 3-piece follower is unable to transition through the tight hairpin curves inside the magazine body; this causes it to jam in place. Unfortunately this jamming behavior often tends to dislodge the air nozzle from the tappet plate, owing that the fit between these two parts trends on the “sloppy” side. In some cases,
it also breaks off the retaining shoulder of the air nozzle. VFC later admitted the fit between these parts was not good, but their proffered fix was to apply superglue to the interface to build up the surface and create a tighter fit. Hardly what you’d expect from a US$424 gun. Nozzle fit aside, the tappet plate itself was designed poorly and had a major weakness in the center portion, which was where it inevitably snapped in half. Similarly, the original design of the plastic delayer chip tended to fracture in half, which caused additional problems. There were other issues too. The piston head is affixed by a screw threaded into plastic and has never seen a drop of Loctite. From many examples I’ve seen, this would sometimes rip free of the screw or come unthreaded during operation. There were several microswitches of varying design and some were especially prone to breaking due to misalignment. The hop up arm was a flimsy piece of plastic that torqued over at an angle when hop up was applied, thusly curving shots to the right. The MOSFET was a bulky, needlessly complicated design. There was more…
Again, all of this would have maybe been forgivable if the gun had even possessed a shred of parts commonality with stuff that was already commonly available in the aftermarket. At least then one could hope to repair it and make it better. But it did not, in fact, the VFC MP7 is proprietary as hell, save for a handful of parts that can be counted on one hand. Adding insult to injury, the “Gen. 2” release only rectified a couple of these issues, while completely ignoring some of the major ones.
Owing to the myriad issues with the MP7, one would almost think this gun was forever destined for the trash heap of failed designs. On my end, I stopped accepting them in for work. They were breaking as soon as they were repaired and this made them negative-gain job. There was poor parts support, and for close to a year after release, there was zero aftermarket options available to fix it with.
GETTING DOWN TO IT
But oh, how I wanted this little AEG to work, and the particular MP7 shown in this article is one I inherited after we burned through numerous tappet plates, air nozzles and microswitches. Eventually the owner said “eff it” and we moved on to getting him outfitted with something else that was reliable. I was originally planning on just blowing it out as a boneyard, but never quite got around to posting it up. So there it lay for months, collecting dust. Occasionally I would get a bee up my butt or an idea and tinker on it some. Usually I would run up against the same issues as before and get frustrated and bin it again for several more months.
Eventually VFC released their improved Gen. 2 tappet plate and delayer chip design. This was substantially stronger than the original version,
and seemed to solve the issues of snapping. It unfortunately required some milling of the tappet rail guides on the Gen. 1 gearboxes in order to fit it. But it was a step in the right direction. Likewise, the new delayer chip, which was now made of (presumably MIM) metal, was also substantially better than the fragile plastic version. Rather bizarrely though, the issue of the air nozzle not fitting well persisted. Now when experiencing a magazine jam, you didn’t outright destroy the tappet plate or delayer, but you would dislodge the air nozzle or break off the retaining shoulder. In many ways, the Gen. 2 improvements felt like a “hotfix patch” one experiences with a new game release that is quite buggy at launch. Solving some things, but leaving many stones unturned.
Over in Russia, on the aftermarket side, BullGear was simultaneously releasing their new CNC tappet plate. This was a flashy red anodized aluminum tappet plate that was both immensely stronger, but equally as important, also gripped the air nozzle tightly. This included a nice delayer chip that was machined out of a solid piece of aluminum too. These two items largely solved the major failure components on the gearbox side, though the rest of the issues would prove
themselves to have to be solved in a different fashion.
My curiosity now piqued, I started to feel a glimmer of hope that this ill-fated MP7 might actually be resurrected. Revisiting the gearbox again, I went back over it with a fine tooth comb. The piston and tappet guides were polished out to make them as smooth as possible. The bearings were bonded to the shell halves with Loctite 638 to ensure they didn’t wander out of their recesses and foul with the shimming like they previously would. Then each and every gear was shimmed and adjusted, starting with the pinion-tobevel, to the final sector gear. In pure stock form, the gear shimming tends to lean on the tight side, owing largely to the bushing sleeves on the shafts leaving little or no room for shimming. To rectify this, I had to carefully turn down most of the sleeves so shims could be applied and the gears spaced out properly. This effort paid off nicely as it completely eliminated the characteristic AEP-like whine of the gearbox.
The piston head was replaced with a Lonex POM piston head, which has a t-shaped threaded aluminum insert for the screw; the latter of which is affixed with
Loctite. The metal rack on the piston body itself was epoxied in place. AOE is the one thing that VFC did well on these, so that was well enough left alone. I would have liked to replace the cylinder head with a better fitting unit, but no options exist presently. The fit with the cylinder is a little loose for my tastes, so I installed a thicker o-ring to help out here.
I also took the opportunity to outfit the gearbox with a Real Sword Type 56 anti-reversal latch and drilled the top rail so the latch could be tripped with an allen key or similar. The Real Sword latch has an extended tail which allows for one to press against to trip the latch and release pressure on the gears. This is a feature found later on the Gen. 2 guns, but was not present on the Gen. 1’s. With the gearbox side taken care of, I moved on to tackling the rest of the gun.


MOVING ON UP
The original aluminum inner barrel was replaced with a Lambda One 6.01 cold forged stainless steel barrel. Originally I wanted to R-Hop this setup, but found that the stock hop up arm was ill-suited to this task.
As previously mentioned, when hop up is applied, it torques the hop up arm over to the right at a severe angle. There was simply no way around this issue that I could see. This actually proved to be a big wrench thrown my way as even with traditional aftermarket buckings, the issue of curved shots proved very persistent. And speaking of buckings, this gun was a picky bastard.
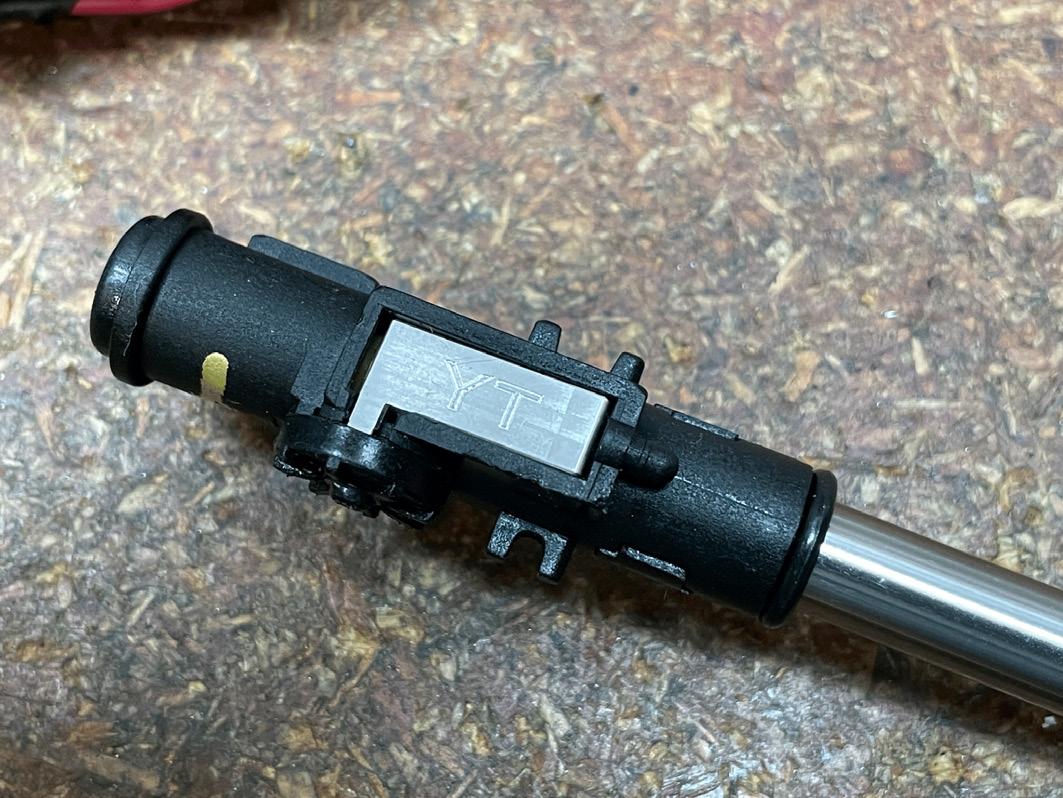
I experimented around with a lot of different buckings and eventually I settled on a 60 degree Maple Leaf Mr. Hop. This is essentially a bucking with an R-Hop style concave contact patch; 90% of the result with only 1% of the effort. As chance would have it, I discovered through Google image search that someone in South Korea had designed some CNC’d aluminum hop up arms for this gun. Going simply by “YT”, this was reported to solve the torquing issue of the arm and to provide a nice little spot for holding in a round nub. Ideally, I reasoned, I should be able to make an R-Hop work with this new hop up arm. Obtaining it wasn’t easy though, as the designer does not have a website, and only sells inexplicably through Twitter, AND at a princely sum to boot. As it was later revealed, most of the cost was wrapped up in shipping charges. The tiny arms arrived in a small plastic canister suspended web-like with tape inside a large ramen noodle box. Cue the Drew Scanlon meme.
Despite working substantially better than the stock hop up arm, the YT arm ultimately proved unsuitable for R-Hopping. The recess for the nub is too shallow to allow for much a nub to be used, in fact, I had to go with a carefully cut KWA nub, which trend on the
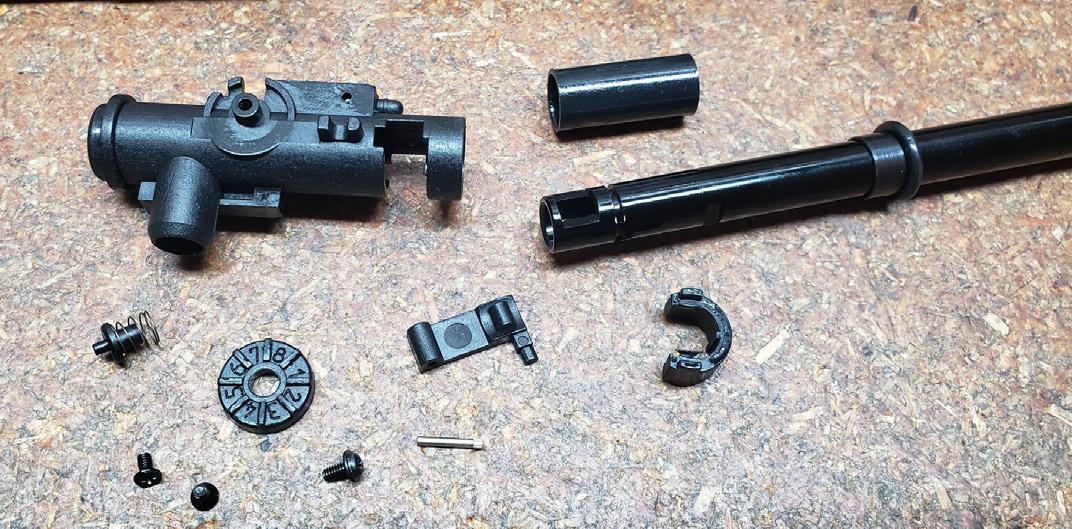
smaller diameter size. Attempting for a bit of M-Nub or pink eraser was not really feasible due to the short length of the arm and the subsequent sharp angle at which it comes down. So in the end, I stuck with the Maple Leaf Mr. Hop, but at least my curving issue had been solved.
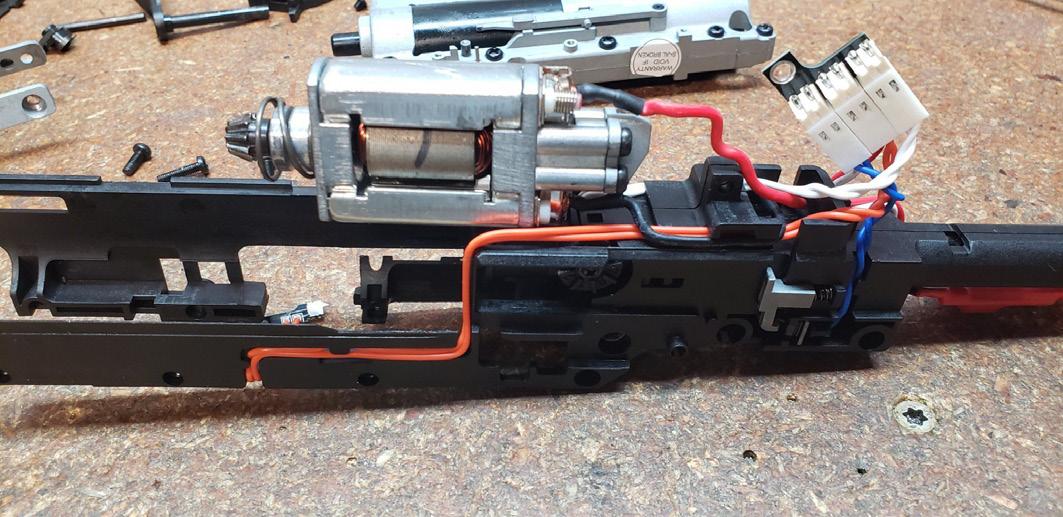
From there I hit the remaining trouble points. The stock MOSFET and corresponding electronics was a tentacled morass of wires and plugs that was ultimately removed entirely. Keeping It Simple Stupid, I wired in a compact little Gate PicoSSR3 with a 30A fuse, which situates nicely alongside and under the outer barrel. 16AWG AlphaWire EcoWire was used for the rewiring, and a Deans plug fitted. The magnetic cutoff switch from the hop up was removed as was the other one nearby the trigger. Didn’t want it. Didn’t need it.
With the old MOSFET out of the way and the setup greatly simplified, there was a fair bit of wasted dead space now inside the gun. VFC uses a plastic ‘chassis’ of sorts that wraps around the gearbox and sandwiches around the outer barrel. I took to cutting away all of the supporting structure for the old plug interface and sanding it smooth. With all of that removed, I was able to stuff in a lot bigger battery – specifically an 11.1v 1450mah buffer tube style LiPo fits right on top now.
Over on the MP7 Tech Group on Facebook, there’s been a great deal of experimentation with resolving the magazine jamming issues. Solutions have ranged from using PTS NGRS followers to cutting, sanding, shaping the stock followers to the 3D printed. From what I have seen, many of these ideas work, albeit every magazine seems to require an individualized approach, with the main goal being to eliminate any binding of the follower on the curves of the channel. In some cases it is also necessary to do some light sanding and polishing of the channels themselves.
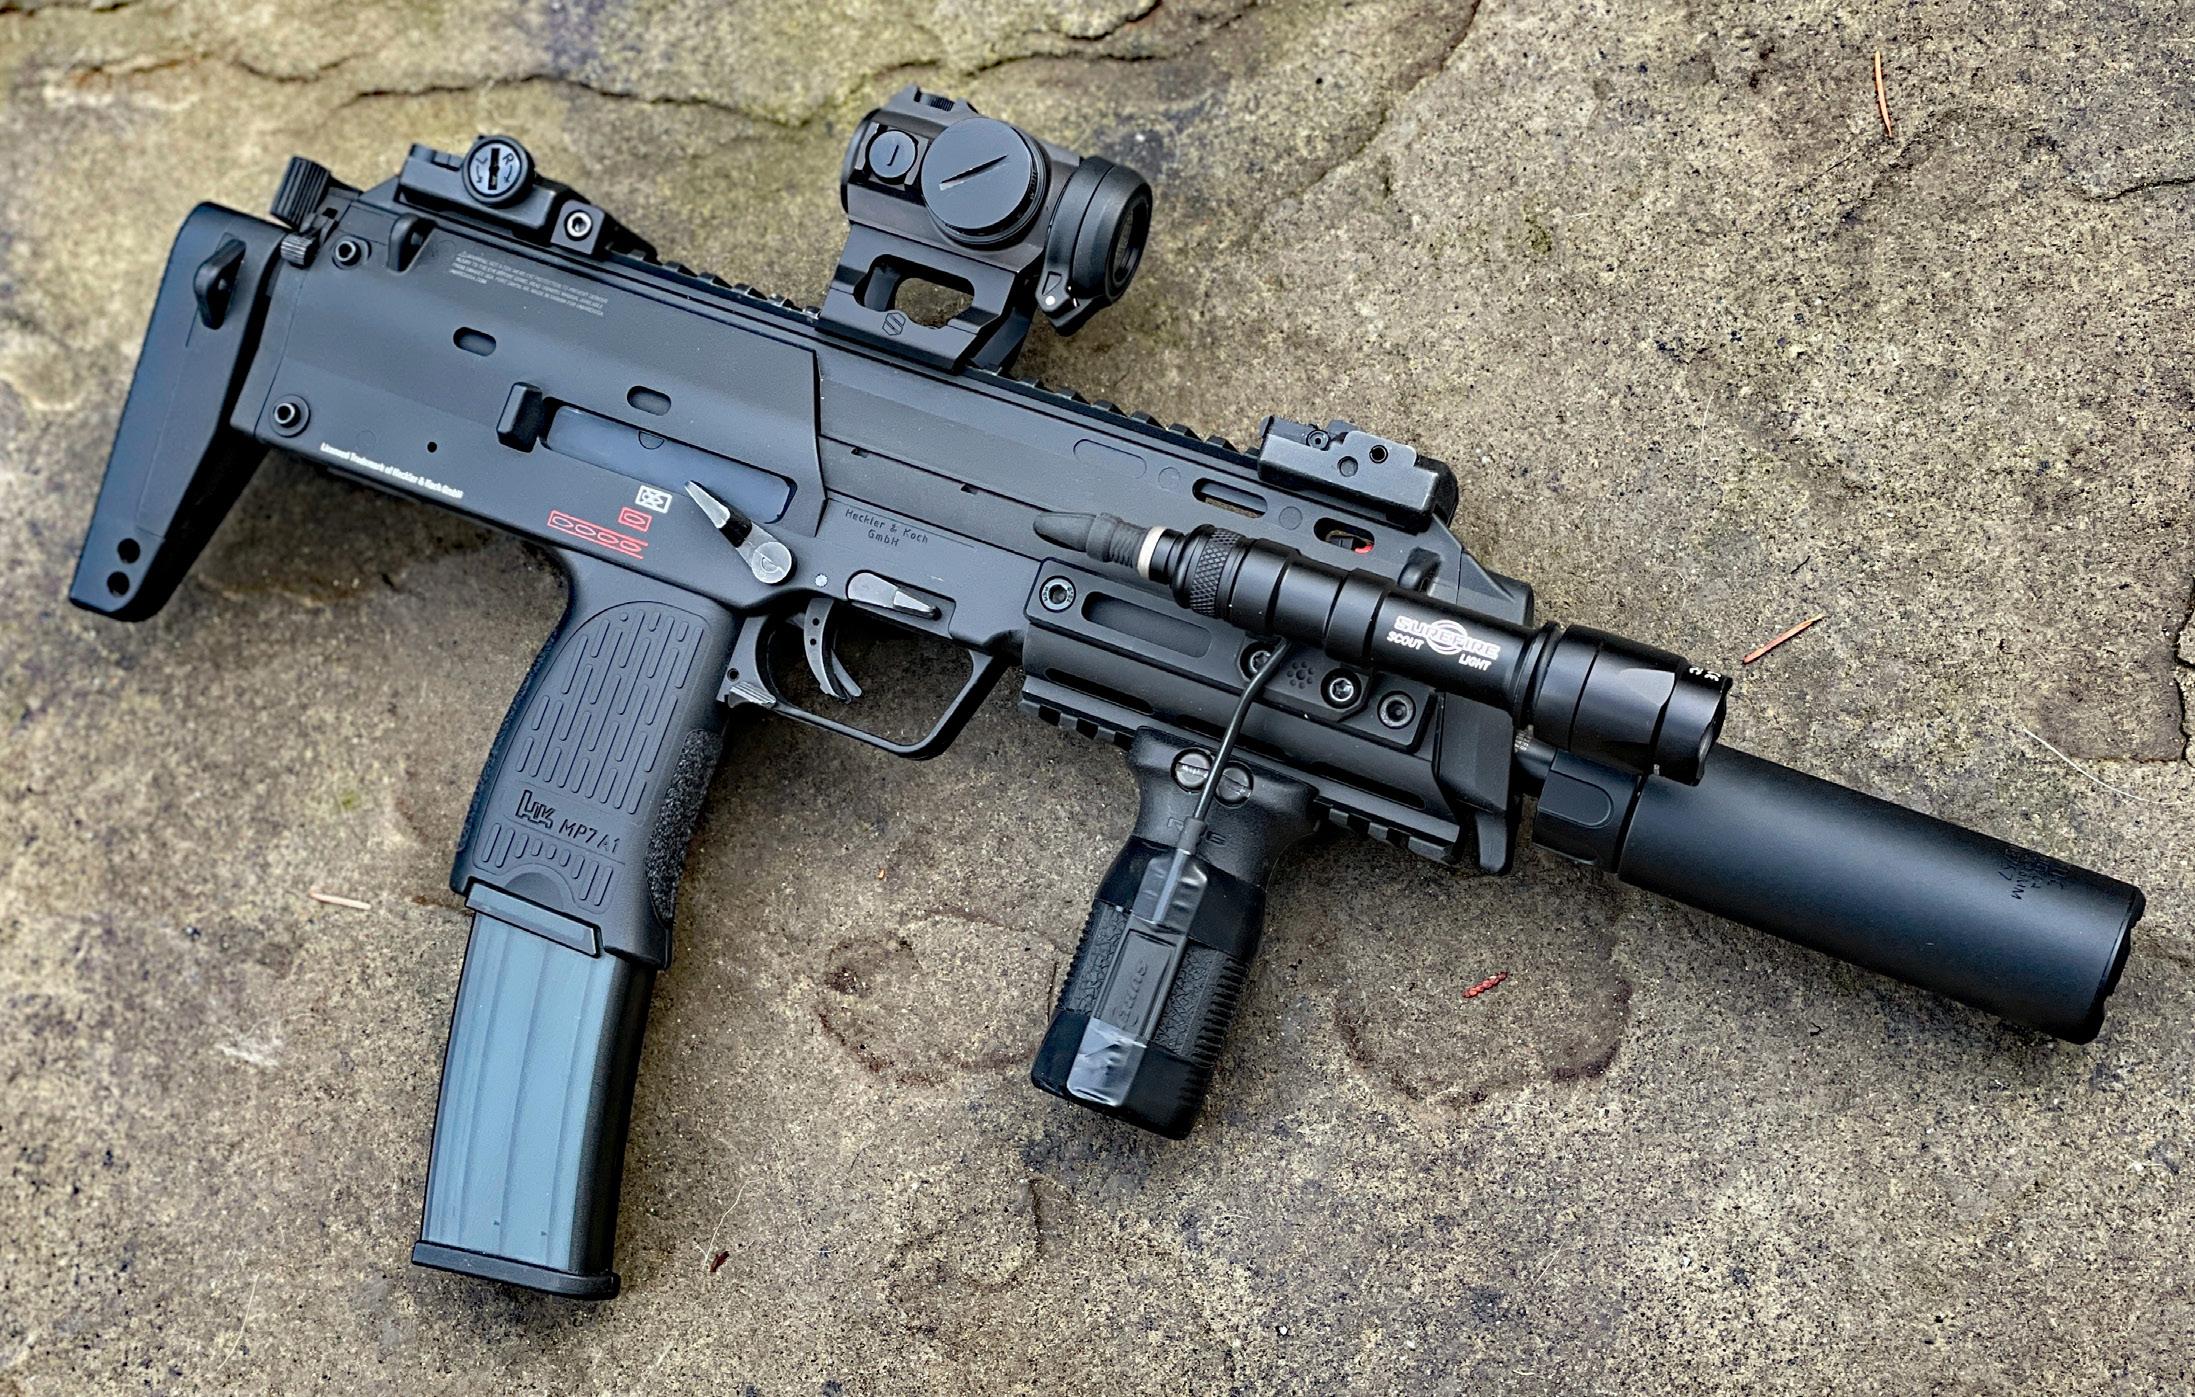
FINISHING OFF… FOR NOW!

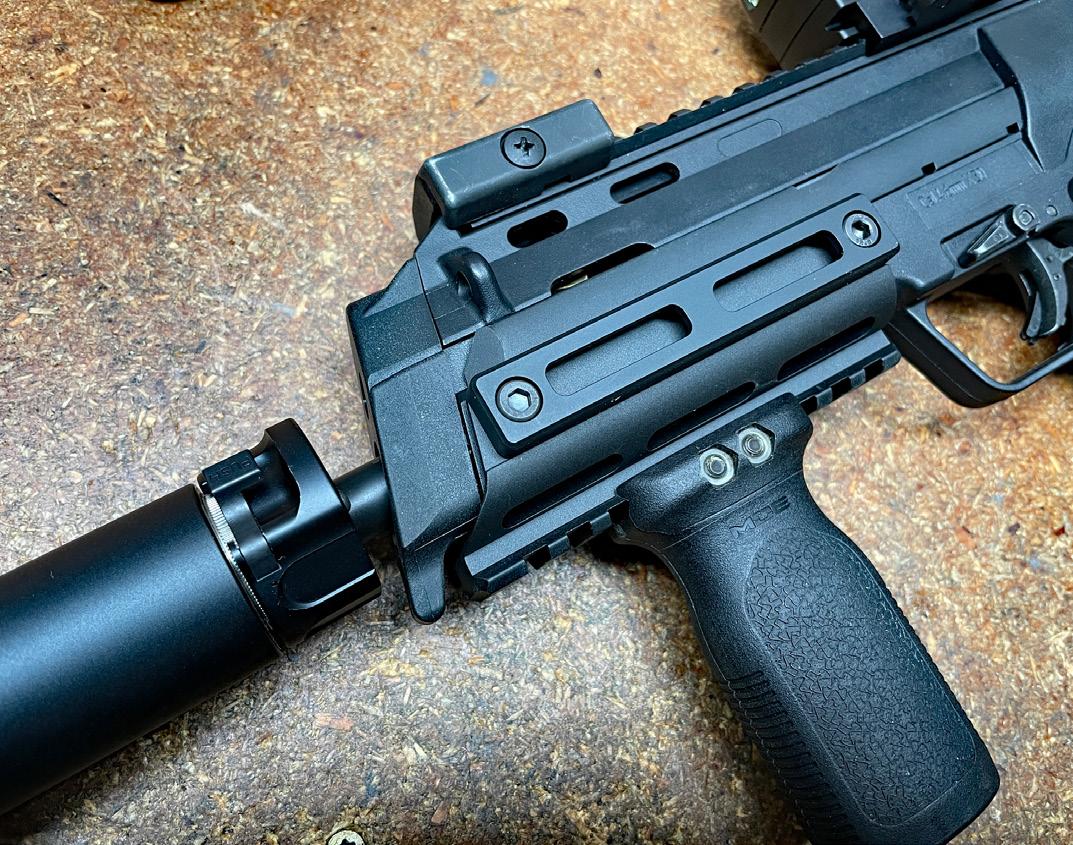
Moving onto the external side, the muzzle end was outfitted with a RGW SOCOM flash hider and mock suppressor. This is a copy of the Surefire flash hider designed for the MP7. The can itself holds an Acetech Blaster tracer unit with a bit of foam to quiet the pop. For night shoots, the Acetech Blaster looks hella cool with its simulated muzzle flash.
The folding grips on these have less flex than the Tokyo Marui MP7’s do, but they still possess a fair amount of the Gumby. I elected to cut off the grip to make room for a copy of the Wilcox MP7 rail. This particular item was sourced from KIC Taiwan for around US$28 and when coupled with a Magpul RVG, provides a rock solid base to hold onto. Since most of my stuff is now M-LOK oriented, I decided not to go with the traditional 1913 style side rails and used the Revanchist M-LOK rail sections instead. Technically, the use of rails, M-LOK or 1913, is still optional as the Wilcox style mount can be used without them.
Off the top rail I kept the stock VFC irons. These are nicer than the Tokyo Marui versions, but don’t feel quite as nice as KWA’s. If I got adventurous with my wallet, I might opt for the Strike Industries MP7 rail which has low-profile integrated sights that can be flipped out for use. I also added on a Fortis QD socket adapter just in front of the rear sight. This makes a great attachment point for a one-point sling.

For optics, a Holosun HE403R on a Scalarworks 1.57″ mount rides on top. Technically this is just high enough for passive aiming use with night vision. But I could see maybe going with the taller 1.93″ version due to the height of the rear sight. And here, the Strike Industries rail would be absolutely perfect too (I’m passive-aggressively convincing myself…)
While the overall scope of this build has lasted well over a year of back-and-forth on-and-off tinkering while adding on the few upgrades that eventually became available, the payoff has finally, exhaustingly… been worth it. This gun is now an absolute laser beam at a crispy 28 rounds per second. With a full power spring, FPS sits right on the dot at 377 w/.20g’s and using a cut spring, I can easily drop it down to 330 FPS for full auto legal CQB use on those fields that allow for it.
The VFC MP7 is admittedly a cool gun, leveraging heavily on the iconic and visual history of the real version, especially as an AEG that is out of the hands of all but a relative few. In many ways, it follows the old VFC template of producing, until very recently, stellar externals with admittedly variable quality internals. More regrettably though, it follows the more modern software-esque template of using the customer base as beta testers; eking out problems to eventually be solved by incremental generational releases is a model that I’m very relieved and pleased to see that VFC have moved beyond, and all power to them! It’s just a shame that with the original MP7 what should have been a home-run out of the park has required an untold amount of dedication by the customer base to make operable examples of.
While there are a few areas I would still like to see improvement on, the lone remaining trigger switch being a primary concern, a stronger outer barrel assembly, an improved cylinder head and cylinder, this is the closest I’ve ever been to having a truly fieldready VFC MP7, and I’m eager to put it through its paces next season! AA