
2 minute read
Photography 5 Techniques to Improve Your


BY MARK CHANDLER
With the technology and features available in smartphones and digital cameras, everyone is a photographer. In most cases, a simple focus and shoot will create images that will be treasured for years. Photographers in today’s world have a big head start over those in the past, as the ability to create quality images has gotten easier. But what does it take to improve your photos and become a better photographer? The answer starts with learning the basics of exposure and composition. Let’s take a look at a few basic composition tips to help you improve your images.
Advertisement
1. Think before you shoot.
Before you start firing off shots with your camera, take a moment to think about what your subject is and what story you are trying to convey. Once you have an idea of the subject, think about what needs to be included in the photo to tell the story and what can be excluded. If something does not add to the image, can it be removed by moving in closer to the subject, finding a different angle or using shallow depth of field? It might not always be possible to remove items from the photo, but the more you tell your story without distractions, the better.
2. Fill the frame.
One of the easiest ways to isolate your subject is by moving closer and filling the frame. Whether it’s a landscape, people or other subjects, move in close enough to fill the frame with your focal point and eliminate distractions that don’t belong in the photo.
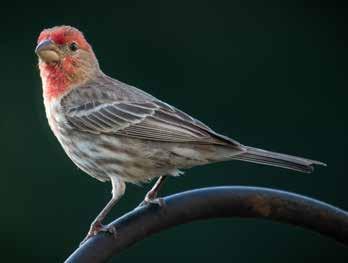
3. Use shallow depth of field.
Another technique for isolating your subject is using a shallow depth of field, or the area of your photo that is in focus. Using a shallow depth of field, you can separate your subject from the background by making the background blurry or out of focus. This is accomplished in-camera by using a wide aperture or f-stop. The wider the aperture, the smaller the number of f-stop on your lens. Different lenses open to various sizes, but common f-stops, such as f-1.8, f-2.8 or f-4 (the bigger the number, the smaller the aperture), will represent the widest aperture value of a particular lens. A wide aperture will give you a blurry background, but you will have to be more precise in focusing. In the bird photo, notice how the background is completely out of focus, making the bird stand out as the subject.
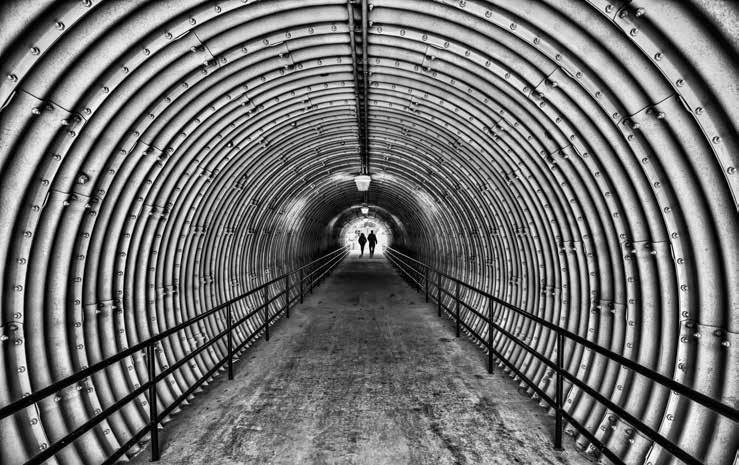
4. When to center the subject.
The best time to consider centering your subject is when you have symmetry in your image. To give a feel of balance, centering your subject might be the best way to present your photo. This image of the tunnel in downtown Kennesaw is an example of symmetry.
5. Learn the rule of thirds.

Generally, it’s best not to put your subject in the center of the frame. There’s a photographer’s technique for placing subjects called rule of thirds. Not really a rule, but a great guideline to think about when composing your photo. By dividing your image into thirds, similar to a tic-tac-toe board, it’s typically considered more pleasing to place your subject on one of the intersecting points and/or on one of the lines. The rule also applies to your horizon lines. It is generally better to place your horizon on one of the lines, rather than in the center. In the photo of the Kennesaw Mountain flags, notice the prominent flag is at an intersection point, and the horizon is in the bottom third. The main flag fills the frame to the top but is not centered, leaving space to show other flags that help tell the story.
Ultimately, how you compose your image is your choice. You are the artist and have your own style, and you should control the results. These are starter guidelines — not hard-and-fast rules — to get you thinking through the picture-taking process and to help you take the best image possible. But the most important tip is to think before you shoot. Consider your subject and the story you are trying to convey, and no doubt, you will begin to see improvement in your photography skills.


