11 minute read
A prickly project
While riding Mr Pickwick's March Madness this year, Arrivèe editor Ged Lennox admired the bike being ridden by Herefordshire-based Richard Tofts. It turned out the machine, complete with unique hedgehog badge, had been entirely designed and built from scratch by Richard himself. In this feature, Richard explains how he did it – and urges anyone who’s ever thought about building their own bicycle to give it a try…
I’VE LONG BEEN INTERESTED in tinkering and ‘rolling my own’ – designing and building my own equipment. In recent years, I’ve enjoyed participating in Audax rides, often on my trusty old fixed gear Raleigh. It was therefore probably inevitable that at some point I’d try making my own bike too.
Advertisement
One advantage of making your own bicycle is that you can balance the various compromises and if you plan carefully, you should end up with exactly what you want. Another is that, having built the thing, you’ll have a much better grasp of how to fix it when something goes wrong. And things will go wrong from time to time. Based on my own preferences, experience and many discussions with other riders, I started to put together a wish list for my bike. My top priorities were to have a reliable and comfortable bike.
I didn’t have the facilities or the skills to build my own frame without some expert assistance so I looked around for suitable frame-building courses. I decided on a course run by Dave Yates. In summer 2019 I spent a fascinating and very rewarding week working in Dave’s workshop, just south of Tattershall, Lincolnshire.
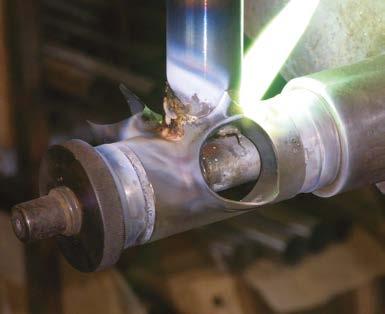
With the design concept clear in my head, once in the workshop the first job was to decide on the type of tubing (Reynolds 631) and to select the various lugs and other bits from the parts store. Then, after brazing (a metal-joining by soldering process) a couple of test pieces for practice, it was time to get down to the proper work and braze the cast bottom bracket shell to the lower end of the seat stay. The parts were held in the correct positions using a purpose-built jig.
The dropouts were filed to fit. Dave brazed the front dropouts because they were rather specialised stainless steel ones to suit the SON internal cable routing system I’d chosen. The brazing of stainless steel required a more experienced hand and special flux. After a bit more work the steering tube, crown and forks were ready, the crown having been worked on the lathe to turn it to the correct diameter to allow a friction fit with the crown race in due course. These parts were then held in another jig and brazed together to produce the front fork unit. It was then time to fit the rear dropouts to the chainstays.
The various main tubes were cut to size and filed to provide a flush fit (without lugs in place) thus maximising contact between the metal and creating a strong joint. A fter this, the tubes were slipped into the
How Richard built his very own ‘hedgehog’ bike from scratch
lugs which were brazed using yet another purpose-built jig, the top tube being worked on first. The overall strategy now was to build up the separate parts of the frame with their associated lugs before brazing the subsections together in the frame jig to complete the frame.
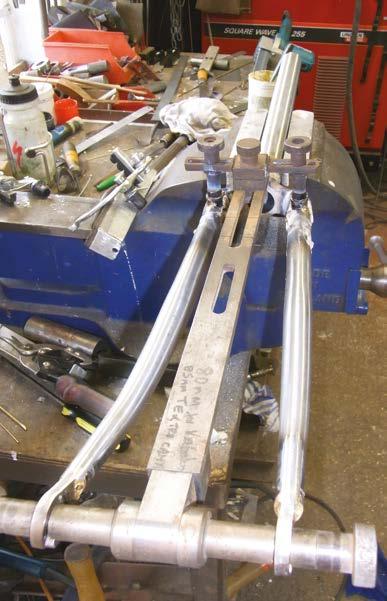
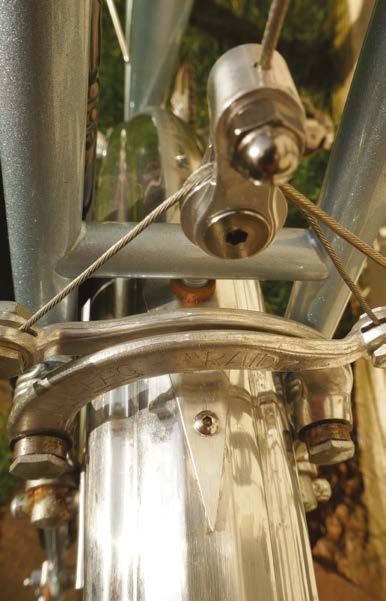
Two pairs of brake bosses were brazed and turned to the correct diameter on the lathe to fit the Mafac Raid brakes which I obtained as “new old stock”. The first pair of mounts was then brazed to the front forks using yet another special jig. The chainstays were bent outwards (using brute force!) to give the correct rear spacing (120 mm in my case) and the now brazed front fork unit was bent over a wooden former to give the desired amount of trail and further bending was undertaken using a threaded metal cylinder to ensure the forks were in proper alignment.
After filing and fitting the two bridges, it was simply a case of finishing off, including drilling and brazing the bottle cage bosses, mudguard bosses, pump pegs and reaming the interior of the steering tube. Dave then sandblasted the frame to clean off the flux and other debris and that was that.
With the pandemic and family matters, I didn’t do anything with the frame until early 2021. In the meantime I gathered the parts I needed to build the bike and I’d made the wheels (lacing the SON28 SL and Grand Cru hubs to Grand Bois 650b rims using butted stainless steel spokes), with advice provided by Roger Musson’s excellent Wheel Building Guide.
To do this, I’d built myself a truing stand, dishing gauge and other basic wheel-building tools from garage scraps and bits from B&Q. I couldn’t find anyone who had the equipment to bend narrow gauge tubes, or who was also prepared to teach me to braze the stainless steel tubes for the front rack I had in mind, so I got Richard Hallett to make it for me instead.
I’d also designed a head tube badge and had it manufactured by a seller on Etsy. I don’t like too many logos and decals on bike frames but to my mind they look rather naked without a head tube badge. Mine combines a hedgehog, the symbol of my home town of Ross-on-Wye, with a cog as a nod to my fondness for riding fixed gear. The hedgehog also symbolises my average speed on an Audax ride nowadays! I then left the frame and forks with Argos Cycles in Bristol for spraying.
I was a little apprehensive at this stage because it meant lavishing more money on the frame before I’d had a chance to see how the bike handled. There was a nagging doubt that maybe I hadn’t got the amount of trail quite right, given that a large bar bag inevitably puts more weight on the front wheel than if I’d made a similar bike but with a saddlebag.
Having collected the sprayed frame, putting all the bits together was fairly straightforward. The only matters worthy of comment concern the mudguards and the internal wiring.
I’d chosen metal mudguards because I wanted to mount the rear light directly to the mudguard and a fairly robust design was therefore needed. In the end I opted for Honjo aluminium mudguards; reasonably light, beautifully made and strong but flexible enough for me to be able to shape and modify as necessary.
Even after selecting the correct size of mudguard, it’s almost inevitable that some fine tuning will be needed. The mudguards need to be formed into the correct shape to follow the circumference of the wheels as closely as possible. It is all too easy to end up with them being too close at some points and too far away at others.
Not only is a well-fitted mudguard aesthetically pleasing, but if a bit of road debris is picked up by the wheel and ends up between the tyre and the mudguard, the last thing you want is a pinch point where it gets stuck and jams the wheel. If the space is large enough for the debris to enter the tyre/ mudguard gap, it needs to remain large enough for it to be thrown out again. Riding fixed gear can complicate this, however.
The front wheel is no problem, but if the rear wheel can move back and forth in the dropouts to allow correct chain tensioning and wheel removal, then the mudguard needs to be bent into a slightly elliptical shape to accommodate this. And unless they are very narrow or stop above the chainstay bridge, the rear mudguards will need an indentation on either side to accommodate the chainstays.
Of course they also need to be drilled in the right places. Additionally, I decided to make my own diamond-shaped aluminium strengthener to reduce the likelihood of failure where the rear mudguard is fixed to the seat stay bridge.
With the internal wiring, I chose a SON28 SL hub which lacks the usual spade connectors (I’d had one of those fail on me previously) and instead uses the axle and one of the faces of the hub combined with an insulated dropout to make the necessary connections with the generator inside the hub.
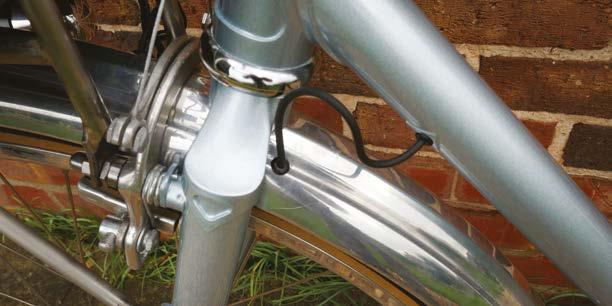
From the insulated dropout, a wire runs up the inside of the right fork and emerges at the fork crown. I then routed it via the mudguard to the rack-mounted front light and then back again to run from the mudguard to a hole in the downtube. My intention was to use a coaxial connector to allow the cable to be detached when necessary for easy removal of the front forks, but none of the UK suppliers had any connectors when I needed one so I’ve left it for now and will fit one in due course.
I’ve also left a tapping point on the rack so I can incorporate a charging point for mobile phone or GPS in due course, should I choose to. The electrical cable then runs along the downtube to emerge through the bottom bracket and thence to the rear mudguard and around to the mudguard-mounted light. Both lights are activated by the switch on the front light, something I’ve found to be a useful convenience.
Aluminium mudguards have an inrolled edge that is hidden from view when they’re mounted, and I simply needed to prise this open slightly and run the wire through the cavity before closing it up again using pliers with the jaws cushioned by a piece of scrap leather.
One thing to bear in mind is that if you run a small diameter floppy electrical cable through a much larger diameter tube (the downtube in this case), the cable is likely to flap around every time you go over a bump and make an annoying pinging sound. One way to avoid this is to fix cable ties around the cable every couple of inches or so but to leave the free ends of the cable ties intact. Once the cable is pulled into the tube, the natural tension provided by the cable ties ensures that the cable remains pressed against the inside of the tube.
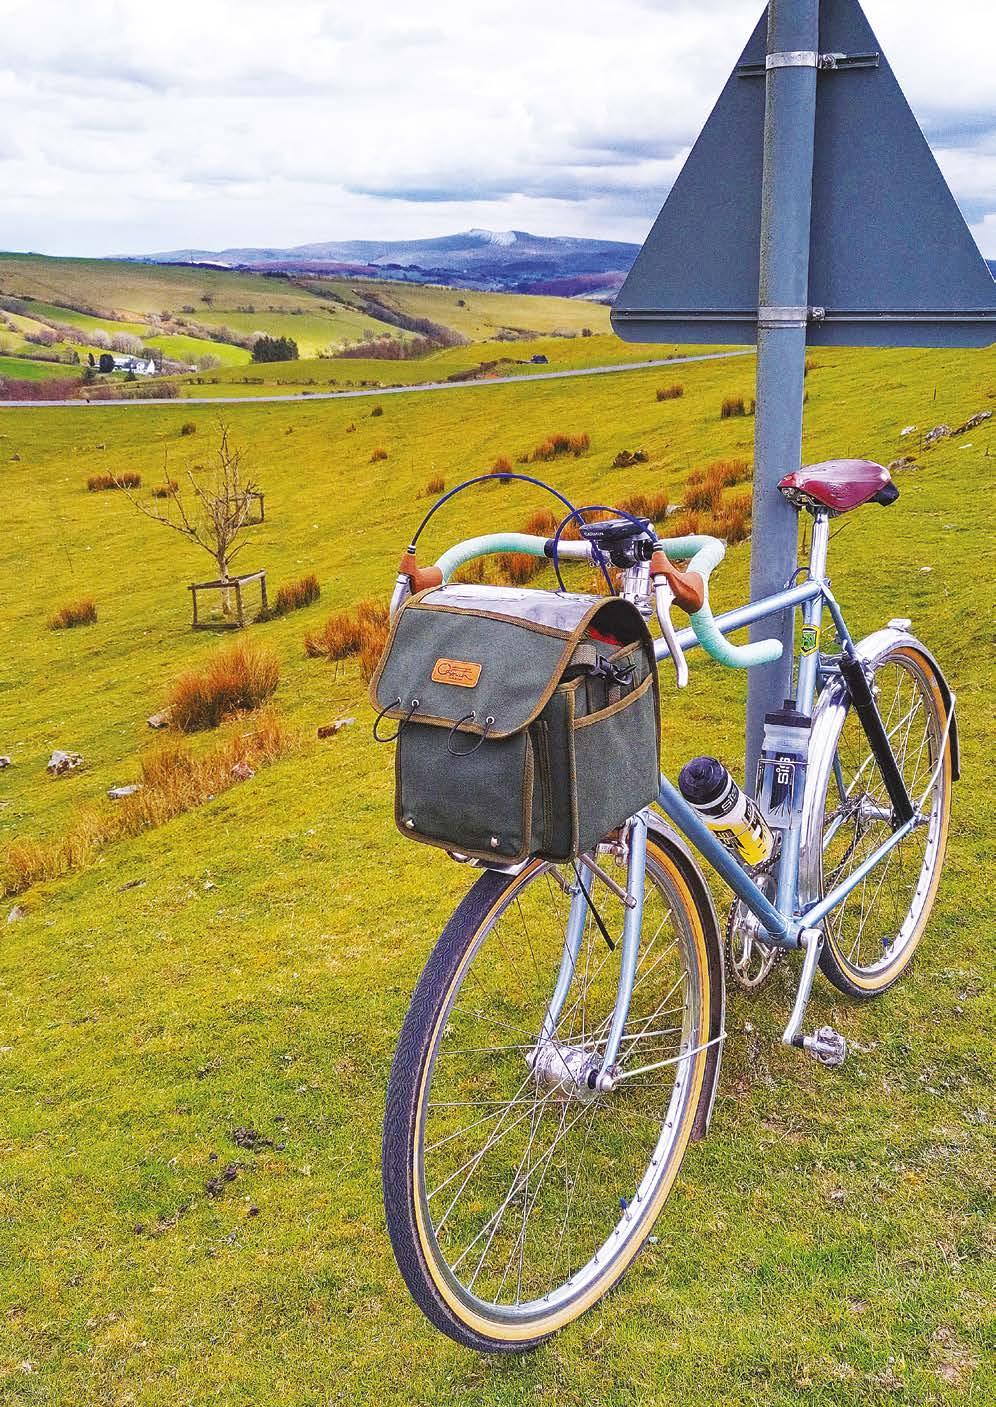
My 2022 Audax season got off to an inauspicious start. I abandoned my first ride soon after the start on account of an old knee injury which flared up. But in March I rode Mr Pickwick’s March Madness, a 200km route with some hilly sections over the Malverns and around the Forest of Dean. I took it easy and the bike went like a dream, the handling being neither twitchy nor dead but reassuringly predictable. I’ve now completed Helfa Cymraeg Benjamin Allen, a good 300km workout on fixed and have a couple of other rides in the calendar to bring me up to a fixed gear SR series, I hope I’m also booked to ride LEL this summer. On fixed? We’ll have to see…
I would encourage anyone who’s interested to take up the challenge and build a bike from scratch. I found it hugely rewarding and I picked up a lot of useful mechanical skills and tips along the way. Why not give it a go?
RICHARD’S KEY REQUIREMENTS:
◗ Fixed gear with “horizontal”’ rear dropouts to facilitate chain tensioning. ◗ Permanently fitted mudguards suitable for mounting rear light. ◗ Steel frame, a practical material for an inexperienced fabricator like me, with a reasonably high bottom bracket and 165mm cranks to minimise the risk of pedal strike and decent clearance between forward foot position and front mudguard when turning. ◗ Internal wiring for dynamo lighting, front and rear, for reasons of aesthetics, to reduce the possibility of snagging, failure at the spade connector join and to ease cleaning. ◗ Handlebar bag for ease of access to jelly babies, extra clothing etc., and rack-mounted to keep centre of gravity as low as possible. ◗ Robust 650b wheels with 32 spokes and wide tyres to give a “plush” ride quality. ◗ Rim brakes for ease of maintenance because
I’m already familiar with them. ◗ Frame-mounted full-sized pump on seat stay, because it’s liable to be knocked by a stray knee when grinding uphill if mounted under the crossbar, and obstructing bottle cage locations if mounted on the forward-facing side of the seat tube or upper part of the down tube.
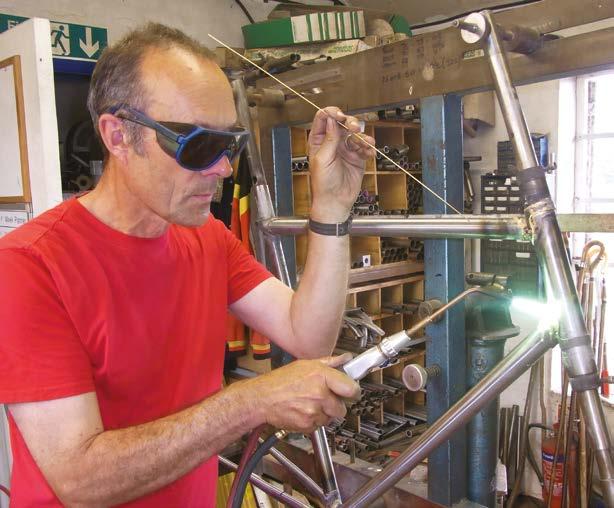
At the start… a box of tubes, lugs and braze-ons Brazing head tube to down tube using purpose-built jig

Brazing bottom bracket to seat tube
Brazing brake bosses to front forks Internal dynamo wiring detail – from front mudguard to down tube
Rear brake and diamond mudguard reinforcement
Internal dynamo wiring detail – from bottom bracket to rear mudguard

Head tube badge

