3 minute read
3ds Max
from AUGIWORLD
by AUGI, Inc.
3ds Max Video Compositing with 3DS Max – Part 1
One essential element of 3ds Max is its ability to help supplement video footage for presentations, visual effects, film, still images, and motion graphics. Combining 3ds Max with After Effects, or software like Nuke, we composite existing elements, like drone video, with 3D elements in Max to prepare and present content in powerful ways. So let’s review how the process works with 3ds Max and Adobe After Effects.
The first step is to prep the video. Start by clipping the video to the frames you want to focus on. Using After Effects, you can export the video using Adobe Media Encoder (installed separately) to the final resolution and proper codec. If you don’t know what resolution and codec you are working with, the High Quality 1080p HD preset option using the H.264 codec is relatively standard for most users’ tasks. However, it’s worth noting my iPhone is nearly reaching that resolution itself, and the standard is pushed higher constantly. It’s becoming common to work with 4K resolution (sometimes higher) and res down when necessary in almost all media.
The next step is to export to an image sequence to use in 3ds Max. Select the drop-down and custom, then select Jpeg Sequence, as shown in Figure 1. Using the Adobe After Effects render queue, export the images using the Jpeg Sequence option next to the Output Module label. See Figure 1.

Now, in 3ds Max, add your content by activating the perspective viewport, then hold Alt and press B. On the Background menu, select the option displayed in Figure 2 to apply the sequence to your viewport. See Figure 2.
You should be able to press the play button and watch the sequence play in the background. If the sequence isn’t playing, select Update Background While Playing in the preferences under the Viewport tab. Now, adjust your frame number to match your sequence and set the playback to real-time.
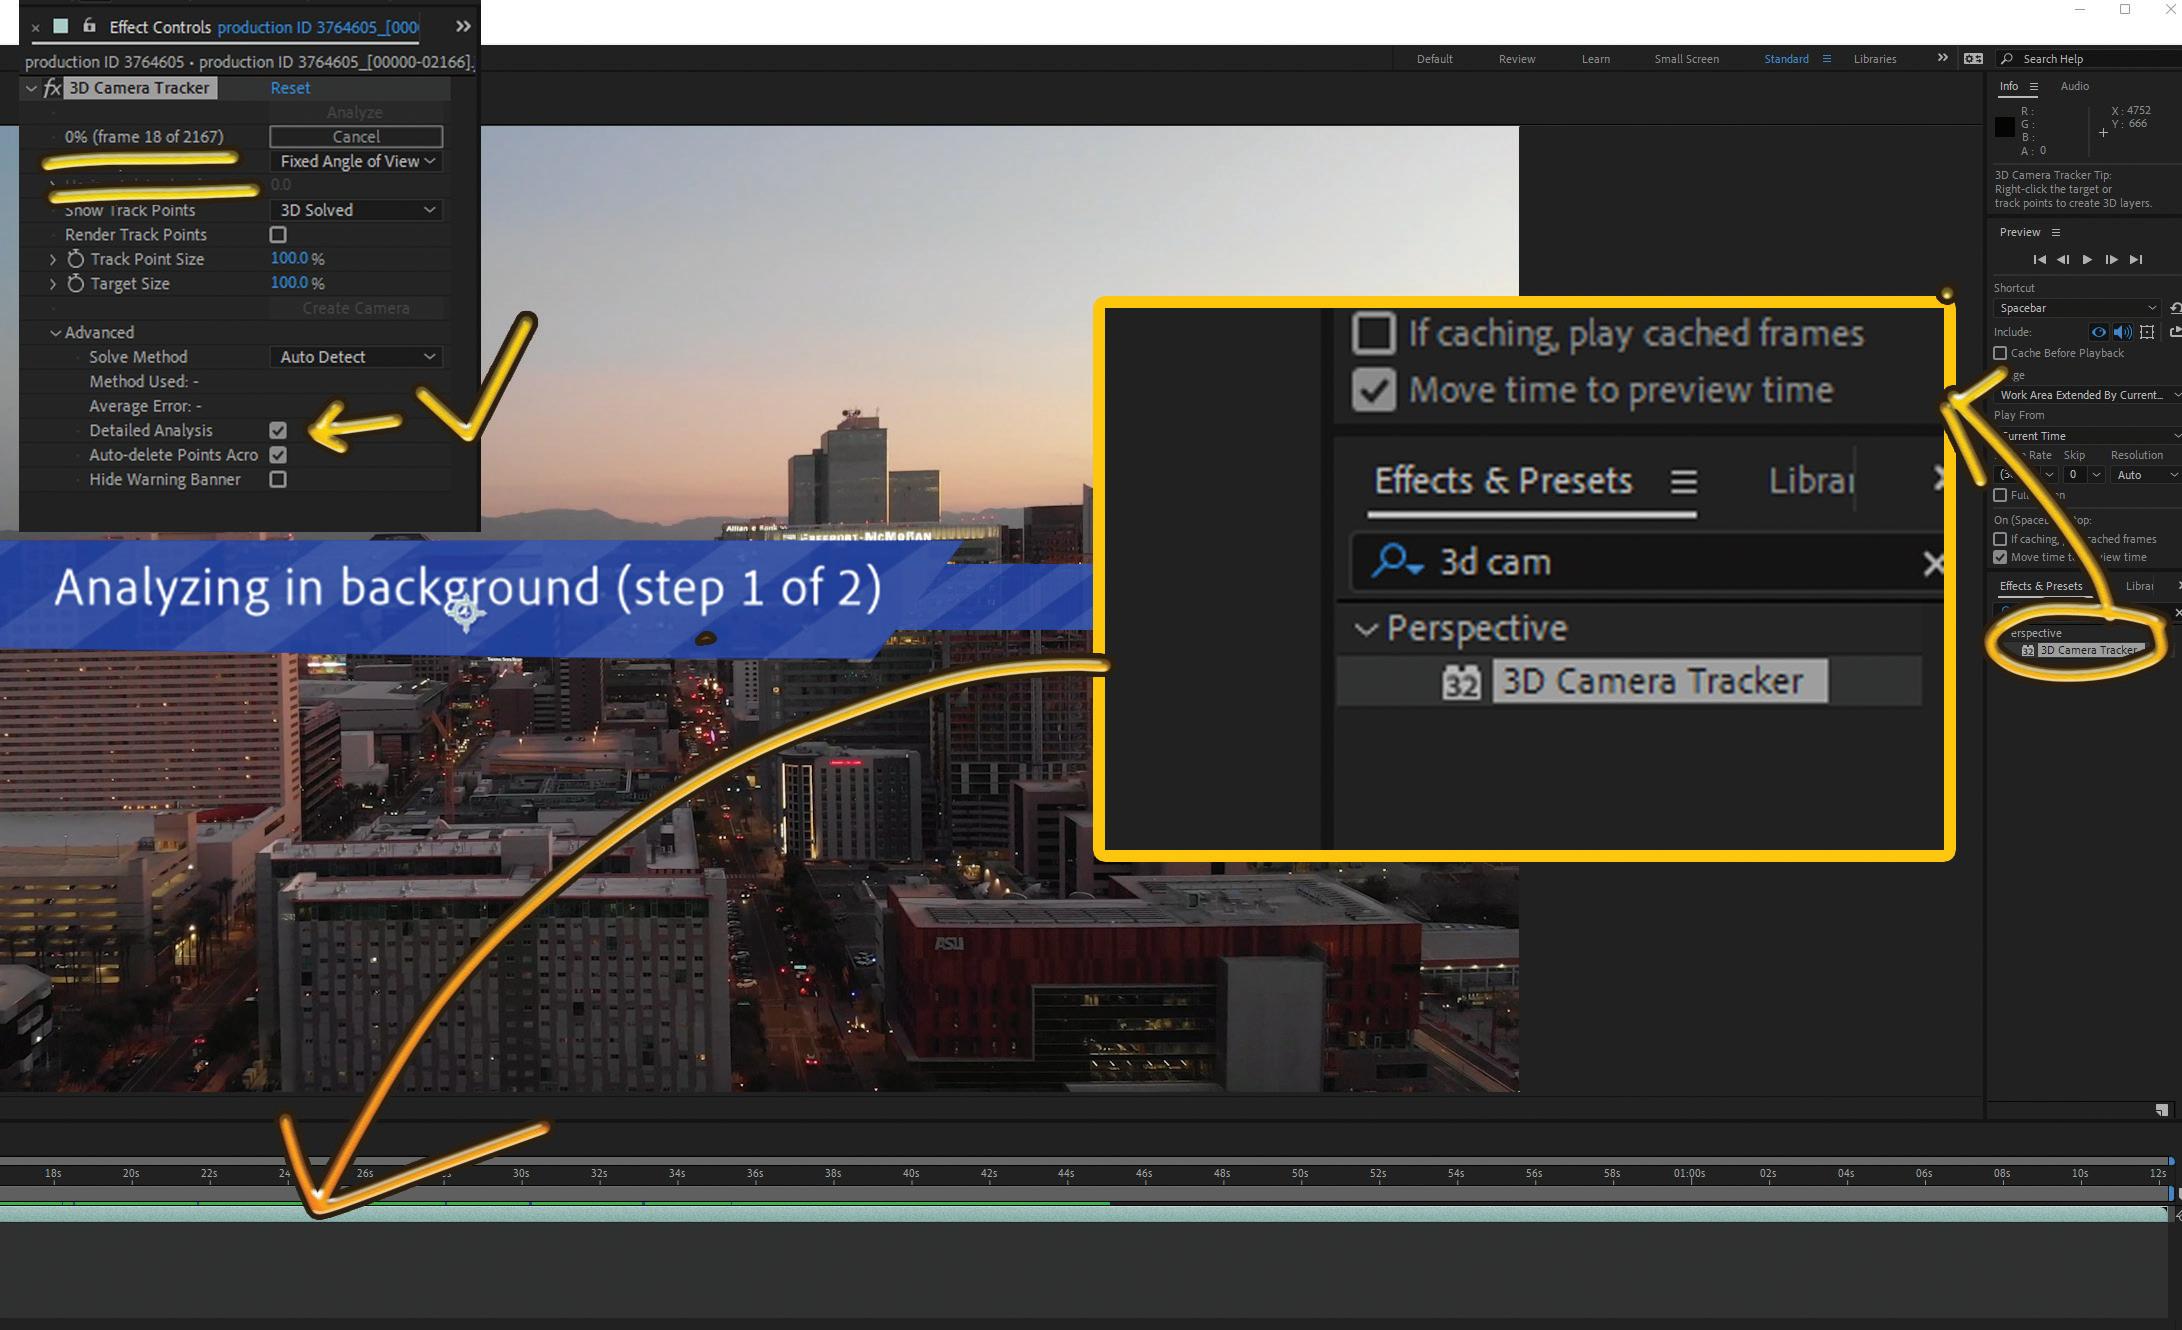
Back in Adobe After effects, start a new project and create a composition from sequence using the JPEG images initially exported. Using the Effects & Presets panel, search for and select 3D Camera Tracker. Drag and drop the item onto your composite and give Adobe a few minutes to calculate the results. That ensures we work with the same elements in After Effects and 3ds Max to avoid confusion or mistakes. After Effects also has more predictable results tracking from an image sequence than a video. See Figure 3. You can see a frame-by-frame/percentage of the process complete on the effects control panel generally located on the top left. After that, a series of tracking nodes will appear in color. Tip: Choosing the detailed analysis option creates more accurate tracking and not much more time.
Select a few nodes representing the ground in 3ds Max, such as streets (avoid higher elements like building tops or bridges), click the right mouse button and select Create Null and Camera. Select roughly 20 and continue the same process.
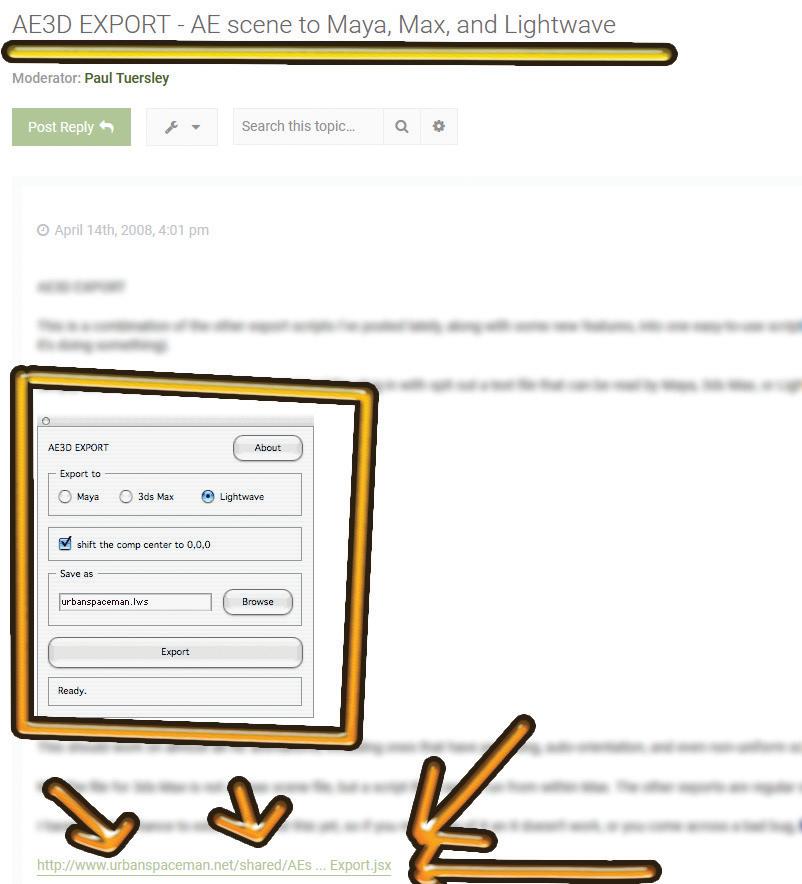
Now, if you head over to the internet address here https://aenhancers.com/viewtopic.php?f-=3&t=991 you’ll be able to download the script necessary to export to 3ds Max. See Figure 4.
In After Effects, select File -> Scripts -> Run Script File and select the script. Under the options, disable Add 4 Views for Maya and set the scale to 1:10 at first (this will vary per project, you’ll need to experiment with it as you get more familiar with the workflow). Choose 3ds Max and assign a file name. The browse button doesn’t work. It will save


Figure 4
the final file to the desktop. Select the 3D Camera and all the tracking nodes, then press export, which will generate the Maxscript file necessary to generate the content in 3ds Max.
This concludes Part 1. Part 2 will follow next month. Stay tuned!
Brian Chapman is a 3D Artist located in Las Vegas building 3D content for the AEC industry, games, film, entertainment, and software development. Brian can be reached at pictelforge@gmail.com


