3 minute read
Battlefordlocationnowopen inBattlefordCrossing


6. Brakes. Don’t wait for something to go wrong before getting your brakes checked. Have the pads and rotors professionally inspected to keep them in good working condition.
Advertisement
7. Lights. When you take your car in for a spring tune-up, have the mechanic check the turn signal bulbs, brake lights, headlights, marker lights and daytime running lights.
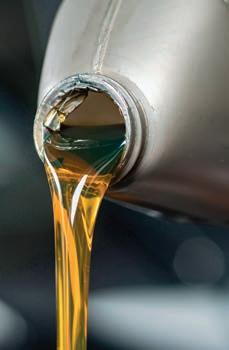
8. Fluids. Several fluids must be changed when you go through your spring tune-up routine. For example, the engine oil, power steering fluid, brake and transmission fluids, coolant and windshield washer fluid should all be checked and topped up as necessary.

When you’re ready to get a spring tune-up for your vehicle, contact a local mechanic to get the job done right and keep you safe on the road.

How to clean your car’s undercarriage
is an optional step, but it allows you to move more freely around the vehicle and get into all the nooks and crannies.
mud
1. Lift the vehicle. Lifting your car with a jack makes accessing every part of the undercarriage easier. Skip this step if you have a lifted truck.

2. Remove the tires. This
3. Rinse the undercarriage. Wash the undercarriage section by section using a pressure washer or garden hose with a spray attachment. Start from the front, moving toward the back. Hold the spray attachment or pressure washer wand at a 45-degree

How to maintain your car’s weatherstrip
angle for the best cleaning action.
4. Clean stubborn areas with a degreaser. To get rid of persistent dirt and debris, spray degreaser on the undercarriage and let it sit for 20 minutes. Scrub with a brush and then rinse the surface.

5. Dry the undercarriage. Rust can develop if moisture is left behind on the metal. Dry every part of the undercarriage with old towels.
6. Apply a protectant. This helps protect the metal of the undercarriage against damage. It‘ll also keep it cleaner for longer.
If you don’t feel confident washing your car’s undercarriage, look for a local car wash that offers the service.
The rubber seals, or weatherstrips, around the edges of your car doors prevent rain, wind and moisture from seeping through the gaps into the cabin. Here are a few tips for keeping yours in good shape.

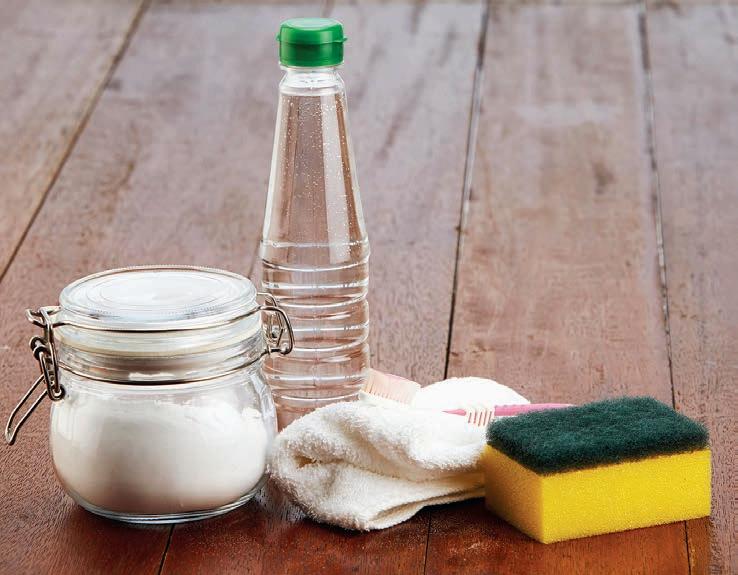
1. Wash the weatherstrip. Keep the weatherstrip clean by washing it regularly with car-safe soap and warm water. Dip a rag or sponge in the bucket and scrub any dirt off the lining. Do this whenever you wash the outside of your car.
2. Repair or replace weatherstrip. When cleaning the weatherstrip, inspect it to ensure it isn’t coming loose anywhere. If it is, reattach it with a tube of weatherstrip adhe- sive. If it’s frayed or torn in several spots, replace it.
3. Apply a protectant. To prevent the rubber weatherstrip from drying and cracking, apply a silicone protectant. This’ll protect the rubber from excessive heat, preserving its sponginess and lubricating it. The protectant also prevents the strip from freezing in the winter. Performing these tasks regularly keeps the weatherstrip from damage and helps you avoid replacement. Ask your mechanic to inspect your weatherstrip when you bring your car in for your next maintenance appointment.
4 Car Deodorizing Tips
spritz the mixture on your car’s dashboard, cupholders, seats and carpets. Let the solution sit for 30 minutes, then wipe it away with a clean, damp rag.
3. Baking soda lifts unpleasant scents. For example, sprinkle some baking soda on your vehicle’s carpet or upholstery if you’ve spilled something on your vehicle’s carpet or upholstery. Rub the baking soda into the area and leave it for a few hours. Then, vacuum it up.
rities and nasty smells. That’s why it’s commonly used in air and water filters. Pick up a charcoal briquette, like the ones used for grilling, at a local store. Leave the briquette in your car for a few days. Charcoal is highly porous and absorbs any nasty odours floating in the air.
white vinegar.
4. Charcoal absorbs impu-
Lastly, spray down your car vents with a specialized cleaner. Over time, your car’s vents build up dirt and debris that can cause an unpleasant smell. If any bad smells persist, take your car to a cleaning professional.

Soft-touch vs. touchless car washes
Winter roads are filled with dirt, mud and road salt. After months of driving in less-than-ideal conditions, you probably want to visit a car wash to make your ride look its best. Here’s a short guide to help you choose between a softtouch or touchless car wash.
• Soft-touch car washes use foam and cloth applicators filled with soap and water. The materials gently glide across the vehicle, spreading the soapy solution over its surface. The cloth makes physical contact with the car, wiping away the dirt. However, the cloth strips can be applied too forcefully, potentially dama - ging your vehicle’s mirrors, detailing, antenna or other loose parts. Small stones and dirt can also get stuck inside the fabric, damaging your vehicle’s finish.

• Touchless car washes are entirely automated. They use sophisticated sensors to guide high-pressure washers along the contours of your vehicle to clean every inch of it effectively. The car isn’t physically touched by anything other than powerful cleaning agents and water. This reduces the risk of your vehicle being damaged during the cleaning process. However, the pressure washers can’t get into every crack, crevice and hard-to-reach area. Moreover, chemical cleaners can harm your vehicle’s finish. Lastly, a touchless car wash should work just fine if your car is only slightly dirty. If you haven’t washed your car in a while, a soft-touch car wash will provide a more thorough clean.