22 minute read
Tech Stuff
Tech Tips Never Replace Flare
Getting Tired of Buying New Flares? Check This Out!
Advertisement
I don’t know about you, but in the 40 years or so I have been sailing, I figure I have invested megabucks buying new flares. Not only that, but with the overzealous Harbor Patrol dudes trying to increase revenue, I found that soggy flares that won’t light are not exactly considered legal in the dink. So I add the cost of a few tickets, and we are into real money.
So what’s the answer? Well, it’s a neat little doodad I saw at the Chicago Strictly Sail. Jim O’Meara, the CEO of the company, told me they called it the Omni Directional Electro Optical or ODEO Flare. A mouthful for sure. It is available from North American Laser Flares.
We don’t need to get into what a pain in the butt disposing of old flares is. Yeah, when I was a kid it was fun. But it just seems like a waste of money now, burning perfectly good flares because the Coasties want to see a different date. With these laser flares, you don’t have to replace them!
These goodies use laser technology so there’s no dangerous flammable pyrotechnics. The side benefit of that? It won’t hurt you, your boat, your equipment, or the environment. It’s even FDA approved laser light technology which is safe for boats and people. It’s also as easy-to-use as turning on a flashlight and runs five hours continuously on one set of batteries. Best of all, it’s visible from all directions for 3-5 miles.
The ODEO Flare floats so it can be used in “man overboard” situations. Of course it’s waterproof, and made with salt-water and chemical-resistant materials. It can be tested before each outing and during safety briefings.
Oh yeah, did we mention no expiration or disposal concerns?
How long does it last? How about a ten thousand working hour lifetime with manufacturer’s warranty.
Okay, with all this kewl stuff, there must be a drawback, right? Well, it’s not cheap. But once you figure what you’ve spent on old flares, and let’s not forget dinghy tickets for outdated flares, all of a sudden this unit is looking pretty good. Check it out at www.odeoflares.com.
Yacht Thruster
Spin Your Boat in Its Own Length
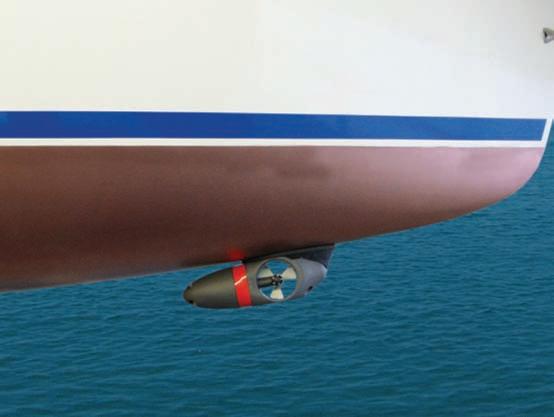
Here is an idea that I am sure has people palm-slapping their foreheads saying, “Why didn’t I think of that?” I mean, here is a super simple way to handle your boat in tight quarters, and it’s basically a bolt-on.
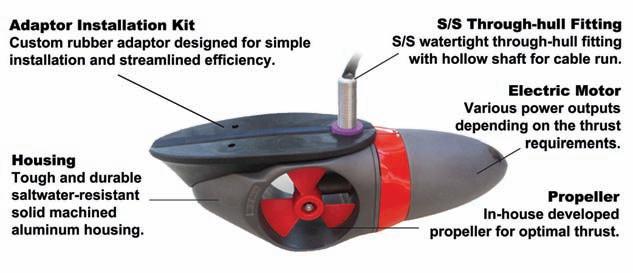
The compact eXturn System, now produced by Sleipner (also the owner of Side Power Thrusters), includes a solid machined aluminum body housing, a hand built motor using rare earth magnets, German cut worm gears and Swiss components for exceptional reliability and strength. These sealed motor housings, coupled with proven relay technology and state of the art controls with built-in safety features, provide an incomparable thruster system for both power and sailboats. You can use them as bow or stern thrusters in a power range for boats from 17 feet to 70 feet. These things are easy and quick to mount with no fiberglass lamination involved; a lot less expensive than the Tube Thrusters. Half of the purchasers choose to self-install due to the simplicity. Once installed there is never a concern about moisture or corrosion affecting the workings of the thruster motor.
In operation, the Yacht Thruster is both powerful and quiet, and with a continuous operating time of five or more minutes, (30 minutes in every hour), it will provide the operator with abundant time to move their boat as required against the wind or tide without timing out. For more information check them out YachtThruster.com.
Tech Tips Anchoring Basics
Always Remember - Anchoring is a Spectator Sport
By Alex & Daria Blackwell
Unless you are far offshore, at some point or another you are going to need to park your boat. This may be because you want to or because you need to. In either case you have three choices. You can go to a dock, which lacks many of the plus points of being away from land. You can pick up a mooring, which often has a number of challenges and unknowns associated with it. Or you can drop a hook (common term for anchor), which just happens to be our preferred choice.
Just like knowing how to stop your car before you start is perhaps the most important part of driving, anchoring is perhaps the most important skill you can and should acquire in boating. Anchoring a boat can be a lovely dance in a harbour or a painful and often embarrassing display of Homo sapiens’ inability to plan or communicate. Anchorage Selection
Most anchorages consist of one of three types of bottoms: mud, sand, or rock, with mud being quite predominant. The cruising guides and harbour charts will indicate where the best anchorages are and what the bottom composition is likely to be, so there’s not much guesswork. Just bear in mind that how the cruising guides rate an anchorage may have more to do with the anchor they used, than how good or bad the holding actually is.
Usually an anchorage will be in the prevailing lee of an island or shore. The best anchorage for any particular night depends on the weather conditions predicted. Listen to the weather report for your area on your VHF first. Then choose your spot for maximum protection from the wind and the waves to keep your family snug and comfortable all night long. If is going to be hot, then you may want to pick a spot where you will be able to scoop in some breezy relief. Shelter and holding are not the only things that may determine where you wish to anchor. Reasonable access to shore side activities can be also be important factors. Anchoring Method
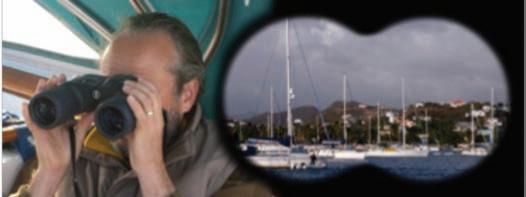
Anchoring is a spectator sport. It is a fact that as soon as a new boat enters a harbour, binoculars come out scanning the new arrivals and keeping a close eye on their technique. So it pays to be prepared. Here is a method that works best for us when setting the anchor.* 1. Choose a location that will be best suited for predicted overnight conditions (e.g., in the lee of a high shore). Prepare your anchor and rode on deck. If you like being prepared for eventualities, add a trip line (a line equal to maximum expected depth attached to the crown of the anchor with a buoy to the surface). 2. Check the tide to see where it is now, and how it is likely to affect the depth relative to your draft as well as to the amount of scope you will need. 3. Drive in a circle around the perimeter of what you expect your swing to be to make sure there
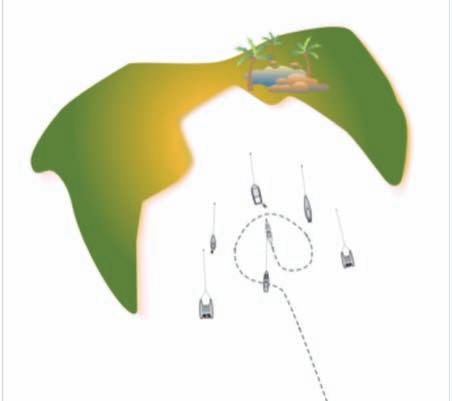
aren’t any obstructions, boats that could swing close, or variables in depth that weren’t charted. Your boat will swing, sometimes in a 360° circle. 4. Point into the wind and head for the centre of your circle. 5. Stop the boat, and let the anchor drop slowly to the bottom. 6. When the anchor reaches the bottom, start reversing slowly (or let the boat drift backwards) and slowly let out some more rode. This achieves two results: the anchor will land on the bottom in the correct orientation, and the rode is cleanly stretched out from it. 7. When you have let out three times as much rode as the water is deep, tug on the line repeatedly to set the anchor. If you are using a windlass, gently apply the brake. You should feel the anchor catch securely. 8. Let out the some more rode and secure it on a sturdy cleat. 9. Reverse your boat slowly to make sure the anchor is securely buried. Applying too much power will simply pull the anchor out. This is best done with one person at the bow and one at the helm of the boat. While the helmsman reverses, the other person carefully places a hand on the rode that is stretching away from the boat. If the boat drags, the vibration is easily felt. At the same time the helmsperson should take a sight on a near and distant point to see if the boat is moving. If it drags, pull up the anchor and start again in slightly different spot or with a different anchor. (Remember a different anchor may work better on a given bottom). 10. Now you can let out the remaining rode. Use adequate scope. We use at least a 5:1 ratio of rode to depth. 11. If you have a rope rode, attach a chafe protector where the line passes through the chock (and anywhere it may come in contact with something else). If you have an all chain rode, add a snubber to absorb the shock loads with a chafe protector. 12. In light air, or if you are at a location with changing currents, it is advisable to weigh down your (rope) rode. This will help prevent wrapping it around your keel if you have a modern fin-keeled sailboat. We use a 4-pound lead weight, which we tie to the rode about 15-20 feet from the bow of the boat. If we then drift over the anchor, our rode is usually safely lying on the bottom. 13. If you have an anchor alarm on your GPS, set it so it will keep watch for you overnight. You’ll sleep much better! Just always remember electronics are not fool-proof. It always pays to stay vigilant. It is always a good idea to go topsides during the night to check things out; the weather may have changed, or someone else’s anchor may be dragging. But even if nothing has changed, you will also see how beautiful it is out there at night! *Every boat, every bottom, every anchor, every condition, every situation is different, so what works best with our gear for us may not be best for you. Please be sure to consult your equipment manufacturers for their specific recommendations.
Up the Mast!
Etienne Shows Us the Ascender from ATN
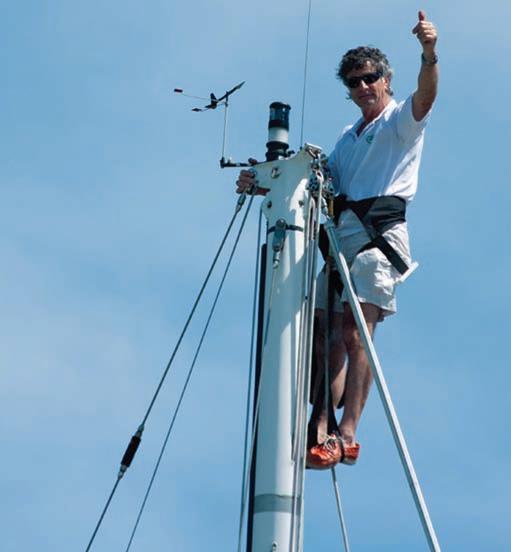
Etienne Giroire is an experienced racer, sailor and inventor. Since his company started in 1985 he has created many innovative products, but most people know him from “hangin’ around” at boat shows.
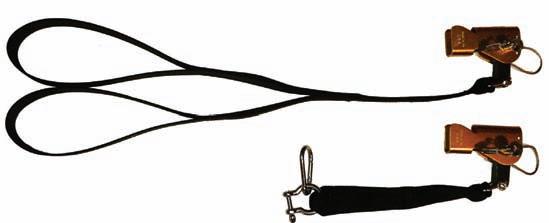
You see, one of his first creations was the MastClimber. It allows a person to hoist him/ her self to the top of the mast by their self, higher than just about any other system. So at the boat shows he spends countless hours going up and down a mast showing folks how it works.
His latest product is the Ascender. It is the same unit he uses on his MastClimber, but it allows boaters to use their own bosun’s chair. As we all know, sailors are not known for throwing money away, and being able to use your bosun’s chair for double duty makes all the sense in the world. So now a cruiser can ascend to the top of his mast when he needs to, using his own muscle power and his own bosun’s chair. This is the only mast ascender conceived to operate in a marine environment; manufactured with anodized aluminum and stainless steel so it will not rust. Its open design allows it to be fitted OVER a taught halyard / synthetic shroud / stay from 3/8” up to 5/8” and enables the sailor to climb the mast alone. It can also be used as a safety, in conjunction with the ATN MastClimber. You can check out Etienne’s video at http://bit.ly/Z6u8Hw or get more info from his website at www. atninc.com
DIY Hard Dodger
Step by Step Way to Do It By Rick Johnson

This is what I wanted but could not afford.
After reading a story on Sailblog.com about building a hard dodger, I decided to give it a try myself.
The first step was to acquire a soft dodger frame. I was lucky enough that a friend (Charlie Silver, owner of Marina Sailing in Newport Beach, CA) gave me a nice 1” stainless steel dodger frame. Thanks again Charlie.
The next step was to buy a 4x8 sheet of fiberglass reinforced panel at Home Depot. This had a smooth side and a side with a texture (cracked ice). I sanded both sides and put the textured side up where I would be adding fiberglass cloth and resin. I laid the sheet of FRP out on my garage floor and started sanding with 80 grit sandpaper. After smoothing the textured side and removing any coating on the FRP, I flipped the panel over and repeated the process on the other side. I ended up with a sheet of FRP about 1/16” thick.
After mounting the dodger frame where I wanted it on my 1990 Catalina 34, I used some duct tape to hold the frame open and in the correct position. I laid the sheet of FRP on top of the frame and using some duct tape to hold the ends down on the frame, I was able to run a pencil around the frame so I would know where to cut (we will come back to this later).
I then drilled 3/16” holes in several places in the FRP, so I could use plastic wire ties to attach the FRP to the frame.
I also used some 1” aluminum “L” metal, which I pop riveted along the edge, to make sure that the ends of the FRP remained straight.
At this point I noticed that I had cut the FRP wrong on one side. Damn!
You can clearly see, in this photo that
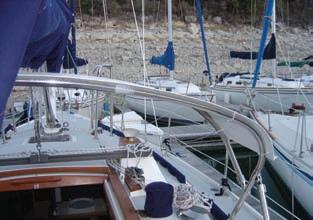
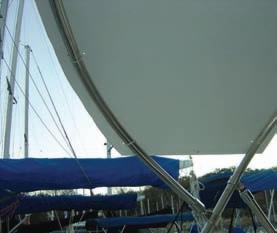

the port side is not level and is cut higher than the starboard side. This would be the point when you remember your father telling you to measure twice and cut once. I should have gone back to Home Depot and bought a new sheet of FRP. Instead I cut a piece to fix the mismatch and pop riveted it in place.
I also decide I wanted a “lip” on the forward edge. I felt that this should make the dodger stronger and when the windows were added later, would help keep any water out. I laid the remaining FRP over the top of the dodger and marked a 3” wide piece to attach to the forward edge. I cut a number of 4” pieces of 1”x1/8” aluminum and bent them to a 40 degree angle (I think it was 40 degrees). Each piece of aluminum got three holes drilled and the leading edge was pop riveted to the rest of the FRP dodger. Something very important, which I almost forgot, is making sure the pieces of aluminum that hold the lip do not become glued with resin to the underside of the FRP. I placed blue masking tape on the top of each piece of aluminum. That way the worst thing that would happen is that I would glue the masking tape to the FRP.
I was concerned about fiberglassing over the plastic wire ties. My original hope was that I would be able to pull the wire ties out and fill the voids. The more I thought about this the more it seemed like a bad idea. During one of the many trips to Home Depot I noticed stainless steel wire ties. Since these were flat and very thin, I decided to use them instead to attach the FRP to the dodger frame. If they could not be removed, they would not create a “bump” in the fiberglass and they would not rust. This worked out very well.
I had decided that I wanted to add the fiberglass in two stages (both on the boat) and sand everything smooth between the stages. I would add several alternating layers of 8 oz fiberglass cloth and heaver Bi-axel cloth. Then I would drill out all the pop rivets and remove the aluminum angles. I sanded everything smooth with 80 grit sandpaper on a Makita palm sander. A put little blue masking tape across the bottom of the holes and then finished the fiberglass layers. I bought some 6 oz (fine) fiberglass cloth to try to give the surface a very smooth finish.
If you look closely at the lip and forward edge, you can see a discolored area. This is because I used three layers of fiberglass tape before starting the actual cloth layers. I bought 3”, 4” and 6” inch tape and covered the area of the lip and the forward edge
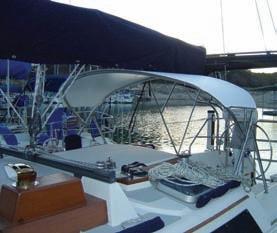


of the dodger with increasing widths of tape. It was hoped that this would strengthen this area as well as adding more curvature to the lip area. You can also see the dark spots where I drilled out the pop rivets before adding the next layers of cloth. I used MAS Epoxy with a slow hardener. The temperatures were in the 70s and I was able to add six layers of cloth during each of the two stages (12 layers total). The cloth (both types) should be already cut to size and a roller to work out the bubbles helps. I had to work quickly but never felt like things were out of hand. Working the cloth around to lay flat did not present a problem.
Although I had already removed all the paper drop cloths I used to cover the deck, you can still see that I wrapped the dodger frame in plastic wrap to keep off the fiberglass resin. The drop cloths were not 100% effective and if I was to do this again I would either add additional layers of drop cloths or mount the dodger frame on a workbench on shore.
In the picture above you can see some of the stainless steel wire ties.
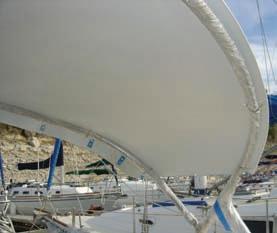
This photo again shows the stainless steel wire ties. You can also see that the masking tape on top of the aluminum pieces holding the lip were indeed glued to the FRP
After sanding, using in order 80, 100, 150, 180 grit sandpaper, I painted the hard dodger using Interlux PrimeKote epoxy primer.
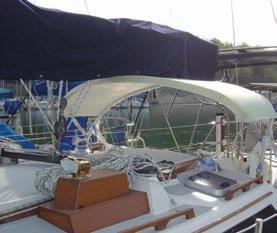
After sailing with the hard dodger several times I have lowered it by another 3” and moved it forward by about 2”.
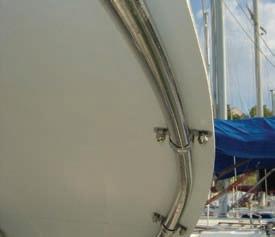
I purchased 1” stainless steel metal pipe clamps from McMaster-Carr (part #8874T44) to attach the hard dodger to the frame. I used 1/4”x1/2 ”stainless steel carriage bolts and used a square file to file the holes square. A pencil line helped mark the location for the mounting holes, it’s not a flaw in the hard dodger.
There are a total of eight of the pipe clamps and 16 carriage bolts holding everything together.
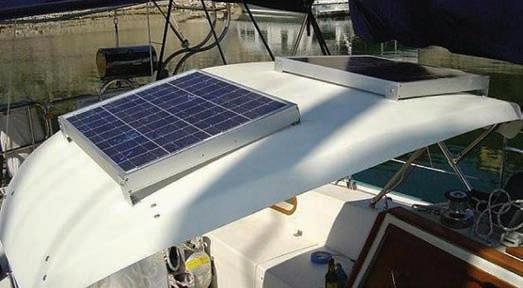
The below picture shows the current state of the hard dodger project. I still need to do some more sanding and then go back and paint the dodger with Interlux Perfection epoxy paint. The hard dodger is not perfect, but was well worth the effort and the $400 involved.
The Art of Enjoying a Good Refit
In the middle of refitting our old wooden boat in depths of winter when it was dark and cold, I sometimes questioned our motives on why we did it. Sure, we loved the boat and the pleasure we all got as a family from sailing her, but was this work that my wife and I did compensated for enough? One winter I met an old hand who showed me a much better way of fitting out.
The boat was afloat at her mooring close to the town quay in Lymington. I’d spent most of the day boiling up pitch on the stove, then pouring it between the lands of my clinker planks so no fresh water would be trapped in certain areas, but would run off into the bilge. This was an area I’d identified where ‘Blauwe Slenks’ frames had gone soft before, and wouldn’t happen again whilst I was looking after her (on the principle that you don’t own an old wooden boat, you just keep her in trust for next person!). The old watering can of pitch took an age to boil, so I’d also been painting (grey) in the forepeak, before replacing all the newly varnished mahogany planks of her interior lining. Not surprisingly for a February day in the UK, the colour of the sky matched the colour of my paint; it was damp and bleak. So occasionally, with the boat well shut up, I had to go on deck just to breathe some cold fresh air. The combined vapours I’d been breathing weren’t quite ‘Colombian Gold!’
During one of these breaks, David Gay, who had obviously spotted me in my cockpit, rowed across and invited me for a cup of tea on his own old boat. I didn’t know him well, but we had seen one another when he was about to examine some of my YM candidates, or at the odd RYA YMI meeting.



All Sailing Caps Just $15

Cruiser’s Hats
Show The Folks On The Dock Who You Are!
Floppy Hat Just $18

Cruising Outpost Burgee
Double Thick - Two Sided $25
12’ X 18” Made In The USA! www.cruisingoutpost.com
The Art of Enjoying a Good Refit
By John Simpson
“Come over in about half an hour, John,” he said. “When you’ve finished. The light will be gone soon anyway!”
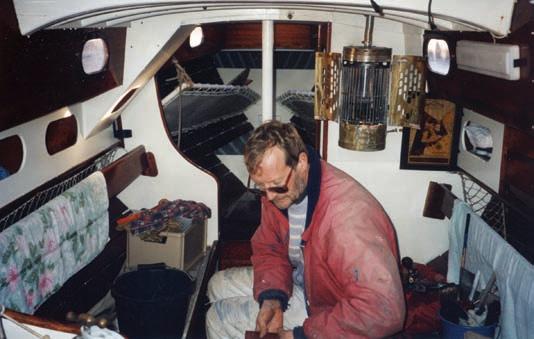
It gave me fresh incentive to try and finish some of my painting before I couldn’t see the runs anymore. Then I duly sculled over to visit him on his boat, Mutine. I knocked as I came aboard, and David greeted me covered in paint (including his hair) with his overalls on, explaining that he had been painting his deck head. He didn’t’t think it a good idea to light his stove, but a ‘Pinkers’ might be just the ticket. Joining me in the cockpit David produced a couple of large, paint splattered, halfpint mugs of ‘Pink Gin.’ By the time he poured the second, the evening mist looked really good and the cold had gone. We had moved into discussing his days of running ‘Royalist’ sailing square-riggers. “Always finish your days of refit feeling good,” he said. “Then you’ll be back for more“!
Certainly, as our refit wore on through the winter, occasionally we’d meet again. He mentioned that he quite understood why I thought Mount Gay rum and fresh lime made a reasonable drink to end the day, and I became educated in the importance of Angostura bitters with gin as the Navy drinks it! Both our old yachts ended up gleaming like new pins with David’s different way of viewing a refit!


49’ 2006 Jeanneau 49DS Please Call 47’ 1983 CT $119,000 45’ 1992 Bruce Roberts Cutter 89,000 43’ 2008 Beneteau 219,500 42’ 1979 Pearson 424 65,900 42’ 2007 Catalina 209,900 41 41’ 1987 Bristol 41.1 Aft Cockpit 144,900 40’ 2004 Jeanneau Sun Odyssey 154,900 40’ 1983 Endeavour 40CC 96,750 39’ 1989 Pearson 84,900 39’ 1985 Jeanneau 39 Regatta 34,900 38’ 2001 Catalina 380 114,900 38’ 1988 Ericson 38 69,900 38’ 1986 Island Packet 38 127,900 37’ 2007 Island Packet 370 274,900 36’ 2012 Island Packet Estero 349,000 36’ Catalina MkII several from 87,900 36 36’ 1990 Pearson 69,900 35’ 1984 C&C Landfall 34,500 35’ Catalina 350 2 from 114,500 34’ 2000 Gemini 105M 109,900 34’ 2002 J105 88,000


Brokerage Boat of the Month


Nerissa is a one owner 2006 Sun Odyssey 49DS designed by today’s top naval architects: Philippe Briand for the high-performance hull, and Vittorio Garroni for the pure, graceful lines. Her rich teak interior shows the elegance and outstanding quality of this fast, sleek, and beautiful yacht. She is in exceptional condition and is equipped with all navigation electronics and electrical power systems such as electric winches, bow thruste systems such as electric winches, bow thruster, electric windlass, full electronics and dual steering stations. Dark blue hull (sistership shown). Please call for pricing and details.


