11 minute read
Celebration Cakes


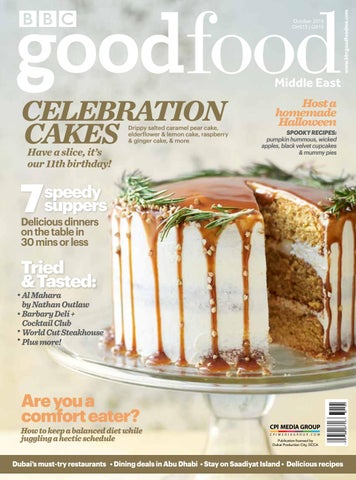
In celebration of BBC Good Food Middle East’s 11th birthday, we’re making cake!
Salted Caramel Pear Cake
This spiced cake has it all: moist, fragrant sponge, silky Italian meringue tahini buttercream and sharp, moreish, pear-laced salted caramel.
SERVES 12 | PREP 1 hr | COOK 50 mins | A CHALLENGE V
Ingredients
• 2cm piece ginger, grated
• 4 Williams pears, 3 grated over a sieve, reserving the pear juice for the caramel, 1 peeled, cored and chopped (do this when about to decorate)
• 360g self-raising flour
• 15g rye flour 1 tsp ground ginger
• 1/2 tsp each turmeric, nutmeg, ground cardamom and cinnamon
• 1 tsp baking powder
• 4 eggs
• 200g golden caster sugar
• 150g light brown muscovado sugar, sieved
• 150ml rapeseed or vegetable oil
• 120g natural yogurt
• toasted buckwheat, dehydrated pear and rosemary, to serve (optional)
For the Pear Salted Caramel
• 50g unsalted butter, plus extra for the tins
• 50ml reserved pear juice
• 150ml perry
• 100g light brown muscovado sugar
• 1 tbsp double cream generous pinch sea salt for the icing
• 4 egg whites
• 250g golden caster sugar
• 250g butter, at room temperature
• 2 tbsp tahini
• 1 tbsp vanilla bean paste
Instructions
1) Heat oven to 195C/175C fan/gas 5 1 /2. Butter and line the base of three 20cm round cake tins. Add the grated ginger to the grated pear and push down with a wooden spoon to squeeze out as much juice as possible.
2) Mix the flours, spices, baking powder and 1 tsp salt in a bowl. In a stand mixer, vigorously whisk the eggs and sugars for 3 mins until thick and frothy. Slowly pour in the oil in a steady stream. Turn the speed down, then add the flour mixture, 2 tbsp at a time, alternating with the yogurt, until incorporated. Mix in the grated pear (for no longer than 20 secs). Divide the mixture between the tins and bake for 25-30 mins or until a skewer inserted comes out dry.
3) For the caramel, heat the pear juice and perry in a pan until reduced to about 50ml. Add the sugar and butter and whisk to a smooth caramel, then add the cream and whisk again until smooth. Add sea salt to your taste – I’d go for a generous pinch, so that the caramel is still fruity and sharp but has a little saltiness to it – then allow to cool slightly to just warmer than room temp.
4) To make the buttercream, put the egg whites and sugar in the bowl of a stand mixer. Place the bowl over a pan of boiling water, then whisk until the sugar dissolves and the mixture is no longer gritty. Put the bowl in the mixer, then whisk until soft peaks form and the bowl returns to room temperature. Switch to the paddle attachment, then add the butter, one spoonful at a time. Add the tahini, vanilla and a pinch of salt, and beat to a light, fluffy icing.
5) Place the bottom layer of sponge on a platter or cake stand, then top with a layer of the buttercream and scatter over a third of the chopped pear. Repeat with the next two layers. To ice the cake, do an intial layer all over, chill in the fridge for 20 mins, then use the remaining icing to cover everything. Use a stepped spatula to spread it out evenly. Pour the caramel over the top of the cake, and allow it to drip down the sides. Scatter with toasted buckwheat, dehydrated pear and rosemary, if you like.
PER SERVING (12) 743 kcals • fat 38g • saturates 16g • carbs 89g • sugars 66g • fibre 3g • protein 8g • salt 1.5g
Elderflower & Lemon Celebration Cake
The cake of the summer, we’ve recreated Prince Harry and Meghan Markle’s wedding cake. It looks amazing decorated with fresh flowers – but make sure you use edible and non-poisonous varieties. We used unsprayed roses, violas and pansies.
SERVES 15-18 | PREP 45 mins | COOK 40 mins | MORE EFFORT V ❄ uniced

Ingredients
• oil, for the tins
• 6 medium eggs
• 100g natural yogurt
• 50ml milk
• 450g butter, softened
• 450g golden caster sugar
• 450g self-raising flour
• 2 lemons, finely zested, 1 juiced
• 3 tbsp elderflower cordial fresh flowers, to decorate
For the Icing
• 250g butter, softened
• 700g icing sugar
• 300g full-fat cream cheese
• 1 lemon, finely zested
Instructions
1) Heat oven to 160C/140C fan/gas 3. Oil and line the base and sides of three 20cm cake tins with baking parchment. In a jug, whisk the eggs, yogurt and milk. Beat the butter and sugar together in a large bowl using an electric hand whisk. When you have a light and fluffy mixture, add the flour, the liquid in the jug and the lemon zest, and mix again until smooth. Divide the cake mixture between the tins, level the surfaces and bake for 40 mins.
2) Mix the lemon juice and elderflower cordial. When the cakes are cooked, poke all over the surface with a cocktail stick, then spoon the lemon and elderflower syrup over the cakes. Leave to cool in the tins. Once cool, you can wrap in cling film and keep for up to three days before icing.
3) To make the icing, beat the butter until smooth using an electric hand whisk. Add half the icing sugar, use a spatula to mash together (this will help to prevent an icing sugar cloud), then whisk again. Add the remaining icing sugar, along with the cream cheese and lemon zest, mash, then whisk again until smooth.
4) Stack the cakes on a cake stand with plenty of icing between each layer. Pile most of the rest of the icing on top, then use a palette knife to spread it across the top and down the sides, covering the cake in swirls (don’t worry about it looking too perfect.) Use the final bit of icing to cover any patches where the cake is showing through. Decorate with fresh flowers to serve.
PER SERVING (18) 715 kcals • fat 38g • saturates 24g • carbs 86g • sugars 67g • fibre 1g • protein 6g • salt 0.2g
Rainbow Cake
Rainbow cakes are perfect for special occasions – they look so impressive, yet are relatively simple. You just need to set aside some time to bake three sets of sponges, then decorate your showstopper. We’ve spent lots of time in our Test Kitchen developing this recipe: the sponges are dense and squidgy, so they shouldn’t rise unevenly or require any trimming. They’re made in pairs, so you only need two sandwich tins, and there’s plenty of icing – no danger of running short! The below quantities are for two layers – you’ll need three times this amount to make six colours.
CUTS INTO 18 slices | PREP 2 hrs | COOK 45 mins-1 hr | MORE EFFORT ❄ un-iced sponges only

GF TIP: MAKE AN EXTRA LAYER This recipe makes six sponge layers, but you can make one extra layer by halving the cake quantities and baking a single sponge dyed pink – use this as your seventh layer. It’s not strictly necessary, the cake will still look fabulous with six, but why not!
Ingredients
• 125g butter, softened, plus a little extra for the tin
• 225g plain flour
• 150g golden caster sugar
• 3 medium eggs (very important to use the correct size)
• 3 tbsp buttermilk
• ½ tsp baking powder pinch of salt
• 1 tsp vanilla extract
• edible food colouring – red, orange, yellow, green, blue and purple, plus optional pink (see tip)
• For the icing 1 tsp vanilla extract
• 3 x 250g tubs light cream cheese or mascarpone
• 350g icing sugar
Instructions
1) Heat oven to 160C/140C fan/gas 3. Grease 2 x 20cm round sandwich tins and line the bases with baking parchment. Tip all the sponge ingredients, apart from the food colouring, into a mixing bowl, and beat with an electric whisk until smooth.
2) Working quickly, weigh the mixture into another bowl to work out the total weight, then weigh exactly half the mixture back into the mixing bowl. Pick two of your colours and stir a little into each mix. Keep going until you are happy with the colour – the colour of the batter now will be very similar to the finished cake, so be brave! Scrape the different batters into the tins, trying to spread and smooth as much as possible. Try not to waste a drop of the batter (a rubber spatula will help). Bake on the same oven shelf for 15 mins until a skewer poked into the middle comes out clean.
3) Gently turn the cakes out onto a wire rack to cool. Wash the tins and bowls thoroughly, and start again from step 1 – this time using another two colours. Unless you’re making the optional pink layer (see tip, right), repeat one more time to get six sponges, all of different colours. Leave them all to cool.
4) To make the icing, very briefly beat the vanilla and cream cheese or mascarpone with an electric whisk until smooth. Sift in the icing sugar and gently fold in with a spatula. Be careful – the more you work it, the runnier it will get, increasing the chance of splitting. 5 Smear a little icing on your cake stand or plate – just a splodge to stick the first sponge. Start with the red, then spread with some icing right to the very edge. Repeat, sandwiching on top the orange, yellow, green, blue and finally purple sponges. Spread the remaining icing thickly all over the sides and top of the cake.
PER SLICE 601 kcals • fat 29g • saturates 18g • carbs 73g • sugars 47g • fibre 2g • protein 11g • salt 0.6g
Raspberry & Ginger Fridge Cake
Icebox cake, or fridge cake, is one of the easiest desserts you can make. When it’s left to chill in the fridge, the biscuits absorb the moisture from the cream and begin to soften, which gives the cake a deliciously fudgy texture. This method suits all kinds of flavour combinations; try peanut biscuits with strawberries, or chocolate or caramel biscuits with layers of chocolate sauce and cream.
SERVES 8 | PREP 20 MINS PLUS AT LEAST 3 HRS CHILLING | NO COOK | EASY

Just 5 ingredients!
Ingredients
• 600ml double or whipping cream
• 1 tsp vanilla extract or paste
• 1 ball preserved ginger in syrup, finely chopped (reserve the syrup)
• 400g ginger biscuits
• 250g raspberries
Instructions
1) Using an electric whisk, beat the cream to soft peaks, then fold in the vanilla extract and chopped preserved ginger.
2) Arrange about 5-6 biscuits (depending on their size) in a circle on a serving plate, then fill the gap in the centre with more biscuits. Spoon a layer of the whipped cream in blobs onto each biscuit and dot over some raspberries, pushing them into the cream. Add another, smaller circle of biscuits in a layer, and add more cream and raspberries. Repeat until you have used all the cream and biscuits, then decorate with any remaining raspberries.
3) Put the cake in the fridge to chill for at least 3 hrs. To test if the cake is ready to serve, poke a skewer into the biscuits in the centre. Once they’re soft enough to cut, the cake is ready. Drizzle over some ginger syrup just before serving, if you like.
PER SERVING 526 kcals • fat 38g • saturates 23g • carbs 40g • sugars 19g • fibre 2g • protein 4g • salt 0.5g
Easy Chocolate Cake
An airy light sponge and rich buttercream makes this cake simple enough for an afternoon tea but special enough for a party; just add cake candles.
SERVES 10-12 | PREP 35 mins | COOK 20 mins | EASY V ❄ sponges only

GF TIP: For the chocolate shards, melt 50g dark chocolate and pour it onto a tray lined with baking parchment or foil. Now melt 25g milk chocolate and 25g white chocolate and drizzle them over the dark chocolate before it sets. Shake the tray gently to level the mixture then leave to set somewhere cool. Chop into shards.
For the Cake
• 200g golden caster sugar
• 200g unsalted butter, softened plus extra for the tins
• 4 eggs
• 200g self-raising flour
• 2 tbsp cocoa powder
• 1 tsp baking powder
• ½ tsp vanilla extract
• 2 tbsp milk
For the Buttercream
• 100g milk chocolate, chopped
• 200g butter, softened
• 400g icing sugar
• 5 tbsp cocoa powder
• 2 tbsp milk
To Decorate
• chocolate shards (see tip)
Instructions
1) Heat oven to 190C/170C fan/gas 5. Butter the base and sides of two 20cm round sandwich tins, then line the bases with baking parchment.
2) In a large bowl, beat all the cake ingredients and a pinch of salt together until pale. Divide the mixture between the prepared tins. Bake for 20 mins or until a skewer inserted into the centre of the cake comes out clean. Leave to cool in the tin for 10 mins, then turn out onto a wire rack to cool completely.
3) For the buttercream, put the chocolate in a heatproof bowl and melt in the microwave, stirring every 30 secs. Leave the melted chocolate to cool for 5 mins. Mash the butter and icing sugar together with a fork, then switch to a wooden spoon or electric beaters, if you have them. Sift in the cocoa with a pinch of salt and pour in the melted chocolate and milk. Mix again until smooth.
4) On a cake stand or large plate, sandwich the cakes together with half of the buttercream, then spread the rest on top. Decorate with chocolate shards, if you like.
PER SERVING 523 kcals • fat 29g • saturates 18g • carbs 59g • sugars 47g • fibre 2g • protein 6g • salt 0.6g
Giant Mint Choc Ice
SERVES 6 | PREP 20 mins plus at least 2 hrs freezing | COOK 5 mins | MORE EFFORT ❄

Ingredients
• 2 tbsp vegetable oil, plus extra for the tin
• 200g dark chocolate
• 500ml good-quality vanilla ice cream
• 8 chocolate digestives or wafers
• 250g chocolate mint thins (around 24 individual chocolates)
Instructions
1) Brush a 450g loaf tin with oil. As neatly as you can, line the bottom and sides of the tin with two strips of baking parchment. Melt 100g of the chocolate in the microwave with 1 tbsp vegetable oil on high in 30-sec bursts until smooth and glossy, then pour the melted chocolate into the loaf tin. Carefully spread the chocolate up the sides of the tin using a cutlery knife until they are all evenly coated. Put the tin in the freezer for 15 mins to set and take the ice cream out of the freezer to soften.
2) Take the tin out of the freezer and, working as quickly as you can, spread a quarter of the ice cream onto the base, then top with a single layer of chocolate mint thins. Add another layer of ice cream, followed by a layer of biscuits and mint thins. Top with another layer of ice cream, then a single layer of mint thins, before sealing with the last of the ice cream. Put back in the freezer to harden for at least 2 hrs or overnight. Don’t worry if your layers are a bit messy – once everything has set and you cut a slice, it will look great.
3) Melt the remaining chocolate with the oil, leave it to cool a little, then, working quickly, spoon blobs over the ice cream and smooth over with the back of the spoon to cover the base. Return to the freezer until set. About 10 mins before you want to serve it, invert the ice cream bar onto a plate and peel off the baking parchment. Cut into six slices using a hot, sharp knife.
PER SERVING 695 kcals • fat 41g • saturates 22g • carbs 70g • sugars 54g • fibre 5g • protein 8g • salt 0.3g