9 minute read
SUMMER FÊTE SWEETS
family summer fête sweets
Create an irresistible display of cakes and biscuits using our recipes, including vegan and gluten-free treats that everyone can enjoy
recipes CASSIE BEST photographs WILL HEAP
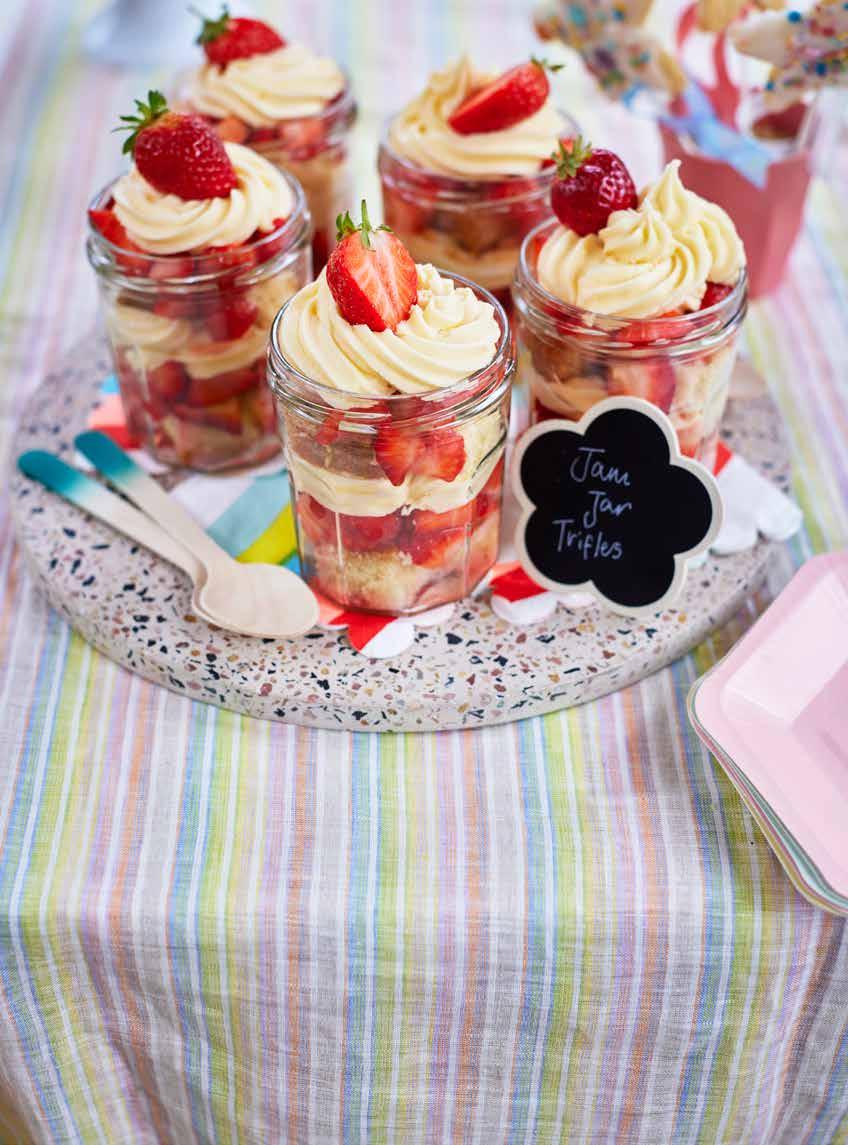
Jam jar trifles

If you’re not much of a baker or just short on time, this recipe could save the day. It’s essentially an assembly of shop-bought ingredients, but you can make the sponge yourself if you like. Cut an extra corner and buy ready-made icing – either way, the results look pretty and taste great.
MAKES 6 PREP 30 mins NO COOK EASY V
1 tbsp custard powder 500g icing sugar 250g butter, softened 1 tsp vanilla extract 1-2 tbsp milk 500g strawberries 2 tbsp elderflower cordial 300g shop-bought madeira sponge You’ll also need 6 x 400ml jam jars 1 Beat the custard powder, icing sugar, butter, vanilla and 1 tbsp milk together in a stand mixer until smooth and creamy, or do this in a large bowl using an electric whisk. Add a little more milk to loosen, if needed. Transfer the icing to a piping bag fitted with a large star-shaped nozzle and set aside. 2 Choose three of the best-looking strawberries, then halve and set aside for decorating later (or you can use six whole strawberries). Halve, hull and chop the rest of the berries, then mix with the cordial. 3 Cut the madeira sponge into roughly 2cm cubes. Arrange a layer of sponge pieces in the bottom of each jam jar, then top with a generous spoonful of the chopped strawberries, including any juice. Pipe a swirl of the custard icing on top, then repeat the layers again, finishing each jar with a strawberry half. Will keep chilled for up to a day.

GOOD TO KNOW vit c • 1 of 5-a-day PER SERVING 882 kcals • fat 42g • saturates 26g • carbs 119g • sugars 106g • fibre 3g • protein 4g • salt 1.3g
Gluten-free lemon shortbreads
Bring some zest to the occasion with this crowd-pleasing shortbread. You could also try using lime or orange zest in place of the lemon.
MAKES 16 PREP 20 mins COOK 35 mins EASY V ❄ unbaked dough
300g gluten-free plain flour 200g cold butter 200g icing sugar 2 lemons, zested, plus 2 tbsp lemon juice 150g lemon curd 1 Line a 20 x 20cm cake tin with baking parchment. Blitz the flour, butter, half the icing sugar and the lemon zest together in a food processor until the mixture looks sandy. Add half the lemon juice and blitz again until the dough starts to clump together. At this stage, the dough will keep wrapped and frozen for up to two months. Heat the oven to 170C/150C fan/gas 3. 2 Press half the dough into the base of the tin using your fingertips, ensuring it’s in an even layer. Spread the curd over the dough, leaving a 1/2cm border of around the edge. 3 Roll the remaining dough into cherry-tomato-sized balls, then press these into flat discs using your fingers. Arrange the dough discs over the layer of curd in a random patchwork pattern until completely covered. Bake for 35 mins until the shortbread is pale and lightly golden at the edges. Leave to cool completely in the tin. 4 Mix the remaining icing sugar with enough of the remaining lemon juice to make a pourable icing. Drizzle this over the cooled shortbread and leave to set, then cut into 16 squares. Will keep in an airtight container for three days.
GOOD TO KNOW gluten free PER SERVING 231 kcals • fat 11g • saturates 7g • carbs 32g • sugars 17g • fibre 0.2g • protein 1g • salt 0.3g

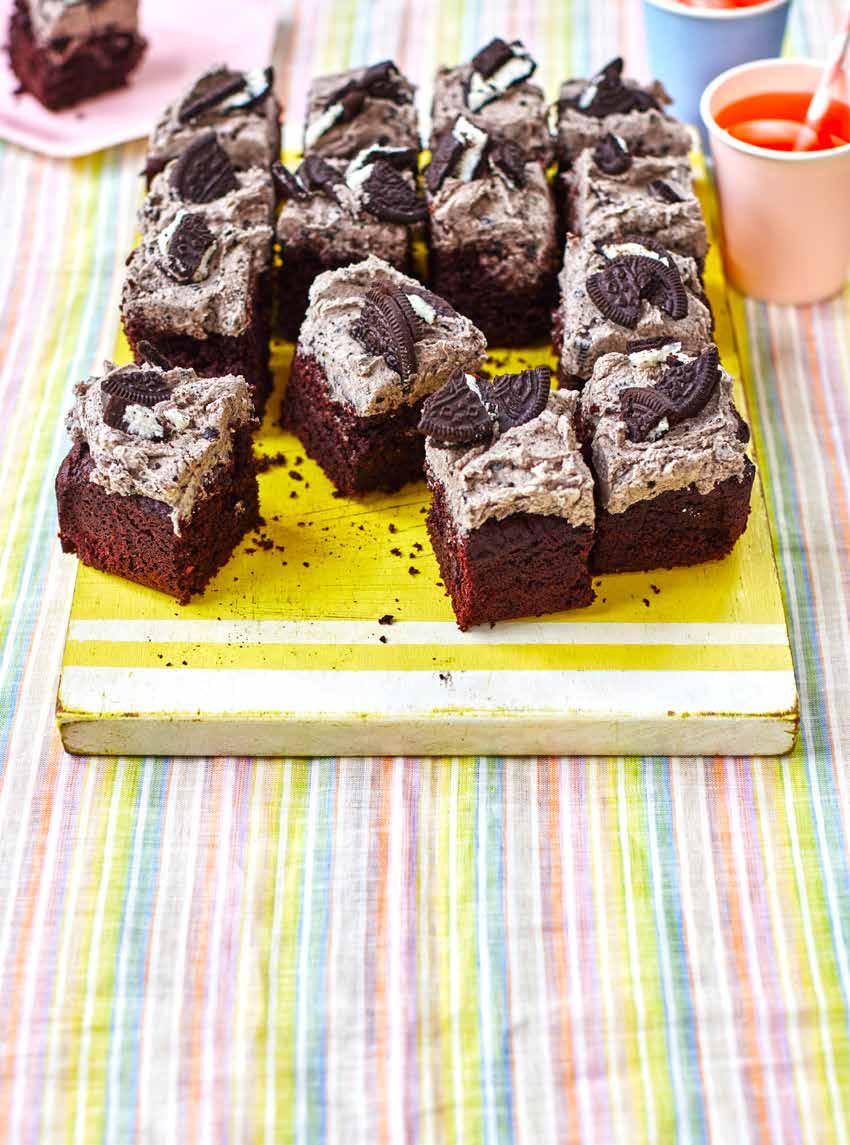
Vegan cookies & cream cake
Make this bake for any children or adults with allergies or intolerances, or those following a dairy-free diet.
SERVES 16 PREP 30 mins COOK 35 mins EASY V ❄ un-iced

150ml sunflower oil, plus extra for the tin 200ml dairy-free milk (we used oat milk) 1½ tsp white wine vinegar 1 tsp vanilla extract 120g dairy-free yogurt (we used coconut yogurt) 225g light brown soft sugar 200g self-raising flour 70g cocoa powder 1 tsp baking powder ½ tsp bicarbonate of soda For the icing and decoration 150g crème-filled chocolate sandwich cookies 150g vegan spread 1 tsp vanilla extract 275g icing sugar
1 Oil a 20 x 20cm baking tin and line the base and sides with baking parchment. Heat the oven to 180C/ 160C fan/gas 4. Combine the oil, milk, vinegar, vanilla and yogurt in a jug. Mix the sugar, flour, cocoa powder, baking powder, bicarb and a pinch of salt together in a bowl. 2 Pour the wet ingredients into the dry and mix until there are no pockets of flour remaining. Tip the mixture into prepared tin and level the surface with a spatula. Bake for 35 mins, or until a skewer inserted into the middle of the cake comes out clean. If any wet cake mixture clings to the skewer, return the cake to the oven for another 5 mins, then check again. Remove from the oven and leave to cool completely in the tin. 3 Set half of the cookies aside for decorating later. Bash the rest with the end of a rolling pin or blitz in a food processor to chunky rubble. Beat the spread, vanilla and icing sugar together using an electric whisk until fluffy, then gently fold in the crushed cookies until combined. 4 Put the cake on a board. Spread over the icing. Halve or crumble the rest of the cookies and use these to decorate. Cut into squares. Will keep in an airtight container for four days.
GOOD TO KNOW vegan PER SERVING 391 kcals • fat 20g • saturates 7g • carbs 49g • sugars 35g • fibre 2g • protein 3g • salt 0.5g

Fairy wand biscuits
MAKES 12-15 PREP 40 mins plus chilling and setting COOK 15 mins EASY V ❄ unbaked dough
175g softened butter, plus extra for the tin 100g golden caster sugar 250g plain flour, plus extra for dusting 1 egg yolk (freeze the white for another recipe) ½ tsp vanilla extract 250g icing sugar sprinkles of your choice, to decorate You’ll also need star-shaped biscuit cutter 12-15 cake pop or lolly sticks coloured ribbons (optional)
1 Tip the butter, caster sugar and flour into a food processor with a pinch of salt. Blitz until the mixture looks sandy. Add the egg yolk, vanilla extract and 1 tbsp cold water, and blitz again until the dough clumps together. Tip onto a surface and knead briefly until all the flour is incorporated. Shape into a disc, wrap and chill for 30 mins, or up to two days. Will keep frozen for two months. If chilled for longer than 1 hr, leave at room temperature for 10 mins before rolling out. 2 Line two baking trays with baking parchment. Heat the oven to 180C/ 160C fan/gas 4. Roll the dough out on a lightly floured surface until it’s 3mm. Stamp out stars using the cutter, then carefully lift onto the baking trays and gently push a lolly stick into the base of each. Bake for 12-15 mins until golden at the edges (you may need to do this in batches). Cool on the trays for 5 mins, then transfer to a wire rack to cool fully. 3 Combine the icing sugar with 2-3 tsp water to make a thick icing. Spread this over the biscuits, then scatter with sprinkles. Leave to set for 1 hr, then tie ribbons around the wands, if you like. Best eaten within 24 hrs, but will keep in an airtight container for three days.
PER SERVING (15) 254 kcals • fat 10g • saturates 6g • carbs 38g • sugars 25g • fibre 1g • protein 2g • salt 0.2g

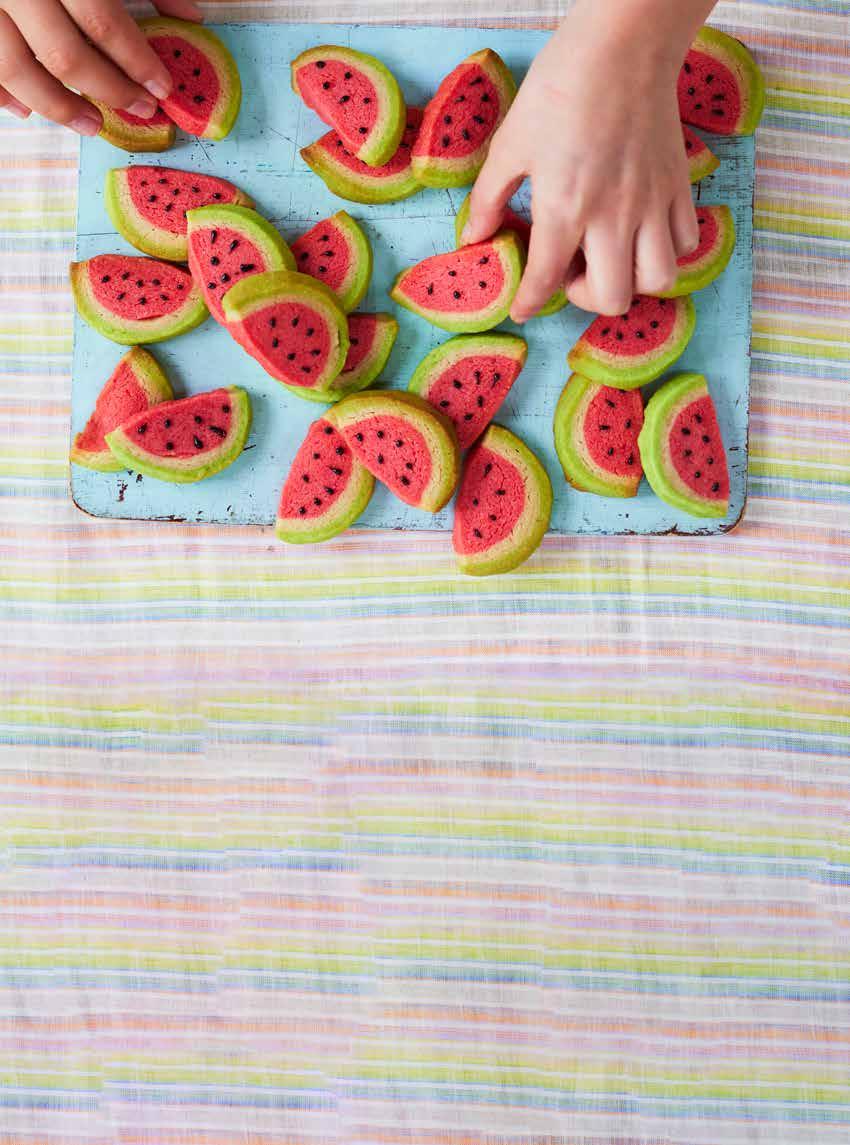
Watermelon sugar cookies

Brighten up summer with these colourful cookies. They look impressive, but you only need a few ingredients to make them.
MAKES 40 PREP 25 mins plus at least 2 hrs chilling and setting COOK 15 mins MORE EFFORT V ❄ unbaked dough
175g cold butter 100g golden caster sugar 250g plain flour, plus extra for dusting 1 egg yolk (freeze the white for another recipe) ½ tsp vanilla extract red and green food colouring gels black edible icing pen
1 Tip the butter, caster sugar and flour into a food processor with a pinch of salt and blitz until the mixture looks sandy. Add the egg yolk, vanilla and 1 tbsp cold water, and blitz again until the dough starts to clump together. 2 Remove half of the dough from the food processor and set aside. Add a few drops of red food colouring to the dough still in the food processor and blitz until it’s bright red. Halve the reserved plain dough, then add a few drops of green food colouring to one piece, kneading it until it is evenly coloured. 3 Roll the red biscuit dough into a long sausage shape on a lightly floured surface – it should be about 20cm long. Roll the plain dough out on a lightly floured surface into a 20 x 10cm rectangle. Repeat with the green dough, rolling it out to the same size. Roll the plain dough around the red dough, bringing the ends together and trimming any excess. Repeat with the green dough, rolling it around the plain layer. Wrap the sausage of dough tightly and chill for at least 2 hrs. Will keep wrapped and frozen for up to two months. 4 Heat the oven 180C/160C fan/ gas 4 and line two baking trays with baking parchment. Unwrap the dough sausage, then use a sharp knife to cut it into rounds about 1cm thick. Arrange these on the prepared trays, then cut each round in half to make the watermelon wedges. You should have about 40 in total. Bake for 12-15 mins, swapping the trays over halfway through cooking if needed. Leave to cool completely on the trays. 5 Once cooled, pipe small dots over the red ‘watermelon flesh’ using the black icing pen to look like seeds. Leave to set for 30 mins before serving or packing into bags. Will keep in an airtight container for up to three days.

PER SERVING 67 kcals • fat 4g • saturates 2g • carbs 7g • sugars 3g • fibre 0.2g • protein 1g • salt 0.1g


