DIY MADE EASY Ceramic Tiling Guide tile.com.au

Well done for deciding to tackle your own tiling. Before you start we recommend you really do your homework and research what it will take to do a great DIY job.
This booklet provides you with loads of handy hints on how to lay your tiles. Plus, we have created a number of helpful video tutorials available on our website, each with a useful step by step guide. If you are just starting out, it’s a good idea to watch these videos first, they are jam packed with great tips from professional tilers.
Don’t forget further information can be obtained from any one of your friendly Beaumont Tiles consultants, in over 115+ outlets Australia wide.
While most DIY tiling jobs are fairly straightforward and simple, a few can have problems which are difficult to overcome. In these cases, it is advisable to contact a professional tiler to seek advice based on your own circumstances. Beaumont Tiles can put you in contact with a reputable tiler.
All details within this booklet are a guide only. All the best for your project!
Do you need a Renovators Service or Tradie?
Don’t worry, you’re with Beaumonts!
We’ll put you in touch with renovators, tilers, painters, plumbers, even electricians.

Ask in-store for recommended renovators, or go to tile.com.au to Find A Tiler.


HOW TO PREPARE A
HOW TO shower base
cut tiles
HOW TO TILE A
shower floor
HOW TO APPLY
HOW TO waterproof in tiles for taps
HOW TO TILE A
shower wall
HOW TO TILE A
HOW TO CUT HOLES grout & silicone
splashback

There is an old saying
You will need – ideally
1 An appropriately sized notched trowel or “handy-man” spreader.
6mm notched trowel: 150x150mm flat back tiles or mosaics
8mm notched trowel: 200x200mm tiles
10mm notched trowel: 250x250mm tiles
12mm notched trowel: 300x300mm tiles and above.
2 A tile cutter for normal straight line cutting.
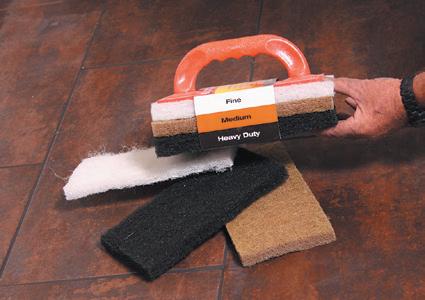
3 A carborundum file or block is useful (but not absolutely essential) for smoothing down your cuts.
4 Tile nippers or a grit saw blade are essential to cut corners, round pieces, or to cut very small pieces.
5 A home-made plumb bob (a piece of string with a heavy washer on the bottom will do) for wall tiling.
6 Some pieces of straight timber suitable for battens to provide a base for the tiling (plus hammer and nails or screwdriver of course) and another to use as a measuring rod.
7 A spirit level to ensure your tiling is level.
8 A fine felt tipped pen, pencil, tape measure and a ruler for marking.
9 A string and straight edge (for floor tiling).
10 A grout float or rubber grouter (large for large jobs – small for small jobs).
11 A sponge, bucket, plenty of water and lots of clean rags.
12 Protective respirator/mask and eyewear to use while cutting and gloves.
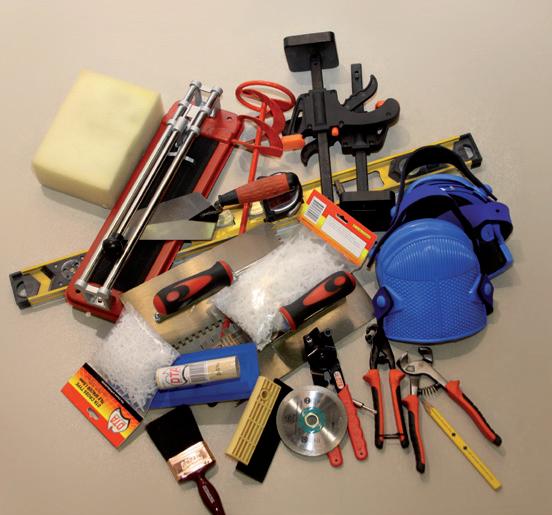
13 Knee pads (optional but they will save your knees!)
14 Drop sheet to protect the floor or other surfaces
15 A small trowell called a gauging trowel
16 Adhesive mixer
17 Cross spacers (don’t embed them but use one arm between tiles to keep grout joints even and remove before grouting).
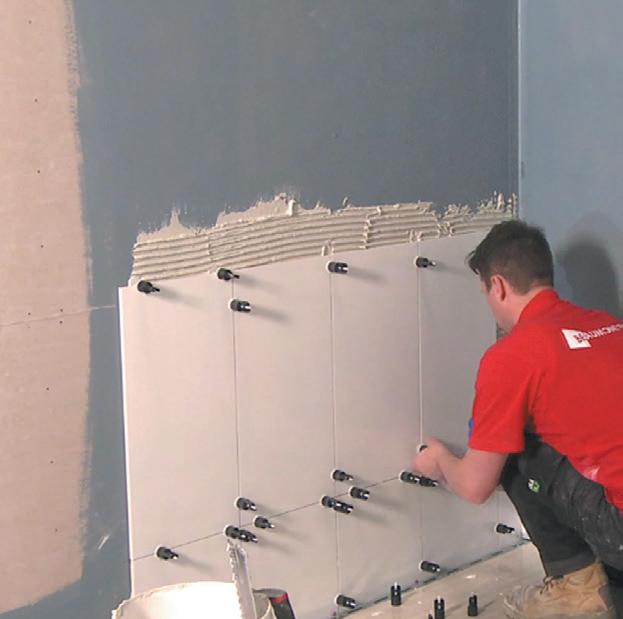
18 Tile levelling system (especially for all larger size tiles).
“a workman is only as good as his tools ”
That may or may not be so, but if you have attempted any handyman job, you know just how essential the right tools are.
This seems difficult for many people, but when you know the right way it is simple.
a. Draw out each wall on a piece of paper (not necessarily to scale) and take each square section as a separate area.
b. Take the “width” measurement in millimetres and divide it by the width of the tile e.g. in the sketch below the room is 1950mm wide. If the chosen tile is 152mm x 152mm then 1950 ÷ 152 = 12.82 tiles. The wall is 13 tiles wide.
c. Now decide how high you would like to tile (sometimes you will have no choice). In our example, the basic tiling is going 1520mm high or 10 rows. (For the best results floor to ceiling tiling is recommended)
d. Our second area on the wall is where the shower tiling is higher. This goes up an extra 2 rows. The width is normally 900mm, so 900 ÷ 152 = 5.92. So the area is 6 tiles wide and 2 tiles high.
So summarising:
The first part of the wall is 13 tiles wide by 10 tiles high = 130 tiles. The second part of the wall is 6 tiles wide by 2 tiles high = 12 tiles. Total for the wall = 142 tiles. If you have a window to take out of a wall, simply take the number of tiles required to cover the window from the total for that wall. (Don’t forget to take the sills and sides of the window into consideration)
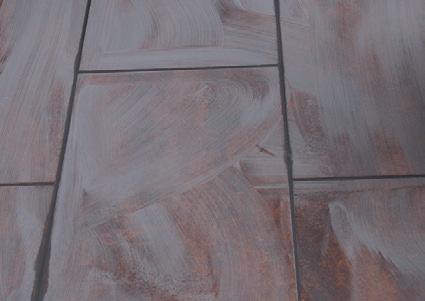
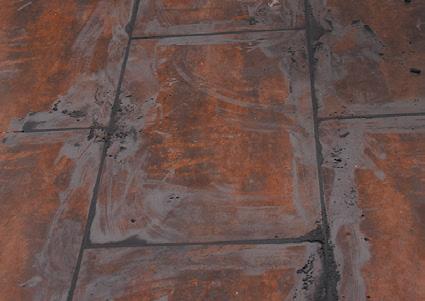
It is very important that tiles must be of a suitable type for your project. Many floor tiles can be used on the floor and wall, whilst wall tiles are only suitable for the wall. Some floor tiles are especially suited to high traffic areas while outdoor areas require tiles with greater slip resistance. To assist you in choosing the best tile for each area, please consult with your local Beaumont Tiles representative.
900mm (6 Tiles)
304mm (2 tiles)
1520mm (10 tiles)
BATH SHOWER
1950mm (13 Tiles)
1824mm (12 tiles)
Do not bother about making allowances for the bath apron tiling, because the amount of tiles required for that is the same as the amount of wall covered up by the bath.
If you are still not sure about working out quantities, simply draw the walls up on a sheet of paper in scale and mark the actual size on the diagram. Then just count up the squares! (or rectangles).
Floor tile quantities are worked out in a similar way to wall tiles. Unless you are measuring up for a large single area, it is not a good idea to work in square metres (or square anything else) as it is likely to be inaccurate. Let’s look at an example. Assume we are tiling this passage with 250mm x 250mm tiles.
The length is 6000mm which works out to 24 tiles and the width is 900mm which is 4 tiles (actually 3.6 but 4 tiles across will be needed). The total number of tiles needed will be 24 x 4 tiles = 96 tiles. If we worked out 5.4sqm which is 86 tiles, would have been quite wrong. So remember – work in tiles not square metres. If you are still not certain about quantities, just draw out your measurements on some paper and one of Beaumont Tiles’ friendly tile consultants will be only too pleased to work it out for you. Do not forget you may need an edging of “step treads” (very tough anti slip tiles) to go on any steps down. You will probably also need brass angles to put along the edge of any unfinished tiling where it butts up against another type of flooring.
PLEASE NOTE:
When we work out quantities, we always allow an extra 10% for cuts, breakages and spares. At Beaumont Tiles we have dozens of people each week chasing old tiles to replace where a pipe has burst or to extend and so often they have been out of production for years. It pays to keep spares! We suggest keeping them in a shed, garage or ceiling space.
Simply draw out your measurements on paper (in mm) and a Beaumont Tiles team member will happily work it out for you!
Ceramic tiles can be laid over virtually any level, firm, rigid surface that is clean, dry and structurally able to support the weight of the tiles; e.g. plaster, cement render, fibre cement sheet, plasterboard. Even surfaces like metal, old tiles and wood can be tiled over using the correct adhesive. If you are not sure, ask a Beaumont Tiles consultant.
NOTE:
It is not advisable to tile over fibreglass.
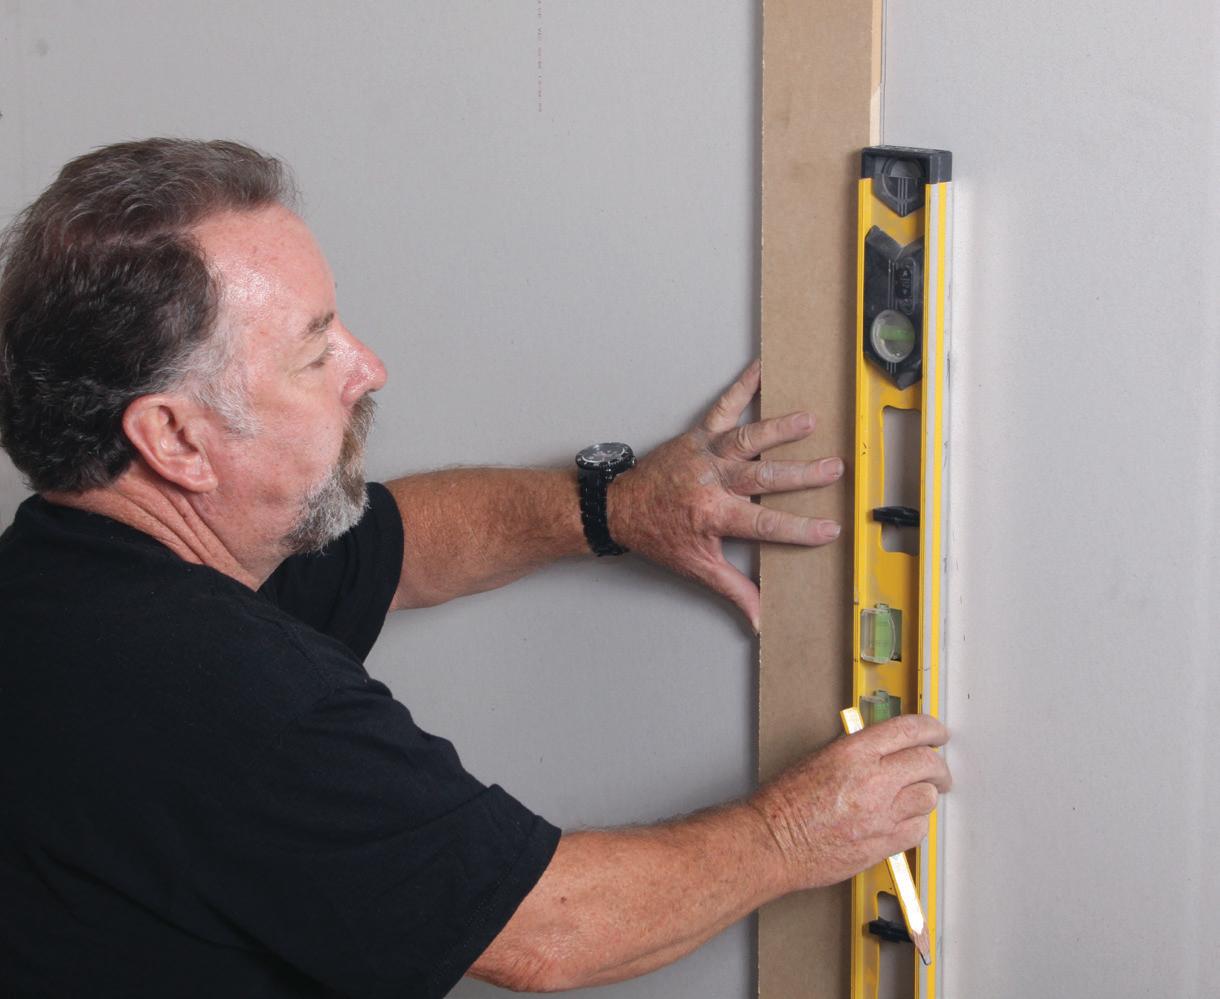
If you plan to tile over plaster or cement render, patch any small irregularities with one of the many excellent fillers available for this purpose. If the wall is really rough, it will probably be worth lining it with fibre cement sheeting. To do this, simply plug and screw 45mmx19mm battens to the wall at intervals recommended by the fibre cement sheet manufacturer. Make sure that each batten is vertical and level by packing behind the batten until your spirit level shows it is just right. Then simply fix the fibre cement sheet in accordance with the manufacturer’s instructions.
To tile over this, just follow the directions for the particular adhesive you are using, remembering first to prime the surface.
Remove loose or flaking paint. Thoroughly remove water based paint. Do not use paint stripper as residue may act as a releasing agent. Oil based paint must be sound. Roughen surface by mechanical means. Allow the surface to dry after cleaning.
Never tile over a wallpapered wall or one with any other surface which may separate from the base wall. Remember, the finished job is only as good as the surface beneath.
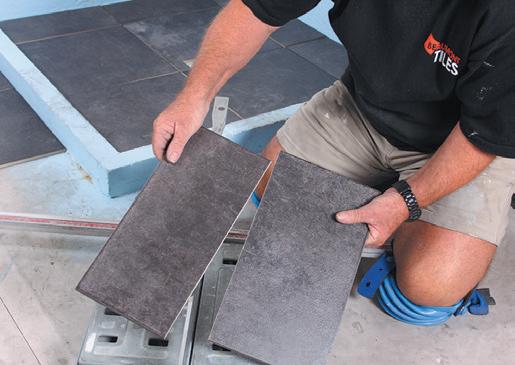
Before starting to set out and install, it is advisable to check your tiles from different boxes. Ensure they are what you selected, that the shade is acceptable and that you have enough to finish the complete job. Tiles are produced in batches so there is no guarantee that a later batch will still match.
By using your spirit level, determine the lowest point of the floor
against any wall, usually one of the shower walls. Measure up one tile from this point, then rest batten on jacks or blocks. If there is no waterproofing (you cannot pierce this membrane), temporarily fix the batten to the wall 20mm below this spot, making sure it is horizontal by means of the level. Continue this right around the wall. When the adhesive is set, this batten can be removed. After the floor tiles have been laid, this last row is filled in. Almost every tile in this row is cut to allow for the gradient in the floor. If you are starting part way up a wall, e.g. above the bath, determine a starting point by measuring up from the base batten with tiles and fix another batten horizontally to the wall.
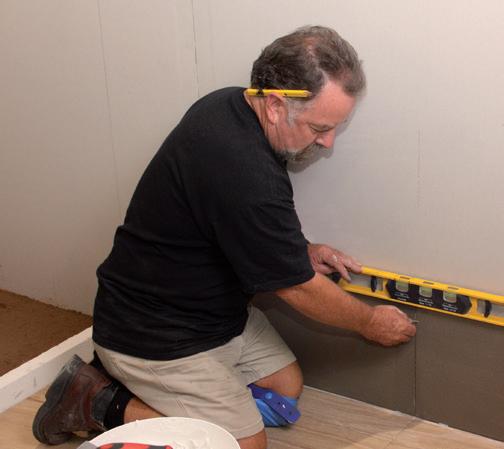
Before you commit yourself to a horizontal level, it is not a bad idea to mark around the wall where each horizontal tile joint will go and if you find it is going to be necessary to have unsightly small cuts in any places, e.g. above the bath or vanity, you can adjust the level to avoid this. It may mean a little extra cutting around the bottom row, but is worthwhile. The golden rule is, try as much as possible to avoid small pieces of tile or try not to make them obvious.
The same basic idea applies to the vertical lines of your job. Try to minimise any small cuts. It is best to start with a centre line and mark along your wall where each vertical joint will occur.
From this you can ensure there are not going to be any small cuts on either end, up the edge of a window or at the end of a bath.
To make this setting out easier use your measuring rod, marked with the interval between each tile and move it across the wall until you can see the best layout can be achieved.
The walls of most houses are rarely perfectly vertical, so to ensure your tiling is at right angles to the base, use your plumb bob to make a vertical line to follow. Remember, if you start against the wall with a full tile at the base, the lean on the side wall can mean you will be filling in several centimetres of tile at the top, so arrange your layout so this does not occur.
When tiling around windows and doors, keep your return tiles in line with the rest of the wall tiles and cuts to the back or to the least visible side if possible. Special tiling trim mouldings are an excellent way of hiding these and external corners. Tiling trim is available in metal and PVC in a full range of colours.
We cannot emphasise too strongly the need for setting out your job properly. Be prepared to give a few hours thought and experimentation with dry tiles before starting your job, as it will determine very greatly the finished look of your job. You can also check and adjust position to achieve an acceptable blend of any pattern or shades within each tile.
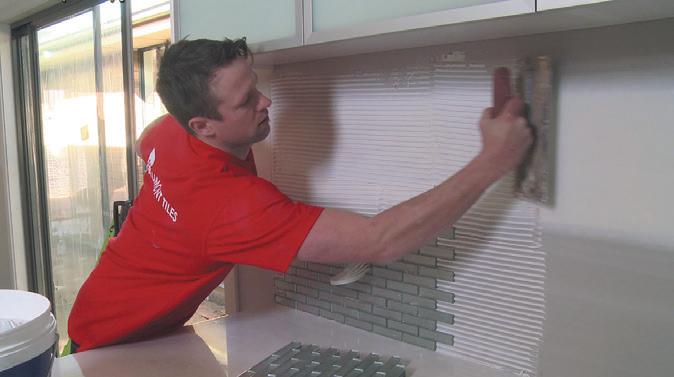
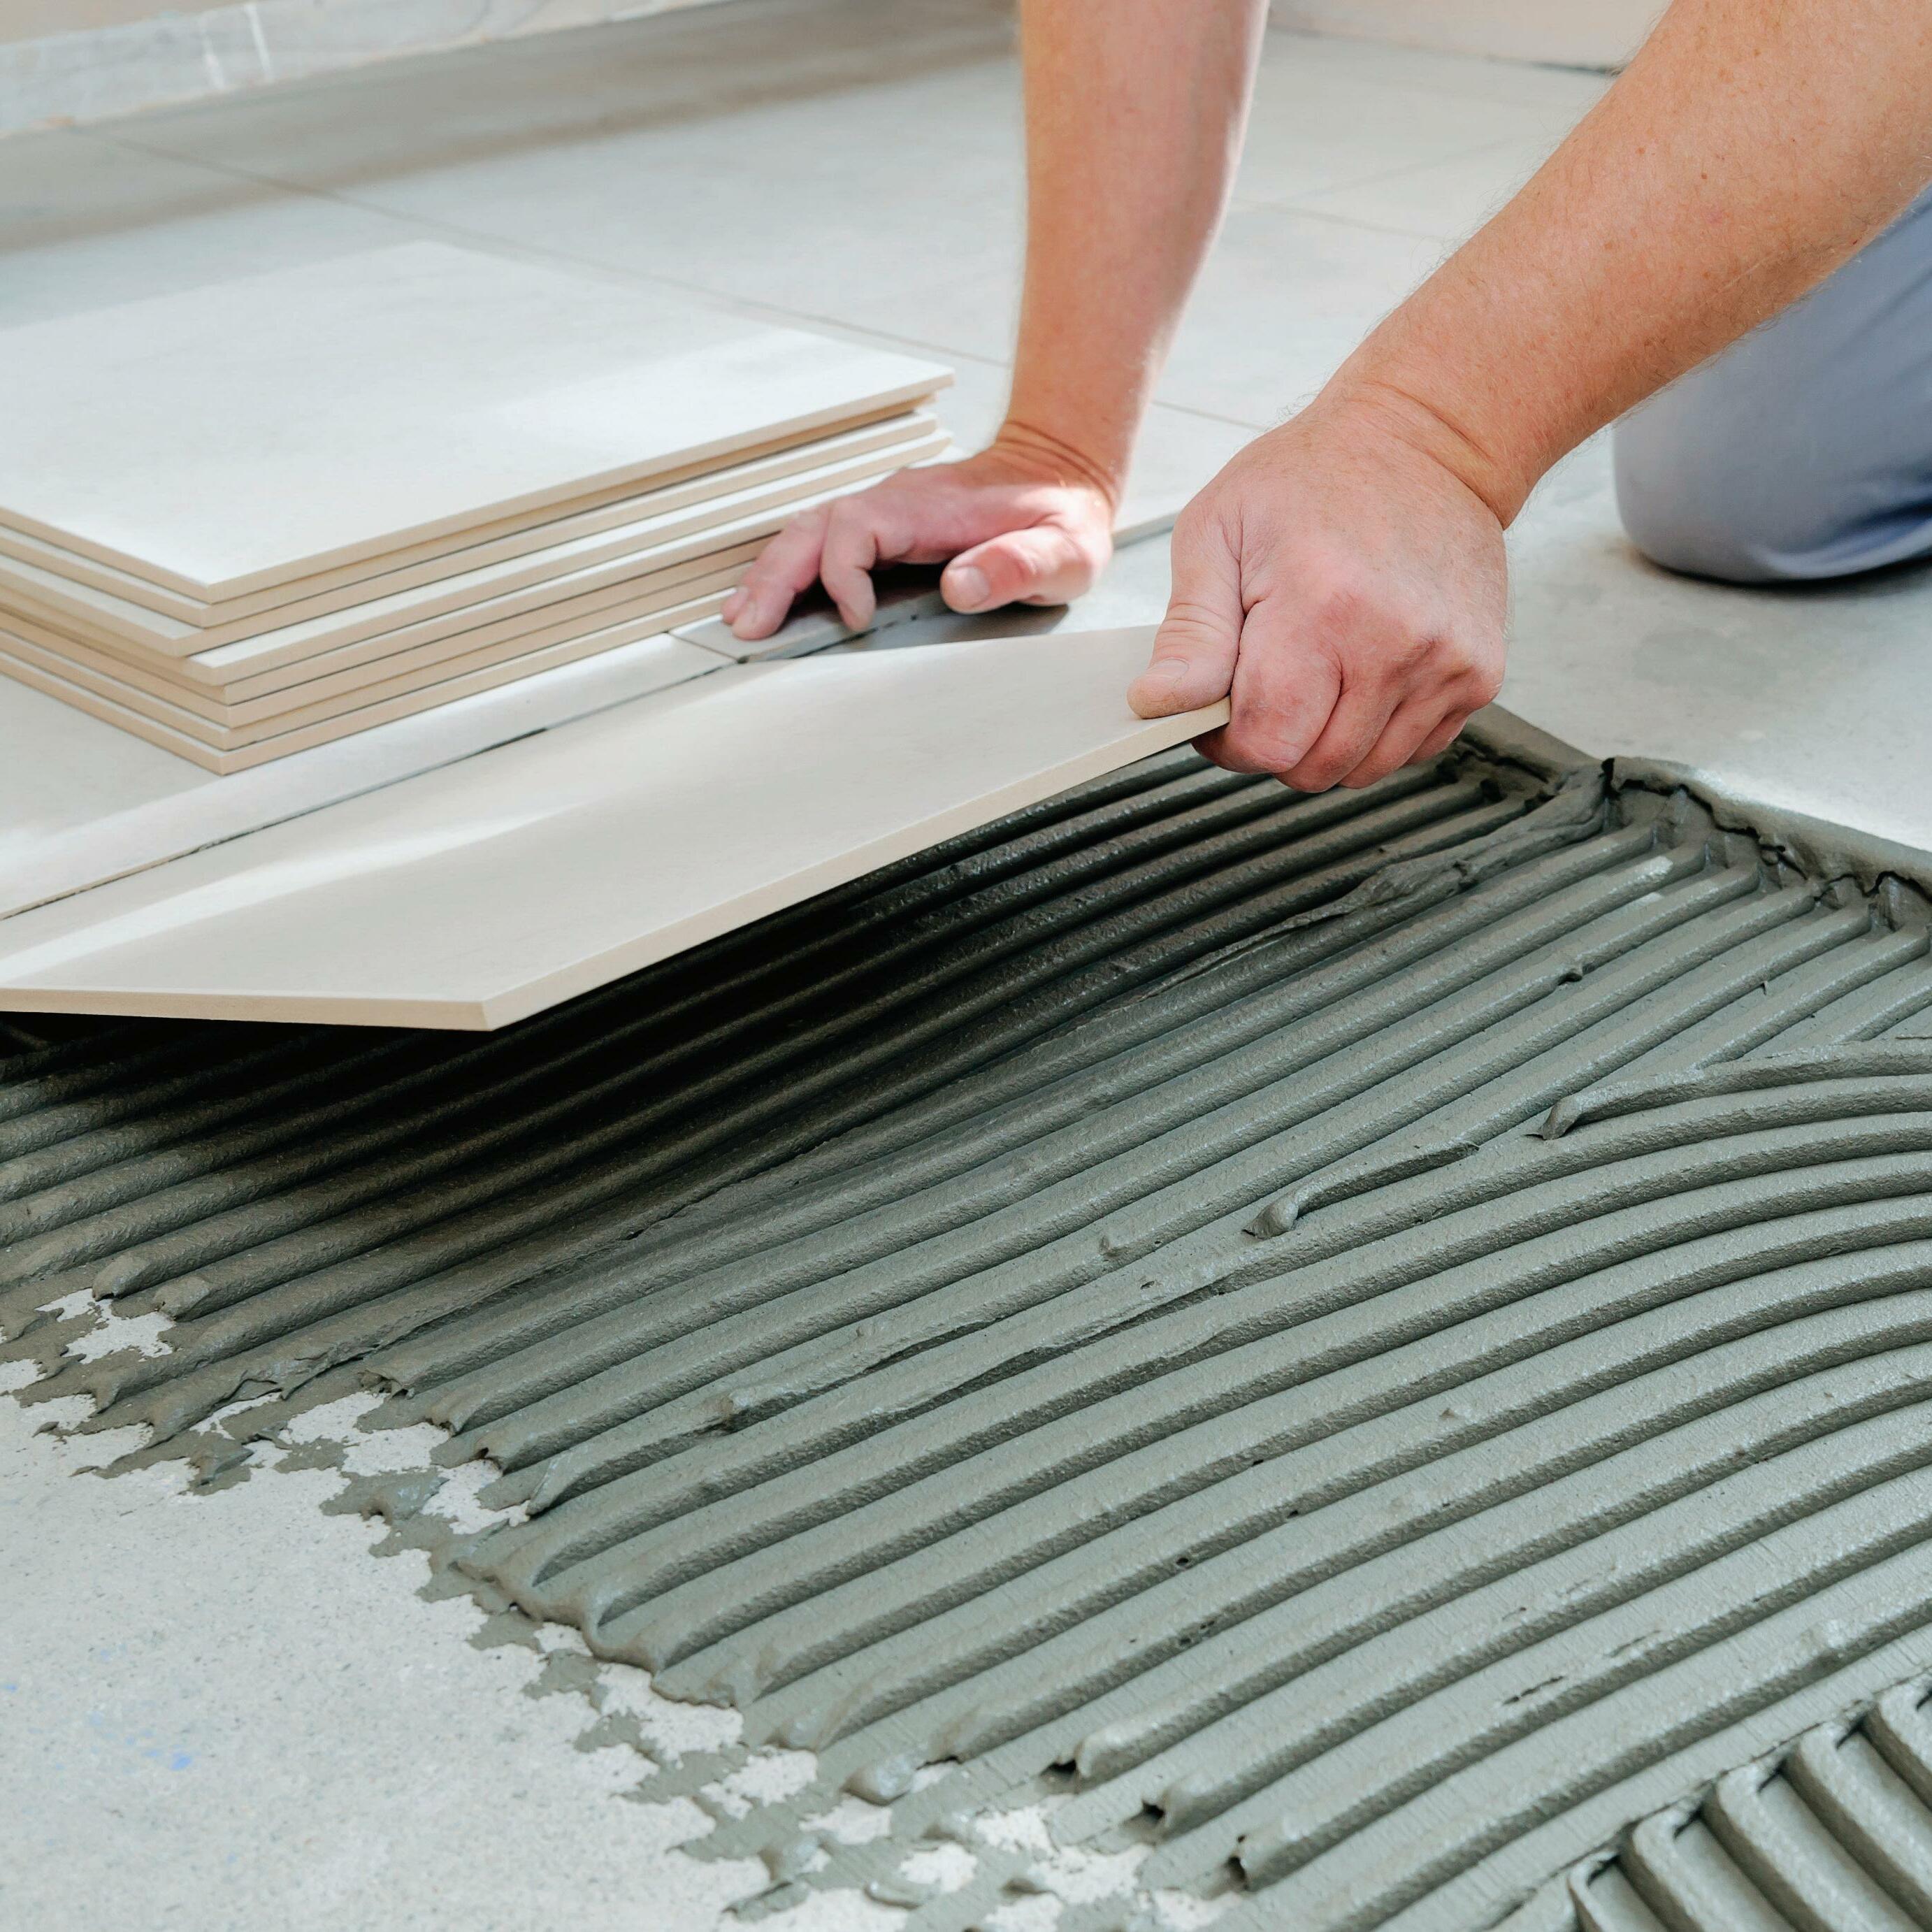
At last, after your careful selecting, purchasing, surface preparation, waterproofing (if required) and laying out of your tiles, you are ready to go! We will not go into the different adhesives at this stage, so suffice to say, you MUST follow precisely the directions on the bucket or bag to achieve the results. Ensure the backs of the tiles and surface are clean and free from dust or contaminants. The most important things to remember is simply to keep your lines straight and ensure you are getting total adhesive coverage on the surface and back of the tile!
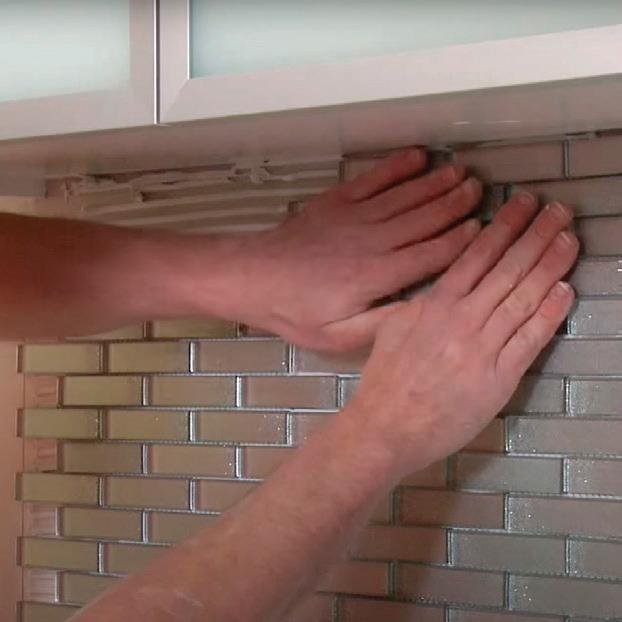
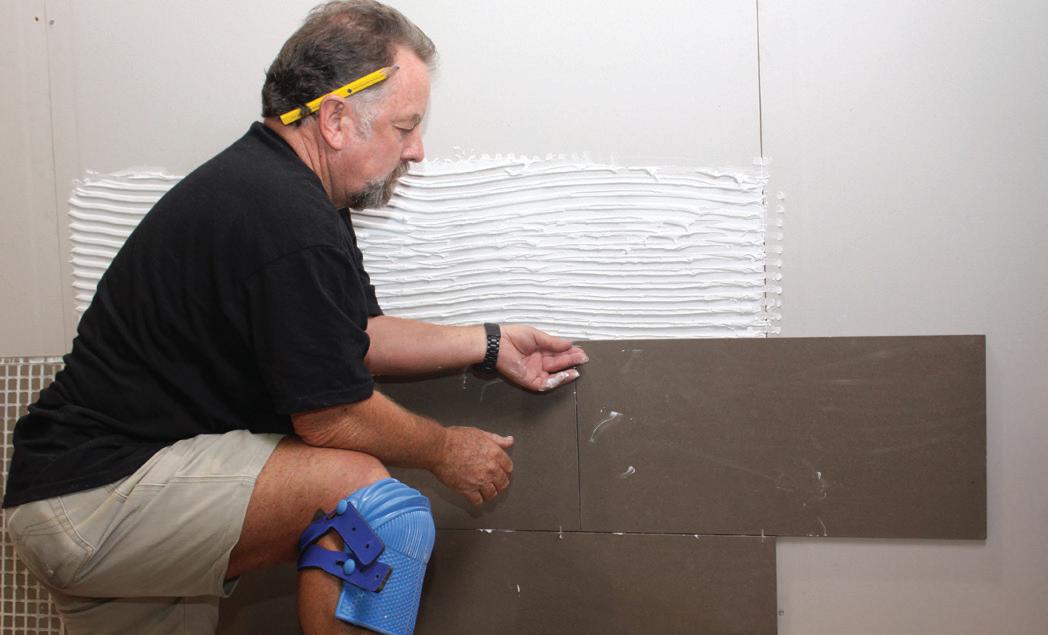
Always start tiling at the bottom, keeping to the vertical line (you can even use a vertical batten if you prefer). Apply your adhesive with horizontal strokes with a special notched spreader or trowel. It is important you do not use a spreader designed for anything other than ceramic tile laying as the notches may be the wrong size. Use the size of notched spreader recommended on the adhesive you are using. Spread about 1 sq.m. at a time, or the amount you can cover in 15 minutes, pressing the tiles firmly into the ribs of adhesive. Check your levels every few rows with a spirit
level and use a damp cloth to wipe away any excessive adhesive that squeezes onto the tile. Any cut tiles and larger size tiles can have the adhesive “buttered” on the back to make them easier to place. Every so often, it is a good idea to pull a tile off to ensure you are getting complete adhesive coverage on the back of the tile.
Some tiles have spacer lugs “built-in” to ensure the correct space is left between each tile. Most imported tiles do not have these, so a simple solution is to use plastic spacers (which are removed before grouting) or a tile levelling support, to keep a constant joint size.
With cut tiles, ensure you place them so the uncut edge is adjacent to the other tiles. If you are using a patterned tile, as far as possible, try to arrange your cuts so the adjacent cut on the wall at right angles gives the appearance of the pattern running on around the corner. This is not always possible, but improves the finished appearance of the job where it can be used.
When tiles are set, take the battens away and fill in the bottom row space with cut tiles. It is a good idea to leave the bottom row off if you are doing floor tiling, so the floor tile tucks under the wall tiles
Allow movement joints in wall tiling at all internal vertical corners, over existing movement joints in the structure or substrate, where tiles abut other materials, at any change in background materials and at 3 to 4.5 metres apart vertically. Fill movement joints with flexible jointing material available from Beaumont Tiles.
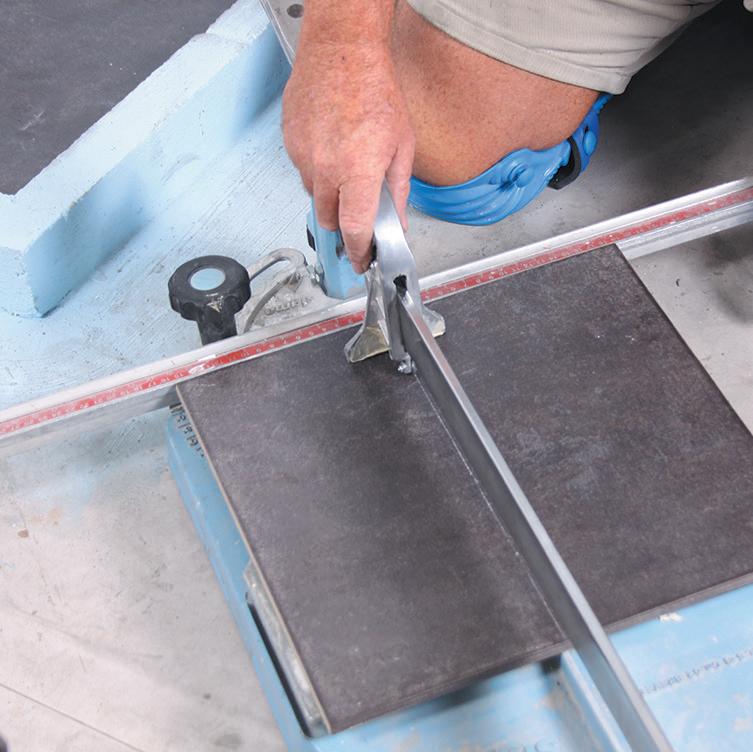
Cutting tiles is not difficult with access to decent equipment and with a little practice. If you’re cutting your own tiles (and especially if you’re doing this for the very first time), it’s a good idea to allow a couple of extra tiles for practice or in case of any slight mishaps that may happen. Below we explain how to make a straight cut with a tile cutter, cut a shape with a grinder, use tile nippers, and to cut a hole for a tap with a hole cutter
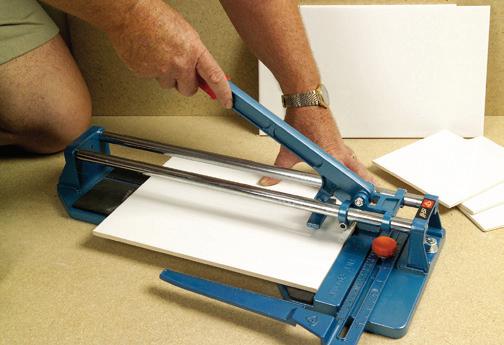
Using a fine tipped marker, mark where the tile needs to be cut. Place the tile in the tile cutter and run the scorer across the tile (once only!). This creates a break point in the tile.
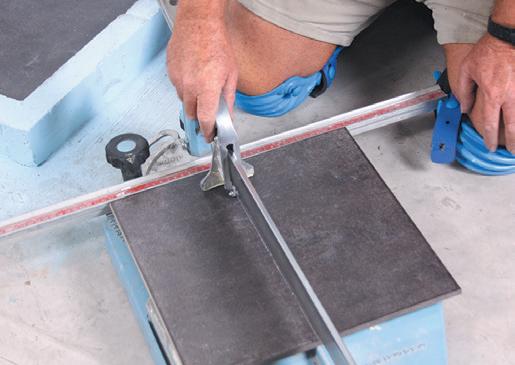
Finally, push down the breaker. This will deliver a nice clean and evenly cut tile.
If only a very small amount is to be cut off the tile, scribe as normal, but then with tile nippers, nip the rest of the tile away. The big thing is, use small bites!
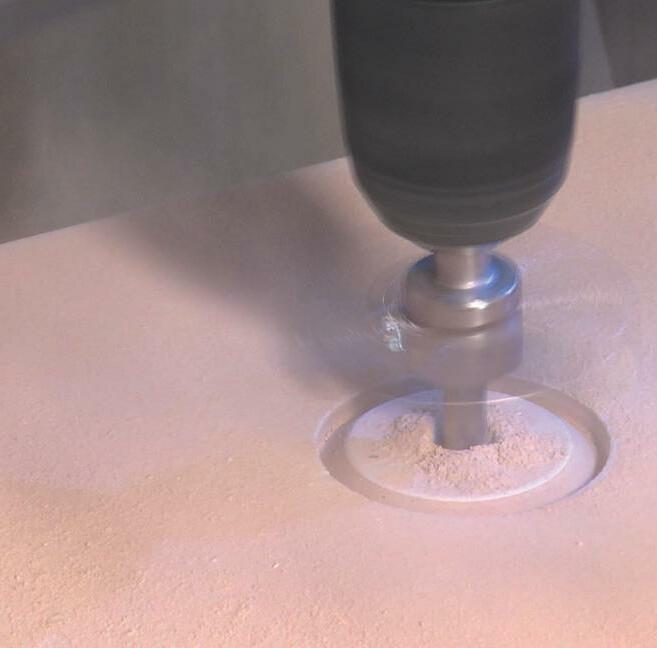
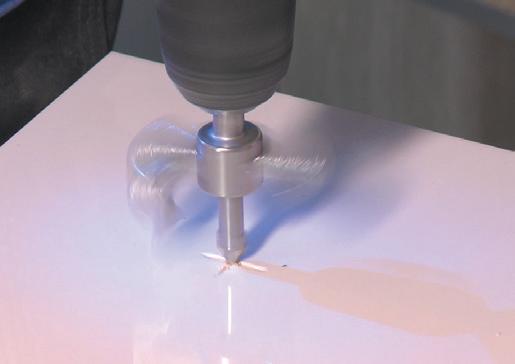
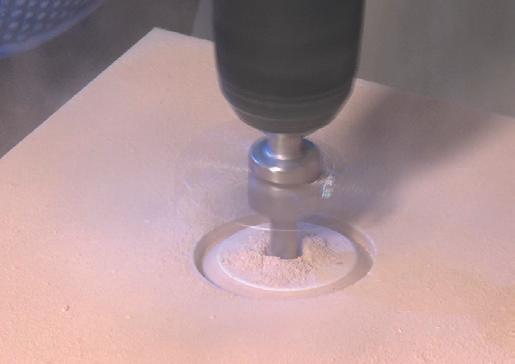
Use a pencil to mark where the tile needs to be cut and mark the centre of the hole.

Place the tile over a stable and suitable work surface and score a small cross with a grinder, making sure to wear safety glasses, hearing protection and a respirator during the grinding and cutting. This will give you a centre point for the drill. Drill the hole using a hole cutter. These tools are available from your local Beaumont Tiles store.

Remember to always wear safety glasses, hearing protection and a respirator when cutting tiles with an electric grinder and only cut outside or in a well ventilated area. Using a fine tipped marker, mark where the tile needs to be cut. Make sure that you cut the tile on the inside of the line smaller than the space to allow for even grout joints. Cut the sides first and then the middle.
DIY made easy!
Check out our website for expert
DIY advice & video tutorials
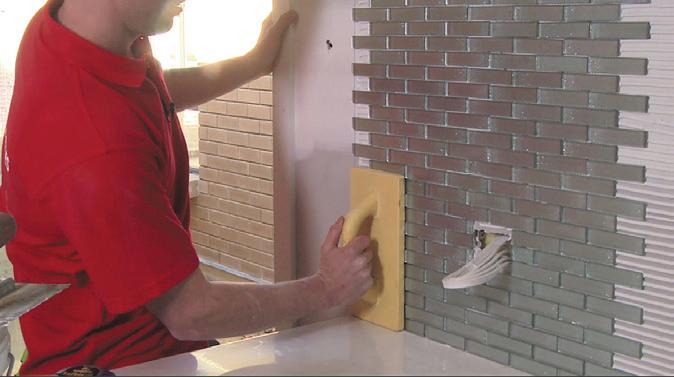
You can grout your tiles after your adhesive has completely dried. Before beginning, remove all grout spacers or protruding levelling system components. Carefully remove any excess adhesive that has filled the space between the tiles. Dampen (not wet) the joints with clean water prior to the application of grout to ensure correct curing.
Mix the flexible grout to the consistency of a thick creamy paste following the manufacturers instructions. Apply it to the wall with a rubber grouter using a driving diagonal motion, pushing the grout firmly into the joints leaving no air pockets or voids. Don’t worry about individual joints, just go over the whole job. Leave as little grout on the surface of the tiles as possible.
A handy hint is to start in a small section until confident.
Allow the grout to dry and for a film to form on the face of the tiles. If you clean too soon, before the grout has a chance to dry, you risk removing grout from the joints.

Once the grout has become slightly powdery on the surface, remove the excess grout on the tiles with a clean, damp sponge by wiping across the tile diagonally to the joint. Turn the sponge over and repeat. Rinse and squeeze and keep repeating. Do not wash the wall or overly wet the surface. The trick is to lift the film without wetting the actual grouted joint. Make sure that you wipe on a 45 degree angle and keep rinsing the sponge as you work. Then buff the tiles with a dry cloth.
Do not apply grout to the corners where walls meet floors and where two walls meet. Silicone will need to be applied here.

Grout contains sand and is porous which means it will absorb water and moisture (unless you are using an epoxy-based grout). It’s important to get one step ahead of the moisture, so don’t forget to apply grout sealer to all grout lines on your walls and floors. Beaumont Tiles have a range of grout sealers, including ‘spray-on’ sealer which can make the job a lot easier. Never apply grout sealer to the surface of a non-glazed tile, otherwise the sealer will soak into the tile itself and won’t come out.
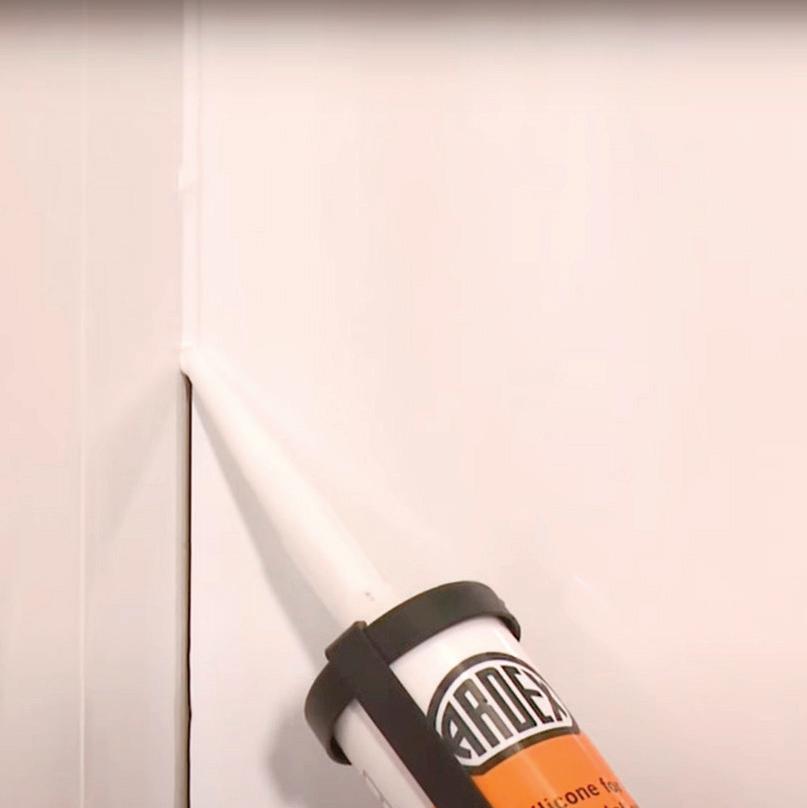
Silicone is a necessary part of every tiling job no matter how big or small. Silicone should be used where a tile meets a tile in a corner, or where a tile meets another surface e.g. where a kitchen splash back tile finishes on the bench top. It can also be used as a movement or expansion joint.
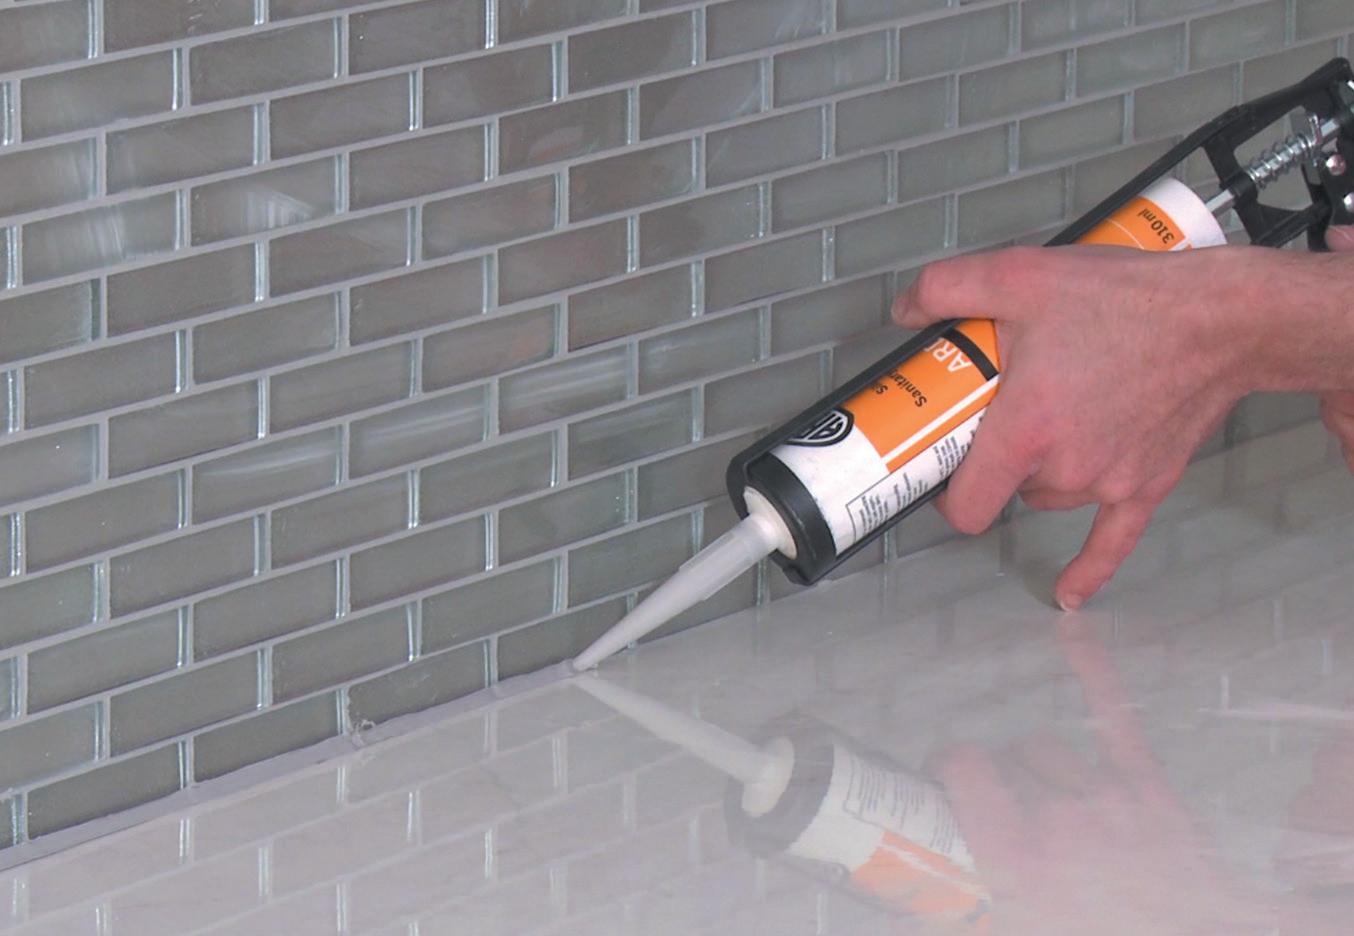
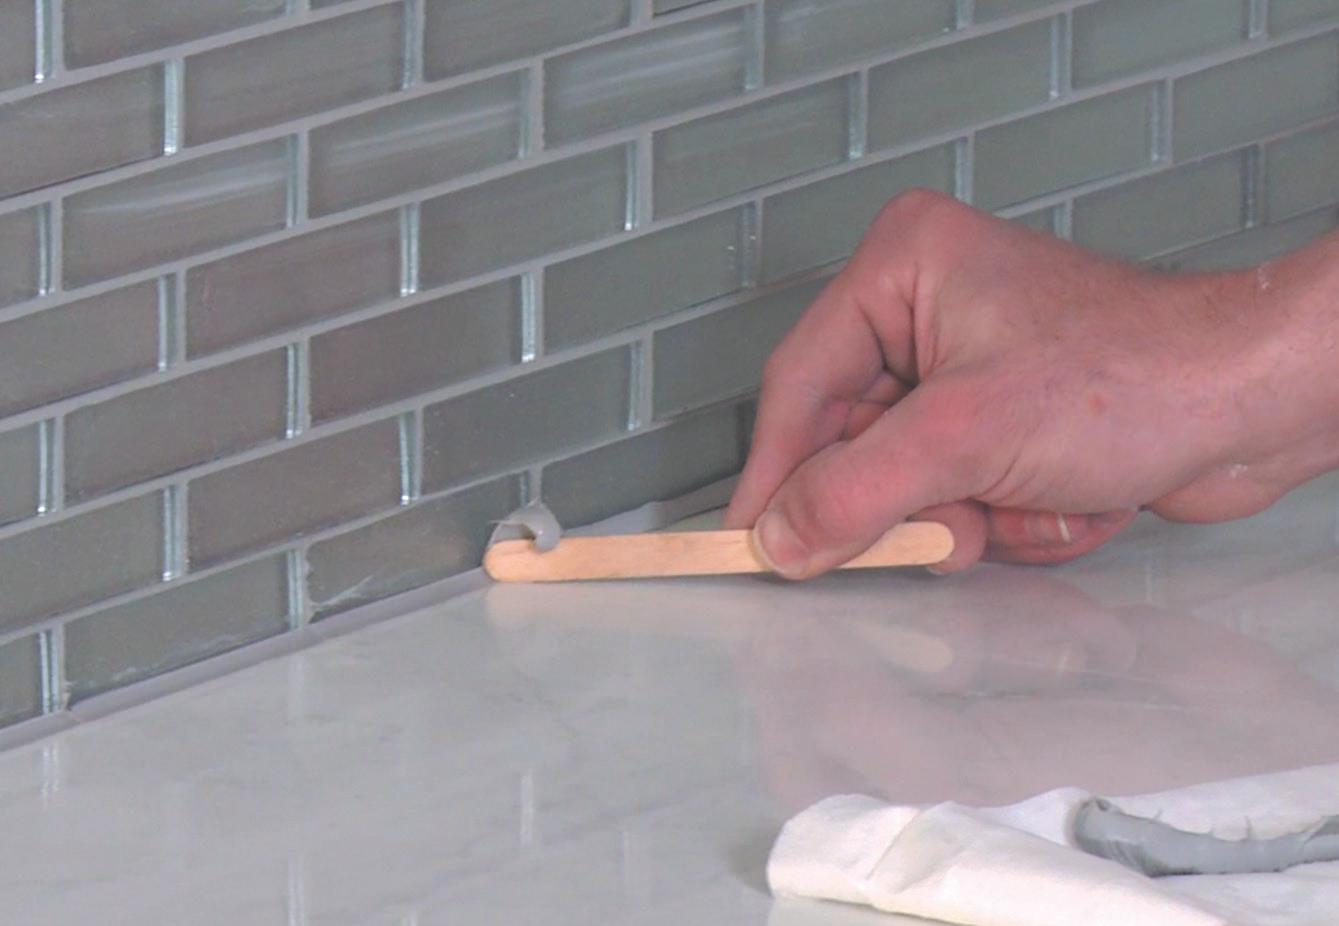
To apply silicone, you will need a silicone tube and caulking gun. Trail the silicone behind the nozzle and line the area in one smooth motion. Use a smoothing agent to spray over it, and then cut it back with a paddle pop stick in one swipe. With a little more smoothing agent, run your thumb over it once more to achieve a nice smooth finish.
DIY made easy!
Check out our website for expert DIY advice & video tutorials
This is very easy. Simply measure the room in metres, e.g. 3.64 by 2.43 and multiply the measurements, e.g. 8.85 sq.m. If the room is more complicated than a simple square or rectangle, just split the area up into rectangular areas, work them out in the same way and add the areas up at the end.
Once again, it is most important to allow for cuts, breakages and spares so add 10% to your area for this purpose. Beaumont Tiles will then be able to work out how many sheets you will need to cover your area.
NOTE:
Although most mosaic sheets are roughly 300x300mm, they do vary quite a bit. Always check the exact measurements of a sheet and compare prices on a per square metre basis, not on individual sheets. When an interlocking sheet of mosaic is selected, check the actual area covered, not just the widest and longest sheet measurements.
Mosaics in general, can be applied to any level, rigid, clean surface, using the correct adhesives of course. See your local Beaumont Tiles store for the right advice as some mosaics require specific types of adhesives and grouts.
You can lay mosaic tiles over suitably installed fibre cement sheeting, plasterboard, render, concrete and even STRUCTAflor OR YELLOWtongue with the right preparation. All surfaces must be strong enough to support the weight of the tiles being installed, level, firm, clean and dry and free from all contaminants. Ask your Beaumont Tiles store for advice and the best options.
Larger mosaics can be cut with the scriber breaker as with wall tiles, but most cutting is done by nippers or a diamond blade wet saw because of the generally smaller size of the tiles.
Before starting, it is important to check your mosaics are the ones you selected and that you have enough to complete the job. Mosaics are produced in batches and there is no guarantee different batches will match. Dry lay the mosaic sheets to check the blend is acceptable and to ensure as few small cuts as possible are used and to work out the easiest place to start.
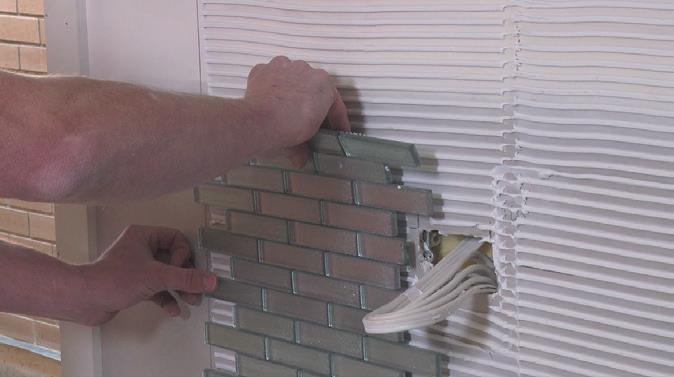
Start from a corner if possible, but this is not essential. Follow the adhesive instructions, spreading with a notched trowel about one square metre at a time or what can be tiled within 15 minutes or before the adhesive begins to dry or skin. Lay the mosaic sheets making sure that all joints are even.
Ensure that the tiles are straight by stretching a string from one end of the room to the other and follow the line, or use a straight edge. Make sure that there is plenty of adhesive on the back of the mosaic by lifting a sheet or few pieces now and then to check.
Clean off any adhesive that may get on the mosaic surface and make sure your grout joints are reasonably clean. This will prevent blotchy grout. A small scrubbing brush is handy for this. When applying wall adhesive, we always suggest that the notches run horizontally.
For mosaics you can use a grout float to push them down to give a nice flat finish but do not push so hard that the adhesive seeps up filling the joints. Clean off excess adhesive as you go. Some mosaics and tiles require special non-sanded grout to avoid scratching the surface. Check the manufacturers recommendation with you local Beaumont Ties store.
A tiling job will only be as good as the surface it is laid on:
a. Concrete floors: Concrete floors should be dry, clean, flat and true. Any holes or irregularities should be filled with a suitable levelling compound 24 hours before laying the tiles. If the floor is too uneven, or has the wrong “fall” it can be built up, after being chipped, with a two to one fine clean washed sand and cement mixture with a bonding agent additive. This building up is not easy and should only be done in cases where the surface is quite unsatisfactory. Concrete floors should be left with a wood float finish.
NOTE:
Drying of concrete depends on thickness of the slab and if polythene sheet is used under the slab or not. For best results, concrete must be allowed to cure for at least 28 days. Cement topping should be 7 to 14 days.
Some specialist adhesives are available if tiling must be done before this full curing period, these are specially made for early age concrete or screed.
See your local Beaumont Tiles store for the right advice.
b. Wooden floors: Yes, you can lay tiles over STRUCTAflor YELLOWtongue and timber floors but there are particular materials and steps to follow. Check with your local Beaumont Tiles store.
c. Tiling over an existing floor: A cost effective way to freshen up your main floor is to tile over the existing tiles! The first and most important step is to check that you are working with a solid surface. Tap each tile and if you hear a hollow sounding one it will need to be removed. Use a hammer and chisel to do this. Mechanically remove the old tile adhesive back to the concrete and fill the area with a patching mortar. Once this is done and the mortar has dried, thoroughly vacuum the area to ensure it is free of loose material and dust, then scrub the floor clean with tile and grout cleaner to remove oily residues, paying particular attention to grout lines. Then rinse down
with hot water. If you have a glazed tile, you need to remove 90% of the glaze by mechanical means, or it can be primed with a specialised etching primer. Remember to use safety glasses, mask/respirator, gloves and hearing protection when grinding. You will be adding the thickness of the tile and adhesive to your floor and will need to use a transition edge in doorways where your new tiled floor will meet an existing floor covering. Also consider your door heights that open onto the slightly built up tiled area. These doors will need to be removed, cut or replaced.
Whatever the substrate, surface flatness is important, especially with rectified edge tiles.
It is easy to skip over this step, but it is just as important and worth spending time on. For a start, work on the assumption that the area you are tiling is way out of square! Usually, it is best to have your full tiles in the doorway or in the case of a verandah – around the edge and cuts at the back of the room. In other words, set up your tiles so the cuts are in the least noticeable part.
Dry lay a row of tiles from the door, or wherever you want your full tiles to finish, with correct spacing (use your tile spacers), at right angles to the doorway. Mark the point where the last tile will finish. It is a good idea to mark on the floor, so you can keep an eye on how you are going. Nail a batten down right across the room on the last tile line, exactly at right angles to the row of tiles. Do not take any notice of what angle your walls may be at, because remember, we are assuming they are way out of square.
Dry lay tiles across the rear batten and determine where it will be best to start and finish, taking into consideration the best position for cuts and if your side walls are splaying out or in. Simply ensure there will be as few small cuts as possible. Mark the joint positions on the rear batten, then nail another batten exactly at right angles to it, near the left wall on one of the joint lines. This makes the corner in which to start your tiling.
It is vital your angle is 90 degrees, otherwise you will be in more strife than you can poke a stick (or batten) at.
It is simple to check by using the following method. Measure 3 metres along one batten and mark. Measure 4 metres along the other batten and mark. This distance between the two marks should be exactly 5 metres. If not – you do not have a right angle. This all seems like an awful waste of time when you are impatient to get on with your tiling, but it is very important as you can see from our exaggerated diagram.
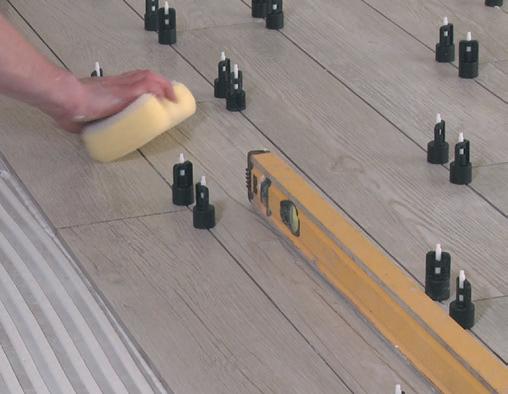
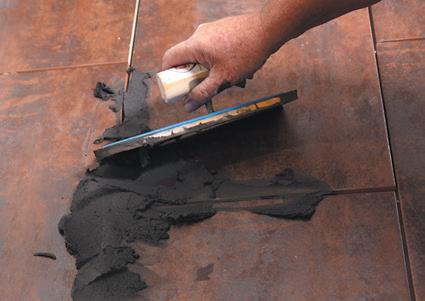
push the tiles into the adhesive, spacing each one with a tile spacer to allow the joint width you feel looks best and allows for the size tolerance of the tile. Pressed edge tiles should not have less than a 3mm joint (the spacers are removed before grouting).
The cross tile spacers are easiest to use, but make allowance for slight irregularity in the tile. Quarry tiles usually have a far wider joint than pressed floor tiles. Rectified edge tiles are often laid with a narrower joint as they should have less size variation than pressed edge tiles. Using a tile levelling system is recommended with larger tiles and rectified tiles with narrower joints. Ensure you wipe off any excess adhesive as you go.
As you go, it is vital to pull up a tile every so often to ensure you have complete coverage of adhesive on the tile and floor.
Use a straight edge across each few rows to ensure you are keeping your rows exactly straight and parallel. When you have completed the area, remove the battens and fill in the gaps.
1 Provide movement joints over all movement joints in the background substrate.
2 At junctions between different background materials.
3 At fixtures interrupting the tile surface, e.g. columns etc.
Well, we are finally here! After making sure the surface is completely clean, the temptation is to rush straight in, but the secret is to take your time and keep your lines straight. Remember, tiling is not difficult but does require care.
Adhesives are a very big subject, but the best advice is to talk to your local Beaumont Tiles store. One of our consultants will be happy to advise. Remember, you MUST follow the instructions on the pack to achieve the best result.
Spread about 1 square metre of adhesive at a time with a notched trowel. Generally a 12mm notched trowel will obtain complete adhesive coverage for large floor tiles but a skim coat of adhesive can also be buttered onto the back of larger sizes or tiles with ridges on the back to ensure complete adhesive contact. Firmly
4 At internal vertical corners.
5 At the perimeter of the floor. (Put skirting on after)
6 At maximum 4.5 metre intervals in a grid pattern.
7 Joints shall go right through the tile and adhesive bed to the background and be kept free from dirt and adhesive droppings.
8 Joints shall not be less than 4mm and not greater than 10mm wide.
9 Seal all movement joints with a coloured silicone to match your grout.
If you are using tiles with an irregular back, you must “butter” the back of the tile with adhesive as well, to achieve complete adhesive coverage. Any cut tiles can also be “buttered” to make them easier to place.
Cuts should be laid so that the uncut edge is adjacent to the other tiles. When tiling steps, ensure your tiles continue straight down the riser and as far as possible. Try to arrange your cuts so the adjacent tiles on the surface at right angles gives the appearance of the pattern or tile running down and around the step. This is not always possible, but results in a neater finish. When you are finishing off against another floor covering, e.g. carpet or vinyl, use a brass angle as the edging. It is best once again, to finish with full tiles where possible, against the brass. Brass angle will protect the edge of the tiles against chipping.
For more of a professional grade finish, we recommend you use a tile levelling system. These are great when tiling a main floor with large rectified tiles and can make the job a lot easier. The tile levellers also double as a spacer and will help to remove lipping (uneven surfaces). Use these to clamp down the tiles and achieve a flat surface. These are available at your local Beaumont Tiles store.
It’s likely some of your tiles will need to be cut to fit the floor, and there may be some that have to be cut into a different shape as well as size.
Cutting tiles is not difficult with access to decent equipment and with a little practice. If you’re cutting your own tiles (and especially if you’re doing this for the very first time), it’s a good idea to allow a couple of extra tiles for practice or in case of any slight mishaps that may happen. Refer to page 13 for a guide on how to cut tiles.
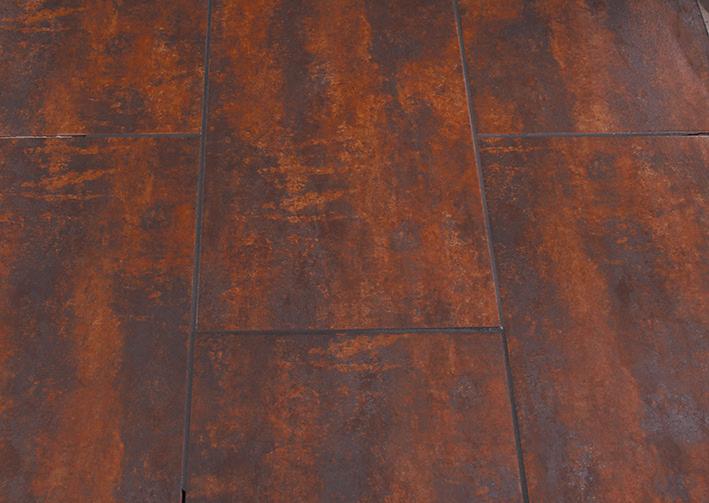
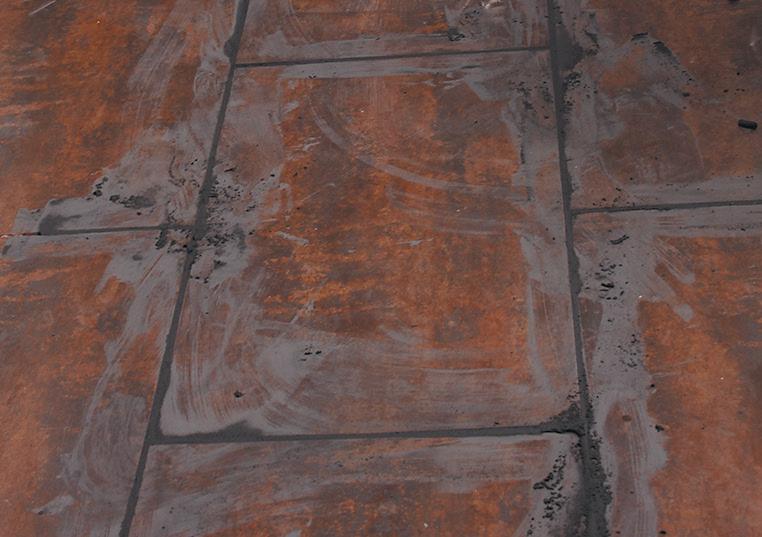
Now we are on the home stretch! Grouting can make or break a great job – or rather the removal of grouting can.
It is done in exactly the same way as wall tiles, so refer to the instructions on page 14 and follow the procedures exactly. Note that with floors it is extremely important that absolutely all the grout is removed from the surface of the tiles.
Floor tiles are generally rougher in texture than wall tiles, so the grout takes more time to remove. It is not difficult, just tedious but very important. Note, dark grouting is normally used in floors and can be messy if you allow it to get onto other surfaces. Use your masking tape to ensure this does not happen. Even cover the walls with newspaper, it is worth it.
Refer to page 14 for more information on applying grout.
There are certain areas that are referred to as a “wet area”. These include your shower and bath. Special attention must be given to these areas to ensure that they are “waterproof”.
Our recommendation is to use a special waterproofing membrane and adhesive developed for Beaumont Tiles.
See your local Beaumont Tiles store for the right advice.
When tiling a wet area like a bathroom, waterproofing before you tile is absolutely essential. Because of this, it can pay to have a licenced waterproofer do it for you. But, if you have some experience and would like to try it yourself – follow these steps. When waterproofing, it’s important to always refer to the manufacturer’s instructions on the back of the packaging.
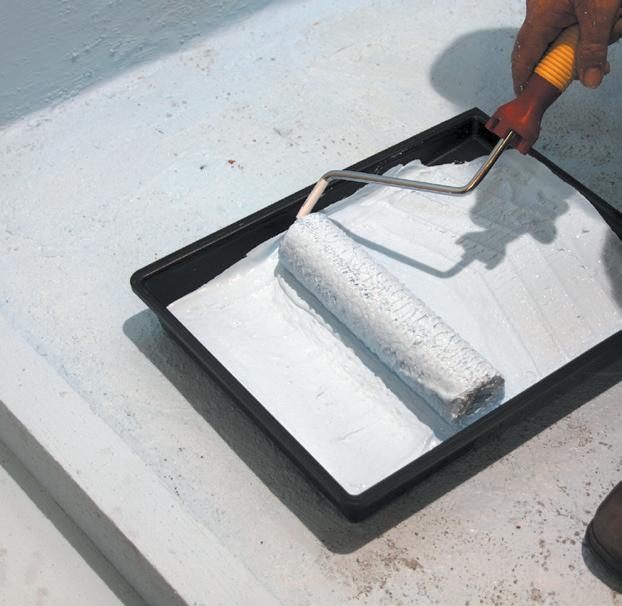
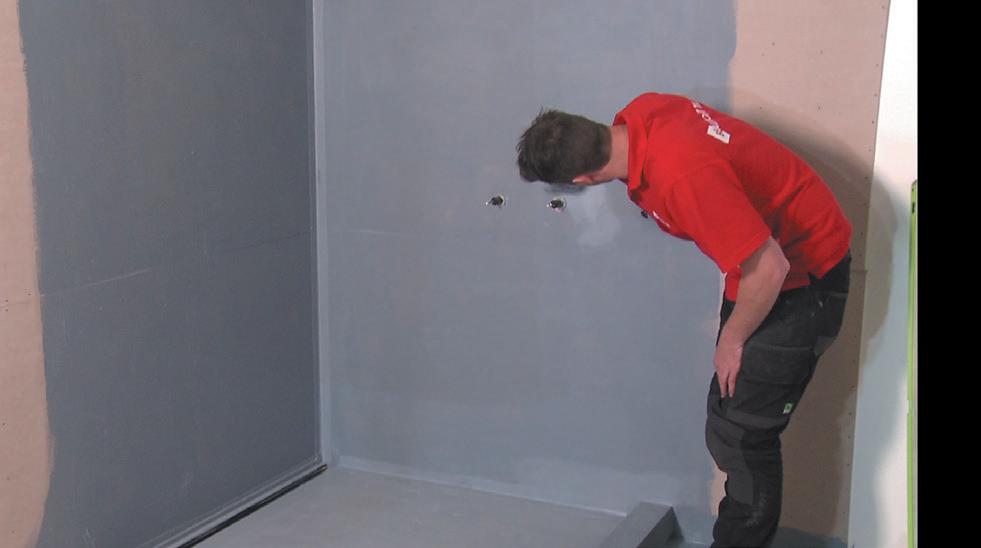
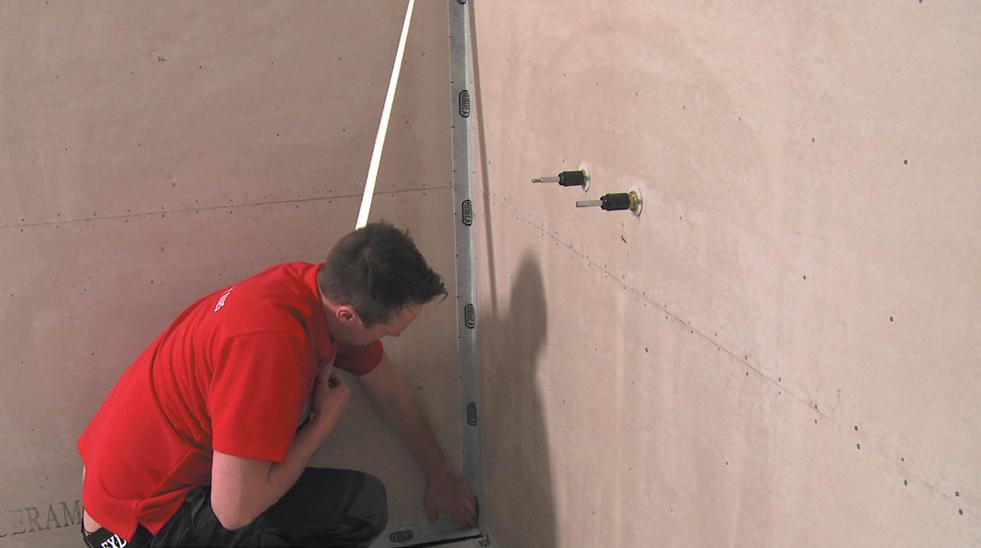
Having cleaned the wall and floor area thoroughly to remove all the dirt and dust, apply a liberal coating of primer using a brush and allow it to dry. Then use neutral cure silicone to run a generous bead along all internal corners (wall and floor). This includes the vertical corner joint in your shower. Finish off the bead using your finger. Note: Do not use any other kind of silicone.
Start by putting waterproofing tape along each corner of your shower and shower hob. Also apply it along the flashing to ensure no water gets behind the grate drain. Once you have peeled off one half, remove the other half of the tape and press it all down.
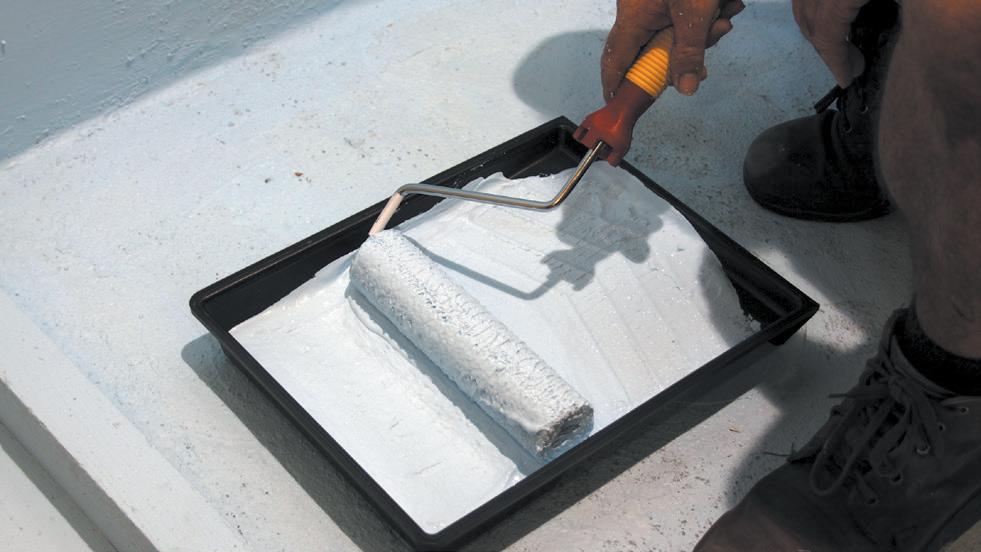
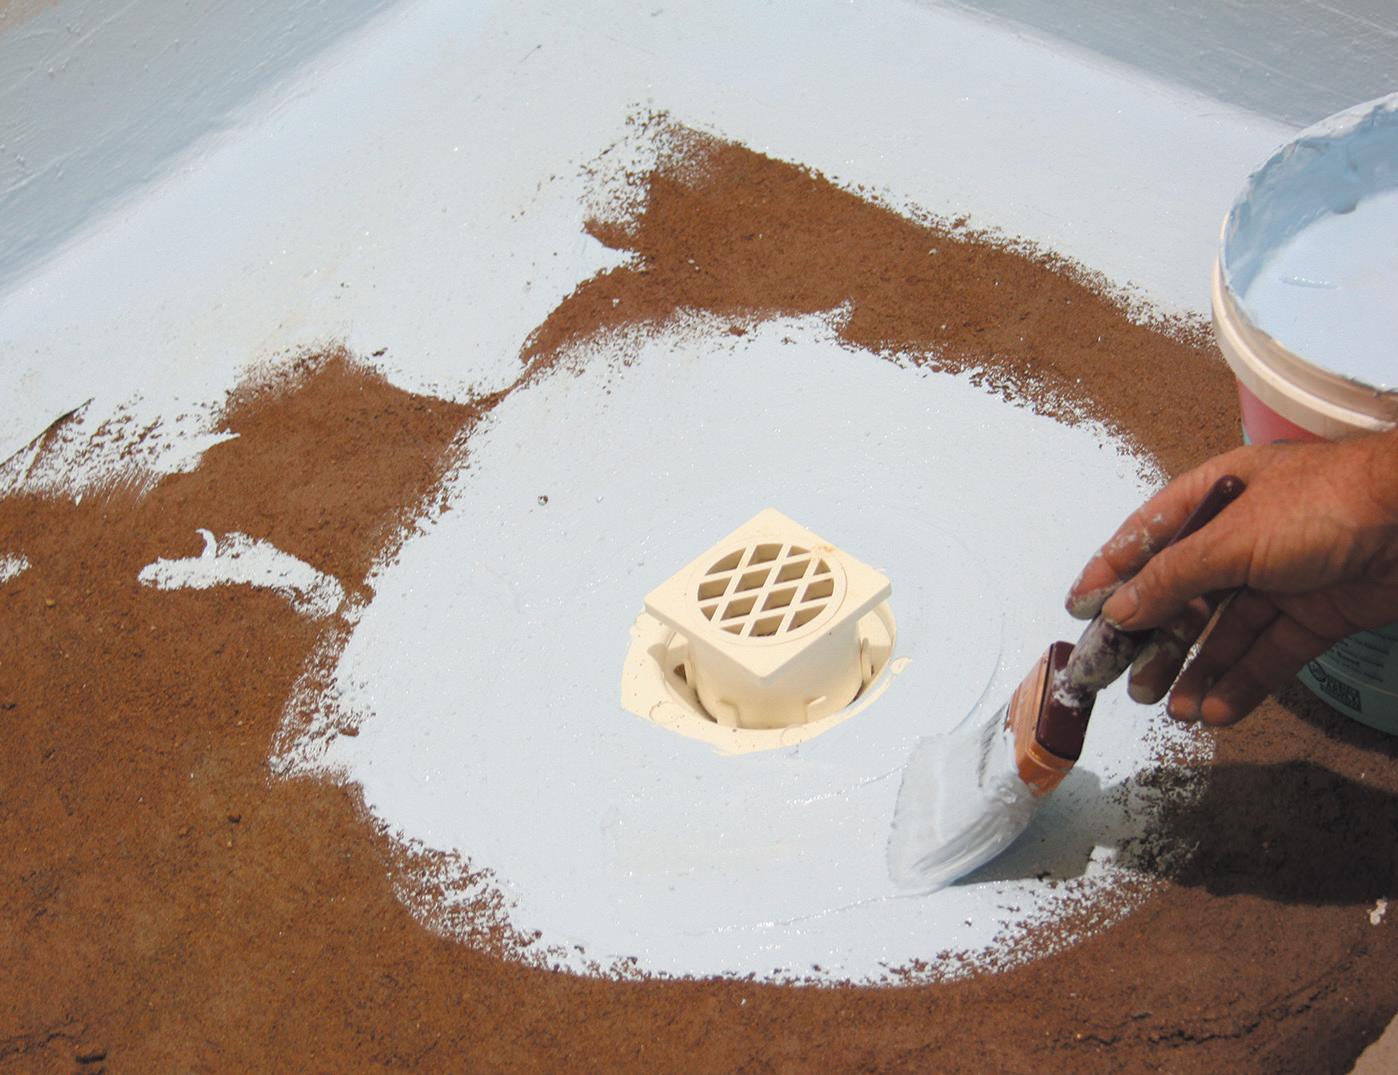
Once all the corners are done, use a paint brush and roller to cover the entire wall and floor with the waterproof membrane. We always insist that the total wet area is waterproofed, so the waterproofer should be applied over the entire surface as well as the floor outside of the shower. Follow the manufacturer’s instructions for the number of coats that are required and drying times. This coating should be 0.5mm on walls and 1.0 mm thick on floors. Even a hole the size of a pinhead can cause disastrous problems later on.

A good tip is to roll the first coat all in one direction and roll the second coat at 90 degrees (a right angle) to the first.
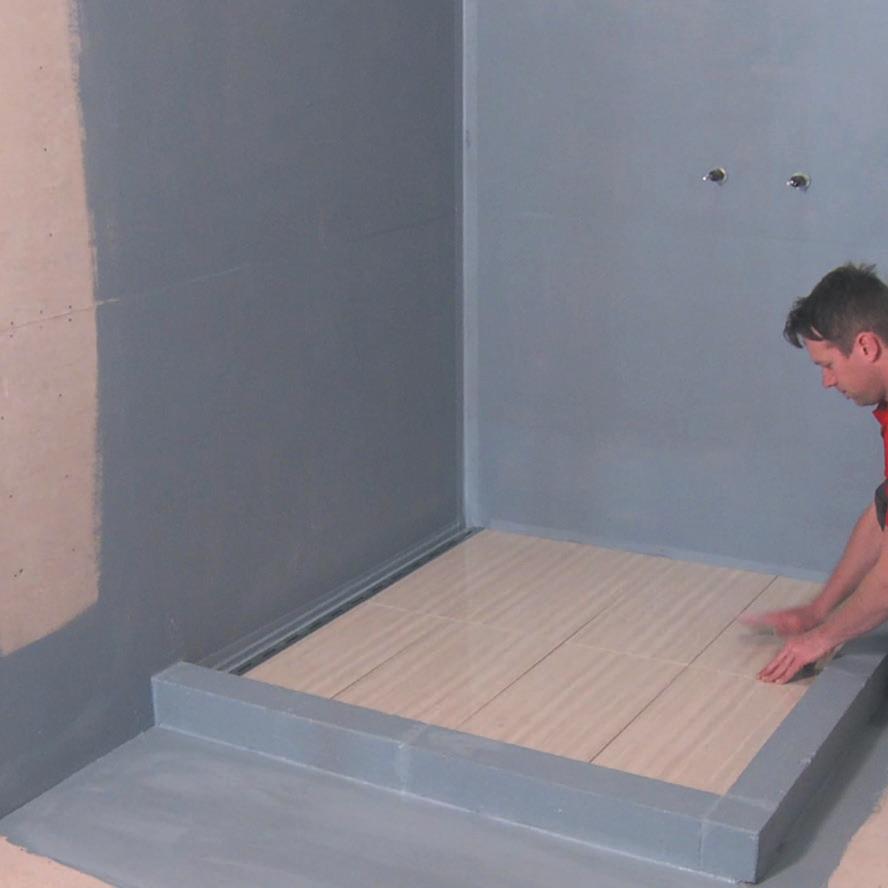
In these “wet” areas, it is necessary to grade the floor to the waste outlets. The simplest method is to lay a mortar bed and build your gradient or fall into this topping. When this has cured apply your waterproofing membrane then tile over the membrane.
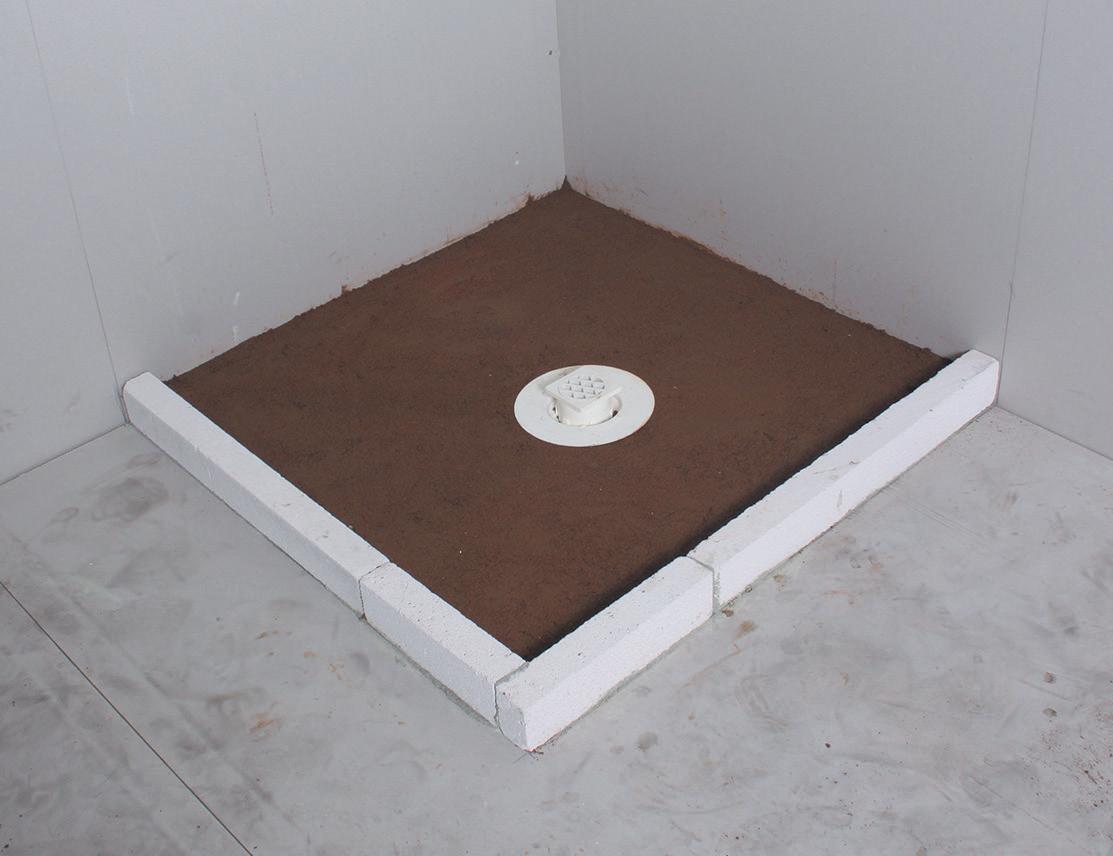
By using a mortar bed, there is plenty of time to screed off a smooth, even fall to the waste outlets.
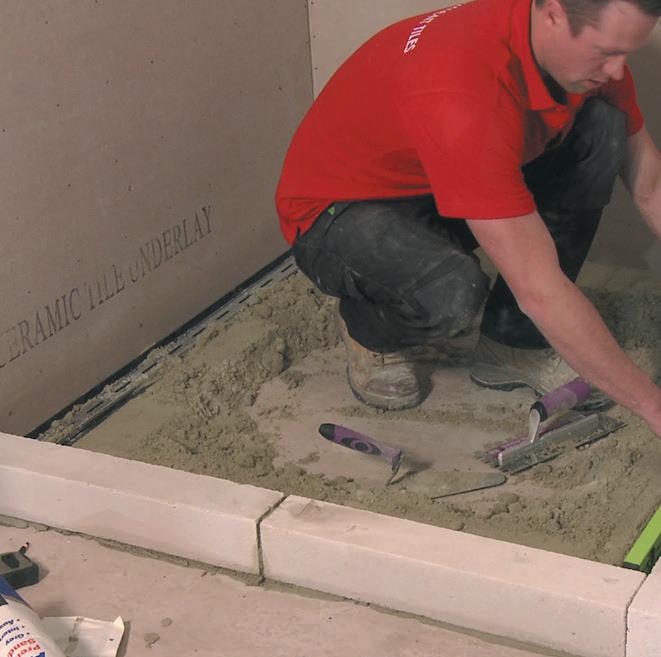
Mix your mortar 3:1 sand/cement. This topping mix should be a firm consistency, so it will retain its shape when squeezed in your hand. Pre-mixed sand and cement screed is also available. Spread the mix over the floor and compact it. Then screed to achieve 20-35mm thick coverage.
When laying a mortar bed over suspended floors of fibre cement sheeting or structural particle board, it is a good idea to incorporate an expanded galvanised mesh in the mortar bed. This helps prevent cracks appearing in the mortar bed.
Don’t forget to run your silicone “bond breaker” around all corners before applying the waterproof membrane.
NOTE:
Falls 1:80, which equates to 12.5mm fall over 1 metre, or 1:100 depending on the set up of your shower screen.
There are many brands of adhesives available and each brand produces several different adhesives. Mostly, these are for specific types of tiles onto specific substrates or surfaces. Choosing the right adhesive is important and is determined by the porosity of the tile and substrate material, location and conditions. Check with your local Beaumont Tiles store. They will advise you of the best adhesive to use. We guarantee the performance of the tiling systems we recommend. The simple guide is to select the best tiles and adhesives for the job, the cheapest may not give you the best long-lasting result and could be unsuitable for your project.
When it comes to grout, always choose a flexible, mould resistant grout for joints 1-8mm.
For joints 5mm to 50mm, always use a wide-joint grout.
For the ultimate grout that is colourfast and stainproof, ask about our epoxy grouts.
Bricks
The surface should be rendered and allowed to cure for at least 7 days.
Existing Tiles Internal
Existing tiles should be sound, free from dust, grease, oil, etc. Roughen the surface by mechanical means to remove 80% of the glaze. Remove any cracked, loose or “drummy” tiles and patch gaps with a suitable patching mortar.
Painted Surfaces Remove flaking paint, roughen surface by mechanical means. Thoroughly remove water-based paints.
Concrete
New concrete should be allowed to cure for 28 days before tiling, unless using early age concrete adhesives. Smooth concrete to be mechanically roughened prior to tiling.
Concrete Walls Ensure all release agents are removed prior to tiling. NOTE: Do not use acid for this purpose. Use mechanical means.
Shower Recesses
Waterproof walls and floors using waterproofer & waterproofing tape. Allow to cure prior to tiling.
Swimming Pools Concrete and Cement Render
New concrete should cure for a least 6 weeks. Render should be left with wood float finish and allow to cure for 7 to 14 days.
GROUTING: dampen all tile joints before grouting.
Concrete Internal and External
New concrete should be left with a wood float finish and allowed to cure for at least 28 days. Smooth finish should be mechanically ground or scabbled. Old concrete should be clean, dry, free from all contaminants.
Timber Floors Internal Must have fibre cement sheet applied over prior to tiling. Ask your local Beaumont Tiles store for alternative options.
STRUCTAflor or YELLOWtongue floor (internal use only)
Compressed Fibre Cement Sheets
Internal and External
Existing FIbre Cement (6mm)
Ceramic Tile Underlay
Must be primed with a suitable primer, flexible membrane or have primed fibre cement sheet / ceramic tile underlay attached prior to tiling.
Fix sheets according to the manufacturer’s instructions. The sheets should be dry, clean, free from dust, grease, oil etc. Prime the sheets prior to tiling. Ask your local Beaumont Tiles store for alternative options.
Fix sheets according to the manufacturer’s instructions. The sheets should be dry, clean, free from dust, grease, oil etc. Apply a flexible membrane with strand mat over the joints between the sheets. Prime the sheets prior to tiling.
Existing Tiling
Existing tiles should be sound, free from all contamination, clean and dry. Remove any cracked, loose or “drummy tiles”, clean and fill gaps with a suitable patching mortar. Roughen surface by mechanical means to remove 90% of the glaze, or ask your local Beaumont Tiles store about other options such as specialised etching primer.
Painted Concrete Remove all paint by mechanical means.
Vinyl Floor Tiles
Wash with neutral cleaning agent. Then mechanically roughen and vacuum. Please note that some old vinyl may contain asbestos, seek specialist advice from your local Beaumont Tiles store for alternatives.
Swimming Pools
Concrete and Cement Render
New concrete should cure for at least 6 weeks. Render should be left with wood float finish and cure for 14 days.
1 Check all boxes of tiles match your selection, have an acceptable shade blend and that you have enough to complete the job.
2 Tiles must be dry and the back of the tile clean. Any loose powder should be removed.
3 Surface to receive tiles should be structurally sound, flat and free from grease, wax, oil, curing compounds and all forms of contamination.
4 Adhesive should be applied using the appropriate notched trowel. Do not use the spot fixing method. Always apply adhesive with notched trowel horizontally, not in a swirling motion.
5 Press tiles firmly into adhesive bed with a slight sliding motion across the ribs. The whole of the back of the tile must be in good contact with the adhesive. No voids must occur beneath tiles. NOTE: 100% coverage of adhesive must be achieved.
6 Remove a tile from time to time to check that complete contact with the adhesive is made.
7 Do not fix tiles over adhesive that has begun to dry or has a “skin” on top.
8 Allow adhesive to set before grouting, usually not less than 24 hours. During this time, the tiles must be protected from weather, water penetration etc.
9 Adhesive and grout must be used strictly in accordance with the manufacturer’s instructions.
10 To achieve greater adhesion and a longer open time, porous concrete should be dampened with water prior to tiling with cement-based adhesives.
11 Appropriate movement joints must be used and construction joints must not be tiled over.
12 Thin bed fixing of floor tiles: the minimum finished thickness of the adhesive should not be less than 3mm thick.
13 Tiles must NOT be stored in direct sunlight prior to fixing.
14 Some tiles have different amounts of variation between each piece. Dry lay from different boxes to check the blend and the position of pieces prior to installation.
If you take care and follow the instructions in this booklet, your tiles will stay down for life. Rushing into the project, not keeping the area clean from dust and mess, or trying to save a dollar on substandard adhesives will generally see the tiling fail.
We see a number of poor installations each year and they are all due to one of the following.
1 Incorrect or no expansion joints
2 Incorrect choice of adhesive
3 Adhesive “skins” before tile is bedded in
4 Contaminated background
5 Poor/incorrect surface preparation
6 Poor adhesive coverage
7 Unsatisfactory adhesive bed thickness
9 Dust or loose backwash not removed from tile back
Bathroom, kitchen and laundry wall tiles need only be cleaned with a mild detergent or household cleaner. There are really only two rules to follow:
1 Don’t use an abrasive cleaner such as a powder or gritty cream. These will cause minute scratches in the surface and make the tiles harder to clean the next time.
2 Clean the tiles regularly so dirt doesn’t build up. Tiles are a great product, but they don’t stay clean by themselves.
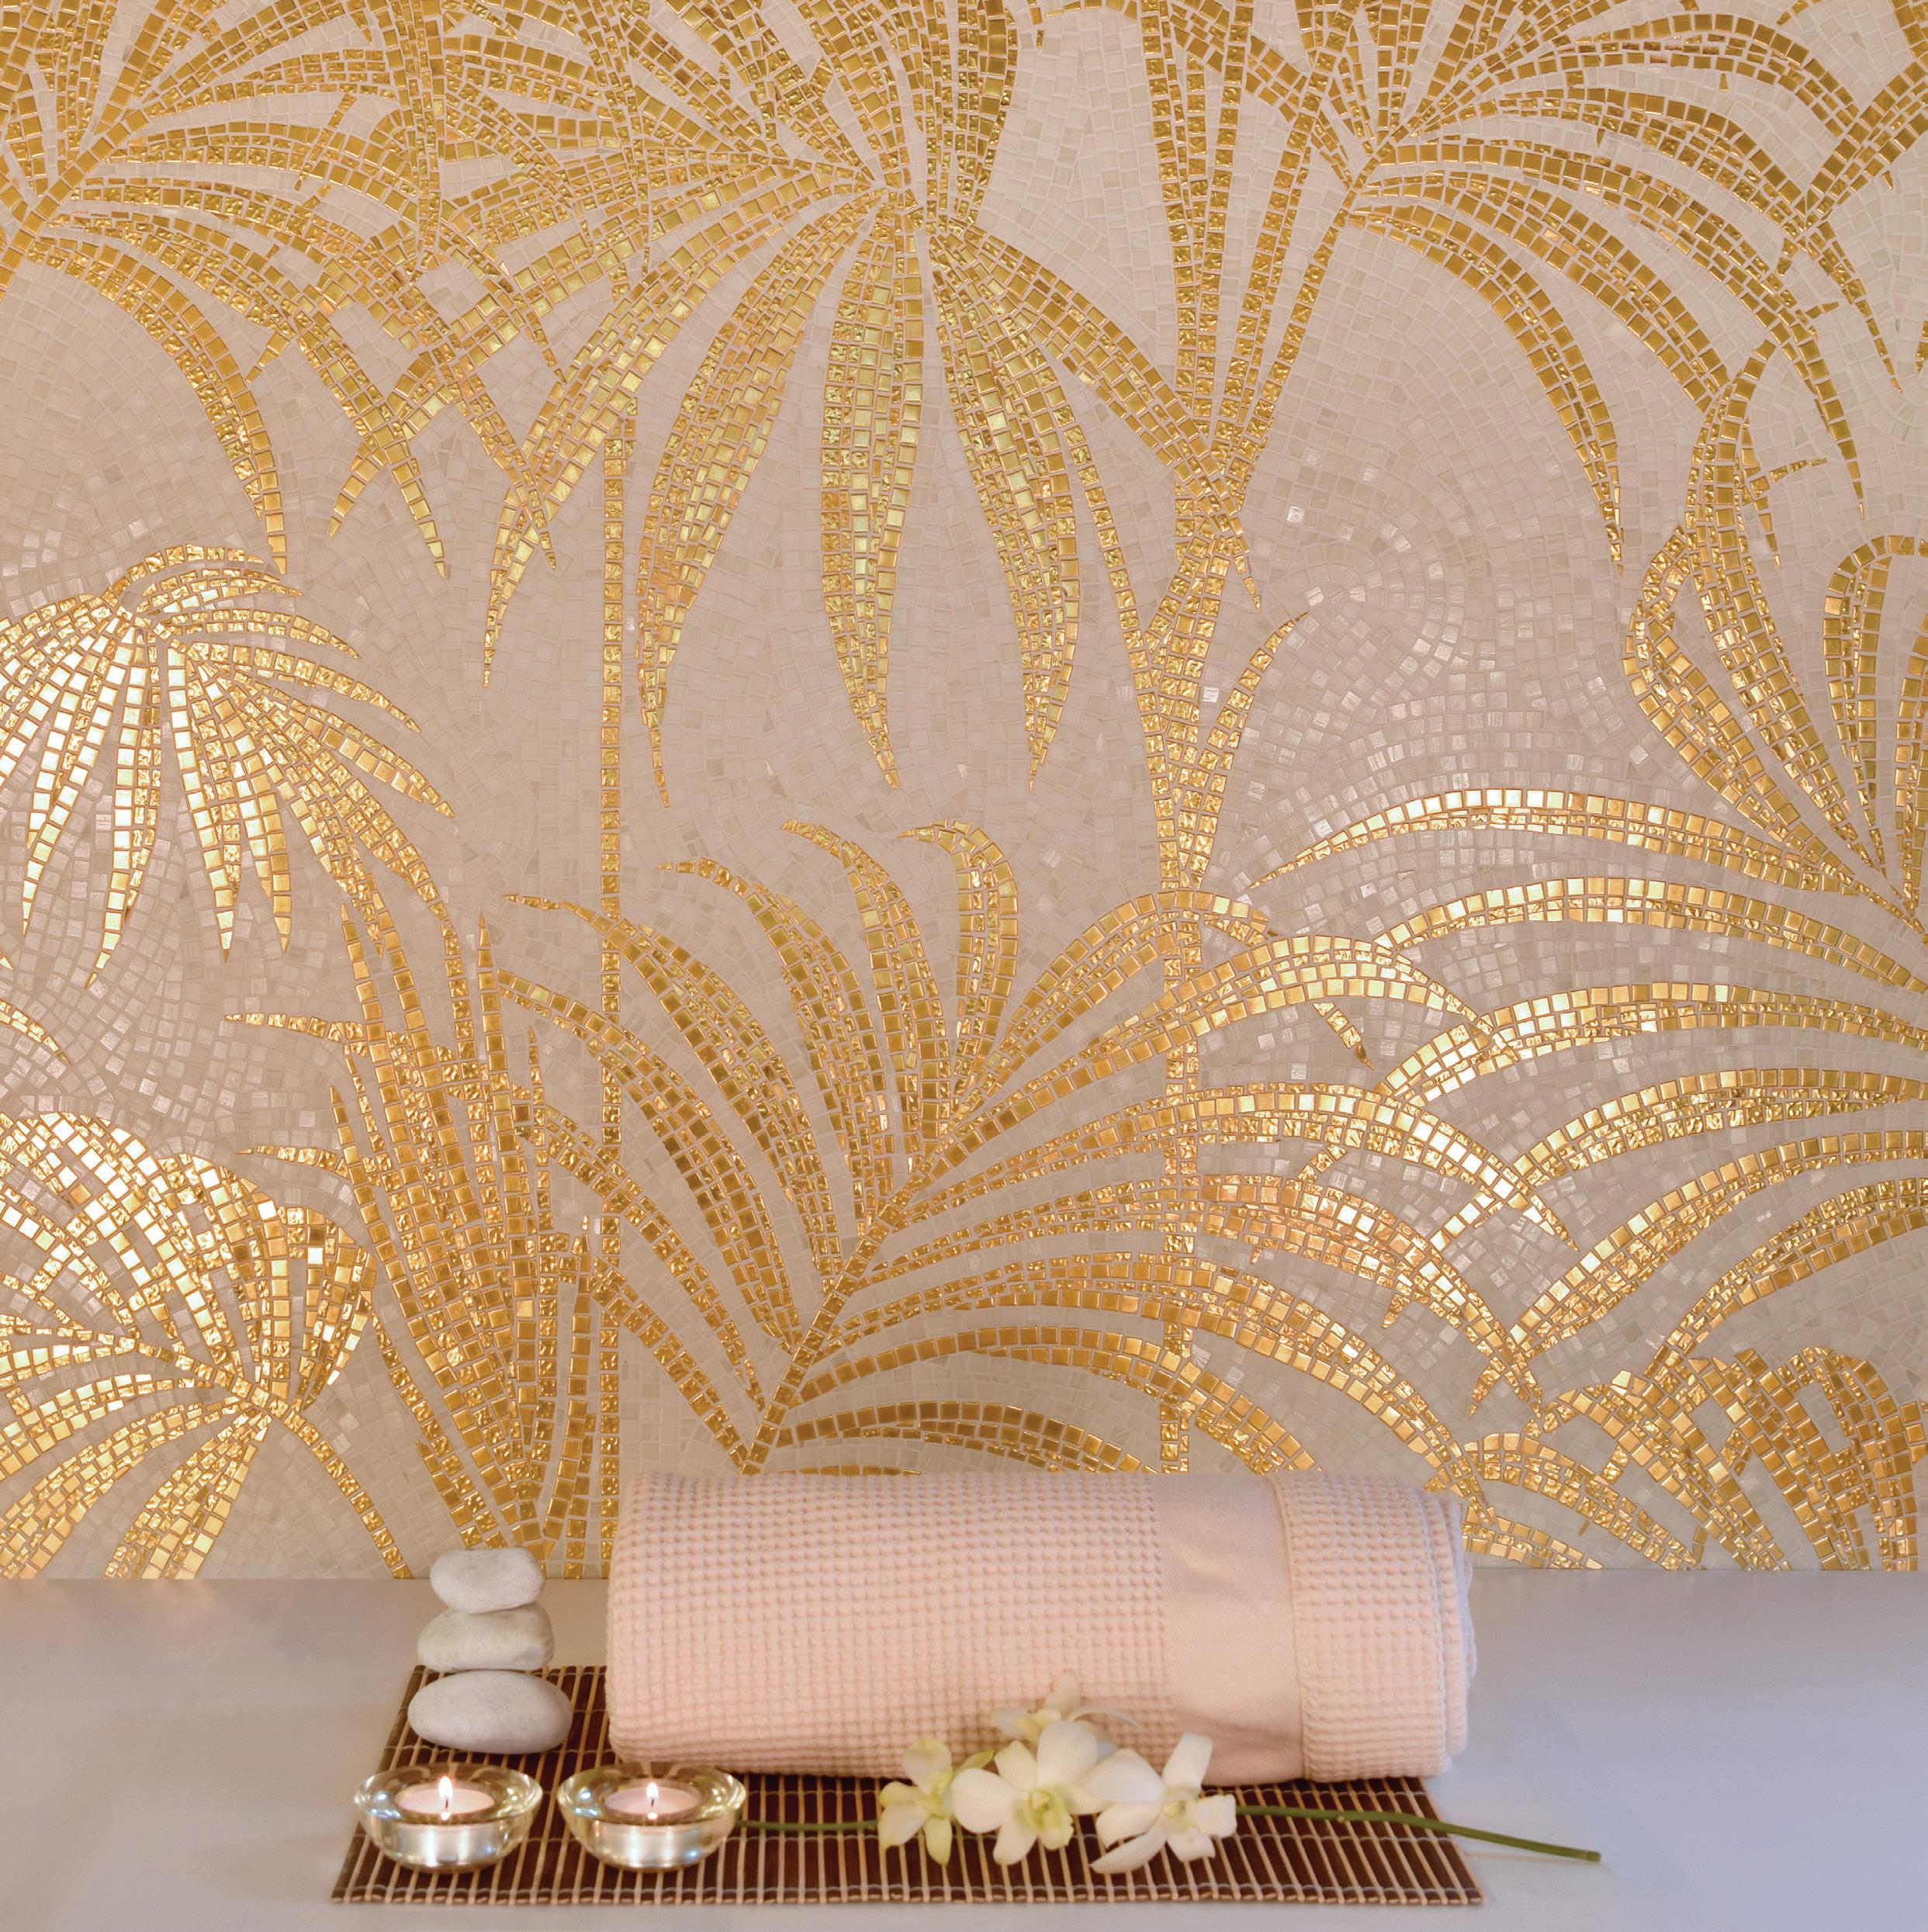
Be careful of metallic finishes on your tiles. These are very delicate areas and easily damaged, especially by abrasive cleaners and scourers.
An important note on seasonal movement. As the walls of your house move against each other, the silicone seal between the bath, shower base, basin and tiles may be broken. This may also occur on the vertical internal corners. You may have put a flexible sealant in, but this can deteriorate or come away with age and must be replaced to ensure moisture doesn’t leak through.
This can have disastrous consequences. This is as much a maintenance job in a house as repainting timber surfaces. When you see that the sealant is lifting away, replace it as soon as possible. To replace it, remove the whole lot, then thoroughly dry the joints using a hairdryer or similar. Wipe the tile faces clean with a little methylated spirits on a cloth and then simply reapply the silicone as outlined in the section on silicone.
The same basic rules apply to floor tiles. Don’t use abrasive cleaners, or any sort of polishes or additives. They will only build up and cause problems later. Wash your tiles regularly using hot clean water with a little neutral (not acidic or alkaline) soapless household cleaner.
It may be possible that a very thin film of grout has been left on the surface of the tiles making them appear dull after the job is completed. In this case, we recommend the use of special heavy duty cleaner.
Your local Beaumont Tiles store will advice on the best product. Make sure that you try it out first on a less noticeable area (behind a door or cupboard for example) to ensure it does not damage the tile. Make sure you rinse the floor thoroughly with clean water after treatment.
Tiles can become scratched by grit, especially highly glazed ones. To minimise this, ensure a door mat is used just inside any exterior door. If you have very high glazed floor tiles in your bathroom, avoid walking on them with harsh footwear.
One or two tiles in your floor may become chipped or cracked. Please make sure you have kept some spares, as tile batches vary in colour and fashions come and go, so it’s very unlikely that you could ever match your tiles up a few years later. Store them away in a safe, dry place, perhaps in your ceiling space.
Ceramic tiles are basically a low maintenance product, but some basic rules need to be followed:
Tiles Taps Tub ...the lot!
Get theforlookless!
They even offer a renovator service!

Scan here to see all of our COMPLETE BATHROOM PACKAGES
Our buyers travel all over the world, scouring the globe for the very best in quality and design. When we find a tile that we love, we work closely with the manufacturer to ensure that the tile is tested thoroughly for quality, performance, durability, and conformity to Australian standards.
Your tiles should last you a long time. Having been around for more than 60 years now, we at Beaumont Tiles know a thing or two about longevity and reliability; and you can be confident in our ability to uphold our guarantee long into the future.
For more information, terms and conditions, please visit our website.
tile.com.au
Information in this DIY tiling booklet is given as a guide only. While we endeavour to keep the DIY guide up to date and correct, we make no warranties of any kind, express or implied, about the completeness, accuracy, reliability and suitability of its content. Any reliance you place on such information is therefore at your own risk. For a DIY tiling project, we recommend you also seek professional advice based on your own circumstances.