
REVIEWCOPY
Twisted REVIEWCOPY
HERBERT PRESS
Bloomsbury Publishing Plc
50 Bedford Square, London, WC1B 3DP, UK
29 Earlsfort Terrace, Dublin 2, Ireland
Bloomsbury, Herbert Press and the Herbert Press logo are trademarks of Bloomsbury Publishing Plc
First published in Great Britain in 2025
Copyright © Nadja Shields 2025
Nadja Shields has asserted her right under the Copyright, Designs and Patents Act, 1988, to be identified as Author of this work
All rights reserved. No part of this publication may be reproduced or transmitted in any form or by any means, electronic or mechanical, including photocopying, recording, or any information storage or retrieval system, without prior permission in writing from the publishers
Bloomsbury Publishing Plc does not have any control over, or responsibility for, any third-party websites referred to or in this book. All internet addresses given in this book were correct at the time of going to press. The author and publisher regret any inconvenience caused if addresses have changed or sites have ceased to exist, but can accept no responsibility for any such changes
A catalogue record for this book is available from the British Library Library of Congress Cataloguing-in-Publication data has been applied for
ISBN: 978-1-7899-4244-6; eBook: 978-1-7899-4245-3
2 4 6 8 10 9 7 5 3 1
[Insert fsc logo here]
To find out more about our authors and books visit www.bloomsbury.com and sign up for our newsletters
Acknowledgements
REVIEWCOPY
This book is dedicated to my mother, Martina, and my grandmother, Inge. Both were incredible women whose inspiring approach to life taught me that you can do whatever you put your mind to as long as you are prepared to persevere. To my amazing husband, Paul: thank you for being the steady constant I need in my life. I wouldn’t want to navigate it without you! Lastly, a big thank you to my editor, Russell. Without him this book would not have become a reality.
Twisted wire jewellery techniques and projects
NADJA SHIELDS
Design by Laura Woussen Design Printed and bound in China by RR Donnelley Printing Solutions Ltd
I NTRODUCTION 6
BEFORE YOU BEGIN 8
Safety 8
Glossary of useful terms 9
TOOLS 10
MATERIALS 19
Wire 20
Stones and beads 23
TECHNIQUES 30
Weave library 30
Findings 46
Coils 53
Frames 57
Bails 61
Stone settings 74
Oxidising metals 110
Polishing and finishing 113
PROJECTS 118
Hammered butterfly earrings 120
Gothic heart earrings 126
Shiloh swirly pendant 132
Link bracelet 138
Luna pendant 144
Sunburst earrings 152
Beaded cuff bracelet 158
Khepri pendant 166
Tama pendant 172
Minimalist pendant 180
Aurora pendant 188
Modern twist pendant 198
Gaia pendant 204
Channel-set ring 212
Heady bracelet 220
PLANNING YOUR OWN DESIGN 232
USEFUL INFORMATION 234
Tips and tricks 234
Reference tables 238
Suppliers 240
Introduction
Wire work has long been a popular art form, but it was the growth of social media that led to an explosion of new artists wanting to learn the craft. Techniques that were only ever passed on within small circles suddenly became available online for everyone, and the wire-work community began to flourish and expand. The content-sharing which followed, using platforms with a global reach, started to influence the kinds of wire work we see today. Intricate styles such as the ‘heady’ style, hammered frame work, and complex weaving and stone-setting techniques began to emerge, and with every new design, these styles developed, as each artist built on the knowledge they had gathered from others. The art of wire continues to evolve, and I am privileged to be able to contribute to its growth in a small way with this book.
I began my wire-work journey in 2017. I had worked with wire once or twice before, but my main interest at the time was macrame and micro-macrame. In 2015, I became a guest designer at the JewelleryMaker channel and was required to work with different media as part of the job. I loved the look of woven pieces and decided to learn how to work with wire. It was all new to me, and I spent many hours looking for tutorials and how-to guides online.
At that time, there was not much information available online and I found trying to learn the craft frustrating. Fast forward to today and the online world offers a plethora of tutorials, how-to guides and technique snippets, so much so that it can be a little overwhelming if you don’t quite know where to start. I learned a lot through trial and error and eventually met other artists online who were willing to share their knowledge. I began teaching wire work and over time formed the
idea of gathering and setting out all the techniques and invaluable information I had accumulated into an easy-to-use ‘wire-work encyclopaedia’, which could be used at any stage of a maker’s artistic journey. I wrote many tutorials and made videos, but the idea of a book lived quietly at the back of my mind. It took gentle nudging from my editor, Russell Butcher, who wrote to me asking if I would be interested in writing this book, to finally put pen to paper. This book is the culmination of the skills I have acquired over time, and I feel privileged to be able to pass them on to you.
REVIEWCOPY
Acquiring a new skill can be intimidating, and learning the art of wire is no exception, especially with social networks showcasing the best artists in the field. New artists often tell me that this can be a little overwhelming, and I always try to explain to them that everyone starts at ‘square one’ and one should not compare
a chapter 1 to someone else’s chapter 26. It’s a process and starts the same way for everyone. If you are new to wire work, I recommend that you start with the tools and materials sections of this book. Here, I go over various types of wire, what metal to choose for which application, different wire gauges, the array of gemstones and beads you can use in your pieces, the tools and supplies you might need for a basic set-up, and a lot more to help you feel confident in starting your wirework journey. You might also like to look
through the projects for beginners (see pages 120–151) to see how these materials can be used. In the techniques section, I have included step-by-step guides that are easy to follow and describe basic weaves and processes frequently used in wire work. There are also more complex techniques covering things like frame building, component creation and various stone-setting techniques, as well as more intricate projects, so that you can advance your skills to the next level as and when you are ready.
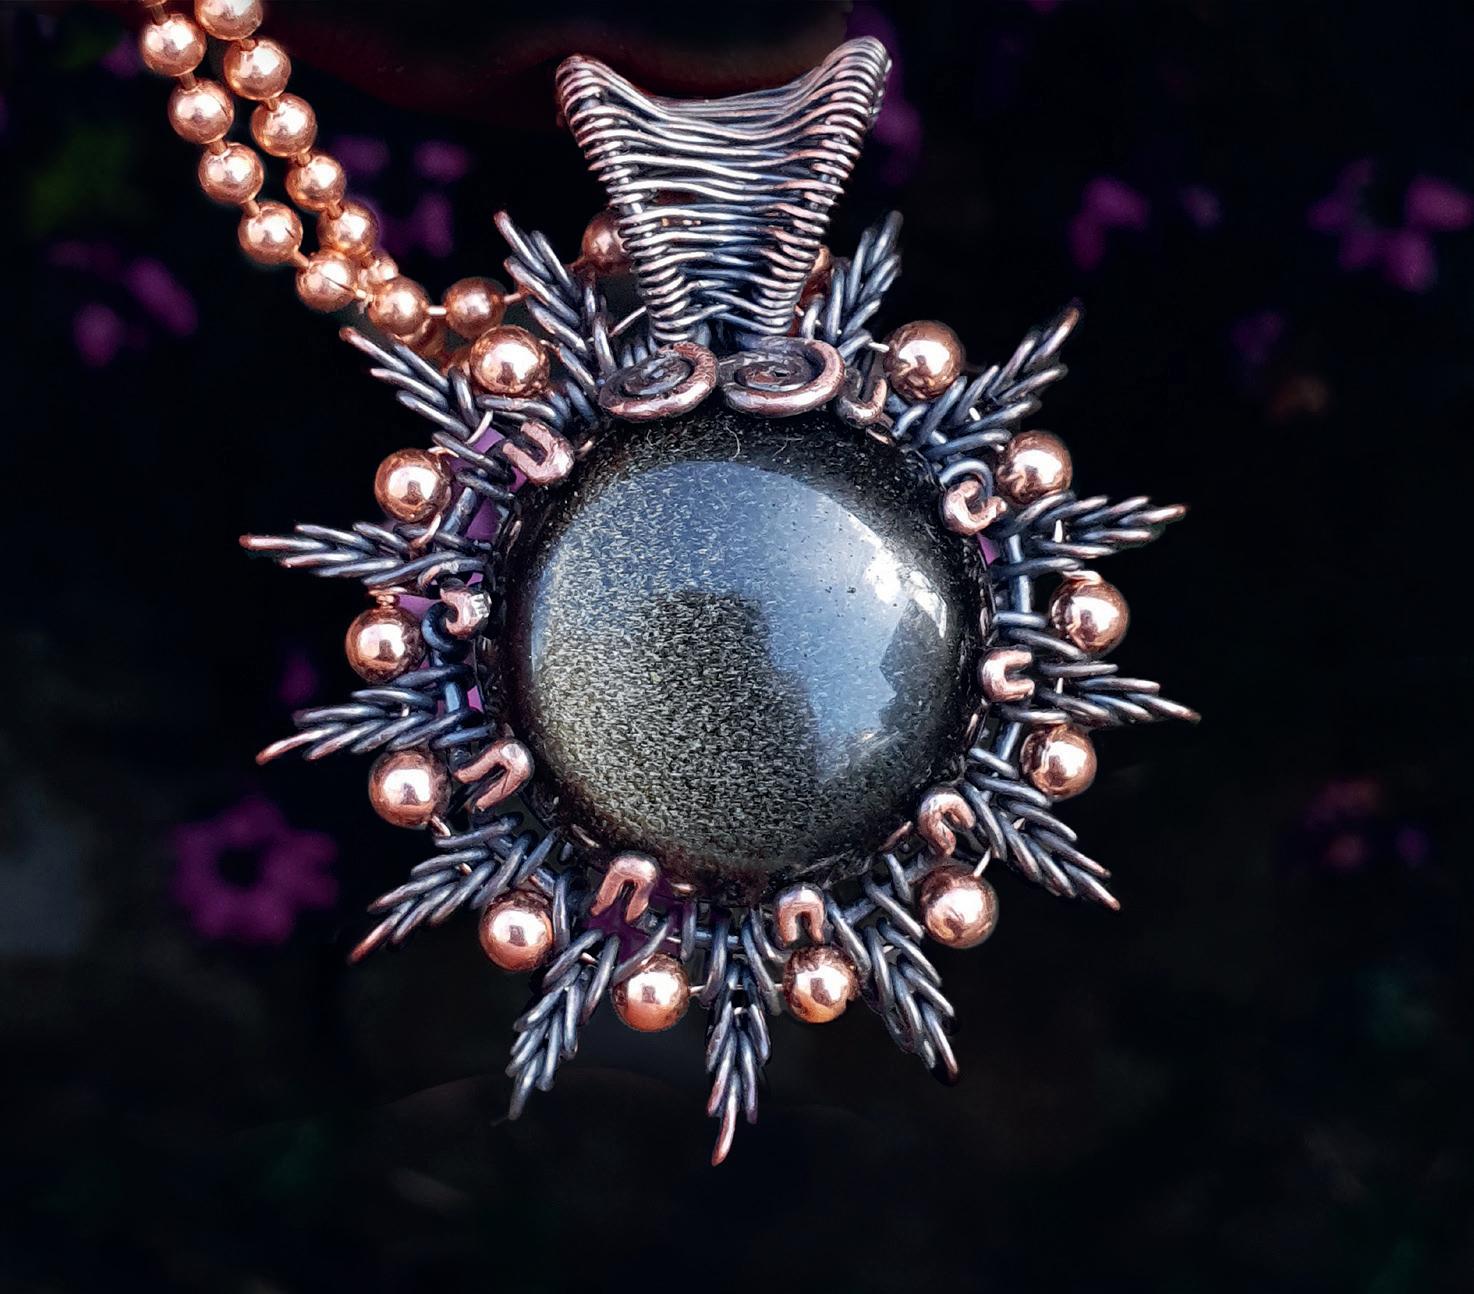
A sunburst design with a gold obsidian focal stone set in dead-soft copper.
ADVANCED TOOLS
As you develop your skills and create more advanced wire work, you will also want to grow your tool collection.
Bail-making pliers and mandrels
There are many variations of bail-making pliers, but the ones I mainly use come in stepped sizes or as single-sized barrels. They are useful for creating perfect, identical loops and for forming a bail after it has been woven. Bail-making pliers have handles, and have two sides. Mandrels are single-barreled tools, but you can also have multiple, stepped barrel sizes on one tool. Mandrels also come in different shapes such as ovals, triangles, squares, even stars and hearts.
Needle-nose pliers
Wire designs can be quite complex, and the thick tips of normal chain-nose pliers cannot reach into small spaces. Needle-nose or watchmaker’s pliers are a great help when it comes to gripping wire ends in tight areas or manipulating a stubborn, tiny bead into place.
Bent-nose pliers
The tips of these pliers are bent at an angle, which makes it much easier to perform certain tasks, such as pushing weaves together or reaching into a small gap in your frame that is difficult to access with straight pliers.
Texture and forming hammers
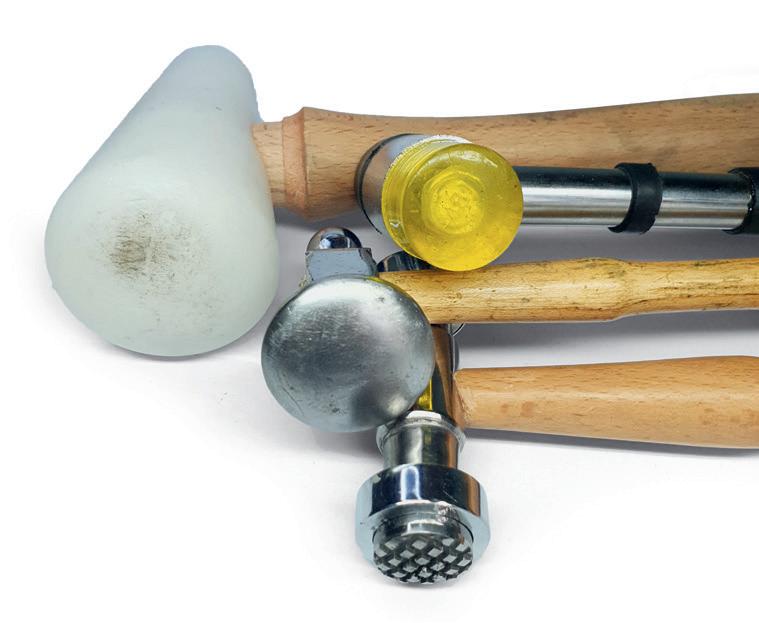
When working with thicker wire gauges, I often use various types of hammers to create shape and texture them. A forming hammer is used when creating bangles, for instance. The aim is to shape but not damage or mark the wire. A texture hammer generally comes with interchangeable ‘heads’ of varying textures. This is useful if you want to create recesses, patterns and detail on metal or wires before oxidising.
Domed chasing hammers

REVIEWCOPY
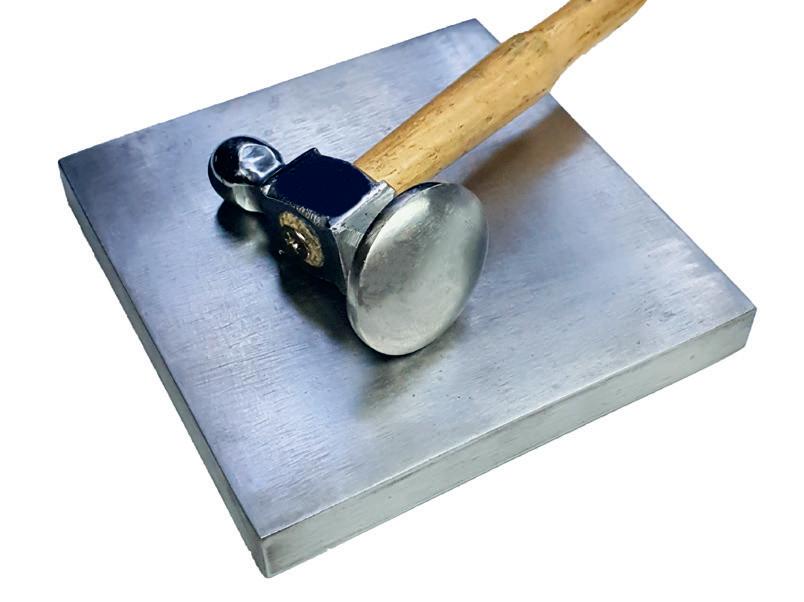
I always recommend using a domed chasing hammer, rather than one with a flat face, because the edge on the flat-faced hammers causes marks on the wire while hammering.
Steel blocks and sandbags
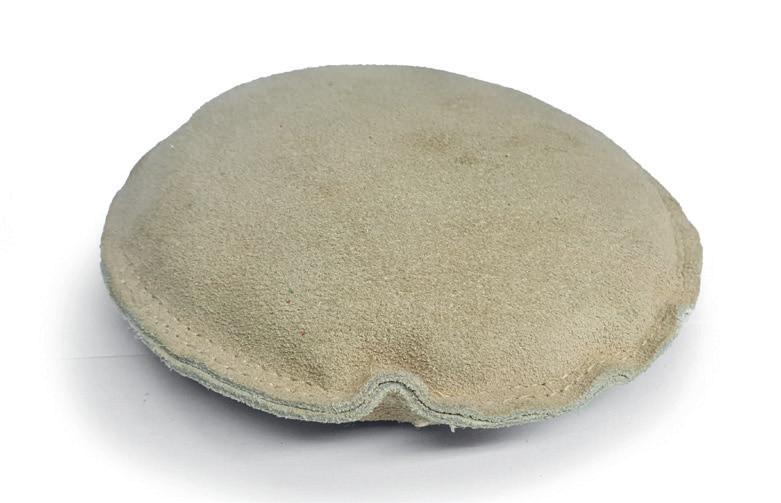
When hammering, you will need a suitable surface to hammer on, and usually a steel block measuring 10cm x 10cm (3.9in. x 3.9in.) will do the trick. You can get rubber bases to buffer the noise as well as sandbags which you can place underneath your hammering surface. They will also help you maintain good relations with neighbours and/or family!
Wooden ring clamps
These are very useful for those who have dexterity issues or find it difficult to hold wires when weaving multiple lengths of wire at the same time. Wires are clamped in on one end while the wedge holds it all together in the other. This means you have more control over the base wires without having to worry about your weave falling apart.
A selection of forming, texturing and chasing hammers.
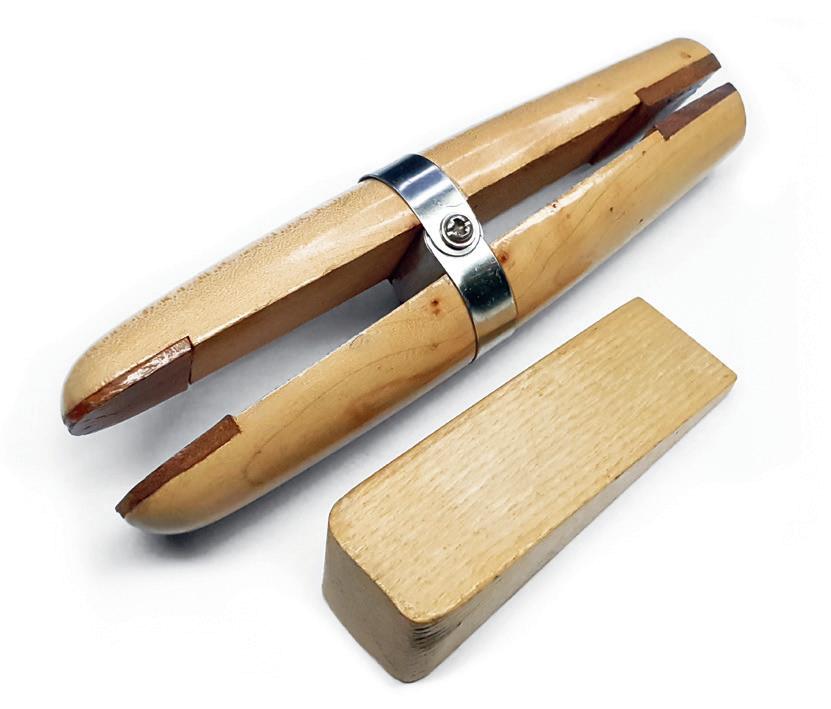
Wooden ring clamp and wedge.
Domed chasing hammer and steel block.
Sandbag.
A selection of pliers used in wire work
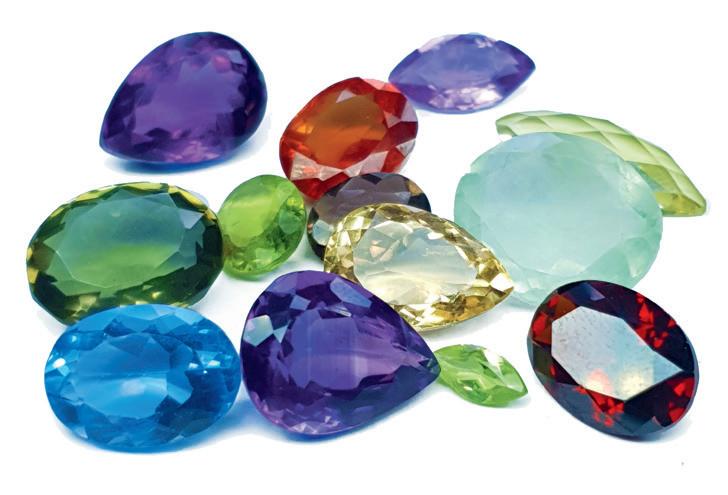
Faceted gemstones
Faceted gemstones are some of my favourite types of focal stones. In my opinion, they instantly elevate a piece and add to its overall value. Faceted gems are a little harder to set than flat-back cabochons due to their shape. The depth of the culet/keel (a gemstone’s pointed tip or faceted bottom) prevents the stone from sitting flat and therefore it is necessary to create some sort of ‘recess’ or ‘basket’ for the stone to sit in. The plus side of this is that, once seated in the ‘basket’, the stone is already quite secure and will need less wire than flat-back stones to keep it in place.
Gemstone nuggets
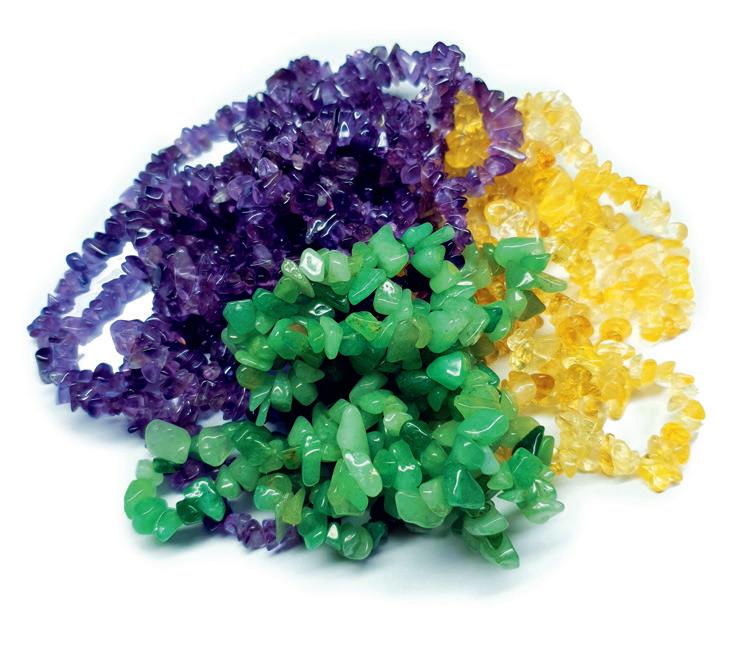
These are very popular in tree-of-life designs as well as sun-catchers, wind charms and wire tree sculptures. Because gemstone nuggets can be quite inexpensive, you can go as gem-heavy as you like. I love using these in my sun-catcher trees or sculpture wire trees to add colour. Like drilled beads, these are really easy to work with, if a little tedious, but well worth it. The smaller the nuggets, the more work it involves to thread them all onto your wire, but going small also adds more detail and colour interest.
Glass crystals
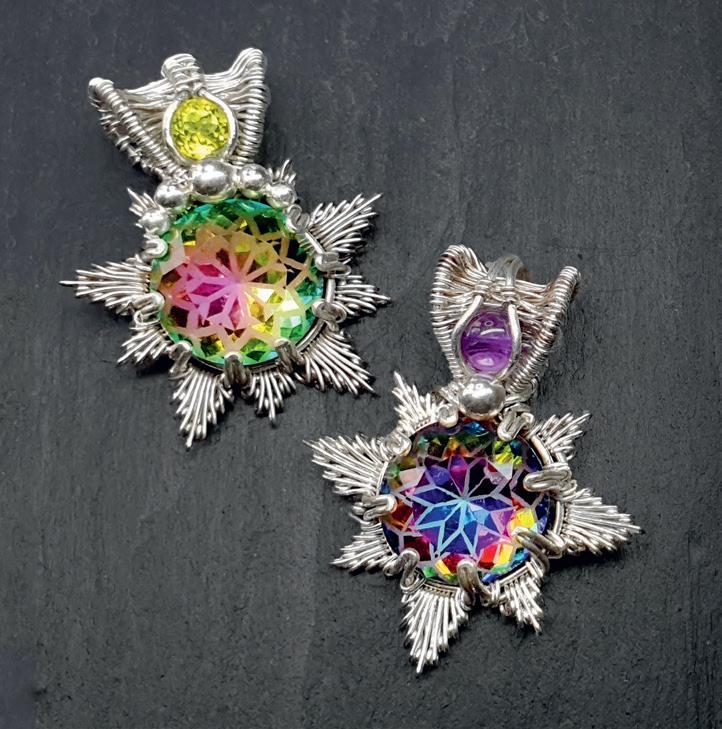
Extremely popular in micro-macrame and seedbeading circles, glass crystals have recently started to make a big impact in the wire-work community. For those that like a burst of colour or a little mystery and sparkle in their jewellery while still keeping it affordable, glass crystals are the answer. As focals, these are guaranteed to draw the eye. Most glass crystals on the market today are affordable, great quality with a beautiful finish, and some have stunning patterns within.
REVIEWCOPY

Rough crystals
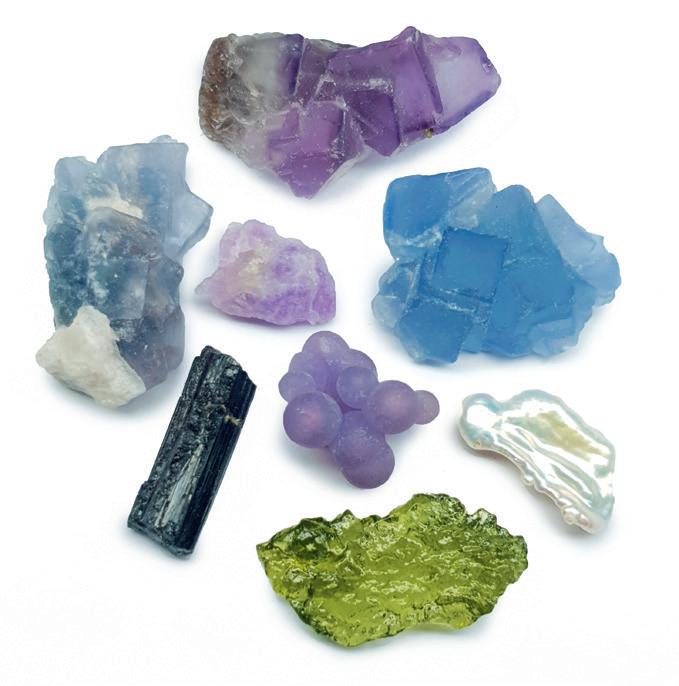
These stones are a little more challenging to set, but their raw beauty is stunning. When working with polished cabochons, it is easy to forget how incredibly old the stones are, and how they were created. Setting stones which have been left in their natural state helps to capture the essence of Mother Nature’s wonder. As they are usually very irregular in shape, incorporating them into a design requires a bit of planning. It is important to make sure that they are securely held in place without hiding too much of the stone.
Faceted focal gemstones.
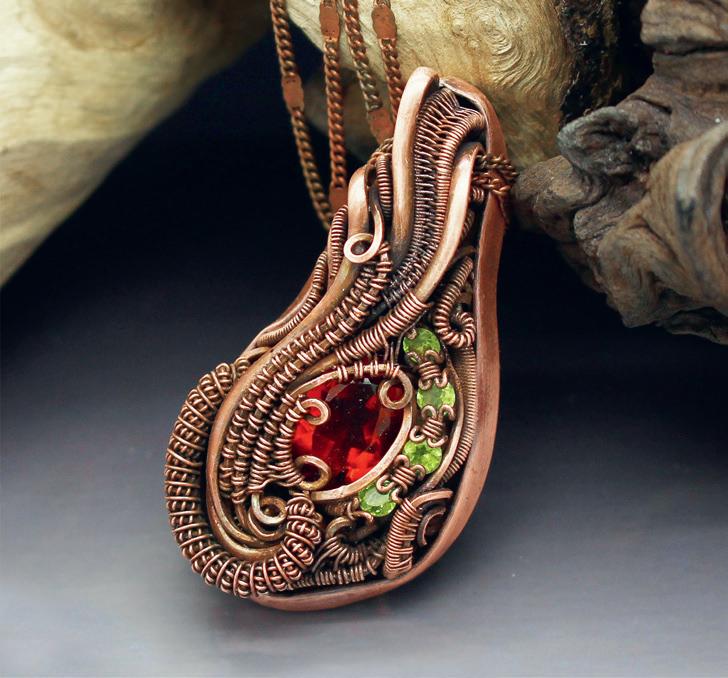
Red faceted garnet focal in copper wire accented with faceted peridot gemstones.
Gemstone nuggets.
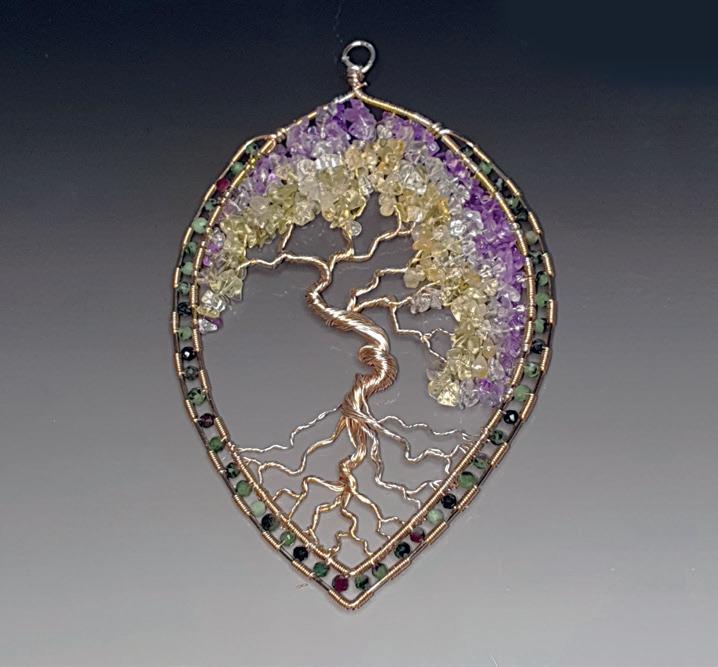
Tree of Life with citrine and amethyst gemstone nuggets in copper wire, accented with emerald drilled beads.
Undrilled faceted glass crystals.
Faceted mandala glass crystals set in sterling silver and accented with peridot and garnet gemstones.
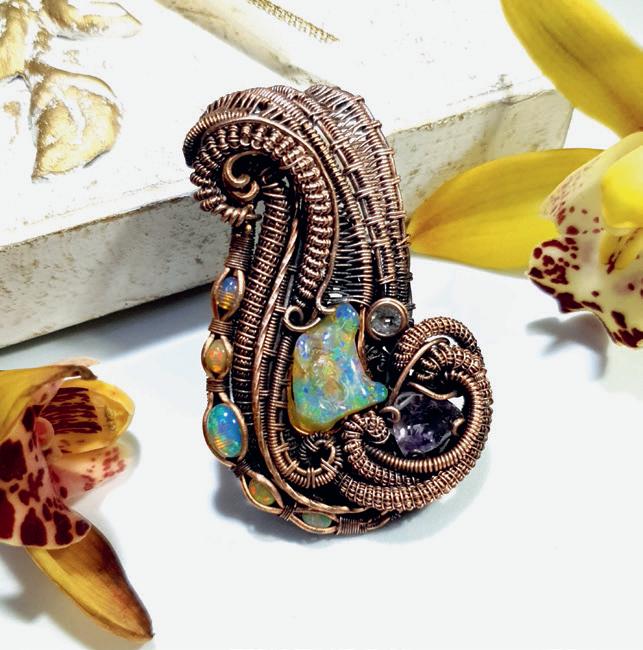
Gemstone rough crystals in their unprocessed form.
Ethiopian rough opal nugget set in copper and accented with flat-back Ethiopian opals and a faceted amethyst.
SHEPHERD’S HOOK
EAR WIRES
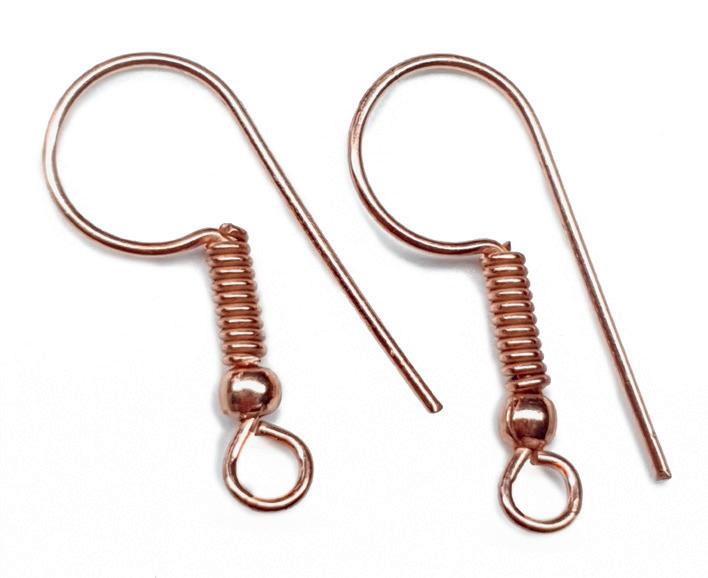
Shepherd’s hook ear wires are an essential component in jewellery making. While you can buy them ready-made, there is something to be said for creating a piece for which you have made every component. They are really easy to make, and can be formed in various sizes. One word of caution, however: bare copper, brass and bronze can stain skin, and some people are allergic to nickel. Therefore I would recommend using plated silver or gold wire for creating ear wires.
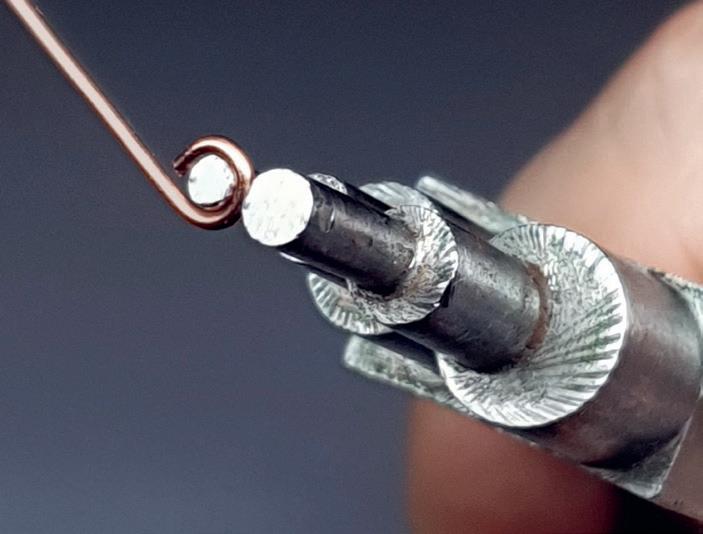
1 Cut 1 x 5cm (2in.) of 0.6mm (22ga) wire. You can also use 0.8mm (20ga) wire, but this gauge can be a little too thick for some to wear as ear wires. Here, I have used a pair of stepped bail-making pliers and have chosen the smallest mandrel. Grab one end of the wire with the pliers and wrap the wire around the mandrel until the loop is closed.
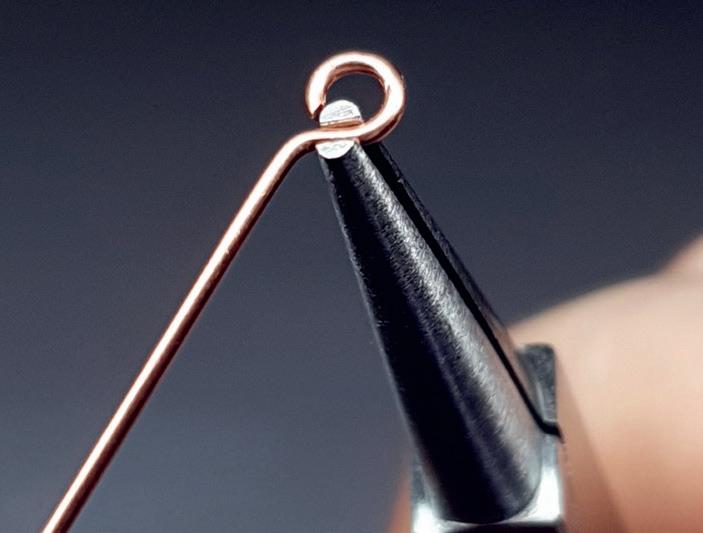
2 Using a pair of fine-tipped chain-nose pliers, make a bend in the wire, just below the loop opening.

REVIEWCOPY
3 Add a small 2mm or 3mm bead to the ‘post’. Cut 1 x 10cm (3.9in.) length of 0.4mm (26ga) wire and wrap it around the post seven or eight times, just above the bead. Leave a short tail to the left-hand side before creating the wraps.
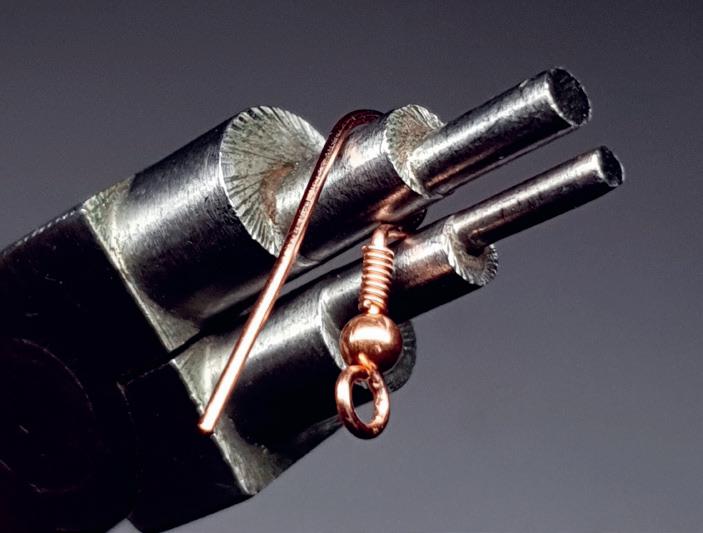
5 Use the larger of the medium-sized mandrels or place a pair of 9mm (0.35in.) bail-making pliers at the bend and loop the wire over until it is nearly parallel with the bead post and the wrapped section. If you don’t have bail-making pliers, you can use any cylindrical shape of the right size.
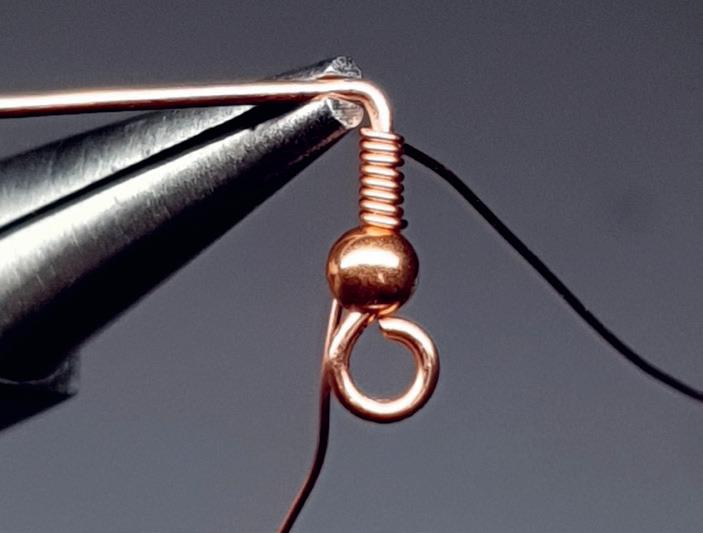
4 Using a pair of fine-tipped chain-nose pliers, make a 90° bend in the ‘post’ wire as shown. Trim off any excess 0.4mm (26ga) wire.
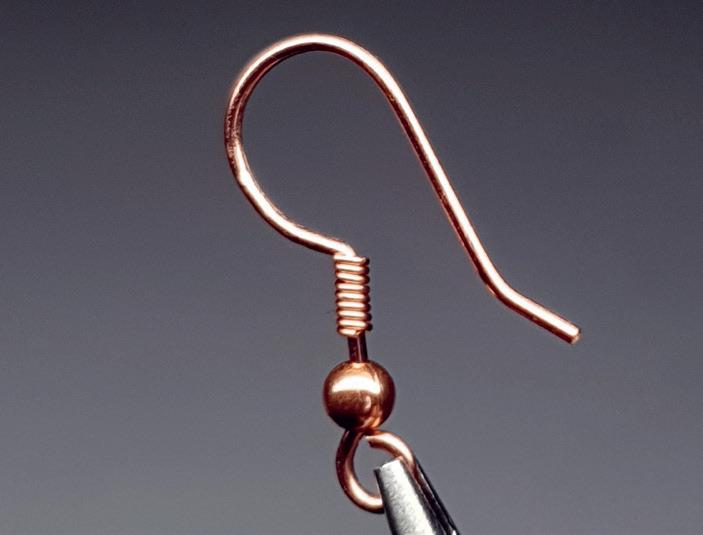
6 Using a pair of chain-nose pliers, make a small bend at the end of the wire. To add a component to the loop at the bottom, be sure to open it from side to side rather than from top to bottom, as the loop will lose its perfect shape if straightened out.

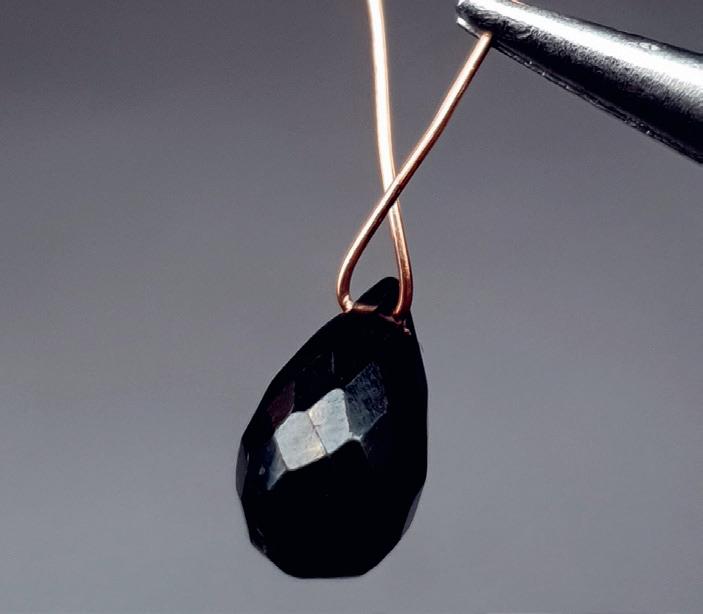
1 Cut 1 x 10cm (3.9in.) of 0.4mm (26ga) wire. Feed the wire through the drill hole at the top and cross them over each other.
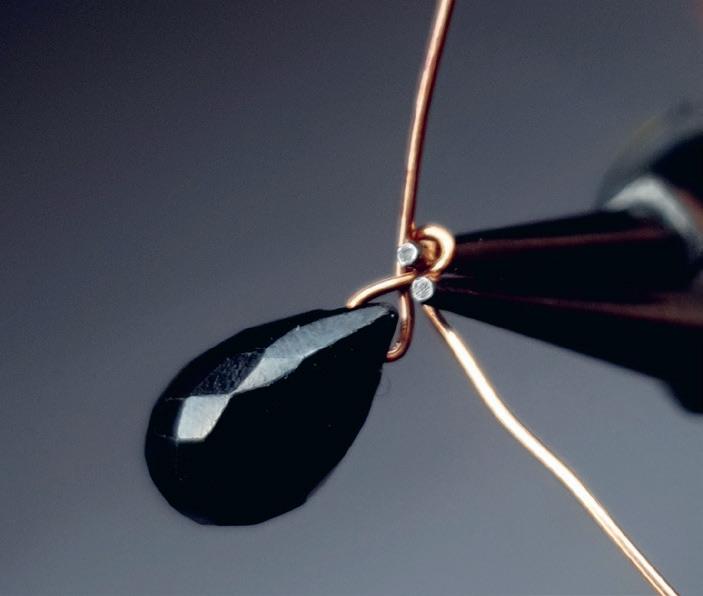
3 Loop the right-hand wire over the upper mandrel and bring it out underneath the pliers behind the loop. Do not cross any other wires at this point.
WRAPPED LOOP
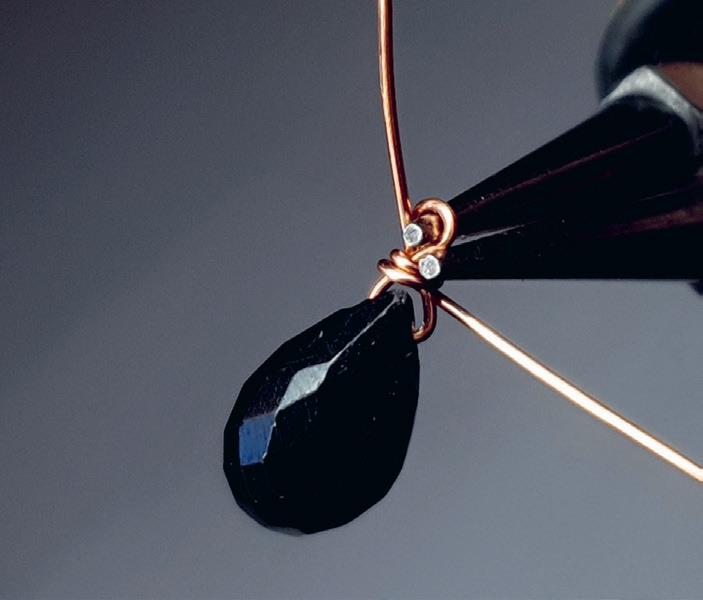
A wrapped loop is a very useful technique for adding a fixing to the top of drilled drops or pear-shaped stones. They are also often used in rosary links to create bracelets and necklaces. I usually use 0.4mm (26ga) or 0.6mm (22ga) wire to make these, as the drill holes of these types of stones are often narrow.

2 Place a pair of round-nose pliers where the wires cross. Depending on how big a loop you want, you can place the pliers right at the tip for a tiny loop or a bit further up for a bigger one.
Coils
SIMPLE COIL
1 Cut 1 x 15cm (5.9in.) of 0.8mm (20ga) wire, 1 x 25cm (9.8in.) of 0.6mm (22ga) wire and 1 x 50cm (19.7in.) of 0.4mm (26ga) wire. These are the kinds of lengths you need to create a small coil. For me, these would yield a 1.2cm (0.5in.) long coil, but all wire and resulting coil lengths depend on how tightly woven the base coil is and how neatly it is then wrapped around the main base wire. You can do the coiling by hand, but I prefer to use a cordless drill with an adjustable chuck. Wrap your 0.4mm (26ga) wire around the 0.6mm (22ga) wire about 3cm (1.2in.) from the right end a few times to anchor it. If you are using a drill, add your wires to the chuck. Push both of them in as much as possible and tighten.
REVIEWCOPY
2 Using a low speed on the drill, gently coil the wire until you have a coil approximately 3.5cm (1.4in.) long. This thin base coil will now be wrapped around our main base wire.
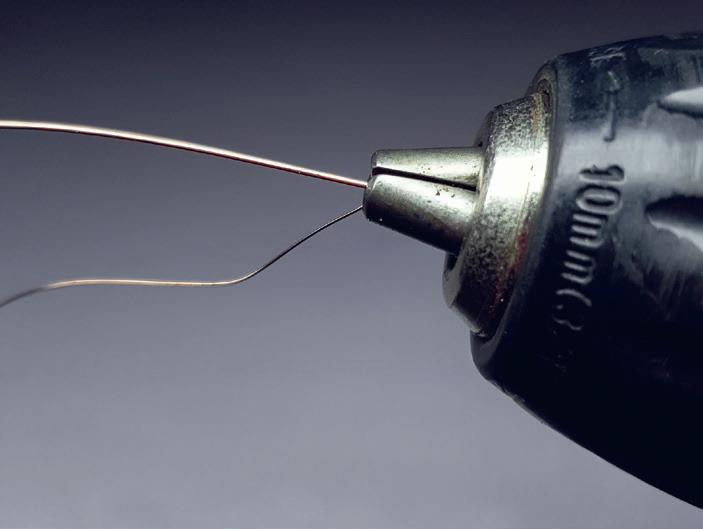
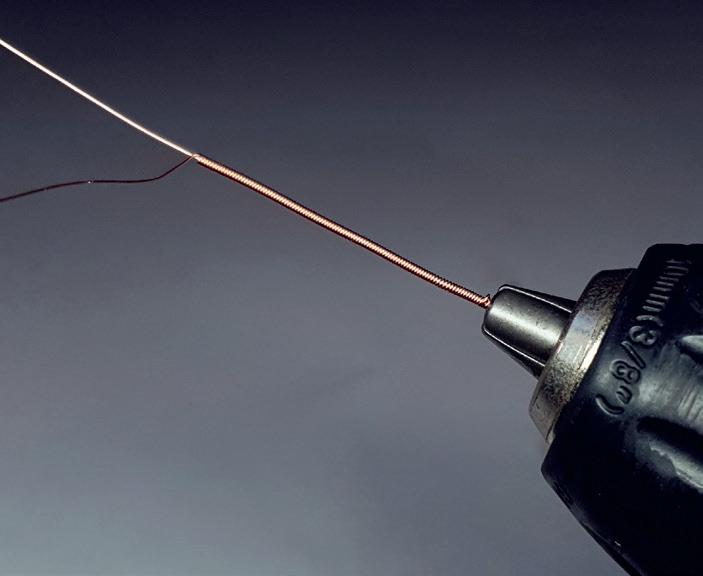
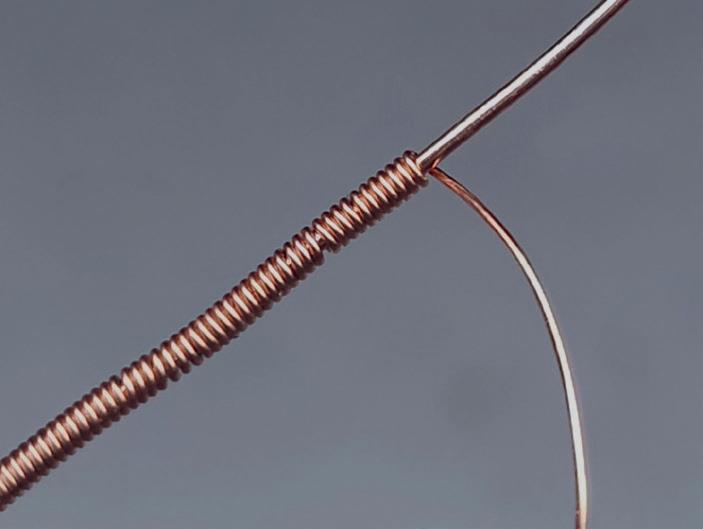
4 Wrap the same wire you have just looped in step 3 around all of the wires at the base twice. You can do more loops, but twice should be enough to secure everything. Use a pair of flush cutters to trim off any excess wire.
3 Using chain-nose pliers, anchor the base coil to the 0.8mm (20ga) wire about 1cm (0.4in.) to the right of the centre. If the coil is not central enough, you can shift it once complete. With longer coils, this will be a bit more difficult so be sure to move it into position well before finishing the coil.

Projects
With the following projects, my aim is to cover as many styles and techniques as possible. The beginner projects are simple designs that will help you ease yourself into wire work. Once you are comfortable, you can move on to the intermediate projects, where you can apply those newly learned techniques to explore the medium in more depth and find your own style. The advanced projects will teach you how to further expand on those skills and learn more complex techniques, stone settings and assembly processes.
Many techniques are used again and again in wire-work designs, and the projects refer to the sections of the book where these are set out in detail. See also the reference tables on pages 238–240, and the suppliers list on page 240 for suggestions on where to find the materials listed at the start of each project.
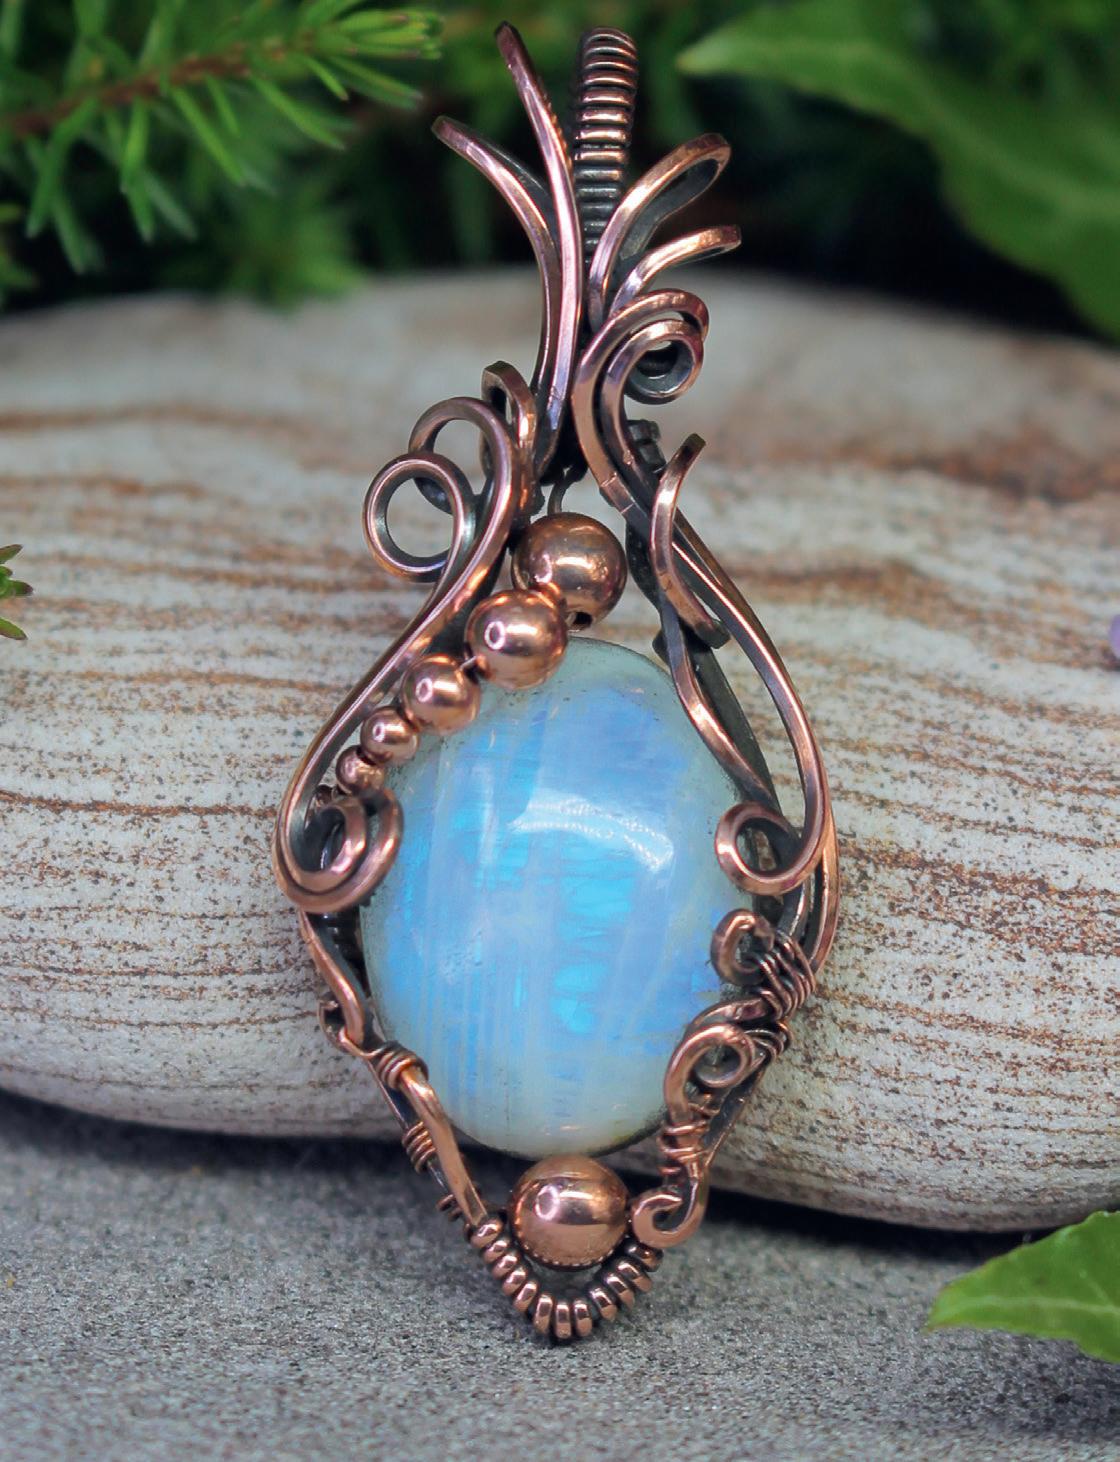
Note that the wire in these projects is always round, unless otherwise specified, and all wire lengths in the material lists have been rounded up slightly. Most of the projects are made with dead-soft copper wire, except on four advanced projects where I have used sterling and fine silver wire, and many also feature metal beads: hollow, seamless bare copper beads in the copper projects, and seamless sterling silver beads in the silver projects. I oxidise and polish my copper pieces and leave the silver pieces untarnished.
REVIEWCOPY

Hammered butterfly earrings
Beginner
MATERIALS & SPECIAL INSTRUCTIONS
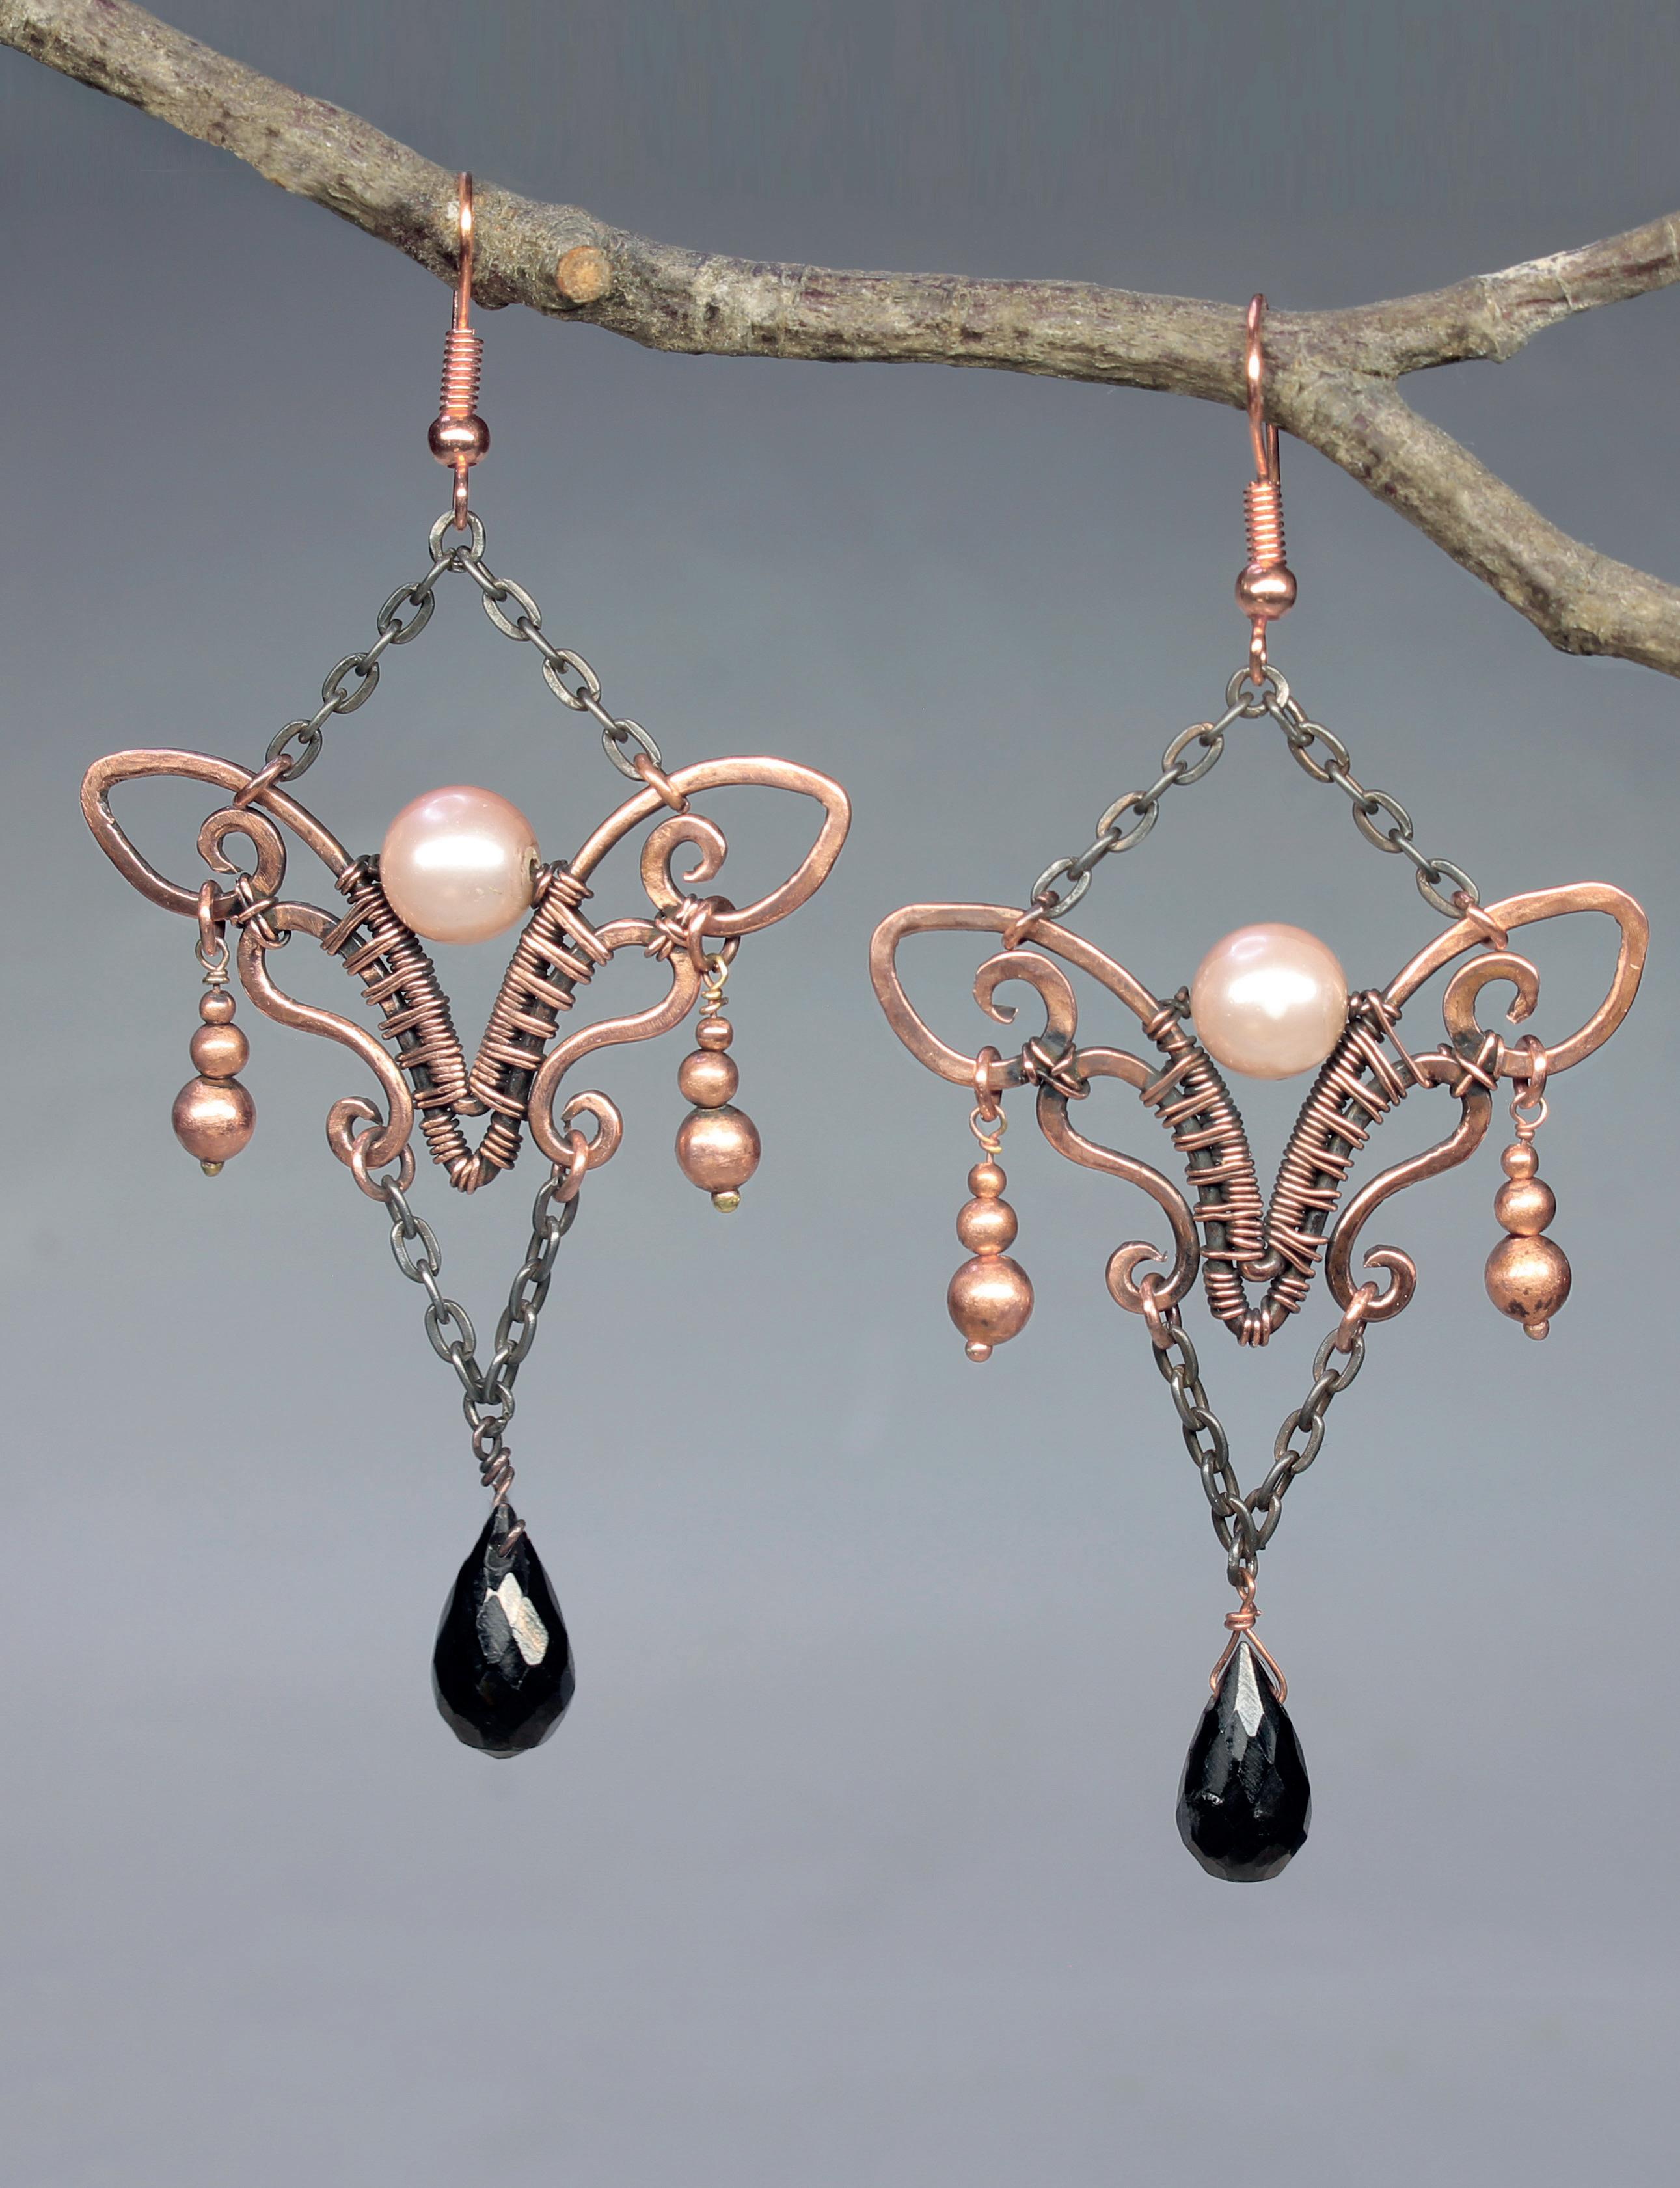
In this guide, I will show you how to create hammered components and how to assemble them using weaving wire. I have used dead-soft bare copper wire – which I have oxidised – for this piece, but you can use any type of wire you like. Bear in mind that hammering will damage the plating on coated wires, and the colour can be chipped or marked when working plated wire with tools. The list of materials covers all you need for two earrings, and this guide takes you through making both earrings simultaneously. This method will help to ensure that your pieces are the same size and as symmetrical as possible. Instructions on how to create the basic weaves and stone settings used for this design are found in the weave library.
TECHNIQUES NEEDED
• 2 by 3 weave (see page 32)
• wrapped loop (see page 52)
• shepherd’s hook ear wires (see page 50)
• jump rings (see page 46)
WIRE
• 50cm (19.7in.) of 1.3mm (16ga) wire
• 250cm (98.4in.) of 0.4mm (26ga) wire
STONES, BEADS AND FINDINGS
• 2 x 4–8mm gemstone drops or pears
• 2 x 8mm drilled shell pearls
• 4 x 4mm beads
• 4 x 3mm beads
• 4 x 2mm beads
• 20cm (7.9in.) of box chain, or similar
• 2 x shepherd’s hook ear wires
MAKE YOUR OWN FINDINGS
Shepherd’s hook ear wires:
• 20cm (7.9in.) of 0.4mm (26ga) wire
• 10cm (3.9in.) of 0.6mm (22ga) wire
• 2 x 2mm or 2.5mm beads
Jump rings:
• 10cm (3.9in.) of 0.8mm (20ga) wire

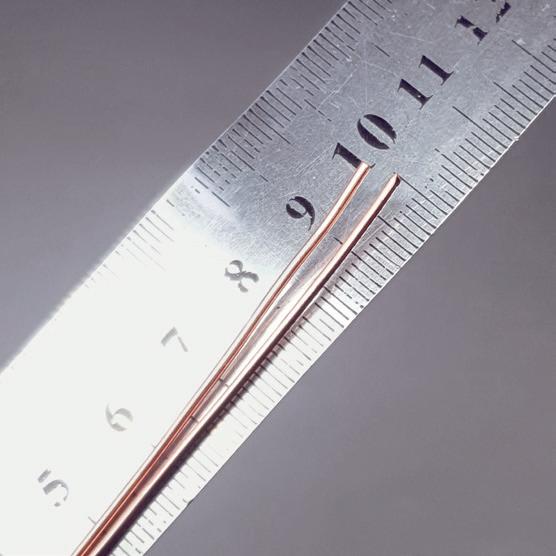
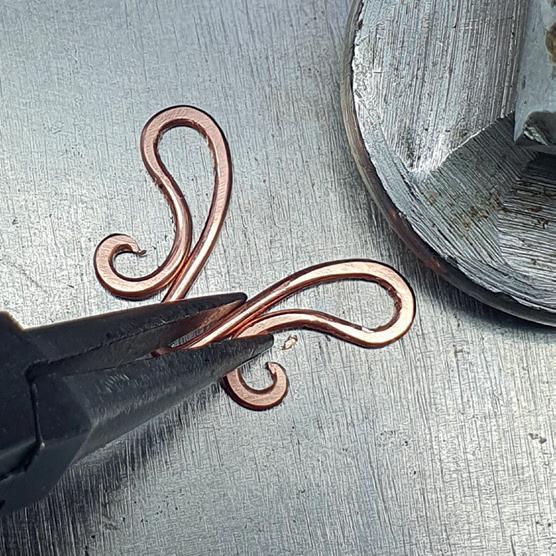
1 Cut 2 x 10cm (3.9in.) of 1.3mm (16ga) wire, one for each earring.
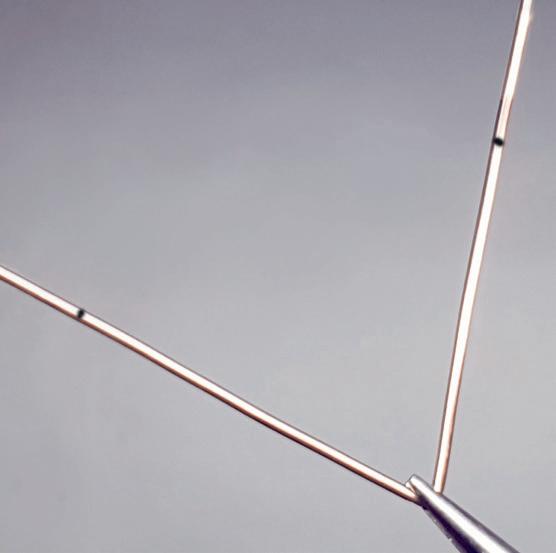
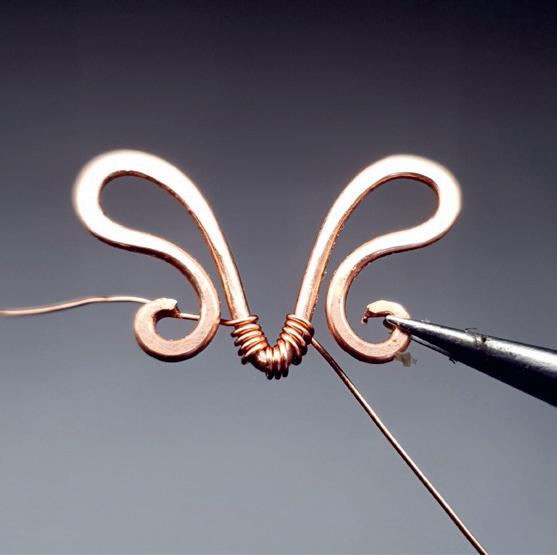
2 Fold these wires in half. Measure out around 22mm (0.9in.) from the bottom of the ‘V’ and mark with a marker pen. Use the template, if helpful.
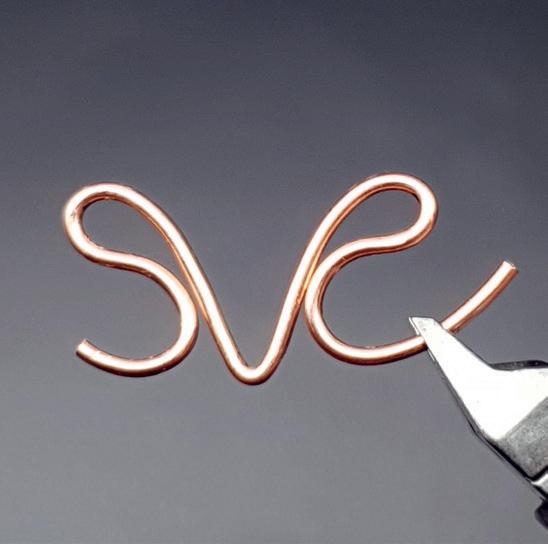
3 Using a pair of bail-making pliers or round-nose pliers, fold the wire outwards as shown. Ensure the mark you made earlier is at the top-centre of the loop. Try to make both loops the same size.
4 Shape the wire so that it folds back on itself, towards the ‘V’, then curl it outwards as shown. You are now creating a swirl. For this, you need to trim off any excess wire. Leave around 1cm (0.4in.) to have enough wire to create the swirl.
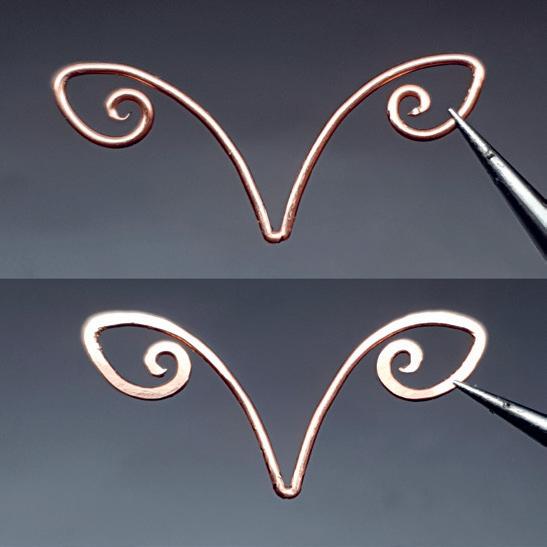
5 Use round-nose pliers to create a tight swirl. To achieve a pointed tip, gently squeeze the wire with the pliers as you twist it. This will shape the wire and narrow it down to a point.
6 Create a second shape, ensuring that your counterpart is as symmetrical as possible.
1:1 scale frame. Trace the outlines with your wire to create 1:1 scale components for your earrings.
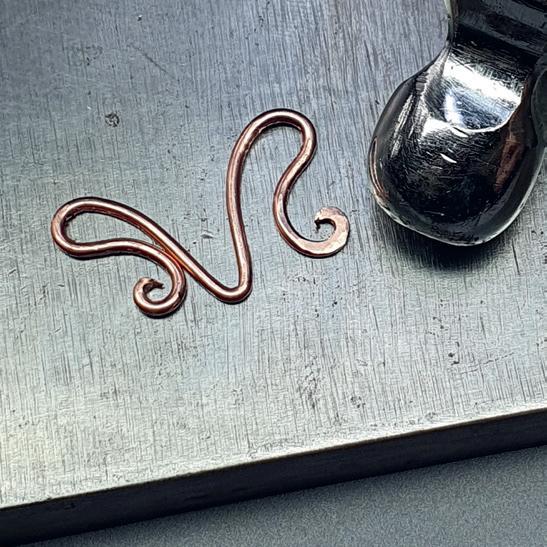
7 Once you are satisfied with the symmetry, pull the swirls away from the ‘body’. This is so that you can hammer the swirl without accidentally marking the ‘V’. Hammer the swirl (see page 235).
8 Next, close up the swirl and hammer the top loop. You can use a pair of pliers to stop the frame from distorting as you hammer it.
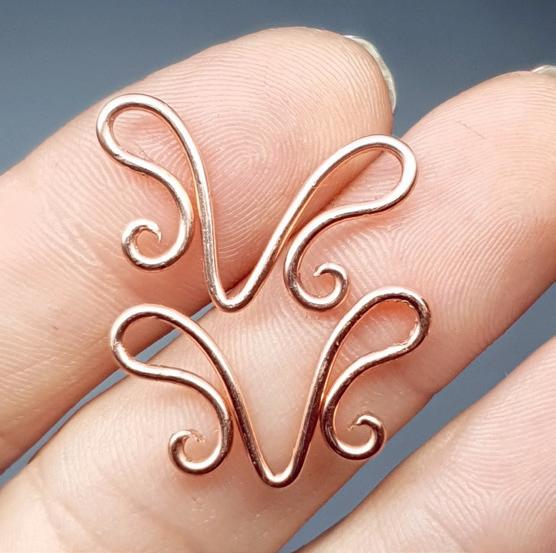
9 Cut 2 x 10cm (3.9in.) of 1.3mm wire, one for each earring. Find the midpoint and fold in half. Measure out around 4cm (1.6in.) from the bottom of the ‘V’. Mark with a marker pen.
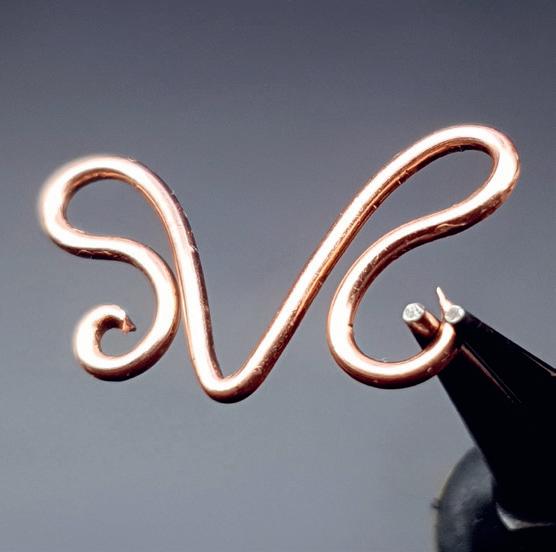
10+11 Shape the wire. Hammer the top loops. Repeat with the other wire.
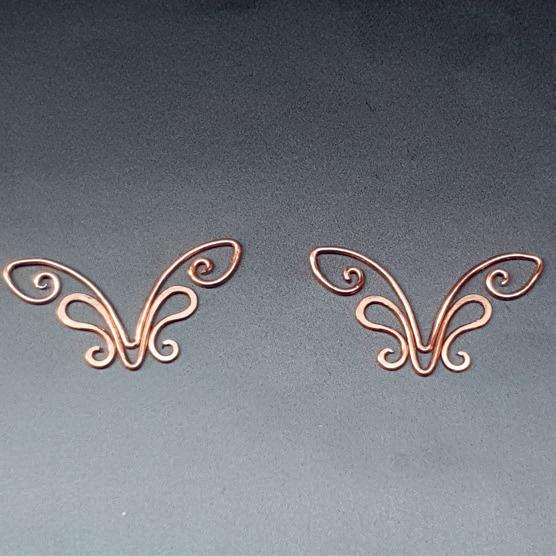
12 This is what your components should look like at this point. A good fit and symmetry is important, so manipulate the components if necessary.
REVIEWCOPY
13 Cut 2 x 100cm (39.4in.) of 0.4mm (26ga) wire, one for each earring. Find the mid-point and attach to the ‘V’ of one of the small components. Create about nine or ten loops in total.


Shiloh swirly pendant
Beginner
MATERIALS & SPECIAL INSTRUCTIONS
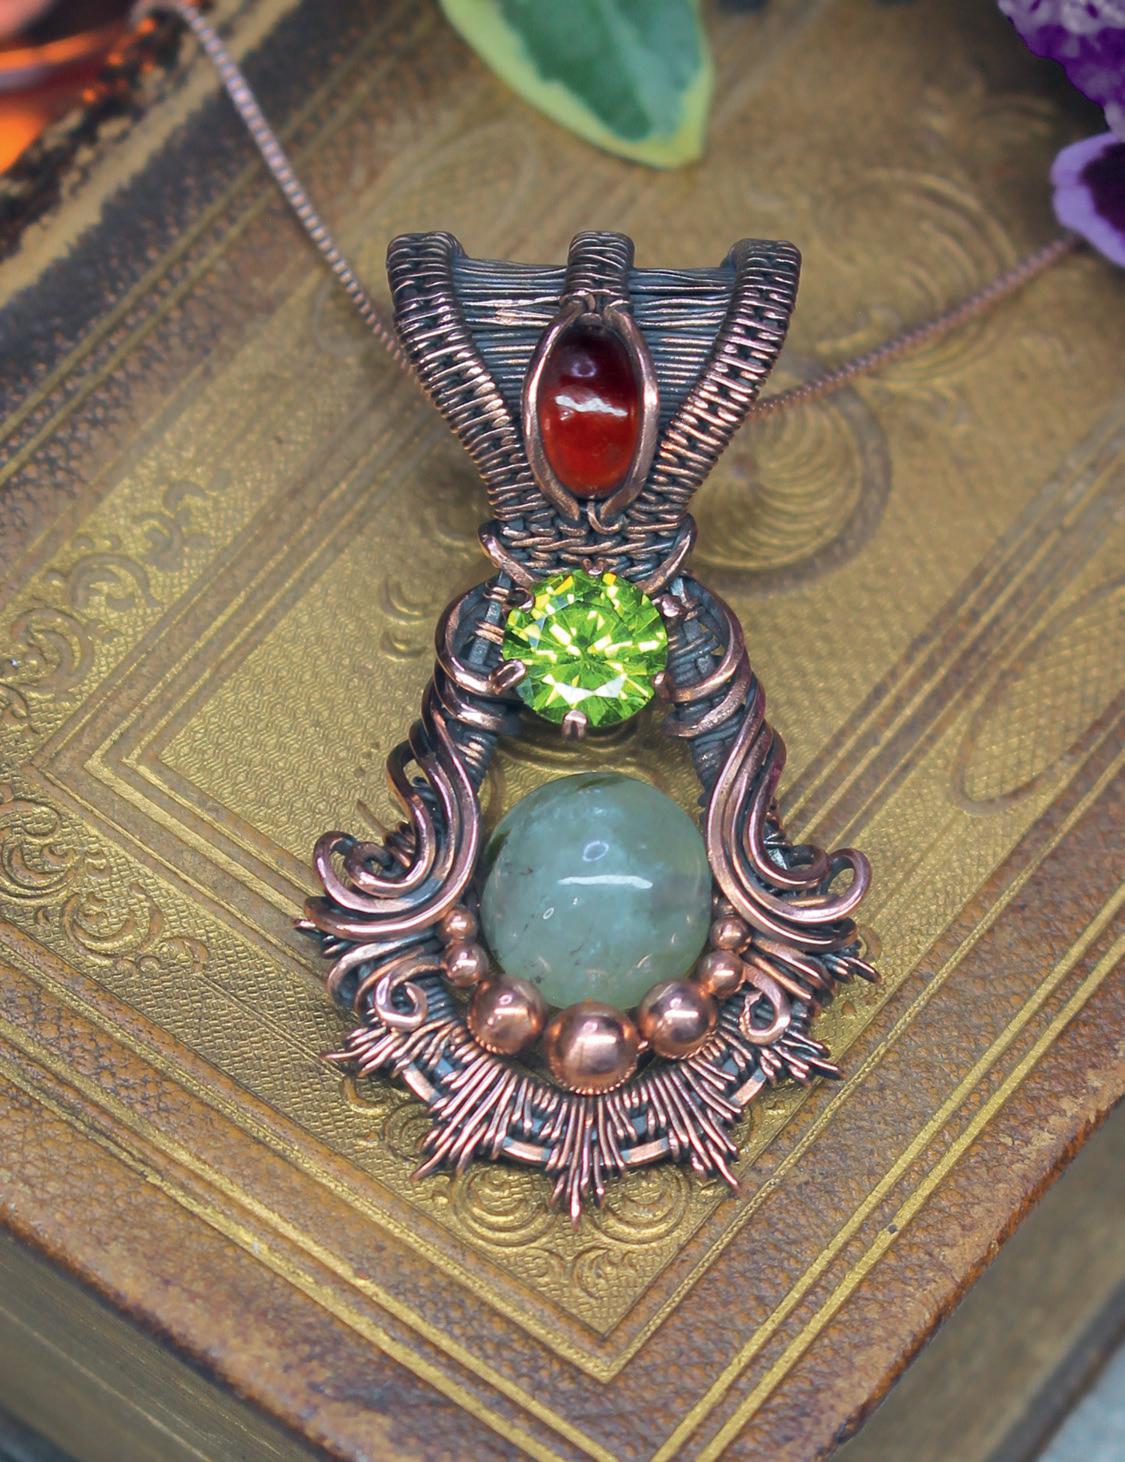
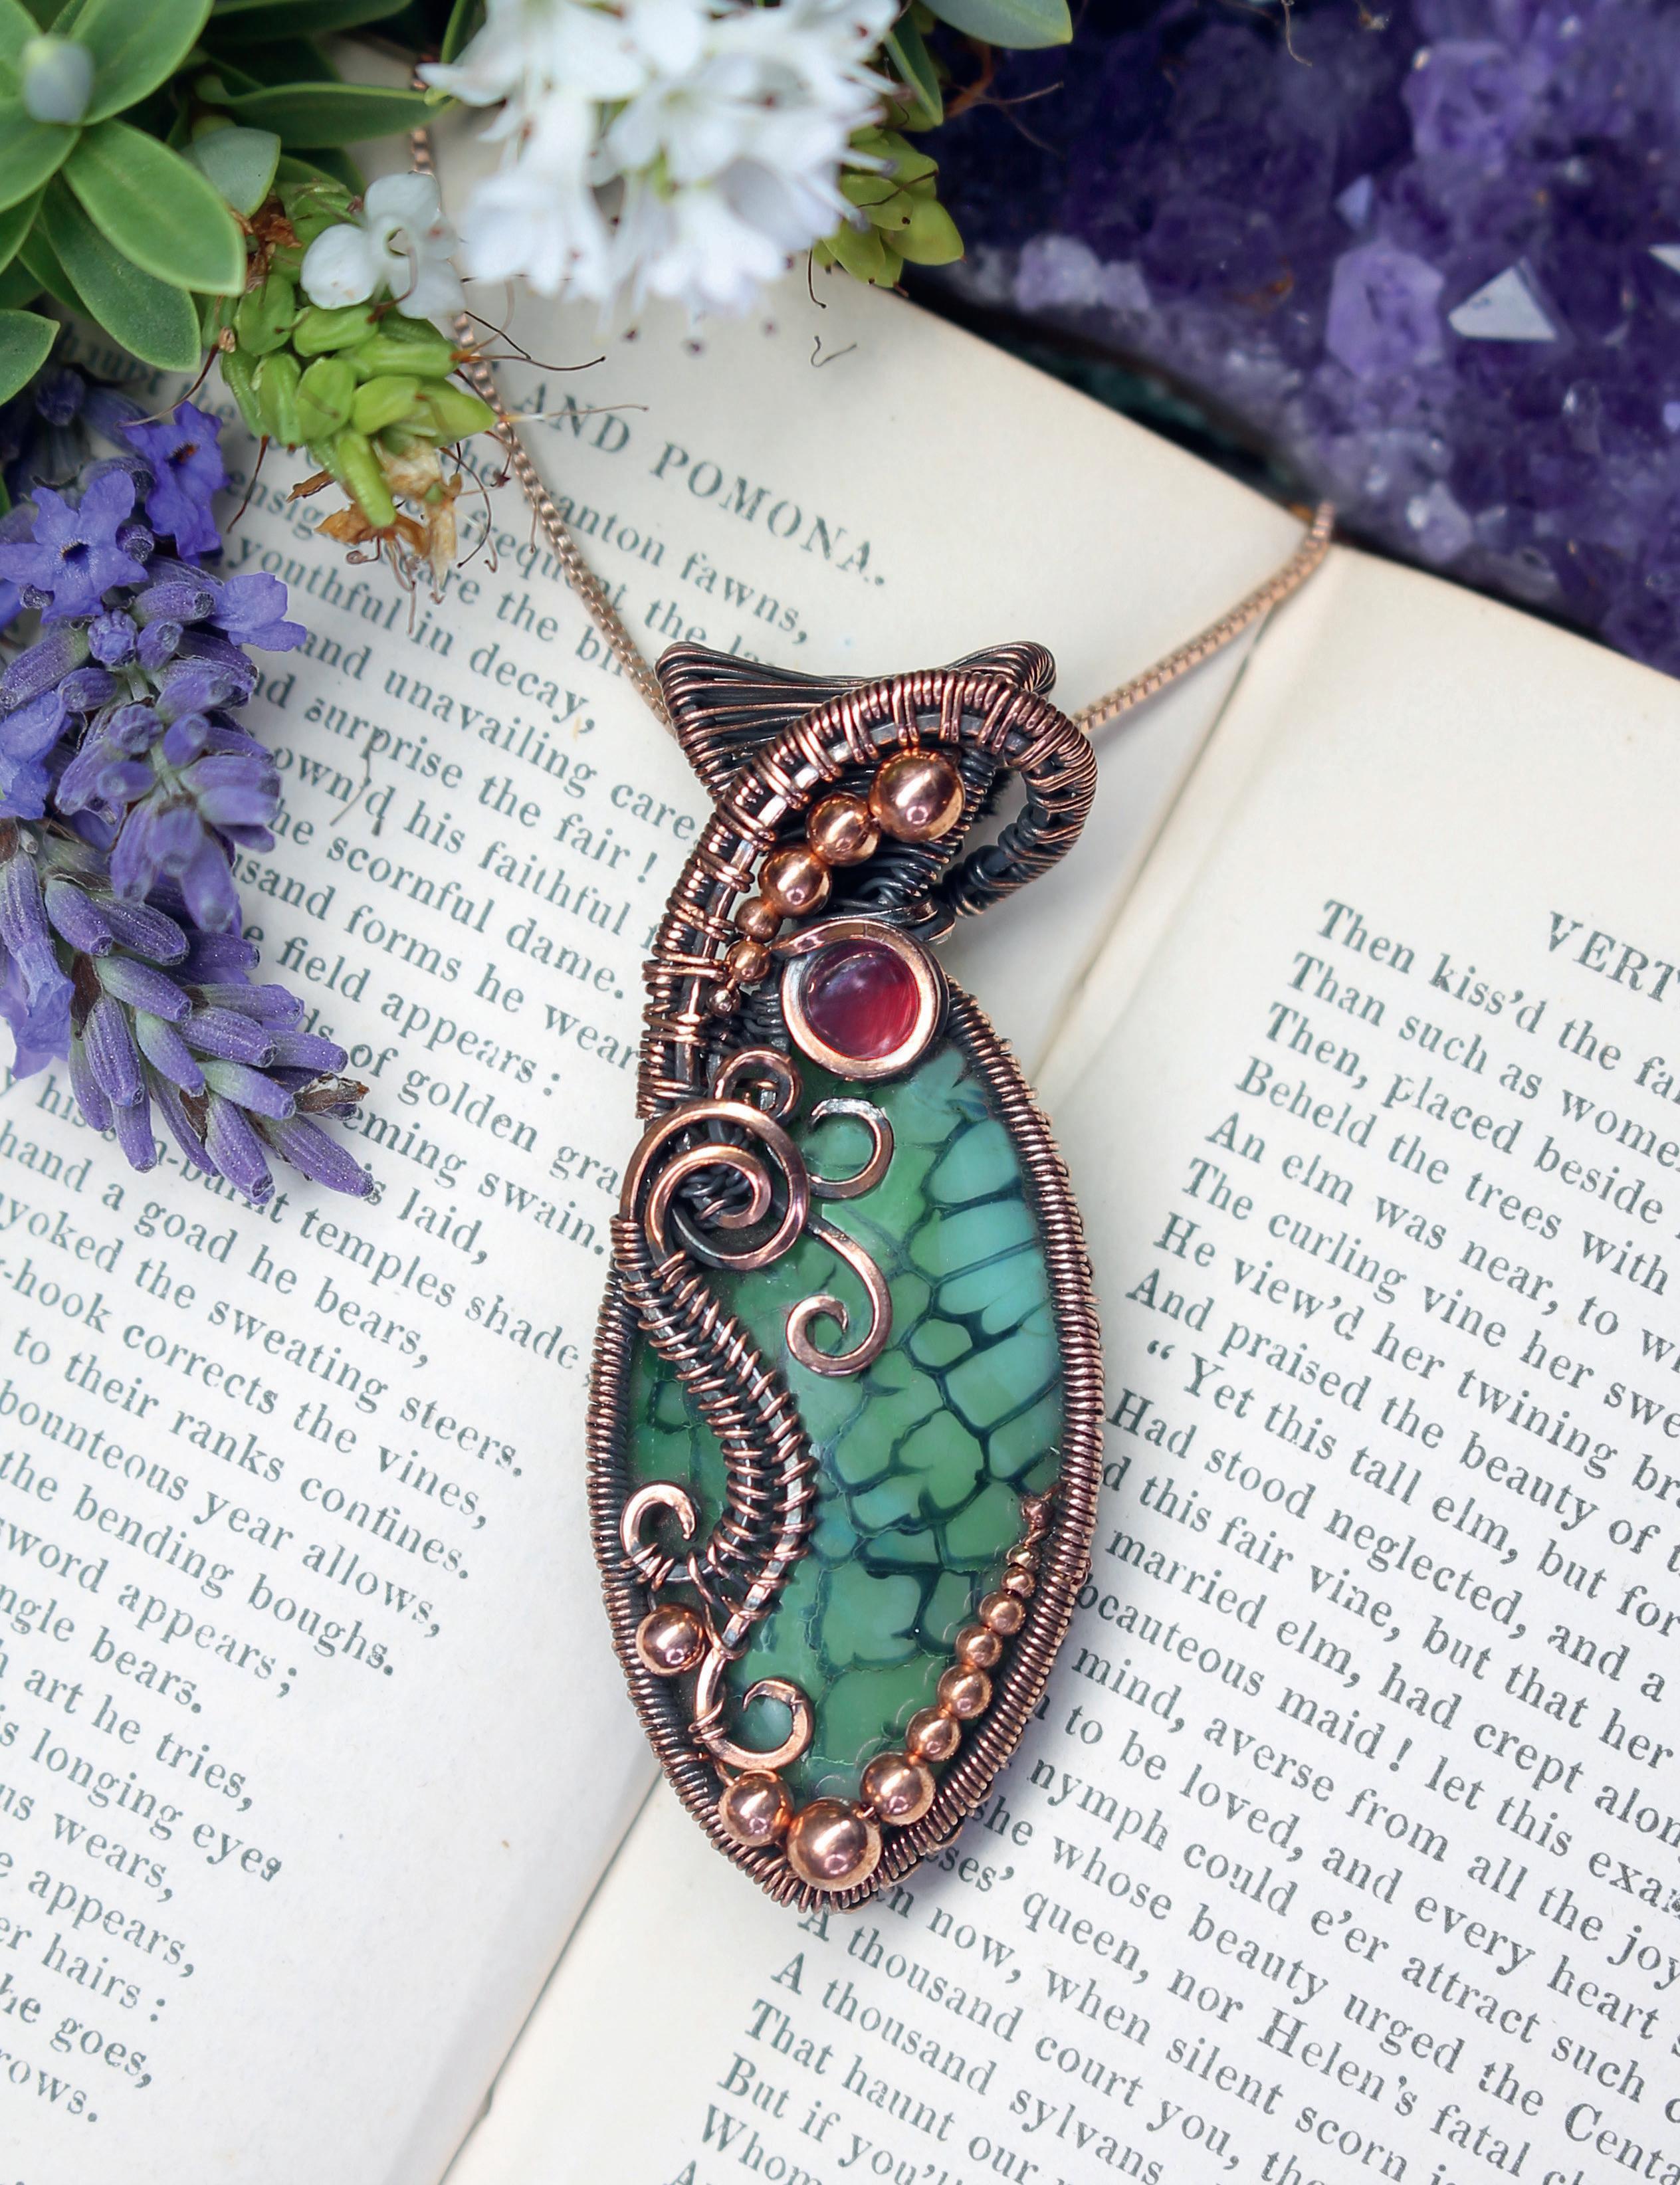
This project features an easy-to-create stone setting which is fantastic for setting focal and larger stones. I will show you how to create a ladder bezel and a figure-of-eight bail and how to use base wires to create detail. I have used bare copper wire – which I have oxidised – for this piece, but you can use any type of wire you like. Bear in mind that hammering will damage the plating on coated wires, and the colour can be chipped or marked when working plated wire with tools. This pendant was made using dead-soft copper wire.
TECHNIQUES NEEDED
• 2 by 5 weave (see page 32)
• figure-of-eight weave (see page 39)
• figure-of-eight bail (see page 66)
• cage frame/ladder frame (see page 88)
• lollipop (or coil) setting (see page 91)
WIRE
• 100cm (39.4in.) of 0.8mm (20ga) square wire
• 500cm (196.8in.) of 0.4mm (26ga) wire
STONES AND BEADS
• 1 x 40mm marquise gemstone (any shape can be adapted to this design)
• 1 x 6mm flat-back round cabochon
• 3 x 5mm beads
• 3 x 4mm beads
• 4 x 3mm beads
• 4 x 2.5mm beads
• 5 x 2mm beads
REVIEWCOPY
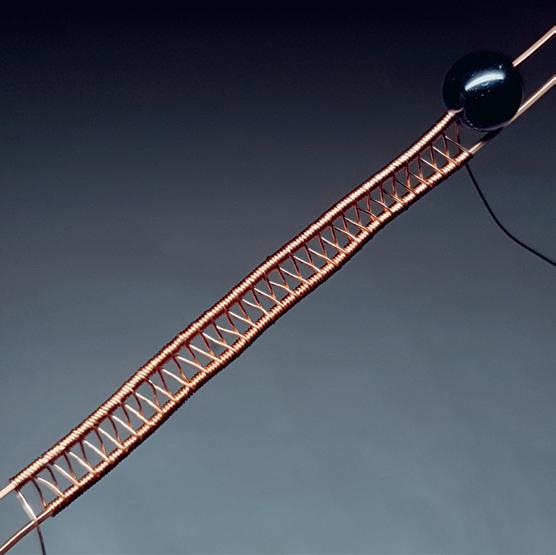
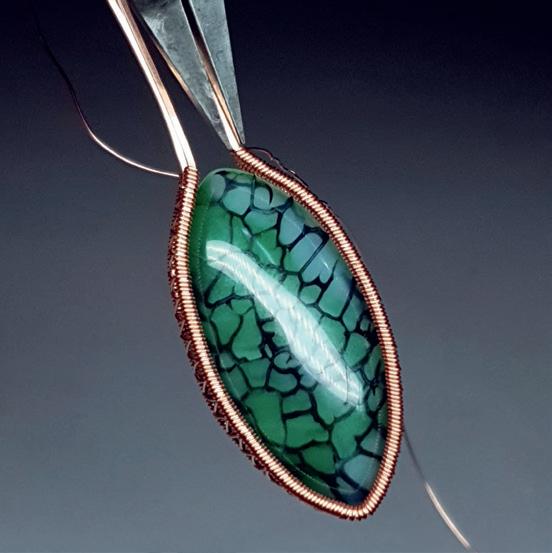
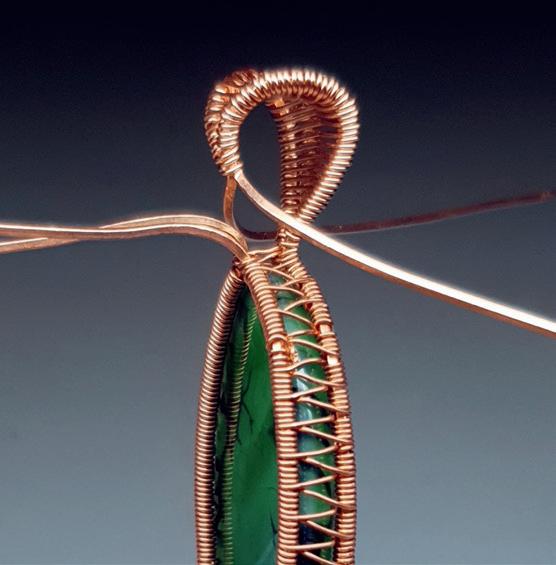
1 Cut 2 x 35cm (13.8in.) of 0.8mm (20ga) square wire and 1 x 200cm (78.7in.) of 0.4mm (26ga) wire. Create a ladder bezel which is long enough to fully reach around your stone – in this case, roughly 40mm long. (See the ladder bezel tutorial on page 88.) The weave ends should just touch once the bezel is wrapped around the stone. You can always take off or add in weaves wherever necessary. Next, measure the weave to find the bezel’s mid-point.
2 Fold the bezel in half and wrap it around your stone. Be sure to ‘mould’ the bezel against the stone as much as possible to ensure a snug fit.
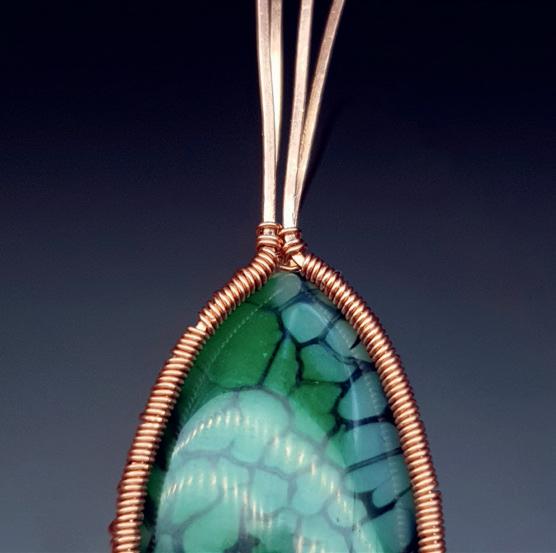

3 Tie the four wires together with a figure-of-eight weave (see page 39).
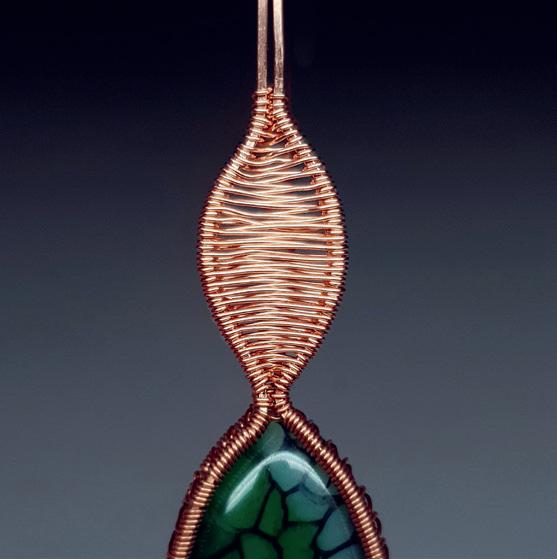
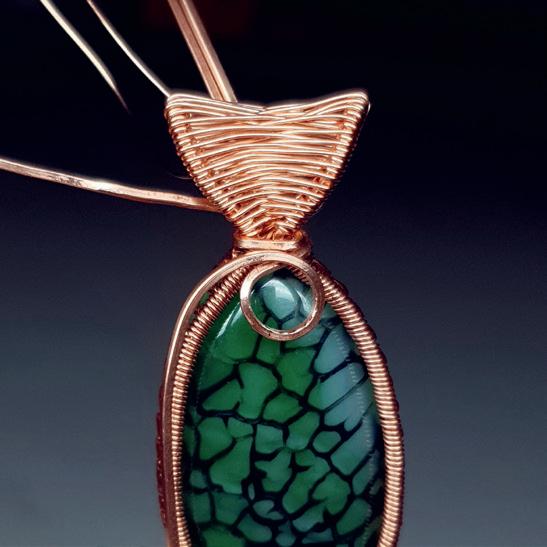
4 Cut 1 x 150cm (59in.) of 0.4mm (26ga) wire, and create a figure-ofeight bail (see page 66).
5+6 Bend the bail over on itself with one base wire passing on each side of it, as shown. You can use a mandrel to shape the bail, but I usually just use my hands as the weave is very malleable and easy to manipulate. Wrap each ‘leg’ around the base of the bail in opposing directions to tie it off.
REVIEWCOPY
7 Use the 0.8mm (20ga) wire coming from the right to create a loop. The loop should be just big enough to fit snugly around your flat-back round cabochon.
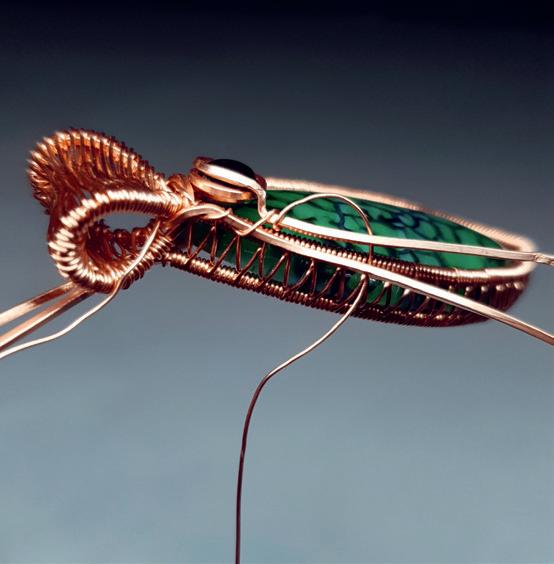
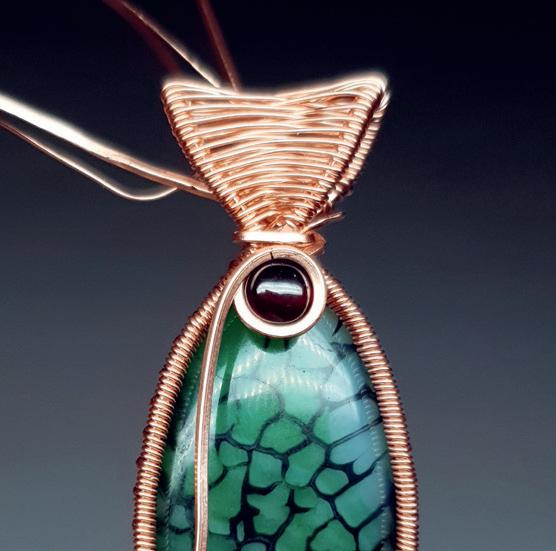
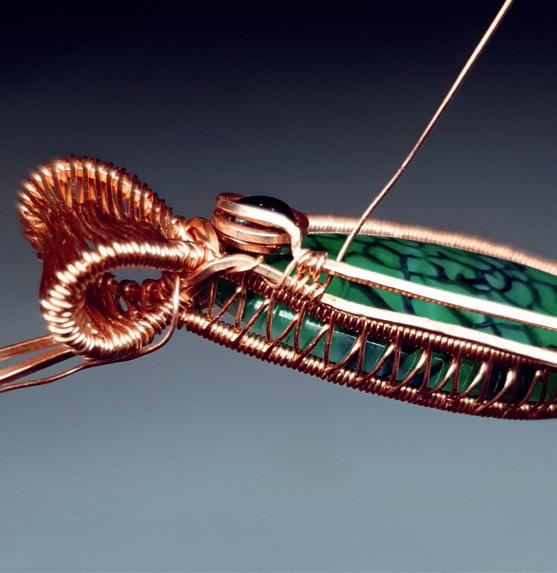
8 Add your cab and coil the 0.8mm (20ga) wire around and then over it. Stop coiling once the wire sits over the curvature of the stone, as that is enough coverage to hold the stone in place. You don’t want to do too many coils as that will make the setting too bulky. You can use a drilled bead instead of a cab if you find this setting too challenging.
9 Next, you need to ‘step down’ the square bail wire to bring it in line with the second 0.8mm (20ga) square wire that ties off the bail. Using chainnose pliers, bend the wire to the left downwards at a 90° angle, keeping it close to the stone. Then bend the wire along at a 90° angle so that it is in line with the second bail wire.
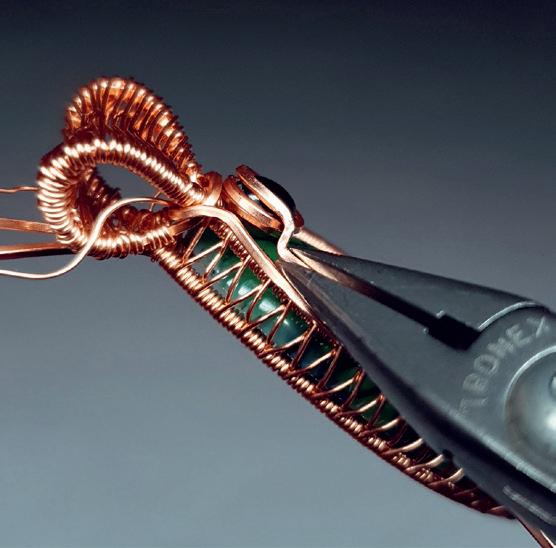
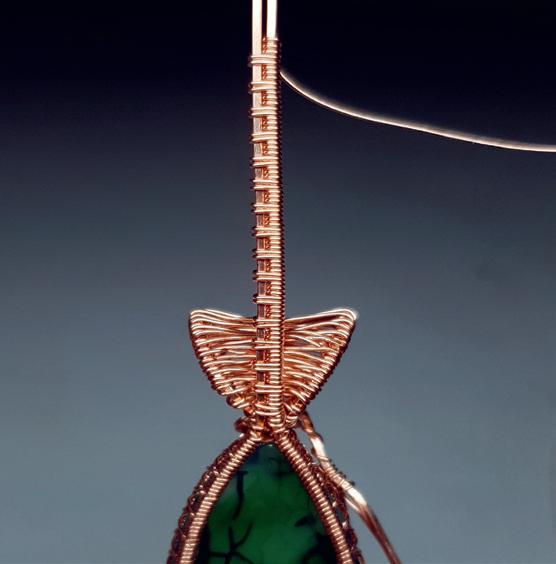
10 Cut 1 x 100cm of (39.4in.) 0.4mm (26ga) wire. Measure out 60cm (23.6in.) and attach it to the lower square bail wire, as shown. The longer end of the 0.4mm (26ga) weaving wire should point to the back. Use the shorter end to tie the two square bail wires together at the side of the stone.
11 Continue to tie the two base wires together with a double figure-of-eight weave (see page 39).
12 Next, concentrate on the two square wires at the back. These are the wires that make up the back of the bezel. Use the 60cm (23.6in.) piece of weaving wire to create around 16 sets of 2 by 3s (see page 32, variation B). You may need to add or remove sets of this weave, depending on your design.
Create a swirl
Bend the wire here
Tie together here
