6 minute read
MAiNTENANCE CoRNER - TyRES
TYRE REPAIR - THE BLACK ART EXPLAINED
By Tony Gray, Member #3905
If you ride your motorbike any further than the corner coffee shop then you should carry a tyre repair kit with you and know how to use it effectively. Cars have the advantage of room to carry a spare wheel (or they did have before the marketing and accounts departments introduced space saver wheels and run flat tyres). Here is a comprehensive list of what you should carry: 1. The ‘traditional’ tubeless tyre repair kit that should contain repair strings (plugs) and glue, a reaming tool, an inserting tool and a sharp bladed trimming tool. Alternative screw & snap inserts are also available (Cargol Brand). 2. A means of getting air back into the tyre. This may be an electric compressor, a foot or hand pump and/or compressed air cylinders with a valve adapter to connect to the tyre valve.
3. Spare tyre valves and a valve insertion tool. 4. Water.
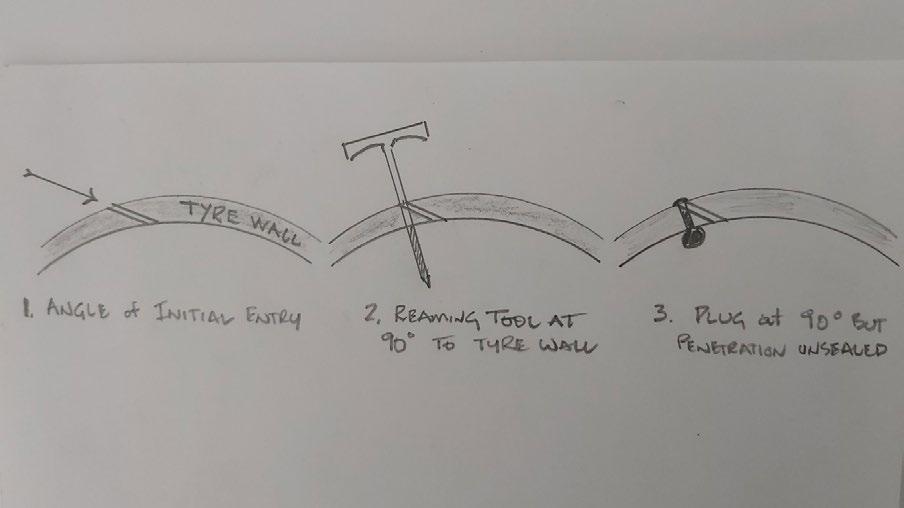
5. A pencil type tyre gauge. 6. A probe to test the angle of the puncture. There are some things to consider when choosing your inflation device. An electric compressor runs off your bike’s battery so the engine should be running while using the compressor so you don’t drain the battery. That is fine with a liquid cooled bike but not so for an air cooled bike that will quickly overheat if run at idle for any extended length of time especially in hot weather. Compressed CO2 cylinders are ‘one use’ so having a ‘back up’ especially on a long trip should be considered. It will require 4 of the standard cylinders to inflate a 150 rear tyre to approx. 30psi. ie 7-8 psi / cylinder. Beware that compressed gas releasing from these cylinders is extremely cold so hand protection is required. Now you are riding along and you get that ‘my rear end is sliding around’ feeling. Fortunately most punctures affect the rear wheel as the front wheel ‘flicks’ up the sharp object and presents to the rear wheel ready to create maximum carnage. Most times the cause of your sudden deflation will be visibly obvious – a screw or nail imbedded in your tyre. If no obvious obstruction and the tyre is still partially inflated then listen for air escaping. If you cannot hear any noise then applying water (soapy water is best) around the tyre progressively may let you see bubbles forming where the air is escaping. If still no success or your tyre has fully deflated then introduce more air to the tyre to trace the leak location. A faulty valve may be the culprit? Remove the valve cap and cover the opening with spittle – escaping air will blow out the spittle ‘bubble’. A faulty valve has to be unscrewed with the special tool and new valve inserted in the reverse manner. OK you have found the source of the leak. As you remove the obstruction check the angle that it entered the tyre. If the obstruction does not provide any evidence of the angle of entry then probe the hole gently with a stiff small diameter probe. Something like coat-hanger wire would be suitable. If the sharp object has entered the tyre at an angle and you push the reaming tool it at right angles to the tyre then it is very unlikely you will get an effective seal. Thanks to Club Life Member Tony Malone for this insight. This exact scenario happened to Tony on his R1200RT and eventually resulted in a ride home in an RACQ recovery truck.
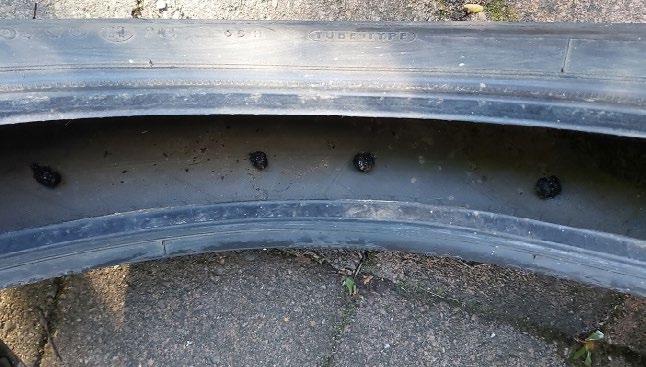
Next use the reaming tool to clean out the hole. The tyre may not be be fully deflated. It is possible to repair the tyre while it still retains air. It may make the insertion of the repair string a bit more difficult but you won’t need to reintroduce as much air to get you back on the road. See what works best for you! Push a repair string through the insertion tool eye to the mid-point of the plug. It may be necessary to open up the eye of the tool slightly to get the plug pushed through. Apply glue to the string then push into the hole leaving a tail exposed. Don’t push the whole string into the tyre or you will have to start again with a new string. Wait until the glue ‘goes off’ meaning it is no longer wet but just tacky. Do not trim the string at this stage. Inflate the tyre and listen for any leak. If no further leak then trim off the excess string just above the tyre face. Leave about 3mm exposed. If you are plugging a split in the tyre and there is still air escaping then it is acceptable to put a second string in against the first. You should be able to see or feel where the air is escaping so plug at that point. The small tubes of rubber glue are one use – they dry out after opening. I use proprietary brand Selleys rubber glue as an alternative. Others have effectively plugged a tyre with no glue but the glue does lubricate the string making it easier to insert. The screw & snap ‘cargol’ plugs are straight forward (but quite expensive) – just follow the instructions. This type of plug is hard plastic and gets screwed into the penetration in the tyre then the head is snapped off leaving the threaded plug in the penetration. No glue is required. Hopefully you will be one of the lucky riders and never have to affect this roadside repair but best to be prepared. I do a lot of miles and I have had half a dozen punctures in the past 10 years. We had an informative test and try session at the last service day so if you missed that session but would like to test your skill level then let me know and I will bring a tyre and repair kit along to a future service day. Here is what a repair plug looks like from the

BMWMCQ TRAINING COURSE SUBSIDY
Your club encourages all members to continue to improve as a rider and offers a financial incentive to foster greater uptake in rider training. A broad interpretation of training has been adopted to include First Aid Training and Traffic Accident site safety management. The intention of the subsidy scheme is to not only improve the road craft of individual members but also to enhance the safety and enjoyment of club runs and events for all participating members.
These are the simple rules to qualify for a subsidy:
1. Every financial member is eligible. 2. Subsidy is limited to one in three years for each member eg subsidy June 2021 re-eligible June 2024. 3. Subsidy provided in the form of a $50 reimbursement after course has been completed and invoice presented to the Treasurer. 4. The applicant must present details and receive approval for the intended training course from the Club Secretary prior to the course being undertaken.
There you have it, an incentive to help to make you a better and safer rider. If you undertake a course please let us know your thoughts on the success of the course, positive or negative.
Tony Gray - President BMWMCQ


