
3 minute read
The Countryside in July
Bullion Stitch
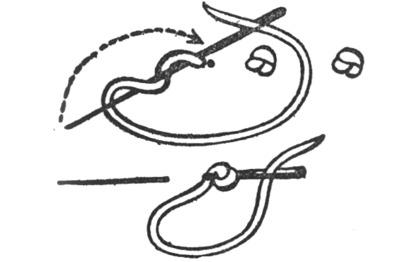
Bring your needle through your fabric at the point indicated by the arrow on the diagram above. Insert your needle back through your fabric at the required length of the stitch and bring it out exactly at the arrow again.
Advertisement
Don’t pull your needle right through, but leave it lying in the material as in the diagram and twist your thread around it close up to the emerging point. Six or seven twists are an average number, but this can be varied according to the length of stitch you want to make.
Place your left thumb upon the twists and pull your needle and thread through your fabric and also the twists as carefully as possible. Now pull your needle and thread away in the opposite direction. This movement will force your little coil of thread to lie flat in the right place. Tighten it up by pulling your working thread, then reinsert your needle at A. This should also be the end of your bullion knot if you’ve chosen the correct number of twists to fill the space.
French Knot

Bring your thread through to the front of your fabric at the place you want to place your knot. Hold it down firmly with your left thumb and first finger and twist your needle two or three times around the held thread as shown by the upper needle in the diagram above. Then, with your twists pulled fairly tightly around your needle and the thread still held firmly in your left hand, turn your needle around and push it back through your fabric very close to where it first emerged, still keeping your thread tight with your left thumb. Pull your thread through firmly and the knot will be left on top. If you’re having problems check that you’re twisting the thread around the needle in the same direction as the diagram above and keeping your thread nice and taut. The secret of successful French knots is in the correct twist of the needle and the tautness of your thread.


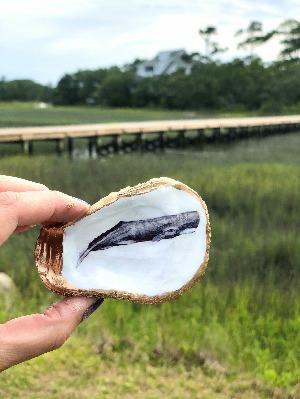
talks to us about where she finds her inspiration, involving her children in her design process and how she started her business,
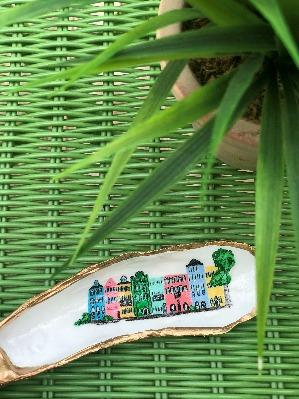
Based in North Carolina, I start each of my oysters by Erica is constantly inspired by hand painting an image. Usually the beautiful creations of the I start with a quick draw/paint coast. After working in a and build from there. Once I variety of mediums, she has become fascinated with acrylics and painting coastal themed images.
It started during my senior year of high school when I took an art class and loved it so much that I ended up going to college to study Graphic Design. I have always loved creating and have done a lot of projects for family and friends. I finally decided to jump all in and start my own business. come up with a design I love, I spend the time to perfect the painting!
I love creating with my kids and listen to them when I want to be inspired. I also love being in nature and find a lot of my inspiration there.
My typical work day consists of getting organized (I cannot create in clutter!!) then trying to do all my painting in steps. I paint a bunch of oysters at a time and then the next day I resin them all, then add the gold after that. I try to work in sections to be efficient with my time!


