16 minute read
Screen Tone Techniques
by Charlie San
Step right up. Don't be shy.
My name is Ton NUo
Oh, yes. Professor Pen told us that if we wanted to learn about screen tone, we should visit Professor Ton. By the way, I'm Keiko. Pleased to meet you.
And, Did you make any improvement with your pen studies? I heard all about you two from Professor Pen.
So, you wanna learn about screen
tone, eh?
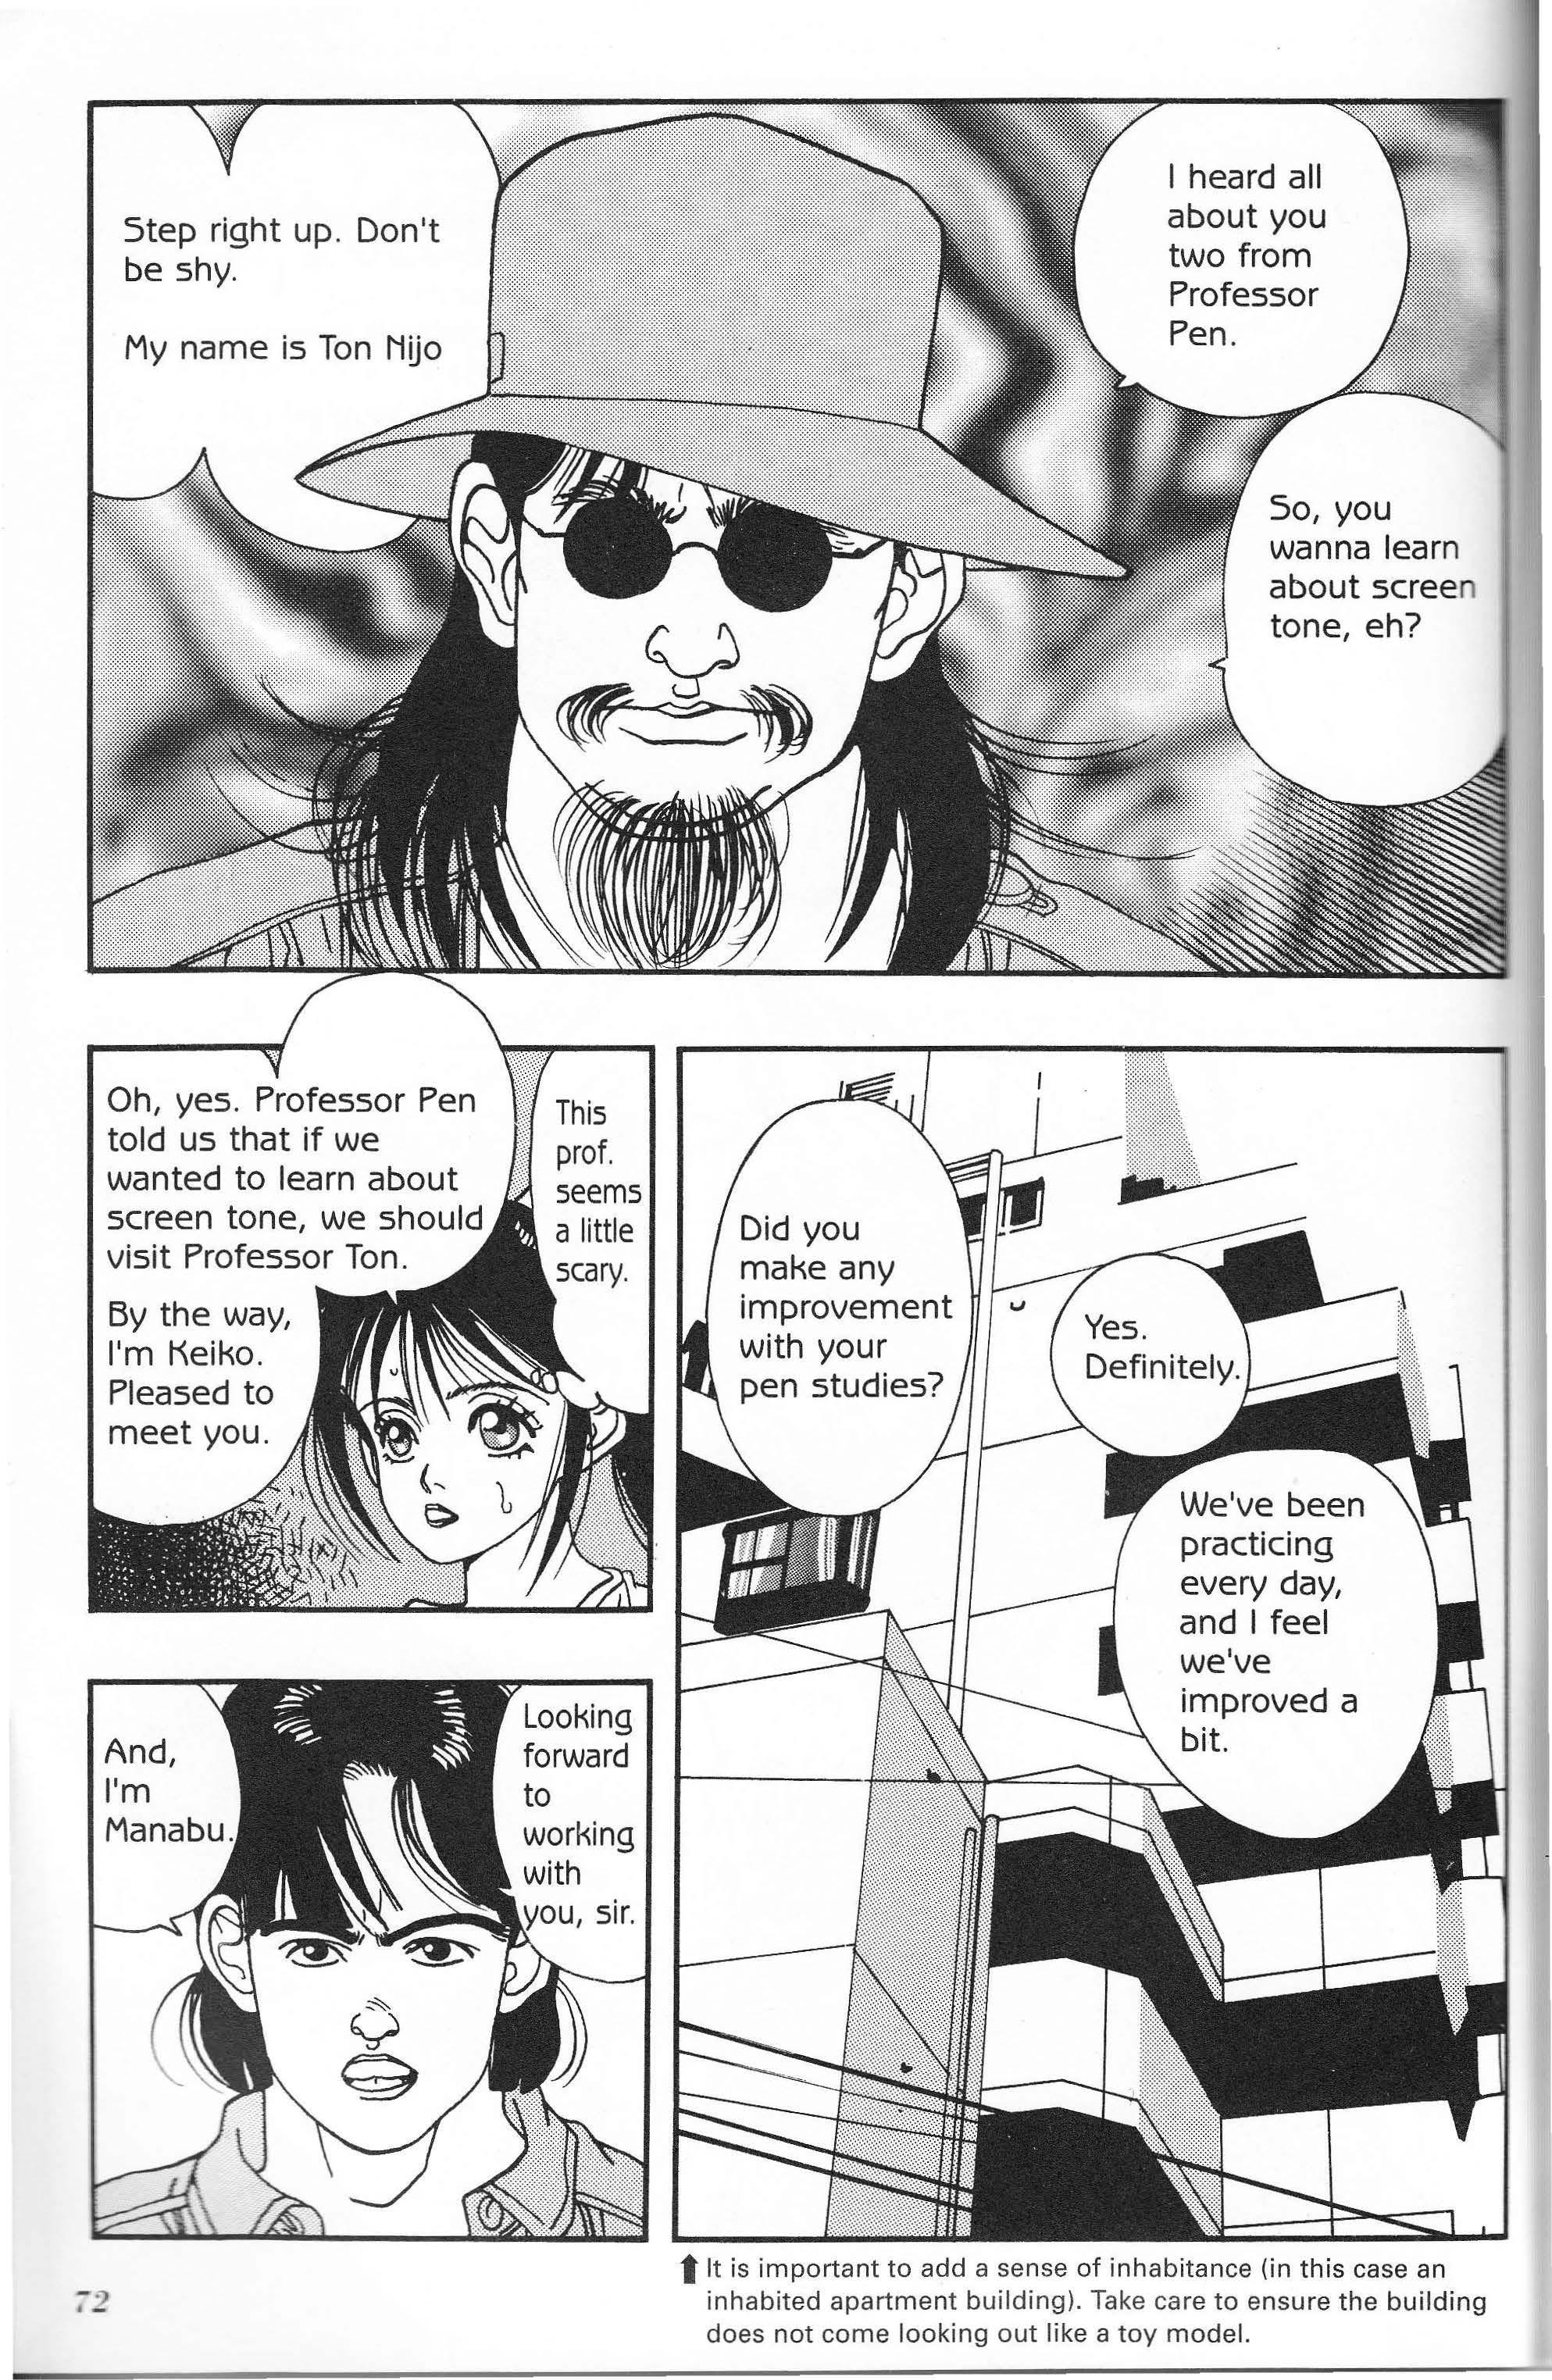
We've been practicing every day, and I feel we've improved a bit.
s important keep working ens, with tones all e to do I really hate all this laborDon't think you have it licked so easily, Manabu. What you have waiting for you is pretty intense
: :: littl e every day. Now let's get started on
screen tones. For that reason, you don't have to practice every day, like you do with pen strokes. Anyone can soon learn screen tone.
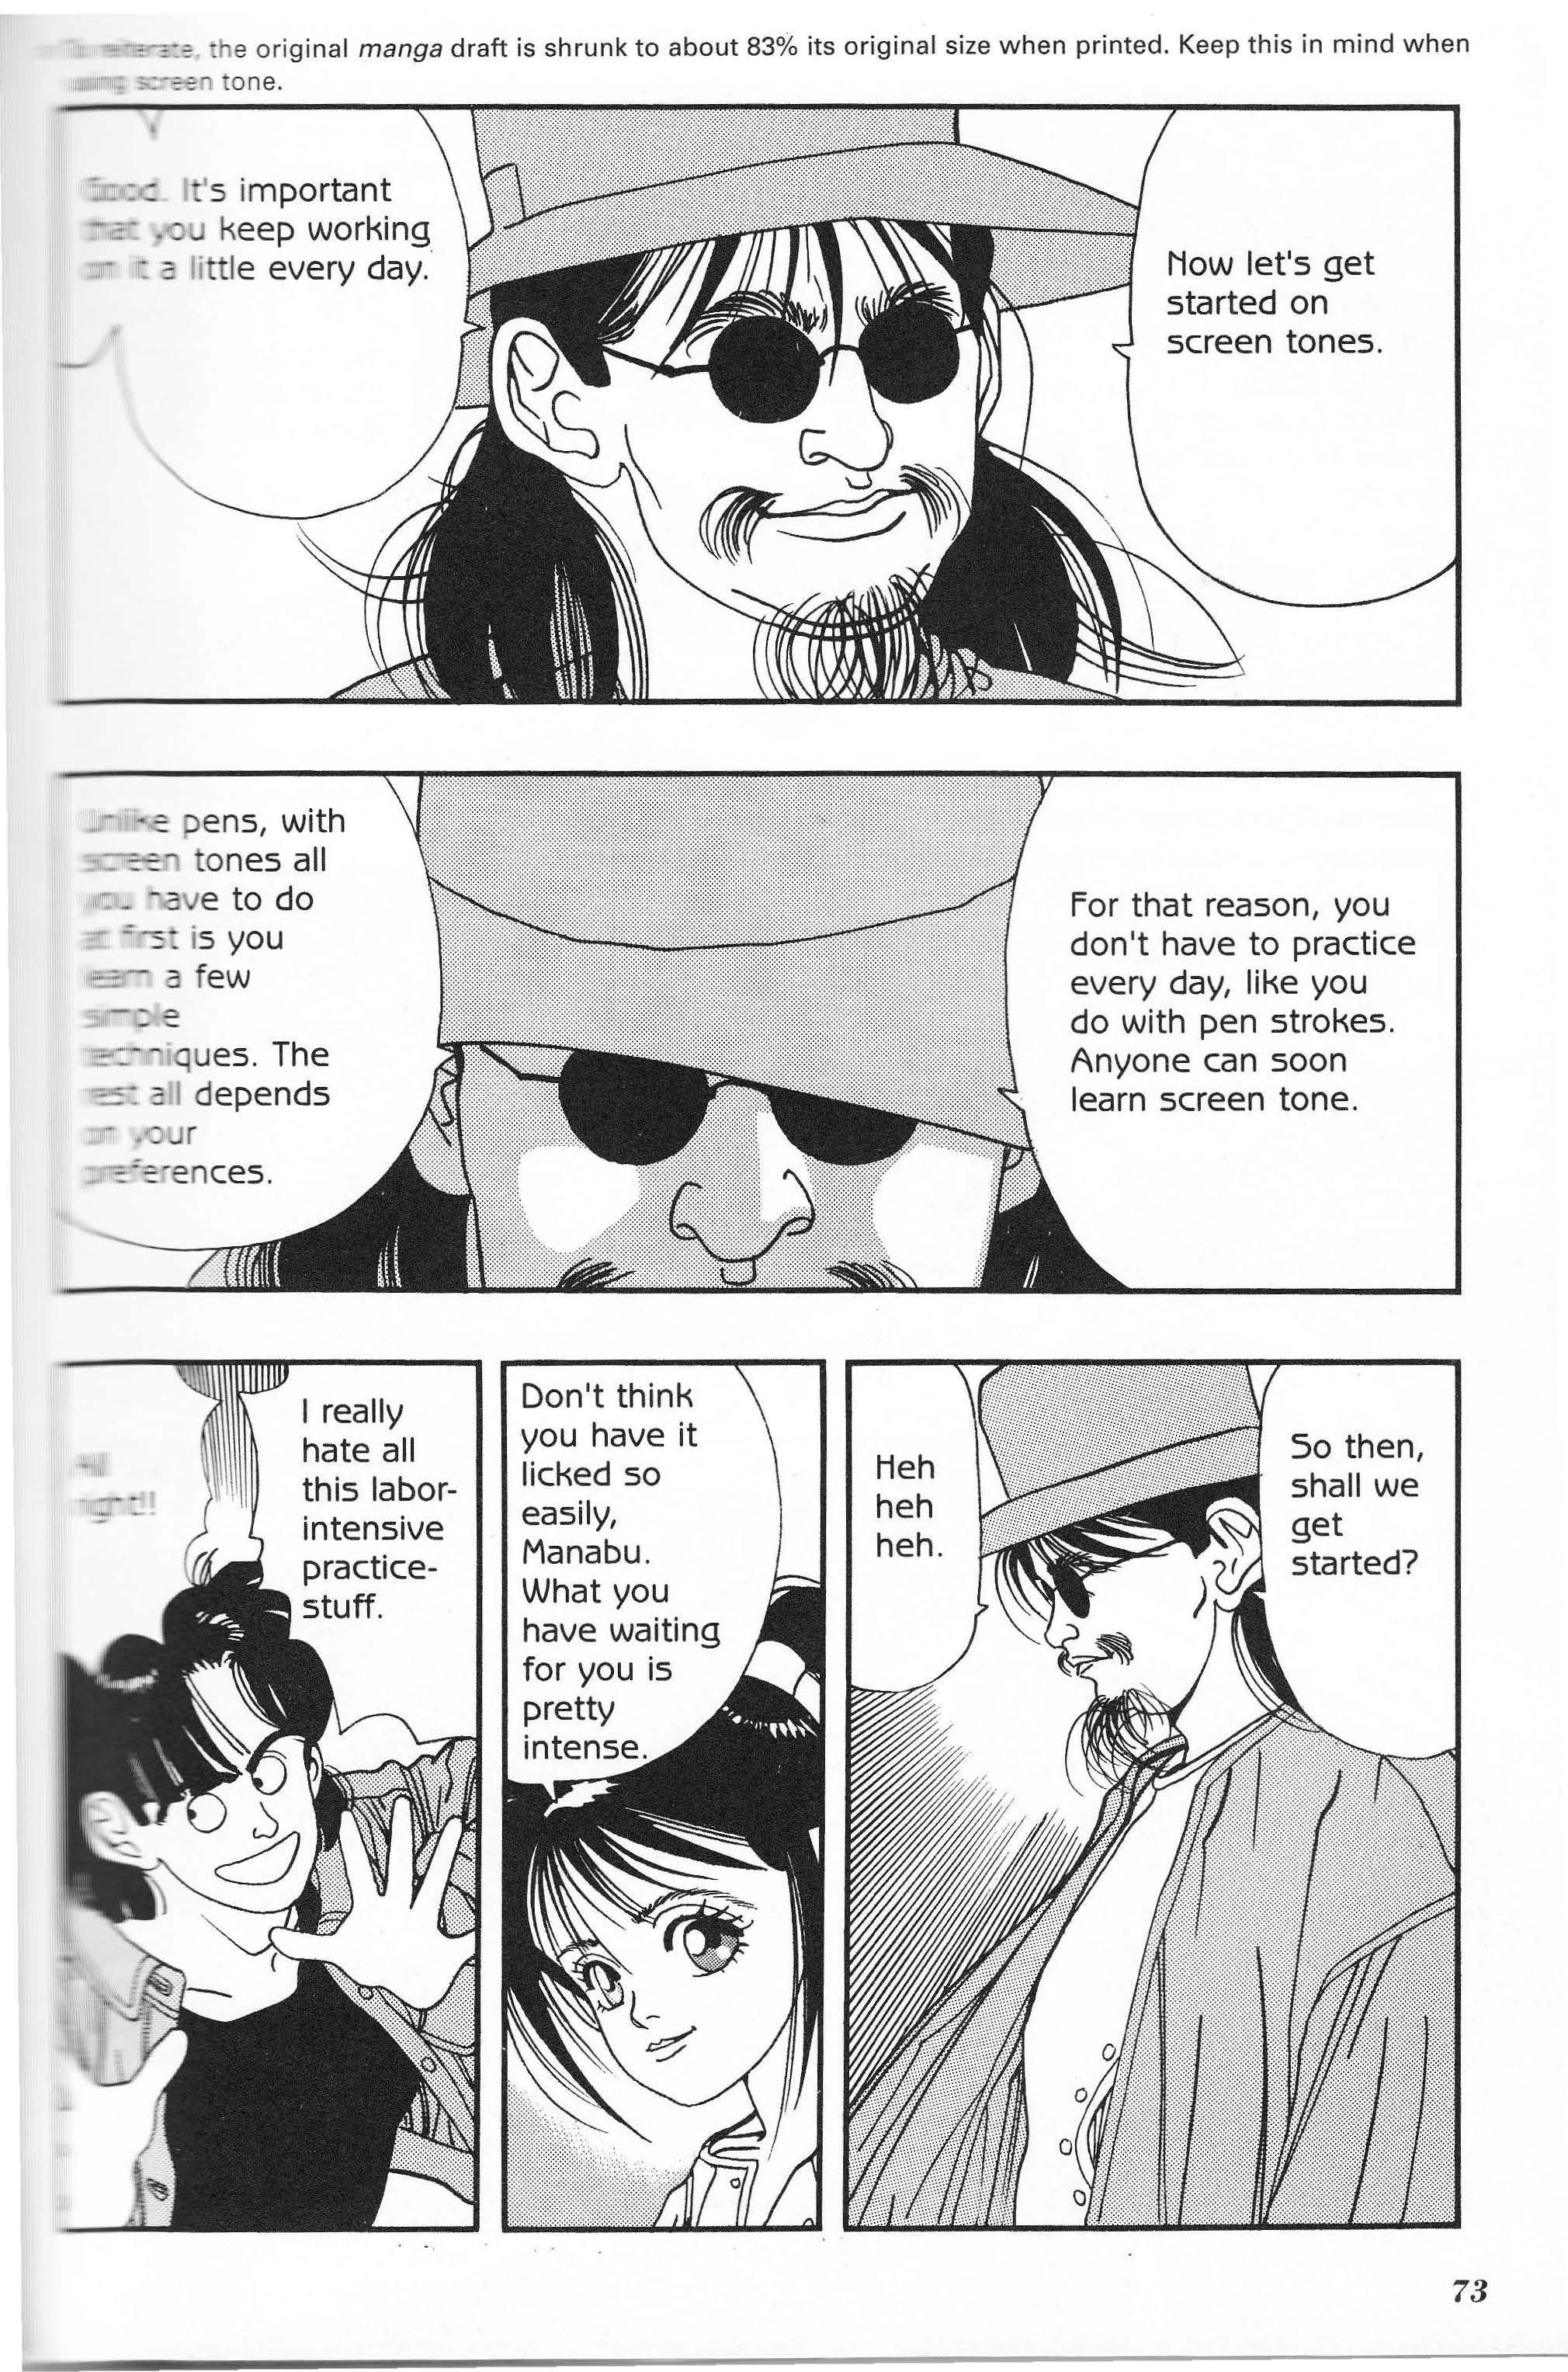
So then, shall we get started?
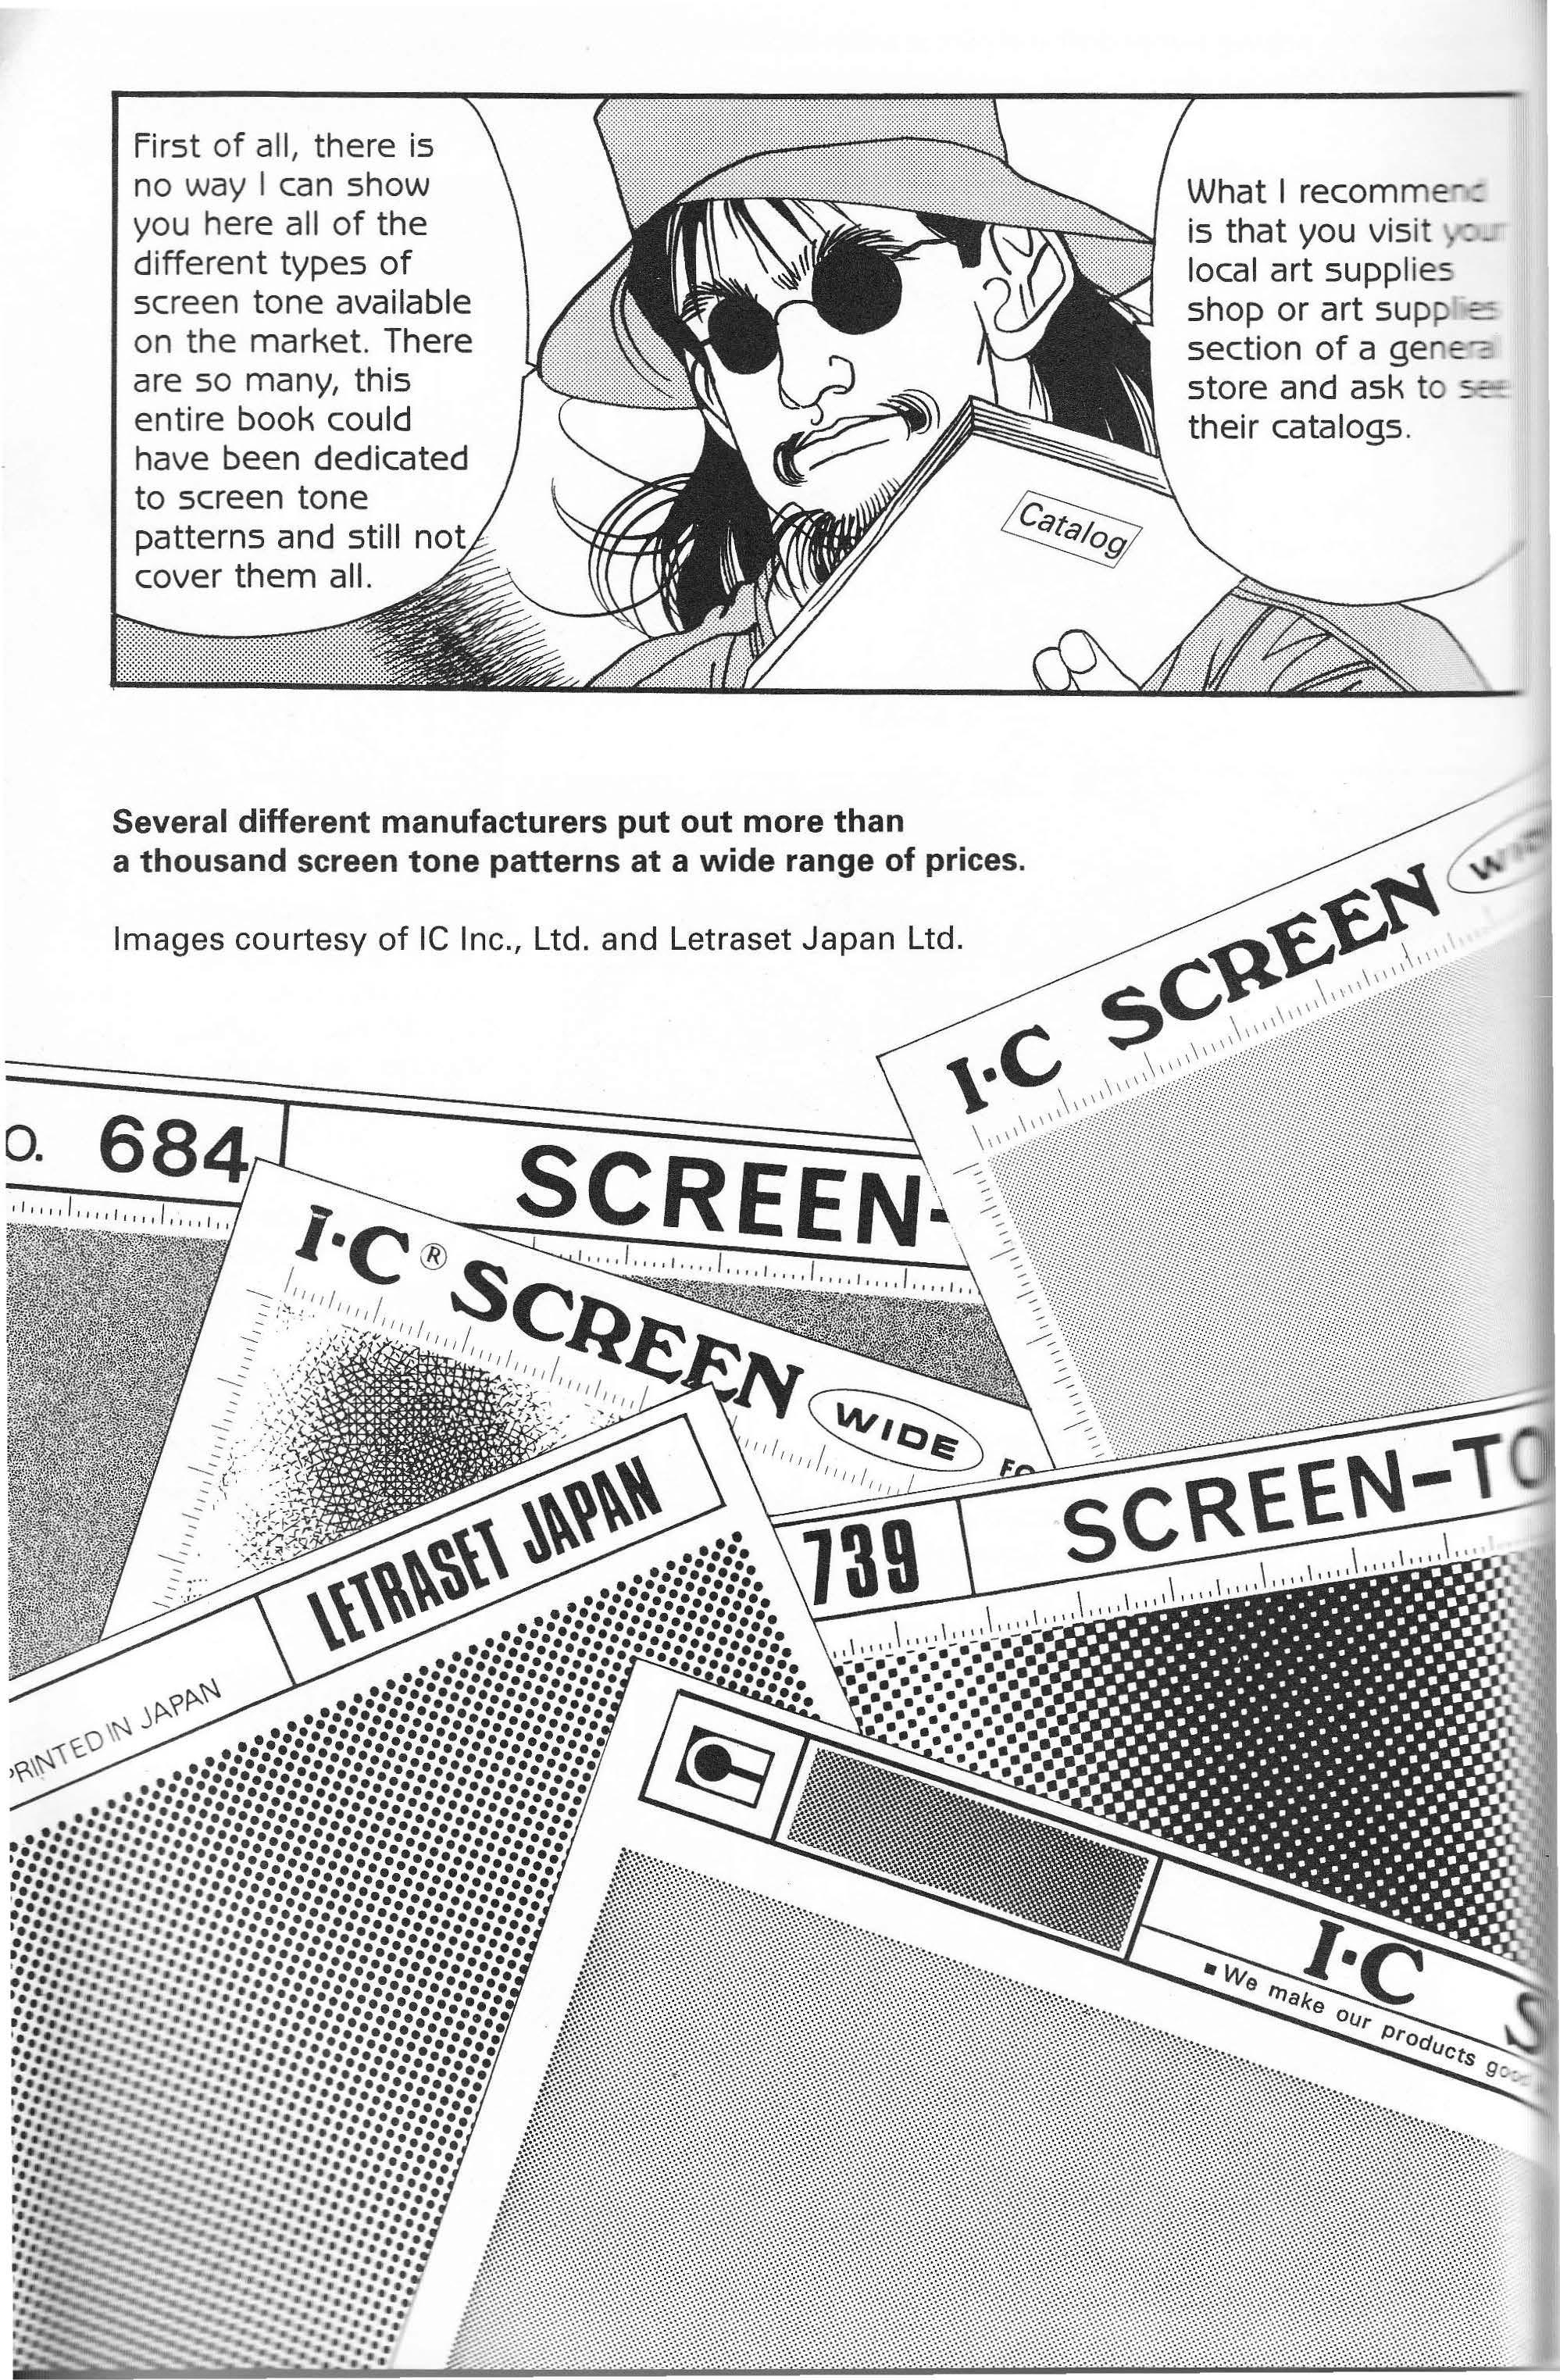
First of all, there is no way I can show you here all of the different types of screen tone available on the market. There are so many, this entire book could have been dedicated to screen tone patterns and still n cover them all.
Several different manufacturers put out more than a thousand screen tone patterns at a wide range of prices.
Images courtesy of IC Inc., Ltd. and Letraset Japan Ltd. What I is that recomme::. you visit -=local art supplies shop or art supp _ section of a ge e:-:: store and ask to s=their catalogs .
that, new patterns tone appear each ---:.: ==ecently, screen tones ·nted backgrounds :>een appearing on the 0 such the extent that are sometimes at a Preferences depend on the individual. Plus,
jthere is also the question of price. Consequently, I _:: ately, - -:you -=s ::.s o which to use. This is because each company uses a different adhesive backing, has different prices, and uses different printing standards. Your best bet would be to determine your standard tone (which screen tone you plan on using the majority of the time), purchase several brands of that screen tone, and use and compare the tones.
Um, excuse me, professor, but which
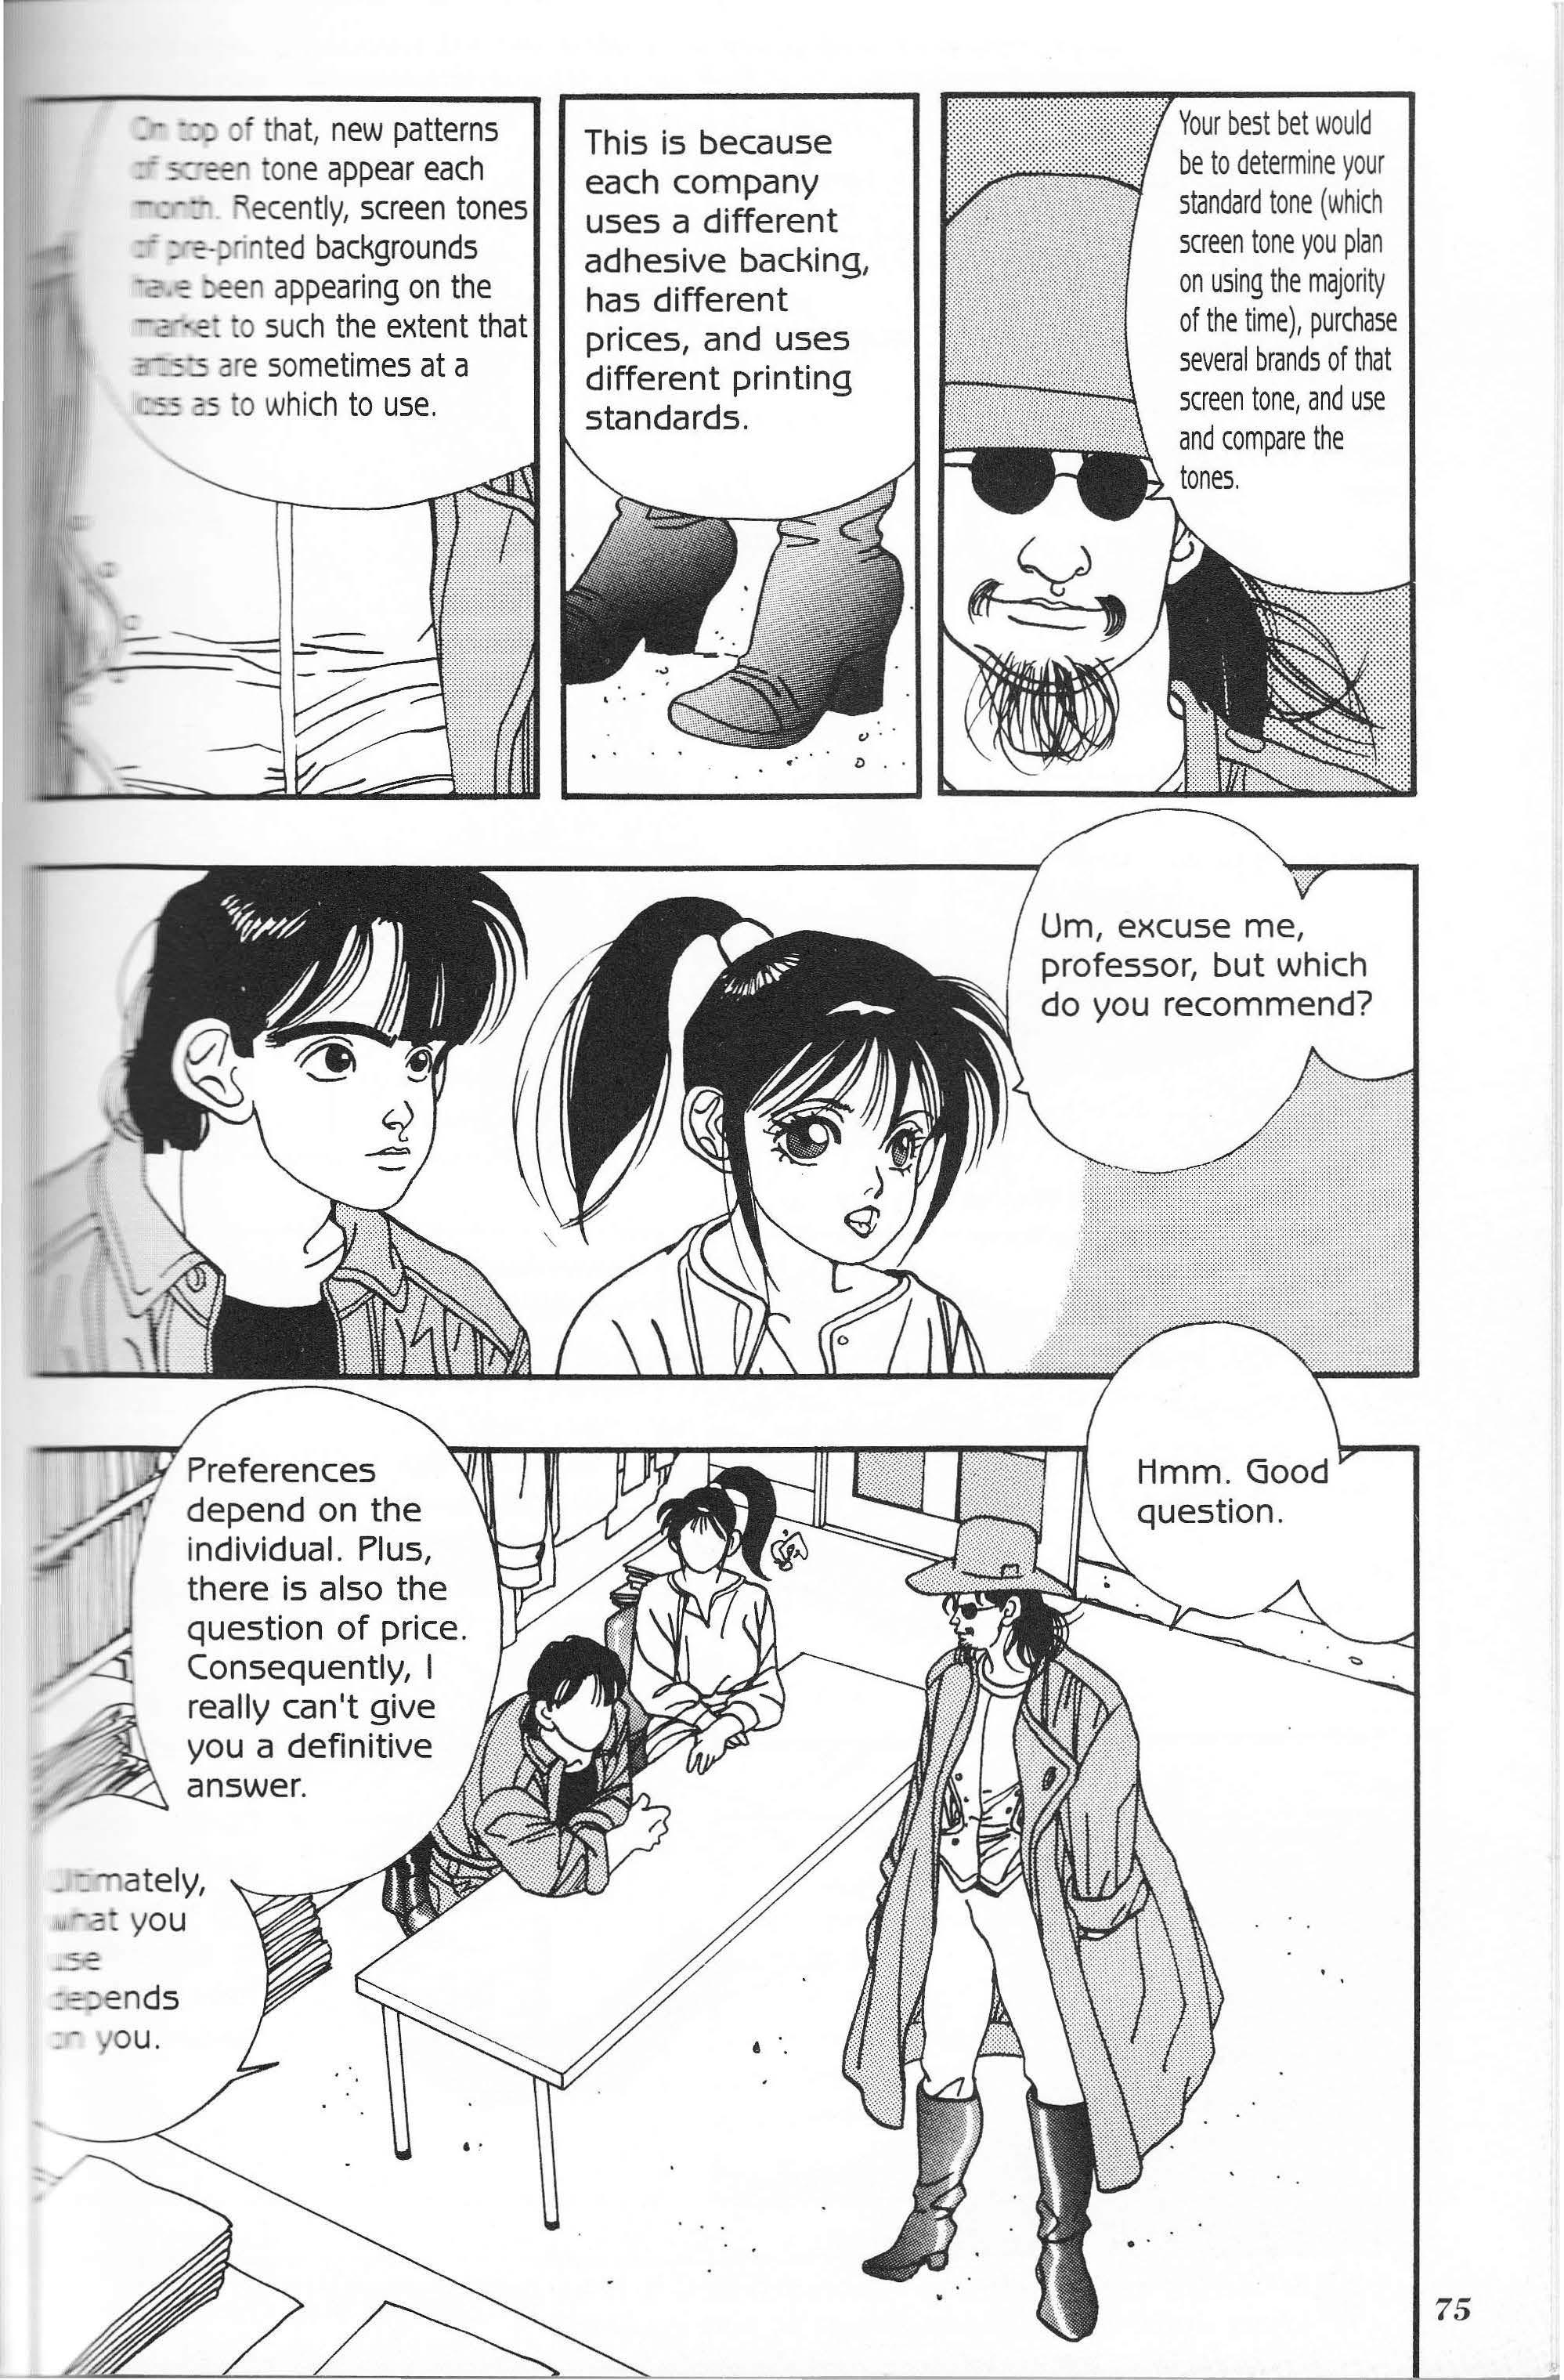
Areally can't give you a definitive answer.
do you recommend?
: -=- en ds _ - J OU.
The non-photo blue pencil is used to mark where the screen tone will be attached to the drawing. The other tools are for pressing or holding down the screen tone sheet.
Plastic plate or block
Plus, you will need craft knives for trimming and cutting the tone.
It doesn't matter which brand of craft knife you select, provided that the blade cuts adequately. A bamboo paddle A plastic spatula or paddle
In addition to those shown here are many other types of craft knives. Select the one that best suits you .
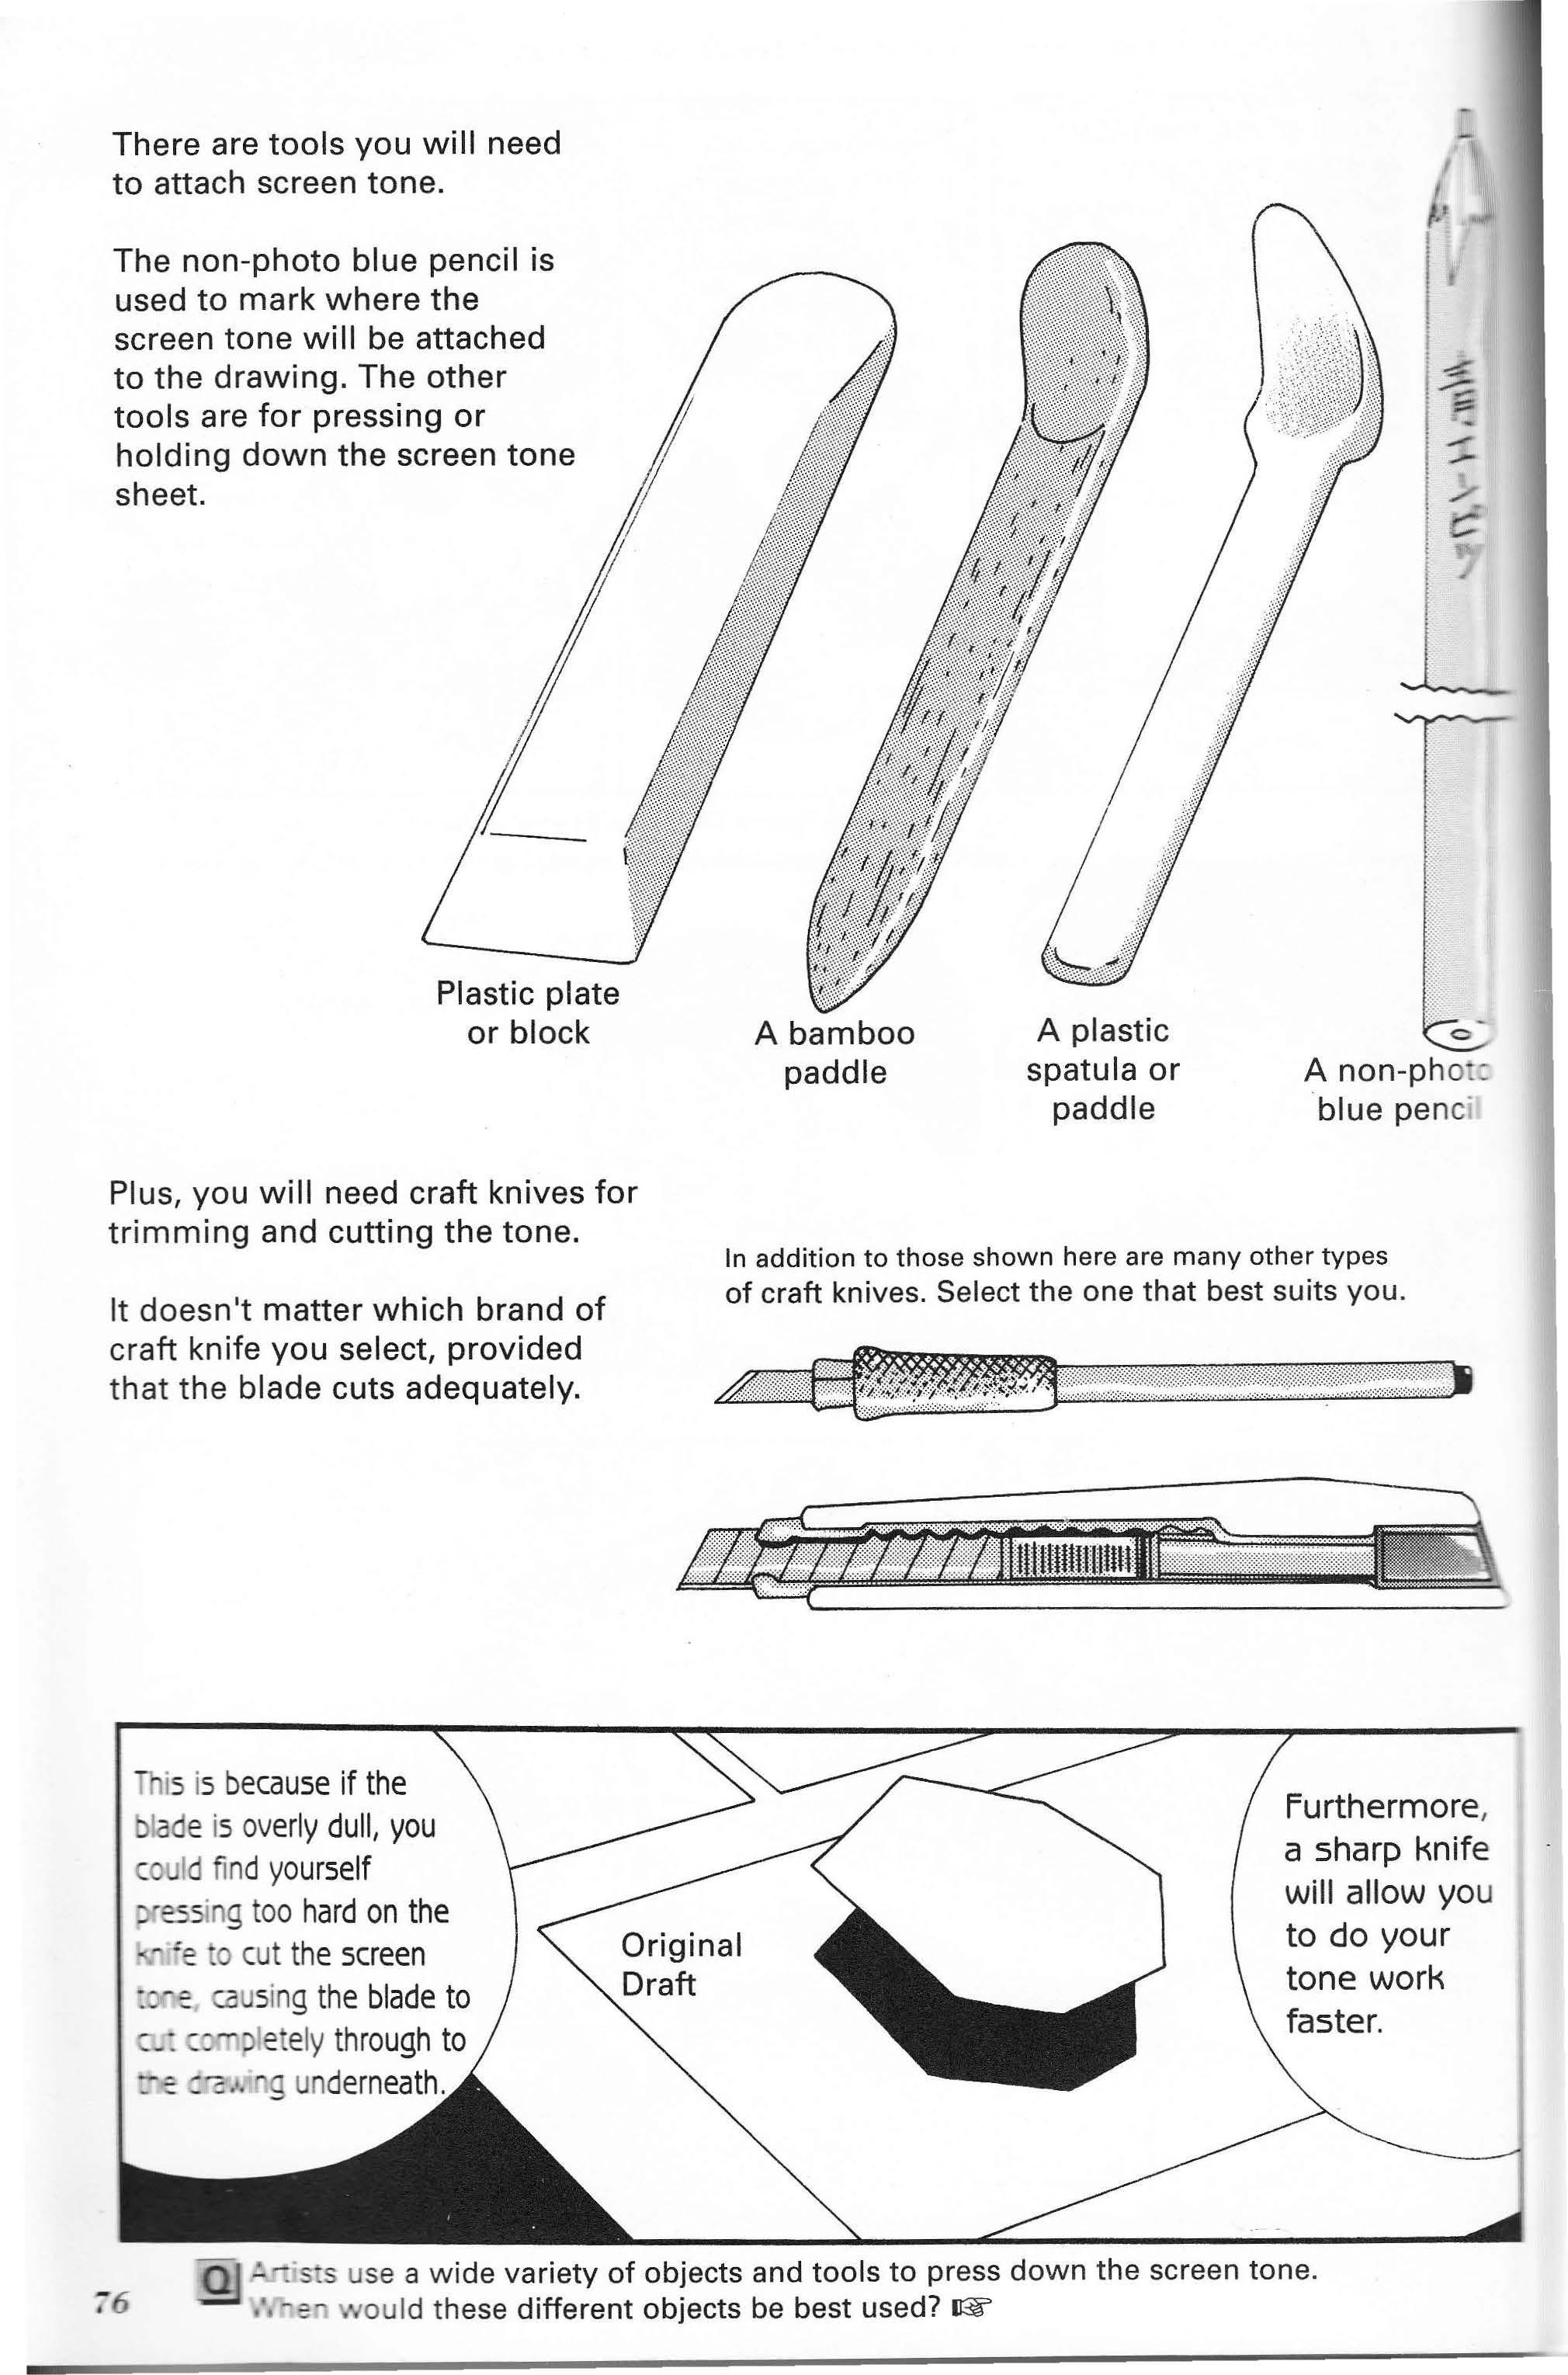
is is because if the lade is overly dull, you ld fi nd yourself essi g too hard on the cut the screen :T e co sing the blade to )le ely through to underneath
Furthermore, a sharp knife will allow you to do your tone work faster.
Myself, I use an extraspecial, customize d tool. This is a vitamin drink bottle I wrapped in double-sided adhesive tape and then coiled kite string around that. tool ;-eat, :.•.s you _ ;e a --grip • _ e jar, :.•.'s you _ ess ::e area
ly, when you are attempting to attach a large piece of screen center, pressing down (rubbing) as you work your way outward. This will prevent the screen tone from creasing . If the jar or bottle you select has bumps, they will rub against the screen tone and destroy Here it is! Ain't she a beaut!
Kite
_ -=--== se it : _s i _: . a - ne at = ·me . tone, start from about the string
It is essential that the jar or bottle you select not have bumps on the bottom. These are to prevent the jar or bottle

\. This is what will result-
from sliding.
So, now that we've finished our discussion of tones, there is one more th ing you need to decide above all else. manga artists, and the vast majority And that is wha your standard de: screen tone
I surveyed my fellow number will be .
used one or more of the following 6 types.
#51 (10% Density) #52 (20% Density)
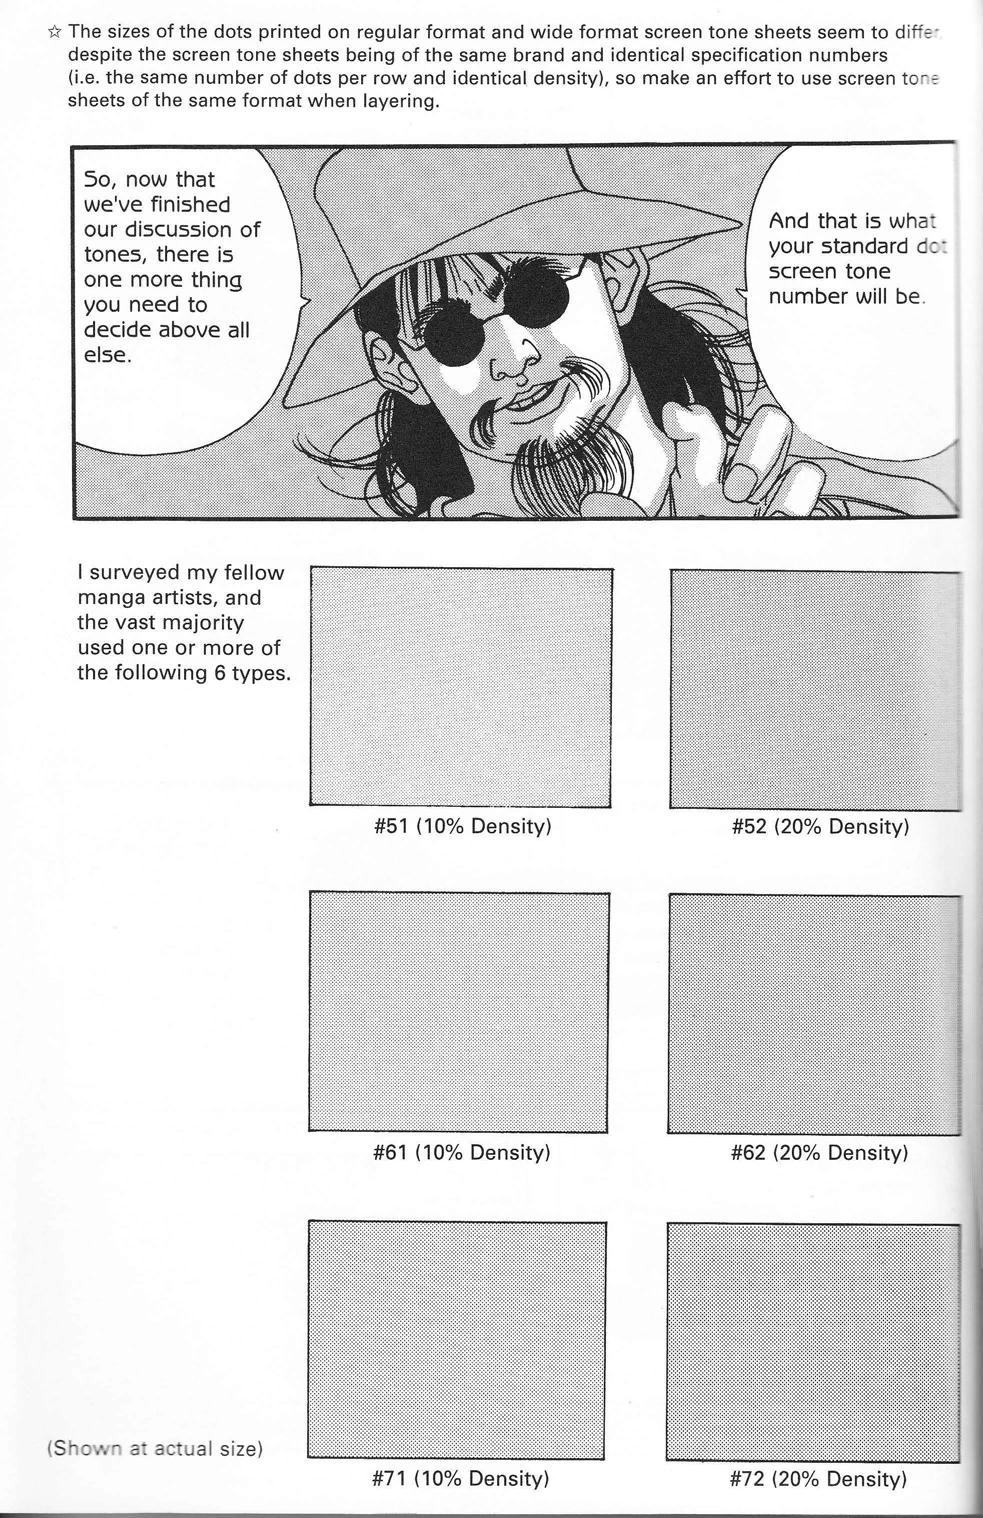
#61 (10% Density) #62 (20% Density)
:--poses here, let's use #62 - : is what I use as my _ 3- ee n tone.
tone is generally known attern .
#62 Whoa, !just noticed that my clothes are all in dot screen tone! This dot pattern v 'I screen tone I has a number of potential
Sh own at actual size)
uses. reference, take a look at the
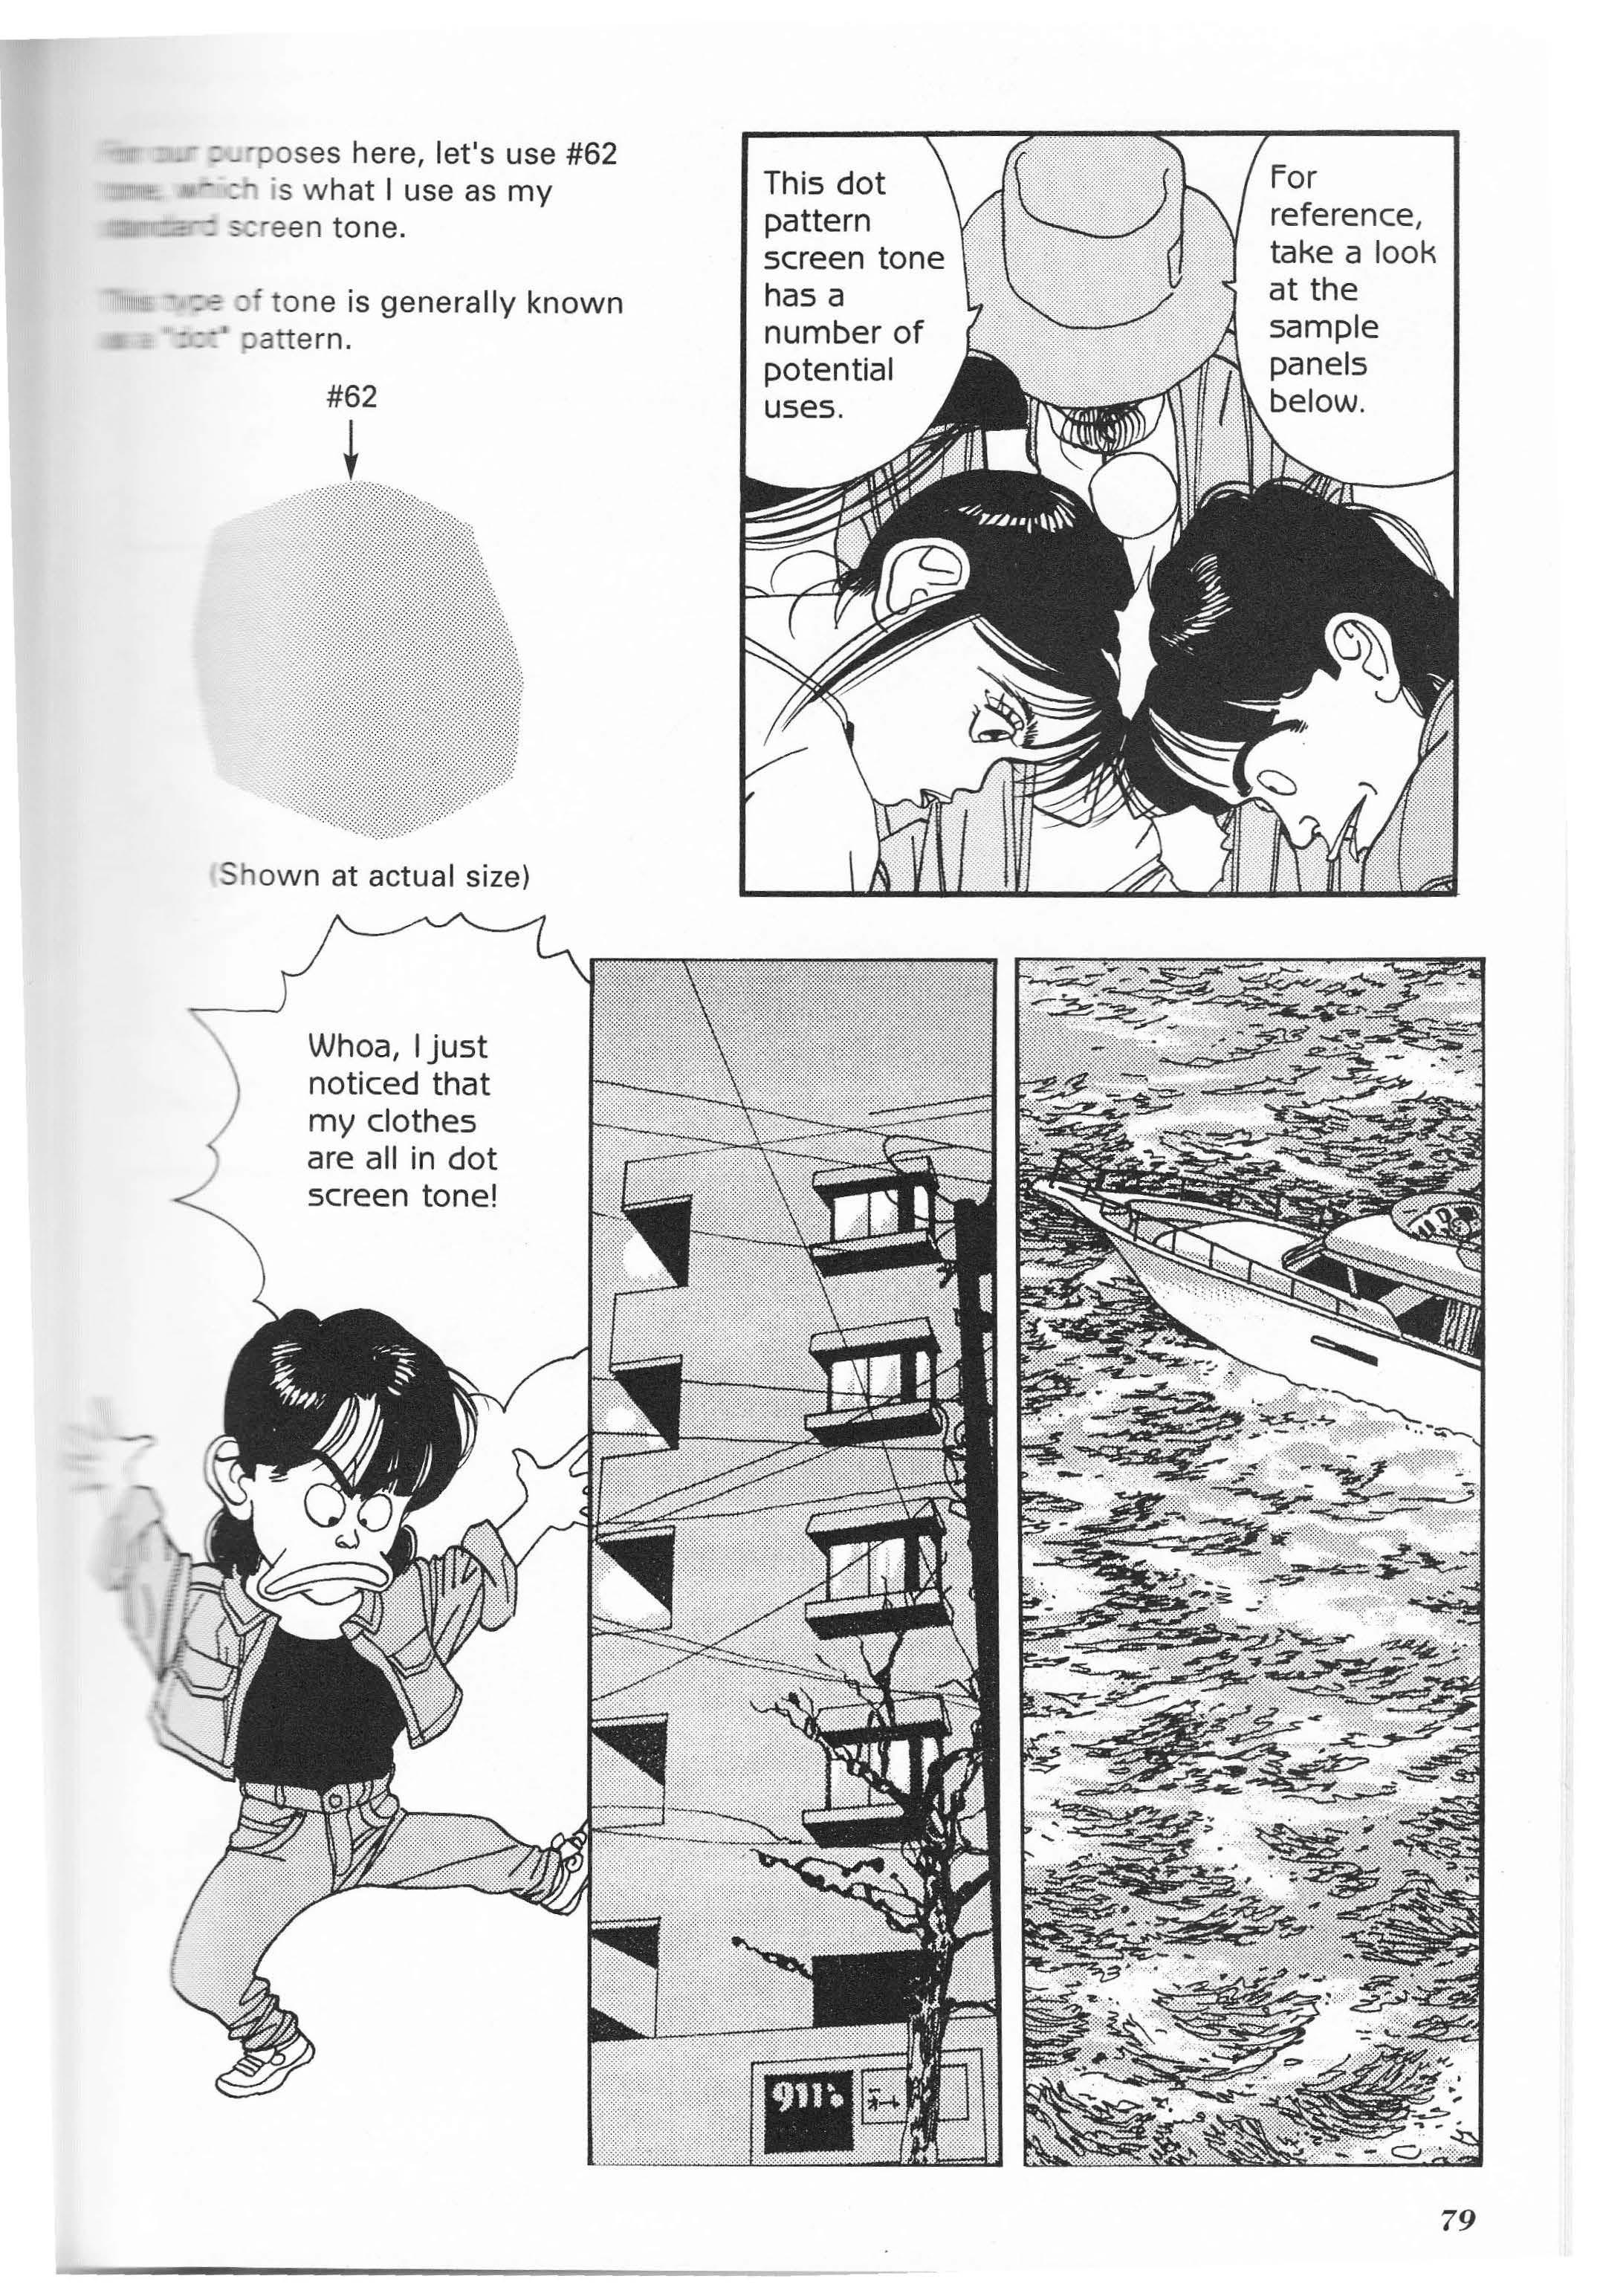
So, dot screen tone is used for any number of purposes. Now let's go over how to attach tone. .lJ atch the tone with the paper backin g still attached to the location he drawing where it will be a. ached (i n the above example, er he clot hing). Take a look inside = few of those ma f:= books sitting on ,...-== shelf next to you. Now you see wh various artists use dot screen tonebecause of its
versatility. Wait a second· Didn't I just set: somewhere e """-
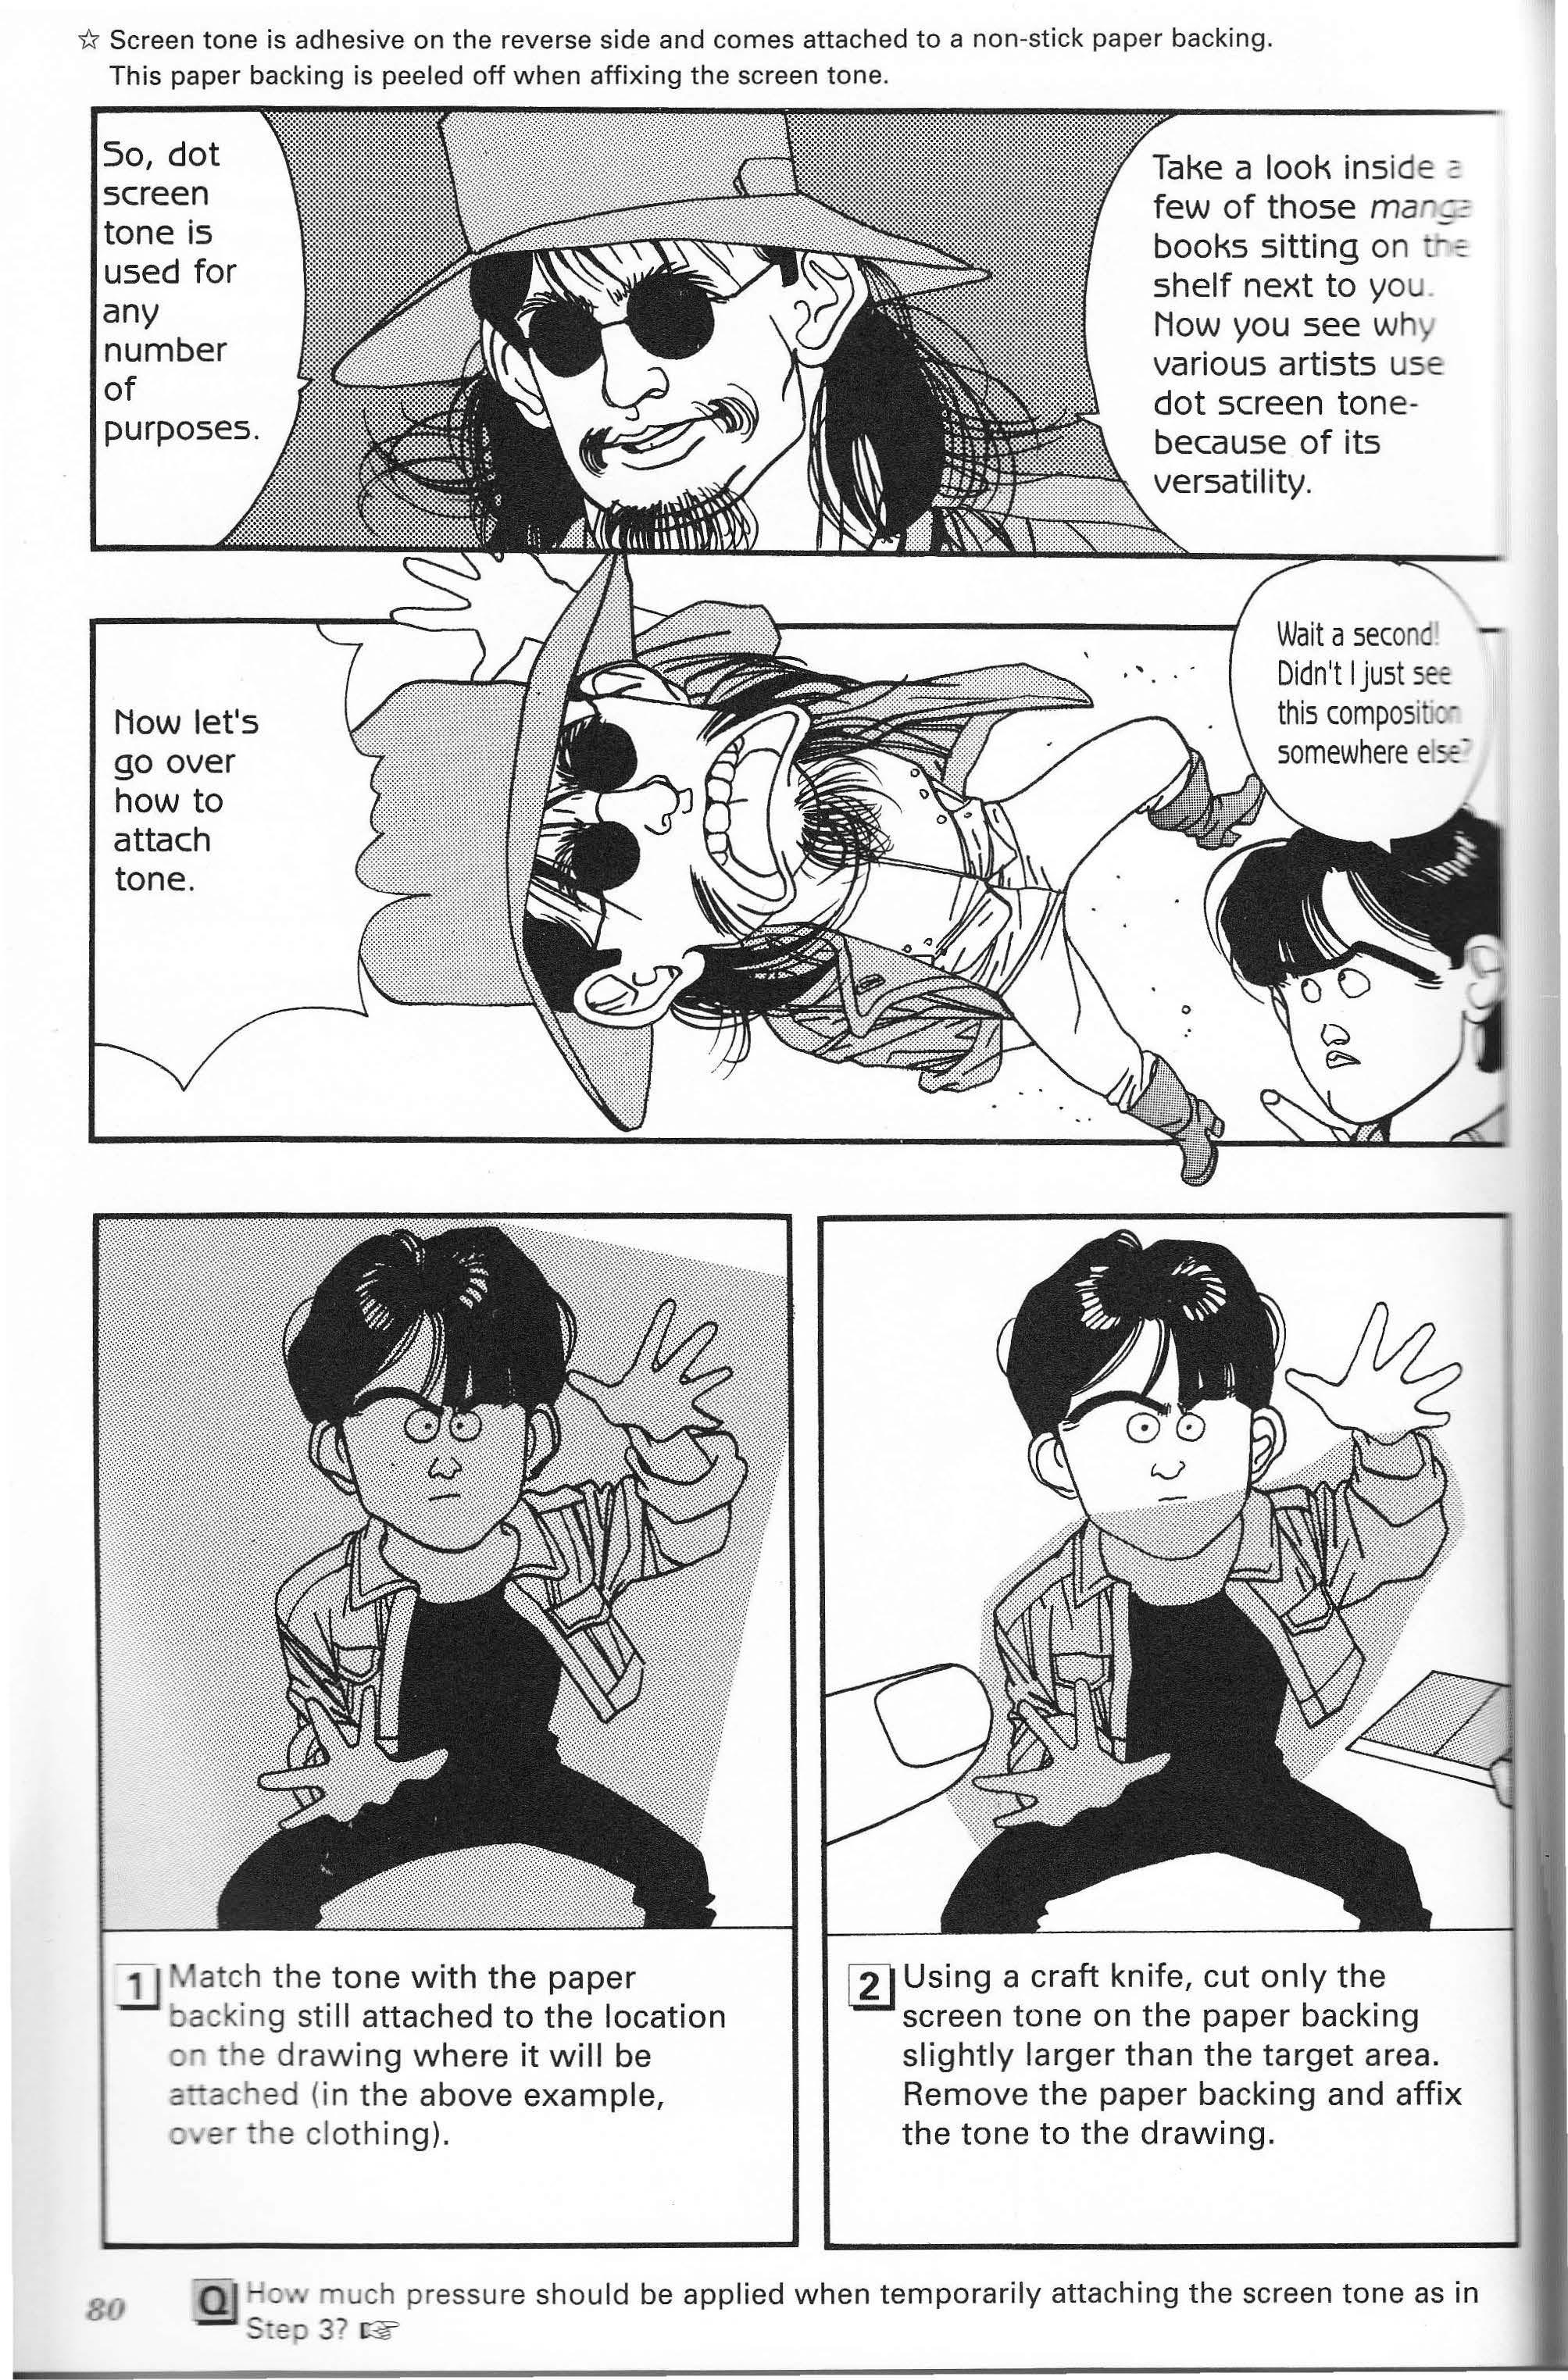
this composi · llJ Using a craft knife, cut only the screen tone on the paper backing slightly larger than the target area.
Remove the paper backing and affix the tone to the drawing.
se a glass rod or some other tool to =-ess down and rub the tone lightly. 11) Using a craft knife, trim around the drawing. Be sure to use a sharp blade. (If you use a knife blade that is overly dull, you will ultimately press down too hard, causing the blade to cut through to the drawing, the tone to tear, or any number of undesirable hassles to occur.)
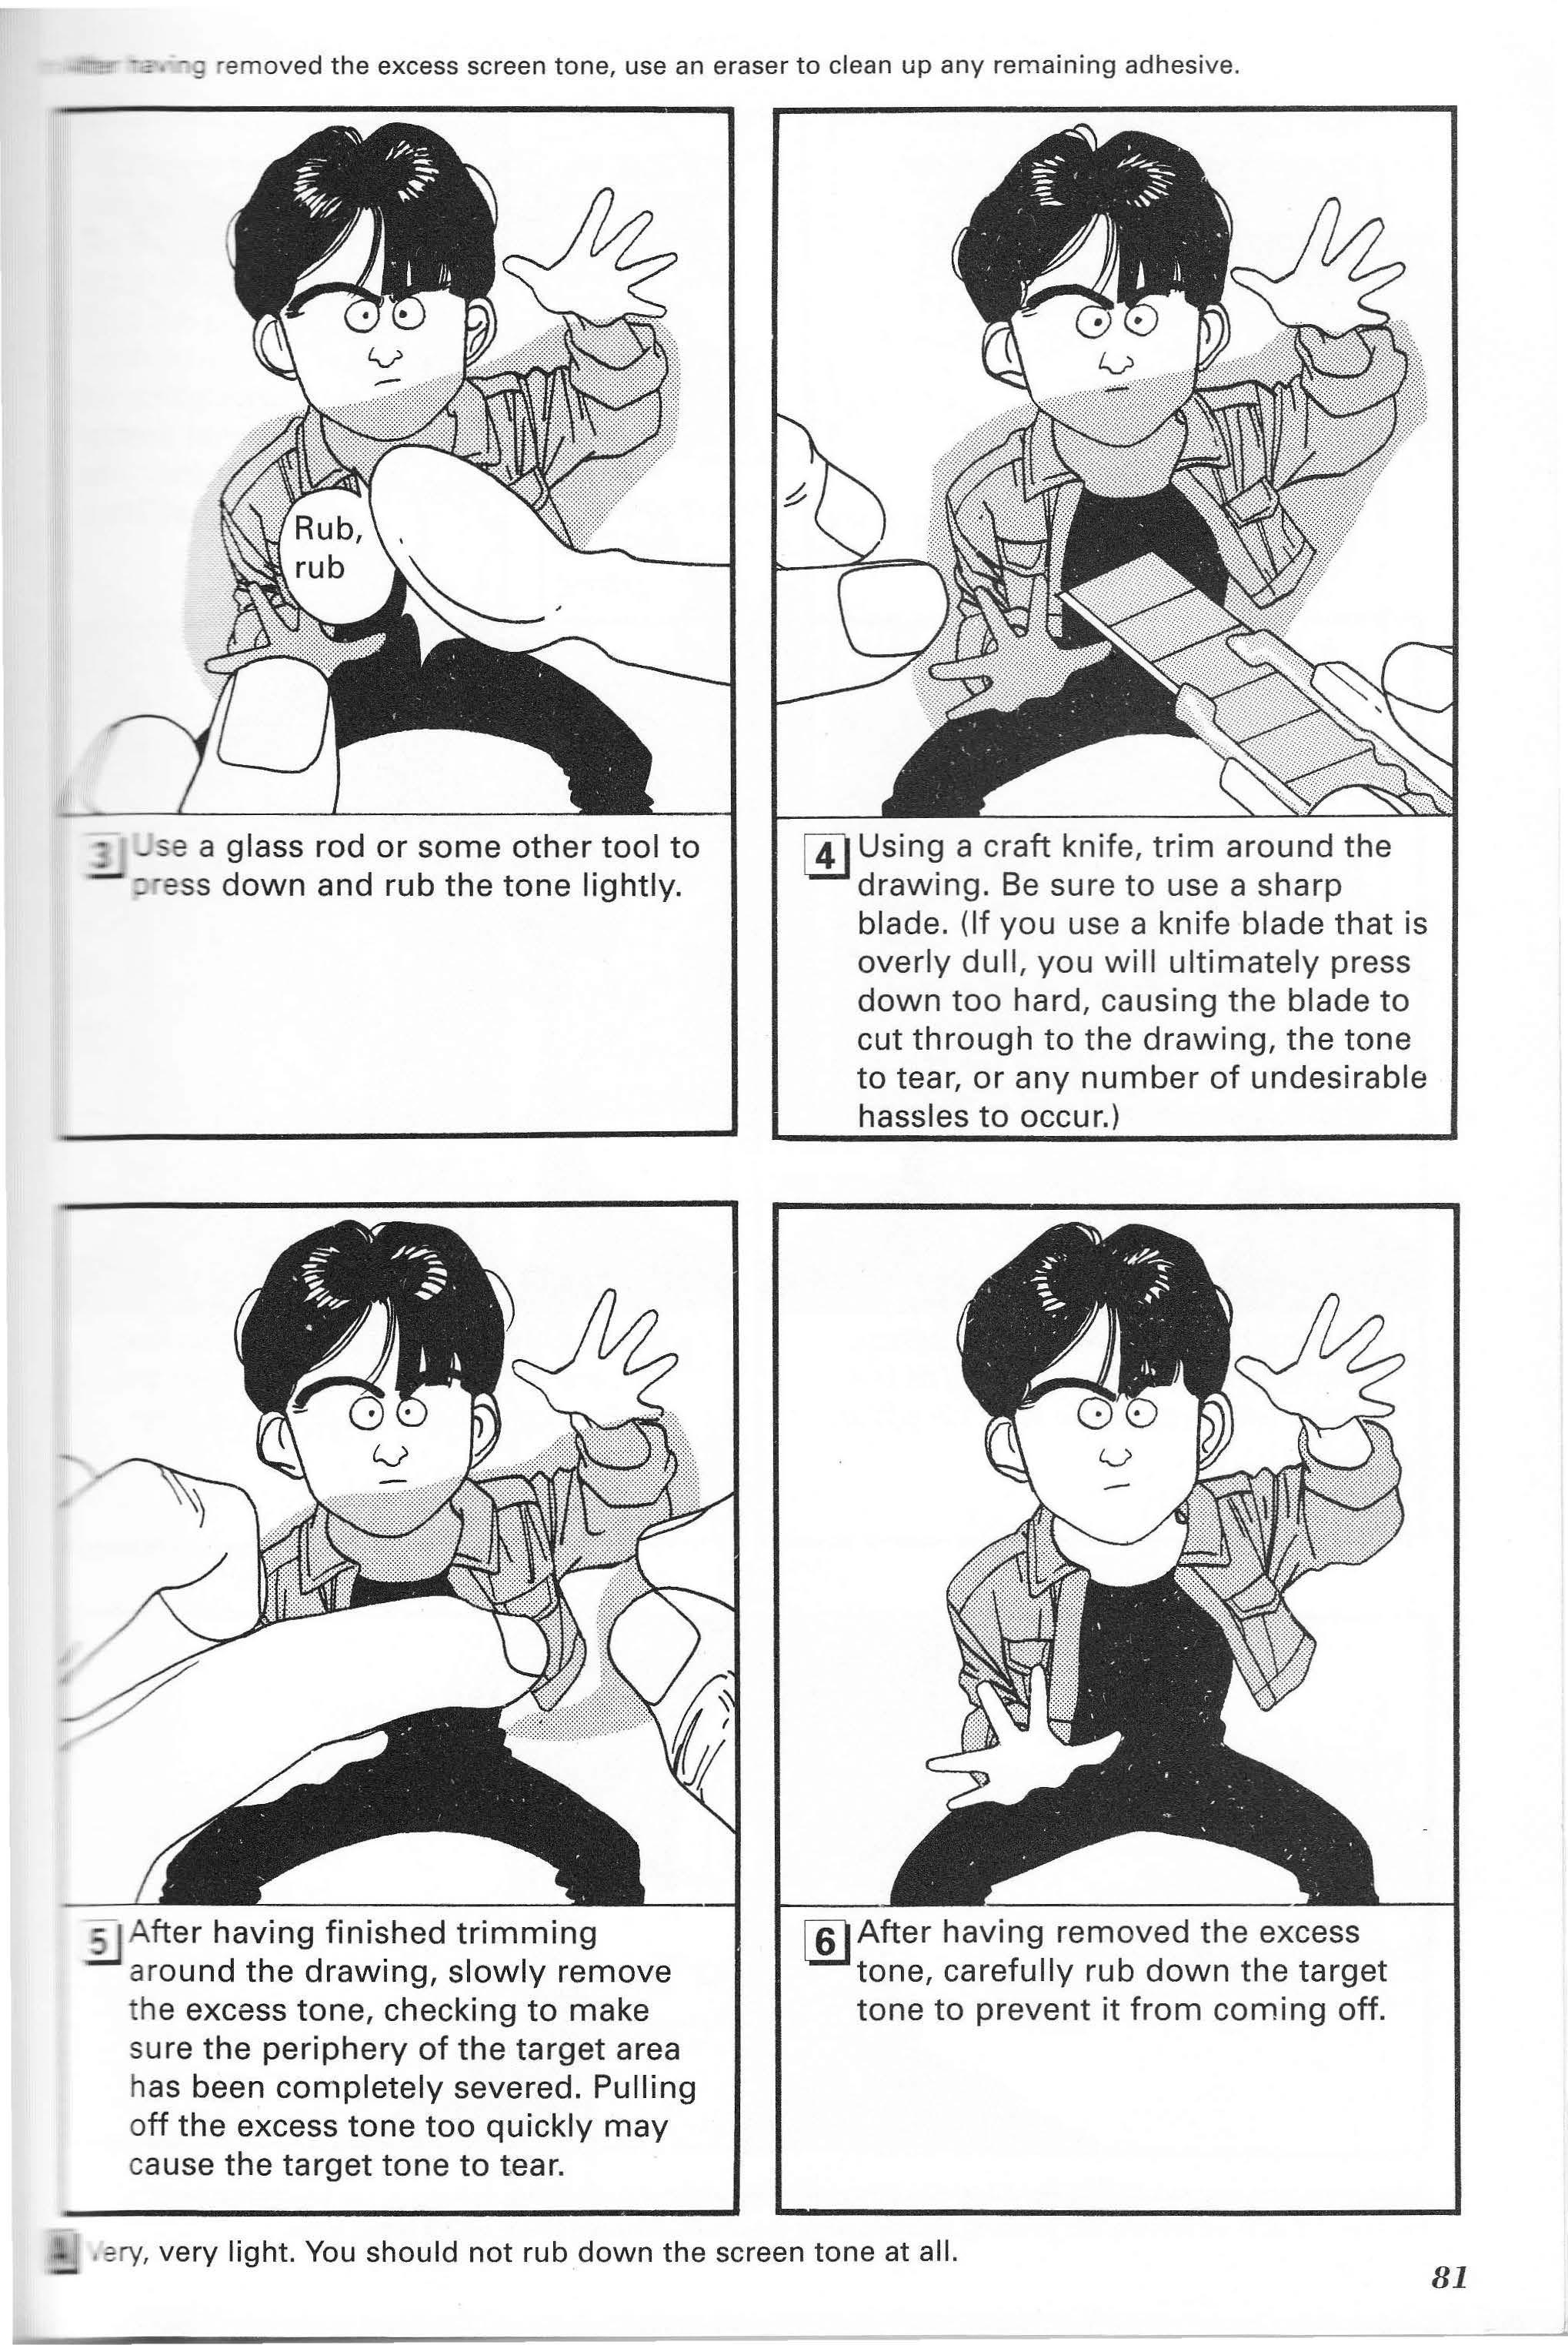
iJ After having finished trimming around the drawing, slowly remove the excess tone, checking to make sure the periphery of the target area has been completely severed. Pulling off the excess tone too quickly may cause the target tone to tear. [!]After having removed the excess tone, carefully rub down the target tone to prevent it from coming off.
A non-photo blue pencil comes in handy on such occasions.
Blue Pencil
Select the lightest penC: possible.
[}]Using the non-photo blue pencil, lightly draw in those areas of the face where shadow is to be added. 11] Attach the screen tone as described on the preceding page and trim the tone along the lines drawn in blue.
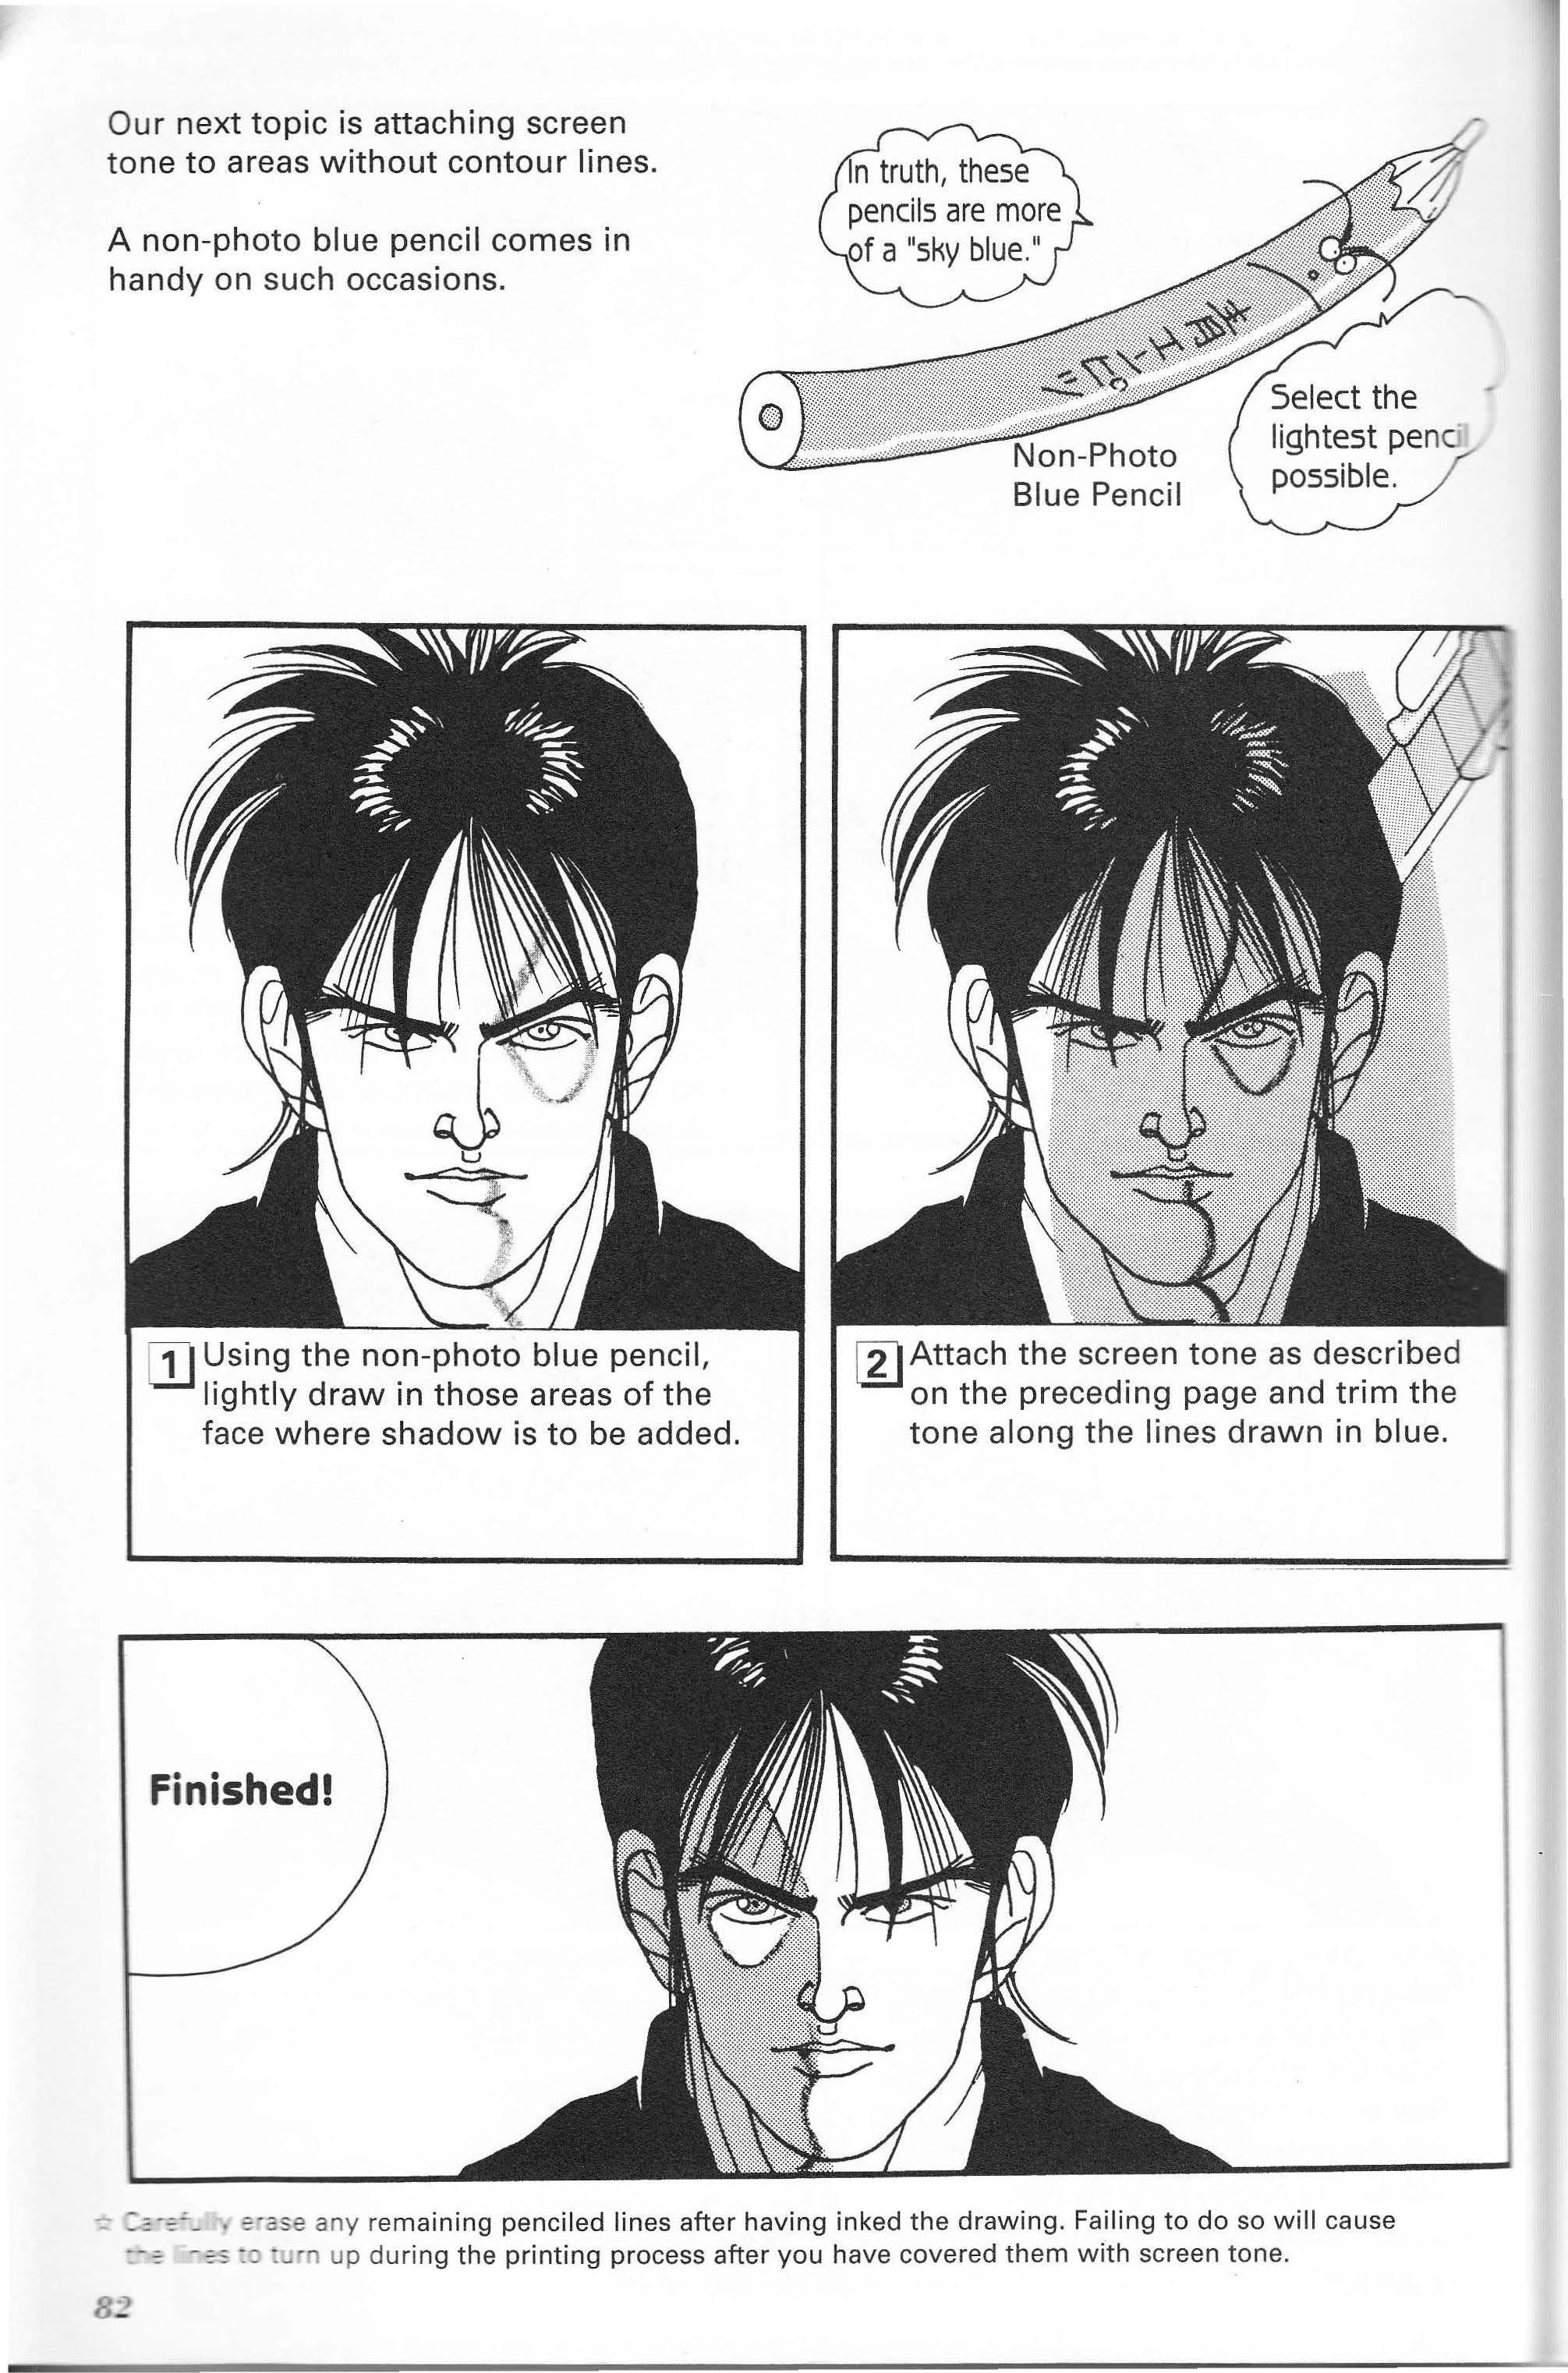
Finished!
Use as thin of a line as possible when marking where or what tone to lay. Especially since any blue lines under the tone have the tendency to show up during printing. But, this doesn't mean you shouldn't use a blue pencil. et's say you create an image entirely in screen one.
I'd be real useful at a time like this. Oops! I think I've seen that before in comics. I've seen numbers like 61 or 71 underneath the
1:!: Those who are worried about using a blue pencil may use a sky blue pencil instead.
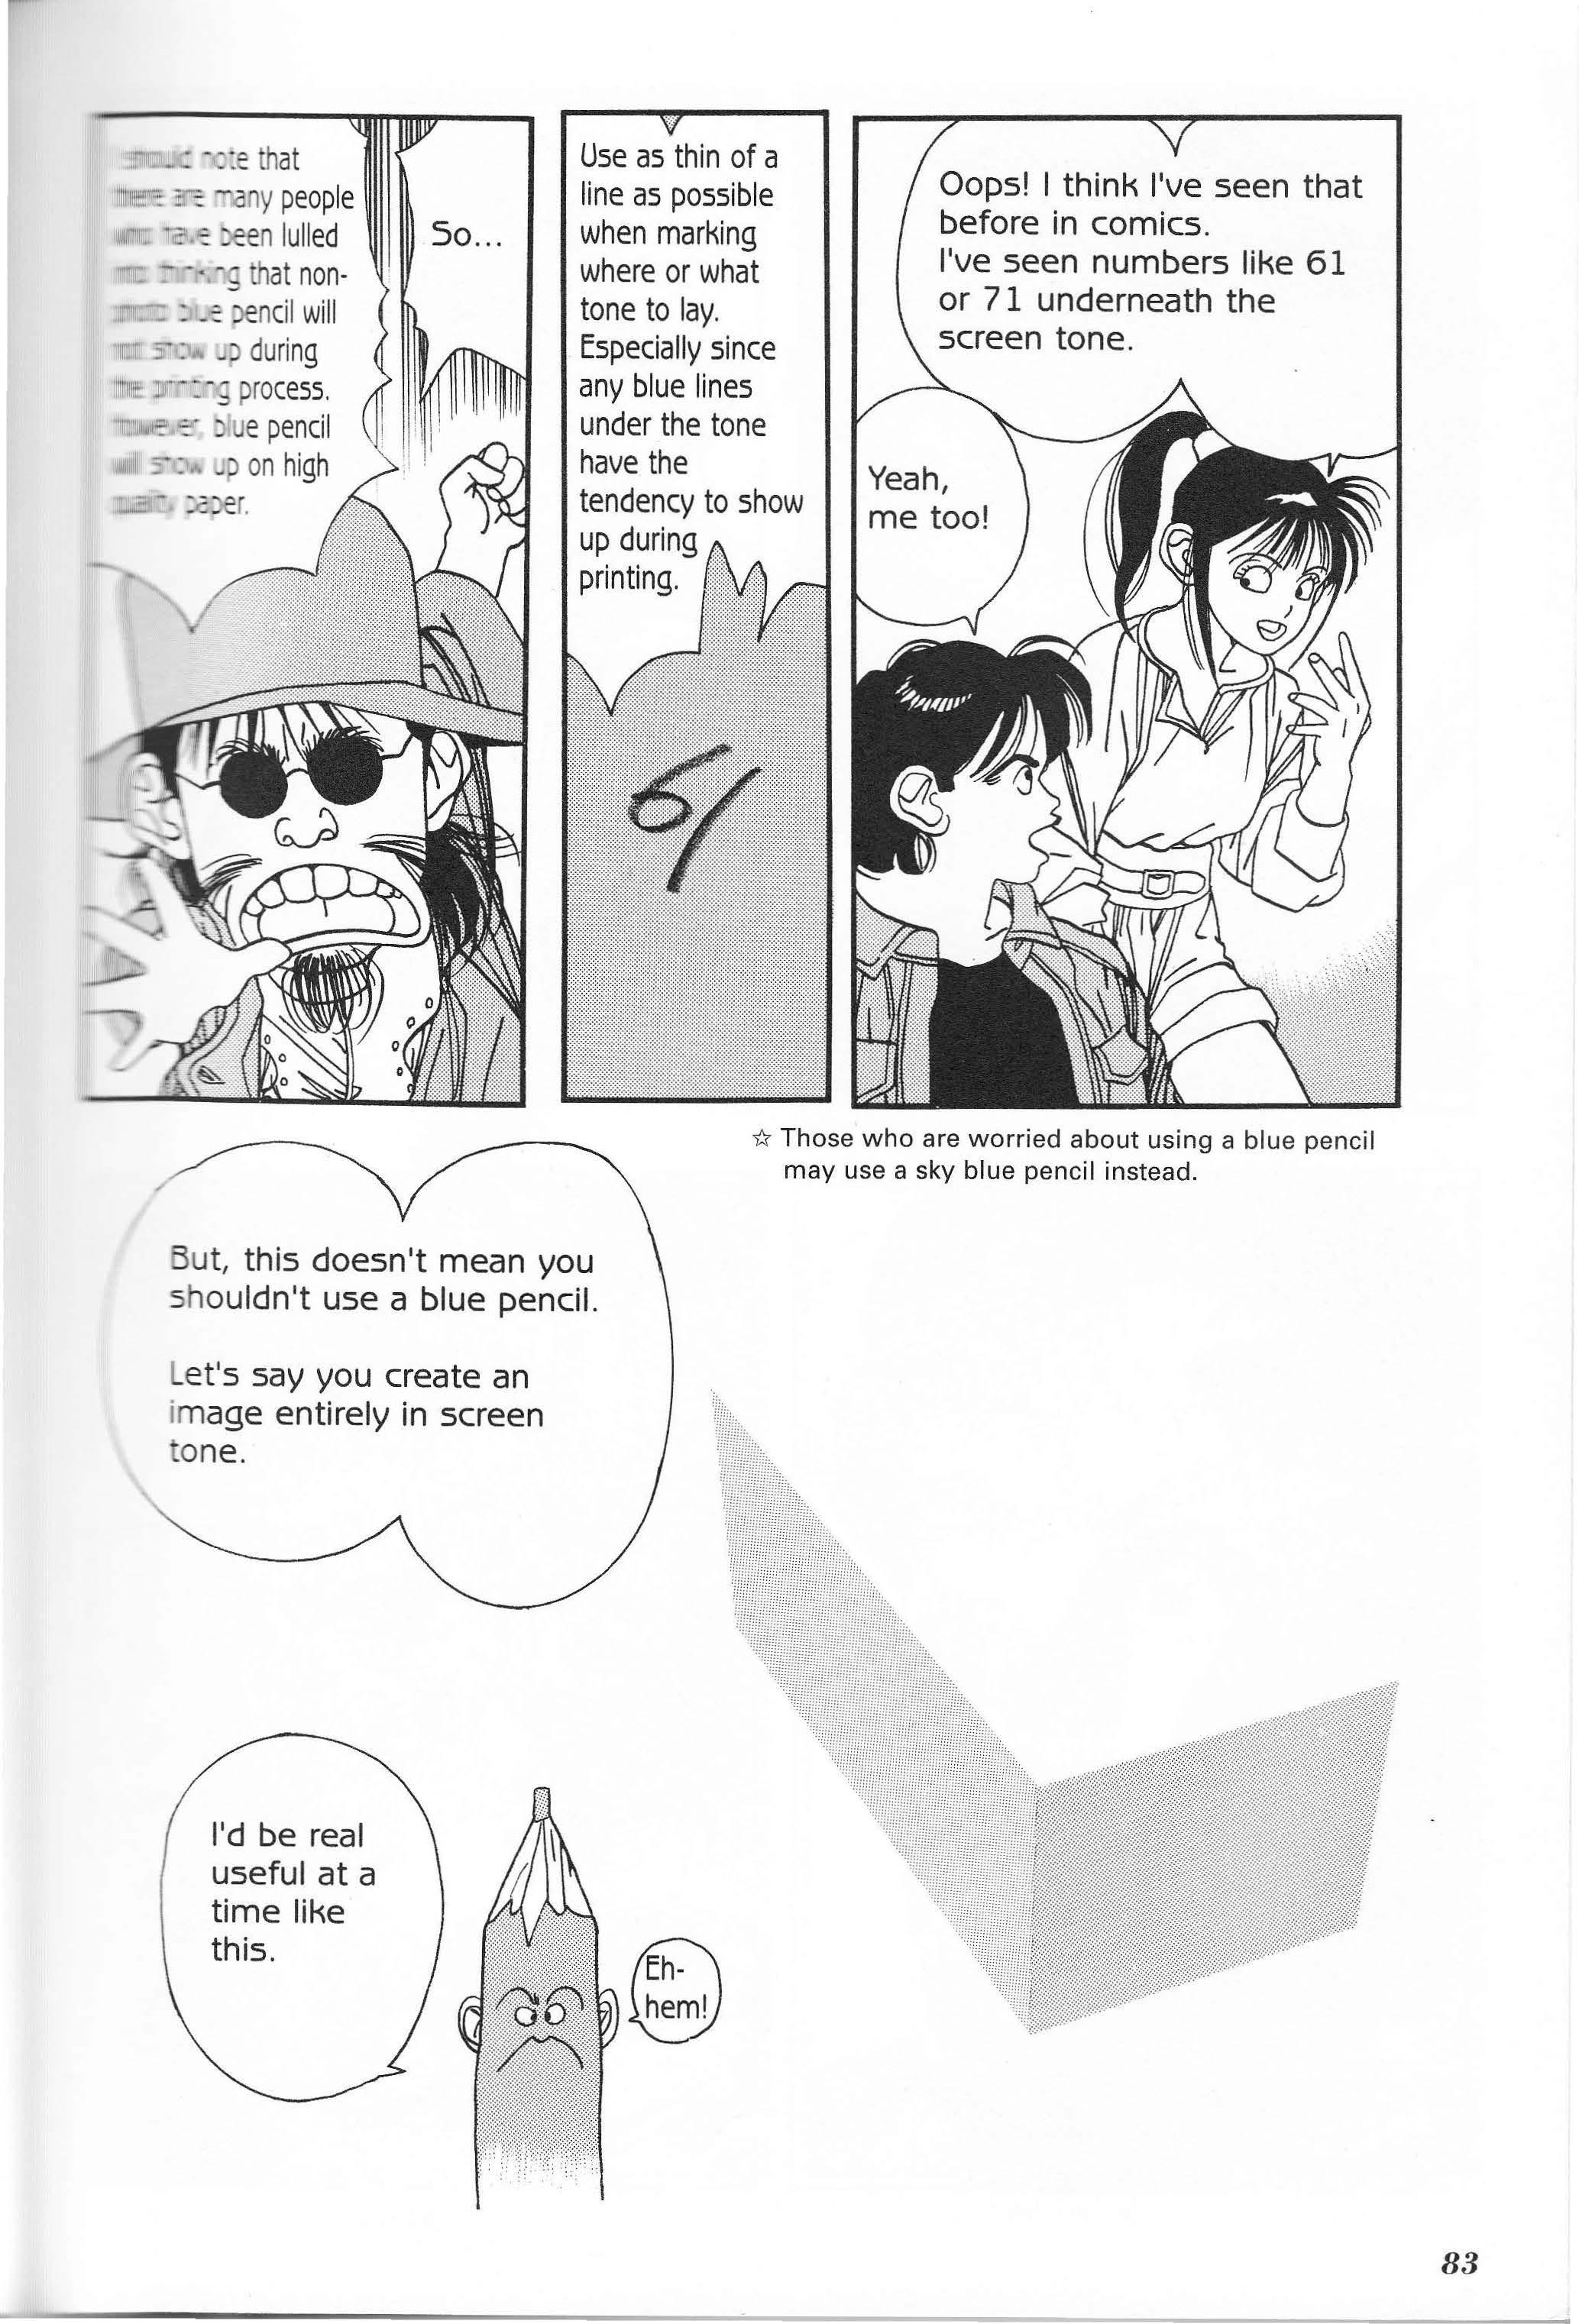
screen tone.
(Eh.\
Now let's look at a number of different ways screetone can be used with faces .
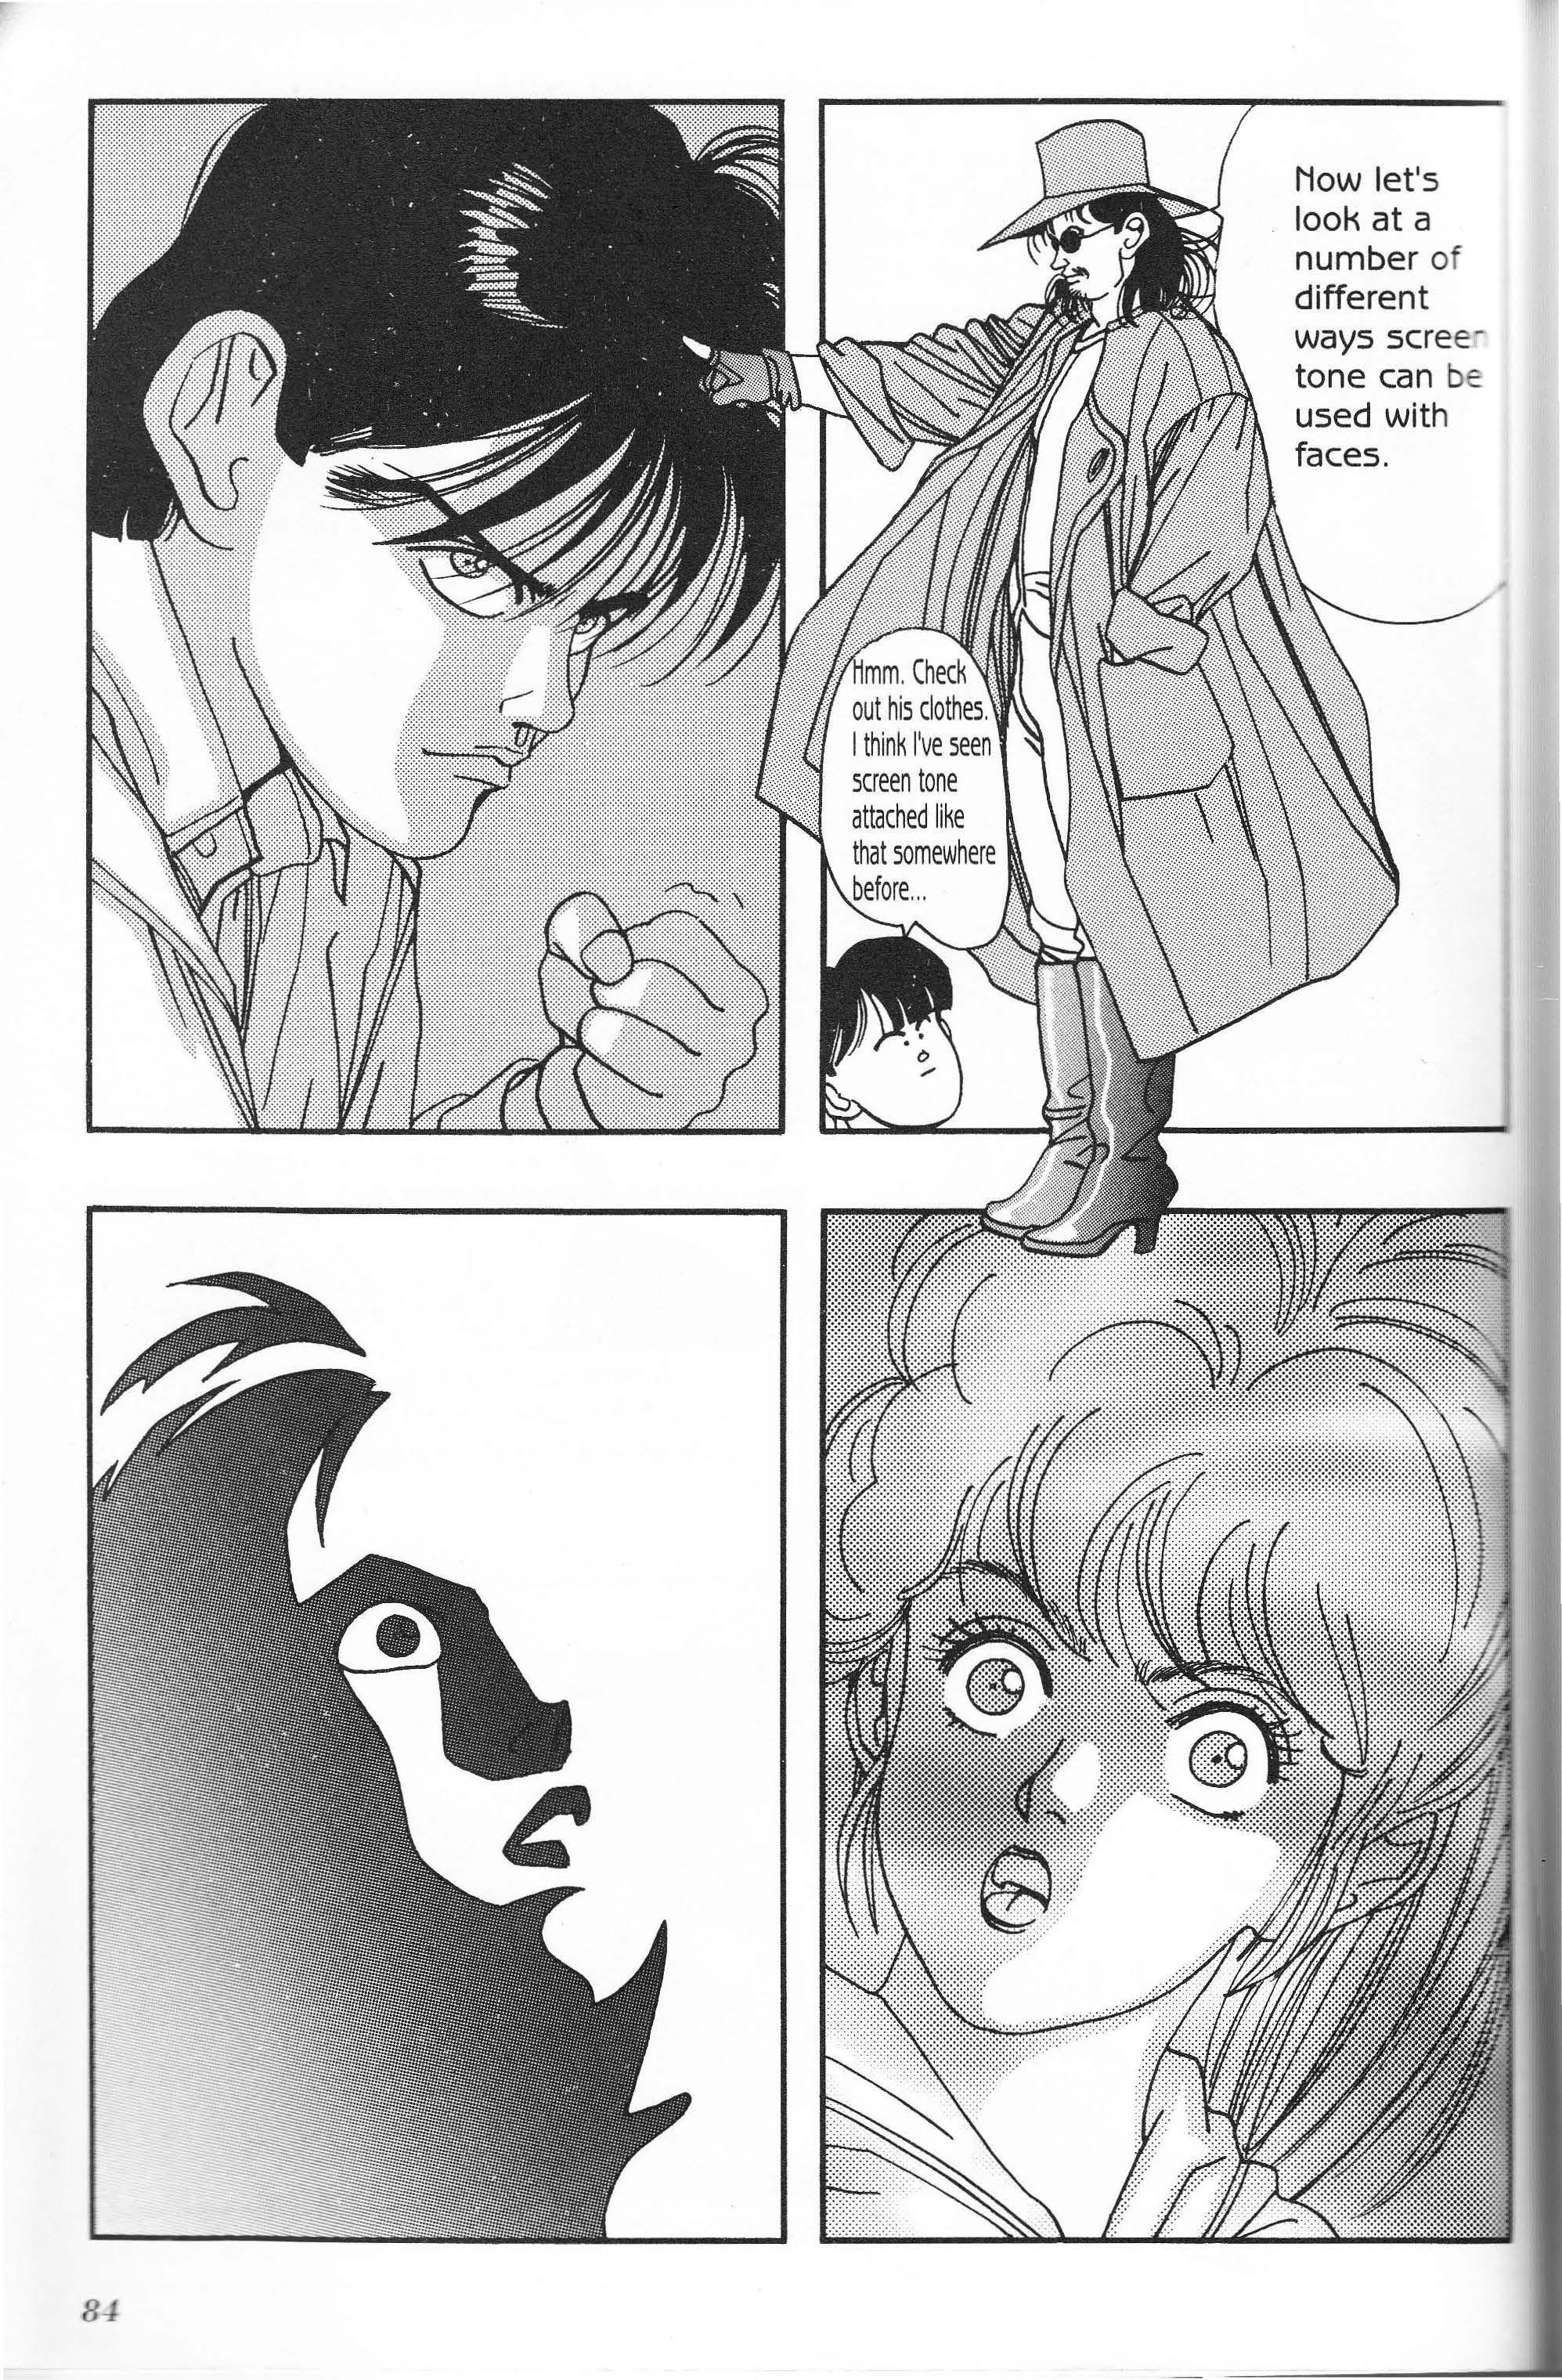
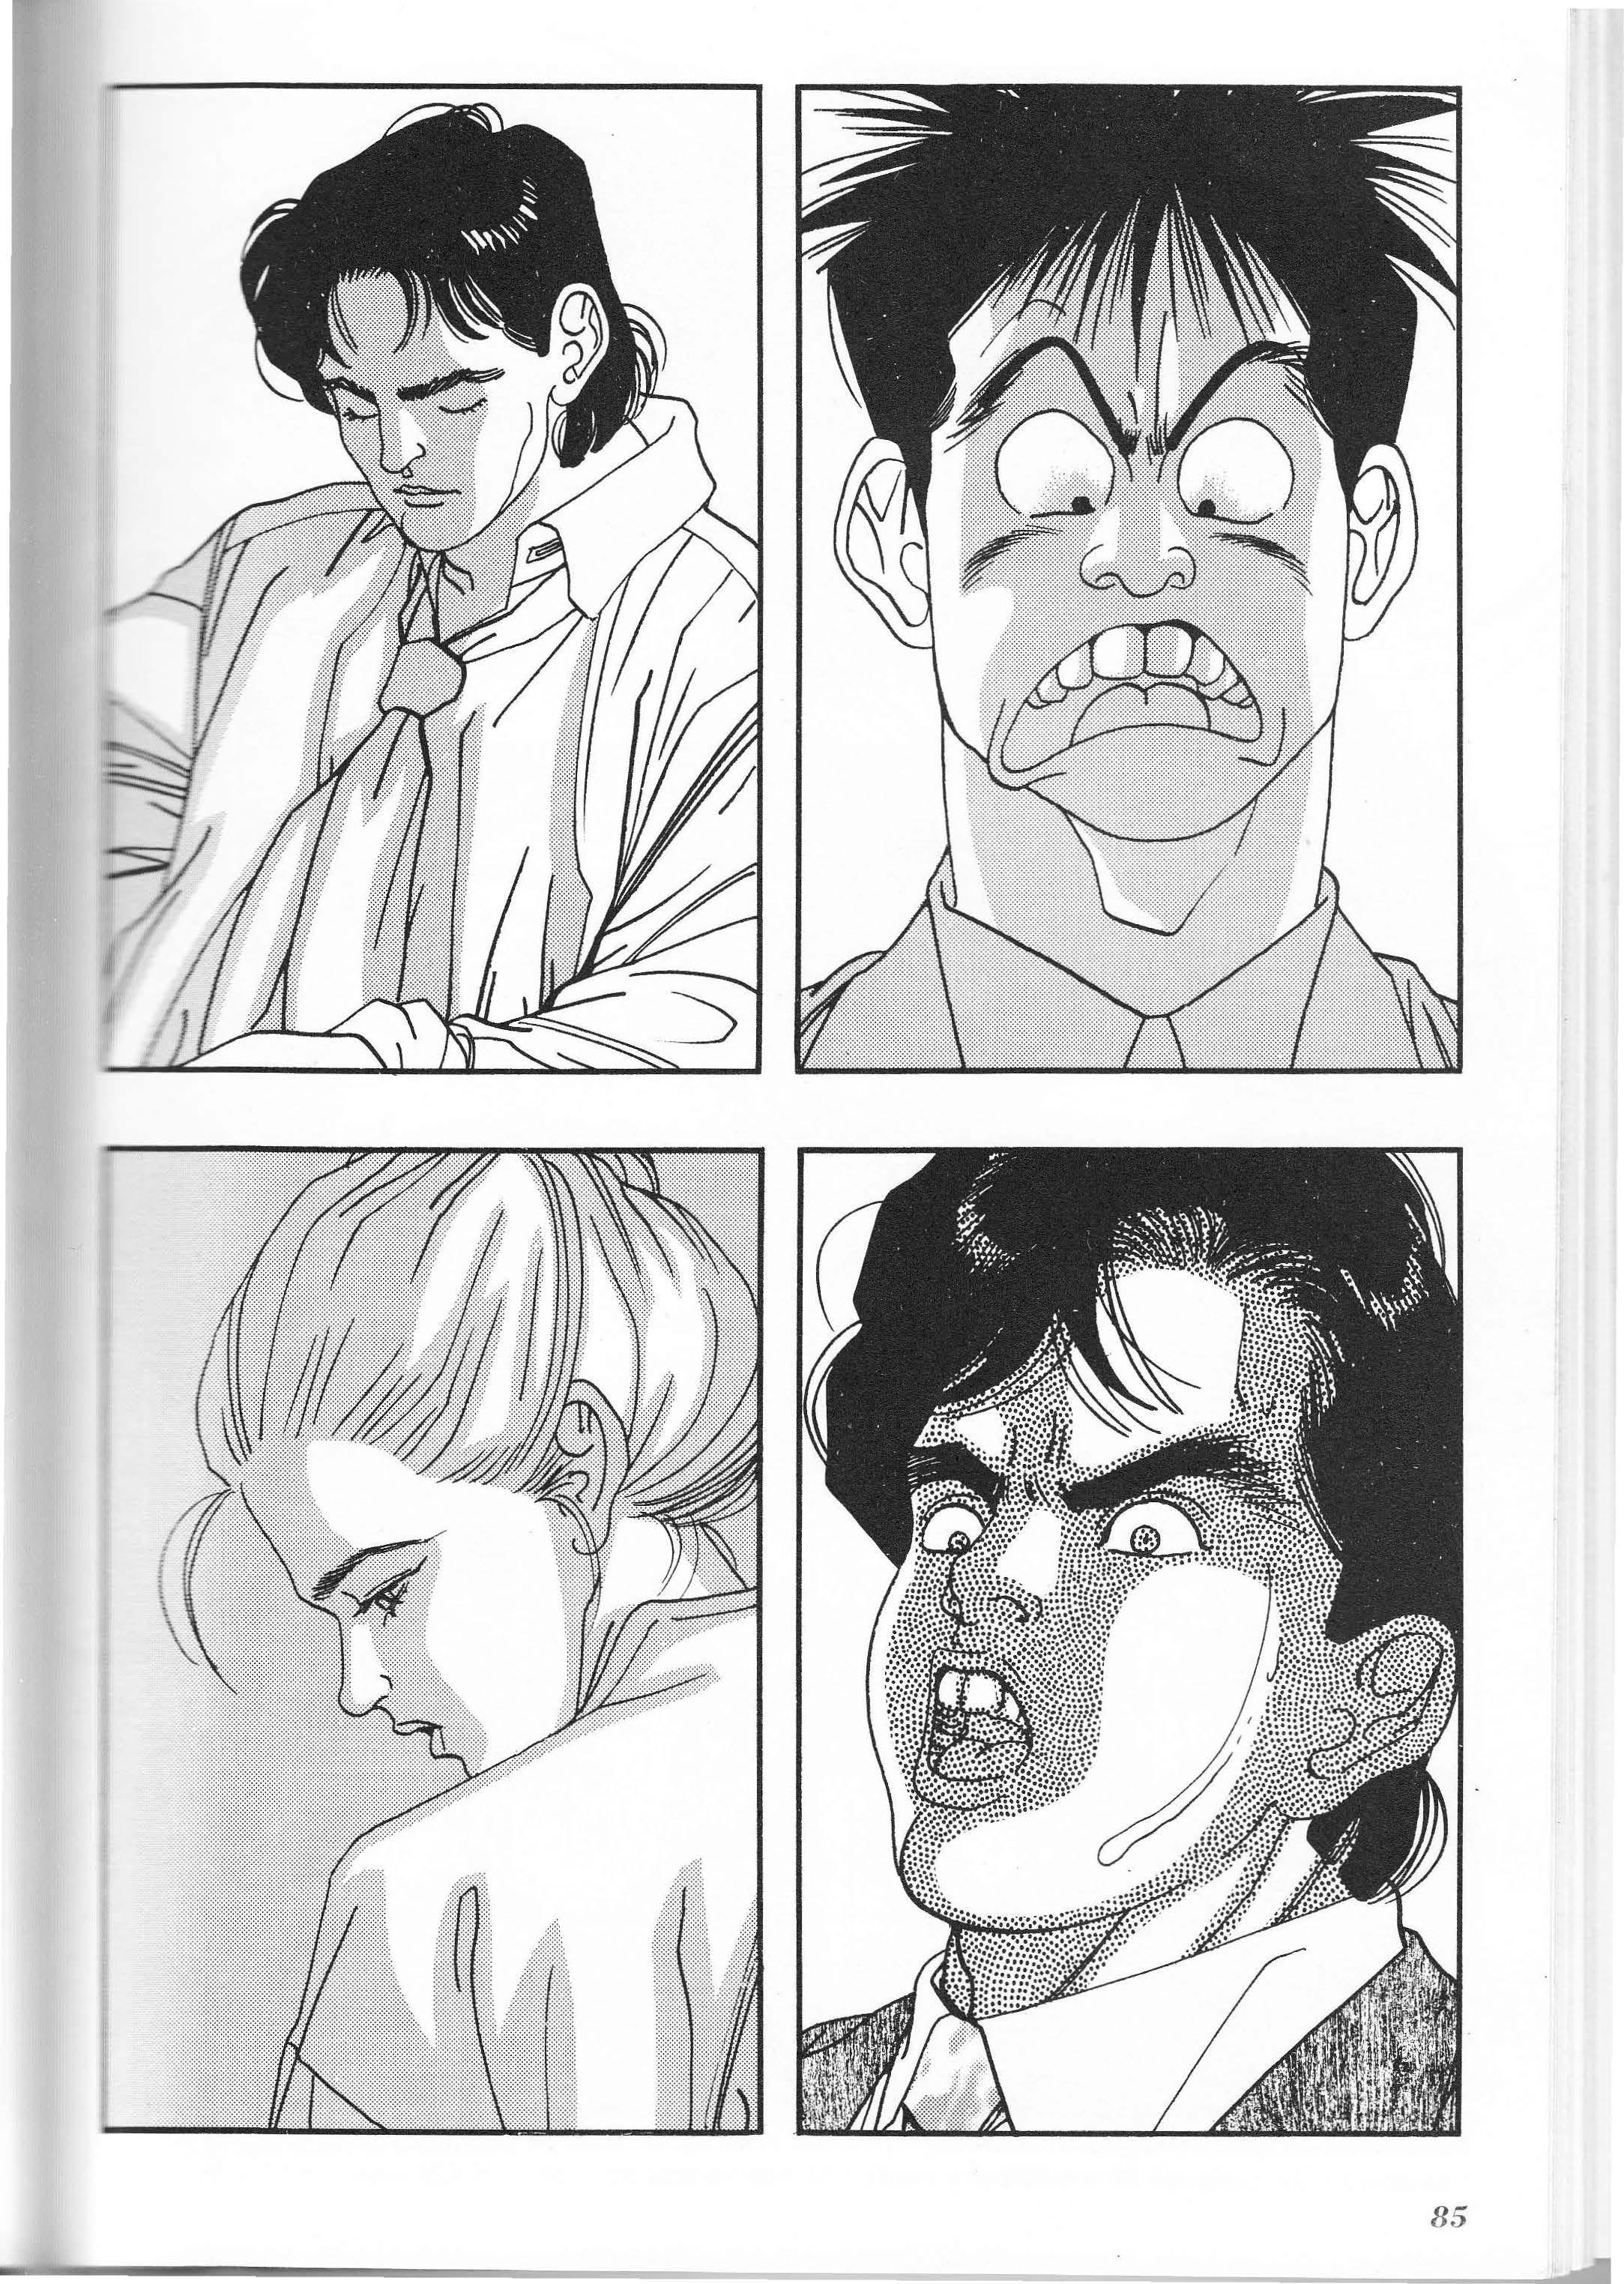
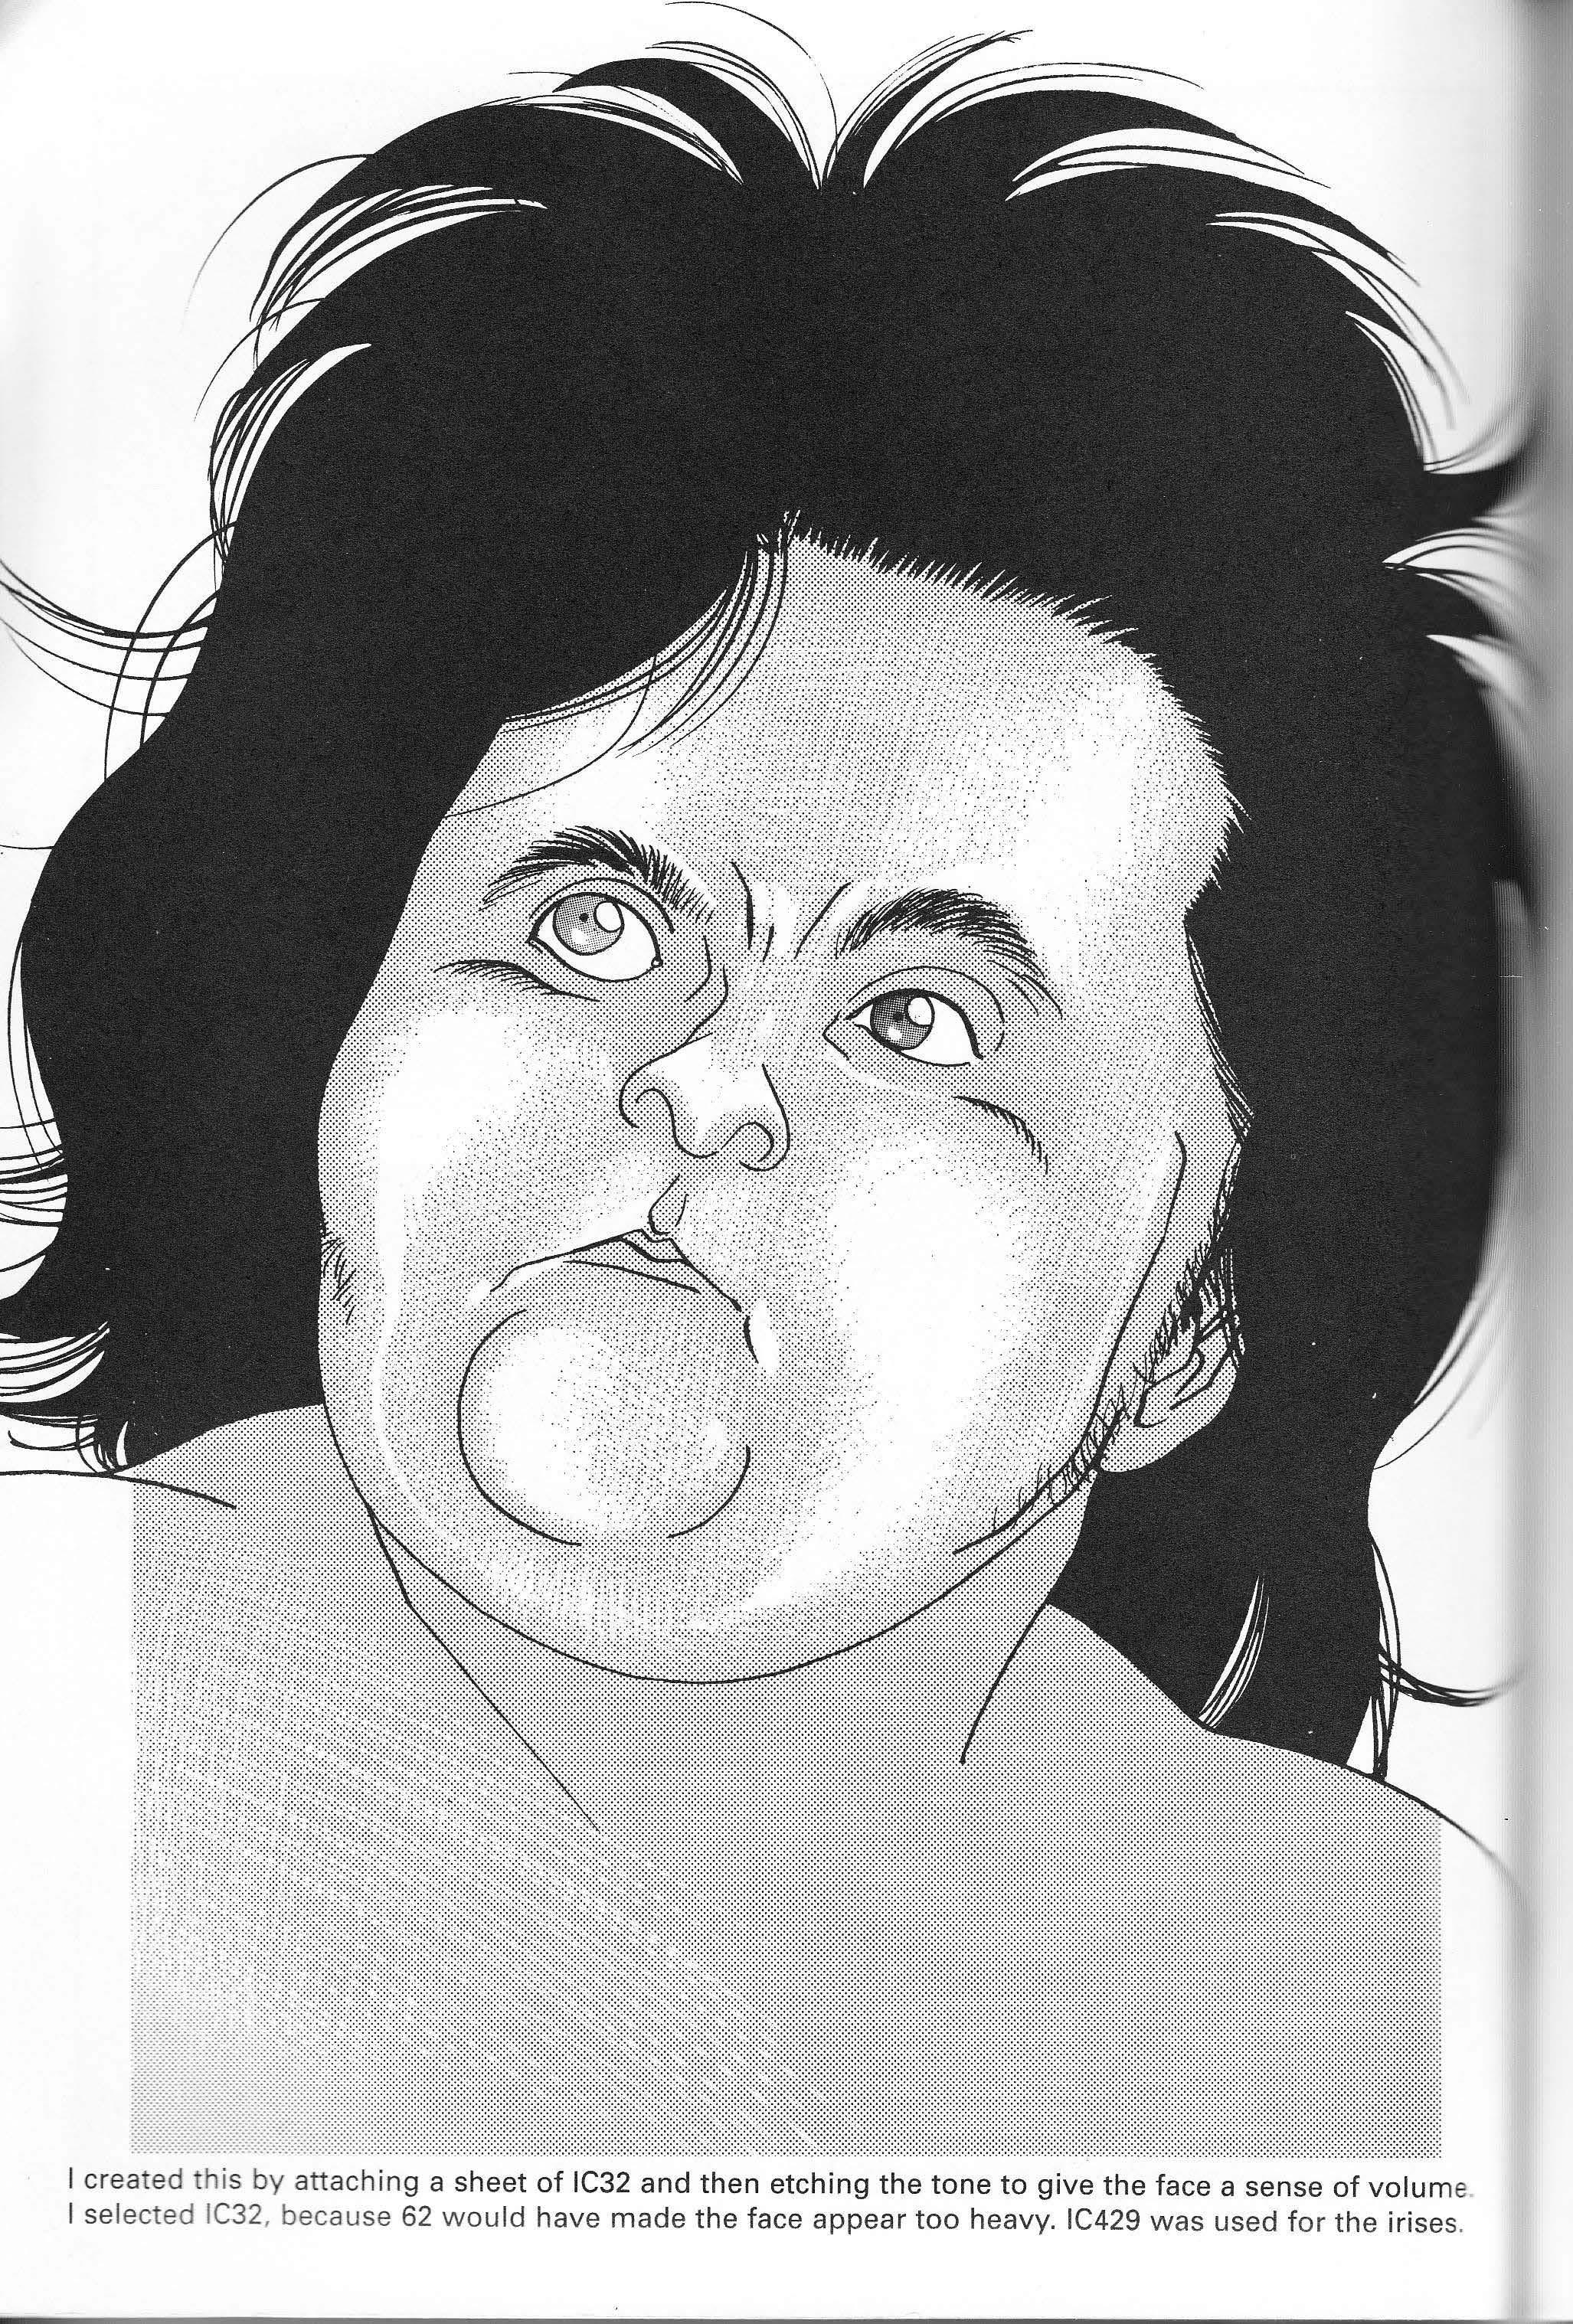
Shading is used in faces primarily to generate a sense of moods or To take this thought even further, it's no exaggeration to say manga basically represents people's emotions (feelings). Notice anything when you look at this?
A lot. The face seems powerful and intimidating, yet at the same time seems sad
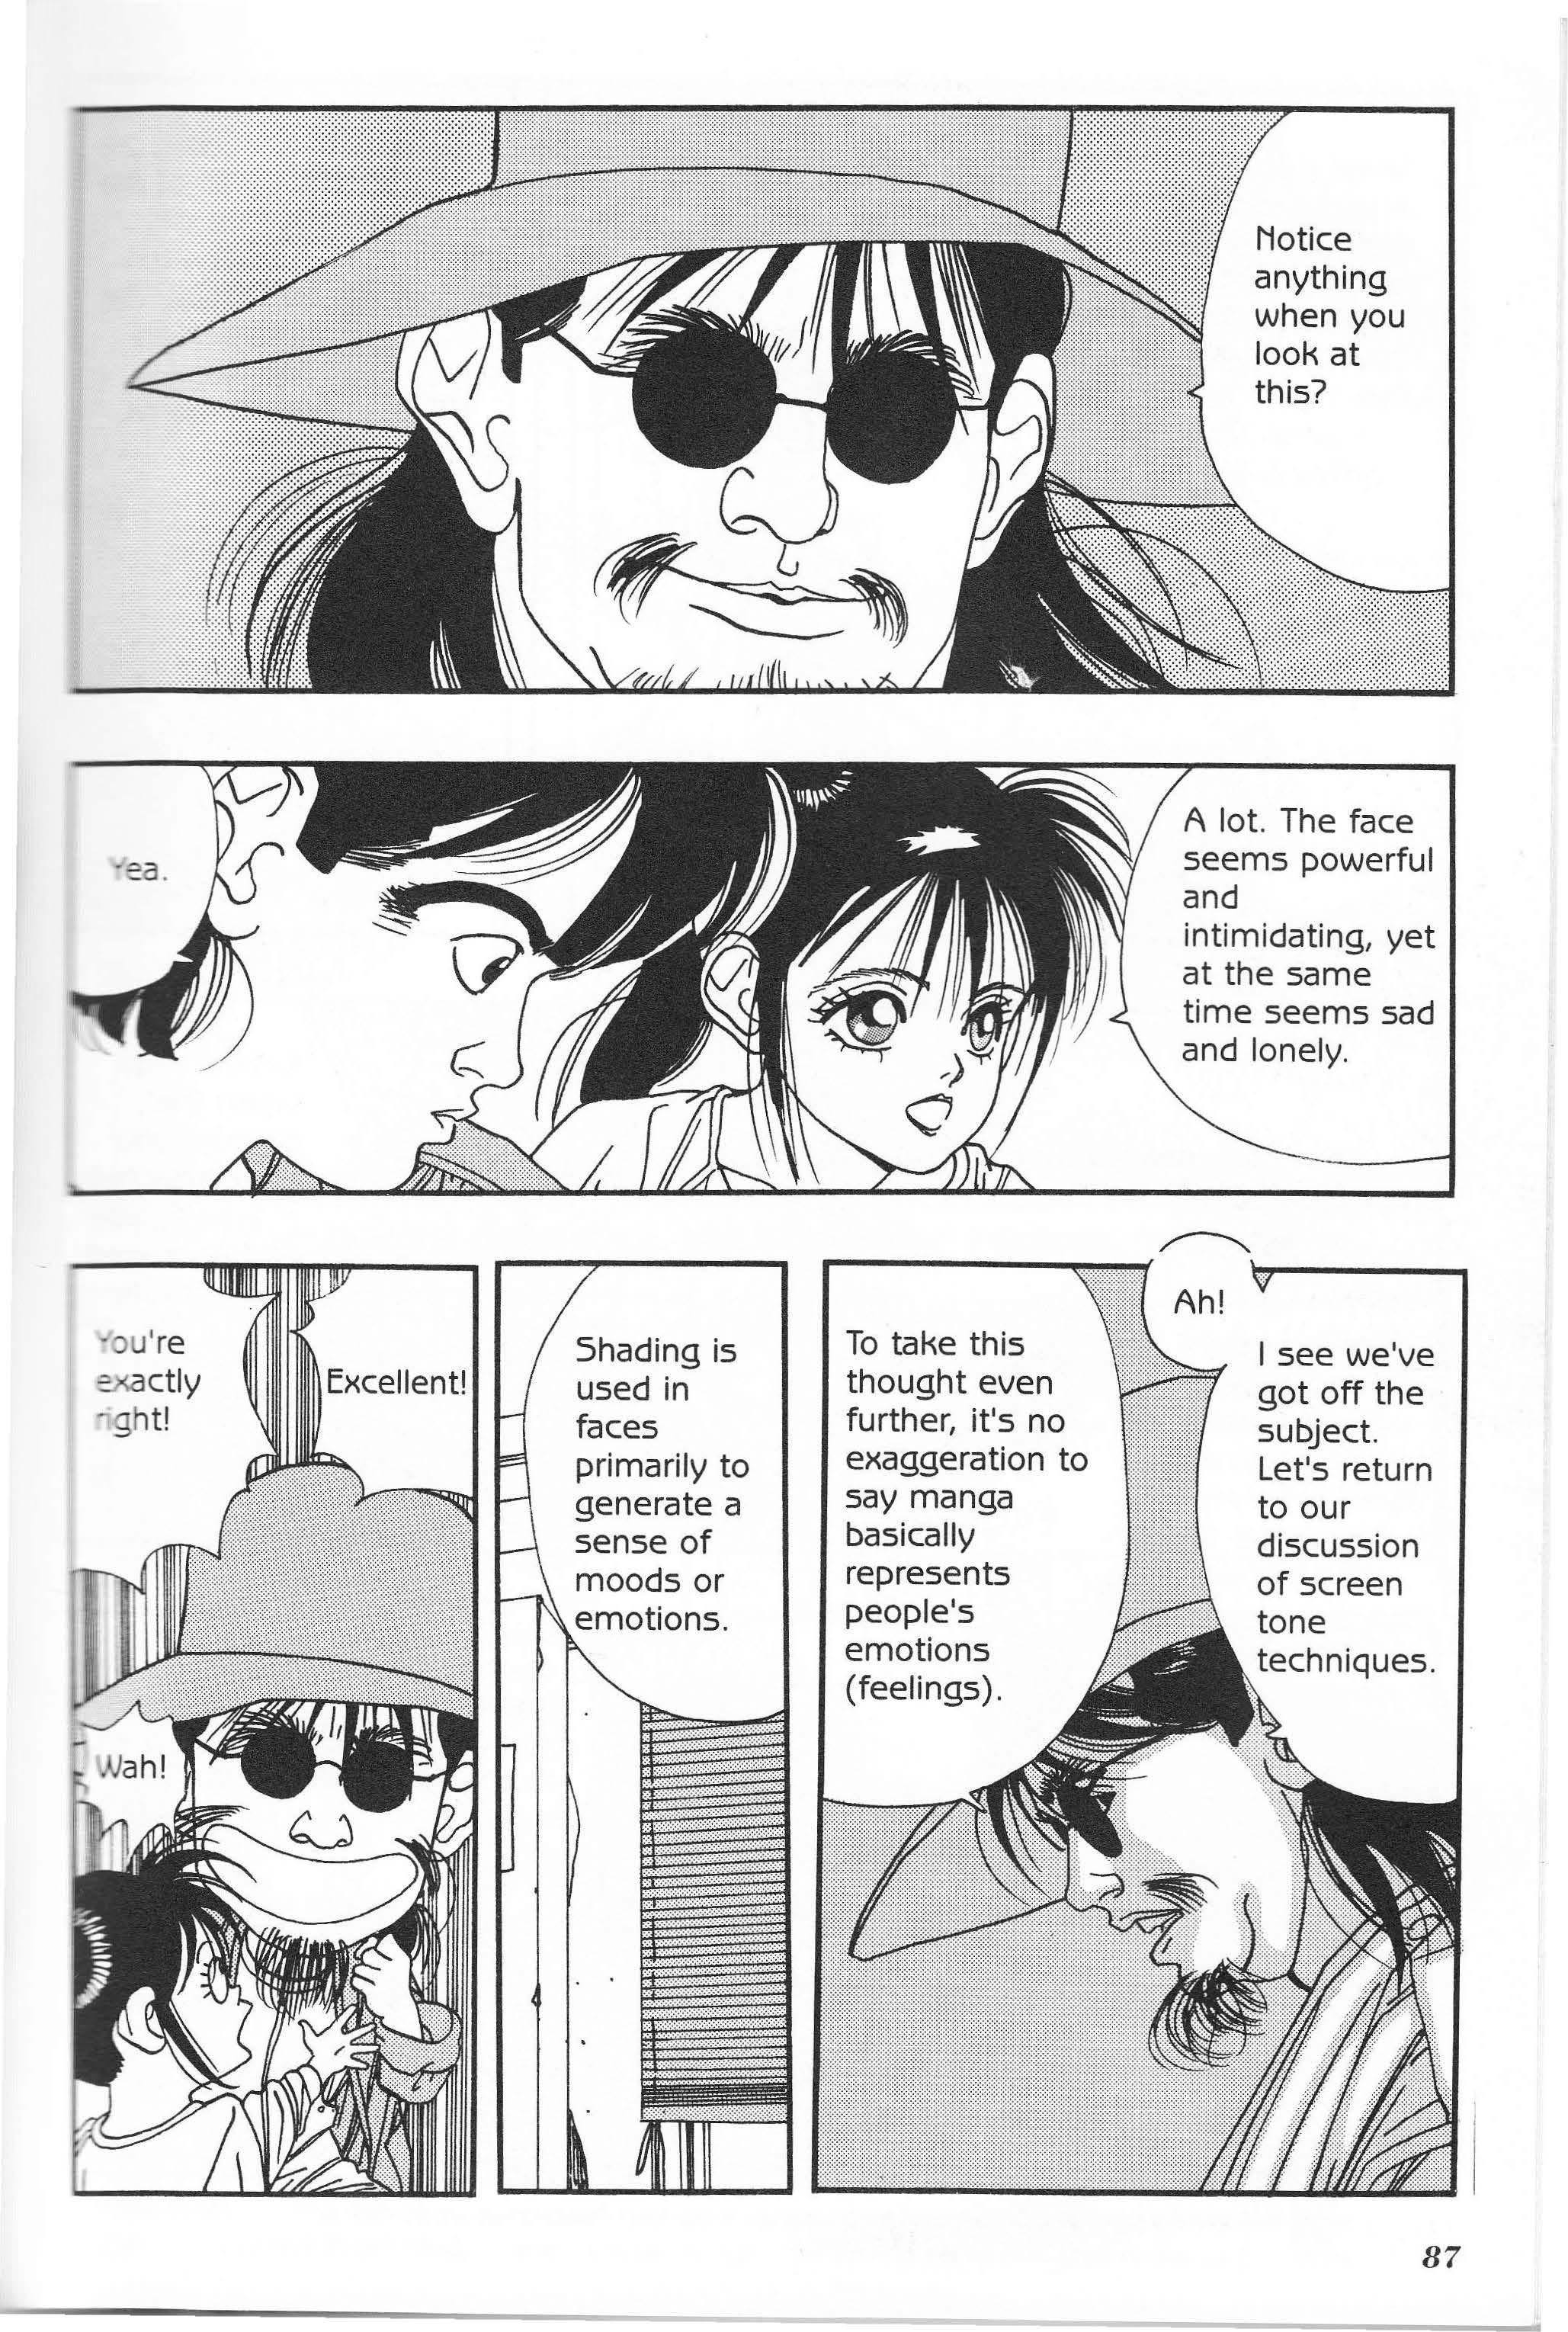
and lonely.
I see we've got off the subject.
Let's return to our discussion
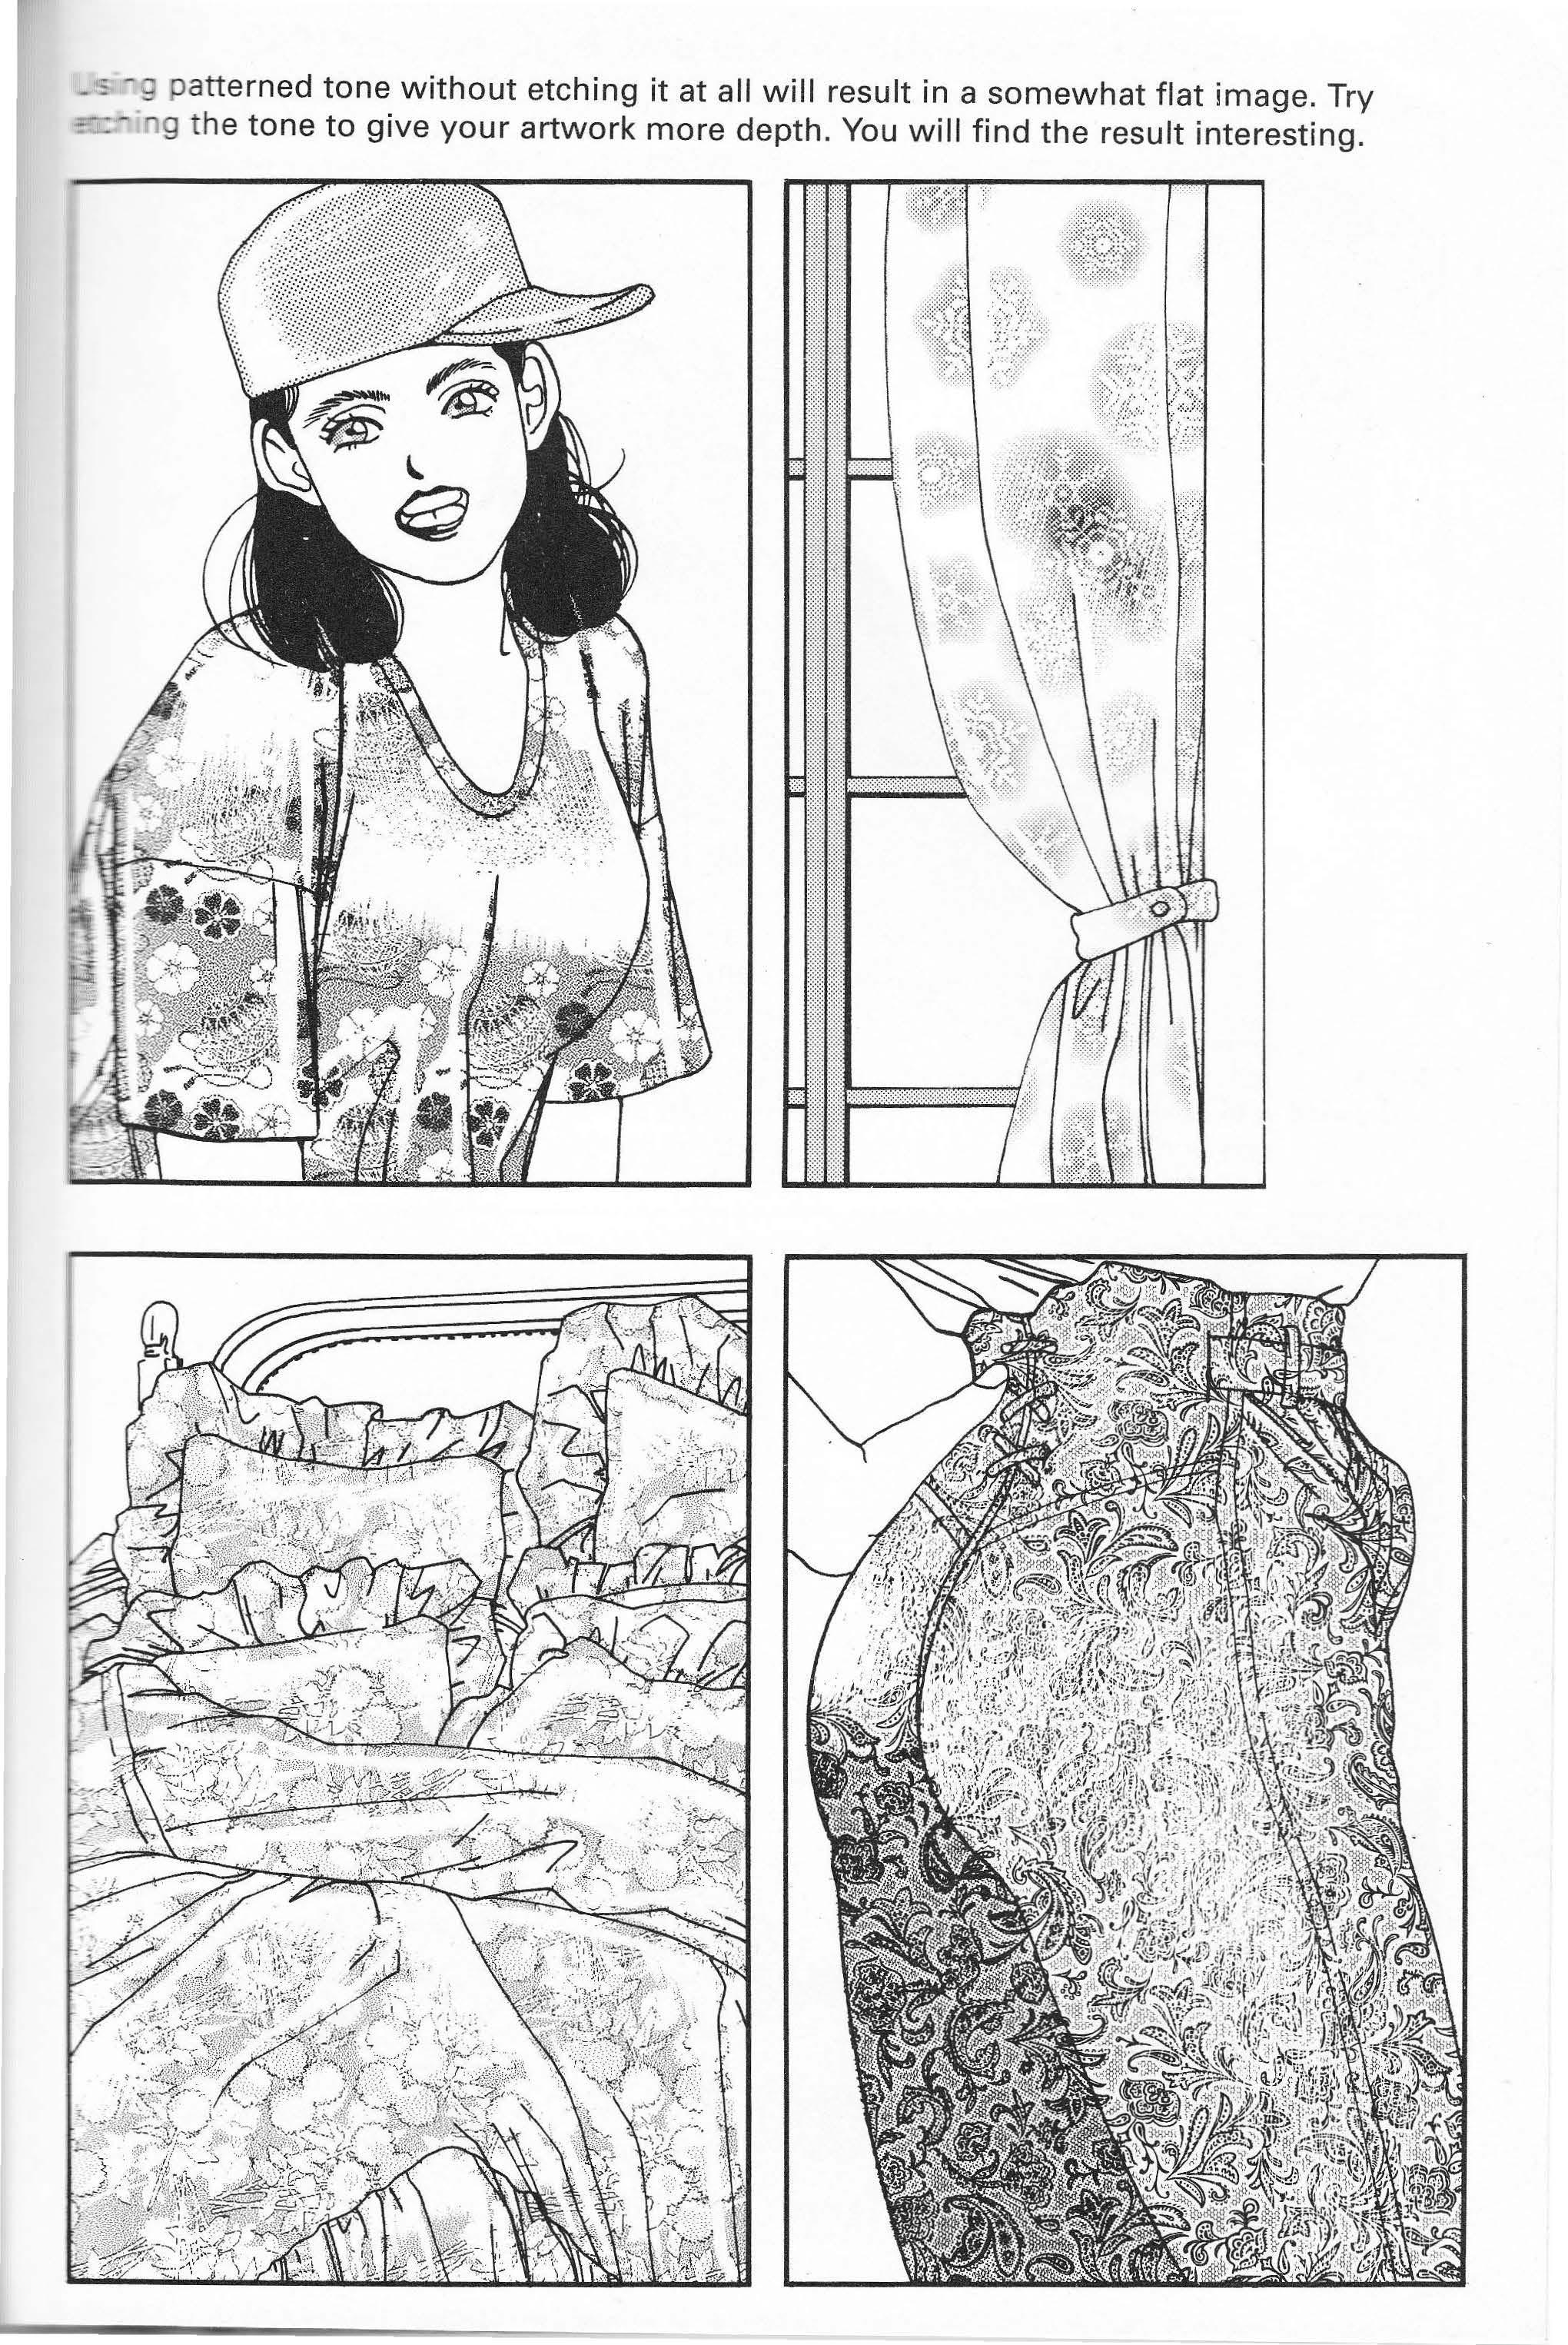
After having attached the tone, use a craft knife to etch away any tone extending over the contour lines. Fill in the area with In order to etch with a craft knife ...
More tone needed here ___ , Using the tip of the I blade, scratch away the screen tone
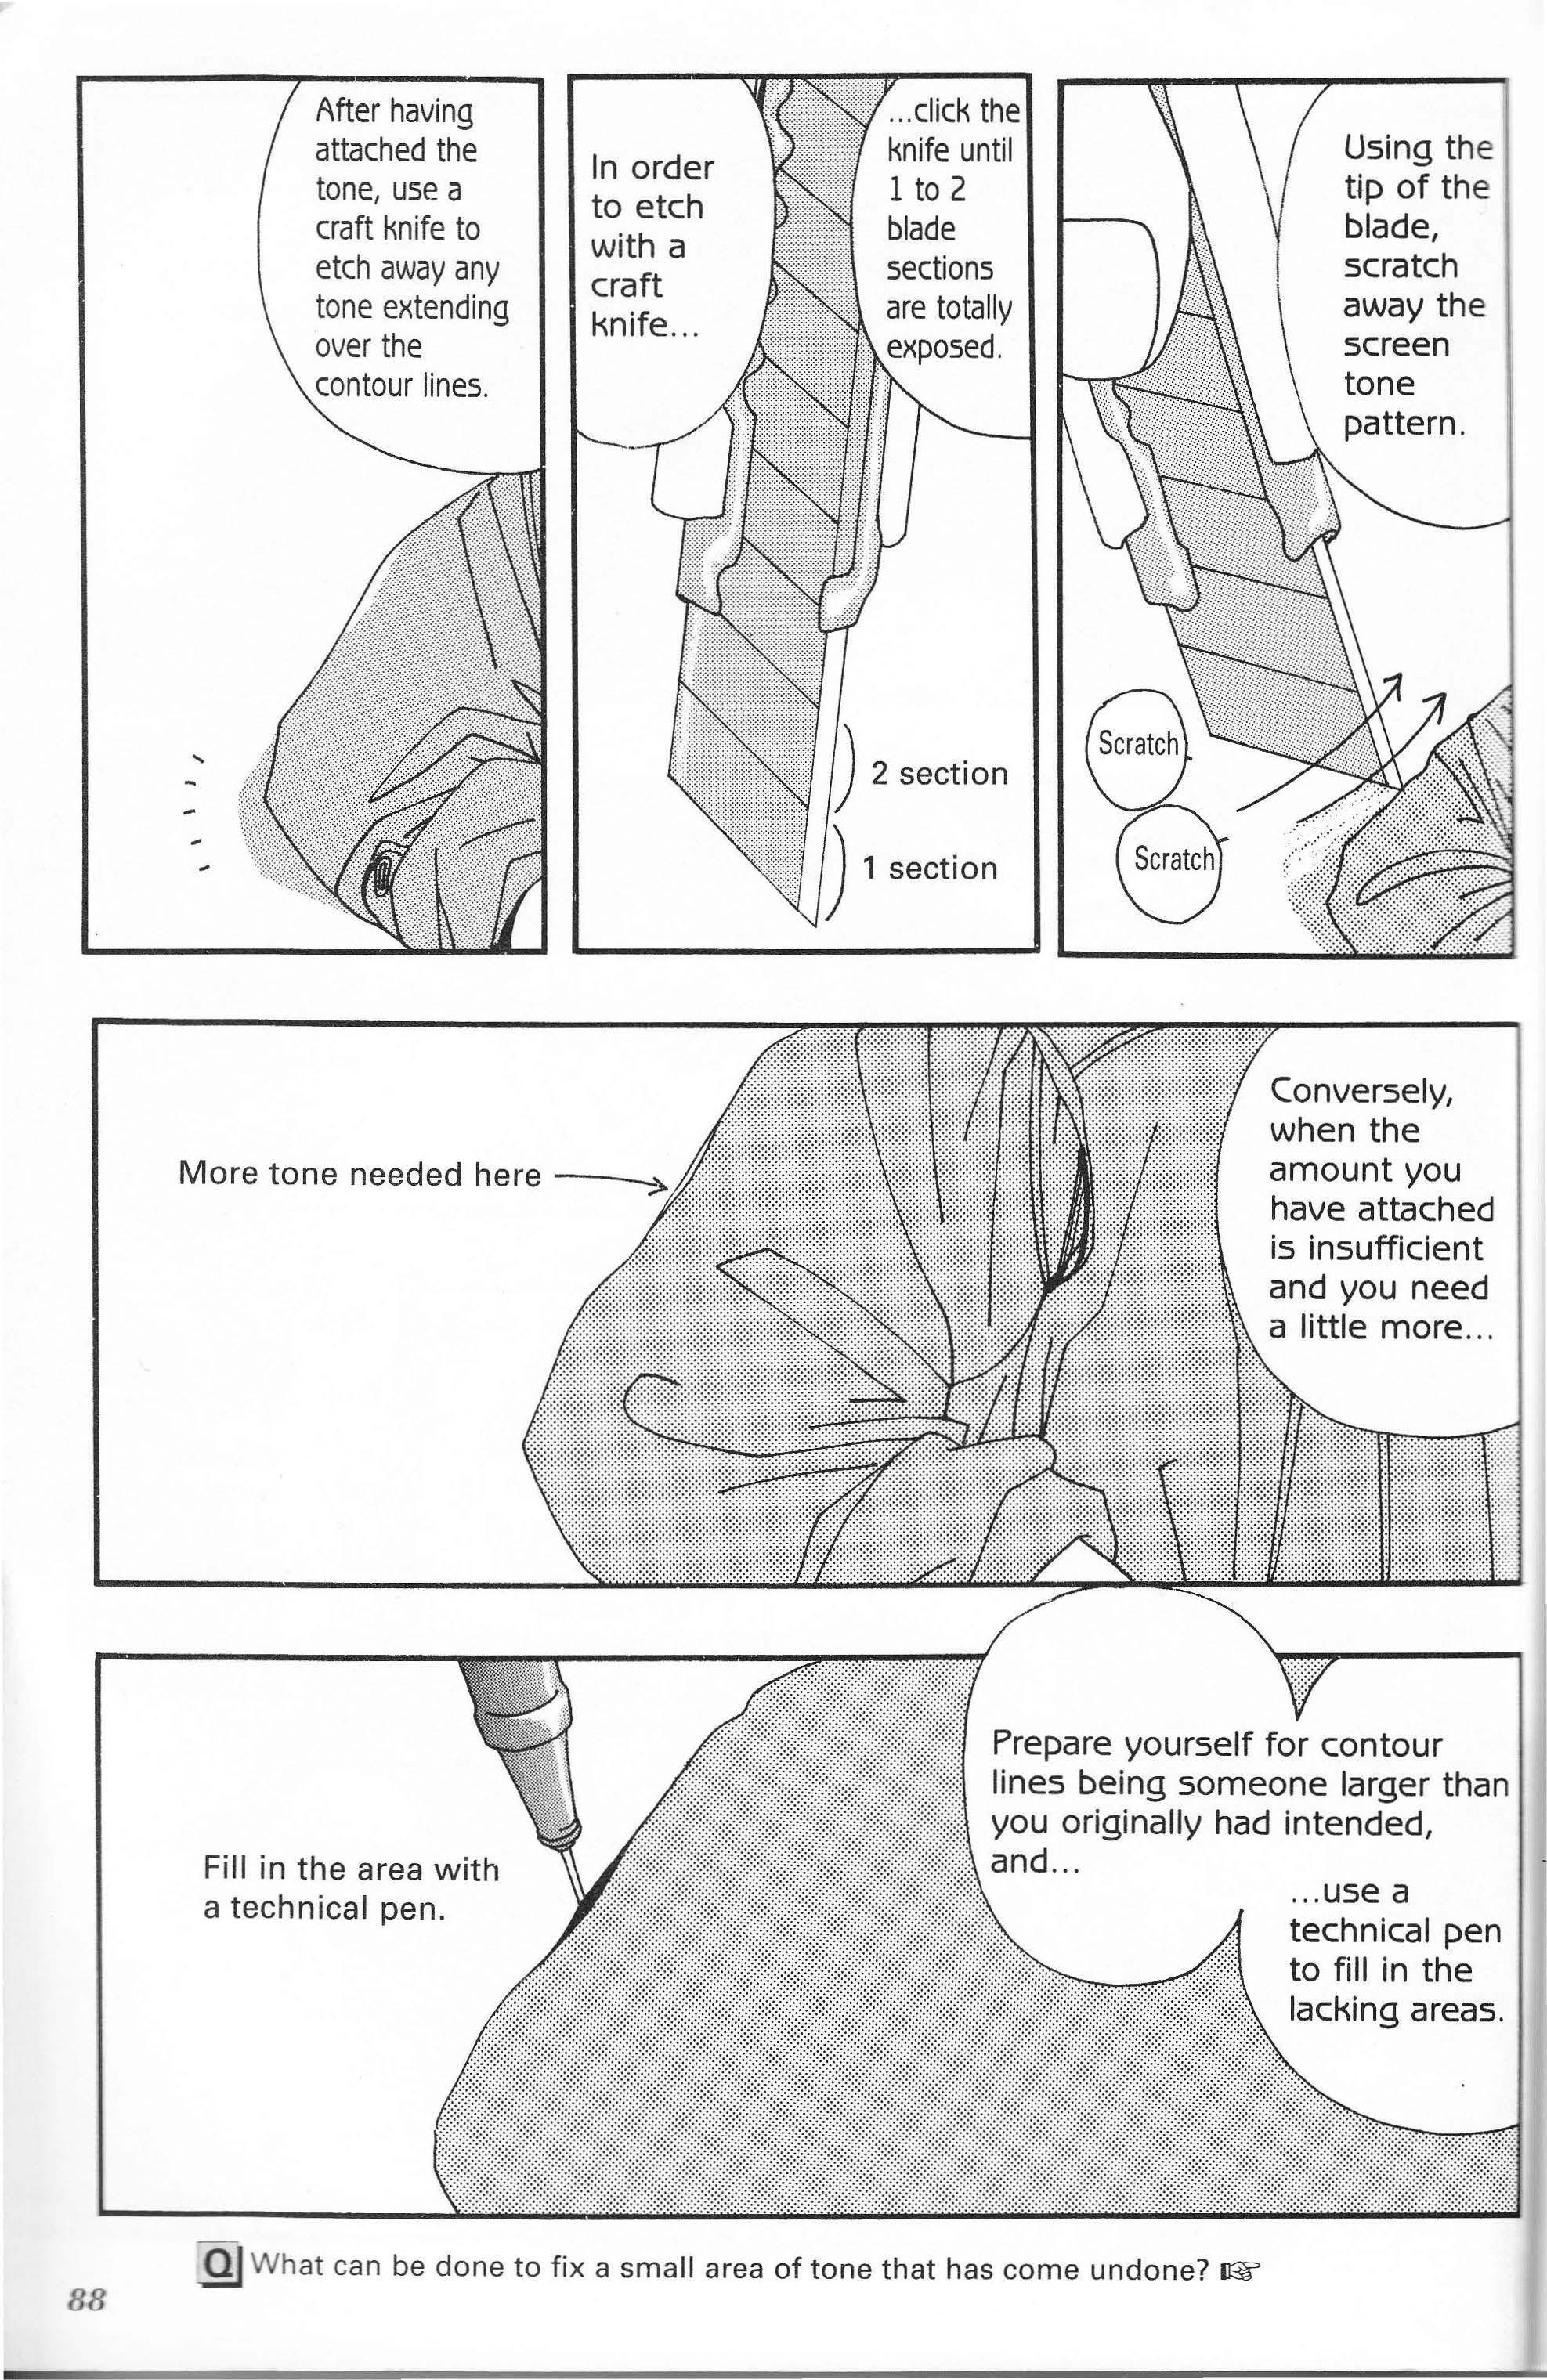
1 section
8 8
pattern . a technical pen.
Prepare yourself for contour lines being someone larger than you originally had intended, and ... .. . use a technical pen to fill in the lacking areas.
If you have missed a large target area when you laid down the tone or if you have laid down the tone incorrectly, you'll have no choice but to peel off the tone and ttach it once again .
A neat trick is to warm up the tone with a dryer. This makes it easier to remove. But, you still should be careful of dust, eraser bits, etched tone bits, and other particles becoming attached to the screen tone sheet's screen tone, be sure that you first carefully clean the top of your desk. If it is a small piece of tone, the heat from a lit cigarette may work instead, but be very careful not to burn
--e sale of tobacco products to minors is illegal. It has been determined that cigarette smoking aza rdous to your health.
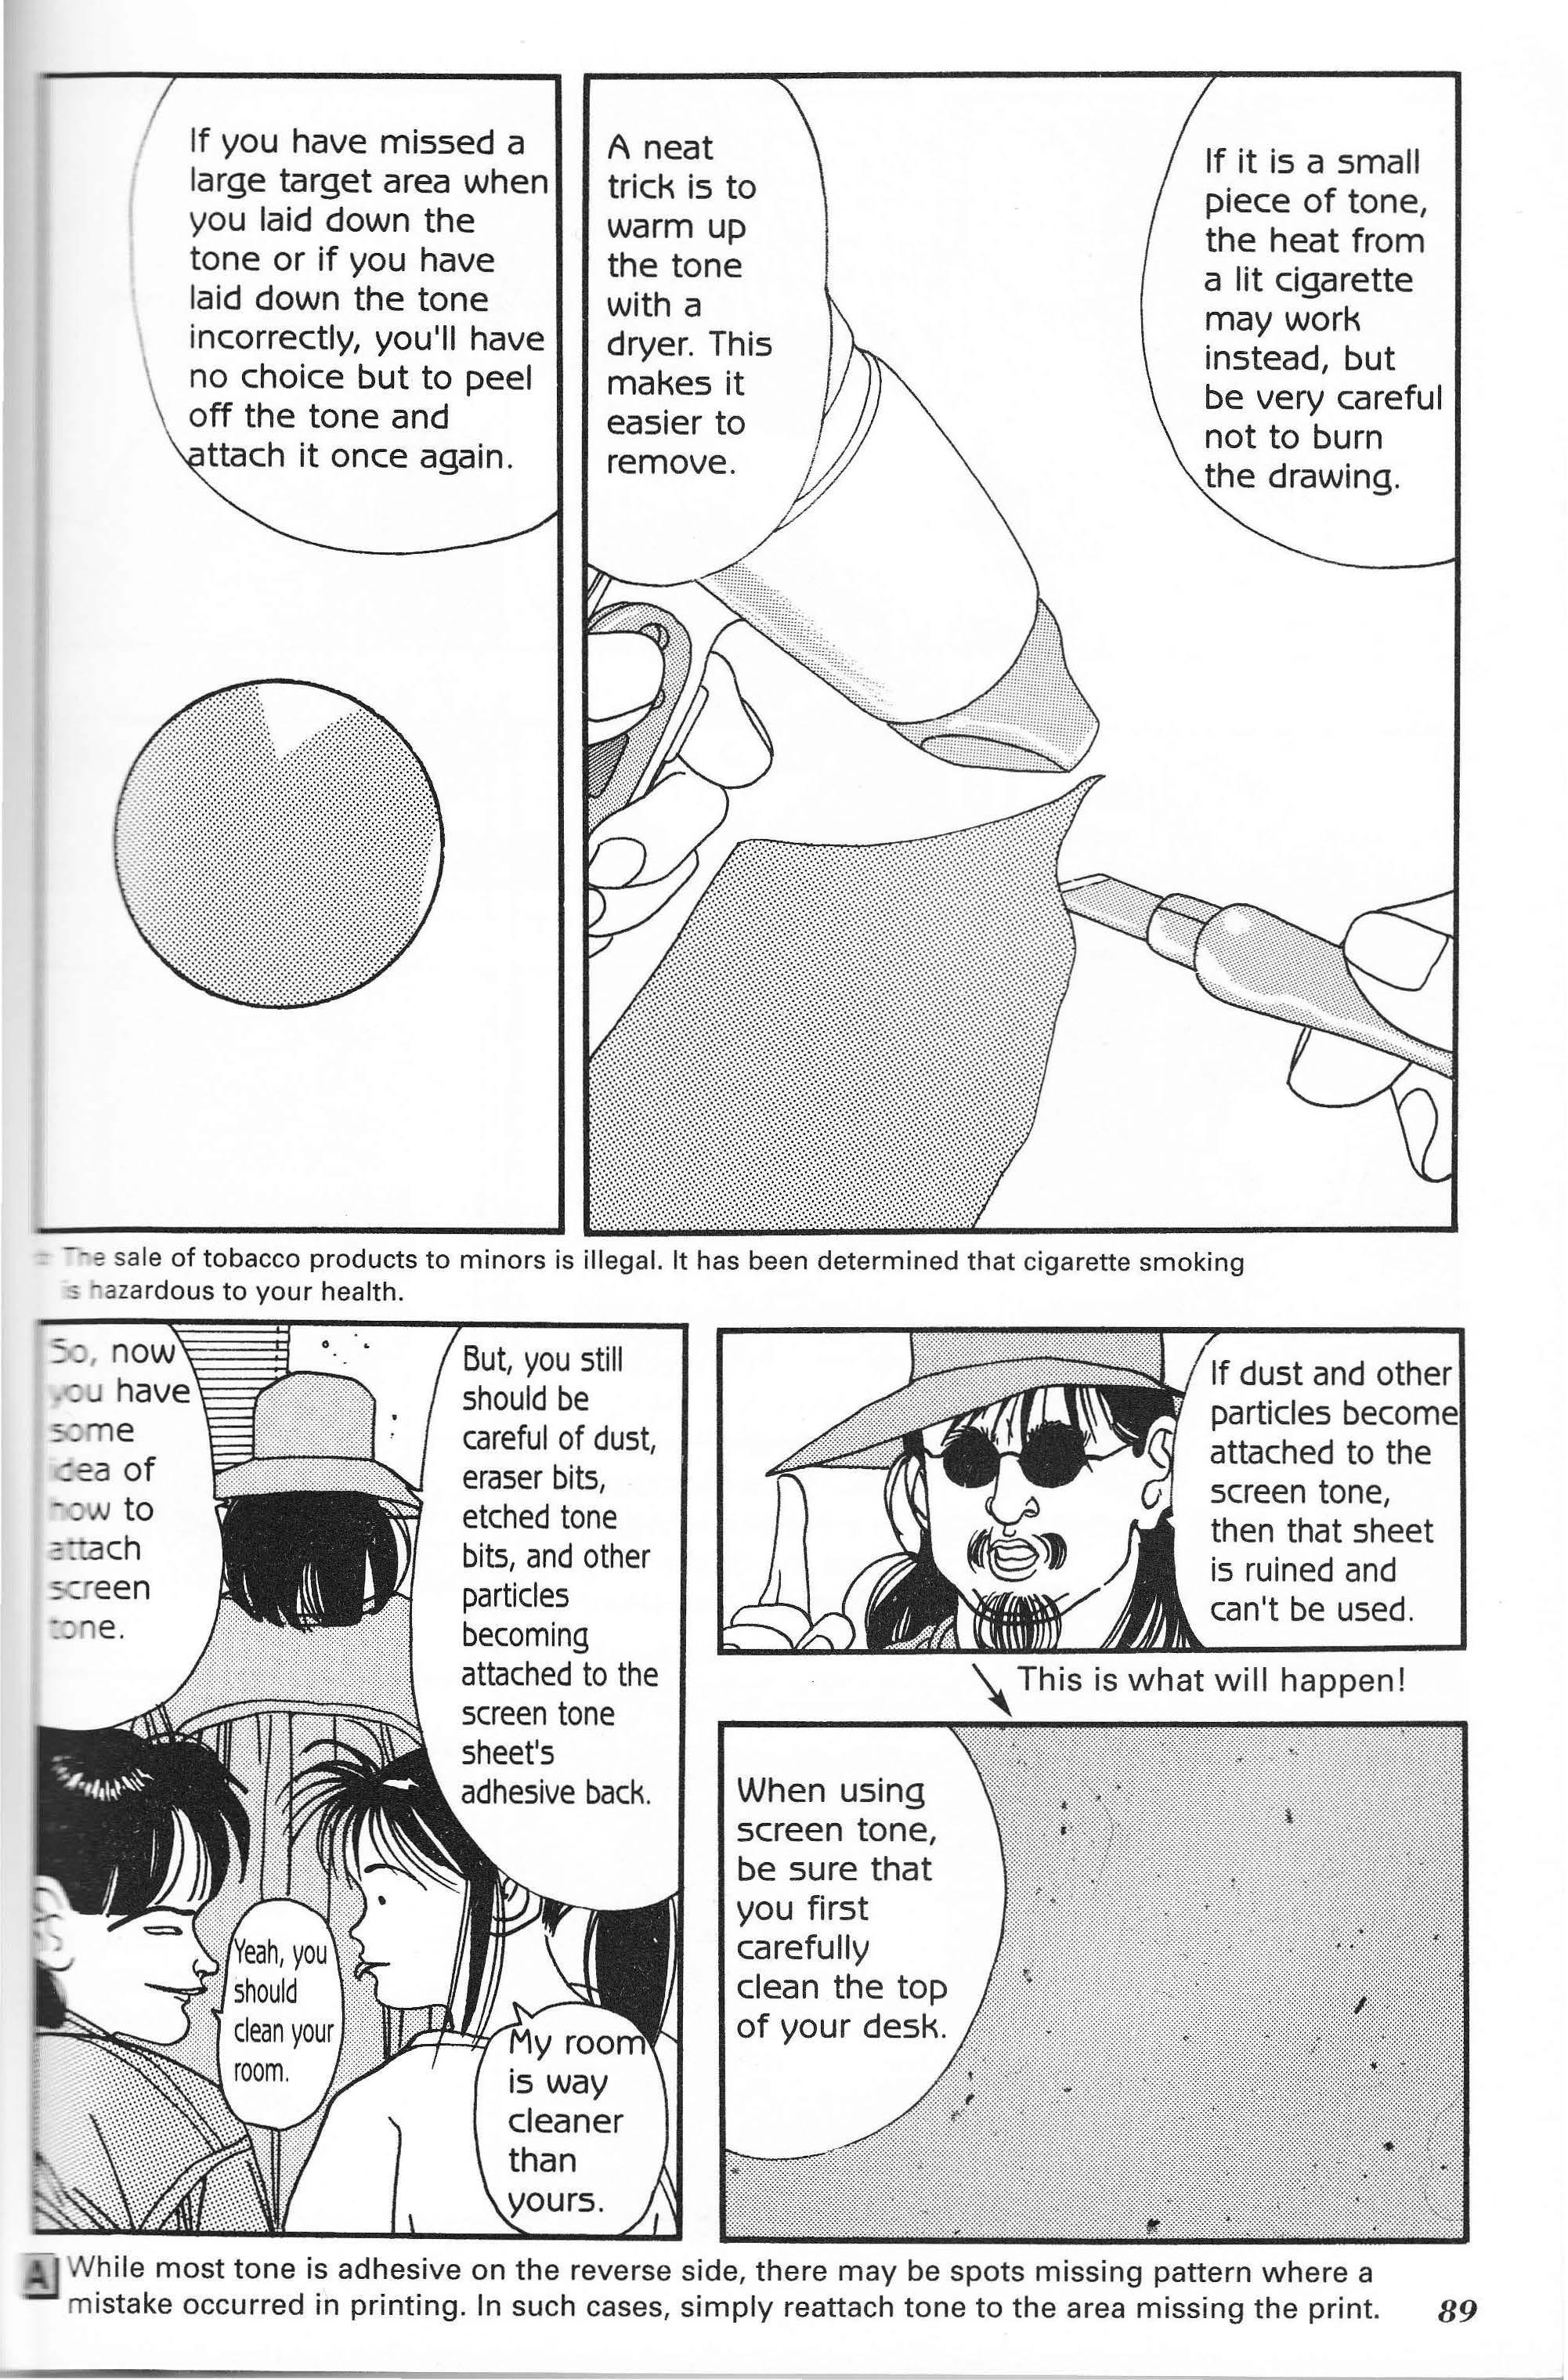
e drawing. adhesive back.
If dust and other particles attached to the screen tone, then that sheet is ruined and
\This is .------.,. what will happen!
When using can't be used .
Our next topic are peculiar traits of dot screen tone . Dot screen tone .. .
Shifting the direction of the screen tone slightly allows the dots to align horizontally or vertically The screen tone as it appears on its paper backing
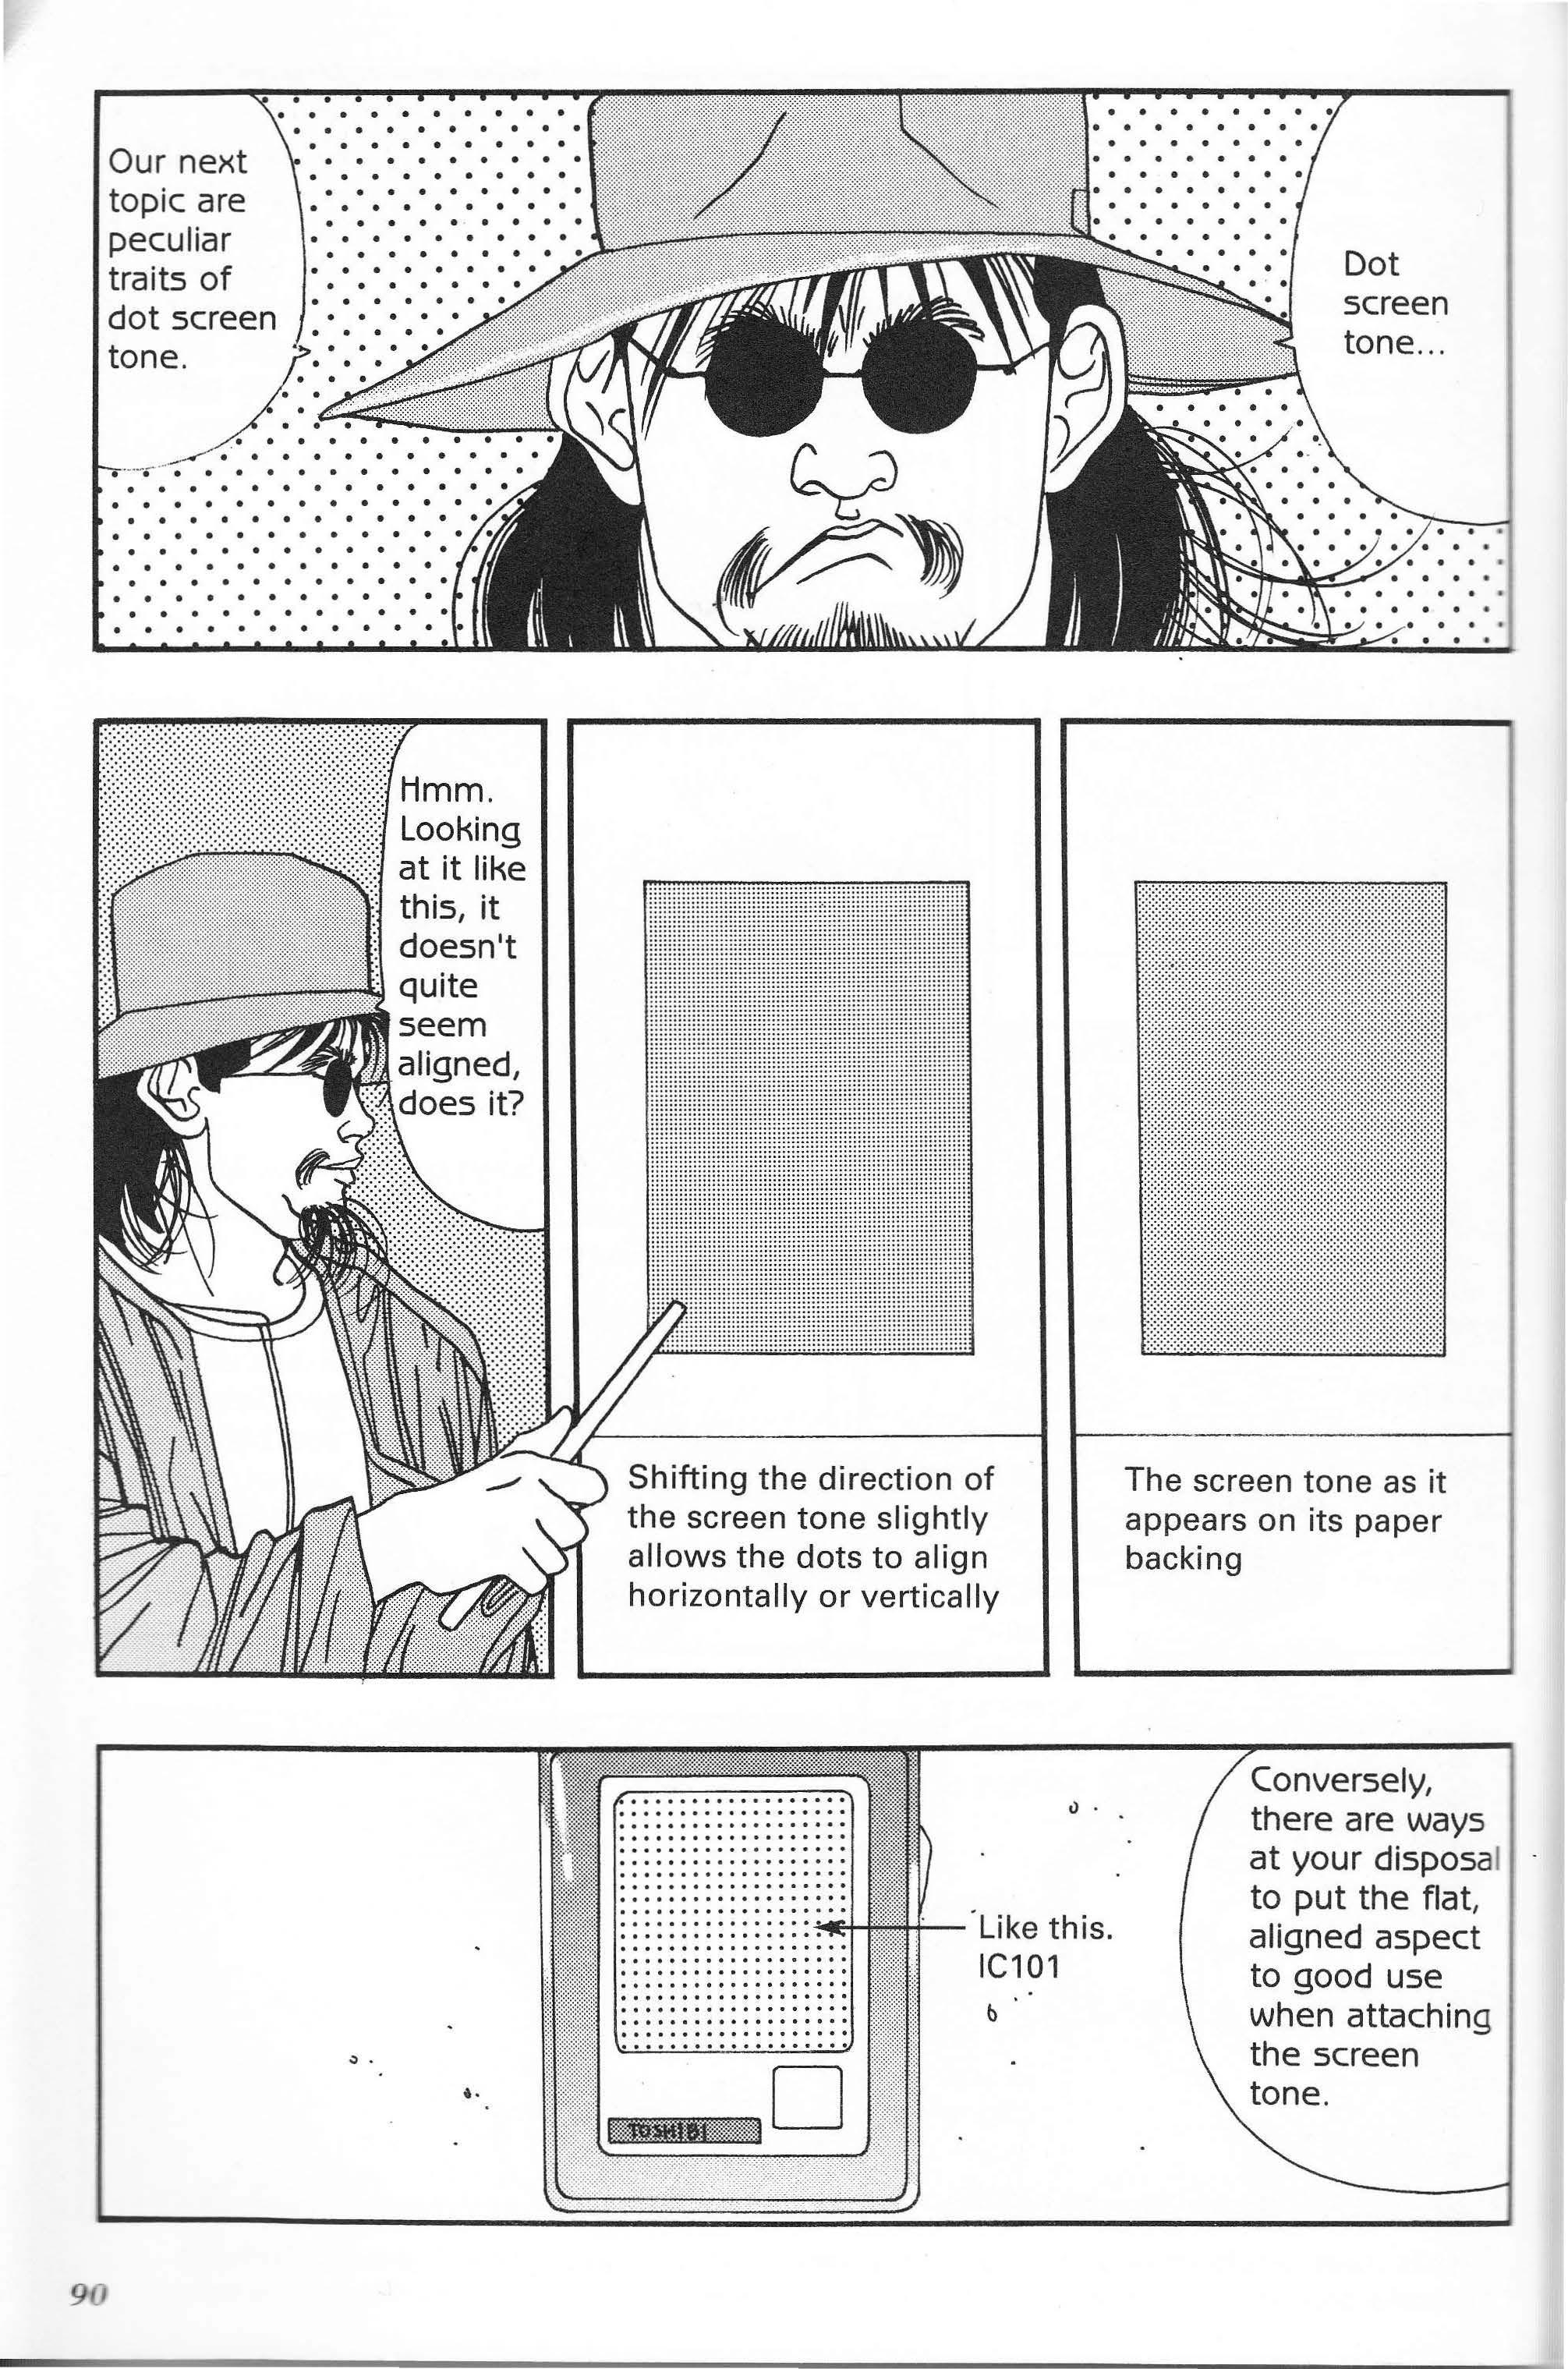
Like this. IC101
b Conversely, there are ways at your disposal to put the flat, aligned aspect to good use when attaching the screen tone .
However, the ideal would be for you to attach the dot tone in the same direction the pattern runs as it sits on its paper backing. This part of the blade is used for etching.
So then, let's take a closer look at etching tone. Take note that depending on the there is the risk that while using point ® to etch the screen tone, point ® may come in contact with the tone leaving unwanted marks.
=C.J ent ly replace your craft knife's blade. It is vital that your knife blade always remain sharp. Etching is done with
the most frequently way the old blade was snapped off, either this
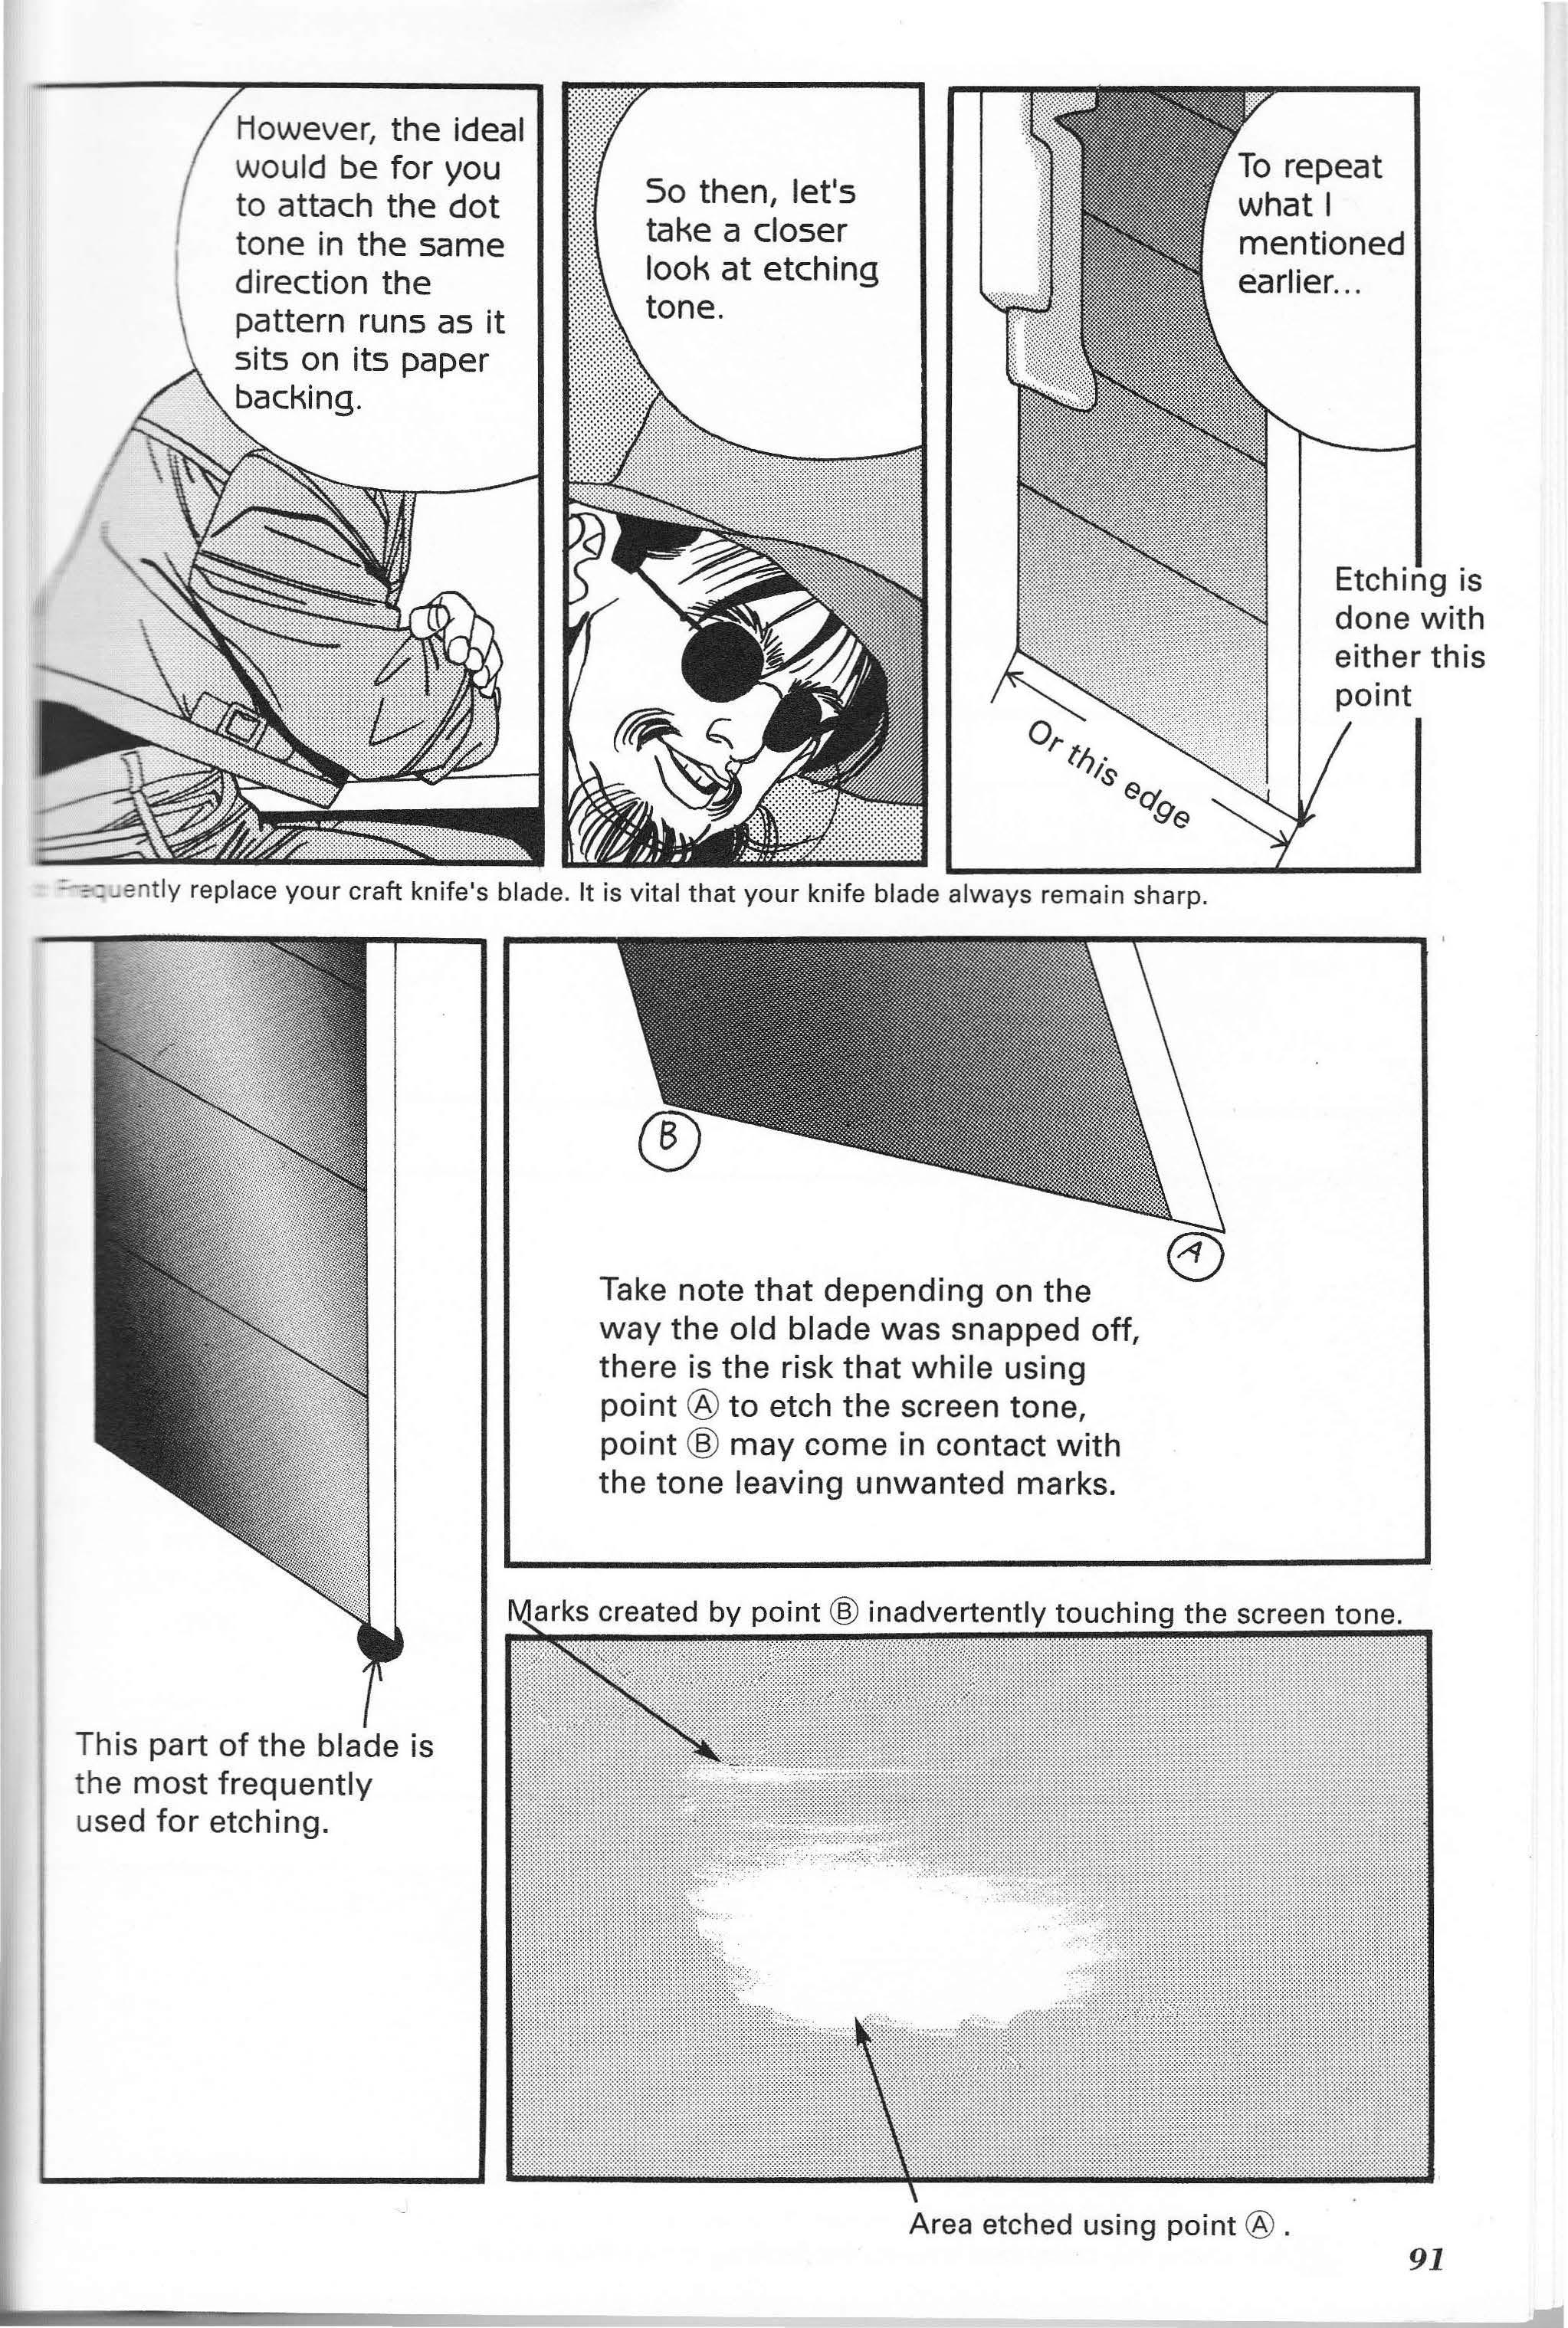
rks created by point ® inadvertently touchin
the screen tone.
The etching is done with this
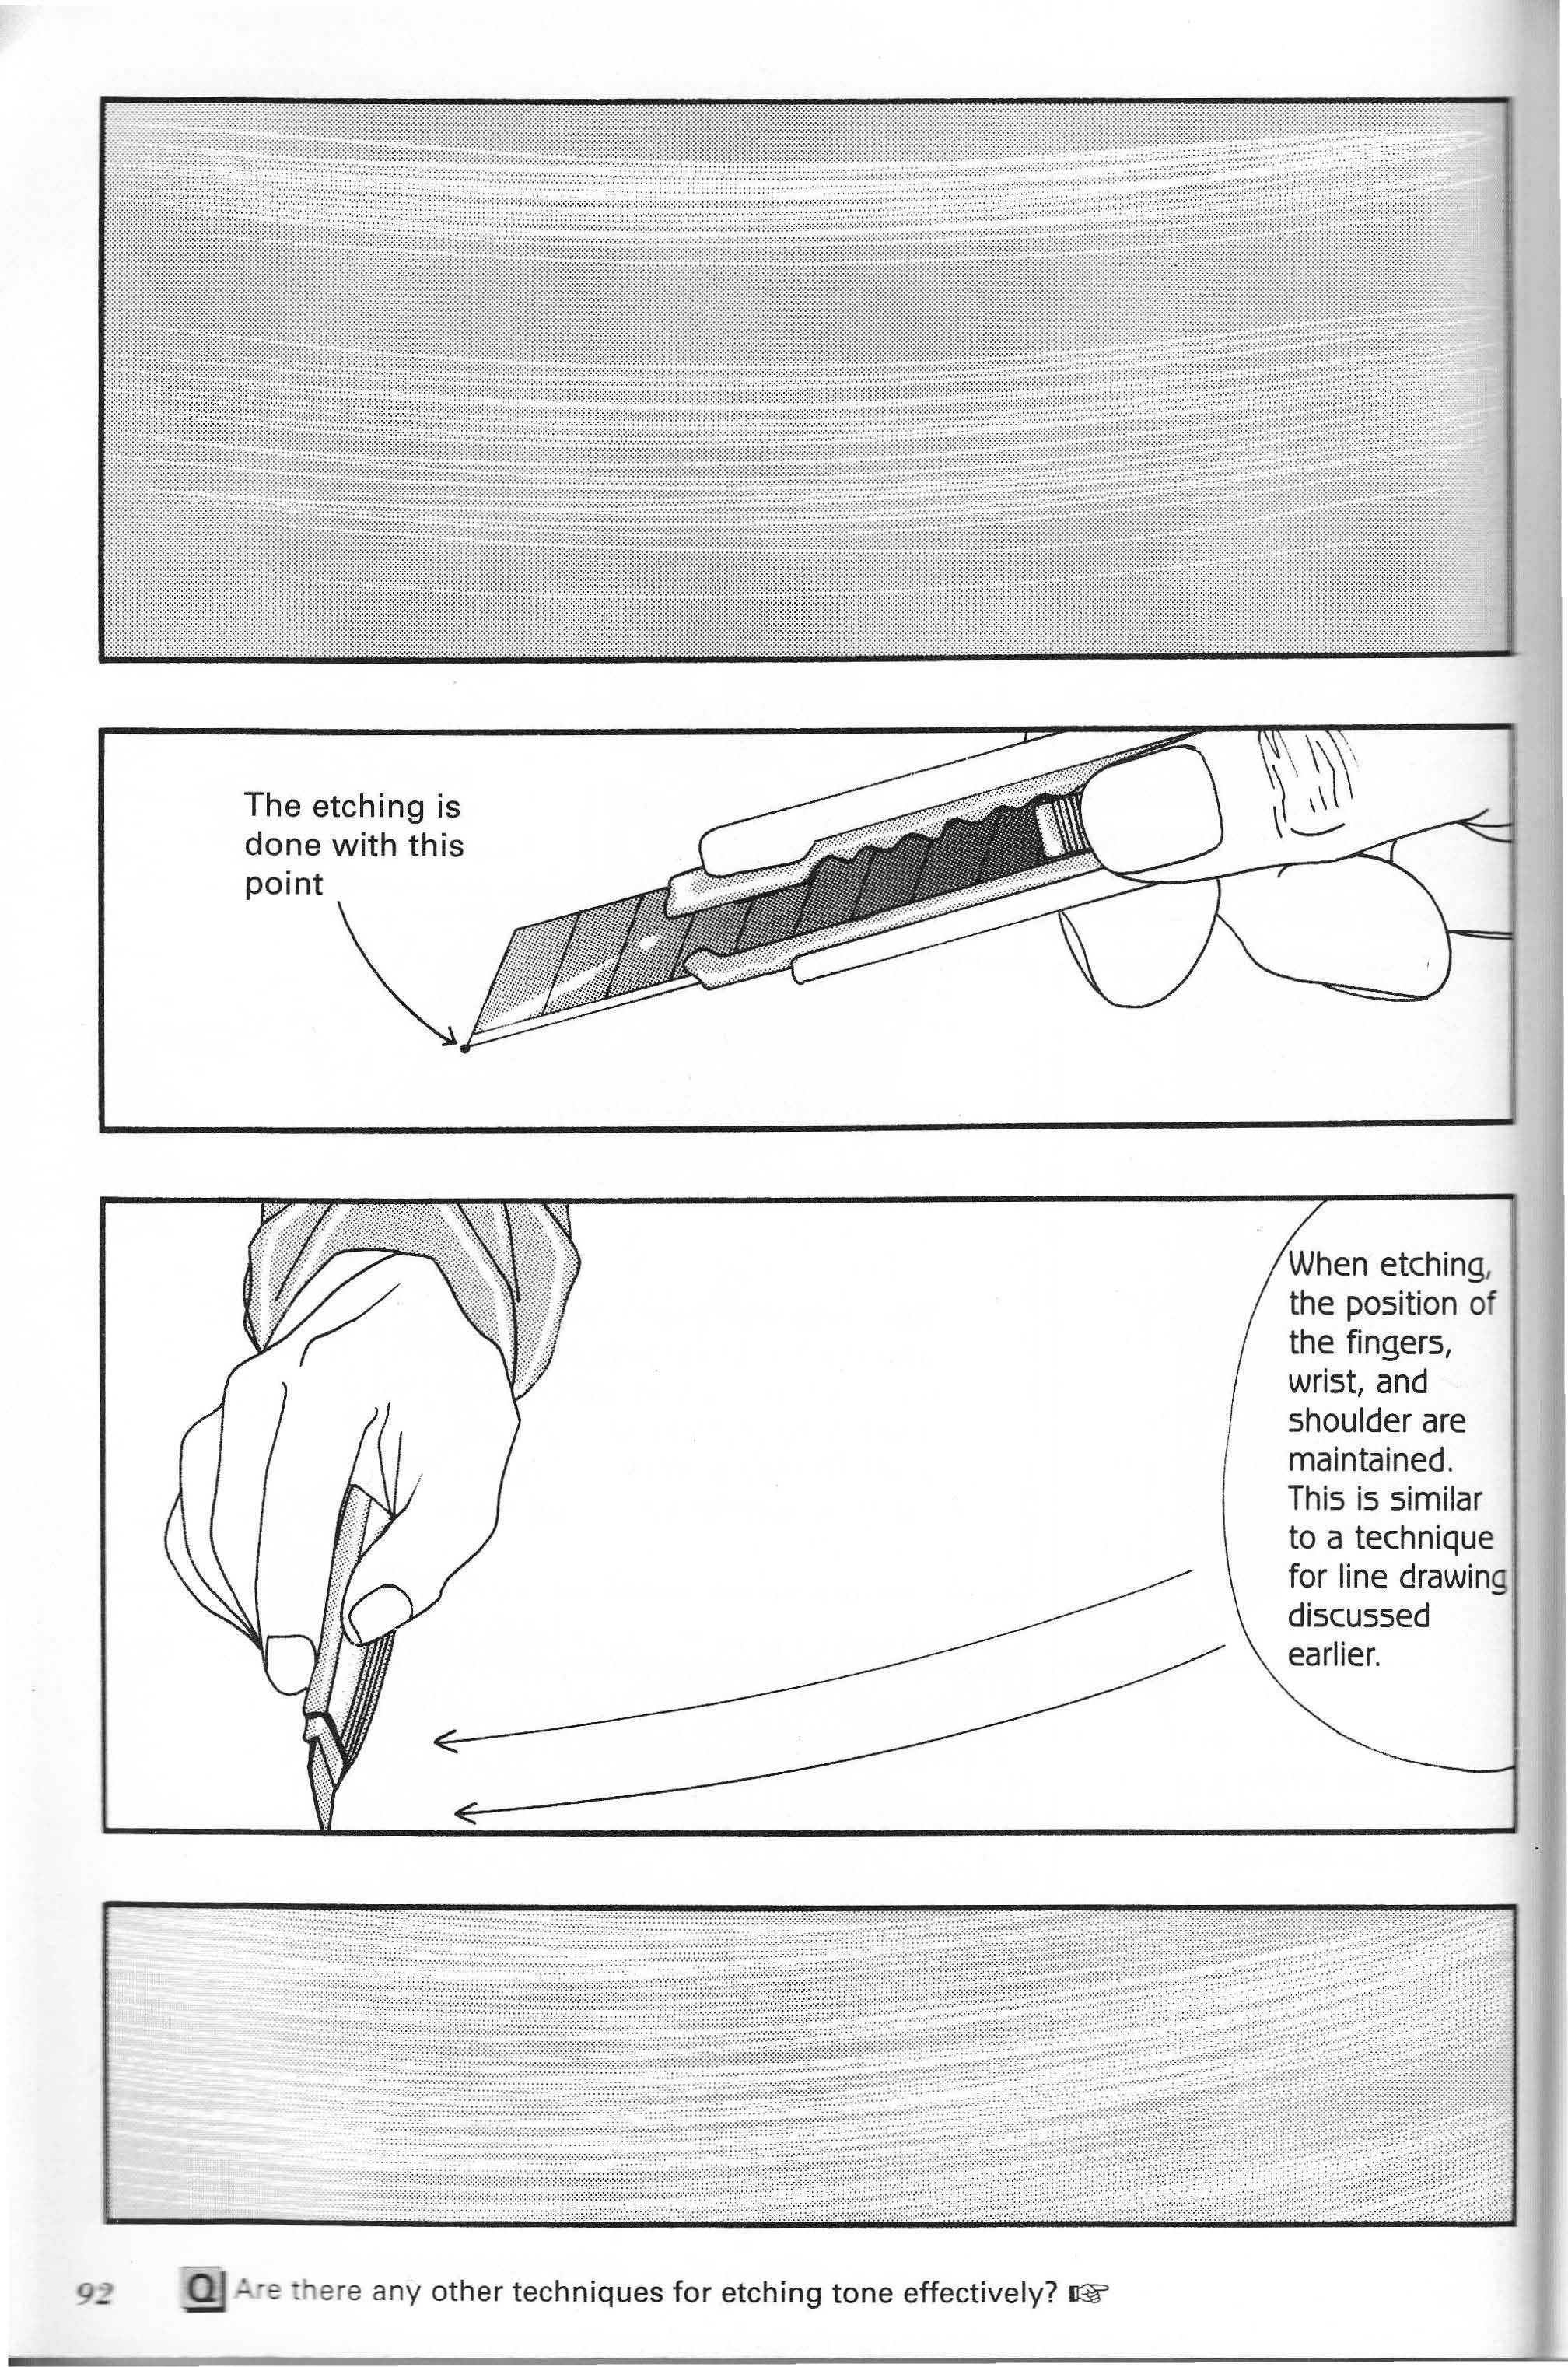
etching, the position of the fingers, wrist, and shoulder are maintained . This is similar to a technique for line drawi discussed earlier.
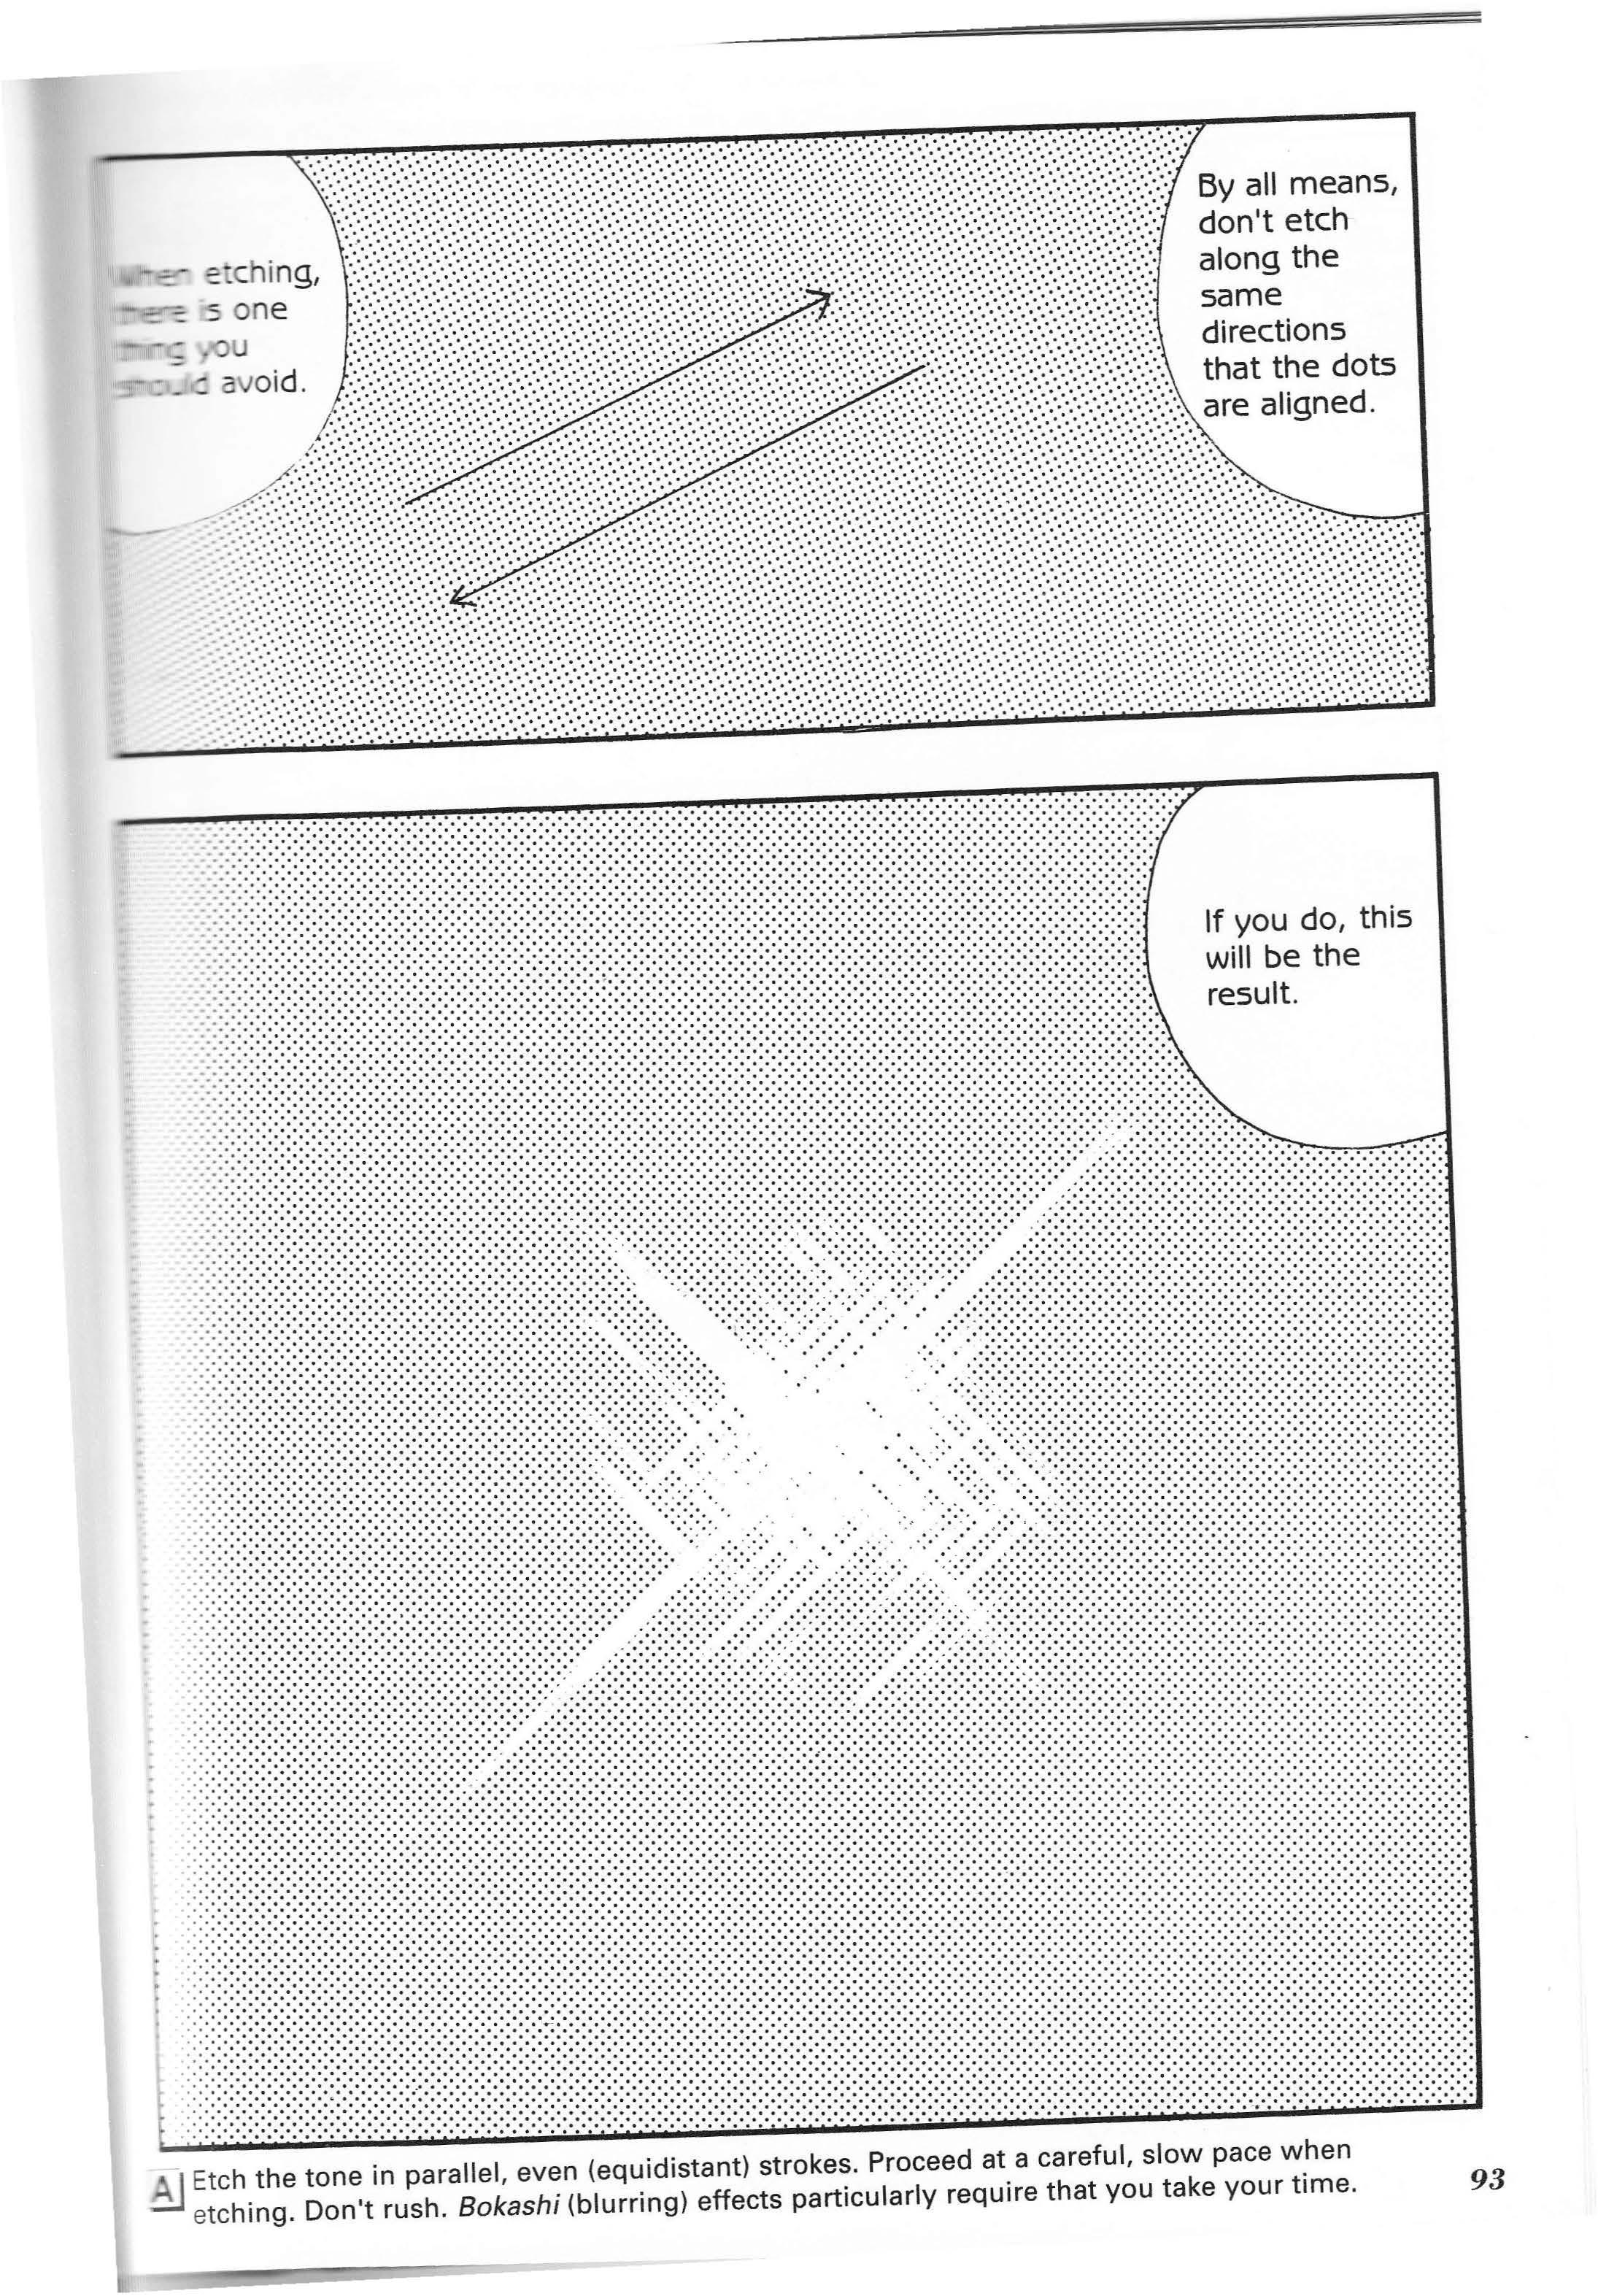
If you do, this will be the result.
••••••••·••••••••••••••••••••r
0 0 ;:;:;:;:;:;:;:;:;:;:;:;:;:;:;:;:;:;:;:;:;:;:;:;:;:;:;:;:::;:;:;:;::;:;::::·:.::;Direction of :;:;:;:;:;:;:;:;:;:;:;:;:;:;:;: :;:;:;:;:;:;:;:;:;:;:;:;:;:;:::;:;:;:;:;:;:;:;:;:;:;:;:;:;:;:; ;:;:;:;:;:;:::;:;:;:;:;:;:;:;:;:;:::;:;:;:::;:;:;:::;:;:;:;:;:;:;::::;:;:;:;:;:;dot alignment:;:;:;:;:;:;:;:;:;:;:;:;:;:;::: :;:;:;:;:;:;:;:;:;:;:;:;:;:::;:;:;:;:;:;:;:::;:;:;:;:;:;:;:;:: <·:-:-:-:-:-:-:-:-:-:-:-:-:-:-:-:-:-:-:-:-:-:-:-:-:-:-:-:-:-:-:-: .... ·.· ........ . .. ::::::::::::::::::::: :-:-:-: -: -:-:-:-:-:-:-:-:-:-:-:-:-:-:-:-:-:-:-:-·-:-:-·-:·····

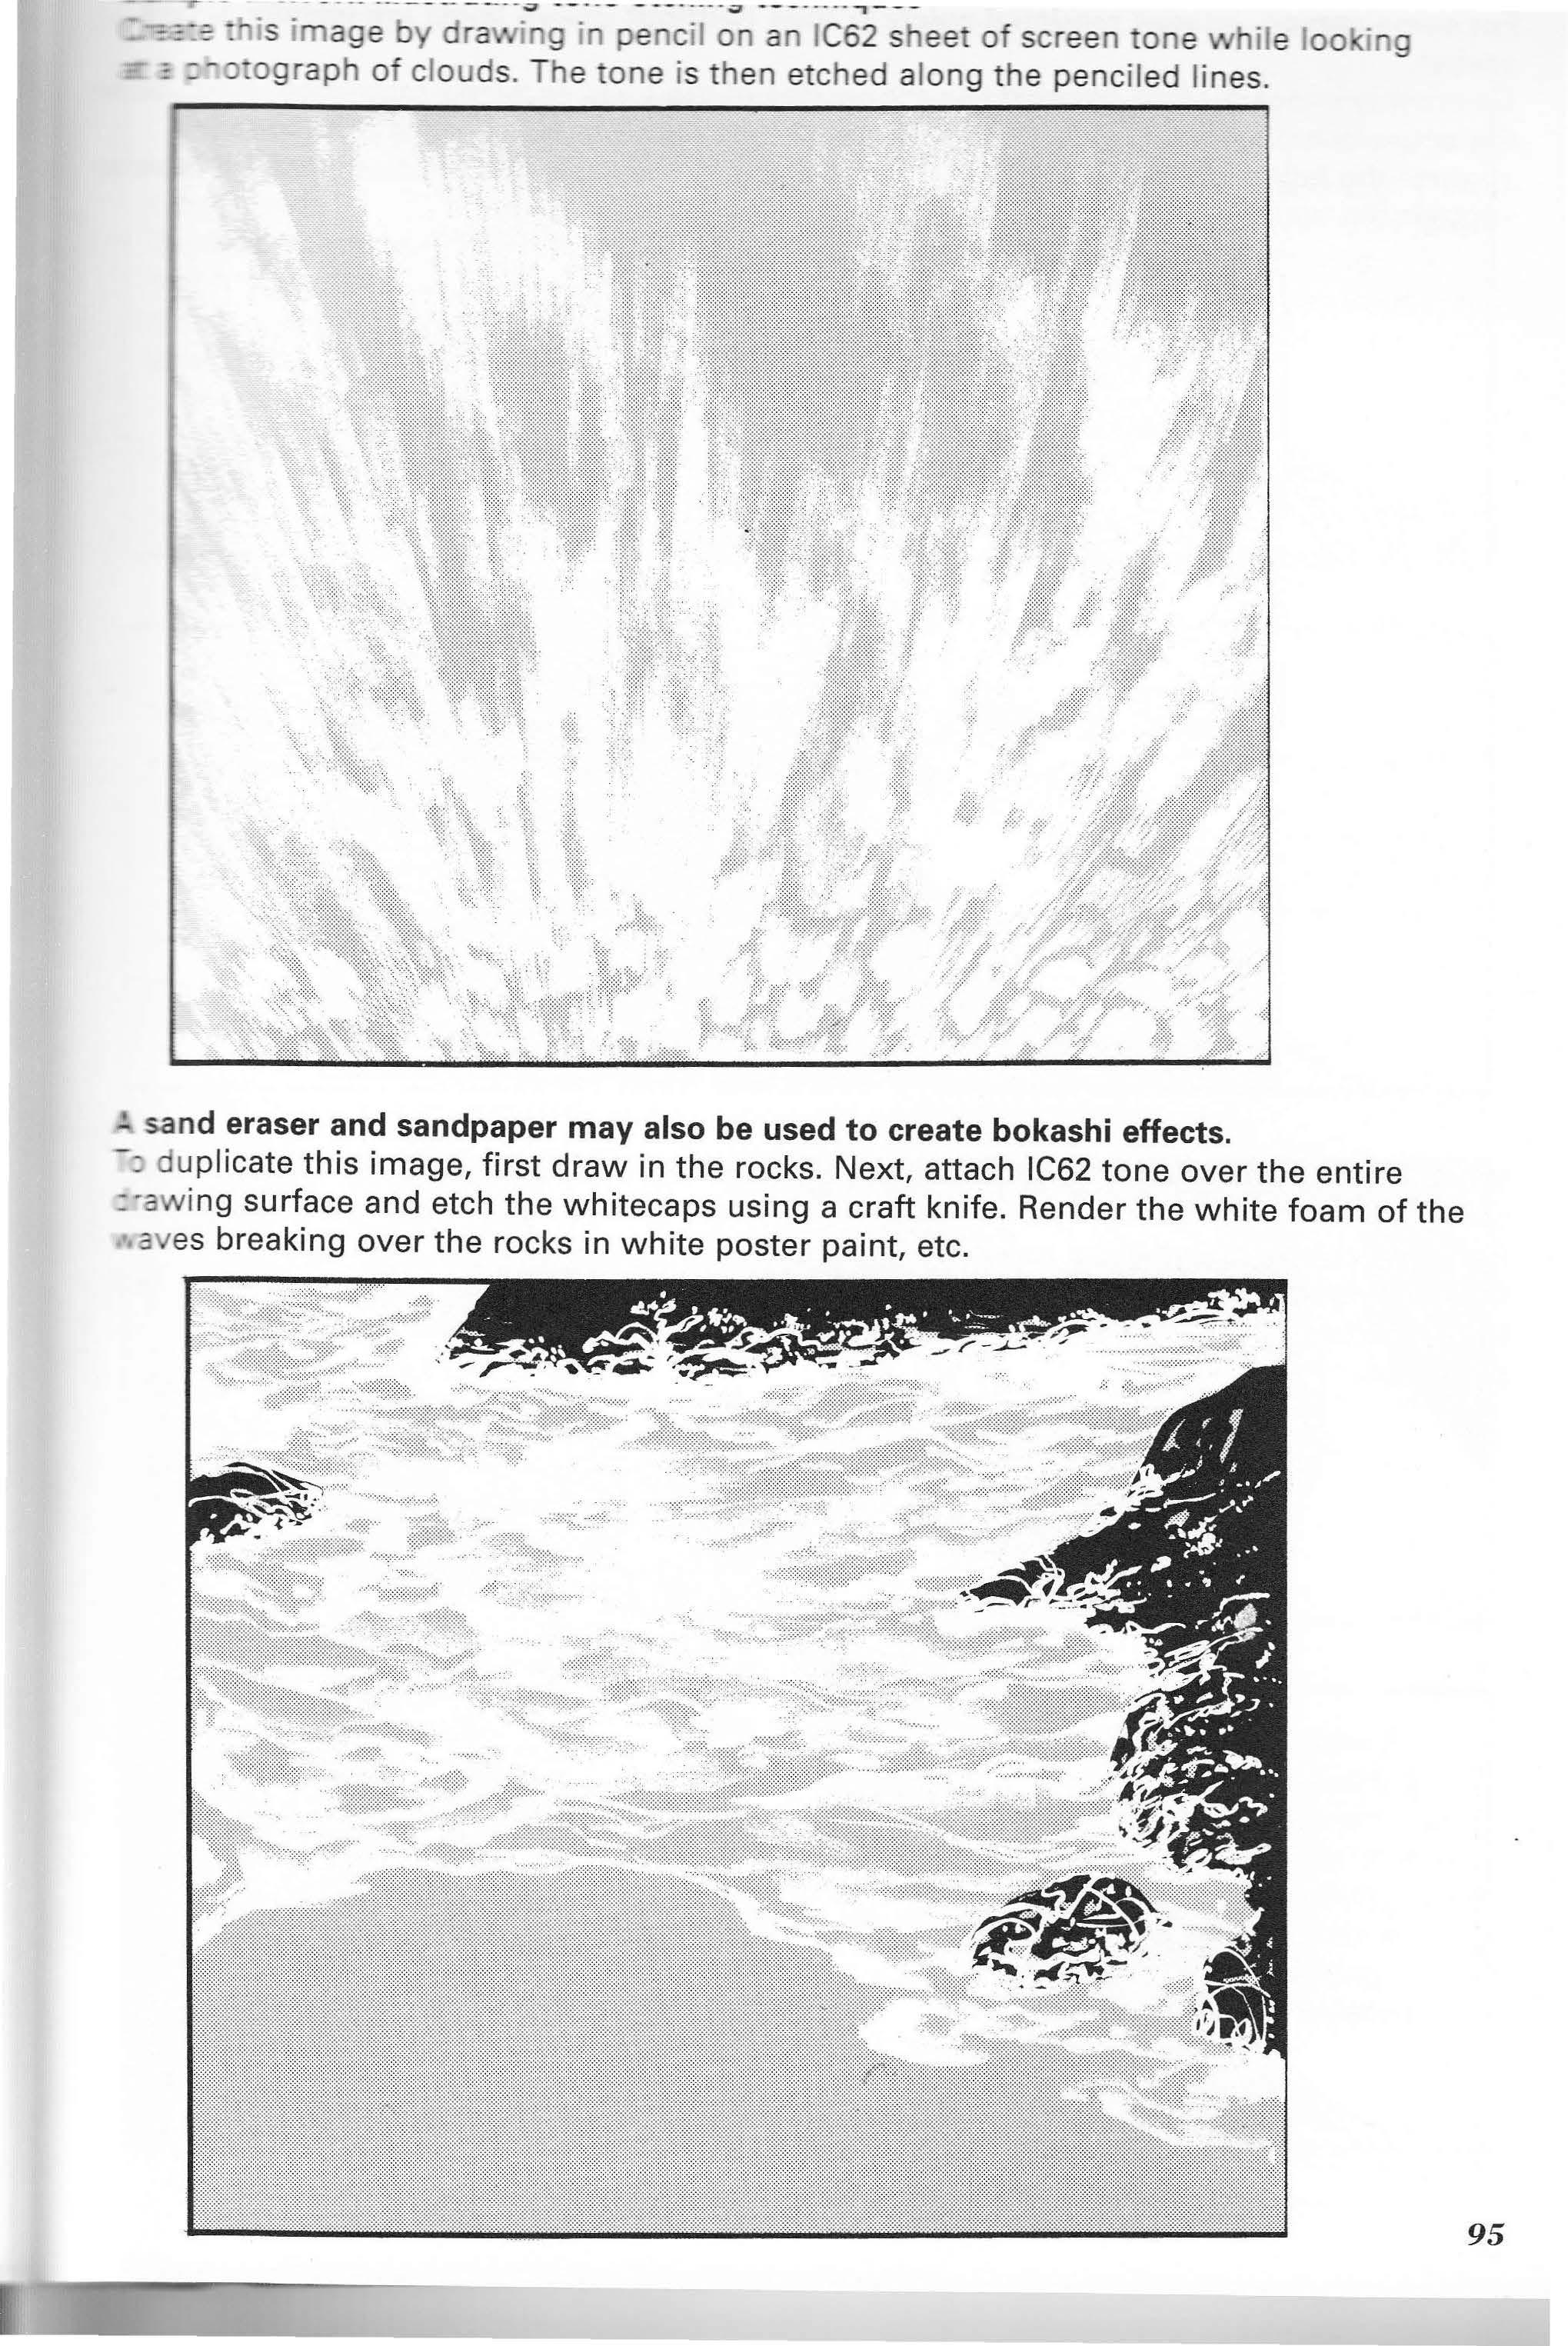
- sand eraser and sandpaper may also be used to create bokashi effects. - =d uplicate this image, first draw in the rocks. Next, attach IC62 tone over the entire .:·awi ng surface and etch the whitecaps using a craft knife. Render the white foam of the aves breaking over the rocks in white poster paint, etc.
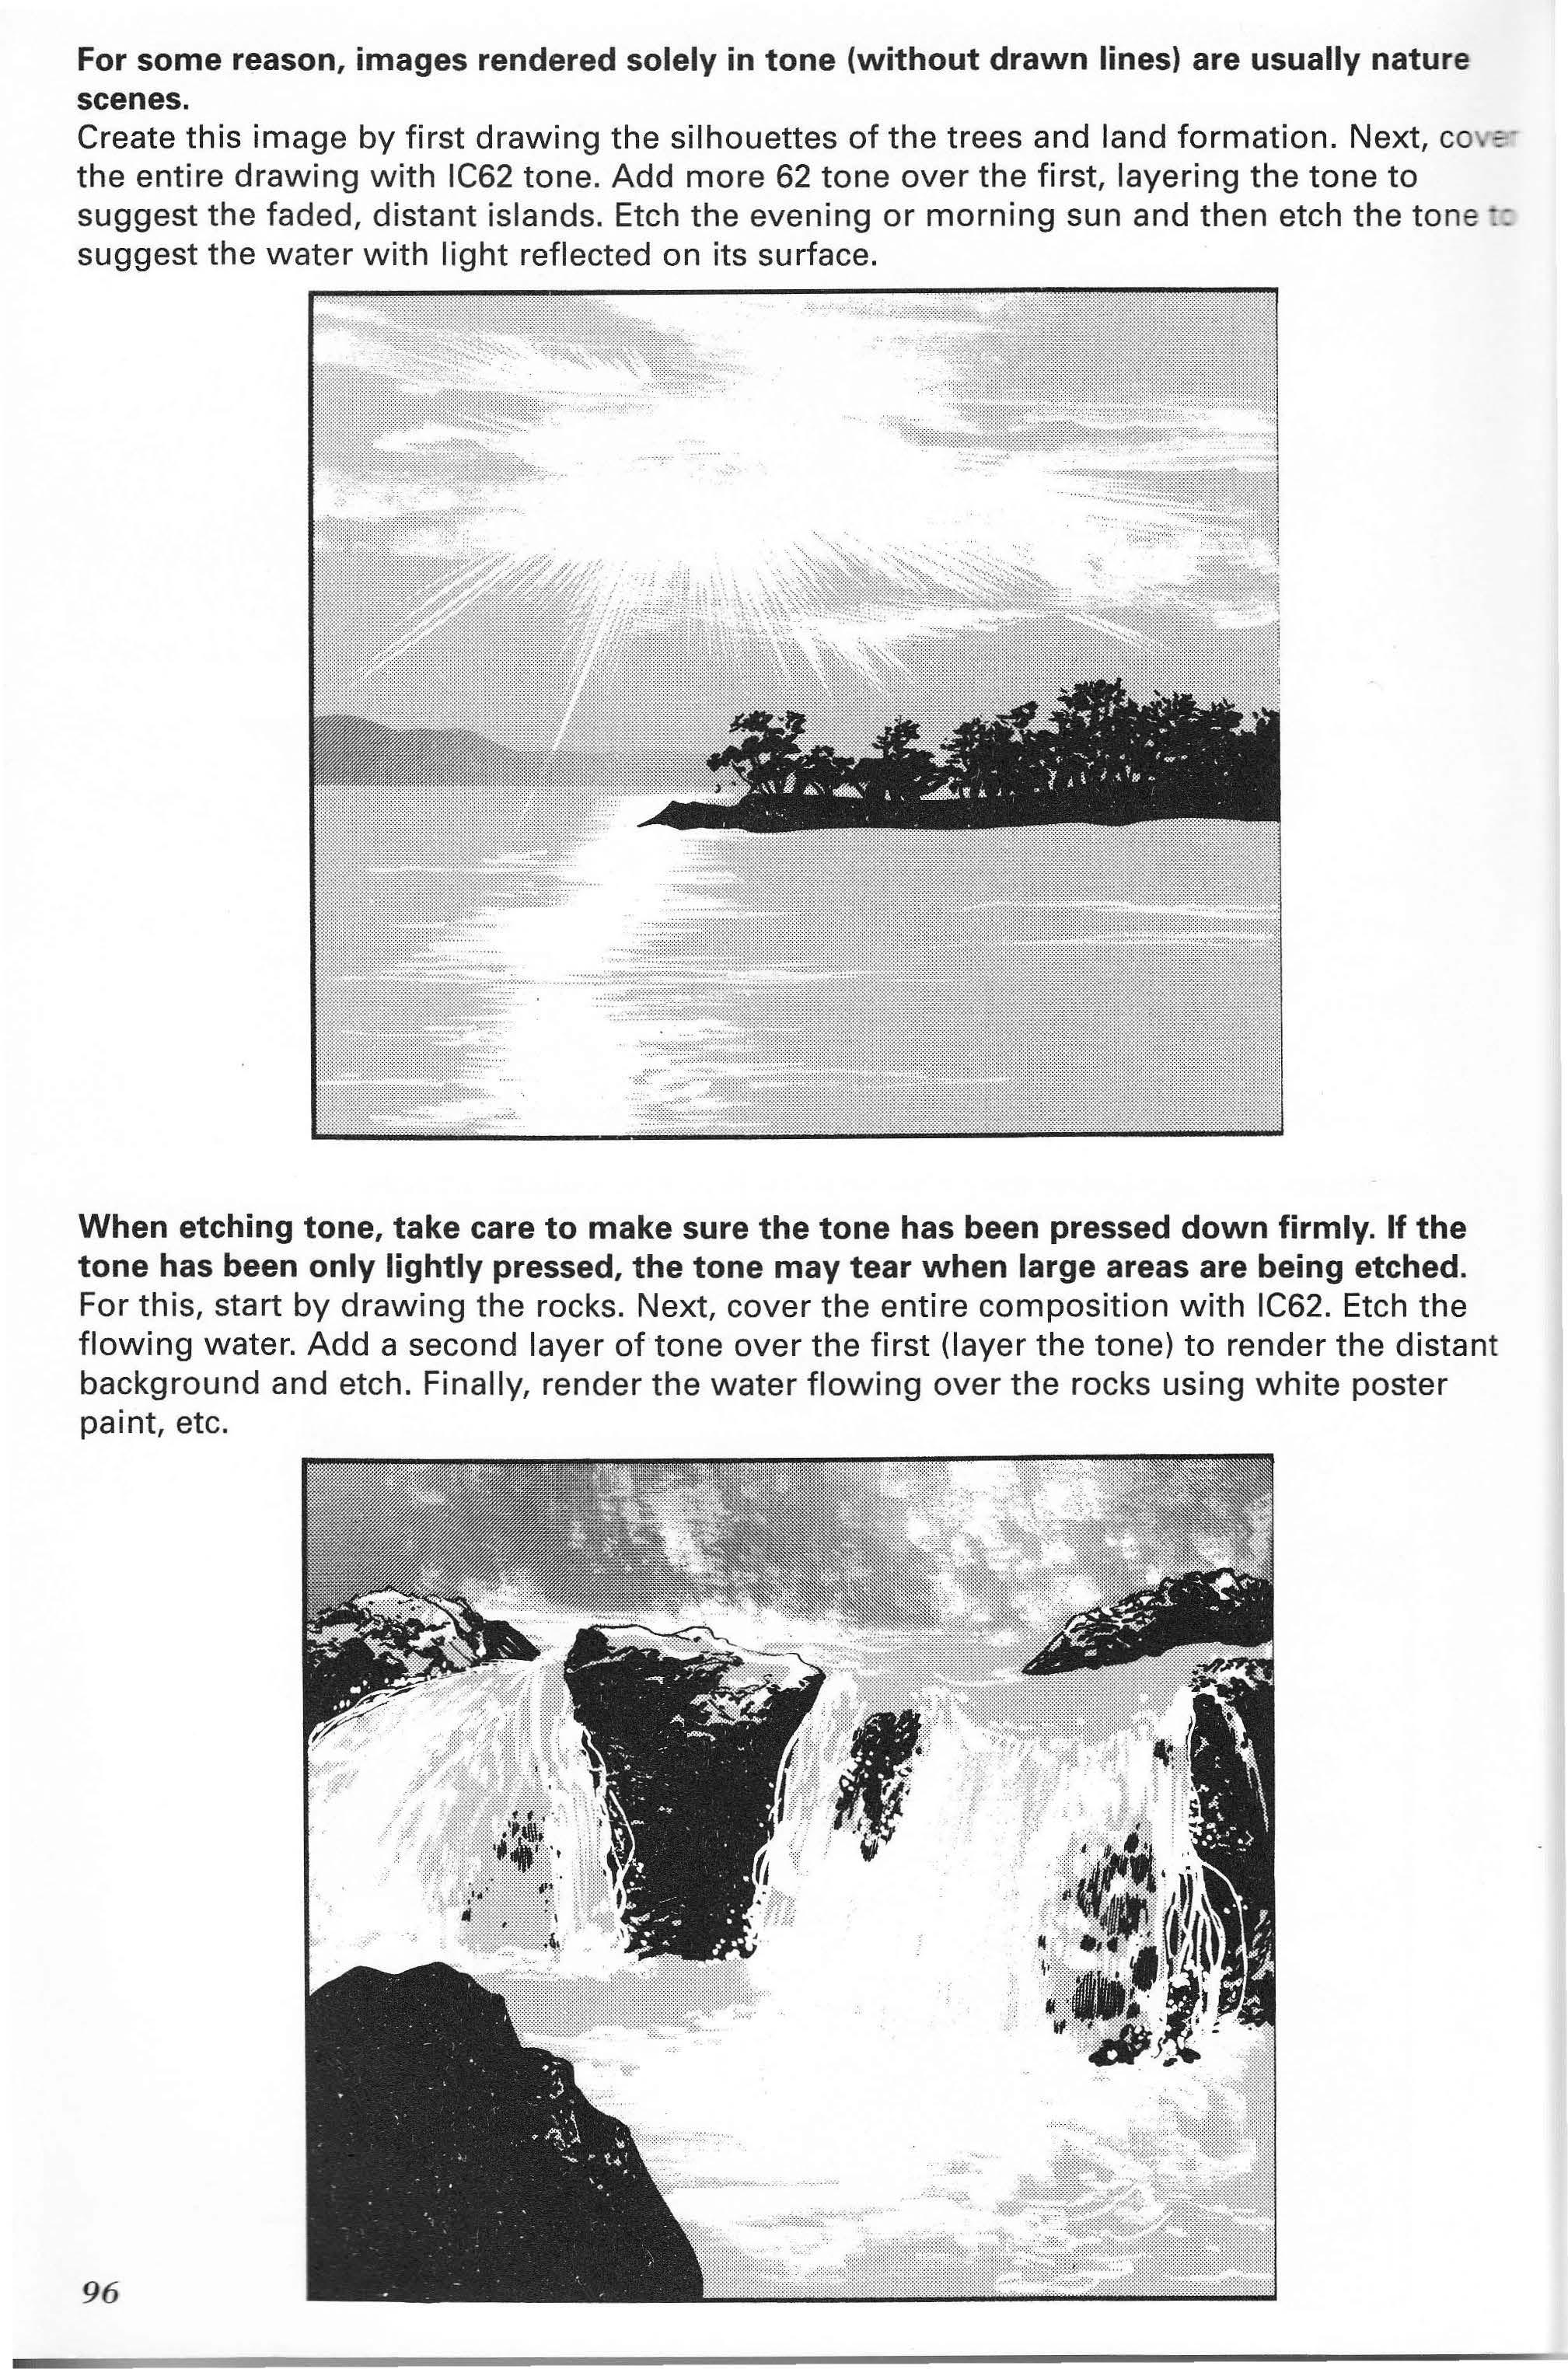
For some reason, images rendered solely in tone (without drawn lines) are usually nature scenes.
Create this image by first drawing the silhouettes of the trees and land formation. Next, co _ the entire drawing with IC62 tone. Add more 62 tone over the first, layering the tone to suggest the faded, distant islands. Etch the evening or morning sun and then etch the tone :: suggest the water with light reflected on its surface.
When etching tone, take care to make sure the tone has been pressed down firmly. If the tone has been only lightly pressed, the tone may tear when large areas are being etched.
For this, start by drawing the rocks. Next, cover the entire composition with IC62. Etch the flowing water. Add a second layer of tone over the first (layer the tone) to render the distant background and etch. Finally, render the water flowing over the rocks using white poster paint, etc.
ow --=--o ing! - --=--e is sooo _ - you can ::-=: :e using
now on, screen -- e will be an integral :.c of manga.
"you are 3 are of a :ew simple '1J ies, you can just -ollow the methods of attaching Seriously! I really feel like drawing something
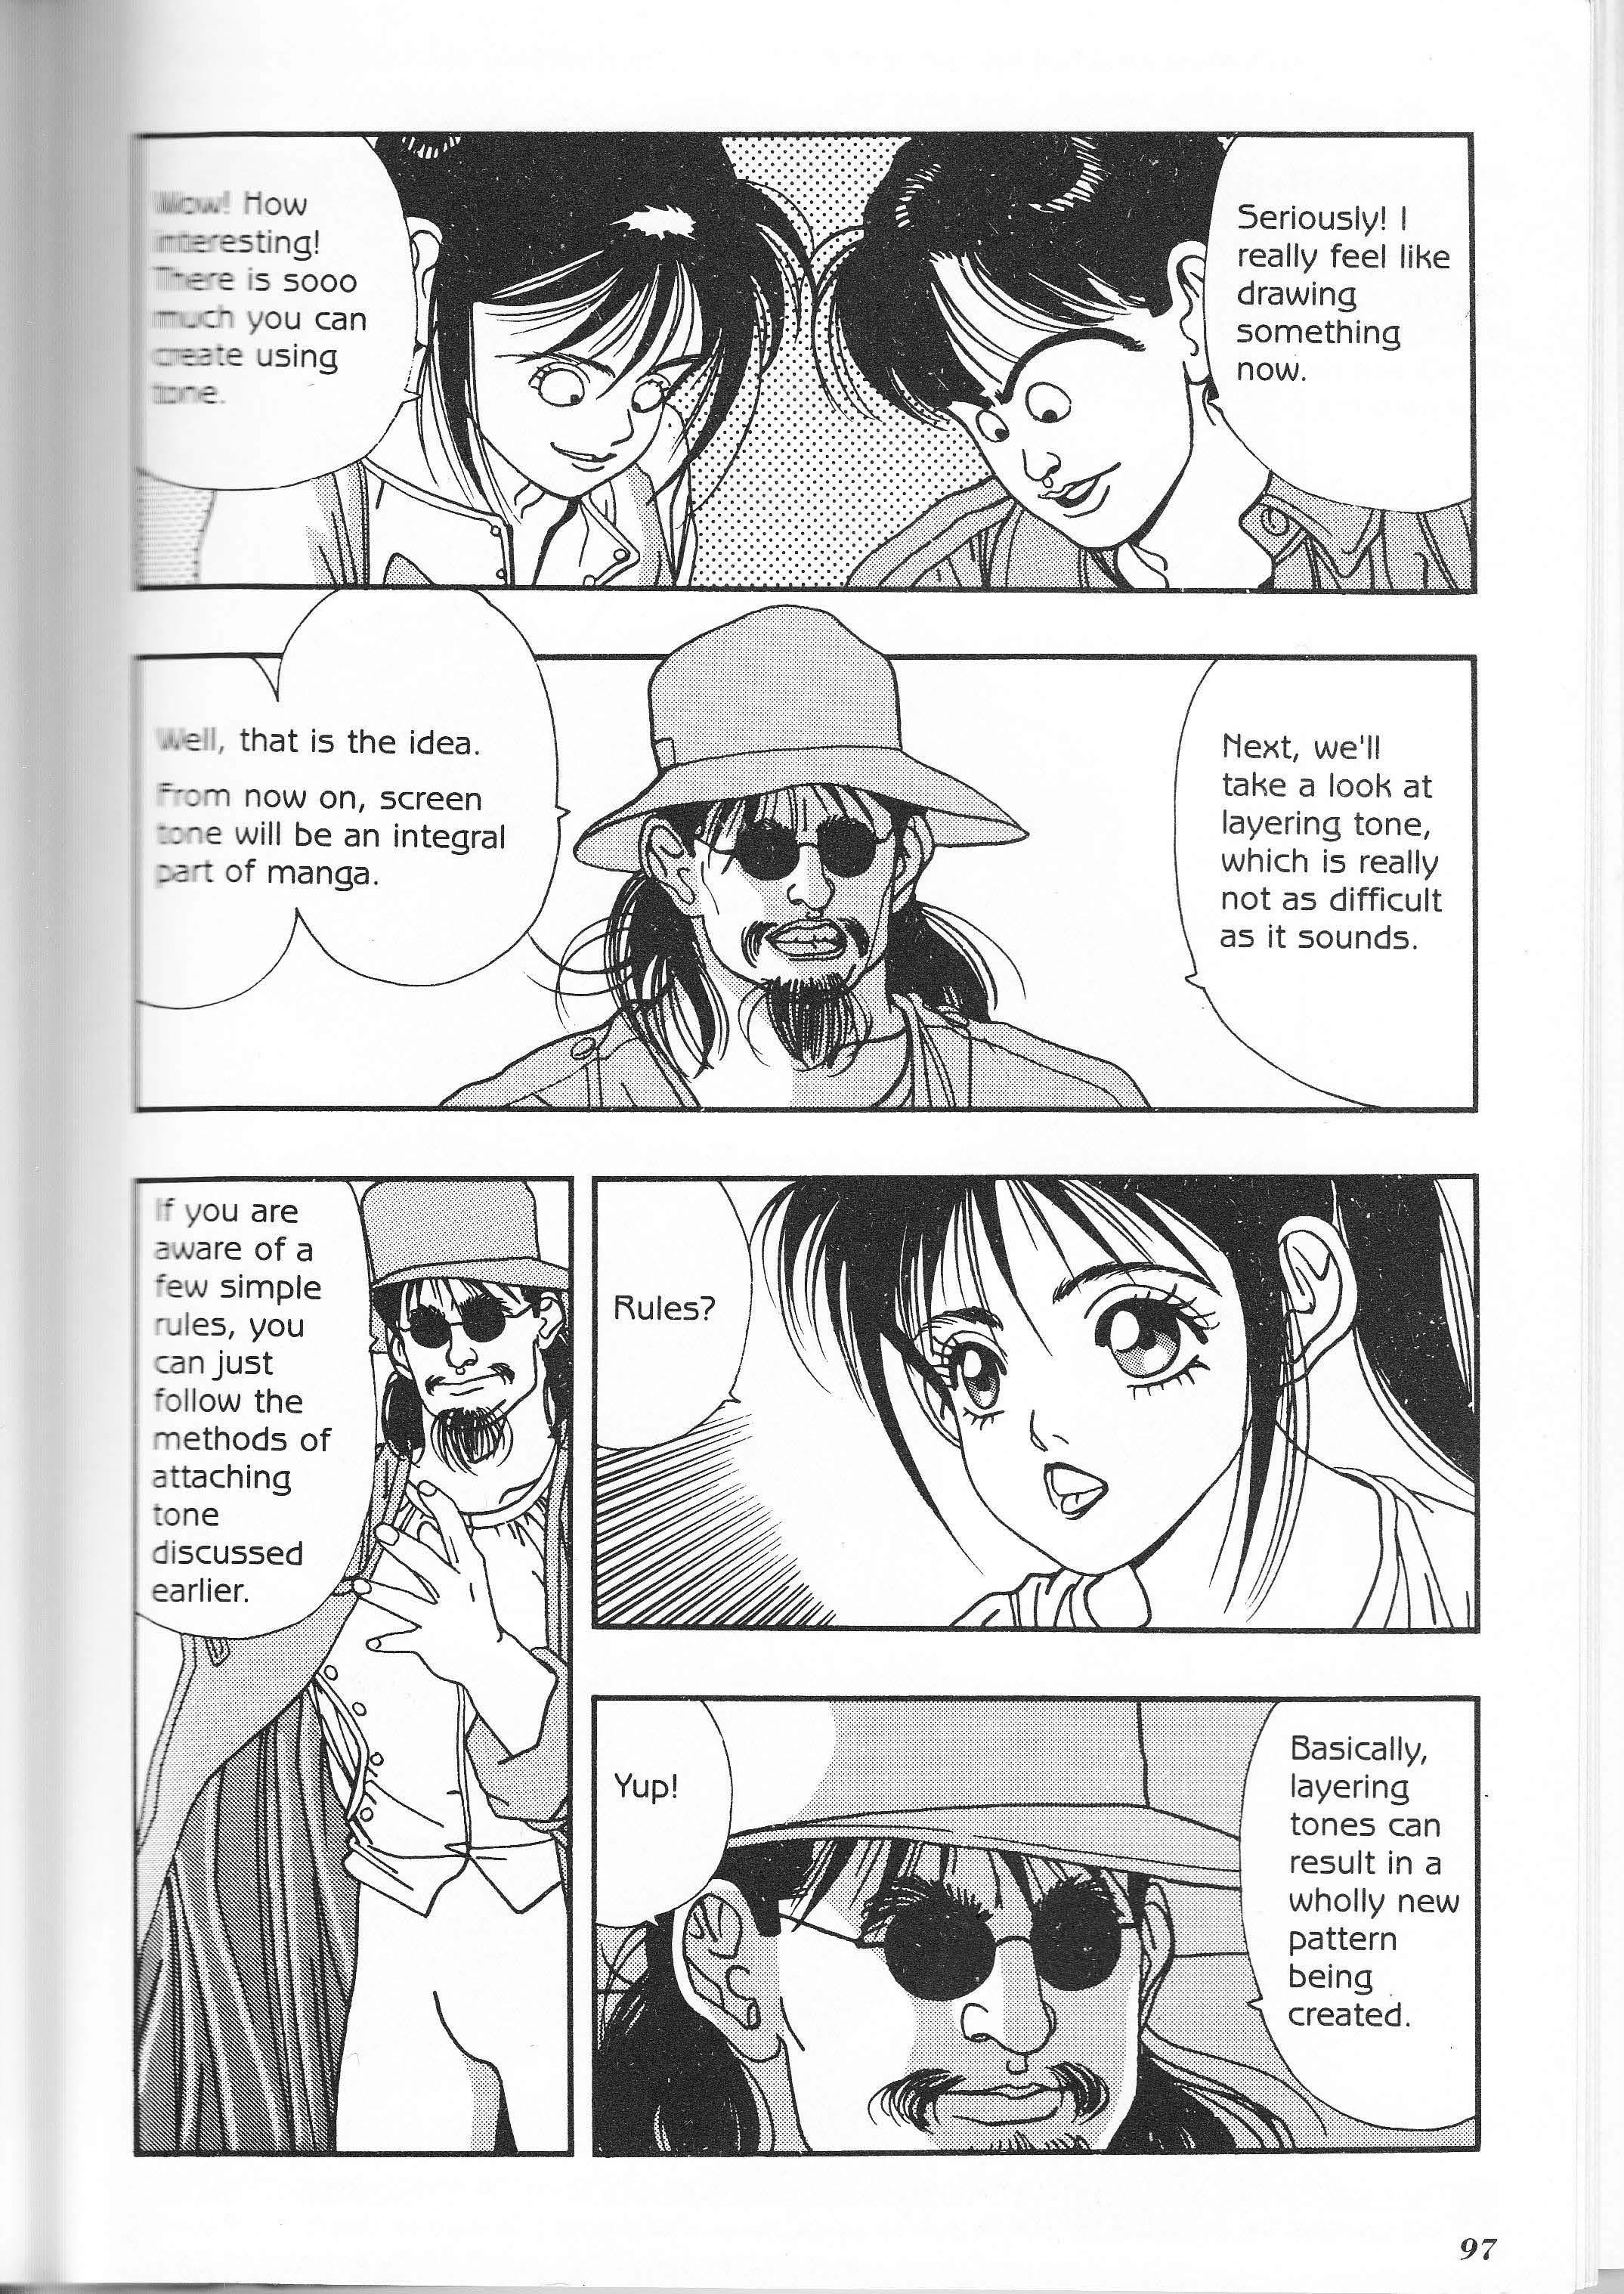
Next, we'll take a look at layering tone, which is really not as difficult as it sounds.
Basically, layering tones can result in a wholly new pattern being . created.
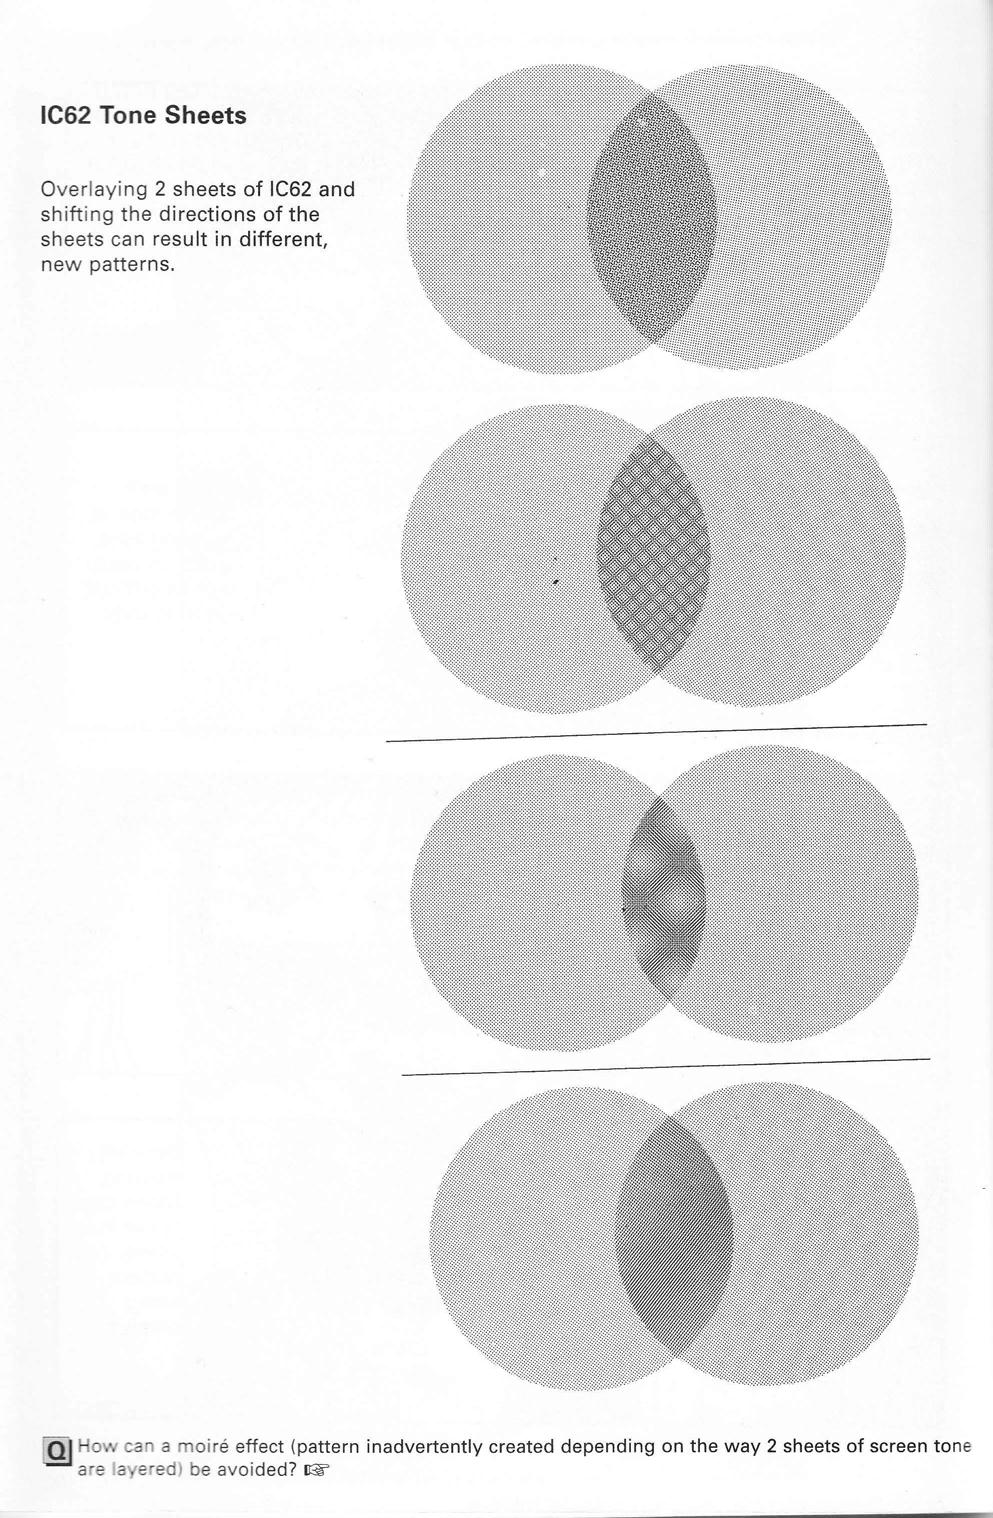
IC62 Tone Sheets
Overlaying 2 sheets of IC62 and shifting the directions of the sheets can result in different, new patterns.
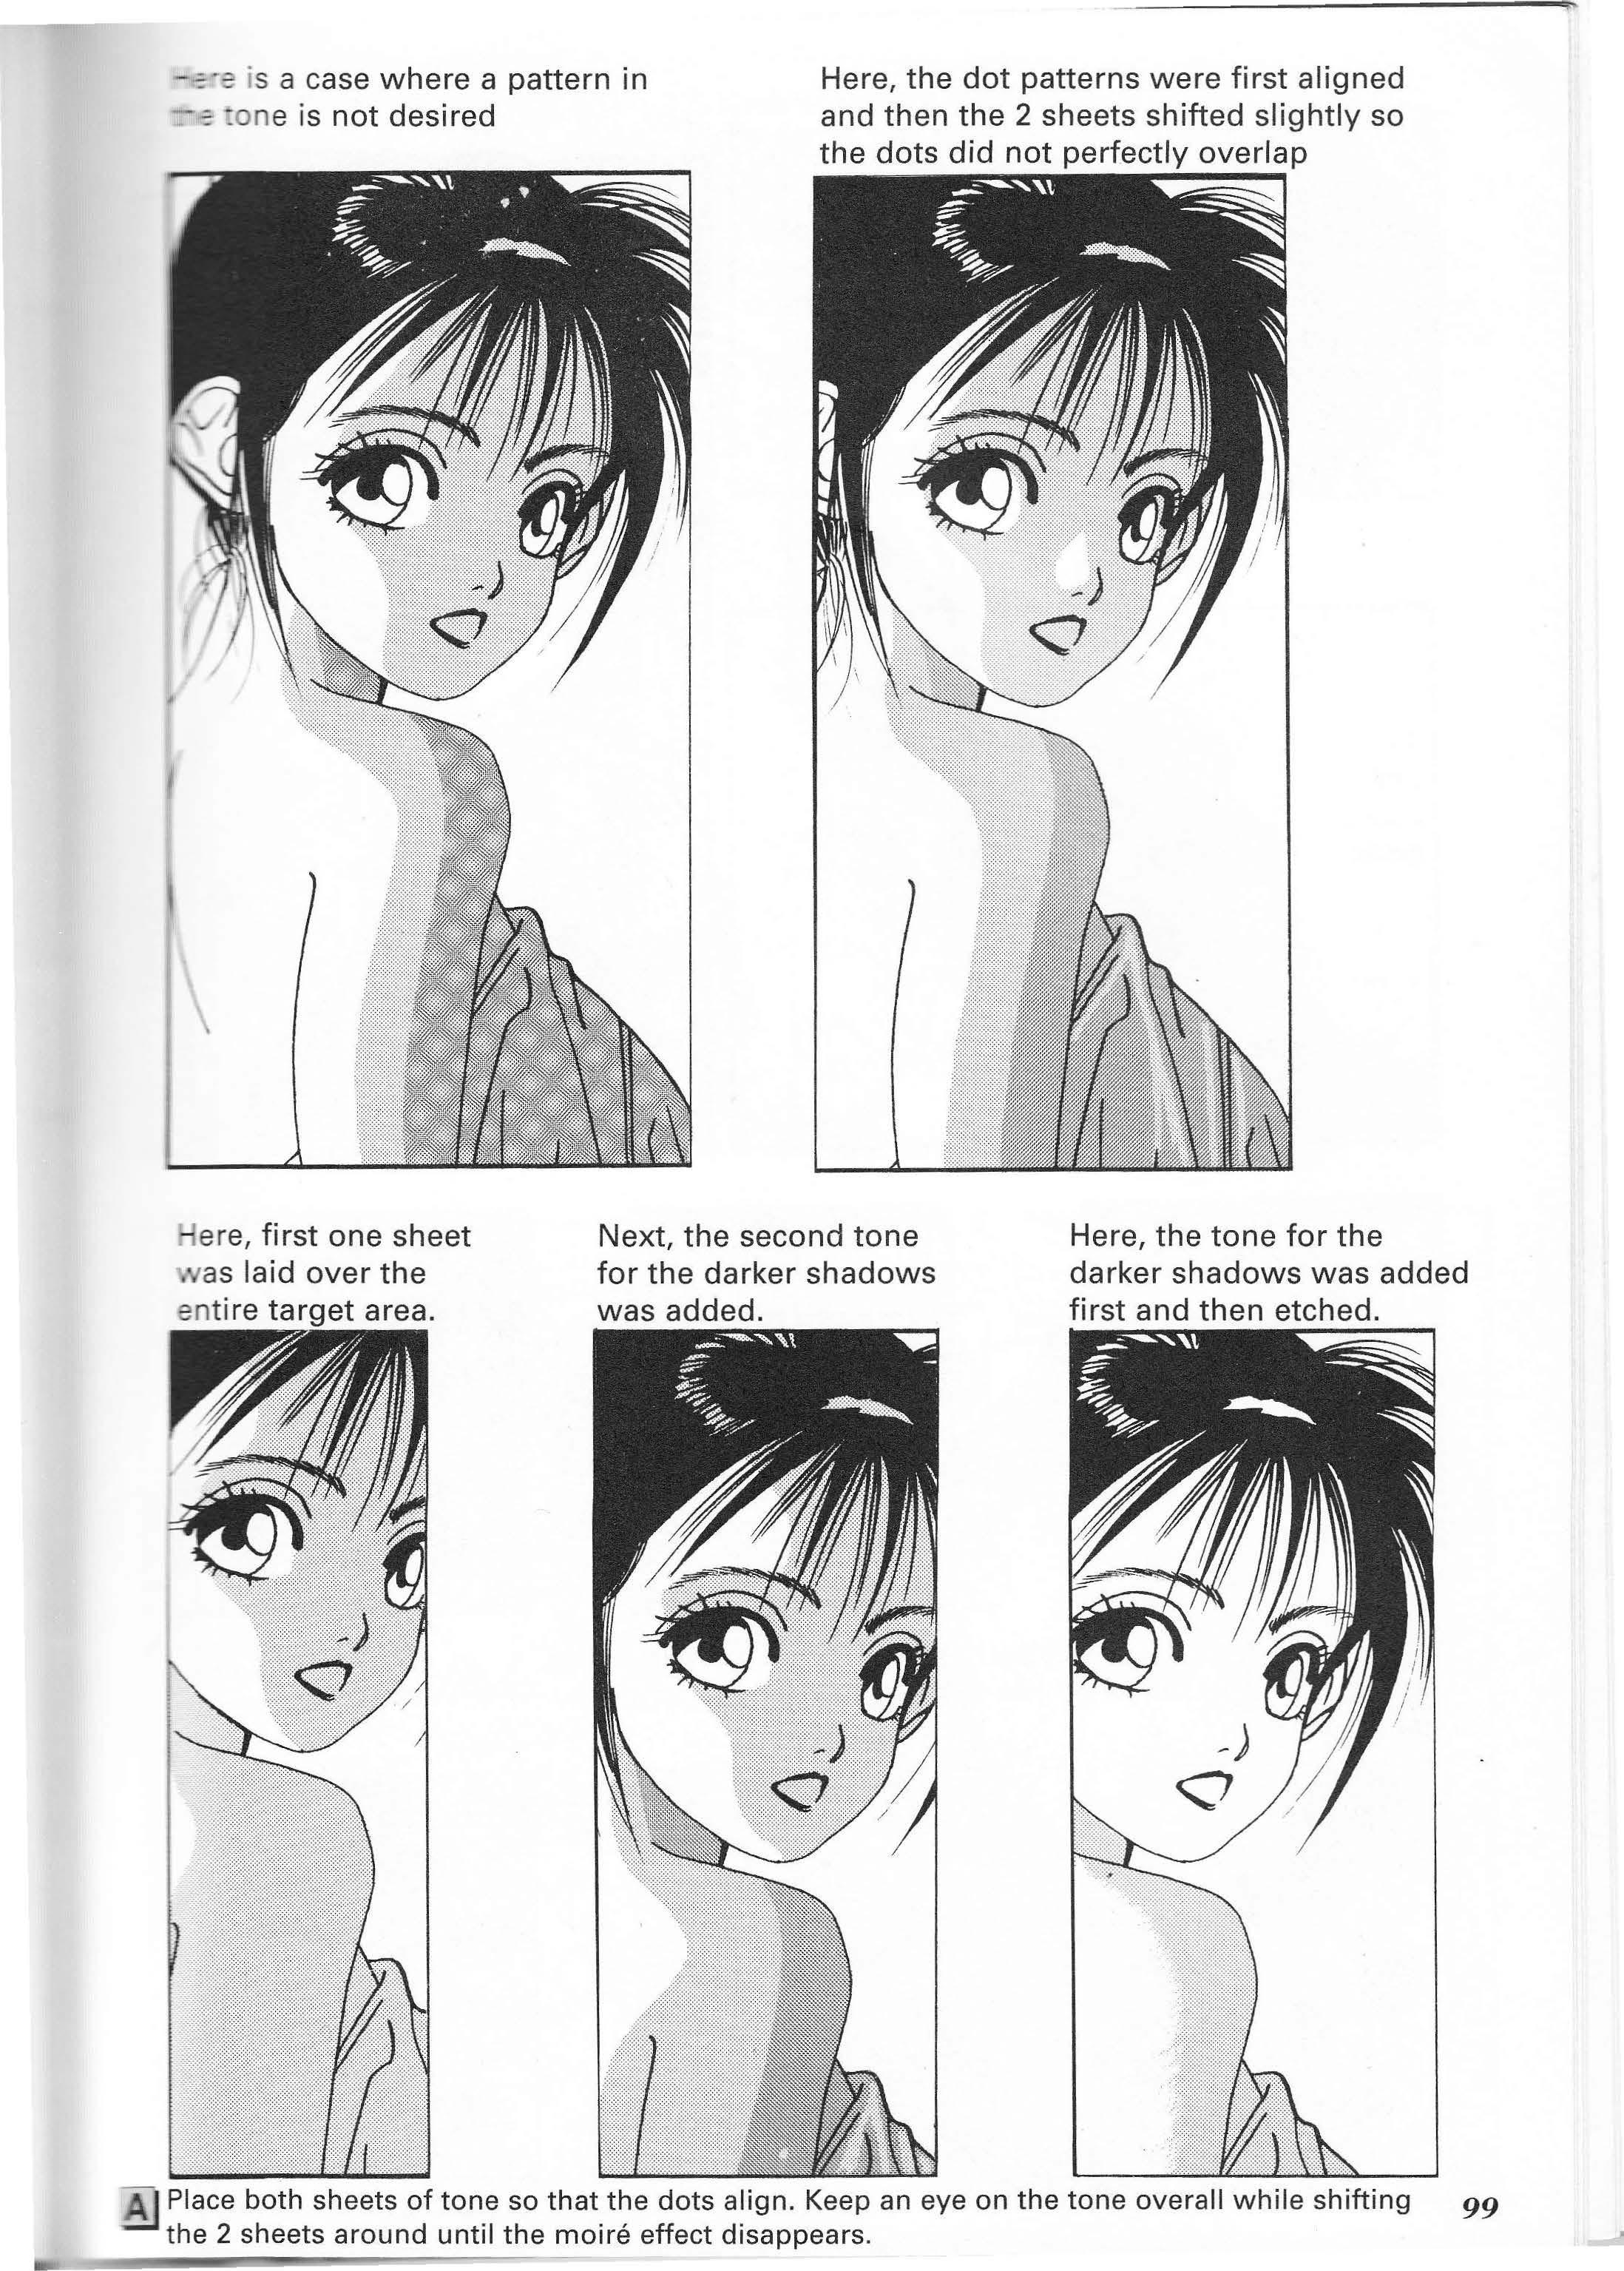
ere, first one sheet , as laid over the Next, the second tone for the darker shadows was added. Here, the tone for the darker shadows was added first and then etched.
Just one more point... own sensibiliti es when determini ng the order for attaching the tone .
There may be times where you will intentionally layer tone to create a new pattern. For example ...
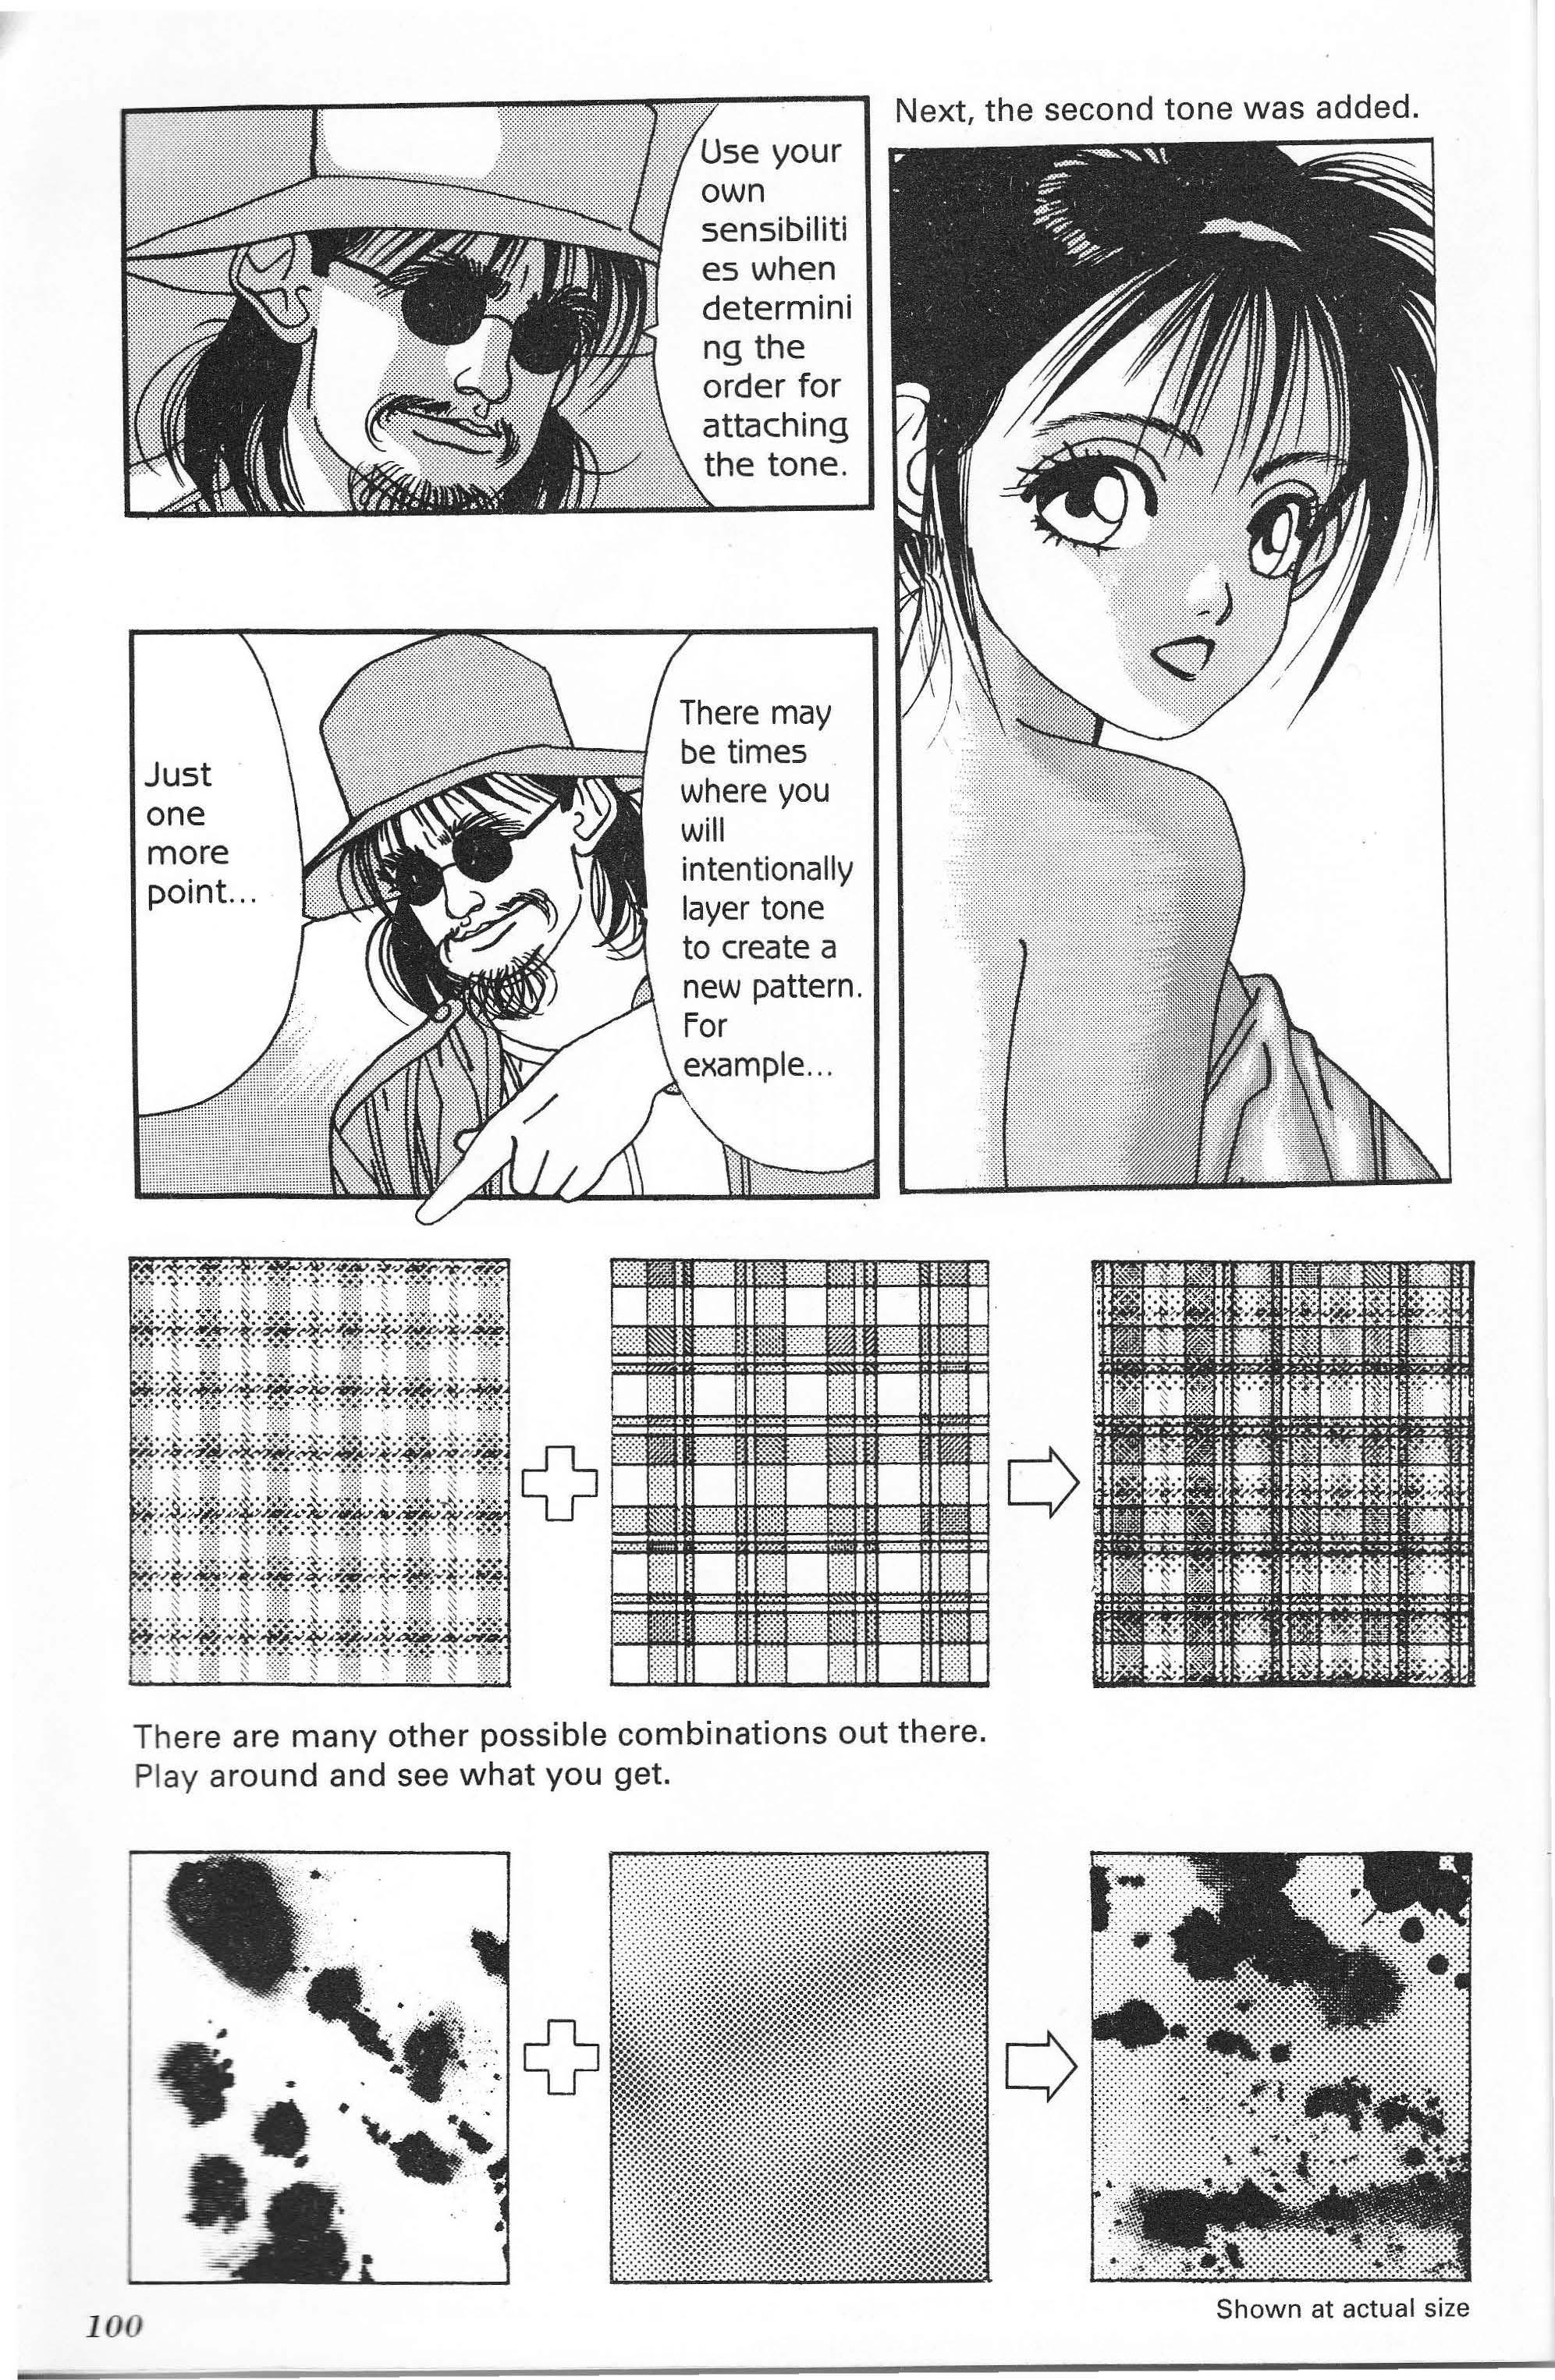
There are many other possible combinations out there. Play around and see what you get.
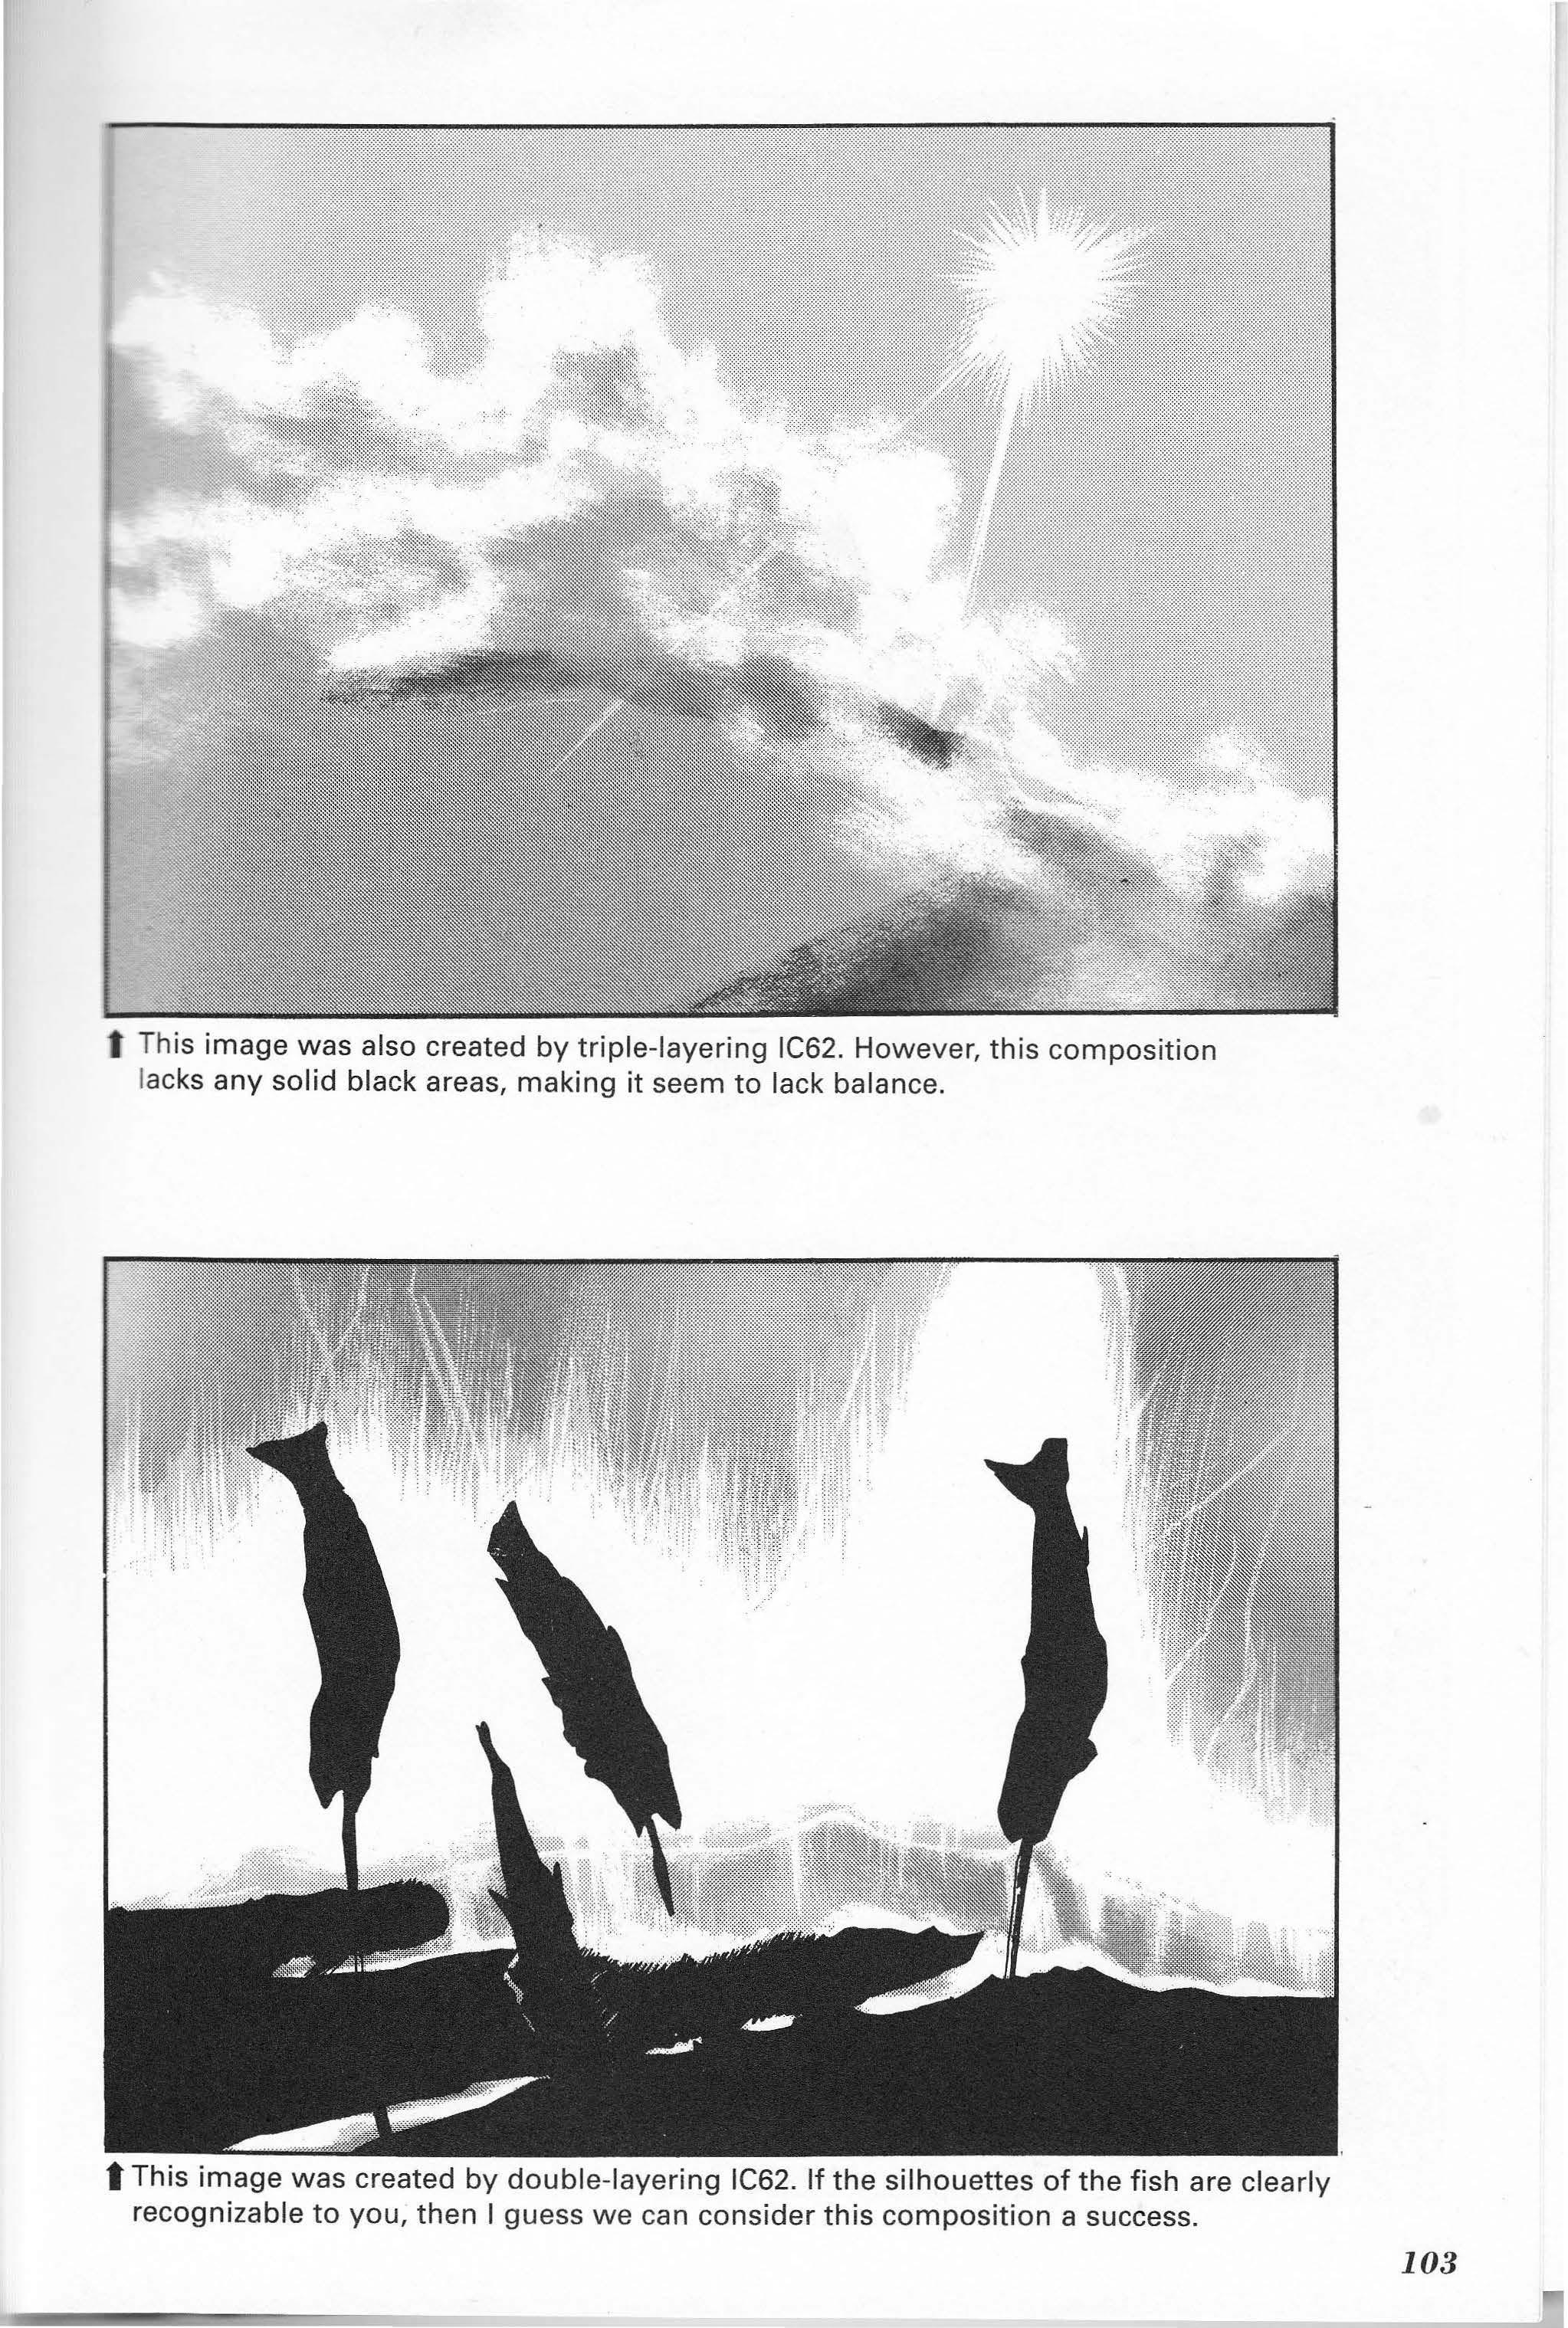
t First, spot blacks, filling in the darkest areas with solid black. Next, cover the entire drawing with IC62, etching it to allow the next darkest areas to remain. Last, add the 2nd layer of IC62, etching the lightest areas of the image.

f This image was also created by triple-layering IC62. However, this composition lacks any solid black areas, making it seem to lack balance.
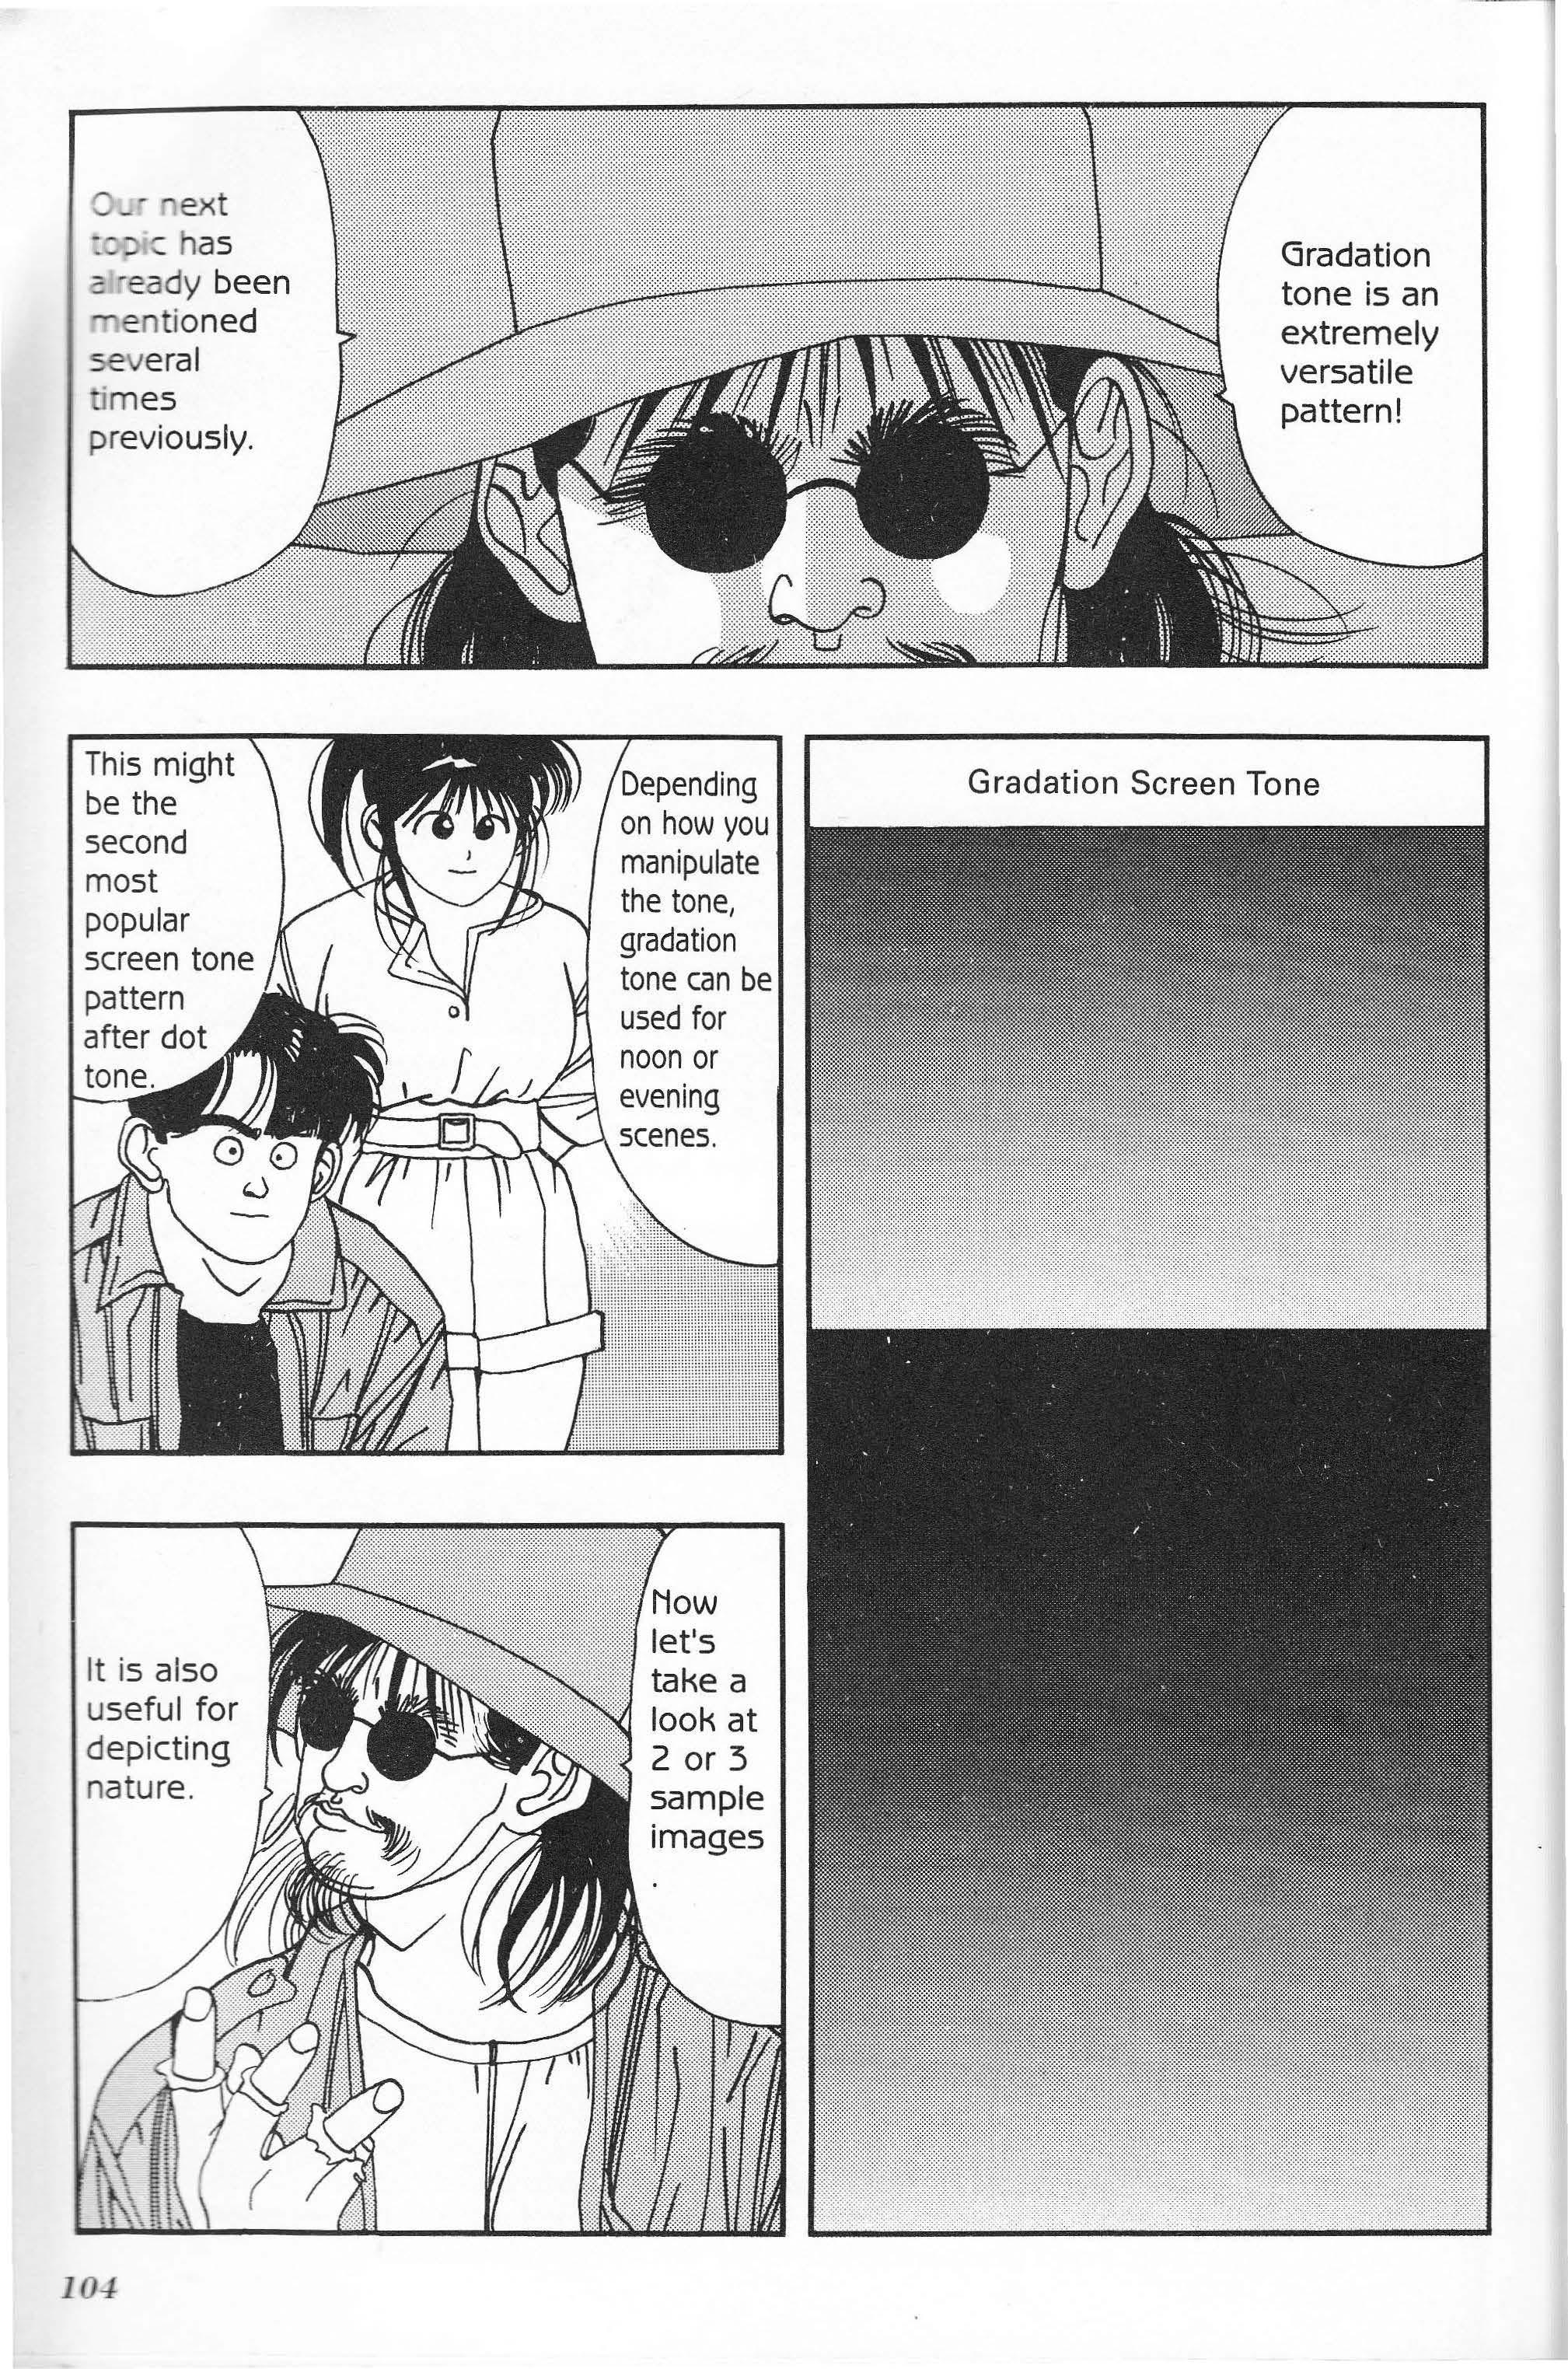
·eady been entioned several
This might be the second most popular screen tone pattern after dot
It is also useful for depicting nature. Gradation tone is an extremely versatile pattern!
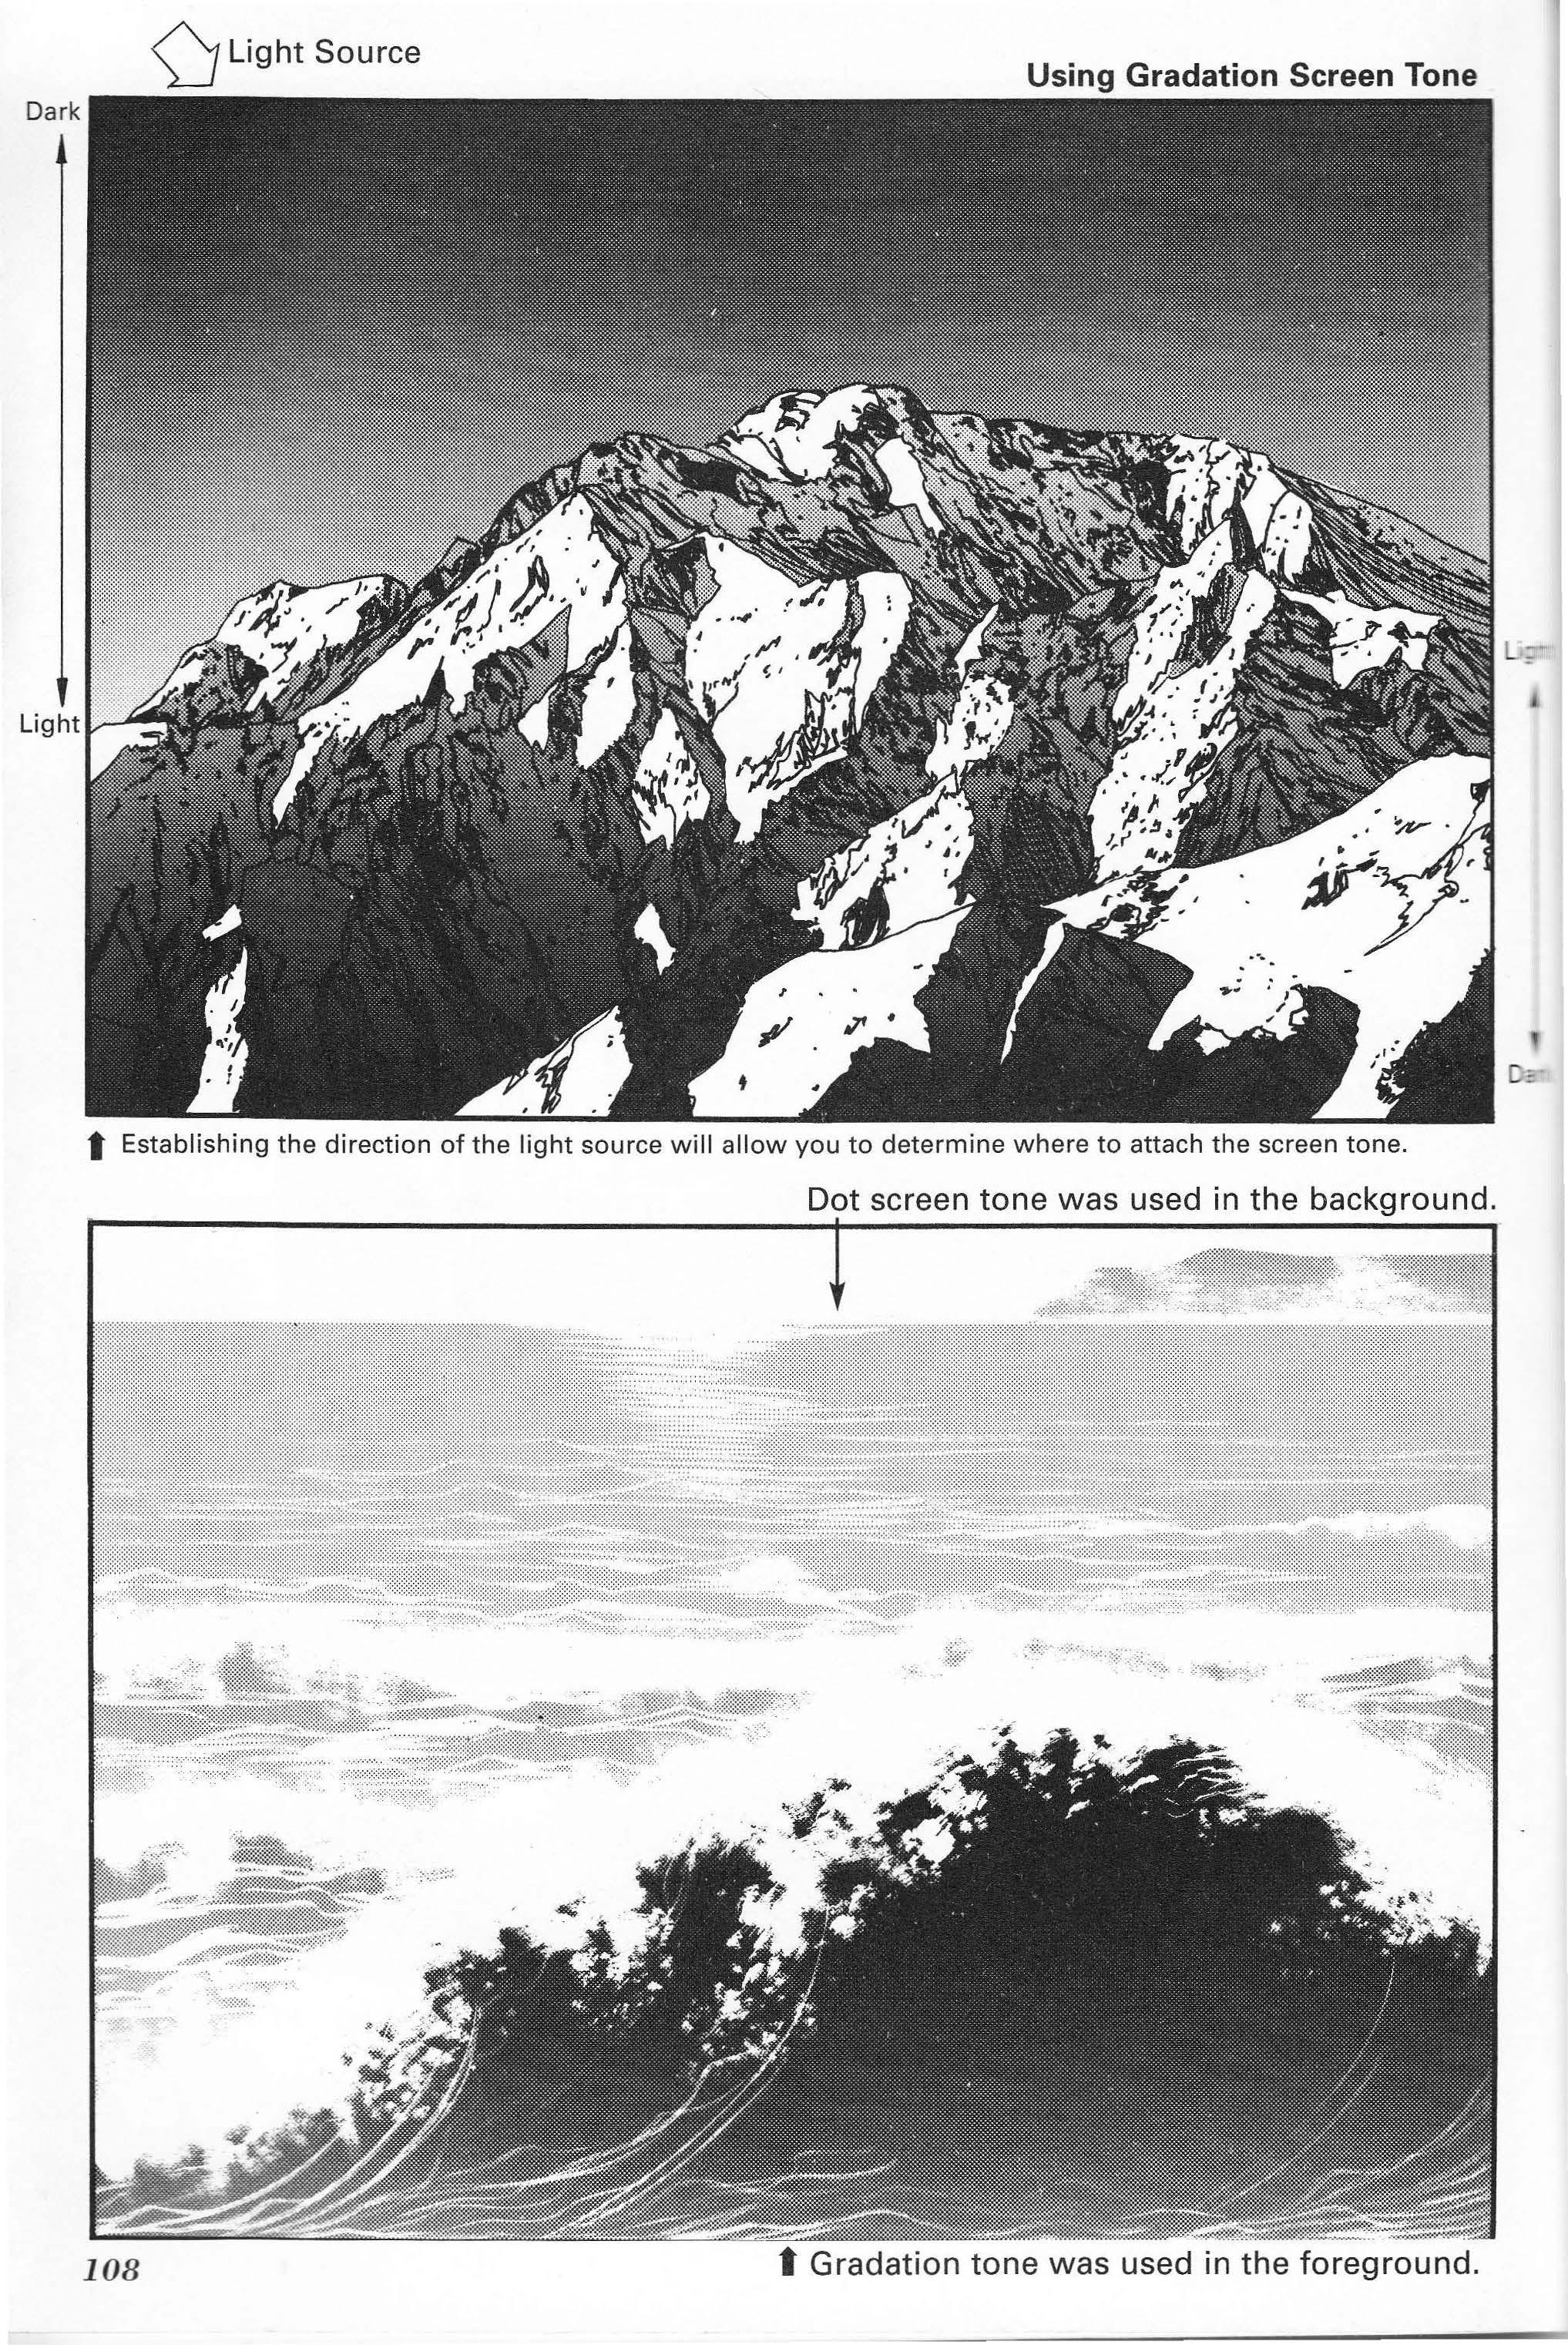
Gradation Screen Tone
Light Table (Tracing Table)
Use a craft knife to etch areas of light.
From time to time, remove the original draft from the li ght tabl e and check the appearance of the tracing.
n
... photocopy and enlarge the photograph.
Photocopy
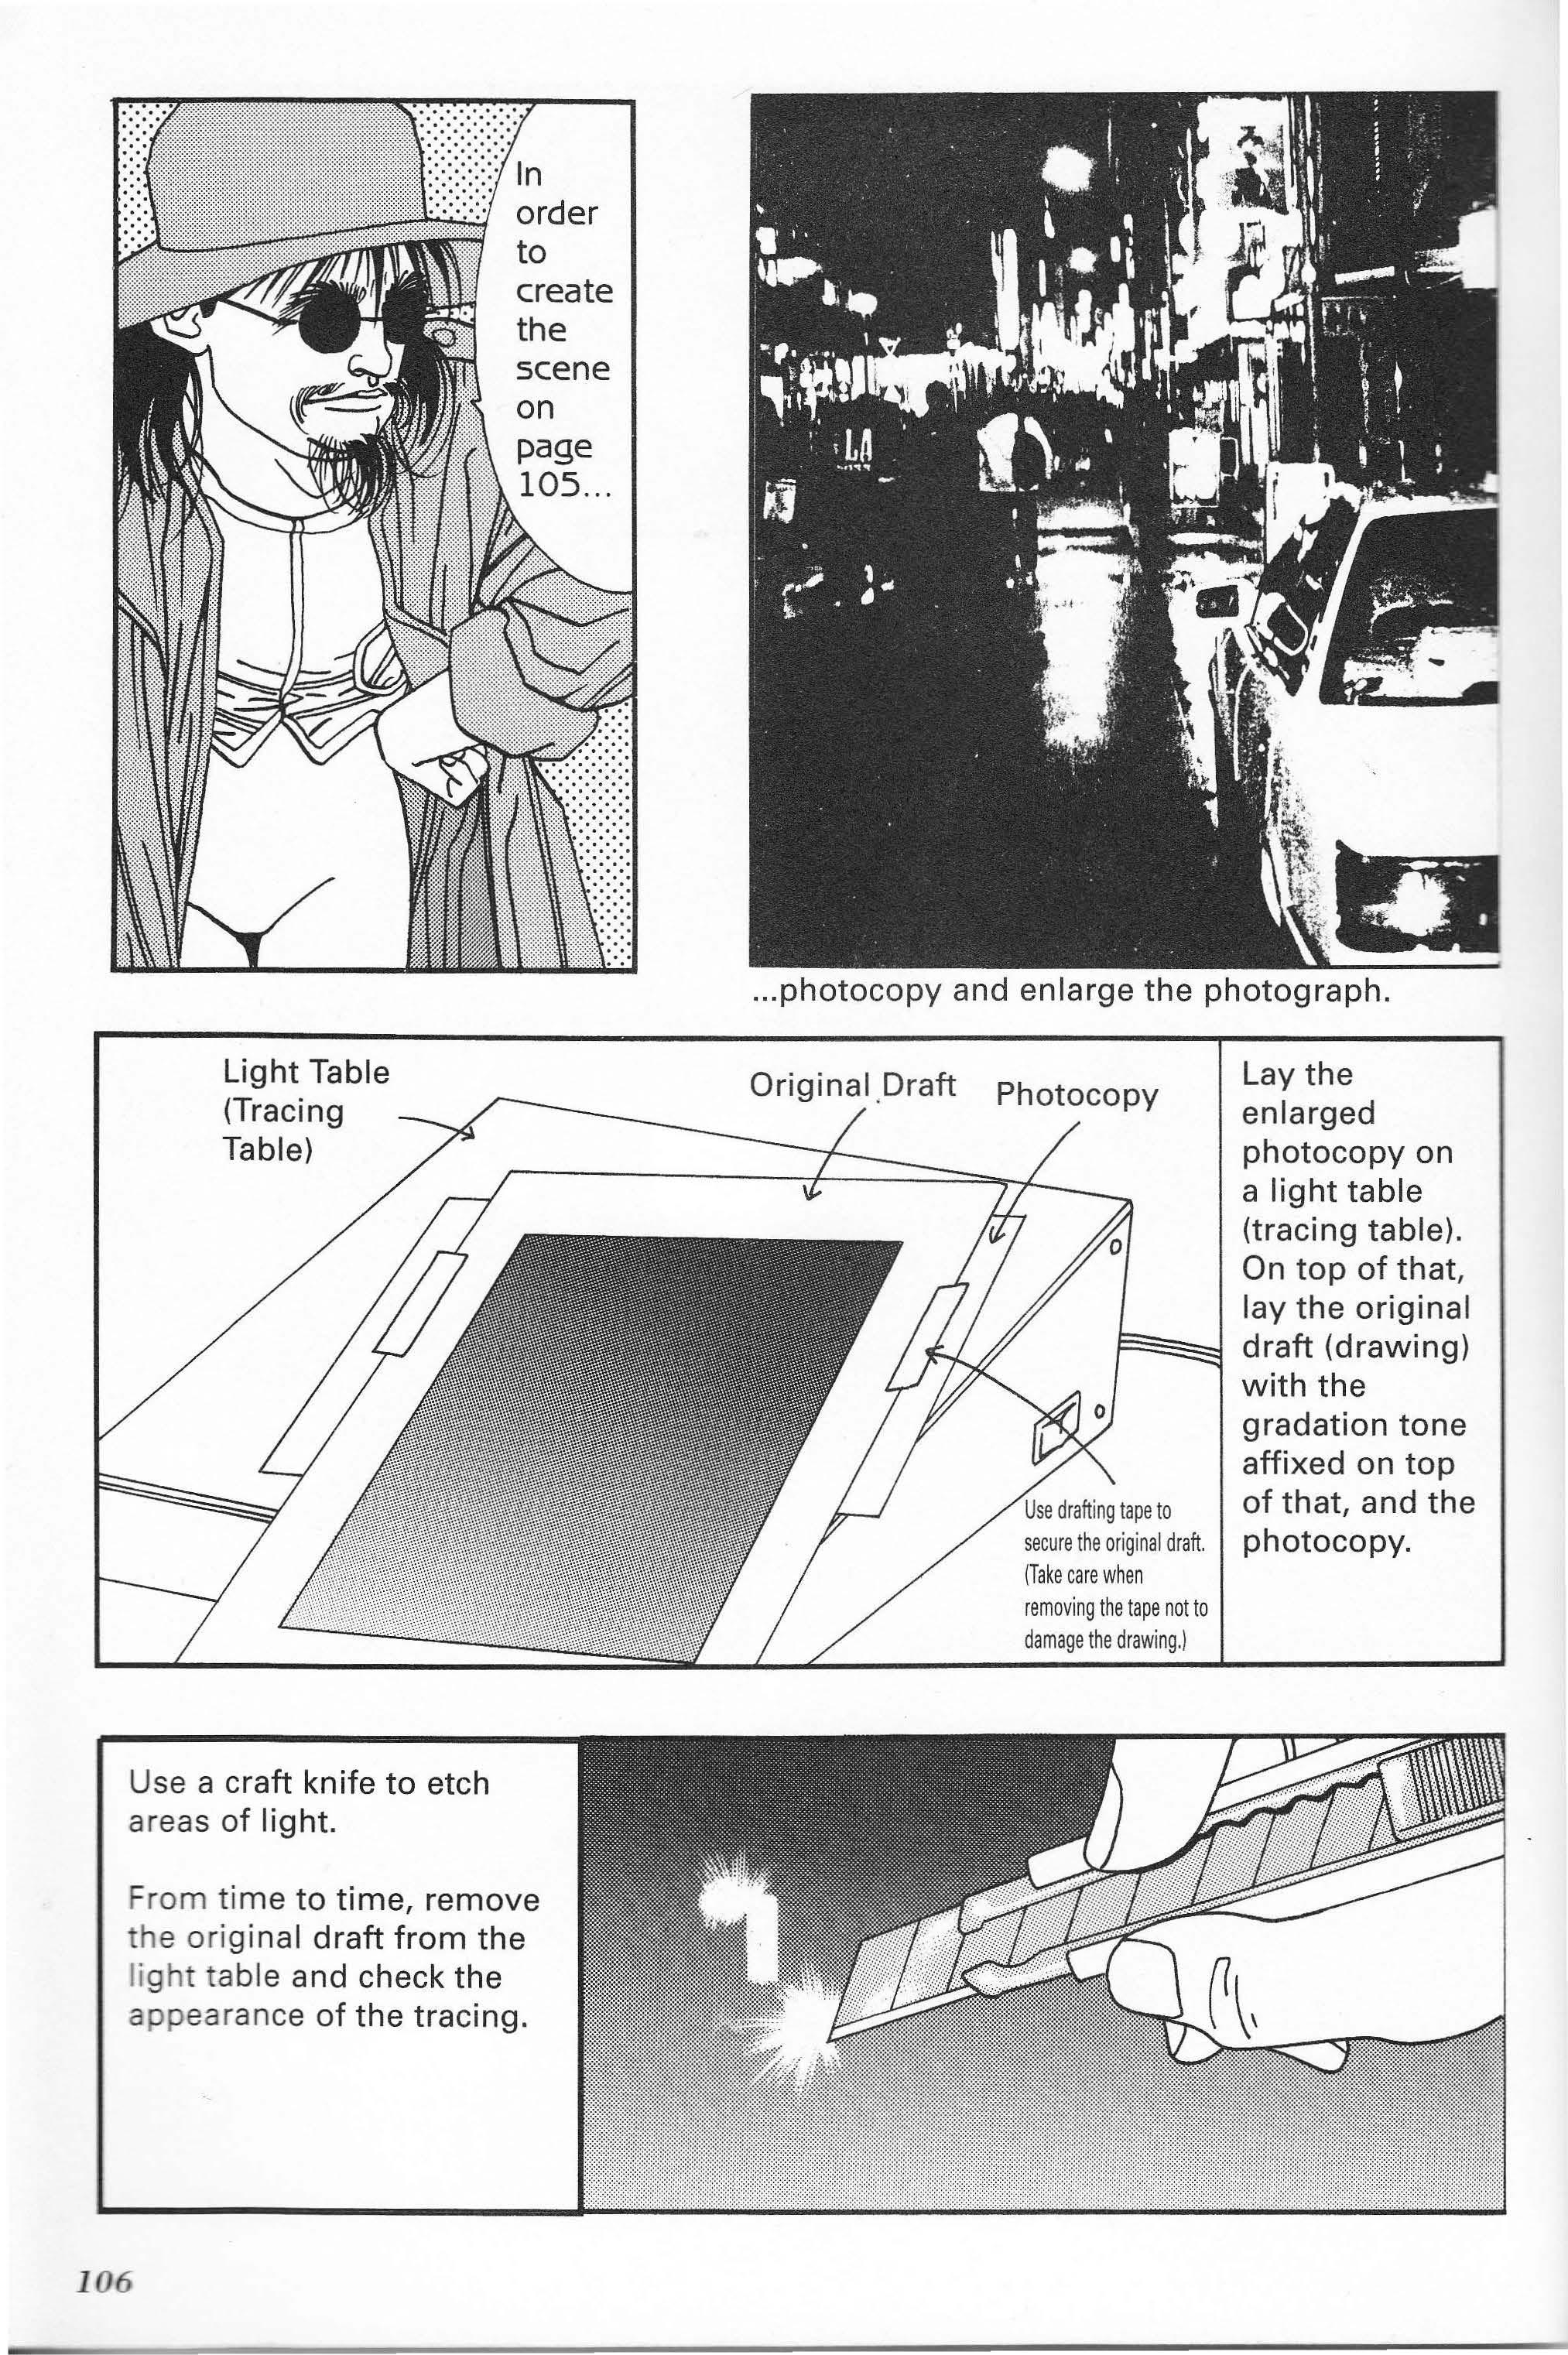
removing the tape not to damage the drawing.) Lay the enlarged photocopy on a light table (tracing table). On top of that, lay the original draft (drawing) with the gradation tone affixed on top of that, and the photocopy.
- all __ -eed
ete
le Artwork Using Gradation Tone
<::3ara nce before etching: IC430 The light section of IC433 was used here.

Border where the gradation screen tone sheet was cut. Also lighter section of IC433 was used here.
IC430
tEstablishing the direction of the light source will allow you to determine where to attach the screen tone.
Dot screen tone was used in the background.
.: e =--:ISt were -- :each er
- screen :.: e ... nis is a secret :echnique f mine.
... these would definitely be the basics.
A curved knife is faster and easier than a craft knife when etching
A curved knife like this works best.
Tilt the blade when etching the tone.
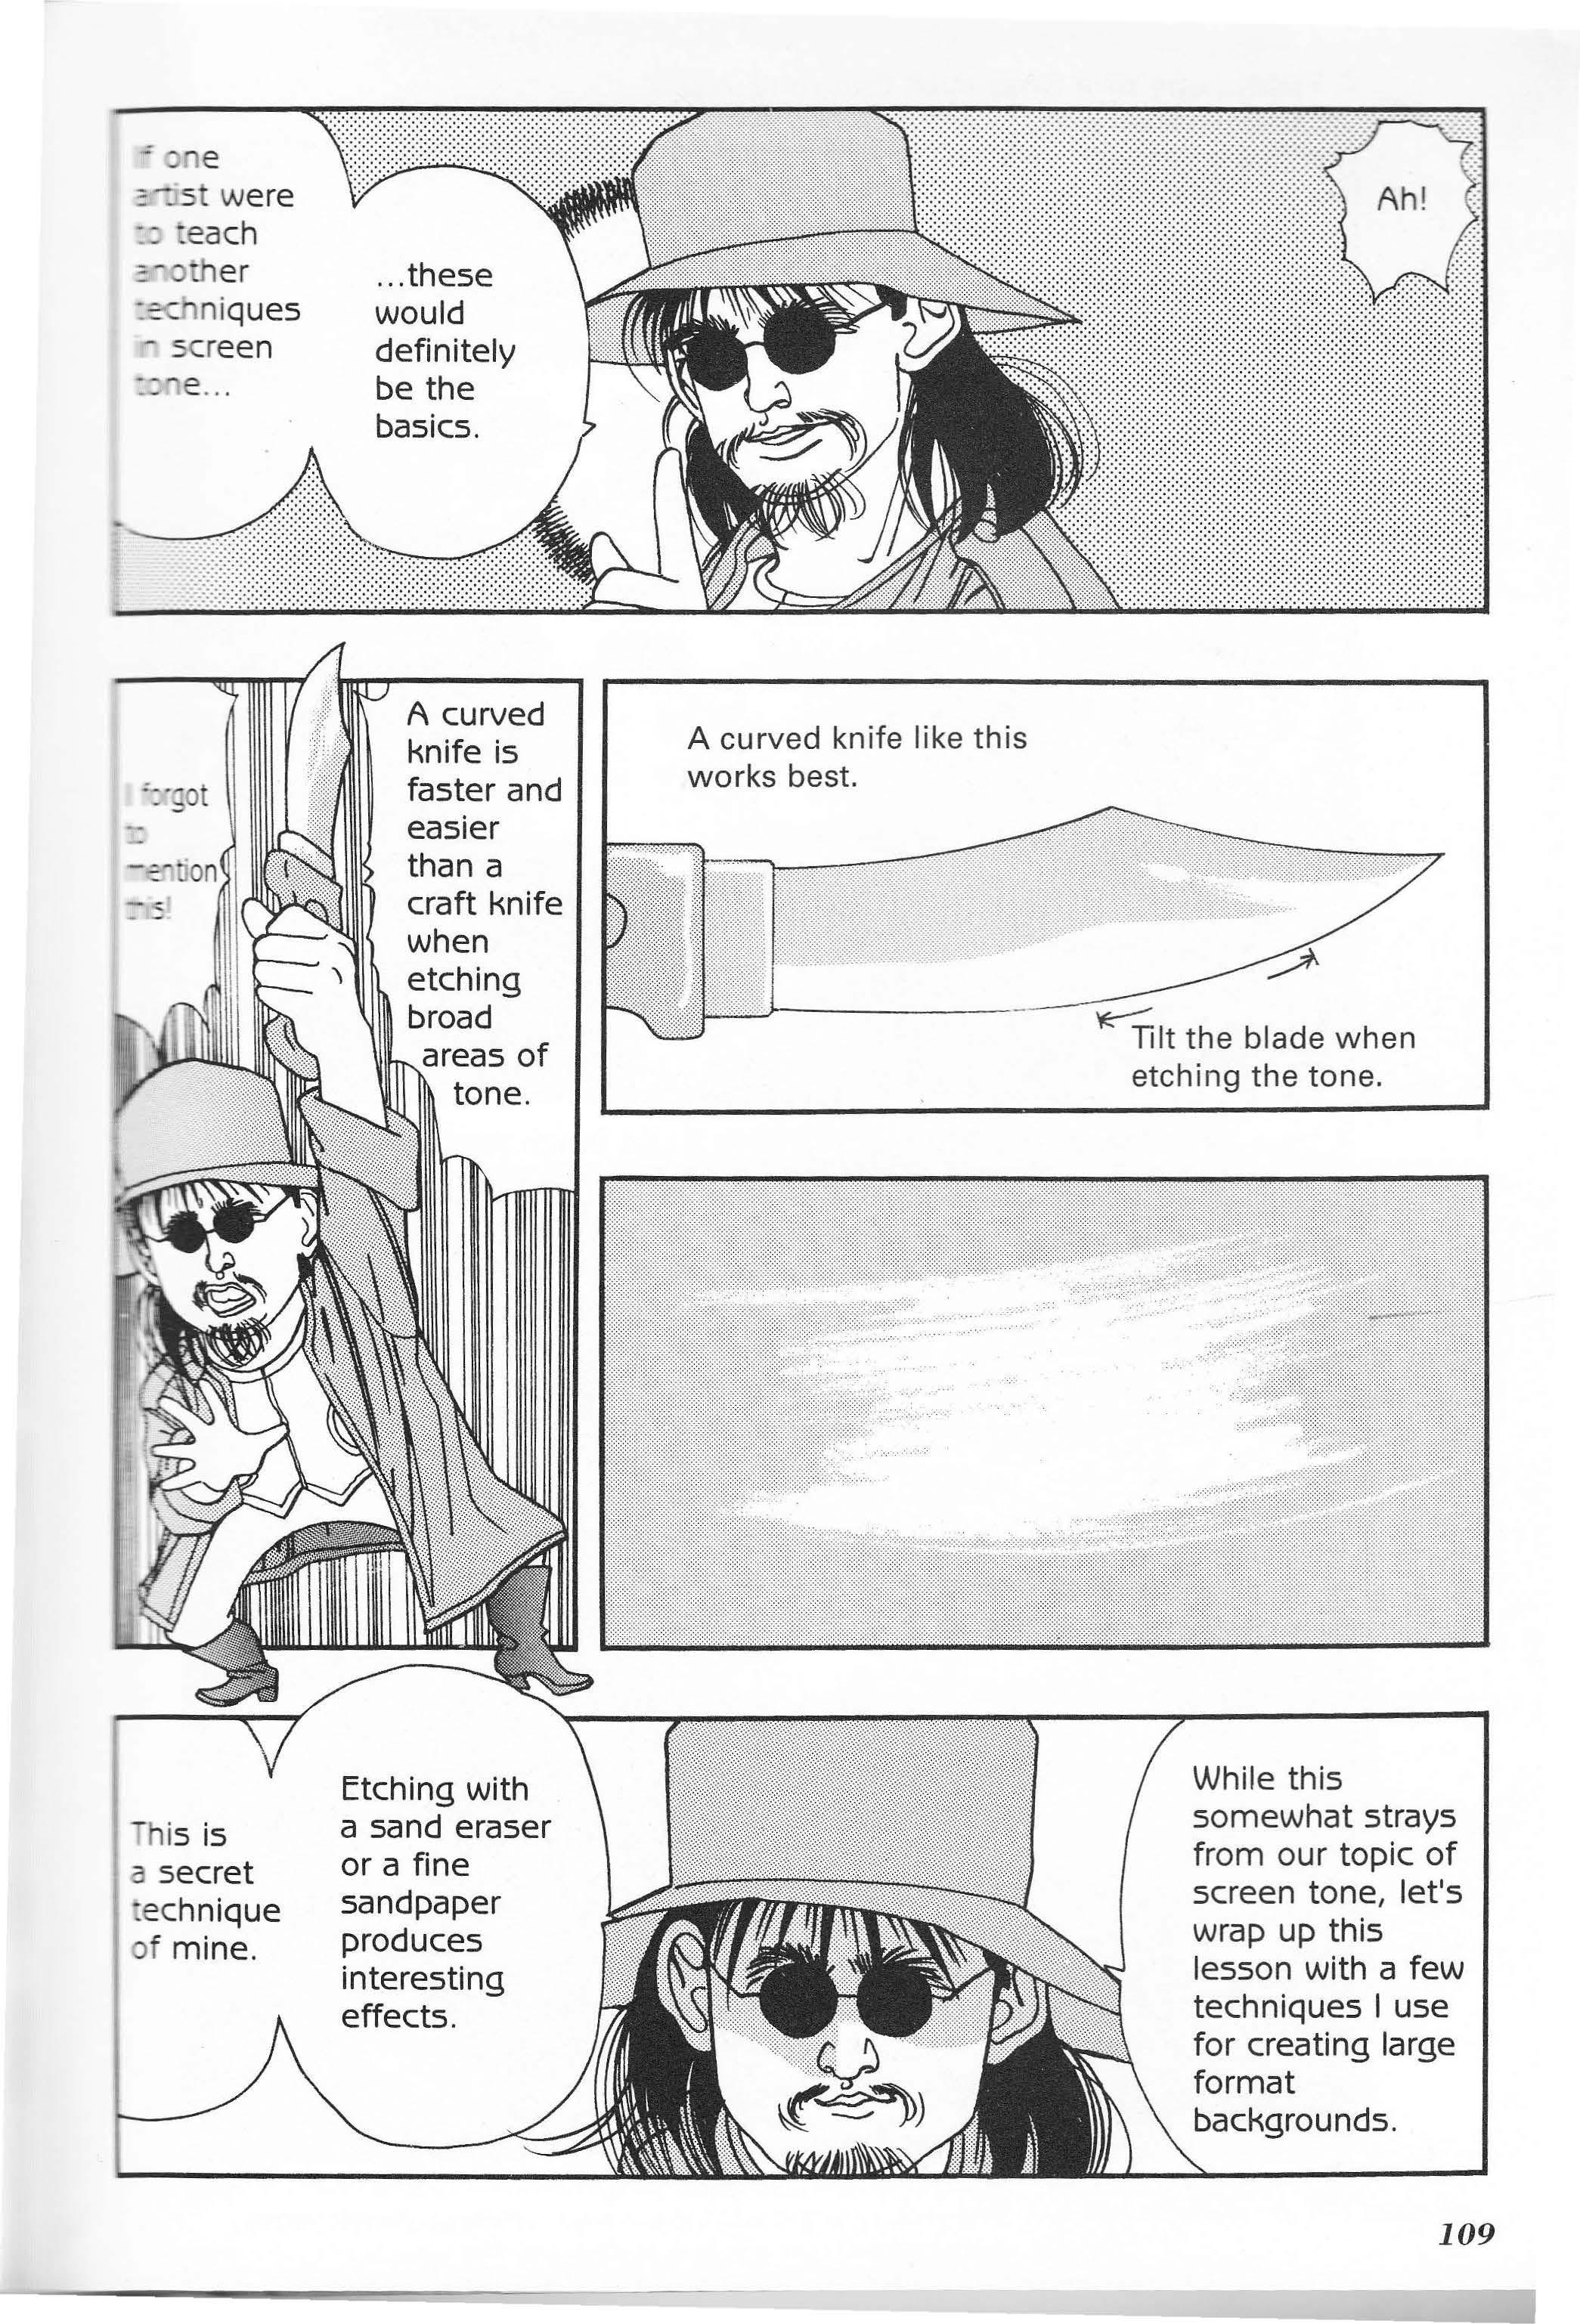
broad Etching with a sand eraser or a fine sandpaper produces interesting effects. While this somewhat strays from our topic of screen tone, let's wrap up this lesson with a few techniques I use for creating large format backgrounds.
A Line Drawing of the Photocopy with Solid Black Areas Filled
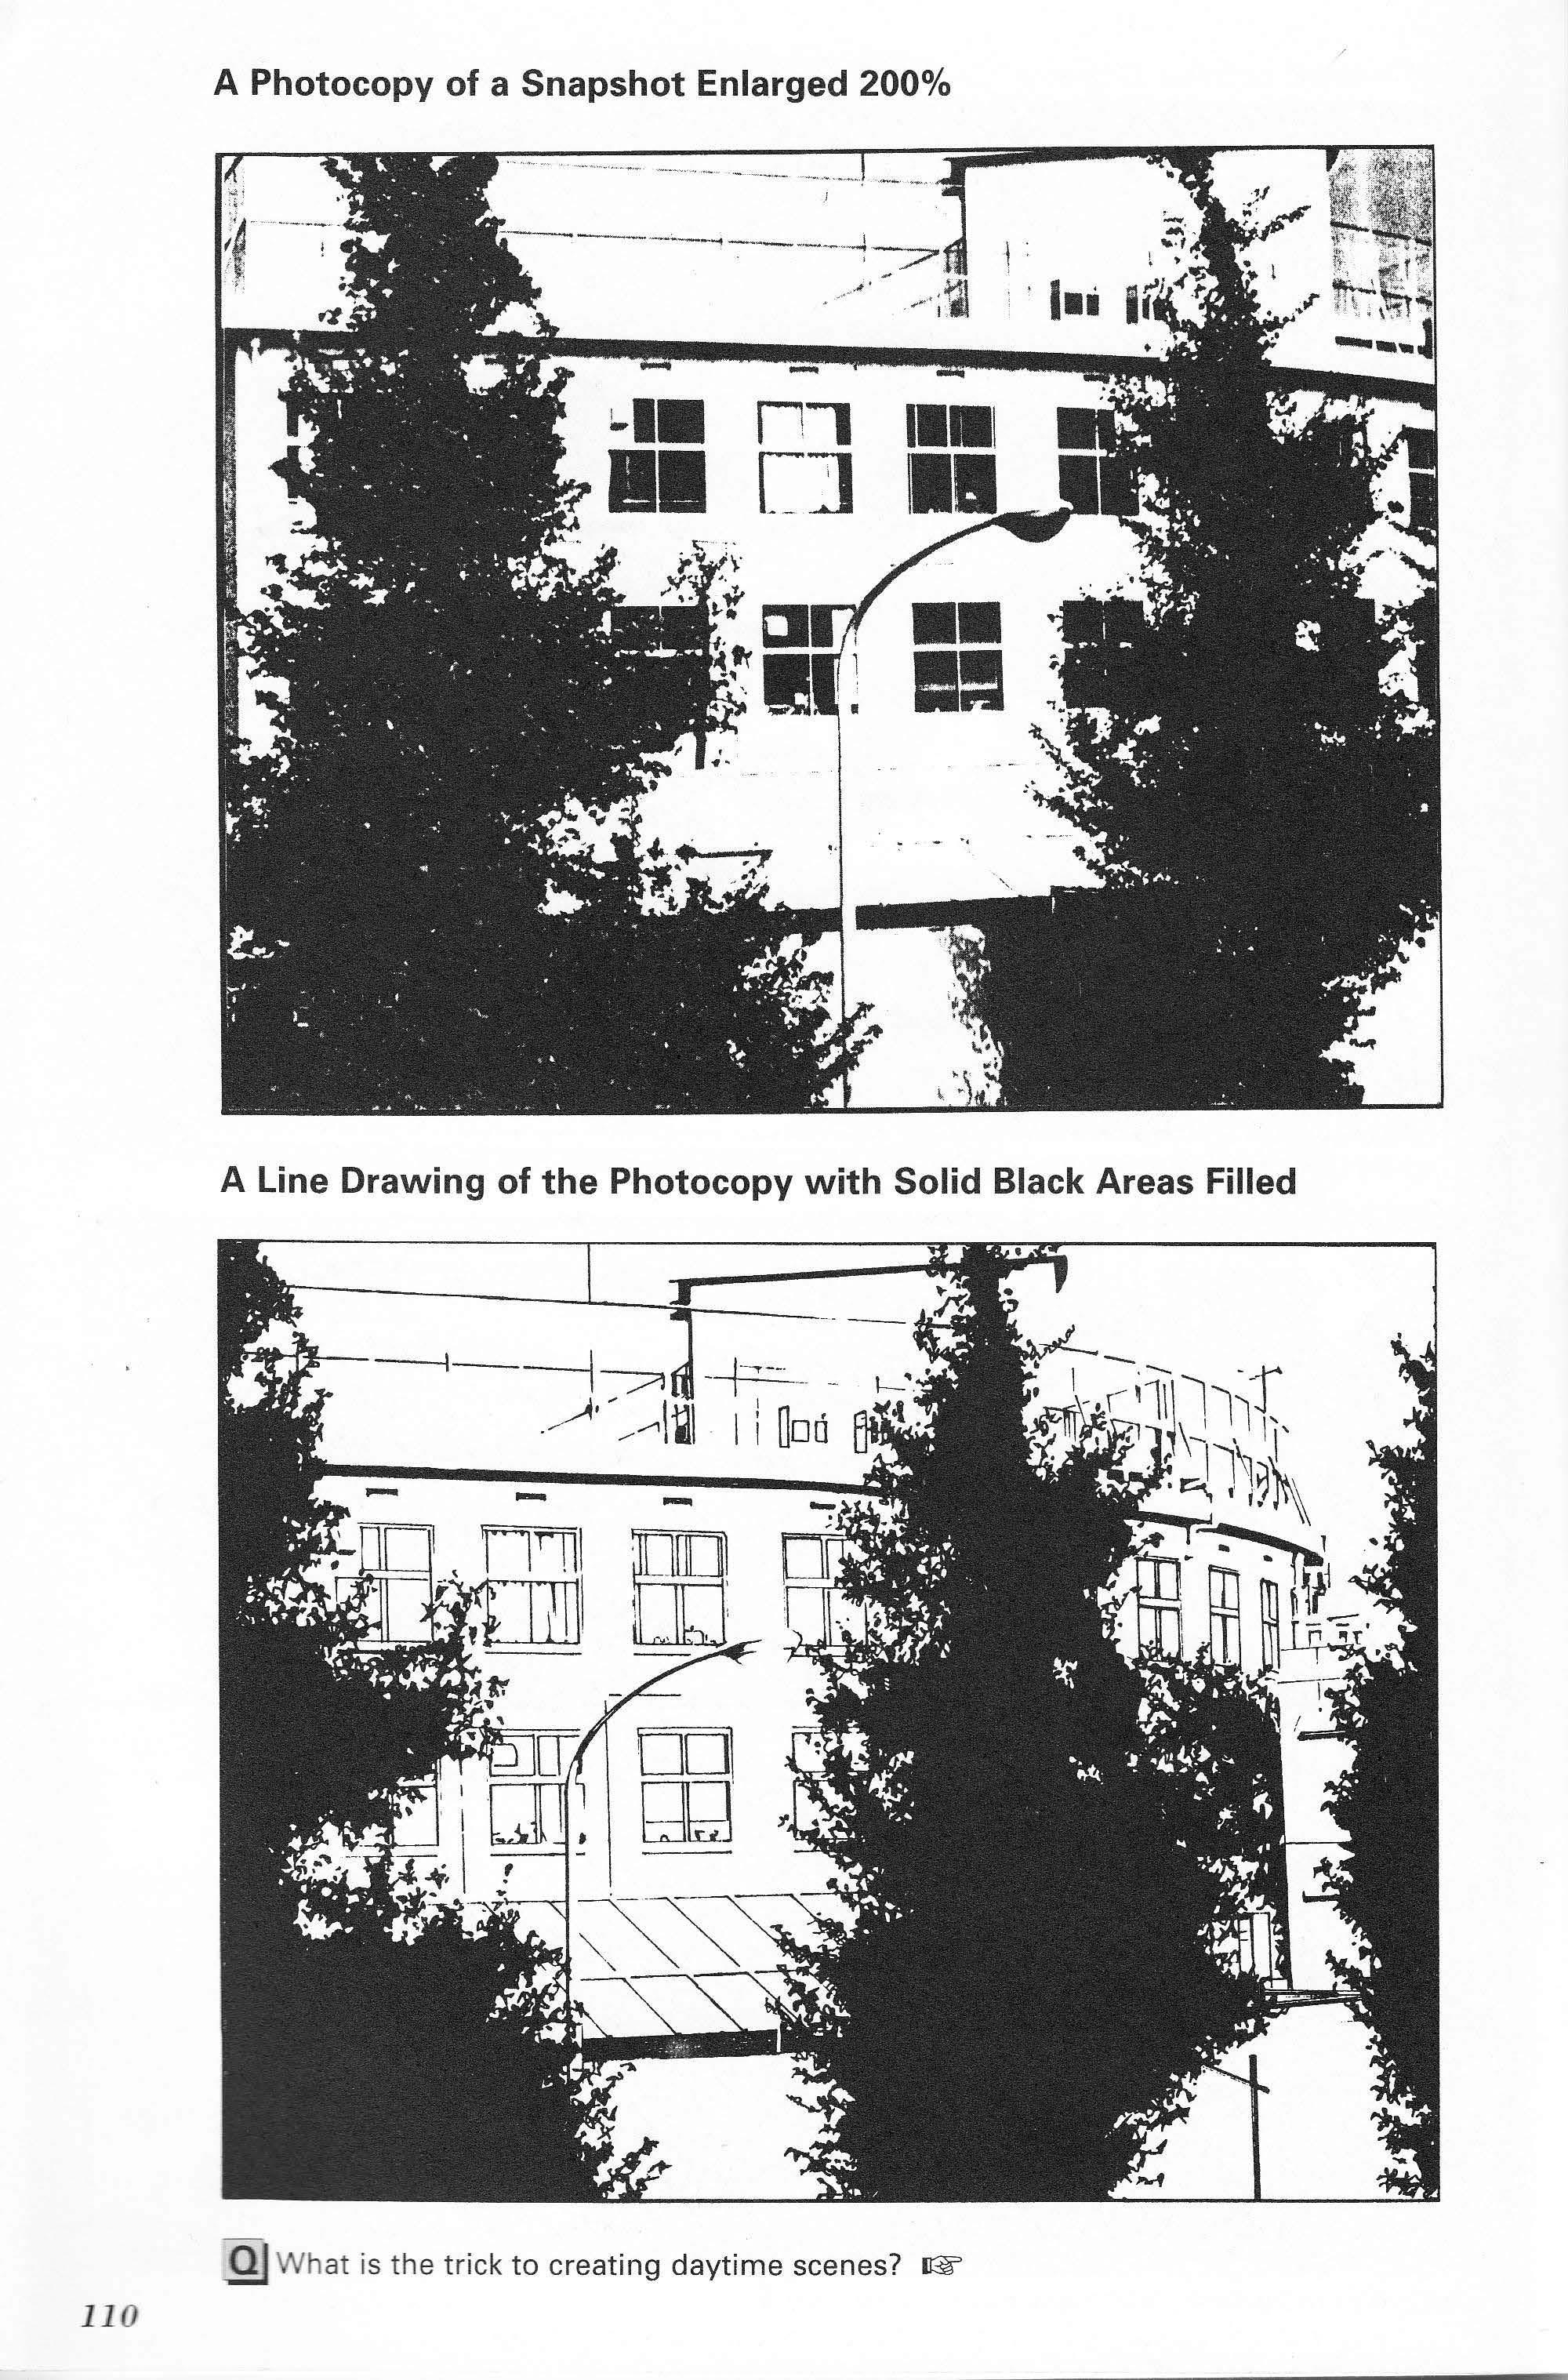
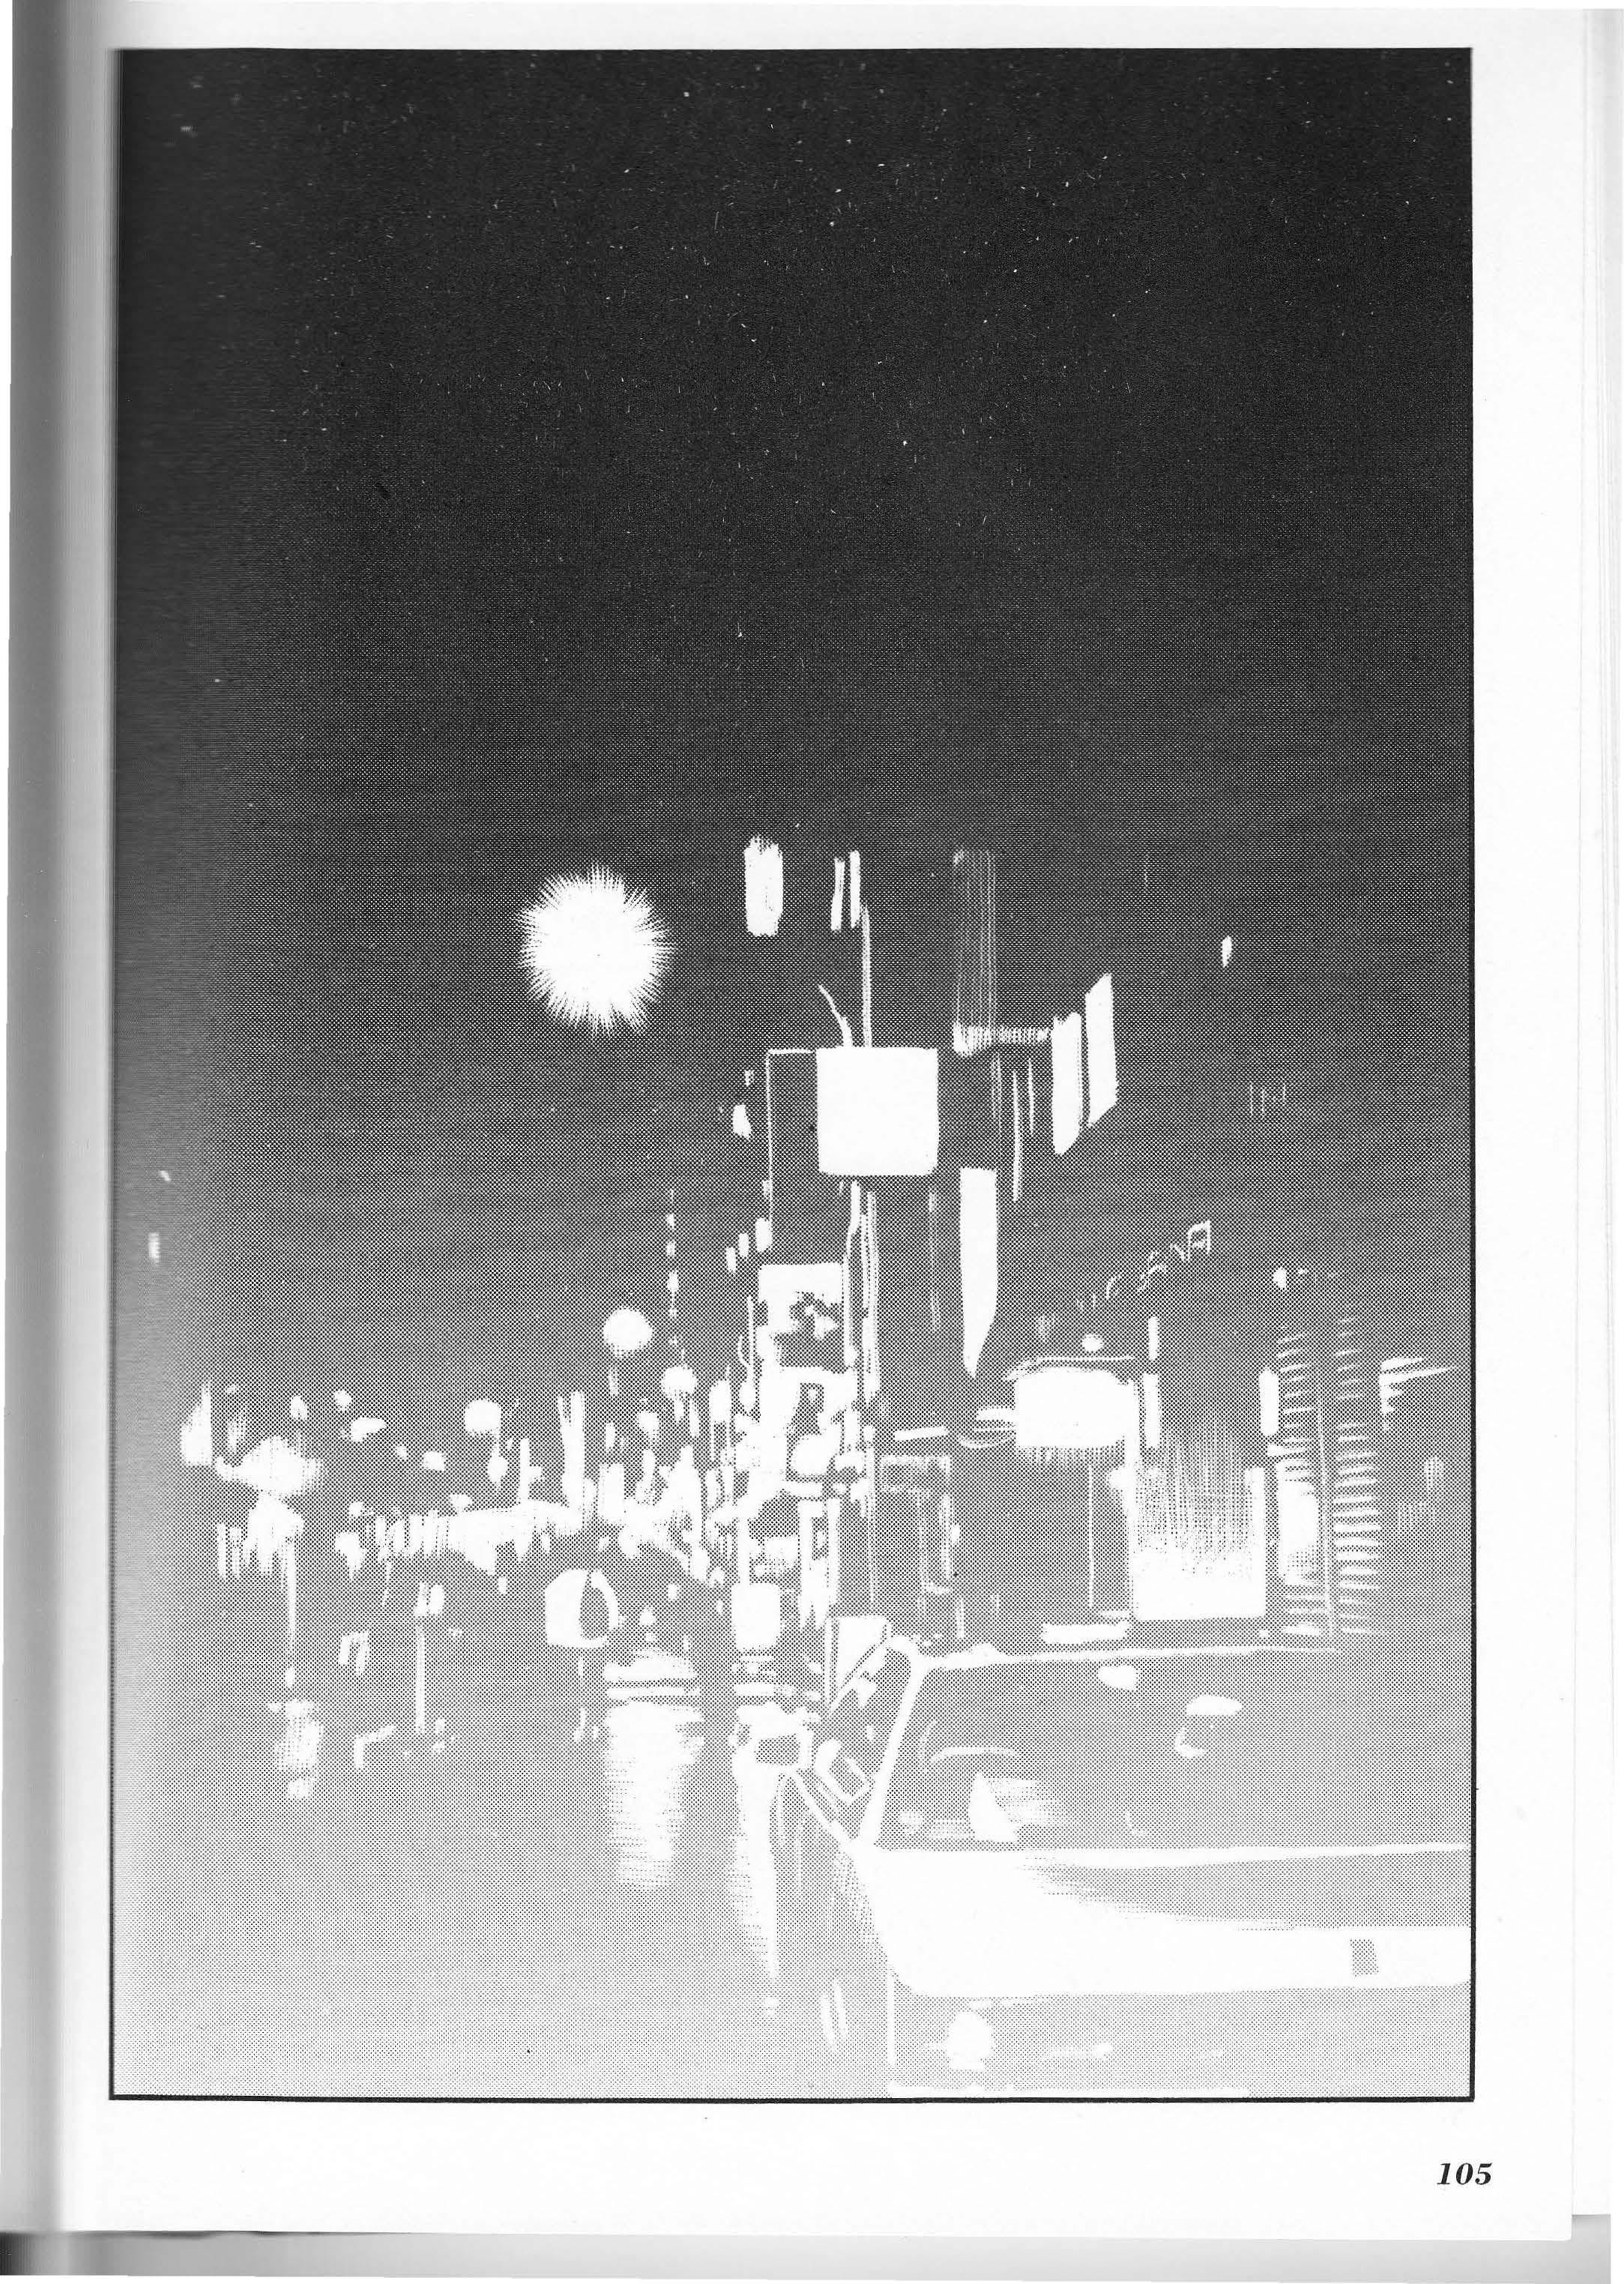
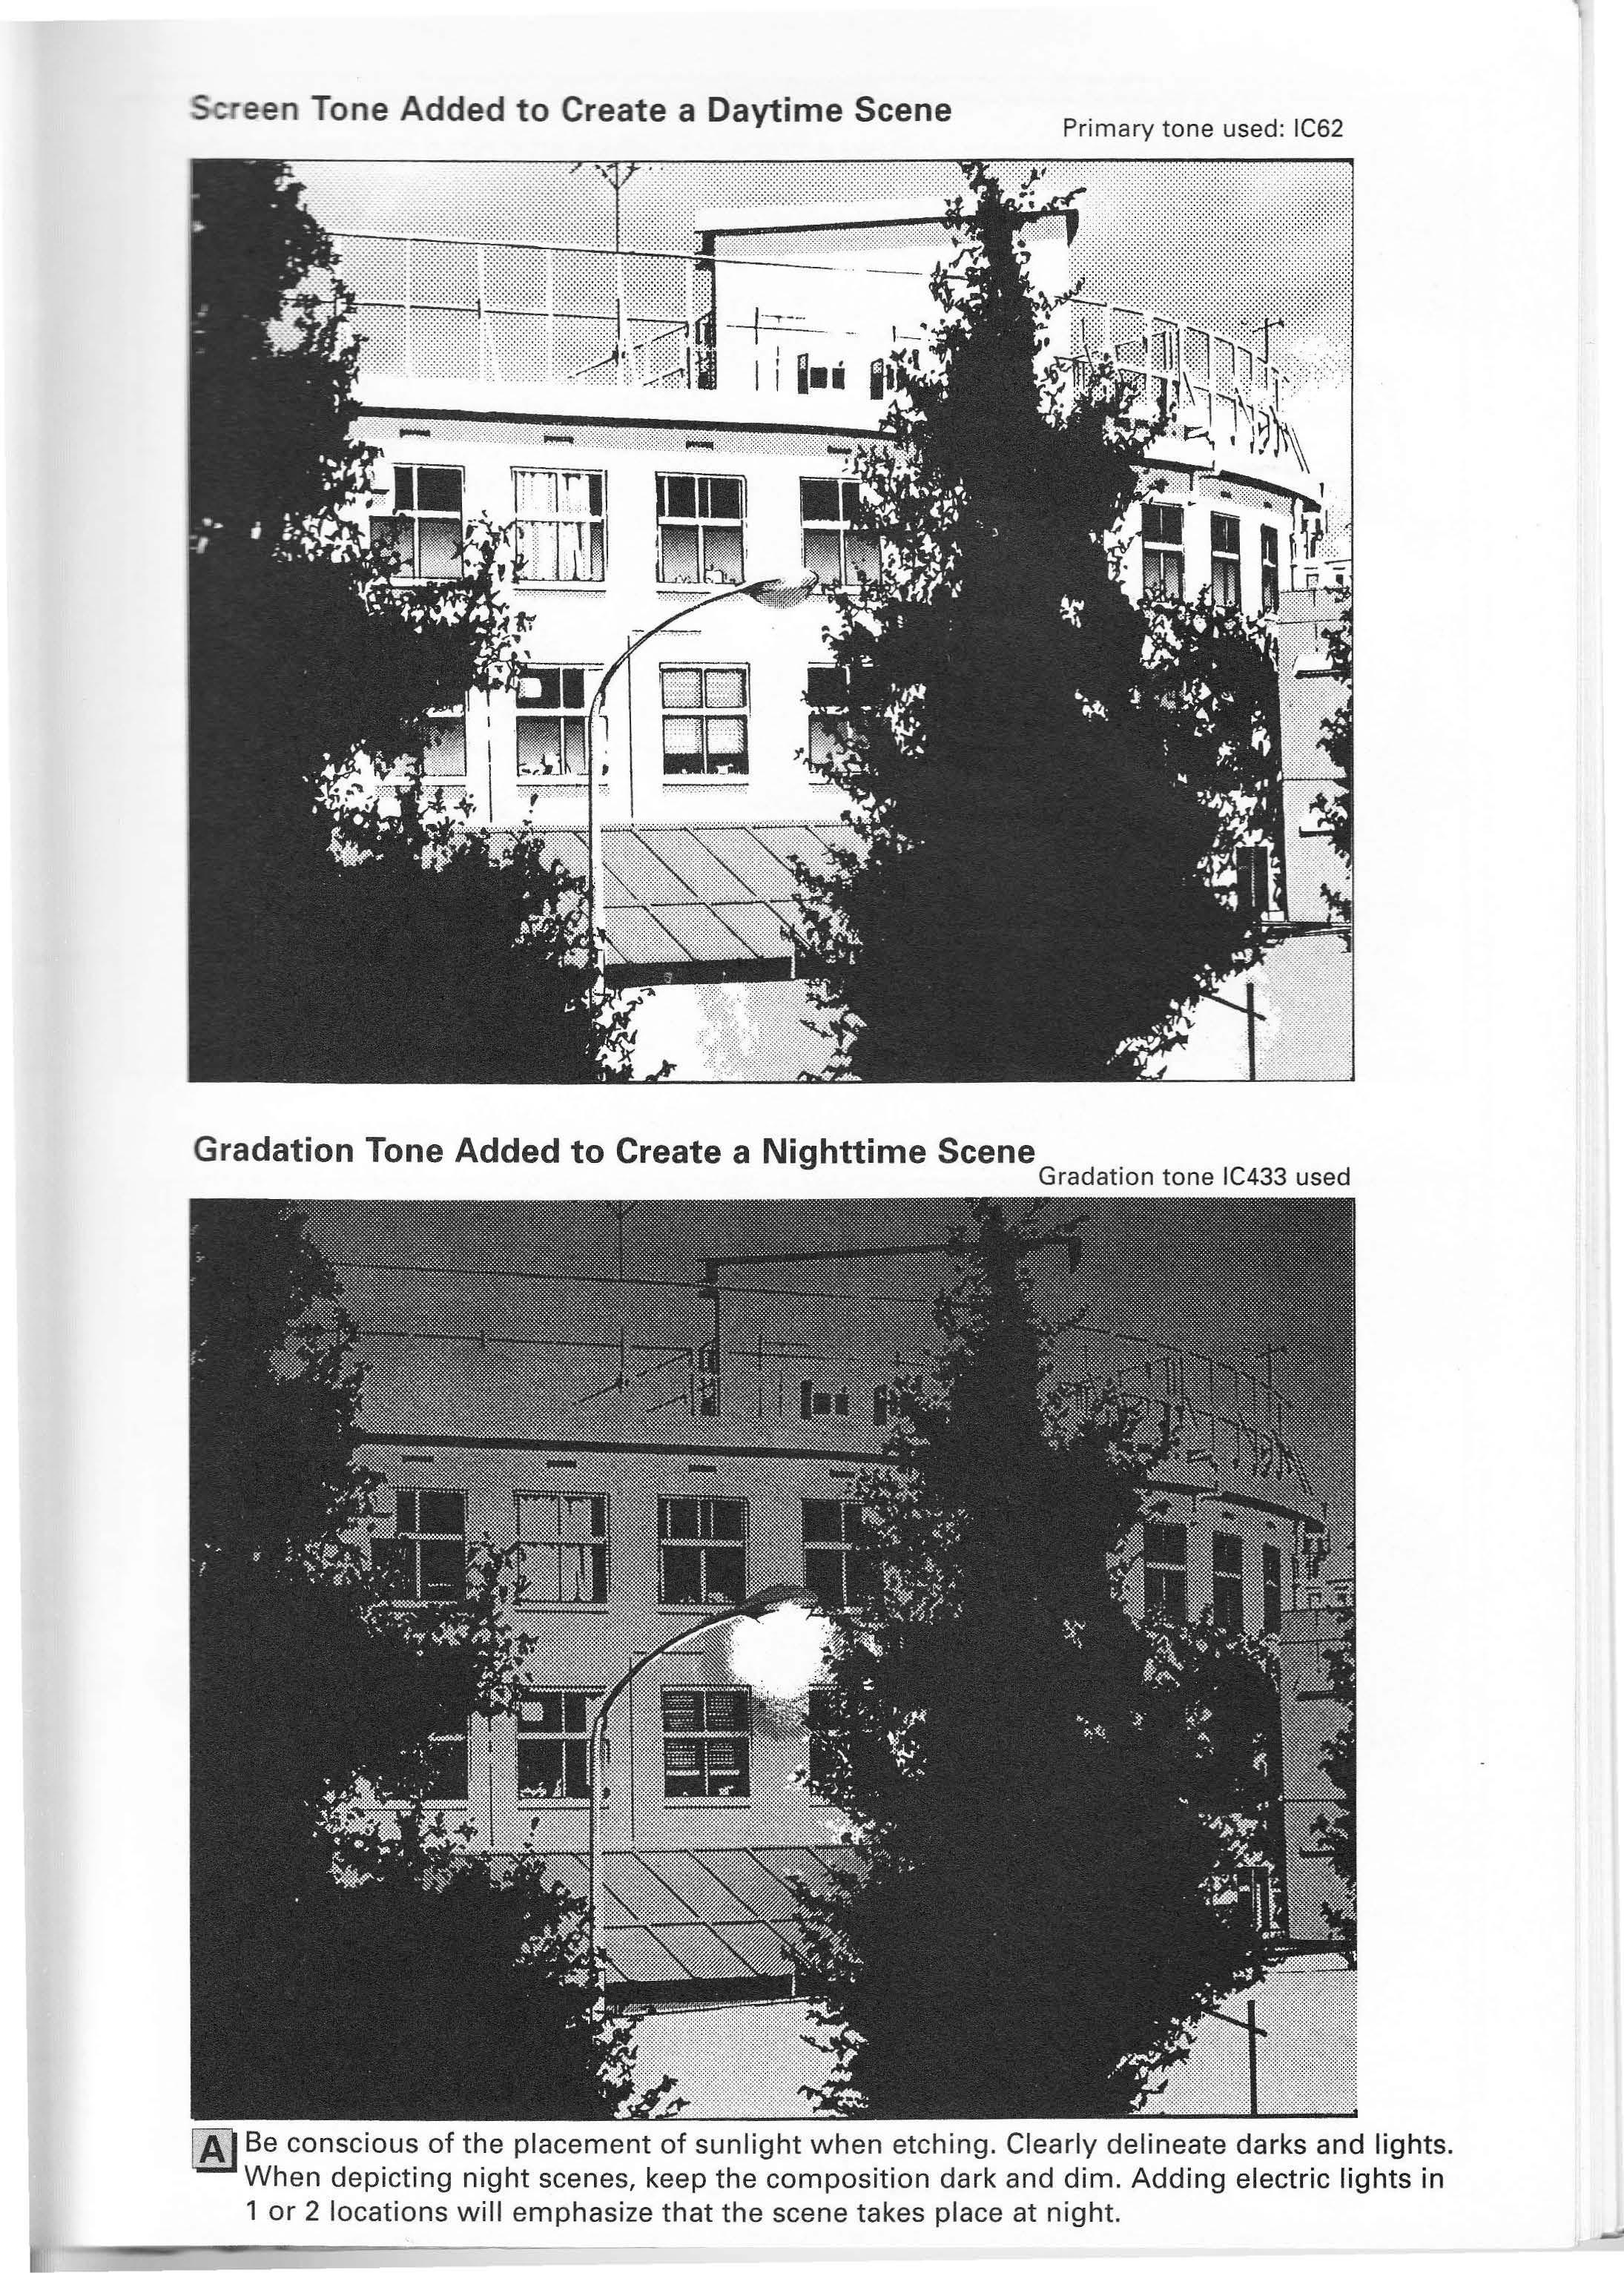
Gradation Tone Added to Create a Nighttime Scene
Gradation tone IC433 used
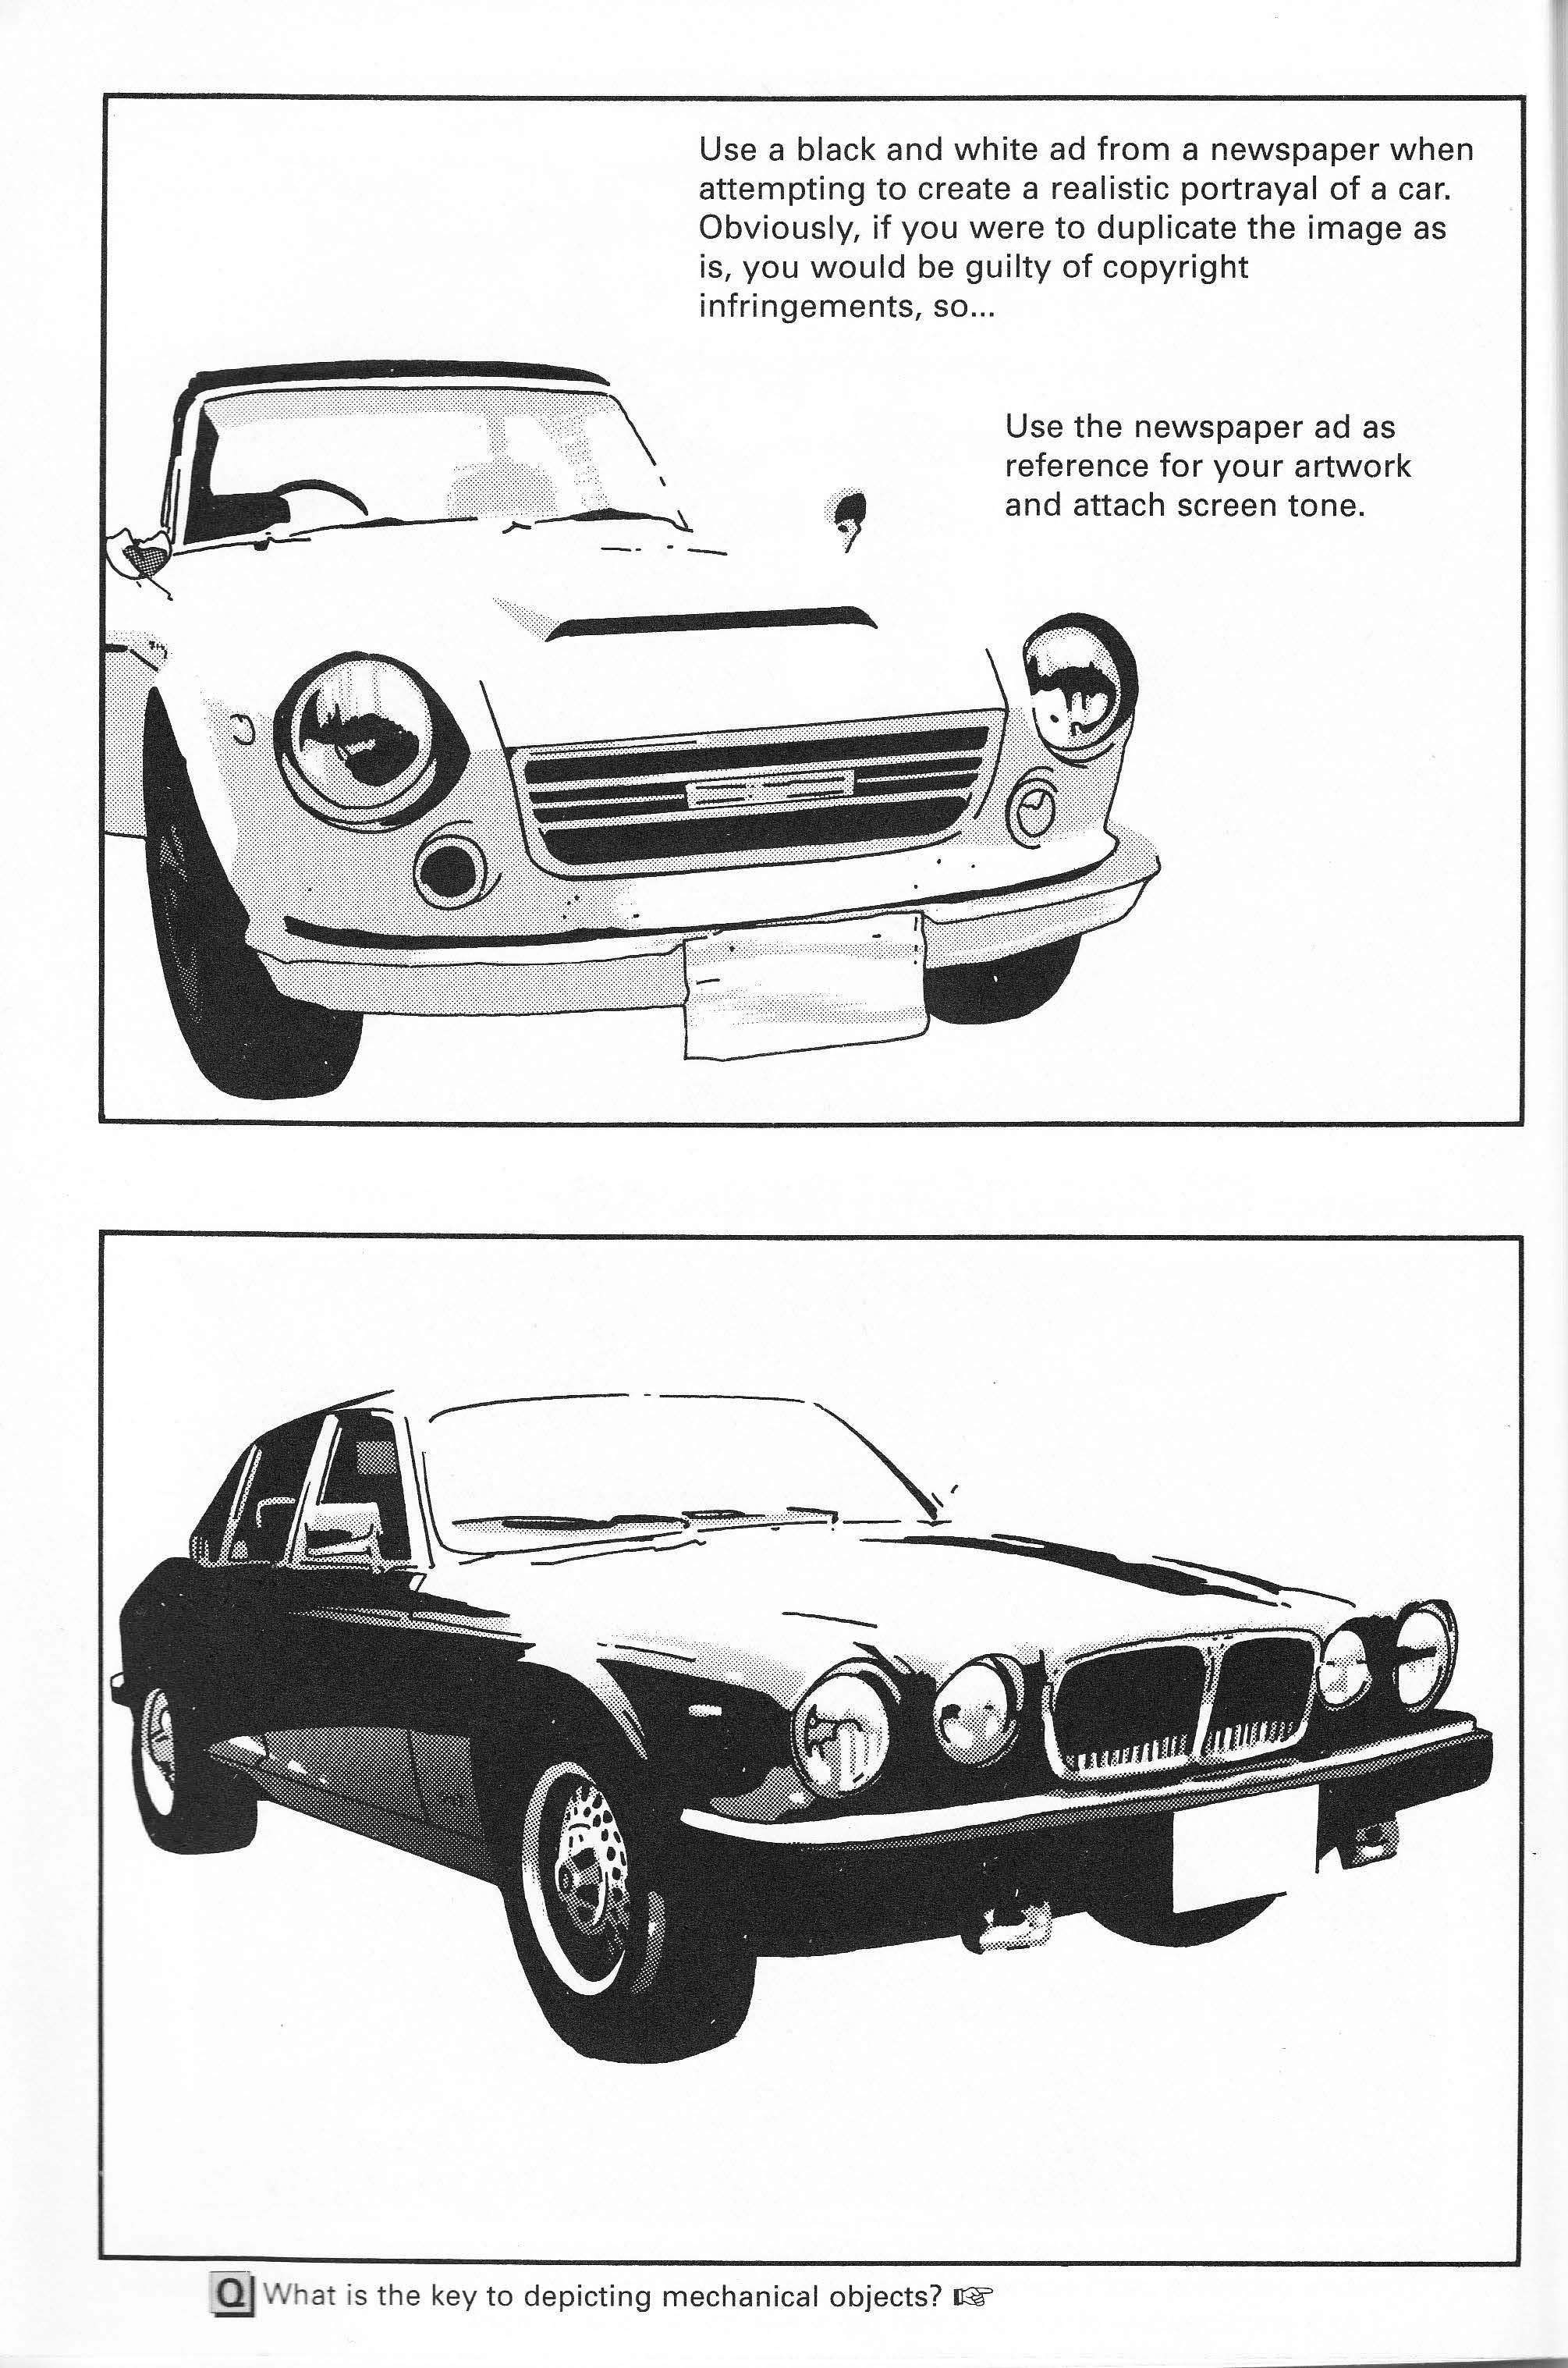
Use a black and white ad from a newspaper when attempting to create a realistic portrayal of a car. Obviously, if you were to duplicate the image as is, you would be guilty of copyright infringements, so ...
Use the newspaper ad as reference for your artwork and attach screen tone.
.:: ever come ss artwork :. . c: m anga artist - •. ich you feel :-:: e work was :.c ·cularly well =-· ec ted, cut it :. __ an d keep it - :: scrapbook "":: - ture =:e ence.
. en I was nger, I kept a _ ber of scrapbooks for _ ildi ngs, for 2rs, for nature, .:: - people, and - ·scellaneous scrapbooks. I still -a e them today. is book has only · uched on the ery tip of the ceberg that is anga. First, pick p a pen. That is of As you might expect, it is illegal for you to copy and pass off another artist's work as your own. However it is acceptable for you to use the techniques employed in that work as
scrapbooks proved invaluable reference

sources to anga.
Take it step by step and keep plugging away until you are finally able to create manga that is attentiongrabbing and appealing.
Hey!
- rry, kids. Heh heh . ::;,ofessor Ton had :. me urgent siness to take ::are of.

I thought I smelled Their Just as I suspected!
I'm looking forward
Hope we meet again! Catch ya later! Hang in there!
