4 minute read
BOATBUILDER’S NOTES AND TRADITIONAL TOOL


Boatbuilder’s Notes By Robin Gates
Reference paring with a chisel
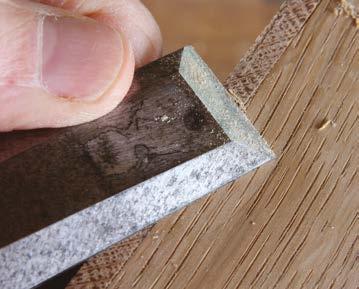
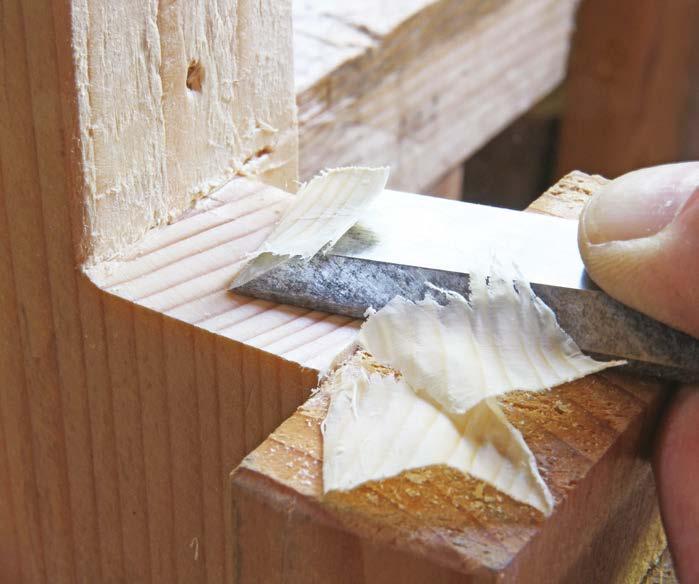
When paring across tough end grain with a chisel, it’s important to keep the tool flat against the wood if you want the pared surface to remain perpendicular to edges and faces. Sometimes you can use the work itself to support the chisel, for example where this thin oak board meets another at right angles (1). But where there’s no surrounding surface for the chisel to bear against, as with this rebated end of spruce (2) you can easily clamp a supporting reference block to it, helping to make a clean start to each cut while also preventing the chisel from tipping. It helps to both skew and slide the chisel sideways while cutting, effectively lowering the bevel of the chisel’s edge – which should be ultra sharp.
Transverse sections of fast- (left) and slowgrown oak (right)
1 1 Using the work to support the chisel 2 Paring with a reference block
2
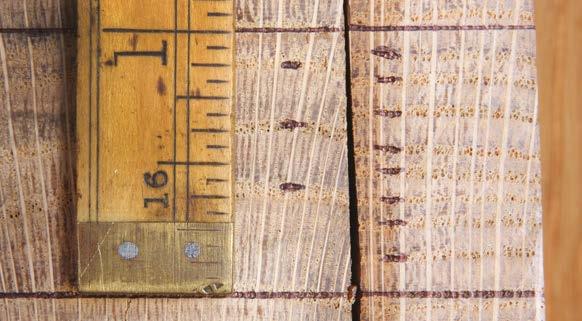
Fast-grown oak is stronger
For temperate ring-porous hardwoods like ash and oak, showing characteristic growth rings composed of pale large-pored wood laid down in spring transitioning to the darker, denser small-pored wood of summer, the timber from a fast-grown tree is stronger than one which has grown more slowly. This is because the broad growth rings of a fast-grown tree contain a higher proportion of the dense summer wood.
In this comparison of samples from oak which grew quickly (left) and slowly (right) the prominent medullary ray is running vertically, away from the heart of the tree, while alternating pale and darker bands of spring and summer wood, respectively, run horizontally. The bands of spring wood marked with a Biro indicate that the fast-grown oak took four years to increase by 1in (25mm) in radius, whereas the slow-grown oak took nine years. As a consequence, the fast-grown sample has more of the desirably dense wood laid down later in the yearly cycle and will be better able to withstand the stresses and strains experienced by a wooden boat at sea. It also steam-bends quicker than slow-grown wood. Hand countersink for small brass screws in oak
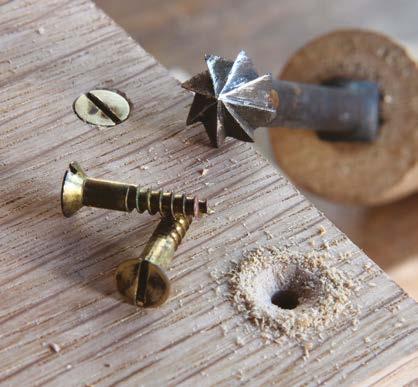
Hand countersink
A swing brace or even smaller hand drill can feel like overkill when countersinking for small screws, and it’s all too easy to bore the countersink too large. A power drill is prone to make the same mistake, but faster. At such times a small hand countersink comes to the rescue, providing better control and more direct feedback to the user. Although there are many hand countersinks on the market with prices ranging from £3 – 40, you can make one very simply by fitting the square-shanked rose head bit from the brace into a length of wooden rod. I used a piece of sweet chestnut cut from a walking stick and carved the tapering square socket for the bit with a narrow chisel.
Boatbuilder’s Notes Traditional Tool
By Robin Gates
Of all the hand tools developed for special purposes in working wood, surely none delights the eye so much as the little stair saw – it’s as shapely as a carousel pony. Although rarely used today, having been made obsolete by machinery and simpler techniques of construction, this saw’s particular job was cutting the dados housing treads and risers in the stringers of a staircase. Back in the heyday of the big class and stately motor yacht, a staircase leading to the deckhouse could be a grand affair embellished with exotic timbers and swirling hand rails, and no one wanted their entry marred by creaky ill-fitting stairs.
The job could also be done with the common tenon saw but in accustomed hands the stair saw was faster and reliably precise, cutting to the same depth every time without the need for measuring. You can see that when the saw’s wooden body bottoms out on the surface of the work the saw ceases cutting, at which point you begin the second kerf, thence to remove the waste between them by chisel or router and – Hey presto! – you have a dado.
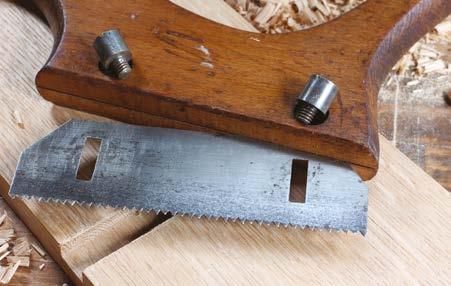
Commercially the saw was available with a fixed blade cutting to a single depth or an adjustable blade, as in this example, which cuts from 1/2–3/4in. The adjustable blade is secured by two screws tightening on the slotted blade. Alternatively you could buy just the blade and make your own handle, or make the entire tool by also filing teeth in a suitable piece of steel plate.
The saw is held rather like a plane, with one hand pushing from the rear while the other placed forward is largely responsible for steering. That said, you can turn the saw around and comfortably pull it, or even fit the blade in reverse. It helps with making a clean start if you scribe the marks with a knife or corner of a chisel and then, on the waste side of the line, pare a sloping groove for the saw’s relatively coarse teeth to follow. Rubbing the blade with a stick of beeswax eases progress. But beware of pushing down with the steering hand or the saw will dig in like a figure skater tripping over their toe pick and come to an undignified halt.
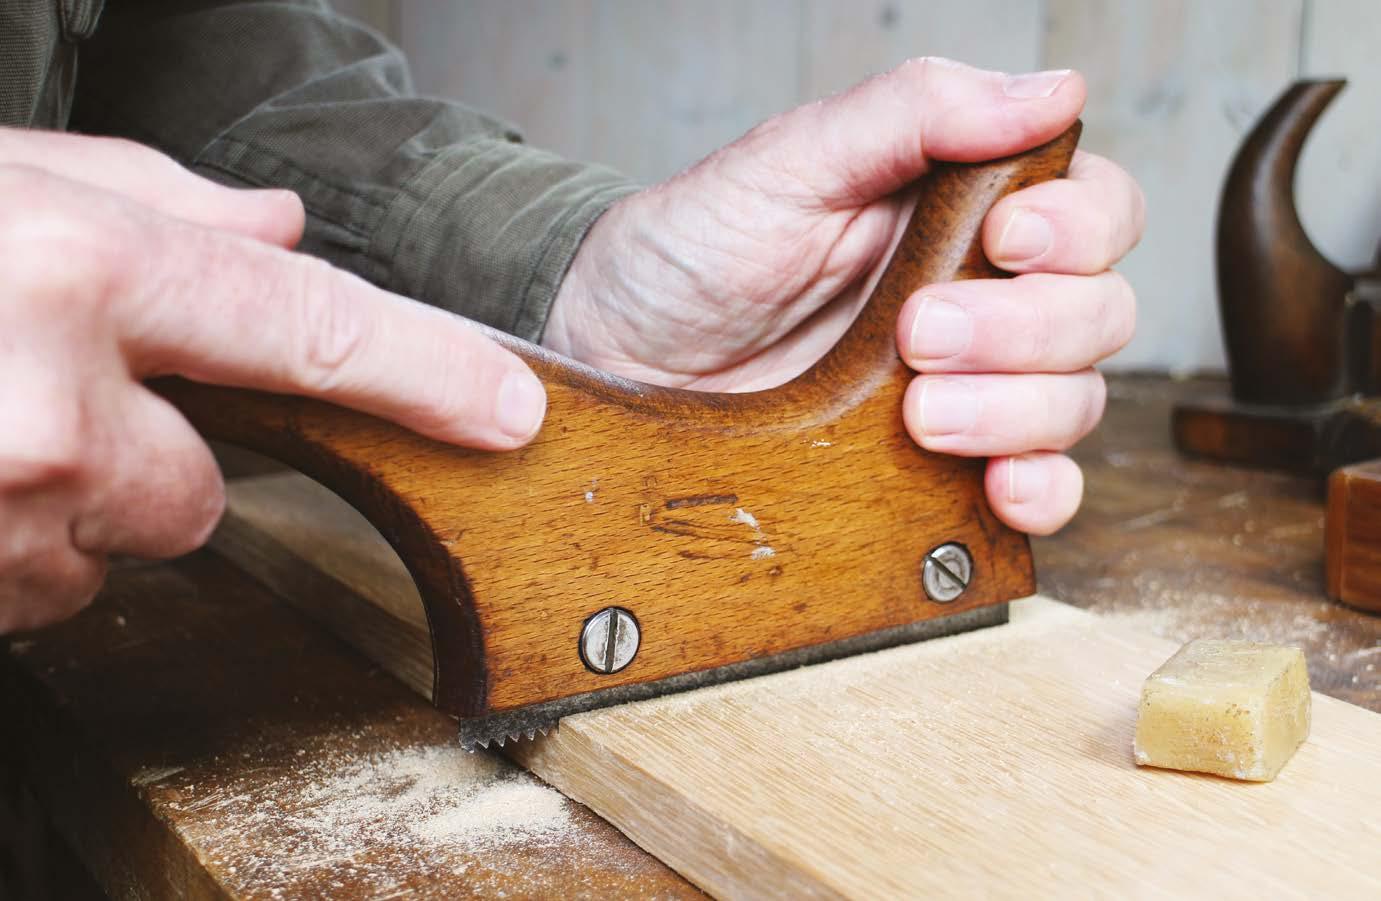
STAIR SAW
Clockwise from above: One hand pushes, the other steers; The stair saw in the kerf of oak; Dismantled to show the adjustable blade
NEXT MONTH: Spill plane