9 minute read
SLIP CASTING FROM 3D PRINTED PARTS
By Chris Donnelly

Advertisement
INTRODUCTION
I wanted to take a moment to explain why I have written this. I am a potter that works primarily on the wheel, but have been pursuing different slipcasting projects recently. When making functional slipcast work, I found it difficult to create design features (handles, knobs, hinges etc.) of the same quality as historical and traditionally made types in factories. I knew what I wanted to achieve but I didn’t have the traditional model making skills taught and honed in the factories in Staffordshire for example. What I did have however, was a basic knowledge of computer modelling software with my post as technician in Design Technology at the Edinburgh Academy. We do have a 3D printer there, and there has been an increasing need for quality results as it is more and more influential in the curriculum at the school. It is therefore my job to facilitate good results with this machine. I thought, ‘What better way to achieve reproducible and quality results with the 3D printer than to take on a small project for my own practice.’
I designed a couple of handles and some of them have worked, and some of them I know will not. It is a little trial and error, but with the cost of printing dropping incredibly recently, the real cost is the makers time.
I hope that this is helpful for people that are interested in using this technique and I wish you the best with your creative practice.
NB: You are free to use any of this content, add, ammend or completely ignore it.
MODELLING
I have used a variety of modelling tools and have had problems with them all. Some are really exceptional but really counter-intuitive while others look like a video game and will give you terrible results when going to print. Free software is always a bonus as some of the industry standard packages can be a fortune for licencing. There are a lot of links to different guides, best stories, disasters etc. but I would recommend looking into the ‘Maker’/’Hack’ movement or whatever it’s called now where there are a lot of people using different programs and printers for all kinds of applications. I found a page at Shapeways http://www.shapeways.com/creator/tools that has many of the more common programs listed.
What software you can use changes considerably if you are associated with an educational institution. Many of the commercial application packages costing thousands are available free for students and educators. I use Autodesk Inventor Professional and have a licence for my work and Home PC. Solidworks is another standard software package that I believe has educational licencing.
I would strongly advise against ‘acquiring’ software for modelling purposes. There are many free open source programs that offer everything you need to 3D print things. Some of which include Creo Elements, Sketchup, Blender, and Openscad.
PRINTING
I have a very basic 3D printer at my work but it does give some great results. Whatever you are modelling for slipcasting, I would try to print it as strong as you can. I have printed all of the pieces solid for the most strength. Because the price for 3D printing has become reasonable to everyone, it is in your interest to get the strongest and best print you can afford.
If you do not have direct access to a 3D printer, there are many options available. There are very commercial companies that do nothing but print things out for people like Shapeways. There are some other options that I’ll list in the back of this pamphlet. Another option is to get in touch with local businesses that may have a printer. I grew up in a city that had a lot of business in the oil and gas industry, and therefore developers needed 3D printers or rapid prototyping machines to develop innovative practices. There are sometimes 3D printers in architects and product design offices.
The next thing about printing is that you can go about things two different ways. You can print something, like a handle, and sand and fill, sand and fill, until it looks like a perfect model that you made on the computer. The second way is to print off the model, and sand and smooth the model down just enough to get the casting under way. I prefer this method as it takes less time and maintains process oriented marks... That is, it looks 3D printed. Whichever way you choose, I have finished models using the same processes. The next section will deal with the finishing of the model after printing.
FINISHING THE MODEL
The first method of finishing the model is to get exactly the same result as your computer model. Before I start filing and sanding the model, I give it a good wipe down with some acetone. This can smooth down some irregularities and artefacts (mistakes) in the 3D printing process. I think it also breaks down the bonds of the plastic on the outer layer which will in turn allow you to finish the model quicker. I would then spray the model with a primer of a different colour than the plastic you printed it with. This will give you a visual cue to where the low spots of the model are, and where you need to file and sand more. I would do some initial filing and sanding, and take contrasting spray paint from the primer and paint the model. If you find that you have taken too much away, or there are low spots or undesired holes, I have used car body filler to patch up and level out areas. This process should be repeated until your model is exactly as you want it. This can take a long time but doing the work at this stage will make life a lot easier later and the finished result will be better.
The second method is to finish the model so that there are still traces of the printing process left. I would remove any of the artefacts (blobby mistakes) in the printing process with a scalpel or sandpaper and then smooth the model down with acetone. Then I would spray paint the model to seal it for casting.
PLASTER CASTING
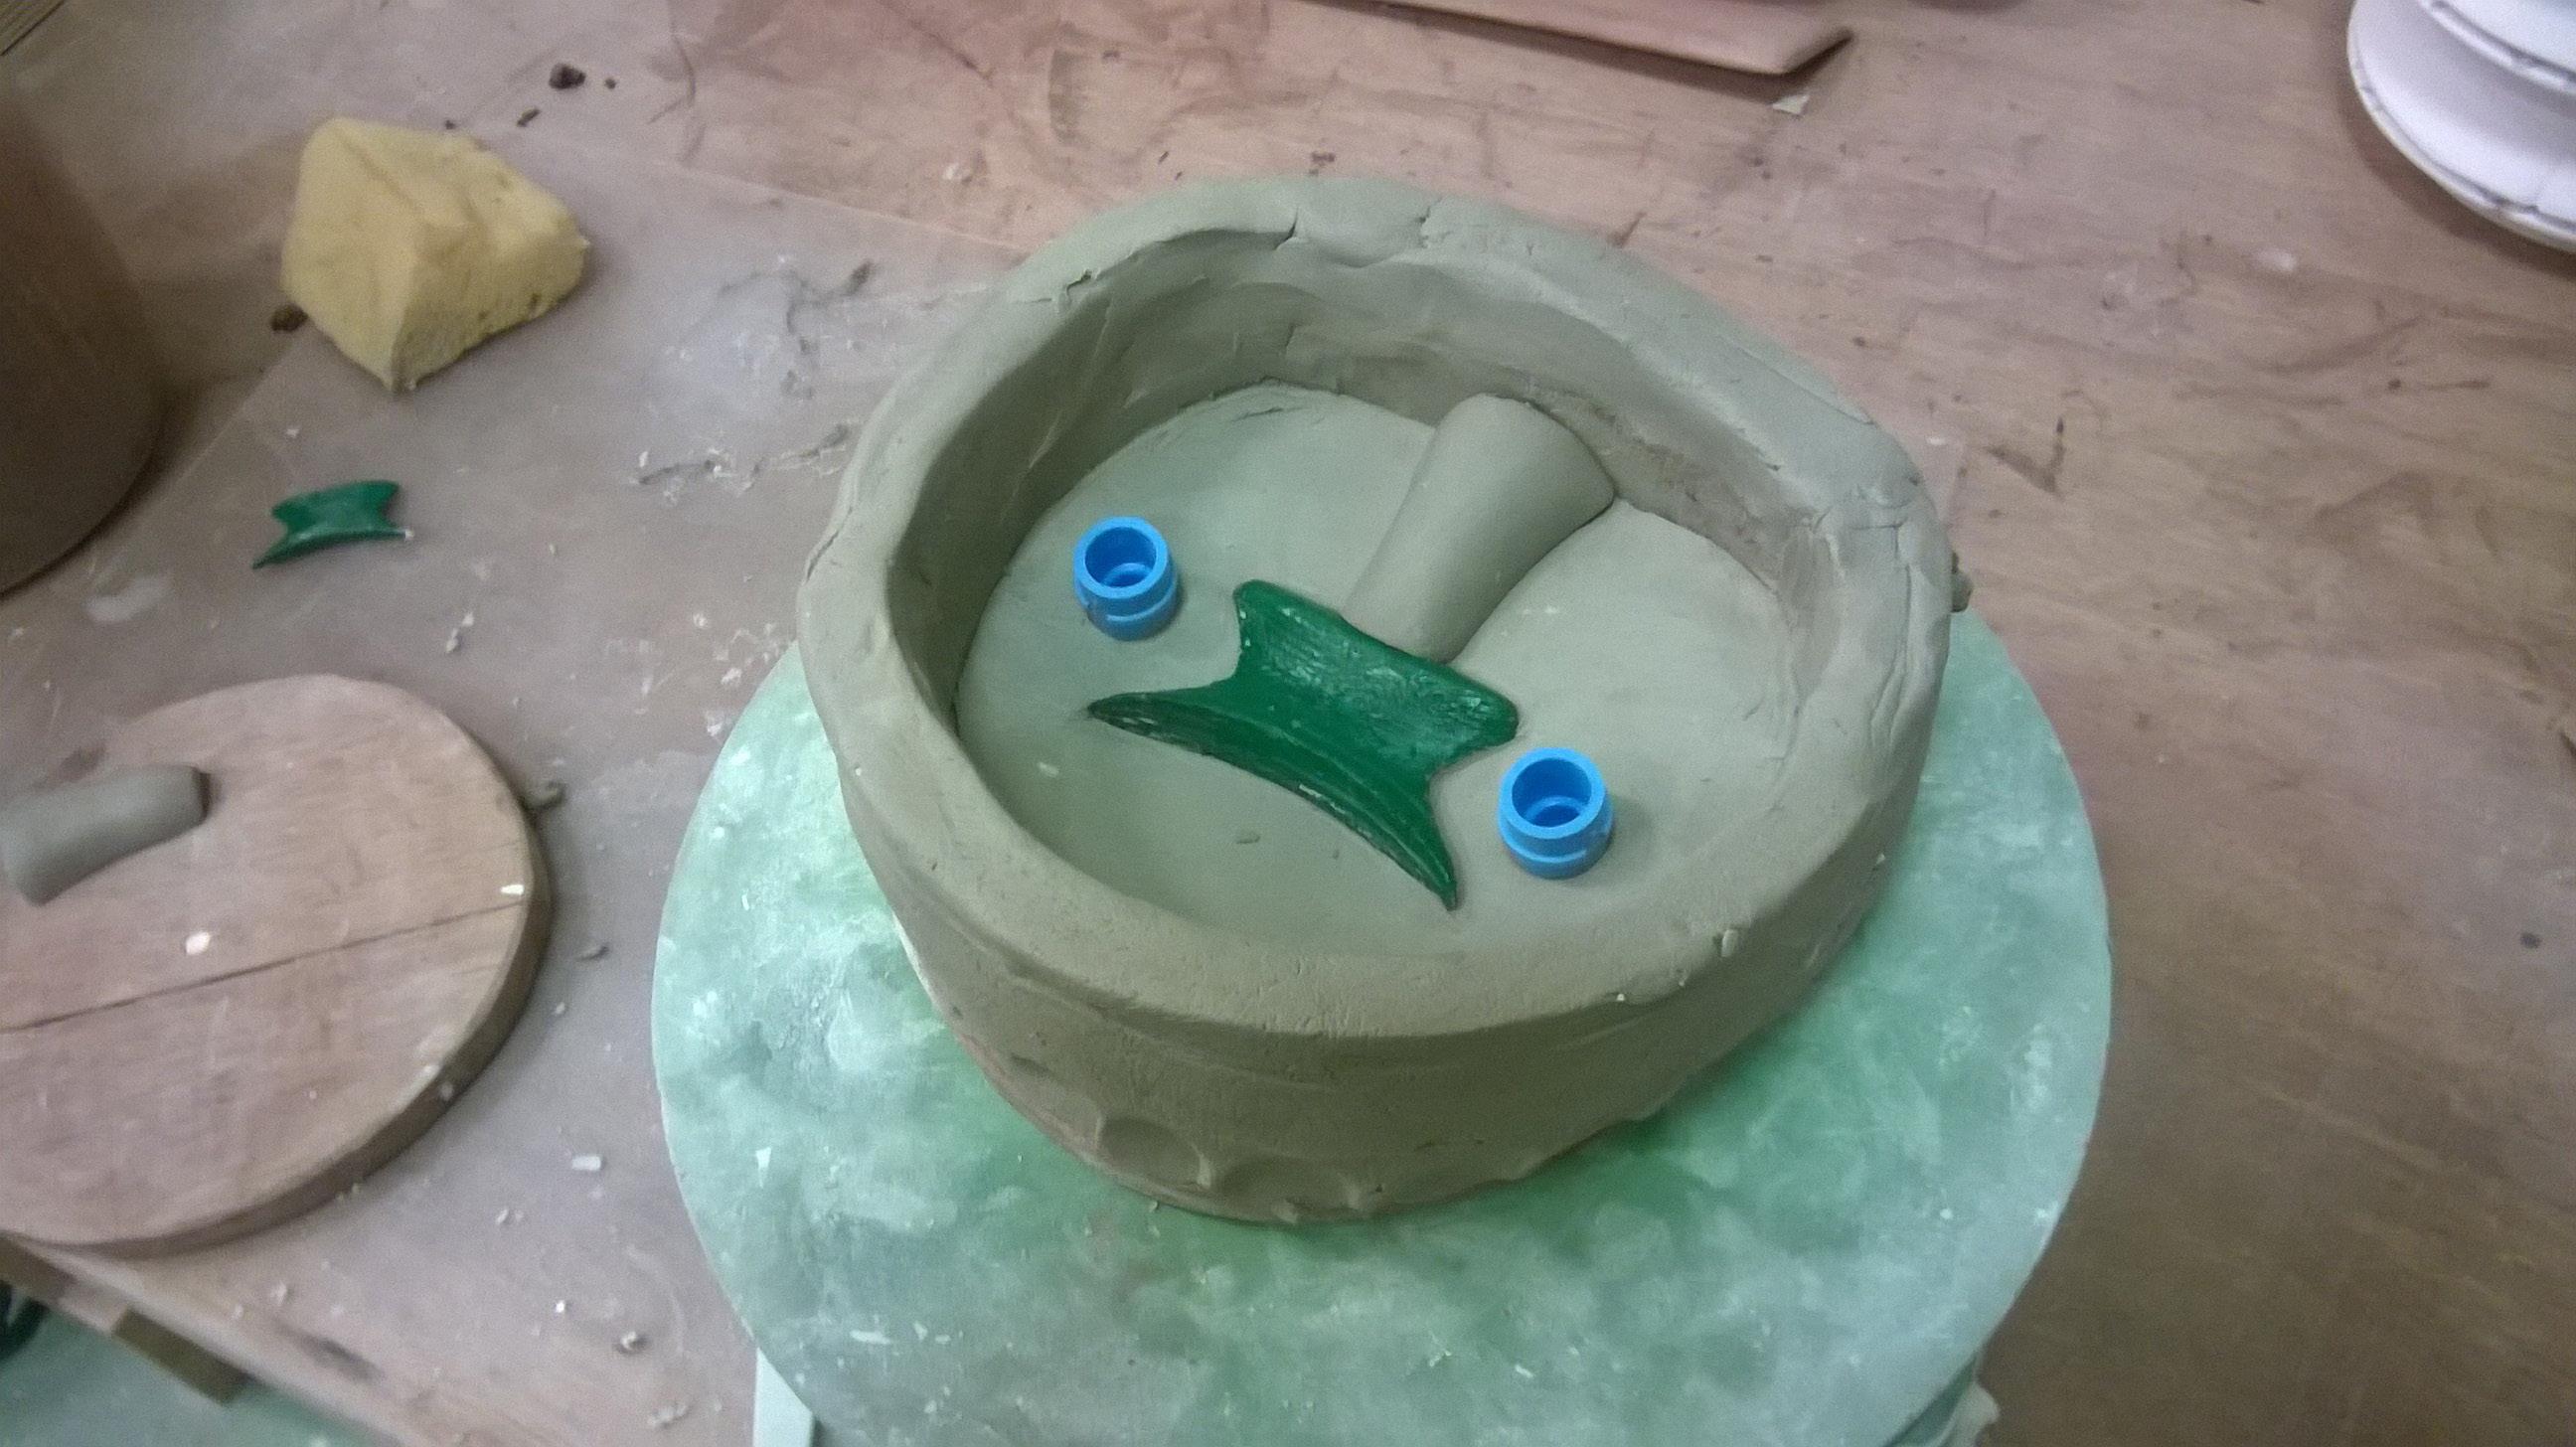
Casting the part from here on should be the same as casting anything in plaster. I would find the parting lines to your model and draw them on with a permanant marker. The next step would be to separate one of the part lines (mould pieces) with clay as seen below

Next we should make a sprue for filling the cavity with slip

Split the sprue in half and place it onto the part you are casting

I find that these natches are great and keep the registration of the mould very accurate. They are a helping hand if it is a small or awkward model.

Then it is time to cottle the model. This is making a dam around the outside border where you want the bulk of the mould to stop. On larger models, I use plywood boards, but for something as small as this handle, and probably most 3D printed things, a clay wall should suffice.

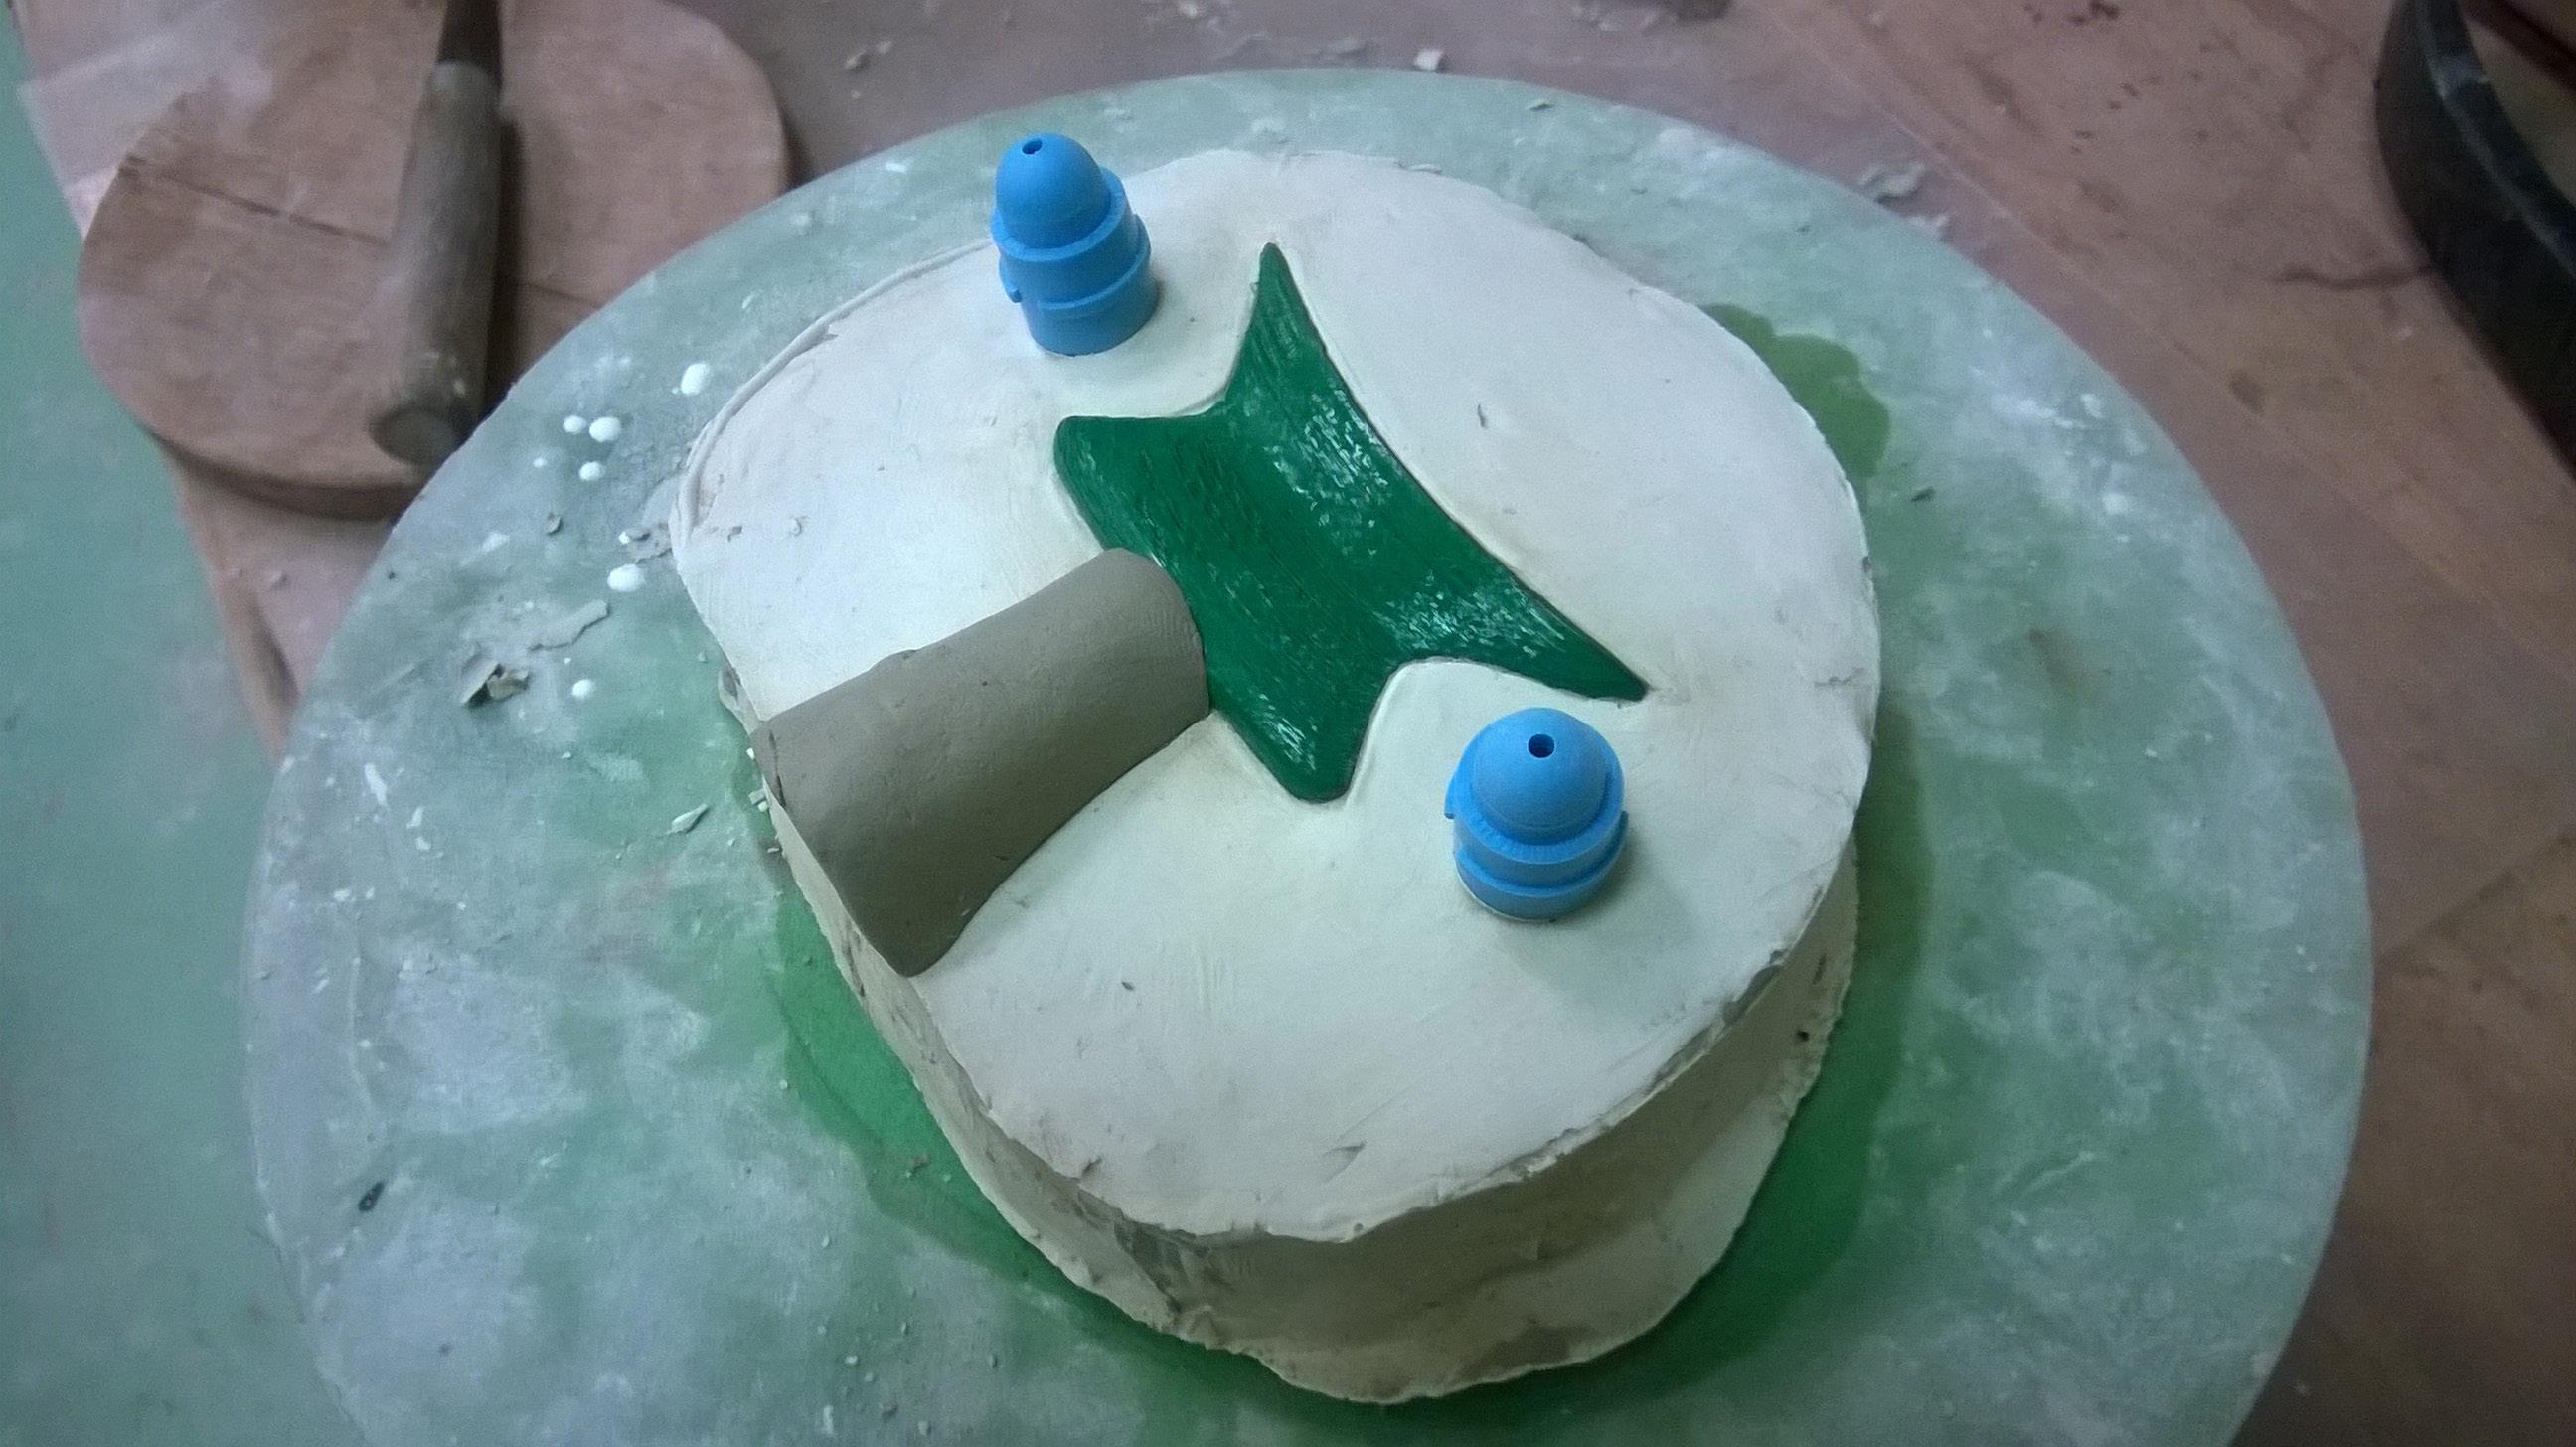
Then we have to soap up the plastic model. I find that one coat of soft soap is enough for the first part at least. The clay does not need soaped as it will come away from the plaster. Do not soap the natches either as we want them to stay in the plaster. Mix and pour a small amount of plaster inside the cottle. I find the best result is to pour the plaster through a sieve and not directly on the model. This method will give you the best detail and very few bubbles in the plaster.
The next step is to remove all of the clay from the plaster. As an insurance policy, I would soft soap the entire model 3 times... even the back of the plaster. This will ensure if the second pour leaks at all, you can get the plaster off.

Place another set of natches onto the previous ones. These will make sure that your mould will register back together accurately.

Make a clay wall around the plaster high enough to accommodate the other side of the mould. Pour the plaster, again through a sieve and not directly on the model.
Remove the clay wall and inspect the mould. While the plaster is still warm, start shaping the outside with a sur-form and sandpaper to tidy the edges together and to round off the outside of the mould. This step isn’t necessary, but it will prevent small bits of plaster breaking off your mould, and when someone visits your studio, it’ll look like you know what you’re doing.

Wait until the plaster is room temperature before you attempt to separate the mould. If you soaped up the plaster enough, the two halves should come apart without much effort. Remove the clay sprue, and rub the outsides of the two halves of your mould with sandpaper. This again will ensure there are no little bits of plaster chipping off your mould when you put the two halves together and will prolong its life.

Now try to remove the model from the half of the mould it is sitting in. If it doesn’t come out right away, there may be an undercut on that side. Carefully inspect the edges around the model and with a pointed knife run around the edge lightly. Do not dig around the edge of the model too much as it will increase the flashing in between the halves when you cast. If you are satisfied there are no undercuts and the model will still not come away from the mould, place a piece of wood on the model, and hit it with a rubber mallet.

You should then have the two halves of the mould. Clean up any rough edges like where the sprue leaves the mould and where it hits the model with some sandpaper. Wash the mould under the sink with a sponge to remove all of the soap and clay. Put the mould together and fasten with a rubber band. You should keep the mould together when drying as there is a slight chance the plaster may warp.
I hope this has given you some insight into how I have done this. I think that this technology can be used with traditional making techniques to create new and exciting opportunities with clay.

