City of Independence
Missouri

City of Independence
Missouri
A Guide to Preservation Standards for the Rehabilitation, Restoration, and Preservation of Historic Resources and New Construction

“I tried never to forget who I was and where I’d come from and where I was going back to.”
- Harry S. Truman
Cover Photograph of the Jackson County Courthouse Courtesy of: Jackson County Office of CommunicationsMayor
Don Reimal
Members of the City Council
Marcie Gragg, District 1
Will Swoffer, District 2
Myron Paris, District 3
Jim Page, District 4
Lucy Young, At-Large
Jim Schultz, At-Large
Members of the Heritage Commission
Jeffery Shawhan, Chair
Mike Calvert
Cody Fann
Tim Grove
Jean Kimball
Jim Legge
Sam Rushay
Duane Stephens
Larry Villalva
Community Development Department
Jennifer Clark, Director of Community Development
Historic Preservation Division
Wendy Shay, Historic Preservation Manager
Prepared By
Susan Richards Johnson & Associates, Inc.
This publication is partially funded by a grant from the Missouri Department of Natural Resources, State Historic Preservation Office and the National Park Service, U.S. Department of the Interior. Grant awards do not imply an endorsement of contents by the grantor. This program receives Federal financial assistance for identification and protection of historic properties. Under Title VI of the Civil Rights Act of 1964, Section 504 of the Rehabilitation Act of 1973, and the Age Discrimination Act of 1975, as amended, the U.S. Department of the Interior prohibits discrimination on the basis of race, color, national origin, disability or age in its federally assisted programs. If you believe you have been discriminated against in any program activity, or facility as described above, or if you desire further information, please write to: Office of Equal Opportunity, National Park Service, 1849 C Street, N.W., Washington, D.C. 20240.
Additional funding and assistance provided by the City of Independence, Missouri.

Chapter 10 - Sustainability (Continued)
•
Site Work
◦
• Composting
◦
Water Conservation
◦
◦ Pervious Paving Materials
Rain Barrels and Rain Gardens
• Sustainability COA Approval Matrix
Certificate of Appropriateness Review Requirements
Chapter 11 - Demolition
Demolition •
•
Mothballing Treatment
• Measures
Types of Demolition by Neglect and Recommended Corrective
Appendix A - National Historic Landmark District
National Historic Landmark District Map
Appendix B - National Register of Historic Places Properties
List of Properties
National Register of Historic Places Map
Appendix C - Midtown Truman Road Corridor District
MTRC Map
Glossary

1 nch = 4,800 feet
Historic Landmark Properties
Independence, Missouri

u e n e Ch o p i n H o u s e 7 0 2 N D e a w a r e A v e 4 B r y a n t H o u s e 5 1 9 S M a n S t 5
H u g h e s Ch i d e r s H o u s e 8 0 1 S M a n S t 6 P c h e r H i n d e J o h n s o n H o u s e 6 2 7 S L i b e r t y S t 7 P o r t e r Ch i e s H o u s e 5 2 2 W M a p e A v e 8 N o e l H o u s e 4 0 9 N P l e a s a n t S t 9 P r e w t W r i g h t H o u s e 6 1 1 W M a p e A v e 1 0 L o b b Ce me t e r y 2 5 1 5 S L o b b Ce me t e r y R d 1 1 V a e M a n s i o n 1 5 0 0 N L b e r y S t 1 2 B n g h a m W a g g o n e r E s a t e 3 1 3 W P a c c A v e 1 3 M o P a c c T r u ma n D e p o 1 1 1 1 W P a c c A v e 1 4 1 8 2 7 L o g Co u r t h o u s e 1 0 7 W K a n s a s A v e 1 5 W o o d a w n Ce me t e r y 7 0 1 S N o l a n d R d 1 6 P o n e e r S p r i n g Ca b n S e 2 0 1 N D o d g o n S t 1 7 Ch c a g o & A o n D e p o t 3 1 8 W P a c f c A v e 1 8 F r e H o u s e # 1 2 2 3 N M a i n S 1 9 T r u ma n M e mo r a B u i d i n g 4 1 6 W M a p e A v e 2 0 K i r b y - K l e H o me 9 8 6 7 E W n n e r R d 2 1 W o o d s o n - S a w y e r H o me 1 6 0 4 W L e x n g o n A v e 2 2 G n g e r R o g e r s B r t h p a c e 1 0 0 W M o o r e S t 2 3 Y o u n g Co mm S e r v i c e Ct r 5 0 1 N D o d g o n S t 2 4 R a a s c h H o u s e 9 7 2 5 E W n n e r R d 2 5 S c h o w e n g e r d / W a l k e r H o u s e 1 3 4 0 7 E 3 5 t h S t S 2 6 O w e n s - M c Co y H o u s e 4 1 0 W Fa r me r S 2 7
DATE: December, 2010
The City of Independence encourages the designation of historical, architectural, and cultural resources throughout the community as a means of stabilizing and enhancing property values, fostering civic pride, and maintaining the character that defines individual sites and neighborhoods. Independence currently has one locally designated historic district and 26 individually listed local historic landmarks. According to Section 14-907 of the Unified Development Code, locally designated properties, whether within a district or individually listed, require design review for all exterior improvements.
This set of Design Guidelines is based upon The Secretary of the Interior’s Standards for Rehabilitation (herein referred to as The Standards for Rehabilitation), the national model for the appropriate treatment of historic buildings. The design principles outlined by The Standards for Rehabilitation are used during the Certificate of Appropriateness (COA) application and review process by the Independence Heritage Commission. The Independence Design Guidelines are intended to aid property owners looking for direction or guidance on how to restore their historic property and give the owner a better understanding of how and why The Standards for Rehabilitation apply to their property. They are also designed to inform and assist property owners about how to seek approval for proposed exterior improvements to their historic property. These guidelines apply to historic properties City wide.
These Design Guidelines outline how to best protect the unique historic features that most likely first attracted owners to the area, including features such as: mature trees, diverse architecture, quality craftsmanship, unique materials, and walkable streets. When used effectively, the design review process ensures that small, cumulative changes do not slowly peel away one layer of historic fabric after another; eventually removing all historic character that a property or district possesses. For instance, changing out one original wood window may not affect the overall look of a property or of a neighborhood. However, removing all the original wood windows by one owner, removing wood siding and replacing it with stucco by the next owner, and enclosing the open front porch by the next owner, would eventually destroy the integrity of a once unique, character-defining property.
The intent of these Design Guidelines is to allow property owners to comfortably and affordably live and work in an older structure without compromising the conveniences of today’s newer homes and businesses. Thus, the goal is two-fold: to preserve as much integrity as possible of a historic property over time, and in accordance with these guidelines, to allow for the upgrade of structures with the incorporation of modern, energy-efficient, consumer-safe conveniences present in today’s newer homes and businesses. Use of these guidelines will aid property owners, City Officials, City staff, and developers to complete preservation, rehabilitations, and new construction that are sympathetic to the historic character of the property and/or district while making a lasting, long-term investment.
In this chapter you will find:


Established in 1827, the City of Independence holds a rich heritage that includes a connection to the Santa Fe, Oregon, and California Trails, the Civil War, the Mormon Church, and, of course, President Harry S. Truman. Today, the City highlights that history within a locally designated historic district, a National Historic Landmark District, as well as through individually designated properties, known as local historic landmarks. The focus of much of that history lies within central and western Independence.
The rolling hills dotted with free-flowing springs attracted Native Americans who first gathered here and called the location the “Big Spring.” By the 1820s, these same hills and springs also attracted new settlers from the south and east. Through the Treaties of 1825 with the Osage and Kansa Indians, the U.S. government took control of the Big Spring and opened up the land of the newly proclaimed Jackson County for settlement. Later, the Indian Removal Act of 1830 forced the relocation of all natives west of the Missouri River, opening the way for the settlers to claim the land.
As the population grew, Missouri’s General Assembly chose what was now known as Independence as the county seat. On March 29, 1827, authorities approved the 160-acre site. The new town’s proximity to the Missouri River was an obvious choice as the starting point for westward expansion along the trails. Trading was reinforced by Mexican merchants who came northeast on the Santa Fe Trail. In the 1840s, Independence became a thriving trading post where pioneers of the Oregon Trail stocked their wagons with final supplies before heading west.
 City of Independence Historic Preservation Design Guidelines
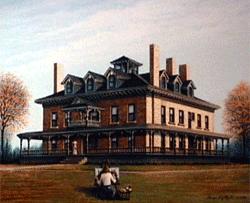
The winter of 1830-31 brought a new kind of settler to Independence. Missionaries were sent by the Church of Jesus Christ of Latter Day Saints to convert the Native American Indians living in western Missouri and eastern Kansas. This group of five elders from the church headquarters in Ohio, chose the up-and-coming trading town as the base for their missionary work. Founder and prophet Joseph Smith, Jr. visited Independence the following summer and declared it to be the location of Zion, God’s city on earth. To establish the prophet’s vision of an earthly paradise, the church purchased more land and other Mormon church members soon migrated to Independence.


Locals had trouble accepting the new missionaries and their evangelistic tradition of religious and social norms. Mormons built homes, schools, churches and stores, began the first newspapers, and worked hard to spread their religious philosophy which included an anti-slavery belief. Joseph Smith chose the location of the temple of the Latter Day Saints in Zion, but his plans for construction were halted. Some of their neighbors, fearing economic domination and loss of political control, joined together and by 1833 drove the missionaries out of Jackson County.
Independence saw great prosperity from the late 1830s through the mid-1840s while the business of outfitting pioneers boomed. In 1848, many of the 12,000 settlers who reached Oregon had started their trek in Independence and the 1849 gold rush prospectors poured through the town. The population and economic power of Independence grew so rapidly that on March 8, 1849 the Missouri General Assembly granted a home-rule charter. On July 18, 1849, William McCoy, the City’s first mayor, was elected. But by the late 1840s the town of West Port, located just to the west, brought the Independence monopoly on the wagon trail trade industry to an end by taking away the town’s claim to the “last stop on the western frontier.”
The population expansion was not only stunted by the development of West Port, but also by a bloody slavery feud in 1855. Missouri had been admitted to the Union as a slave holding state in 1821. In the Kansas Nebraska Act of 1854, residents of the Kansas territory were given the choice of joining the Union as a free or a slave state and the controversy began. In favor of slavery, the Missouri Bushwhackers waged a battle against the anti-slavery Kansas Jayhawkers all along the western border of Jackson County. The feuds had a serious impact on the outfitting trade in Independence and soon the stream of pioneers drastically declined.
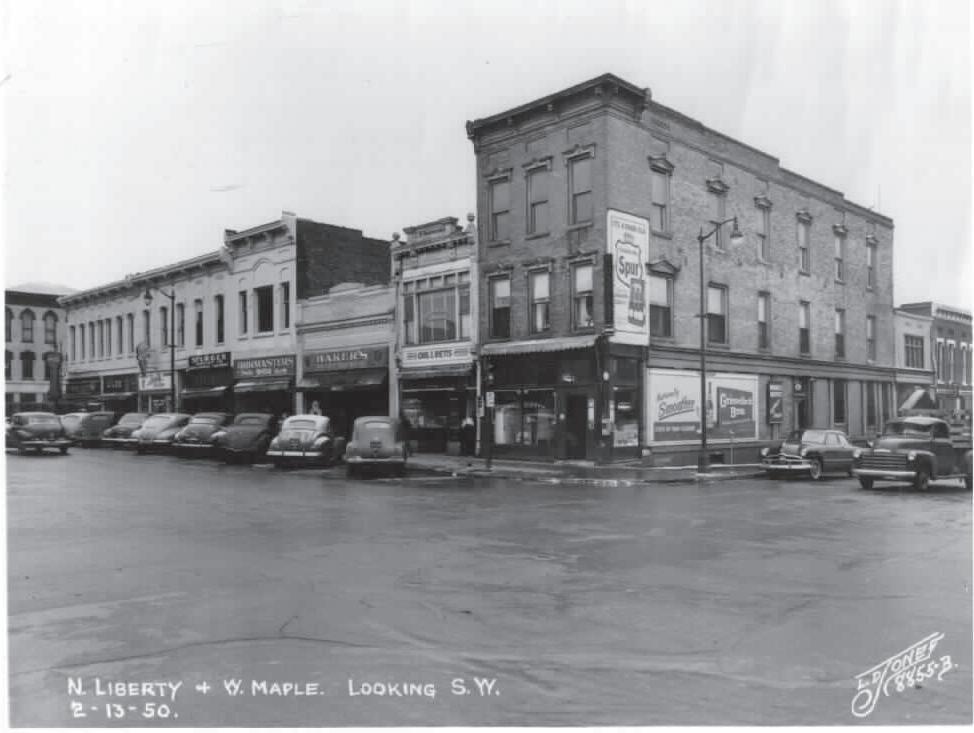
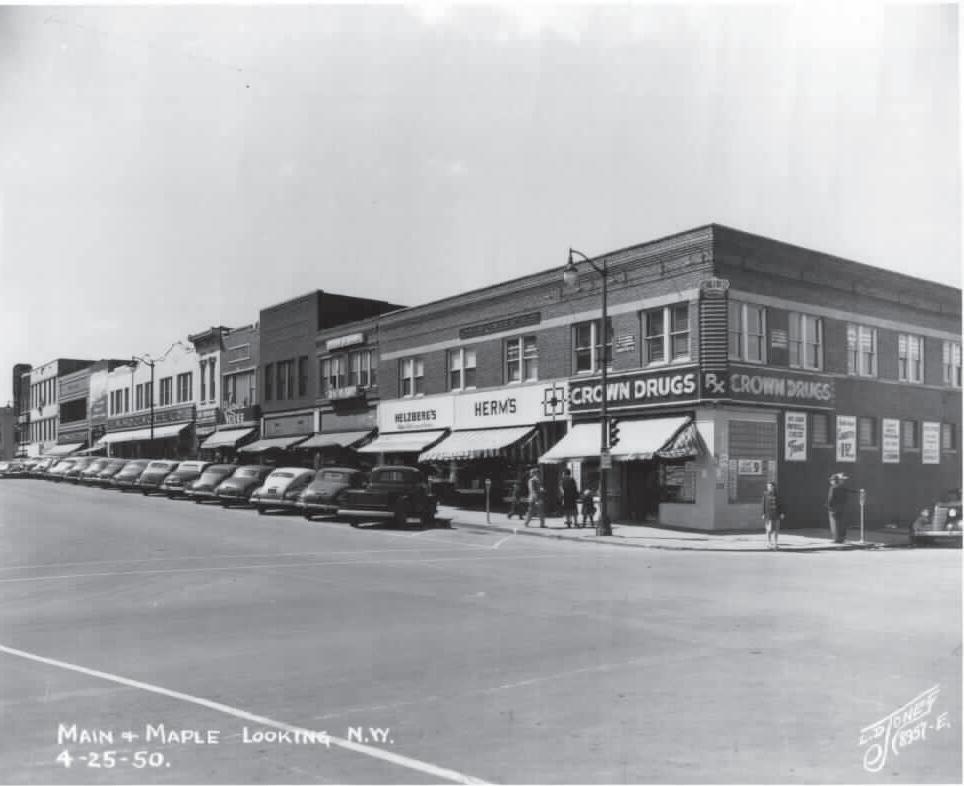

The border war and American Civil War split local sentiments. Missouri remained a border state during the war, though allegiances remained divided. Independence saw two important battles during the Civil War; the Battle of Independence on August 11, 1862, when confederate troops captured the town, and the Battle of the Little Blue in October 1864 which lasted for two days. The war took its toll on Jackson County, and as a result Independence was never able to regain its previous prosperity.
A faction of the Latter Day Saints missionaries, who were evicted from the town in the 1830s, won a quiet victory by returning to Independence after the Civil War. While expelled from the state, leader Joseph Smith, Jr. was killed. The church split into factions; one led by his son Joseph Smith III was named the Reorganized Church of the Latter Day Saints (RLDS). The RLDS members returned to the area and their headquarters were established in Independence in the early 1900s. (The RLDS church is now known as the Community of Christ with International Headquarters in Independence).
The City prospered from the late 19th century into the 20th century with the growth and annexation of surrounding land. Stately homes near the Square were built and torn down well into the first quarter of the 20th century to make room for more modest, working and middle class dwellings. It was during this time that Harry S. Truman began his life-long residency in Independence. Truman held his first job at Clinton’s Drugstore, and in 1922 was elected presiding judge of the County Court. In 1934, Truman was elected to the U.S. Senate and became Roosevelt’s vice-president in 1944. Upon the passing of President Roosevelt in 1945, Truman became President and was re-elected in 1948. During his eight years in office, Truman used his Independence home as a summer residence. When he returned home at the end of his presidential term, 10,000 people greeted him at what is currently known as the Truman Depot. Truman’s influence on Independence can be seen throughout the community to this day with his Presidential Library and home as the centerpieces of historic Independence.
The City of Independence is a reflection of the growth of the nation. Today, Independence is both a thriving community as well as a heritage tourism destination. Protection of its cultural resources ensures that physical evidence of its history is maintained. Local designation of those resources aids in the stabilization of neighborhood property values, rehabilitation of the historic built environment through local investment, fostering of community pride, and further economic development of the City’s historic commercial districts.
History provided by the City of Independence, Missouri Department of Tourism. For additional Independence resources and further reading go to: http://www.visitindependence.com/IndependenceHistory.aspx


 City of Independence Historic Preservation Design Guidelines
In this chapter you will find:
•
What makes a property historic?
• program?
•
Why does Independence have a historic preservation
What is the Independence Heritage Commission?

• designated historic property?
What does it mean to be a locally versus a nationally
• property?
What are the benefits of owning a historically designated
How does local historic designation benefit the
• neighborhood and why do exterior improvements require design review?
• historic?
What areas of the city are already designated as
• designated as historic?
Can I still make changes to my property once it is
• require review?
Do interior improvements and routine maintenance
•
Who do I contact for more information?

To be considered historic, a property is typically at least 50 years old and appears much as it did when it was originally constructed. If it would be unrecognizable on the outside to its original owners, it probably has lost most of its architectural integrity.
In order to be designated “historic,” the property must also: be affiliated with an important event, be associated with an important person, reflect a unique style of architecture or design, or be associated with a pre-historic (archaeological) site. Examples of resources can include famous houses, battlefields, commercial buildings, and barns, to name just a few. Properties that contribute to the overall context within historic districts, are considered historic. Cemeteries or burial sites are generally not eligible for national or state significance.
The City of Independence recognized in the early 1970s that, without some form of protection and review, significant buildings, sites, and structures could be lost or irreversibly changed. In order to begin documenting and protecting these resources, the City adopted an ordinance that allowed for the creation of: the Independence Heritage Commission, a designation process, a design review, and a demolition review process. The City was formally recognized by the State of Missouri in 1987 as a Certified Local Government (CLG) for its preservation program aimed to document, designate, preserve, and protect its historic resources.
The Independence Heritage Commission is a citizen board of nine members appointed by the Independence City Council. Two of the nine commissioners serve as ex-officio members representing the Harry S. Truman Presidential Library and Museum and the Harry S. Truman National Historic Site which is owned and operated by the National Park Service. Appointed members must either live or work in Independence and can serve no more than two consecutive three-year terms.
The Commission is responsible for reviewing proposed exterior alterations for all locally designated historic sites. They also make recommendations to the Planning Commission and City Council regarding community preservation issues and historic designations and work to promote public outreach and education. Commission meetings are held at 6:00 p.m. on the first Tuesday of each month in City Hall. City Hall is located at 111 E. Maple, Independence, MO 64050 and can be reached at (816) 325-7000.
Listing on the Local Register of Historic Places means that the City of Independence has recognized that property as being significant at a local, regional, state, or national level. Local designation is the highest form of protection that can be bestowed on a historic property as all exterior improvements require design review by the owner, City staff, and/or by the Heritage Commission. Similar to a Homeowner’s Association, this review ensures that a minimum standard is followed to protect the look and feel of that historic property. The design review process provides a level of protection against inappropriate and irreversible alterations, additions, and demolition.
In exchange for review, property owners can benefit from stabilization of their property values, and tend to see an increase in values over properties that are not designated. The City does not mandate any changes (for example reversing previous inappropriate alterations) or require upgrades to a property based upon its historic designation.
Listing in the National Register of Historic Places means that the federal government recognizes the property for its architectural or historical affiliations also at a local, state, or national level. However, the National Register holds properties to a higher standard in that they must retain a significant level of integrity in order to be honored.
National Historic Landmarks (NHL) are buildings, districts, sites, structures, and objects designated by the Secretary of the Interior because they are: sites where events of national historical significance occurred; places where prominent Americans lived or worked; icons of ideals that shaped the nation; outstanding examples of design or construction; places characterizing a way of life; or archeological sites able to yield information.
Note: National designation is merely honorary and requires no design review at the local, state, or federal level. Designation on the National Register or National Historic Landmarks also provides little to no protection, from inappropriate alterations or even demolition.
Locally designated properties and districts are better protected from inappropriate change. The local review process provides an opportunity for citizens to comment on whether proposed changes may detract from the look and feel of the neighborhood. This protection is similar to that provided by Home Owner’s Associations (HOAs). Further, property values tend to stabilize and often increase as a result of local historic designation and the added protection it brings.
Properties listed in the National Register of Historic Places may qualify for state or federal (income-producing properties only) rehabilitation tax credits. These tax credits are available for rehabilitation work on eligible historic buildings. In Independence, this would include individually listed National Register properties and many of the properties located within the Harry S. Truman National Historic Landmark District (See Appendix A for a map of the district). Refer to the Missouri Department of Natural Resources website for information about the Missouri State Historic Preservation Office and the state review requirements for National Register applications, and more in depth information about rehabilitation tax credits (eligibility, requirements, applications and the review process). http://dnr.mo.gov/shpo
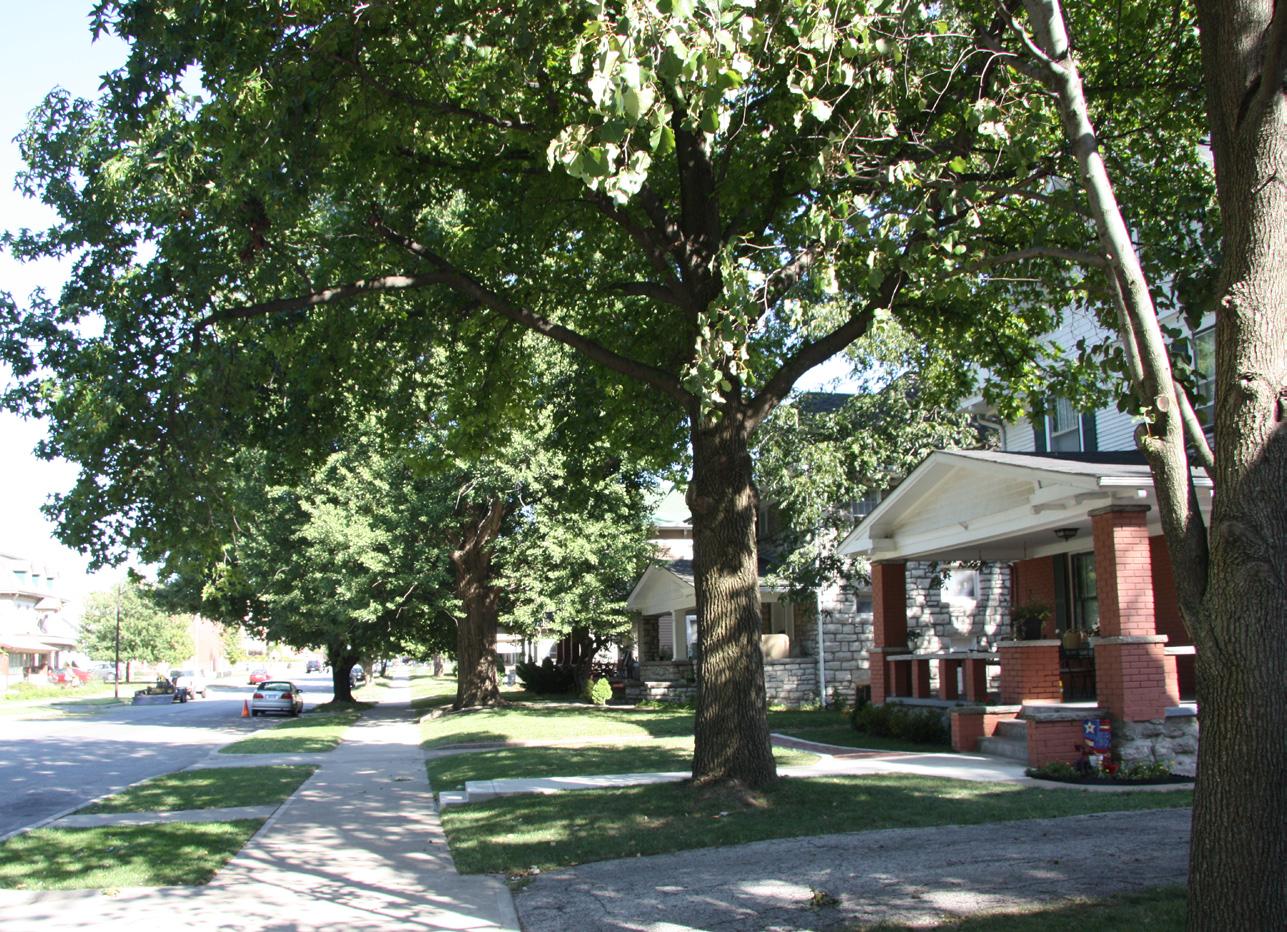
Unique architectural features and traditional streetscapes are most likely what attracted owners to an area where they first purchased their historic property. Protection of features such as mature trees, quality craftsmanship, superior materials and design, and walkable streets is the intent of the designation and the design review process.
Studies have repeatedly shown that the higher standards designated properties are held to help to stabilize and even increase property values. Designated historic districts become more desirable neighborhoods and often see consistent investment, even in neighborhoods that are in decline. Properties listed for sale in designated districts also tend to move more quickly than similar properties in un-designated districts.
Independence has one local historic district, the Harry S. Truman Heritage District (designated in 1973), and a federally recognized district, the Harry S. Truman National Historic Landmark District (designated in 1971). Additionally, there are 26 individual buildings/ structures that have been listed as “local landmarks” and 23 individual properties listed on the National Register of Historic Places
Yes. Designation does not prohibit alterations or additions to historic properties. In fact, property owners are always encouraged to make improvements to their properties in historic districts. Property owners may construct free-standing garages, add an addition onto an existing house, or even install solar panels and insulation, assuming the review process is followed and the appropriate minimal design guidelines are upheld. Some exterior changes require either administrative or Heritage Commission approval only to ensure that the alterations maintain the historic character of a property while meeting the modern-day needs of residents and owners. Design review also helps to ensure the traditional streetscape features such as mature trees, walkways, and building orientation are also maintained.
No. Interior improvements and routine indoor and outdoor maintenance such as painting, caulking, weatherstripping, rotted wood repair replaced with wood, and landscaping (except removal of mature trees) requires no review by the Heritage Commission. Refer to Chapter 6 - Application Process for Rehabilitation for the Certificate of Appropriateness (COA) Matrix in order to review the most common types of property improvements and their review requirements, if any.
For more information regarding historic designation and Independence’s Historic Preservation Program, contact the Historic Preservation Division:
City of Independence, Missouri
Historic Preservation Division
111 East Maple Independence, Missouri 64050
(816) 325-7419 Phone
(816) 325-7400 Fax
In this chapter you will find:
Individually Listed Historic Landmarks
Local Historic Landmarks Map •

Historic Districts
City Wide Historic District Map •
Truman Heritage District
History of the Truman Neighborhood • Neighborhood Characteristics

•
Truman Heritage District Map •
Individually Listed Local Historic Landmarks:
1827 Log Courthouse • - 107 West Kansas
Bingham-Waggoner Estate • - 313 West Pacific Avenue - http://www.bwestate.org/welcome.asp
Bryant House • - 519 South Main
Bullene Choplin House • - 702 North Delaware
Chicago & Alton Depot • - 318 West Pacific - http://www.chicagoalton1879depot.org/
Fire House #1 • - 223 North Main
Ginger Rogers Birthplace • - 100 West Moore
Harry S. Truman National Historic Site • - 223 North Main Street
Hiram Young Community Service Center • - 501 Dodgion
Hughes Childers House • - 801 South Main
Kirby-Kille House • - 9867 East Winner Road
Lobb Cemetery • - 2515 Lobb Cemetery Road
Missouri Pacific/Truman Depot • - 1111 West Pacific
Noel House • - 409 North Pleasant
Owens-McCoy House • - 410 West Farmer
Palestine Missionary Baptist Church • - 138 East Farmer
Pioneer Spring Cabin Site • - 201 North Dodgion
Pitcher Hinde Johnson House • - 627 South Liberty
Porter Chiles House • - 522 West Maple
Prewitt Wright House • - 611 Maple
Raasch House • - 9725 East Winner Road
Schowengerdt/Walker House • - 13407 East 35th Street South
Truman Memorial Building • - 416 West Maple - http://www.indepmo.org/parksandrec/tmbhist.aspx
Twyman/McGuire/Harper House • - 803 West Waldo
Vaile Mansion • - 1500 North Liberty - http://www.vailemansion.org/Welcome.html
Woodlawn Cemetery • - 701 South Noland
Woodson/Sawyer House • - 1604 West Lexington
** Those properties underlined are also listed as National Register Properties (see Appendix C).
1 inch = 4,800 feet
Historic Landmark Properties Independence, Missouri

u s e 8 0 3 W W a l d o A v e 3 B u l e n e Ch o p i n H o u s e 7 0 2 N D e a w a r e A v e 4 B r y a n t H o u s e 5 1 9 S M a n S t 5 H u g h e s Ch i d e r s H o u s e 8 0 1 S M a n S t 6 P t c h e r H n d e J o h n s o n H o u s e 6 2 7 S L b e r t y S t 7 P o r t e r Ch e s H o u s e 5 2 2 W M a p e A v e 8 N o e H o u s e 4 0 9 N P e a s a n t S t 9 P r e w t W r i g h t H o u s e 6 1 1 W M a p e A v e 1 0 L o b b Ce me t e r y 2 5 1 5 S L o b b Ce me t e r y R d 1 1 V a e M a n s i o n 1 5 0 0 N L b e r y S t 1 2 B n g h a m W a g g o n e r E s t a e 3 1 3 W P a c c A v e 1 3 M o P a c f c T r u ma n D e p o t 1 1 1 1 W P a c f c A v e 1 4 1 8 2 7 L o g Co u r t h o u s e 1 0 7 W K a n s a s A v e 1 5 W o o d a w n Ce me t e r y 7 0 1 S N o l a n d R d 1 6 P o n e e r S p r i n g Ca b i n S e 2 0 1 N D o d g i o n S t 1 7 Ch i c a g o & A o n D e p o t 3 1 8 W P a c f c A v e 1 8 F r e H o u s e # 1 2 2 3 N M a n S t 1 9 T r u ma n M e mo r a B u d i n g 4 1 6 W M a p e A v e 2 0 K i r b y - K i l e H o me 9 8 6 7 E W i n n e r R d 2 1 W o o d s o n - S a w y e r H o me 1 6 0 4 W L e x n g t o n A v e 2 2 G i n g e r R o g e r s B r h p a c e 1 0 0 W M o o r e S t 2 3 Y o u n g Co mm S e r v i c e C r 5 0 1 N D o d g o n S t 2 4 R a a s c h H o u s e 9 7 2 5 E W n n e r R d 2 5 S c h o w e n g e r d / W a l k e r H o u s e
O w e n s - M c Co y H o u s e
DATE: December, 2010
0 7 E 3 5 t h S t S
r me r S
Truman Heritage District • - Area along North Delaware Street and Maple Avenue. (Rough boundaries are from West St. Charles Street to, North McCoy Street to, Lexington Street to, North Union Street to the West.)
** Those districts underlined are also listed as National Historic Districts.

Period of Significance: 1850-1972
Harry S. Truman’s Midwestern, small-town values came from both family and community influences. His roots were strong, guiding him as President of the most powerful nation in the free world; then pulling him back to Independence, and the quaint little neighborhood that he called home. His neighborhood walks and friendliness are legendary. The neighborhood houses, streets, sidewalks, and setting all continue to tell the story of “the man from Independence”.

“I tried never to forget who I was and where I’d come from and where I was going back to.”
- Harry S. TrumanPresident Truman walking on North Delaware Street, date unknown
Harry S Truman walking in what is now knows as the Truman Heritage District, Date Unknown. Image courtesy of
City of Independence and Jackson County Missouri Historical Society
The Truman Heritage District was locally designated by the City of Independence in 1973. The district is architecturally significant due to its establishment in the mid-nineteenth century as a neighborhood of stately homes and for its historical affiliation with the Truman family and their influence on the area. The irregular shaped district is roughly bordered by Lexington Avenue to the south, St. Charles Avenue to the north, Union Street to the west and Pleasant Street to the east. Unlike many historic districts throughout the country, properties achieve their historic significance in the Truman Heritage District based upon their date of construction, culminating at the death of Harry S Truman in 1972. As a result, buildings and structures constructed up to, and including, 1972 are considered contributing to the local district and are reviewed as significant historic properties by the Heritage Commission. As a whole, the neighborhood’s features, including houses, garages/carriage houses, streets, sidewalks, retaining walls, mature trees, and overall setting all contribute to the story of the district as well as Truman’s legacy.
The 1971 designation of the Harry S. Truman National Historic Landmark District was the first recognition to honor the national significance of Truman’s neighborhood. His community was described in the designation report as “…the physical nucleus of both his personal and his long and influential political life.” It was the goal of the protection of this legacy that led to the local designation of the Truman Heritage District in 1973. Although the integrity of the heritage district has fluctuated due to political and economic pressures and inconsistent public policy, the intent of the district remains the same: to preserve the historic character of the neighborhood and its landscape.
The evolution of the Truman neighborhood as a residential suburb, situated just west of the Independence Square, began in 1847 with the platting of the first subdivision. J.F. Moore’s Addition to Independence. The subdivision
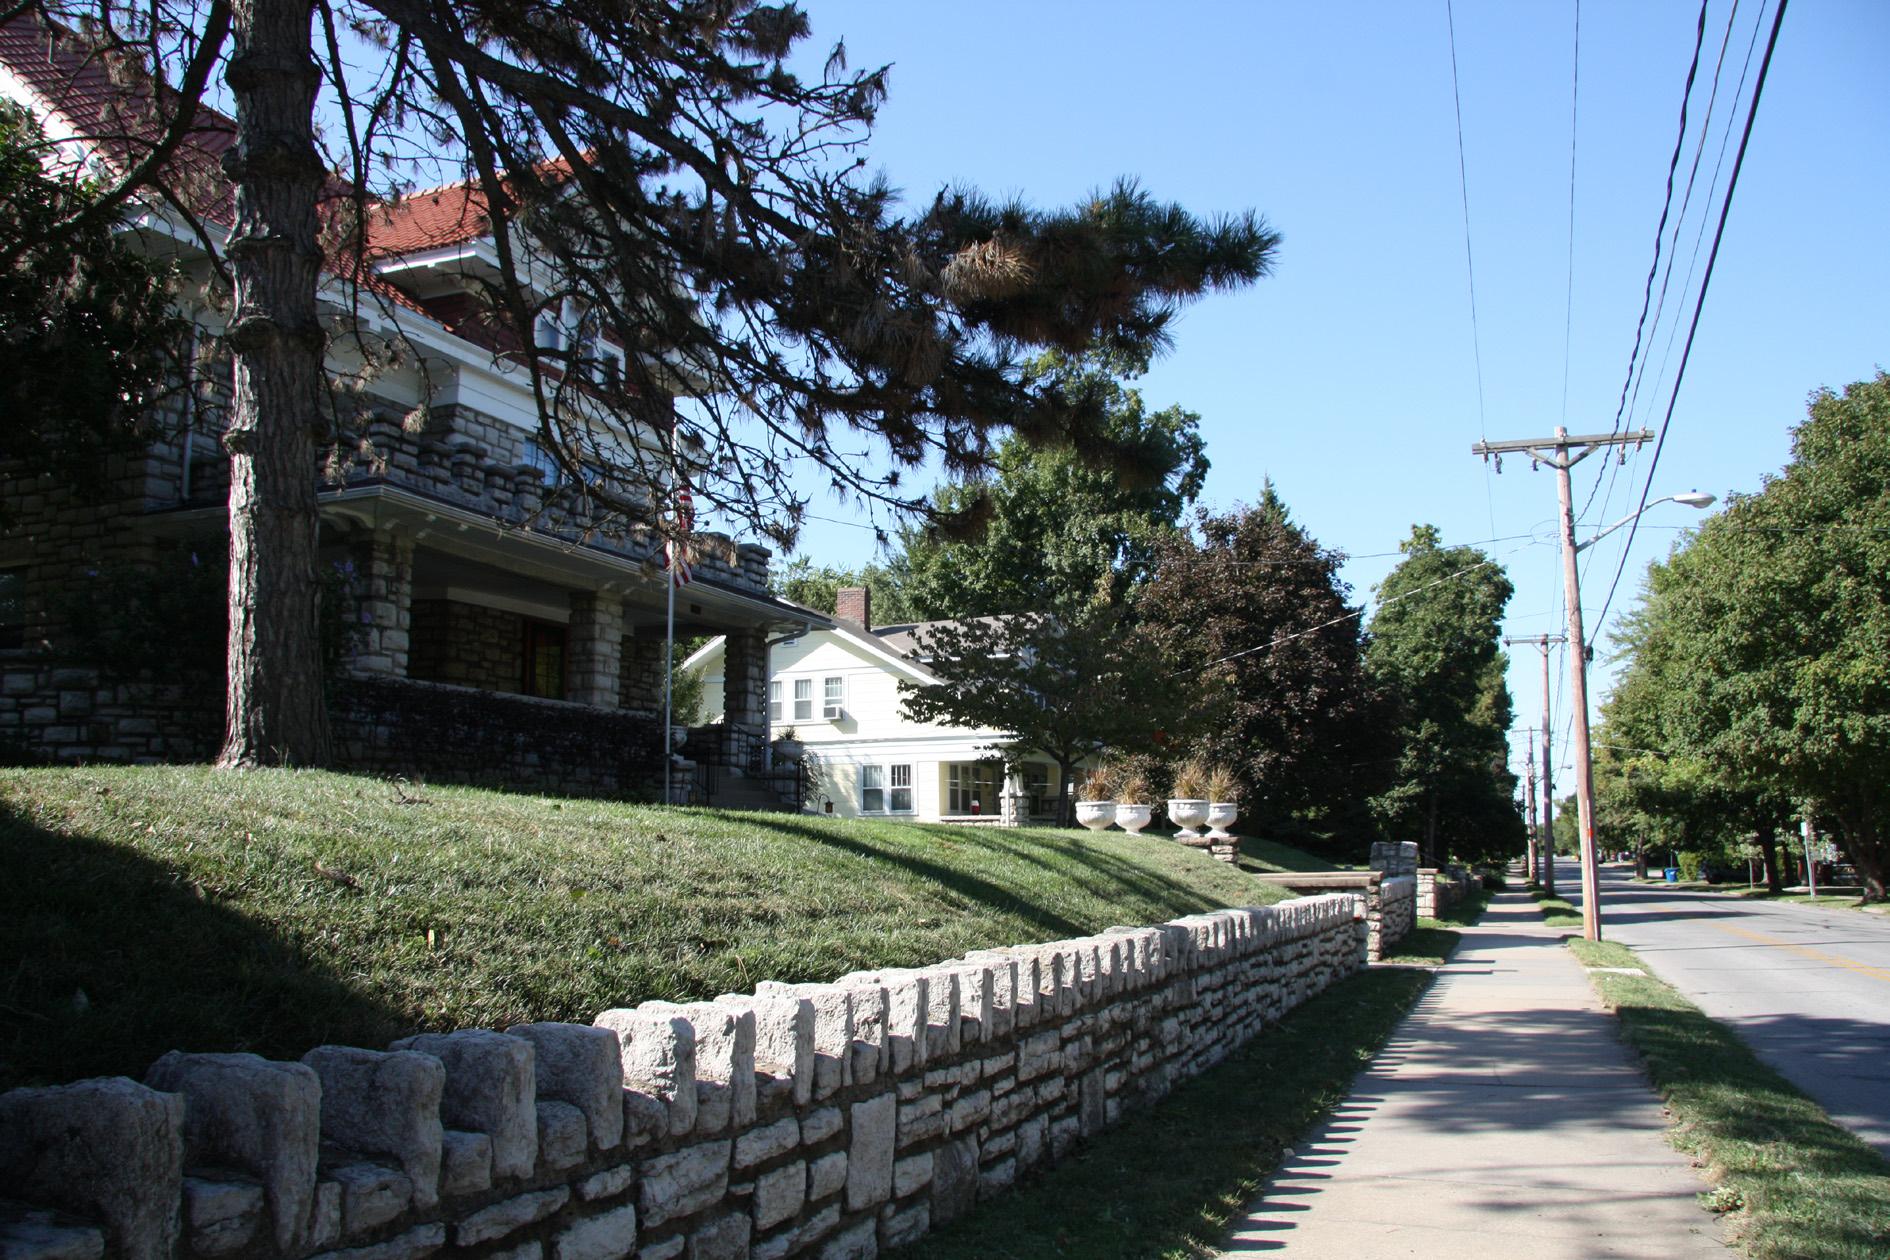
included 18 lots bound between Tanyard Road (now Truman Road) on the north, Union Street on the west, Lexington Avenue on the south, St. Charles on the north, and Lots 38 & 39 of Old Town Independence (current location of the First Presbyterian Church and the Palmer Senior Center) on the east. In 1852 J.F. McCauley’s Addition was platted north of Tanyard between Hickman Street (now Waldo Avenue) on the west and Farmer Street on the east. At this time, Delaware Street developed and evolved as the foundation of the Truman Neighborhood.
Due to economic and political uncertainty leading up to and following the Civil War, growth during the 1850’s and 1860’s slowed. During the Reconstruction Era (c. 1865-1880), however, the Truman neighborhood experienced prosperity and widespread growth. Neighborhood churches were erected along Delaware and Rock (now Maple) Streets and notable residences, including the Gates-Wallace house (now the Truman Home), were constructed by those able to re-build their fortunes.
Between 1880 and 1890, Independence experienced a building boom that resulted in the platting of eleven major subdivisions within the Truman neighborhood. The finest Victorian mansions were constructed for some of the most wealthy and influential families in all of Independence. Earlier estates like the Truman Home were remodeled to stay current with the latest building trends and architectural styles. Queen Anne, Italianate, and Second Empire influences were seen throughout the district. Two significant buildings that remain today from that era are the First Presbyterian Church (100 N. Pleasant Street), built in 1888, and the First Baptist Church (500 W. Truman Road, then Blue Avenue) built in 1894.

Following the turn of the twentieth century, Independence’s prosperity spread to larger segments of the population, resulting in the construction of more practical, less architecturally detailed houses. Within the Truman neighborhood, previously undeveloped additions boasted new American Foursquares and Colonial Revival homes, larger lots were subdivided, and stately homes were demolished to make way for the construction of smaller, more pragmatic houses. By 1915 the Craftsman Style Bungalow was gaining in popularity, a trend that would continue throughout the 1930’s in this district. The city’s increasing population brought new demands for multiple-unit housing that offered “modern” amenities, the convenience of a location near town, and easy access to public transportation. To meet these new demands, many of the larger homes in the neighborhood were converted to rooming houses, and by 1930 three modern apartment buildings were built along Maple Avenue and Van Horn Road (now Truman Road).
The introduction of institutional buildings to the neighborhood began in 1901 with the construction of Central High School at the northwest corner of Maple Avenue and Pleasant Street. Central was replaced by Chrisman High School (located on West Maple near Union) in 1918 and became the Junior High; and in 1919 a public library was built directly to the north on the corner of Pleasant and Van Horn Road. In 1926, two nineteenth century homesteads were demolished to make way for the construction of a number of filling service stations at the southeast corner of the neighborhood, clinching the transition of this once suburban setting to a more urban appearance. Slowly but surely, the City’s commercial growth had finally
Truman Heritage District
Neighborhood Characteristics:
•
Mature Street Trees - Historic Landscaping
•
•
•
•
Architectural Diversity
Authenticity of Materials
Nostalgia
Stone Retaining Walls
Detached Garages Toward Back of Property
• Green Spaces
•
•
Separation of Residential &Commercial Properties
Truman Legacy
•
• Walkability


reached the eastern edge of the Truman neighborhood. Post World War II through the final years of the Truman legacy in the early 1970s saw perhaps the most visually impactful development of the Truman neighborhood. This period ushered in the construction of Truman’s Presidential Library on 24 Highway, just north of the Truman Heritage District boundaries. It also saw Urban Renewal projects, including the demolition of over 200 city lots of predominantly African-American housing known as the Neck, to accommodate the creation of McCoy Park and Bess Truman Parkway. All dramatically altered the historic character of the area.
Preserving Truman’s heritage by protecting the character of his historic neighborhood begins with understanding the story told by the district and the significance of its historic architecture. The quality and diversity of the buildings and the overall streetscape amenities concentrated within this historic district are defining elements of the Truman era. Maintaining the integrity of these features, both individually and as a whole, is key to maintaining the integrity of the entire neighborhood.
City of Independence Historic Preservation Design GuidelinesCity of Independence Historic Preservation Design Guidelines



This chapter identifies architectural styles most frequently represented within the historic districts of the City of Independence. The discussion of each style is meant to provide a brief historical overview of the general dates and characteristics that pertain to each style and can be applied nationwide. Familiarity with the defining characteristics of each style will help property owners understand what design and material considerations are appropriate for a particular home or building based on its individual historic character.
In this chapter you will find:
Residential Architectural Styles
Commercial Architectural Types & Styles
It should be said that not every structure will fall neatly into one of the identified architectural styles or types. Historically, many houses were built without architectural features associated with a popular architectural style. Builders sometimes mixed ornamentation or changed a house’s design to suit current fashion. Later alterations by property owners could also have concealed or removed features to update the home’s appearance to once again suit current fashion. Sometimes the only indications of a building’s original style are in the floor plan, roof type, and minor decorative detailing (ornamentation). Defining the architectural style of a property is not an exact science, and can be quite subjective. If you would like assistance in identifying the style of your historic home or building, contact the Preservation Division.

In this chapter you will find:
Residential Architectural Styles

•
Log Structures
•
Multi-family Dwellings
•
Italianate
Queen Anne •
Folk Victorian •
•
Mission
Colonnade Apartment ◦
Buildings
Apartment Buildings ◦
•
Colonial Revival
•
American Foursquare
•
Neoclassical
Prairie •
•
Tudor Revival
•
Craftsman Bungalow

Spanish Eclectic •
•
French Eclectic
Minimal Traditional •
•
Ranch
Split-level •
Massive stone or brick chimneys common
Gabled roof with wood shingles and shallow overhangs common
All log structures are made from large lengths of wood with notches at the corners where the logs intersect. Spaces between logs sometimes filled or ‘chinked’ with clay both on the exterior and interior
Usually seen with minimal windows and doors
Typically only a 1 story, sometimes 1 1/2 stories
This building type is defined by construction materials and methods. As Europeans began to settle in America, they brought with them the techniques and tradition of building log structures for houses (or cabins), barns and other outbuildings. Log structures were relatively easy to build. Historic records show that a group of three men, with experience in log building, could build a one room cabin with chimney and fireplace in two days. Most log structures are only a single story in height because of the physical difficulty of lifting the logs; thus most structures were only six to eight logs high. Log structures were later replaced or integrated into other types of housing. These structures can be found throughout Independence and sometimes can be located apart of a now much larger house camouflaged beneath cladding, or concealed in barns.


Low-pitched, and/or hipped roofs with wide eave overhangs
Ornamental cornice and eave brackets
Decorative lintels above windows and doors
Tall, narrow windows, commonly arched or curved at the top
Typically are 2 or 3 stories in height, rarely 1 story
Simple 1 story porches
Sometimes has a square cupola or tower
Originating in England during the 18th century, the Italianate style belongs to a period in architectural history known as the Picturesque Movement. The primary focus of this movement was the creation of buildings and landscapes that had an artistic and picturesque quality. Italian farmhouses and country villas served as models for the movement. Largely popularized by the influential pattern books of Andrew Jackson Downey. By the mid-19th century the Italianate style had become fashionable in both residential and commercial buildings in America. In the Truman Neighborhood many property owners discovered that these stylish, Italianate designs could easily be modified and adapted to suit their own personal tastes and construction budgets. A wide-range of interpretations of the Italianate style still exists throughout the Bingham, Benton and Truman neighborhoods.
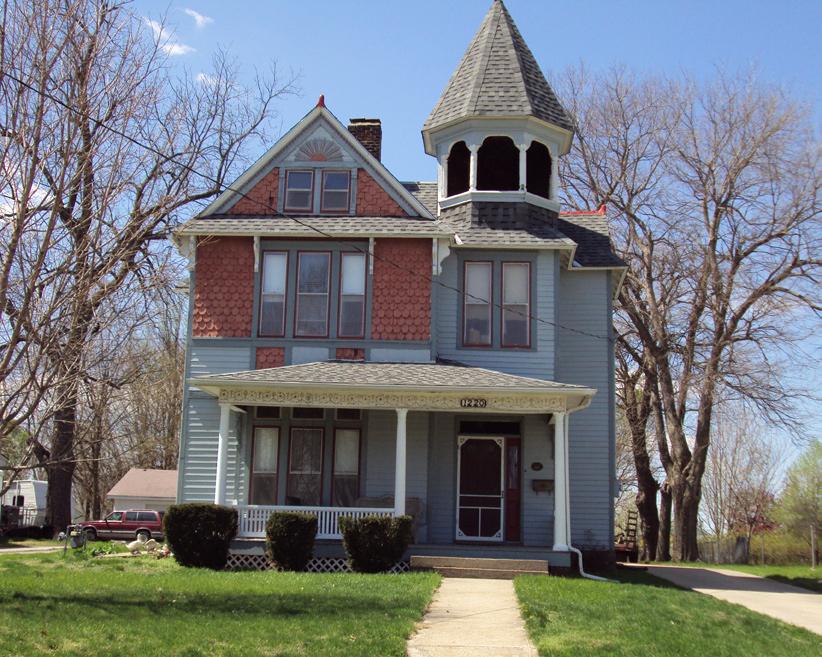
Steeply pitched, complex roof configuration, usually with front facing gable
Decorative wall surfaces created with patterned shingles & masonry
Bay windows, towers, overhangs and wall projections used to avoid smooth wall surfaces
Stained and leaded glass windows common
Asymmetrical facades, occasionally with a tower
The Queen Anne style first reached America in the mid-1870s. Inspired by the late medieval manor houses of 15th, 16th and 17th century England, the first American interpretations of the Queen Anne used half-timbering and patterned masonry in the English Tudor tradition. By the 1880’s however, the influence of American spindle work dominated Queen Anne design. Pattern books and railroad delivery of precut ornamental details were responsible for popularizing the style. A period of adaptation in the 1890’s revived the use of classical detailing, and wall cladding began to take on a simpler appearance that used fewer types of materials and less pattern work. A large number of spectacular Queen Anne homes, some of which are the most notable surviving examples, were constructed in Independence within the Benton, Procter and Truman neighborhoods.


Roof lines are most commonly front gabled, though side gabled and L-shaped roofs are also common
Brackets under eaves are common
Windows are often encased in simple surrounds
Porches are found on nearly all Folk Victorian houses


Facades are typically symmetrical
Often with elaborate wood spindles, decorative brackets, and refined columns on porches
The Folk Victorian Style came about with the railroad. Woodworking machinery was available to local trade centers enabling a craftsman to easily produce both a large volume and variety of elaborate scrollwork. Pre-cut details were also available to home owners who would either adorn their new homes with these details or add them to their existing homes. This style was popular throughout the United States until about 1910, and was influenced heavily by the Queen Anne style. Evidence of this influence can be seen in the homes’ roof lines and detailing such as spindle work on porches and bracket shapes. Most of the Folk Victorian houses in Independence were built between 1890 and 1910, with many versions of the style found throughout the city.

Curvilinear “Mission shaped” dormer or roof parapet
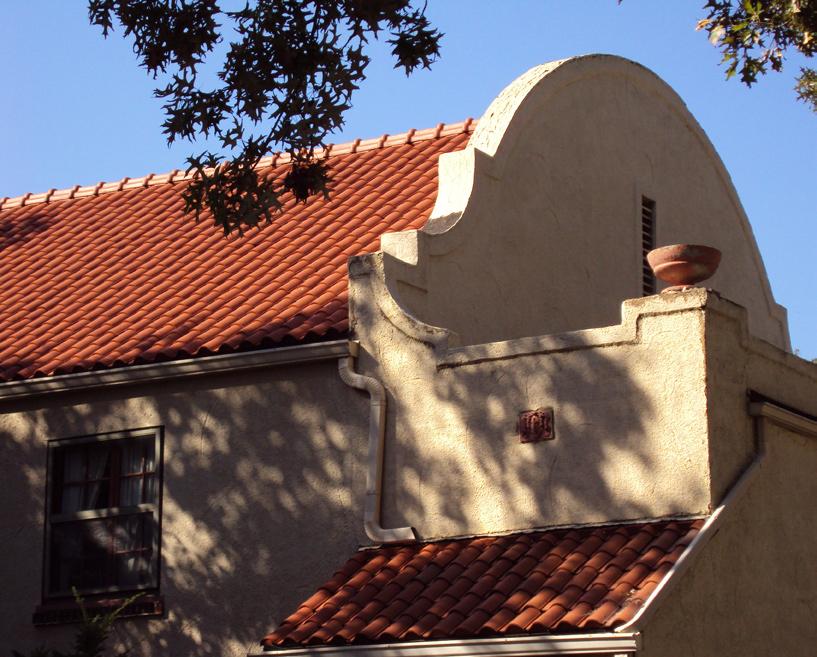

Spanish style details such as cross or circular decorative shaped windows are common
Commonly with red clay tile roofs
Wall cladding typically stucco finish
Often found with an arched entry door
Front and/or side porches supported by large square piers with arched openings
Also known as Spanish Mission, this style originated in California, where there are many landmark examples concentrated in communities originally settled by Spanish colonists. The earliest examples were built in the 1890’s and by 1900, houses of this revival style were spreading East under the influence of popular architects and national builders’ magazines of the time. The main identifying feature of this style is the dominant curved parapet (often referred to as a Mission-shaped, or bell shaped parapet) located at the main facade roof, side elevation, and/or at the porch roof. Although this Mediterranean inspired style is not common in the Midwest, there are scattered examples throughout. Examples within the Truman neighborhood date between 1905 and 1920.


Side-gable or gambrel roofs
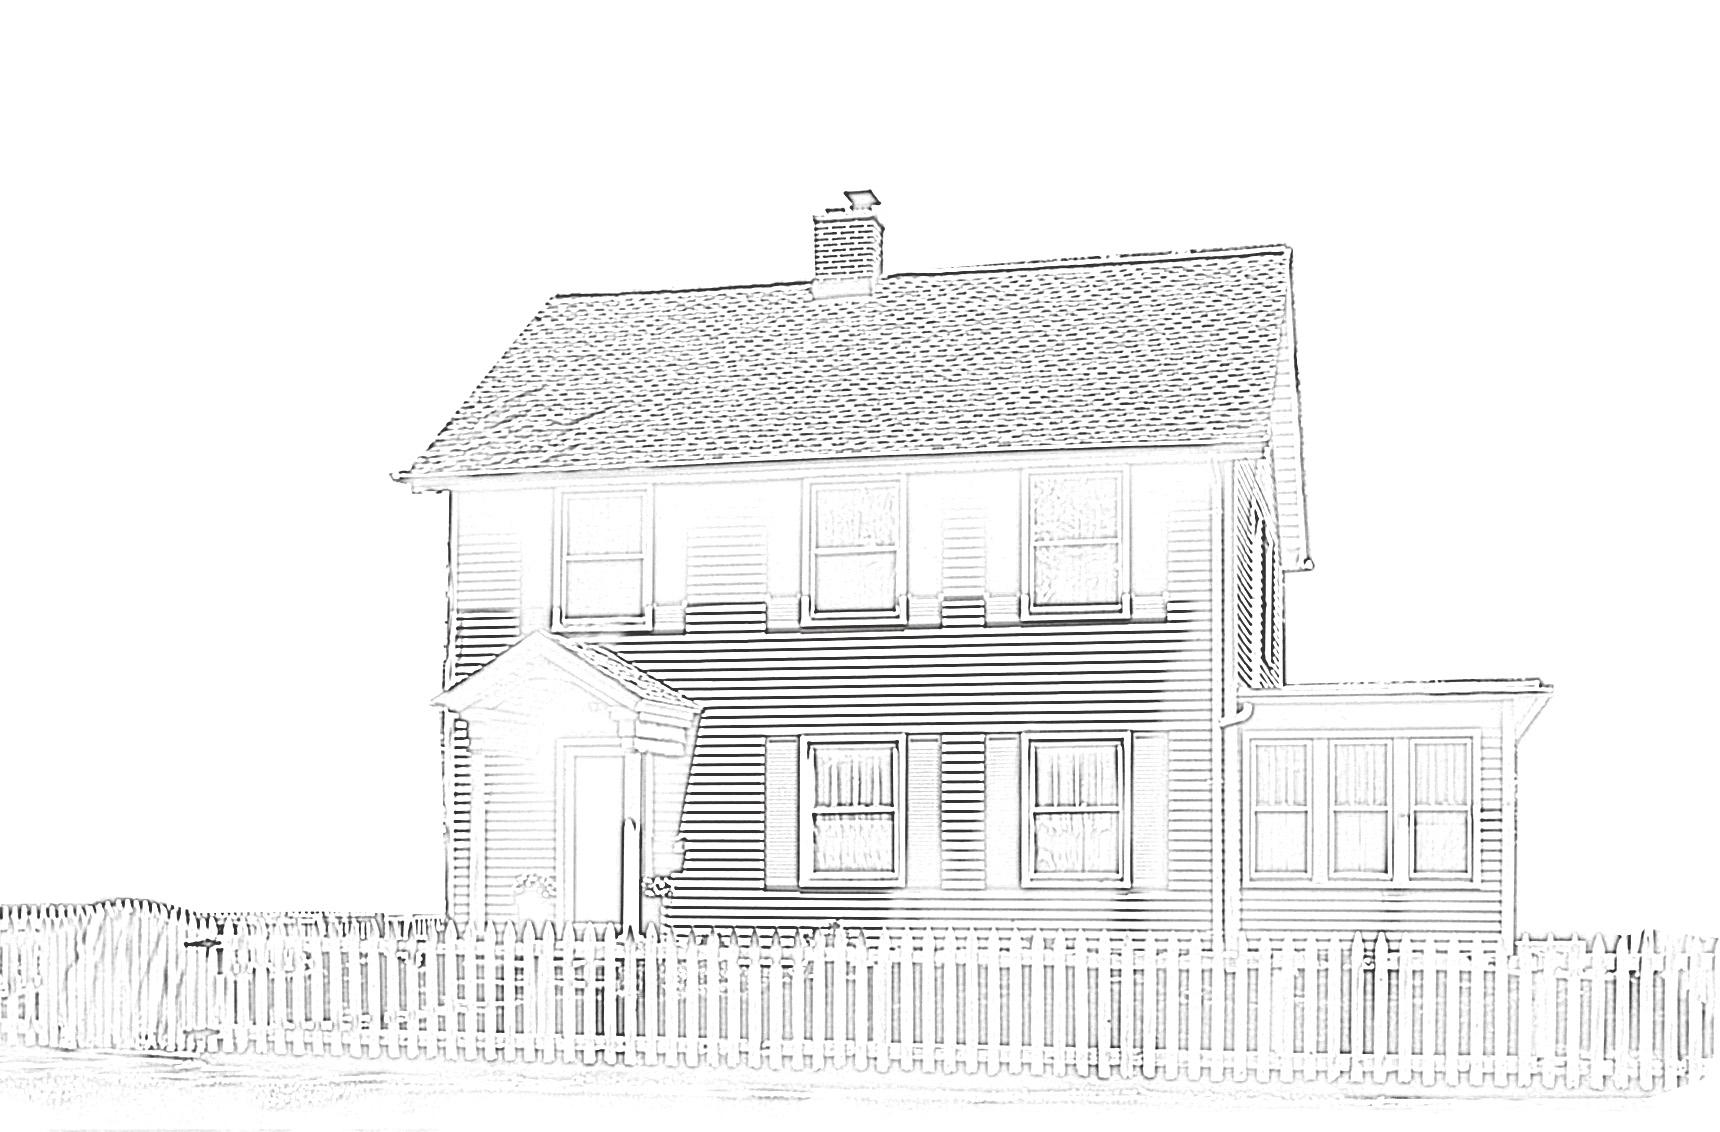
Typically 2 stories, with symmetrical facade
Windows are often paired and have double-hung, multi-pane sashes
Simple window surrounds, commonly found with shutters
Sidelights and fanlight surround at entry are common
Dominant front entrance, usually with a decorative pediment supported by slender columns or pilasters
After Philadelphia’s Centennial Exposition of 1876, Americans began to experience a renewed interest in their Colonial Heritage. Trends in modern building design fell under the influence of early American English and Dutch houses constructed in the Colonies during the 17th and 18th centuries. Colonial style buildings showed America’s revived sense of patriotism and history. The first attempts at Colonial Revival architecture merely altered Colonial style decorative elements and design characteristics to fit the size and scale of the buildings during the Victorian era. Later the style adapted to more proportional buildings with applied Colonial details. Colonial Revival architecture was influential both after the turn-of-the-century, and during the post WWII period, and can be found throughout Independence.
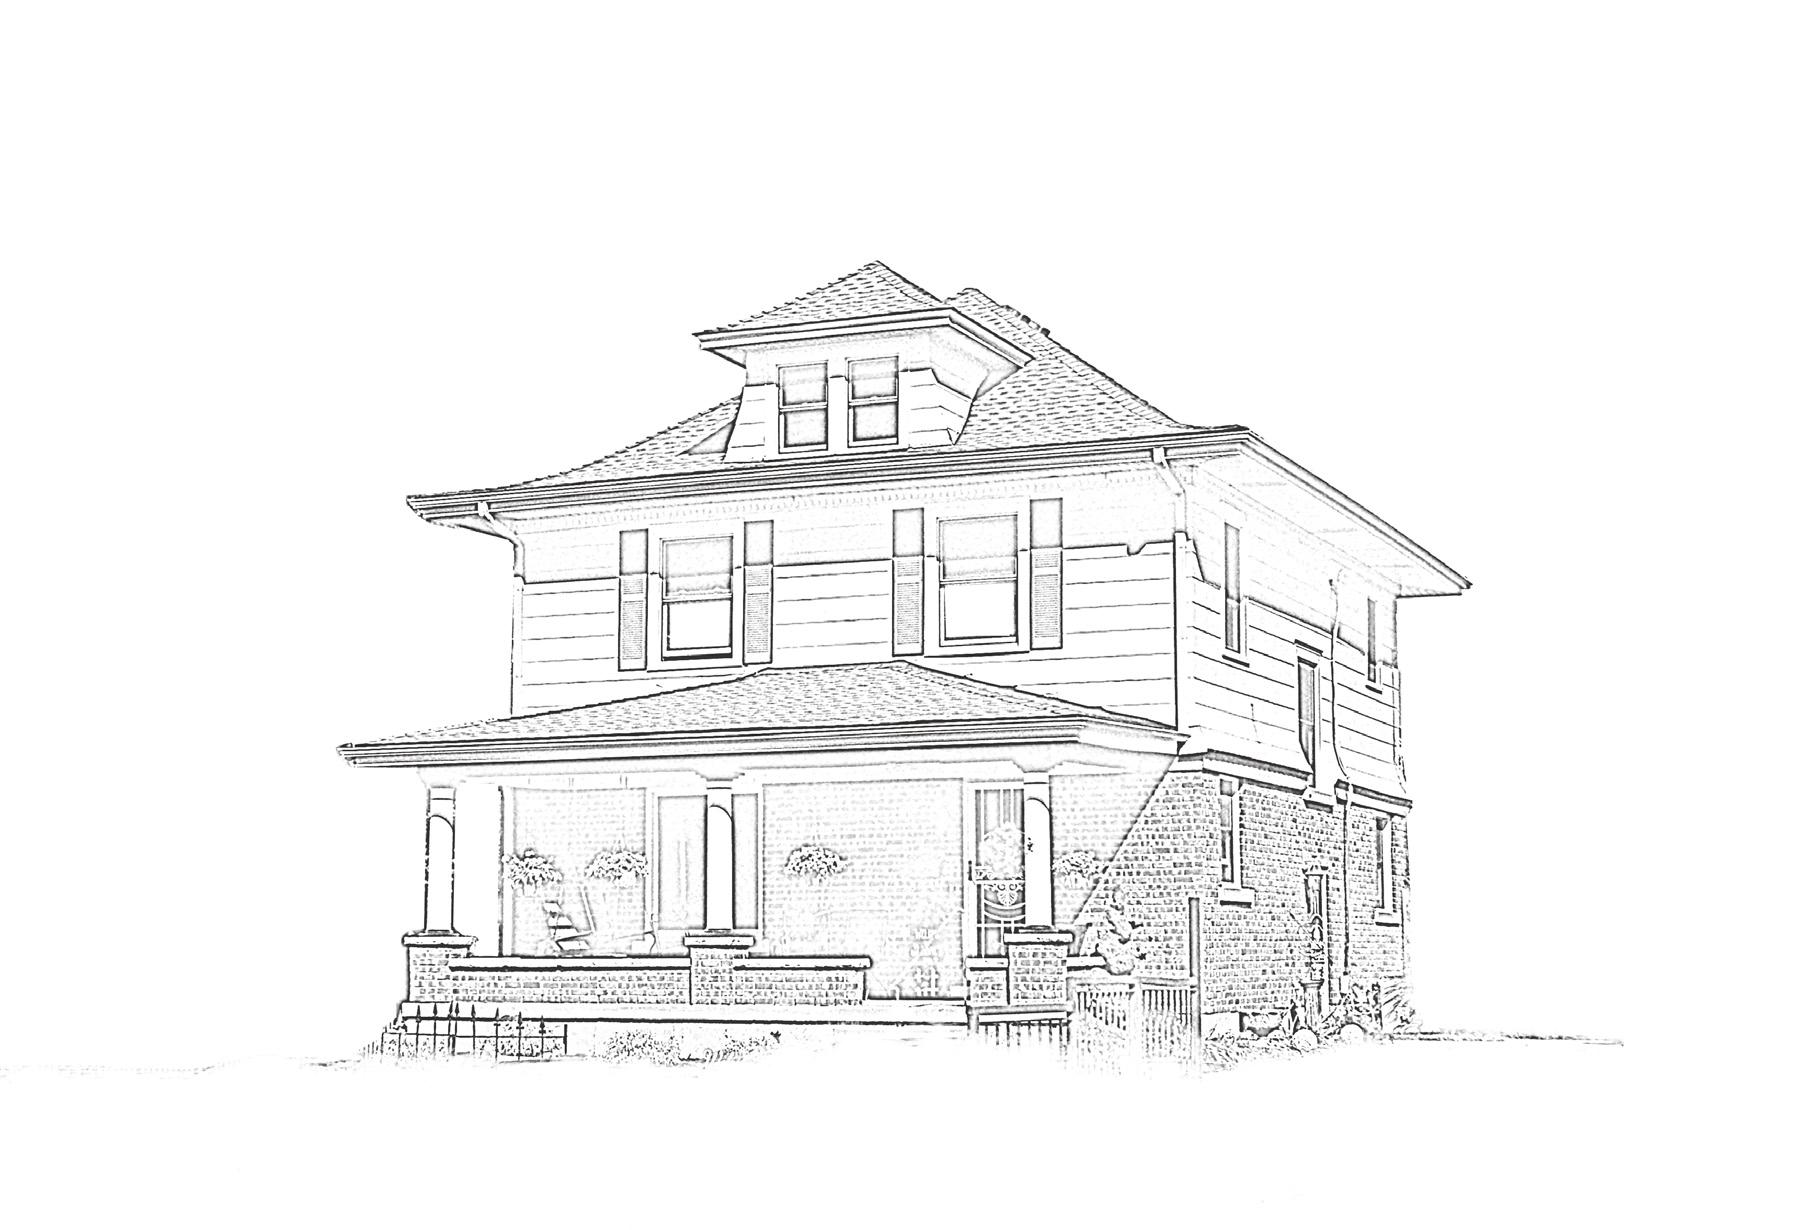
Large central dormer
Typically 2-1 /2 stories high
Simple symmetrical box shape with four room plan
Low-hipped roof with deep overhangs
Commonly clad with wood siding, stone, brick or stucco finishes
Dominant, elevated, large front porch with large porch columns and stairs
This popular American house style, (also sometimes known as the “Prairie Box”) was a post-Victorian style, plain in comparison to the mass produced elements of the Victorian and other revival styles of the last half of the 19th century. Foursquare houses may be built with a variety of materials including: brick, stone, stucco, concrete block, and wood. Known for being economical to build, the Foursquare also was ideal for downtown city lots or smaller plots of land. They are efficient houses that make use of every square inch of house and land. Their simple, square shape also made the Foursquare style practical for mail order house kits from Sears, Roebuck Co. and other catalog companies. They were commonly used as infill houses in established, older neighborhoods such as Procter, North and South Main and Truman neighborhoods.
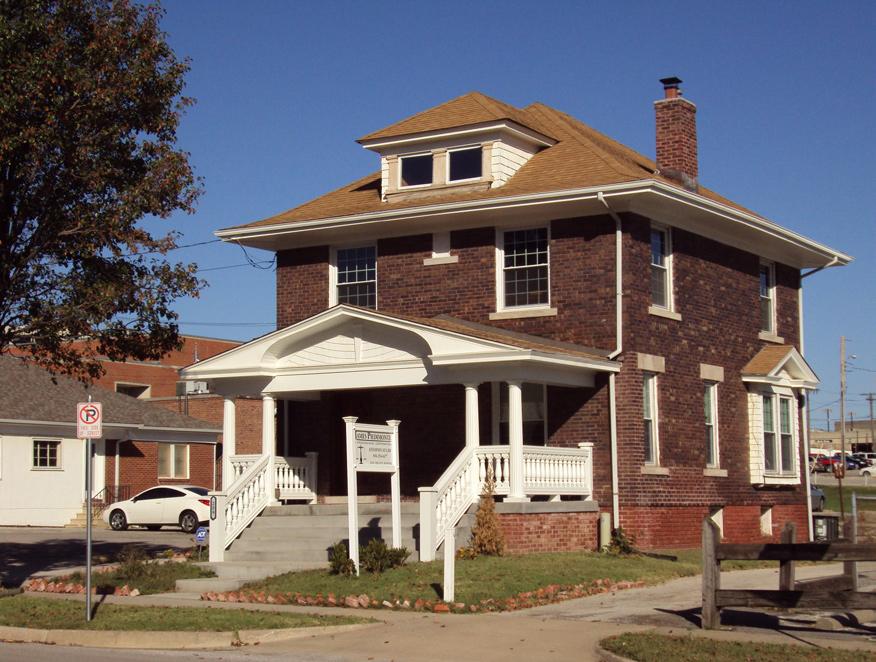

Typically seen with hipped or gabled roofs and a front-gabled roof (or pediment)
A major character-defining feature is the tall, fullheight porch with classical columns
Typically 2 stories, rarely 1 story
Symmetrical facade with centered front door. Front entry door commonly seen with decorative Greek Revival surrounds
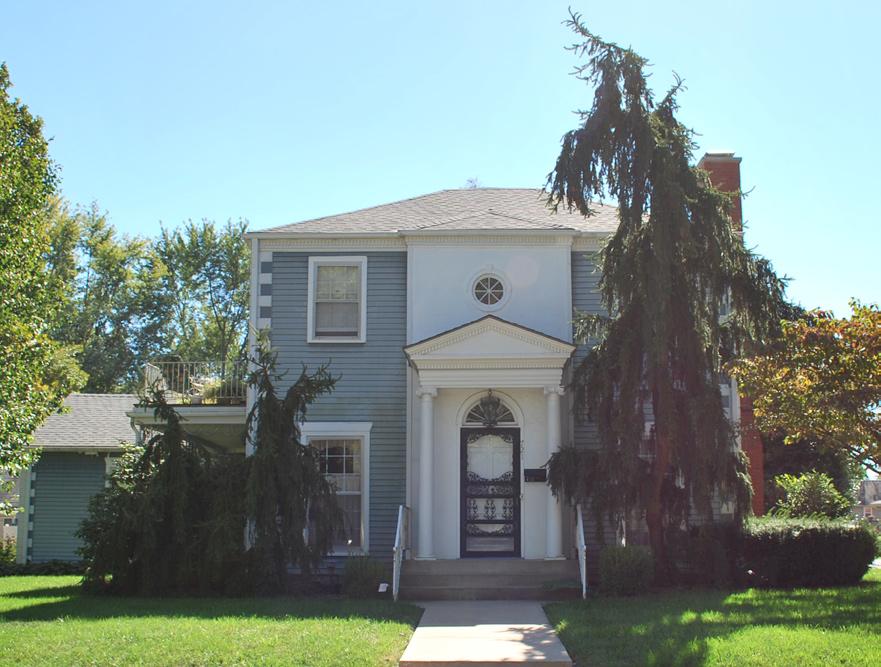

Neoclassical style is defined by a full-height porch with gabled roof which is supported by classical columns. Columns typically have Ionic or Corinthian capitals, but can also have simple Doric column capitals. The Neoclassical style is very similar to the Greek Revival style, popular from 1825-1860, which was most common on the East Coast of the United States. The Neoclassical style was very popular throughout the first half of the 20th century. Character-defining features also include a symmetrical facade with evenly spaced windows and a centered front door. The front entry door is often found with elaborate, decorative surrounds and mouldings based on Greek Revival ornamentation consisting of engaged columns and triangular or semi-circular pediments.

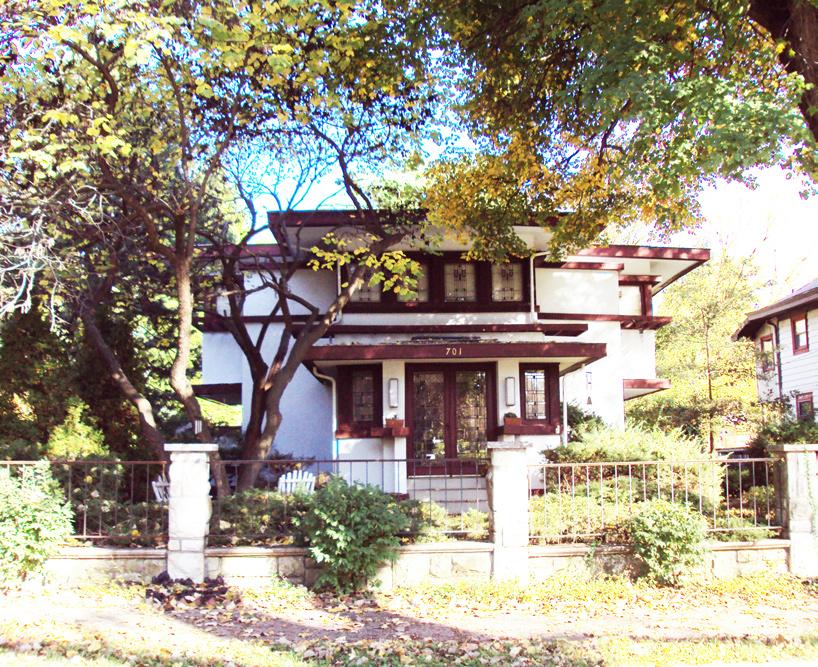
Typically 2 stories, with 1 story porches
Low-pitched roof, hipped roof, or gabled roof with wide overhanging eaves
Geometric patterns of small pane window glazing
Porches, eaves, cornices and facade detailing emphasizing horizontal lines very common

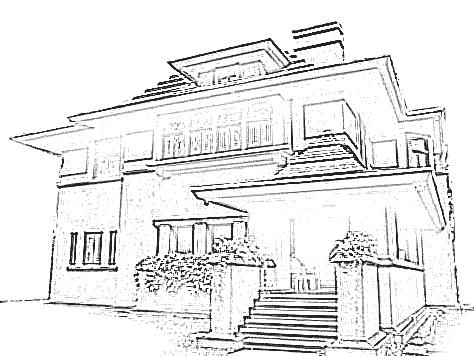
Massive square porch supports
Brick, stone, stucco and wood wall cladding
Prairie style is one of the few indigenous American home styles. It was developed by a creative group of Chicago architects known as the Prairie School, from which Frank Lloyd Wright was a notable figure. Outside the Chicago area, local architects produced Prairie style houses throughout the Midwestern states. The style spread throughout the country by home pattern books produced in the Midwest. It is most common to see homes in this style built between 1900-1920. These houses sometimes have a form similar to the American Foursquare, and details similar to Mission or Italian Renaissance styles (such as tiled roofs or cornice brackets). Many great examples of Prairie style and “KC Shirtwaist” houses (a subset of the Prairie style) are located within the City of Independence and Truman Neighborhood.

Steeply pitched roof, usually side-gabled
Massive chimneys, with decorative chimney pots on each flue
Facade dominated by one or more prominent gables
Brick, stone and stucco wall cladding typical and decorative half-timbering common
Tall narrow windows, grouped with multi-pane glazing
Arched front entry doors common
The first American houses to be constructed in the Tudor Revival style were patterned closely after elaborate late Medieval and Renaissance architecture popular in 15th, 16th, and early 17th century England. Preferred for its association with the tastes of England’s wealthiest class of citizens, Americans found that the solid masonry construction and unique detailing of the Tudor Revival were ideal for creating the picturesque qualities and grand spaces sought after during the Victorian era. After the turn-of-the-century, Americans returned to a simpler life, resulting in modest interpretations of the Tudor style using details like steeply pitched gables and half-timbering with more traditional frame house forms. Examples of the Tudor Revival style in Independence were primarily constructed in the 1920s and 1930s.


Low-pitched, front or side-gabled roofs
Wide eave overhangs, typically with exposed rafters and triangular knee braces
Usually 1 or 1-1/2 stories in height
Commonly clad with wood siding, stone, brick or stucco
Commonly have full-width porches with heavy, square tapered columns and piers that extend to the ground
As early as 1880, the 17th century term “bungalow”, meaning a simple one-story dwelling with a wide porch used for relaxation, was being used in the U.S. to define this architectural style. It was not until ca. 1905 however, when introduced as a new house type of the Craftsman-style, that the bungalow began its period of widespread growth. Craftsman bungalows became the first stylized architecture in the U.S. to be designed specifically with the middleclass in mind, and were successfully marketed as an ideal starter home for the ambitious American family. Popular publications like The Craftsman, Bungalow Magazine, and the Sears, Roebuck and Co. mail order catalogues popularized the style, which resulted in the construction of bungalow subdivisions and infill houses in older neighborhoods. This style can be found throughout the traditional neighborhoods of Independence.

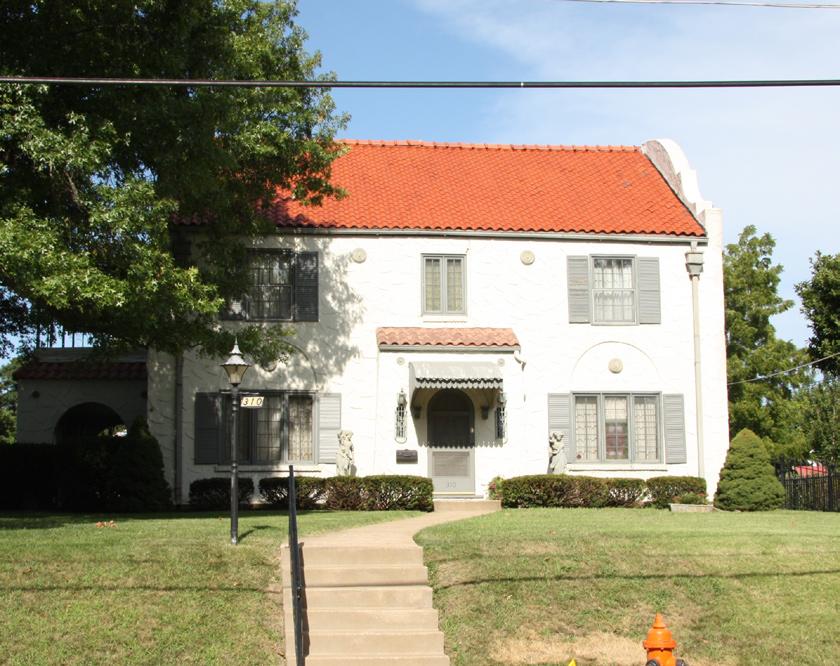
Typically low-pitched, red clay tile roofs
Also found with flat roofs and parapet walls
Commonly found with projecting eaves, usually with little or no overhang
Arched doors and/or windows
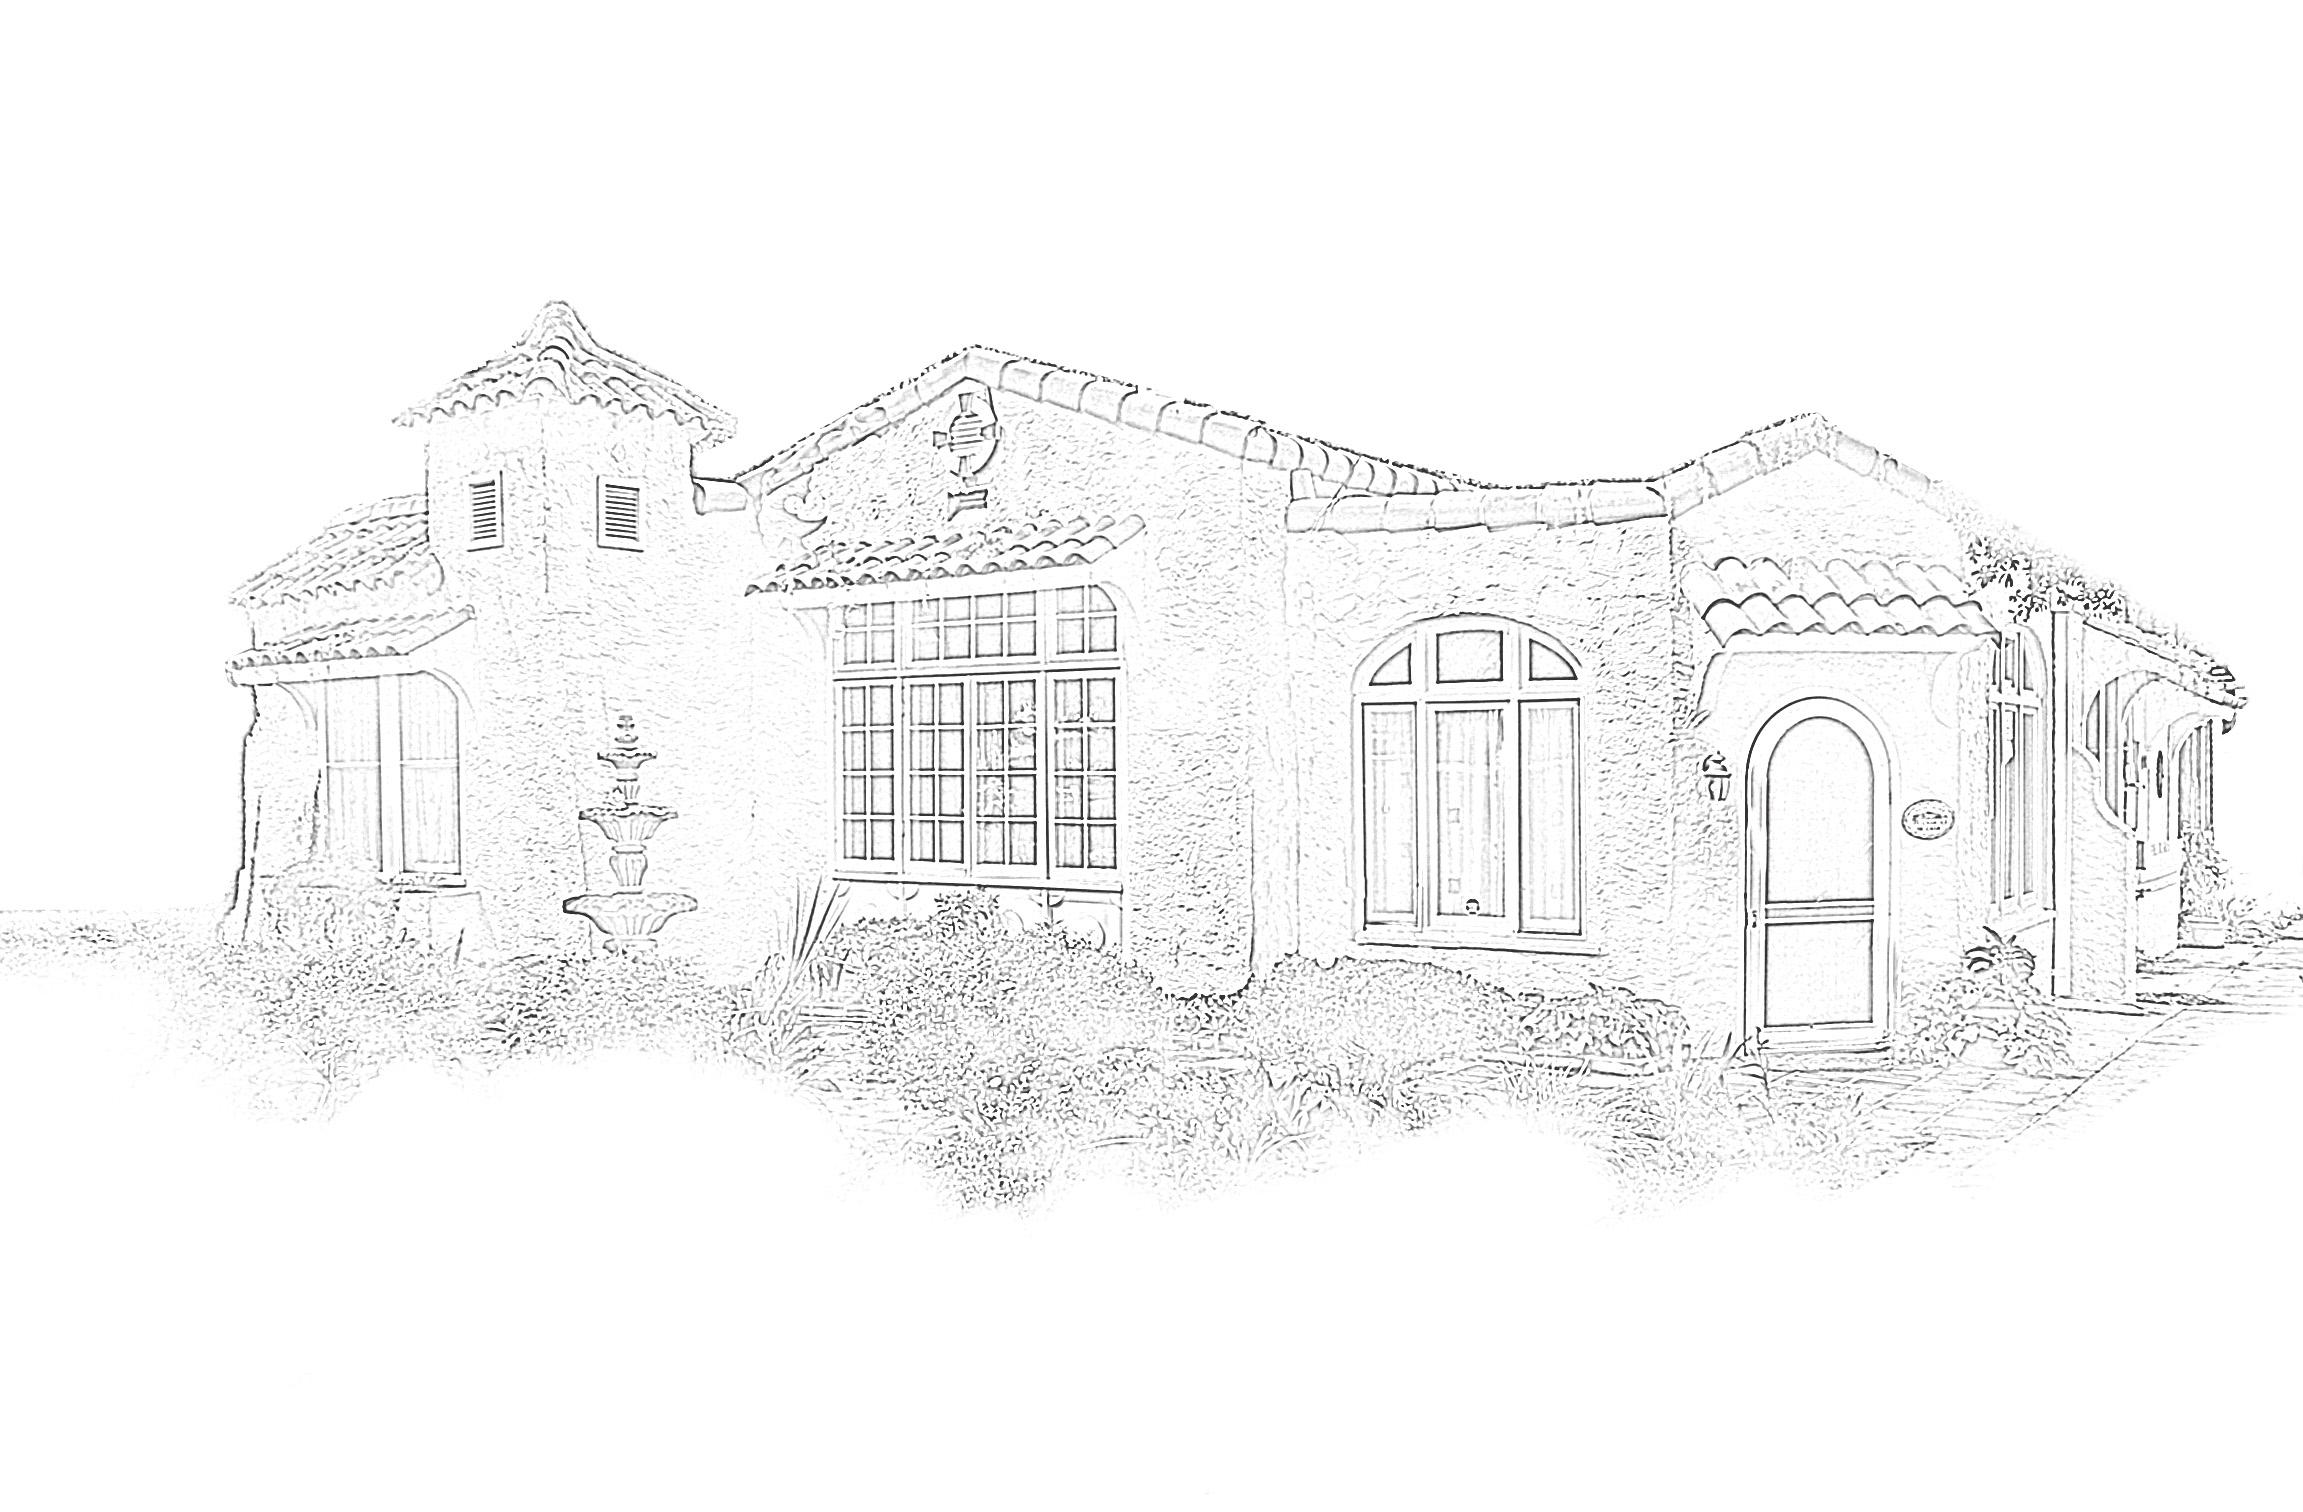
Wall surfaces usually stone or stucco finish
Front or side porches common, typically with arched openings and large square porch supports
The Spanish Eclectic style uses decorative details borrowed from the history of Spanish architecture. The signature identifying feature is the red tile roofs. These roof tiles have two basic types: Mission tiles, which are shaped like half-cylinders, and Spanish tiles, which have an S-curve shape. This style has either a low-pitched roof, or a flat roof with parapet walls. Wall cladding is almost always stucco, but can also be stone. This Mediterranean inspired style is most common in the southwestern states and in regions where the original Spanish Colonial building occurred, but can also be found sprinkled throughout the country. Spanish Eclectic style reached its peak during the 1920’s and early 1930’s and declined after the Second World War and a few examples exist in the Procter and Truman neighborhoods.


Massive chimneys, sometimes with decorative chimney pots
Tall, steeply pitched hipped roof (occasionally gabled), eaves commonly flared upward
Commonly with dormers or windows that break the roof line
Brick, stone and stucco wall cladding typical
Arched windows, dormers, and/or doors


Occasionally with a tower form incorporated
This style is based upon preceding centuries of French domestic architecture and shows a great variety of shapes and architectural details. The style is generally identified by its unique roof shape. Traditions in French architecture dating to Medieval times are represented in this style. This style is relatively uncommon, but is found throughout the country in eclectic suburbs of the 1920’s and 1930’s. The French Eclectic style is thought to have been popularized by Americans who served in France during World War I who brought back with them their familiarity with the style. A few French Eclectic homes can be found within the City of Independence, and are good examples of this post WWI influence.

Basic rectangular shape with little ornament or detailing
Front facing roof gable, gabled or hipped roofs with low to medium pitch, and shallow eaves, cross gables common

Typically 1 story, occasionally 1-1/2 stories
Wood, brick, and/or stone wall cladding common
Detached or single attached garage, rarely a two car garage is present
This style was common during the 1930’s until the 1950’s when it was replaced by the popular ranch homes of that time. The Minimal Traditional incorporates forms from other styles such as Colonial and Tudor, but characteristically has little ornament or great detail. The height of this style was during the Depression, but again it surged in popularity post WWII as the GI Bill influenced the rate of home building and homeownership. Typical features include: a front facing roof gable, commonly with gabled roofs, one story (but can also be 1-1/2 stories), a prominent chimney, and built of wood with brick, stone, and wood cladding materials. Minimal Traditional homes were designed for the growing number of families and the rising number of families with automobiles. These homes are prominent in Golden Acres, but can also be found throughout Independence.
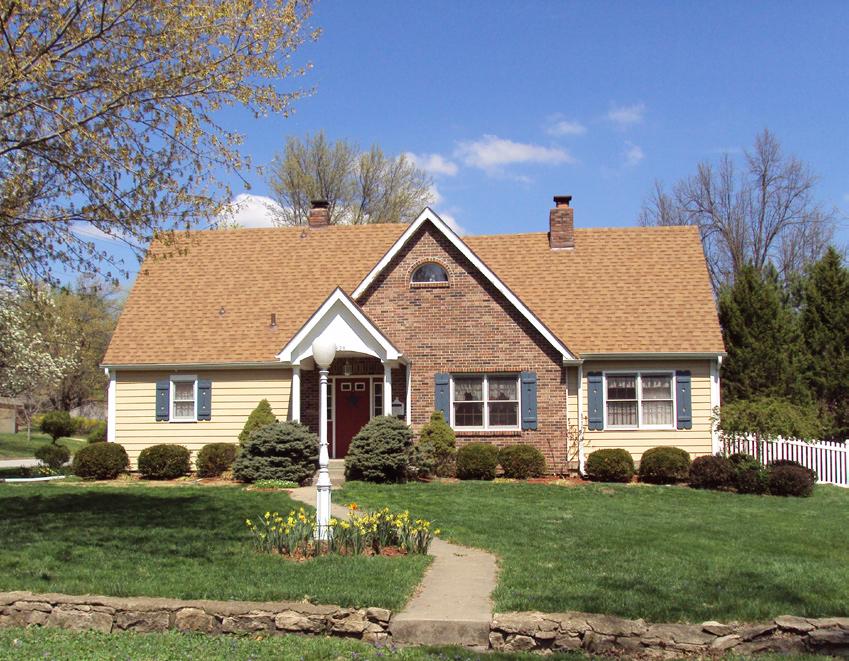

Basic rectangular shape with little ornament or detailing
Typically 1 story in height with long horizontal roofs with little to moderate overhangs


Front facing roof gable, gabled or hipped roofs, low to medium pitch

Wood, brick, and stone wall cladding
Single car garage sometimes attached to primary facade or in rear, rarely a two car garage is present
The Ranch style originated during the mid-1930’s in California and gained in popularity during the 1940’s. The Ranch house was the dominant housing style built post WWII as Americans bought automobiles and moved to suburbs. Compact houses of the early suburbs were replaced with long, low, sprawling designs due in part to the larger lot sizes of the new postwar suburbs. These single-story houses often have a large, open front yard, typically with a driveway leading to the garage, and a sidewalk or pathway to the front door. Ranch homes are found throughout the country and Midwest, and are common as infill in older neighborhoods, and can be found in numbers in South and Southeastern Independence.
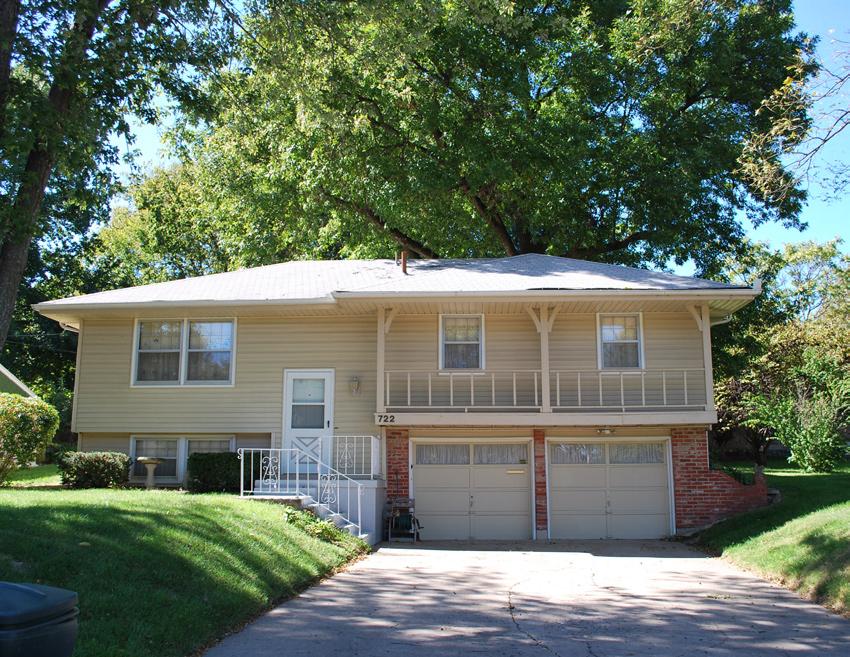
Basic rectangular shape with little ornament or detailing
Two stories with attached, two car garage common
Visible horizontal projection over the lower portion of the home
Wood, brick, and stone wall cladding common
Unobstructed front door
The Split-Level style became popular during the 1950’s as a multi-story variation of the dominant Ranch style home. This style retains the Ranch home’s low-pitched roof, horizontal lines, and overhanging eaves. However, it adds a second story that can be seen from the exterior usually by a break in the house’s main facade by a roof eave extending across the facade, or as a projection out from the main facade over the lower portion of the house. The intent of this added story was to move the quiet living and bedroom spaces away from the noisy living spaces. Split-Level homes often have an attached, two car garage on the lower level with the rest of the house built above and around. These homes are common throughout the country, and can be found throughout the City of Independence.


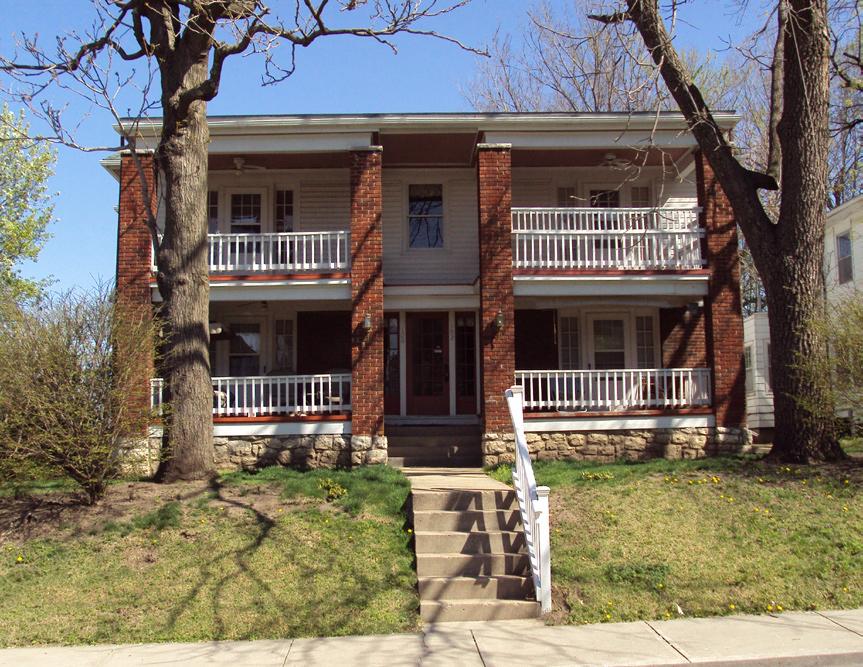
Flat roofs, occasionally low slope pitched roofs
Multiple stories, typically 3 or 4 stories
Open front porches with wood or brick columns, vary in size, shape and level of detail, variety of capitals
Rear porches common with exterior exit stair

Wood, stone or brick wall cladding common
Elevated central entry door and hall to interior stairs
This style of multi-family dwelling is recognized officially as the Kansas City Colonnade Apartment Style. It evolved around the turn-of-the-century with the first examples and precedents seen ca. 1880. The style applies Beaux Arts and Neoclassical elements such as symmetry, central elevated entrance and the use of classical columns and column capitals, and often incorporates details from other architectural styles and eras. The predominant architectural feature for this building type is the colonnaded open front porch. There are several sub-types such as the “Classical Colossal Column Porch,” the “Combined Column Porch,” the “Square Brick Column Porch,” and the “Transitional Colonnade Apartment Building.” These highly recognizable buildings can be found throughout the metropolitan area around Kansas City.

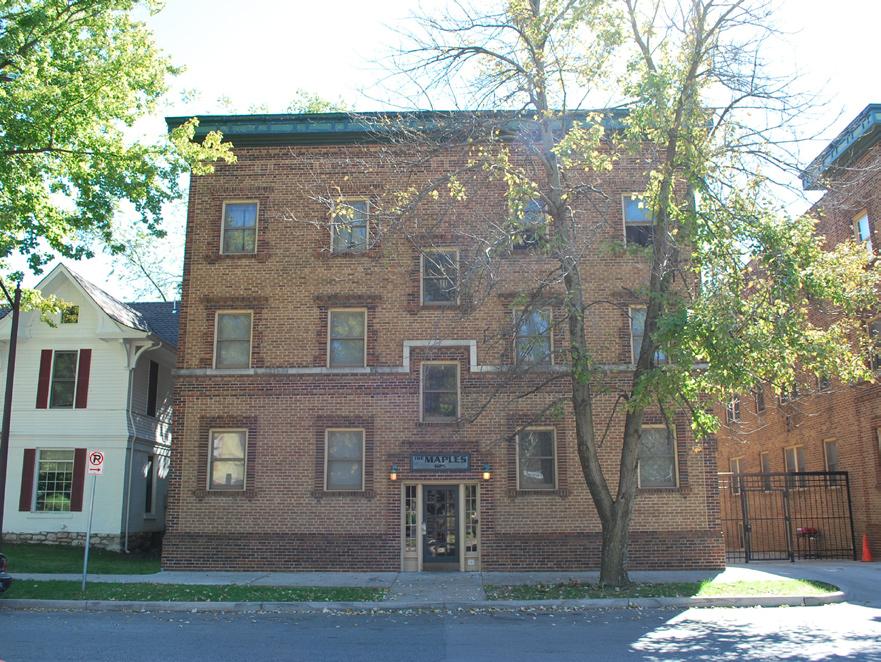
Variety of roof configurations, flat or pitched
Typically 2 or more stories
Occasionally with front and/or rear porches
Often with operable windows, various configurations and window types
Wood, stone or brick wall cladding common, often with simple details from various styles
Central entry door and hall to interior stairs
The City of Independence has a variety of apartment buildings from various time periods. Historically, this type of multi-story building was often built as a boarding house or apartment building with multiple rooms or units which could be rented by the day, week or month. Defining characteristics of this broad style evolved over time drawing from regional and national building trends, and were built based upon the local need for affordable housing. Typically these buildings are two to four stories in height, and have a prominent central entry door which leads to an interior hall and stairs to upper floors. The apartment buildings in Independence are typically multi-family dwellings, and also may include front and rear porches, exterior stairs, and can have a flat roof or a pitched roof. Apartment buildings are often found closer to commercial centers and are found throughout Independence.


In this chapter you will find:
Commercial, Civic, and Religious Styles
One-Part Commercial •
Two-Part Commercial •
Moderne •
Gothic Revival •


•
One-Part Commercial Block

• Moderne
Two-Part Commercial Block
• Gothic Revival
•
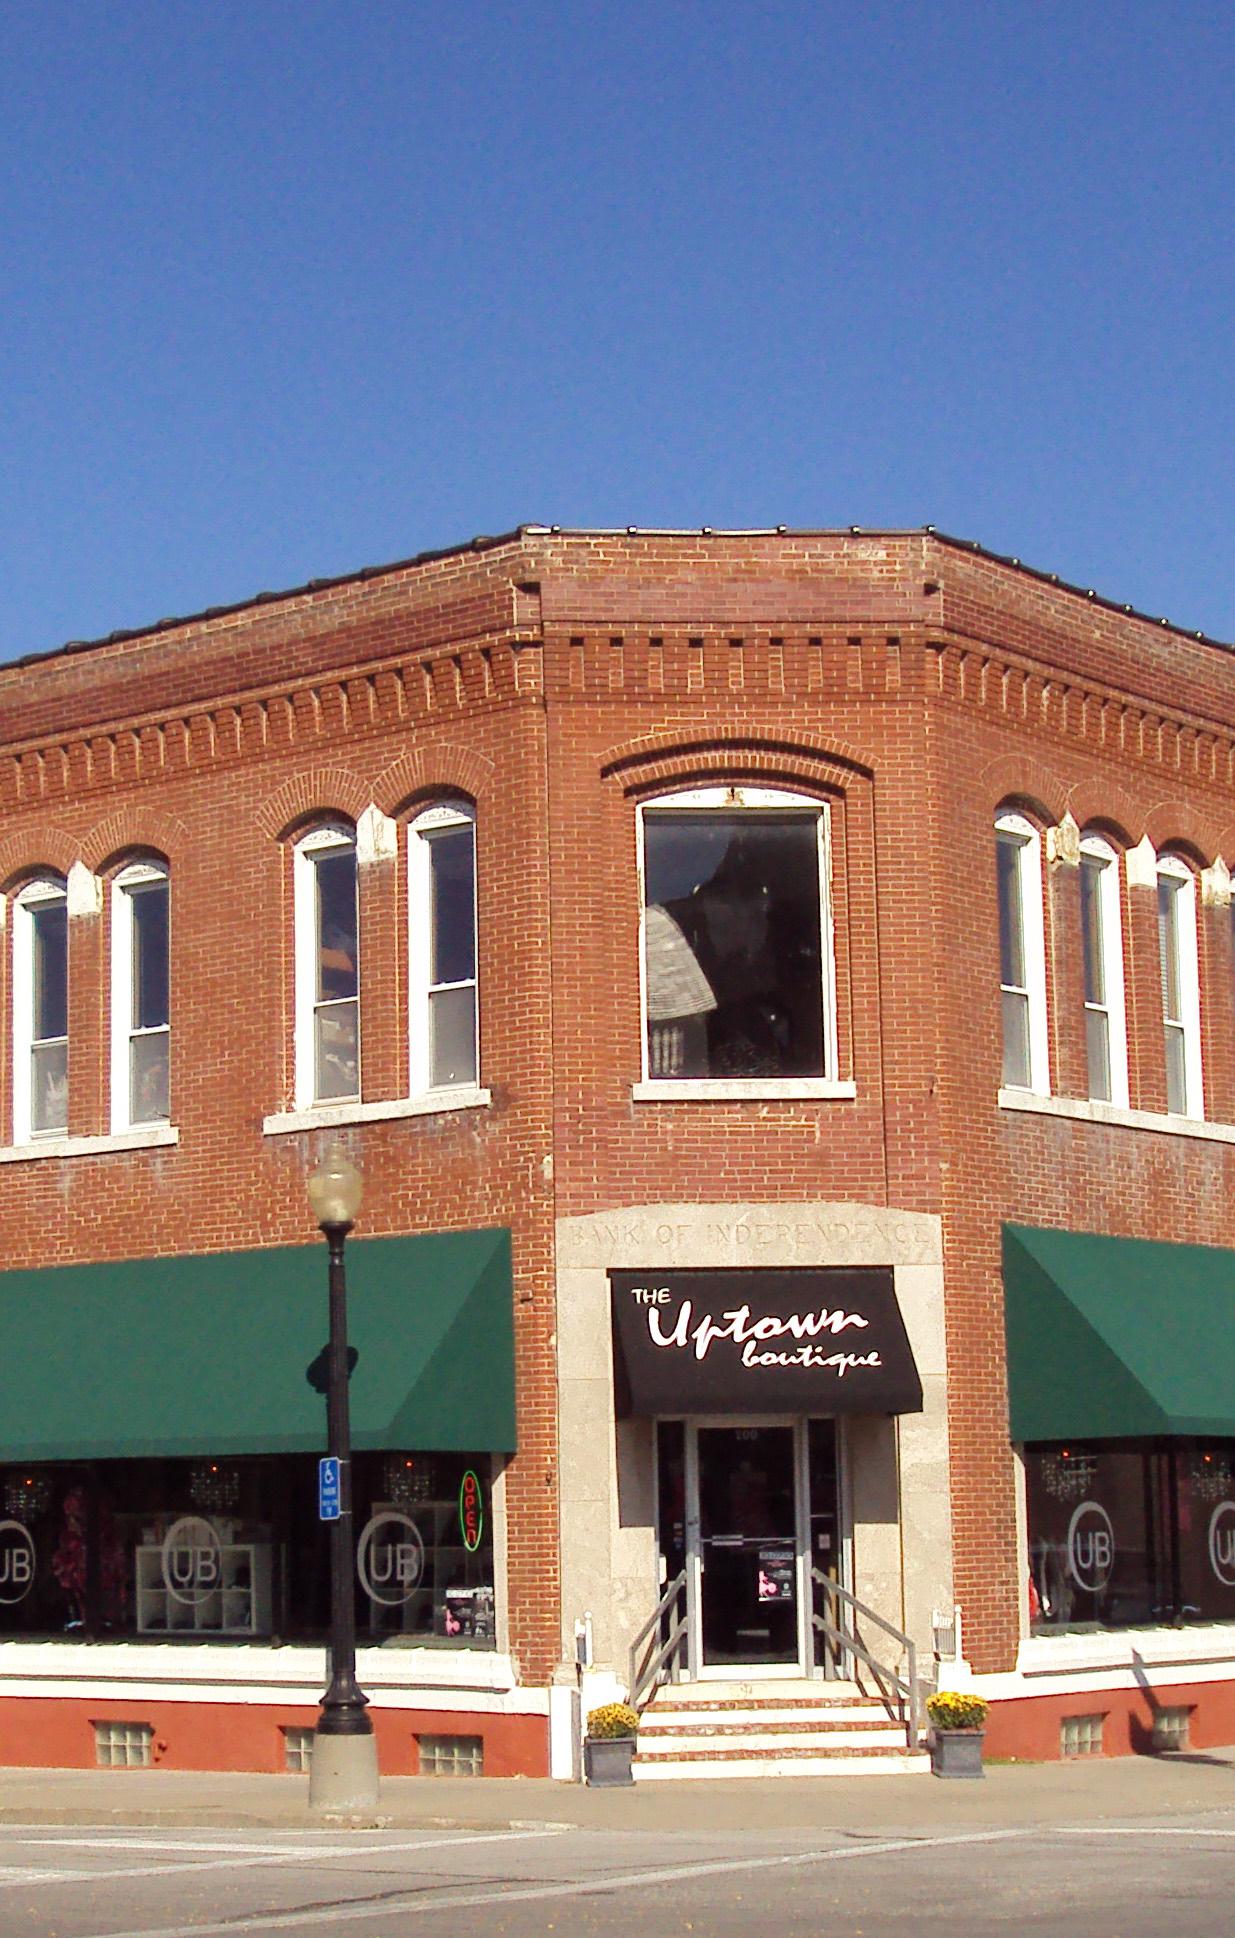
Many of the commercial buildings in Independence were constructed as One or Two Part Commercial Block buildings and are concentrated within the downtown area. These buildings were the most common forms used for commercial and institutional structures in small and developing communities, and range from one to four stories in height. Sometimes these buildings can be further defined by architectural styles, for example: Victorian, Federal, or Modern. In Independence, Two-Part Commercial Block buildings are
two or more stories in height and have a distinct horizontal separation between the first and second floors, with the first floor serving the public and the second floor utilized as private offices or residential space. One-Part Commercial Block buildings are a single story in height and often have a single business occupying the space. Typically these buildings were constructed of masonry with a large, framed storefront system set between masonry pilasters that had modest decorative treatments. This form was mostly


used for retail stores and occasionally these single story buildings appear as standalone buildings. Traditional commercial centers or districts in Independence include the Independence Square, Englewood, Fairmount and Maywood.

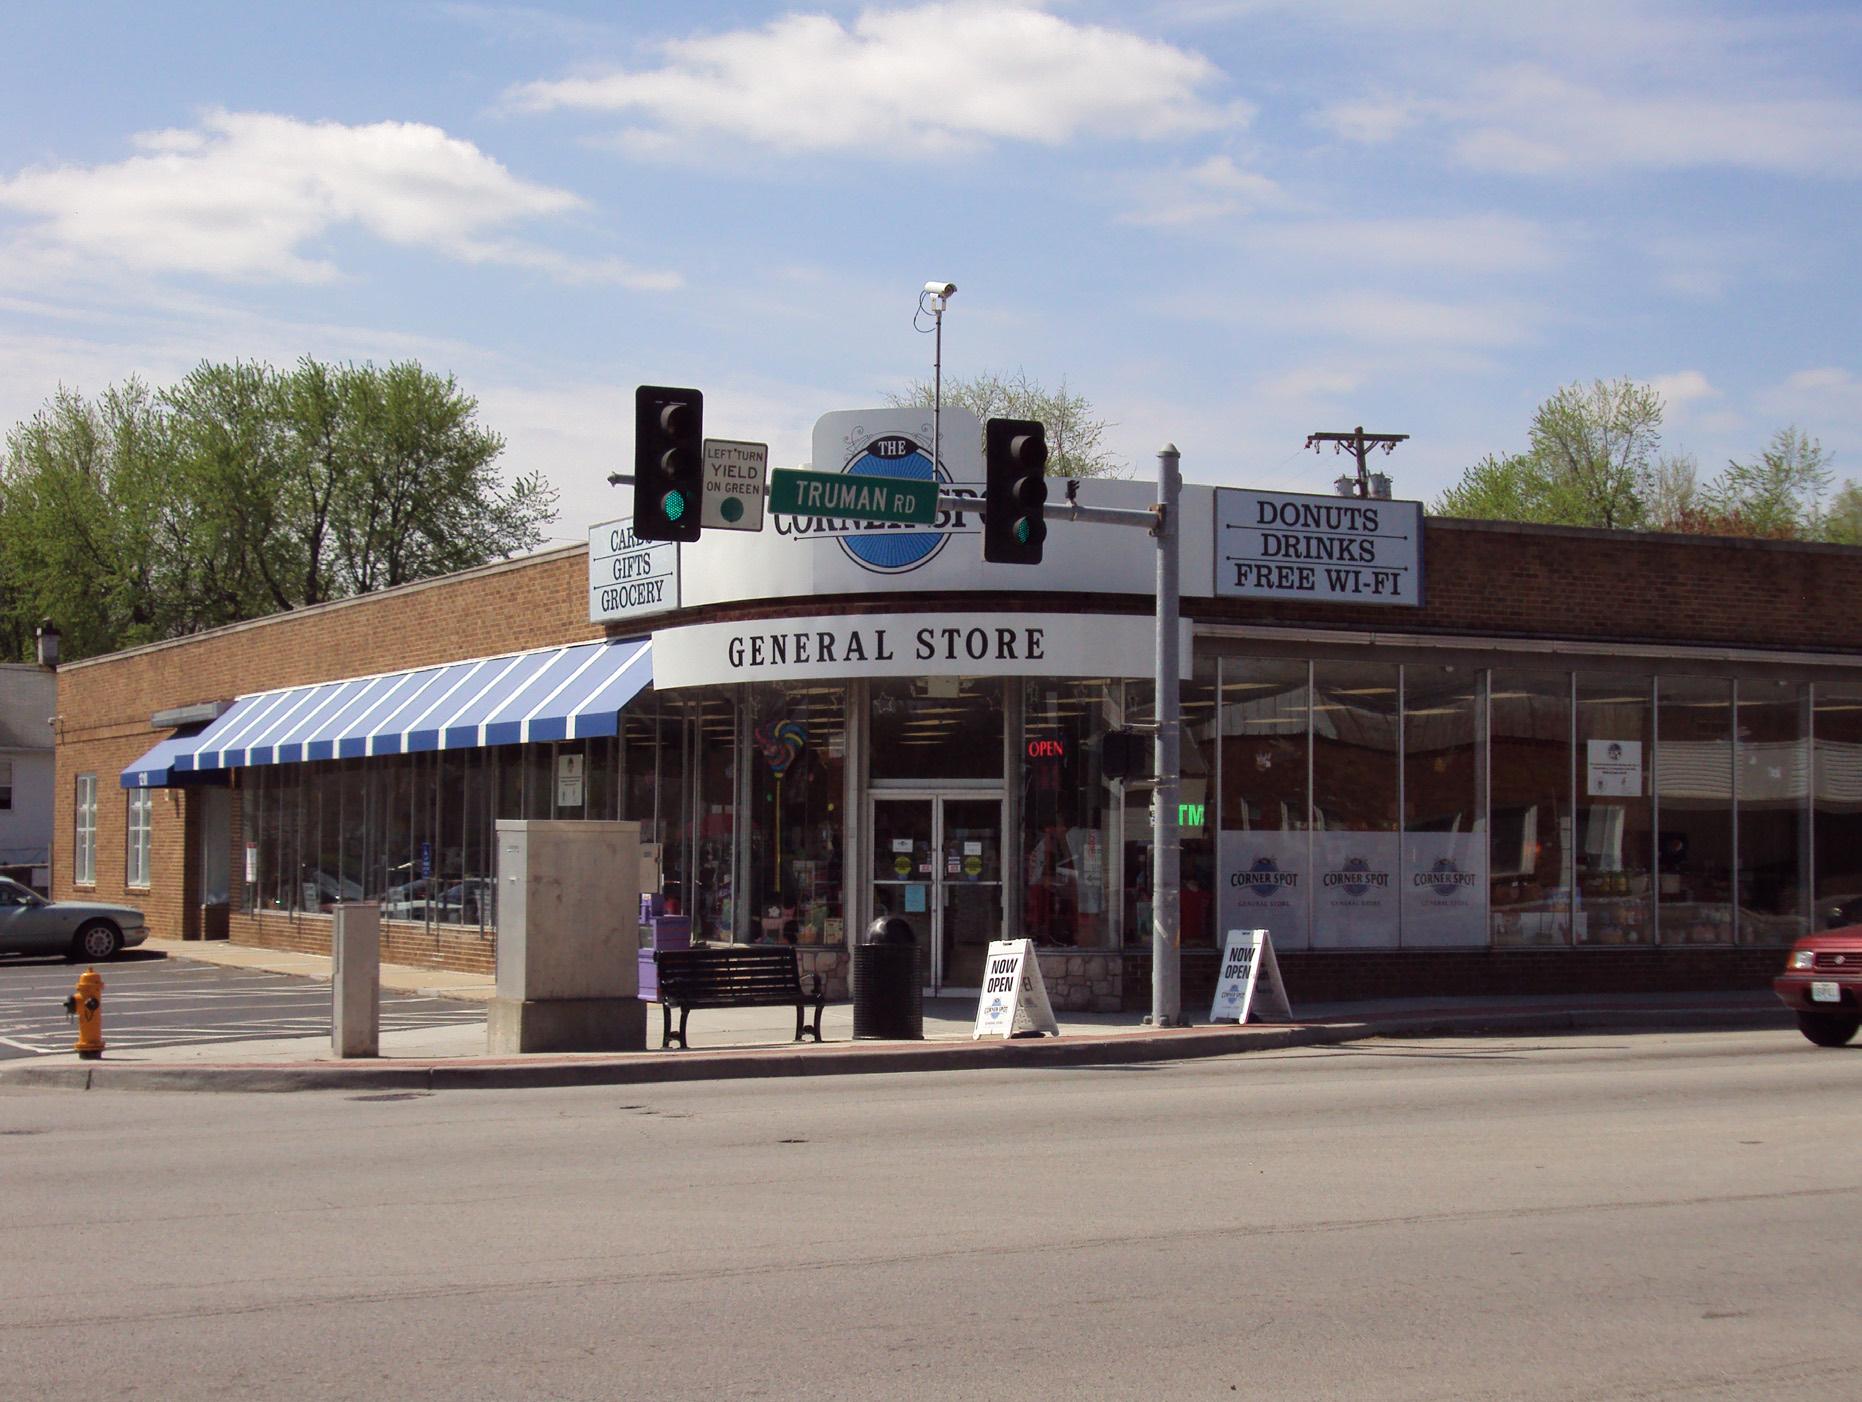
Typically 1 story
Simple brick detailing at parapets and cornices
Commonly with signage on a horizontal band, projecting signage from brackets or storefront windows
Upper transom windows common
Large storefront and display windows with glass transom windows and entry

Typically masonry construction with pilasters
Fabric awnings common
One-Part Commercial Block buildings were often constructed to simply meet the needs of a single business or user. They were modest structures with simple brick detailing at parapets and cornices. The main defining characteristic for this building type is a large storefront system set between masonry pilasters which can be clad in stone, terra cotta, pigmented structural glass, metal or wood. Sometimes the main entry has additional decoration such as tile, and leaded or colored glass transom windows. It is common for these structures to have flat roofs and fabric awnings to shade the large storefront windows. This is a very prevalent style throughout the downtown area and is therefore an important element in the context and history of Independence.


Decorative brick detailing and cornices
Typically between 2 and 4 stories with a flat roof
Tall narrow double-hung windows with stone sills
Projecting brick pilasters

Distinct horizontal separation between first (public) and upper floors (private)
Commonly with signage on a horizontal band, projecting signage from brackets or storefront windows
Glass transom windows above storefront and entry
Two-Part Commercial Block buildings are the most common type of buildings for small to moderate sized commercial and institutional buildings throughout the United States. The main defining characteristic is the horizontal separation between floors and is typically two to four stories in height. The first floor was typically utilized as a business or public space and the upper floors were more private spaces such as offices, residences or meeting halls. Ornamentation varies by building with some Two-Part Commercial buildings and can be clad in stone, terra cotta, pigmented structural glass, cast iron, metal or wood. It is common for these structures to have flat roofs, fabric awnings, and multiple signage locations. This style is also very prevalent throughout downtown Independence and is important to the history and context of Independence.


Typically 1 to 2 stories in height, sometimes multiple
Typically seen with flat roofs with metal coping
Horizontal orientation with horizontal features
Commonly found with subdued exterior color schemes (light earth tones) with contrasting detail colors, chrome or silver hardware common
Glass block, rounded edges, corner windows, rounded horizontal grooves on exterior wall surfaces, and horizontal projecting canopy at main entry
Moderne Style (also referred to as Streamline Moderne Style) evolved from the Art Deco movement of the 1920s and 1930s. The character-defining features of this style are curved building corners, curved entrances, and emphasis on long horizontal lines. Unlike the Art Deco style preceding it, Moderne emphasizes form and has simple ornamentation. Materials common to the style are brick, cast concrete, glass block, glass, and stucco. Large metal storefronts and windows, and projecting canopies are typical for this style. This style was very popular and was highlighted during the 1939 New York World’s Fair. Moderne style embodied the optimism and prosperity of the American middle class. Its popularity was so widespread that the style was applied to everything from buildings and automobiles, to toasters and radios.
Prominent towers common with either a steeply pitched roof or castellated parapet
Steep gabled roof
Brick, stone and wood wall cladding common
Large round rose window with decorative tracery (common on churches)
Typically with pointed arched windows and door openings


The Gothic Revival style can be applied for both residential, commercial and institutional architecture. This style was popularized in America by the first house plan book published in the country by Alexander Jackson Davis in 1832, and is based on the Gothic movement of the Medieval era. In the 1870’s, the writings of John Ruskin popularized the use of the Gothic Revival Style for public and religious buildings. There are a number of sub-movements and styles such as English Gothic, French Gothic, and vernacular adaptations such as Carpenter Gothic (the majority of which are small churches in North America). Typical Gothic elements include steep gables, arched (often pointed) windows and doors, large center (round or arched) window with decorative tracery, and towers with steeply pitched roofs or castellated parapet walls. This style is found throughout Independence.



In this chapter you will find:
Getting Started
Contributing vs. Non-contributing Properties
Certificate of Appropriateness (COA)


•
The Application Process
• Administrative Review


The COA Review Process


• Heritage Commission Review
•


• Decisions by the Heritage Commission & Appeals
Certificate of Economic Hardship
Routine Maintenance and Painting


COA Approval Matrix APPLICATION

Step #1 - Determine if the project needs to be reviewed administratively or by the Heritage Commission. Refer to the COA Matrix (located at the end of this chapter) for more details or contact the City’s Preservation Division at (816) 325-7419.
Step #2 - Is the property contributing or non-contributing to a district? (Refer to the definition included in this chapter.) If the property is individually listed and outside of a district, proceed to Step #3.
Step #3 - How involved is the project? Will construction documents be needed (such as with an addition) or a simple specification (such as installation of a new door)? If there are any questions about what type of documentation you need, contact the City’s Preservation Division for an informal, pre-application meeting.
Step #4 - Submit a completed COA application. Staff will contact you if more information is needed. If the project can be administratively reviewed, City staff will mail an approval letter to you. If the project requires Heritage Commission approval, a copy of the meeting agenda and staff report will be forwarded to you.
The following is a suggested checklist when preparing a COA application: A pre-application meeting with staff is recommended, though not required).

ü A completed COA Application with property owner’s signature
ü Photographs of the property with proposed improvement location marked
ü Material specifications
ü Material samples
ü Construction documents and architectural drawings (new construction only)
ü Engineering report and cost estimates (demolition only)
ü Rehabilitation cost estimates (demolition only)
ü Cost estimates for required materials vs. proposed materials (economic hardship application only)
All properties within historic districts are classified as either “contributing” or “non-contributing” to a district. If a property is individually listed and located outside of a district this classification does not apply.
A contributing property is defined as a building (house) or structure (garage, barn, etc.) that adds to the historic significance of a district through its location, design, setting, materials, workmanship, feeling, and association. A contributing property is one that still reflects much of its historic appearance.
Non-contributing properties are defined as a building or structure that lacks historic significance due to its young age (typically less than 50 years old) or shows significant loss of its original design, architectural features, or is physically deteriorated to the point that it is not feasible to rehabilitate the property to its historic appearance.
The City of Independence Preservation Division determines if a property is contributing or non-contributing to a district. Properties that are classified as historic and contributing to a district are typically reviewed more stringently than those that are non-contributing as any exterior improvement could potentially impact the overall historic appearance of the building and the district. As a result, it is always recommended to consult with the City’s Preservation Staff prior to beginning the application process. To determine if a property is “contributing” or “non-contributing,” call the Preservation Division at (816) 325-7419.
A Certificate of Appropriateness is not actually a physical certificate but an application submitted for approval to the Preservation Division and Heritage Commission that authorizes the alteration, construction, removal, or demolition of a locally designated historic landmark, or property within a historic or conservation district. Any project that involves exterior alterations, that can be seen from a public rightof-way, must be reviewed by the Heritage Commission prior to the issuance of a building permit. Approval by the Heritage Commission is also needed for designations, signage, and re-zoning of all historically designated properties. Minor repairs or alterations using the same materials may be reviewed administratively by the City’s Preservation Division. See the COA Matrix at the end of this chapter for more detailed information on the review requirements.

All exterior alterations, visible from either a public street and/or an alley, to locally designated historic properties require review by either City staff or the Independence Heritage Commission prior to beginning work. Preservation Division staff and the Heritage Commission base their design review decisions on the same set of principles for all properties in local historic districts, conservation districts, and for all local historic landmarks (individually listed properties), though buildings that possess a greater degree of architectural integrity, craftsmanship, and historic significance may have standards more strictly applied than those with lesser significance.* These standards are applied for all alterations, new construction, demolition, or repairs affecting the exterior appearance of the property.
*Refer to Chapter 4 for information about the Local Historic Landmarks and Districts. There are no conservation districts in Independence at this time, but can be implemented by the city at a later date. To find out information about their purpose and how they are organized, please refer to City of Independence Unified Development Ordinance.
NOTE: It is important to remember that any exterior changes to your property (alterations, changes to building materials, new construction, demolition, site improvements, etc.) are subject to review by the Heritage Commission before the project begins, regardless of whether or not a building permit is required.


Projects requiring a Certificate of Appropriateness (COA) application are scheduled for review by the Heritage Commission at a monthly meeting held on the first Tuesday of each month at 6:00 p.m. in City Hall. Projects that require administrative review will be approved or denied within seven (7) business days of submittal.
The same COA application is used for either administrative review by the Preservation Division staff or Heritage Commission review. There is no fee for COA applications reviewed by staff, however, a minimal fee is required for all COA applications reviewed by the Heritage Commission. COA applications are available in the Community Development Department, located on the second floor of City Hall and on-line at: http://www.indepmo.org/comdev/HP_Applications.aspx. Hard copies can also be requested by calling the Preservation Division at (816) 325-7419.
In order to be placed on the agenda, a complete application must be submitted, including a project description and all supporting documentation. This may include, but is not limited to: photographs, specification sheets, materials samples, a site plan, and/or architectural drawings. A pre-application meeting with City staff is highly recommended prior to the application submittal. Once submitted, the Preservation Manager will determine whether all of the documentation needed to clearly understand the proposal has been submitted. COA applications must be submitted in advance of the Heritage Commission meeting in order to comply with the 15 day public notification mandated by City Code. For an updated list of application deadlines, go to: http://www.indepmo. org/comdev/HP_Applications.aspx.
Upon receipt of a completed COA application, Preservation Division staff will prepare a staff report and recommendation based upon the proposal and the review criterion established by the Unified Development Ordinance. The application and staff report will then be presented to the Heritage Commission at their monthly meeting.
Administrative review is required of smaller projects that could impact the appearance of historic resources. These improvements/ alterations may include:
• Construction of a deck
• Installation of decorative shutters
• Installation of doors that are not visible from the street
• Installation of fences or gates using traditional, historic materials
• Installation of a pool
• Roof replacement with the same materials
• Screening-in of existing porches
• Replacement of sidewalks and stairs with the same materials
The following are some examples of major exterior projects that require a Certificate of Appropriateness from the Heritage Commission:
• Re-location or demolition of any building
• Additions to existing buildings
• New construction including detached garages, sheds, barns, etc.
• Site improvements such as new sidewalks, driveways, and retaining walls, where no such amenity was previously located
• Fully enclosing, adding, or removing porches
• Installation/removal of siding
• Changes in exterior building materials (i.e. roofing, siding, window trim)
• Installation of dormers
• Removal of mature trees
• Installation of new/replacement windows, doors, or storm windows
The Heritage Commission can either approve, approve with conditions, continue a review request, or deny a COA request. If approved, building permits, on hold due to the required Commission review, will be approved by City staff and a letter stating the approval will be mailed to the property owner for their records within seven (7) calendar days.
If continued to a different meeting date, the Heritage Commission will request additional information from the property owner and set a new meeting date to discuss this new information.
If a COA is denied, a letter stating the reasons for the denial will be mailed to the property owner within seven (7) calendar days of the Heritage Commission meeting. This letter will state the reasons for denial, including recommendations for possible changes which would cause the Heritage Commission to re-consider its finding. A re-hearing of the application can be granted if new evidence is submitted within 30 days of receipt of the letter.
A Certificate of Appropriateness approved administratively or by the Heritage Commission will become void unless work commences within six (6) months of the date of issuance and is completed within 18 months, unless a request for an extension has been approved by the Heritage Commission.
Applicants who have been denied a Certificate of Appropriateness may appeal the decision to the City Council. Appeals must be filed within 15 days from the date of denial by the Heritage Commission. The City Council will act within 30 days after receiving the appeal by holding a new evidence hearing. The City Council may approve or disapprove the decision of the Heritage Commission. (Refer to the City of Independence Unified Development Ordinance for more information about this process).
A Certificate of Appropriateness for Economic Hardship is an application reviewed by the Heritage Commission based on the financial burden placed on the property owner to replace historic materials in-kind or to retain a building outright when requesting demolition. In making a determination of economic hardship, the Heritage Commission will consider any evidence showing that the owner failed to maintain or protect the property, or performed or permitted any acts to harm the property. This evidence may be used as a basis to deny the application.
Requests for a Certificate of Economic Hardship are made by filing an application with the Independence Heritage Commission. Using the same basic application and review process as a COA, the Heritage Commission will make a determination either supporting or denying the claim of economic hardship based on criterion established under the Unified Development Ordinance. Along with the application form, the owner is asked to submit additional documentation to justify a hardship claim, such as: cost estimates, structural evaluations, market value, and real estate tax figures. Based on the information provided with the application, the Heritage Commission will either approve or deny the request for the Certificate of Economic Hardship.
Approval of a Certificate of Economic Hardship does not supercede compliance with the requirements of other City ordinances and regulations, and does not guarantee the issuance of building permits. If new evidence is provided, that was not available at the time the application was reviewed, a request for re-hearing may be submitted to the Heritage Commission within 30 days from the date of notification of the Commission’s original determination.
Applicants who have been denied a Certificate of Economic Hardship may appeal the decision to the City Council. Appeals must be filed within 15 days from the date of denial by the Heritage Commission. The City Council will act within 30 days after receiving the appeal by holding a new evidence hearing. The City Council may approve or disapprove the decision of the Heritage Commission.
Many improvements that are considered reversible and would not negatively impact the look of the building, require no approval at all. For instance, painting and in-kind repair (repair using the same materials and the same details and finishes) do not require a Certificate of Appropriateness. Examples of work that do not require approval are:
• Driveway repairs
• Exterior or interior painting (same or different color)
• Foundation repairs
• Roof repairs
• Installation of the same type of lighting or repair of that exterior lighting

• Window repairs
• Re-pointing masonry walls
• In-kind repair of siding (wood repaired with wood)
Please refer to the City’s COA Matrix on the next several pages for more specific details on what type of improvement requires COA approval.
Repairs are defined as minimal replacement of original architectural feature in order to stabilize the materials. Examples include fixing cracks in concrete, replacing a portion of rotted wood on a soffit, addressing a broken window sash with wood putty or consolidator.
In-kind replacement is defined as any changing out of similar materials that consist of less than 50% of the overall architectural feature. New
consists of the replacement of 50% or more or the original archirtectural feature of the creation of a new feature.
In this chapter you will find:
The Secretary of the Interior’s Standards for Rehabilitation
General Maintenance
Architectural Materials
Architectural Features
•
Roofs
• Storefronts
Gutters and Downspouts
•
•
Doors
•
Windows
•
Awnings
•
• Concrete
Architectural Metals
•
•
Porches, Decks, & Balconies
Signage and Historic Markers
Masonry
• Siding and Trim
•
• Stucco
• Lighting
Mechanical Equipment
•
Sitework

•
Accessibility

•
Retaining Walls
•
Fences and Railings
The following guidelines are intended to help property owners choose appropriate rehabilitation treatments for individual elements of their historic building. They are not meant to prescribe the exact action for every situation, but to suggest appropriate approaches that will prevent damage to the historic fabric of the building. As a general rule, preservation standards encourage maintenance of existing historic fabric as the priority, repair when possible, and replacement only as a last resort. However, with any project there will be other factors that play a role in the selection of treatment methods including budget, planned use, access to trades people, owner’s preference, and family priorities. These guidelines allow for the flexibility of a range of treatments that are appropriate.
In an effort to assist property owners in making sound historic preservation decisions that also meet their needs, the Secretary of the Interior and the National Park Service have developed a set of standards, or general principles, addressing each of the treatment approaches used for historic properties. There are four distinct, but interrelated approaches, for the treatment of historic properties and they are defined as follows:
Preservation is the act of sustaining the changes to the property that have occurred over time and have become historic in their own right due to age and integrity. For example, the approach taken at the Harry S. Truman National Historic Site allows for the retention of changes to the building from its original construction date through the end of Truman’s lifetime.
Restoration is the accurate depiction of the features and character of a property as it appeared at a particular period of time by means of the removal of features from other periods in its history and reconstruction of features missing from the restoration period. For example, the approach taken at the Vaile Mansion allows only for the retention of features that were seen on the building when it was constructed in 1881.
Reconstruction is the depiction, through new construction, of the form, features, and detailing of a non-surviving site, landscape, building, structure, or object in a specific period of time and in its historic location. For example, if a historic building burned to the ground by fire, the decision to re-build the building as it previously appeared would be considered reconstruction.
Rehabilitation is the re-use of a building through repair, alterations, and additions while preserving features that reflect its historical, cultural, or architectural merits. For example, a property owner purchases a historic church and re-uses the building for a future office. Any of the work required to change the use while maintaining the overall architectural character would be defined as rehabilitation.
The Design Guidelines for historic properties in Independence are based on the Secretary of the Interior’s Standards for Rehabilitation. These principles are applied by Preservation Staff and the Independence Heritage Commission to all projects that require a Certificate of Appropriateness. Additionally, owners that wish to have projects certified for Federal or State historic rehabilitation tax incentives must comply with the Secretary’s Standards to qualify. The Standards for Rehabilitation are defined as follows:
1. A property shall be used for its historic purpose or be placed in a new use that requires minimal change to the defining characteristics of the building and its site and environment.
be avoided.
Example: The historic Kritser House (115 East Walnut Street, 2010), once used as a residence, was converted to an office building. A small addition was placed on the rear of the building to accommodate additional office space. The addition placement is appropriate because the original building footprint, brick exterior, gingerbread detailing, and overall appearance from the street is unchanged.


Example: This Queen Anne home is an individually listed local Historic Landmark (409 North Pleasant, 2010). It has numerous architectural elements that make it unique. Alterations such as enclosing the front porch, removing the decorative shingles on the gable end, or covering over the wood clapboard siding would irreversibly change the character and historic appearance of the house.

2. The historic character of a property shall be retained and preserved. The removal of historic materials or alteration of features and spaces that characterize a property shallView from the right-of-way, addition cannot be seen View from private parking lot at rear
3. Each property shall be recognized as a physical record of its time, place, and use. Changes that create a false sense of historical development, such as adding conjectural features or architectural elements from other buildings, shall not be undertaken.
Example: Adding a wrap-around porch to this historic house (410 W. Farmer, 2010) would be inappropriate as there is no documentation to show that the house ever had a wrap-around porch and would be inconsistent with the building’s architectural style. Constructing a porch, even with the same bracket detail and brick on the house, would create a design that was never there, and thus create a false sense of history.
4. Most properties change over time; those changes that have acquired historic significance in their own right shall be retained and preserved.
Example: The Bullene Choplin House, (702 North Delaware, 2010) was constructed in three phases in 1860, 1890, and finally 1920. Since each alteration is over 50 years old and all tell the story of the evolution of the property, each change is considered historic and should be protected and preserved.
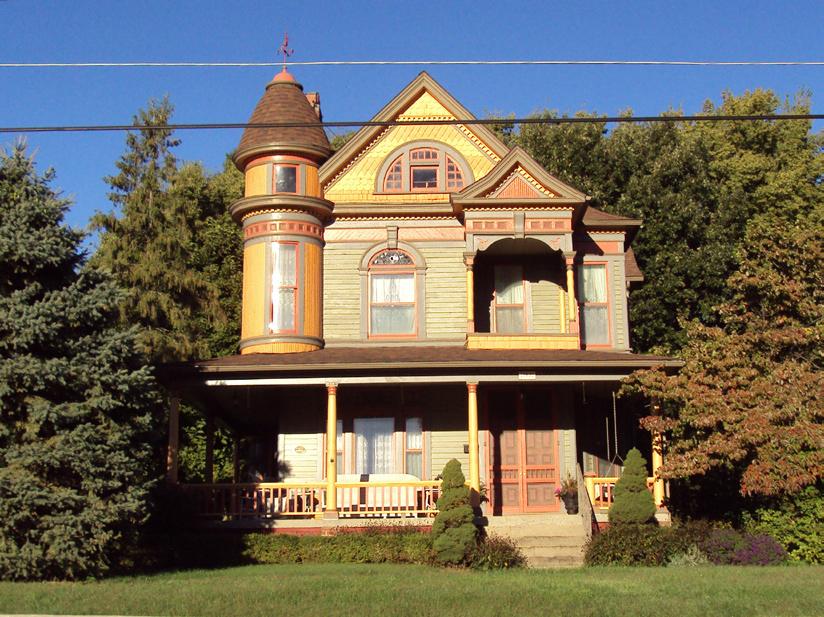
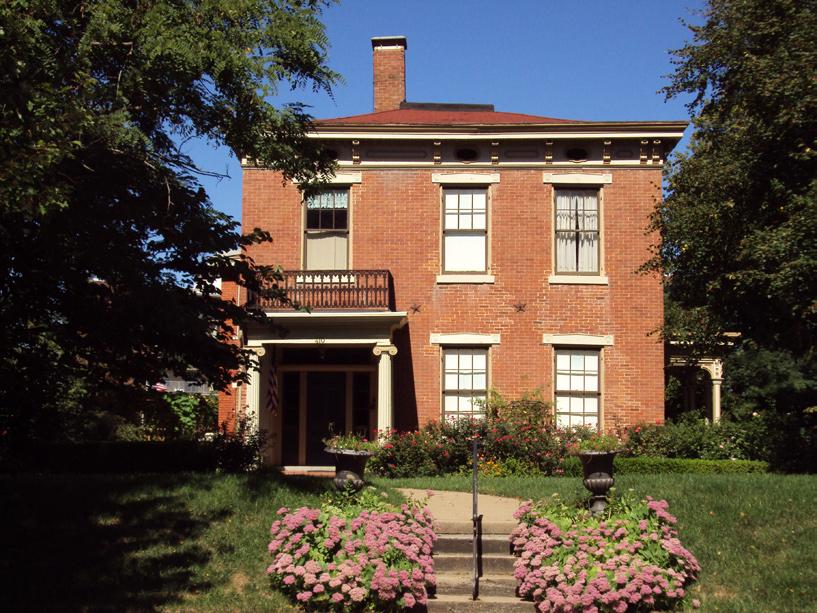
5. Distinctive features, finishes, and construction techniques or examples of craftsmanship that characterize a property shall be preserved.

6. Deteriorated historic features shall be repaired rather than replaced. Where the severity of deterioration requires replacement of a distinctive feature, the new feature shall match the old in design, color, texture, and other visual qualities and, where possible, materials. Replacement of missing features shall be substantiated by documentary, physical, or pictorial evidence.
**Note: While colors may be a consideration when replacing metals such as copper flashing or roofing materials, paint colors for architectural features are never regulated in Independence. Although, the property owner’s sensitivity to painting within a historically appropriate color palette will maintain the historic integrity of the property and neighborhood.
Example: The Vaile Mansion, (1500 North Liberty, 2010) is famous for its Second Empire Architectural Style and ornate details. Removal of one or all of these unique features such as the tower, slate roof, decorative brackets, or porch details, that define the style and craftsmanship of the mansion, should never be undertaken. Refer to the glossary for a definition of Second Empire architectural style. This style is rare in Independence.
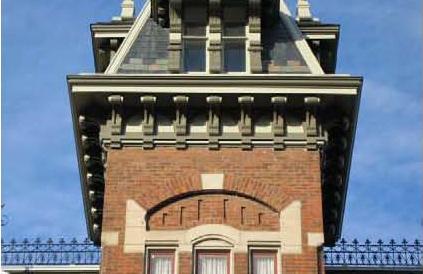

Example: This house on North Spring Street (2010), has many architectural features in repairable condition. However, if there are elements, such as the decorative wood trim and clapboard siding, that are deteriorated beyond saving, reproductions of the wood trim and clapboards should be made to match the original as closely as possible. The reproduction pieces should be made of the same material as the original (if possible), match all dimensions of the original (including thickness, reveal, and tapered edges), and should be placed back in their original location/configuration.

7. Chemical or physical treatments, such as sandblasting, that cause damage to historic materials shall not be used. The surface cleaning of structures, if appropriate, shall be undertaken using the gentlest means possible.

Example: A property owner wishes to remove graffiti from a historic stone foundation. The owner hires an architect with a specialty in historic properties and recommends beginning with the gentlest means possible, low to medium pressure washing the area. If this is not sufficient to remove the stain, a non-corrosive light chemical wash could be used. More aggressive methods should be reserved for last. All cleaning methods should be tested in an inconspicuous area to make sure the process does not damage the building. If the method should start to damage the area, the test should be discontinued and the cleaning halted until a safer alternative is found.
8. Significant archeological resources affected by a project shall be protected and preserved. If such resources must be disturbed, mitigation measures shall be undertaken.

Example: A property owner is burying power lines at their home when they come across what appear to be pottery chards and bone fragments in the new ditch. The property owner should halt the work and contact local law enforcement. Secondly, the owner should contact the Department of Natural Resources and the Missouri State Historic Preservation Office for additional information on how to proceed. The City of Independence reviews archeology if the project requires Section 106 review, has federal funding, or if human remains are found. The city consults with the Missouri State Historic Preservation Office on matters involving these instances.


9. New additions, exterior alterations, or related new construction shall not destroy historic materials that characterize the property. The new work shall be differentiated from the old and shall be compatible with the massing, size, scale, and architectural features to protect the historic integrity of the property and its environment.
Example: Above are photographs of inappropriate changes to the exteriors of these houses which have irreversibly altered their original designs. Inappropriate materials were used to enclose an open front porch, which should be avoided. Windows were added which do not visually resemble the rest of the home, and a large front addition was added, made from an incompatible material. Additions should never overpower the front facade of a building, and cladding should be sensitive to the original materials (brick, wood, stone, etc.).
10. New additions and adjacent or related new construction shall be undertaken in such a manner that if removed in the future, the essential form and integrity of the historic property and its environment would be unimpaired.
Example: This new open porch addition (403 North Delaware, 2010) on the back of this historic house could be removed in the future without damaging the original design of the building (original building footprint, traditional wood clapboard siding, or orientation to the street).
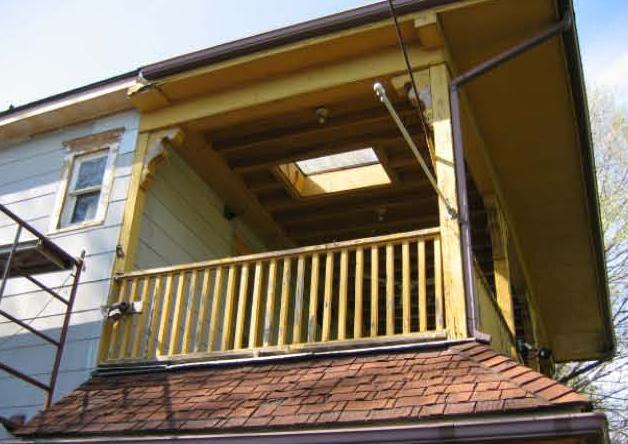


Regular maintenance is critical for the upkeep of every building, regardless of age. However, it is especially critical to develop a regular maintenance plan for a historic building. Bi-annual inspections of the exterior and interior should focus on the building envelope and its components. This includes the roof, siding and outer walls, foundation, and window and door openings. Inspections should be completed after winter’s freeze thaw cycles are done and after summer’s heat, humidity, and rain.
While even the most experienced of property owners cannot be expected to know all of the intricacies of building construction, it is vital for owners of historic property to understand the nature of weathering. Locations where water can enter the building is of particular concern. Property owners should note all locations where wood rot, water, and air infiltration is evident and address those areas immediately. Almost all deterioration is the result of the damaging effects of moisture. In fact, the most visible damage to wooden elements, referred to as “dry rot”, is caused by wet conditions.
In order for a house or building to be comfortable for its inhabitants it must remain weathertight. Every structure needs upkeep in order to maintain: a strong foundation to support the weight of the building, structural walls to support the roof and to protect the interior from wind and rain, windows that permit light in while keeping the elements out, doors that allow access but that can be closed tight when necessary, a roof designed to shed rain water and snow, and gutters and downspouts to carry the runoff away from the building.
When a regular plan is adopted by the property owner and basic maintenance is kept up, the owner will find that years can be added to the life of the building. Refer to the sections on architectural features and sitework found within this chapter for additional information.

The following notes on basic maintenance offer important advice on keeping your historic building weathertight:
Roofs and Flashing
• Roofs are the first line of defense against damage to building fabric from water infiltration. Any location where two rooflines intersect, and where the roof meets a chimney or dormer should be inspected on a regular basis. Check the condition of roofing material and flashing, including sealants on stepped flashing. This should be done in the spring after the freeze thaw cycles of winter, and in the fall after summer heat and storms.
• Keep metal roofs painted with proper paint. Do not use asphalt patch or asphalt-based paint on metal roofs.
• Gutters and downspouts should be checked once every season to see that they are clean and free of debris. Be sure to check for deterioration of the covering, mechanical attachments, and flashing. Make sure that the correct type of fastener is used with metal flashing or roofing to prevent galvanic reaction which accelerates corrosion.
Foundations
• Foundations should be checked annually for signs of cracking, water penetration, or mortar damage. Make sure that all water is draining away from the building. Keep all vegetation far enough away from the foundation (at least 24”) to prevent damage from moisture or from the roots. Make repairs in accordance with guidelines for masonry repair.
Windows and Doors
• Windows and doors should be inspected seasonally. Any cracked or broken glass should be repaired. Check for missing or cracked glazing compound as well, and repair if needed. Glass should be cleaned on a regular basis. Inspect painted surfaces of sash, sills, frame, and lintels for signs of paint problems. Sand, prime and touch up areas once a year. Check the condition of weather-stripping and replace if needed.
• Trim around doors and windows should be sound when inspected. If gaps are apparent, apply caulk to any gap less than 1/8” and
re-inspect seasonally. If a gap of more than 1/8” is present, insert foam backer rod into the gap and seal over the backer rod. This prevents both water and air from entering the house at those points. If trim shows signs of wood rot, repair or replace rotted wood immediately with in-kind materials (wood for wood).
• Brick and stone are enduring materials and are associated with buildings of a permanent nature. But masonry buildings require cyclical maintenance. The mortar used should be softer than the brick or stone used. Mortar is meant to take the brunt of damage from the elements before the brick or stone is damaged. Mortar should be inspected and repaired with material matching the original where it has cracked or washed out. Mortar testing is highly recommended.
• Never sandblast a masonry building. Abrasive cleaning of any kind damages and erodes the weathering surface of all masonry. Dirty masonry should be cleaned in the softest possible manner, starting with water and a soft bristle brush. When cleaning with a new chemical or treatment, find an inconspicuous location as a test location (on the back of a building is preferred). If there is no evidence of damage after a few days, proceed with the process.
• Masonry should always be able to breathe; allowing moisture to pass from the inside of the building to the outside. Sealants should only be considered on severely deteriorated brick or stone. Sealants should be breathable in order to ensure that moisture is not trapped on the inside of a building. Sealing of masonry walls may do more damage than good if moisture is trapped, accelerating damage. It is recommended that a property owner contact a qualified professional prior to the application of any sealants.
• All painted surfaces can be cleaned with appropriate chemical products but care must be taken in the selection and the use of chemicals. Always test any material prior to performing large-scale cleaning efforts. Some chemicals will require a neutralizing wash after their use. Avoid high-pressure scrubbing, even on wood surfaces.
• Keeping a good paint surface is necessary to prevent deterioration of wood. The surface must be clean and dry. All flaking or peeling paint must be removed. Tightly bonded paint can be left in place, and light sanding will help prepare for additional layers. With older buildings, an oil based primer is recommended. However, new latex paints have been much improved, so a good quality bonding primer can often be used successfully. Plastic coatings and elastomeric paints should be avoided as they do not allow the substrate to breathe. **Remember, if the building was built prior to 1973, the paint probably contains lead and must be properly handled in scraping, sanding, removal, and clean up. Refer to the National Park Service Preservation Brief No. 37: Appropriate Methods of Reducing LeadPaint Hazards in Historic Buildings and State and Federal regulations regarding the safe removal of lead paint.
The following is a good maintenance checklist:

ü Check roofing and flashing for areas where water may penetrate.
ü Check seals around windows and doors.
ü Look at all caulked areas and replace caulking if necessary.
ü Look for cracking and peeling paint and apply a fresh coat if needed.
ü Check all wood trim and siding. Repair rotted wood where evident.
ü Clean all gutter and downspouts of debris.
ü Inspect flashing around chimneys.
ü Clear foundation of any overgrown landscaping or groundcover. Be certain that all grading around the building slopes away from the building’s foundation to help keep it dry.
The Rehabilitation Guidelines are intended to help property owners choose appropriate rehabilitation treatments for the architectural materials and features of their historic building. Each section has photographs and illustrations to help demonstrate the individual materials/features and has accompanying text that describes recommended rehabilitation treatments. Rehabilitation treatment recommendations are based upon The Secretary of the Interior’s Standards for Rehabilitation and the National Park Service Preservation Briefs. When the Heritage Commission or the city’s Preservation Division review a potential rehabilitation or new construction project, they utilize the City of Independence, Missouri’s Unified Development Ordinance and the Design Guidelines to determine the appropriateness of the proposed project.
Example page of the information presented in each section:
Introduction to the section begins with a definition and overview of the material/feature
Architectural metals often make up much of the distinctive character of a building, its curb appeal, especially commercial buildings. Cast iron, tin, copper, and wrought iron were all used for structural columns, storefront windows, balconies, and decorative architectural details such as cornices and bulkheads. It is important to maintain these details, as they help define the style of a building while being the most vulnerable to weather and deferred maintenance. Architectural metal details should be kept painted and free from rust and corrosion. Roof damage can affect these elements, especially cornices, by allowing water to penetrate the joints, leading to rust and deterioration of the concealed interior surfaces like plaster. If metal features are damaged beyond repair, replace elements with new in-kind materials matching the original feature in size and detail.
Specific information about recommended rehabilitation treatments

Retain and maintain metal elements that contribute to the character of the building. Repair metal features when possible, or if the existing material is too deteriorated to repair, replace materials in-kind, which means that the replacement matches the original as closely as possible in all dimensions, texture, profiles and material. Do not remove original metal features from the building. Do not replace historic metal with new “updated” replacement materials. Do not replace a feature that can be repaired.
Make sure that water is not standing on or behind metal elements, causing them to rust or otherwise deteriorate. Sometimes moisture problems due to roof or gutter damage can also deteriorate metal and cause irreparable damage to these decorative elements.
References:
Preservation Brief 11: Rehabilitating Historic Storefronts
Preservation Brief 25: The Preservation of Historic Signs
Preservation Brief 27: The Maintenance and Repair of Architectural Cast Iron
Bulleted list of topics covered
Referenced National Park Service Preservation Briefs. These briefs can be found at: http://www. nps.gov/history/hps/tps/ briefs/presbhom.htm
Photographs or illustrations demonstrating the principles or recommendations for a material/feature
Preservation design guidelines are intended to help a property owner retain the charm and historic appearance of a historic building. As such, the addition of features that were never apparent on the building and the introduction of materials that do not complement the architectural style is not recommended. Exceptions are made on a case-by-case basis. The preference may be to install different materials on side or rear elevations, or on new construction and additions only.

The following is broken out into easy reference sections: “Repair/Restore,” “Replace,” etc.. Refer to each section below to learn more about what is and is not recommended on historic properties.

•
Architectural Metals
•
Concrete
Masonry •
Siding and Trim •
Stucco •
Architectural metals often make up much of the distinctive character of a building, its curb appeal, especially commercial buildings. Cast iron, tin, copper, and wrought iron were all used for structural columns, storefront windows, balconies, and decorative architectural details such as cornices and bulkheads. It is important to maintain these details, as they help define the style of a building while being the most vulnerable to weather and deferred maintenance. Architectural metal details should be kept painted and free from rust and corrosion. Roof damage can affect these elements, especially cornices, by allowing water to penetrate the joints, leading to rust and deterioration of the concealed interior surfaces like plaster. If metal features are damaged beyond repair, replace elements with new in-kind materials matching the original feature in size and detail.
Retain and maintain metal elements that contribute to the character of the building. Repair metal features when possible, or if the existing material is too deteriorated to repair, replace materials in-kind, which means that the replacement matches the original as closely as possible in all dimensions, texture, profiles and material. Do not remove original metal features from the building. Do not replace historic metal with new “updated” replacement materials. Do not replace a feature that can be repaired.
Make sure that water is not standing on or behind metal elements, causing them to rust or otherwise deteriorate. Sometimes moisture problems due to roof or gutter damage can also deteriorate metal and cause irreparable damage to these decorative elements.
• Repair / Restore
Retain Original Metal Features
• Paint / Maintenance
•
•
Avoid Creating a False Historical Sense
References:
Preservation Brief 11: Rehabilitating Historic Storefronts
Preservation Brief 25: The Preservation of Historic Signs
Preservation Brief 27: The Maintenance and Repair of Architectural Cast Iron

Properly prepare metals before painting. Avoid leaving metal details exposed if they were originally intended to be painted. Do not use cleaning agents that will harm the finish on the metal, whether it is a natural patina, paint, or sealant. It is typically not recommended to remove patina from metal, as it may be protecting the metal from weather damage.
Remove all corrosion and repair any damage prior to painting. Prime all surfaces with metal primer, if required, and follow paint manufacturer’s instructions. Oil-based paint is typically recommended for exterior applications.

Original architectural metal cornice. The original cornice and wood support structure behind were too deteriorated to effectively repair, Rockport, MO, 2009
•
Avoid creating a false historical sense by adding embellishment to a building when it had none before. Do not add features that are not appropriate for the style of the building or are incompatible in size, scale, material, and color.
Replicated architectural metal cornice. New metal cornice has new structural supports and matches in-kind (all dimensions, profiles, and is made from the same lead coated copper as the original), Rockport, MO, 2009
Concrete is often reinforced with metal rebar that corrodes over time due to water infiltration and the freeze/thaw cycle. Find the source of deterioration (typically rusted reinforcement bar) prior to patching concrete or replacing damaged components. Do not patch concrete without removing the source of deterioration.
•
Avoid using a patching material that does not match original concrete in consistency, texture, or color. Make sure new concrete will bond properly with existing concrete, matching the existing concrete detail in-kind. Preserve concrete features of a building, such as steps, walkways, hexagonal pavers, porches, foundations, chimneys, and details, whenever possible. When looking to replace your hexagonal paver sidewalk, contact the Community Development and Public Works departments prior to initiation of work.

•
Since water is often the source of concrete deterioration, a proper slope should also be used to encourage proper drainage. Always provide a proper slope for drainage so that water does not stand on concrete surfaces which can cause water penetration and cracking/damage, and drains away from concrete foundations.
•
Cleaning concrete is usually not necessary unless dirt, mildew, and debris are causing damage or is unsightly. Test an inconspicuous area to ensure that no permanent damage will be done. Pressure washing concrete with lowpressure (300-400 psi) using a wide fan tip will likely provide the desired results without damaging or permanently discoloring the concrete.
•
Deterioration and Correct the Problem
Preservation design guidelines are intended to help a property appearance of a historic building. As such, the addition of features building and the introduction of materials that do not complement recommended. Exceptions are made on a case‐by‐case basis. The materials on side or rear elevations or on new construction and additions
•
The following is broken out into easy reference sections: “Repair/Restore,” section below to learn more about what is and is not recommended
References:
CONCRETE
Preservation Brief 15:
Preservation of Historic Concrete
REPAIR
Concrete corrodes over freeze/thaw (typically rusted concrete patch concrete deterioration. Avoid original concrete Make existing concrete and further cracking or damage.
not to harm the brick pavers, North Delaware Street, 2010
Masonry is typically defined as a form of stone or brick. It can be used for exterior cladding, structural needs, or design elements. Brick and limestone were traditionally very common materials to use in Independence. Both can be seen on historic buildings, used as chimneys, retaining walls, porch railings and columns, and as decorative banding on commercial buildings.
Stylistic masonry work is a distinctive feature of the Truman, Benton, Procter, Englewood and Winner Neighborhoods that tells us much about the neighborhoods’ development as areas historically associated with the town’s most prominent citizens. Early works, including brick homes, stone retaining walls, and masonry steps and walkways, demonstrate the wealth enjoyed by property owners between 1850-1940. Every effort should be made to preserve their historic masonry features. In order to maintain these buildings for future generations, it is imperative that the correct materials and methods are utilized during rehabilitation. Equally important is to hire a mason that has an expertise with historic buildings and a knowledge of historic building techniques.
It is important to understand that mortar serves to take the impact of building movement, weather, and age from the masonry itself. As a result, it is critical to inspect mortar joints for cracking, missing, or deteriorated mortar on an annual basis to ensure the longevity of the stone and brick. Buildings constructed prior to about 1920 did not utilize portland cement as part of the mortar mix. If new mortar is harder than the brick or stone it is applied to, permanent damage could be done to the building. Be sure to consult with a mason who is familiar with traditional mortar mixes, and have a mortar test performed prior to the initiation of work.
• Mortar - Repointing
Repair and Replacement
• Cleaning
•
• Paint / Sealants
References:
Preservation Brief 1: Assessing Cleaning and Water-Repellent Treatments for Historic Masonry Buildings
Preservation Brief 2: Repointing Mortar Joints in Historic Masonry Buildings
Preservation Brief 6: Dangers of Abrasive Cleaning to Historic Buildings
Preservation Brief 7: The Preservation of Historic Glazed Architectural Terra-Cotta
Preservation Brief 38: Removing Graffiti from Historic Masonry
Preservation Brief 42: The Maintenance, Repair and Replacement of Historic Cast Stone
•
Replace only masonry that is deteriorated. Masonry should not be replaced or covered over simply to eliminate evidence of past cracks, repairs, or alterations. When masonry features are damaged, the preferred treatment is to patch them in place with appropriate materials. If the stone or brick is too damaged or is missing, replace them in-kind utilizing salvaged material to match existing historic masonry. Consider reversing a brick to expose its good surface before replacing it with a new brick. If salvaged material is not available, use in-kind masonry units matching: dimension, texture, features, color, and installation of the surrounding historic materials. If it is necessary to replace a large amount of a masonry feature, replacement materials may be used provided they have the same visual appearance as the historic material.
•
Repointing is the process of renewing mortar joints in order to restore masonry construction. Tuckpointing is the process of finishing off joints in newly laid masonry. This term, however, is often used interchangeably with repointing but is technically referring only to new masonry.
When repointing masonry construction, old mortar should be removed with a hammer and chisel, if possible, taking care not to damage the masonry edges. Power tools, if not properly handled, can permanently damage the mortar, stone, and/or brick, that can be very costly to repair.
Match original mortar (in color, texture, aggregate, joint profile, and proportion of portland cement to the other materials such as lime) as closely as possible. An appropriate mortar mixture will allow for a proper bond to be made to the brick or stone and ensure that water is kept out of exterior walls. Replacement

Incorrect
Mortar not cleaned out to a sufficient uniform depth.
Edges of brick have been damaged by tool or grinder, resulting in a wider joint that will be susceptible to water absorption and infiltration
Correct
Mortar cleaned out to a uniform depth of about 1” deep.
Edges of brick are undamaged which will help prevent further deterioration

Testing the Mortar to ensure the correct recipe is applied, is always recommended. Many older buildings have high lime content in their mortar. Standard portland cement should never be applied to a building constructed prior to 1920 without testing the mortar first. Excessively hard mortar can permanently damage the building.
mortar that does not match the original historic mortar will also be an obvious alteration to the building facade. New mortar should also match the physical properties of the original historic mortar for several structural reasons. If the new mortar is too hard or too soft, it will not adhere to the masonry units. Additionally, mortar that is too hard or too soft may expand and contract at a different rate than the surrounding historic masonry and cause the brick or stone to crack or spall.
Cleaning masonry is usually not necessary unless dirt, mildew, and debris are causing damage or is unsightly. In any case, the goal should not be to make the masonry look new. If necessary, clean masonry using the gentlest means possible, usually with water or other non-abrasive means. Prior to cleaning, select an inconspicuous area to test to ensure that no permanent damage will be done.
Cleaning test on limestone, with gentlest chemical cleaner available and low-pressure water rinsed. (Above and Below photographs: Kansas City, MO 2009)
After cleaning test on limestone, gentle cleaner successfully cleaned the stone, no abrasives or high-pressure was used

Recommended cleaning methods can include low-pressure water pressure washing and non-corrosive chemical washes. The pressure should be less than 300-400 psi to prevent damage to the masonry and mortar. Abrasive methods, including sandblasting or soda blasting, should not be used because they may destroy mortar and damage or remove the protective fire skin of the brick (which prevents water from penetrating the brick). Sandblasting or soda blasting can also leave permanent pock marks on the face of the brick and can unnecessarily force water into the walls of the building. Preventing water from entering walls will result in historic masonry that will last for generations. Once water penetrates an exterior masonry wall, it can cause irreversible damage to the interior of the building, as well as the masonry and/or mortar through spalling (loss of large chunks of the face of the brick or stone), cracking, and severe deterioration.

Painting masonry is never recommended. Most paints trap moisture in the masonry, which causes the paint to peel very quickly. Painting masonry also causes it to crack or spall due to the trapped moisture freezing and thawing each winter.
Sealants are never recommended unless the stone or brick is extremely soft and severely deteriorated. Non-permeable sealants prevent the natural flow of vapors, trapping them inside the masonry, which can crack or erode with freeze-thaw cycles. Additionally, sealing is not generally cost-effective unless water penetration is a serious problem.


Sealants should be used only as a last resort. Other drainage problem causes such as poor flashing, negative ground slope, and inadequate gutters should be explored first to determine if they are the cause of penetration. If recommended by a preservation professional, the sealant should be water permeable, allowing moisture to evaporate through, while maintaining the integrity of the stone or brick exterior.

It is not considered appropriate to apply siding to a building that was not originally sheathed in siding or to cover traditional wood or masonry with new, contemporary siding as it can significantly change the appearance of the facade of a historic building. Once siding is applied to the facade of a historic building, it is difficult to assess on-going maintenance and water infiltration issues related to the historic fabric behind the siding.


It is not appropriate to apply siding to a building that was not originally sheathed in siding. When possible, it is advisable to remove synthetic siding that has been applied to a building inappropriately. When removing siding from a building, first remove a test area in a discreet location. If removal of the siding is not causing harm to the original building, carefully remove the remainder of the siding, taking care not to damage the historic materials beneath. However, it should be noted that in some instances synthetic siding has achieved historic significance, and its removal should be reviewed by the Preservation Division or Heritage Commission. If you have questions about siding and synthetic siding installation or removal, contact the Preservation Division.
Trim refers to any ornamentation, embellishment, or individual finish pieces located around windows, doors, in gable ends, fascia, soffits, eaves, corner boards and porch details that enhance the appearance of a building’s façade. Trim can be as important to the architectural, character defining features as any other building element. Traditionally, trim was constructed of wood. Today, replacement trim can be fabricated from cementitious composites (Hardieboard), vinyl (such as Azek or Trex), and fiberglass. Care should be taken when choosing alternate materials to make sure they will weather well over time and will match the character of the materials in-kind. For example, some early composite materials would yellow and warp in the sun over time. Technologies have improved however, and most manufacturers can create products that will withstand exposure to the elements, that will match the historic materials in-kind, and most can be painted on site.
Many housing styles are defined by the use of decorative wood shingles, trim, and siding. Tudor Revival, Stick, Queen Anne, and Folk Victorian are just a few of the architectural styles that are defined by their intricate wood details. These character defining features should be maintained throughout the life of the building or property. Substitute synthetic sidings, such as aluminum and vinyl siding, can damage the integrity of a historic property and are therefore, not recommended. The color choices of synthetic siding are often limited and cannot be easily painted, which makes traditional multi-colored paint schemes difficult to achieve.
The Heritage Commission encourages the removal of synthetic siding from a building where possible to return the building to its traditional, historic appearance. When removing synthetic siding, first remove a test area in a discreet location. If removal of the siding is not damaging the traditional siding underneath, carefully remove the remaining siding, taking care not to damage the historic wood, stone, or brick beneath.
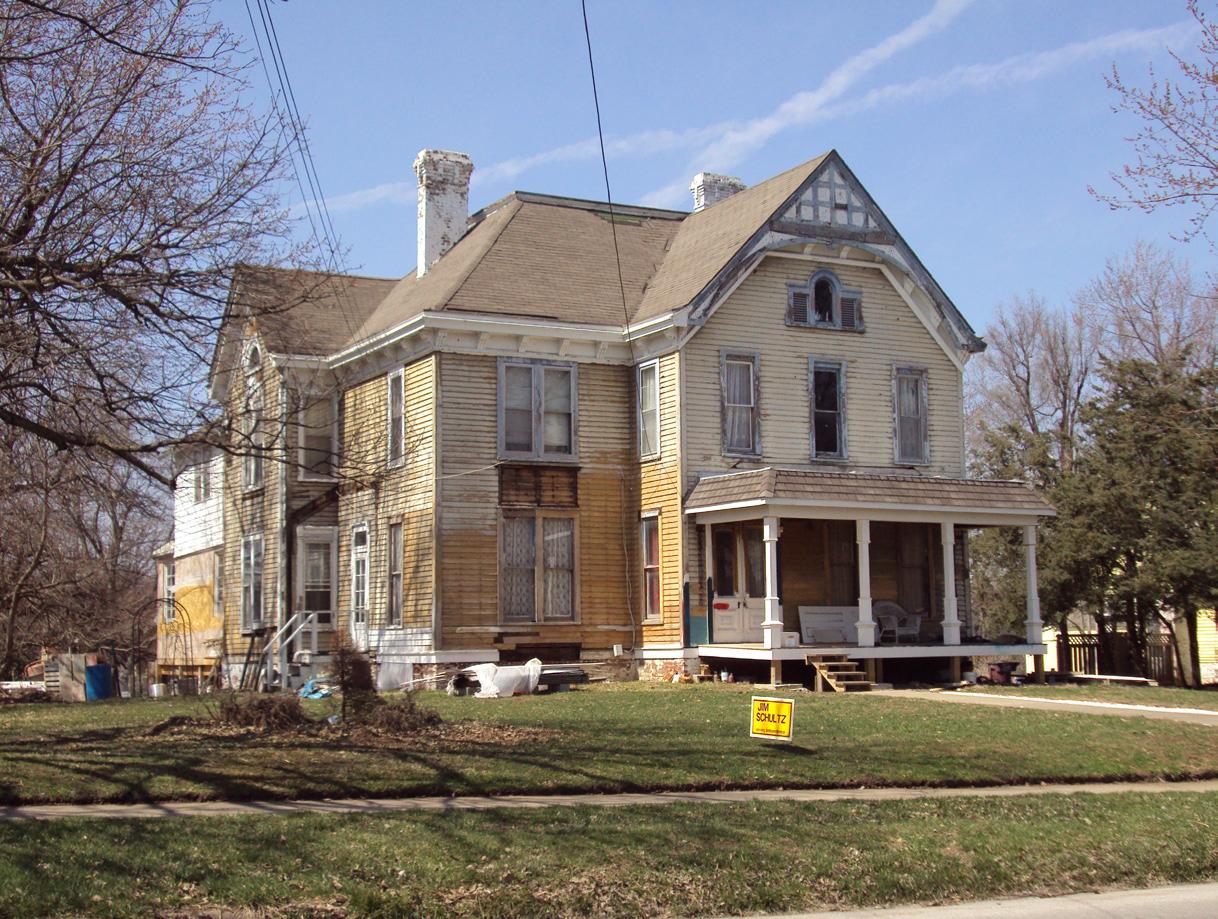
While synthetic siding and trim are alternatives to wood, they cannot typically achieve the same detail and dimensions offered by wood. The Heritage Commission will always consider a proposal to utilize synthetic siding or trim on a historic property or building; however, the Commission prefers the use of materials that match in-kind with the original when there is no original siding or trim present. Alternative materials will be considered for new additions and for new construction.
While building permits are not required for the installation of new siding or trim work, approval by the Heritage Commission must be given prior to their installation.

•
Repair with wood rather than with another material. Do not remove character defining elements from a house. Deteriorated siding or decorative elements should be patched, consolidated in place, replaced with in-kind materials, and painted or finished to match the original materials.
•
Replace only wood that is damaged beyond repair and cannot be stabilized with wood consolidants or epoxies. When replacing materials, match the overall dimension, thickness, profile, scale, and finish of the original material. Synthetics are not encouraged for repair where splicing is required.

Where there is evidence of missing decorative detailing, replacement elements should be reconstructed to match the original. Evidence of missing detail can often be found in old photographs, remnants left on the building, ghost lines or paint lines where parts were removed, nail holes, old notches, and cut-outs in the siding and trim. Observation of the details on another similar historic building should not be relied upon as conclusive evidence.
Use of synthetic materials, in lieu of wood, are acceptable when there is no original siding or trim present, on new additions and for new construction.
Fabrication of new trim work should be created only with photo documentation or where ghost lines (outlines of original trim and location) are present.
Removing elements that were added during a historic remodeling, in an attempt to make the building look older, is not recommended.
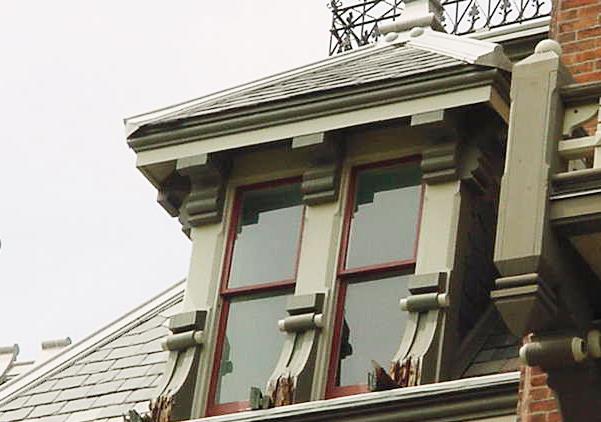
(For example: In the early twentieth century, it was a trend for Craftsman style porches to be used during the remodeling of a Victorian home. Where such porches exist, they should be maintained as part of the building’s historic fabric).

It is not appropriate to “dress up” a historic building by adding stylistic trim and ornamentation that would have never existed. Doing so will result in a false sense of the history and character of the building.
•
Remove existing inappropriate siding that covers original, historic materials. It is not always accurate to assume that historic siding will have to be replaced because it has been covered by insul-brick or asbestos cement shingles. In fact, where water has not been allowed to penetrate between layers, later coverings have usually served as protection for the original material.
Do not install aluminum, vinyl, or synthetic siding to cover original, historic siding or building elements. Over time, the appearance of many properties have been compromised by the addition of asbestos shingles, rolled asphalt, aluminum, or vinyl siding. Covering original siding almost always results in concealing historic character derived from materials, details, and texture and is not recommended.

Preparation of wood surfaces and proper priming will add longevity to paint applications. Utilize high quality exterior paint. Do not apply new paint to existing deteriorated paint that has cracked or has too many layers. Paint stripping should be done by the gentlest means possible and tested first in an inconspicuous area. Avoid high heat paint strippers as they may permanently damage the historic wood.
Although paint selection is not subject to review by the Heritage Commission, it is encouraged to choose a paint scheme appropriate for the time period in which the house was constructed and the architectural style.

New Siding / Trim & the COA Approval Process:

If a property owner wishes to install new siding or trim work using an alternative material to traditional wood siding, the following should be considered before requesting approval by the Heritage Commission:
1. Does the new siding match the original reveal (the space exposed on the front of each board)?
Does the new siding/trim match the original in profile (side view/thickness/taper)?
2. Does the texture match the original (for example: no faux wood graining on siding that was originally
3. smooth)?
4. sidewalks)?
Can the proposed location of the new siding/trim be seen from the public right-of-way (streets and
5. Has all the original siding/trim been previously removed?
Is the original siding/trim still on the building? If so, can it be repaired?
6. Can trim pieces (for example: cornerboards and window trim) be retained if new siding is installed?
7.
8.
9.
Will the existing trim appear to be the same (retain its dimensions) after new siding is applied?
Is there evidence (ghost lines) of what the original trim looked like and its location?
Stucco is a plaster-like mix applied to the exterior of a building. Traditionally it was utilized on Mediterranean-inspired, Art Deco and Moderne architectural building styles, and on both residential and commercial buildings in Independence. Stucco is an important feature of historic buildings and should therefore not be concealed with wood, masonry or synthetic siding. If stucco was added inappropriately and masks historic architectural features or was utilized to create architectural details that were not originally present, the Heritage Commission encourages (but never requires) the careful removal of the stucco in order to expose the historic facade.
Stucco was often applied to historic commercial buildings, either at the time of construction or in later years as a way to “modernize” the structure. If the stucco is important to the historic character of the building (as it is in many residential applications), it is important to maintain the material as one would any other exterior cladding.
Do not remove stucco from a building that was installed to mask damaged masonry, unless it is intended that the underlying masonry will be restored to its original appearance. Existing stucco areas with signs of deterioration should be patched to match original stucco as closely as possible in appearance and texture.
Repair
• Replacement
•
• Painting
•
Applying Stucco to an Existing
References:
Preservation Brief 22: The Preservation and Repair of Historic Stucco
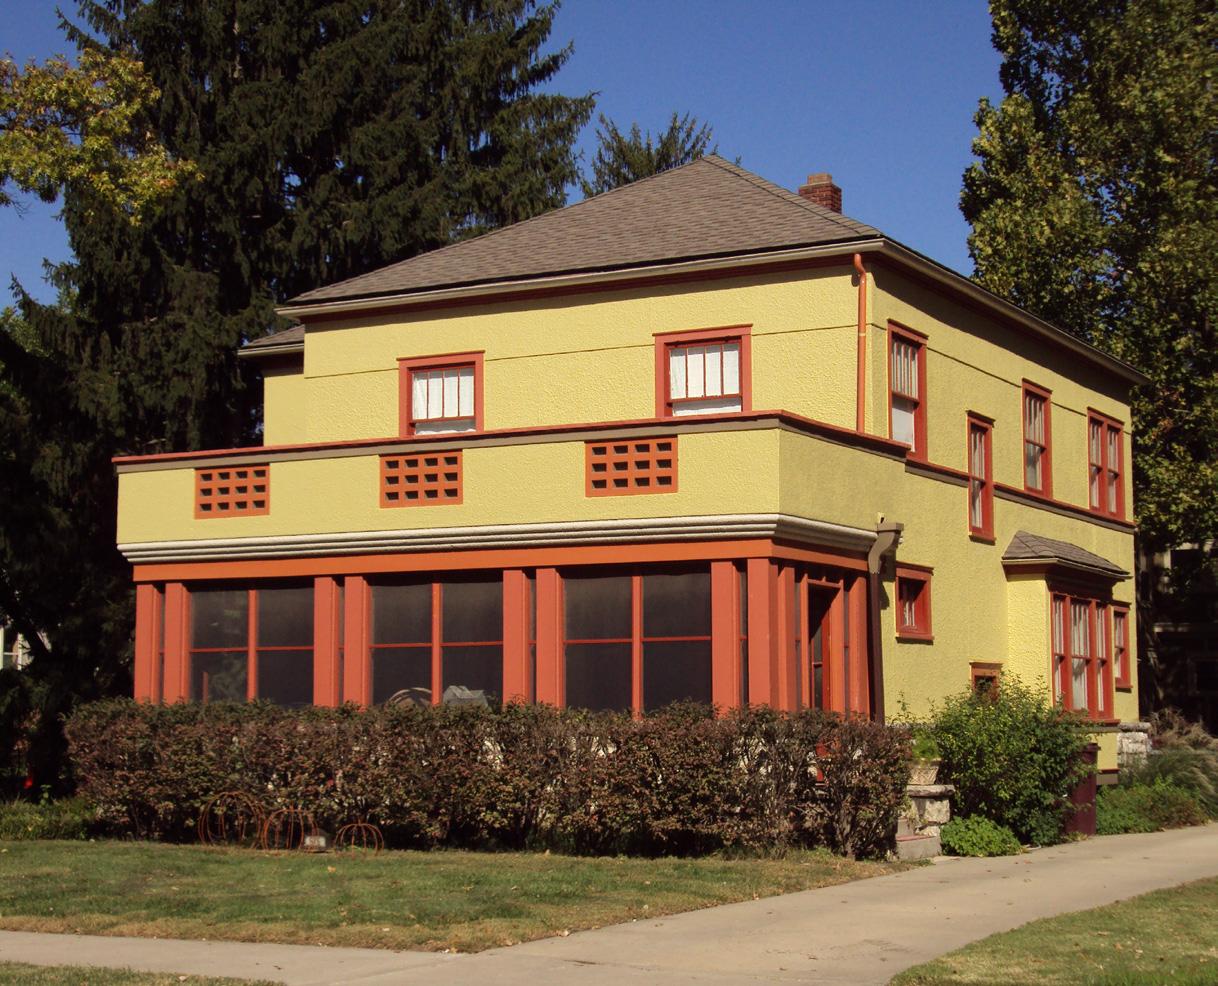
•
Install only historically appropriate, lime-based stucco. Use of contemporary stucco systems such as Exterior Insulation and Finish Systems (EIFS) should be avoided.
•
Always remove loose stucco and repair damaged areas before painting.

•
It is discouraged to apply stucco to a building that did not originally have stucco.
According to the COA Approval Matrix, replacement of stucco with new materials or the application of stucco where there previously was none, will require Heritage Commission Review. (This includes the installation of modern synthetic stucco systems.)

Architectural Features
•
Roofs
•
Gutters and Downspouts

•
Storefronts
Doors •
•
Windows
Awnings •
Porches, Decks, and Balconies •
•
Signage and Historic Markers
•
Mechanical Equipment
Lighting •
Roofs
Rooflines and roofing materials are important, character defining features of historic properties. These features relate to the style in which the buildings were constructed and should be retained. Roofs on residential buildings sometimes can distinguish the particular style of the house. For example, the use of turrets and towers on a Queen Anne or a curvilinear parapet on a Mission style building define the architectural style. The majority of commercial buildings have flat roofs with parapet walls, which extend above the roof plane. Some commercial structures have decorative features such as cornices or other strong characterdefining decorative treatments at the parapet walls. These character-defining features and flat roof shape should be retained on commercial properties.
Major exterior changes such as installation of new dormers, raising or lowering the pitch of a roof, or adding a porch or addition requires approval by the Heritage Commission prior to the issuance of a building permit.
Repair • Replacement (Re-roofing)

•
• New Roofing Materials & the COA
Approval Process
References:
Preservation Brief 4: Roofing for Historic Buildings
Preservation Brief 19: The Repair and Replacement of Historic Wooden Shingle Roofs
Preservation Brief 29: The Repair, Replacement, and Maintenance of Historic Slate Roofs
Repairs should be made using the same materials including the color and style.
Annually check around chimneys, dormers, and porch roofs for missing flashing or sealants along flashing.
Apply new sealants along flashing and stepped flashing when needed. Missing or loose sealants around flashing is a major cause of water infiltration in a historic building.
Preservation Brief 30: The Preservation and Repair of Historic Clay Tile Roofs
CH. 7 - 112
•
Use of new materials (not already found on the building) is discouraged when they are not historically appropriate (i.e. original roof is wood shake shingles and proposed new material is asphalt shingles).
Be sure to maintain existing roof lines when considering a new roof. The shape of the roof is also important to the design of the building. Replace missing or deteriorated flashing and counter-flashing, particularly around chimneys, dormers, porch roofs, etc. during all re-roofs. When installing flashing adjacent to masonry, counter-flashing should always be inserted directly into the mortar joint and affixed prior to installing the roofing materials.

Slopes and overhangs should not be changed and original details such as soffits, fascia, and friezes should be maintained. Additionally, dormers and chimneys should remain intact and in their original locations. For example, combining two dormers (to enlarge an attic space) is not appropriate, as it changes the roof line of the house and can cause a loss of architectural integrity.
It is often not financially feasible to re-roof using original materials such as slate; however, it is important to use appropriate roofing materials according to the style of the building. For example, a metal standing seam roof is not appropriate for a Prairie Style house, although a patterned asphalt shingle roof may be appropriate for a Queen Anne Style house.
Approval by the Heritage Commission must be given prior to the installation of new roofing materials (such as changing slate to asphalt shingles). Approval for re-roofs using the same materials can be obtained administratively by City staff.


If a property owner wishes to install new roofing materials (for instance, replacing an asphalt shingle roof with standing-seam metal), the following should be considered before requesting approval by the Heritage Commission:
1. Can a reasonable alternative be used (simulated slate material vs. real slate)?
Is replacing the roofing material with the same historic material cost prohibitive?
2. Does the building currently have the original roofing materials on it?
4.
3. Will the installation of new materials conceal or require changing any historic trim (fascia, soffits, rooflines)?

Gutters and downspouts are a key component to the success of a roofing system as they carry water down and away from a building. Many of the City’s historic buildings originally used box gutters (refer to illustration) that were an integral part of the roof. As box gutters age, the joints of the metal liners often fail and the metal corrodes. Other historic gutter and downspout materials are half-round gutters and round, fluted downspouts constructed of copper. As an alternative to repairing box gutters, or replacing expensive copper gutters with new copper gutters and downspouts, many property owners have installed contemporary, aluminum “K” style gutters and downspouts which can come in a variety of colors and sizes. While both the traditional and contemporary gutter and downspouts are acceptable, the Heritage Commission encourages the restoration of historic box gutters, and the installation of half-round gutters and fluted round downspouts to match the original.
Maintain gutters by ensuring that they are clear of vegetation and debris at all times. Inspection of the gutters and downspouts should be scheduled seasonally. Do not allow gutters and downspouts to become clogged and overrun with water, allowing water to run down the face of the building. When installing new gutters and downspouts, make sure that the gutter selected will have adequate capacity to carry water from the roof. Hire a qualified roofing contractor with experience on historic buildings.
References:
Preservation Brief 16: The Use of Substitute Materials on Historic Building Exteriors
•
REPAIR
When repairing traditional gutters, be sure that all metal seams within the box gutters are sealed and do not allow water or ice to penetrate the soffits and fascia.
When repairing half-round gutters, be sure that the fasteners are secure and the gutters are sloped to flow towards the downspouts.
•
Box gutters are an integral part of a historic gutter system. The Heritage Commission considers concealing box gutters with decking a reasonable option in order to preserve the option of restoration at a later time.

Be certain to size and install the correct gutters and downspouts to accommodate all the water run-off. Factory-made gutters often do not have the capacity to catch the increased water flow from a variety of roof pitches. If necessary, have a professional inspect the roof to get an accurate measurement.
•
Paint new aluminum gutters and downspouts a color to match or complement the building.
Avoid painting contemporary gutters and downspouts colors that highlight the new system rather than blends them into the wall plane of the building.
Historic glass storefronts are an important character-defining element of a commercial building. Storefronts were traditionally designed to draw attention to the merchant’s goods and services. They served as signage, advertisements and welcomed shoppers into the building. A typical storefront is made up of a series of components including the display windows, doors, transom windows, divided window mullions, signage, and corner posts. Retention of each of these components is key to maintaining the historic look and charm of any commercial building. Examples of historic storefronts can be seen on the Independence Square, Englewood Shopping District, and Maywood and Fairmount commercial districts.
•
Preserve historic storefronts when possible. If one element of a storefront is damaged, have only that part replaced. Replace any deteriorated materials in-kind. Repairs of broken glass, such as colored Vitrolite, glass block, and large storefront picture-style windows, should be made with the same materials, opacity, reflectivity, and color. When restoring a storefront, use any documentation of the historic storefront that exists to choose materials and methods appropriate for that building.
•
When replacement is the only option, do not replace storefronts with a system not in keeping with the historic feel of the historic district. Many modern aluminum systems have framing which is too heavy (thick) or too light (thin) in comparison to the appropriate scale of a historic storefront system.
• Replacement
Preserving Historic Storefronts
• Maintenance/Painting
•
References:
Preservation Brief 11: Rehabilitating Historic Storefronts
Preservation Brief 12: The Preservation of Historic Pigmented Structural Glass (Vitrolite and Carrara Glass)
Preservation Brief 25: The Preservation of Historic Signs
Preservation Brief 27: The Maintenance and Repair of Architectural Cast Iron
Preservation Brief 33: The Preservation and Repair of Historic Stained and Leaded Glass

CH. 7 - 118
Signage
Transom Windows
Awning
Display Windows
Corner Post
Divided window mullions
Entry Doors
Do not replace storefronts with a system that gives a false historical appearance or one that is inappropriate for the style or age of the building. Do not replace historic systems that can be repaired.
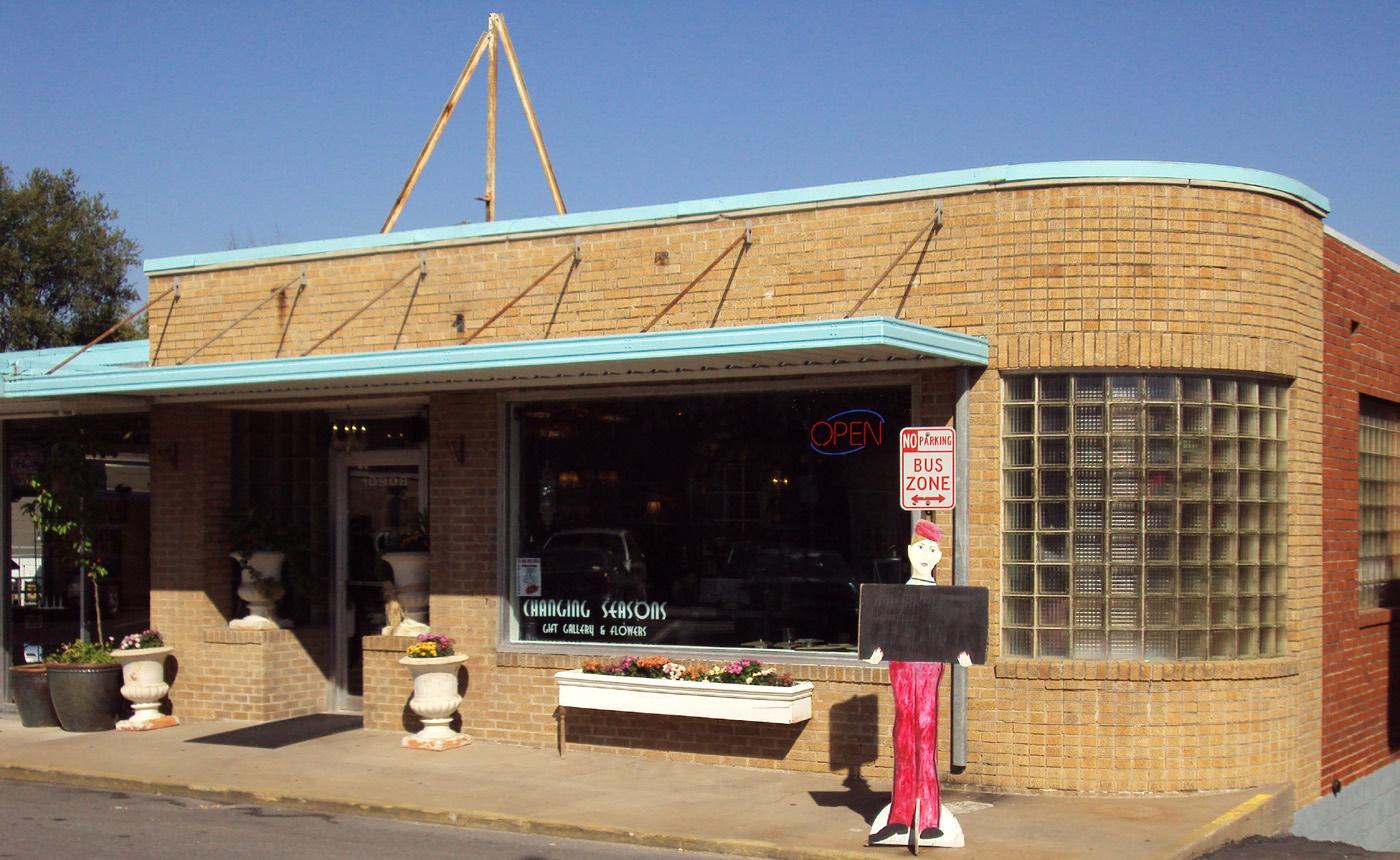

Replacement glass should have the same reflective characteristics of the traditional historic glass. Tinted or glass with reflective coatings should be avoided. It is not uncommon to find historic storefront transom windows with stained or leaded glass. Restore stained glass and leaded glass windows to match the glass texture, color and luminosity of the original.
•
Keep storefronts painted and maintained. This will prolong the life of the storefront and will provide a more attractive street level appearance for your building and business.
Historic doors come in a variety of colors, styles, sizes, and uses. Doors may be constructed of both wood and glass or include transoms and sidelights as part of their decorative features. Often characterized by their use of paneled surfaces and stylized glazing patterns, historic doors add to the overall architectural character of buildings and can be identifying features of a particular style or trend. Doors and the patterns of door openings reflect both architectural style and the structural evolution of historic properties.
Size, shape, style, placement, configuration, and materials, including hardware, are all important aspects of doors. It is often less expensive to repair original doors rather than replacing them in-kind. Original doors were crafted with materials, often no longer available, and detailing through craftsmanship that is difficult to reproduce.
As with siding and trim, synthetic, man-made products such as steel and fiberglass are contemporary alternatives to strictly wood doors. Synthetic materials are intended to provide a “maintenance free” product for a property owner while attempting to replicate traditional historic door patterns.
While alternative materials such as steel and fiberglass are alternatives to wood, they cannot typically achieve the same detail and dimensions offered by wood. Therefore, the Heritage Commission encourages the retention and restoration of wood doors, transoms, and sidelights. The Commission will always consider a proposal to utilize synthetic materials for door replacements. The Commission prefers the use of new wood doors and alternative materials for doors only when the original doors are no longer on the building, on new additions, and for new construction. While building permits are not required for the installation of new doors, approval by the Heritage Commission must be given prior to their installation.
• Replacement
•
•
•
Repair / Restore
• Hardware
•
Storm Doors
Garage Doors
New Doors & the COA Approval
Process
References:
Preservation Brief 10: Exterior Paint
Problems on Historic Woodwork
Preservation Brief 16: The Use of Substitute Materials on Historic Building Exteriors


Transom Windows
Sidelight Windows
Door Hardware
Decorative door trim and mouldings
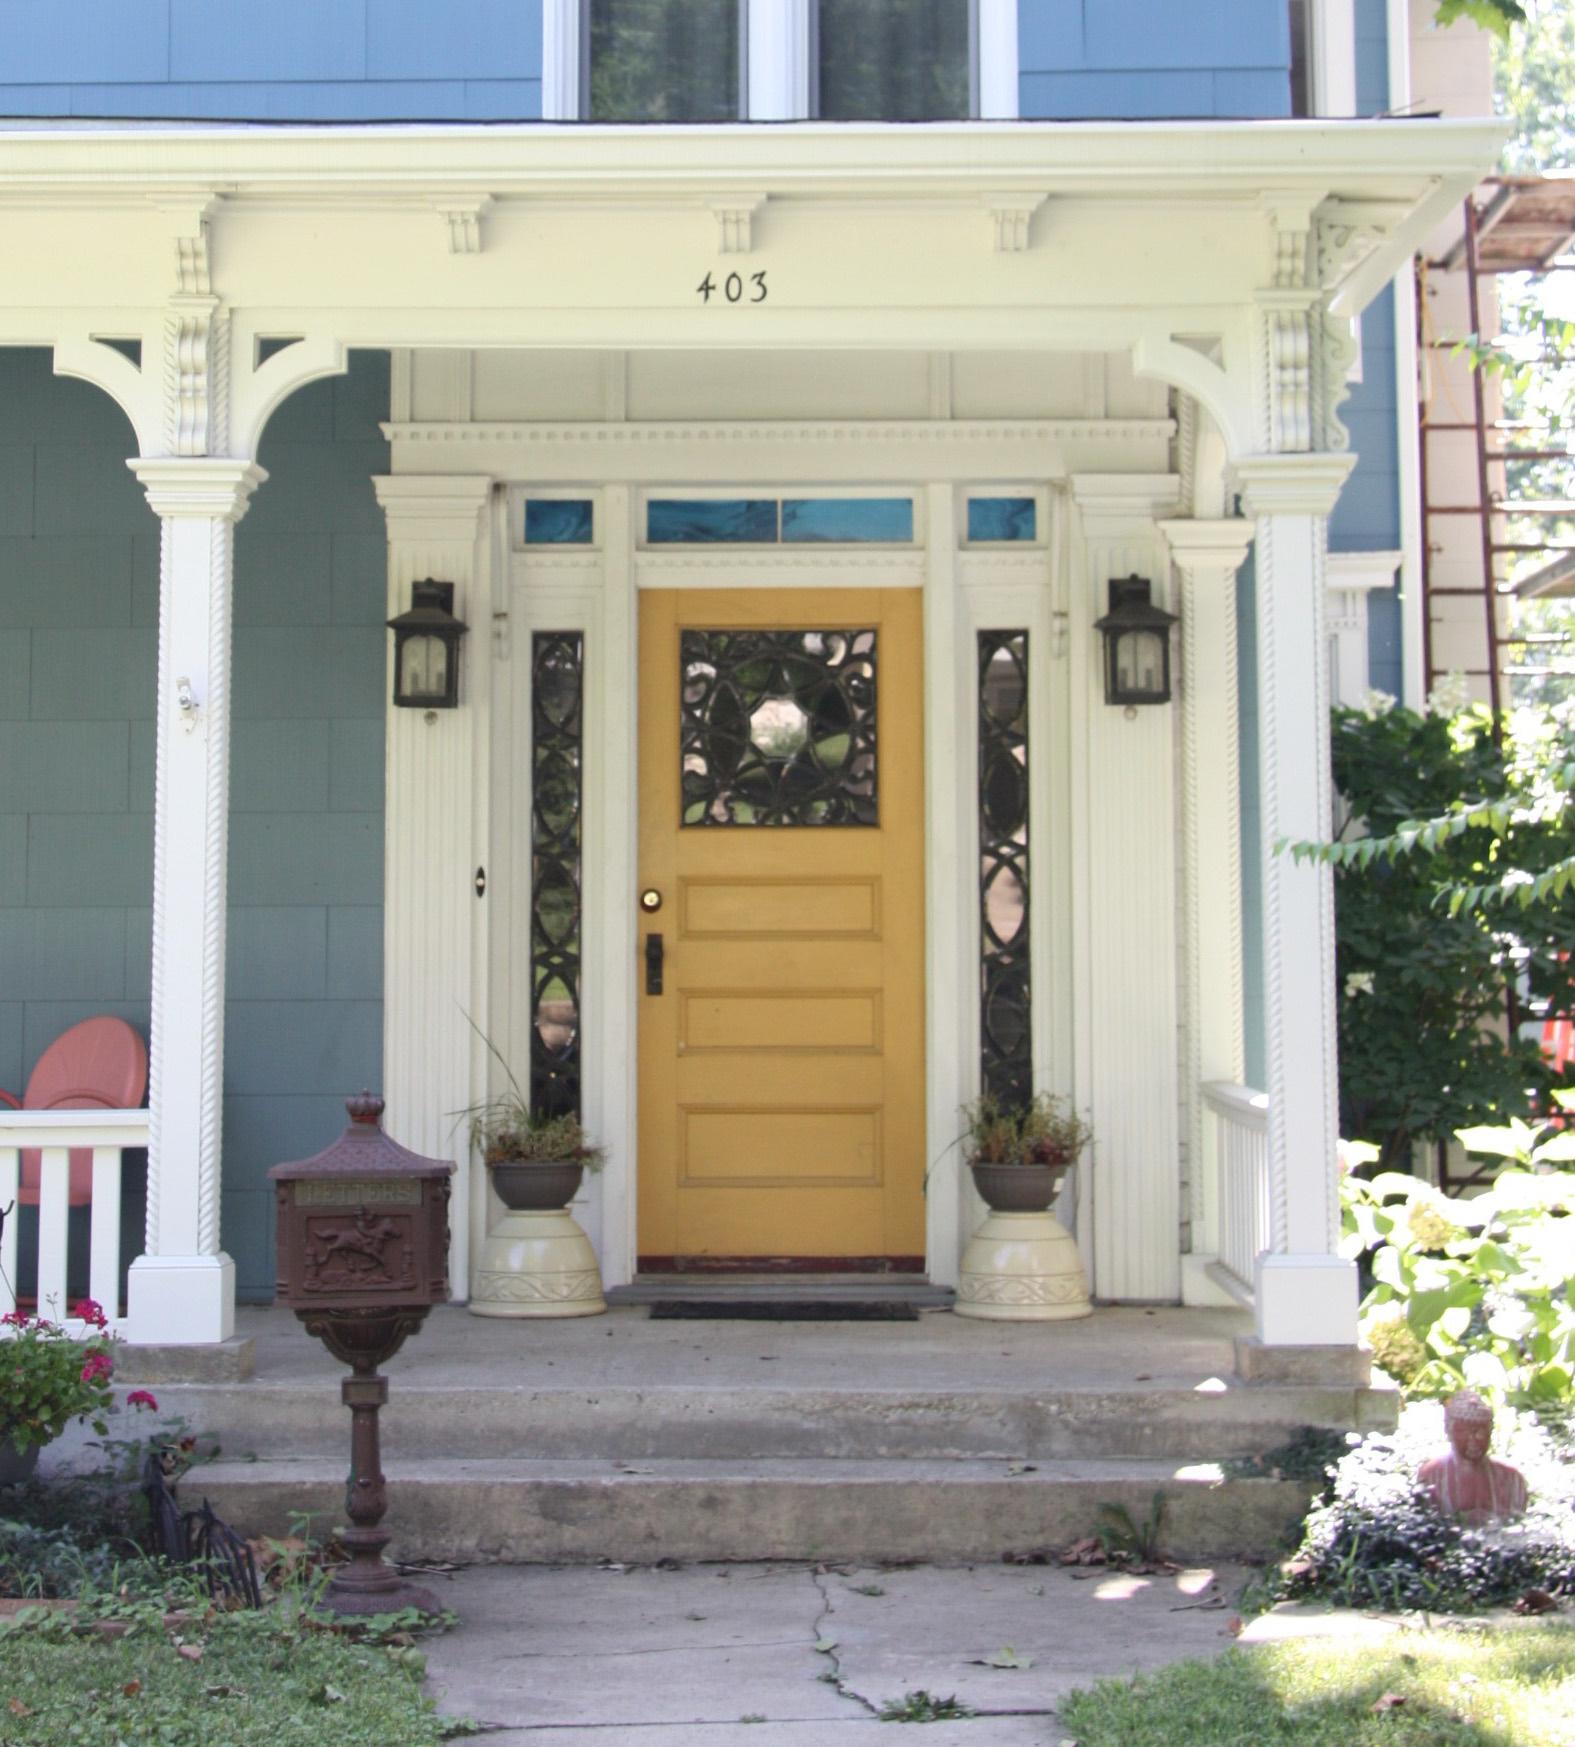
•
Original doors should be maintained and repaired whenever possible. Traditional wood should be protected from the elements through the use of storm doors, and protective paints and sealers such as polyurethane or marine-grade varnish.
Transom windows, sidelights, and door trim are essential components of a door system and should always be retained. If necessary, a custom storm sash can be made for sidelights and transom areas.
Sidelights and transom sash can often be retrofitted with insulated glass units.
Energy-efficiency retrofits for historic entry doors can be made by installing storm doors, caulking and sealing around door trim, and if trim is removed for repair, sealing with low expansion foam around door frames.

•
REPLACEMENT
When replacement of historic doors is required, new doors should match original features, size, shape, style, placement, configuration, and materials (including hardware) of the original doors when possible. Alternative materials will be considered on a case by case basis.

Do not replace original doors unless they are deteriorated beyond repair. Replacement due to assumed energy inefficiencies should be avoided. A properly fitted and weatherstripped door with a storm door will be just as energy efficient as new units.
It is often less expensive to repair original doors rather than replacing them inkind. Original doors were crafted with materials and detailing that is difficult to replace.
If an original door has been removed, its replacement should be a door compatible to the style of the building. Every effort should be made to match the original features as closely as possible including: the original size, shape, design, proportion, lite configuration, and material. For example, do not replace a single-lite wood door with a new solid hollow-metal door. Sidelights and transoms should also be maintained when considering replacement. Overall, replacement doors should not change the proportion of the original openings unless necessary to accommodate the American with Disabilities (ADA) Act. (Please consult the local building code and the ANSI/ADA Accessibility Guidelines for a full listing of code requirements.)
Generally, it is not necessary to replace historic hardware knobs, hinges, handles, knockers, locks, etc. Hardware can be refinished and repaired when in less than perfect condition. Replacement parts such as door knobs, locks, and hinges are readily available through salvage or through companies that specialize in hardware reproductions.
If existing hardware cannot be repaired, or does not provide the security required, replacement hardware should be compatible with the building’s style. Replacement hardware that is unobtrusive and appropriate to the architectural design of the building is preferred. New dead bolts and security locks can be added to the existing door system. Care should be taken to minimize damage to the historic fabric when retrofitting security locks to an existing door.

Storm doors are intended to protect historic doors and are encouraged by the Heritage Commission. Wood storm and screen doors are most compatible with historic buildings. Aluminum or other material storm doors may be considered if the finish is in a color to match the existing door or trim. Full view type storm doors are ideal because they allow the original door to be readily seen from the street.
Do not use highly reflective contemporary storm door units. It is not appropriate to install storm doors in a way that will obscure or damage a historic door and/or door opening.
As storm doors are typically reversible, meaning that the historic material behind the storm door is not damaged by installation when removed, storm doors are encouraged by the Heritage Commission.
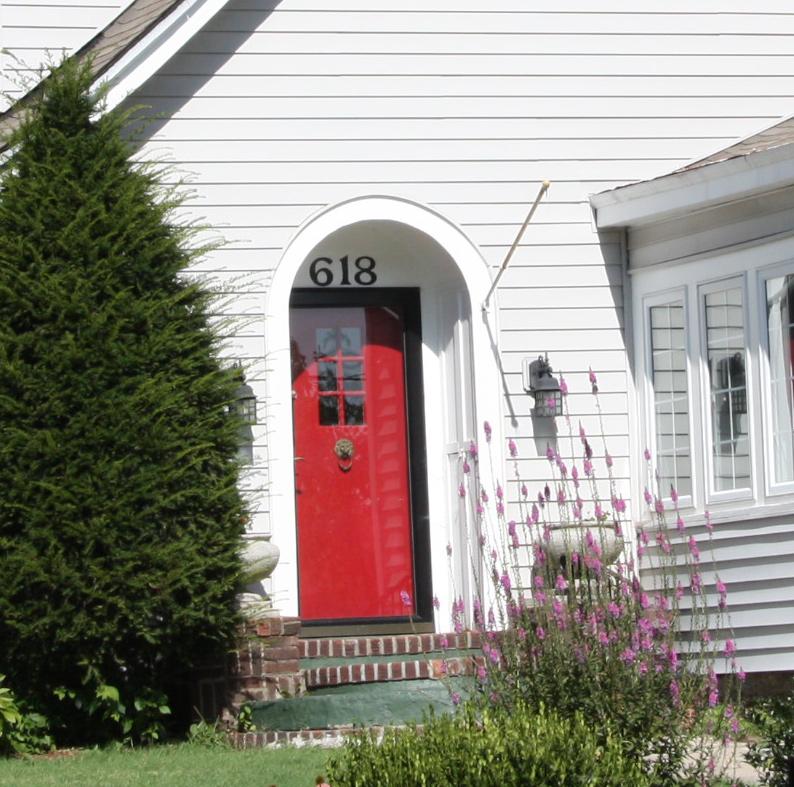
Original garage doors that add to the character of a garage should be repaired and retained. If beyond repair, the original door should serve as a model for design of a replacement. Overhead garage doors of a compatible design will be considered in the interest of security and safety. When possible avoid altering the size of a historic garage/ancillary building door opening, or replacing the existing doors, unless access into the building is an issue.

If a property owner wishes to install new doors using an alternative material to traditional wood doors, the following should be considered before requesting approval by the Heritage Commission:
1. considered to be installed on a Queen Anne home?
Does the new door complement the style of the building? For example, is a Mission style door being
2.
Does the new door match the original style (panels, glass, dimensions, etc.)?
3. way (streets and sidewalks)?
If a new door is to be installed, can the proposed location of the new door be seen from the public right-of-
4.
Is the original door able to be restored?
5. Can trim pieces around the door be retained?
If the original door is being removed as part of the project, can it be salvaged?
6. Is a storm door necessary with the installation of a new door? 7.
Windows, and the pattern of window openings, play an important role in defining the architectural style of historic homes and buildings. While double-hung, wood sash windows commonly provide the basic form, each style differs in its treatment of lite pattern (6 over 1, 3 over 1, 1 over 1, etc.), proportion, size, and placement. Window use (fixed or operable), hardware, and materials are also important elements of design. From a practical perspective, they also serve as sources of light and ventilation, and delineate the divisions of interior rooms on the exterior of the building.
Traditional wood windows are considered a superior product of craftsmanship and material due to their use of old-growth wood. This wood was originally harvested from trees that were decades old, creating a dense and extremely durable material. As this wood is no longer available on the market today, the retention of this quality product is invaluable to a historic property owner. Wood windows that are repaired and in good working order can last for decades. Therefore, an investment in the restoration of wood windows due to its lifespan will often pay a property owner back faster than an investment in replacement windows, not to mention its sustainability for the environment.
Windows are often considered for replacement when thought to be less energy efficient than new. In fact, studies have shown that windows can achieve the same energy efficiency as double-paned windows when fitted with weatherstripping, sashes are tightened, missing glazing is re-applied, and storm windows are installed. It is often less expensive to repair original, wood windows than it is to replace them with high quality, replacement windows of any material, including solid wood.
As with historic doors, synthetic, man-made products such as vinyl, aluminum, composites (such as Fibrex), and fiberglass are contemporary alternatives to
•
Original Windows
•
• Replacement
Repair/Restore
•
•
•
Storm Windows
• Shutters
Window Trim
New Windows & the COA Approval
References:
Preservation Brief 9: The Repair of Historic Wooden Windows
Preservation Brief 10: Exterior Paint Problems on Historic Woodwork
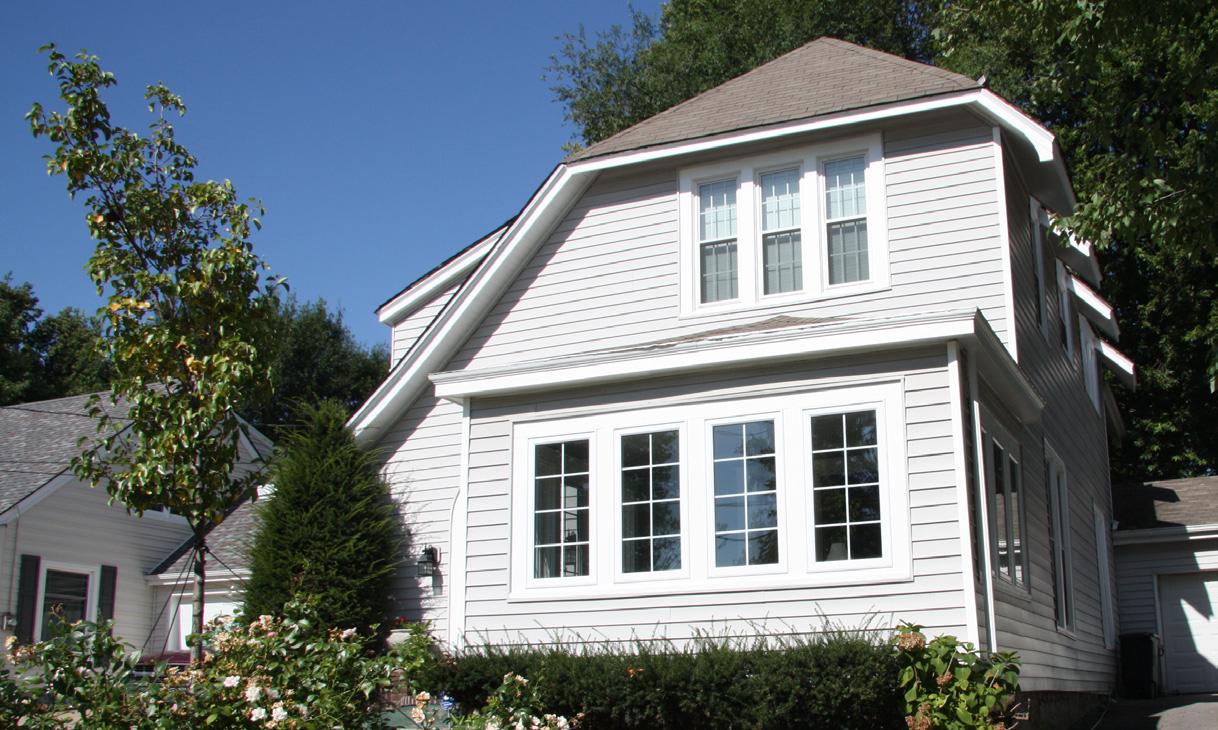
Preservation Brief 13: The Repair and Thermal Upgrading of Historic Steel
Windows

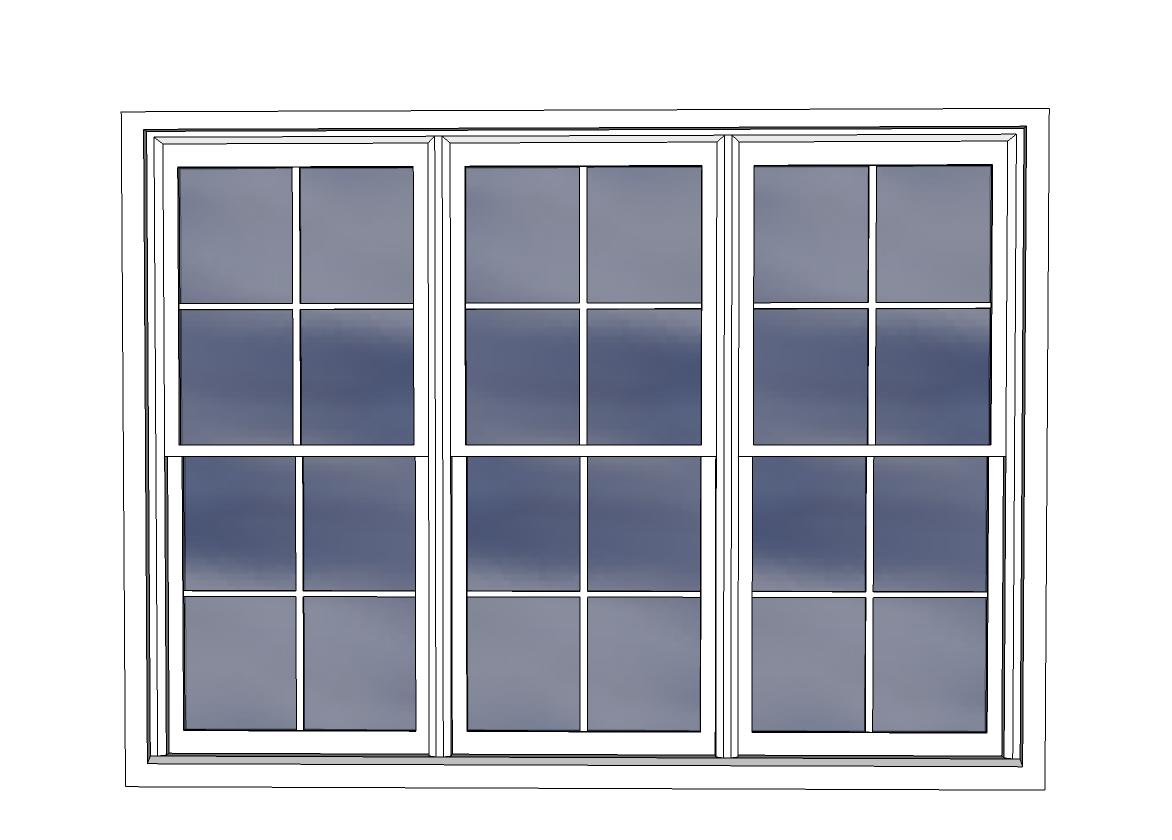

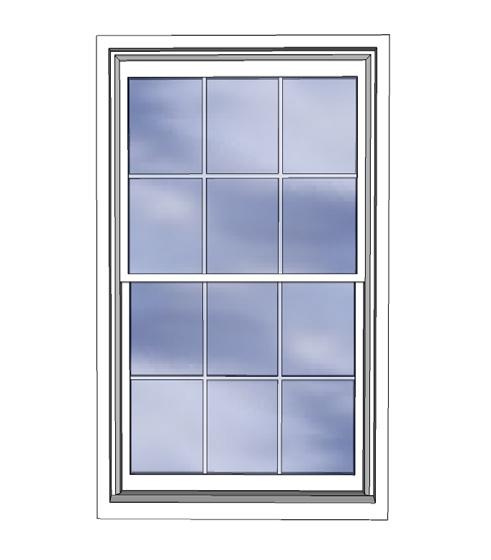
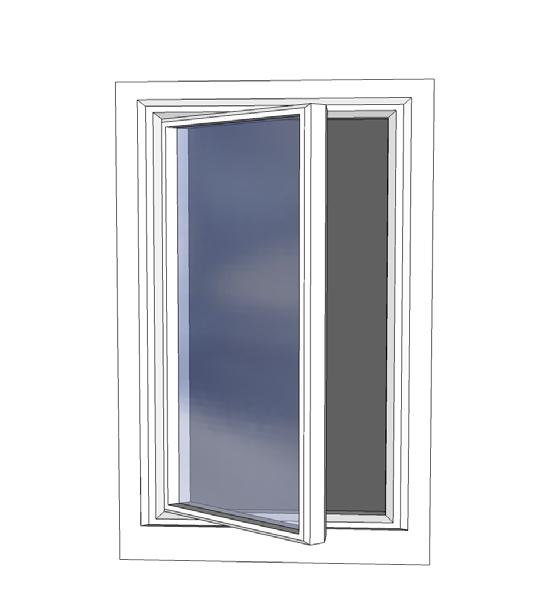



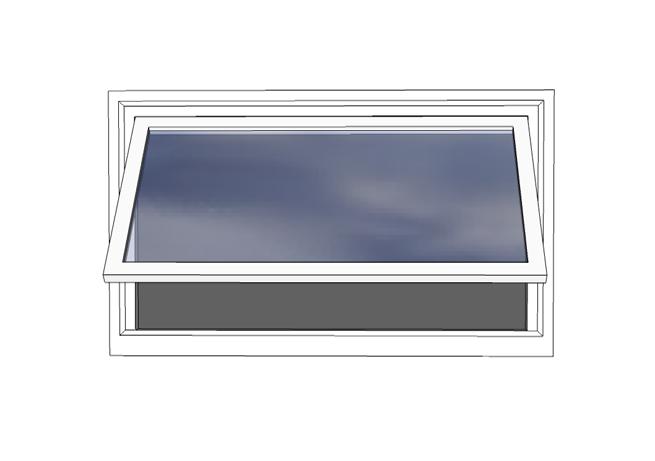

old-growth, wood windows. Synthetic materials are intended to provide a “maintenance free” product for a property owner while attempting to replicate traditional historic window patterns.

While alternative materials such as vinyl, aluminum, and fiberglass are alternatives to wood, they cannot typically achieve the same detail and dimensions offered by wood. For example, replicated muntins between glass panes or snap-in muntins do not have the same dimensional quality or profile as they do with traditional wood windows. Therefore, the Heritage Commission encourages the retention and restoration of wood windows whenever possible.
The Commission will always consider a proposal to utilize synthetic materials for window replacements; however, they prefer the use of similar materials when the original windows are no longer on the building, are proposed on new additions, or for new construction. Windows that are painted shut, have sash cords that are cut, or do not slide easily are not considered viable candidates for replacement. While building permits are not required for the installation of new windows, approval by the Heritage Commission must be given prior to their installation.
•
Original windows should be repaired and retained. New epoxy consolidants and fillers can be used to cost-effectively repair even severely deteriorated sash.
Avoid creating new window openings or eliminating original windows on all principal elevations, or on areas of a historic building that can be seen from a public right-of-way.
Again, epoxies, fillers, and consolidants can be used very effectively to repair deteriorated sashes. Cut or worn sash cords should be replaced with cotton cords. Broken glass should be replaced and re-glazed.
Wood windows can be retrofitted with weatherstripping, jamb liners, and caulking to tighten sash and reduce air infiltration. Storm windows should be installed to increase the existing wood window’s energy efficiency.
Single pane glass can also be retrofitted with double-pane insulated glass in order to increase energy efficiency. Care must be taken not to alter the muntins or other window elements to the point they no longer retain their proportion or profiles.
•
Window replacements should be considered only when the existing windows are not original, part of a remodel such as an addition, or when they are so deteriorated that repair is not economically feasible or physically possible.
Avoid replacement windows that do not match the original in size, dimension, shape, design, material appearance, and glazing pattern. Replacement windows should fit the existing openings without the use of spacers or new, wider framing. Tinted or reflective glass should be avoided. Framing material and sash material that will not retain the look of painted wood should be avoided.
Avoid creating new window openings or eliminating original windows openings on front or side elevations, particularly if that area can be seen from a public right-of-way.
Replacement windows should match the original in all dimensions, design, material appearance and glazing pattern Graphic by Susan Richards Johnson & Associates, Inc., 2011

As storm windows are considered reversible, having the ability to remove them without damaging the historic fabric underneath, the Commission highly recommends their use. Storm windows should fit window openings exactly, without the use of spacers. They should be painted, anodized, clad, or otherwise coated in a color to match the windows and trim. They should be compatible with the window pattern and the meeting rails should match the existing window, if possible.
Interior storms are an effective alternative to exterior hung storms. Wood storm windows are highly recommended as they are the least likely to transfer heat and cold.
Storm windows should fit the window openings exactly, and should match the color of the windows and trim
Graphic by Susan Richards Johnson & Associates, Inc., 2011
Original window trim should be preserved and retained. Only badly deteriorated sections should be replaced. The replacement trim should match the original in material and appearance. Decorative window lintels or other details should be added only if there is evidence that they existed originally.
Window shutters may be installed if there is evidence that they existed on a building historically. Evidence of shutters can include old photographs, remaining hardware, or evidence of where hardware has been removed.


If a property owner wishes to install new windows using an alternative material to traditional wood windows, the following should be considered before requesting approval by the Heritage Commission:
1. Are the original windows still present? If so, can they be repaired or restored?
Are replacement windows being proposed due to lack of maintenance of historic wood windows?
2. Does the new window complement the style of the building? For example, is a casement replacement
3. window appropriate for a bungalow that had 3 over 1 double-hung sash windows? Would the new window match the original style (glass, dimensions, locations, etc.)?
4. Are original windows being removed as a part of the project?
5. Can trim pieces around the windows be retained or repaired?
6. Are storm windows currently installed?
7. Are storm windows going to be installed as a part of the project?
9.
8. Which is most cost-effective, repair or replacement of wood windows?
Awnings can be an attractive element in a streetscape when they are made of a compatible, durable material and appropriate design. They provide shade, shelter, and a point of reference. Additionally, awnings can create continuity in a streetscape as well as a sense of human scale.
•
Choose an awning design that is appropriate to the scale of the building. An awning that is too large or small will not look like an integrated part of the building.
Use treated canvas, cloth, or a soft vinyl. The shape of the awning should be simple enough to not detract from the building’s architectural features. A shedstyle awning is typically most appropriate. Install the awning in a manner that does not damage or hide the architectural character of the building.
Hardware for awnings installed on a masonry building should utilize the mortar joint rather than the face of brick or stone.
Avoid awnings made of hard materials such as wood, plastic, or metal.
Avoid color schemes that are incompatible with the building. Do not use too many colors.
Though signage can be integrated into the awning, the awning should not be used as a billboard. It is best to limit the signage to the valance or skirt of the awning.
Design
• Replacement
References:
Preservation Brief 44: The Use of Awnings on Historic Buildings: Repair, Replacement and New Design


Porches and balconies are significant character-defining elements of architectural style, from the Victorian period through the era of the bungalow. Most late nineteenth and early twentieth century houses had open, front porches, and often times a combination of side and back porches. Porches, whether open or screened, were historically used to shade interior spaces, add open living space when temperatures were warmer (such as sleeping porches), provide space for neighborhood interaction, and add architectural definition to a building. When a porch or balcony is removed or altered, not only is the character of the building changed, but the loss can greatly affect the visual rhythm and alignment of the streetscape.
•
It is important to maintain and retain original porches and balconies and their elements. Regular maintenance of porches and balconies is necessary, because they are exposed to weather and thus, are extremely vulnerable to the elements. If deterioration has occurred, repair wood elements first with wood epoxy before painting or staining. If the deterioration is too extensive to repair, replace heavily deteriorated wood elements in-kind and paint or stain to match the historic materials.
Do not alter character-defining elements such as replacing turned spindles with straight spindles or replacing wood railings with decorative metal railings. Not only do these alterations drastically change the appearance of the building and result in the loss of architectural integrity, but they create a false sense of the building’s historic appearance.
•
Repair / Restore
• Enclosure / Removal
• Replacement
• New Construction
References:
Preservation Brief 10: Exterior Paint Problems on Historic Woodwork
Preservation Brief 16: The Use of Substitute Materials on Historic Building Exteriors
Preservation Brief 45: Preserving Historic Wooden Porches

Avoid removal and replacement of original stone or concrete steps; and avoid replacing original wood floors with concrete. When possible, traditional methods of repair should be used to restore these elements for use. Alternative materials (such as Trex or Azek) for decking and porch details will weather and fade over time, so be sure to research the longevity of these materials and if they can be repaired. When using these alternative and composite materials they should match the original porch details in texture and all dimensions. (Refer to the Siding and Trim section for additional information about alternative materials.) New materials require Heritage Commission approval if not evident.
The enclosure of a front porch, or a second-story sleeping porch located on a primary elevation, is not considered appropriate. Enclosing side and rear porches in a way that will damage existing historic fabric should be avoided.

Always assess the significance of a non-original porch before considering removal or alteration. Such porches may have attained historic importance as evidence of the evolution of the building.
The replacement of missing original porches and balconies is highly encouraged. Photographic, physical, or written documentation are helpful tools for the reconstruction of missing elements.
Construct a replacement porch or balcony with design elements appropriate to the style and age of the building, and if appropriate, take cues from surrounding buildings of similar styles.

Introducing new porches, where historically none existed, may diminish the historic character of the building. Caution should be taken to locate new porches on non-character defining elevations and to minimize damage to the historic building.
The construction of modern porches, decks or balconies on a primary facade detracts from the historic feel of the neighborhood, and are therefore never recommended.

Commercial signage and historic markers help to define the location and identity of a historic building. Historic markers help tell the story of a building, site, or district through a brief narrative. Signage denoting the location of a business or a historic resource should be kept to a minimum so as not to detract from the building’s or district’s architectural features.
All privately owned signage or markers being placed on a historically designated property must comply with Section 14-504 of the City’s Unified Development Ordinance (UDO), and be approved by the Heritage Commission prior to installation. Copies of the UDO are available in the Community Development Department, Second Floor, City Hall.
•
Retention of historic signage that conveys the current use of the building is always encouraged. Historic signs should be repaired in such a way that they utilize traditional materials. Signage which has been painted on the side of the building may be considered historic, consult with the City of Independence prior to its removal.
New signage or historic markers should be unobtrusive; relating to, rather than obscuring the design elements of the building or site. Use signs that are appropriate in size, scale, and color to historic buildings. Signs should be made to a pedestrian scale rather than automobiles.
Sign materials should complement those found on the related building, or that are common within the neighborhood. Metal, stone, or painted wood signs are generally most appropriate.
CH. 7 - 136
•
•
Repair / Restore
• Lighting
Replacement / New Signage
References:
Preservation Brief 11: Rehabilitating Historic Storefronts

Preservation Brief 25: The Preservation of Historic Signs
Preservation Brief 44: The Use of Awnings on Historic Buildings: Repair, Replacement and New Design
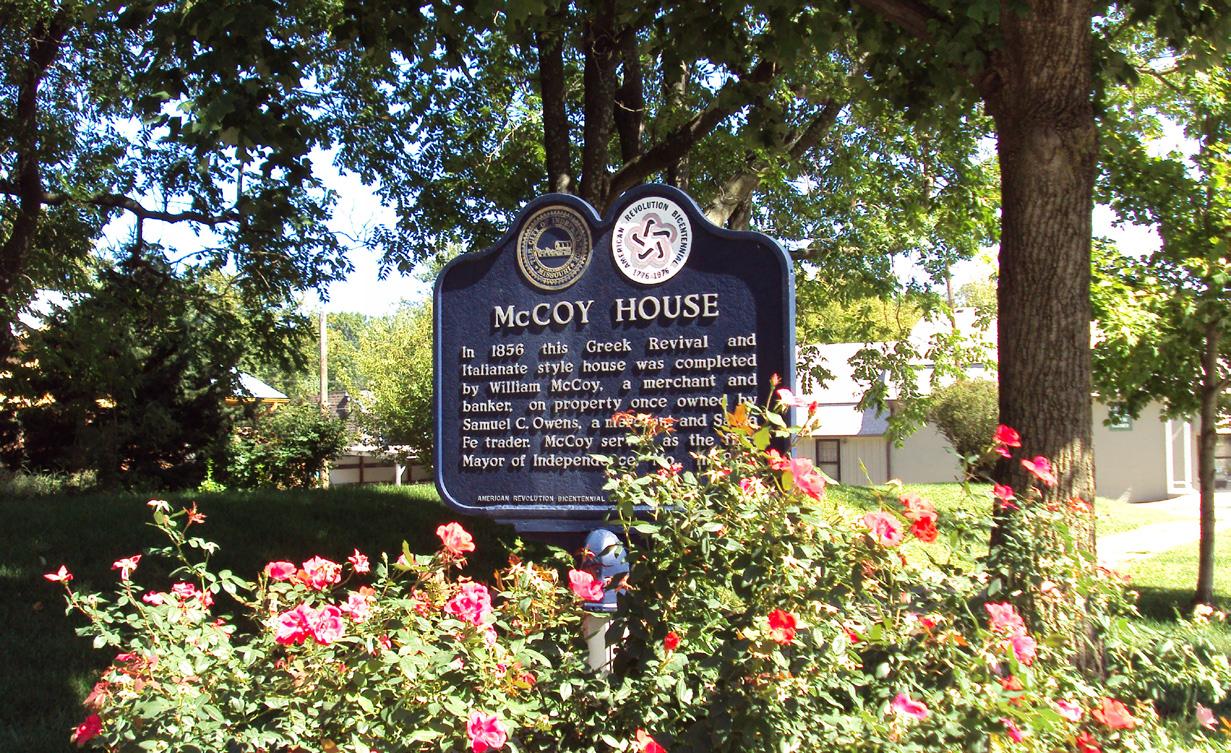
Attach signs to windows or sign friezes above storefronts. Awning signs are also recommended. The signage should be attached to the building causing the least damage to the building as possible.
Neon will be considered as a material when appropriate to the age and architecture of the building/district. Neon signs that have gained historical significance may be rehabilitated for use in their original location.
Freestanding signs should be mounted fairly low to the ground to avoid blocking the pedestrian’s view. Signs mounted on low, landscaped bases may also be appropriate.
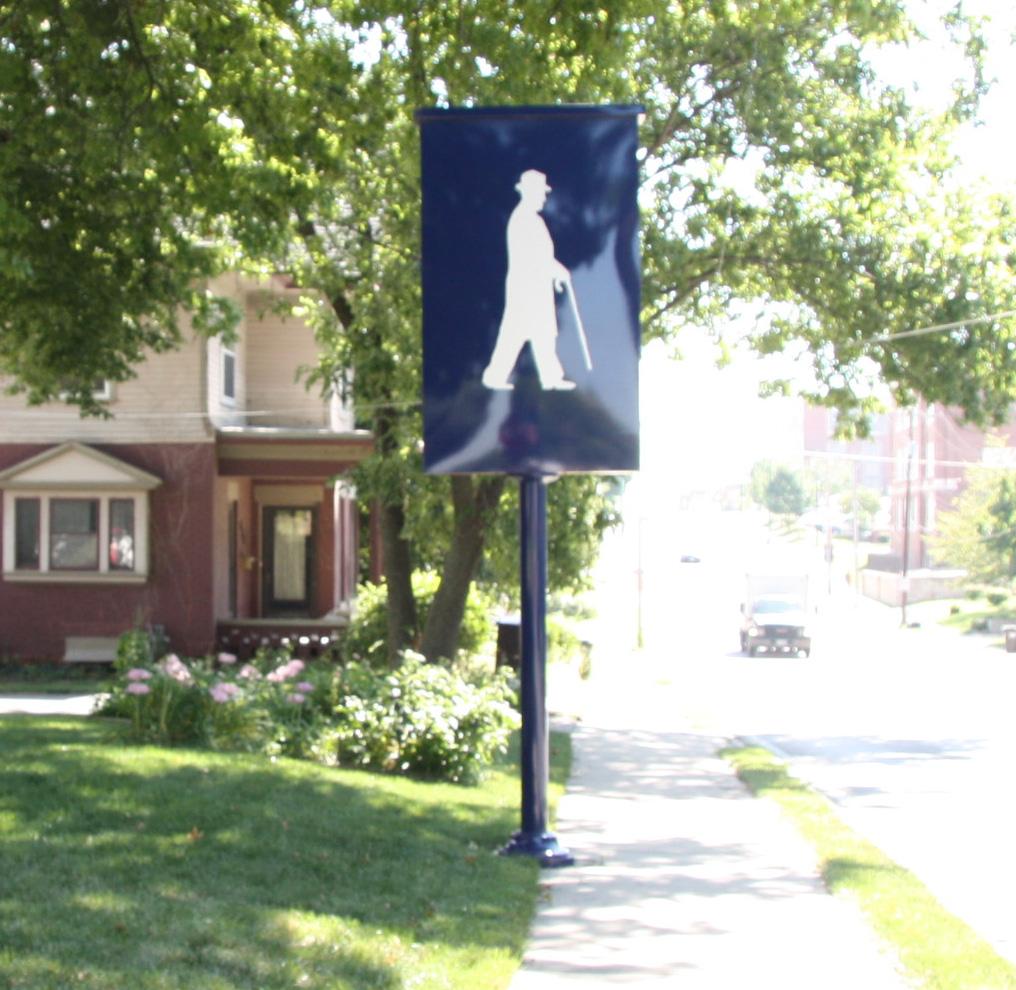
Projecting signs should be utilized if there is historic precedence for that particular storefront.
Avoid signs that are too large in relationship to the size of the building or that obscure character-defining elements. Avoid roof-mounted signs. They are often difficult to read from pedestrian level and alter the rooftop continuity of the surrounding buildings.
Internally illuminated signs and modern materials such as plastic are generally not appropriate.
Accent lighting used to illuminate signs should be installed in a manner that minimizes visibility of the light fixture and does not result in glare. Up-lighting of monument signage should not spill onto neighboring properties.
Mechanical equipment, such as satellite dishes, antennas, HVAC condensing units, solar panels, wind turbines, and utility wires, are a necessary part of a building and city infrastructure. These items should be installed at the rear of a building in an inconspicuous location. Landscaping and fencing may be used to screen these elements from the view of the public right-of-way (streets and sidewalks). These elements should be installed in such a way that they do not cause permanent damage to the building, if removed at a later date.
•
Minimize the visual impact of mechanical and electrical equipment. Utilize lattice panels and plantings to screen utilities, as appropriate for the building type and period of construction.
Screen utility connections and boxes such as telephone, gas meters, and cable.
Locate service and mechanical equipment and standpipes on non-primary facades so that they will not impact the historic primary facade materials.
Do not install through-wall air-conditioning units on the primary facade of the building or in locations visible from the public right-of-way.
Avoid cutting channels into or removing historic facade materials to install utility lines or mechanical equipment including exhaust hood fans or dryer vents.
Do not locate utility lines or utility boxes on the front facade of a building or in the front yard of a residence.
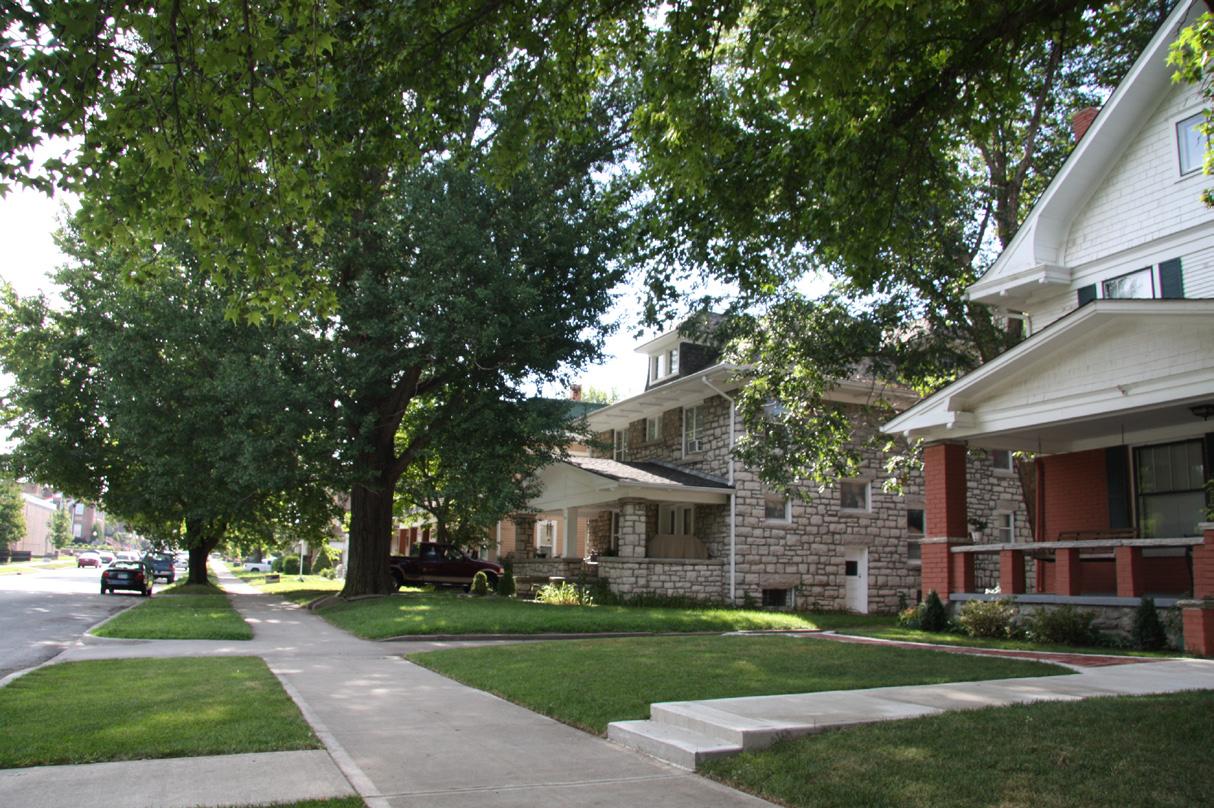
•
Location / Visual Impact
Preservation Brief 3: Conserving Energy in Historic Buildings
Preservation Brief 24: Heating, Ventilating, and Cooling Historic Buildings: Problems and Recommended Approaches
Although most streetscapes in commercial districts are lit by street lamps, it is often desirable to provide additional lighting. Wall or ceiling-mounted light fixtures at a recessed entrance are appropriate for providing additional lighting at entrances. To light a secondary entrance to an upper level, a wallmounted fixture placed above or beside the door is appropriate. If the fixture is too large and apparent (drawing one’s eye straight to the light), the fixture should have some historic precedent.

Lighting within most of the City’s historic neighborhoods, was traditionally fairly sparse. Victorian era houses did not make use of exterior ground lighting, and only occasionally were exterior gas fixtures used to light the porch. Early twentieth century homes more commonly used exterior lighting on porch ceilings and at entrances, but still very few utilized yard lighting.
The introduction of yard light fixtures, security lighting, pathway lighting, and/ or accent architectural lighting is considered appropriate when introduced as a part of an overall site plan. REPAIR
Do not permanently remove or alter original lighting fixtures. Do not replace historic fixtures with new “updated” fixtures unless historic fixtures are no longer repairable.
Repair and maintain historic exterior fixtures whenever possible. When required, replacement in-kind, or with fixtures that maintain a similar material appearance, design, and scale is always recommended.
Finishes of original fixtures should be maintained. Retention of traditional gas lights is encouraged, and often can be successfully converted to electric.
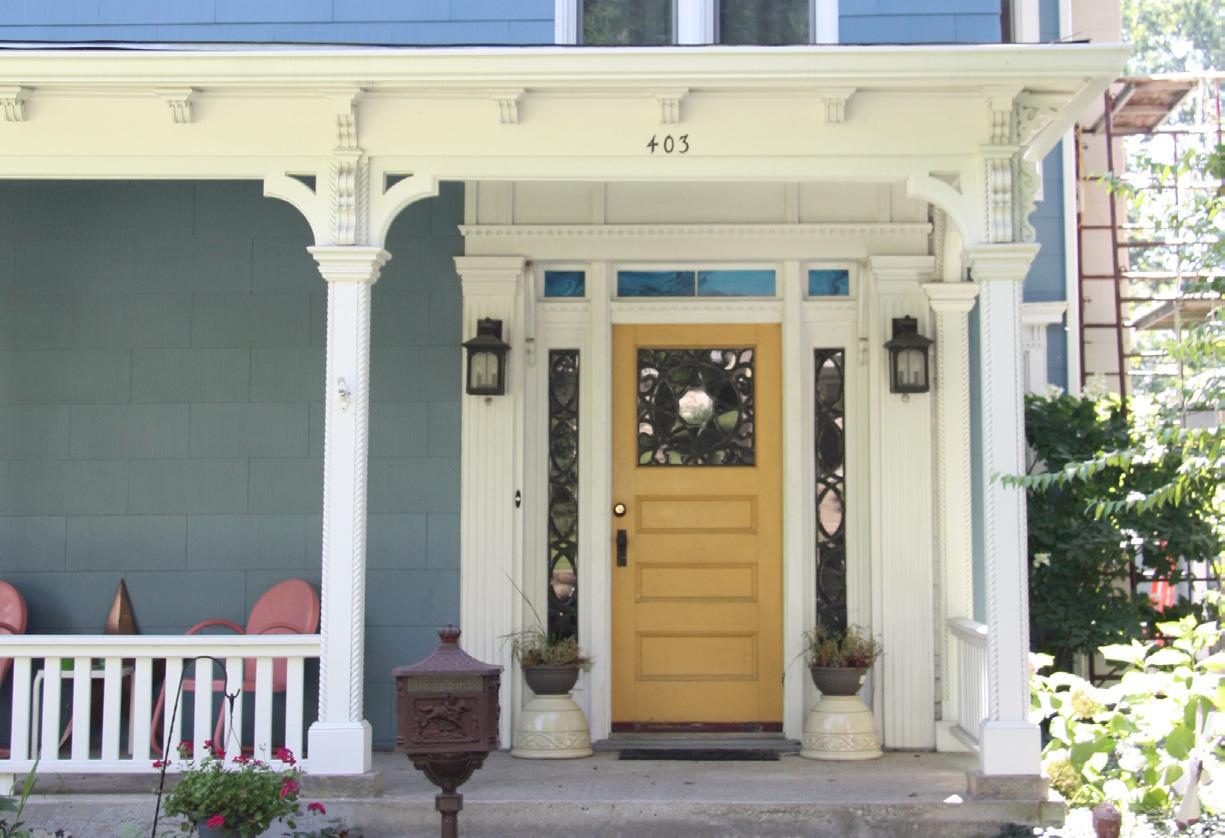
Lighting (Continued)
Choose a fixture that is appropriate for the building age. A Colonial-style carriage lamp, for example, on a 1930’s bungalow is inappropriate. Without documentation, it is not appropriate to install period light fixtures that will create a false sense of history.

Make sure the fixture is an appropriate size for the building. Do not place a very large fixture next to a secondary entrance or a very small, residential type fixture next to a storefront.
The most appropriate place for entry lighting is on the ceiling of the entry vestibule. A simple ceiling mounted or pendant fixture is most appropriate.
•
When considering introducing lighting to a property, consider minimal fixtures on the front of the property. Lighting should be introduced to ensure that pathways and driveway are safe to pedestrians.
New yard and street light fixtures should be oriented toward the pedestrian in terms of scale, location, and intensity of illumination.
All exterior lighting should be directed to prevent light spillover onto adjacent properties or onto the street or alley. Whenever possible, consider low-level lighting sources.
Use of Compact Fluorescent and Light Emitting Diode (LEDs) bulbs is appropriate and encouraged by the Heritage Commission.
Sitework
Accessibility
• Retaining Walls

•
• Fences and Railings
With the 1990 Americans with Disabilities Act (ADA), it became necessary to address the needs of the physically disabled for all commercial and publicly accessed properties. While some limited exceptions for historic buildings can be made by the City’s Building Official, all publicly accessed buildings must comply with ADA regulations. It is highly recommended that a property owner contact the Building Department prior to the initiation of any change of use or historic building restoration to ensure compliance.
Review by the Heritage Commission does not connote compliance with ADA regulations.
For a complete list of requirements, consult the most current ADA Standards for Accessible Design and the current building code of the City of Independence.
•
Location / Visual Impact
References:
Preservation Brief 32: Making Historic Properties Accessible

Note: These are guidelines and are not intended to be complete descriptions of the code requirements. Please consult the local building code and the ANSI/ADA Accessibility Guidelines for a full listing of code requirements.
of

Retaining walls are often dominant visual elements of the streetscape. Throughout Independence, limestone walls appear most often. There are also some concrete retaining walls that date from the early to mid-twentieth century. Retaining walls often help define the setback, offering a visual alignment along a street.

Retaining walls require routine maintenance to keep up their appearance and structural integrity. Proper care and maintenance is also required in order for a retaining wall to endure the harsh elements of the Midwest climate. There are two types of retaining walls: those built with mortar and those built without mortar (drystack). Walls with mortar must be maintained and re-pointed as needed in order to keep from bulging and eventually collapsing. Drystack walls must be checked regularly for stability, as they may need to periodically be restacked.
While building permits are not required for the installation of new retaining walls (under 48” in height), approval by the Heritage Commission must be sought prior to their installation.
Provide for periodic inspection and repair as needed. Winters and wet weather are extremely hard on all retaining walls.
Ensure proper runoff for rainwater, especially from gutter downspouts. Prevent damaging plants from penetrating retaining walls with their root systems.
Repair
• Replacement
•
• New Construction
References:
Preservation Brief 1: Assessing Cleaning and Water-Repellent Treatments for Historic Masonry Buildings
Preservation Brief 2: Repointing Mortar Joints in Historic Masonry Buildings
Preservation Brief 15:
Preservation of Historic Concrete
Preservation Brief 38: Removing Graffiti from Historic Masonry

Make repairs so the pattern of material and the masonry joints match the existing. Inappropriate methods of repair can sometimes do more harm than good.
When patching or parging stone walls, it is critical that a straight portland cement mix not be used as the patching material. A cement mix containing more than 20% portland will not provide the elasticity needed during freeze/ thaw cycles, and the resulting penetration of moisture will accelerate deterioration of the wall structure.
Using excessive force during repair efforts can result in additional damage to historic stone materials. If concrete has been used to parge a masonry wall, it is best to let weathering loosen the parging rather than use a jack hammer or hammer and chisel to remove it.
The use of modern materials in replacement of existing retaining walls is discouraged. Railroad ties, landscape timbers, and new cast stone units are not appropriate for street-front use on historic properties or within historic districts.
If replacement is necessary due to the condition of the wall, first consideration should be given to dismantling and rebuilding the wall using the original material and method of construction.

•
NEW CONSTRUCTION
Respect the style of building and existing walls along the streetscape when designing new retaining walls (i.e. new retaining walls should be designed to match the style of the building and the retaining walls that are adjacent to the new wall.) They should be constructed of materials that match those of the building. Close attention should be paid to details such as stone type (smooth or coarse), pattern (coursed, random, etc.), and joint types (flush, recessed, etc.). This helps the wall look more compatible with the historic building.
New retaining walls should not break the visual line of the streetscape and should not be made of materials such as wood planks, chain link metal, and precast concrete blocks.
Avoid introducing new street-front retaining walls on a lot that did not originally have them.

Throughout history, fences were installed for both ornamentation and privacy. In choosing a fence for a historic property, it is important to make sure the fence material and location complement the architectural style of the building.
There are numerous styles and materials of traditional fences including: picket fences, board on board fences, and decorative fences often constructed of iron and wood. Picket fences are most common because they are appropriate for a wide variety of building types and are more cost-effective than their wroughtiron counterparts. Fences located within the front yard of a building, should be short enough not to block the view of the building from the sidewalk or street. It is preferred that fencing be under 36” in height along sidewalks or streets.
Although a wide variety of modern fence types exist throughout the city, limited examples of historic fencing have survived (mainly wrought-iron). While the use of ornamental iron fencing has been documented in some instances, for reasons of affordability and versatility of style, wooden fences are most common. As the city evolved into urban and suburban neighborhoods, fencing became more functional and limited to rear yard areas. For instance, there is very little historic precedent of the use of front yard fencing within the Truman Neighborhood.
All fencing installed on a historically designated property must comply with Section 14-400-02 of the City’s Unified Development Ordinance (UDO), and be approved by the Heritage Commission prior to installation. Copies of the UDO are available in the Community Development Department, Second Floor, City Hall.
Repair •
• New Fencing •
Replacement / Reconstruction
References:
Preservation Brief 10: Exterior Paint Problems on Historic Woodwork
Preservation Brief 27: The Maintenance and Repair of Architectural Cast Iron
Preservation Brief 37: Appropriate Methods for Reducing Lead-Paint Hazards in Historic Housing
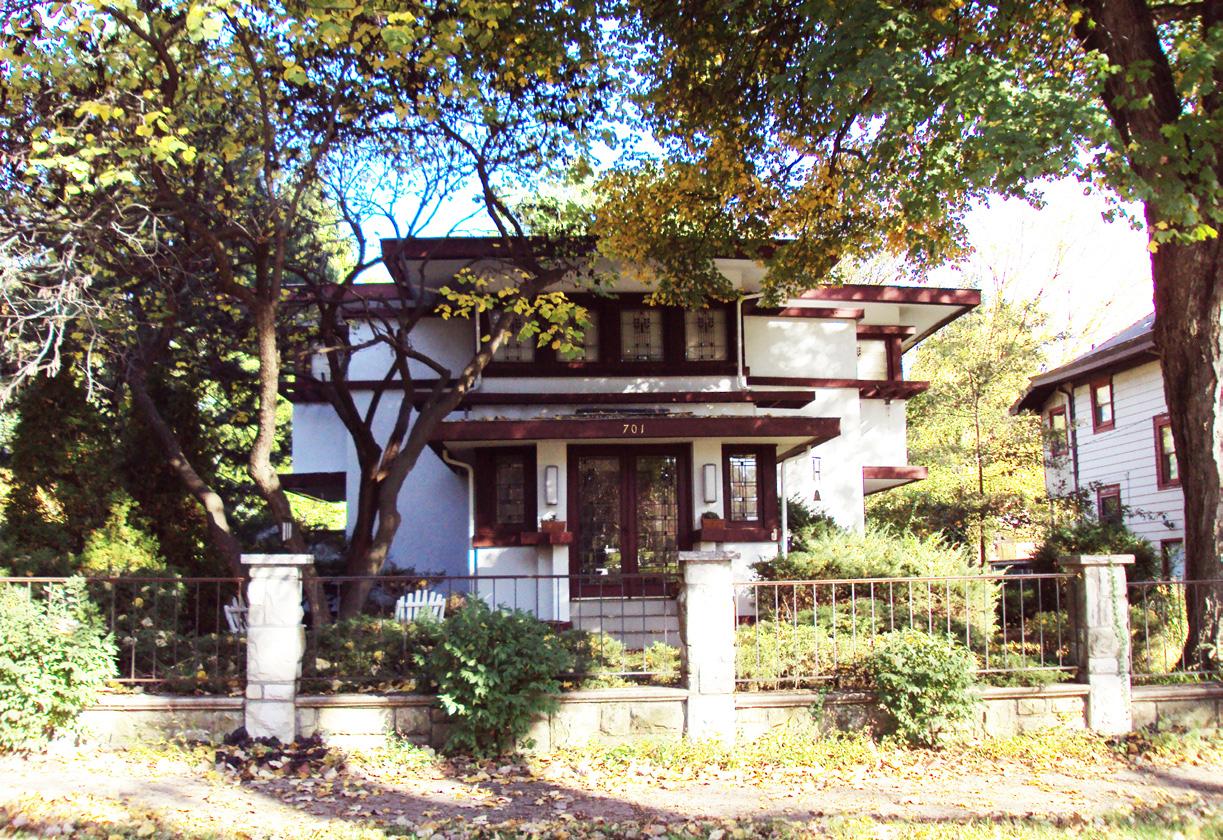
Retain and preserve existing fences that contribute to the historic character of a property.
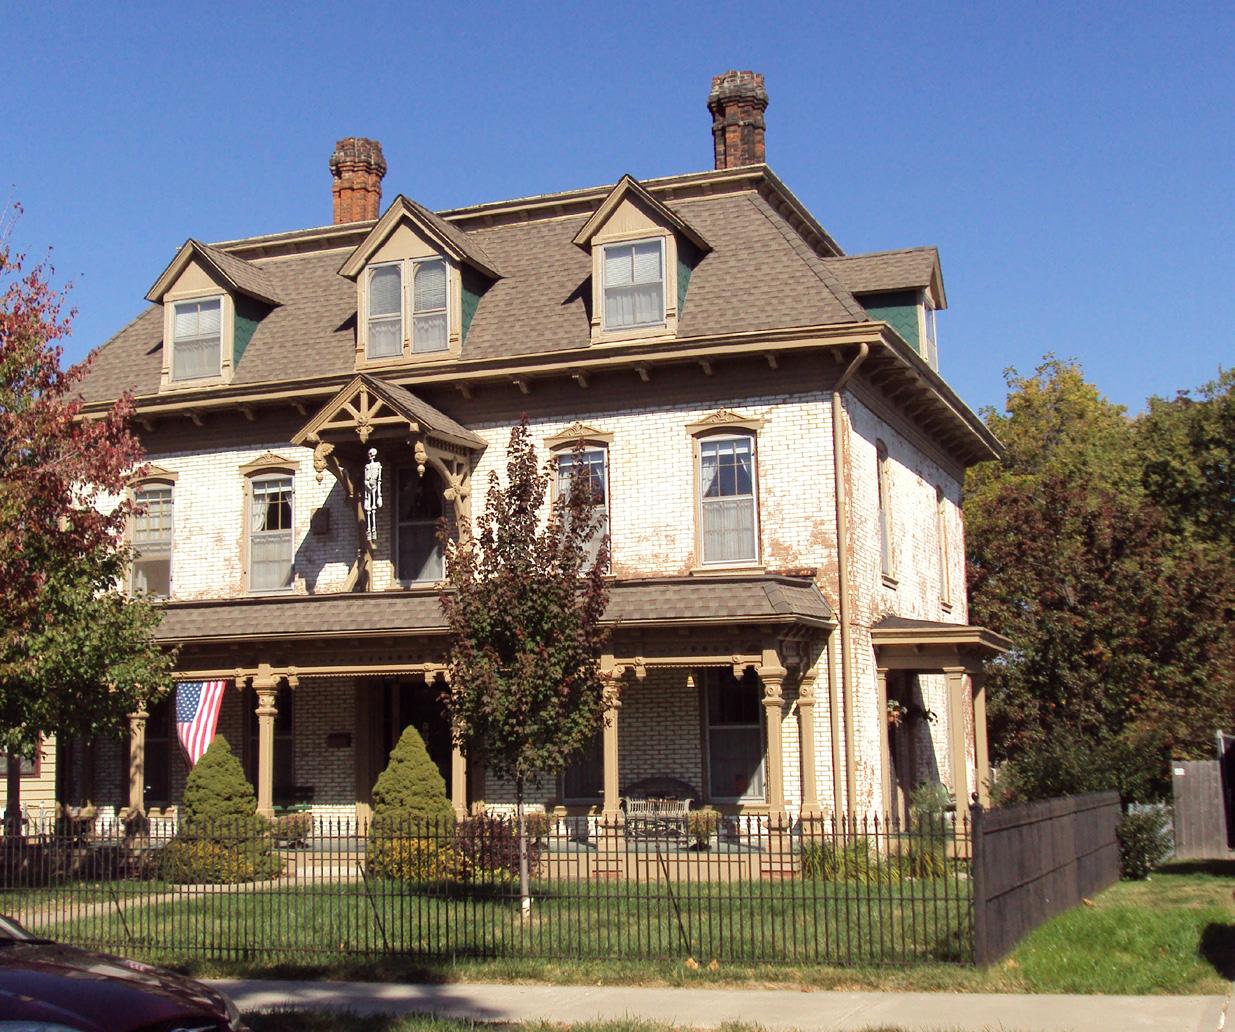
Maintain and repair, through appropriate methods, the defining features of historic fencing including: material, height, configuration, ornamentation, and functional design.
Privacy fences at the rear of the property should be painted or stained an opaque finish. Historically these fences were never left to weather naturally, or stained with a clear natural wood finish.

When the original protective coating has worn, wrought-iron fences should be carefully sanded, primed with a rust inhibitive primer, and painted. It is important to follow all preparation procedures prior to applying the finish coating, for rusty or improperly primed material will reduce the longevity of the paint finish.
•
If replacement is required due to deterioration, remove only those portions that are damaged beyond repair and replace in-kind, matching the original in material, design, placement, and appearance.
When reconstructing a historic fence, the new construction should be based on existing and historic documentation of the original that identifies the defining features including: material, height, scale, configuration, ornament and detail.
The introduction of new fences should be limited to those areas of the property that are not readily visible from the public right-of-way. Modern fences should be located in a way that complements the historic boundaries of the property without concealing its character defining features. Modern fences should also not attempt to look historic. Instead, these features should strive to enhance the character of the property and be constructed of an appropriate material, scale, height, and configuration.
Ornamental fences should be no more than 36” in height (unless required by city building code), so as not to distract from the architectural elements of the building. Ornamental shrubs may also be used as a fence when planted in tight rows. It is essential that the shrubs are pruned correctly and kept neat, in order to clearly define the building’s property line.
Privacy fences should never be installed along the primary facade of the building, or along the secondary property line of a corner lot. Fencing, other than ornamental style fencing, in front yards is discouraged. Metal chain link and wire fences should be avoided.
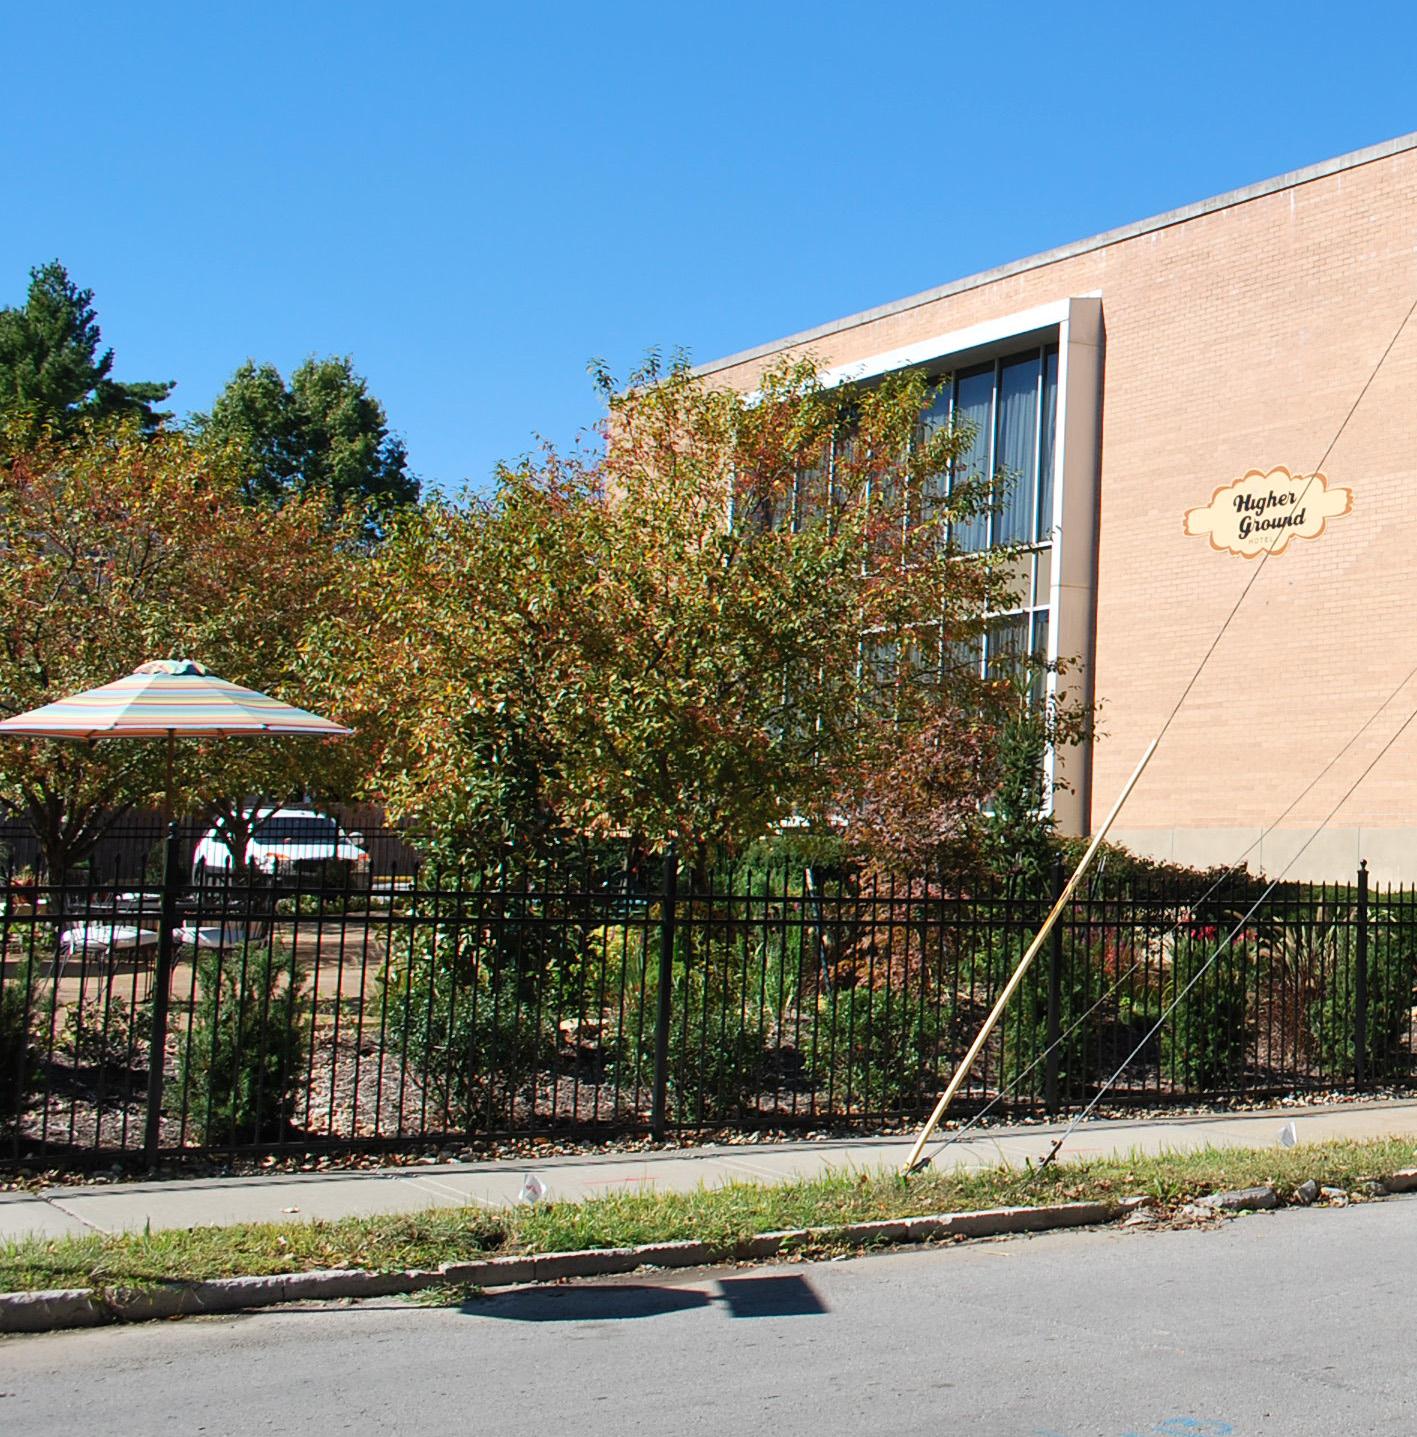
In this chapter you will find:
New Construction
Designing a New Building within a Historic

District
New Construction Checklist

The purpose of this chapter is to aid in the effort of designing new construction (including additions) and infill construction, on a historic property or within a historic district, that blends in with the surrounding architecture and the existing development pattern. Creative and sensitively designed new construction that relates to its historic context will benefit the community as a whole, and encourage new development within the existing historic neighborhoods and commercial districts without detracting from the surrounding traditional architecture.
The Secretary of the Interior’s Standards for Rehabilitation below, written by the National Park Service, shall be followed when designing new construction and infill construction within a historic neighborhood:
9. New additions, exterior alterations, or related new construction shall not destroy historic materials that characterize the property. The new work shall be differentiated from the old and shall be compatible with the massing, size, scale, and architectural features to protect the historic integrity of the property and its environment.
10. New additions and adjacent or related new construction shall be undertaken in such a manner that if removed in the future, the essential form and integrity of the historic property and its environment would be unimpaired.
When considering constructing a new residence or commercial building within an existing neighborhood, there are several factors that should first be considered:
1) What is the predominant style of architecture in the area?
A new building can incorporate elements of that style but should not strive to replicate the style.
New construction should easily be identified as new when walking or driving by.
2) What are the typical height, orientation, and setbacks of most of the neighborhood or district?
Walk the area and determine what the average setback (area from the front plane of the buildings to the property line),
• average number of stories, and the direction that the front of the buildings face. (For example, were the houses built on a 45 degree angle facing the street or a 90 degree angle?)
Base all new construction on the typical neighborhood
• design. Do not exceed the height of the highest building. Also, be sure and check all current City zoning requirements when at this design stage for additional setback and lot coverage requirements.
3) What are the typical materials used in the district?
While new construction has much more flexibility than • rehabilitation of an existing historic building, consider what is complimentary to the surrounding buildings. For instance, it may not be appropriate to build a glass and metal framed house in an area with Tudor Revival and Minimal Traditional houses that display stucco and wood exteriors. Instead, utilization of complimentary new materials (in this case wood composite cladding) to differentiate the new house from the surrounding historic houses is encouraged.
Example of an incompatible infill (center structure) utilizing inappropriate materials that do not match the red brick of the neighboring commercial structures. This new infill also does not match the openings or storefront pattern (repetitive elements of the windows and storefronts) or massing (height) of the adjacent buildings.

New Construction Checklist:
The Heritage Commission will consider the following when reviewing new construction or infill Certificate of Appropriateness (COA) applications:

ü Height - Does the height of the proposed building match that of the surrounding buildings?
ü Materials - Do the proposed, contemporary materials complement that of the buildings in the district?
ü Orientation - Does the building face the same direction as surrounding buildings?
ü Setbacks - Does the building set back from the street the same distance as its neighbors? (Setbacks are often grandfathered in for existing structures but may be more restrictive for new construction.)
ü Architectural Style - Does the new construction blend well with the district while looking new?
ü Demolition - Refer to Chapter 11 for information about Heritage Commission review of demolition.
Incompatible Infill
Residential New Construction: Pay close attention to the surrounding buildings when designing a new building or addition. This is an example of incompatible residential infill that does not utilize the surrounding building mass, proportion, pattern, or alignment in its design. This interrupts the rhythm of the front porch streetscape.
Commercial Infill Construction:
The top diagram indicates an incompatible infill design that does not match the mass, proportion, or alignment of the surrounding buildings. This proposed infill disrupts the continuity of the commercial streetscape. The bottom diagram illustrates a compatible infill design, which is complimentary to and is in keeping with the surrounding buildings.
Mass, proportion, pattern, alignment, and materials are all important elements of design to take into consideration when constructing in a historic neighborhood.
Mass: Mass refers to the overall dimensions of a building (height, width, and depth create volume and form). The overall volume and form of a new building or addition should resemble that of the surrounding buildings. Mass plays an important role in the streetscape of a historic neighborhood. Historic neighborhoods typically have buildings which relate to one another through their similar masses. An incompatible building in volume and form which does not relate to its surroundings, distracts from the streetscape.
Proportion: Proportion is a harmonious relationship between the dimensions of one object to another. If the elements of the building are too large or too small in relation to the whole building or to another object, it is said to be “out of proportion.”
Alignment: Alignment is the way buildings line up together along a street. It is usually created by the required zoning set back. Alignment can also occur vertically by lining up the rooflines or heights of adjacent buildings.
Pattern: Pattern is a repetition of elements or form. Patterns can be found in individual buildings in elements such as windows or in groupings of buildings with similar elements situated along a street. A building that breaks the pattern of a streetscape tends to look out of place.
Materials : Materials differ between commercial and residential historic neighborhoods. Commercial buildings are typically brick or stone with metal, wood, or masonry trim. Materials found within residential neighborhoods are typically wood frame with wood siding, brick, or stone, with wood windows and shingle roofs. The consistency and repetition of building materials of the neighborhood form a cohesive environment.
Outbuildings, such as garages, sheds, and barns are often necessary for storage of cars and other equipment. Traditional outbuildings (garages, barn, or carriage houses) were historically constructed as structures (non-habitable spaces) separate from the main house. They can be found throughout the urban core and into eastern Independence on large agricultural parcels. Outbuildings, such as garages and sheds, were often located at the rear of the property when in an urban/suburban setting. These outbuildings could often be accessed from a driveway leading from the street or from a rear alley.
The construction of new outbuildings is preferred in a vacant location. Demolition of existing outbuildings to accommodate new outbuildings should be avoided. New outbuildings should complement the adjacent home, utilizing similar proportion, style, color, and materials found on the existing building, as well as reflect a similar design to other outbuildings in the neighborhood.


Outbuilding - New Construction Checklist:
The Heritage Commission will consider the following when reviewing new outbuilding construction Certificate of Appropriateness (COA) applications:

ü Height - Does the height of the proposed building match that of the surrounding buildings?
ü Materials - Do the proposed, contemporary materials complement that of the main house?
ü Orientation - Does the building face the same direction as the main building?
ü Setbacks - Does the structure meet the current building setback requirements? (Setbacks are often grandfathered in for existing structures but may be more restrictive for new construction.)
ü Architectural Style - Does the new structure complement the other structures in the area?
ü Location - The new outbuilding is not viewed from the right-of-way (street or sidewalk)?
ü Demolition - Refer to Chapter 11 for information about Heritage Commission review of demolition.
In this chapter you will find:
Energy Audits
•
Where to Begin
•
Energy Audit Checklist

Energy Efficiency in Historic BuildingsAddressing the Building Envelope

•
Ten Tips for Sealing Air-Leaks
•
Weatherstripping and Caulking
•
Insulation
•
Mechanical Systems
•
Windows and Doors
•
Site Improvements and Landscaping

According to recent energy reports from the U.S. Department of Energy, buildings account for roughly 40% of all U.S. energy use. The majority of the country’s energy is obtained through non-renewable resources (coal and nuclear) and as such, more and more consumers are seeking energy alternatives and ways to increase energy efficiency in homes and businesses. When investigating the energy use of a building, it is beneficial to look at the building’s overall energy performance as a whole. For example, factors such as the amount of natural ventilation and the presence (or absence) of insulation will have an impact on the efficiency of heating and air conditioning equipment, and thus will have a direct correlation to energy consumption.
Consider obtaining a professional energy audit when trying to determine the most appropriate approach to increasing energy efficiency. The goal of an energy audit is to help the property owner assess and prioritize possible energy improvements which provide the most cost effective, energy conscious solutions. Tests that may be performed include: a blower door test or infrared thermography scan, which help to identify air infiltration and building insulation problems. The audit will itemize ways to reduce air infiltration, tighten the building envelope, increase efficiency of mechanical systems, and improve overall site conditions. An energy audit will also help explain how a historic house
NOTE: While there are high- tech gadgets to suit just about every energy need, it is highly recommended that a professional energy audit is conducted when considering more expensive and complex equipment upgrades.
operates, good or bad. The more educated a property owner is about how their home and all its interwoven components function, the easier it will be to create a long-term weatherization and maintenance plan.
It should be noted that property owners do not need or require an energy audit. It is an option available, but not required, to address energy conservation and efficiency of your property.

Average residential energy use
Source: 2007 Building Energy Data Book http://www.energysavers.gov/tips/home_energy.cfm

Once a home or business has been evaluated for its energy loss (typically through an energy audit performed by a professional), the following questions should be answered to develop a weatherization plan prior to beginning an energy retrofit:
•How much money is spent monthly/annually on energy? What is the most common energy source?

•Where are the greatest energy losses in the building?
•How long will it take for an investment in energy efficiency to pay for itself in energy cost savings? (For instance, if the installation of new windows will cost $10,000 but the return on investment is less than $100 per year in energy savings, it would take over 100 years for new windows to pay for themselves.)
•Do the energy-saving measures provide additional benefits that are important to make the home more liveable?
•How long will the home be occupied to ensure return on investment?
•Is it a do-it-yourself job or will a professional contractor be needed?
•Will be a permit be required?
•Will be a COA be required?
•What is the budget and how much time will be required for regular maintenance or repair?
Once energy needs are assessed and prioritized, a whole house weatherization plan can be made. Keep in mind that any improvements should be sensitive to the historic property and should follow the Secretary of the Interior’s Standards for Rehabilitation. The plan will provide a strategy for making smart purchases and home improvements that maximize energy efficiency, save the most money, and have the least visual impact on the historic property.
When seeking a professional to carry out an energy audit, ask the following:
1. materials?
Does the auditor have any experience with historic buildings and building
How will the building’s historic integrity be addressed and protected?
2. Will alteration of historic building materials or demolition be required?
3. Is the auditor certified to conduct an audit?

4. What type of access into the building will be required?
6.
5. What type of tests and diagnostics will be performed?
7. Are there financial incentives available for energy improvements through the local, 8. state, or federal government?
Once a report is generated, will the auditor do a walk-through of the building with you?

Making building improvements to a historic property involves thoughtful research and planning. Property owners are encouraged to consult a professional architect and/or engineer (consultant) familiar with retrofitting historic properties and sustainable design prior to the start of any considerable “green” improvement. The owner and professional architect/engineer should consult the City of Independence Historic Preservation Design Guidelines throughout the design process, and they should contact the City of Independence Historic Preservation Department, as questions arise.
NOTE: The Sustainability COA Approval Matrix is located at the end of Chapter 10. Please reference this matrix in addition to the Rehabilitation COA Approval Matrix (found in Chapter 4), prior to the initiation of a project that includes energy efficient upgrades.
For additional information regarding home energy audits, please visit:

“Home Improvement: Improve Your Home’s Energy Efficiency with ENERGY STAR,” U.S. Environmental Protection Agency and U.S. Department of Energy, (http://www.energystar.gov/index.cfm?c=home_improvement.hm_improvement_index).
“Home Energy Audits - Missouri Personal Income Tax Deduction for Home Energy Audits,” Missouri Department of Natural Resources, (http://www.dnr.mo.gov/energy/residential/homeenergyaudits.htm).
“Low-Income Weatherization Assistance Program,” Missouri Department of National Resources, (http://www.dnr.mo.gov/energy/ weatherization/wx.htm).
National Park Service Technical Preservation Brief No. 3, “Conserving Energy in Historic Buildings - Preservation Retrofitting,” (http://www.nps.gov/hps/tps/briefs/brief03.htm).
The following information is from the U.S. Department of Energy:
Air infiltrates into and out of a building through every hole and tiny crack. About one-third of air infiltrates through openings in ceilings, walls, and floors.
1. First, test your home for air tightness. On a windy day, carefully hold a lit incense stick or a smoke pen next to your windows, doors, electrical boxes, plumbing fixtures, electrical outlets, ceiling fixtures, attic hatches, and other locations where there is a possible air path to the outside. If the smoke stream travels horizontally, you have located an air leak that may need caulking, sealing, or weatherstripping.

2. Caulk and weatherstrip doors and windows that leak air.
3. Caulk and seal air leaks where plumbing, ducting, or electrical wiring penetrates through walls, floors, ceilings, and soffits over door and window frames.
4. Install foam gaskets behind outlet and switch plates on walls.
5. Look for dirty spots in insulation, which often indicate holes where air leaks into and out of the house. Seal holes in inconspicuous areas with low-expansion spray foam.
6. Install storm windows over single-pane windows.
7. Chimneys are a major source of air leakage. When the fireplace is not in use, keep the flue damper tightly closed. Install an inflatable chimney balloon to help seal the flue during seasons when the chimney is not in use. The balloons are made from several layers of durable plastic and can be removed easily and re-used for years. For safety, if the balloon should accidentally be left in place when a fire is started, the balloon will automatically deflate within seconds of coming into contact with heat.
8. Kitchen exhaust fan covers can keep air from leaking in when the exhaust fan is not in use. The covers typically attach using magnets for ease of replacement.
9. Replacing existing door sweeps and thresholds with ones that have pliable sealing gaskets is a great way to eliminate conditioned air from leaking out from underneath the doors. Take caution not to damage historic doors.
10. Fireplace flues are made from metal. Over time, repeated heating and cooling can cause the metal to warp or break, creating a channel for hot or cold air loss. Inflatable chimney balloons are designed to fit beneath your fireplace flue during periods of non-use.
Sources of Air Leaks in Your Home Areas that leak air into and out of your home cost you lots of money.

Source: http://www.energysavers.gov/tips/air_leaks.cfm
Dropped ceiling
light 2. Attic entrance
Sill plates
Water and furnace flues
Door frames
Chimney flashing
Window frames
Electrical outlets and switches
The following are some of the most common improvements that assist in making a historic building more energy efficient and weather tight:
Weatherstripping helps seal air leaks around movable joints, such as windows or doors. Foam or rubber weatherstripping should be applied to all doors and windows in a historic home. Weatherstripping should withstand the friction, weather, temperature changes, and wear and tear associated with its location. It should seal well when the door or window is closed while allowing it to open freely.
Caulking should be applied to any gap seen between window and door trim and the exterior of a house, the tops of doors and windows, and at other small cracks around the building’s foundation at the sill. A siliconized caulk will allow for some movement while retaining its integrity for many years. Gaps larger than 1/4” should first be filled with foam backer rod in order to provide a base for the caulk to adhere to.

The application of weatherstripping and caulking are considered basic maintenance and requires no administrative or Heritage Commission approval prior to their installation.
Inadequate insulation and air infiltration are the top causes of energy inefficiency in homes. Many older homes have inadequate insulation in spaces like attics, crawl spaces, ceilings, garages, and basements. Proper insulation can help lower heating and cooling bills, and provide a sound barrier between interior spaces. There are numerous types, materials, and manufacturers of insulation. These include cotton or
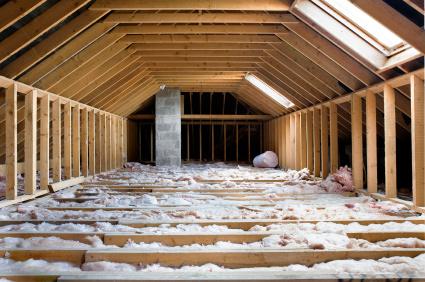
fiberglass batts, blown-in cellulose, foam board, and spray-on open and closed cell expanding foam, to name just a few. However, it is highly discouraged to pump or blow in insulation into closed wall cavities in historic buildings. Packing the cavities and limiting air flow does not allow building materials such as plaster walls, wood, stone, or brick to breathe. This lack of air flow can actually encourage the retention of moisture in the walls and can create a breeding ground for mold and mildew. Moisture retention in exterior walls can also cause exterior peeling of paint and the de-lamination of stone and brick.
Insulation can be installed by the property owner or a qualified contractor with no administrative or Heritage Commission approval required.

Introduce or add insulation when:
•There is little or no insulation in unconditioned, easily-accessible areas such as attics, basement ceilings, and garage walls;
•It is noticeably and consistently cold in the winter or hot in the summer;
•A new addition is added; and,
•Energy bills are consistently high in the summer and winter.
It is estimated by the U.S. Department of Energy that only 20% of homes built before 1980 are well insulated.
Locations where insulation should be added in the home.
Source: http://www.energysavers.gov/tips/insulation_sealing.cfm


The introduction of heating and cooling systems to areas not previously conditioned, may cause damage to the building both on the exterior and interior. Prior to the installation of new mechanical equipment, refer to an energy audit performed on the building or consult a professional heating and cooling contractor about your building’s specific heating and cooling needs in order to determine the size/capacity of mechanical units that will be required. Choose ENERGY STAR ® equipment and carefully consider the placement of the new equipment on the building site so the equipment is not visible from the public right-of-way.
Historic wood and metal windows and doors typically have a good thermal rating (or U-value) to begin with, and are not the main cause of energy loss. Inadequate insulation and not sealing up gaps where air infiltration occurs are the leading causes for energy loss. Existing historic windows and doors are simple to retrofit for greater energy efficiency. Improvements may include the installation an additional layer of glass increasing single pane windows to double pane, and re-glazing. A larger investment may include the installation of storm windows or doors. Retrofitting windows with additional panes of glass and re-glazing both require no review or approval and are encouraged by the Commission.
Installation of new storm windows and doors, while appropriate, may affect the exterior appearance of the building from the public right-of-way. As a result, installation of new storm windows and doors requires administrative review and approval.

To further decrease drafts around doors and windows, framing around windows and doors can be carefully removed to accommodate the application of sprayed expanding foam. This project is best accomplished when the property owner is looking to restore original historic windows as trim pieces are often removed as a part of this restoration process. Please note that every effort should be made to retain the original trim around doors and windows. As with other basic maintenance, this treatment requires no review or approval.
If historic wood or metal windows and doors are no longer repairable, the installation of new windows and doors will be considered by the Heritage Commission on a case-by-case basis.

•Install tight-fitting, insulating interior window shades on windows that feel drafty after weatherizing.
•Hang lined curtains. Close curtains and shades at night; open them during the day.
•Keep windows on the south side of the house clean to let in the winter sun.
•Install exterior storm windows. Storm windows can reduce heat loss through the windows by 25% to 50%. Storm windows should have weatherstripping at all movable joints; be made of strong, durable materials; and have interlocking or overlapping joints. Storm windows incorporating low-e glazing save even more energy.
•Repair and weatherize your current storm windows and doors.
*Source: U.S. Department of Energy - http://www. energysavers.gov/tips/windows.cfm
•Install white window shades, drapes, or blinds to reflect heat away from the house.
•Close curtains on south and west-facing windows during the day.
•Install awnings on south and west-facing windows.
•Apply sun-control or other reflective films on southfacing windows to reduce solar gain.
*Source: U.S. Department of Energy - http:// www.energysavers.gov/tips/windows.cfm


All figures based upon article by: Lord, Noelle. “Embracing Energy Efficiency.” Old-House Journal Sept. 2007: 40-45. Print.
*Estimated cost of Average 3’x5’ window, installed by a professional (discount per unit may apply for whole house)
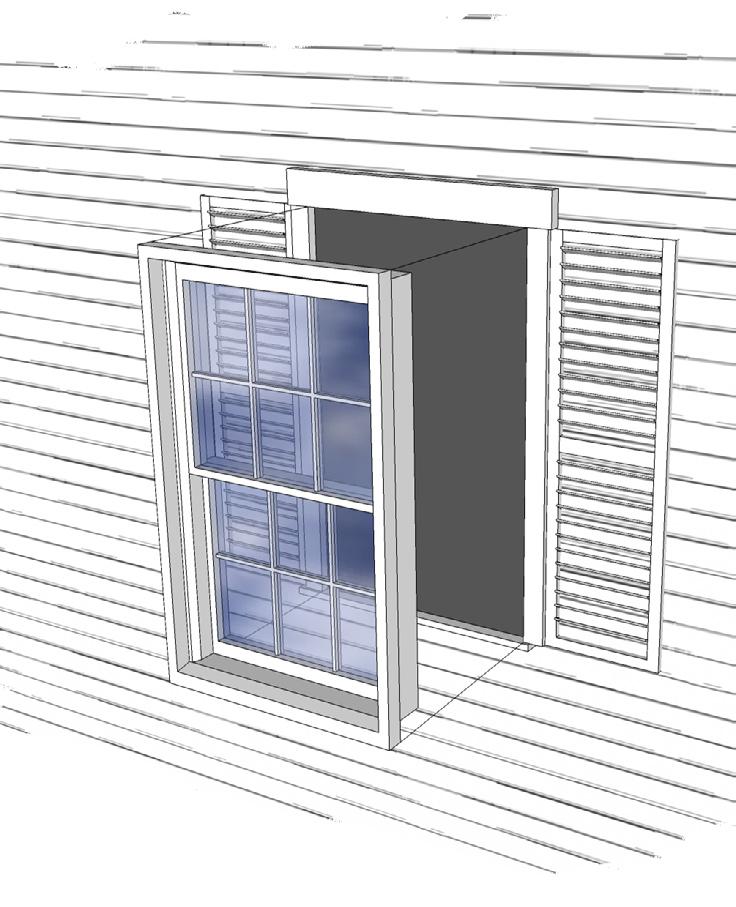


**Assuming gas heat at $1.09/therm

For additional information regarding historic windows and doors please refer to these sources:
“The Effects of Energy Efficiency Treatments on Historic Windows,” Center for ReSource Conservation, (http://conservationcenter. org/assets/EffectsEnergyonHistoricWindows.pdf). January, 2011.
“Home Improvement: Improve Your Home’s Energy Efficiency with ENERGY STAR,” U.S. Environmental Protection Agency and U.S. Department of Energy, (http://www.energystar.gov/index.cfm?c=home_improvement.hm_improvement_index). 2010.

“Restoring Window Sashes,” Gibney, David, Fine Homebuilding, (http://www.finehomebuilding.com/PDF/Free/021161084.pdf). March, 2004.
“National Park Service Technical Preservation Brief No. 9: The Repair of Historic Wood Windows,” (http://www.nps.gov/history/hps/ tps/briefs/brief09.htm). 1981.
“What Replacement Windows Can’t Replace: The Real Cost of Removing Historic Windows,” APT Bulletin: Journal of Preservation Technology, (http://www.state.il.us/hpa/PS/images/replacement_windows.pdf). 2005.
“Top Myths About Replacement Windows,” Louisiana State Historic Preservation Office, (www.prcno.org). December 2008/January 2009.
“Embracing Energy Efficiency,” Old-House Journal, (http://www.oldhousejournal.com/embracing_energy/magazine/1453). September/October 2007.
“Creating Windows of Energy-Saving Opportunity,” Shapiro, Andrew M. and James, Brad, Home Energy Magazine Online, (http:// www.homeenergy.org/archive/hem.dis.anl.gov/eehem/97/970908.html). September/October 1997.
“Measured Winter Performance of Storm Windows,” Klems, Joseph H., Lawrence Berkeley National Laboratory, (http://escholarship. org/uc/item/05p5881m). August 2002.
A well-designed landscape can add curb appeal to a property and can also help to reduce heating and cooling needs. According to the U.S. Department of Energy, appropriately placed landscaping elements can provide real energy savings to property owners. On the average, the initial investment in landscaping materials is recovered in less than eight years.
Landscaping elements include shade trees, native shrubs, grasses, and groundcovering (plants which serve to keep the soil from eroding). For example, planting a large deciduous tree on the south and west sides of a house will shade the house in summer, and allow sunlight into the windows to help heat the house in the fall and winter. Proper selection of landscape elements which grow within the USDA Hardiness Zone for Missouri is critical. Native trees and plants to Missouri are always a good choice, for they are already adapted to the region’s climate.

Only the removal of mature trees is regulated by the Heritage Commission. The Commission encourages the introduction of historic landscape patterns, native plantings and mature trees on historic properties.


In this chapter you will find:
Sustainability and Historic Preservation: Saving Money, Energy and Resources

Introducing New Technologies to Historic Buildings
•
Low-tech and High-tech Solutions
•
Solar Panels
•
Wind Turbines
•
Skylights
Sitework
•
Composting

•
Water Conservation
•
Pervious Paving Materials
•
Rain Barrels and Rain Gardens
Certificate of Appropriateness Review Requirements
Sustainability COA Approval Matrix

Sustainability can enhance the livability of a historic • residence or business
Sustainable practices help to save the environment by
conserving resources
There are many technologies (both low and high-tech) • that can help improve the energy efficiency of a property and save money
Implementing sustainable practices increases a building’s
market value
Today’s historic property owners are conscientious about saving money while being sustainable, by introducing energy-efficient improvements to their homes and businesses. Historic preservation has all the components to address sustainability on all fronts – environmental, economical, and social. Historic buildings are inherently sustainable for they were often designed and built using sustainable principles. They were typically constructed with materials produced locally, and were positioned on a site to take advantage of natural light and passive heating and cooling methods, natural ventilation, and landscape plantings. These same design and construction principles are encouraged today for new construction to create sustainable or ‘green’ buildings and environments.
The preservation of existing buildings is environmentally friendly because it uses fewer new resources, and diverts waste from local landfills. When a historic property is demolished, aside from a social/cultural loss, the majority of the embodied energy of the building is also lost. According to an article found within a bulletin published by the Association for Preservation Technology (APT), embodied energy is defined by sustainability experts as “the sum of the energy required to extract raw materials, manufacture, transport and install building products” (Sedovic, Walter and Gotthelf, Jill H. “What Replacement Windows Can’t Replace: The Real Cost of Removing Historic Windows,” 2005).
Buildings rehabilitated or adapted to new uses, conserve this invested energy, and help to curb the need to build on undeveloped land. Materials that are salvaged and reused also preserve their embodied energy. Through the use of a construction waste management plan, materials that are not reused are diverted from the landfill to recycling centers where they will be recycled into new products.
"It takes energy to construct a new building—it saves energy to preserve an old one." (Poster Caption)
Source: National Trust for Historic Preservation, Preservation Week Poster, 1980.

“Sustainable development is development that meets the needs of the present without compromising the ability of future generations to meet their own needs.”
”Report of the World Commission on Environment and Development,” United Nations General Assembly Resolution 42/187, (http://en.wikipedia.org/wiki/Sustainable_development - cite_ref-0 (United Nations). 11 December 1987.
The following definitions come from the U.S. Environmental Protection Agency: Recycled-content products: products made from materials that would otherwise have been discarded. Items in this category are made totally or partially from material destined for disposal. Recycled-content products can also be items that are rebuilt or remanufactured from used products.

Post-consumer content products refers to material from products that were used by consumers or businesses and would otherwise be discarded as waste. If a product is labeled “recycled content” the rest of the product material might have come from excess or damaged items generated during normal manufacturing processesnot collected through a local recycling program.
Recyclable products can be collected and remanufactured into new products after they have been used. These products do not necessarily contain recycled materials and only benefit the environment if people recycle them after use. Check with your local government to determine which items are recyclable in your community, and where the nearest recycling center is located.
©iStockphoto.com/ChrisSteer
Preservation contributes to the local economy by: utilizing local labor, generating revenue from the purchase of materials from local businesses, and increasing property values. Sustainability and historic preservation positively impact our society through the protection of cultural resources and our identity within the community. It also encourages the retention of community connections through livable, walkable neighborhoods, and the retention of local schools and unique character defining architecture.
A walkable neighborhood is an area with a diverse mixture of parks and public spaces, schools, businesses, mixed income/mixed use properties, and pedestrian friendly streets and sidewalks. Walkable communities can also give the people who live and work in them many health benefits including: a healthier environment and healthier people due to the proximity of public amenities within walking distance and a healthier economy by increasing property values. This type of neighborhood thrives as a historic district because of these characteristics. The preservation of neighborhood character through historic districts also offers additional opportunities for heritage tourism and financial/ business growth, which in turn will help community stability and prosperity.

Historic neighborhoods and commercial centers in Independence display many characteristics inherent in their design that incorporate sustainable living concepts. Much of the city was designed before the invention of automobiles, making it a very walkable, pedestrian friendly community. The building stock was constructed from local materials in a manner that took advantage of sustainable principles. (For example, large wrap-around porches were designed and built to take advantage of natural light and ventilation. The design of the porches provided areas which blocked the harsh sun in the summer and permitted warming sun in the winter.) By learning about these features and recognizing all the advantages they offer, property owners can live sustainably while respecting and maintaining the unique, historic components of their property.
©iStockphoto.com/ChrisSteer


Technologies are continually evolving and advancing to increase the energy efficiency of buildings. These ‘green’ products may help to solve the perceived inefficiency of historic buildings by helping owners to realize their building’s existing strengths and future potential. Great care must be taken to ensure that the building and/or district’s historic integrity remains intact. New does not always mean better. The long-term effects of these products on the historic building should be taken into consideration prior to the initiation of work, including: the product’s design, material, installation method, proposed location, and life-cycle cost. A product’s life-cycle cost refers to how it is manufactured, shipped, utilized, and later disposed of. It also can refer to the product’s initial investment, and if this money can be recovered by saving money/energy over a reasonable amount of time. (For example, the lifecycle cost of solar panels may be seem to be a very ‘green’ improvement by helping to reduce the home owner’s fossil fuel use. However, if the solar panels traveled thousands of miles to get to the site, were are installed by a contractor from hundreds of miles away, and were installed in a part of the country that gets only minimal to average sunlight, then it could take over 30 years to recover the initial cost of the panels and the energy expended to manufacture, ship and install the panels. It would not be the most sustainable choice.) If the product addresses the issue at hand, has a reasonable life-cycle cost, and is sensitive to the historic nature of the property, it may be considered an appropriate, permanent solution. High-tech options are often the most expensive and invasive to a historic property, meaning that they have the greatest potential to impact the property either physically, visually or both. Whereas Low-tech options are often less expensive and their installation reversible.

New eco-friendly products will be evaluated on a case-by-case / property-byproperty basis by the City’s Preservation Division staff and the Heritage Commission.


Low-tech Solutions
Historic window and door repair/restoration
-Tighten wood sashes
-Weatherstripping
-Expanding foam around windows & doors
-Caulking
-New glazing compound
Re-glazing existing windows
Storm windows and doors
Clotheslines
Roof ridge vents
Rain barrels and water collection systems
Air sealing wall joints (sill plates), wiring, plumbing, chimney, and fixture penetration
Cotton batt or cellulose insulation for all easily-accessible, unconditioned spaces
Attic door blankets
Seal all air ducts with professional-grade duct tape or mastic
Foam gaskets behind outlets and switchplates
Compost bins
High-tech Solutions
New mechanical systems such as high-efficiency furnaces, ground source systems, or solar air-heat panel systems
Solar light tubes/skylights
Solar-powered attic fans
Biomass pellet heating stoves
Dual flush toilets
Energy Star-rated appliances
Wind turbines
Solar panels
Retrofit existing windows with double pane glass
Composite siding (new construction and additions only)
Solar water heaters or tankless water heaters
White membrane roofing for flat roofs
Green roofs with native plant materials for flat roofs
Geothermal heating and cooling systems
Information about solar panels and historic properties from the National Trust for Historic Preservation: http://www.preservationnation.org/issues/sustainability/solar-panels/design-guidelines.html

Locate solar panels on the site of a historic resource. If possible, use a ground-mounted solar panel array. Consider solutions that respect the building’s historic setting by locating arrays in an inconspicuous location, such as a rear or side yard, low to the ground, and sensitively screened to further limit visibility. Care should be taken to respect the historic landscape, including both its natural (i.e. topography) and designed (i.e. materials) features.
Locate solar panels on new construction. In cases where new buildings or new additions to historic buildings are proposed and approved, encourage the placement of solar panels on the new construction. To achieve overall compatibility with the historic building and its setting, consider solutions that integrate the solar panel system in less visible areas of the new design.
Locate solar panels on non-historic buildings and additions. If the site cannot accommodate solar panels and the project does not include new construction, consider placing solar panels on an existing, non-historic addition, or on an accessory structure. This will minimize the impact of solar installation on the significant features of the historic resource and protect the historic fabric against alteration.
Place solar panels in areas that minimize their visibility from a public thoroughfare. The primary façade of a historic building is often the most architecturally distinctive and publicly visible and thus, the most significant and character defining. To the greatest extent possible, avoid placing solar panels on street-facing walls or roofs, including those facing side streets. Installations below and behind parapet walls and dormers or on rear-facing roofs are often good choices.
Avoid installations that would result in the permanent loss of significant, characterdefining features of historic resources. Solar panels should not require alterations to significant or character-defining features of a historic resource, such as altering existing roof lines or dormers. Avoid installations that obstruct views of significant architectural features (such as overlaying windows or decorative detailing) or intrude on views of neighboring historic properties in an historic district.
Avoid solutions that would require or result in the removal or permanent alteration of historic fabric. Solar panel installations should be reversible. The use of solar roof tiles, laminates, glazing, and other technologies that require the removal of intact historic fabric or that permanently alter or damage such fabric, must be avoided. Consider the type and condition of the existing building fabric for which solar panels installation is proposed, as well as the method of attachment and future removal. Minimizing the number of points of attachment, including the use of brackets, will avoid damaging the historic fabric.
Require low profiles. Solar panels should be flush with – or mounted no higher than a few inches above – the existing roof surface. They should not be visible above the roofline of a primary façade.
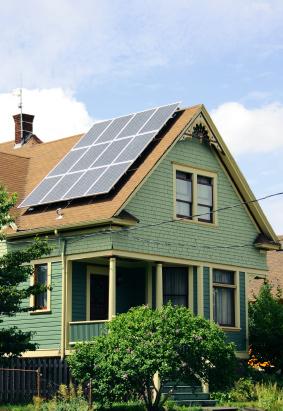
On flat roofs, set solar panels back from the edge. Because they are generally hidden from view, flat roofs can provide an ideal surface for solar panel arrays. To ensure that a solar installation is minimally visible, set the solar panels back from the roof's edge and adjust the angle and height of the panels as necessary.
Avoid disjointed and multi-roof solutions. Solar panels should be set at angles consistent with the slope or pitch of the supporting roof. For example, avoid solutions that would set panels at a 70 degree angle when the roof pitch is 45 degrees. In addition, solar panels should be located on one roof plane (as opposed to scattered among several roofs) and arranged in a pattern that matches the general shape and configuration of the roof upon which they are mounted.
Ensure that solar panels, support structures, and conduits blend into the surrounding features of the historic resource. The overall visibility and reflectivity of solar panels and their support structures can be substantially reduced if elements of the solar installation match the surrounding building fabric in color.
Solar panels require the Heritage Commission’s review and approval. Applications will be evaluated on a case-bycase / property-by-property basis by City’s Preservation staff and the Heritage Commission.
Wind Turbines
Prior to the installation of a wind turbine, consider the following:
• and zoning department for any zoning restrictions.
Prior to purchasing a wind turbine, check with the local planning

• of the building and address them.
Have an energy audit performed to assess the energy inefficiencies


• is proposed.
Research the average wind speed for the area where the turbine
Talk to your neighbors. Before moving ahead with a wind turbine
• purchase, discuss your plans with your neighbors and the City to assess the viability of a turbine.
Wind Turbines require the Heritage Commission’s review and approval. Applications will be evaluated on a case-bycase / property-by-property basis by the City’s Preservation staff and the Heritage Commission.
©iStockphoto.com/Ralph125

Skylights are usually installed on the roof of a building and are used for day lighting the interior of a building. There are several types of skylights including: do-it-yourself skylight kits, sky tubes (which are smaller in surface area and reflect light from the sky down into the building through a highly reflective tube), acrylic ‘bubble’ type skylights, and of course, glass skylights.
Correct skylight design can help energy savings in residential, commercial, and industrial applications. They help to illuminate the interior of a building using natural day lighting by reducing the need for electric light. However, skylights that are poorly constructed and/or installed may cause leaking problems and single-paned skylights may weep with condensation. Care should be taken when choosing a skylight and locating it on the roof of the building.
Skylights/sky tubes require the Heritage Commission’s review and approval. Applications will be evaluated on a case-by-case / property-by-property basis by the City’s Preservation staff and the Heritage Commission.
©iStockphoto.com/KVMithani
For additional information regarding sustainable technologies and historic buildings please refer to these sources:
National Park Service Weatherizing and Improving the Energy Efficiency of Historic Buildings:
http://www.nps.gov/history/hps/tps/weather/index.html

Center for ReSource Conservation: http://conservationcenter.org

Sierra Club, Green Home Blog: http://www.sierraclubgreenhome.com
Whole Building Design Guide: http://www.wbdg.org/resources/sustainable_hp.php
Mid-America Regional Council: http://www.marc.org
Habitat for Humanity ReStore: http://www.restorekc.org/portal/page/portal/ReStore


Conservation-oriented sustainability site improvements range from the installation of rain barrels to compost bins to solar ground lighting. Improvements considered reversible, meaning that they could be installed or removed without affecting historic building materials on buildings or other structures (garages/outbuildings) are encouraged by the Heritage Commission and require no additional review or approval.
Composting allows for the recycling of organic matter from daily waste. Nature recycles everything from debris to waste and remains. Composting is a way of using and mimicking nature that can be a money saving measure, is beneficial for home gardening, and reduces the waste that would otherwise end up in a landfill or an incinerator. The organic matter in the soil produced from compost can improve plant growth by amending the soil, adding water and nutrient-holding ability, and supplying vital nutrients.
There are many things a typical homeowner can include in their home compost. Any organic yard waste has potential, including grass clippings, leaves, weeds, and dead garden plant remains. Woody plants should generally be left out of the compost but when chipped or shredded they can be used as mulch or pathway material. Kitchen scraps that can be used include wastes that do not contain meat, bones, or fatty foods. There are many variations on strategies for composting.
Research should be done for specific materials that can be composted and what strategy is best for individual homeowners.

©iStockphoto.com/cjp


Methods of Reducing Potable Water Use:
• Use graywater from sinks, showers, flush toilets (Check with the City of Independence for code requirements and city ordinances)
• Harvest water from roof and site runoff for use in toilets
• Faucet Aerators
• Low-Flush Toilets
• Toilet Displacement Devices
• Low-Flow Showerheads
• Pressure Reduction
• Automatic Controls
• Dry Fixtures – like composting toilets (Check with the City of Independence for code requirements and city ordinances)

• Altering user habits and practices
Pervious Surfaces are surfaces that allow stormwater runoff to infiltrate into the subsurface. Most pavements used in streets, sidewalks, and parking lots today are considered impervious. The following list of materials can create pervious surfaces for commonly encountered situations. Properties need to consider ADA requirements when choosing an appropriate pervious paving solution. Review by the Heritage Commission does not connote compliance with ADA regulations. For a complete list of requirements, consult the most current ADA Standards for Accessible Design and the current building code of the City of Independence.
Pervious Materials:
• Porous asphalt
• Porous concrete
• Grass and plastic grid system
• Concrete grids with grass

• Concrete grids with gravel
• Pavers with airspace between modules
• Crushed stone
©iStockphoto.com/wyndy25 ©iStockphoto.com/berkant_sezer
Rain barrels are a new term for an old invention, also known as a cistern. Rain water is captured from a building’s downspouts and gutters and collected in a large receptacle. These simple containers conserve water by reducing the amount of potable water used for irrigation purposes. Collected water is typically used for watering of exterior plantings, landscaping, and gardens. The barrels come in various shapes, sizes, and colors and can be attached to most downspouts with ease. Care should be taken about choosing an appropriate size/quality of rain barrel, and to place them around the building’s site in a visually pleasing location.
One way which helps to alleviate excess water from being directed into storm sewers are small, well kept rain gardens which act as a temporary overflow retention pond and can be constructed on a building’s site.
A rain garden slows down, captures, and absorbs water using native plant materials, rocks, and shallow depressions in the soil to let rain water temporarily collect and be absorbed by the soil. These gardens improve water quality in lakes, streams, and rivers by reducing top soil run off, chemical pollutants, and soil erosion. Rain gardens can help cities cut costs and save tax dollars by helping to manage storm-water run off, and reduce the need for additional infrastructure such as larger storm sewers and retention facilities. The gardens also can provide a beautiful, natural wildlife habitat when properly maintained on a regular basis.
A 1,000 square foot roof can produce more than 600 gallons of runoff for every 1” of rain that falls on it. If your downspouts are connected directly to a storm drain, disconnecting them is the single most important step you can take to reduce runoff. Instead of allowing water to go directly into the sewer or to run into the street, direct your downspouts toward a vegetated area, such as your garden or lawn. Use extensions to ensure the water comes out at least 5 feet away from your foundation.

Residential irrigation accounts for up to 40% of domestic water consumption in a given municipality. Rain barrels capture and store water for later use.
It only takes 1/4 inch of rainfall runoff from the average roof to completely fill a typical 55-gallon barrel.Information about rain gardens from 10,000 Rain Gardens: http://www.rainkc.com
One inch of rain running off of an average 1,500 sq. ft. house equals 935 gallons of water and can fill up to sixteen 55 gallon rain barrels or more than 13 bathtubs! - Information about rain gardens from University of Maryland University College: http://www.umuc.edu/gogreen/resources/rainbarrels.shtml
For additional information regarding sustainable site work:

U.S. EPA Water-Saving Tips: www.epa.gov/OW/you/chap3.html
Missouri Department of Natural Resources and Grow Native* sponsored brochure about rain gardens: http://www.epa.gov/owow_keep/NPS/toolbox/other/KSMO_buildRainGarden.pdf
*Grow Native! is a joint program of the Missouri Department of Conservation (MDC) and the Missouri Department of Agriculture (MDA). The Grow Native! program helps protect and restore our state’s biodiversity by increasing conservation awareness of native plants and their effective use.
Kansas City’s Rain Garden Initiative: 10,000 Rain Gardens - www.rainkc.com
“Discover Rain Gardens - A Kansas City, Missouri, initiative provides inspiration for cleaner, greener community landscapes” Lowes Creative Ideas for Home and Garden, (http://www.lowescreativeideas.com/outdoorliving/0508/raingardens.asp)
Center for ReSource Conservation: http://conservationcenter.org


The Independence Heritage Commission encourages energy-efficiency and sustainability upgrades to historic houses with the understanding that retaining the historic integrity of the building is a priority. Many of the retrofits that can be made to existing houses can be completed without administrative or Heritage Commission review. Those improvements that require any exterior alterations, ground disturbance, or changes to building materials, such as the installation of solar panels, wind turbines, ground source heating, and window/door replacement, requires Heritage Commission approval.
The installation of all items listed in this chapter are encouraged in locations that cannot be viewed from the public right-of-way (streets and sidewalks), and are required to be reviewed by the Heritage Commission. All applications will be evaluated on a case-by-case / property-by-property basis by the City’s Preservation staff and the Heritage Commission. The City’s Preservation staff and Heritage Commission will review sustainability improvements based upon the Secretary of Interior’s Standards for Rehabilitation and these Design Guidelines.
Please refer to the Sustainability COA Matrix for specific review requirements.
If you have questions about a project, please contact the City’s Preservation Division at (816) 325-7419 to learn more about application and review requirements prior to the start of any retrofit.


In this chapter you will find:
Demolition
Mothballing Treatment
Types of Demolition By Neglect and Recommended Corrective Measures


Historic designation, either local or national, does not protect historic resources from demolition. Demolition requests for buildings or structures within a locally designated historic district or demolition of a historic landmark always requires Heritage Commission review prior to issuance of a permit. In addition, according to City Code, Article 1.30.009, the Heritage Commission must also review all city-wide demolition permits for buildings or structures, whether they are designated or not. In order to expedite this process, the Preservation Division staff reviews each demolition permit that is applied for. If the property is located within an area that has a high concentration of historic resources (for example, historic districts or those areas recognized in Chapter 11 of the City’s Comprehensive Plan), the demolition request must first be reviewed by the Commission prior to issuance of a permit. The Heritage Commission Review Policy provides applicants who have been denied a demolition COA by the Heritage Commission or Preservation Division staff, the opportunity to appeal the decision with the City Council.
Demolition of a historic building, outbuilding, or accessory structure should only be considered when the building is so deteriorated that it is no longer safe to occupy and cannot be rehabilitated. It is up to the property owner to show proof of structural stability or evidence of severe deterioration, associated rehabilitation costs if the building was put back into service, and evidence that maintenance was not deferred by the current property owner. A structural report prepared by a professional may be used to substantiate the owner’s request for demolition.
Each demolition request is evaluated on a case-by-case / propertyby-property basis by the City’s Preservation staff and the Heritage Commission.


ü A pre-application meeting with staff (recommended, not required)
ü A completed COA Application with property owner’s signature

ü Photographs of the building(s) or structure(s) to be demolished
ü Structural engineer’s report
ü Cost estimates for rehabilitation vs. demolition
Refer to the Certificate of Appropriateness application process found in Chapter 4 for more detailed information about the Heritage Commission review process.
The Heritage Commission adopted a policy outlining their requirements for review of city-wide demolition requests to provide guidance to City staff as well as to property owners. The policy can be obtained from the Preservation Division and is as follows:
Pursuant to City Code §1.30.010(6), requiring the review of all city-wide demolition permits by the Independence Heritage Commission, the following policy applies:
A. The City Historic Preservation Manager shall, within three days of receipt of an application for demolition permit, verify, through a physical inspection or through documentation, the dates of construction of the building or structure to be demolished.

B. If the Historic Preservation Manager determines that the application for demolition permits that involves:
1) Any built resources (including, but not limited to, buildings, garages, sheds, barns, etc.) that is older than 100 years of age; or,
2) Any property older than 45 years of age that qualifies under the following criterion:
a) Any property eligible for listing or already listed individually in the local or National Register or as a part of a local or National Register District possessing architectural, archaeological, or historical significance as described in the Unified Development Code §14-907-06 & §14-908-02;
b) Any property recognized individually or within a proposed district boundary in Chapter 11 of the City's Comprehensive Plan;
c) Any property within 300' of an established local or National Register Historic District; or,
d) Any building or structure tagged as a “dangerous building” by the City's Building Official that is neither structurally unsound nor a hazard to public safety that meets the criterion above.
The Historic Preservation Manager shall submit the application for demolition to the Heritage Commission for review. Review shall be scheduled within thirty days.
C. All applications that do not meet the above criteria for Heritage Commission review shall be approved by the Historic Preservation Manager.
Reference:
Preservation Brief 31: Mothballing
Historic Buildings
If a property owner is denied approval of the demolition of a building, the property owner may elect to do nothing but secure the building, a treatment also known as “mothballing.” This course of action is acceptable only when the lack of attention does not result in the further deterioration of the building or its unique architectural features. If the building is vacant, it should be boarded and secured from public access.
NOTE: The Heritage Commission and the Preservation Division can never override a decision by the Building Official if a building or structure poses a life or safety issue. If a building/structure is tagged for an “emergency demolition”, meaning an immediate threat to the public’s safety and in imminent danger of collapse, no Commission or Preservation staff review is required.
“Demolition by neglect” is one of the most serious threats to the preservation of the City’s historic resources. According to the National Trust for Historic Preservation, “demolition by neglect” is defined as, “a situation in which a property owner intentionally allows a historic property to suffer severe deterioration, potentially beyond the point of repair.” This not only applies to the demolition of houses and commercial buildings, but also, barns, carriage houses, garages, retaining walls, etc. While there can be numerous reasons not to address maintenance issues on a building, the intentional withholding of basic maintenance and repair to a historically designated building is prohibited by the City’s Unified Development Code, Section 14-907-23(C).
The Heritage Commission and City staff are authorized to survey historic properties and request a code violation citation and serve fines if serious maintenance issues are not immediately addressed.
The Heritage Commission reviews all demolition; both Owner-initiated reviews and those that are demolition by neglect.
Above: Example of demolition of a residential property, Independence, MO, date unknown
Below: Example of demolition of a commercial property, Kansas City, MO, 2009


There are any number of problems that can lead to the deterioration of a building. The following is a general list of some of the most common problems with some suggested solutions:
If a property owner is denied approval of the demolition of a building, the property owner may elect to do nothing but secure the building, also known as “mothballing.” An open roof, for example, can result in water damage to the interior and risk structural instability and loss of significant features. If the building is vacant, it should be boarded and secured from public access.

Structural instability of a building or a portion of a building is often the most difficult to diagnose and correct. It is often very difficult to determine what failure can be assigned to the property owner and how much time, and wear and tear is responsible for the building’s failure. If structural stability is thought to be cause for alarm, a professional structural engineer should be hired to determine the extent of the damage and the measures necessary to correct it. If structural defects include masonry failure, construction repairs must be made using bricks or stone and mortar that match the existing in material, composition, size, and density.
If the condition of the building has deteriorated to the point that the building or a portion of the building cannot be saved, it is sometimes reasonable to propose demolition as a means of “correcting” the structural failure. The Heritage Commission will consider the roots of the cause when reviewing such a request.

The roof components and associated drainage systems are the most important areas in protecting a building from water damage and deterioration. If a demolition by neglect citation is issued due to failure of the roof or its systems, the Heritage Commission recommends that repairs be made to match the original in material and detail. Flashing is a critical component of a roofing system. Counterflashing should be installed where the roof meets a chimney, dormer, or other changes in the roof line to ensure that water does not penetrate the underlayment or interior.
If roof damage is so extensive or if other structural repairs are required, it may be necessary to replace the entire roof surface.

Specific situations may require different or alternative solutions. City Preservation Division staff and the Heritage Commission is willing to consider any suggestions as long as they adequately address the problems that have created the deteriorated condition. They are available as a resource to assist building owners with maintenancerelated issues that arise on a property.
Missing or broken windows and doors can allow water infiltration and unwanted public access. If left unchecked, water can lead to the eventual demise of a building; ruining the structural fabric of the building and damaging interior and exterior finishes. An open building is also an invitation to vandals and vagrants to enter and possibly damage the building. If a building is missing doors or windows, or if it is abandoned, City Code requires that the building be boarded and that any loose debris be removed.

For a temporary solution to broken or missing doors and windows, secure a piece of plywood or carefully fitted metal panels to the building. The covering should fit tightly inside the frame of the window or door on the exterior of the building. Avoid unnecessary insertion of fasteners into historic exterior siding or masonry.


Exterior finish material such as siding, trim, fascia, soffits, and window casings provide a weather barrier as well as protection for interior finishes. These elements also often carry important architectural features that help define the style and age of the building. When repairing loose or missing exterior finish material, it is important not to remove any character-defining historic fabric. Where replacement material is necessary, it must match the original in material and detail, in-kind. All replacement wood should be primed with oil-based primer, both front and back, and painted after installation for years of lasting wear.

Bingham-Waggoner Estate - 313 West Pacific Avenue - http://www.bwestate.org/
Blue Mills - 3101 Lentz Drive
Dr. John S. Bryant, Jr. and Harriet Smart House (also known as Bryant House) - 519 South Main Street
Andrew Drumm Institute - 3210 Lee’s Summit Road
John and Adele Georgen House - 933 South Main Street
Mollie and Josephine Hughes House (also known as Hughes Childers House) - 801 South Main Street
Jackson County Courthouse - Bounded by Lexington and Maple, Liberty and Main Streets
Jackson County Jail & Marshals House - 217 North Main
Kritser House - 115 East Walnut
Lewis Jones House - 104 Elizabeth
Lewis-Webb House - 302 West Mill
Charles Minor, House - 314 North Sprint Street
Missouri Pacific Depot - 1111 West Pacific
Smallwood V. Noland House - 1024 South Forest Street
Overfelt-Campbell-Johnston House - 305 South Pleasant Street
Owens-McCoy House - 410 West Farmer Avenue
Santa Fe Trail - Santa Fe Trail Park, Independence Trail Segments - Santa Fe Road
Temple Site - Lexington Avenue and River Boulevard
Trinity Episcopal Church - 409 North Liberty Street
Harry S. Truman Heritage District (also known as the Truman Heritage District)- Area along North Delaware and Maple Avenue. (Rough boundaries are from West St. Charles Street to, North McCoy Street, to Lexington Street, to North Union Street to the west.)
Harry S. Truman National Historic Site - 219 North Delaware Street
Vaile, Harvey M. Mansion (also known as Vaile Mansion) - 1500 North Liberty - http://www.vailemansion.org/Welcome.html
Woodson/Sawyer House - 1604 West Lexington
** Those properties underlined are also listed as local Historic Landmarks.
National Registered Properties Independence, Mo.

o h n & A d e l e G e o r g e n H o u s e 9 3 3 S M a i n S 4 H a r r y S T r u m a n N a t i o n a l H s t o r c S i e 2 1 9 N D e l a w a r e S t 5
M o l i e & J o s e p h i n e H u g h e s H o u s e 8 0 1 S M a i n S t 6
J a c k s o n C o u n t y C o u r t H o u s e 1 1 2 W L e x i n g t o n A v e 7 J a c k s o n C o u n t y J a i & M u s e u m 2 1 7 N M a n S t 8 L e w s J o n e s H o u s e 1 0 4 W E l i z a b e h S t 9 K r i s t e r H o u s e 1 1 5 E W a l n u t S t 1 0
L e w i s - W e b b H o u s e
3 0 2 W M i l S t
3 1 4 N S p r n g S t 1 2
1 1 M i n o r , C h a r e s H o u s e
M i s s o u r i P a c f i c D e p o t
1 1 1 1 W P a c i f c
1 3 N o a n d , S m a l w o o d V , H o u s e 1 0 2 4 S F o r e s t A v e 1 4
3 0 5 S P l e a s a n t S t 1 5 O w e n s - M c C o y H o s u e
O v e r f e l - C a m p b e l - J o h n s t o n H o u s e
1 6 S a n t a F e T r a l S e g m e n t s
4 1 0 W F a r m e r A v e
2 7 3 1 S S a n t a F e R d 1 7 T e m p e S i t e
2 0 1 S R v e r B v d
1 8
T r n i y E p o s c o p a l C h u r c h
4 0 9 N L b e r t y S t
2 0
1 9 T r u m a n , H a r r y S H s t o r i c a l D i s t r c t D e l a w a r e S t A r e a
V a l e , H a r v e y M M a n s i o n
1 5 0 0 N L i b e r t y S t
2 1 W o o d s o n - S a w y e r H o u s e
1 6 0 4 W L e x n g t o n A v e 2 2 A n d r e w D r u m m I n s t t u t e
3
2 1 0 S L e e s S u m m t R d
2 3
The Mid-town/Truman Road Corridor (M/TRC) was established in 1996 as part of Chapter 353 of the revised Missouri State Statutes providing property tax abatement to blighted properties or designated areas in order to encourage re-development. In addition to the declaration of blight, a minimum cash investment must be made by each participating property owner in order to qualify for property tax abatement. Abatement can be approved, denied, or even revoked by a designated 353 board made up of community volunteers and local residents.
Although the program officially closed in 2004, the M/TRC, which includes the Truman Heritage Local District, utilizes the Secretary of the Interior’s Standards for Rehabilitation as a minimum standard by which all proposed property improvements must follow and continue to be maintained throughout the life of the abatement. The standards include consideration for the retention of historic building materials such as original wood windows, wood siding, and wood trim, to name a few.


ALIGNMENT - the linear relationship of structures creating a visual line and a sense of continuity along the streetscape.
ALTERATION - any act or process that changes one or more of the exterior architectural features of a building or structure, including, but not limited to, the erection, construction, reconstruction, removal, demolition, or moving of any building, structure or utility.
AMERICANS WITH DISABILITIES ACT (ADA) - a 1990 Federal law that mandates all public buildings are accessible to all people with any type of physical handicap.
ARCHAEOLOGICAL SITE - earthworks, any subsurface remains of historical, archaeological or architectural importance, or any unusual ground formations of archaeological significance.
AREA - a specific, contiguous geographic section of the City of Independence.
BUILDING - a resource created principally to shelter any form of human activity.
BUILDING OFFICIAL - the official who is charged with the administration and enforcement of the City’s Building Code.
CERTIFICATE OF APPROPRIATENESS (COA) - an approval issued by the City of Independence Heritage Commission or the Historic Preservation Manager authorizing alteration, new construction, removal or demolition affecting a defined feature or improvement of a Landmark, Historic District or Conservation District.
CERTIFICATE OF APPROPRIATENESS APPROVAL MATRIX - a comprehensive listing of alterations or other real property improvements that require the following actions: no approval needed, administrative approval required, or Heritage Commission approval required. This document is amended from time to time by the Heritage Commission to incorporate new/changing technologies.
CERTIFICATE OF ECONOMIC HARDSHIP - an approval issued by the Heritage Commission authorizing alteration, removal, or demolition, on the basis of the applicant’s financial constraints to meet the conditions for the approval of a Certificate of Appropriateness referenced in Section 1.30.027.
CITY COMPREHENSIVE PLAN - the comprehensive planning document adopted by the City Council to direct planning and development activities.
CITY COMPREHENSIVE HISTORIC PRESERVATION PLAN - the comprehensive planning document adopted by the City Council to direct historic preservation activities.
CLAPBOARDS - traditional wooden siding consisting of horizontal, overlapping wooden beveled boards which are usually four to six inches wide.
COMMISSIONERS - members of the City of Independence Heritage Commission as appointed by the Independence City Council.
CONSERVATION DISTRICT - an area designated as a “Conservation District” by ordinance of the City Council which possesses special historical, architectural or cultural significance as part of the heritage of the City, but is of lesser historical or architectural significance than a Historic District. A Conservation District has retained a sufficient amount of its historical and architectural character for interpretation as part of the development of the City, including, but not limited to scale, massing, and orientation of buildings, although some alterations have been made.
CONSTRUCTION - the act of adding to an existing building or structure or the erection of a new principal or accessory structure on a lot or property.
CONTRIBUTING PROPERTIES - buildings, structures, public improvements or sites or objects adding to the historic significance of a site or district which by location, design, setting, materials, workmanship, feeling and association add to the site’s or district’s sense of time and place and historical development. While these buildings, structures, land improvements, sites or objects, by themselves may not meet the definition of “significant properties”, they maintain their historical and/or architectural integrity and contribute to their site or district based upon their scale, design, use of materials, location, or age, and retain qualities or have the potential to make a positive and compatible contribution to the character and appearance of a defined area.
CORNER BOARD - a narrow vertical board placed on corners of buildings to terminate the wooden clapboards.
CULTURAL RESOURCES - districts, sites, structures, landscape elements and objects that show evidence of some importance to a culture, a subculture, or a community for scientific, engineering, art tradition, religious, or other reasons, significant in providing interpretation of past life ways and for interpreting human behavior.
DEMOLITION - any act or process which destroys, in part or in whole, a building or a structure.
DESIGN GUIDELINES - a standard by which an appropriate construction activity will preserve/maintain the historic and architectural character of a building, structure, or area.
ELEVATION - any external face of a building.
EXTERIOR ARCHITECTURAL APPEARANCE - the architectural character and general composition of the exterior of a building or structure, including, but not limited to, the type and texture of the building material, as well as design and character of all elements visible from the exterior such as windows, doors, siding, trim, roofs, porches, and ornamentation.
FACADE - an exterior elevation of a building, usually a principal elevation.
FENESTRATION - the composition of windows and doors on a wall.
GLAZING - the glass area of windows or doors.
GREEN SPACE - space that is planted with grass, plants, shrubs, or trees. Sometimes this land is set aside and cannot be built on.
HISTORIC DISTRICT (LOCAL) - an area designated as a “Historic District” by ordinance of the City Council which meets one or more of the criteria contained in Section 1.30.013 of the City Ordinance and that may contain, within definable and contiguous geographical boundaries, one (1) or more contributing resources and which may have within its boundaries other properties or structure that while not of such historical and/or architectural significance to be designated as Landmarks, nevertheless contribute to the overall visual characteristics of the significant, contributing resource(s) located within the historic district.
IN-KIND - a term used to denote replacements which replicate the original element in material, dimension, texture, and color.
INTEGRITY - authenticity of and adherence to a property’s historic and architectural identity, evidenced by the survival of physical characteristics that existed during the property’s historic or pre-historic period.
INVENTORY - a listing of resources which retain levels of historic significance and integrity which includes information regarding their condition, locations, architectural details, history and areas of significance.
LANDMARKS (LOCAL) - a building, structure, or property individually designated as a “Landmark” by ordinance of the City Council based upon meeting qualifications of one or more of the criteria contained in Section 1.30.013. Such properties are worthy of rehabilitation, restoration and preservation based upon their archaeological, historical, cultural and/or architectural significance to the City of Independence.
LOCAL REGISTER - a listing and a means by which to identify, classify, and recognize various sites, buildings, structures, improvements, and districts as archeologically, historically, and/or architecturally significant.
MASS - the measure of scale which refers to the amount of space occupied by a structure of its elements.
NATIONAL HISTORIC LANDMARK - buildings, districts, sites, structures, and objects within the United States or its insular areas and designated by the Secretary of the Interior because they are nationally significant: sites where events of national historical significance occurred, places where prominent Americans lived or worked, icons of ideals that shaped the nation, outstanding examples of design or construction, places characterizing a way of life, or archeological sites able to yield information.
NATIONAL REGISTER OF HISTORIC PLACES - a federal listing maintained by the United States Department of the Interior of buildings, structures, objects, sites, and districts that have attained a quality of significance as determined by the Historic Preservation Act of 1966, as amended.
NON-CONTRIBUTING PROPERTIES - a building, structure, public improvement or site not contributing to the historic significance of a site or district by virtue of the fact that it lessens the site’s or district’s sense of time and place and historical development; or one where the integrity of the original design or individual architectural features or spaces has been irretrievably lost; or one where physical deterioration and/or structural damage has made it not feasible to rehabilitate the property. Ordinarily, structures and buildings that have been built within the past fifty (50) years will be considered non-contributing unless a justification concerning their historical or architectural merit can be established, or the period of significance of the historic district includes structures and buildings less than fifty (50) years old. The period of significance for the Truman Heritage District is 1919-1972. Any future development of these sites will be of concern because of the effect on the continued quality of the surrounding site or district.
PATTERN - the rhythm of architectural elements in a space.
POINTING - the process of filling the gaps between masonry elements with mortar in new masonry construction.
PRESERVATION - a treatment that places a high importance on the retention of all historic fabric through conservation, maintenance, and repair. It reflects a building’s continuum over time, through successive occupancies, and the respectful changes and alterations that are made.
PROPERTY - any historic resource including, but not limited to, the land on which a historic building, structure, site or object is sited in addition to the building, structure, object, physical attributes, and/or related improvements. Historic properties may also be those resources included within a historically designated local or National district.
PROPORTION - the relationship between buildings or elements in a building. For example, the combination of elements in one building is said to be proportionate if they are of like size or dimension to those of an adjacent or neighboring structure.
PUBLIC IMPROVEMENT PROJECT - an action of the City or any of its departments or agencies involving major modification or replacement of streets, sidewalks, curbs, street lights, street or sidewalk furniture, landscaping or portions of the public infrastructure. Such projects may also affect publicly or privately owned buildings or structures.
PUBLIC NOTICE - in accordance with City Code, notice of the time and date of a public hearing shall be published in an official newspaper of general circulation within the City of Independence at least fifteen (15) calendar days prior to the date of such hearing.
RECONSTRUCTION - the re-creation of a deteriorated, beyond repair, or a non-surviving site, landscape, building, structure or object with all new materials replicating documented species and/or materials which existed on the no longer existing site, landscape, building, structure, or object.
REHABILITATION - the act or process of returning a property to a state of utility through repair or alteration which makes possible an efficient contemporary use while preserving those portions of features of the property which are significant to its historical, architectural, and cultural values.
RELOCATION - the removal of a building or structure from its original orientation, or the moving of a building or structure to a new site whereas the building is no longer in situ.
REMODELING - rehabilitating an old building by removing or destroying its original features and substituting new features to give it a new appearance unlike its original look.
REPAIR - any change that constitutes basic maintenance that is not construction, relocation or an alteration.
REPOINTING - the process of removing damaged mortar and replacing it with new mortar in existing masonry construction.
RESTORATION - the act or process of accurately recovering the form and detail of a property and its setting as it appeared at a particular period of time by means of the removal of later work or by the in-kind replacement or repair of missing earlier work.
SECOND EMPIRE - a residential architectural style from 1855-1885. This style is rare within Independence, Missouri. Typical features of this style include a mansard roof (dual-pitched hipped roof), often with dormer windows on the steep slope, decorative cornices at the roof edge termination and decorative brackets beneath the eaves. The house can be found in simple symmetrical floor plans, a centered wing floor plan, asymmetrical plans or L shaped plans and floor plans with a rectangular or square shaped tower. The style reflects the latest French building styles and details which were popular during the reign of Napoleon III, who reigned during the “Second Empire (1852-1870)”.
SIGNIFICANT PROPERTIES - those historical, architectural, or archaeological resources which are determined to be eligible for the local or National Register of Historic Places using the Secretary of the Interior’s Criteria for Evaluation (36 CFR Part 60). Significance is present in districts, sites, buildings, structures, objects, and land such as viewsheds that possess integrity of location, design, setting, materials, workmanship, feeling, and association with events/activities that were important in the past.
SITE - any area or location utilized by humans for a sufficient length of time to construct features or deposit a number of artifacts or any place with evidence of past human activity. Sites include, but are not limited to, occupation, location, work areas, evidence of farming or hunting and gathering, burial remains, artifacts and permanent or temporary structures or dwellings of all types.
SPECIAL USE PERMIT - authorization granted by the City Council for uses allowed only under special conditions of site development within a zoning classification.
STOP WORK ORDER - an order issued by the Building Official directing an owner, occupant, contractor or subcontractor to halt an action for which a Certificate of Appropriateness is required, and notifying the owner, occupant, contractor or subcontractor of the application process for a Certificate of Appropriateness. A Stop Work Order is also issued to stop work that is being done contrary to the provisions of a Certificate of Appropriateness. Such orders may be requested by the Historic Preservation Manager in order to ensure that preservation guidelines, including any conditions imposed by the Heritage Commission, are met.
STREETSCAPE - the overall feeling or emotional response to a street which is made up of components such as: trees, sidewalks, lamposts, pavement and landscaping of the built environment that makes up that street.
STRUCTURE - anything constructed or erected for the purpose of non-habitation, the use of which requires permanent or temporary location on or in the ground, including but not limited to, garages, sheds, fences, gazebos, and swimming pools.
STYLE - a given type of architecture made of specific character defining elements.