

Financial Contributors
Cities
Mission, Kansas
Roeland Park, Kansas
Overland Park, Kansas
Funders
Excelsior Springs, Missouri
Gladstone, Missouri
Grandview, Missouri
Independence, Missouri
Prairie Village, Kansas
Raymore, Missouri
Department of Aging and Adult Services, Mid-America Regional Council

Roger A. and Corinne R. Durkee Fund, Greater Kansas City Community Foundation
W. J. Brace Charitable Trust, Bank of America, N.A. Trustee
Special Thanks
to the National Association of the Remodeling Industry, Jan Burchett and Piper-Wind Architects, Inc. for their contributions to this publication.

Production
Principal Author
Richard Duncan, Executive Director
RL Mace Universal Design Institute, Asheville, North Carolina

With support from
Tim Callahan, Callahan Home Services, Asheville, North Carolina
Cathy Boyer-Shesol, KC Communities for All Ages, MARC
Kristin Johnson-Waggoner, MARC
Bryan Eytcheson, Lunar Designs, Inc. (graphic design)
Accessibility Remodeling (photo contributions)
Cost Estimating
Robert Gurinowitsch, Best Bath
Charlie Schloegel, CR, UDCP, Schloegel
Design Remodel, Overland Park, KS
Lauren Balestrieri, UDCP, L Marie
Interior Design, Olathe, KS
Scott Balentine, MCR, CLC, Black Oak
Construction, Overland Park, KS


To continue to attract and retain families and businesses, Kansas City’s First Suburbs Coalition has been interested in finding ways to maintain the region’s housing, business structures and utilities, and to renew and revitalize these facilities.
In service of these goals, the First Suburbs Coalition, with Piper-Wind Architects, created the Idea Book in 2005; a guide to renovation for owners or prospective buyers of homes built between 1940 and 1970. The book contains ideas for making improvements for each home type to modernize the most crucial elements of homes.
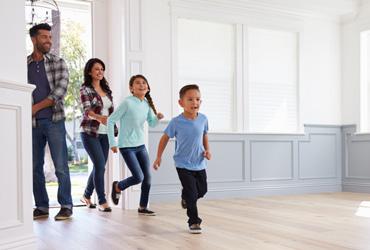
At that time and since then, the changing demographics of the Kansas City metropolitan area have produced a growing need for homes that better support typical activities of people of all ages and are more accommodating as our abilities change. There is a growing need for home renovation information to meet our changing populations, and home and design issues in the 21st century.
support our activities as we grow up, mature and pass through many of life’s changes over time. We’re learning that housing in this century must be able to meet the differing needs and requirements of users. We now know that individual characteristics such as strength or agility should not prevent a person from safely using and enjoying their home’s features.
While it is certainly a good idea to design homes better to begin with, more often we are confronted with the need to modify an existing home so that a family member can live more safely and independently, while maintaining family and community activities.
As a supplement to the Idea Book, the First Suburbs Coalition, in partnership with KC Communities for All Ages, now present Remodeling For Accessible Homes.
In recent years, it has become more widely recognized that many of the homes most of us live in cease to
The need is great and growing. There are 850,000 residential units in the Kansas City Metropolitan Area (KCMA) right now. Perhaps 4% of them have significant accessibility features such as ramps, while 13% of residents require mobility devices like wheelchairs. As much as 20% of the total KCMA population are individuals living with some type of disability. Longer life expectancies will contribute to a more rapidly growing older adult population in the near future. The number of 55+ older adults will increase to 416,000 by 2030, a 31% increase from 2020. Longer life expectancies will contribute to a more rapidly growing older adult population for the foreseeable future. (Sources: The 2019 American Community Survey and the Mid-America Regional Council’s long-range population and employment forecasts for the Kansas City region.)
Some of the features and changes that are described here are custom and specific to the needs of people with significant mobility challenges, including those who operate from a seated position. Accessible design elements for these people include features such as lifts and ramps or permanent knee space under counters may be needed to accommodate a seated person that wouldn’t be appealing to a broad audience. Other features mentioned here offer more generic utility to a much wider group. Examples of these are graded entrances, 42” wide hallways and curbless showers (also called zerostep showers). These generic features that have generalpurpose utility are universal design features. A universal design approach produces more accommodating homes designed in a way that is appealing and marketable to a broad audience. Universal design strives to make day-to-day living and home tasks possible and safer for everyone, allowing a person to remain independent for as long as possible. Both new and remodeled homes might have universal design or custom features, or both, depending on the needs of the people who live there.
A great time to address issues of usability is when significant construction is underway. Because most of us don’t live in universal homes, a great option is to include universal features as a part of otherwise standard remodeling projects: modifying an entrance when doing landscaping or replacing a porch, including better lighting and multiple work surface heights in kitchens or easy-to-use door hardware.
Housing designs that support occupants now and require no expensive modifications when customizations are needed are clearly superior to standard designs. When housing can be safer and more usable by current and future residents, allowing them to “age in place,” countless dollars in costly nursing home and healthcare expenses can be saved. Multiple studies show that most older adults prefer to remain in their homes where close family and community relations can be maintained, contributing to an individual’s sense of place and helping to maintain community cohesiveness, neighborhood permanence as well as individual mental and physical health.

Graded entry Ramps
Vertical platform lifts
Circulation
Widened doors (including pocket doors or barn doors) Stair lifts
Widened hallways
Elevator
Bathroom
Located on main level Grab bars
Curbless shower Knee space at sink
Maneuvering room
Handholds
Kitchen
Located on main level Lowered counters
Maneuvering room Knee space at sink and as worksurface
Stovetops
Front control ranges
Lowered microwaves Lowered storage
Drawer base cabinets
Multiple work surface heights
Bedroom
Located on main level Bed bar to assist getting into and out of bed
Laundry
Universal housing integrates well with the sustainability movement by connecting goals of environmental ecology with the goals of social ecology or social sustainability. Universal homes result in better physical and mental health and are the starting point for all of us in maintaining our connections to family and community life. Note the following examples:
Energy Star washers and dryers are available in front-control/ front-loading models that offer superior ergonomics.
Sealed foundations, when used instead of standard crawl spaces, allow for greater flexibility in the foundation height and use of exterior berms to enable more options for step-free entrance solutions. A sealed crawl space is also an excellent method of controlling heating and cooling costs and avoiding indoor air quality issues that can contribute to respiratory problems.
Adding lumens to existing lighting fixtures can aid older eyes. Added interior natural light through skylights and light tubes increases light and saves energy during the day by avoiding unnecessary artificial light usage. Motion sensing and light sensitive controls turn lights on/off as needed, which decreases energy consumption. Lights using LED bulbs offer substantial energy savings.
Combining sustainable and universal design elements results in a healthier, safer and inviting environment for all who interact in the home. Current users can enjoy these benefits for longer than a similar home that does not design for human performance characteristics. Homes that are constructed of durable and sustainable materials require less maintenance over the lifetime of the home, which benefits future occupants. Low maintenance suits the universal design goals for ease of use and convenience.
Located on main level Reacher to get clothes out of washer or dryer
Front-control/front-loading
washer and dryer
A universal design approach is also consistent with social sustainability in that it prevents or reduces the renovations needed to make a home functional and accessible for people with disabilities and older or activitylimited residents. On the sustainable front, minimized modifications save natural resources by avoiding the use of additional building materials.
This guide addresses several of the most significant remodeling areas for homes: entrances, interior pathways, kitchens and bathrooms. It is critical to ensure that people can get in and out of their home safely. Usable bathrooms are essential for safe and independent use with a temporary or a long-term disabling condition. Safety and independence within one’s home is impacted by bathroom design to a great extent. But full use of the main level of a home can only be achieved when we can move about through hallways and doorways easily, and get to and use the kitchen, as well.
This publication is intended for people who are interested in safer and more usable homes for their families now (families with children or grandparents), families who are responding to a current disabling condition of a household member, or those who are concerned with the future use of their home or its resale value. This guide is intended to introduce readers to basic types of home modification projects and their associated costs. It is important to know that there are differences between home modification projects and standard home repair or remodeling efforts. Home modifications for accessibility can have different design requirements than those that are typically used in remodeling. Accessibility modifications may also require different hardware and equipment. Modifications may include ramps off porches and decks, or interior or exterior lifts. Door and sink hardware have lever handles instead of knobs. Bathrooms may have curbless showers, and grab bar blocking and grab bars. (Blocking is wooden reinforcement installed behind the walls in the bathroom for the purposes of later mounting grab bars). Kitchens feature multiple-height counters, work areas that allow sitting and storage at convenient heights.
Because many of us lack experience with these features, we may have questions about design, construction and prices. While there are many cost estimating guides and sources consumers can turn to for the many standard remodeling projects, there have been few references for estimating costs of home accessibility projects. Most cost estimating references do not cost-out home modifications and few combine costing from the perspective of an experienced practitioner.
While there are differences between home accessibility modifications and standard remodeling, noted above, most home modification projects involve construction and installation issues that are similar to standard remodeling projects. For example, whether you are relocating an electrical outlet so it is reachable by someone who can’t bend down or relocating it nearer to an appliance, the relocation demands the same equipment, materials and skills of the electrician. In this situation, the outlet location is the important point. For someone who can’t reach down, it can make a big difference whether an outlet is 12” above the floor or 18” above the floor. Restroom renovations follow this same pattern. Homeowners commonly renovate and enlarge bathrooms. Typical bathroom renovations are not so different from accessibility upgrades even though access modifications might include a curbless shower, wider door and lever hardware.
Consider the projects and features in this guide as suggestions. This publication explains each modification, provides notes on variations and gives basic costs.
This publication should be used to get ballpark estimates for home modification projects. It should help you figure out if you have a $2,000 project or a $20,000 project. Precise estimates should always be obtained from three qualified remodelers before deciding to go forward with a project. The cost estimates in this publication have been obtained from a variety of sources. Some come from our direct experience with home modification projects or remodeling specialists. We have solicited cost estimates from remodelers and used other cost guides, as well.
The cost estimates listed here are retail costs; that is, they are comparable to a professional remodeler’s price on the open market. Using a nonprofit home repair service or having modifications installed with volunteer labor or donated equipment can cost far less. Costs can vary depending upon several factors, including building type and whether a particular project is attempted alone or as a part of a larger project. Costs can vary from place to place and might also depend on the time of year or the level of activity in the remodeling sector.
We have listed cost ranges to compensate for these project and cost variations; however, your project costs could be different. Unless otherwise noted, all costs include hardware, products and equipment costs.

The project costs listed in this guide include all elements needed for a remodeling project; however, some home owners may choose to implement portions of these modifications at a far lower cost than the renovation of an entire room. Examples include widening doorways, adding grab bars, or replacing appliances.

Unless otherwise stated, cost estimates assume that projects are for a 50- to 70-year-old wood framed house. Other housing types or home age may affect the cost estimates.
We are estimating the project to be of average difficulty with some surprises, delays, etc., which are typical of all home remodeling work.
Materials and finishes are specified as standard quality, including trim and finishes consistent with the existing style of the house.
A series of individual unit costs, if added up, will always cost more than if all the work is contracted together. Individual project costs can be lowered if they are combined with other work.
The costs for all trades, subcontractor, overhead, markup and profit are rolled into the costs.
Working with or moving masonry walls or loadbearing walls will raise the cost of projects. The relocation of electrical or mechanical systems will also add to project costs.

The cost of an engineer, architect, interior designer or other designer will need to be added to the construction cost to arrive at your project total.
Finding experienced professionals to help with universal or accessible home renovations can be a challenge. Asking friends for a referral is a good first step. Refer to the Resources section, page 45, for specific questions to ask. You can go to the Kansas City chapter of the National Association of the Remodeling Industry

(https://www.remodelingkc.com/) for a list of the graduates of their universal design training program.


The National Association of Home Builders runs their Certified Aging-in-Place Specialist (CAPS) designation program, which helps professionals learn technical, business management and customer service skills needed to serve the needs of older adults. To find a CAPS remodeling professional in your area, contact the National Association of Home Builders in Kansas City, www.kchba.org.
The University of Southern California runs their own online Executive Certificate in Home Modifications. You can find their course graduates, here: https://homemods.org/about-us-2/program-alumni/.
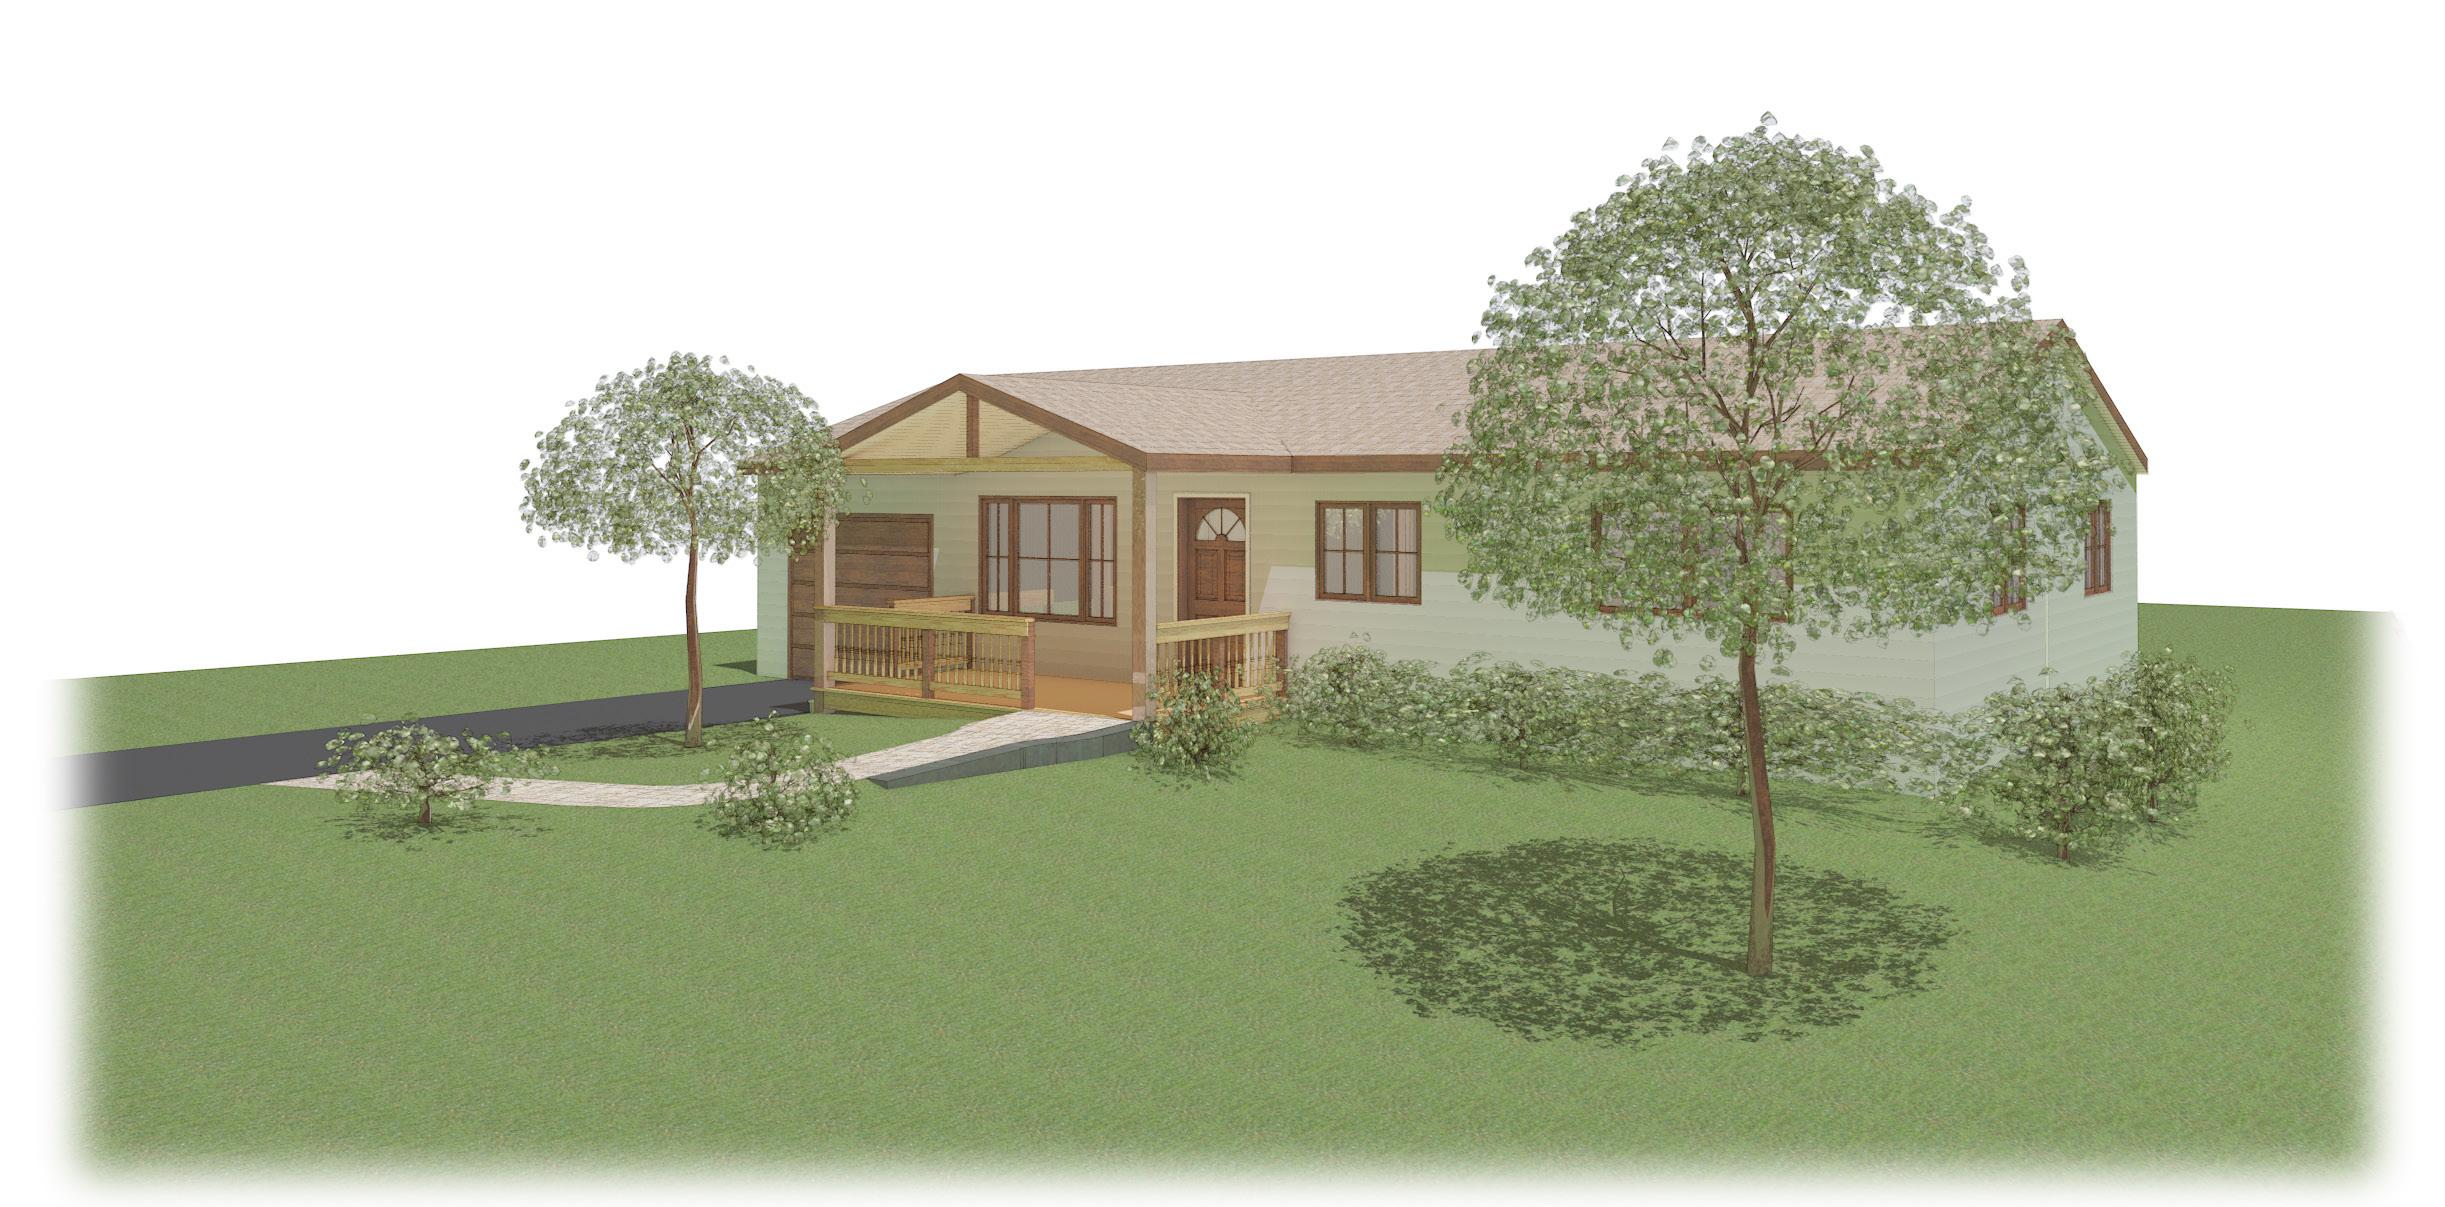
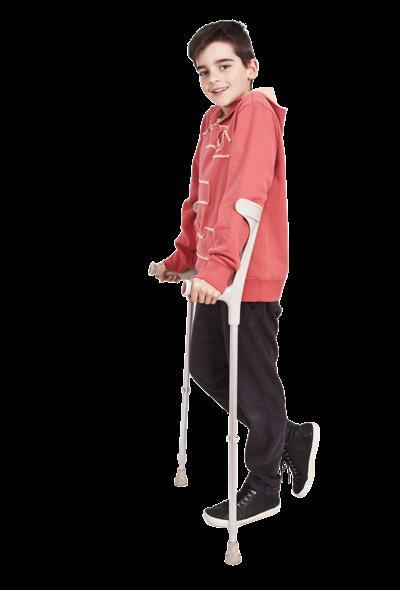
Some people with mobility impairments have trouble with steps and stairs at the entrance to their homes. The problems can include difficulty with balance, requiring a reliance on handrails; strength and stamina problems that prevent them from climbing long flights or require them to rest part way; or an inability to use stairs or steps at all. Entry challenges can range from a high threshold to a single step to a flight of stairs spanning 3 to 4 feet of rise. Several different remodeling solutions might be used alone or in combination. It is common, for instance, for a project that includes a ramp or berm (a gentle sloping path on rising ground from the driveway to entrance) to also include some attention to the entry door.

Ramps are one of the most common of several stepless entrance options that include vertical plat-form lifts and landscaped entrances. Each is appropriate for a particular combination of resources, heights and site conditions. You must carefully weigh the advantages and disadvantages of each option. Below are the outlines of each option.
For many, ramps are the most familiar home accessibility modification. They can be built quickly by carpenters and can be inexpensive, especially when using volunteer groups or donated materials. Although ramps make a significant difference in the lives of those who use them, they may have drawbacks, as well. Ramps accommodating rises above 30” require a lot of construction, are very long, take up a lot of space and
can be quite expensive. Ramps add maintenance for the homeowner, too. Leaf, snow and ice removal plus painting, and periodic repairs all take time and resources. Ramps can also have a negative impact on the appearance of a home, particularly if constructed in an incompatible style. For additional resources on ramps and entries, see the Resources section, page 45.
Site conditions may offer an opportunity to use landscaped earth pathways for a more natural and blended solution than other options. This approach may include a retaining wall, an earth berm and sometimes a bridge to the entrance. A safe path with a gentle slope of 1:20 (1 inch of rise for every 20 inches of run) or less can be built without railings (unless there are abrupt drop-offs on either side or users need them), thereby avoiding the cost and intrusive appearance of the railing. Landscaped options are often more expensive than an equivalent ramped solution but can have a longer lifespan and need less maintenance.
Adding exterior light at entry doors increases a sense of security while allowing easier operation of the lock and general illumination for seeing visitors at night. Motion detector controls can also activate lights when someone approaches the door. Inside, appropriate lighting can significantly reduce the potential for falls in the home. For additional resources on lighting, see the Resources section, page 45.

Ramps should be designed to minimize construction, visual impact and maintenance. It should be as short as possible while being safe and with a slope that is not too steep for the user. The ramp should match the construction and detailing of the home. Ramp costs include footings, rails and decking. Consider using non-wood manufactured decking with textured surfaces for better gripping and lower maintenance.
Paint or stain wooden ramps to preserve the wood and match the home’s color and finish. Let any pressure-treated wood weather for about 6 months before applying a finish. If a ramp is added to an existing covered porch, please factor in additional needed work on the porch itself. This additional work might include raising the deck and existing railings to extend a step-free pathway all the way to the entry door.
Rise from grade – 12”
Add plantings around the ramp to soften its impact on the facade.
The porch roof at the entrance provides weather protection while unlocking and opening doors and prevents rain, ice and snow from getting into the house.
All porches/decks are at the level of the first floor.
Ramps should have as shallow a slope as possible, in no case steeper than 1:12, but usually no steeper than 1:14 up to 1:20.
Level landing at the top of the ramp. Include handrails for safety and support.
Ramp slope: Make it with as gentle a slope as possible.

The size of the porch allows for maneuvering room and space for porch-sitting.
Add a place to put packages while opening doors this could be furniture.
Entry doors should include a minimum of 5' by 5' level, clear space inside and outside of the entry door for maneuvering while opening or closing the door.

12”-24” of latch side clearance is needed on the pull side of doors.
Provide a way to see visitors, including children and seated users, through sidelights, windows in doors and/or nearby windows.
Also plan latch-side clearance on the push side of doors, though this is generally not as critical as latch-side clearance on the pull side of doors. Each household should decide the relative importance of this and other accessible/universal features and how far they want to push the design.
Occasionally, entry doors need to be replaced with wider doors. More often, doors might be replaced to change the door from a left- to a rightswing door or to change the door to an out-swinging door. Screen doors can be a problem because of the difficulty in opening both the screen door and the primary door simultaneously. If the primary door is being changed, the screen door problem can be eliminated by removing the screen door and replacing the prime door with an insulating door, which has changeable window/screens, like a double-hung window. This allows some of the insulation, sunlight and ventilating characteristics associated with the use of primary/screen door combinations without operational problems.
A single, insulating prime door with windows also allows for the option of conversion to an out-swinging door. This can relieve tight interior spaces in entryways, making maneuvering around the entry door much easier.
Pressure-treated wood for a 3' wide ramp. (cost does not include paint or stain). $4,100 – $5,600

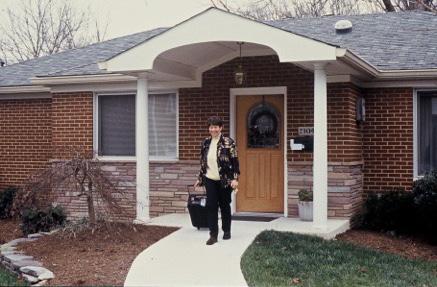
Consider using a graded pathway with an earth berm in place of a ramp. It is particularly effective where shallow slopes (1:20 – 1 inch of rise for every 20 inches of run - or shallower) can be used, sometimes reducing the need for railings. Gently sloping berms with careful landscaping can be easy to use, natural looking and will add value to the house.
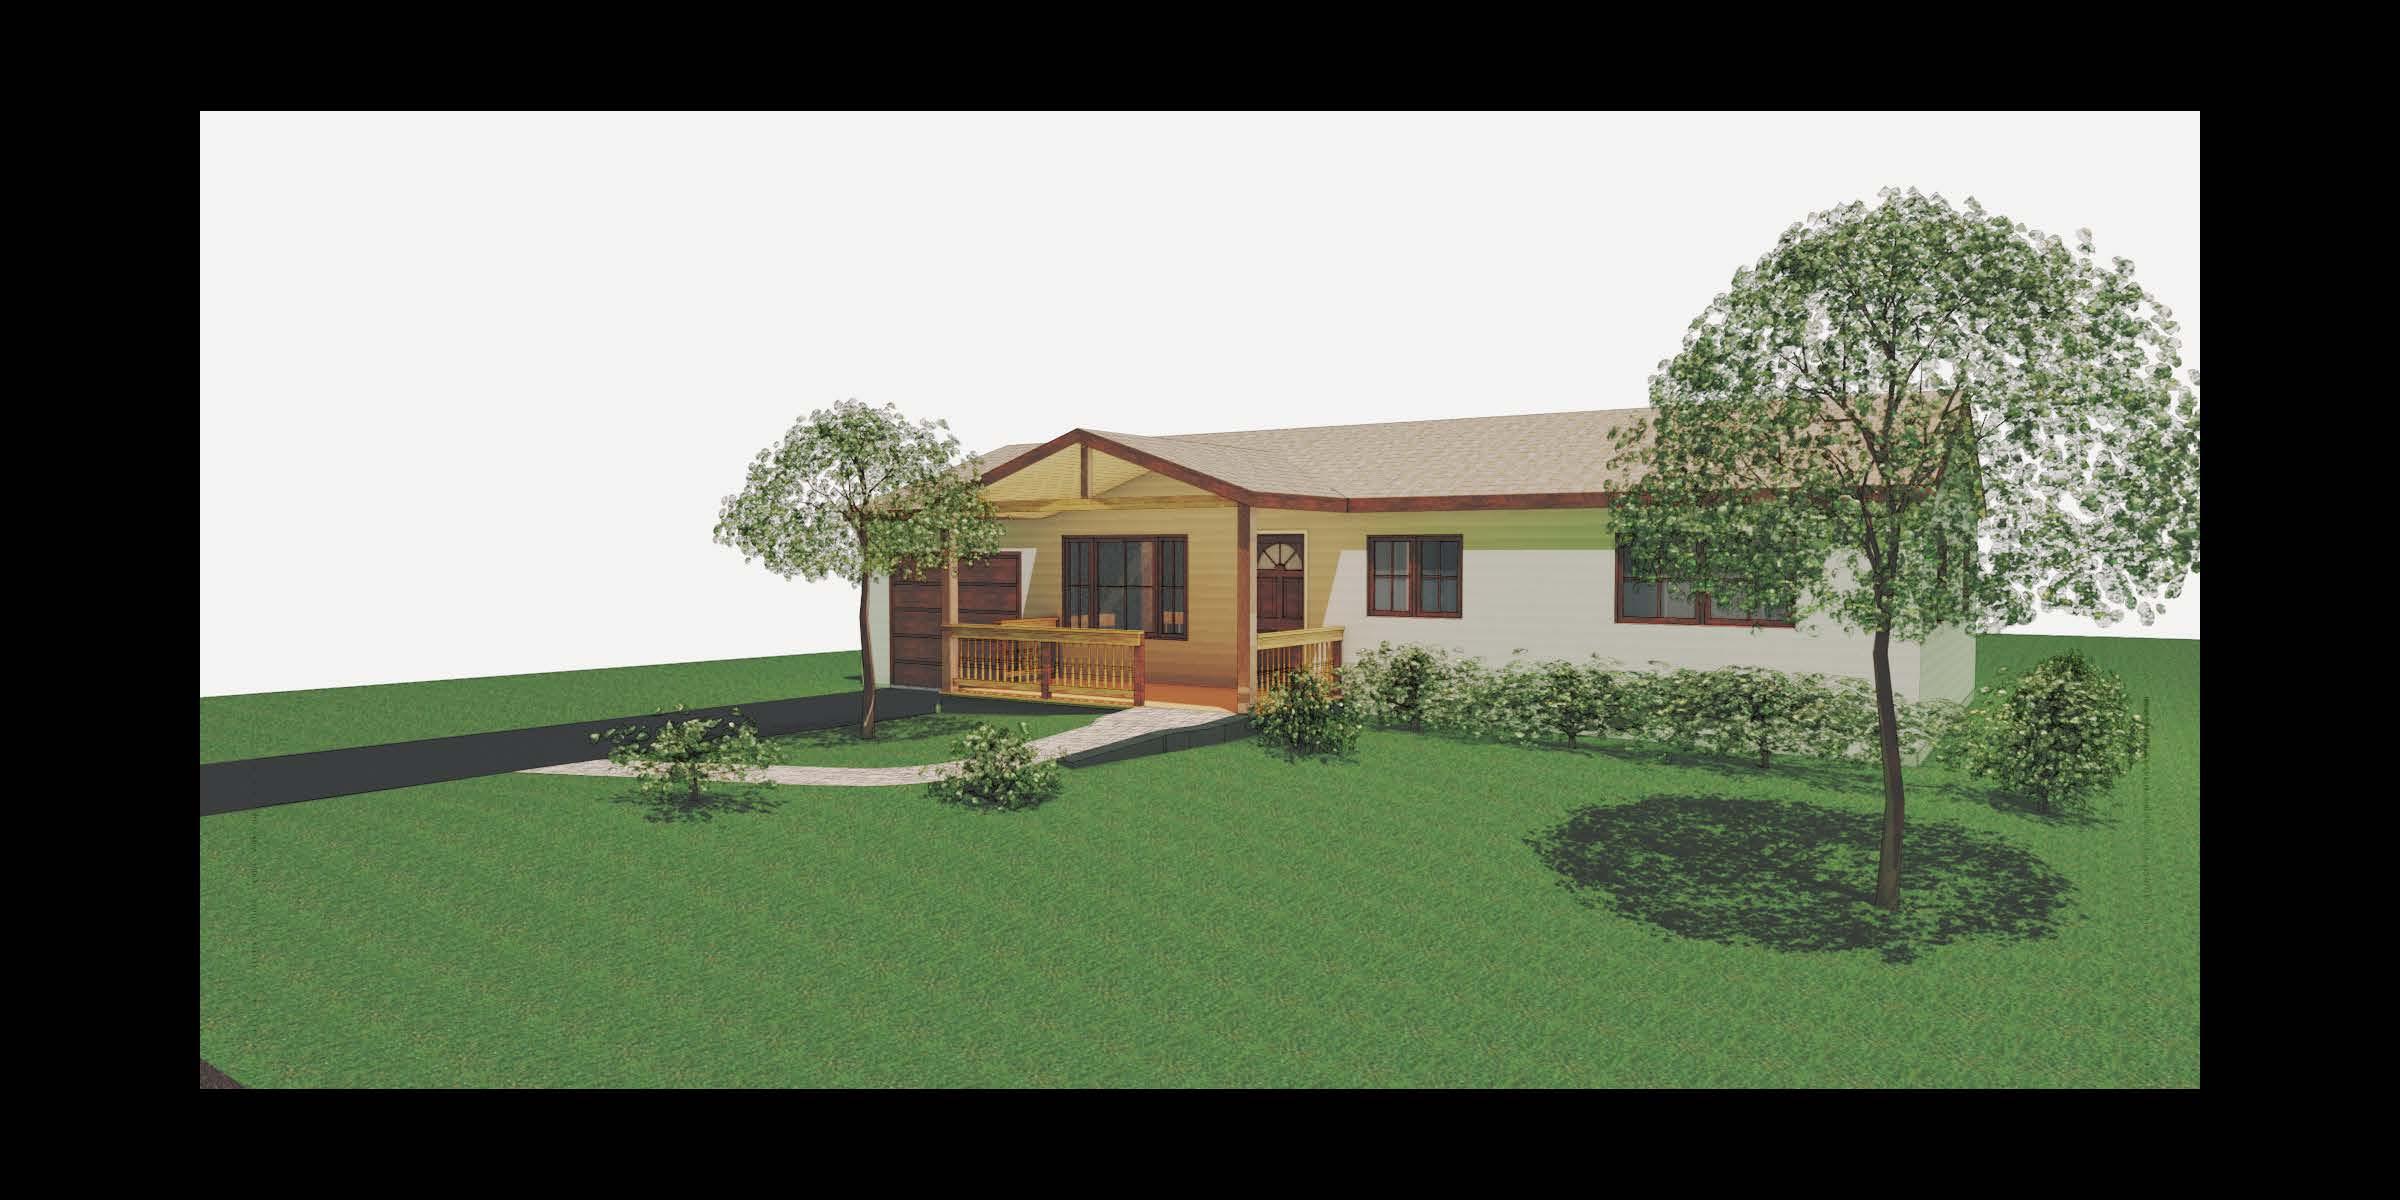
A graded, stepless entrance includes a graded pathway with a maximum slope
3’ wide pathway.
Retaining walls keep soil away from wooden porch.
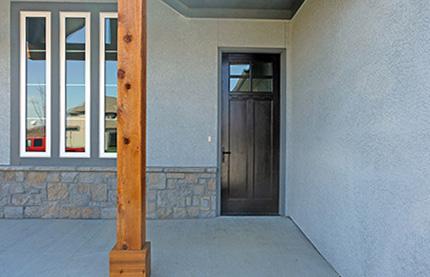
1 Add plantings or shrubbery to enhance appearance.
2
Consider adding a raised edge, guard rail or handrail if someone needs extra safety features or support.
The retaining wall shown here allows water to maintain a positive flow away from the house, minimizing the potential for leakage into the basement or crawl space.
Graded entrances also must have soil separation, away from wood elements such as sill plates, walls, joists or

Many interiors in older homes have narrow hallways and doorways. This creates real maneuvering problems if you use a walker or a wheelchair, often preventing access to bedrooms and bathrooms. When considering home accessibility or universal design alterations, these are among the first problems to solve. The three examples shown can apply to any room or hallway in a home: bathroom, bedroom, kitchen or even a family room.
Interior doors are generally narrower than entry doors. This can prevent a wheelchair from passing, can result in banged-up knuckles and door jambs, or can make passage awkward and slow. Replace a 28"-wide door with a 34"- to 36"-wide door with lever hardware.
Replace the door with a wider-hinged door in the bearing wall.
$875 – $1,500
Pocket door option. $1,200 – $1,800
Replace the door with a wider, hinged door in a non-bearing wall.
$650 – $1,000
Pocket door option. $1,200 – $1,800
NOTE: In some circumstances, changing from standard hinges to “swing clear” hinges can add an effective 1½ inches of usable width to a doorway by taking the thickness of the door out of the door opening. The hinges cost $50 for a pair, far less than the cost of adding a wider door.
Doors that swing into narrow rooms or spaces can cause maneuvering problems for people who use wheelchairs or walkers. Changing the swing of the door so it swings out of a small room will create more space and allow more room on the latch side of the door.


$175 – $250
Simple projects can make a big difference in people’s lives. People with balance and strength problems when walking can have their independence and safety greatly enhanced by the addition of simple railings in hallways and other places.
People may have trouble reaching light switches. Many have trouble reaching down to use outlets located near baseboards, corners or behind furniture. For resources on home technology, see the Resources section, page 45.

(Universal and Accessible)
Light switches should be mounted 42” to 48” above the floor and thermostats at 48” maximum height. Smart phone-controlled thermostats are making the thermostat location somewhat less important.
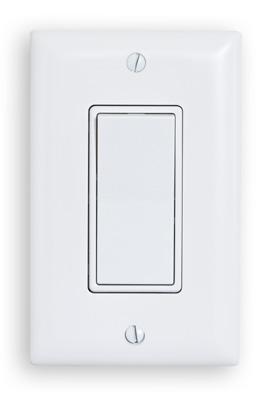
The electrical panel should be placed with its top no more than 54" above the floor and located with a minimum of 30" by 52" clear floor space in front.
Add easy-touch rockers or hands-free switches.
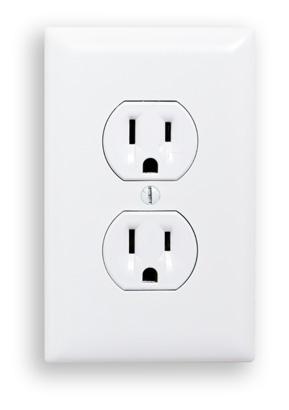
Electrical outlets, at 18" to 24" minimum height to the bottom outlet, allows for easy reaching from a sitting position as well as for those who have trouble bending over.
Additional electrical outlets can be placed near beds and desks, with 4-plex boxes for health equipment, assistive technology, computers and other equipment.
Consider outlets in some locations that include USB ports for charging phones and other devices.
* Refer to the Resources section, page 45, for information on home technology
Safety, ease-of-use and convenience can be greatly enhanced through bathroom modifications. Bathrooms are typically small spaces with few safety features and little room for maneuvering. People who use walkers or wheelchairs can have great difficulty maneuvering through the narrow doorways and within the small spaces that most bathrooms typically have. Bathrooms are often the location of serious fall injuries. For people with balance, strength or stamina issues, getting on and off the toilet can be difficult, as can stepping into the tub, taking showers safely and walking on frequently wet floors. Bathing for children and for people who wash while sitting is greatly enhanced with a hand-held shower. People with grasping and arm strength problems can have a hard time with round or ball-shaped faucets and shower controls. Many may benefit from added heat in the bathroom to avoid becoming chilled after bathing.
showers work well for everyone and allow people with some types of mobility challenges to get in and out easily. A curbless shower can replace a standard shower or a tub/shower combination unit. Curbless showers can be configured in a variety of sizes. While some can fit into the space of a tub (30" by 60"), this size offers little maneuvering room and narrow showers like this will inevitably result in water on the floor. In very small bathrooms, consider a tiled wet area floor for the whole bathroom. A better shower size is 3’ x 5‘ or 4’ x 5’.
NOTE: Costs can vary depending upon how much additional plumbing or moved plumbing is required and whether the bathroom can be accessed from beneath via a crawl space or basement. Plumbing changes with slab foundations can be more expensive.
The responses to these problems can range from the relatively simple installation of a grab bar to the complete renovation of a bathroom, including expansion, adding a curbless shower with hand-held shower, adding grab bar blocking, lever hardware, temperature-limiting mix valve for the shower, shallow sink with rear drain and heated floors.
The two main reasons for attempting most large-scale bathroom modifications are to gain more maneuvering space and to create a curbless shower (also known as a zero-step shower). Gaining popularity in America, curbless
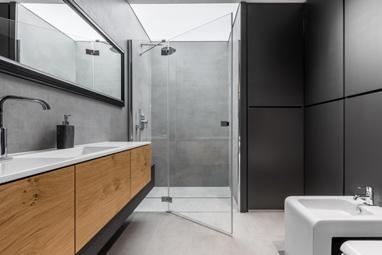
Tub-to-shower conversion kits can simplify the conversion process. We only recommend the use of prefabricated fiberglass or plastic shower insert sets if they are without fixed bar locations and if they allow the installation of full span blocking. Additionally, consider using a formed solid or laminated tub enclosure in place of tiling.
$2,500 – $7,500
are often the location of serious fall injuries.Standard Project: Replace tub with curbless shower
NOT
Broad blocking in walls around the toilet, tub and shower allows for future placement and relocation of grab bars while assuring adequate load bearing and eliminating the need to open up the wall to add blocking later.
Wall demos. Moved window.
Two door options are shown here: pocket door or hinged door. Both are acceptable in this situation. The doors are widened to a 32" minimum clear opening width (34"- to 36"-wide doors) for all doorways. Provide a pull-side and latch-side clearance, 12" to 24".
Pocket doors: When fully open, the door should extend 2" minimum outside the door jamb and be equipped with open-loop handles for easy gripping.
Bathtub.
Hallway widened from 36” to 42” (minimum width) to provide maneuvering room in the hallways and archways.
Widened bedroom door.
The curbless shower is 5' long by 3' wide (4' width is preferred).
Corner-located toilet.
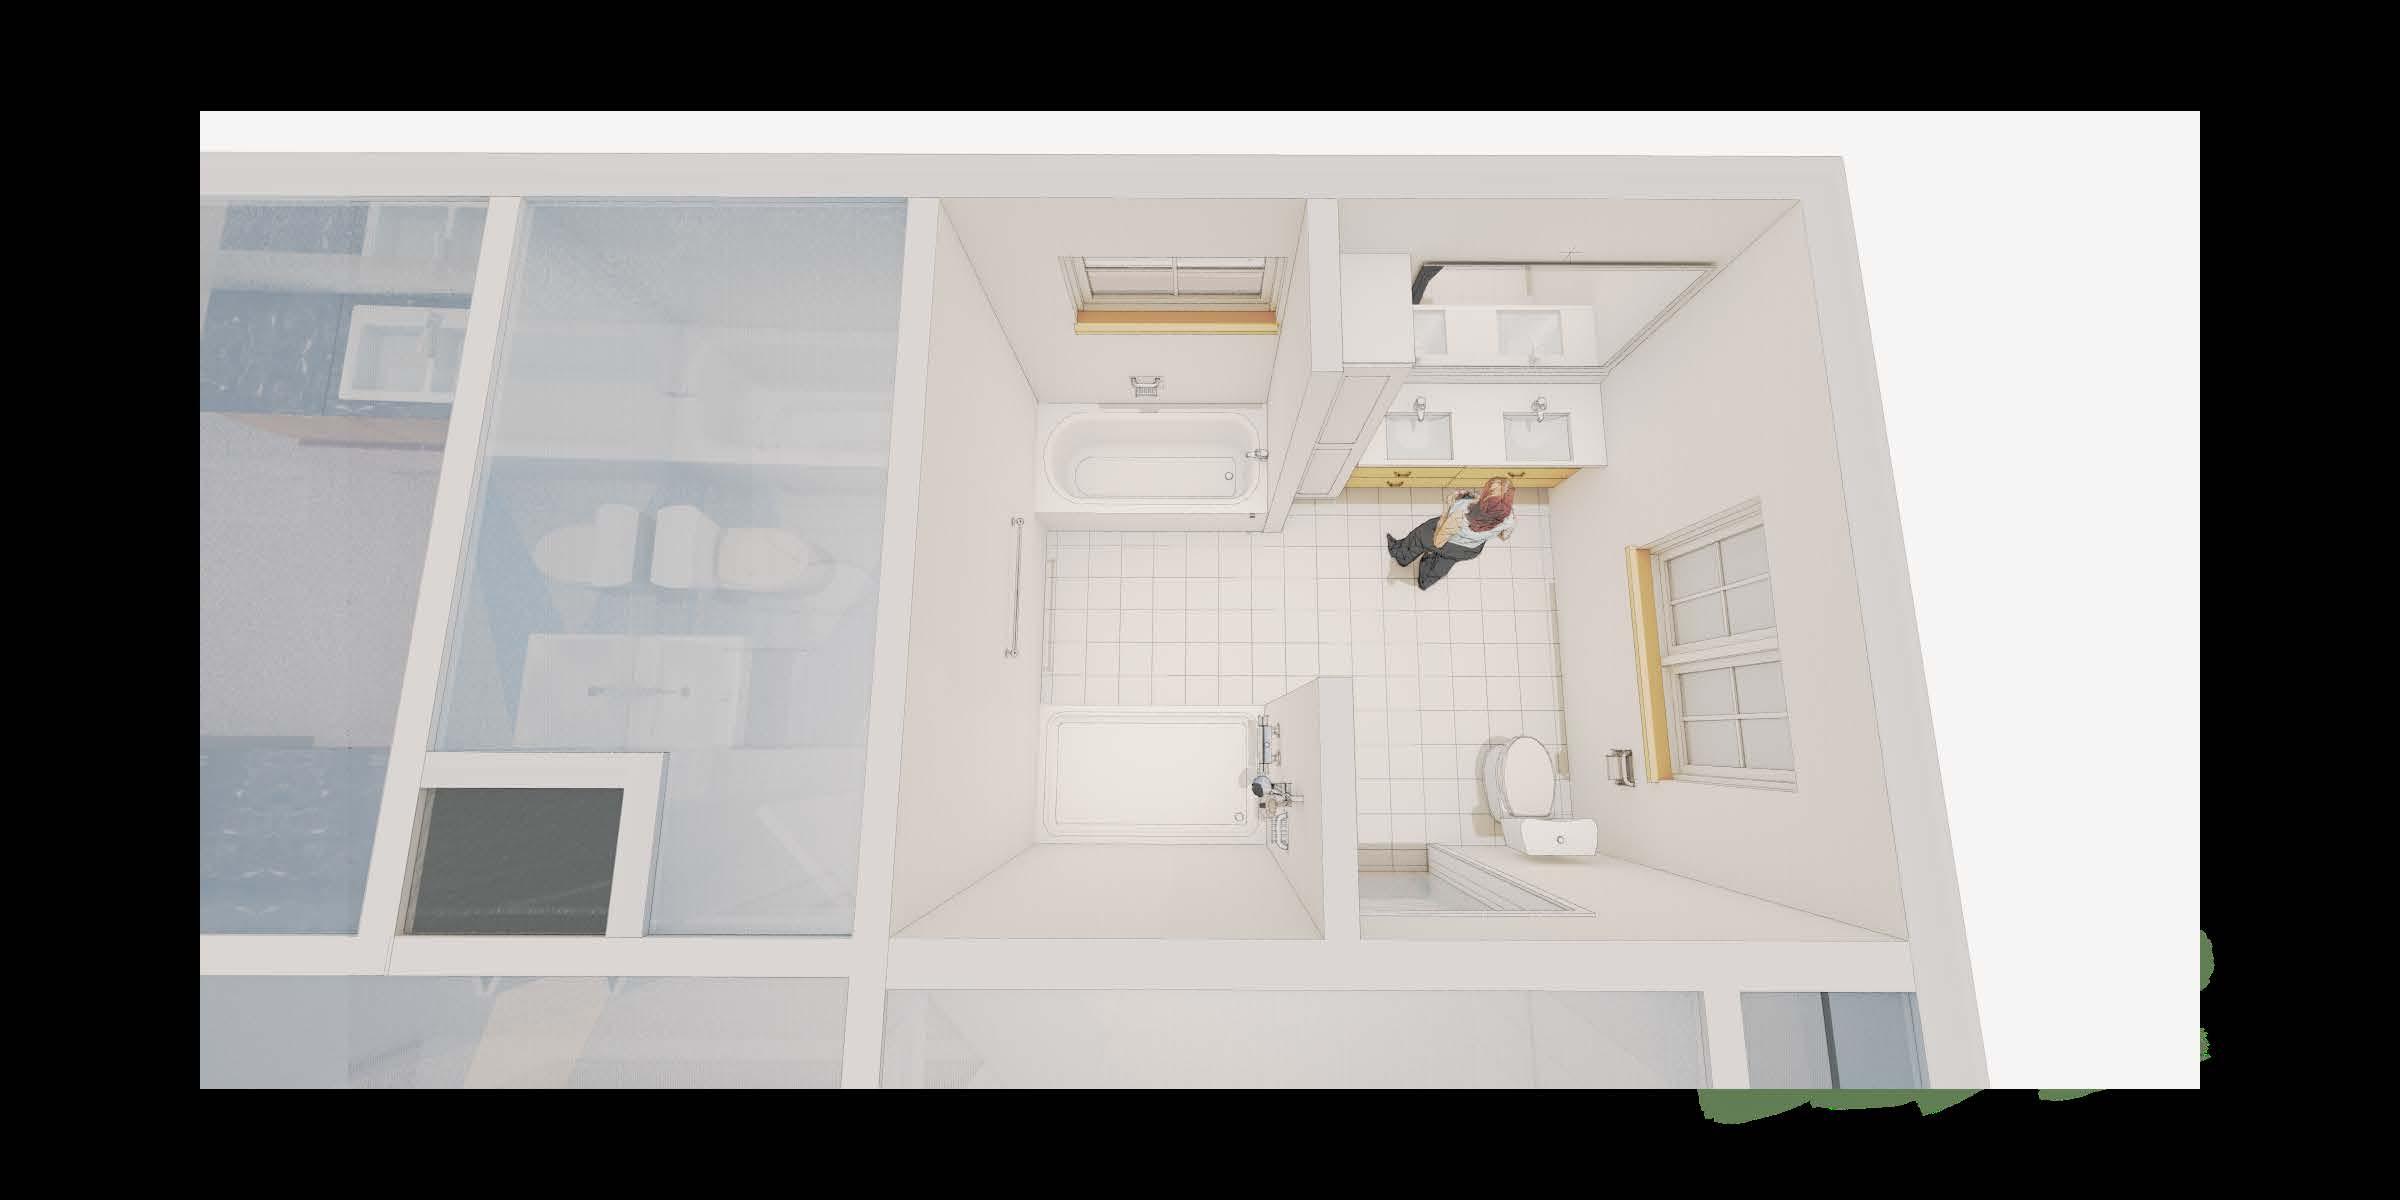
afety should be a consideration in all bathrooms, especially universal or accessible bathrooms, and especially those that will be used by older adults. While grab bars may be considered unattractive, there are relatively new products that we call “hand holds” that perform some of the functions of grab bars but integrate better into a bathroom’s décor. They are sturdy and built into and integrated with typical bathroom accessories: hand holds at toilet paper dispensers, hand holds as soap dishes in the shower or tub, hand holds around the mix valve in the tub or shower, and a combination hand hold and towel bar. These are appealing and are a good transition between nothing at all, and a custom-located grab bar in the same locations.
Dual use toilet dispenser/hand holds.
Dual use soap dish/hand holds.
Dual use towel bar/hand holds.
Fixture Controls: Single-Lever Water Controls at All Plumbing Fixtures and Faucets.
A mix valve with pressure balancing and hot water limiter prevents the scalding of people who cannot move out of the way if the water temperature and/or pressure changes suddenly.
Controls located at the “open” end of the bath and shower make it easier to reach for many. Offset controls in the tub/shower with adjacent clear floor space allows for easy access from outside the tub with no inconvenience when inside.
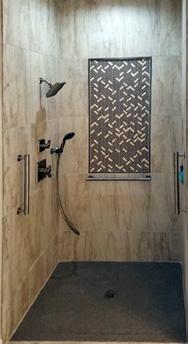
Hand-held showers in all tubs and showers, in addition to fixed heads, if provided. Add single-level diverter valves, if needed.
An adjustable height, movable, hand-held shower head with 60" flexible hose allows easy use by people of all heights.

Clear space (3’) in front and to one side of the toilet to allow for easy maneuvering to and around toilet.
Toilet is centered 18" from any side wall, cabinet or tub.
Add one 18"-19" height toilet in the home.
If you are creating a universally designed bathroom that doesn’t include permanent open knee space under the vanity (this is fine) and you aren’t planning for an immanent change in users, i.e., you don’t think someone may be operating from a wheelchair soon, you may want to consider three options:
Under a 32"-inch high counter, create fold-back/slide-back doors so that you can use the cabinet space until you need the knee space.
Make it so you can remove one or both cabinets easily and without doing a lot of demolition and reconstruction of the whole lavatory area.
In either case, pre-finish the floor, side and back wall so you don’t have to do more than some touch up when you create the knee space.
Add universal bathroom as part of master suite renovation with above features. $75,000 – $85,000

Safety – For improved safety, add grab bars where needed around the toilet, shower and tub. Grab bars can match or compliment bathroom finish choices.
Sample grab bar locations (there are six suggested in the graphic). Always place bars in the best locations for you. Also consider alternate bars such as these:

a) Wall-mounted hinged bars, located on the wall behind the toilet.
b) Consider toilet bowl mounted bars, also.
Sink/Counter. No sharp edges should be on the underside of the sink or provide valence coverings. Integrated or under-counter-mounted sinks are preferred with the bowl mounted as close to the front of the edge as possible with a rear drain. Avoid countertop-mounted sinks.
At least one sink has 30"-wide knee space and a 32"-high counter.
No base cabinet.
Another bathroom vanity option: Install two vanities under a 32” counter. Make one side removable.

18" to 19"-high toilet.
Wider-hinged door with 12" to 24" clearance on the latch side of the side you pull on.
A T-turn indicates one way that a person who uses a wheelchair might change direction. This T-turn has extra room beyond the limits of the T-turn itself. Or, include space for a 60" to 67” diameter turning circle.

Add accessible bathroom as part of master suite renovation with above features.
Two-height vanity, one for a standing (or tall) user and one for a seated user with open knee space.
32" counter with open knee space.
36" counter with cabinet.
Vertical-mounted grab bar.

This option requires that the flue, which extends from the basement up to the roof, be removed. This option also requires that an alternate exhaust route be established for the furnace. If this is not possible, a new furnace may need to be installed that has modern venting options and does not require through-thefloor venting.
Add bump-out to provide room for the curbless shower.
Move the toilet to the alcove where the closet and flue space were located. Keep lavatory.
Change the narrow-hinged door to a wider-pocket door, with at least 32" of clear opening.
Linen storage might be rendered as a piece of movable furniture so that adequate side-maneuvering space can be easily provided, if needed.
Alteration not shown in this view: The hallway and bedroom door are narrow and may also need to be addressed (42"-wide hallway and 32” clear opening for doorway).
Change closet to face into the bedroom.
Flue is removed.
With items above, including altering flue location.
$45,000 – $55,000
In small bathrooms, where it is not possible to expand, the best option may be to create a tiled integral floor shower, resulting in what is called a wet area bathroom. This allows for a curbless shower and adequate maneuvering room within the bathroom.
Flue and adjacent closet are maintained.
Rotate the toilet to the outside wall, creating maneuvering/ transfer space between the toilet and shower.
Curbless Shower
The mix valve is easier to access at this end of the shower because there is more maneuvering room.
Wall-hung sink.
Five-foot turning space diameter.
Change closet to face into the bedroom.
Change the narrow, hinged door to a wider pocket door, with at least 32” of clear opening.
COST
With items above. $30,000 – $45,000
Pocket Doors In pocket door installations, ensure that wall thickness provides clearance for any adjacent electrical outlets or blocking for mounting grab bars.
This option stays within the footprint of the bathroom while removing the flue, like Option #1.
Flue and adjacent closet are removed.
Move the toilet to the alcove where the closet and flue space were located.
Tub.
The mix value is easier to access at this end of tub because there is more maneuvering room.
Wall-hung sink.
Five-foot turning space diameter.
Change the closet to face into the bedroom.
Change the narrow, hinged door to a wider pocket door, with at least 32” of clear opening.
With items above. $30,000 – $45,000
Except for closet/storage systems, no other area of the home better reflects the design evolution in the direction of universal design than the kitchen. This evolution can result in remarkably usable kitchens by utilizing variations of existing cabinet, hardware and kitchen design offerings. The complexity of kitchens is such that we list just a few of the many considerations for more usable kitchen designs that can be applied to the projects that follow.
Replacing an entire kitchen can be costly but can offer opportunities for universal design with little added cost over what you might pay for a “standard” kitchen. The trick is to be careful with product and cabinet selection, design and layout.

While many of the work surfaces in a universal kitchen may be at the standard 36” height, consider adding multiple work surface heights, including bar-height (42") and table-height counters (30") or pull-out cutting boards at 32". Sink areas should have at least 12" of level counter space on each side. Create stretches of continuous counter tops for easy sliding of heavy items, particularly between refrigerator, sink, and stovetop for easy, one-level food flow.
Wall Cabinets
– Adjustable-height shelves in wall cabinets.
Pantry
– Emphasis on pantry storage with easy access pull-out and/or adjustable-height shelves for easy reaching of otherwise hard-to-get items.

Base cabinets have convenience features such as pull-out storage shelves and Lazy Susans for corners. Full-extension pull-out drawers, shelves and racks in base cabinets provide easy reach to all storage space.
The space between the face of cabinets, and cabinets and walls should be 42" to 48" minimum.
Cabinet hardware should be operable with a closed fist. Loop handles are a good choice. They come in a variety of styles and prices. Locate handles at the top of base cabinets and bottom of wall cabinets.
Dishwasher
– Standard dishwashers can be raised on a platform and other dishwashers can be installed as a drawer unit, which puts bottom racks within easy reach, requiring less bending.
Refrigerator
– A side -by-side refrigerator allows easy reach of otherwise hard-to-get items, particularly if pull-out shelving is provided. or
– Use drawer-type refrigerators and install them for optimum access at 36" above the finished floor. or
– Use a refrigerator with a bottom-located, drawer-style freezer.

Cooking
– Look for a range or cooktop with frontlocated controls to facilitate easy reach and eliminate dangerous reaching over hot burners.
– While a standard floor-mounted range (or drop-in or slide-in range) can be OK, consider using a separate stovetop and oven. This allows more flexibility of location and optional knee space beneath each.
– Stovetop burners should be offset to make access to pots and pans easier.
– Consider the careful placement of the controls for wall ovens and microwaves below 54". Do not mount the microwave over the stove. It is helpful if the oven can be mounted with one oven rack at the same height as an adjacent countertop.
Use a single lever, paddle handle or touchless controls. Pull-out spray attachments are especially useful for people with limited hand strength or reach.
Lighting/Color
– Install under-wall cabinet lighting.
– Use contrasting color-edge treatment on countertops. Color or contrast difference allows easy recognition of the edges of counters and the different heights to prevent accidental spills.
– Glare-free task lighting illuminates work areas without too much reflectivity.
– For additional lighting resources, see Resources section, page 45.
One version of a universally designed kitchen, shown here, includes all new cabinetry, interior finishes, plumbing, appliances and electrical in a U-shaped configuration.
More than 5’ between cabinet faces
Wall cabinets
Pantry storage
Counters at 36" height
Free-standing or slide-in range with front controls
– Option: With the proper space, the kitchen could have a stovetop and a separate wall oven.
Undercounter microwave
Sink with rear-mounted drain
Drawer-style dishwasher
– Option: Install a full-height, bottom-hinged dishwasher.
– Option: Install a raised dishwasher, if the dishwasher is located at the end of a run of counters.
Side-by-side refrigerator
– Option: Select a refrigerator with a bottom-drawer style freezer.
Lowered counter with knee space
Convert standard kitchen to universal design with the items above.
$35,000 – $50,000

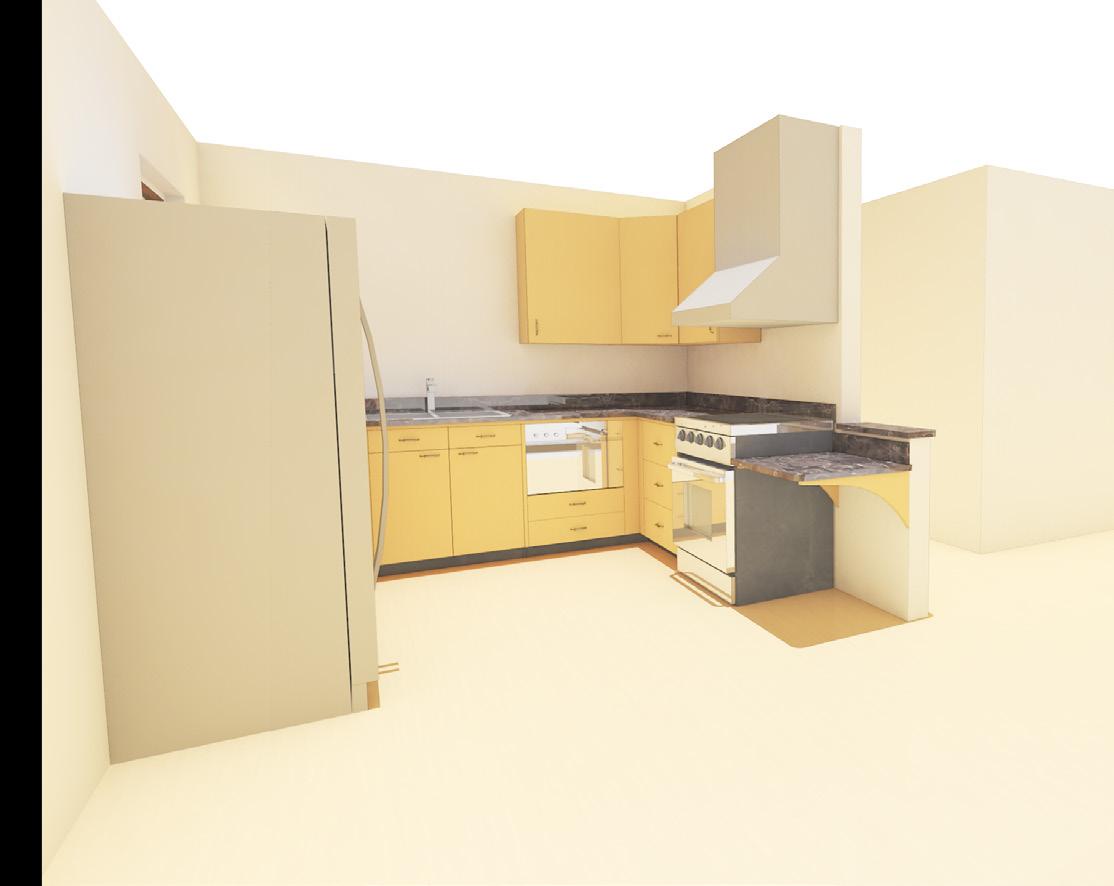
This project includes an addition with all new cabinetry, interior finishes, plumbing, appliances and electrical in a U-shaped configuration. If storage is at a premium, and pantry-style storage is insufficient, consider wall cabinets with pull-down interiors, if necessary.
Greater than 5' between cabinet faces.
36” high kitchen counters.
Lowered work surface, with knee space. Sink with rear-mounted drain.
Extra sink counter depth helps avoid splashes onto the floor.
Laundry has been moved up from the basement to create an accessible laundry area.
A front-loading washer and dryer, with front controls, is raised on platforms to reduce the need to bend, stoop or lean over.
– Create a clear space 36" wide across the full width in front of the washer and dryer and extending at least 18" beyond right and left sides. (The extended space can be part of the knee space under counter tops, sink, etc.)
Under-counter drawer dishwasher
– Option: Consider a bottom-hinged dishwasher raised 4" to 6" limiting the bending and reaching that is required to use it.
– Option: Install a raised dishwasher if the dishwasher is located at the end of a run of counter.
– Option: Consider a full-height, under-counter dishwasher.
Free-standing or slide-in range with front controls
– Option: With the proper space, the kitchen could have a stovetop and a separate wall oven.
Under-counter drawer microwave, (always avoid microwaves located over stovetops or ranges).
Side-by-side refrigerator
– Option: Select a refrigerator with a bottom-drawer style freezer.


$100,000 – $125,000
The addition allows the bathroom to be enlarged from a standard 5’ x 8’ bath to a bathroom with maneuvering space and a curbless shower.
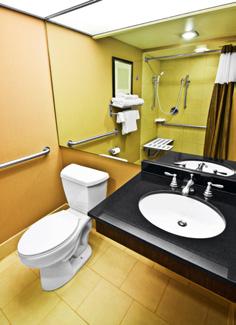

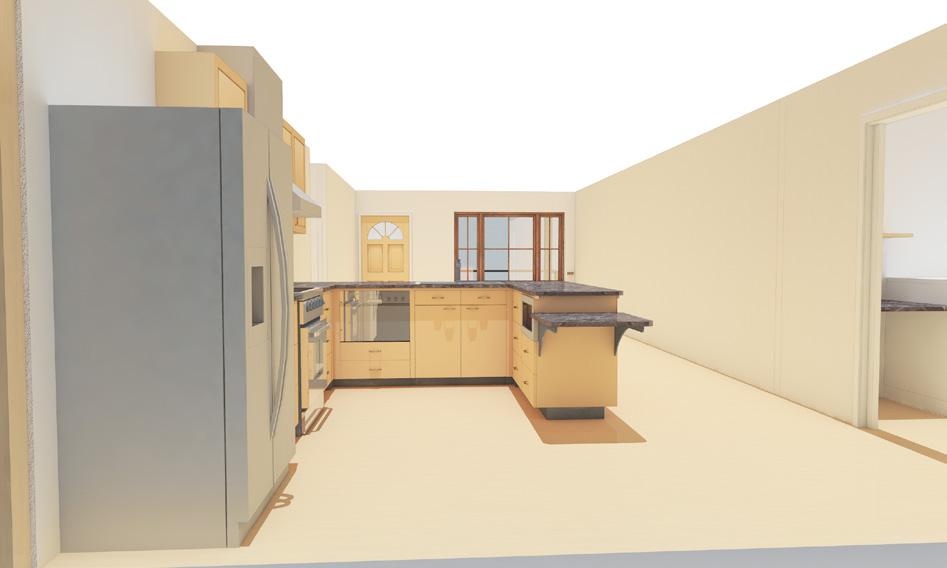
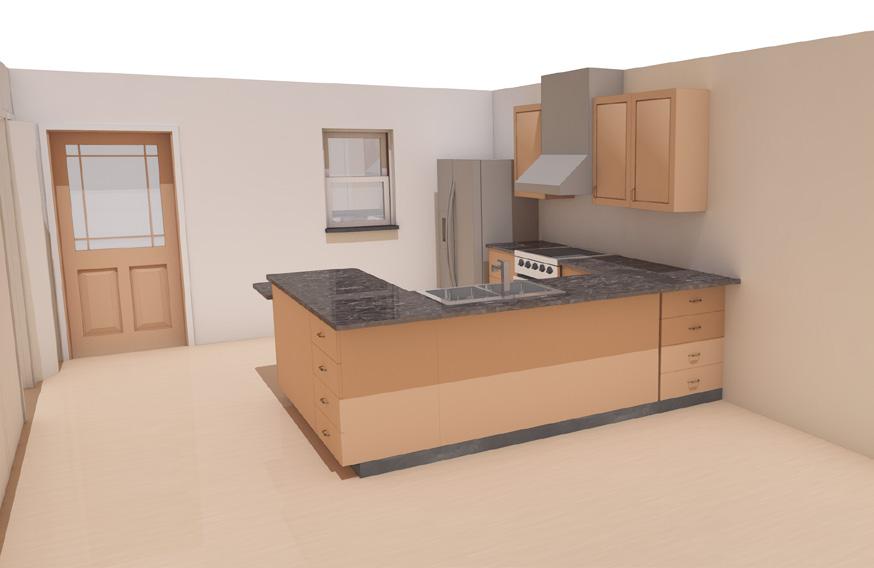
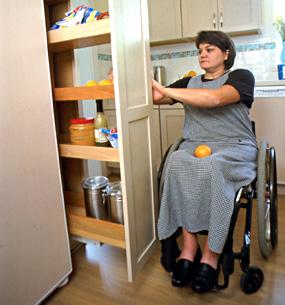
Generally, accessible kitchens are designed for the primary kitchen user, who is seated. A seated user may have limited reach range, which will restrict the usefulness of wall cabinets and will create an immediate need for storage between 18" to 48" high. A person who uses a wheelchair will need more maneuvering room in the kitchen and carefully located knee space under counters.

For someone who operates from a seated position, lower work surfaces with knee space beneath is essential. Consider counters set at 32” high. Always verify dimensional suggestions with the individual. Lowered countertops will mean shorter cabinetry in the locations where knee space is not needed. Don’t assume that you must get special cabinetry with high toe spaces (9” high) to accommodate the footrests of an individual who uses a wheelchair. However, high toe spaces might be useful in small kitchens where extra maneuvering room is needed; it might also save wear and tear on cabinet doors.
Accessible knee space in a counter that is 32” high is possible if the sink depth is 6½" inches or less.
The drain should be located to the rear of the sink so wheelchair users' knees will not touch the drainpipe. The drainpipe must be insulated or fitted with a special cover that shields a user's knees from the pipe area.
Some accessible kitchen features are the same or similar to features that can be found in universal kitchens:
Faucet - Consider using undrilled sinks (sinks without holes for faucets) for alternate or side placement of a faucet, if needed.
Also consider:
Stovetops and wall ovens.
Pantry storage.
Drawer-style dishwasher.
Drawer-style microwave.
Drawer-style refrigerator.
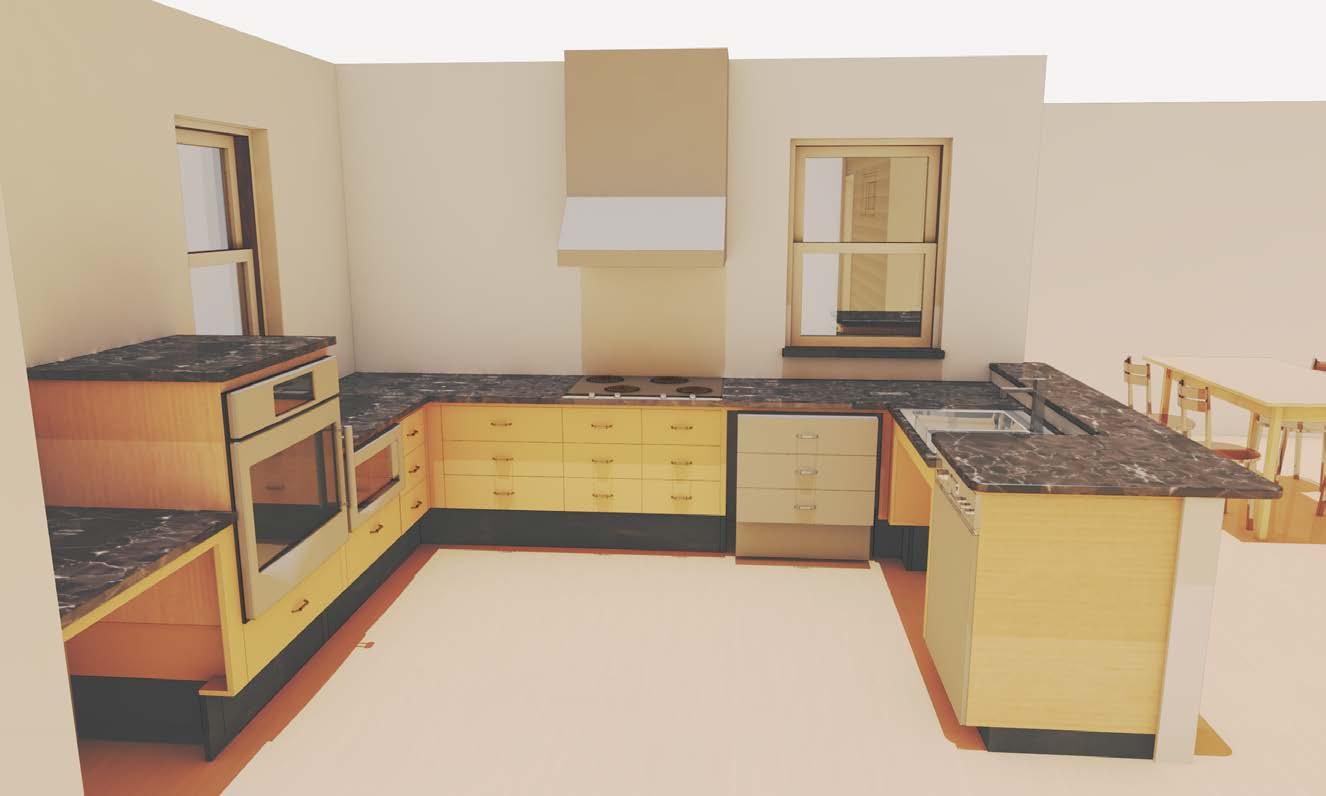


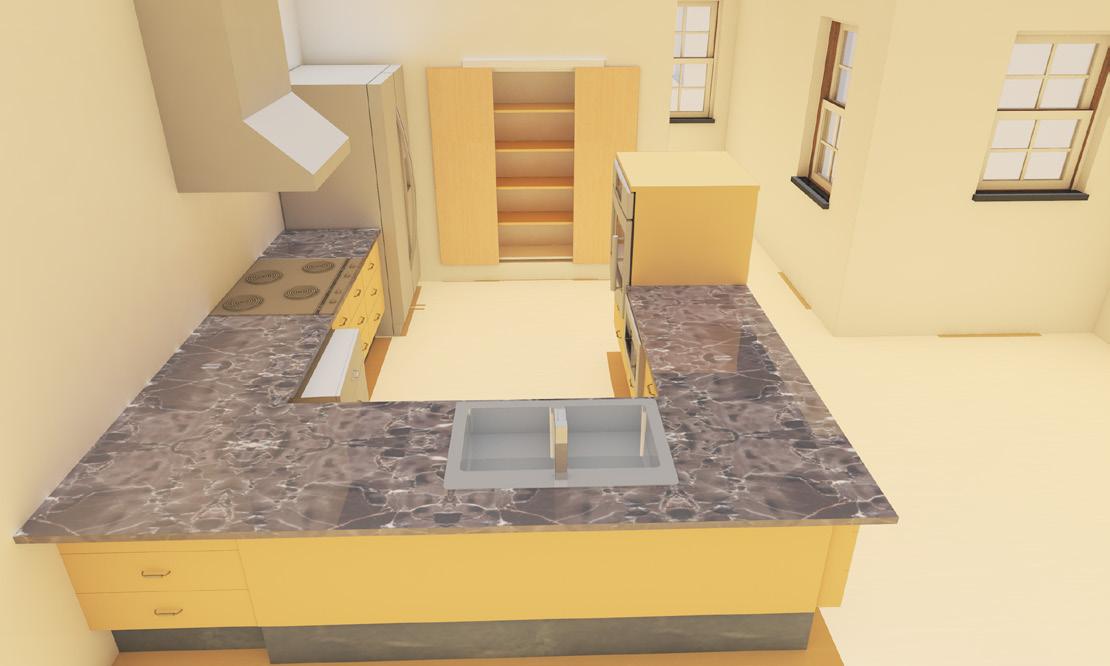
All new cabinetry, interior finishes, plumbing, appliances and electrical in a U-shaped configuration.
Counters at 32" height.
Sink with a rear-mounted drain.
Generally, sinks in islands, peninsulas or kitchen “L’s” need at least 6" of space behind the sink to avoid spillage and leakage behind the sink onto adjacent floors. In this case, we have also added a raised shelf behind the sink at 36” height.
Knee space under the sink.
Knee space under two counters.
– Knee space at the stovetop is optional. Some regard it as dangerous for a seated person to use knee space under a stovetop because of the possibility of hot spilled liquids. It is a personal decision.
Roll-out storage, perhaps with a work surface on top, can be stored under open counters. Rolling storage units can be rolled out of knee space locations when desired. Roll-out storage will probably need to be custom made and needs to be about 4” narrower than the available width, e.g., 26” wide in a 30” wide space to allow for easy roll in and roll out. Consider placing a work surface on top of one or more of the carts.
Raised toe space at 9" by 4" deep.
Range hood with remote control.
Side-opening wall oven installation.
Drawer microwave.
Four-burner electric stovetop with offset burners.
A standard-height dishwasher sits under a 36"-high counter. This is OK for many seated users. While 32" is a good work surface height, 36" is not too high for the top of a dishwasher and is much less expensive than dishwashers that will sit under a 32"-high counter or drawer-unit dishwashers.
Side-by-side refrigerator works well because of the multiple, flexible storage heights.
No wall cabinets (can add wall cabinets, if needed).
Drawer storage in some base cabinets.
Pantry storage in the laundry area.
Accessible counter space between washer and dryer.
Create oversized pocket door opening so that the door protrudes 2” when open. This makes opening the door easier.

The cost of the addition with the kitchen with the above features, plus the added laundry:
$125,000 – $150,000
The laundry has been relocated from the basement to a more accessible location on the first floor.
Cost with addition, kitchen with above features, laundry, and mud room: $150,000 – $170,000

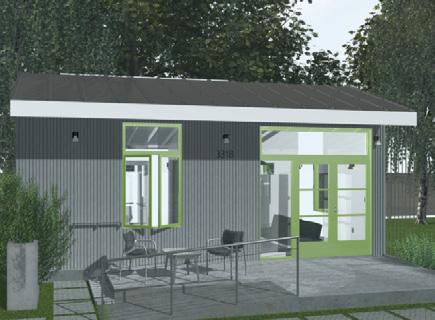
Accessory dwelling units (ADUs) offer an opportunity to create small, fully universal or accessible dwellings. If planning an ADU for an older adult, it is essential to include step-free entrances as well as interior features that will allow for aging in place. For more information about ADUs, refer to the Resources section on page 45.
Here's an excerpt from the 2021 AARP report, Accessory Dwelling Units: Model State Act and Local Ordinance:
“Accessory dwelling units (ADUs) are independent housing units, typically (but not always) created on single-family lots through remodeling or expanding the existing home or constructed as a detached dwelling. Detached ADUs may be freestanding or incorporated into another structure, most often a garage. ADUs have many other names, such as 'secondary suites,' 'granny flats,' 'English basements,' 'accessory apartments,' 'laneway homes,' 'ohana houses,' 'casitas' and 'backyard cottages.'
"ADUs serve multiple purposes for their owners, purposes that may change over time. They assist older homeowners in maintaining their independence by providing additional income to offset property taxes and maintenance and repair costs or by providing housing for a caregiver. ADUs can also become the residents’ home if they wish to downsize, allowing them to rent out the main house or to have family move into it. ADUs can be a cost-effective means of increasing the supply of market-affordable rental housing in a community and accommodating new growth

without dramatic changes to the character of a neighborhood."
This unit is 528 square feet with the features listed below. To save space, it doesn’t have a clothes washer. With a little rearranging, one could be added near the kitchen and bathroom.
If you’d like a smaller unit (e.g., 400 square feet or so), you can:
Create a single-wall universal kitchen with a smaller refrigerator, 24” range, etc.
Remove the wall between the living room and the bedroom and use a Murphy bed or movable wall system.
COST
Accessory dwelling unit, 22' by 24' $106,000 – $132,000

COST
DW
Accessory dwelling unit as an addition, 22' by 24'
$132,000 – $158,000
Accessory Dwellings
How to Create an ADU
The ABC’s of ADU’s
Age-Friendly Design
Ramp Design (UDI)
Age-Friendly Design Checklist

Accessible Renovations/Bathrooms
Construction and Hiring a Contractor
Constructors and Contractors (UDI)
How To Choose A Contractor (UDI)
