4 minute read
Chris Uses The Caswell Epoxy


Article And Photos By: Chris Callen
Tank sealing, for me, is one of the biggest pains in the ass in all of bike building. There is nothing worse than waiting for weeks for a tank to come back from sealing, other than not sealing and having a leaky gas or oil tank ruin a paint job. Although there are many products on the market today to seal a tank like Creme, etc, I have tried them and lost faith in the DIY of these. Instead I have left the sealing to professionals at radiator shops who use redcoat. I’ve never had a problem with this coating and the fact that the tanks are caustic washed is a big added bonus to insure proper sealing before and additive is introduced. So when I heard about this new product that came with great reviews called Caswell
Advertisement
Gas Tank Sealer, I was curious but not yet enthusiastic. Still, under the premise of may-

Since I was making considerable changes to the oil tank for Something Wicked, cutting most of the bottom out and welding new material back in with the old, I would need to make sure that it had an extra layer of security at the finish.
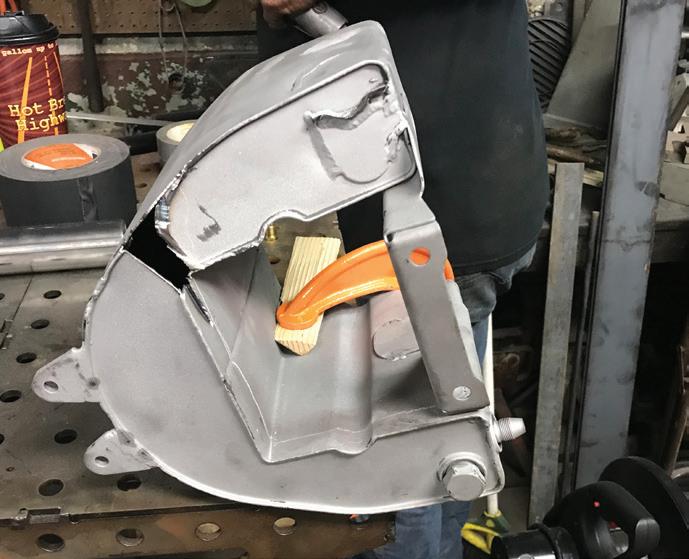

This was due to the fact that the original application for the oil tank was on a ‘49 Panhead and I was using it not only with a ‘77 Shovelhead but also fitting it above a cow pie transmission. Clearance was a big consideration on all sides along the bottom of the tank.
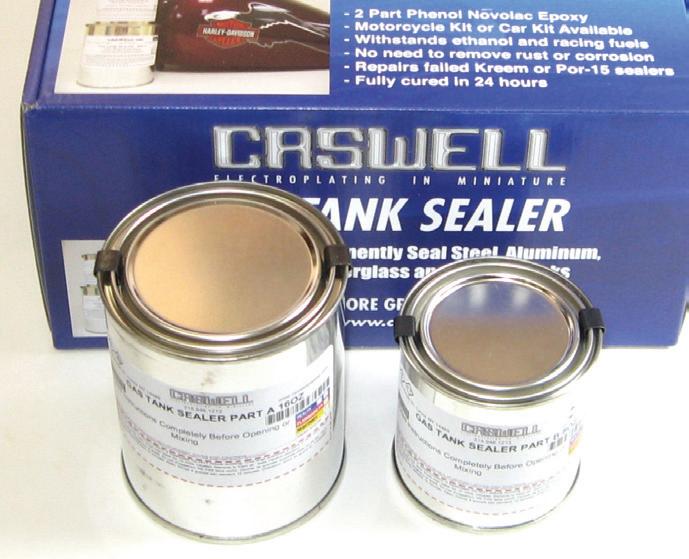
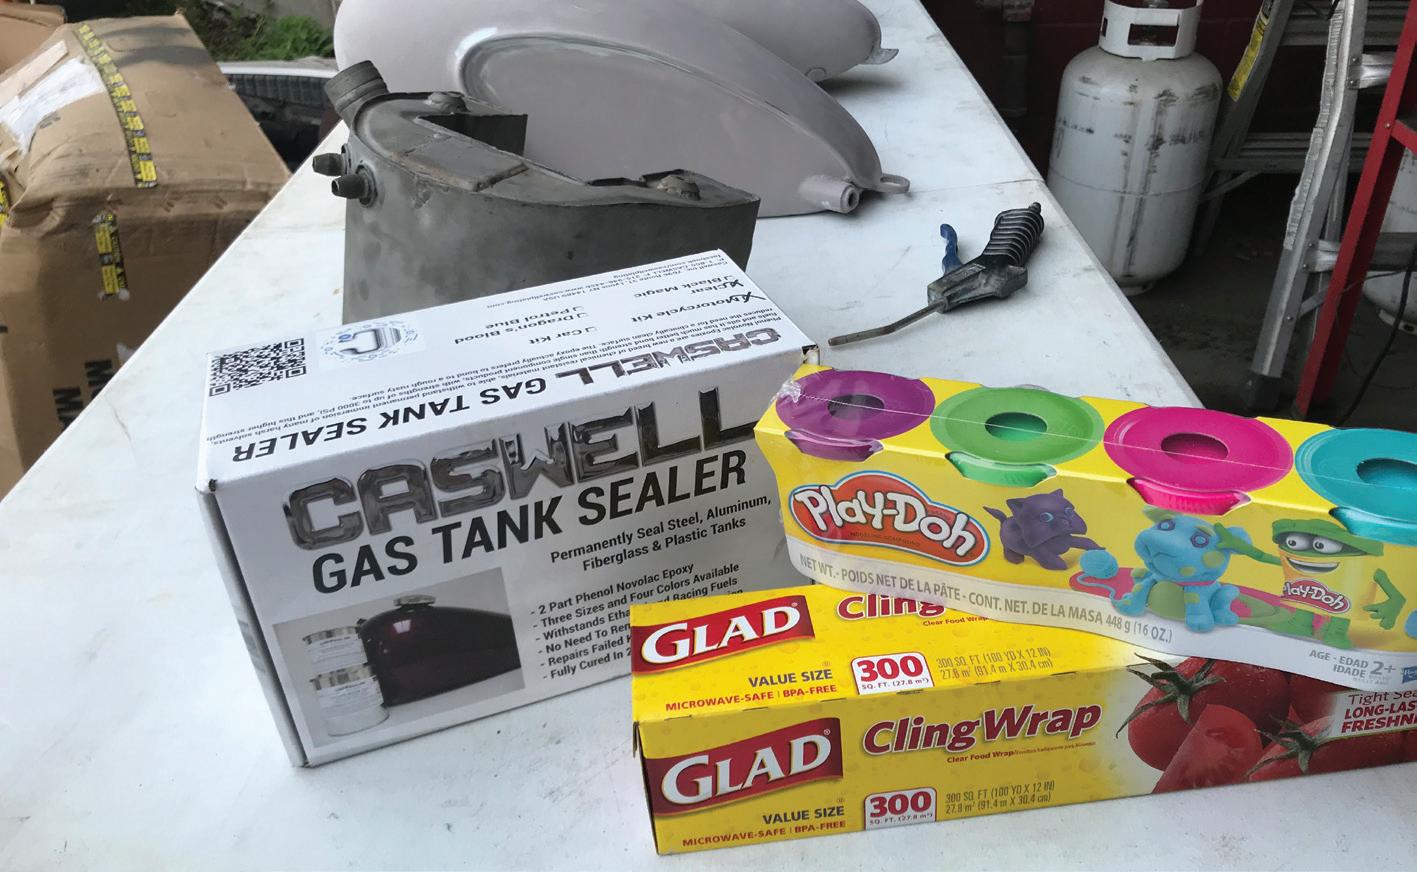
Upon opening the box of the Caswell kit you find two small cans, one small and one large which is appropriate since the mixture is two to one. As you read the included documentation you find out that what this kit has is something called Phenol Novolac Epoxies. Claimed to be a new breed of chemical resistant materials, able to withstand permanent immersion of many harsh solvents, fuels and oils. This epoxy has much better bond strength than single component products, with strengths of up to 3000 PSI, and this higher strength reduces the need for a clinically clean surface, as the epoxy actually prefers to bond to a rough rusty surface. “Our new Phenol Novolac is more thixotropic, which means it ‘hangs’ on the tank walls during the coating process. This gives a thicker overall coating. There is more volume of material in the kit to allow for this.” What I took from that is a clinically clean surface is not needed and that it hangs on to the walls of the tank during coating.
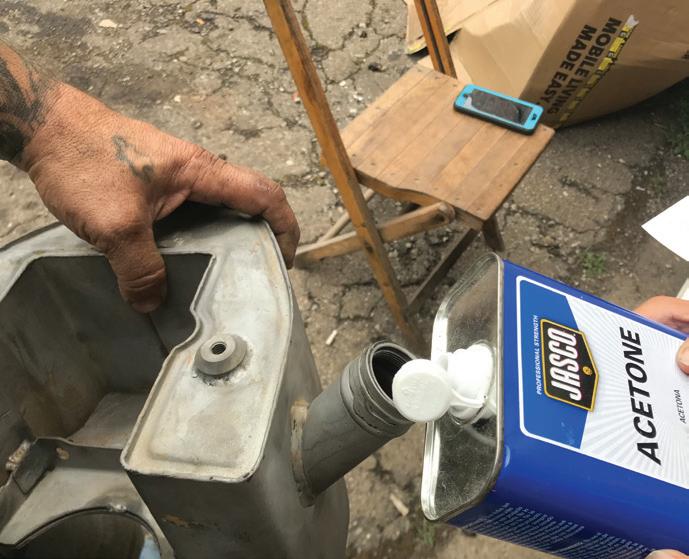
As instructed, I used a pint of acetone to thoroughly clean the tank out. Simply slosh it around for a few minutes, dump out the wasted solution and then power dry with a compressed air nozzle.
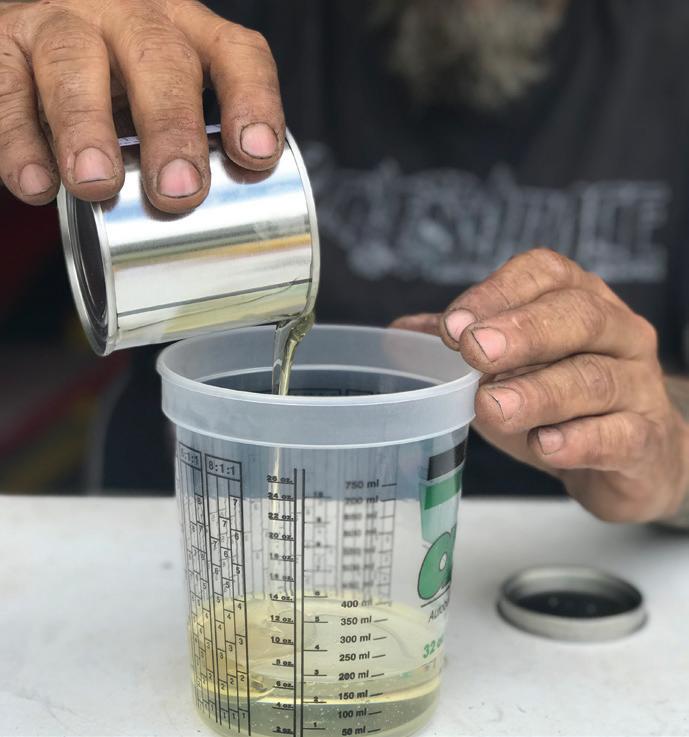
After giving it time to dry thoroughly, the play-doh and plastic wrap come into play. The plastic wrap and a rubber band should be made ready to cover the filler neck once the solution is poured into the tank. The playdoh on the other hand is used to seal up all small holes, in the case of the oil tank, the in, out, drain and vent lines. Since it would seem that nothing can stick to play-doh, which I had never known before this, it is ideal to use in any small area like this, especially those that have threads. This is important, once you start to combine the two parts, immediately begin to stir them together and get ready to pour them into the tank. As you mix them remember to scrape the sides of the container to ensure through combination of the material. I suggest a paint cup like this since the people at Caswell claim the number one reason for failure to be bad mixing and measuring.
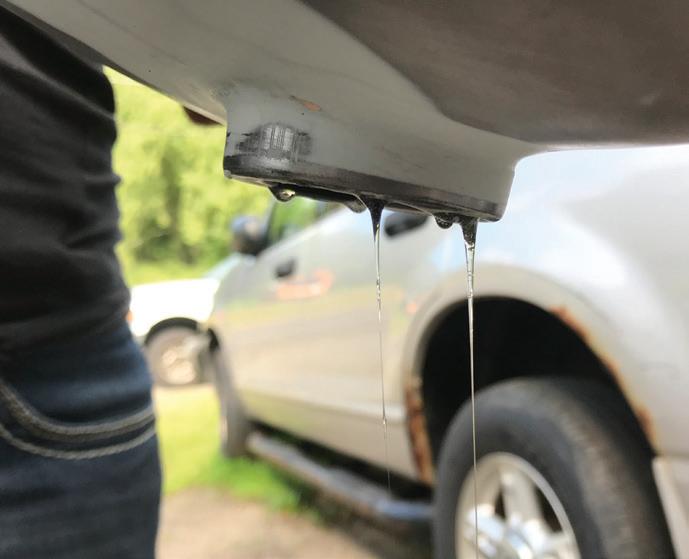
Once your satisfied with the mixture, at least two minutes worth of mixing, then pour the contents into the tank. You will want to immediately cap the filler with the saran wrap and rubber band as the next several minutes you will want to swill the solution all over the tank. It does not move fast so you must concentrate on where the weight of the solution is. Get a good coating on the inside then pour out the excess and let it drain upside down for at least ten minutes. About 40 minutes after the solution has been mixed it will still be pliable enough to remove with a knife or a razor. Scrape off any excess at the openings and clean any threads that you can get to at this point. In a 70-90 degree environment cure time is overnight. Tanks for alcohol fuels are recommended to let stand for 3-4 days. The amount we spilled on the ground was like a sheet of glass the next day and the threads we had to chase were like new steel. This product, thus far, seems to be a killer solution for this shop problem. Check them out at caswellplating.com.