16 minute read
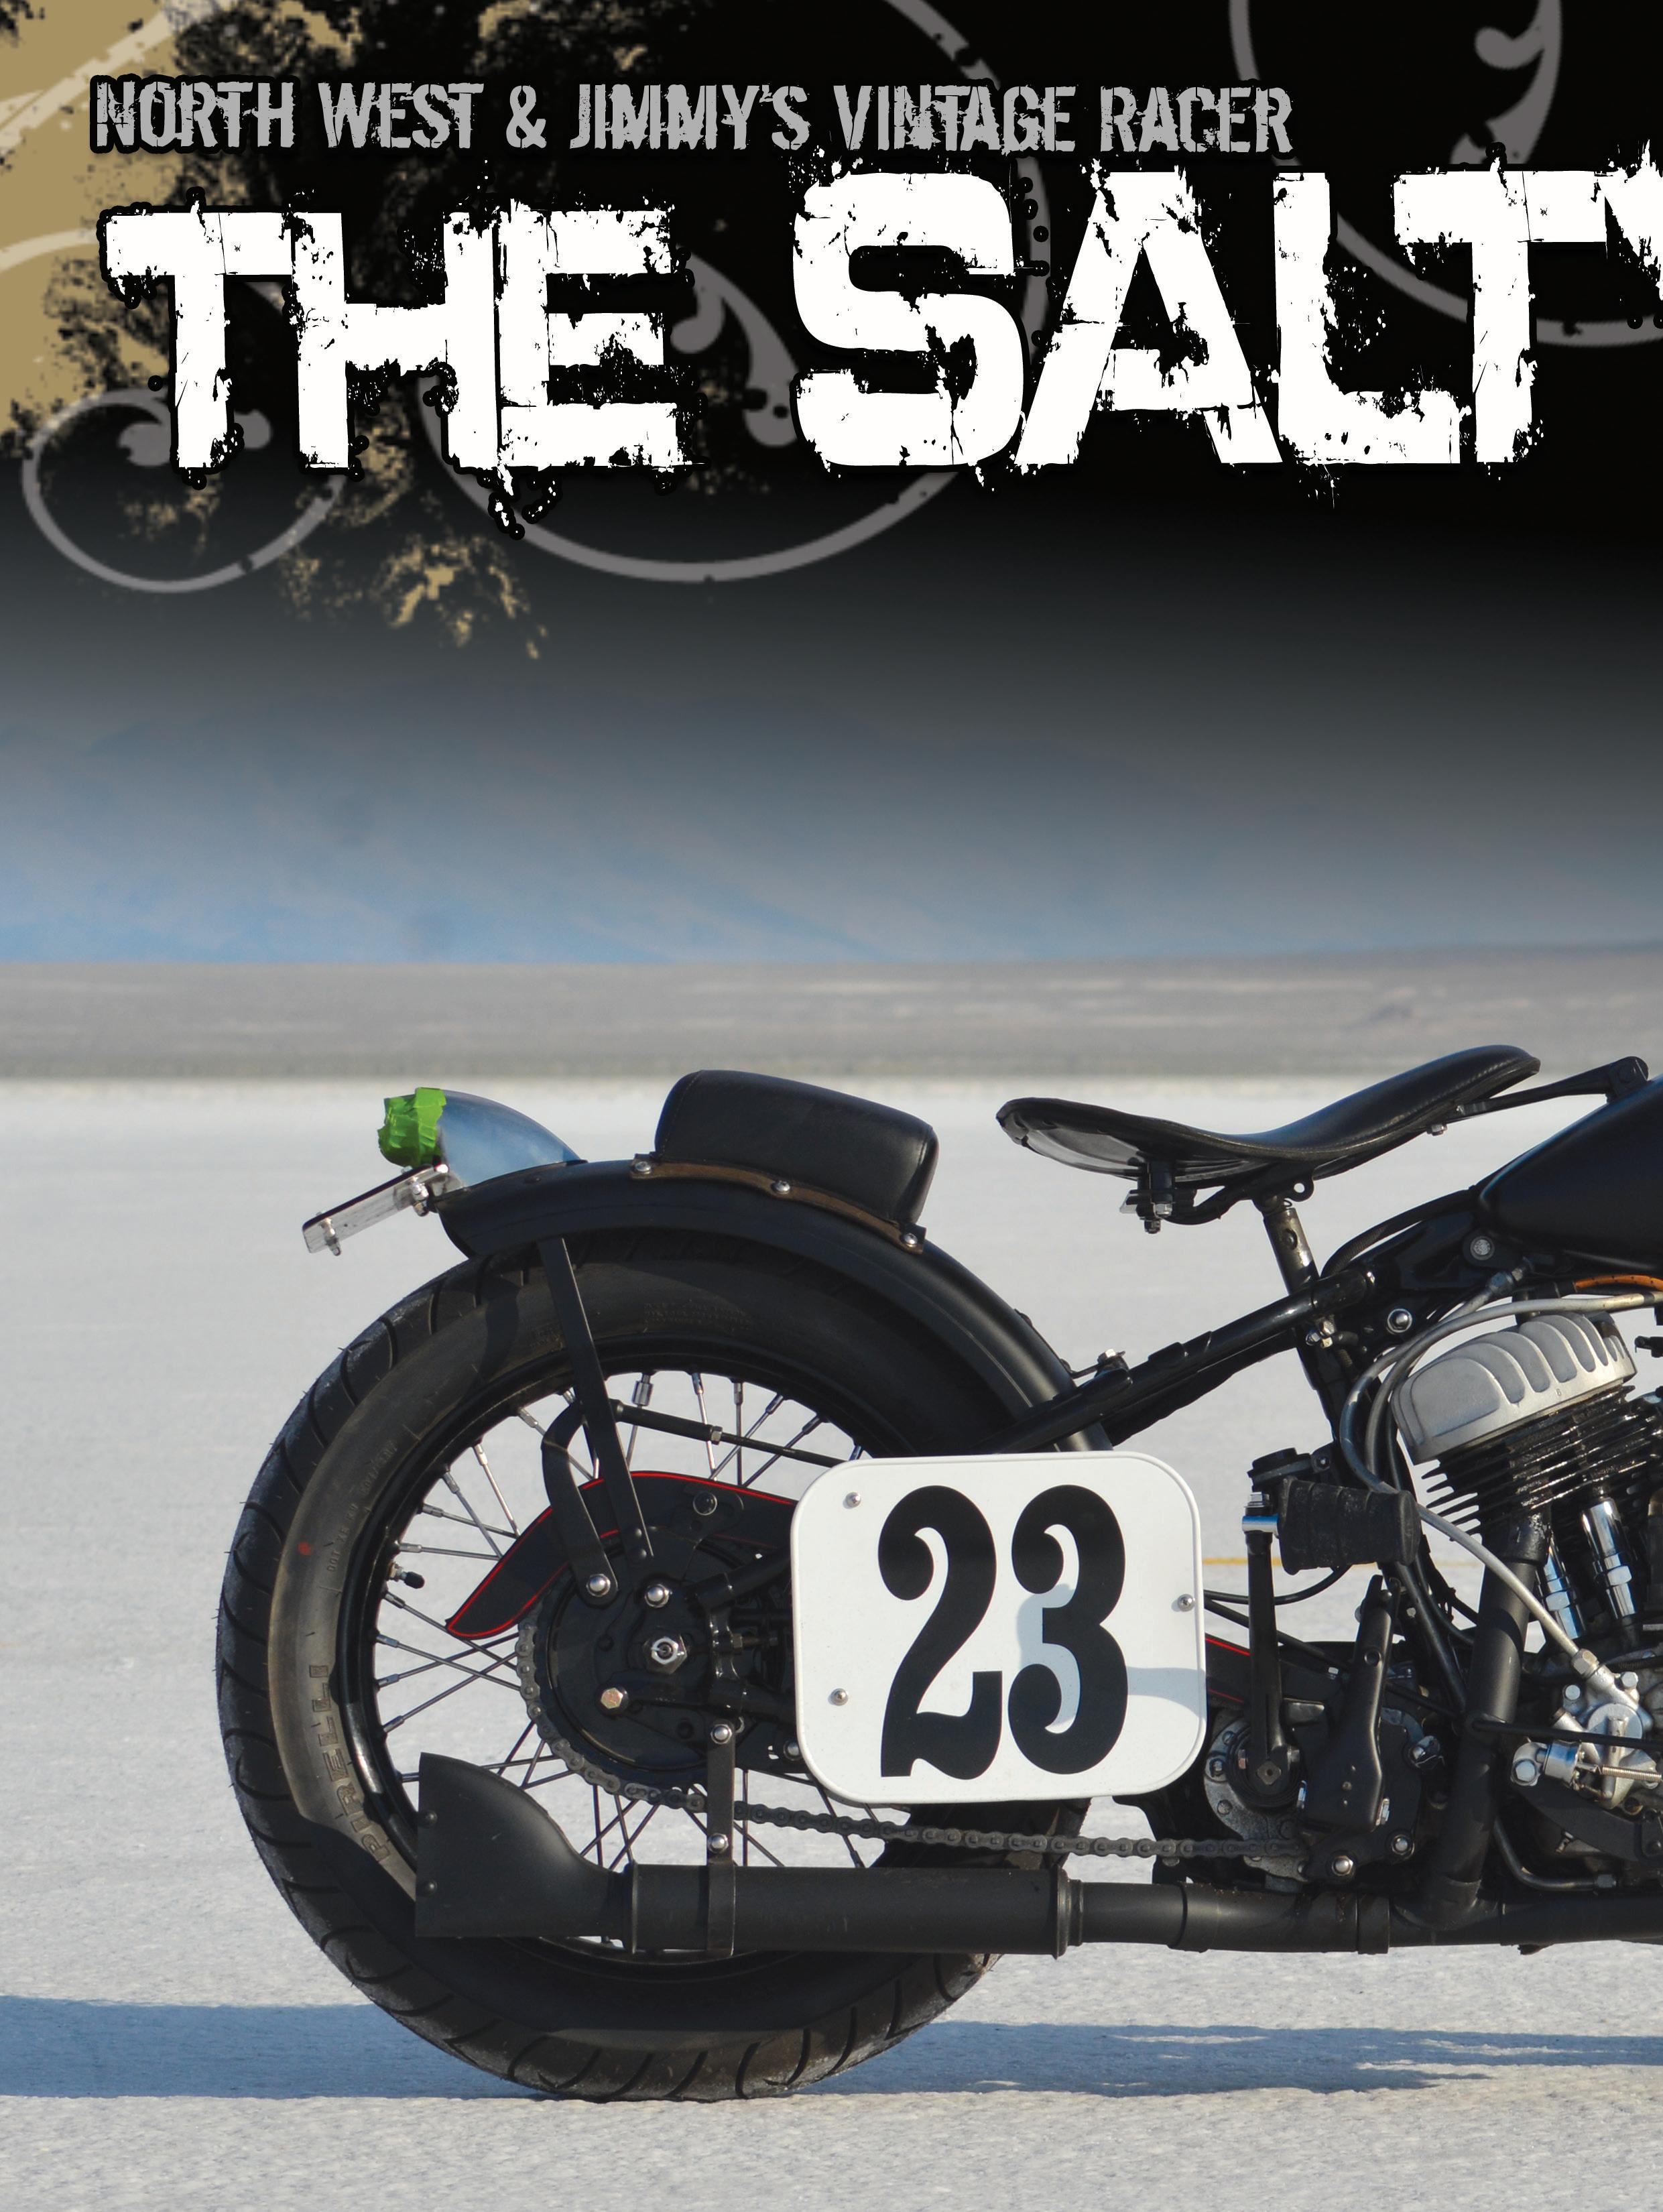
'45 Flathead To Run On The Flats


ost people don’t realize it, but the “45” Flathead was the longest running production engine that the Motor Company m ever produced and included everything from civilian solo, and trike models to police duty to military service which is what we have here or at least to a degree. It’s kind of hard to believe that 73 years ago this frame and some of the other parts she’s running were painted OD (Olive Drab for you non-military types) green and quite possibly saw service in the European theatre. Although, some complete bikes, as well as large inventories of spare parts, were deemed surplus either here at home or to our Axis allies under the Lend-Lease program which accounts the large numbers of these bikes still overseas.
As luck would have it, this one ended up with bobbed fenders and a lot of hard miles behind a closed gas station in Oklahoma and fortunately escaped the scrap yard! Fast forward to around 2005. A rebirth was in order but this time with a G Servi Car motor as well as a few new-fangled pieces like a set of Flanders risers. It was during this incarnation that she ended up as a model for Tom Fritz, an authorized Harley
Advertisement
Article By:GTP Photos By: Chris Callen
Davidson artist, who knew a real bobber when he saw. Fritz painted her next to a 32 Ford Coupe that was titled “Fertilizer Salesman.”
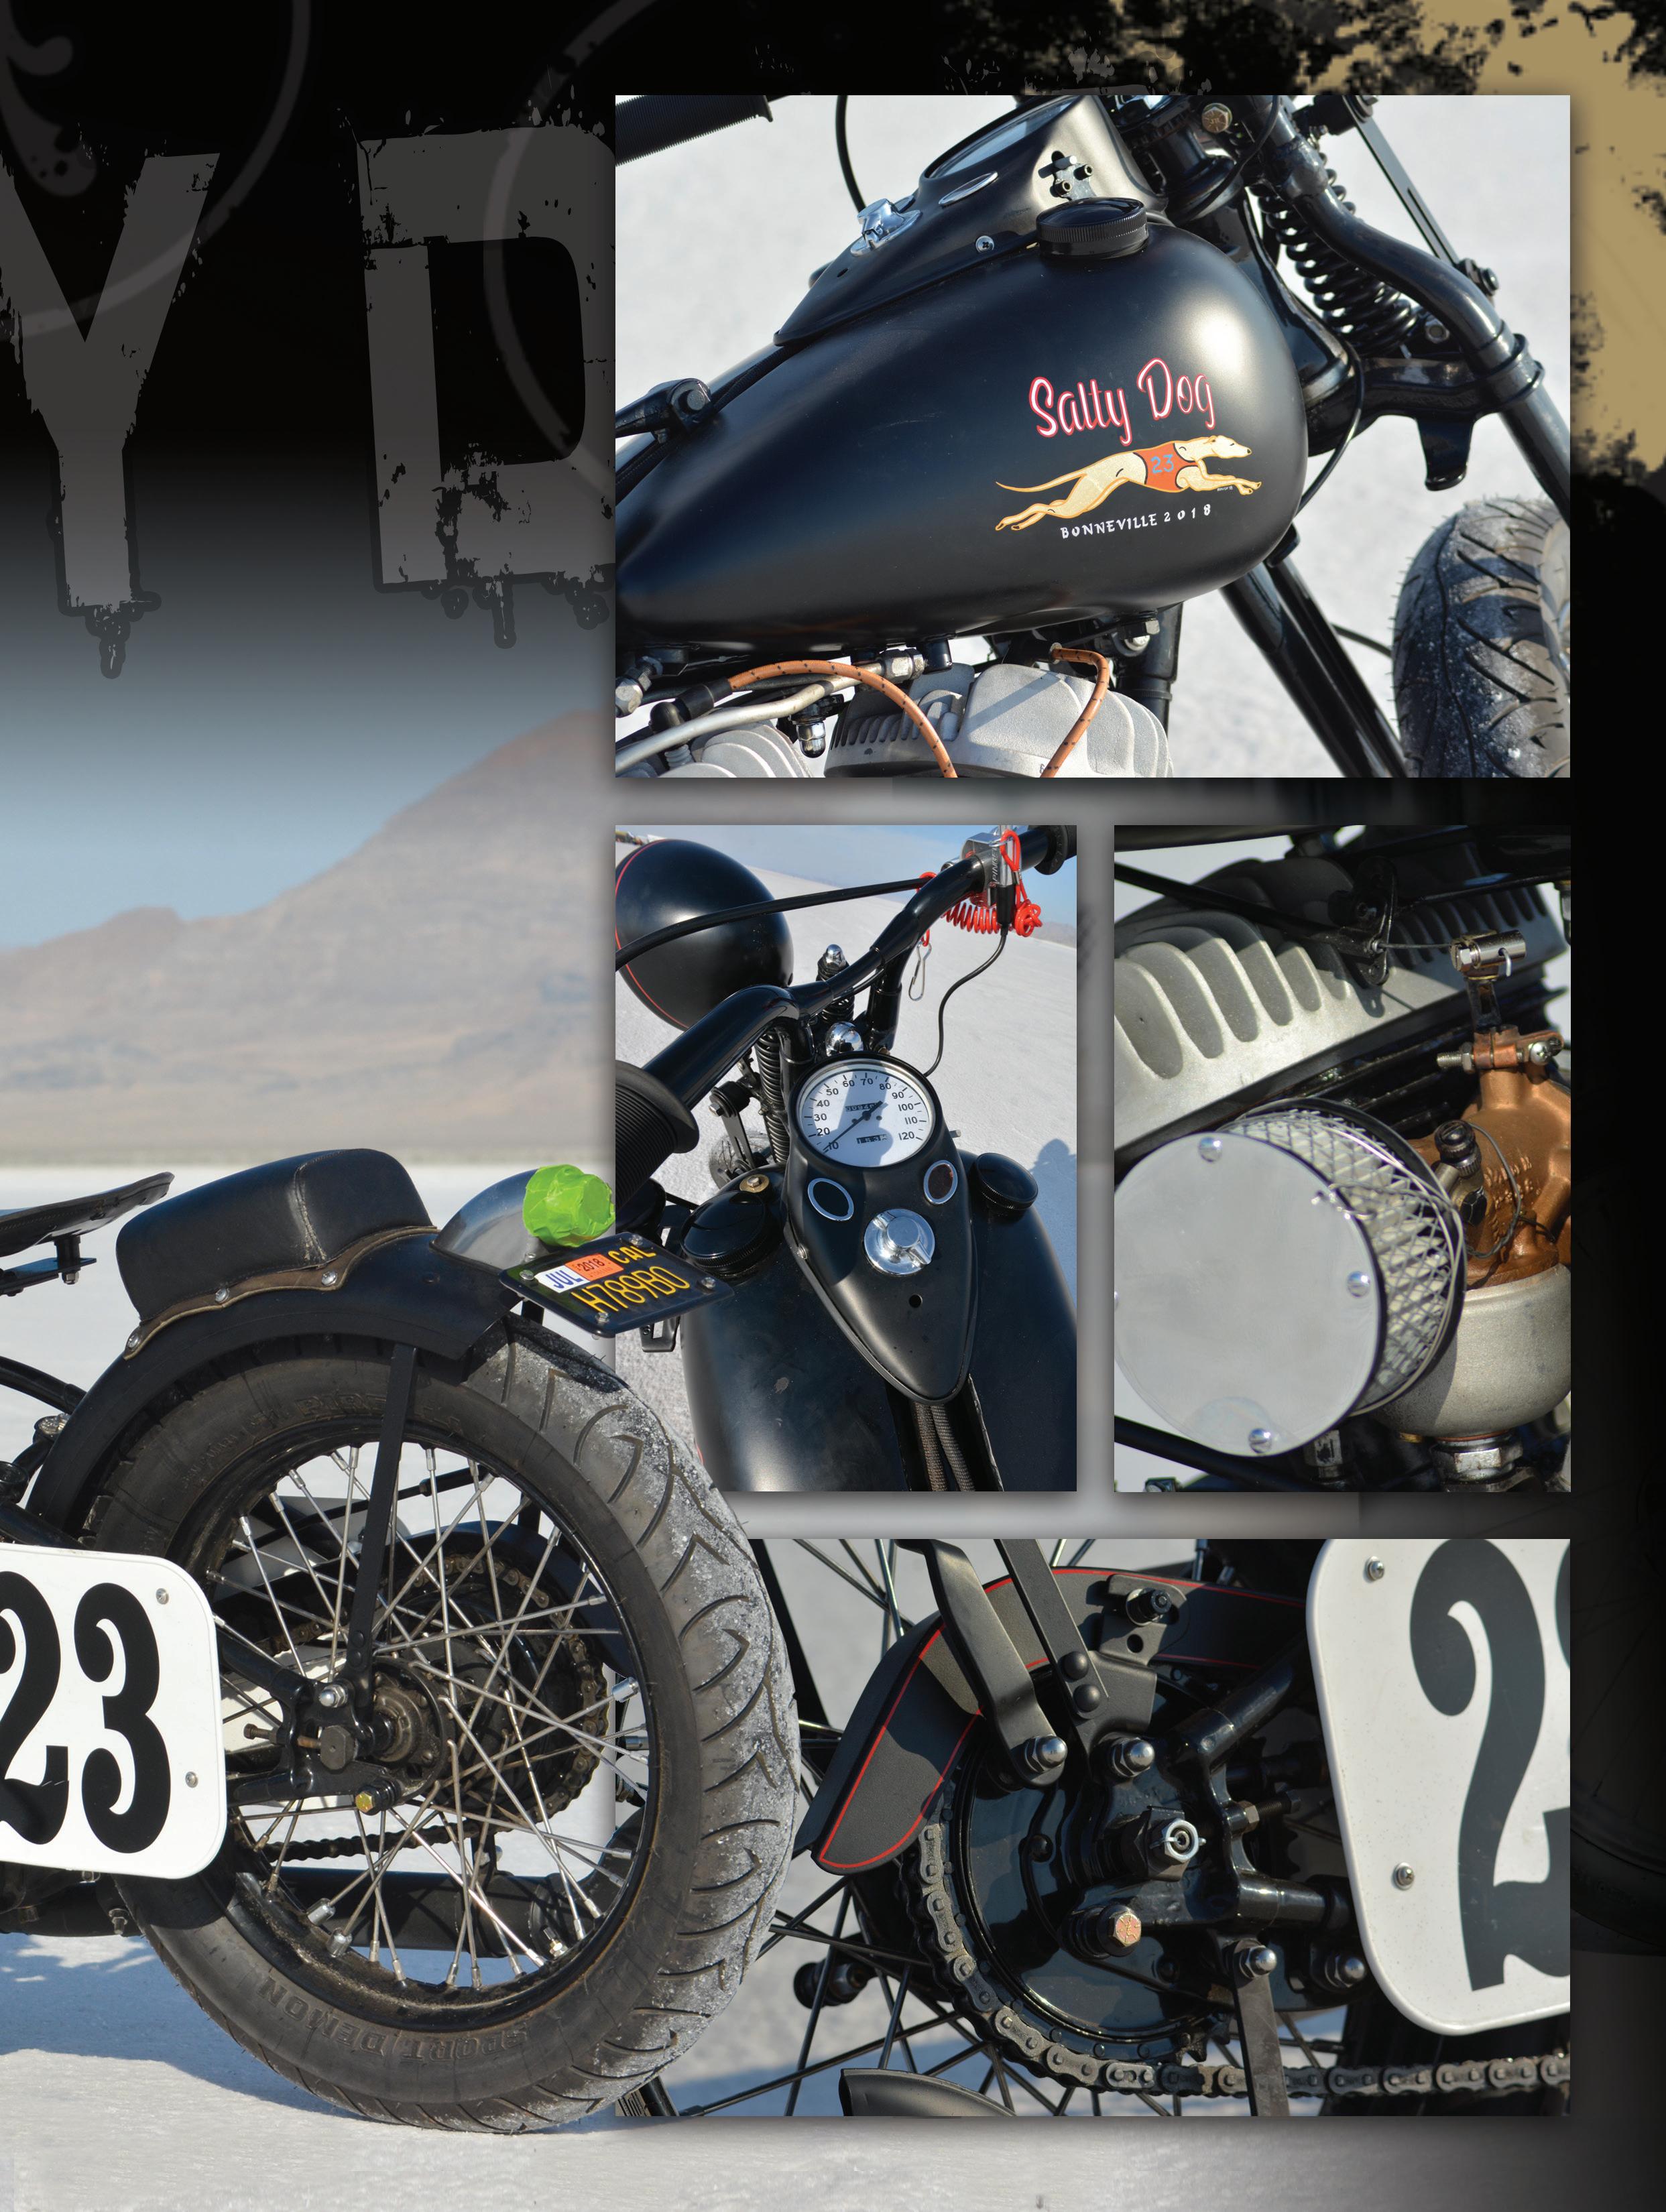
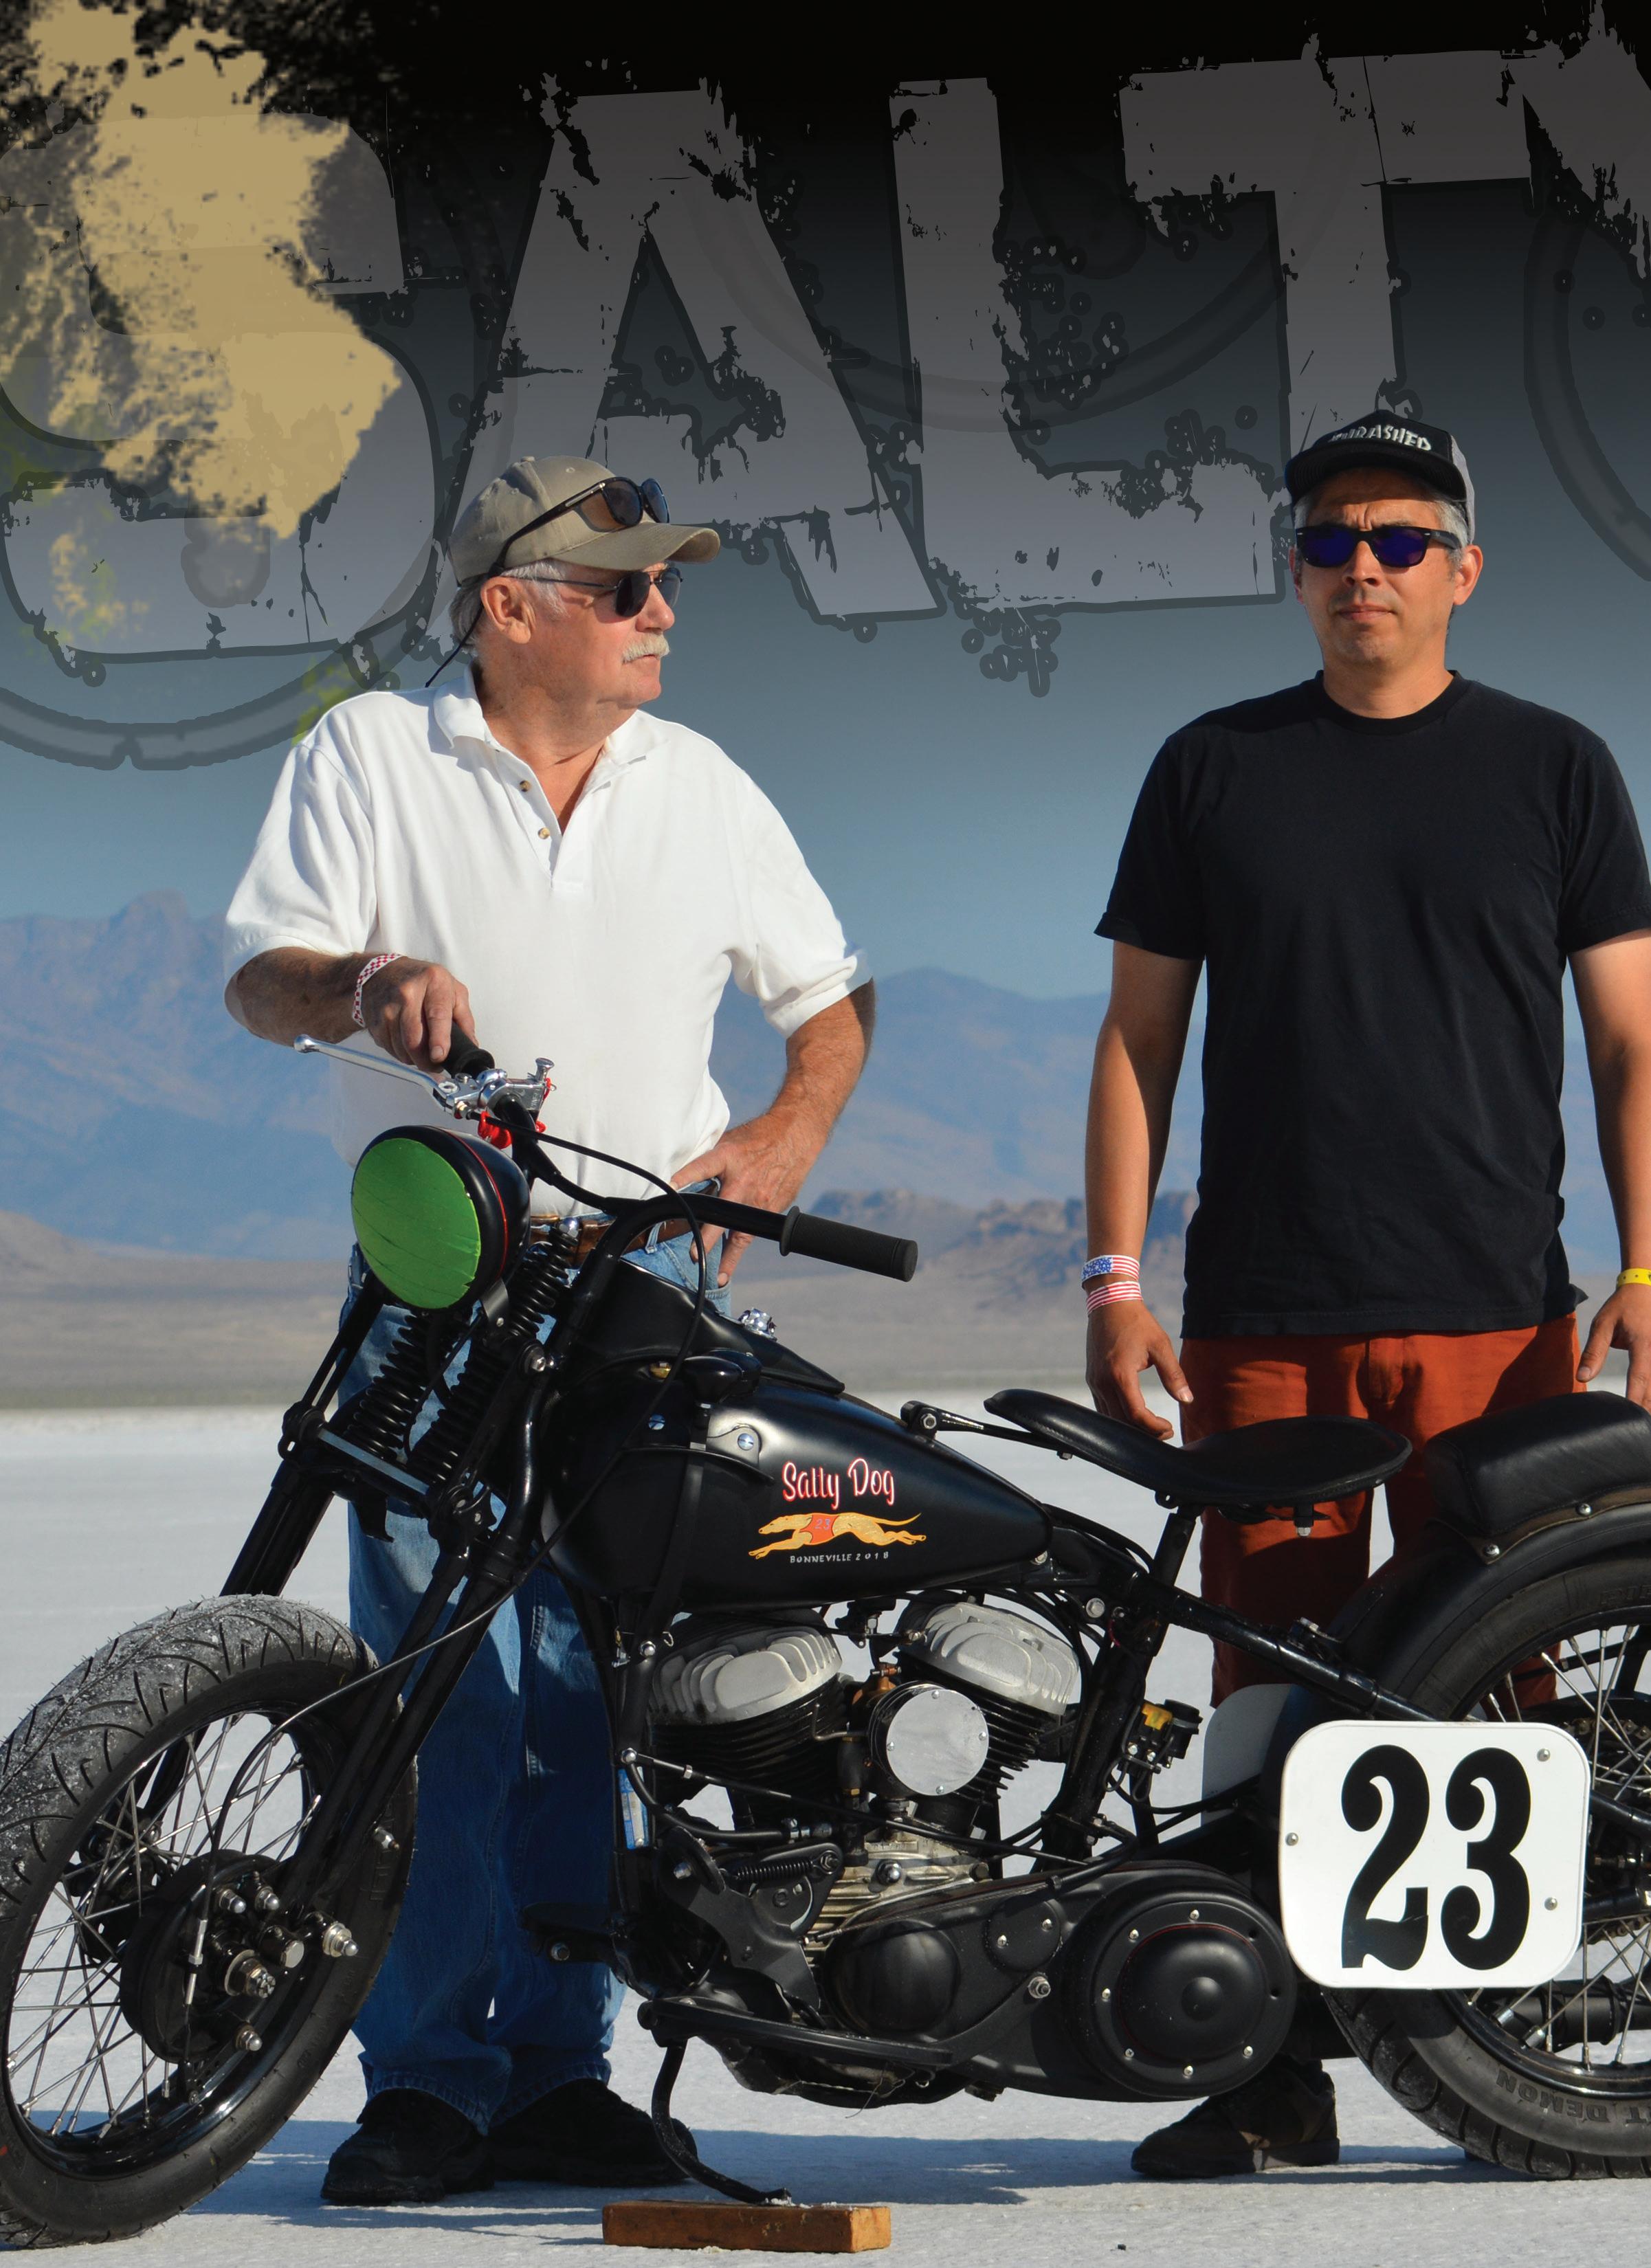
In 2009 she was sold to Jimmy Guerrero from Texas when after a move to the Silicon Valley she was left in limbo due to his work schedule and other bike projects. Jimmy had always wanted to go to the Bonneville Motorcycle Speed Trials, so a plan was put into place to give her a complete makeover. Now a few pieces were good to go, but she was still taken down to the bare frame. The first part of the rebuild started with a new top end, which included new cylinders as well as pistons and rings. The lower end was good to go, so it was left alone. The oil pump was given a good once over and bolted back on. The M88 Linkert went thru a total rebuild from the capable hands of North West, who also handled the motor work. A custom air cleaner made by North was used for the Bonneville runs. For the charging duties, North used the tried and true Cycle Electric generator with a V-Twin regulator. The transmission was the one that came with the bike and only needed a new clutch and a new throw out bearing. The springer was another piece that came with the project; it received a full rebuild as well. The wheels were already laced and good to run except. Firestones were swapped out for some Pirelli Speed Demons that were better suited for the salt. North used all new stainless-steel hardware during the build to help deal with the corrosive nature of the salt. One old racer trick he used was installing a Fairbanks type magneto (with no retard) and a battery eliminator to run the lights. The tanks are stock, and the oil lines are stock and were part of the bike as it came. The rear fender is an OEM hinge type that has the lower hinge part removed, a timeless trick from long ago that looks just as good now as it did in the 50’s. The chainguard, tanks, and fender were painted, and the frame and all of the other small black parts were powder coated

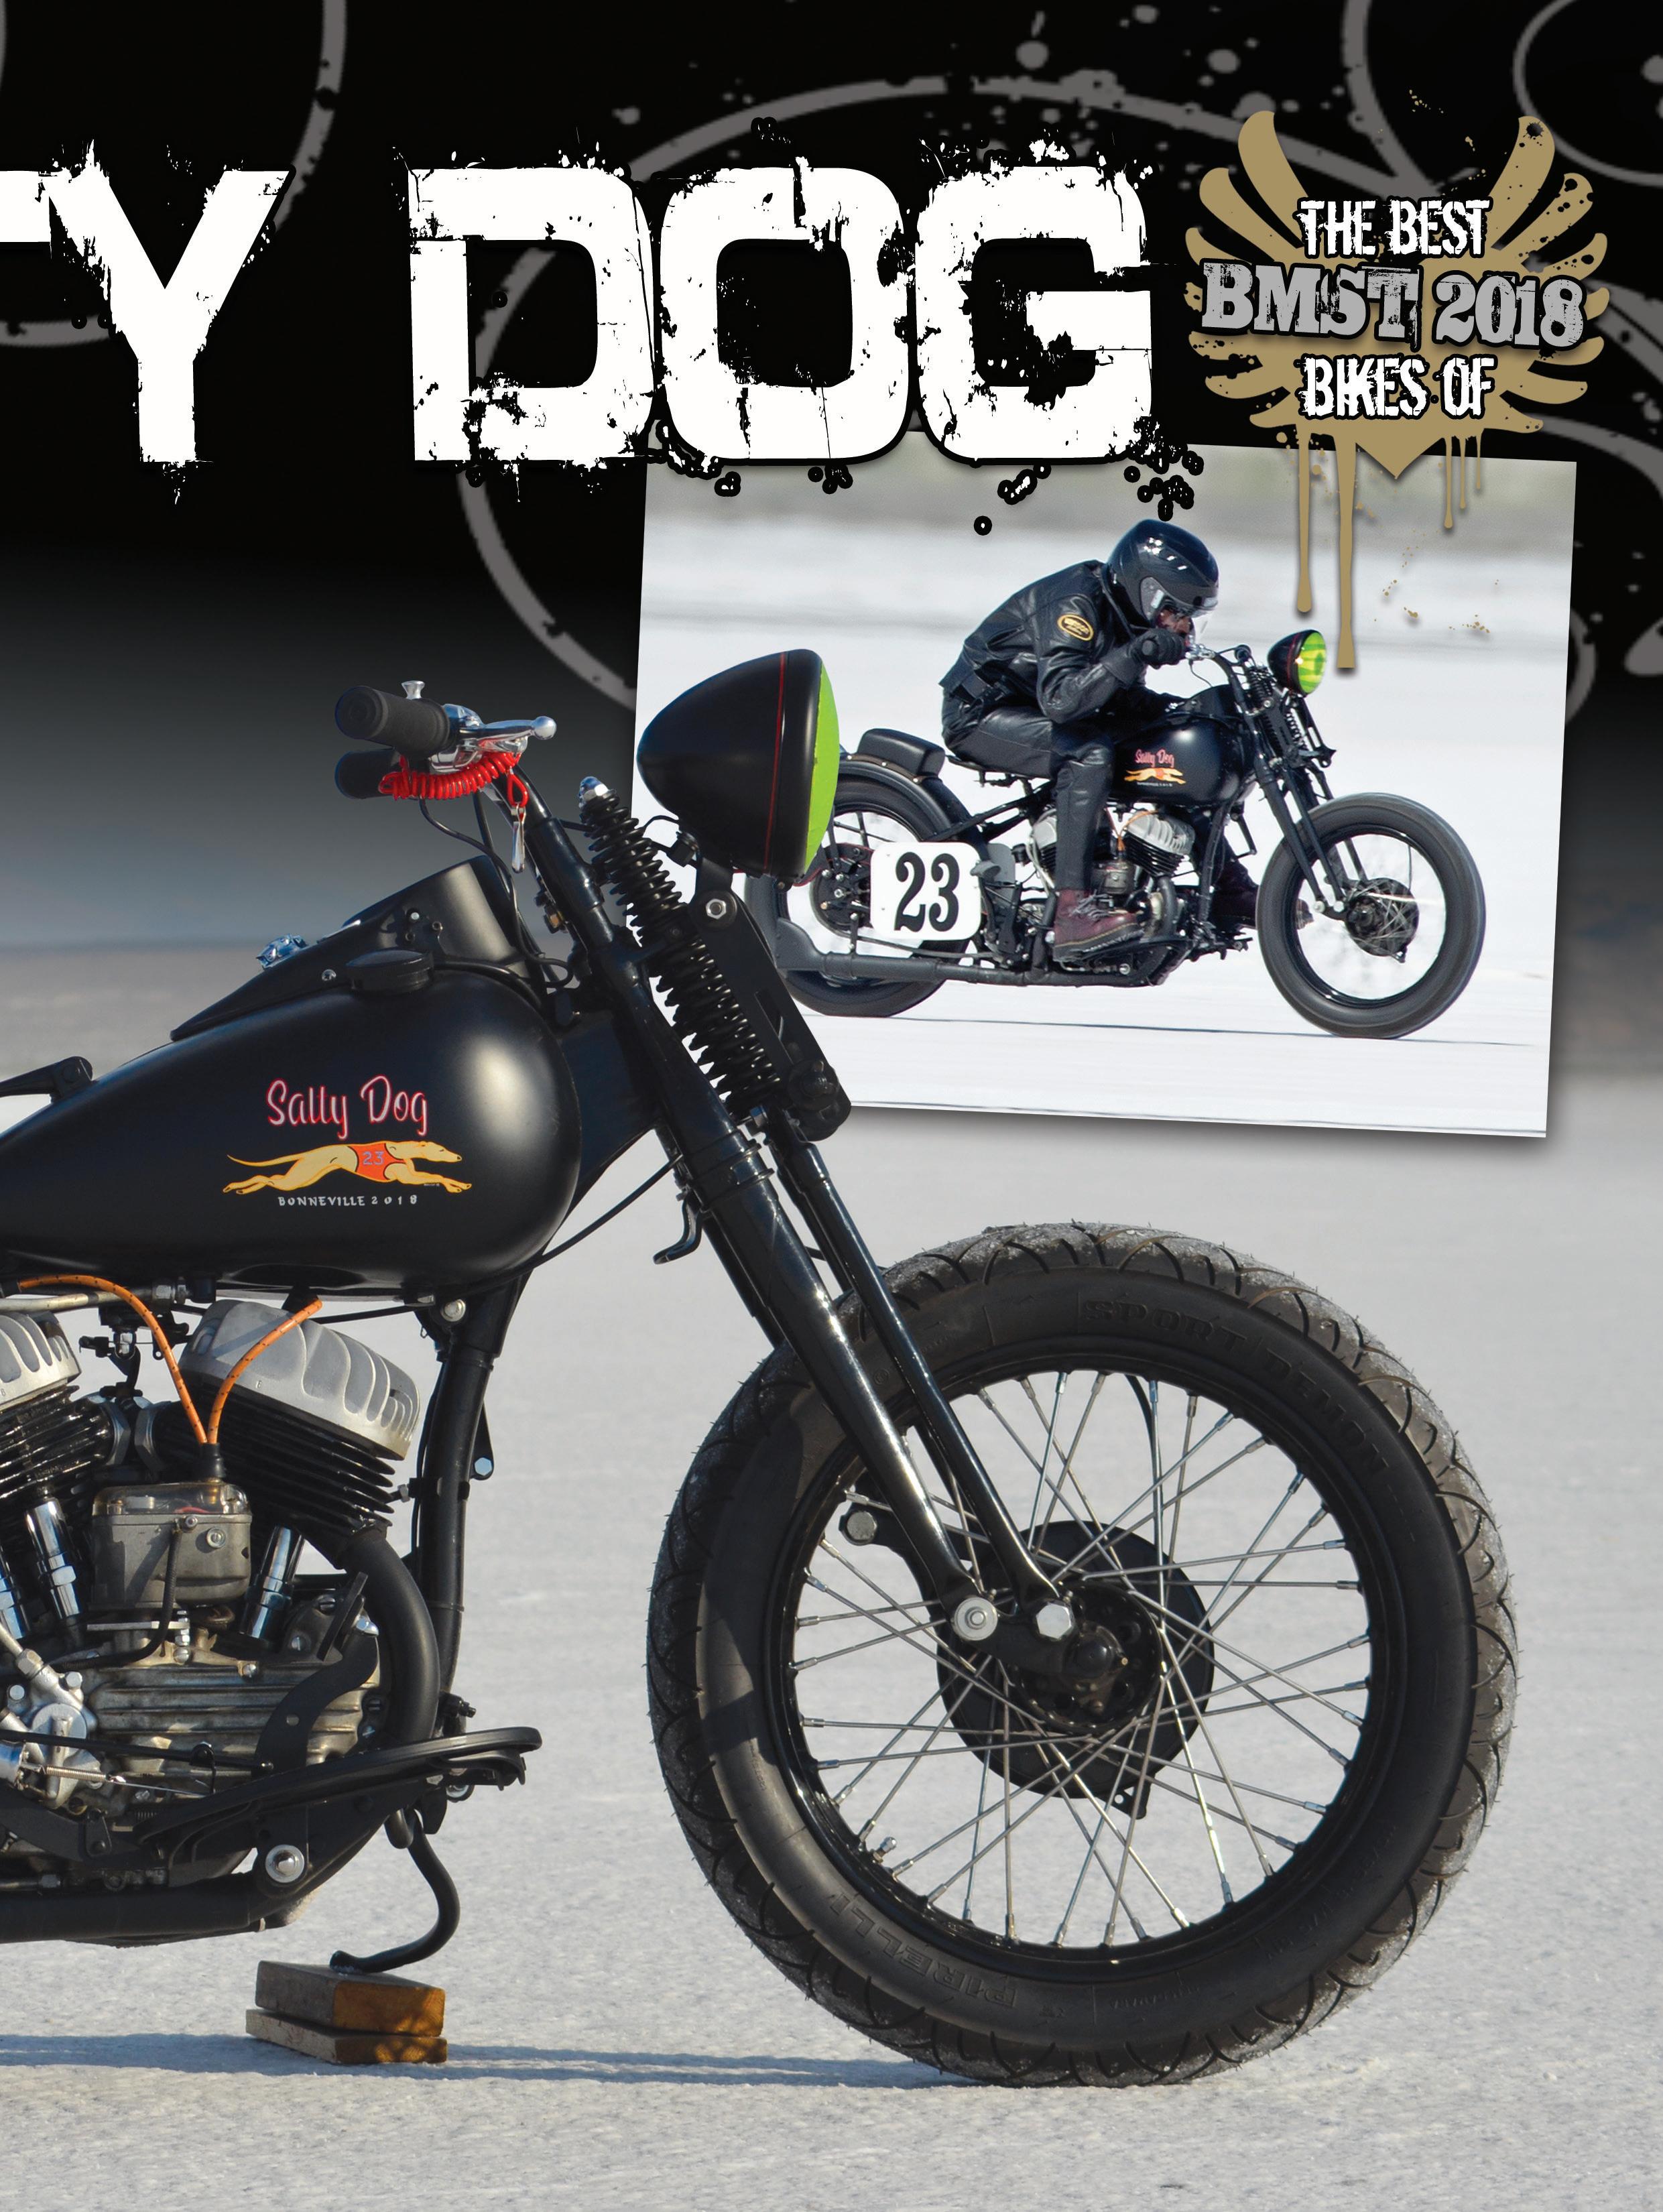
by Precision Powder Coating in Belmont CA. The Salty Dog graphics and pinstriping were laid on by Troy Keogh. One of my favorite pieces on the bike are the Cro’s Nest custom bars that hold an Exile Cycles internal throttle, they look trick, and North says they feel just right.
Once they got to Bonneville they opted to run in the “Run What You Brung” class and were blessed with perfect weather, perfect salt as well as technical assistance from fellow racers which proved invaluable. On a good day at sea level, they were able to hit 70 mph, but she was still running a little fat, so they
Bike Name: Salty Dog Owner: Jimmy Guerrero City/State: San Mateo, CA Builder: North West & Jimmy Guerrero Year: 1963 Model: Harley 45 Flathead Value: N/A Time: 3 Months
ENGINE Year: 1963 Model: 45 Servi-Car G Builder: North West Ignition: Fairbanks Morse Displacement: 45 Cubic Inch Pistons: Harley Heads: Harley Carb: Linkert M88 Cam: Harley Air Cleaner: Custom Exhaust: Harley Primary: Harley TRANSMISSION Year: Unknown Make: Harley Shifting: 3 Speed FRAME Year: Unknown Model: WLA Rake: Standard Stretch: None
Forks Builder: Type: Harley Springer Triple Trees: Extension: WHEELS Front Wheel: Harley Size: 18” Tire: Pirelli Speed Demon Front Brake: Harley Rear Wheel: Harley Size: 18” Tire: Pirelli Speed Demon Rear Brake: Harley PAINT Painter: Ginger Ann Schmidt Color: Flat Black Type: Paint Graphics: Troy Keogh powder coat: Precision Powdercoat
ACCESSORIES Bars: Cro Customs Risers: Cro Customs Hand Controls: Harley Foot Controls: Harley Gas Tank(s): Harley Oil Tank: Harley Front fender: None Rear Fender: Harley Seat: Harley Headlight: Cycle Ray Tail light: Sparto Speedo: Harley Photographer: Chris Callen got the magneto, and the M88 dialed in and gave it another go. Their first run was 62.4 mph and their second run came in at 65.9 mph not too bad for a fresh motor with less than 5 miles on it. Personally, I think they did a helluva job not just on the salt but with capturing a style that’s timeless and classic even now!
I look forward to hopefully seeing this bike in person one day as well as meeting North and Jimmy!

his month we have a customer’s 2003 Heritage Springer in the shop. This bike came in for a basic service. While giving the bike a thorough safety inspection, T I discovered that the neck bearing race had developed a very severe groove. This is especially common with the Springer models due to the weight of the front end. Since most riders spend 80% of their time riding straight, the constant pressure from the Timken roller bearing wears a groove into the race. This is identified by simply turning the front end with the wheel jacked off the ground. A groove this severe is unmistakable as the front end essentially locks into place as it turns back to center. This can be a dangerous scenario on the road and requires immediate replacement of the neck races and bearings. caps without causing any aesthetic damage.:
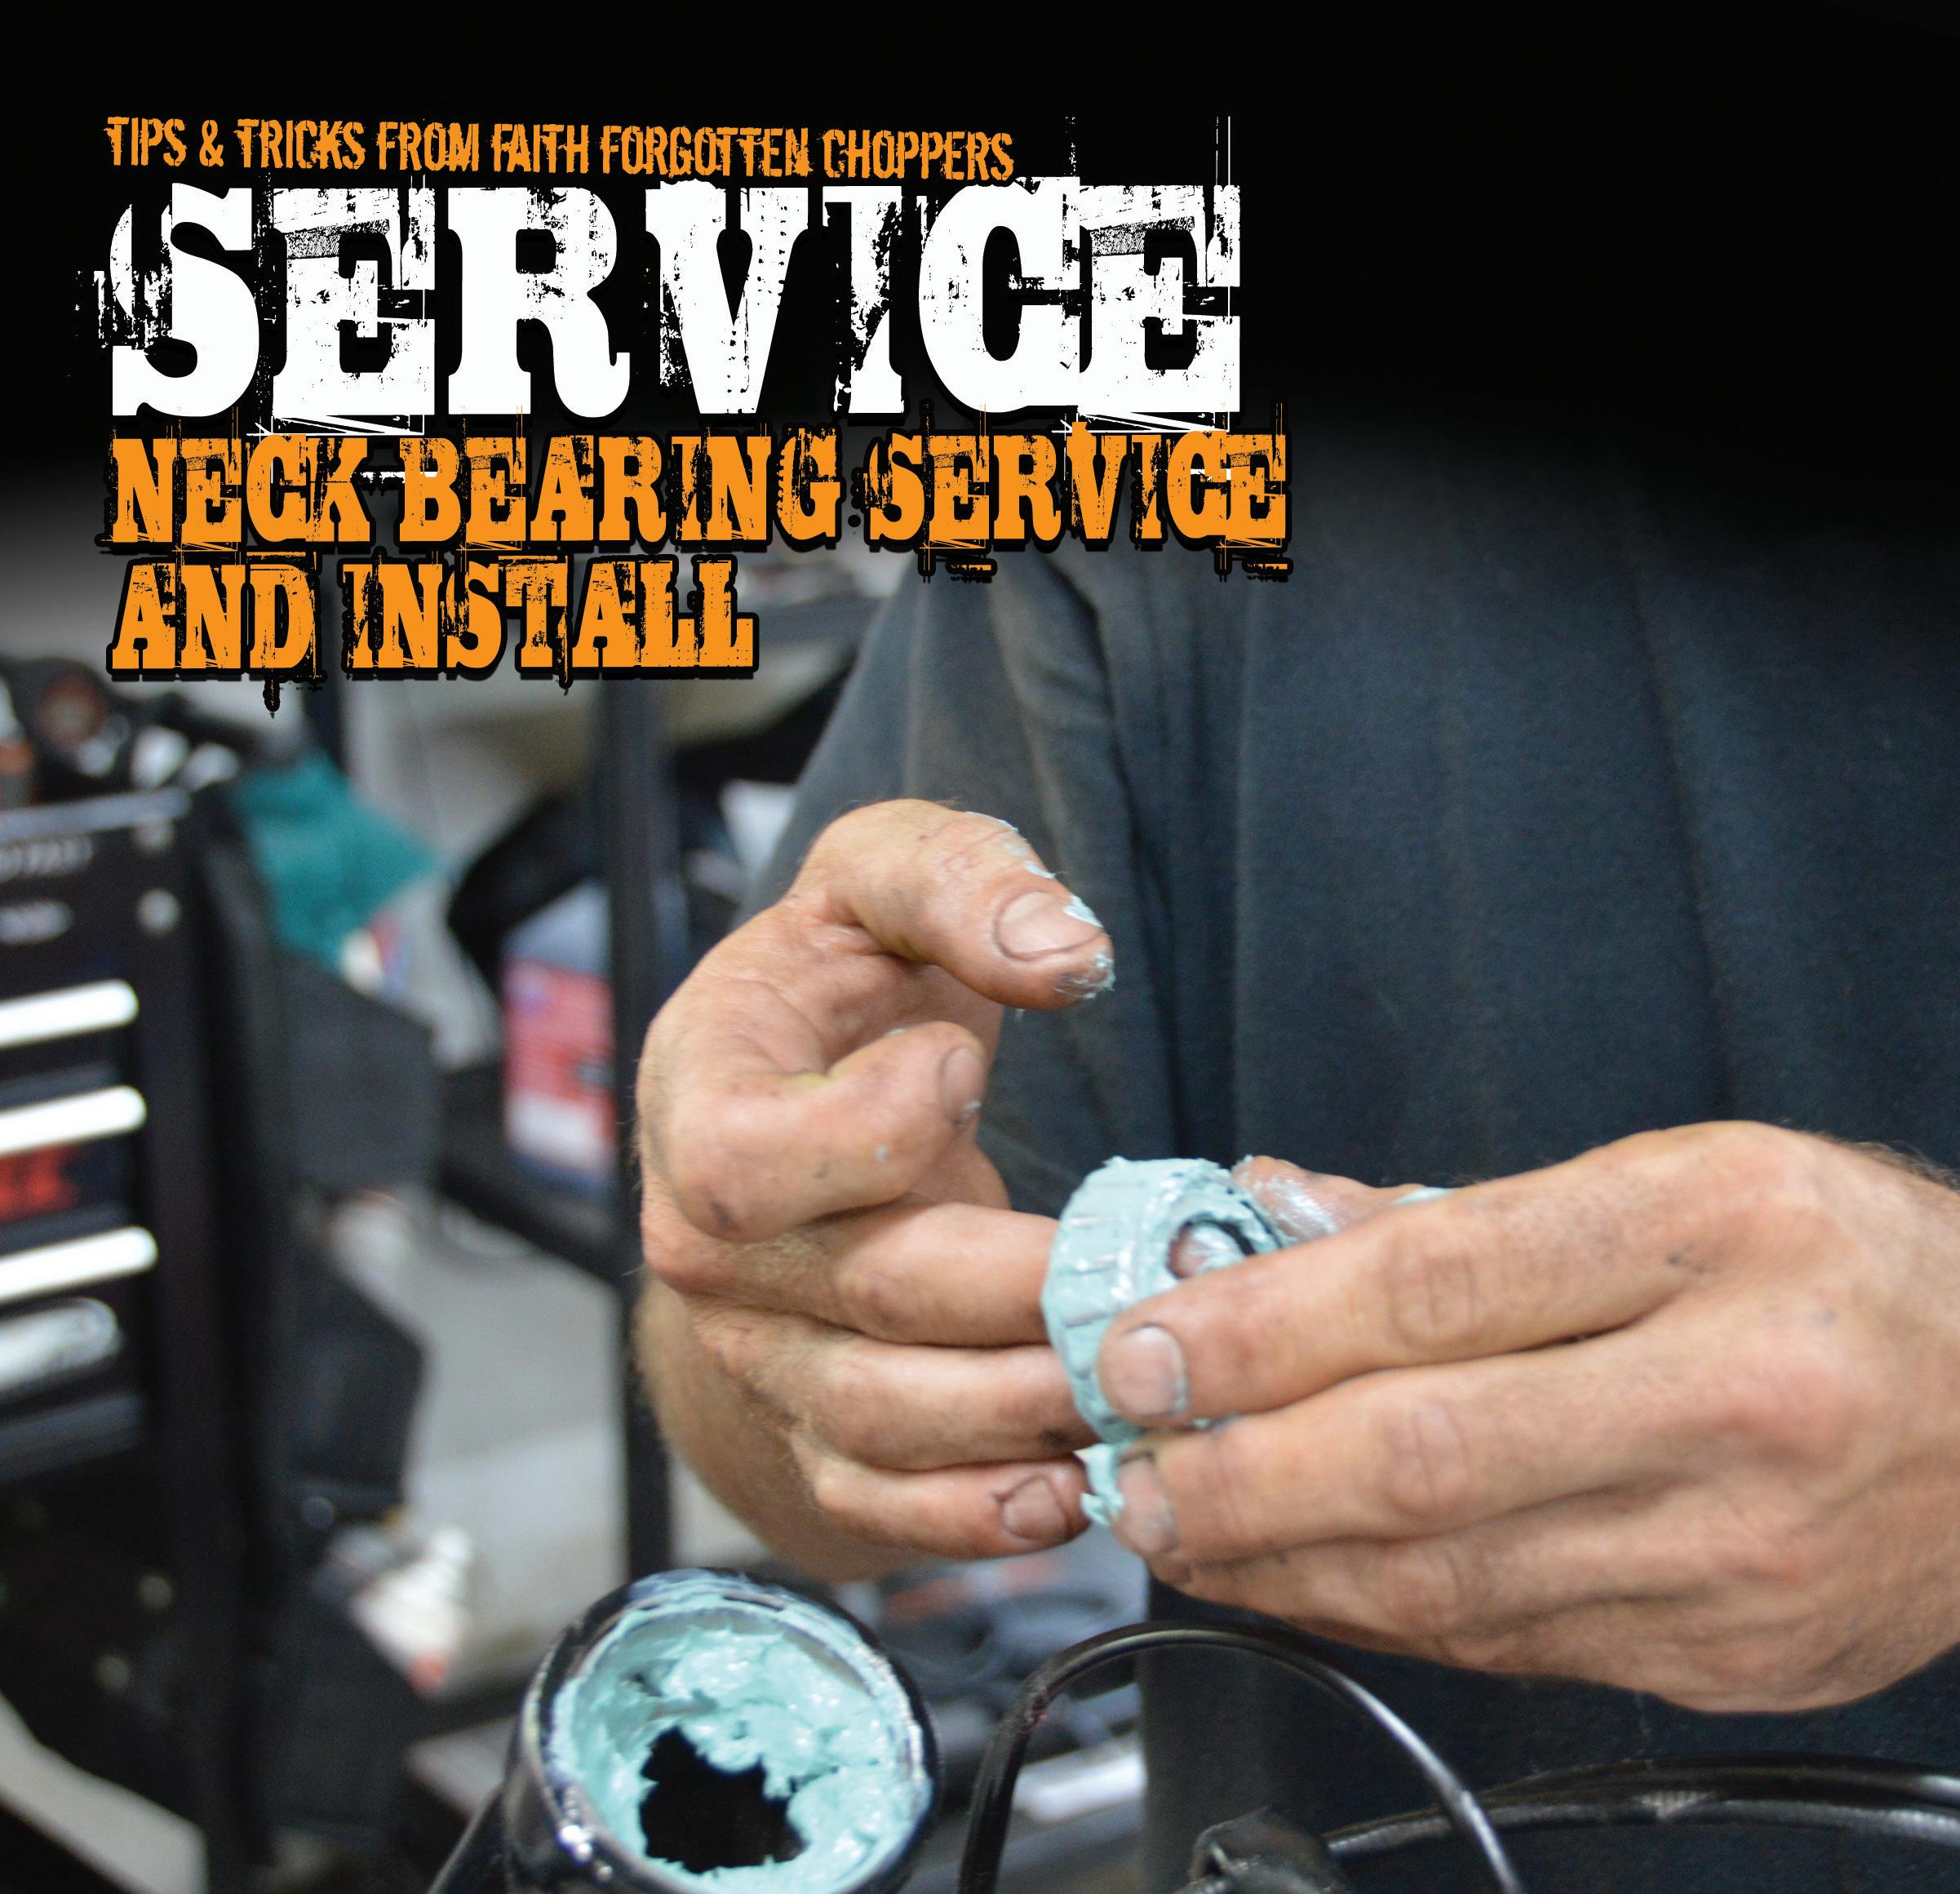

Article by: Corey Barnum Photos by: FFC Management www.faithforgotten.com


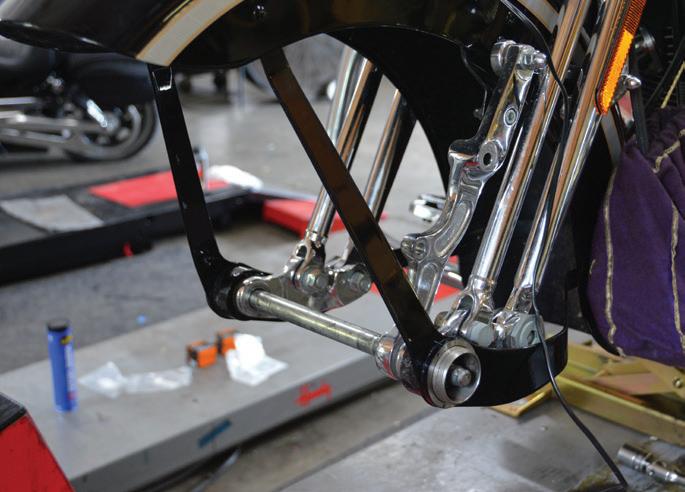
It has always been my personal preference to reinsert the axle to help stabilize the fender during removal. You might notice the purple crown royal bag in this picture hanging from the forks. I use this bag to hold the brake caliper after removal so as to avoid any undue stress on the brake lines. I am not a fan of mechanics who simply let the caliper dangle from the brake line as this is a critical safety system for any motor vehicle.
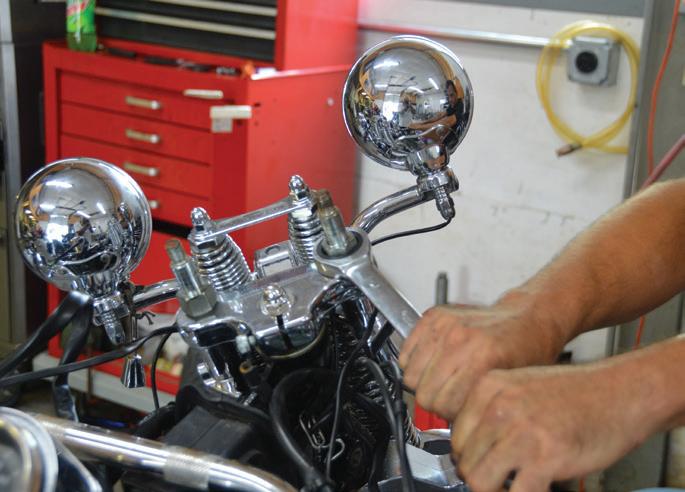
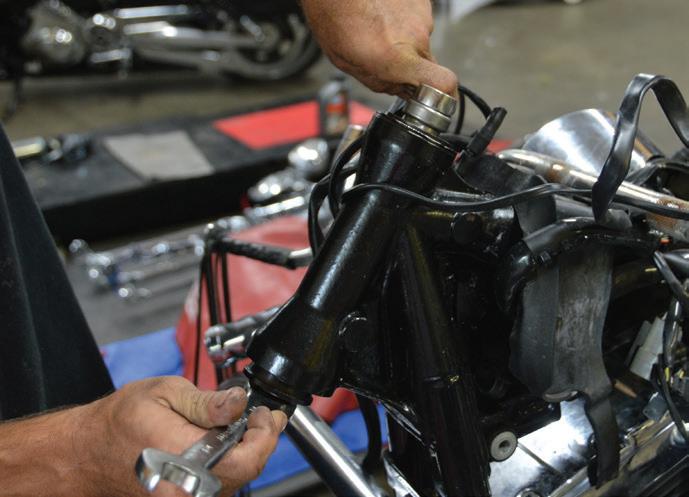
With the front wheel and fender removed, I remove the handlebars in order to gain access to the top of the front end.
During the removal of the handlebars, you will discover this spring inside the right-hand riser. Since the risers are isolated with rubber bushings, this spring is used to establish an electrical ground for the switches on the handlebars. Be absolutely sure that you reinsert this spring during the assembly process. The riser studs are removed with a 1” wrench in order to gain access to the top clamp of the springer.
After removing the top clamp, the bearing tension nut is removed using a specialty tool specific to this procedure. The legs of the spring must be supported because once this nut is removed the springer will slide out of the neck and the races can be removed.
When servicing the neck bearings, it is proper to replace both top and bottom races, bearings and dust shields.
The new races are pressed into the neck using a specialty tool. There are multiple specialty tools available for this job. I prefer the press tool The lower bearing is affixed to the stem with a very light press fit. I simply use an appropriately sized piece of tubing to slide over the stem and lightly tap the bearing into place. Be sure to install the lower dust cover BEFORE you press the lower bearing on.


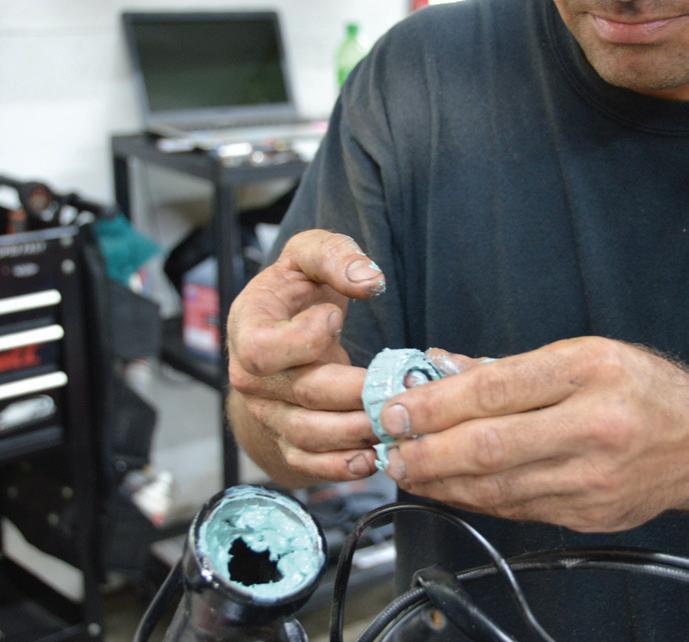
Although the neck on the frame has a grease fitting that will essentially pack the bearings. I still like to prepack the bearings and add a good amount of grease to the neck races.


The last thing to do is set the bearing tension on the neck. Different front ends require methods for determining the bearing tension. This springer front end calls for a fall away measurement of 1 to 2 inches. As bearings tend to break in and wear I tend to lean toward the tighter tolerance of this measurement, which would be 2”. I establish a fixed marking line with either a taught string, laser line, or welding rod (shown here). Using light taps, I establish the point at which the wheels falls away on each side. This measurement will NOT be symmetrical to the centerline of the bike due to the extra weight of the caliper on the left side. Therefore, it is simply the measurement between the two lines (fall away points) that determines the tolerance of the bearing tension.

The finished job heads out for a safety test ride before heading home to another happy customer.


e have just returned from what will forever go down as the trip w that both captured my soul and crushed it at the same time. India. A country known, and I feel this is unfortunate, for extreme overpopulation, poverty and filth is also home to the grandest of all mountain ranges in the world, the Himalayas, some of the most kind and welcoming people you will ever meet and of course, food that will knock your socks off. On this past adventure, Kayla and I would have the distinct pleasure of experiencing both of these environments first hand and in depth.
The area within
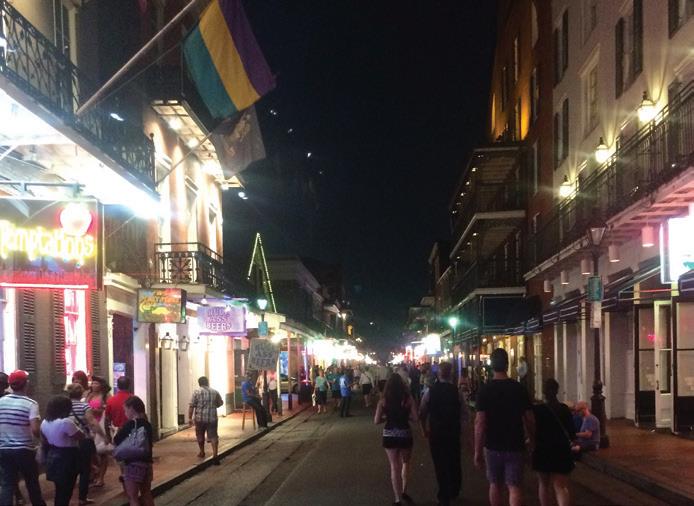
Delhi, called Old Delhi, would be our first real experience and insight into the world we would be living in for the next three weeks.
We walked for hours, up and down alleys lined in small shops carrying any good imaginable. Colorful saris and kurta’s hung in windows; mouth watering aromas wafted from one of the oldest spice markets in the world and beautiful handcrafted jewelry lay proud behind well-lit windows. Mosques and Hindi temples reminded us of the strong sense of spirituality felt all around us, and why, amongst all the perceived chaos swirling in every direction, with the relentless honking of horns, livestock wandering about the streets, every sort of transportation imaginable sharing the same roads, there is a calmness. Nearly impossible to pinpoint, this calmness embraced us and made us feel comfortable and welcome. Maybe it was the pleasant demeanor and kindness of the locals, the genuine smiles that reflected back on their faces, maybe it was that the locals appeared to be happy with what they had and not miserable about what they don’t have, a lesson I think many westerners could learn. I never was able to pinpoint the epicenter of this feeling, but wherever it came from, I’d sure like to find it.
From the crowded streets and alleys of Old Delhi it was time to begin our journey to Manali, a village deep in the Himalayas, and let the motorcycle portion
of our adventure begin. We met Moti, our extraordinary guide from Himalayan Heroes, and the other six riders we would be spending the next two weeks with, at a nearby hotel, loaded ourselves into a van at 4 am and began the 16hour nerve-rattling drive up some of the roughest and most narrow roads I have ever seen. To call these thoroughfares a road is a stretch, but that is what they are. Buses, cars, highly decorated lorries, and motorcycles alike played chicken at every curve and somehow it always worked. Two honks of the horn would magically part the seas. Our arrival to Manali was met with big sighs of relief and the exciting prospect of boarding our Royal Enfield motorcycles that were waiting patiently for us at the hotel. A good night’s sleep would glide us into the following morning where an excited buzz dominated the airwaves. That morning the Himalayan sun warmed our faces. This would be day one of our journey towards the highest motorable road in the world, Khardung La Pass, a major item on my bucket list and an idea that has kept me awake at night with anticipation.
We left Manali, heading south on NH3, weaving and bouncing our way through the dense mountain traffic and the staggering amount of cows in the road towards more secluded land. It didn’t take long to find, and with it, came fascinating places to stay such as our destination on the first night. We pulled into a short and steep driveway that ended next to the Tirthan River, parked our bikes and stared curiously at the makeshift chair, suspended by steel cable that spanned the river. It turns out that this would be our mode of crossing this river, luggage and all, to the other side where our cozy rooms and a homemade meal waited for us. This would be a great first night and an insight into how the rest of the ride would go. From here we continued east and began our journey towards Spiti Valley. This valley is a sight to behold. A desert mountain valley located high in the Himalayas, Spiti means “the middle land,” appropriately named as it sits nestled between Tibet and the rest of India. To access the Spiti Valley a person has to traverse some of the most spectacular motorcycling roads on earth, and I don’t


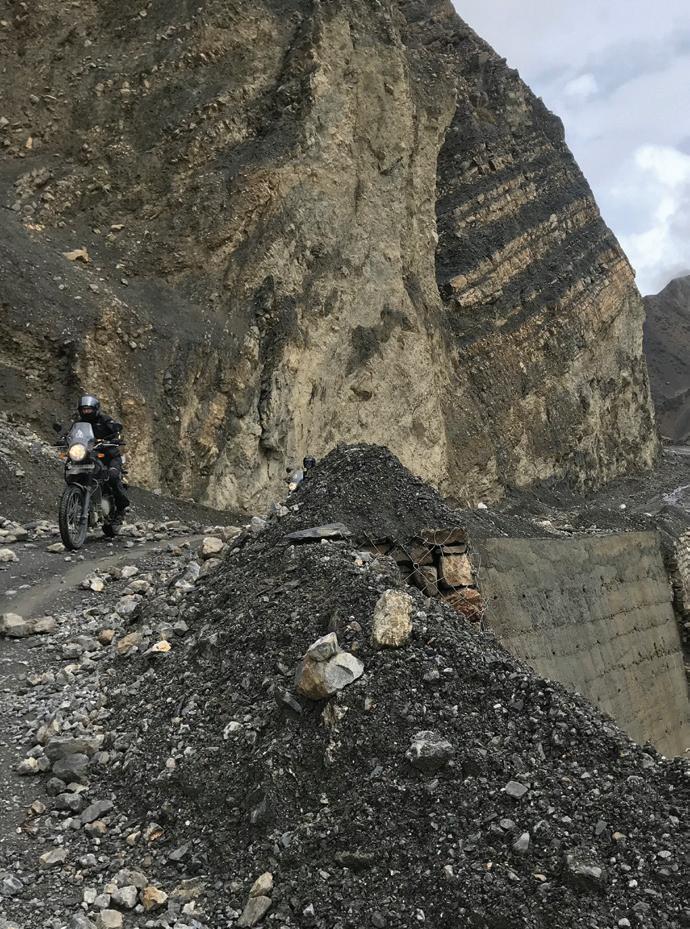


say that lightly. These roads, or trails at times, are equally as challenging as they are picturesque. Constant landslides leave the roads littered with melon-sized rocks, often covering an entire stretch completely in rocks for miles. This, of course, makes for a very slow and arduous ride. Rain will likely have left the next stretch a deep mud bog complete with water crossings and more rocks. The theme here is to expect anything and everything. A relatively smooth road could be found demolished and/or completely missing around any corner. This all made for extremely entertaining motorcycling, especially when coupled with postcard quality views around every corner, but this sort of high altitude adventuring comes with a risk that no one has control over. Weather.
We rolled into the village Kaza, situated at 12,500 feet above sea level and the capital of the Spiti Valley, and began mentally preparing to begin our ascent over Kunzum Pass, our first of five major mountain assaults before reaching Khardung La. This is where the wheels began to come off. Overnight, the night before we were supposed to start this series of 5 passes, a fluke snowstorm rolled in and unloaded 4 feet of the powdery stuff directly where we were supposed to be headed. This is not news any motorcyclist wants to hear after having literally traveled halfway around the world, but alas, it is what it is, so we sat and discussed our plan. We essentially had no option at this point but to wait a couple of days and see if the road got cleared well enough for us to pass. Unfortunately, during this two-day waiting period, the road the other direction, the one we had just come up to reach Kaza, had been hit by multiple major landslides and was now closed that direction as well. We were officially stuck. For five days we waited, hoping the road would open one direction or the other as we’re all now realizing that missing flights home was becoming a potential issue, and with no cell service or WiFi connection, moving those flights wasn’t exactly an option. This was becoming quite the predicament we found ourselves in, but it left us plenty of time to explore the incredible valley we were in, the people of this valley and Key Monastery. I will focus on these highlights, as well as all the positive things that this trip enlightened us to in next month’s article.
As always, you can follow my journeys and view photos from this trip as well as others on Instagram @ charlietravelingchopper
NO THERE ISN’T ANY REAL PRIZE, JUST SOMETHING TO DO WHILE YOU’RE IN THE CAN.

1.Sportster Logo. 2. Extra Buttons On The Seat. 3. Extra Oil Pressure Gauge On The Front Head. 4. Velocity Stack Rotated. 5. Saltster Name In Kicker Pedal. 6. Carb Support Braket Filled With Bolts. 7. Ignition Plate Rotated. 8. Pipe Wrap On Rear Exhaust Extended. 9. Battery Hold Down Strap Holes Filled. 10. Extra Bolt On Kicker Cover.


