
5 minute read
Getting More Life Out Of Your Light
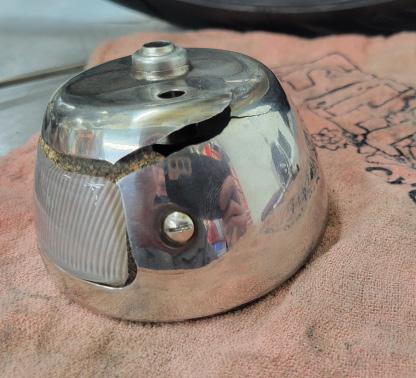
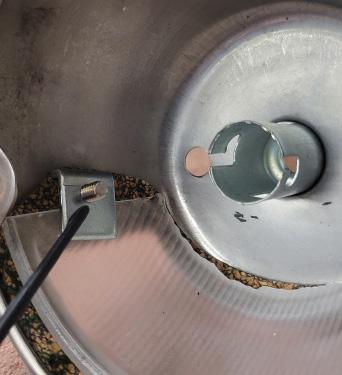
t has been a long winter here in Ohio, and as I sit here and write this month’s tech, there’s snow still on the ground outside. Spring i is coming, and we all know what that means; we finally get to enjoy our motorcycles. So, what better time than now to get them ready. No sense in waiting until the last minute. Take the time now to do any service or repairs. I don’t know about you, but I am ready for the upcoming riding season. After some of last year’s shenanigans, I realized that I had broken my taillight. Other than that, all I need to do is a full service on my bike for the spring. This LED taillight has served me well for more than 8 years and is extremely popular within the custom motorcycle community. Unfortunately, the failure rate of this taillight is extremely high, so for this month’s tech, I will show you how I got 8 years out of my taillight. The taillight that I have on my bike is a reproduction of a Ford Model “A” style light. They make this light for use with incandescent and LED bulbs. From my experience, the failure rate of the incandescent is much higher than the LED, which I will explain in a minute. All these taillights are made from thin stainless steel, which does not get along well with our bikes’ vibrations. Here you can see the S.S. body is cracked and broken beyond repair. This being an LED version, the light still functions as it should. This is why I choose LED over incandescent. LED is much more forgiving to vibrations.

Advertisement
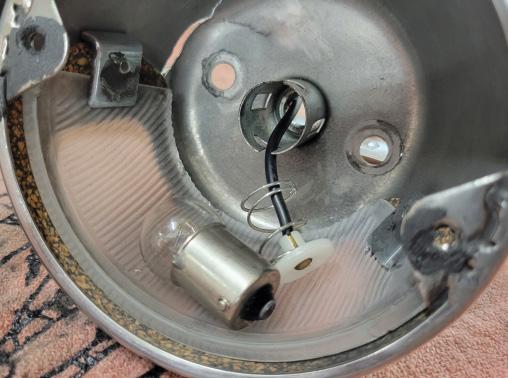
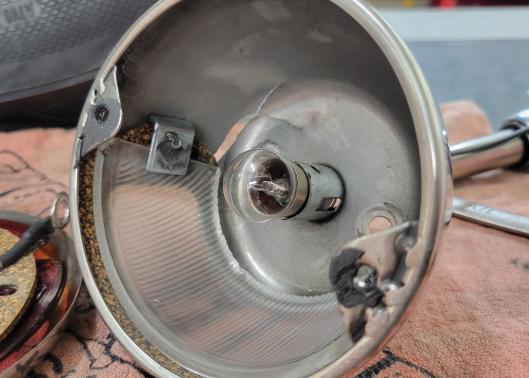
The incandescent bulb version does NOT like vibration. As you can see, there is a spring and a plastic disc with a wire running through it to contact the bulb. When the bulb starts vibrating, it loses contact with the wire and eventually destroys itself. This is why I don’t like this version of this light. Yes, it is cheaper, but you get what you pay for.
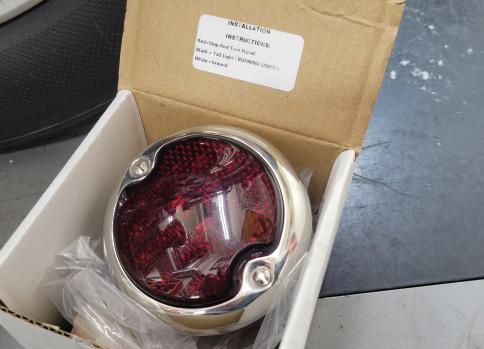
Here is my replacement taillight. Obviously, these are not made in the USA, but they hold up well when installed correctly. You will immediately notice that the colors of the wires or where they go are not typical to what we are used to. Red is typically positive, and black is typically ground. That is not the case here.
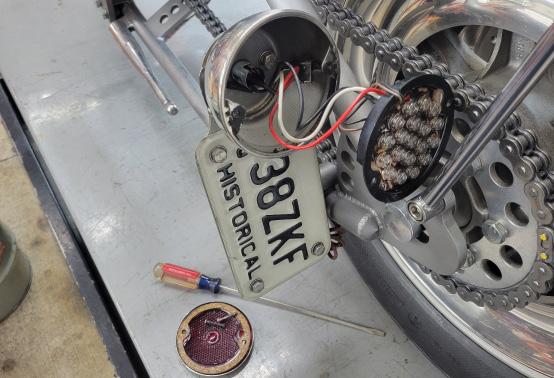
Removing and replacing a taillight is very straightforward, but I am going to show you a few tricks that I do to mine to get longevity out of them. The first thing is I remove the taillight. One common issue with this style of light is that it is assembled with ridiculously small screws. These small screws like to fall out due to vibration. Yes, you could just Loctite them, which works fine, but have you ever tried to remove a small screw that has been Loctited when you need to service something? Good luck with that. I like to use some form of silicone in place of Loctite. Pick your flavor here; it will all do the job. I use the silicone as my thread locker as it still allows the screws to be easily removed if servicing is necessary. You can see that there are 2 little clips inside the light that hold the lens for the license plate illumination. You will want to snug these in place.


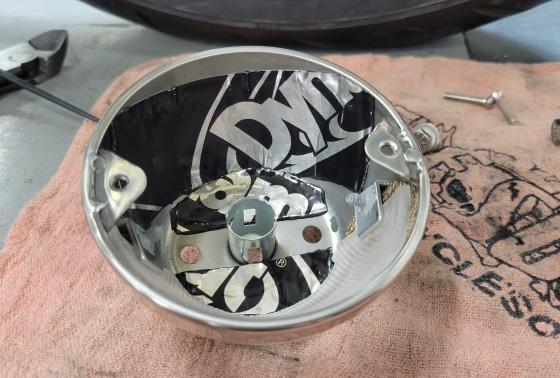
Another little trick I like to do is to use a vibration dampening mat, like Dynamat. This is normally used
for the interior of your street rod to reduce road noise and vibration. Guess what… it will also reduce the vibration inside your taillight, which would typically destroy it. I try to cover as much inside surface area as possible.
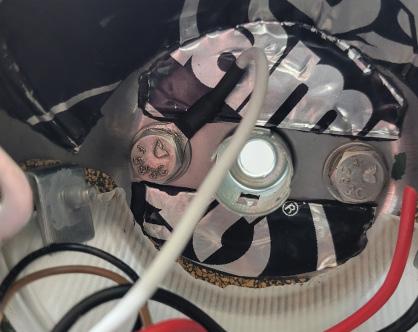
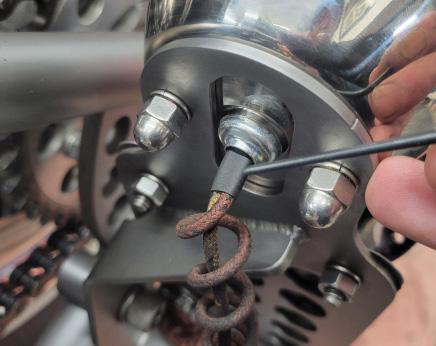
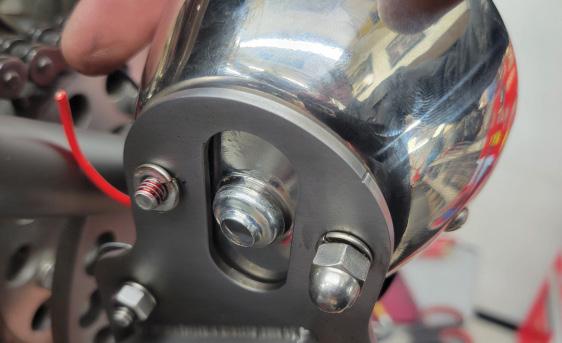
The LED version of this light has three wiring connections that need to be made. One is your running light, the second is your brake light, and the third is a ground. Not wanting to have three wires running from the taillight to the main frame of the bike, I ground the taillight internally. At this point, I only have two wires going to the taillight. I use a piece of heat shrink tube where the wiring passes through the taillight body to reduce wiring chafing. I like to use red Loctite on the fasteners that mount the taillight. I also like to use a zip tie on the inside of the taillight body around the wiring. This will help keep the wiring from being pulled from the taillight if it ever gets snagged on something. As far as the wiring connections, soldering with heat shrink tubing is the only way to go because splicing style connections are big and bulky and do not look professional.


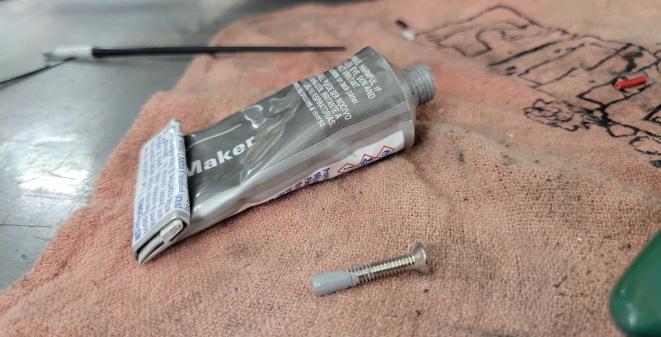
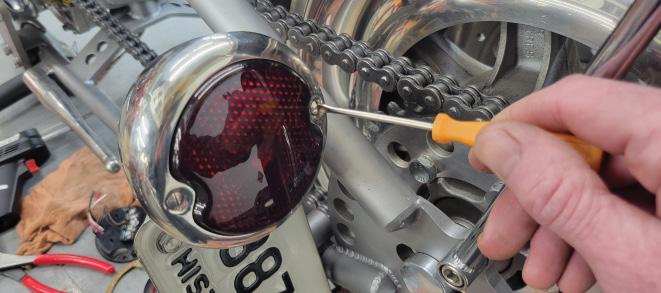
The lens cover screws are tiny, so I put some silicone on the threads and get everything snugged into place. Now, we should be good to go for another 8 years!

It’s amazing the number of tools you need to drag out just to change out a simple taillight!
Yep! We just did a tech article on how to remove and replace a taillight; hopefully, some of the tips and tricks I showed you will help get some more life out of yours! If there is something that you would like to see a Tech article on or if you have any questions, please call me or email me. FB- Pandemonium Custom Choppers IG - pandemoniumc2 happydandemonium@gmail.com www.pandemoniumcustomchoppers.com


