

Connie Patient Connect User Guide
Last update: September 20, 2024
Connie Patient Connect provides a portal to your personal health record (PHR) if you are a resident of Connecticut You can use Connie Patient Connect to view your health information from providers connected to Connie in one place. In addition to viewing your health information, you can add appointments and to-do lists and allow caretakers and family members to manage health data on your behalf. The data in your Connie Patient Connect account may come from any organization connected to Connie, including but not limited to providers, pharmacies, and labs. Information exchanged by Connie member providers arrives in your account daily.
This document outlines the features of Connie Patient Connect and serves as a user guide for its basic functions. It offers an overview of each platform feature, including explanations of their purposes and potential uses.
Patient Connect Support
EMAIL: PatientSupport@ConnieCT.org
Phone: (203) 872-5874
Logging In
Purpose: You would like to set up a new Account or log into Connie Patient Connect.
Setting up a New Account
To set up a new account, select the blue “Sign up now” button in login page.


The Terms and Conditions page displays. Select the “I have read this Agreement and agree to the terms and conditions” box. Select “Accept” button. You must scroll to the bottom of the Terms and Conditions for the accept box to be available to select. You are only able to set up an account if you accept the terms and conditions.

Feature Specification and User Guide for Connie Patient Connect

ID Verification through CLEAR
You will need to verify your identity using CLEAR.
1. In the “Verify with CLEAR” dialogue box, select “Generate QR Code”.
2. Use your cell phone to scan the QR code to open the CLEAR website.


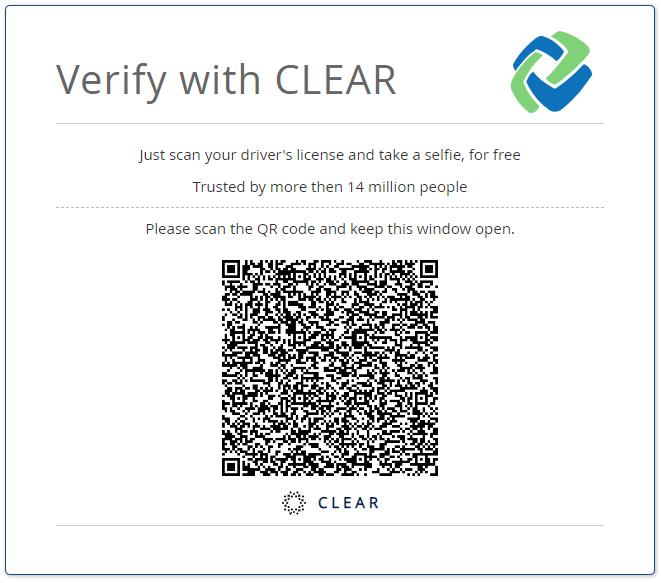


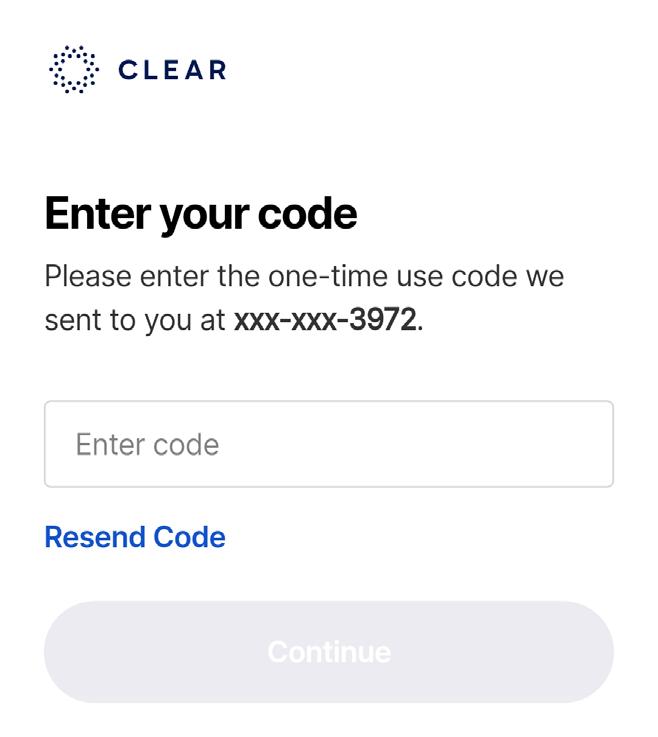
3. Enter your phone number and select the “get started” button. A six-digit code will be sent to your cell phone. If you did not receive a code within a few seconds, select “resend code”.
4. Enter the code into the dialog box.. Click Continue


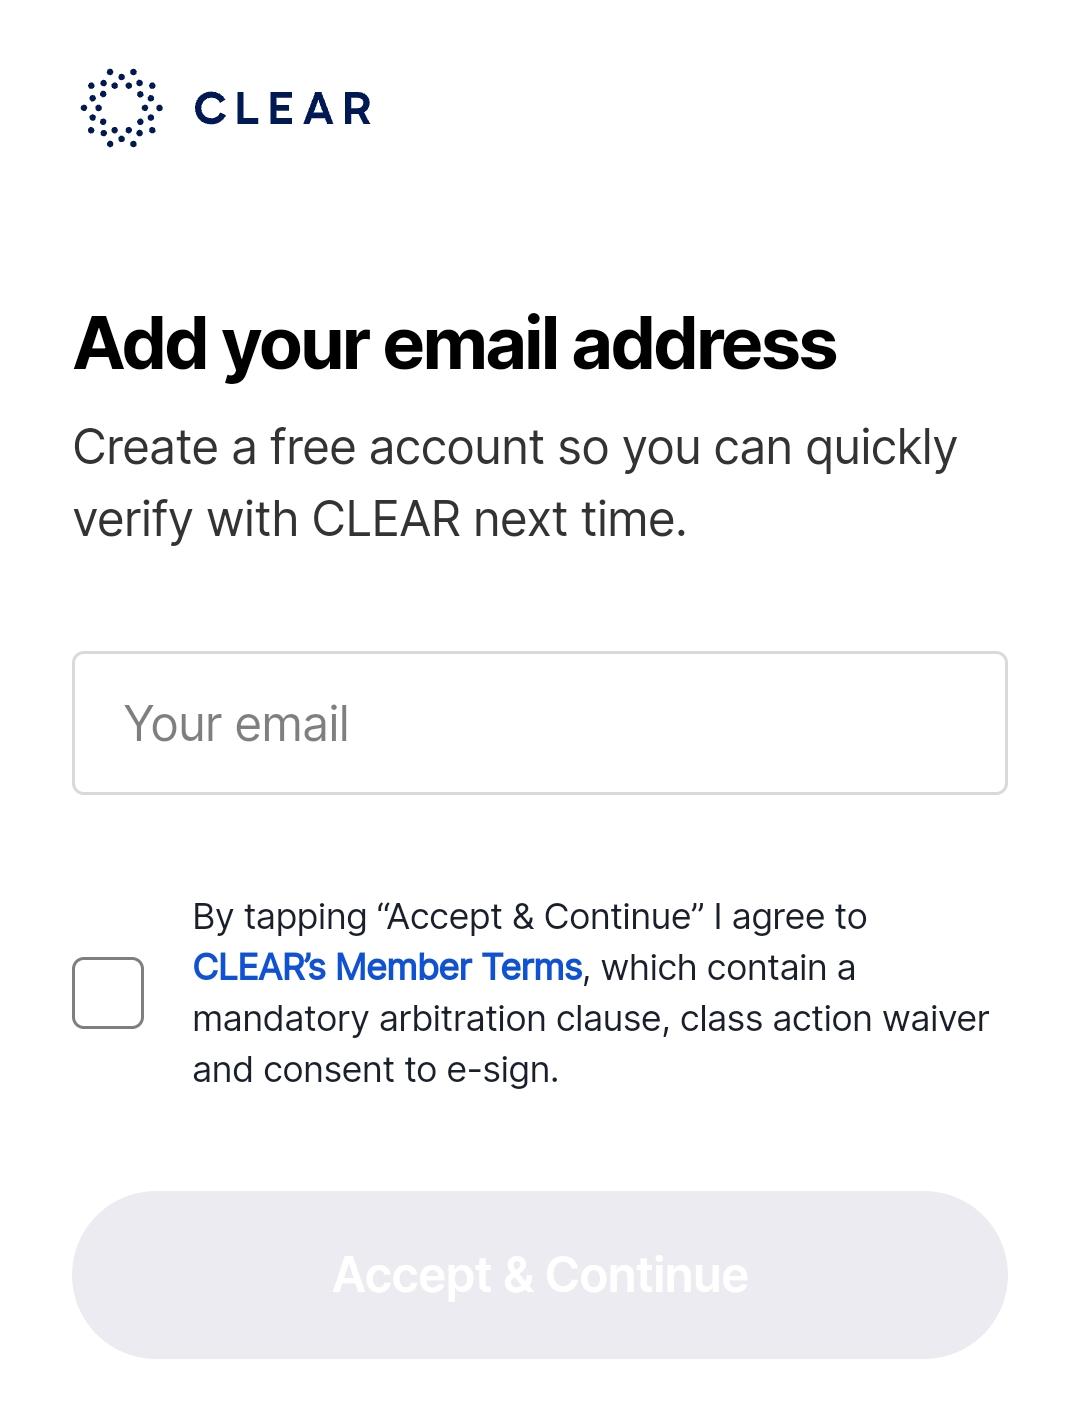
5. Add the email address you would like associated with your CLEAR account, and check the CLEAR’s Member Terms box You can select the blue text to read CLEAR’s Terms. Select the “Accept & Continue” button.


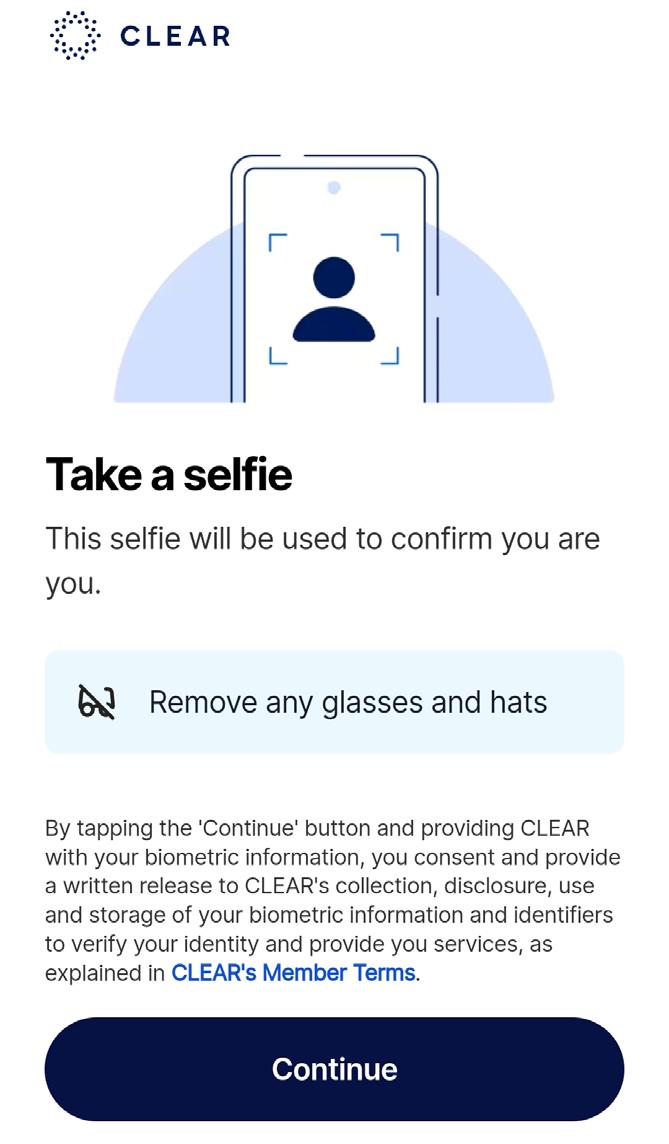

6. Take a selfie using your cell phone. Select the “Continue” button, then allow CLEAR to use your camera to take the image. Follow the directions provided in the CLEAR application to complete the selfie successfully.
7. Choose which ID documentation you will use to complete the process. You can either select a Government ID Card, which includes a driver’s license, state or municipal IDs, green cares, work permits, visas, and passport ID cards from the US, Canada or Mexico. Alternatively, you can use your Passport You will be asked to take a picture of both the front and back of your ID card.
8. The final step is selecting “Send” to send your demographic information from CLEAR to the Connie Patient Connect website. This step is required to match your identity to your health record.


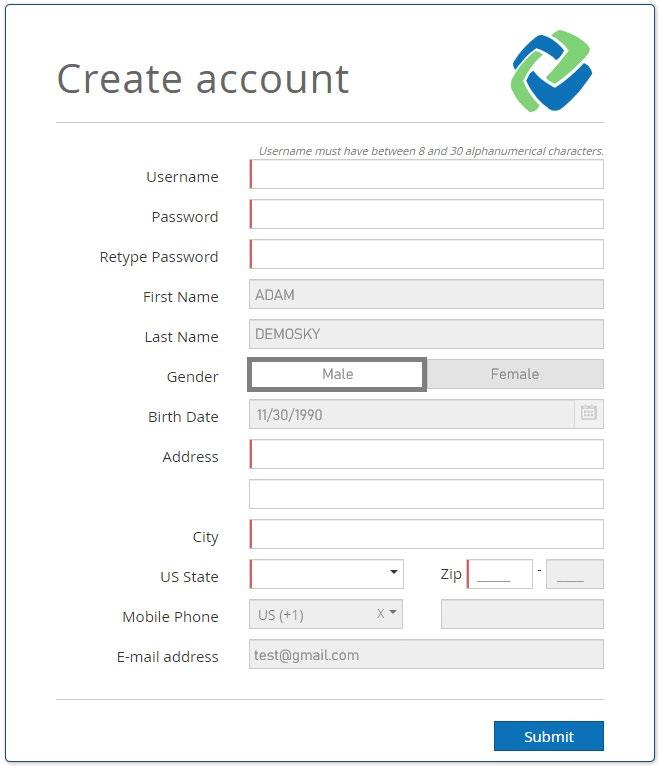
Completing Account Setup


Create a Username between 8-30 characters long. You can use both letters and/or numbers. You will also create a password Once completed, select the blue “Submit” button at the bottom of the dialog box.

An email will be sent to the address provided. Click the link provided in the email to complete the account set up process. The link will open to the Connie Patient Connect login page. You are now able to log in with the username and passcode you created above.
Login to an Existing Account
Using the empty fields in the middle of the login page, enter your username in the field with the image of a person, and your passcode in the field with the image of a lock, and select the blue “login” button If you have forgotten your password or username, you can use the “forgot password?” or “forgot username?” link on the log in page. You will be emailed a link to the email address you used to set up your account. Use the link in your email to reset your password or be reminded of the username you used to set up the account.
Feature Specification and User Guide for Connie Patient Connect


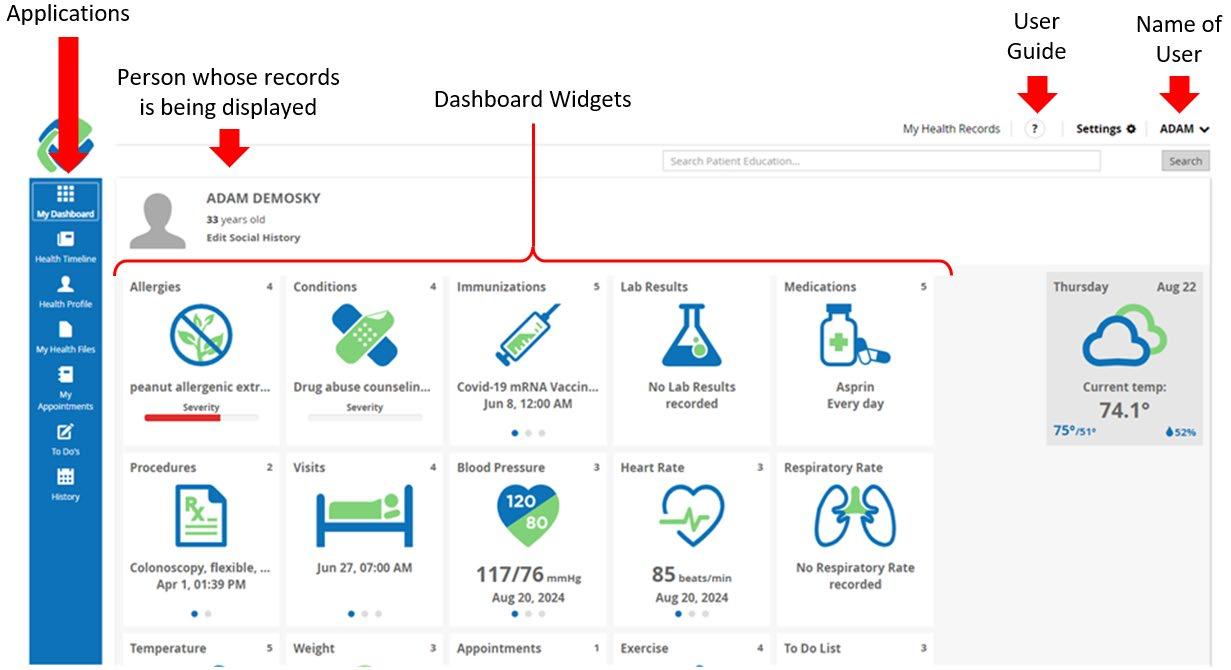
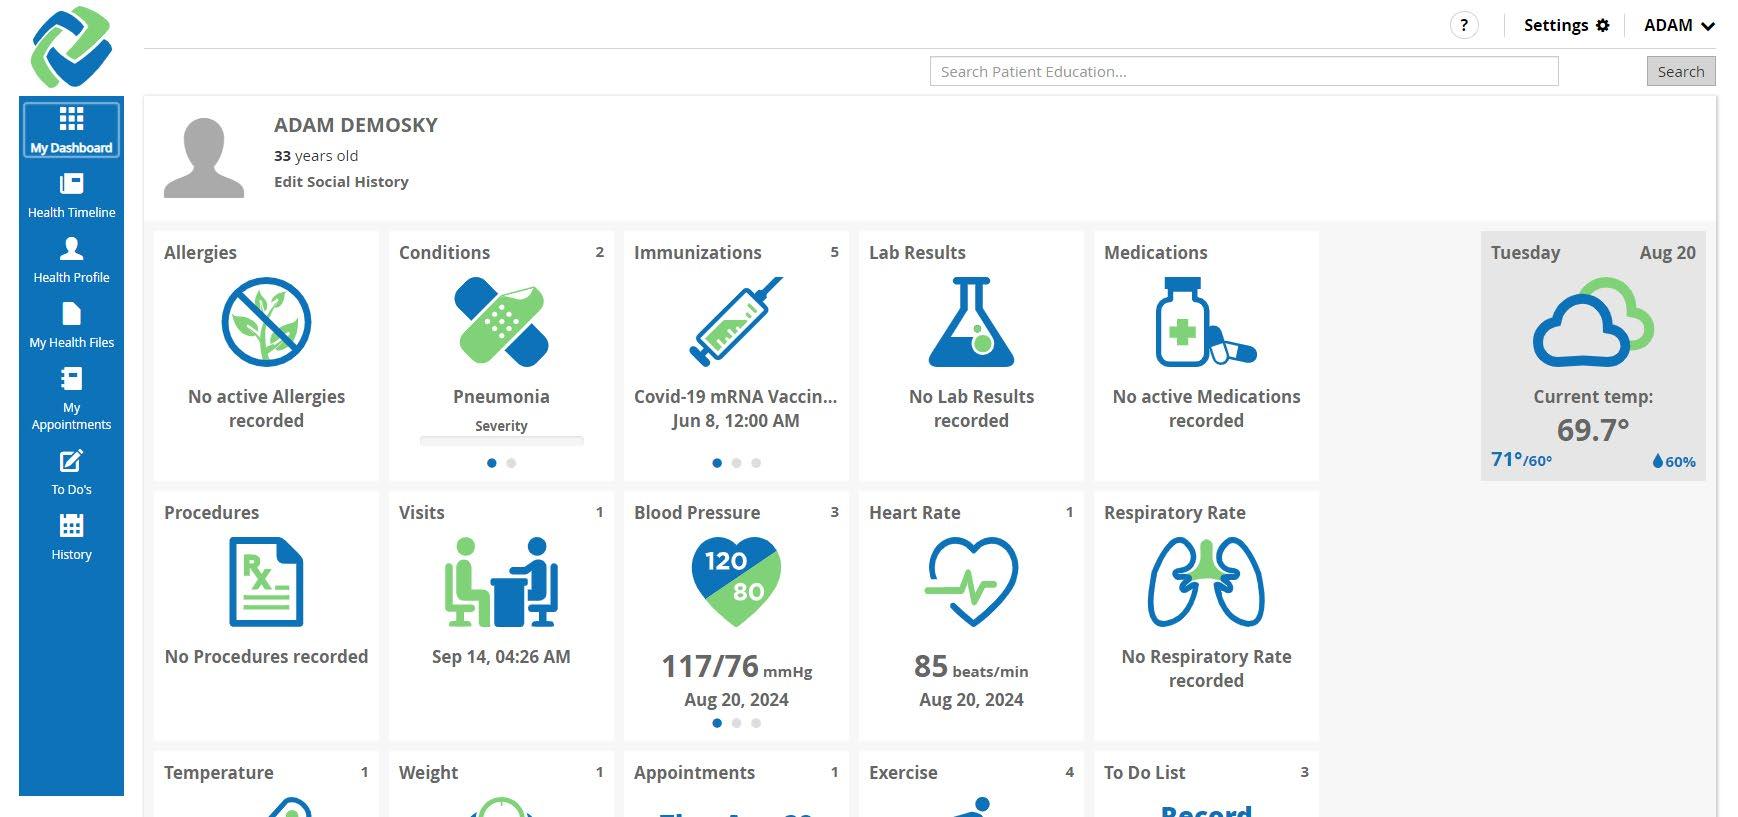
Home Page
You will land on the home page upon login and see a visual summary of your health record. Features at the top enable you to update settings and your profile, as well as log out. Applications along the blue sidebar allow you to navigate between the major functions of the Connie Patient Connect platform Clicking on the widgets in the center (e.g. Blood Pressure and Heart Rate) provides more information on the health measures or other health record elements You can navigate to the Home Page by selecting My Dashboard in blue Applications bar at any time. Select the “?” to open a copy of this user guide in a new window.

My Health Records
Purpose: You want to be able to view your own profile or the profile of another user who has given you access.
Click on ‘My Health Records’ at the top of the screen. When the dropdown menu appears click either ‘My Health Records’ (default) or the name of the user who has authorized you access to their health record.


Feature Specification and User Guide for Connie Patient Connect
When you select another user who has given you access, their name will appear in the upper left corner, but your name will remain in the upper right corner. The “My Health Records” tab will change to “Health Records for: [name]” with the name of the person whose health records you are viewing.


Selecting any of the widgets or applications described below will display the information for the person who has shared their health records with you.
Settings
Purpose: You would like to change your settings for Connie Patient Connect
In the upper right corner of the home page, select “Settings”


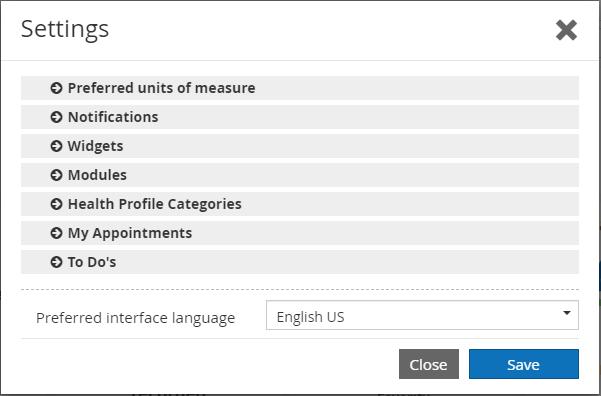
In the “settings” dialog box, you are able to:
• change from imperial (U.S.) to metric (global) units of measurement;
• set up notifications;
• add or hide widgets from My Dashboard;
• add or hide modules from the left hand navigation;
• add or hide categories available under Health Profile;
• change the view from monthly to weekly, daily or in a list and change the granularity of your appointments or to dos from hourly down to minutes.
Feature Specification and User Guide for Connie Patient Connect
To edit settings, select the arrow to the right of the setting you would like to change to expand the setting options.

Preferred units of measure offers options between centimeters or inches for height, kilograms or ounces for weight, and Celsius versus Fahrenheit for temperature.

In Notifications, you can:
• Choose to allow the system to send notifications for received health data and messages from the administrator.
• Select reminders for upcoming appointments and tasks and the timeframe to receive the reminders.
• Choose notification methods by *email and/or SMS. For SMS, in the “Use” field, select the appropriate phone number to use.
Note, your profile must have at least one phone number and/or email address to use the notification feature. Please refer to the “My Profile” section below to learn how to update your profile.
Feature Specification and User Guide for Connie Patient Connect


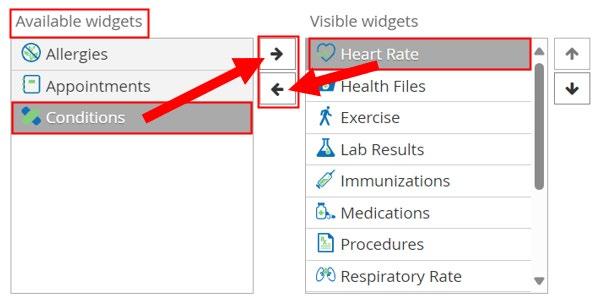
The Widgets, Modules, and Health Profile Categories sections allow you to hide elements from your view and rearrange the order of what you see on your Dashboard. When selecting these sections, you’ll see two categories for what’s available (on the right) and what’s visible (on the left). To modify these sections, follow the steps below
• Click on the drop down arrow by Widgets. This will expand the Widgets section to show you “Available widgets” on the left and “Visible widgets” on the right.
• The “Visible widgets” list are the elements you see on your dashboard. You can change the order of what you see on your dashboard by clicking on the up and down arrows. Or clicking on the element and dragging it your preferred position on the list


11 Feature Specification and User Guide for Connie Patient Connect
All elements that are visible are listed under Visible widgets. Hidden elements are then listed under “available widgets”. To hide or unhide elements, select any elements listed on one side and use the arrows in the middle to move the elements from the “visible widget” list to the “available widget” list or vice versa
To change the settings for My Appointments or To Dos, select your default view and/or the level of detail you would like your appointments to be listed.


Select the blue “save” button at the bottom of the dialog box to save your settings and return to the home screen. Select “close” to go back to the home screen without saving your changes.
September 2024
Feature Specification and User Guide for Connie Patient Connect
User Profile
My Profile
Purpose: You would like to update your username and password, authentication method, or profile information
From the home page, you can select your name in the upper left or upper right corner of the screen. When selecting from the upper right, a dropdown menu will appear. Select My profile.


Only a limited number of fields within the User Profile dialogue box can be edited: Password, Second factor authentication method, phone number, email address. To save changes, click on the blue “save” button at the lower right corner of the dialog box. Select “close” to close the dialog box and return to the home page.
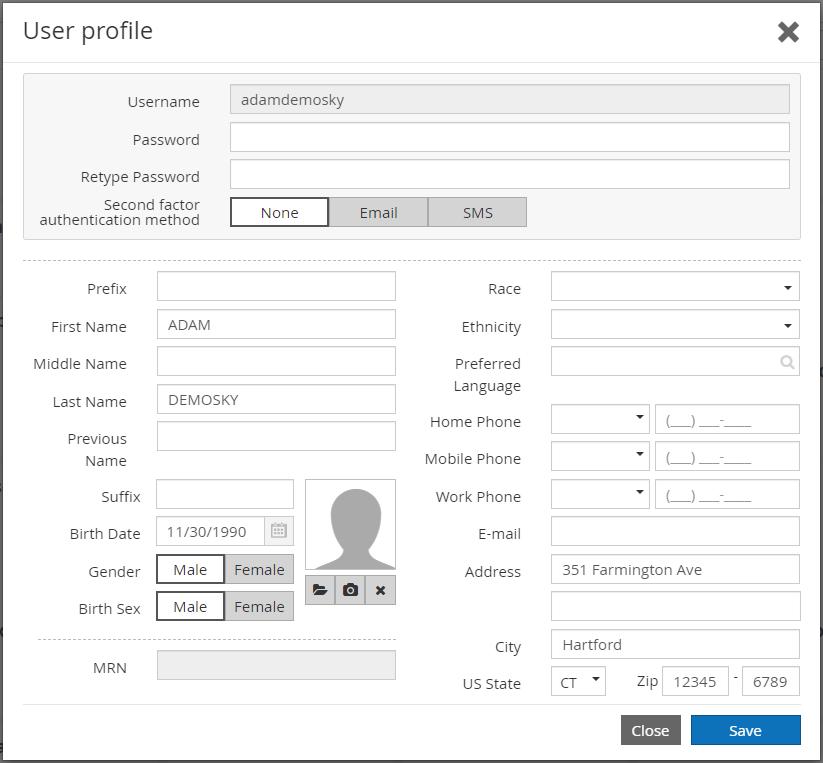
Note: the MRN number is your unique account number Connie attributes to your account.
Feature Specification and User Guide for Connie Patient Connect
Social History
Purpose: You would like to edit your social history
Click your name in the upper right of the screen. In the dropdown menu, click on ‘Social History.’ Alternatively, select “Edit Social History” under your name on the left


Select any of the appropriate responses to the Social History status fields and click on the blue Save button at the lower right corner of the dialog box. Select “close” to close the dialog box and return to the home page.

14 Feature Specification and User Guide for Connie Patient Connect
Authorized Persons
Purpose: You want to authorize another user to access your health records with different permission settings (e.g. read-only or read-write).
Click your name in the upper right of the screen. In the dropdown menu, click on ‘Authorized persons.’

From there, enter in the username of the person to whom you are giving permission to access your health record. Note that the other user must have an existing Connie Patient Connect account. Select permission setting (read-only, read-write) and click ‘Add.’ The new user will then be authorized.

Log out
Purpose: You want to end your session.
Click your name in the upper right of the screen. In the dropdown menu, click on ‘logout.’ Your session will end and the log in page for the portal will appear.

15 Feature Specification and User Guide for Connie Patient Connect
Patient Education
At the top right of each page of the site, you can search for health-related topics.
In the Search Patient Education field, type in a health topic. Click ‘Search’.

Search results will include a list of educational materials related to the search keyword(s).


Click the desired


16 Feature Specification and User Guide for Connie Patient Connect


To save the article, click the ‘Save As’ button on the bottom of the pop-up window.
To print the article, select the ‘Print’ button on the bottom of the pop-up window.
To close the pop-up window, click the ‘X’ on the top right of the pop-up window or the ‘Close’ button at the bottom of the pop-up window.
17 Feature Specification and User Guide for Connie Patient Connect
My Dashboard
The center of the home page contains individual widgets for quick views of your health records. The number of these widgets can be modified using the Settings feature described above. To move the widgets to new locations within the dashboard, you can either select a widget and drag it to your desired new location or you can go to Widgets under Settings (refer to steps on pg. 11). Clicking on a widget from My Dashboard provides a quick view of recent records either as a list or a graph.
List View Widgets
Select the icon for the following widgets to see a summary table of the three most recent records.


The number in the upper right corner of the widget indicates the number of records in your Health Profile related to the widget category
Hover your cursor over the widget icon. Click the ‘<’ or ‘>’ buttons to view the three most recent records.
When provided, the widget will display a bar indicating the Severity of the condition (Mild, Moderate, Severe, Fatal)
18 Feature Specification and User Guide for Connie Patient Connect
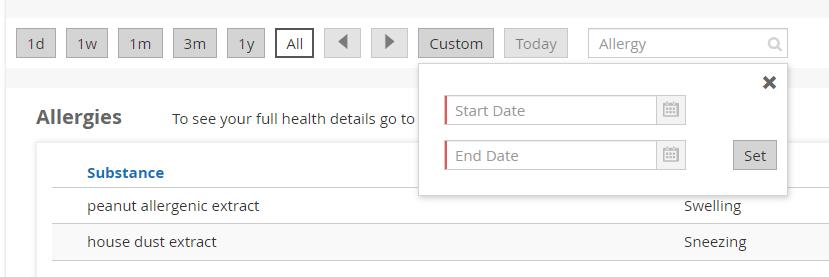
Allergies
Purpose: You want to track your known drug allergies


Click ‘See More >’ to view a complete list of all recorded allergies, with substance, reaction, status, and date recorded in your Health Profile.
Conditions
Purpose: You want to track your current and past medical conditions. Click ‘See More >’ to view a complete list of current and past medical conditions in your Health Profile. Each record lists the name of the diagnosis, severity, status and onset date.

Immunizations
Specification and User Guide for Connie Patient Connect
Purpose: You want to keep track of your immunizations from your healthcare providers.


Click on ‘See More>’ to view a complete list of all recorded immunizations in your Health Profile Each record shows the type of vaccine, date, and performer, body site and administration notes.
Lab Results
Purpose: You want to view your lab results.
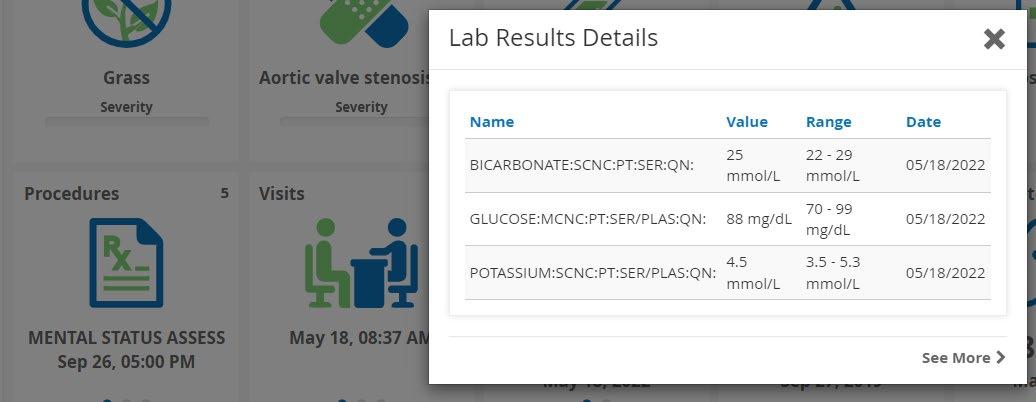

Click ‘See More >’ to view a complete list of all recorded lab results in your Health Profile. Each record shows the name of the test, value, range, date, and section.
Medications
Feature Specification and User Guide for Connie Patient Connect
Purpose: You want to view your medications


Click ‘See More >’ to view a complete list of all recorded medications in your Health Profile. Each record shows the name of the medication with the dosage, schedule (frequency and start date), and status.
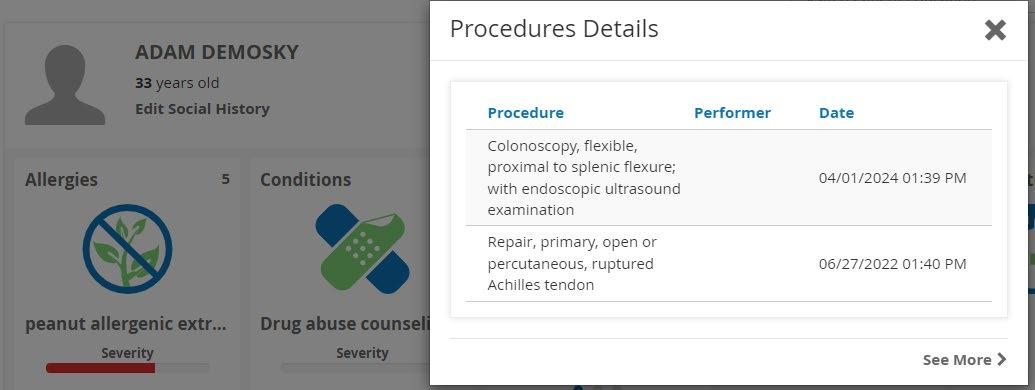
Procedures
Purpose: You want to keep track of your past medical or surgical procedures.

Specification and User Guide for Connie Patient Connect
Click on ‘See More>’ to view a complete list of all recorded procedures in your Health Profile. Each record shows the type of procedure, performer, date and body site
Visits
Purpose: You want to track past visits with your healthcare providers.
The icon to the left of each entry indicates type of visit (inpatient, ambulatory, or emergency). Hover over the icon to identify the visit type.
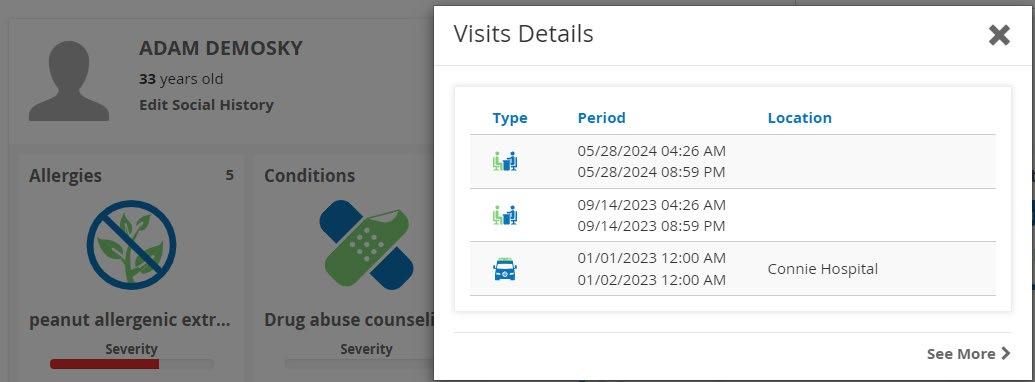


Click on ‘See More>’ to view a complete list of all recorded visits. Each record shows the type of visit (Inpatient, Ambulatory, or Emergency) along with the date period and location. It also shows Reason and Attending.
September 2024
Feature Specification and User Guide for Connie Patient Connect
Graph View Widgets
Select the icon for the following widgets to see a summary graph of the three most recent records. Hover your cursor over the widget icon. Click the ‘<’ or ‘>’ buttons to view the three most recent measurements.


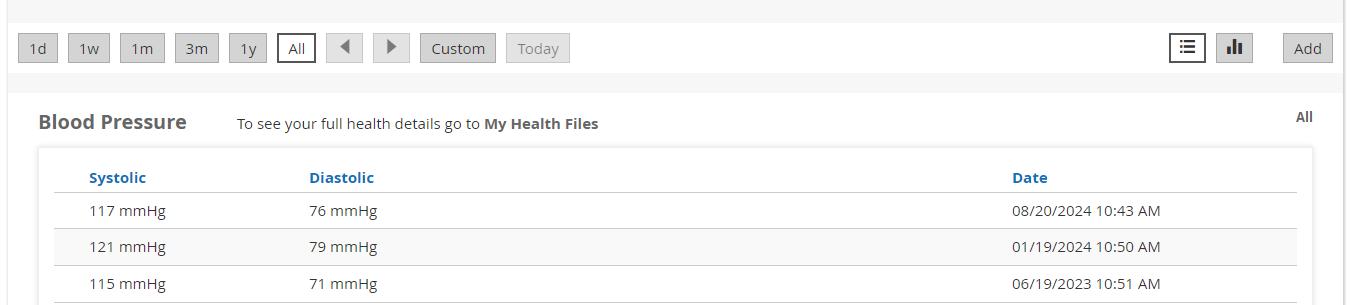
Select the Blood Pressure widget to view and monitor your blood pressure.
Select the Heart Rate widget to view and monitor your heart rate.
Select the Respiratory Rate widget to view monitor your respiratory rate.
Select the Temperature widget to track your temperature over time.
Select the Weight widget to track your weight over time.
Click ‘See More >’ to view the complete list of recorded measurements.
September 2024
23 Feature Specification and User Guide for Connie Patient Connect
User Dependent Widgets
The My Appointments, To Dos, and Exercise widgets are manually populated by you, the user, in the Health Profile (see Health Profile section). You can view your most recent entries from My Dashboard.
Appointments
Purpose: You want to create and maintain a calendar for medication refills and appointment reminders.
From the My Dashboard page, click the ‘Appointment’ icon to see a summary table of up to three future Appointments Details. Each appointment record includes title (e.g. Post Discharge Appointment), healthcare professional (e.g. Dr. Patel), and date.


Click ‘See More >’ to view a complete list of all the prior and upcoming appointments in Health Profile.
Exercise
Purpose: You want to upload and track wearable exercise data.
The ‘Exercise’ icon displays your current week’s exercise mileage with icons reflecting type of exercise (walking, running, biking, or swimming). Each bar is color coded to indicate the type of exercise (walking, running, biking, or swimming) with the weekly total for each type listed below the respective icons.
Click on ‘See More>’ to view a complete list of all recorded exercise in the Health Profile application.


September 2024 Page 24
Feature Specification and User Guide for Connie Patient Connect
To Do List
Purpose: You want to create a to-do list with reminders for upcoming events.
From the My Dashboard page, click the ‘To Do List’ icon to see up to three upcoming to-do reminders.
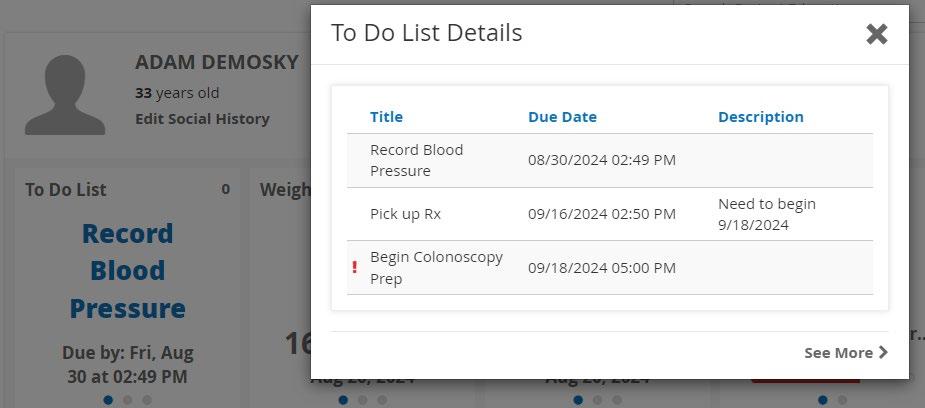
Click ‘See More >’ to view a complete list of all previous and upcoming items on the to-do list in the Health Profile application. Each entry shows the title, due date, and description of the task.

September 2024 Page 25
Feature Specification and User Guide for Connie Patient Connect
Other Health Files
The Health Files widget lists the last three Continuity of Care documents (e.g. summary of episode note) your providers have sent to Connie.

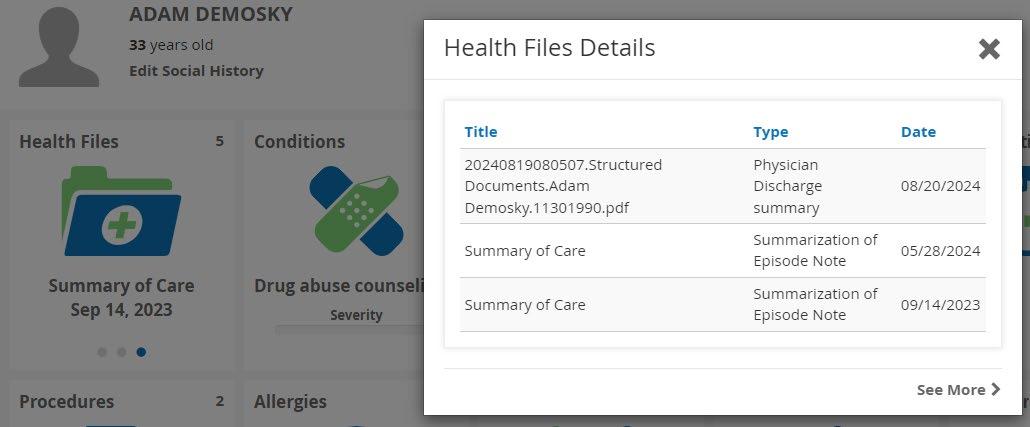
Click ‘See More >’ to view a complete list of all recorded health files in My Health Files. More information about the features of the My Health Files application are described below.
September 2024
Feature Specification and User Guide for Connie Patient Connect
Health Timeline
The Health Timeline function can be accessed from any Patient Connect page by clicking on ‘Health Timeline’ in the blue sidebar. The Health Timeline shows when health data has been received into your account. These events are displayed in order of receipt; most recent first.
Purpose: You want to know when certain files were uploaded to your account.
Navigate to the Health Timeline page by clicking the Health Timeline icon on the blue sidebar.


September 2024 Page 27
Feature Specification and User Guide for Connie Patient Connect
Health Profile
The Health Profile section can be viewed by selecting ‘Health Profile’ in the blue sidebar. The Health Profile function allows the user to view and edit their health record.
View Records
Purpose: You would like to view your health record.
Click on the ‘Health Profiles’ button on the blue sidebar to access the medical record.
To view and edit the different sections of the record (e.g. Blood Pressure, Heart Rate, etc.), click on the blue tabs at the top of the page.


To change the date range for records to view in each category, select one of the preset buttons or click ‘Custom’ to insert your own range of dates.


To toggle the view of the health record between a list and a graph (available for all categories except Allergies and Conditions, Procedures, Care Plan, Devices, Family History, Goals, Health Concerns, Immunizations, Radiology Results, SpO2, and visits to the list) click on the list and bar graph icons to the far right of the date range buttons.
Feature Specification and User Guide for Connie Patient Connect
For categories with a Status column (for Allergies, Conditions, Medications, and Health Concerns) your view defaults to Active records. To toggle the view of the complete record between active and all records, click on the ‘Active’ or ‘All’ buttons on the menu to the far right of the date range buttons.

Edit Records
Purpose: You would like to edit your health record.


Note: You are only able to delete records that you have added to your Health Profile. You are not able to edit or delete records Connie has received from your providers. Connie is not able to share records you have added with your medical providers
To add a new record to the Health Profile, click the ‘Add’ button on the top right of the page.
To edit a record, click on the listed record.
To delete a record, click on the trashcan icon to the far right of that record.


Feature Specification and User Guide for Connie Patient Connect
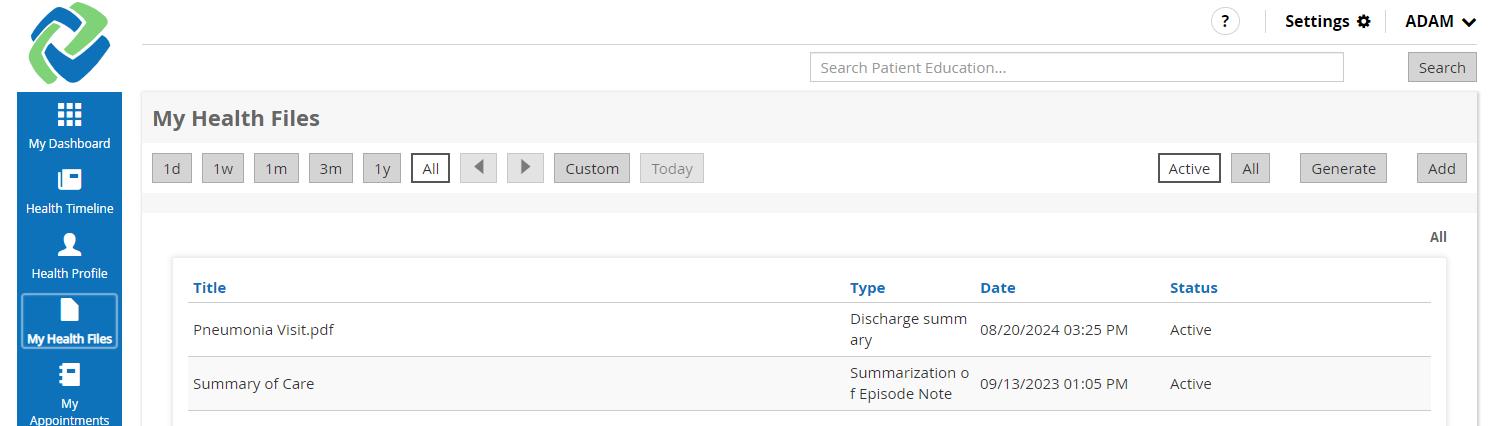
My Health Files
View/Add Files
On the blue sidebar, select ‘My Health Files’ to view a list of all files that have been sent to, or you uploaded into, Connie Patient Connect.

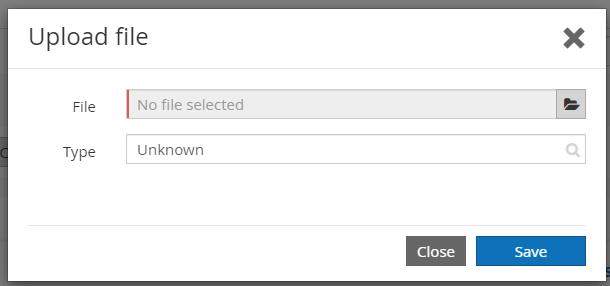
Select “add” to upload your own files.
Click on the folder icon in the dialog box to navigate to the file you want to upload.
Begin typing in the “Type” field to search for and identify the appropriate document type uploaded. Leave blank if you are unable to find an appropriate match.

Feature Specification and User Guide for Connie Patient Connect

Creating Documents from My Health Files
Select “Generate” to create a document from your health records

To select information you can click on the drop down arrow next to the category to select specific records or you can click on “Select All” to add all the records for that category
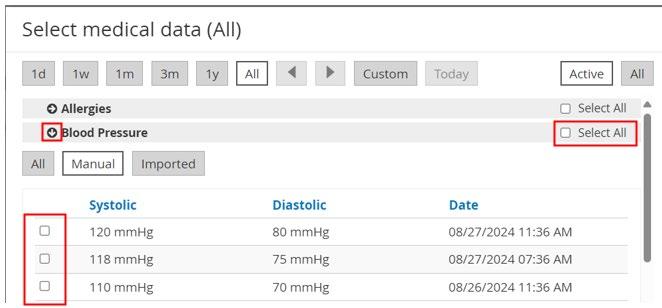
Once you have completed your selections, categories with some or all records selected will highlight in the upper section of the dialogue box, and the lower box will populate with selected records


Name the document and select “Generate as PDF” or “Generate as CCDA (XML)”.
Note: a CCDA is a standard structure used in health information exchange.
The generated document will now be available under your ‘My Health Files’ to download.
Feature Specification and User Guide for Connie Patient Connect

My Appointments
Purpose: You want to add or edit appointments to your calendar.
The Appointments function can be accessed by clicking on ‘My Appointments’ in the blue sidebar. This feature allows you to add an appointment to your calendar, as well as any relevant details about the event.


The My Appointments page can be viewed as a list or calendar (with monthly, weekly, or daily view options). To toggle between these views, click icons at the top right of the page. Select the calendar… or list icon.


To add a new appointment from the calendar view or list view, click the ‘Add’ button at the top right of the page.
Specification and User Guide for Connie Patient Connect


Alternatively, in the Month calendar view, create a new appointment by double clicking the day (or hour, if in the Day view) on which the event will take place.
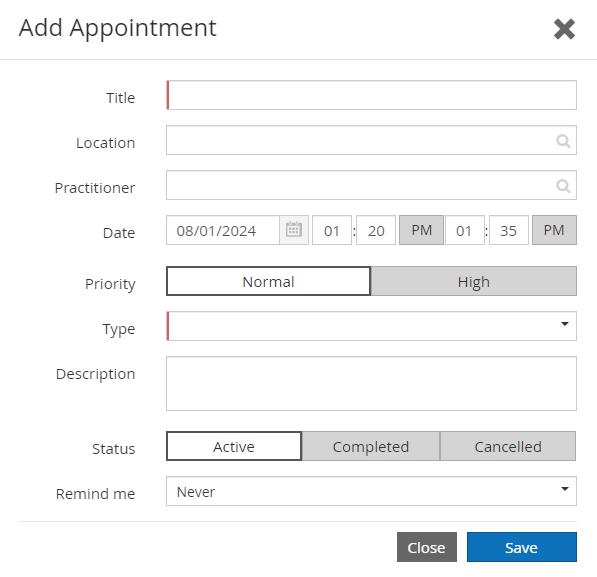

Once the appointment pop-up window appears, enter in the relevant information and click ‘Save’ to create the event.
The Title, Type, Date, and Status fields are required; the appointment will not be saved if these fields are not completed.
Insert appointment title, provider name, and date of appointment
Enter in the title of the appointment (e.g. “Follow-up for cold” or “Well woman exam”), the location of the appointment and the practitioner’s name in the appropriate fields For the Date field, either type in the date or click the calendar icon and choose the day from a monthly calendar. Then, enter the time of the appointment, clicking the AM/PM button to toggle between the two.
Set priority level
All appointments will default to ‘Normal’, but there is an option to flag an important appointment by clicking ‘High’ for the Priority field. This will cause a red exclamation point to appear next to the appointment in the list/calendar view of appointments.
Feature Specification and User Guide for Connie Patient Connect


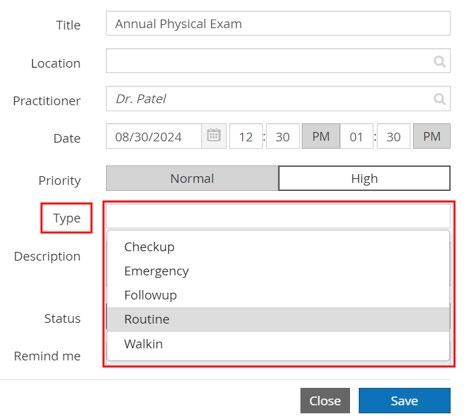
Set type of appointment
As shown in the list below, there are several options for categorizing the appointment. Choose the appointment category by clicking the down arrow, or anywhere within the Type field.
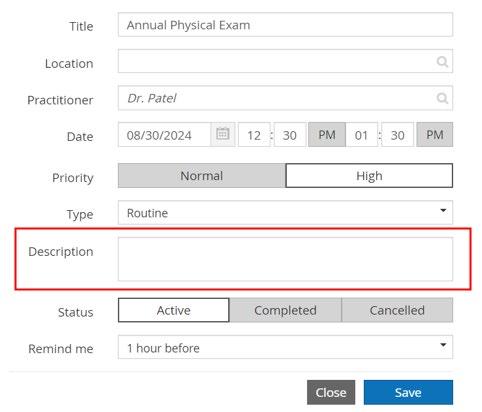
Insert description of appointment
Free-type any relevant information in the Description field.
Select a status
The status of any new appointment will default to Active. To change the status to Completed or Cancelled, click the options in the Status field.

Any past appointment that is not marked as Completed will automatically be marked “overdue” by Connie Patient Connect.
September 2024
Feature Specification and User Guide for Connie Patient Connect

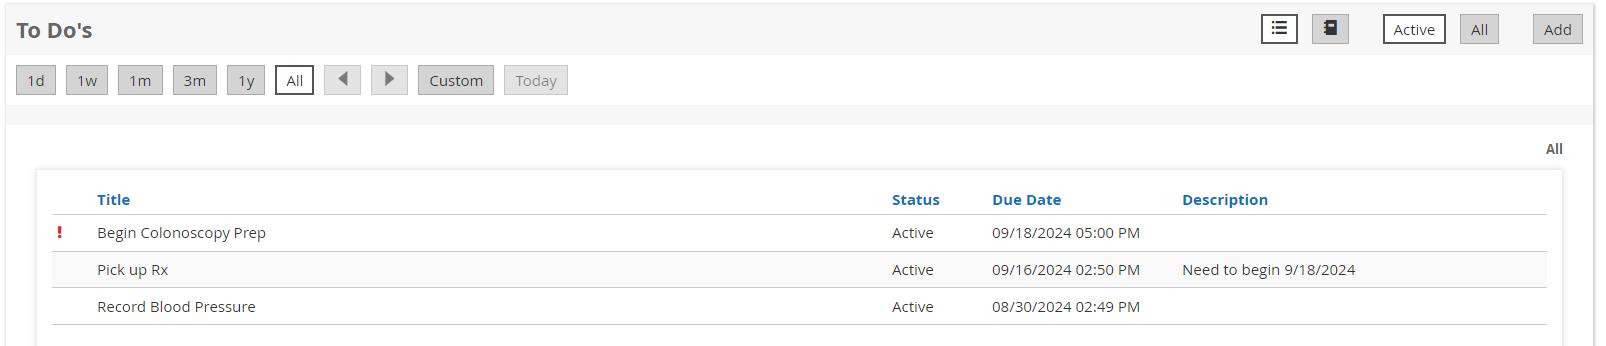
To Do’s
The To Do’s function can be accessed from any Connie Patient Connect page by clicking on ‘To Do’s’ in the blue sidebar. This feature allows you to manage your action items (“To Do” items). The items appear on a To Do calendar, as well as any relevant details you include about the event.
The To Do’s page can be viewed as a list or calendar (with monthly, weekly, or daily view options). To toggle between these views, click the list or calendar icons at the top right of the page. The list view will include all to do items. The calendar view will only display to dos scheduled within the calendar timeframe.
Calendar view of To Do items:


List view of the To Do items:
Specification and User Guide for Connie Patient Connect
History
Access Usage History
Purpose: You want to view a log of who has accessed your health files, and when, as well as other actions taken on the platform (e.g. sending messages, receiving files, and adding records)
Navigate to the History page by clicking the calendar icon on the blue sidebar.

To view more details about an action taken on the platform, click the row of each entry. Certain history have details but not all.
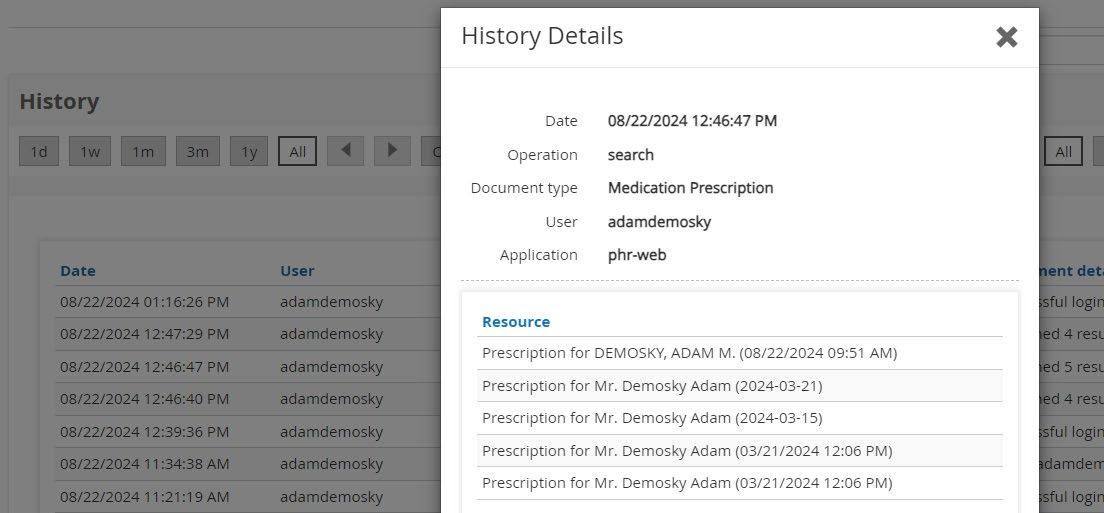

To exit the History Details pop-up window, click either the ‘X’ at the top right corner of the window, or the ‘Close’ button at the bottom right.


