22 minute read
country sanctuary
from Cxfgytrcc
What every kitchen needs…
In the heart of these homes, everything revolves around a functional and sociable island!
Advertisement
Island style
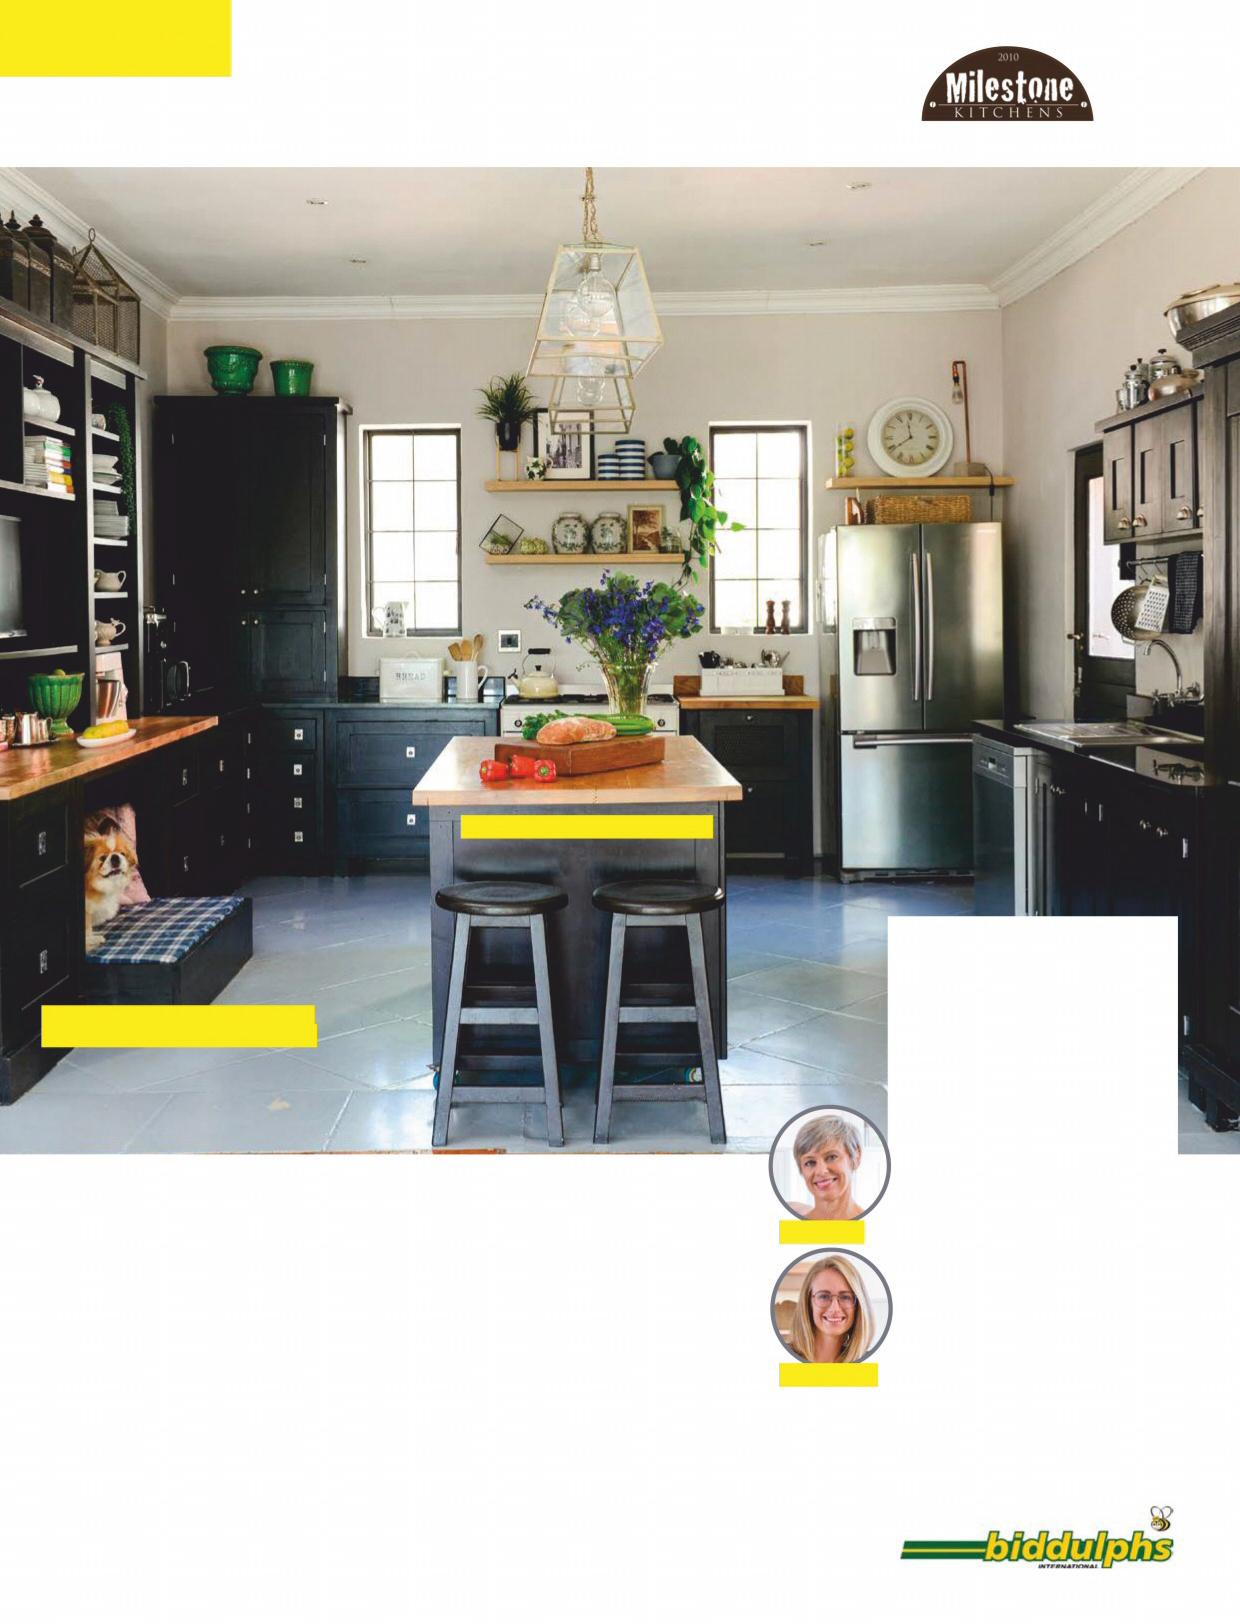
• Two different materials were used for the island’s countertop: stainless steel where cooking takes place and an attractive oak finish for the dining section. • The gas hob is integrated into the stainless-steel countertop, making cleaning easy. • Although the 3m x 1.5m island doesn’t have a water supply, there is a plumbed prep bowl to the left and a sink at the back. • Two oversized pendants (700mm D) provide ample light for cooking and create lovely pools of light that add to the ambience in this sociable kitchen. The standard height for pendants above an island is 800mm, but serious cooks may prefer them to be about 50mm lower, says Micke Fourie of Home’s new online design service Welcome Home. “If your family members are all tall, or the ceiling is very high, the pendants can be suspended up to 1 000mm above the island,” he explains.
When Manuel and Jennifer Cernades bought this property for their furniture shop Orejen in Linden, Johannesburg more than 20 years ago, they had visions of one day building a home at the back and living right where they worked. “We finally got around to building the cottage extension and we plan on moving in in the next two years or so,” Jenny says.
The couple started building the extension and renovating the existing kitchen four years ago. “The kitchen was outdated and not ergonomic or functional at all. We love entertaining in the kitchen and I don’t want to be stuck there on my own,” Jenny explains. A big, inviting island where guests can join in the conversation and participate in the cooking was, therefore, high on their wish list.
Jenny and Manuel loved the idea of industrial-style freestanding units and approached Prochef Concepts to design
A cement-wash has been applied to the brick walls and sealed with ProNature Wall Protect. The latte add a little local African flavour.
Back to black
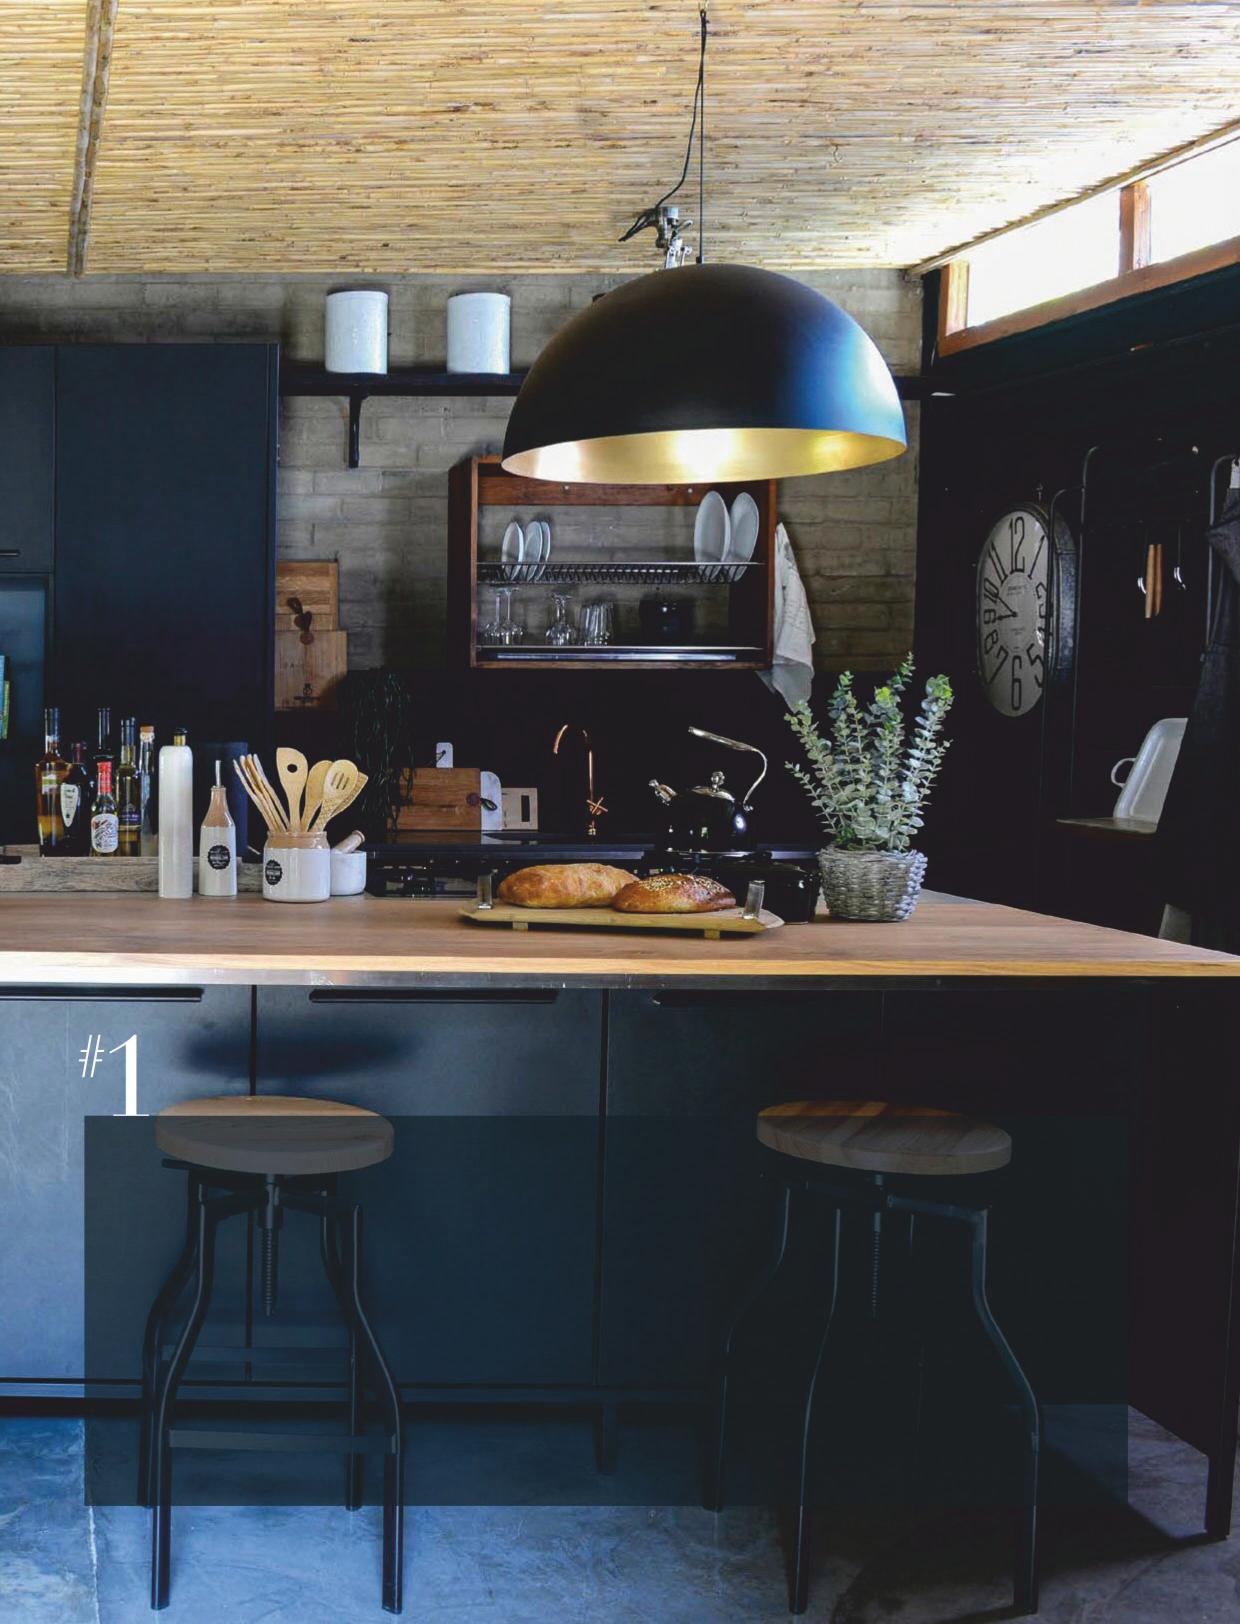
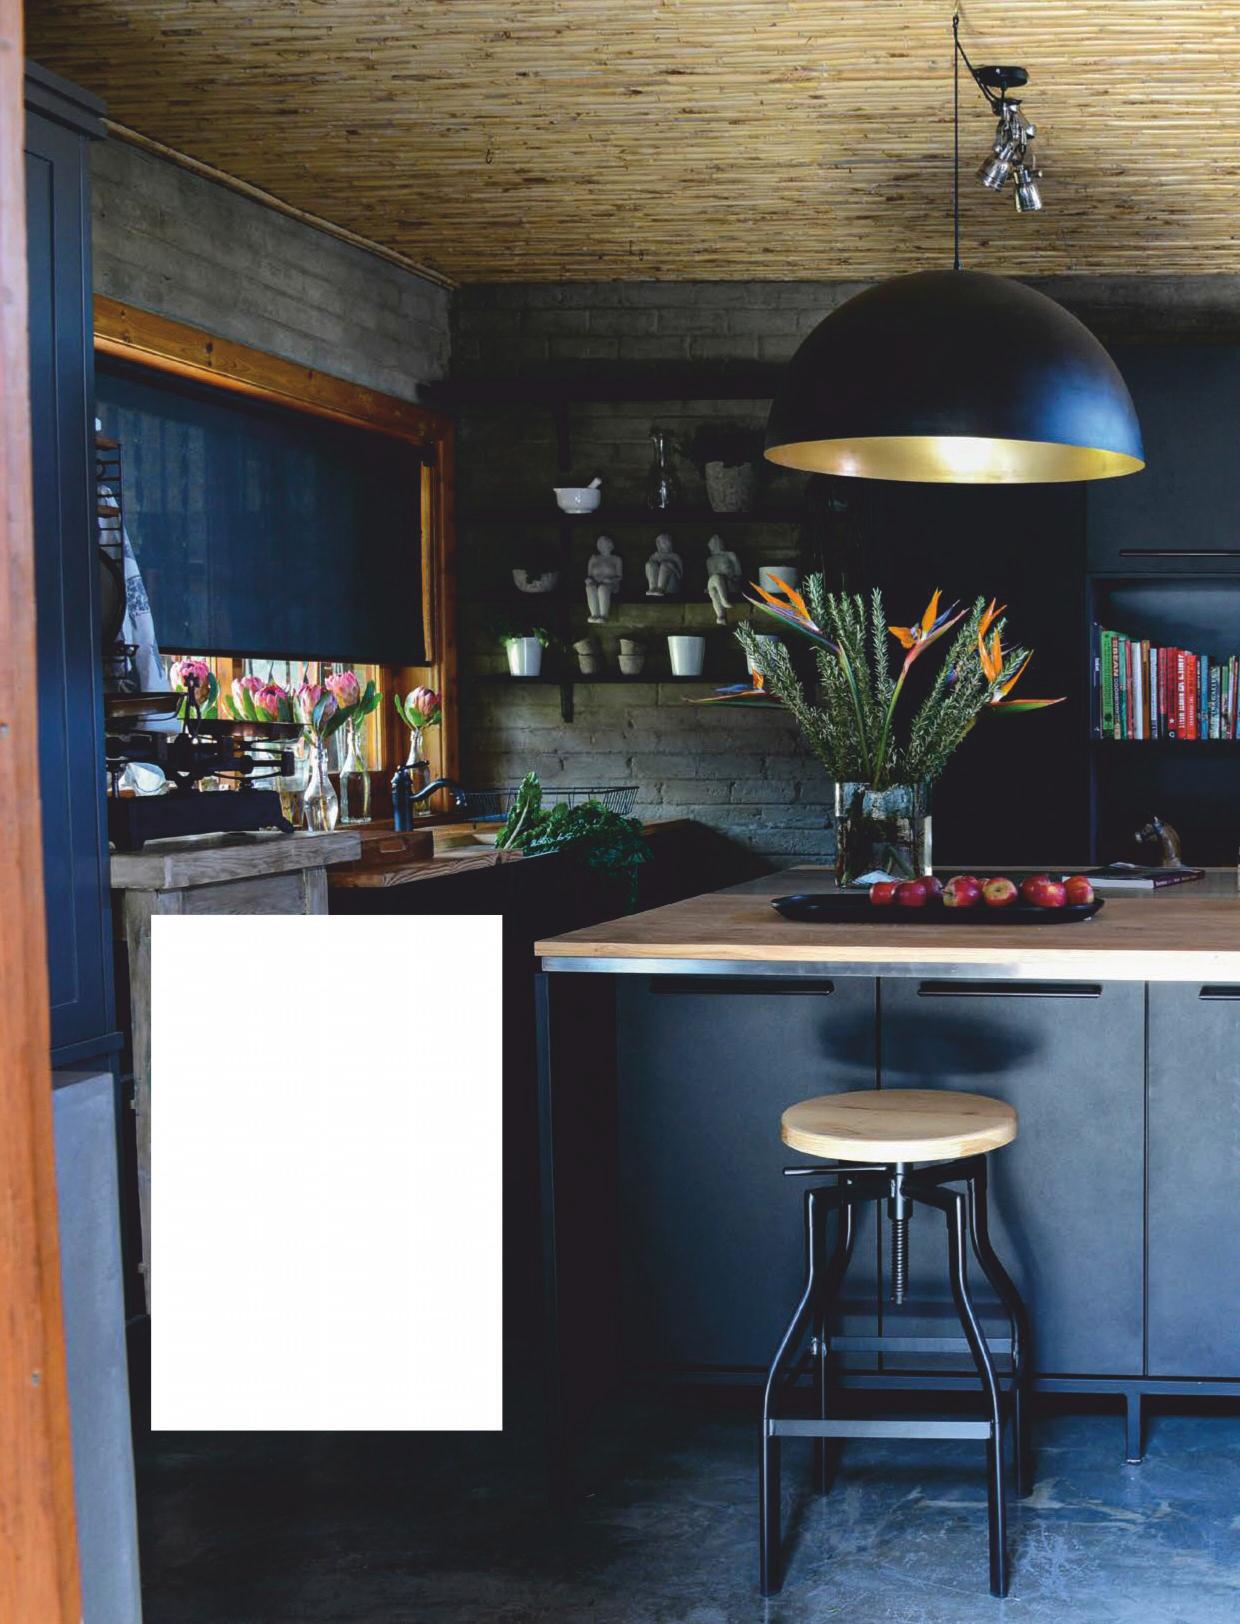
Pendants from Orejen the kitchen with its powder-coated black steel cabinets. “Steel is not only a modern finish, it’s so versatile too. It’s durable, easy to clean and as the kitchen consists of modular units, installation happened in record time,” Jenny explains. “The simple clean lines embody the best of Scandinavian and Danish design.”
As the kitchen would be the centre of their new living area, the couple didn’t want any appliances to be visible. An integrated fridge and space underneath the sink next to the back wall that accommodates the dishwasher, washing machine and tumble dryer provide an elegant solution.
“I love, love, love the easy maintenance of the steel,” says Jenny. “The fact that it’s timeless and will never go out of fashion means it’s probably the ‘last’ kitchen I will ever want. I love the island area, which has become an entertainment space –it really works.” >>
kitchens
“Kitchen islands are great, but the bar stools often get in the way when you don’t have visitors using them,” says Jenny. “Our custom-made stools have screw-top seats so you can adjust the height and they fit neatly into the storage space under the countertop when not in use.”
Convex glass-and-tin wall clock and copper tap from Orejen

A stainless-steel drying rack with a handy drip tray above the sink has been ‘boxed in’ with Oregon pine. “I never have to pack away my everyday crockery. We only have two of everything; after washing up, it’s all ready to be used instantly.”

A family affair

Dirk and Annamarie Blom’s eldest son Theuns bought a property in Betty’s Bay years ago with the idea of one day setting up a family holiday home there. Six years ago, Theuns and his three brothers teamed up to build a retirement home on that property for their parents. “It’s a wonderful house to live in,” says Annamarie. “There are six bedrooms –one for each family, plus one where all the grandchildren sleep. It’s great because we are never under each other’s feet!”
A large open-plan kitchen and living area is the heart of the home. And when the entire family spends their holidays here, cooking and socialising is what it’s all about, says Annamarie. “All my children love making food. We all hang out around the island while one of them is busy and we chat for hours on end.”
“We wanted the kitchen to be the focal point of the space,” she explains. Timeless white finishes suit the couple’s uncomplicated lifestyle, while wooden floors add warmth. A built-in bookcase –where recipe books and ordinary novels stand side by side –is located in the adjoining pantry but it immediately draws the eye. “It’s my favourite part of the kitchen!”
“The plan was actually to hang a painting in the gap where the bookcase now stands,” recalls Annamarie. “But then the bookshelf fitted in there so perfectly, down to the millimetre!” The back of the bookcase is painted dark red for a pop of colour.
The turquoise patterned tiles immediately caught Annamarie’s eye when she had to choose a splash panel. “They remind me of the inside of a shell, perfect for a beach house.” White melamine cupboards ‘disappear’ against the large white wall behind.
Tiles from Douglas Jones

Island style
• The slab of the 1.5 x 3m island is ordinary concrete, painted white. “Occasionally, if there is a mark that doesn’t want to come off, we sand the slab lightly and give it a new coat of paint,” says Annamarie. • The freestanding red Smeg oven fits neatly into a gap in the island, with more than enough drawers for kitchen utensils alongside. • A prep bowl with a cold water tap was built into the island. • Because the kitchen is on one side of an open-plan living area, sufficient storage was essential so that the space does not look cluttered, explains Annamarie. The island also serves as general storage space for blankets and other everyday items.
kitchens
Exposed rafters add a sense of spaciousness, and the IsoBoard ceiling keeps the open-plan area cool in the hot summer months. The paper decorations are a remnant from Christmas celebrations –Annamarie loved them so much that she left them up.
EXPERT ADVICE You can definitely paint your cement countertops if you follow the right steps, says Jenny Moolman, Duram’s brand manager:
1 Preparing your countertop is important in ensuring a good result. Allow new cement to cure for at least 28 days before painting. 2 Make sure that your cement surface is clean and dry and free from dust, oil and grease. Apply Duram Showfloor Cleaner & Degreaser, rinse with clean water and allow to dry. Then lightly sand with 100-grit sandpaper before wiping with a damp cloth. 3 Apply Showfloor Cement Primer to a uniform thickness to seal the surface. The primer dries to a clear finish –ideal for a raw cement look. 4 Paint the counter with Duram Showfloor Polyurethane Floor Paint. First do a test patch with the paint to ensure that it is properly primed (follow the instructions on the packaging). Then apply two coats of paint to your cement countertop, and additional coats in areas likely to endure more wear and tear. Duram Showfloor Polyurethane Floor Paint dries to a mediumsheen finish and is available in a variety of attractive colours. It offers excellent scratch-, scuff-, stain- and wear-resistance and can easily be touched up. 5 Let the paint cure for 2–3 days. Counters should be repainted every 2–5 years, depending on usage and wear. >> CONTACT 021 555 3090, duram.co.za
Just the right height
Sarah and Richard Stevens had always wanted to settle down in the leafy suburb of Walmer in Port Elizabeth, but they just couldn’t find what they were looking for. Eventually, in 2008, they found the perfect empty plot in the neighbourhood where Sarah spent her childhood. “This afforded us the opportunity to design our home exactly the way we wanted it – including the kitchen!” says Sarah.
A keen cook and baker, Sarah loves spending time in the kitchen and was even a contestant on the BBC Entertainment cooking series Come Dine With Me South Africa in 2013. When a special occasion such as a milestone birthday calls for a celebration, as many as 40 guests might arrive at their home and thanks to an open-plan design, Sarah as host can be part of all the action!
Sarah, a landscape architect, and Richard, a cattle farmer, worked with Andrew Hart of Andrew Hart Cabinets who custom built
Sarah has been collecting Le Creuset casseroles in every imaginable colour for years. “They’re a firm favourite for baking bread, plus they look beautiful stacked on top of each other like a Christmas tree.”
the kitchen cabinets and mounted them slightly lower than standard height to accommodate what Richard refers to as Sarah’s “duck’s disease”. “I’m quite short, so it made sense to adapt the cabinets to my height,” she explains.
At first, the kitchen was red and purple but after about five years, the Stevens updated the cabinets by painting them apple-green. “The quote to have them spray-painted was astronomical, so we bought paint and some rollers and got stuck in ourselves,” says Sarah. “It was a huge effort, but so worth it!”
The kitchen is the main attraction in the Stevens’ home and you will often find Sarah here, baking treats. “My heart is happiest when our boys, Charlie (24) and Robbie (21), are home for holidays and long weekends, as it gives me reason to spend even more
time cooking!”

Cake stand from Nicci Stewart Ceramics
I adore the cheerful open feeling of the kitchen and knowing that I can go in there and create magic. – Sarah
Paint colour Dulux Apple Green
Island style
• The standard height for an island is 900mm. Richard and Sarah’s is 870mm, but you can also build it higher if your family are all tall –but it shouldn’t be higher than 940mm. • Richard and Sarah wanted a hardwearing surface for the island but didn’t like the feel of wood or stainless steel. Richard, who also does work in the construction industry, experimented by casting the countertop using self-levelling epoxy resin, a substance usually used for floors in factories . • The Stevens had drawers installed on both sides of the island for Sarah’s collection of kitchen gadgets and utensils. “I love a gadget!” she says. >>

Most mornings, you’ll find Sarah in the kitchen, baking a fresh loaf of sourdough bread.
kitchens
When the Stevens bought their plot, there were two pine trees that had to be felled before the house could be built. “We saved the wood, had it dried and treated, and used it for the other counters, as well as the staircase.” The chandelier from Lemon Tree Interiors is a nod to Sarah’s parents. “My folks have always had a chandelier in their homes, and I love a bit of bling and flamboyance.”
Timeless elegance
When Sharon Rix and Rudolph Prinsloo bought their home in Stellenbosch in February 2019, they immediately upgraded the kitchen and bathrooms. “Although the layout of the kitchen worked, the finishes were outdated,” says Sharon.
Apart from moving the refrigerator and freezer to the scullery for more storage space in the kitchen, only the cabinets and counters were changed to give this room a fresh look. The family enlisted Rikus Visser and Dawid Griesel of Signature Group to build the new kitchen cabinets.
The geometric cement wall tiles from Moroccan Warehouse were the starting point for the new finishes in the rest of the kitchen. Sharon chose white engineered quartz countertops to replace the original black granite surfaces, and a soft shade of grey in a matte finish for the kitchen cupboards.
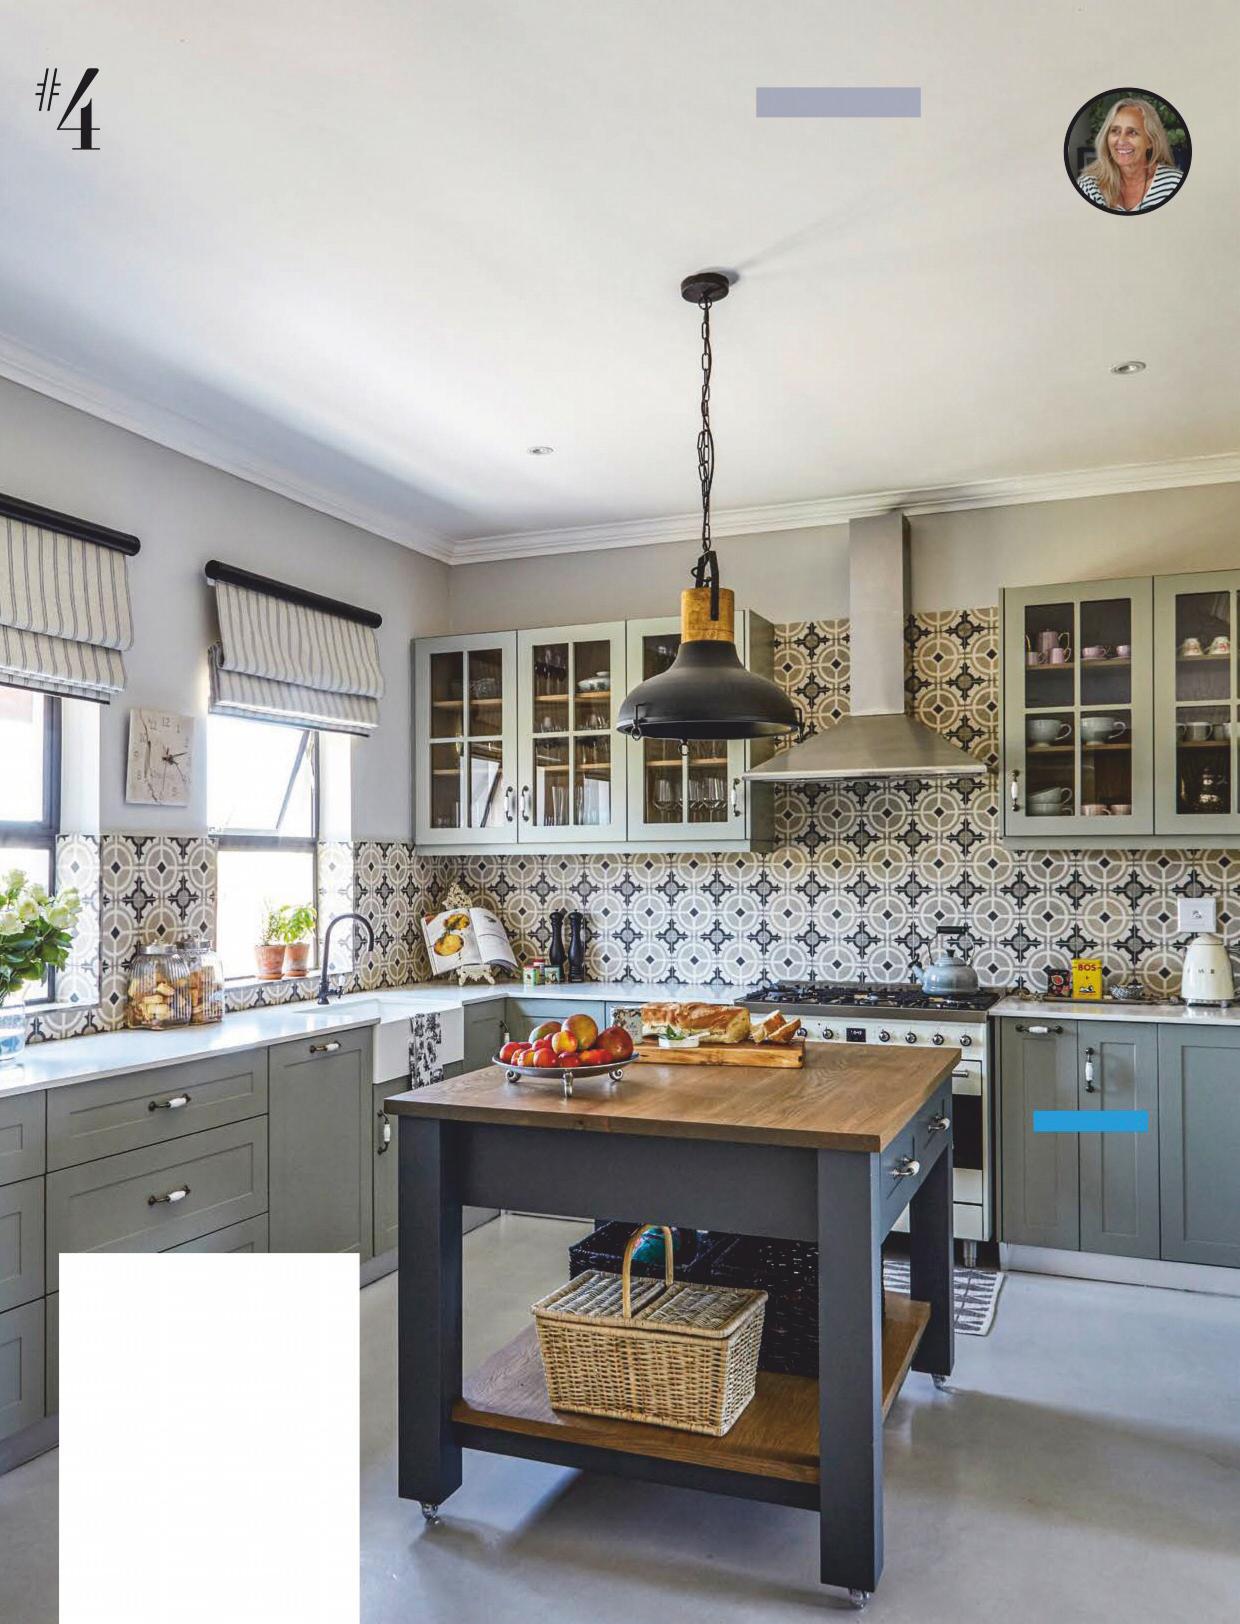
Pendant from Pieter Deon Interiors
EXPERT ADVICE Handmade cement tiles are porous and can easily absorb moisture if not sealed correctly, says Kundra Bowley of Moroccan Warehouse in Cape Town:
All our tiles are ‘pre-sealed’ with our Colour Retainer Sealer, a water-based sealant that prevents marking during installation. For areas like floors and splashbacks, I recommend applying two layers of our Polyurethane Sealer with a satin finish as a final sealant; one layer should be sufficient for a wall surface. If you look after your tiles, these sealants should last for years. However, you can consider giving the tiles a light sanding every 3–4 years and resealing them. Personally, I love the worn look of these tiles – they have soul! CONTACT 021 461 8318
Island style
• The solid oak island has castors at the bottom so that it can easily be moved around when it’s loaded with food and drinks when they entertain lots of guests. • Fresh veggies are stored close at hand in baskets on the bottom shelf of the island. • The island’s wooden slab complements the wooden shelves and echoes the shelves on the wall. It also goes well with the patterned tiles and grey finishes.
Paint colour Plascon Wishing Well
Sharon searched long and hard for a black tap for the laboratory sink. “It has such old-fashioned charm!”
Black tap from Victorian Side Bathrooms

CONTACTS AND STOCKIST Pieter Deon Interiors 082 309 4487, pieterdeoninteriors.co.za Signature Group 061 419 5702, sig-group.co.za Victorian Side Bathrooms 021 982 0461, victoriansidebathrooms.co.za Encaustic cement tile A411-E (200 x 200mm) R1 463/m 2 , Hadeda
kitchens
Pavimento Antiqua Glazed ceramic tile (200 x 200mm) R490/m 2 , Italtile
Perfect patterns
Create a unique focal point in your kitchen with these striking tiles.
Mosaico Vero Picasso Estrella Nero porcelain tile (200 x 200mm) R290/m 2 , Stiles Cuban White Star porcelain tile (223 x 223mm) R695/m 2 , Pudlo
Heritage Grey porcelain tile (331.5 x 331.5mm) R540/m 2 , Womag Encaustic cement tile A500-C (200 x 200mm) R1 463/m 2 , Hadeda >>
STOCKISTS
Hadeda 011 788 5774, hadeda-tiles.com Italtile 0861 555 109, italtile.co.za Pudlo 021 448 0607, pudlo.co.za Stiles 021 510 8310, stiles.co.za Womag 021 447 6161, womag.co.za
Coastal cool

When Guy and Andrea Osler decided to escape the rat race and get into a slower pace of life, a permanent move to their holiday home in Struisbaai was the logical choice. “Struisbaai has always been our happy place,” says Andrea, a freelance communications consultant. “We initially thought we would move for a year, maybe two… But after six months, we knew that we didn’t want to move back to Cape Town. Our daughters Daniela (11), Sofia (10) and Isabelle (3) were thriving in the less frantic environment. We love our home and its proximity to the beach – Guy’s passion is deepsea fishing and the girls and I love to surf.”
The Oslers moved in in January 2019 after building a large extension onto the existing cottage. A functional kitchen was high on the priority list for Andrea, who enjoys cooking and planning occasions that bring people together. From the get-go, she knew she wanted an open-plan kitchen connected to the dining area and living room. She enlisted the help of Jaco Louw from Tip of Africa Creations to build and install the cabinets, including a custom wine storage unit above the fridge.
The island with its striking patterned tiles is the main attraction in the space.
“I wanted the stovetop to face the living area, as I love to interact with family and friends while cooking. When I’m cooking, I feel like the star of a culinary show!”
The island is all about storage: just below the stovetop is a large spice drawer for easy access. Lower down are various deep drawers for pots, pans and plates, as well as shallow drawers for cutlery and other bigger utensils.
A separate scullery at the back of the kitchen, ideal for hiding the mess of cooking and dirty dishes while entertaining, offers extended storage space and allows the kitchen to remain uncluttered.
Andrea has always dreamed of having a light blue kitchen, and has been collecting blue, turquoise and aquamarine platters and bowls of all sizes since she and Guy got married. “Many are gifts from friends and family who think of me when they see a bowl or platter in ‘my colours’.” Choosing blue for the kitchen cabinets was, therefore, a no-brainer.
Floating shelves are functional and offer a neat display space for treasured items.
Pendants from Block & Chisel; tiling by Fred Retief of Disa Renovations
EXPERT ADVICE
I love that the blue cabinets are understated, yet still make a statement.
– Andrea
Island style
• Blue-and-white patterned tiles from Moroccan Warehouse on the island add colour and character, while classic white metro tiles from Italcotto on the splashback provide a neutral backdrop against which the patterned tiles and blue cabinets pop. “The ornate pattern of the tiles also breaks the kitchen’s straight, clean lines,” says Andrea. • The island has an overhang, but it is not actually for seating; instead, guests congregate around the table, as in kitchens of yesteryear. • The Oslers decided on a hardwearing quartz countertop from Caesarstone for the island, while the light oak countertop on the back counter provides balance and texture and ties in seamlessly with the floating shelves above. >>
Quartz surfaces remain a popular choice for kitchen counters as they offer excellent strength and durability and can even increase the value of your property, says Trevor King, marketing director of Caesarstone South Africa:
When it comes to a kitchen countertop, investing in a hard-working surface that will stand the test of time is worth it. Take into account whether the surface comes with any type of warranty, and whether it is scratch- or stain-resistant, a valuable asset in a kitchen. Keep in mind the type of care and maintenance your preferred surface will require and whether it will suit your lifestyle. High quality finishes such as quartz come in a multitude of colours, require simple routine care, and can last a lifetime. CONTACT 083 608 5810, caesarstone.co.za
Soft blue Shaker-style kitchen cabinets work perfectly in a beach house. “All the different shades of blue and turquoise are reminiscent of the sky and ocean,” Andrea says. Another must-have for the Oslers was a butler’s sink. “It’s a timeless character piece
that adds charm to any kitchen,” she says.
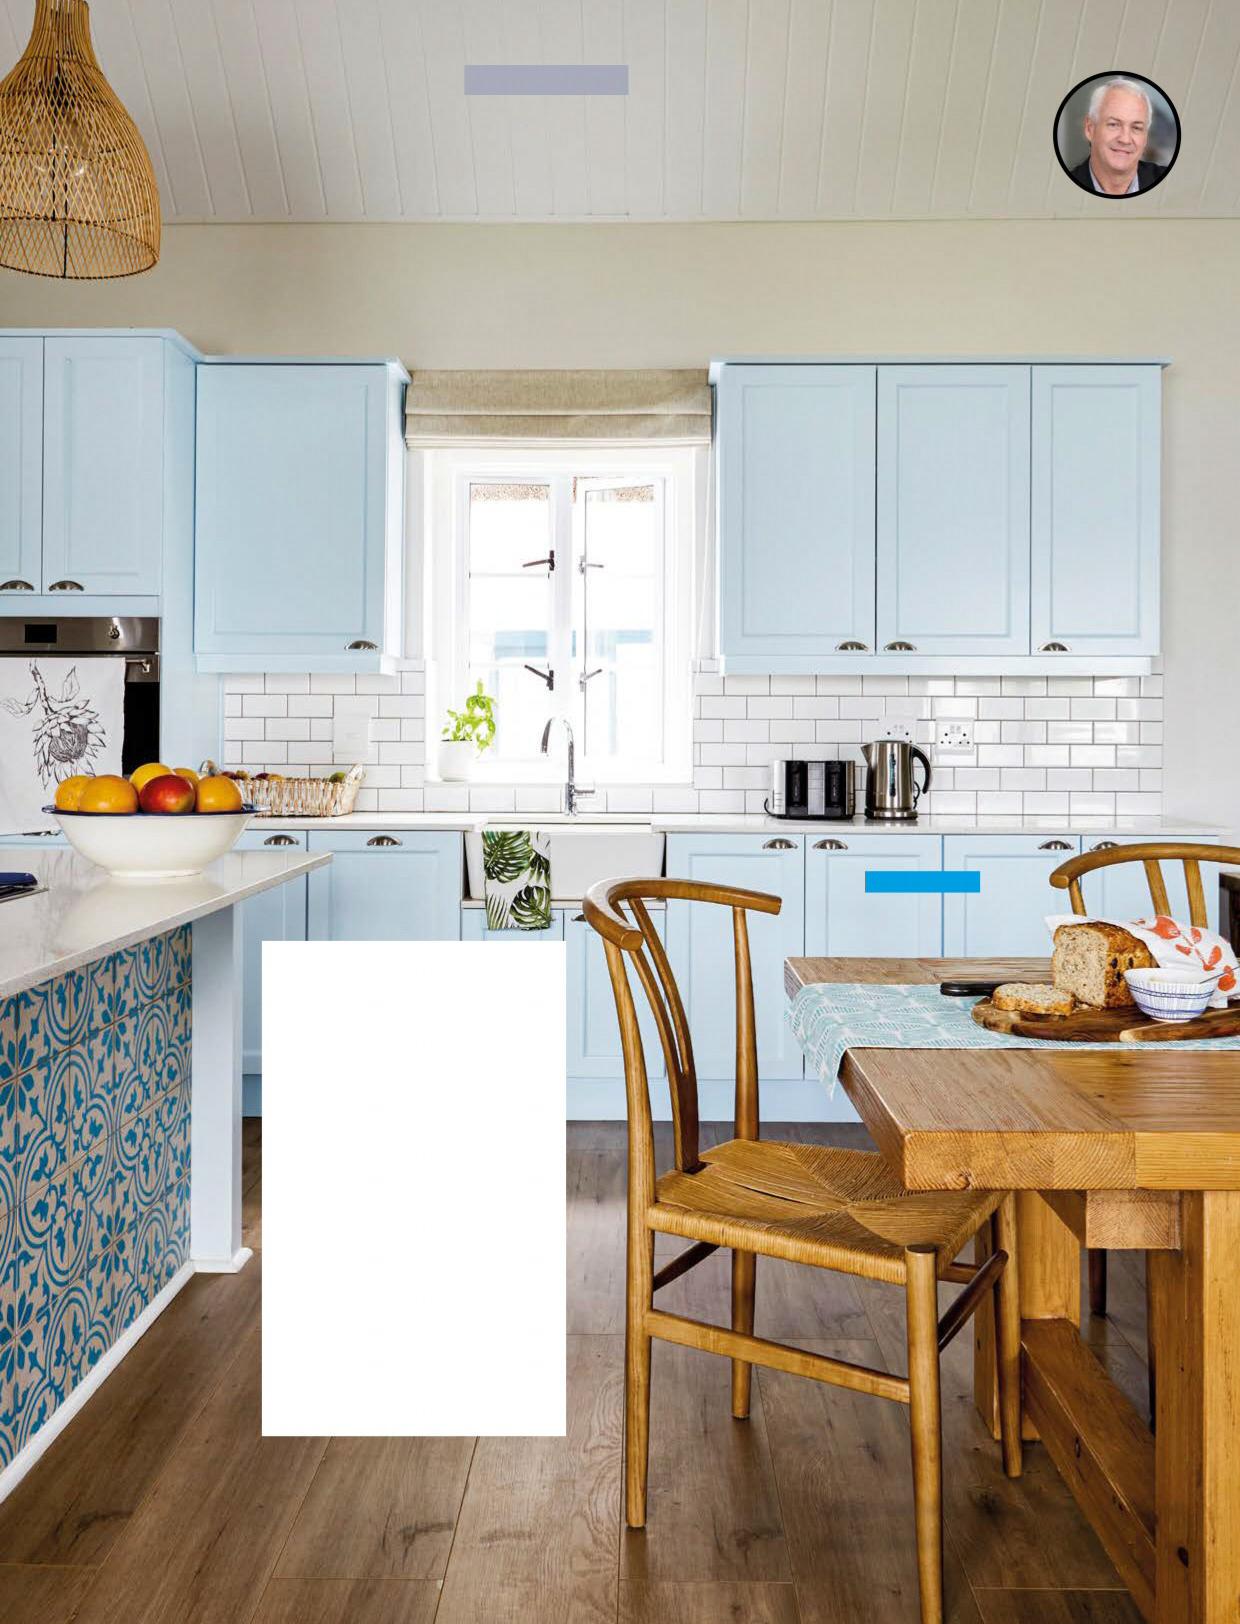
Paint colour Plascon Decide
Minimalist magic

When Riëtte Marshall and Leonard Ricketts moved into this house in Oude Westhof, Bellville five years ago, they knew they had their work cut out for them. The dark kitchen with its black granite slabs bothered them the most. “I had to clean those surfaces all day long because every little spot showed up on the black!” recalls Riëtte.
The family immediately removed the built-in washing machine and tumble dryer and converted that space into a cupboard. Then in April 2019, the major renovation of the rest of the kitchen began.
In consultation with Gerrie van Dalen of Upfront Design, Riëtte and Leonard’s son Mark planned a new kitchen that would include all of the family’s preferences. “I knew exactly what I didn’t want in the kitchen,” says Riëtte. “It had to be practical and everything had to be within easy reach so that we wouldn’t have to constantly move around any clutter.”
An island was non-negotiable. “I wanted an island that would allow me to see everything while I work,” she says. “So many people make the mistake of putting their prep bowl in the island and the stove against a wall. But I wasn’t keen on staring at a wall while I cook!”
Previously, the kitchen was separated from the living room by a wall; this was demolished and a sliding door between the bar and dining room was removed to make the kitchen, dining room, bar and living room one big open-plan area.
EXPERT ADVICE
Ashley Howarth of Blum South Africa says it’s important to calculate your storage needs depending on the size of your family and their shopping habits. “Knowing your daily routines in the kitchen, cooking habits and keeping your lifestyle in mind will make choosing your cabinetry solutions that much simpler.”
Drawers are preferable for all areas of the kitchen. They create more space for storage and are more accessible than shelved cabinets. For added convenience, Ashley recommends Blum’s Orga-Line dividers to keep drawers tidy. Corner cupboards can be awkward to access. “Blum has a unit called the Space Corner which has fully extendable drawers that allow you to reach those items stored at the back.” For an overall minimalist kitchen design, keep the gaps between the cabinetry fronts to a minimum. “Handle-less cabinetry with high quality fittings will add to an uninterrupted design,” he says. CONTACT eclipsegroup.co.za
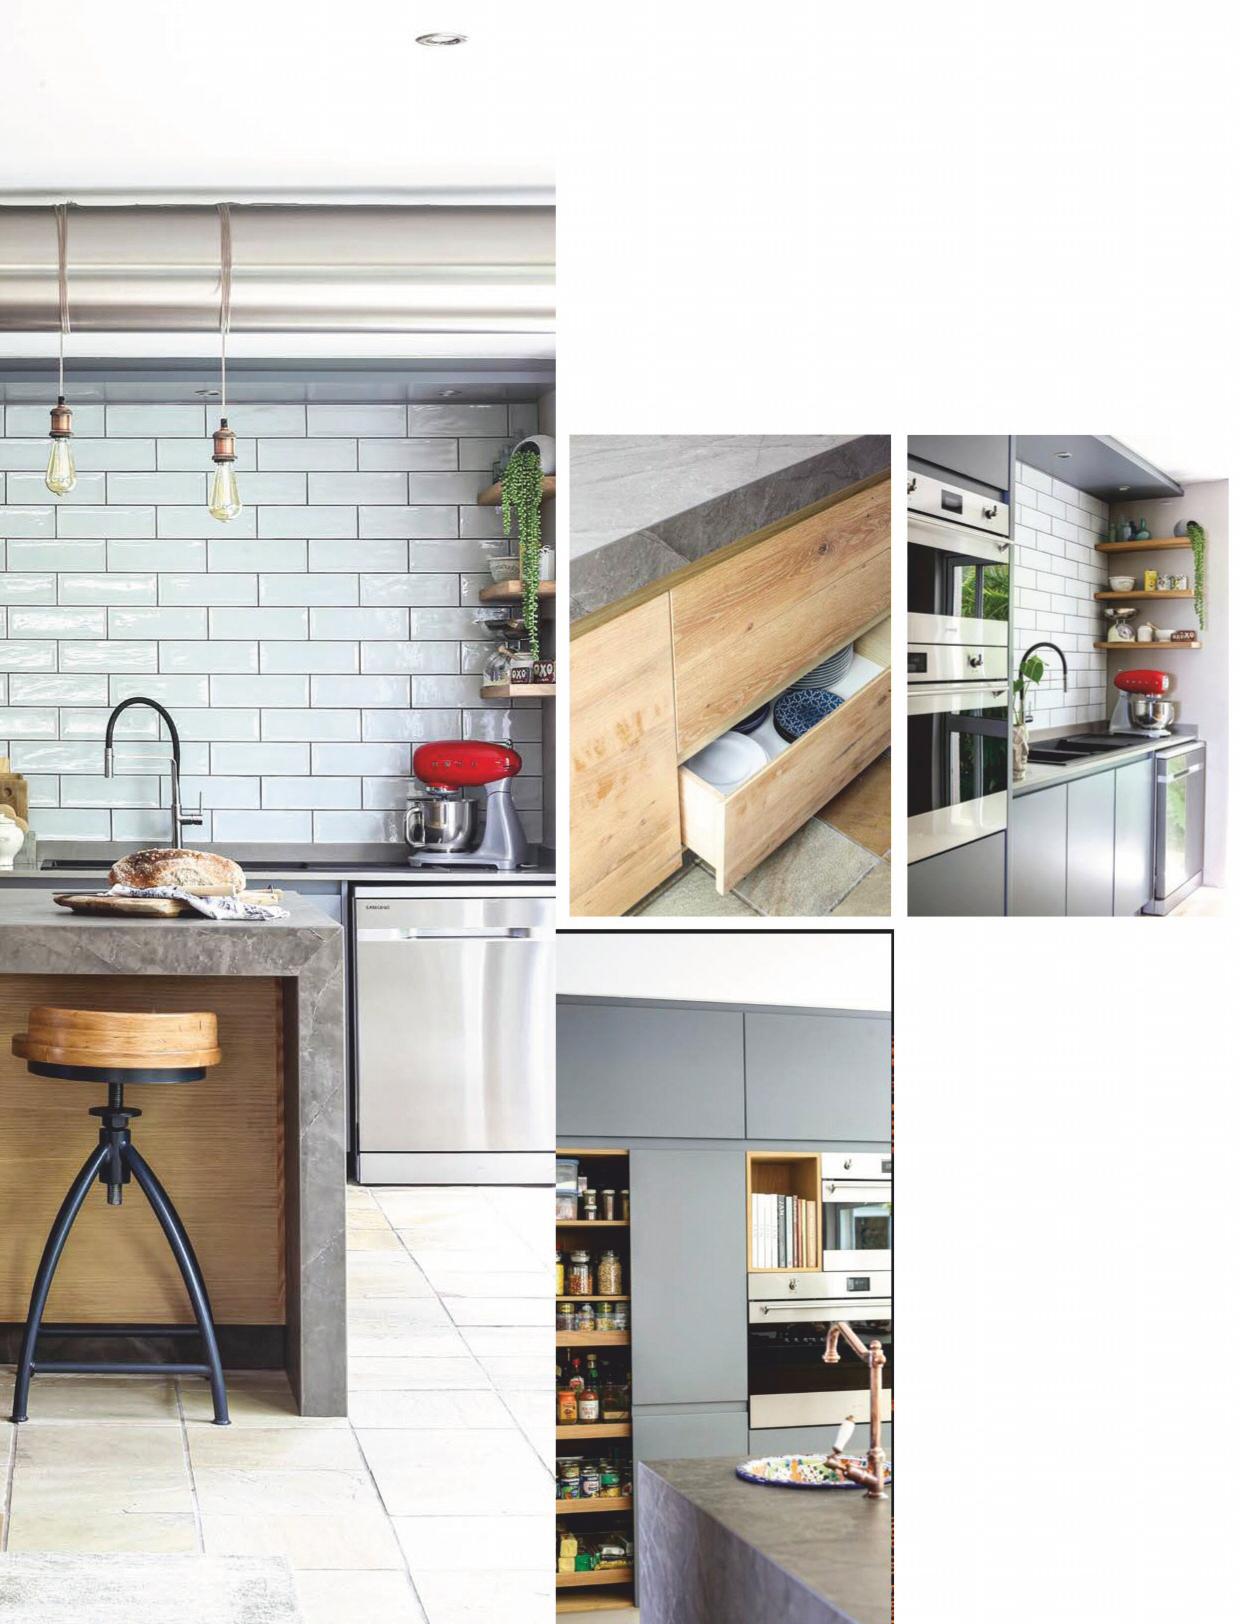
Riëtte loves the industrial look, so she decided to incorporate the extractor fan’s exhaust ducting as a design element in the kitchen. “Good lighting above the island was a must, and Gerrie suggested we wrap the lights around the exhaust ducting,” she explains.
Paint colour Plascon Bovine
The wooden stools were custom made by Reclaimed Woods; they echo the other industrial elements in the kitchen.
Island style
The slab for the island is Dekton in the colour Kira. “Dekton is a combination of quartzite, porcelain and glass heated at very high temperatures and compacted,” explains Gerrie. “It strengthens the surface and makes it extremely durable.” The other work surfaces are Caesarstone in the colour Moorland Fog.
kitchens
The oak elements, such as the drawers of the island, were finished with Rubio Monocoat’s natural oil sealant. The minimalist finishes and handle-less cabinets perfectly suit the family’s uncomplicated décor style.
A new grocery cupboard (left)
was top of Riëtte’s priority list. “I just hate trying to find groceries in the far reaches of a bottom cabinet, so I decided on a tall cupboard with drawers – it’s much more practical.” A ceramic prep bowl provides a touch of colour in the otherwise neutral kitchen and the copper tap is the perfect complement. “I wanted to bring in a Mexican or Portuguese design somewhere in the kitchen because I adore the colours of those countries,” says Riëtte. “The old and more contemporary items work well together.” >>
Talavera prep bowl from Hadeda; copper tap from Copper Bath
No frills or fuss
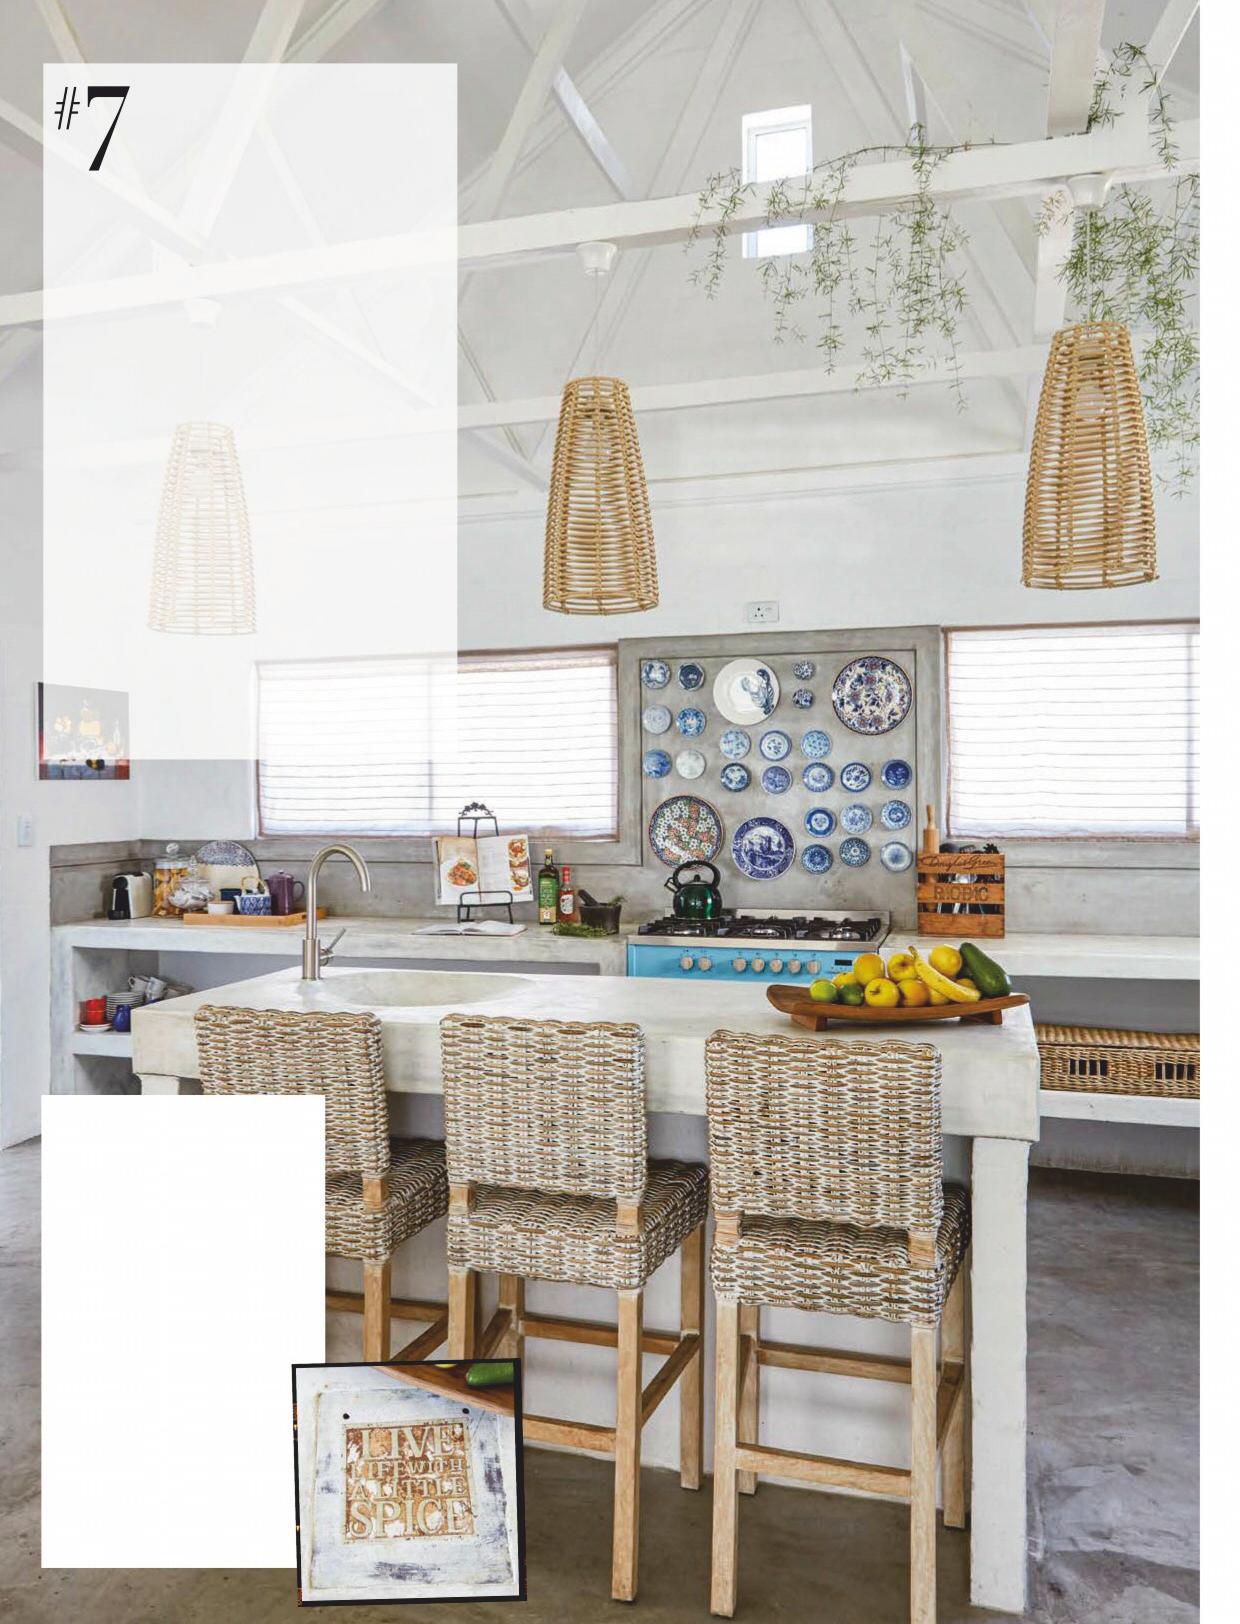
With three children, there’s always activity around the kitchen island in Christo and Yolande Worst’s home in Yzerfontein. “This is where homework is done; where our kids Mila (16), Christo (4) and Stian (2) like drawing; and, of course, where we make food,” says Yolande. “At other times, we just sit with a cup of coffee and chat.”
When the family moved in at the beginning of 2018, they made minimal changes to the kitchen. The earthy finishes perfectly suited their design aesthetic. “The cement floors are practical and easy to keep clean, especially in this phase of our lives,” says Yolande. The Worsts initially considered installing doors over the open cement shelves, but then decided against it. “Luckily, the little ones quickly learned not to touch the stuff on them!”
The Worsts put their own stamp on the kitchen with a few minor alterations, such as new pendant lamps, a lick of paint and a collection of plates that serves as a splashback above the stove. “We live a fuss-free life. We enjoy cooking and love to entertain friends and family,” says Yolande. “It’s my absolute happy place.”
Island style
• The island was built with cement and screeded with Cemcrete SatinCrete in the colour Bone. “You want a good hard sealant for a kitchen counter which takes a lot more wear and tear than most surfaces,” says Joanne Sykes of Cemcrete. Therefore, she recommends first applying Cemcrete SiliconSeal until saturated, followed by three coats of CreteSeal SolventBased Sealer. “Even then, don’t put anything hot directly onto the surface,” she says. • The Worsts ‘inherited’ this quote (right) on the island when they bought the house; Yolande says it matches her personality perfectly.
Exposed rafters create a sense of spaciousness in the Worsts’ kitchen. The bar stools and pendants above the island add texture.
Stools from Decofurn; pendants from MRP Home
Pops of green in the form of paint and plants add life to the scullery. EXPERT ADVICE Yolande brought colour into the mainly neutral kitchen with a powder-blue stove and a collection of blue-and-white plates above it. “I love colour and I’m drawn to anything blue and white. The plates were collected over the years and now they work so

Paint colour Dulux Woodland Fern
STOCKISTS
Cemcrete 0860 236 27383, cemcrete.co.za Decofurn 087 740 1800, decofurnsa.co.za MRP Home 0800 212 535, mrphome.com
beautifully in our beach home!”
A cement shelf can be built using various methods, but the following two ways are probably the easiest if you do it yourself, says Karin Cronjé, owner of Hands On Creative Building & Management:
You can use lintels over which a concrete layer is cast to fill the grooves and then finished to a smooth surface, or you can build shuttering (a wooden box) in which you weave rebar and then fill with a lightweight concrete mixture. For this type of mixture, the stone is substituted with a lightweight material such as vermiculite so that it is not so heavy.
Although lintels are very strong, it is not recommended to make a shelf between two walls longer than 2 600mm. Building lintels between two walls is an easy and quick process, but you are limited by the width and thickness of the material (lintels). A shelf is usually between 280mm and 350mm deep, while standard lintels are 75 105 or 150mm thick – and you cannot cut lintels thinner and place them next to each other to achieve a certain shelf depth.
If you use the shuttering method, you can determine the size of your shelf yourself, without limitations. You can adjust the depth and breadth of the shelf, as long as you weave in sufficient steel. The only disadvantage of this method is that you are going to work with large amounts of wet concrete and the drying time will be much longer than when you use lintels.
Remember, cement surfaces tend to develop hairline cracks. As long as they are hairline cracks, there’s nothing to be worried about, it’s part of the look. Sprinkle the screeded surface regularly with water while you wait for it to dry – this prevents the concrete from drying out too quickly and not achieving its full strength. CONTACT 083 277 3166, karin@handsoncreative.co.za

