12 minute read
RECIPES
by cwgmedia
Lilydale Raised Slow Pistachio Rubbed Chicken with Quinoa Stuffing and Honey Carrots Bush Fennel Fried Prawns with Finger Limes and Samphire Salsa Papaya Chia Pudding Jars with Chocolate Nicecream and Granola
Kanzi® apple, caramelised onion and goat’s cheese galette No-Bake NotNuts Chocolate Balls
Prep Time: 25 mins Cook Time: 1 hour 25 mins Serves: 4


INGREDIENTS
1.8kg Lilydale Raised Slow whole chicken ½ cup tri-colour quinoa 2 tbsp. olive oil 1 red onion, chopped 1 tsp Moroccan spice mix 1/3 cup chopped mint 1/3 cup chopped parsley ¼ cup pistachios, chopped 2 tsp finely chopped preserved lemon
Pistachio Rub 1 tbsp. olive oil 2 tbsp. pistachio dukkah
Honey & Pistachio Carrots 1 small red onion Juice of 1 lime 50g butter 3 bunches Dutch carrots, ends trimmed, peeled 2 tsp honey 1 cup coriander leaves ¼ cup chopped pistachios
METHOD
1. Preheat oven to 1600C (Fan Forced) or 1800C (Conventional). 2. Place quinoa in a small saucepan with 1 cup of water.
Cook, covered, on medium heat for 10 mins or until quinoa is tender and water has been absorbed. Rinse under cold water, and then transfer to a bowl. 3. Heat oil in a small frying pan on medium heat. Cook onion, stirring for 3-4 mins until softened. Add spice mix and stir to combine. Add to quinoa with mint, parsley, pistachios and preserved lemon. Stir to combine. 4. Remove chicken from packaging and pat dry inside and out with kitchen paper. Fill cavity with quinoa mixture.
Secure legs with twine. Place chicken in a baking dish. 5. For the Pistachio Rub, drizzle oil over chicken and season well. Bake for 1 hr. Baste with pan juices then sprinkle over Pistachio Dukkah. Bake for another 45 mins or until internal temperature reaches 750C and juices run clear. 6. Make Honey & Pistachio Carrots. Combine red onion and lime juice in a small bowl. Set aside for 10 minutes to pickle slightly. Heat butter in a large frying pan. Add carrots and cook, tossing regularly for 5-10 mins or until just tender.
Add honey and toss to coat. Transfer to a serving platter.
Top with pickled onion, coriander and pistachios.

Prep Time: 20 mins Cook Time: 25 mins Serves: 4
Australian native ingredients and Australian prawns are perfect for Australia Day. Samphire is a succulent foraged from the coastline and Finger Limes have caviar like pearls with a lovely citrus finish.
INGREDIENTS
1 kilo large green prawns, peeled tails intact 1 cup cornflour 1 cup self raising flour 1 ½ cups chilled soda water Vegetable oil for deep frying 6 finger limes, halved and pearls removed
Fennel Salt and Pepper 2 teaspoons fennel seeds 1 teaspoon black peppercorns 2 teaspoons salt
Samphire Salsa 1 cup fresh samphire, roughly chopped 3 cornichons, finely chopped 1 tablespoon of chopped mint 1 tablespoon of chopped parsley 2 tablespoons lemon juice ¼ cup olive oil
METHOD Fennel Salt and Pepper 1. Place the fennel and pepper in a small dry saucepan over medium heat. Swirl the saucepan regularly until the fennel and pepper are fragrant, then remove from the heat. Add the salt and use a mortar and pestle to pound to a powder.
Samphire Salsa 1. Place the samphire, cornichons, mint, parsley, lemon juice and olive oil in a bowl and mix to combine. 2. Place the cornflour and half the self-raising flour in a large bowl.
Gradually add the soda water and whisk to combine. Place the remaining flour in a small bowl. 3. Heat oil in a large deep saucepan or wok over medium heat until the temperature reaches 180°C. Working in batches, dust the prawns with the flour, then dip into the batter and carefully lower into the oil. Cook for 3 minutes or until crisp and golden. Drain on paper towel. Sprinkle with fennel salt and top with finger lime pearls.
Serve with fresh samphire salsa.

Prep Time: 10 minutes, plus soaking time (30 mins) Makes: 2 large or 4 small
INGREDIENTS 1 medium-sized @australianpapaya 1/3 cup yoghurt of choice 1/2 cup Granola Chia pudding 1/2 cup white chia seeds 2 1/3 cups coconut milk 1 tsp pure vanilla extract 1 Tbsp lime juice 1 tsp lime zest Chocolate nice cream 2 frozen bananas, chopped 1 Tbsp cacao powder 2 Tbsp coconut milk METHOD 1. Make chia pudding by adding all ingredients to a bowl and whisking together. Set in the fridge for 20 minutes. 2. Cut the papaya in half, and remove the skin and seeds.
Put half the papaya in a small blender and blitz until smooth, then dice the other half. Set aside. 3. In a clean blender, add the nice cream ingredients and blitz into a smooth, thick consistency (you will need to use the tamper). 4. Assemble your jars (or put everything in a bowl!)- create layers or papaya, chia pudding, granola and yoghurt, then top with nice cream and papaya chunks. Enjoy immediately.
WHITE CRACKLE BUNNIES

INGREDIENTS Crackle Mixture 2 x 180g block white chocolate, chopped 75g Copha, chopped ½ cup (20g) Rice Bubbles, plus 1 cup (40g) extra for coating ½ cup (50g) desiccated coconut, plus extra for coating tail Decorations 2 ½ cups (435g) white chocolate melts 1 tbsp (30g) Copha, chopped Black liquorice straps for whiskers Milk bottle lollies, pink food colouring and caster sugar for ears Milk bottle lollies and extra desiccated coconut for tails Pink and white mini marshmallows for cheeks and front paws Pink marshmallows for feet White heart sprinkles and black writing icing pen for eyes Pink heart sprinkles for noses
Difficulty: Easy Prep Time: 2 hours 30 mins Makes: 12
METHOD Crackle Mixture 1. To make crackle mixture, place chocolate and Copha in a large heatproof bowl. Sit bowl over a saucepan of simmering water. Stir until melted. Remove from the heat. Stir in ½ cup Rice Bubbles and ½ cup coconut. Mix well until combined. Refrigerate for 45 minutes to 1 hour, stirring every 15 minutes, or until just firm. Bunny Head and Body: 1. To make the bunny bodies, roll 1 heaped tbsp (approx. 30g) of mixture into a ball. Repeat to make total 12 large balls. Place onto a lined baking tray and set aside. 2. To make the bunny heads, roll 2 heaped tsp (approx. 15g) of mixture into a ball then repeat to make total 12 small balls. Place onto prepared baking tray with the bodies. 3. Roll bodies into extra 1 cup of Rice Bubbles to coat. Return to tray and refrigerate for 15 minutes. Coating the Bunny: 1. Meanwhile, place choc melts and Copha into clean heatproof bowl. Sit bowl over saucepan of simmering water and stir until melted. Remove from heat. 2. One at a time, dip all the bunny heads into the melted chocolate, allowing excess to drip away. Return to lined tray. 3. Repeat with the bodies, dipping so that only the bottom half is covered in chocolate. Place onto prepared tray with heads and refrigerate for 15 minutes. Reserve remaining chocolate. Decorating the Easter Bunny: 1. Using some of the reserved melted chocolate as glue, stick one head and one body together securely.
Continue with remaining bunny heads and bodies. 2. Trim liquorice to make whiskers and cut mini pink marshmallows in half to make the cheeks. Stick on 1 pink heart sprinkle for the nose. Add liquorice whiskers and marshmallow cheeks. Stick on 2 white heart sprinkles for the eyes, draw on eyeballs using black writing icing. Repeat with remaining lollies and bunnies. 3. Place a ¼ cup caster sugar into a small plastic sandwich bag and add a few drops of pink food colouring.
Massage sugar until evenly pink. 4. Cut milk bottle lollies to form pointy ears and dip cut side into coloured sugar to make the pink inner ear.
Glue ears onto each head with melted chocolate. 5. For the paws, cut 2 slits into the side of a white mini marshmallow. Repeat until you have 24. Glue 2 onto each bunny body. 6. For the large bunny feet, cut ends off a pink marshmallow. Make 2 slits in the end of each piece. Repeat until you have 24 feet. Glue 2 onto each bunny body. 7. Cut the ends off 12 milk bottle lollies. Dip into white chocolate and drain off excess. Coat in desiccated coconut. Cool to harden and glue onto the back of the bunnies. Tips: • Copha and white chocolate can be melted in the microwave. Select High/30 secs.
Stir and repeat until just softened. • When gluing on candy features, allow the chocolate to cool and thicken slightly to prevent it dripping. • Place and hold candy features for 3-5 seconds to allow chocolate to harden. • If melted chocolate begins to harden too much, microwave for 30 secs and stir until soft. • Store in an airtight container in the refrigerator for up to one week.

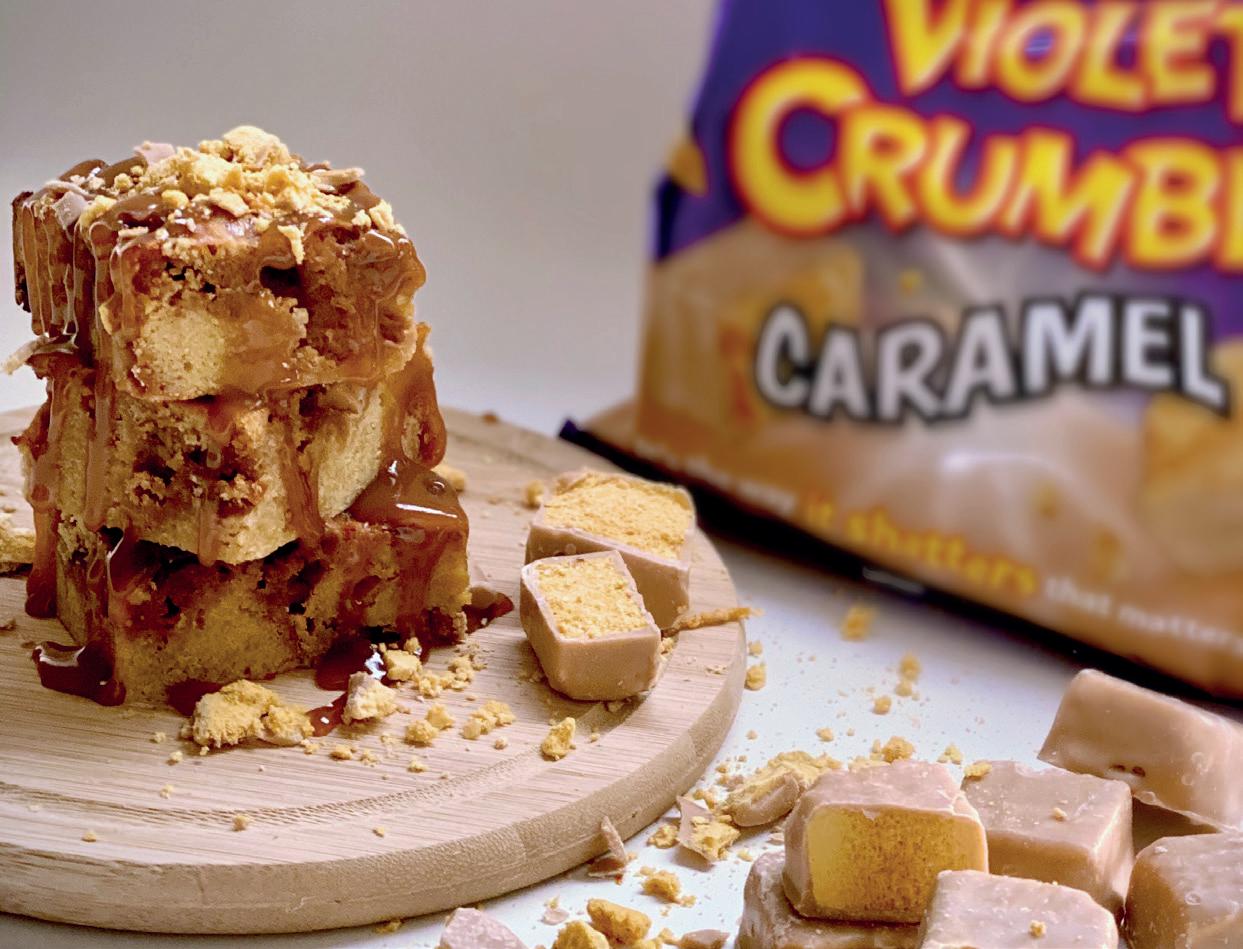
CARAMEL VIOLET CRUMBLE BLONDIES

These Blondie Brownies are a delicious served warm with additional salted caramel sauce, ice cream or cream. Make sure you warm them up before serving to experience their gooey-ness!
Difficulty: Easy Prep Time: 20 mins Cook Time: 30 minw Makes: 12
INGREDIENTS 200g Unsalted Butter, softened 125g caster sugar 125g brown sugar 3 eggs 275g plain flour 1 tbsp cornflour 1 pinch salt 1 packet Caramel Violet Crumble pieces 100g white chocolate 50mls milk 150g salted caramel sauce METHOD 1. Preheat your oven to 180 degrees fan and line a 9x9" square tin with parchment paper. 2. In a large bowl, add the softened butter, caster sugar, brown sugar and salt then beat with an electric beater until pale and smooth. 3. Add in the eggs one at a time, beating well in between each addition.
Finish by adding the milk. 4. Sift in the flour, cornflour and salt and mix by hand until the mixture is well combined. Fold in the violet crumble and white chocolate then spread the mixture into the tin evenly. 5. Dollop on the caramel sauce and lightly swirly through the blondie mixture using a butter knife/skewer. 6. Bake the Blondies in the oven for 30 minutes and allow to cool in the tin. Cut into squares once cool. 7. When serving, re-heat in the microwave and drizzle with more salted caramel sauce.


This savoury Kanzi® apple galette is colourful, rustic and simple to prepare. The flavour combination of Kanzi® apples with sweet caramelised onions, goat’s cheese and fresh thyme is just divine. The perfect dish for a picnic or a no fuss dinner.
Prep Time/Cook Time: 45 mins Serves: 4
INGREDIENTS 4 medium size Kanzi® apples (sliced into thin half-moons 5mm thick) 2 red onions (thinly sliced into half-moons) 1 tbsp brown sugar 2 tbsp balsamic vinegar 100g ash coated goat’s cheese 1 sheet puff pastry thawed out (store bought) 4-5 sprigs fresh thyme 1 tbsp butter for cookingolive oil for cooking pinch of sea salt METHOD 1. Pre heat the oven to 180C. 2. Line a rectangular baking tray with parchment paper, set aside. 3. Add the butter to a frying pan on medium heat followed by the onions, stir to coat. Allow the onions to sweat until they become transparent (8-10 minutes), keep stirring to prevent burning. 4. Add the brown sugar and balsamic vinegar and stir through. Cook for a further 5-8 minutes or until the balsamic becomes sticky and thickened.
Remove from the heat. 5. Toss the sliced Kanzi® apples together in a mixing bowl with ¾ of the thyme leaves, a good pinch of sea salt and a little drizzle of olive oil to coat. 6. Lay the thawed-out puff pastry onto the baking tray. Spread the caramelised onion mixture evenly over the pastry, leaving a 6-7cm border from the edge of the pastry. 7. Lay 5 slices of Kanzi® apples in the same direction, slightly overlapping each over. Then lay another 5 slices of the Kanzi® in a separate direction.
Repeat this process until you have 3 by 4 rows. 8. Crumble up the goat cheese into chunks and spread over the top and in-between the Kanzi® apples. Spread the remainder of the thyme leaves over the top. 9. Using a flat spatula, gently lift up the pastry border and fold the pastry edges inwards over the top of the pie ingredients. 10. Bake for 28-30 minutes or until the pastry is lightly browning and puffing up. 11. Serve warm from the oven or enjoy later cold for a picnic.
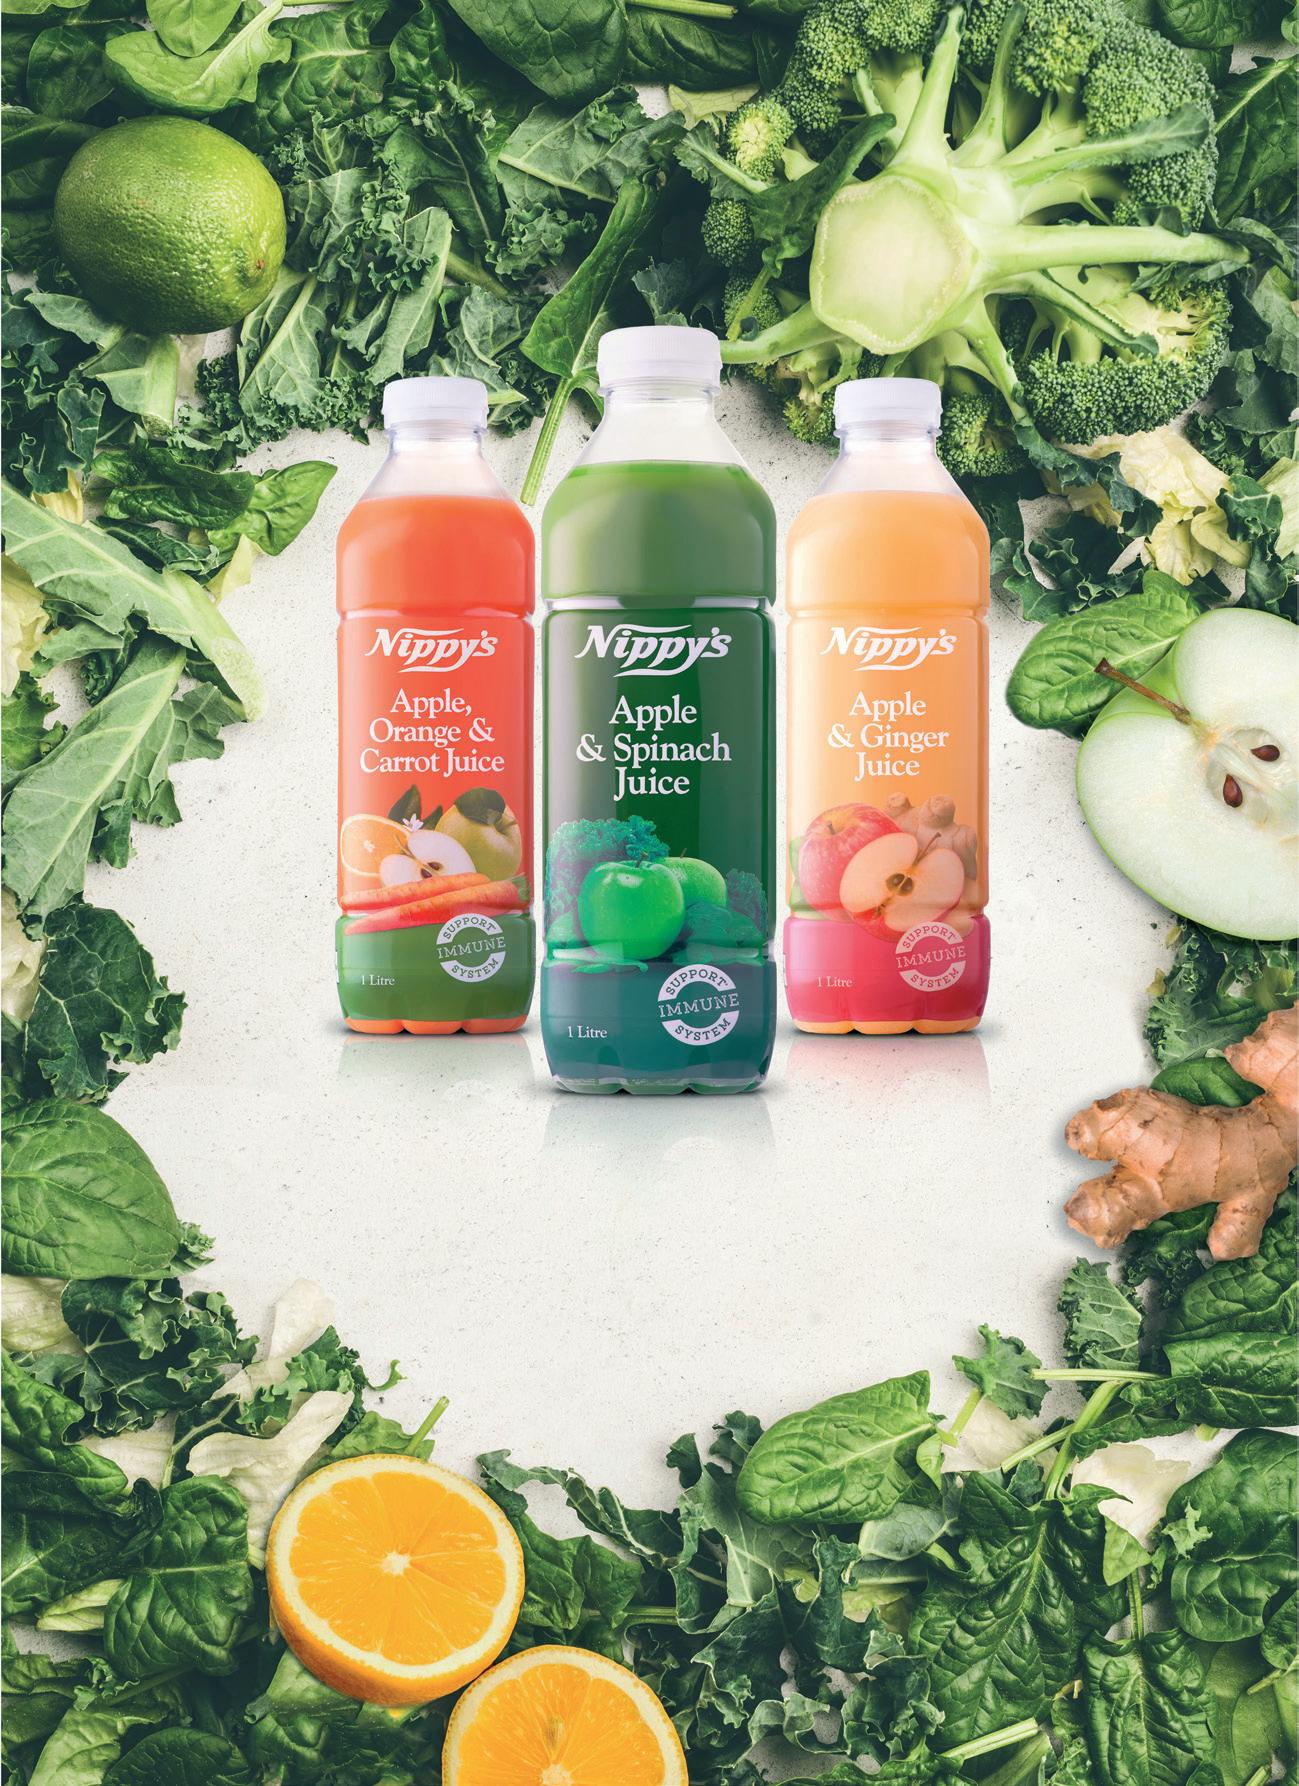
SUPPORT YOUR IMMUNE SYSTEM
Nippy’s are a proudly South Australian-owned, family-run producer of fresh citrus fruit juices and flavoured milk products. Our latest range of new 1L and 215ml Immune Support and Cold Pressed juices contain more fruit in each bottle and an extra boost of nutrients for every day health or fighting off viruses. It’s no wonder that Nippy’s juice is recognised, trusted and loved throughout Australia and the world. Nippy’s Cold Pressed range is available in Blood Orange, Cloudy Apple, Pink Grapefruit and Orange. Immune Support is available in Apple & Ginger, Apple & Spinach and Apple, Orange & Carrot.

nippys.com.au

WANT MORE RECIPES?
CLICK HERE


