
1. Important information and warnings
2. General riding information
3. Dartmoor Hardtails

4. Geometry
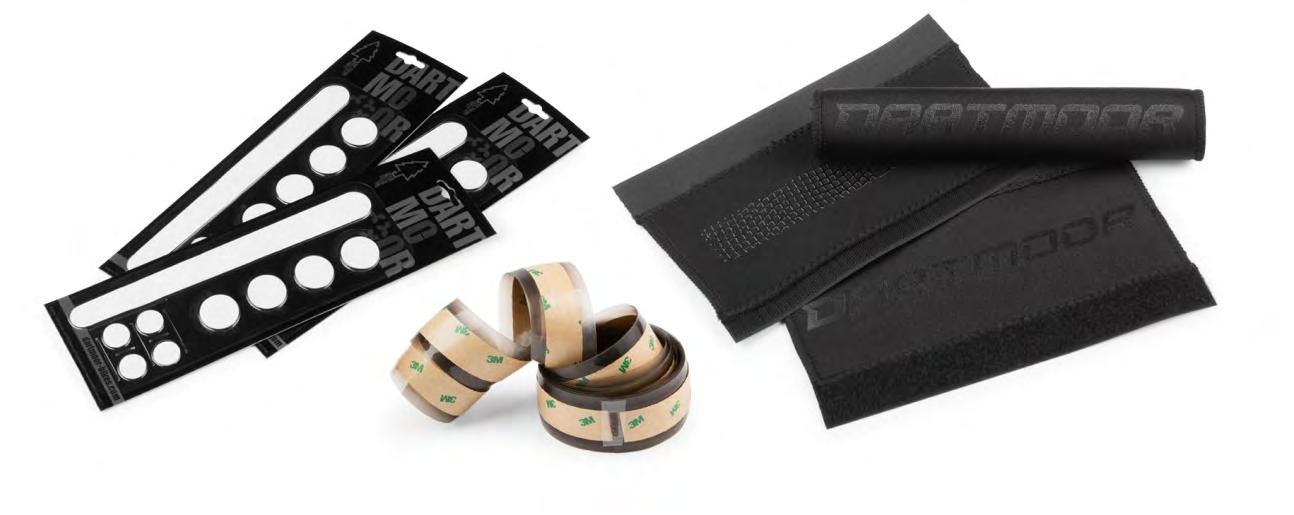
5. Service parts / accessories
6. Suspension settings
7. Rear-wheel assemble
8. General Information
9. Tightening torque
10. External and internal cable routing
11. Maintenance & safety controls
12. List of componens
1. INTRODUCTION – IMPORTANT INFORMATION AND WARNINGS
CAUTION: Please read this manual carefully. It contains important safety information.
WARNING: Extreme bicycle ride is a dangerous sport and requires an amazing amount of skills. By engaging in that type of activity user accepts the risk of injury or even death. Even the best bicycle will not help to drop perfectly if the user does not have sufficient skills. Also, the best protection equipment does not guarantee a hundred percent safety. Please note that in this kind of riding, a user can only trust his abilities and must accept the inherent risk. While riding a user can reach significant speeds and therefore face significant hazards and risks. Inspect a bicycle and equipment carefully and be sure that it is in perfect condition before each ride.
If possible consult with bike-park personnel, expert riders, and race officials on conditions and equipment advisable. Always wear appropriate safety gear, including an approved fullface helmet, full finger gloves, body armor, bright and visible clothing that is not so loose, that it can be tangled in the bicycle or objects at the side of the road or trail, shoes that will stay on your feet and will grip the pedals (make sure that shoe laces cannot get into moving parts, and never ride barefoot or in sandals). Always use protective eyewear to protect against dirt, dust, and bugs.

WARNING: Some of the service procedures require specialist tools and good mechanical skills. Therefore, to minimize the risk of serious or even fatal accidents, maintenance and assembly work on your bike should be carried out by an authorized bicycle workshop.
WARNING: Failure to maintain, check and properly adjust the suspension system may cause suspension malfunction, in a result of which a user may lose control and fall.
WARNING: Introducing changes in the suspension adjustment can alter the handling and braking character-
istics of your bicycle. It is forbidden to change the suspension adjustment unless a user is thoroughly familiar with the suspension system manufacturer’s instructions and recommendations. Users should always check for changes in the handling and braking characteristics of the bicycle after the suspension has been adjusted by taking a careful test ride in a safe area.
WARNING: As with all mechanical components, the frame is subjected to wear and high stresses. Different materials and components may react to wear or stress fatigue in different ways. If the design life of a component has been exceeded, it may suddenly fail possibly causing injuries to the rider. Any form of crack, scratches, or change of color in highly stressed areas indicates that the life of the component has been reached and it should be replaced.
IMPORTANT NOTICE: This manual is not intended as a comprehensive use, service, repair, or maintenance manual. Please consult your dealer for advice and your dealer may also be able to refer you to classes, clinics, or books on bicycle use, service, repair, or maintenance.
2. GENERAL RIDING INFORMATION
Riding a bicycle can be dangerous. Keep this in mind and be cautious at all times. See and be seen. Use lights and reflective clothing in low light conditions. Wearing a helmet when riding can protect the head and save a life.
Always conduct a pre-ride check (detailed information can be found further in this manual).
Never ride the bicycle if you observe any technical problems or have any doubts about the proper functioning of any elements in the bicycle. Keep the bike clean and well maintained.
It is strongly recommended to carry a pump, spare inner tube, patch kit, and a basic tool kit.
It could be required in case of a flat tire or other common mechanical problem. If any doubts or questions ask a bicycle dealer for advice on that issue.
If the bicycle is equipped with gears and user can choose a gear combination that is the most comfortable for riding conditions. Gears will allow a rider to maintain a constant rate of pedalling. Use lower gears for going uphill and higher gears for going downhill. Ease up on your pedalling pressure when you shift gears. Ask a bicycle dealer to give more advice on that issue if needed.
Pay attention to the brakes - they can be powerful and if activated too aggressively, may cause a crash. You should spend some time to get a better feel of the brakes on a side road or empty parking lot before the first ride. Avoid riding too fast, especially downhill. It is easy to lose control of the bicycle and crash at high speeds, and also you will find it very difficult to slow down especially if the hill is steep.
If a bike has been equipped with suspension, the increased speed a rider may develop will also increase the risk of injury. For example, the front of the bike may dive on the suspension fork while hard braking. A Rider can easily lose control and fall if he is not prepared for this.

Please, learn how to operate your suspension system safely. Thanks to the suspension the wheels can follow the terrain better, which improves control and comfort.
This improved capacity may provide an opportunity for riding faster, but riders should be careful, not to mistake the enhanced capabilities of the bicycle for their riding skills. Improving skills takes time and practice.
It is highly recommended to use locks to protect a bicycle from theft. Even if you are planning to be away from a bicycle for just a few minutes never leave your bike unlocked while unattended.
HARDTAILS: FREERIDE, ENDURO, TRAIL, FUNBIKE, DIRT


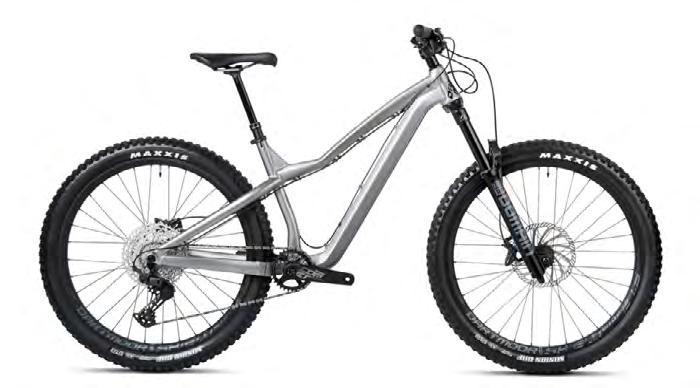
FREERIDE
HORNET PRO


A reliable and functional solution(system) could be simple. Based on an opinion that comes from rider’s feedback, Dartmoor enhances the ideas and provides new solutions which make every minute on trails full of fun and happiness.
A bicycle is a simple machine with massive potential. That is why designing frames from 100mm to 160mm of travel, Dartmoor chose simplicity and functionality.
DIRT/PUMPTRACK
BIKES & FRAMES RIDING STYLE CHART:
Freeride Enduro Trail Funbike Dirt/Pumptrack
ENDURO
Hornet Pro
Hornet
Primal Pro 29
Primal Pro 27.5
Primal Evo 29
Primal Evo 27.5
Primal Intro 29
Primal Intro 27.5
Sparrow Mullet
Sparrow Intro Mullet
Hornet 26
Streetfighter
Two6Player Pro Pike
Two6Player Pro Bomber
Two6Player Evo
Two6Player Pump
Gamer26
Gamer Intro 26
Gamer Pump 24
Gamer Intro 24
FREERIDE
Freeride bikes are downhill bikes tailored to the needs of ordinary people. Minimum stroke of the shock absorber 170 mm, solid frame, wide handlebars. All this is within the limits that can be mastered by intermediate riders. When driving fast, wide tires and sensitive hydraulic brakes are essential. The high position of the handlebars in relation to the saddle and the position of the rider shifted backwards ensure comfort when riding downhill. It is also possible to overcome flat sections. The weight of around 18 kg makes the climb very difficult, which is why freeriders use the lifts most often. It is definitely a bike for fans of extreme experiences.
Enduro bikes were created for long mountain trips in difficult terrain, riding in the mountains, and often unpaved routes. These bikes are more versatile and also allow a rider to ride uphill, although it is not the most pleasant. The travel of shock absorption is smaller than that of downhill bikes. The most common are full-suspension bikes with 160mm of travel, but there are also hardtails. They have a fairly short stiff frame, an adjustable seat post, and hydraulic brakes with large discs. Sometimes there is a front derailleur. Some models even allow you to quickly change the geometry of the frame, i.e. adapt the bike to the climb or descent. Weight approx. 12-16 kg. In enduro, the ability to efficiently overcome not only winding paths, trails full of unevenness, sharp descents, and demanding climbs will be useful. It is up to the rider which route he will take because he has full freedom in this matter. There are no inaccessible places for enduro bikes, and the more diverse the better. You can go crazy and bounce a bit off the ground. It is not the results or the quick time that counts, only having fun. This is the essence of a real enduro. A bicycle should be free, reliable, and its user should be able to use its full potential. In enduro, a rider chooses his path.
TRAIL
Trail bikes allow riders comfortable uphills on long mountain trails, combining the features of enduro and cross country. They are available in full-suspension or hardtail versions. Shock absorption at a level between 130 mm - 150 mm, will allow a rider to easily deal with unevenness and obstacles, such as steep climbs. They allow for more aggressive driving than cross country but are less dynamic. Compared to the enduro, they are a bit lighter and allow for a more pleasant ride uphill. The manoeuvrability of these bikes is influenced by the wide handlebars, adjustable seatposts, and the weighting of the front wheel during the descent. Wheels Are usually 29 inches, although trail bikes with a combination of 29 „front and 27.5” rear wheels (the so-called Mullet) are also popular, as well as with both 27.5 „wheels. The use of wide tires makes it easier to overcome obstacles in the field. Based on the emerging bike parks, a group of trail bike enthusiasts has emerged. If someone would like to go on a long trip on singletrack and not the most difficult mountain paths for pleasure, he should opt for a comfortable trail bike rather than the enduro.
FUNBIKE
Funbike is a bike built to deliver maximum fun and driving pleasure. Once called dual - truly versatile a bicycle, designed with a wide range in mind driving styles.
Regardless of whether you feel like it for a ride on forest paths, racing on trails, or a teaser for jumping on dirt and pumping on pumptracks - funbike provides stable and comfortable driving, anywhere you will go. It will definitely enable you to learn quick first tricks and more advanced tricks.
Provides amazing versatility thanks to forks with a stroke of 100 mm to 160 mm, and agility thanks to 26-inch wheels!
Do you need a rear derailleur? No worries! This is the perfect choice for a rider who is missing from a typical dirt bike gear, a front brake, and a little more pitch in a fork. Each of our funbikes is equipped with a Microshift derailleur with a clutch with a large spread of gears, which ensures comfortable climbs and movement between places, as well as choosing the right gear ratios during evolution requiring speed control. For this reason, we focused on durable hydraulic brakes - reliable when driving off-road and with adequate traction control.
DIRT/PUMPTRACK

DIRT bikes are a combination of a MTB and a BMX. They are mainly used to perform evolutions, jumps on jumps, pumptracks / skateparks, riding over city obstacles, using walls, stairs, etc.
The frames without rear suspension are made of 6061-T aluminum.
The small size, low-sloping top tube, and large angle of the head tube make this geometry good for running the bike on a flat surface and performing acrobatics in the air. Singlespeed drive. The wheels are 26 inches (Two6Player Pro Bomber, Two6Player Evo, Two6player Pump, Gamer 26, Gamer Intro 26) and 24 inches (Gamer Pump 24, Gamer Intro 24). The tires are usually 2.3 inches and 2.1 inches wide with a fairly gentle tread.
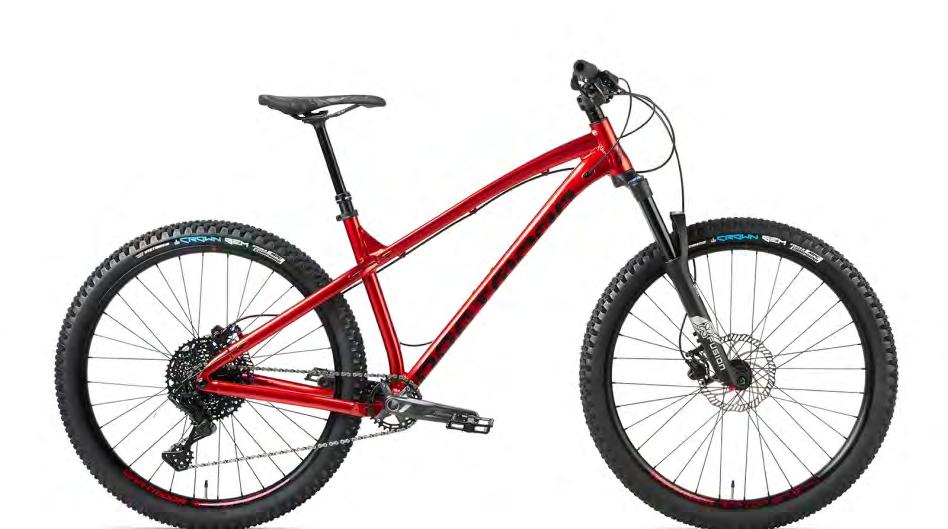
Reach: horizontal distance from BB center to HT center


Stack: vertical distance from BB center to HT center
ST: seat tube lenght (BB center to ST top)
TT: top tube length (actual)
ETT: top tube lenght (effective)

CS: chain stay length


HT: head tube length
HT angle: head tube angle
EST angle: seat tube angle (effective)

BB drop: bottom bracket height (BB center to WB)
WB: wheel base
Reach: horizontal distance from BB center to HT center


Stack: vertical distance from BB center to HT center
ST: seat tube lenght (BB center to ST top)
TT: top tube length (actual)
ETT: top tube lenght (effective)
CS: chain stay length


HT: head tube length
HT angle: head tube angle
EST angle: seat tube angle (effective)

BB drop: bottom bracket height (BB center to WB)
WB: wheel base
Reach: horizontal distance from BB center to HT center


Stack: vertical distance from BB center to HT center
ST: seat tube lenght (BB center to ST top)
TT: top tube length (actual)
ETT: top tube lenght (effective)


CS: chain stay length
HT: head tube length
HT angle: head tube angle
EST angle: seat tube angle (effective)

BB drop: bottom bracket height (BB center to WB)
WB: wheel base
Reach: horizontal distance from BB center to HT center


Stack: vertical distance from BB center to HT center
ST: seat tube lenght (BB center to ST top)
TT: top tube length (actual)
ETT: top tube lenght (effective)
CS: chain stay length

HT: head tube length
HT angle: head tube angle
EST angle: seat tube angle (effective)

BB drop: bottom bracket height (BB center to WB)
WB: wheel base
Reach: horizontal distance from BB center to HT center


Stack: vertical distance from BB center to HT center
ST: seat tube lenght (BB center to ST top)
TT: top tube length (actual)
ETT: top tube lenght (effective)
CS: chain stay length


HT: head tube length
HT angle: head tube angle
EST angle: seat tube angle (effective)

BB drop: bottom bracket height (BB center to WB)
WB: wheel base
Reach: horizontal distance from BB center to HT center


Stack: vertical distance from BB center to HT center
ST: seat tube lenght (BB center to ST top)
TT: top tube length (actual)
ETT: top tube lenght (effective)
CS: chain stay length


HT: head tube length
HT angle: head tube angle
EST angle: seat tube angle (effective)

BB drop: bottom bracket height (BB center to WB)
WB: wheel base
Reach: horizontal distance from BB center to HT center


Stack: vertical distance from BB center to HT center
ST: seat tube lenght (BB center to ST top)
TT: top tube length (actual)
ETT: top tube lenght (effective)
CS: chain stay length


HT: head tube length
HT angle: head tube angle
EST angle: seat tube angle (effective)

BB drop: bottom bracket height (BB center to WB)
WB: wheel base
Reach: horizontal distance from BB center to HT center


Stack: vertical distance from BB center to HT center
ST: seat tube lenght (BB center to ST top)
TT: top tube length (actual)
ETT: top tube lenght (effective)

CS: chain stay length

HT: head tube length
HT angle: head tube angle
EST angle: seat tube angle (effective)

BB drop: bottom bracket height (BB center to WB)
WB: wheel base
Reach: horizontal distance from BB center to HT center


Stack: vertical distance from BB center to HT center
ST: seat tube lenght (BB center to ST top)
TT: top tube length (actual)
ETT: top tube lenght (effective)

CS: chain stay length

HT: head tube length
HT angle: head tube angle
EST angle: seat tube angle (effective)

BB drop: bottom bracket height (BB center to WB)
WB: wheel base
Reach: horizontal distance from BB center to HT center


Stack: vertical distance from BB center to HT center
ST: seat tube lenght (BB center to ST top)
TT: top tube length (actual)
ETT: top tube lenght (effective)
CS: chain stay length


HT: head tube length
HT angle: head tube angle
EST angle: seat tube angle (effective)

BB drop: bottom bracket height (BB center to WB)
WB: wheel base


PRIMAL EVO 27.5
PRIMAL PRO 27.5 PRIMAL INTRO 27.5


5. SERVICE PARTS
Hornet, Hornet26, Hornet Pro derailleur hanger:
Currently, the most commonly used hub size standard is Boost (technology) - 148x12 mm for the rear hub, and 110x15 mm for the front hub. It is a relatively new solution in which the wider track increases the stiffness of the wheel, maneuverability, and dynamics of the bicycle. Other, slightly older standards for hub sizes are 142x12 mm and 135x10mm for the rear hub, as well as 100x15 mm, 110x20 mm, and 100x9 mm for the front hub.

Derailleur hanger for singlespeed frames with horizontal dropuots:
An instructional video showing how to install derailleur hanger to the frame Watch the video
An instructional video showing how to assemble a suspension bike Watch the video
Derailleur hanger:
1. Derailleur hanger


2. Derailleur hanger nut
Sparrow derailleur hanger: rear hub size 135x10 mm


Two6Player Pro, Two6Player Pump, Two6Player, Gamer 26, Gamer 24: rear hub size: 135x10 mm
Primal 27.5 and Primal 29 (2022/2023) derailleur hanger - compatible with SRAM UDH

Streetfighter derailleur hanger: rear hub size: 135x10 mm
Axle frame M12x1.75 with a lever for the hub spacing 142x12 mm or 148x12 mm. The frameset includes an axle without a lever. An option with a lever can be purchased separately.

Hornet Pro, Hornet, Primal Pro 29, Primal Evo 29, Primal Intro 29, Primal Pro 27.5, Primal Evo 27.5, Primal Intro 27.5, Hornet 26: rear hub size: 148x12 mm
UHD compatible derailleur hanger/frame axle assembly.
6. SUSPENNSION SETTINGS
INITIAL SAG
Suspension settings are a matter of personal preference. Some riders prefer a soft setup, others a hard setup. Depending on the riding style, skills, and conditions on the route. The suspension on a trail/ enduro bike works fine with approximately 20% -30% initial sag. For the front shock, the value of 20-25% should be assumed. Before starting work, set the return damping to the fully open position.

To measure the SAG, follow the instructions/indications below: Move the O-ring on the stanchion so it touches the fork seal, the same for the rear shock
• Stand on the pedals with your full body weight with full equipment: protective armor, helmet, neck protector, water bottle or water bag, etc. It is important that the equipment and clothing reflect the real riding conditions to give the most accurate results. While standing on the bike, bend the suspension several times, then push the O-ring against the shock seals again. It is best to have someone to help, but you can deal with it yourself, for example by leaning against the wall of the building.
• Get off the bike carefully and measure the SAG with a ruler or tape measure printed on the stanchion, or ask someone to read the value on the scale when standing on the bike in a neutral position (slightly bent knees and hands in elbows). Inflate or deflate the damper until the desired deflection of the shock is achieved.
It is best to set the front shock return damping as follows:
• Start by unscrewing the damper to the extreme position as it was in the case of the damper. Stand next to the bicycle, depress the shock as far as possible, and release it vigorously. Observe that the front wheel is clear of the ground. Increase the damping by two clicks by using the adjuster on the bottom of the right shock leg, turning towards the „turtle” symbol („+”; „slow”).
• Repeat this process until the wheel stops springing off the ground. The basic setting obtained in this way can be corrected on the trail depending on the driving conditions and individual preferences.
• Finally, get on the bike and on a straight road, vigorously bending the suspension and check that the front and rear work evenly. By pressing the suspension in this way, bend it in the range of 80-90%, if it is difficult, it may turn out that the shock or damper needs to be adjusted in terms of the air chamber capacity. To do this, contact an experienced service provider who will adjust the size of the chamber with the help of tokens.
COMPRESSION – SPEED OF COMPRESSION (DEFLECTION)
Most air shocks have a compression speed damping adjustment implemented by a single knob. It enables smooth or gradual regulation until the shock is blocked.
This adjustment is most often used while driving, adapting the shock to the type of route. The fully open position is most often used when descending on uneven terrain when we want the best traction. Slowing down the compression speed to about half
of the range is used in normal riding on flat sections and in the case of riding on flow routes so that the suspension does not absorb the user’s speed while riding on moguls. This setting is the most used and the most universal, also for people who like to jump on a bike. The shock absorbs energy when hitting a punch, so some riders prefer to increase compression damping. The extreme setting is the least used, most often when climbing steep climbs.
More advanced designs of the shock, mount a damper with two regulators, fast and slow compression. Slow compression damping acts on the first half of the shock travel, mainly when braking, negotiating steep descents, rides, or moguls. Increasing it improves the efficiency of pedaling, prevents „swinging” and reduces the collapse of the suspension when overcoming the above-mentioned elements. Similar to the case when you have only one compression knob. Therefore, the adjustment is made in the same way.

7. REAR WHEEL ASSEMBLY
To properly install the rear wheel:
• put the wheel into the dropouts (depending on frame horizontal or with integrated chain tensioner)
• make sure that the wheel is axially aligned and that the brake disc is properly seated in the brake caliper

• make sure the chain is positioned on the sprocket
• assembly the bolts/nuts from each side of hub without tightening
• move rear wheel backwards ensuring the proper tension of the chain
• tighten the bolts/nuts with a torque wrench to 20Nm.


