55 Fantastic Japanese Knitting Stitches: (Includes 25 Projects) Kotomi Hayashi
Visit to download the full and correct content document: https://ebookmass.com/product/55-fantastic-japanese-knitting-stitches-includes-25-pr ojects-kotomi-hayashi/


Visit to download the full and correct content document: https://ebookmass.com/product/55-fantastic-japanese-knitting-stitches-includes-25-pr ojects-kotomi-hayashi/


Abbreviations used in this book:
BO bind off ch chain (crochet)
CO cast on dec decrease
inc increase
ktbl knit through back loop
LN left needle
m1 make 1: pick up the strand of yarn before the next stitch, place it on LN and ktbl
m1p make 1: pick up the strand of yarn before the next stitch, place it on LN and ktbl
ptbl purl through back loop
PU pick up and knit
RN right needle
skp slip 1, knit 1, pass slipped st over
sl slip
st stitch
wyif with yarn in front yo yarn over
Please note:

Unless a crochet cast-on method is explicitly mentioned as being provisional—and therefore using waste yarn— it’s advisable to use the same yarn as for the body of knitting, as the crochet chain will not be removed later.
For me, there are two things I enjoy about knitting. Of course, making something goes without saying, but above and beyond that, one of these pleasures is to think about the interplay of colors, such as in colorwork stitch patterns. The other is to enjoy the pattern that is created simply by changing my technique when knitting in a single color such as with Aran and Gansey sweaters.

All knitting is basically a combination of knit and purl stitches, which can be combined in an infinite number of stitch patterns which we thoroughly enjoy. I have acquired many stitch dictionaries over the years, but among them, there are 5 books I leaf through if I have time: 400 Knitting Stitches, Mary Thomas’ Book of Knitting Patterns, the German book Omas Strickgeheimnisse 200 bezaubernde Muster, and both the 1953 and 1973 editions of Silmus-Kudumine by Estonian knitter Claire Hallik.
Many books list names for each stitch pattern, and I am attracted to these names and want to knit all of them. It’s quite fun because there are names such as “butterfly stitch” taken from the shape of the stitch pattern and names given due to the knitting technique employed. There is a lace stitch pattern I know called “frost flower.” It’s mentioned in various books under this name, so it must have been called that for a long time.


When making sample swatches for the stitch patterns in this book, I approached the task with a lot of imagination. At times I found it more interesting to knit with thick yarn, at other times I wondered what would happen if I knit with thin yarn, and at others still I wondered if it was suitable for circular knitting. Also, even with stitches usually worked in a single color, I experimented with adding another color on various rows to create a stitch pattern with a different impression.
I also devised stitch diagrams and knitting method illustrations that are so vital to knitters. I was particularly worried about pages featuring brioche stitches. I myself have struggled with these brioche stitch symbols for a long time, finding them strange yet unavoidable. It’s my book, so I can hardly include stitch diagrams that I don’t understand. So I added explanations to the symbols step by step, and on pages with unusual instructions, I also included a knitting illustration along with the symbol diagram so that I, too, could knit it.
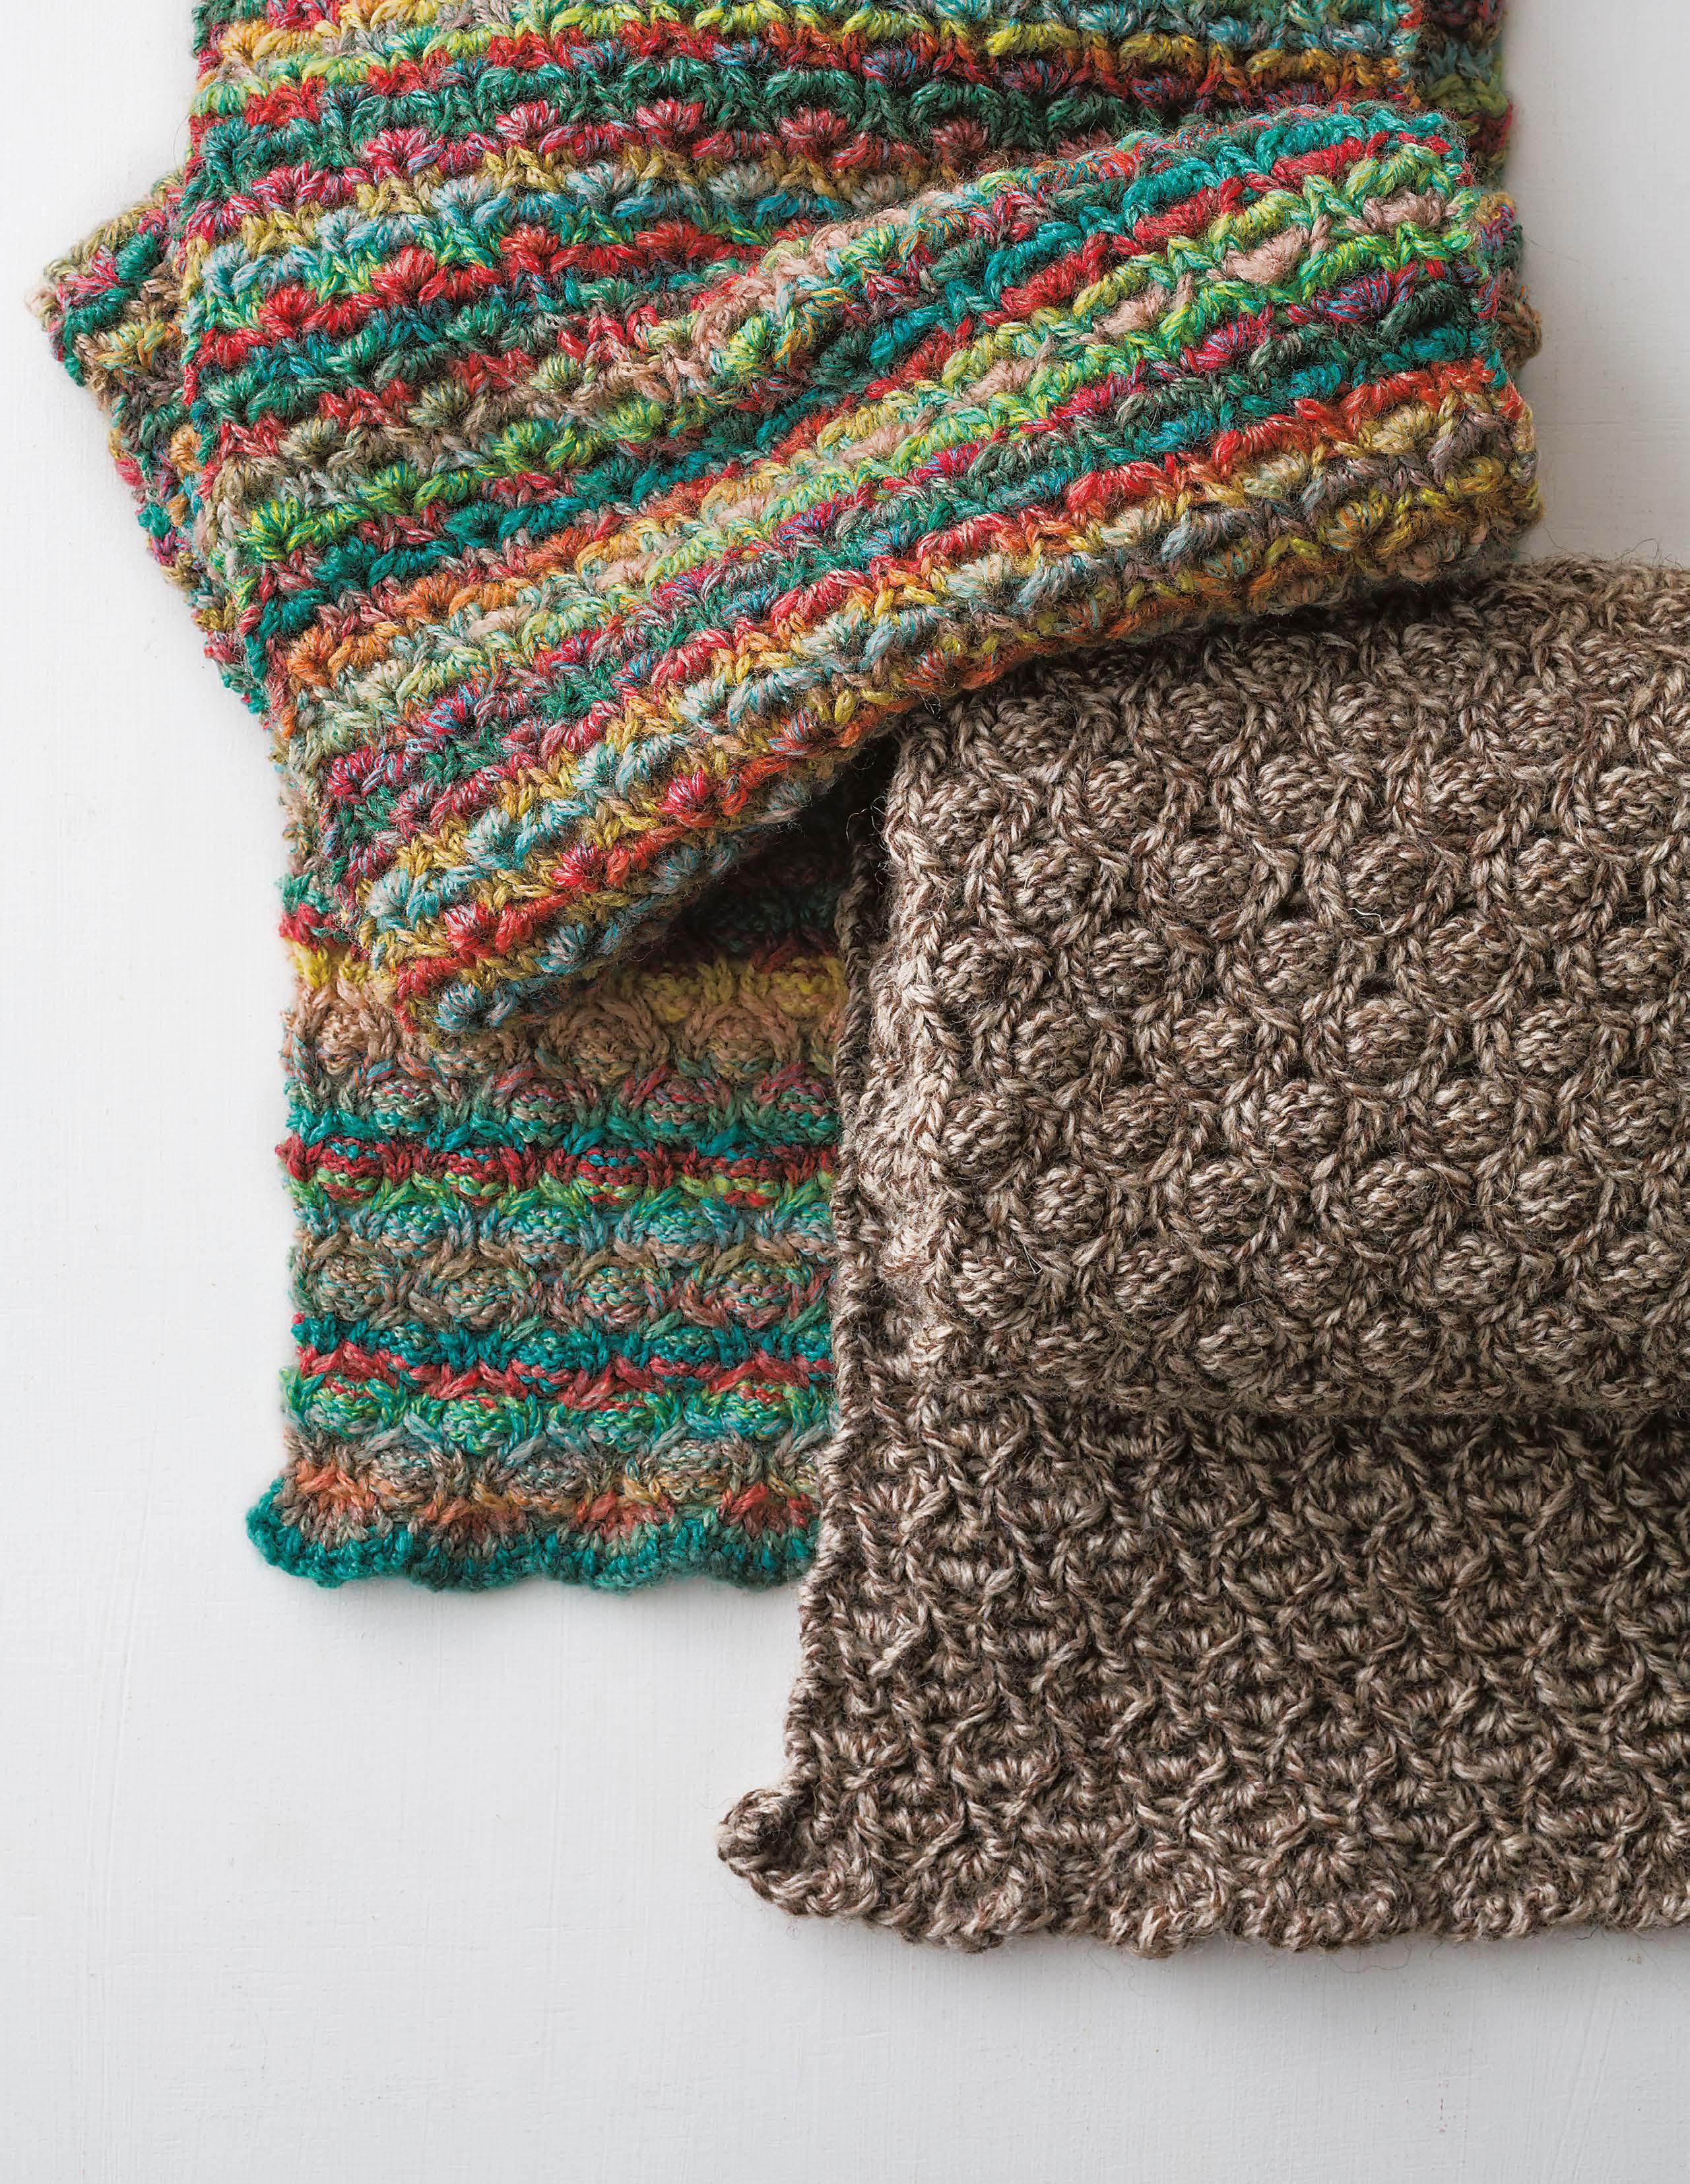
I introduced twenty-five simple shawls, cowls, shrugs, etc. to show the appeal of these knitted fabrics, and the rest are introduced with knitted swatches. Among these there are also some with an attractive wrong side, so I have included photos showing the wrong side. Also, while they are not stitch patterns and therefore may not stand out, I also used techniques that can be applied to other works (casting on, binding off, etc.), so please take a close look at the instruction pages.


The works are all items that are very useful in my own life, especially if I make the shrugs a little smaller—they are really comfortable to wear, warm, and indispensable. Each of the shawls is basically knitted until the yarn is all used up, so even if it ends up a little short, you can fasten it with a shawl pin or a button to make the neckline firmer and increase the warmth. I hope you enjoy wearing them.
—Kotomi HayashiJapanese stitch charts use certain conventions. Read through this section before beginning to ensure that you’re familiar with how the information is presented.
The stitch patterns in this book are presented as charts, using symbols to describe each stitch. The single most important thing to remember about working from charts is this (in bold for emphasis):
The chart shows the right side of the work. It’s a visual representation of what your work will look like when it’s done. Each symbol describes what the stitch will look like on the right side, not necessarily what you execute. For example, to create a knit stitch on the right side, you must purl on the reverse side.
If you’re knitting back and forth:
• On the right side, read the chart from right to left, in the same sequence that you work the stitches.
• On the reverse (or “wrong”) side, read the chart from left to right, and reverse the stitches, so that your stitches will show up correctly on the right side.
• A few charts include some patterning on the wrong side. Look for a footnote or a definition in “additional symbols” to tell you how to work the WS version of the stitch.
If you’re knitting in the round, read every row from right to left. There’s no need to reverse stitches.
Odd-numbered rows are RS and even-numbered rows are WS.
The first row of each chart is the cast-on row, almost always shown as knit and indicated with “CO.” Row numbers appear on the right side of the chart, and stitch
numbers at the bottom. The rightmost column and the bottommost row are not stitches, but holders for the numbers. Notice that only the repeated stitches and rows are numbered, and the repeat may not begin in the lower right corner. There’s a heavy line around the repeat on the chart, as well. If there are stitches to the right of the repeat, use those stitches to begin your item, and mirrorimage them on the left after the end of the last repeat. These conventions apply to the stitch patterns illustrated on pages 7 to 63; the repeats and heavy lines are not included in the charts for the projects.
The charts for the projects may include a gap, vertical and/ or horizontal. There isn’t enough space to include every stitch, so the gap tells you to “carry on as established.”
Japanese stitch symbols are drawn to resemble the finished stitch, and once you’re accustomed to them, you’ll see the visual correlation. The stitch symbols in this book are defined in a couple of places: next to the appropriate chart, or in the “Additional Symbols” table on page 96.
In almost all charts, there are lots of blank boxes that form the “background” of the stitch pattern. Check the key at the bottom left corner to find how to read the blank. For instance:
tells you that a blank box looks like a knit stitch on the right side.
tells you that a blank box looks like a purl stitch on the right side.
This convention keeps the chart cleaner and easier to read – your eye can focus on what you have to do, without a lot of visual “noise” from the background stitches . Remember to think of this as what the RS of your knitting will look like.

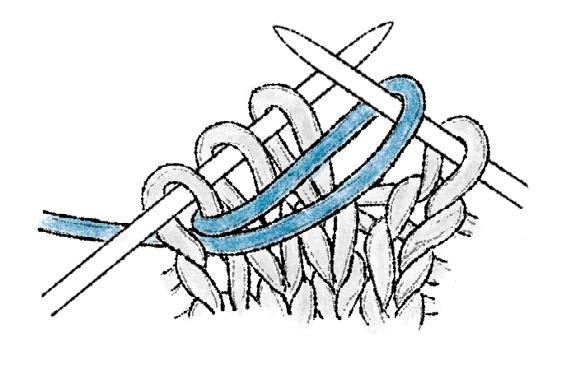
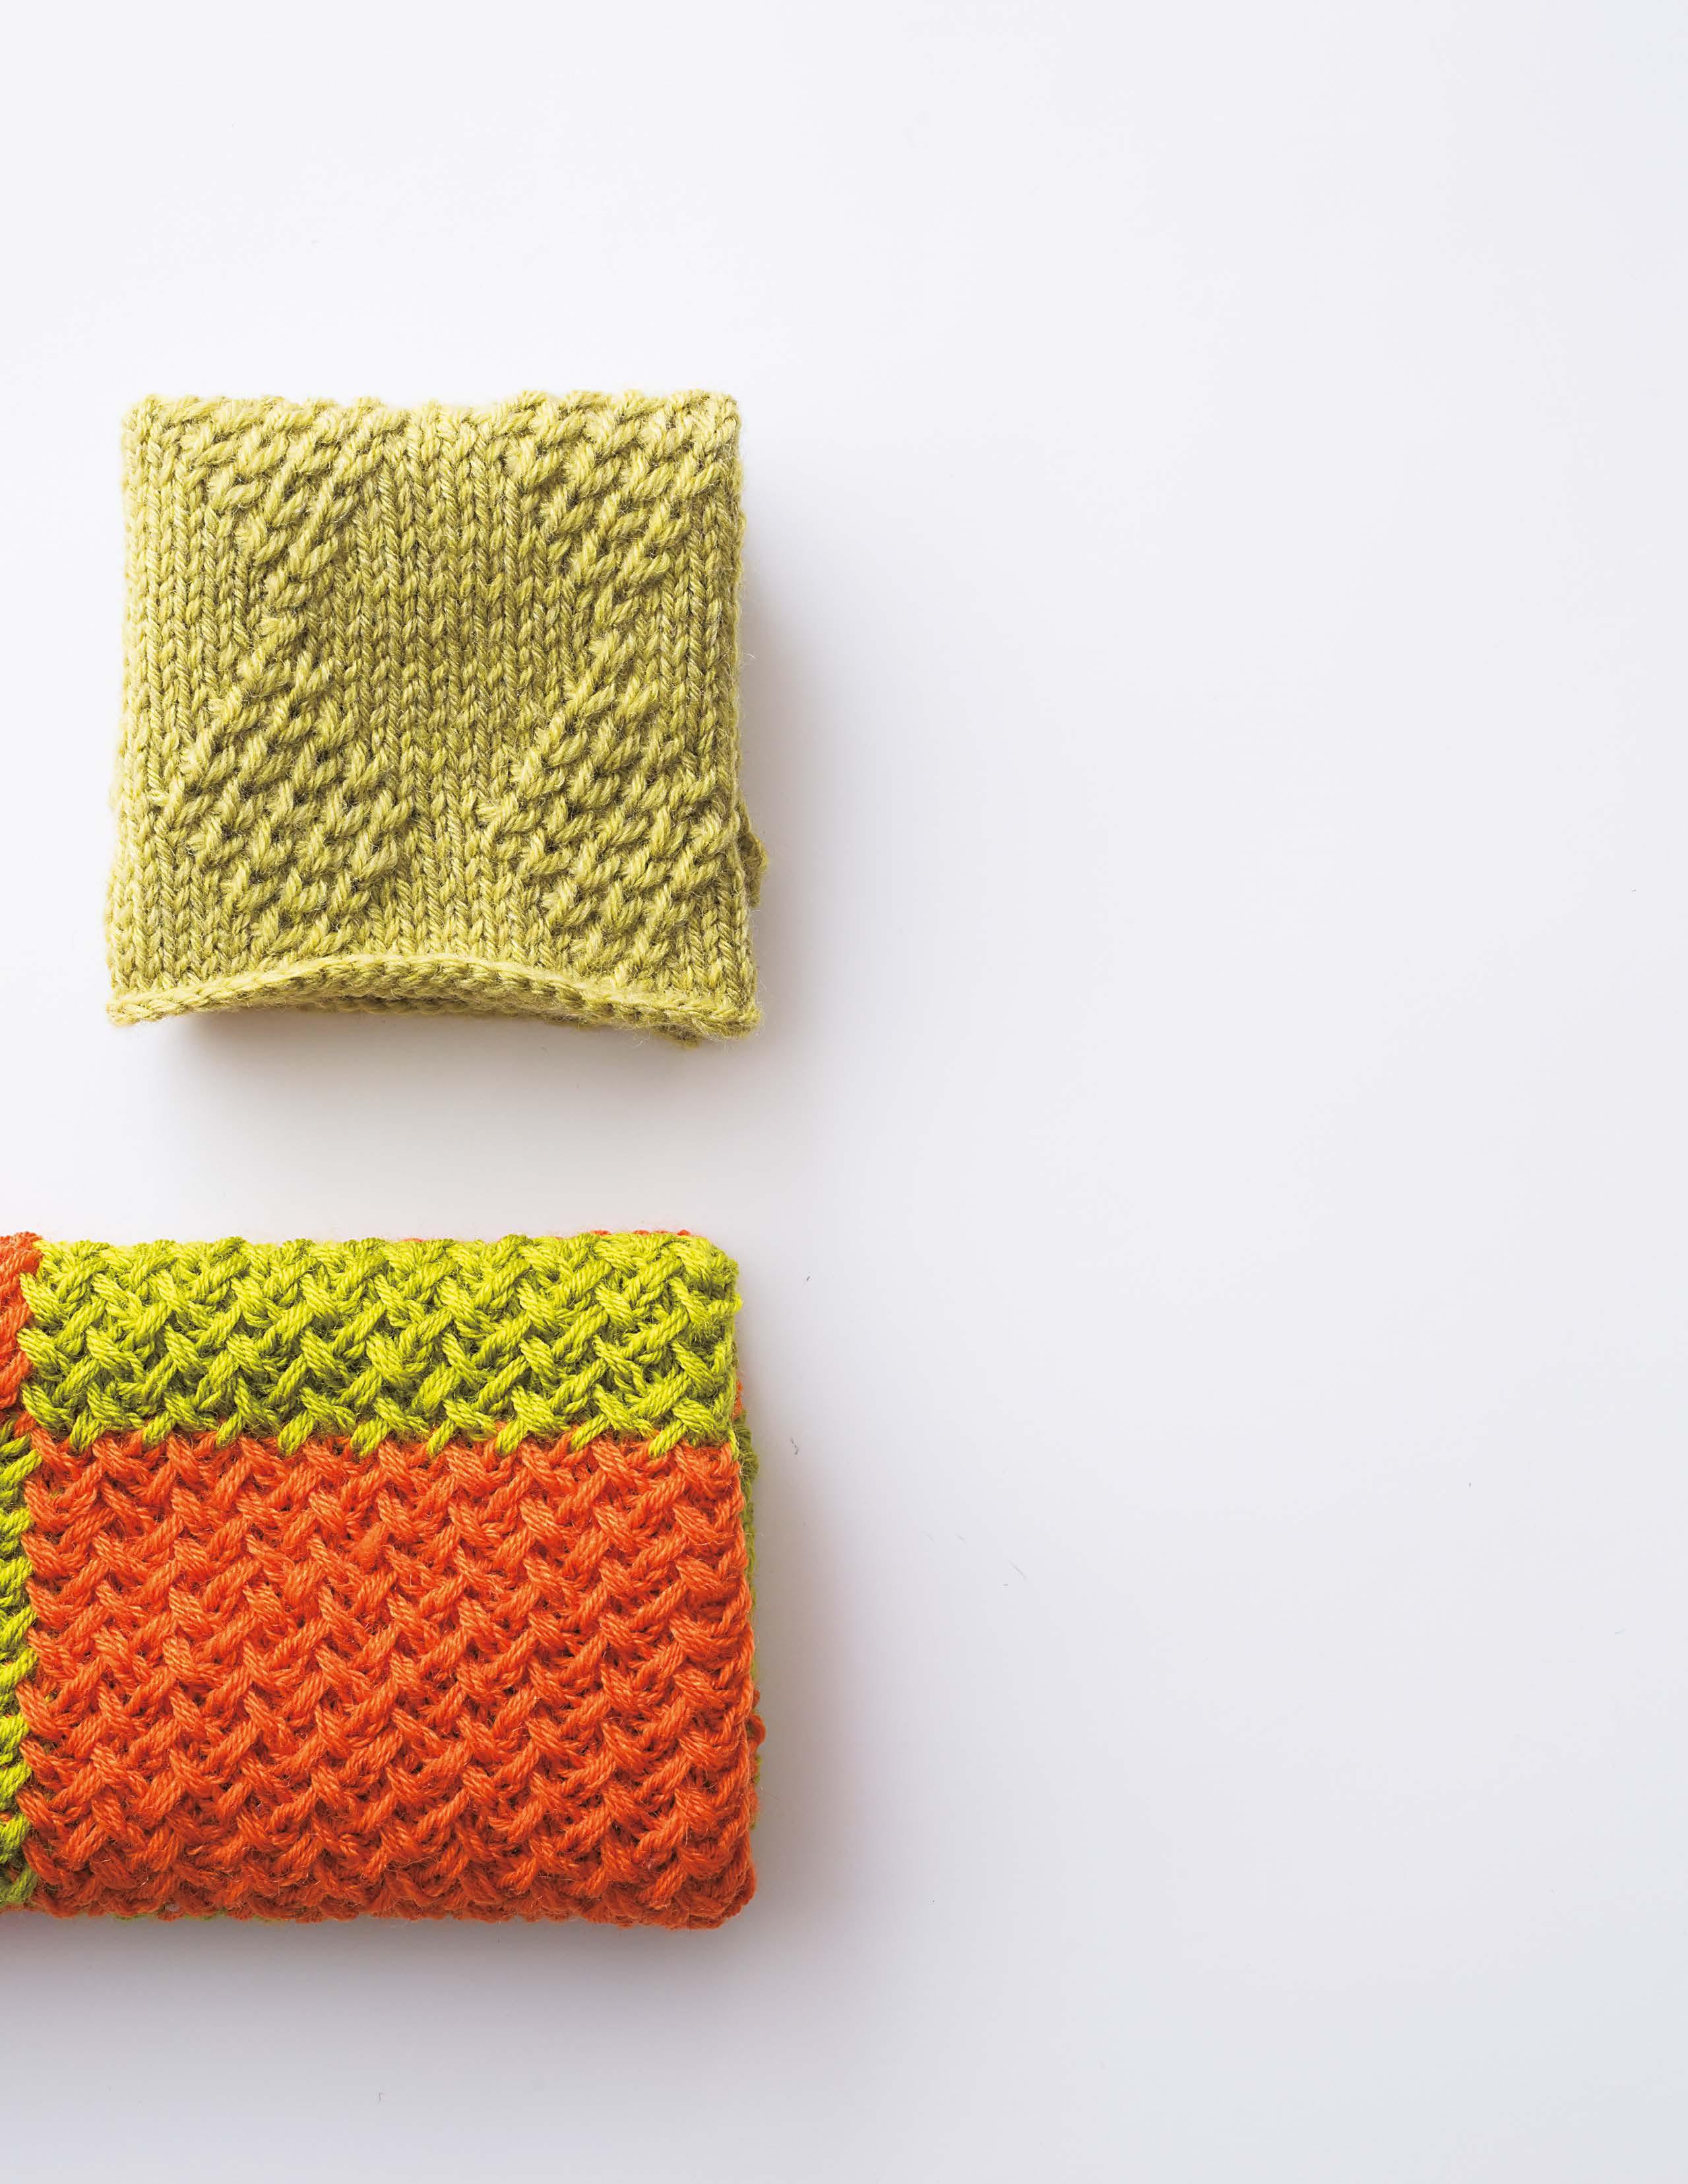
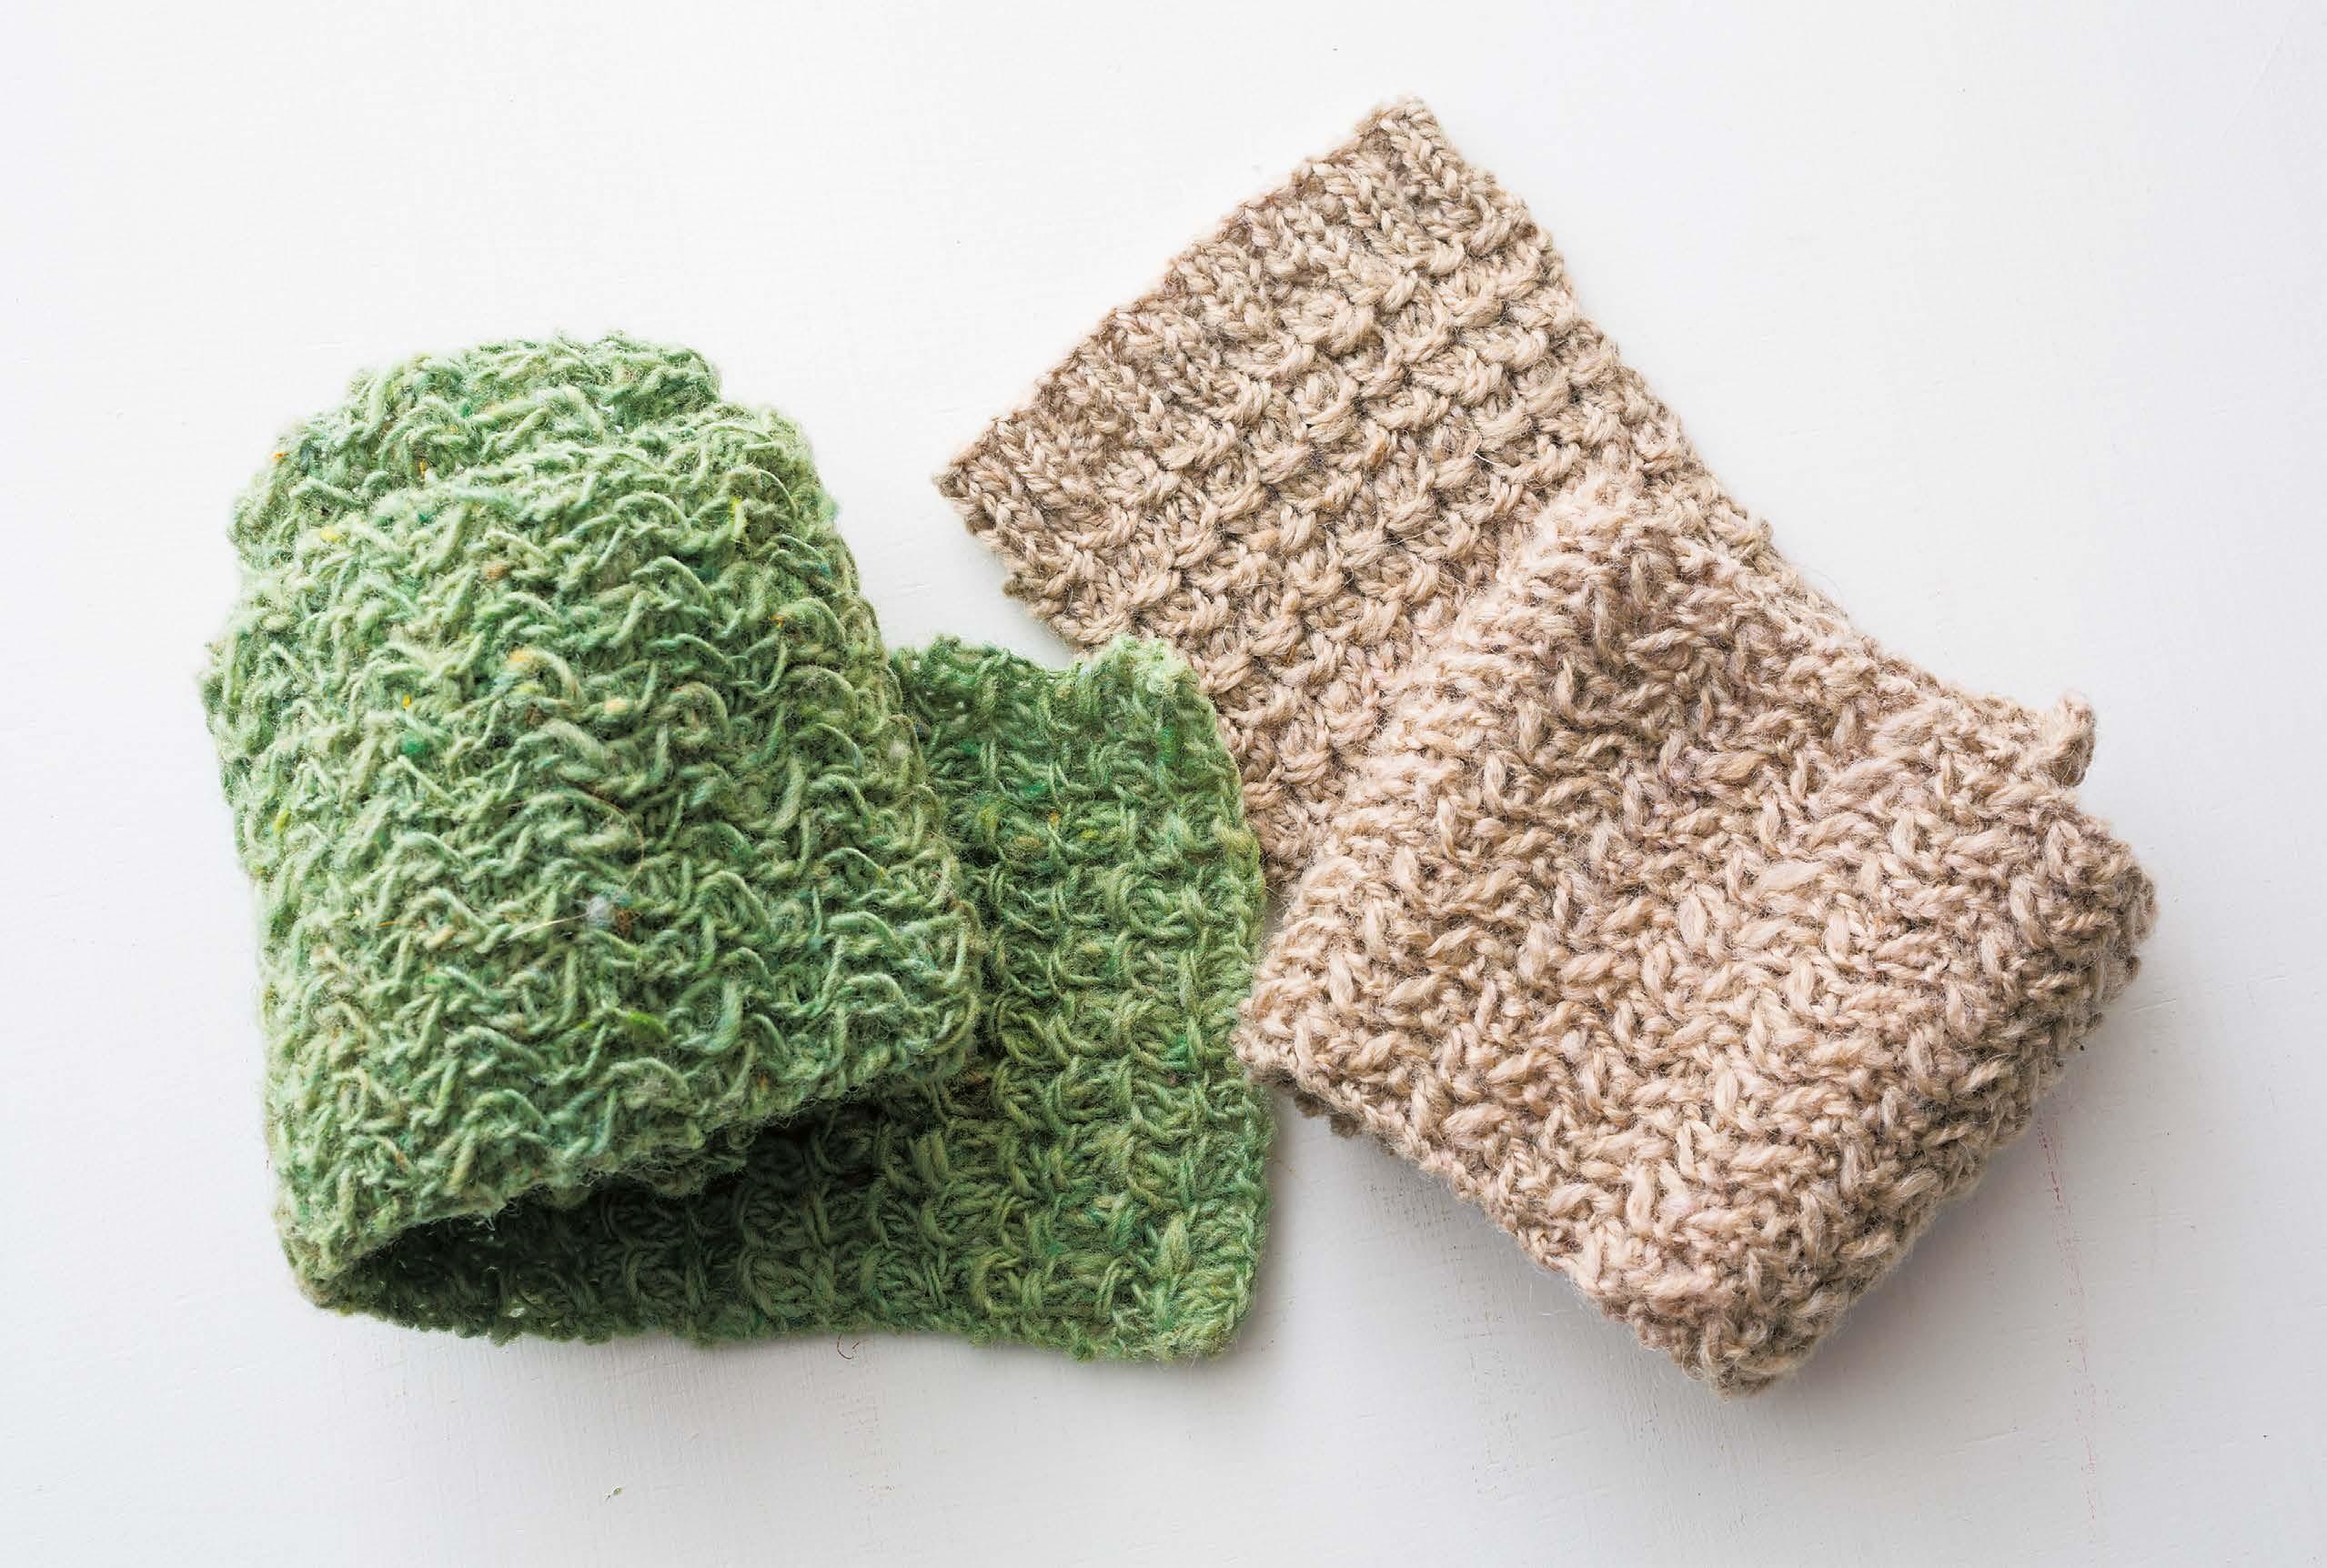
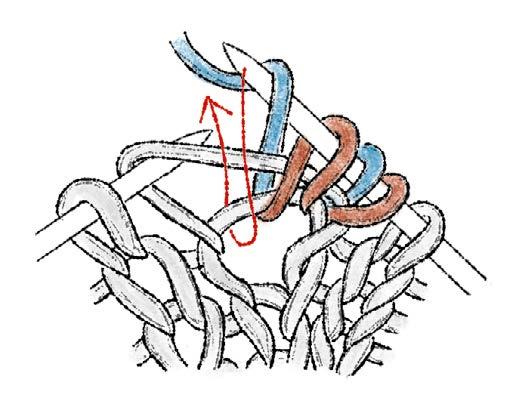
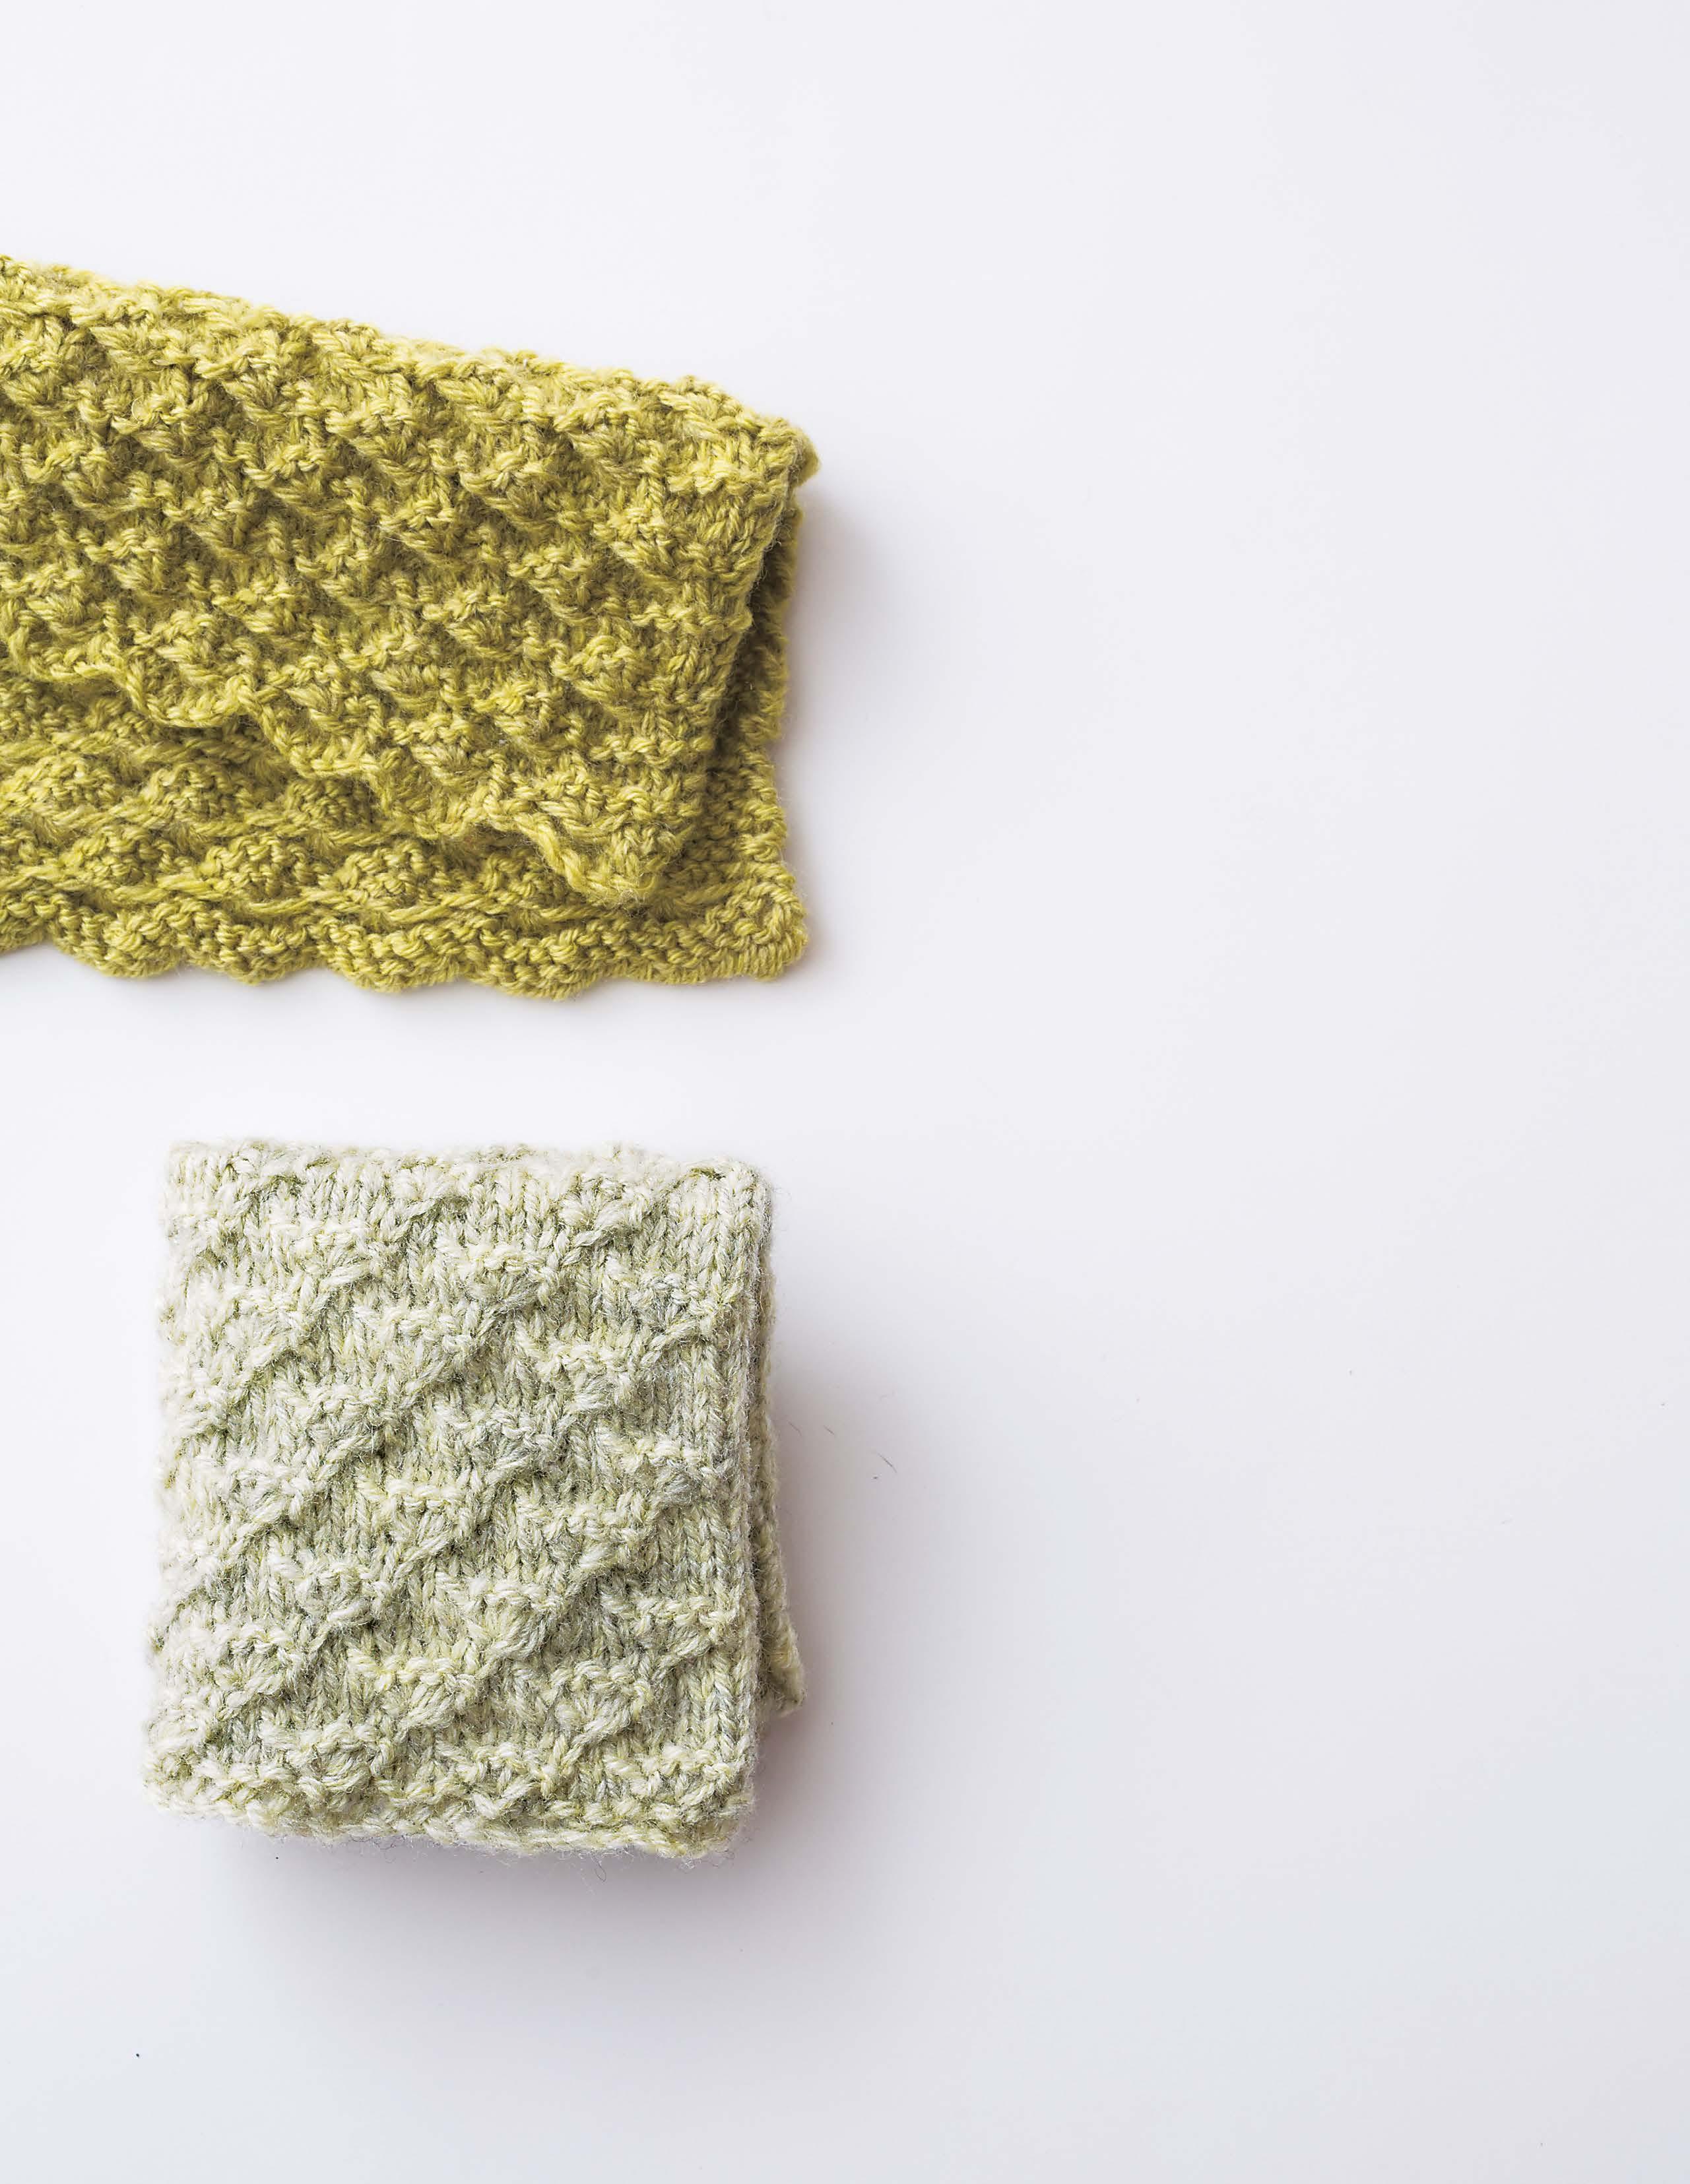
An interesting way of knitting by incorporating slip stitches into cable (crossed) stitches.

A knitted fabric made from a combination of cable knitting and slip stitch.
Since it uses two colors, the slipped stitches appear clearly on the surface like a chain stitch.
This chart illustrates how to work the stitch back and forth. Work a row in one color, then slide your work to the other end of the needle and work the next row in the new color in the same direction. Knitting in the round is recommended for this knitted fabric.
This is because the stitch pattern moves diagonally, so if you knit it flat, the pattern will lose its shape at the edges, while if you knit it in the round, you don’t have to worry about it.
Thinking about how to use the finished product is one of the pleasures of making it.
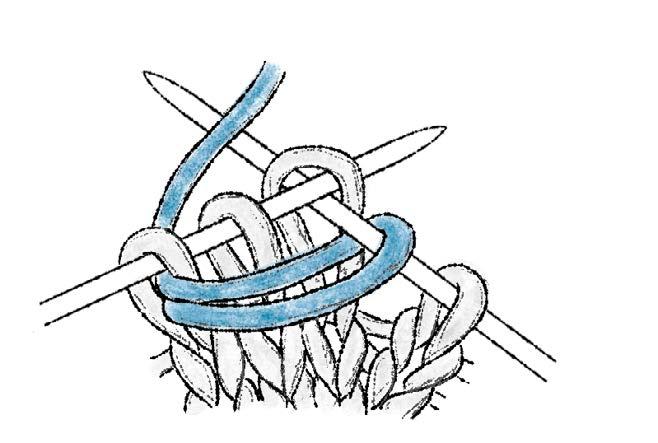
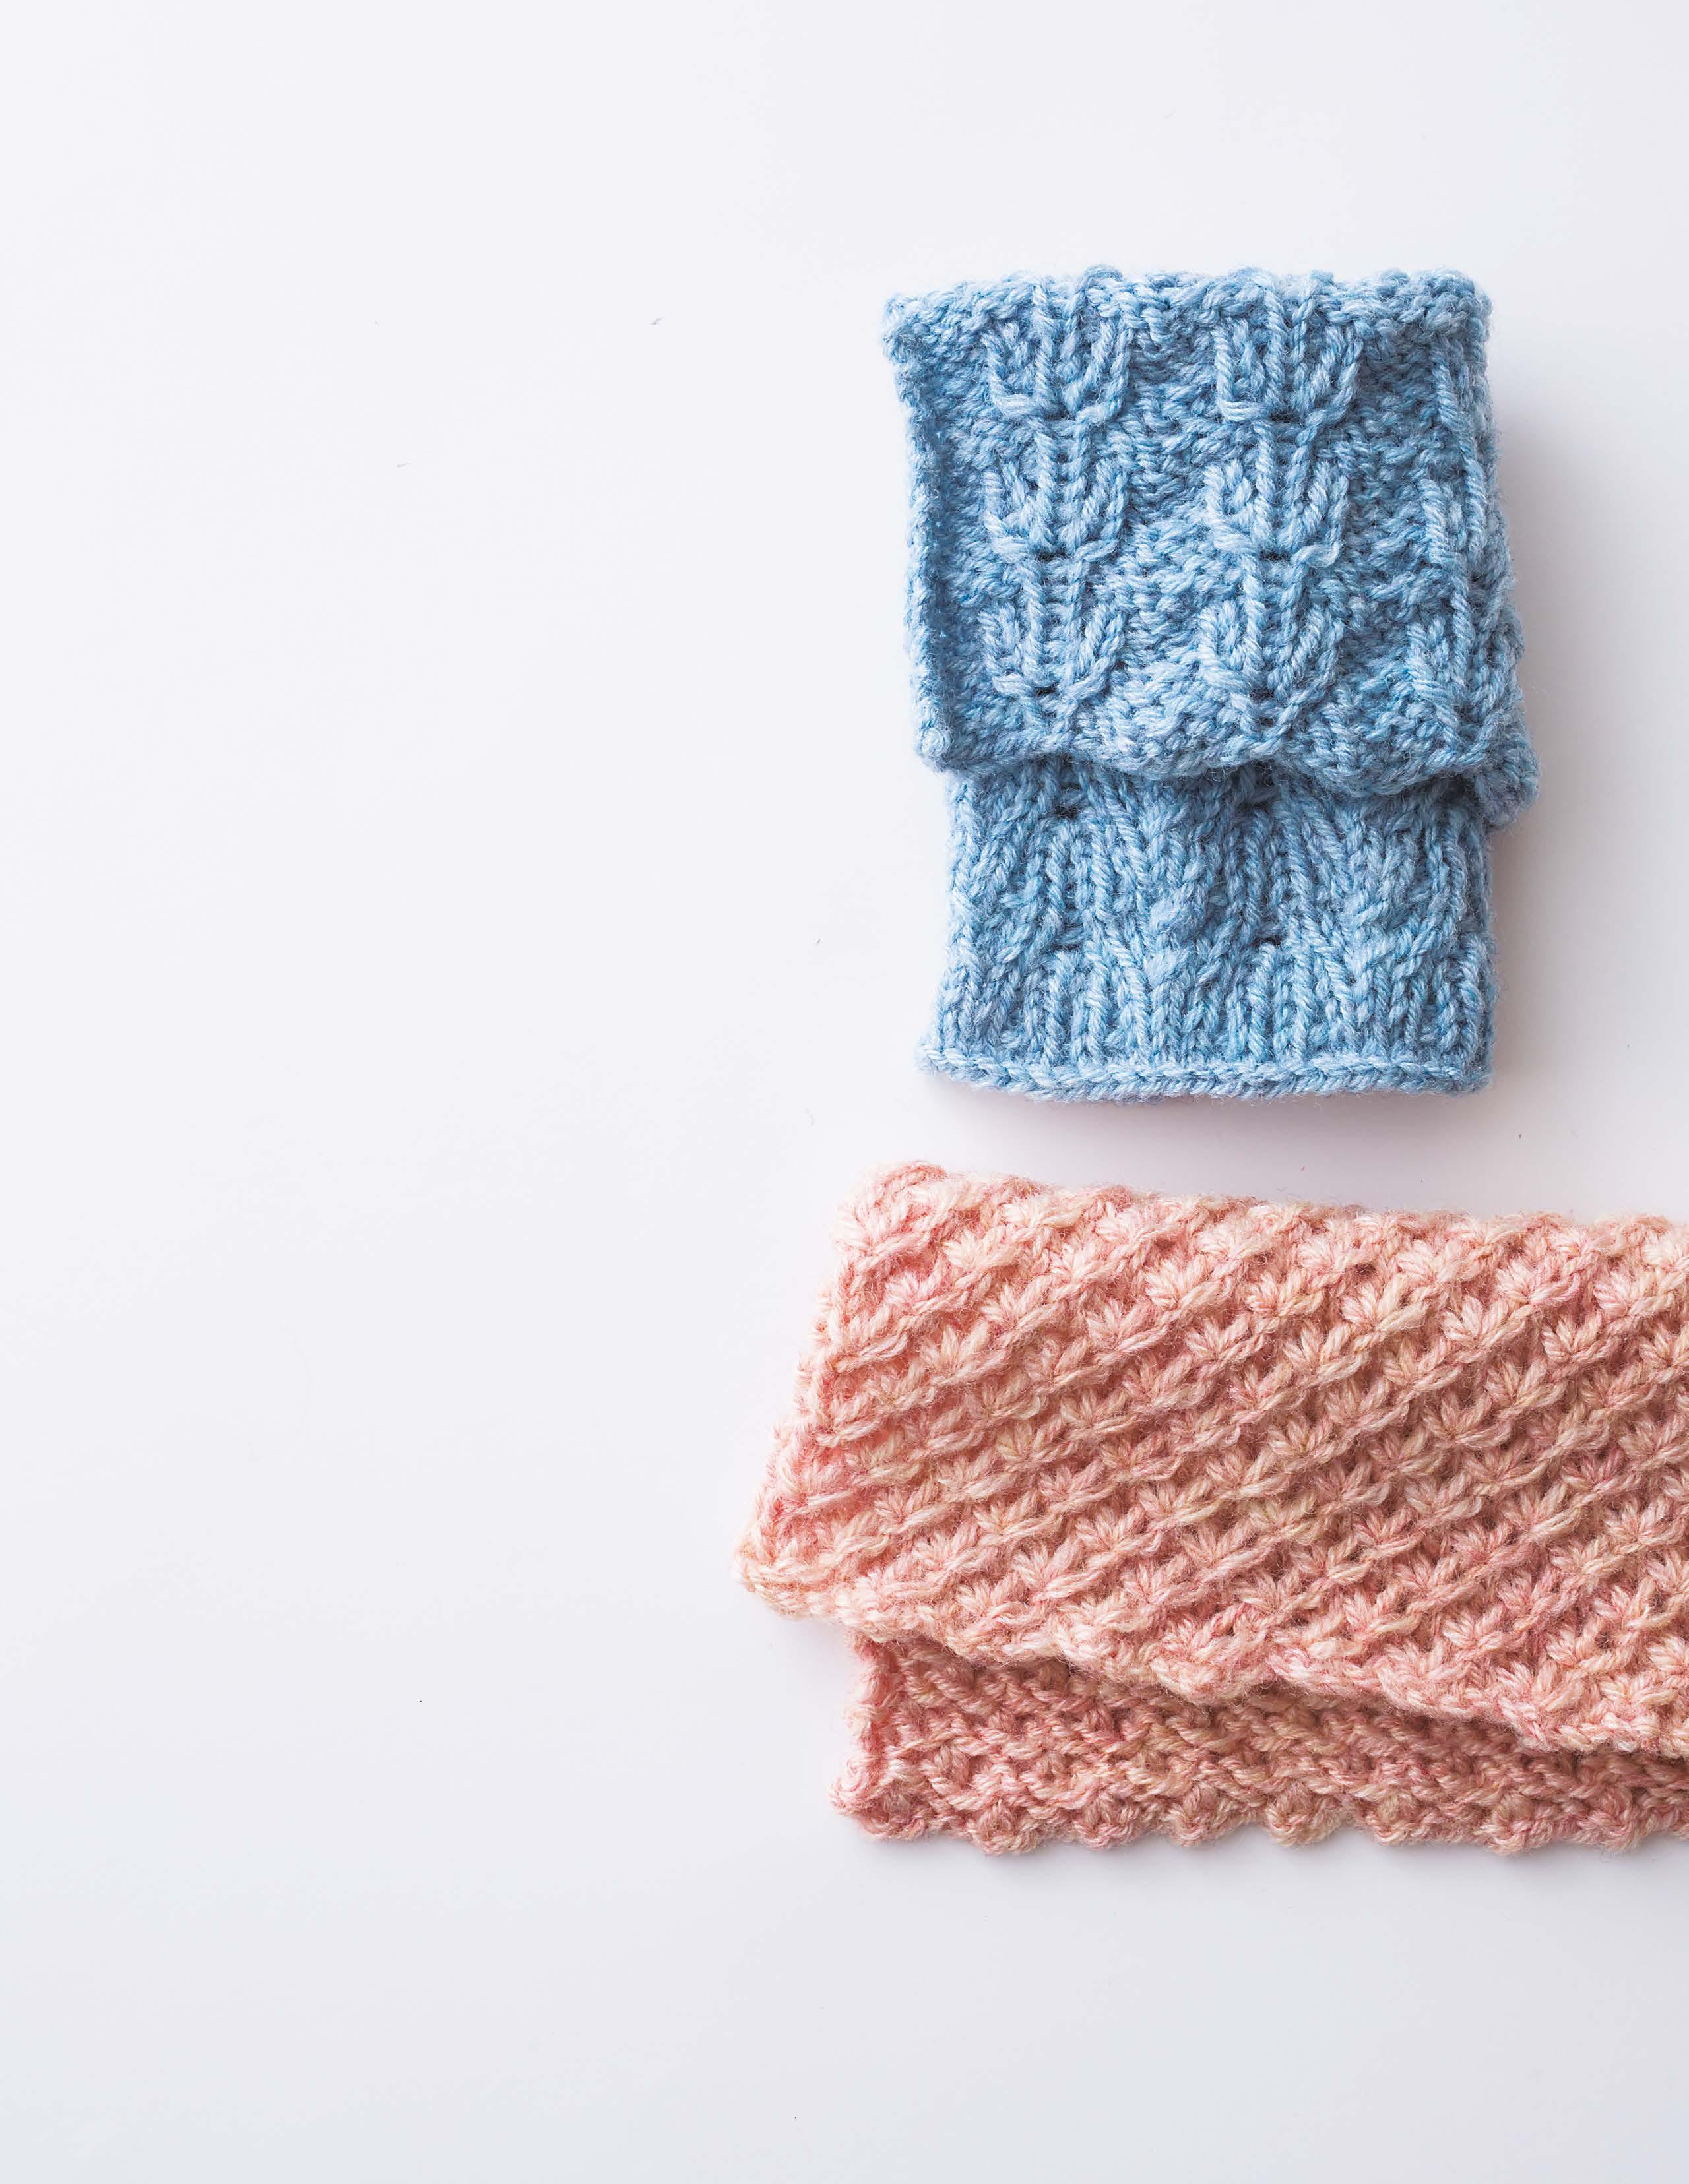
This chart shows a version of the slip stitch cable worked over two stitches. The illustration below uses three stitches, but the stitch manipulation is the same.
Suggested yarns: Puppy Princess Anny, Puppy Lecce Instructions: page 66
=すべり目(90ページ参照)
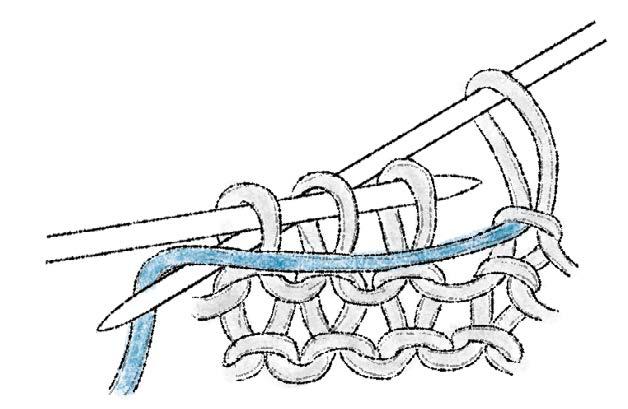
Pull up a long loop from 2nd st; with loop in front of work, k1; drop 2nd st off LN.
作り目=4目×模様数+2目(+端2目)
Number of CO sts = 4 sts × pattern repeat + 2 sts (+ 2 selvedge sts)
Number of CO sts (if working in the round) = 4 sts × pattern repeat
左上1目と2目の交差 Slip Stitch Cable (3-st version)
No. 3
It’s also fun to employ single motifs instead of repeating the rhombus pattern.
Pull up a long loop from 2nd st; with loop in front of work, k1; drop 2nd st off LN.
Number of CO sts = 12 sts × pattern repeat (+ 2 selvedge sts)
Number of CO sts (if working in the round) = 12 sts × pattern repeat
No. 4 If knit with 2 strands held together, it creates an interesting texture. Loosely spun yarn recommended.
CO sts
作り目=12目×模様数(+端2目) 作り目(輪編みの場合)=12目×模様数 作り目
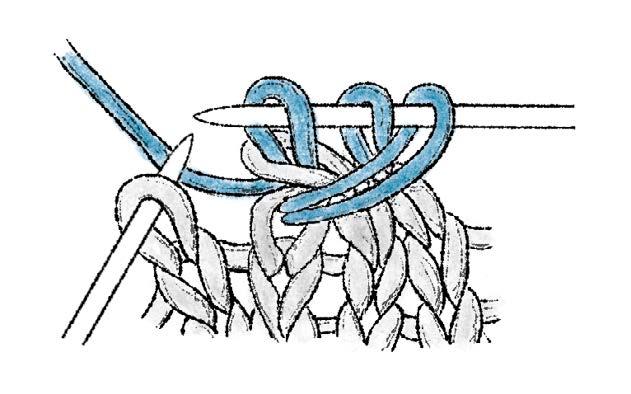
= 1 over 2 left cable worked on WS; pull up 1st st longer (see page 9)
= 1 over 2 right cable worked on RS; pull up 3rd st longer
作り目
CO sts
=右上1目と2目の交差(1の目は長めに引き出す) 裏から編む(9ページ参照) =左上1目と2目の交差(3の目は長めに引き出す)
作り目=4目×模様数+1目(+端2目)
Number of CO sts = 4 sts × pattern repeat + 1 st (+ 2 selvedge sts)
Number of CO sts (if working in the round) = 4 sts × pattern repeat
作り目(輪編みの場合)=4目×模様数
From both the front and back sides, each row is slipped and cabled, but the cabled stitches are alternated for a basketweave effect.
Knit carefully so that the lengths of yarn you pull up are of the same length. The edge is finished with the familiar i-cord bind-off method. (Same knitting method as no. 4.)
Suggested yarns: Puppy Husky
Instructions: page 68

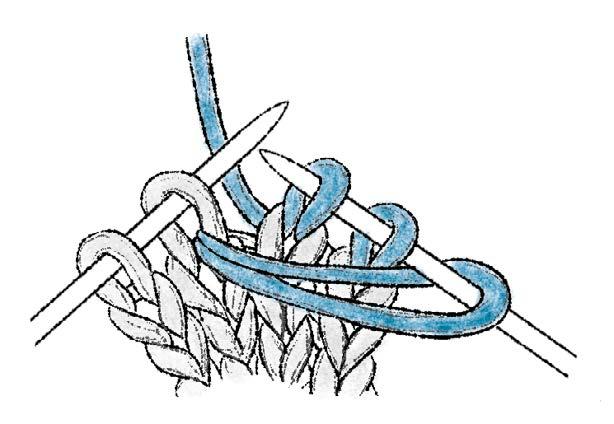
1 over 2 left cross on WS
1 With yarn in front of work, insert RN into 3rd st on LN from the back purlwise.
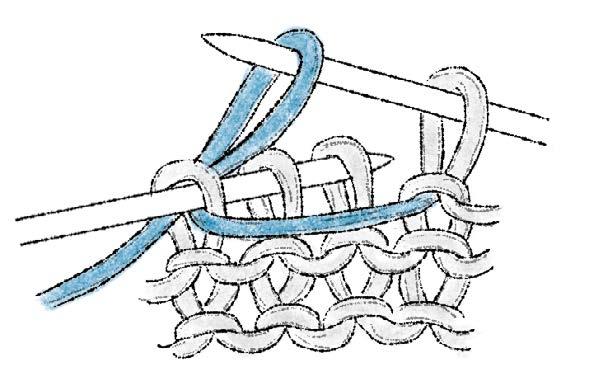
2 Pull up a loop long enough to purl 3rd st (but do not), purl remaining 2 sts, remove 3rd st from LN. The length of the loop should be the same as when knitting from the front.
Slip Stitch Cable (on WS)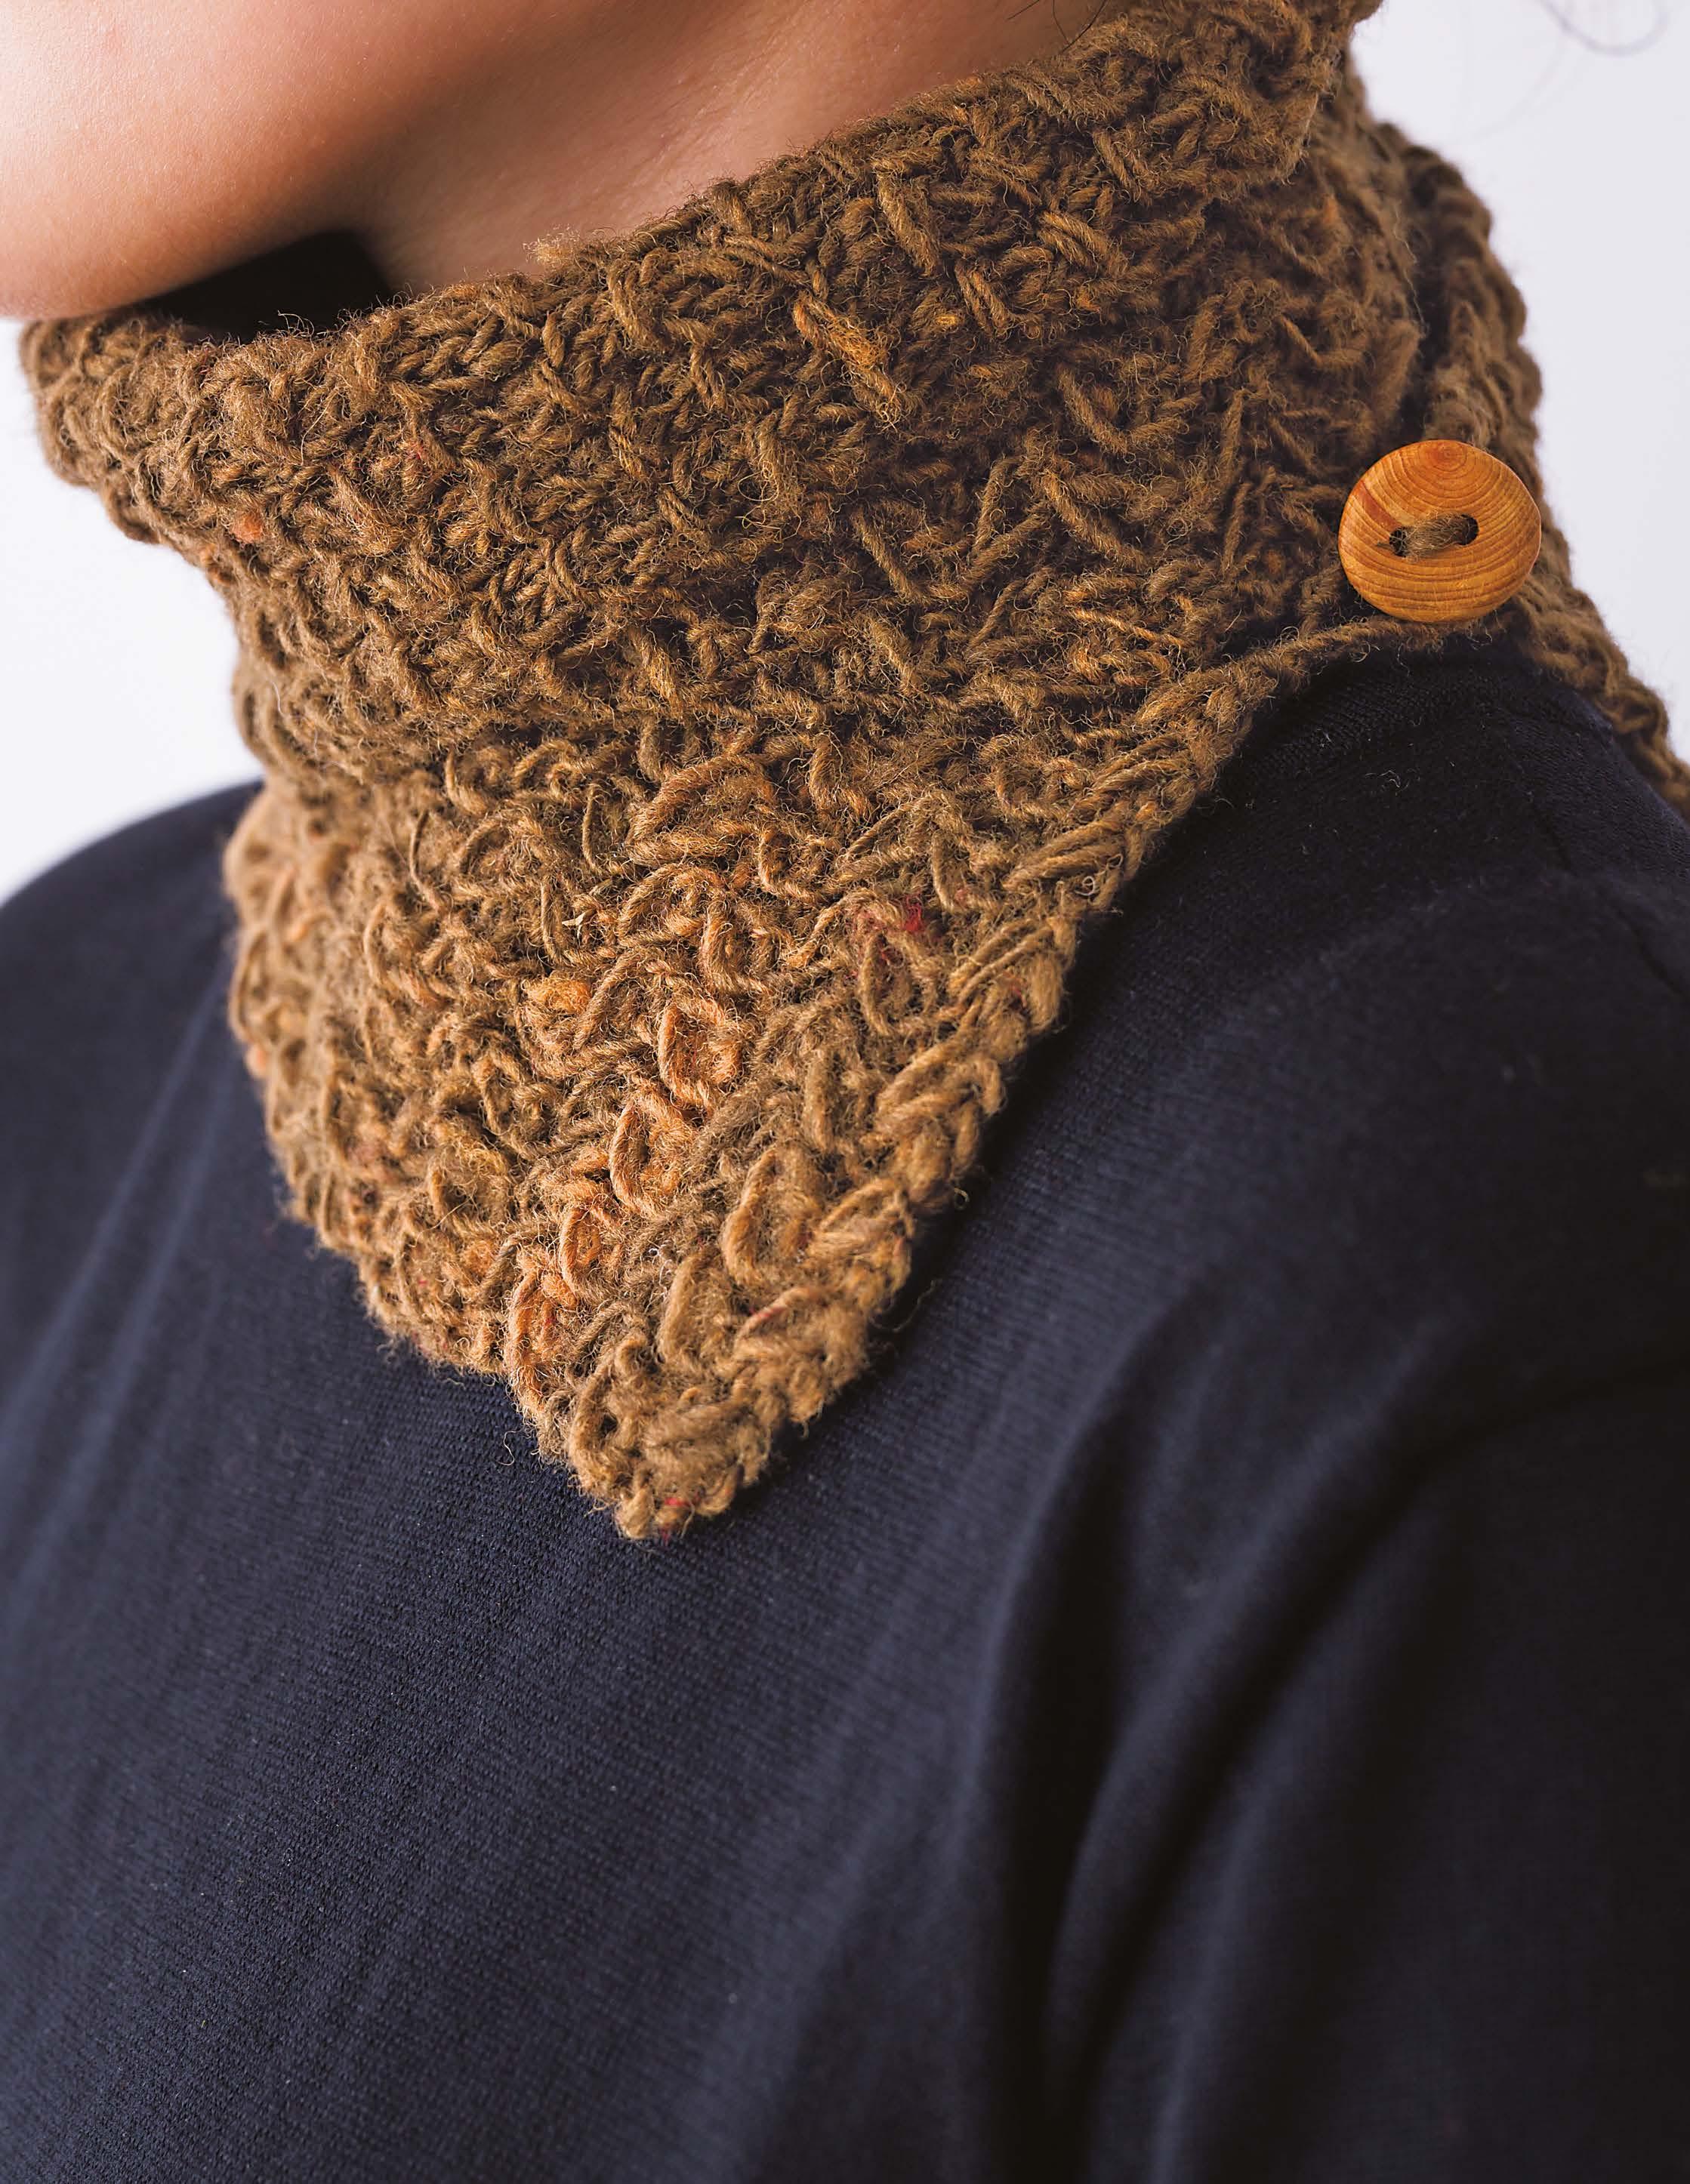
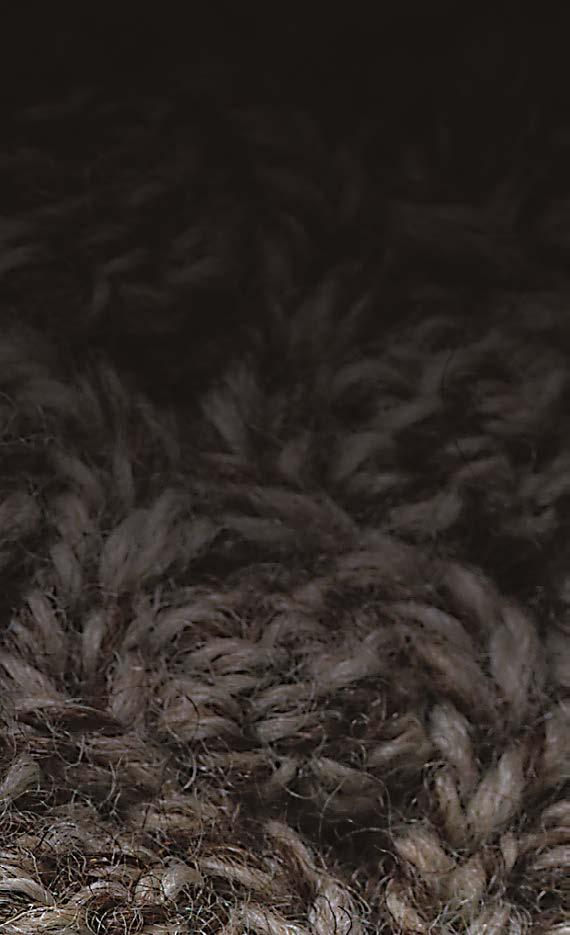
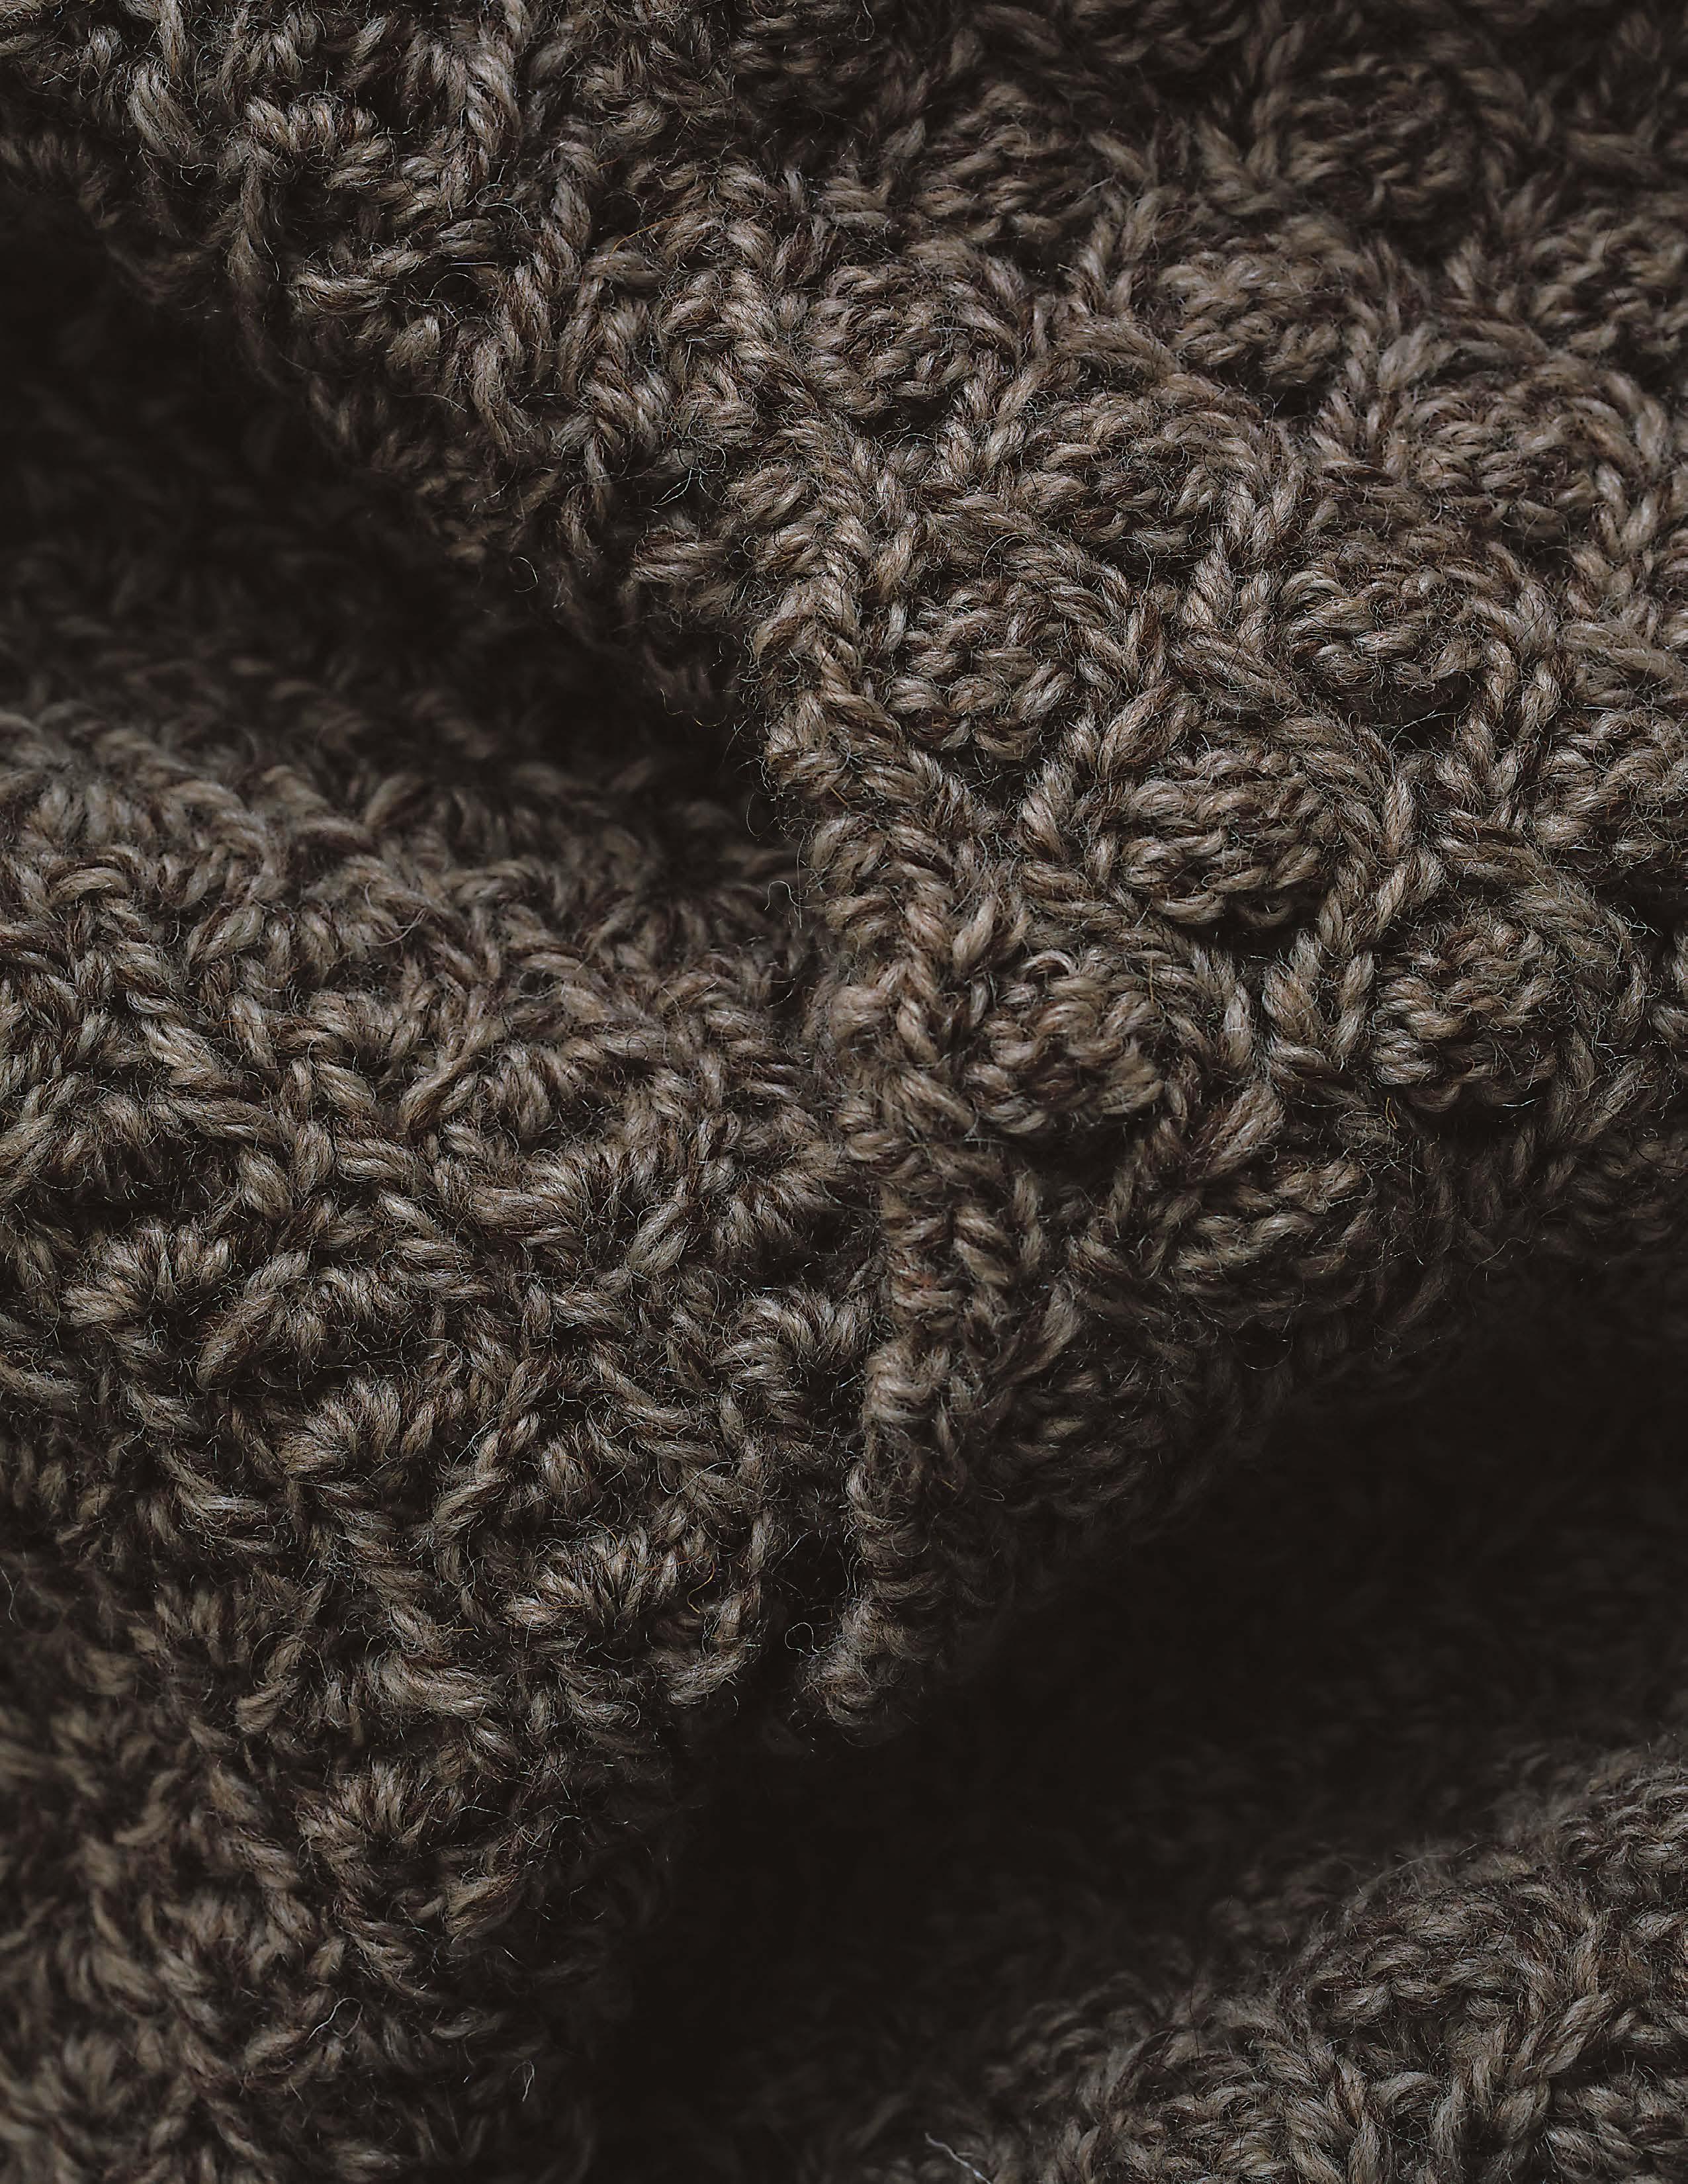
When knit up in a vegetable-dyed handspun yarn, the knitted fabric resembles the curly fleece of Astrakhan cloth (lamb fur).
Attach loops and buttons to the petite shawl and wrap it tightly around your neck for a very warm and easy-to-use piece. The back side has a completely different design, so you can enjoy both sides. I also recommend knitting it in different colors to coordinate with your wardrobe.
Suggested yarns: Hand-Spun Instructions: page 69
No. 7
=左上1目と裏目2目の交差(3の目は長めに引き出す)
=1-over-p2 cable (pull up 3rd st longer)
=右上1目と裏目2目の交差(1の目は長めに引き出す) 作り目 CO sts
裏から編む(9ページ参照)
=1 over p2 left cable on WS (pull up 1st st longer); work from WS (see page 9)
Number of CO sts = 3 sts × pattern repeat (+ 2 selvedge sts)
作り目=3目×模様数(+端2目)
Number of CO sts (if working in the round) = 3 sts × pattern repeat
作り目(輪編みの場合)=3目×模様数
No. 8
Slipped cable stitches employed here and there create an unexpectedly crisp pattern.
Depending on the combination of colors, the knitted fabric will create a completely different impression. Color selection is vital.
CO sts
=Pull up a long loop from 2nd st; with loop in front of work, k1; drop 2nd st off LN.
Number of CO sts = 3 sts × pattern repeat + 2 sts (+ 2 selvedge sts)
Number of CO sts (if working in the round) = 3 sts × pattern repeat
=2の目を長く引き出して左上1目交差を編む 作り目=3目×模様数+2目(+端2目) 作り目(輪編みの場合)=3目×模様数
CO sts
Color key
= color A
= color B
=2の目を長く引き出して左上1目交差を編む
= Pull up a long loop from 2nd st; with loop in front of work, k1; drop 2nd st off LN.
作り目=2目×模様数(+端2目)
Number of CO sts = 2 sts × pattern repeat (+ 2 selvedge sts)
作り目(輪編みの場合)=2目×模様数
Number of CO sts (if working in the round) = 2 sts × pattern repeat
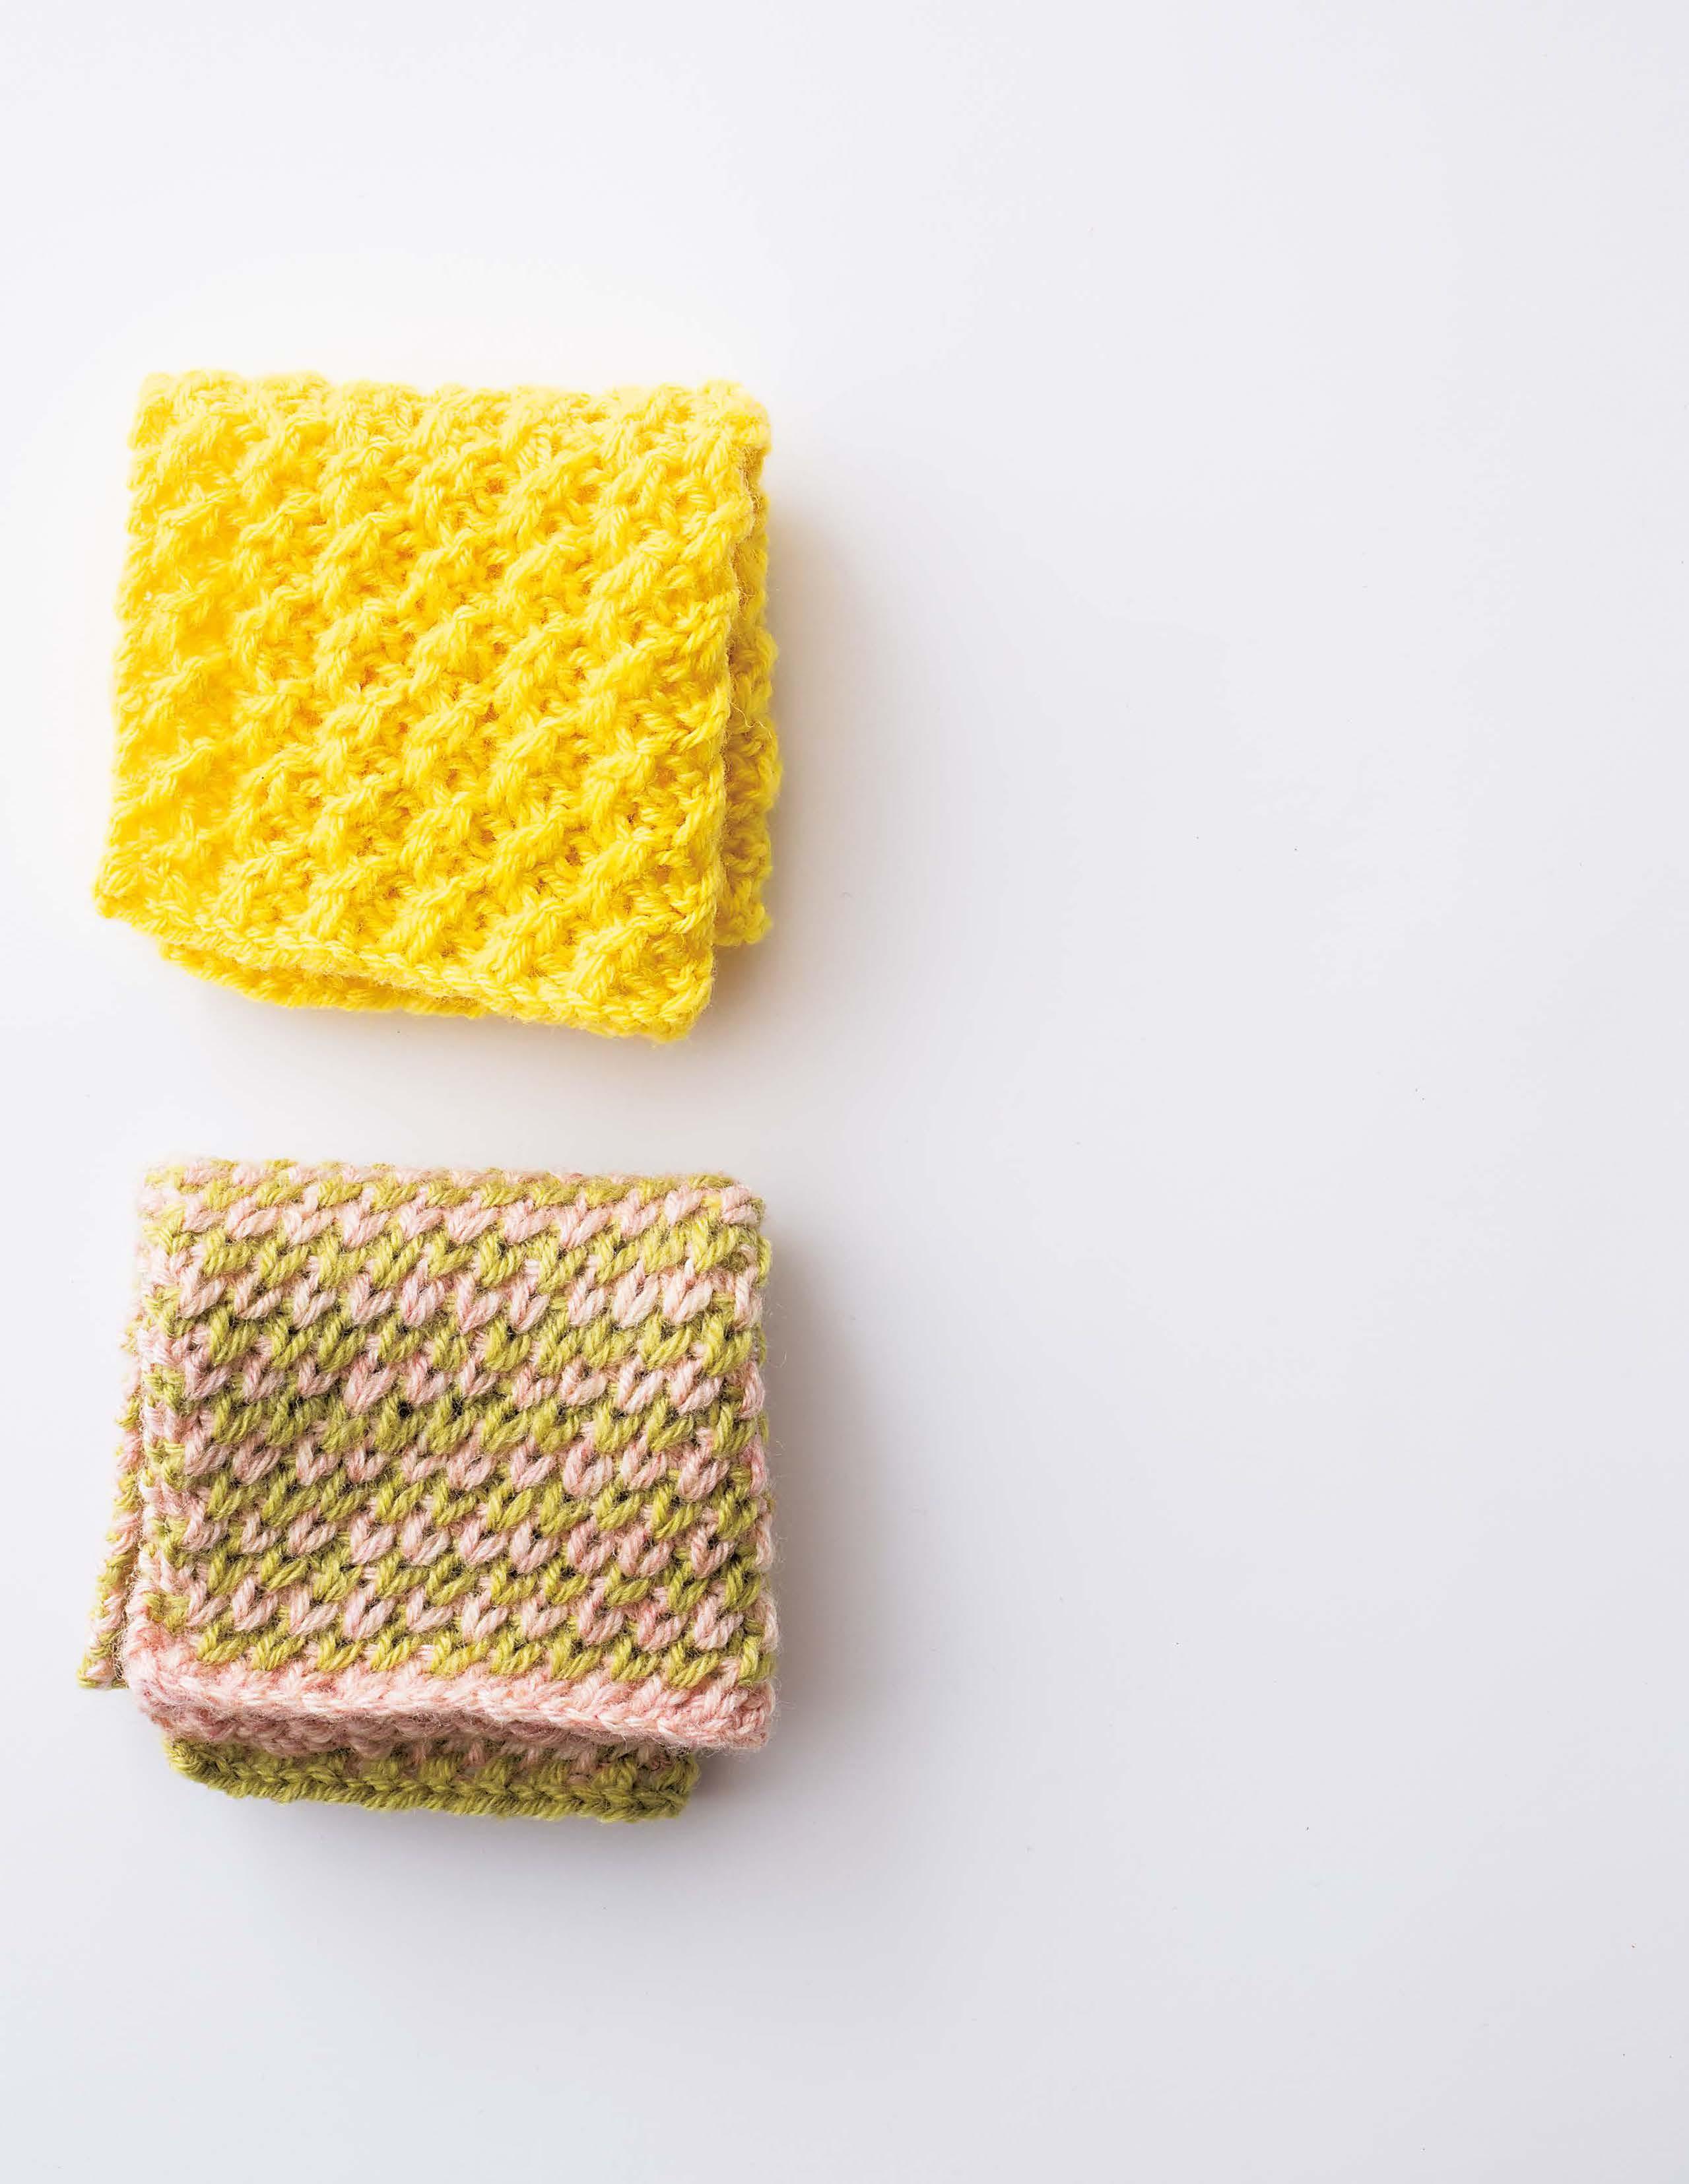
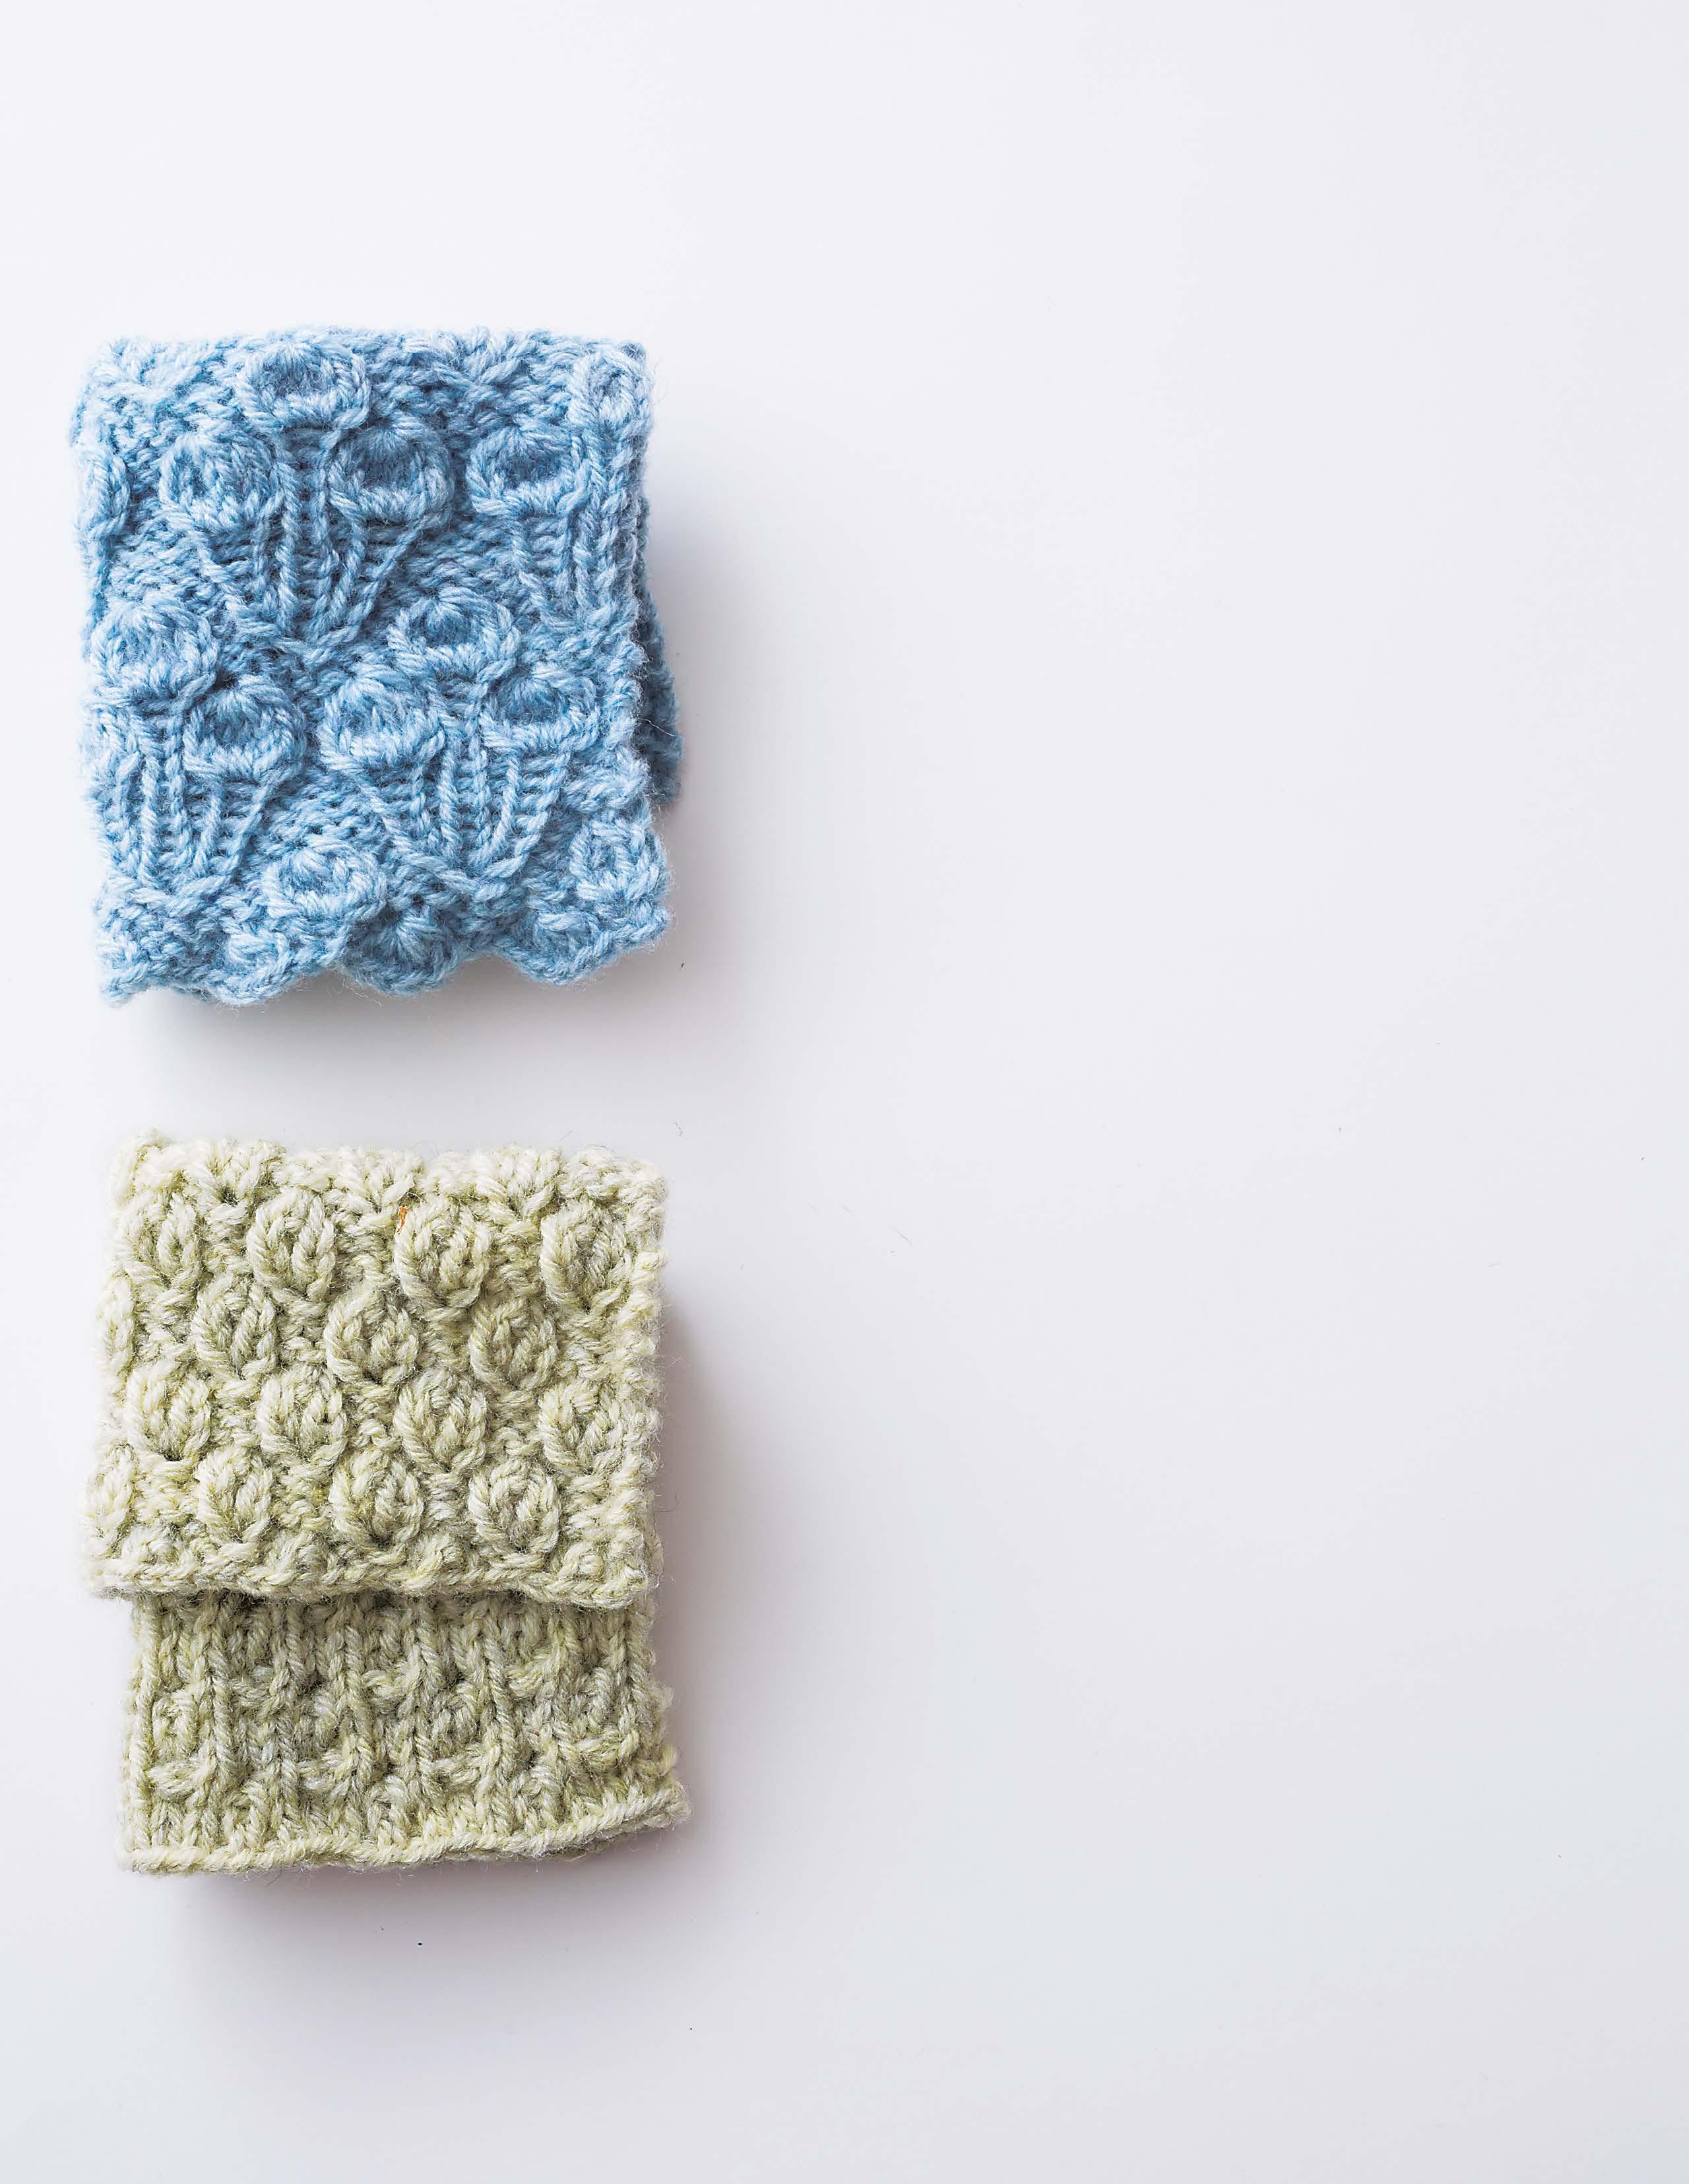
By increasing from 1 to 5 stitches, knitting several rows, then knitting the 5 stitches together, you can create rounded shapes. By varying the number of stitches worked, how to work them, and the stitch pattern, you can create a variety of stitch patterns.
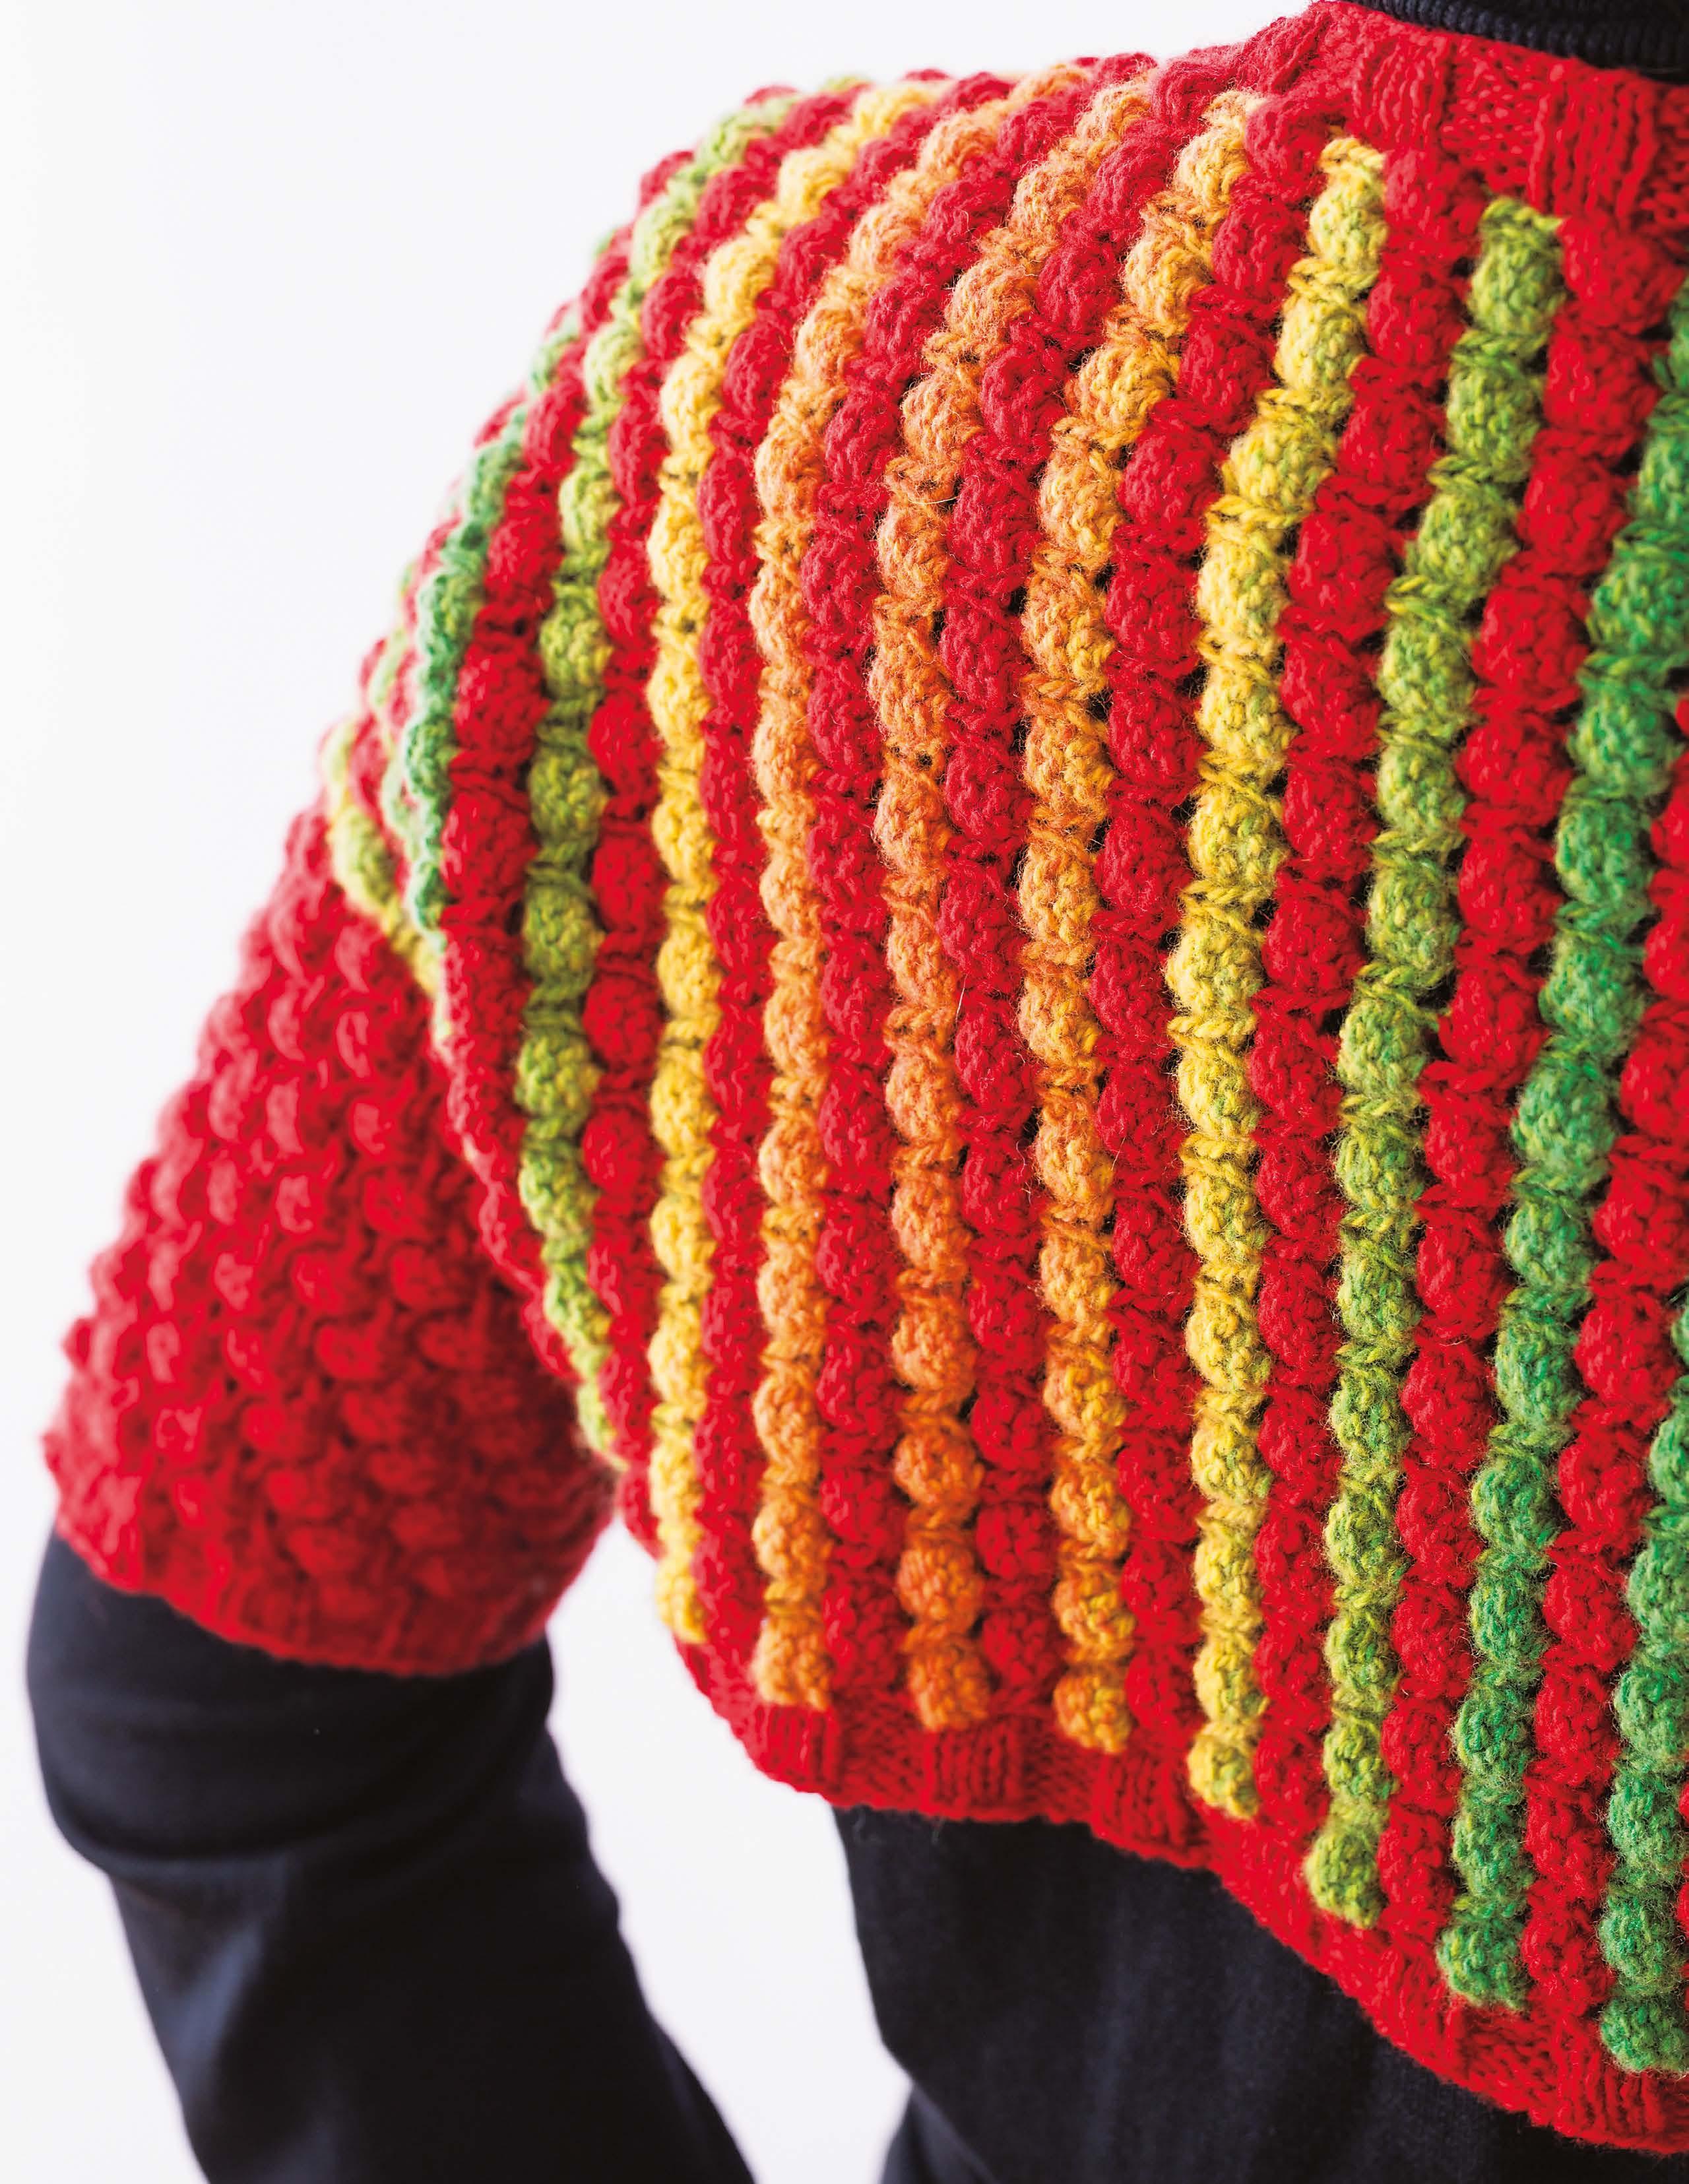
A lovely knitted fabric that pops out like popcorn. The rounded bump created by increasing from 1 to 5 stitches and then knitting 5 stitches together is worked in purl stitch. The round shape is emphasized by alternating the popcorn stitches.
When I combined solid and gradient yarn, it resulted in a fun knitted fabric.
The ribbing on the edge is the somewhat unusual Icelandic bind-off (page 70). It’s invisible yet elastic, which makes it comfortable to wear.
Suggested yarns: Teoriya e-wool, Teoriya e-wool Long Kasuri
Instructions: page 70
作り目=6目×模様数+4目(+端2目)
Number of CO sts = 6 sts × pattern repeat + 4 sts (+ 2 selvedge sts)
Number of CO sts (if working in the round) = 6 sts × pattern repeat
作り目(輪編みの場合)=6目×模様数
= See chart of additional symbols
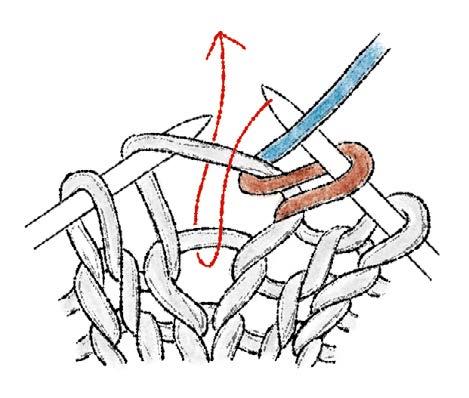
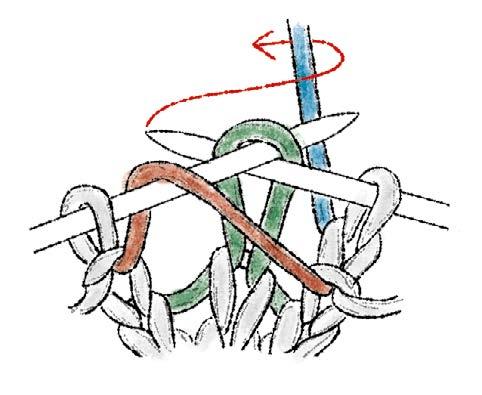
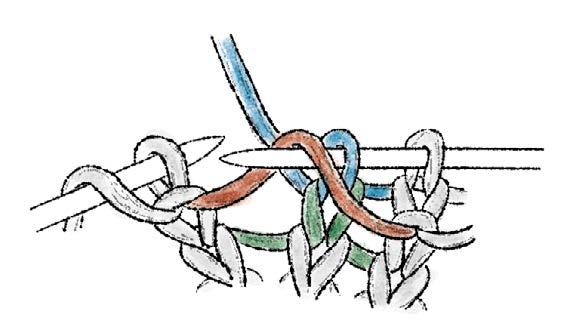
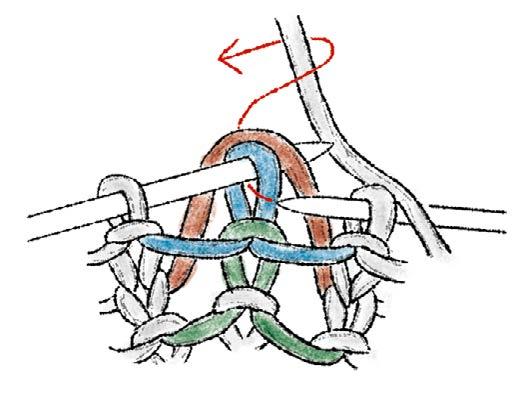
1 K1 but do not drop st from LN. YO, k1 into st 1 row/round below as indicated by arrow.
2 YO again and k1 below again. Drop 1st st off LN. CO sts
This is an interesting knitted fabric with alternating bumps.
The bumps are knitted in the same way as in No. 11, but the resulting knitted fabric is both similar and different. The front and back look different, so it's a nice knitted fabric even if you roll it up. The method of increasing from one stitch is a little tricky, so please look closely at the illustrations on page 15.
To work 5 stitches together, you must insert the needle through all 5 stitches at the same time, which makes it difficult to work the stitch. Instead, slip the 5 stitches to a crochet hook knitwise, YO and pull the hook through all 5 stitches at once.
Suggested yarns: No. 12: Hamanaka Fuuga, No. 13 Hamanaka Sonomono Sport Instructions: page 72
CO sts
=
=
=目のない部分
= no stitch
作り目=8目×模様数+3目(+端2目)
= See chart of additional symbols
Number of CO sts = 8 sts × pattern repeat + 3 sts (+ 2 selvedge sts)
作り目(輪編みの場合)=8目×模様数
Number of CO sts (if working in the round) = 8 sts × pattern repeat
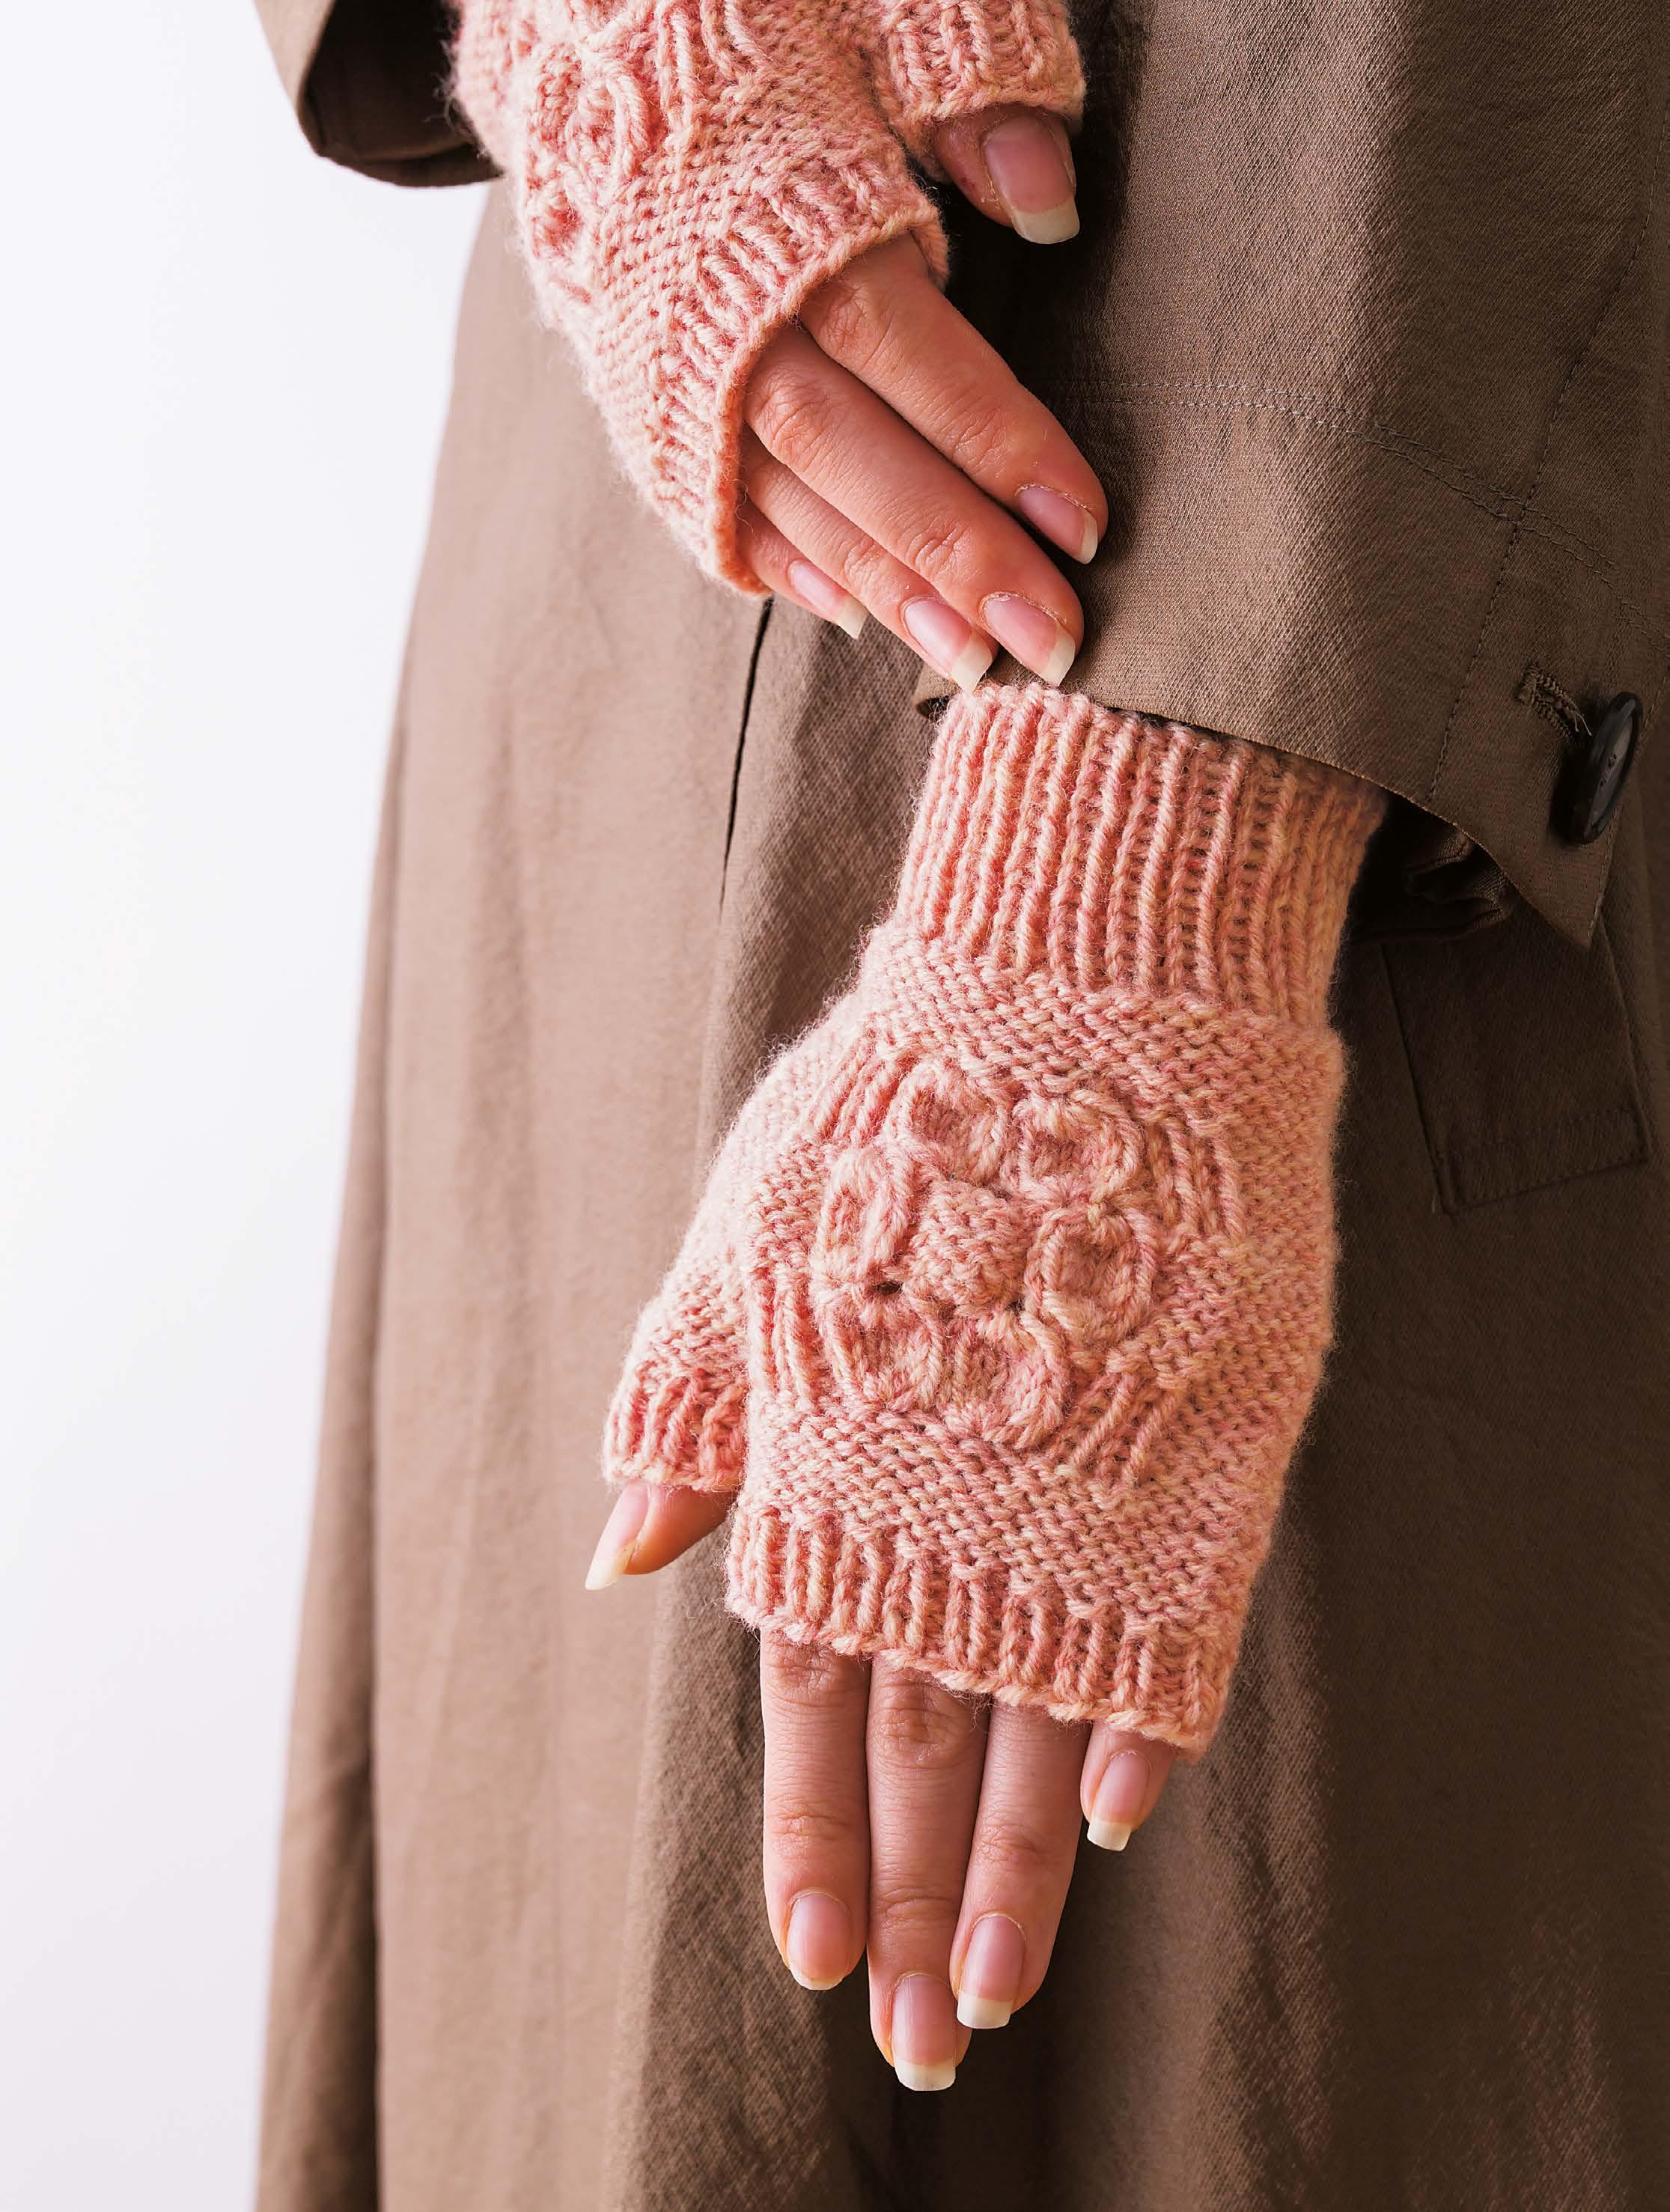
A design where the bumps created via increasing from 1 to 5 stitches are arranged in a circle to form a flower. Since this is a single motif, I tried it using it for fingerless gloves. I also recommend it for hats and sweaters.
Suggested yarns: Hamanaka Amerry Instructions: page 74
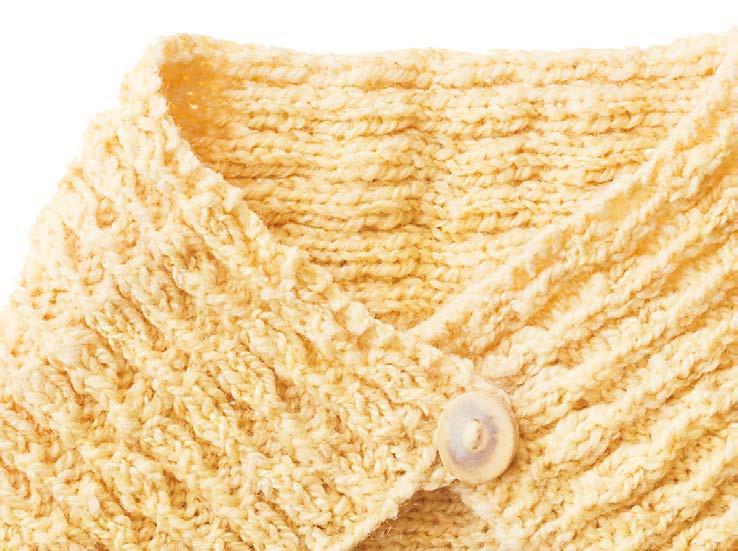
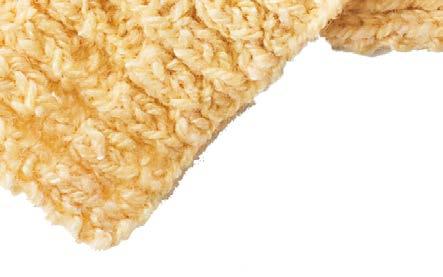
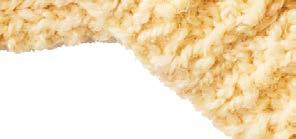
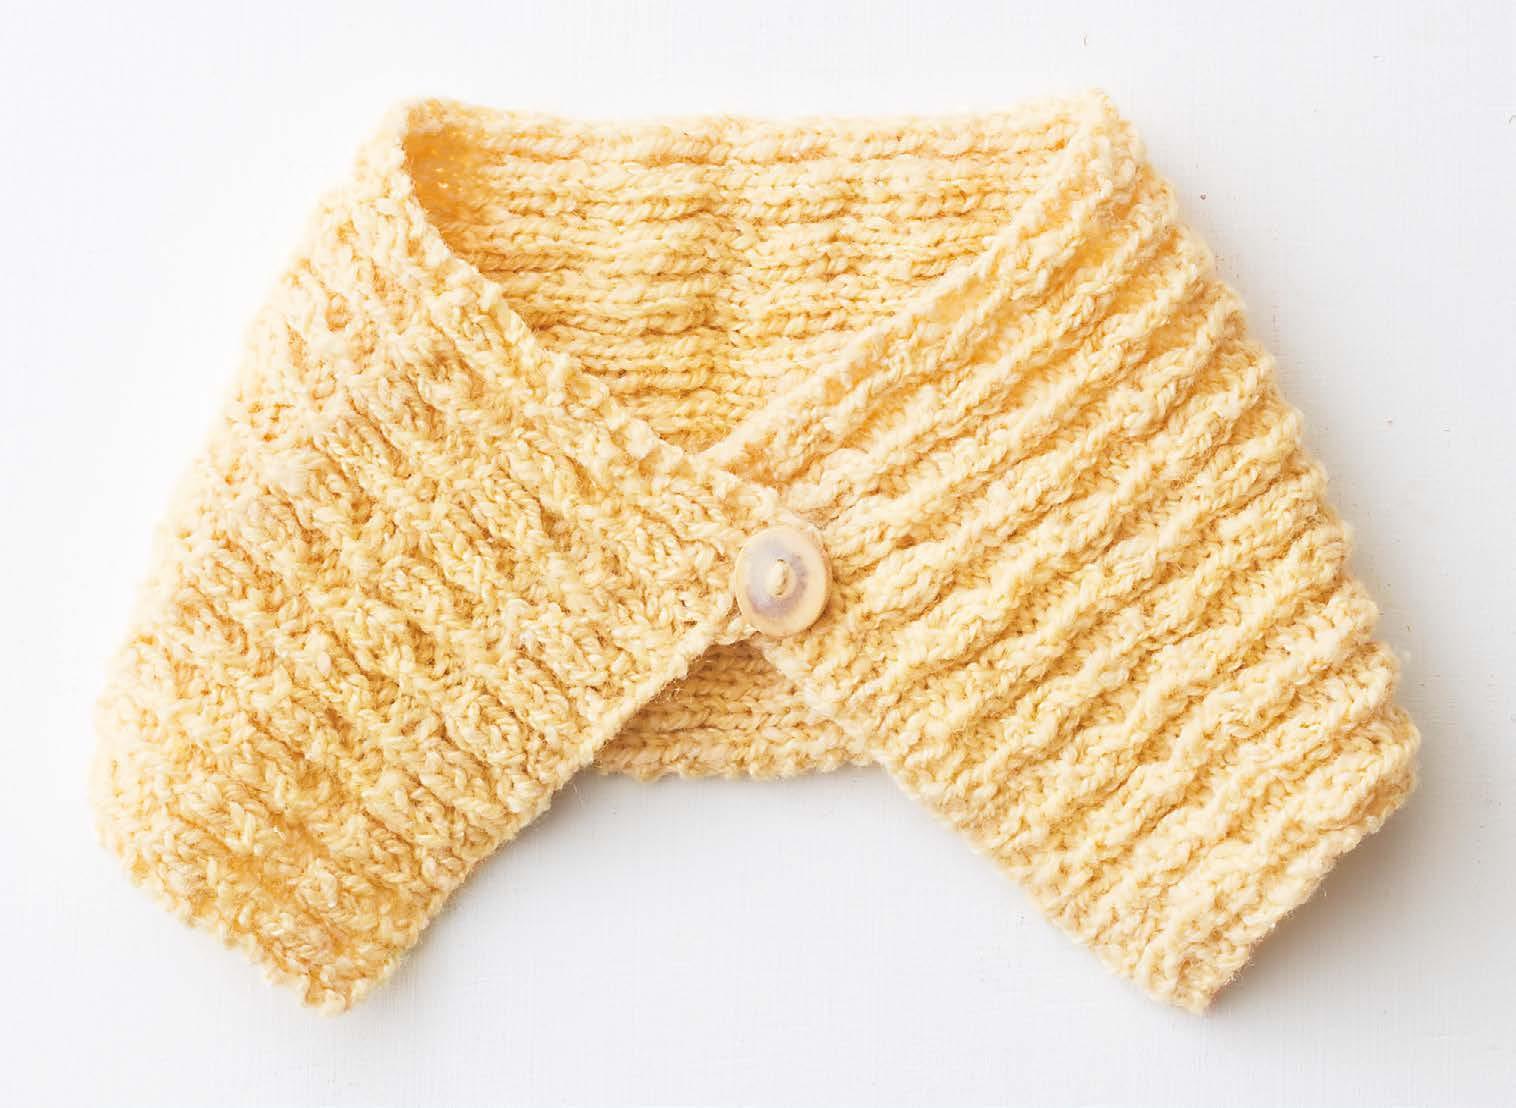
Stitches that line up in columns form the basis of ribbing. Fasten this with a button and enjoy it as an accessory. The choice will change the style, so the point is what kind of button you choose. Here, I chose a button that matches the color of the yarn.
Suggested yarns: Hand-Spun Instructions: page 73 CO sts
1.左上3目一度を編む
2.編んだ目は針にかけたまま、かけ目をし、
1. K3tog, but do not drop sts from LN; yo, then k3tog the same stitches again.
2. With RN still in st from step 1, YO, k1.
1の3目に針を入れ表目を編む
=目のない部分
= no stitch
= Knit , then knit through the back loop into the same stitch (one st increased).
=表目を編んだら、左針から目をはずさずにそのまま後ろの ループに(ねじり目を編むように)右針を入れ、もう1目表目を編む
= no stitch
作り目=3目×模様数(+端2目)
Number of CO sts = 3 sts × pattern repeat (+ 2 selvedge sts)
Number of CO sts (if working in the round) = 3 sts × pattern repeat
作り目(輪編みの場合)=3目×模様数
No. 16
The single row of purl stitch clearly highlights each pattern repeat.
Although it resembles No. 16, the purl stitches interrupting the stitch pattern create a design that looks like little scattered flowers.
CO sts
作り目
1. Insert RN through the back loops of 5 sts at once; k5togtbl, leaving sts on LN.
1.5目の向こう側に一度に針を 入れ、表目を編む
2. Then yo, k5togtbl the same stitches again, yo, k5togtbl the same stitches once more.
2.編んだ目は針にかけたまま、同じ目に針を入れ、 裏目に編む = =
2.編んだ目は針にかけたまま、 かけ目をし、1の5目に表目、 かけ目、表目を編む
1. Work twisted k2tog as sl1 purlwise, k1, psso (see page 68), leaving st on LN
1.ねじり目の右上2目一度を編む(68ページ参照)
2. Insert RN into same st again and p1.
作り目=6目×模様数+5目(+端2目)
Number of CO sts = 6 sts × pattern repeat + 5 sts (+ 2 selvedge sts)
Number of CO sts (if working in the round) = 6 sts × pattern repeat
作り目(輪編みの場合)=6目×模様数
CO sts
前段の3目に左側から一度に針を入れ、 表目、かけ目、表目、かけ目、表目と 5目編み出す(38ページ参照)
= k3 tog, leaving st on LN; k1, yo, k1, yo, k1 into the same 3 sts; increased from 3 to 5 sts. (see page 38)
= twisted k2tog (sl 1 purlwise, k1, psso) (see page 68)
=ねじり目の右上2目一度(68ページ参照)
= no stitch
作り目=6目×模様数+3目(+端2目)
Number of CO sts = 6 sts × pattern repeat + 1 st (+ 2 selvedge sts)
Number of CO sts (if working in the round) = 6 sts × pattern repeat
作り目(輪編みの場合)=6目×模様数
No. 18
At first glance it’s simple, but it’s actually a little tricky. After you knit it, though, it’s a fun knitted fabric.
CO sts
= no stitch
作り目=8目×模様数+1目(+端2目)
Number of CO sts = 8 sts × pattern repeat + 1 st (+ 2 selvedge sts)
Number of CO sts (if working in the round) = 8 sts × pattern repeat
作り目(輪編みの場合)=8目×模様数
Easy yet impressive stitch pattern. I recommend a bright color where shadows can stand out in sharp relief.
=
CO sts
作り目
1. K3tog , leaving st on LN. 2. Yo, k3tog the same sts again
1.左上3目一度を編む
2. With st still on RN, Yo, insert needle into same st worked into before, k1.
2.編んだ目は針にかけたまま、かけ目をし、 1の3目に針を入れ表目を編む
Number of CO sts = 4 sts × pattern repeat + 3 sts (+ 2 selvedge sts)
作り目=4目×模様数+3目(+端2目)
Number of CO sts (if working in the round) = 4 sts × pattern repeat
作り目(輪編みの場合)=4目×模様数
No. 20
Like a small but robust wildflower. Also suitable for increasing a variety of numbers of stitches
No. 21
Like a bud, like a small leaf….
A stitch pattern with a gentle impression
CO sts
作り目
= Inc from 3 to 5 sts (refer to page 38)
=3目から5目編み出す(38ページ参照)
= Inc from 2 to 3 sts (k2tog, leaving st on LN; yo, k2tog again into same st).
=2目から3目編み出す(前段の2目に左側から一度に針を入れ、 表目、かけ目、表目と編む)
=5目の向こう側に針を入れ、一度に表目で編む
= sl1 knitwise 4 times, k1, p4sso
= no stitch
Number of CO sts = 16 sts × pattern repeat + 1 st (+ 2 selvedge sts)
Number of CO sts (if working in the round) = 16 sts × pattern repeat
作り目=16目×模様数+1目(+端2目) 作り目(輪編みの場合)=16目×模様数
CO sts
= no stitch
作り目=6目×模様数+1目(+端2目)
Number of CO sts = 6 sts × pattern repeat + 1 st (+ 2 selvedge sts)
Number of CO sts (if working in the round) = 6 sts × pattern repeat
作り目(輪編みの場合)=6目×模様数
Can be made by combining yarn-overs and slip stitches. Brioche stitch is marvelous Brioche
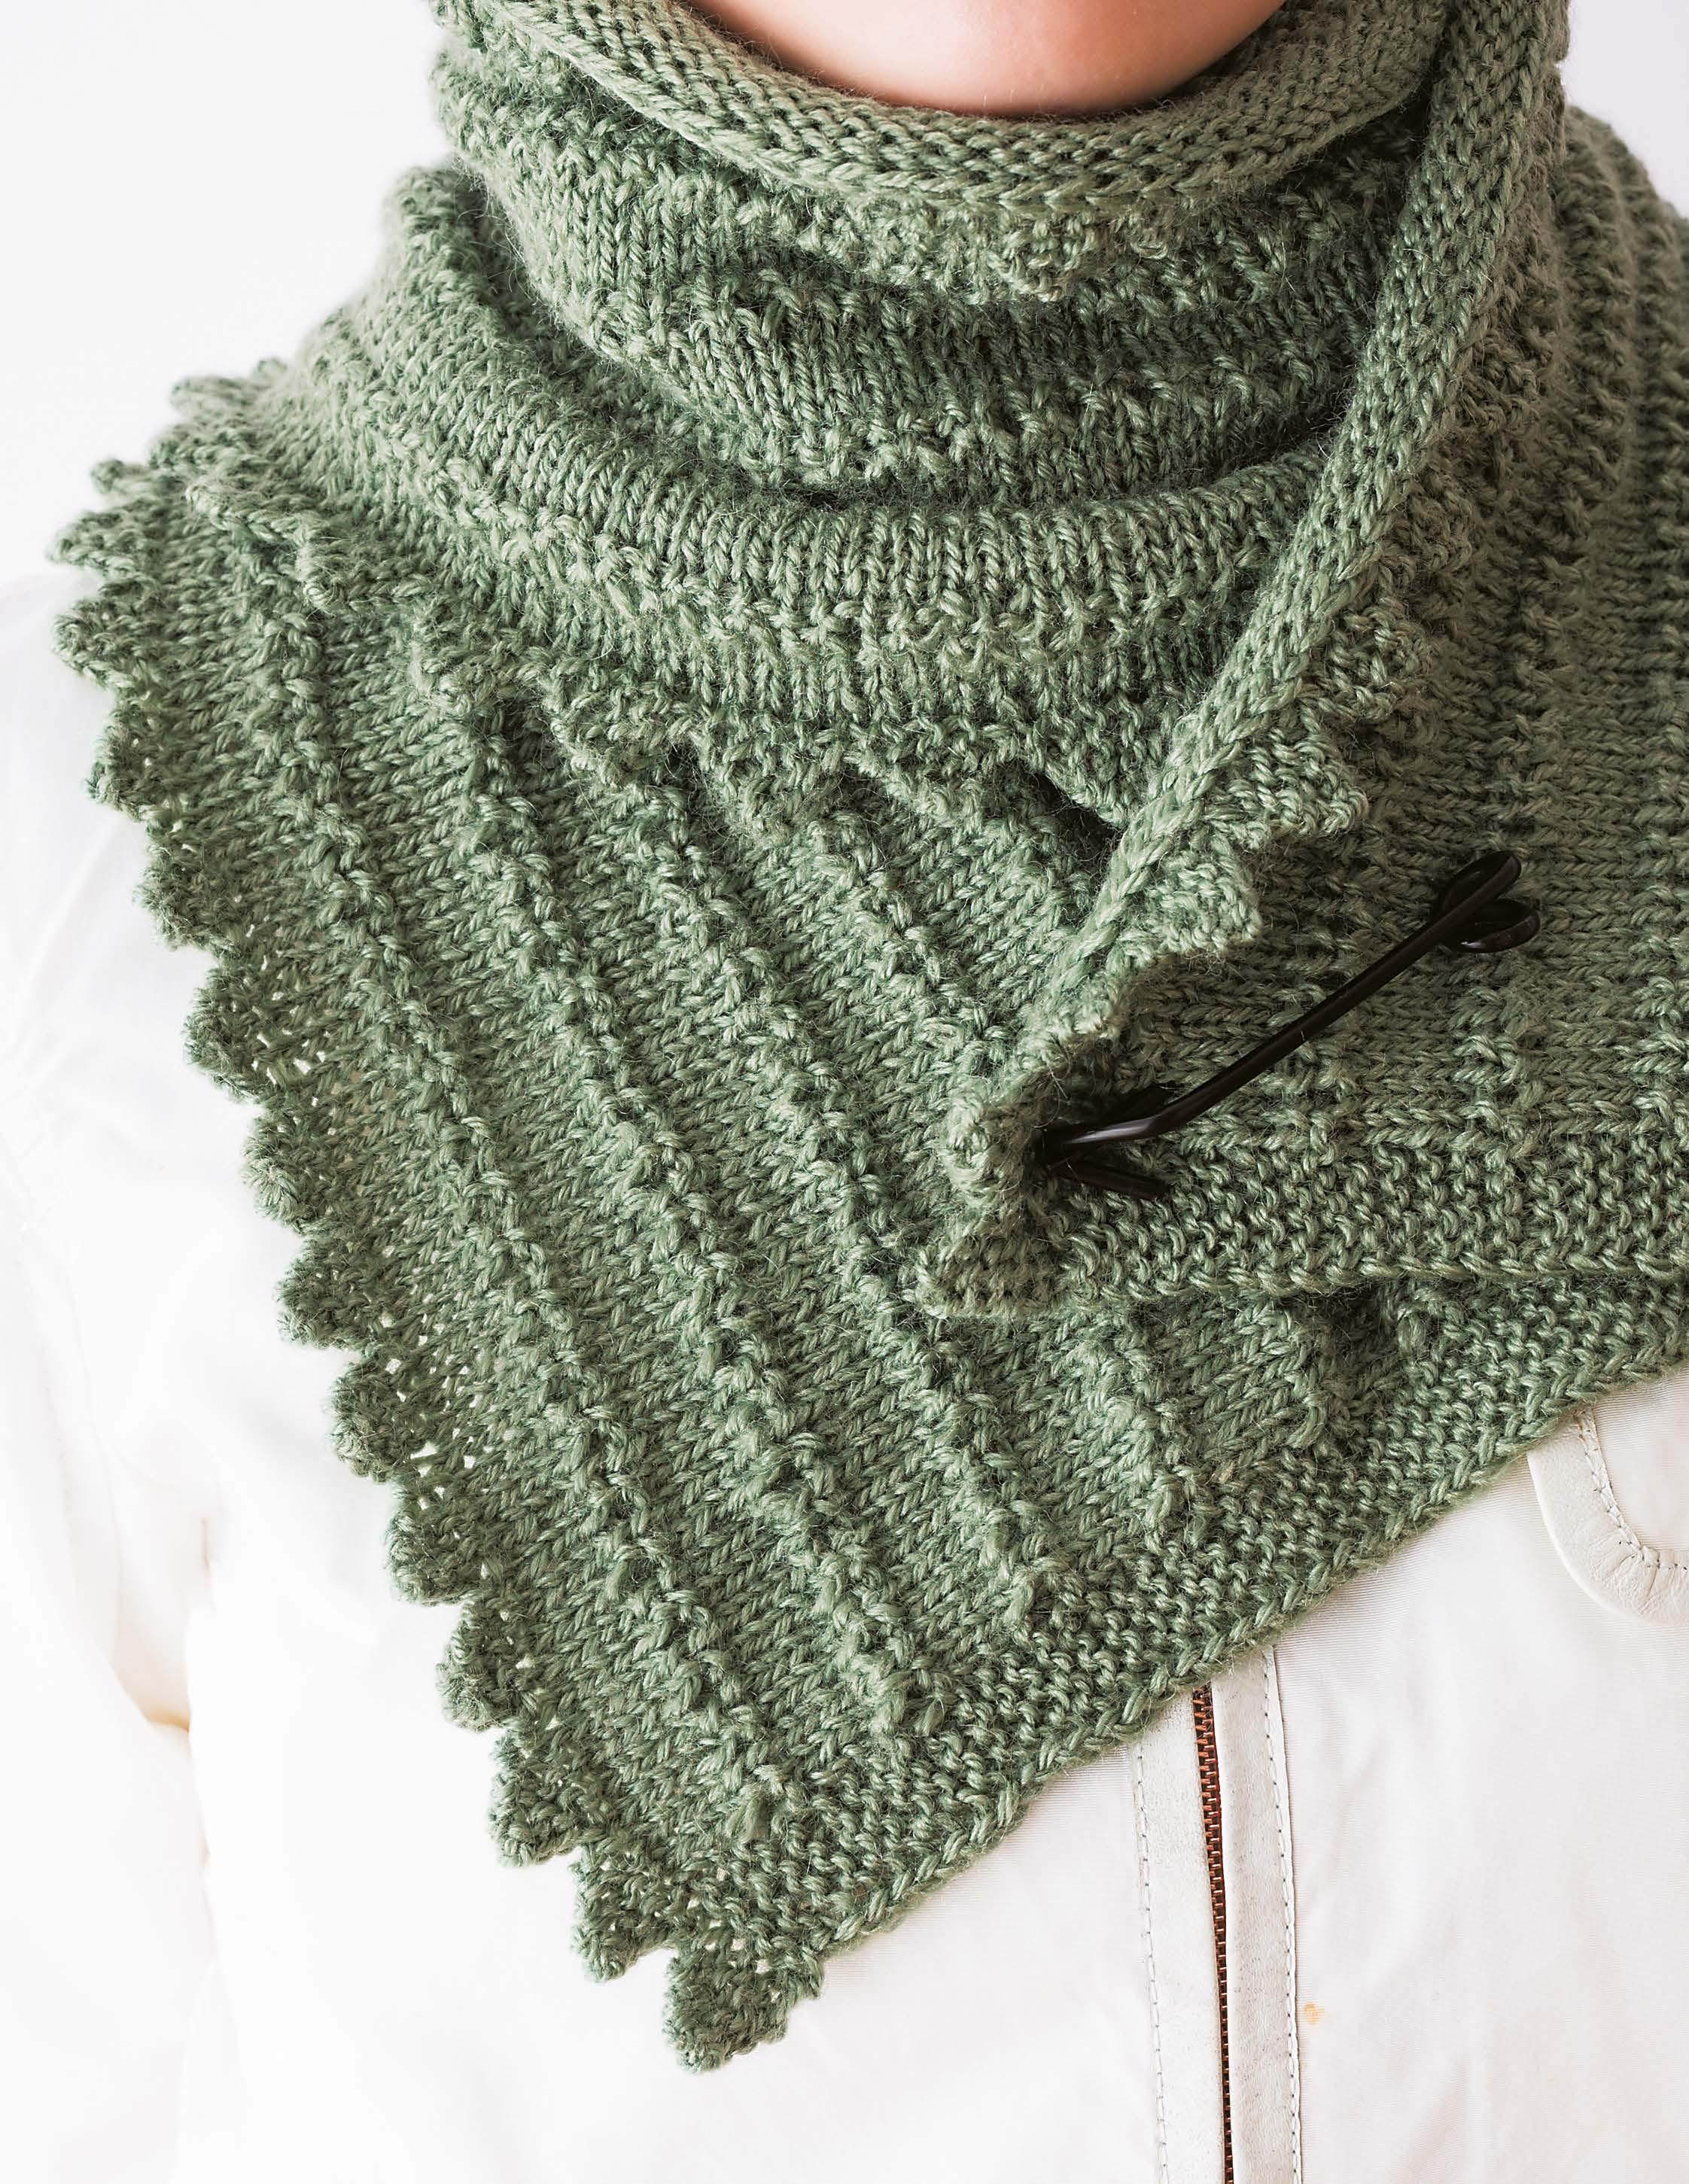
I designed a shawl with a brioche stitch pattern that forms lines. This is an unusual method of employing brioche stitch, so please look carefully at the illustrations. If you make a mistake working brioche stitches, you’ll be in a cold sweat figuring out how to fix them, so knit carefully stitch-by-stitch. The triangular edging is a little different at the beginning and end of the shawl. First, we knit the required number of triangles, then we pick up stitches and work in pattern stitch, and finally we finish by knitting triangles instead of binding off.
旧No.105 マフラー
Suggested yarns: Puppy Boboli
Instructions: page 76
=
作り目 CO sts
4. 裏から引き上げた目と2本いっしょに表目で編む
4. Brioche st on WS: k st from previous row tog with YO from 2 rows below.
3. 表から引き上げ目 ただしすべり目は表目を編む
3. Brioche st on RS: K only the slip st from previous row; slip YO from previous row to RN purlwise.
2.裏から引き上げ目(かけ目・すべり目)
2. Brioche st on WS: YO, sl 1.
1. K1
1.表目で編む
作り目=2目×模様数(+端2目)
Number of CO sts = 2 sts × pattern repeat (+ 2 selvedge sts)
Number of CO sts (if working in the round) = 2 sts × pattern repeat
作り目(輪編みの場合)=2目×模様数
instructions for row 3
2 Slip the YO to RN without working it.
No.124
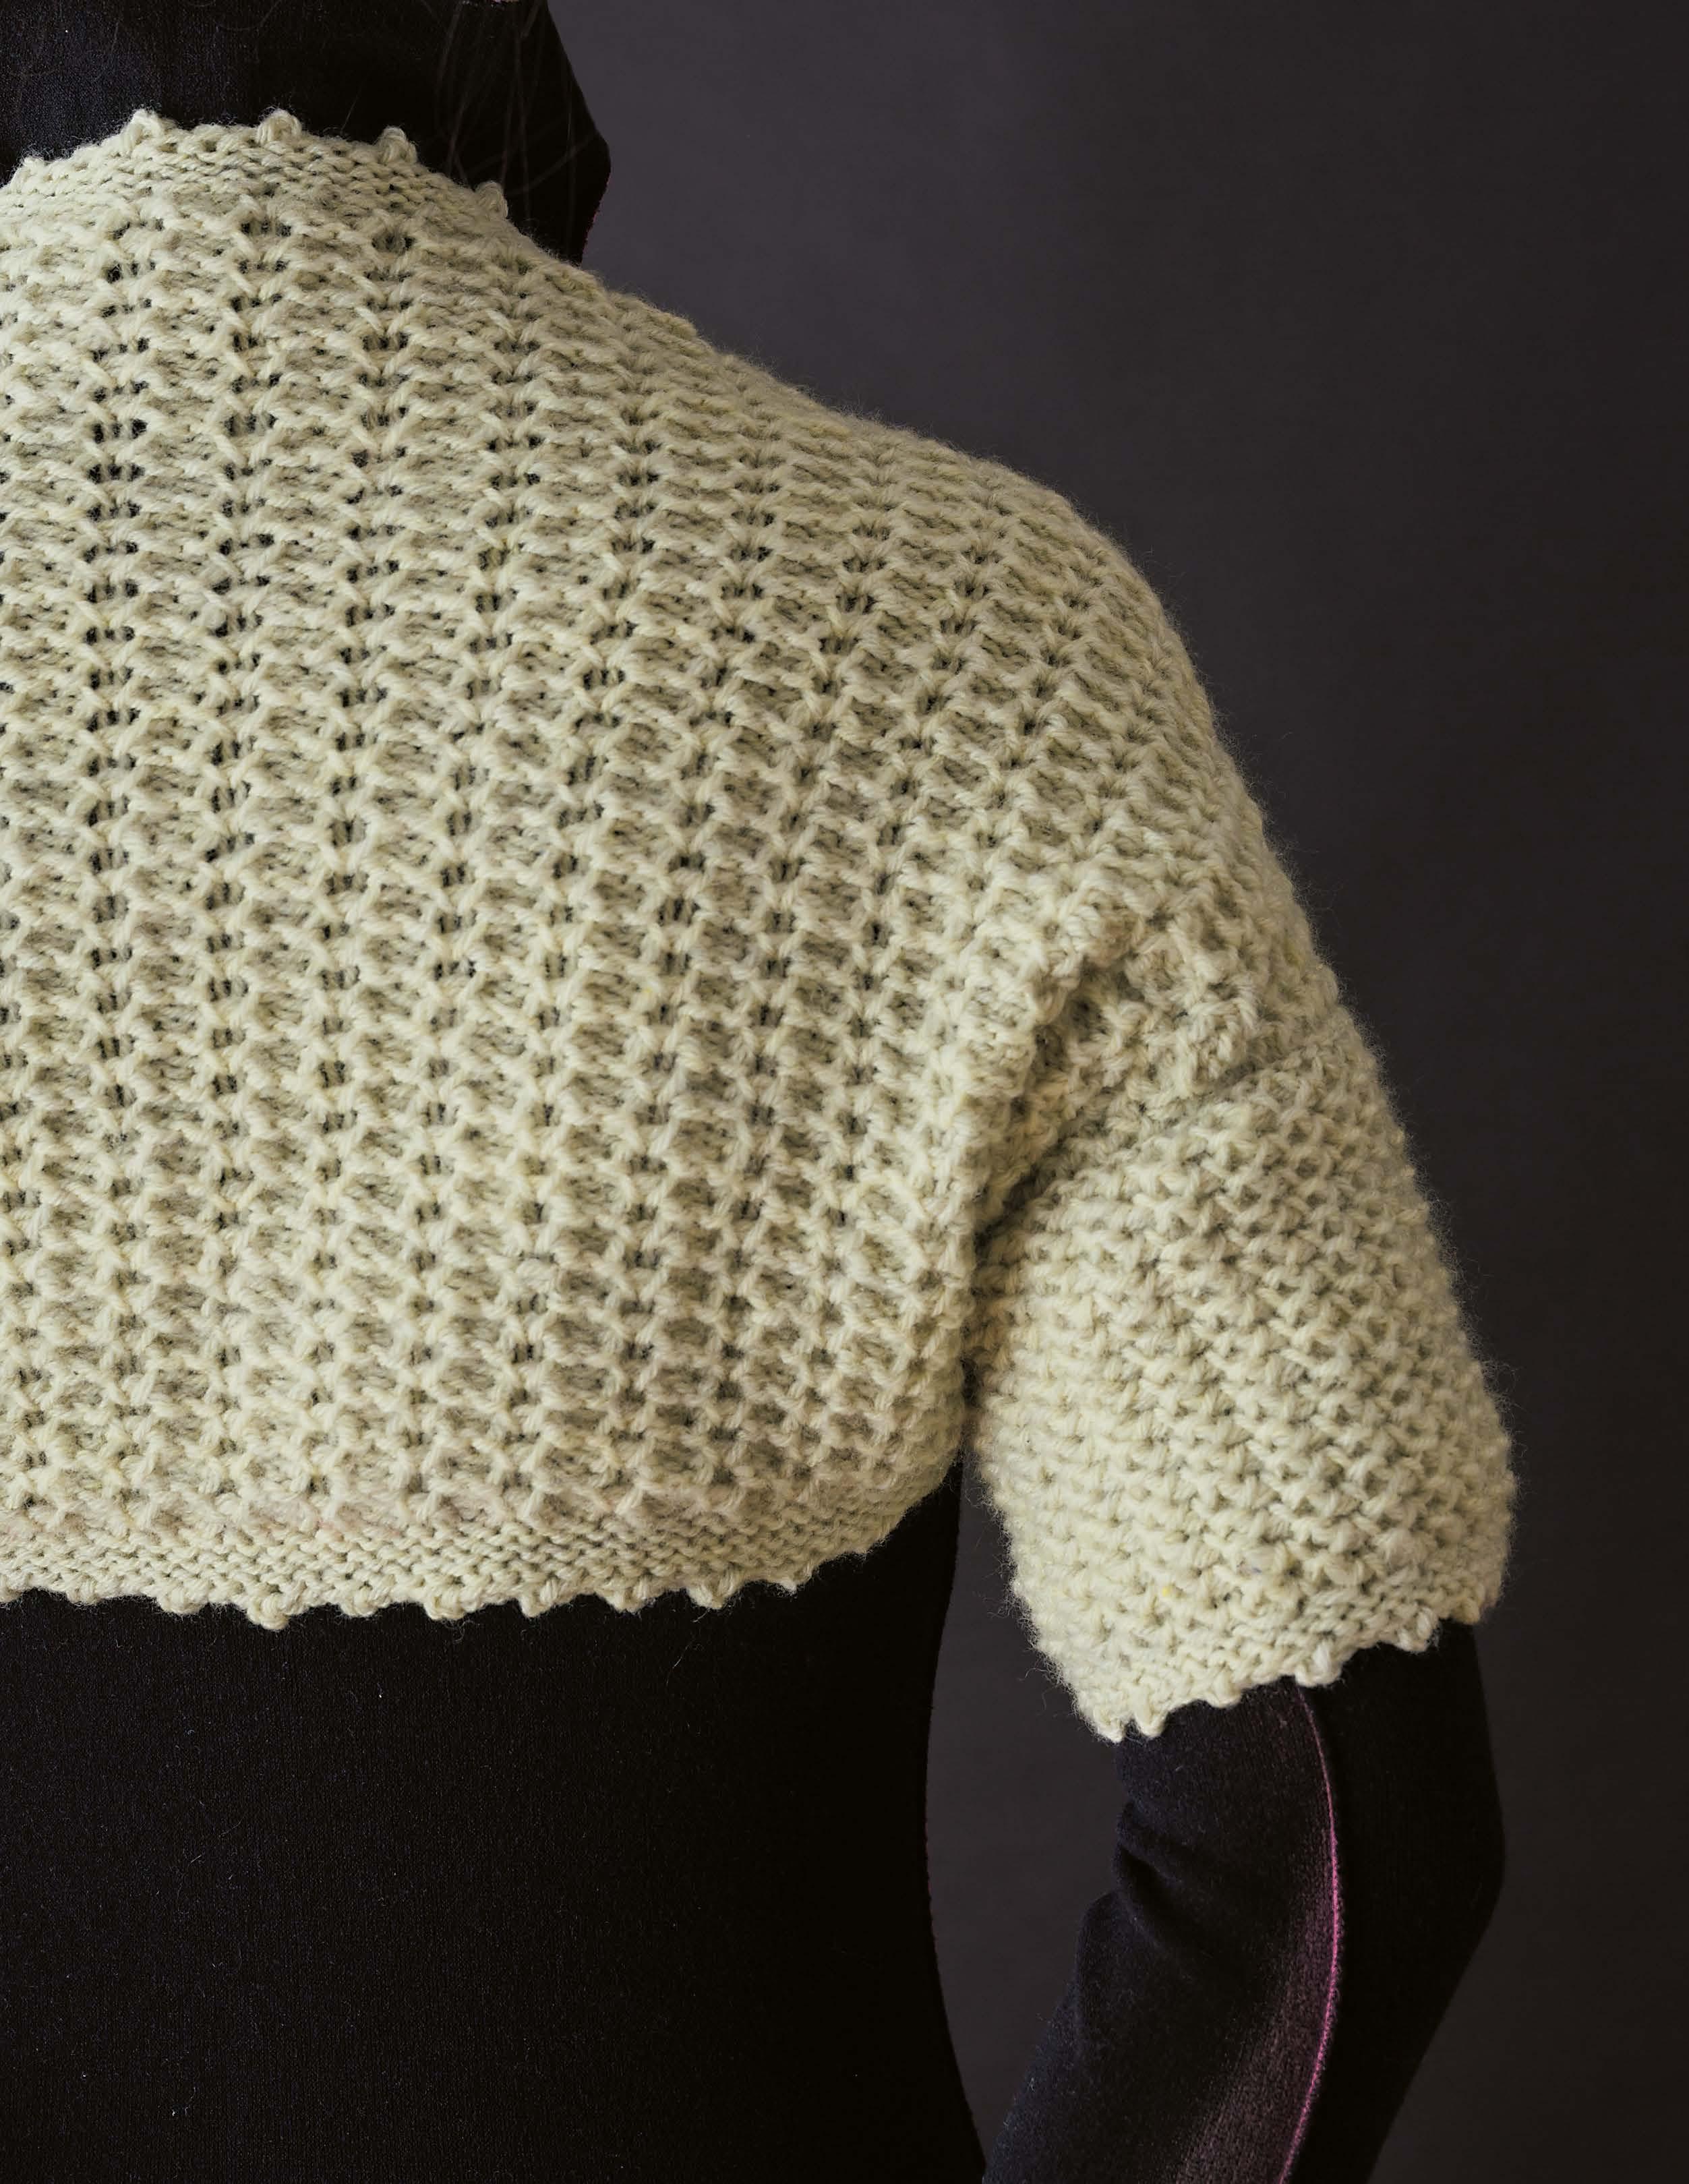
The shrug has warm shoulders and back, and it’s nice and snug if you make it slightly smaller—you won’t want to put it down during the cold season. The sleeves and body are knitted in the same manner, but the configuration is slightly different. Since there are three yarn-overs, the knitted fabric looks like a waffle with a three-dimensional effect. It also has elasticity, making it a little thicker and warmer.
If you knit this with a thin yarn, the slipped stitches will look like lace and the knitted fabric will have a different impression, so please give it a try.
Suggested yarns: Hamanaka Amerry
No.122
Instructions: page 78
No. 23 No. 24
裏からかけ目3本とすべり目をまとめて表目で編む
CO sts
作り目
表から引き上げ目(かけ目・すべり目、かけ目は3本)
裏から引き上げ目(かけ目・すべり目、かけ目は2本)
表から引き上げ目(かけ目・すべり目)
裏から表目で編む
on WS, k the slipped st with all 3 YOs on RS, work brioche st (YO, sl1 with 2 previous YOs) on WS, work brioche st (YO, sl1 with previous YO) on RS, work brioche st (YO, sl1) on WS, k1
作り目=3目×模様数(+端2目)
Number of CO sts = 3 sts × pattern repeat (+ 2 selvedge sts)
作り目(輪編みの場合)=3目×模様数
Number of CO sts (if working in the round) = 3 sts × pattern repeat
作り目
CO sts
裏からかけ目3本とすべり目をまとめて表目で編む
表から引き上げ目(かけ目・すべり目、かけ目は3本)
裏から引き上げ目(かけ目・すべり目、かけ目は2本)
表から引き上げ目(かけ目・すべり目)
裏から表目で編む
on WS, k the slipped st with all 3 YOs on RS, work brioche st (YO, sl1 with 2 previous YOs) on WS, work brioche st (YO, sl1 with previous YO) on RS, work brioche st (YO, sl1) on WS, k1
作り目=2目×模様数+1目(+端2目)
Number of CO sts = 2 sts × pattern repeat + 1 st (+ 2 selvedge sts)
作り目(輪編みの場合)=2目×模様数
Number of CO sts (if working in the round) = 2 sts × pattern repeat
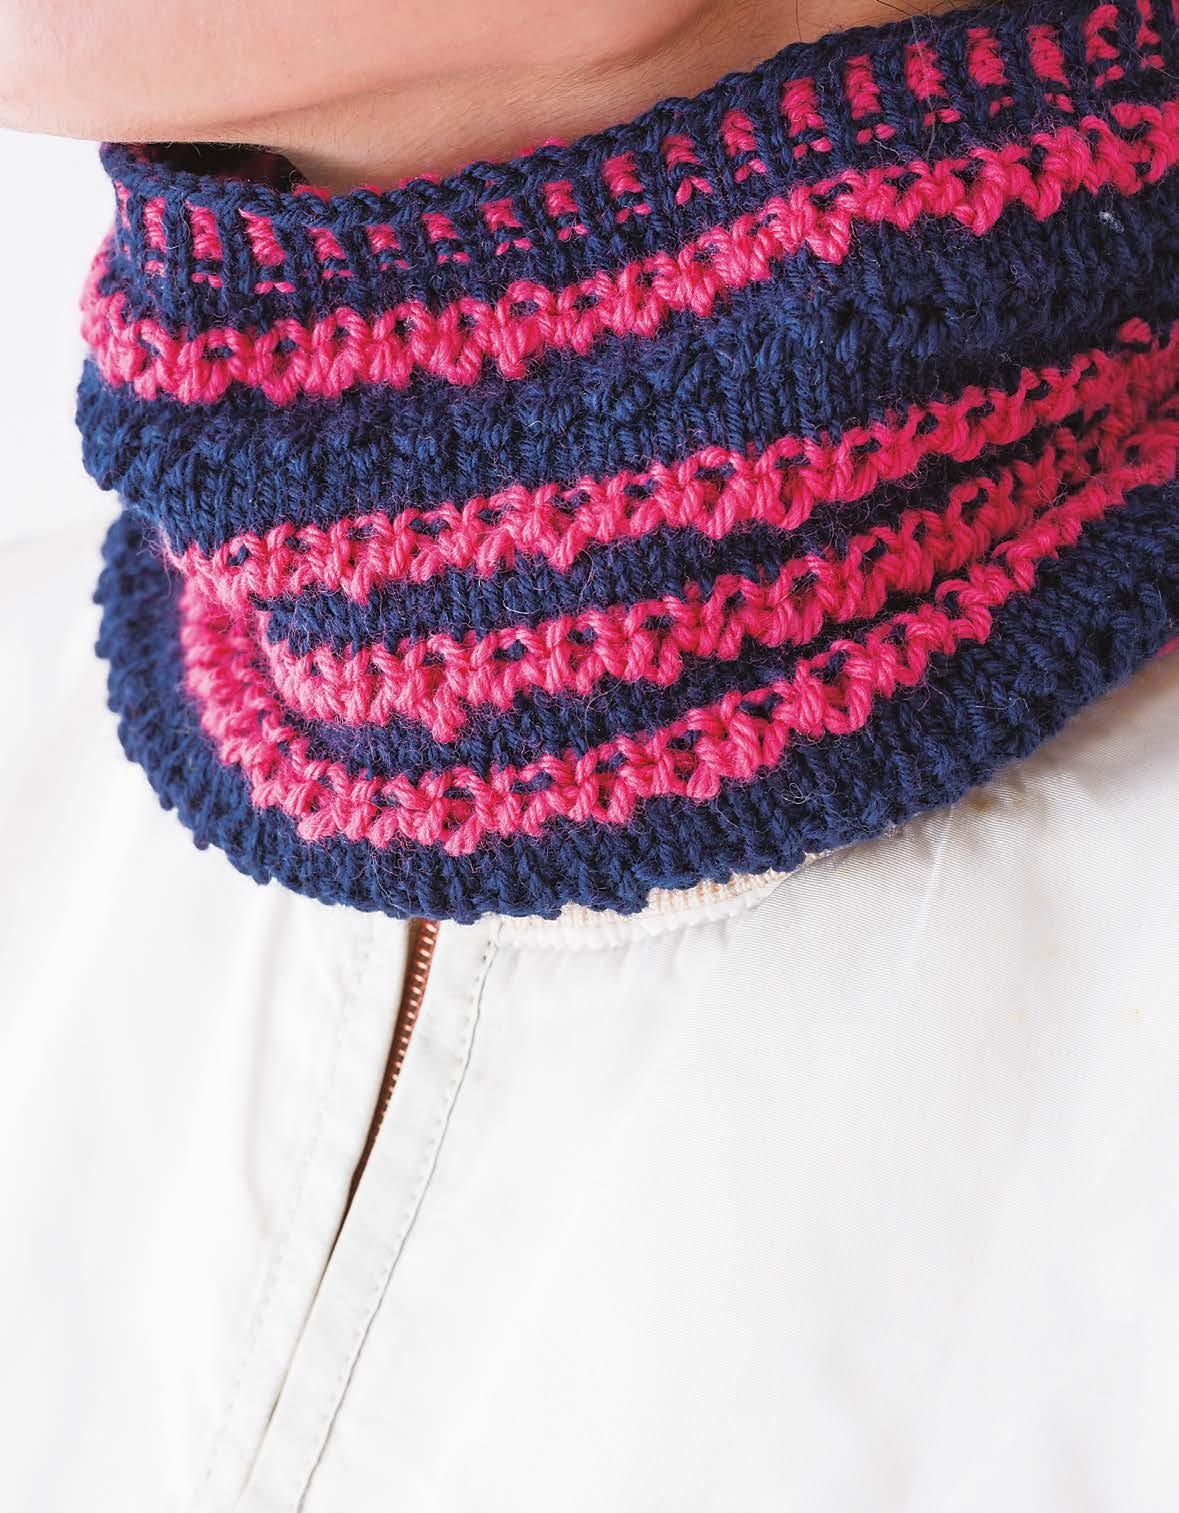
I used the same stitch pattern as for the shawl on page 24, but when I tried using a different color for the brioche stitch, the impression was completely different. The resulting pattern will differ depending on which row/round the color is employed, so please try it out until you are satisfied with the results. The upper and lower ribbing is corrugated ribbing (refer to page 79).
Suggested yarns: Puppy Princess Anny Instructions: page 79
4. 裏から引き上げた目と2本いっしょに表目で編む =
作り目
CO sts
4. Brioche st on WS: k st from previous row tog with YO from 2 rows below.
3. 表から引き上げ目 ただしすべり目は表目を編む
2.裏から引き上げ目(かけ目・すべり目)
3. Brioche st on RS: K only the slip st from previous row; slip YO from previous row to RN purlwise (see page 25).
作り目(輪編みの場合)=2目×模様数 1.表目で編む (25ページ参照)
2. Brioche st on WS: YO, sl 1. 1. K1
作り目=2目×模様数(+端2目)
Number of CO sts = 2 sts × pattern repeat (+ 2 selvedge sts)
配色
Color key = color A = color B 4
=A色
Number of CO sts (if working in the round) = 2 sts × pattern repeat
=B色
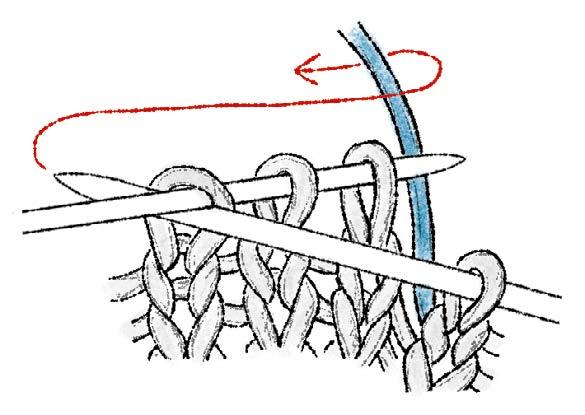
Recently, I feel that it has become mainstream to use circular needles exclusively for magic loop, such as when knitting small items in the round. However, when knitting a large item such as a sweater, knit using a circular needle in the appropriate length. For the cowls in this book, a 16" (40 cm) needle is a little difficult to use, while a 24" (60 cm) needle is a little too long and not very comfortable to work with. Even if it is knit with magic loop with a 32" (100 cm) circular needle, there is not enough slack in the loop, making it difficult to knit. I also tried the method of placing half the stitches on one circular needle and the other half on a second circular needle, but this is also a little unstable, probably due to the knitted fabric. Therefore, first cast on using the 24" (60 cm) circular needle. When you’re ready to join in the round, start knitting with a second circular needle of the same size. If you do it this way, alternate needles each round. I decided to knit in the round— that is, using two circular needles as if they were straight needles. This method is comfortable and problem-free! This is my recommended knitting method. Please give it a try.
No. 26, 27
No.ブリオッシュ追加1
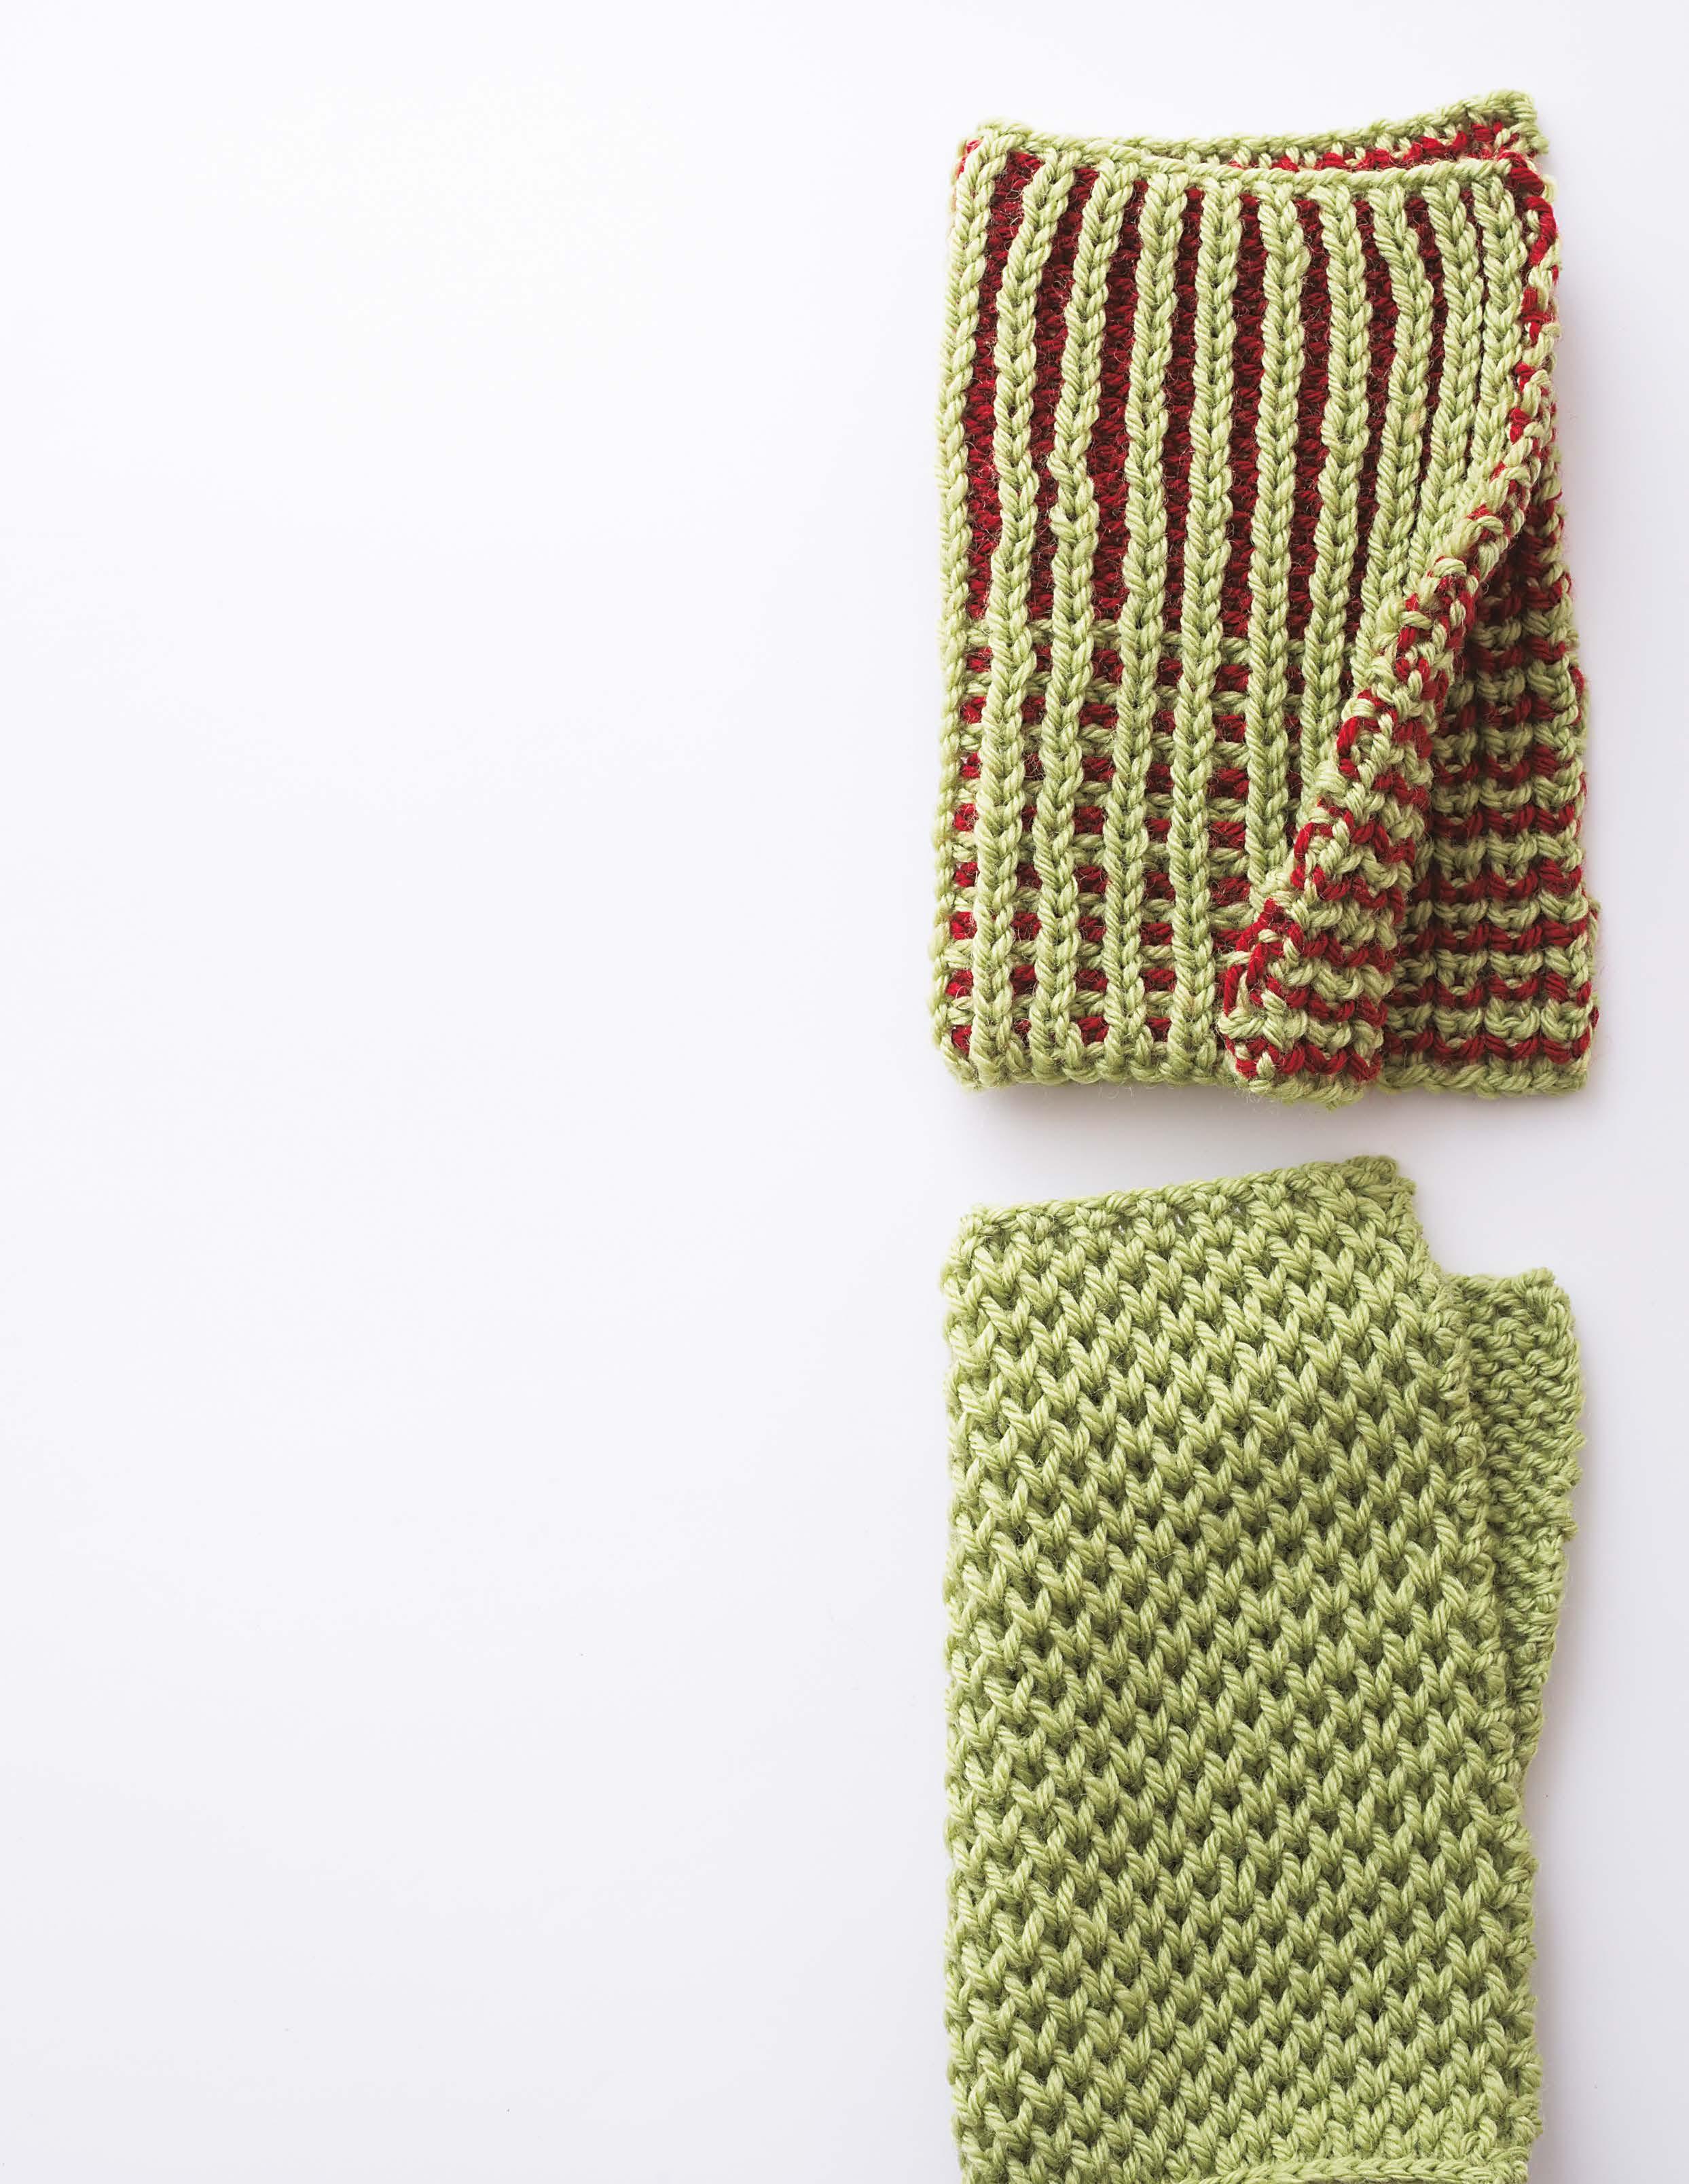
Use two colors. If you work 1 in every 4 rows in a different color, a checkered pattern will appear. If you change the color every row, vertical stripes will appear clearly in the color scheme.
No. 26
No. 27
… この段ではかけ目・すべり目で編む(表から編むときも、裏から編むときも同じ)
On this row/round, YO, sl1 (same whether worked on RS or WS).
… この段では表から見たら表目になるように編む(裏から編むときは、裏目)
On this row/round, work such that k st appears on RS (when working on WS, p).
=A色
=B色 配色
Color key = color A = color B
作り目=2目×模様数+1目(+端2目)
Number of CO sts = 2 sts × pattern repeat + 1 st (+ 2 selvedge sts)
作り目(輪編みの場合)=2目×模様数
Number of CO sts (if working in the round) = 2 sts × pattern repeat
NOTE: Work patterns 26 & 27 on a circular needle. Slide the sts to the other end of the needle every 4th row. Pay close attention to the arrows on the right side of the charts.
No. 28
It looks like a simple knitted fabric, but the knitting method is somewhat unusual.
1 1 2 3 4 2
=
作り目
CO sts
4. Brioche st on WS: k st from previous row tog with YO from 2 rows below.
3. 表から引き上げ目 ただしすべり目は表目を編む
2.裏から引き上げ目(かけ目・すべり目)
3. Brioche st on RS: K only the slip st from previous row; slip YO from previous row to RN purlwise (refer to page 25).
1.表目で編む
2. Brioche st on WS: YO, sl 1.
1. K1
(25ページ参照)
4. 裏から引き上げた目と2本いっしょに表目で編む 作り目=2目×模様数(+端2目)
Number of CO sts = 2 sts × pattern repeat (+ 2 selvedge sts)
作り目(輪編みの場合)=2目×模様数
Number of CO sts (if working in the round) = 2 sts × pattern repeat
作り目 CO sts
On this row/round, YO, sl 1 (same whether worked on RS or WS). On this row/round, work such that k st appears on RS (when working on WS, p).
… この段ではかけ目・すべり目で編む(表から編むときも、裏から編むときも同じ)
… この段では表から見たら表目になるように編む(裏から編むときは、裏目で編む)
作り目=2目×模様数+1目(+端2目)
On this row/round, YO, sl 1 (same whether worked on RS or WS). On this row/round, work such that p st appears on RS (when working on WS, k).
作り目(輪編みの場合)=2目×模様数
Number of CO sts = 2 sts × pattern repeat + 1 st (+ 2 selvedge sts)
Number of CO sts (if working in the round) = 2 sts × pattern repeat
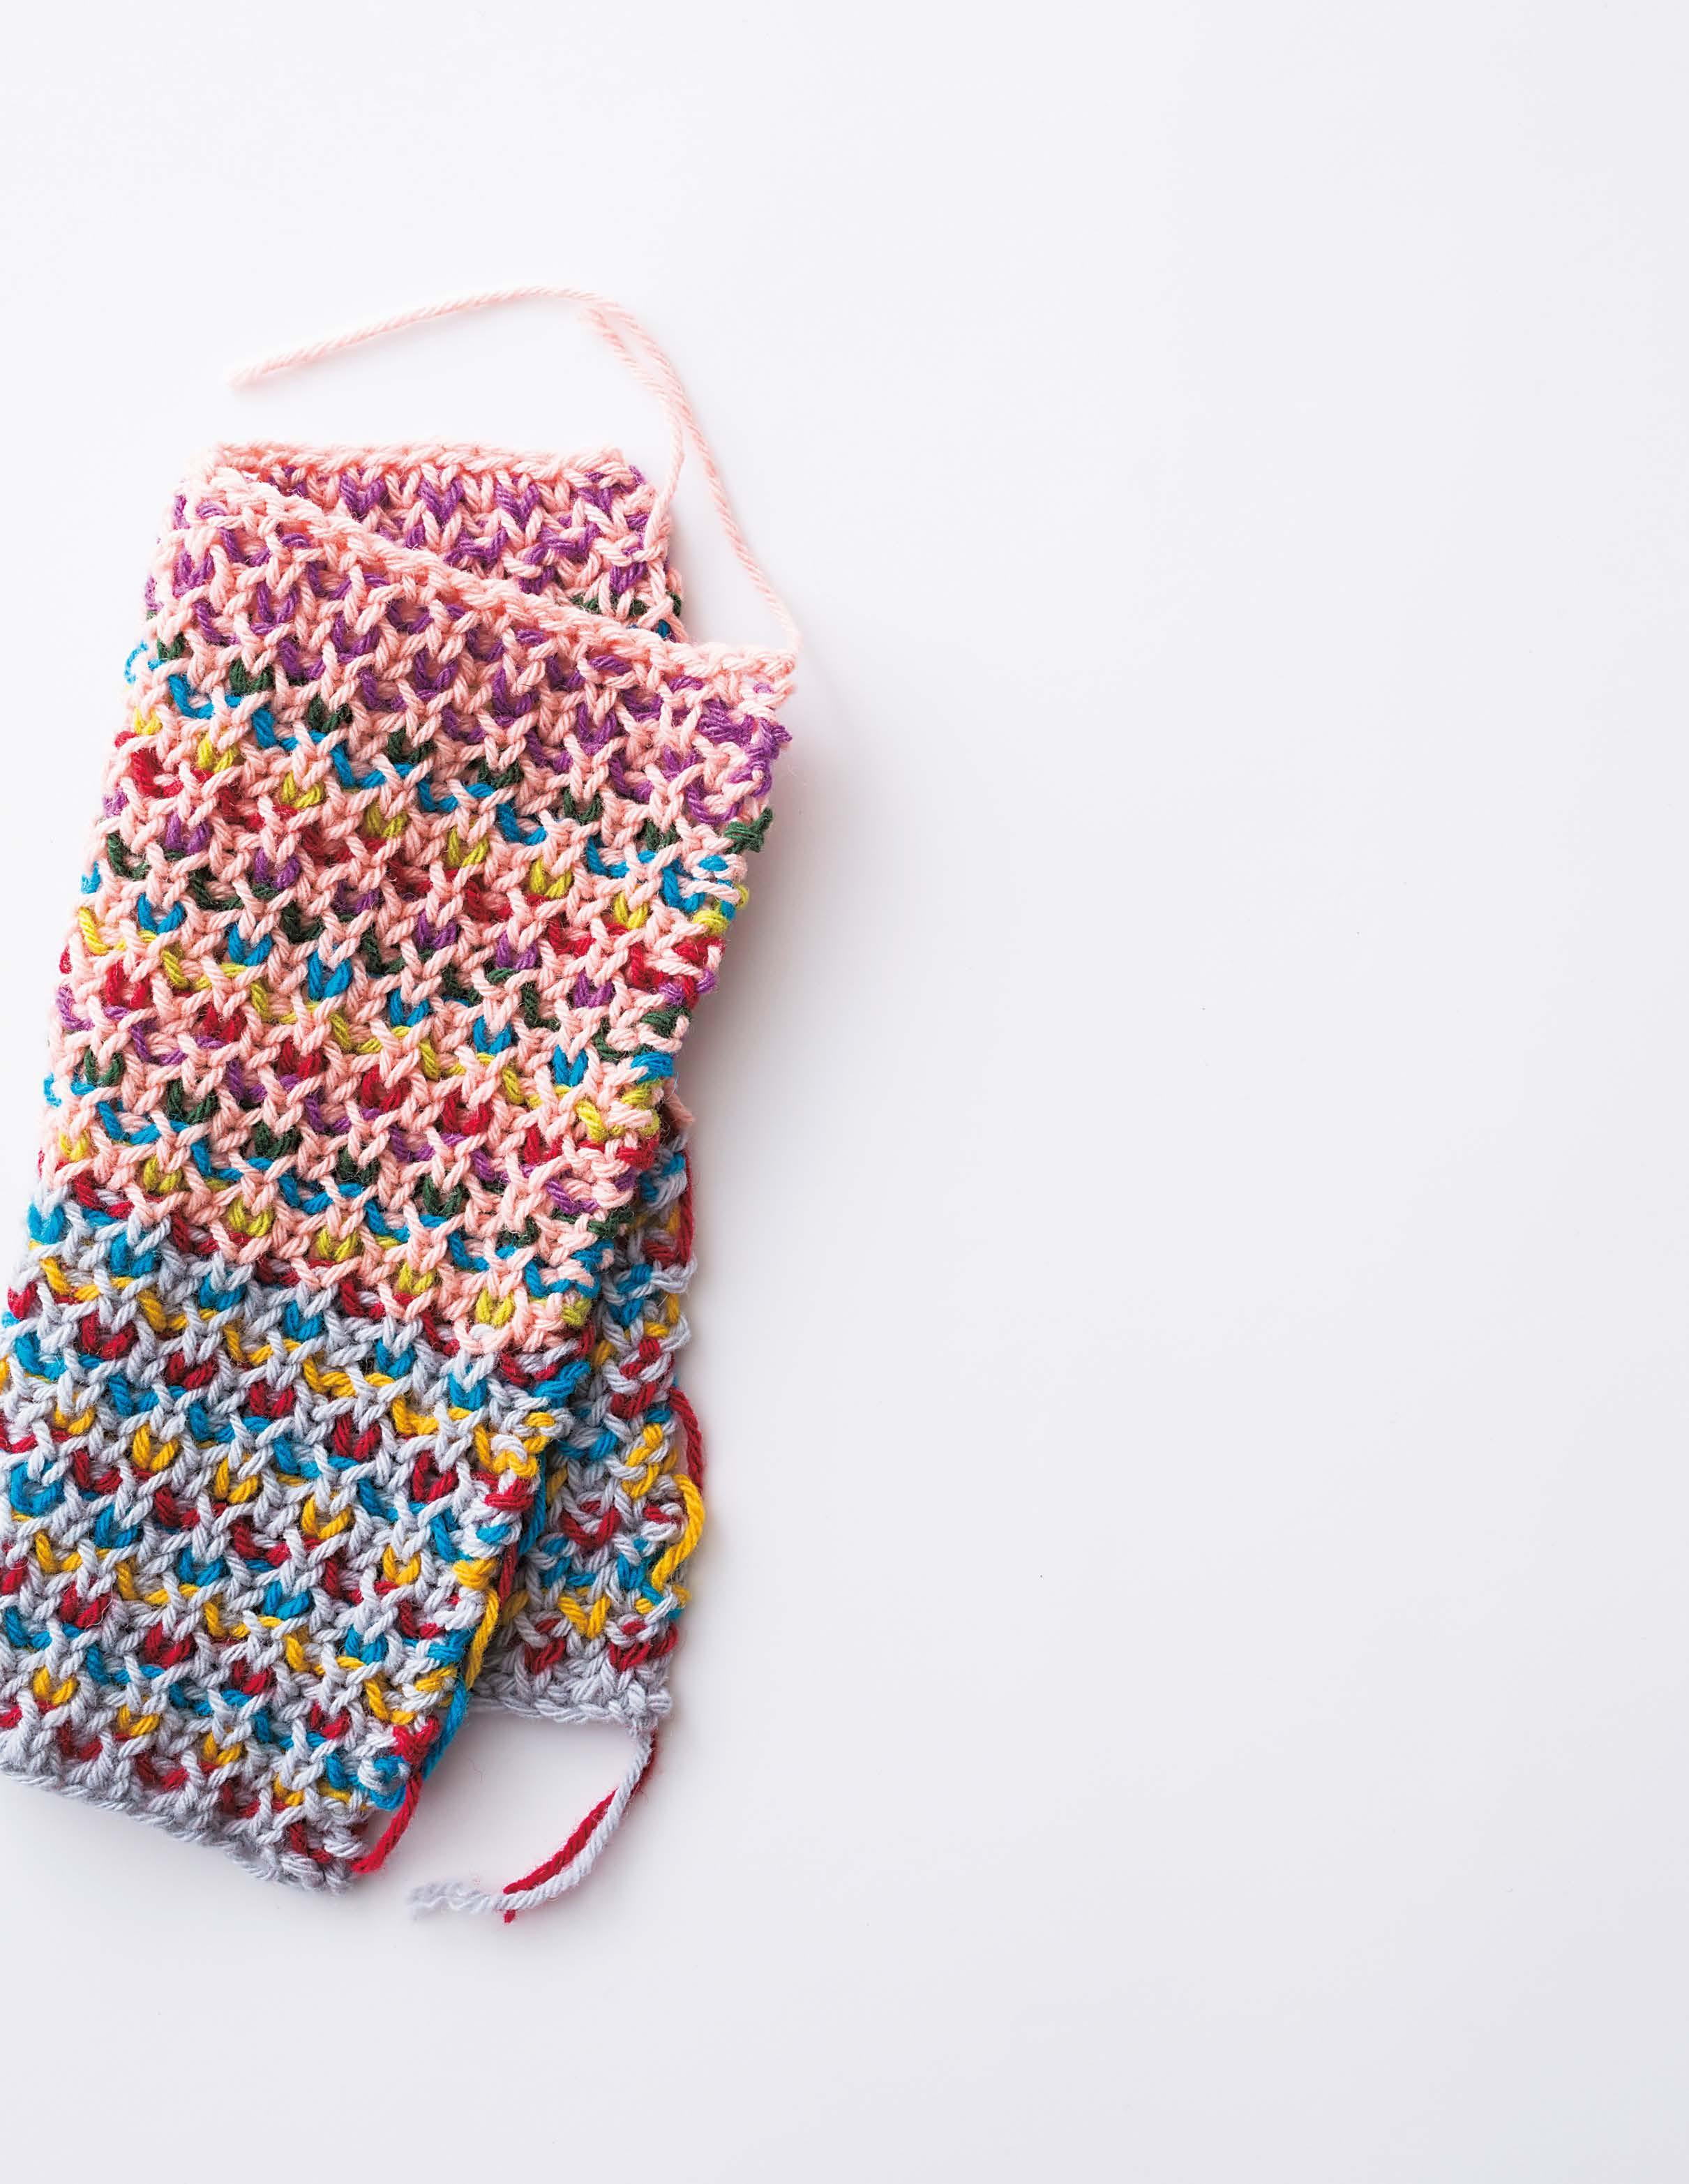
Color key color A color B color C color D
配色 ※配色は好みで変える
Change the color scheme to your liking.
… この段ではかけ目・すべり目で編む(表から編むときも、裏から編むときも同じ) =A色 =B色 =C色 =D色
Change yarn color every 3 rows/rounds. The direction of knitting is determined by where the yarn is. Work this pattern on a circular needle. Slide the sts to the other end of the needle every 3rd row. Pay close attention to the arrows on either side of the charts.
… この段では表から見たら裏目になるように編む(裏から編むときは、表目で編む)