7 minute read
The perfect shoe for YOU


Good shoes keep you walking or running at your best. But how do you find that right pair for you? Diabetes Awareness Month partner ASICS is here to help.
Wrongly fitted shoes can slow you down, causing friction, blisters, discomfort, pain, or injury. On the other hand, great-fitting shoes, of the right type, can ensure that you’re walking or running at your best – and even enjoying it! They’ll provide support where you need it, while still allowing proper movement.
MEASURING UP
When you’re choosing shoes to walk or run in, you’ll need a little more room inside than you might expect.
Start by measuring your feet. Even if you’ve had them measured before, it pays to do it again. Feet can change over time based on things like age, pregnancy, weight, and injury.
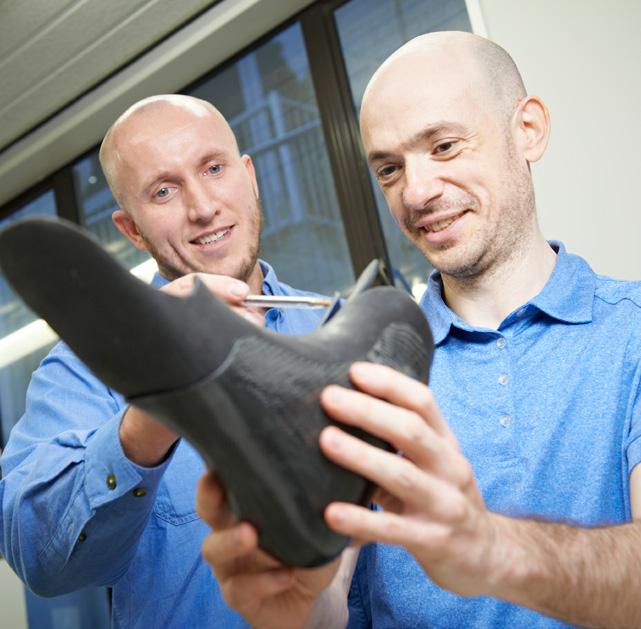
You can visit an ASICS Running Expert store to have your foot professionally measured, or, if that’s not possible, use our guide here.
Because feet swell with heat and activity, it’s better to measure your feet at the end of the day.
What you need:
• Paper
• Pen
• Tape measure or ruler.
STEP 1
Place the piece of paper and your heel against a wall. Using your pen, trace your foot as closely as possible. Now do it for the other foot as well. This is important as one foot is usually longer than the other.

STEP 2
With each foot outline, measure a straight line from the heel to the longest toe, to get the length of each foot in centimetres.

STEP 3
Lastly, add 1 to 1.5 centimetres to the length. This will give you the correct length to match with our shoe size guide. (This extra space gives your feet room to warm up and expand during your run.)

STEP 4
Use the guide below to find your shoe size. These are US sizes, which is what we generally use in New Zealand.

TRYING SHOES ON
Now you’re in the store, or maybe just looking through your existing shoes to check their fit. What do you do?
• If you have one foot that is bigger than the other, base the correct fit on your biggest foot.
• Factor in your socks. The thickness of your sock can play a big role in the fit of your shoes, so when trying shoes on try and wear the usual socks you’d wear for walking or running.
• Does the sock-liner of the shoe match the shape of your foot? Remove the insert and stand on it to check. Be sure your toes and sides of your feet don’t extend over the sides of the sock-liner.
• When trying a pair on, lace the shoes up so they are snug but not too tight. You should still be able to fit a finger under the knot.
• How much space is at the end of the shoe? There should be about a centimetre or a thumb width between the front of the shoe and your longest toe.
Pay attention to how you feel in the shoes. They shouldn’t be too roomy or too snug, and there should be that all important extra centimetre between your toes and the ends of the shoe. Your walking or running shoes are often a bigger size than your dress or casual shoes.
Take a walk – or a run – around in any pair you’re considering buying, to make sure your foot feels right when in motion. Most speciality running stores should have a treadmill for a test run, so take the time to do this.
Remember: Modern shoes for exercise shouldn’t have to be broken in. They should feel great on your first go.
LACING UP YOUR SHOES
Did you know that how you lace your shoes can play an important role in your running or walking performance, and in correcting common problems like heel slippage and blisters? (It’s not a silver bullet though – if you have ongoing problems, consult a medical professional.)
Here are some lacing techniques to address common issues.
Heel blisters or excessive wear in the back of your shoes are common signs of heel slippage. A ‘heel lock’ style of lacing will prevent your heel from slipping out of the shoe and reduce excessive movement of your foot in the shoe. This helps reduce the friction that causes blisters and excess wear.

HEEL-LOCK LACING
This technique ensures your laces don’t become loose and prevents your heel from slipping out of the shoe.
• Lace shoes in the usual criss-cross pattern until the second-to-last eyelet.
• Then thread the lace through the last eyelet so that the lace comes out on the inside of the shoe, creating a loop between the last two eyelets.
• Finish by crossing your laces and inserting them through the loops that you’ve created and pull tightly securing the shoe around your foot, and then tie shoes as normal.
If you feel like your shoes are too tight on the top of your foot, a ‘parallel’ or ‘straight bar’ style of lacing that evenly distributes the laces for better comfort may help.
If a change in lacing style doesn’t alleviate the tightness, make sure that your shoes are the right fit for your foot size, width and foot type.

PARALLEL LACING
• Lace the shoes in a parallel fashion, by skipping alternate eyelets for each lace and running the lace up the side of the eyelets to reduce pressure.
• Tie up the shoe as usual.
If you often get black toenails and/or feel pain in your toes, try a lacing technique that lifts the toe box, giving your toes more space.

TOE BOX LIFT LACING
• Begin by lacing from the eyelet at the big toe to the eyelet at the top on the opposite side – so it goes diagonally across the whole shoe.
• With the other lace, ensure it’s about 10cm longer than the other lace and criss-cross it across all of the eyelets.
• At the top, tie the lace as usual.
If you have high arches, you can adjust your lacing to alleviate the pressure from middle section.

• Start lacing normally with a criss-cross.
• In the middle section, thread the shoelace only through the side eyelets.
• Criss-cross through the final two eyelets and tie as normal.

• Begin by threading the shoelace only through the sides.
• From the midfoot onwards, start tying with a criss-cross.
• Finish with a criss-cross through the final eyelets.
If you have a narrow foot, make sure your lacing style tightens the shoe.

• Start by lacing the shoes normally with a criss-cross.
• Next, skip an eyelet and thread the lace in a criss-cross.
• At the end, lace in a usual criss-cross pattern.
If you have generally wide feet, use a lacing technique that loosens the entire shoe and gives the foot more space.

• Begin lacing in a normal criss-cross.
• Then thread the shoe in a criss-cross every other eyelet.
• Tie at the end as usual.
For a high midfoot, ease any pain by relieving the pressure in this area.

• Lace the shoe normally with a criss-cross.
• Then thread the shoelace only through the sides.
• After the point where bruising has occurred, start tying with the crisscross again.

HOW YOUR SHOES WEAR DOWN
Several things affect the condition of shoes over time. Here are some things to consider:
• Typically, running or walking on the road or footpath all of the time will wear out your shoes quicker than off-road, as the surface has a stronger impact on your shoes.
• Even shoes need rest! A shoe’s midsole material performs best if it has time to recover between runs. The optimum recovery time is 48 hours, so if you wear your shoes casually as well as for walking or running they’ll wear down quicker. We recommend buying two pairs of running shoes and using them in rotation to prolong the life of your shoes.
• Leaving your shoes out in the rain and wind can wear them down quicker. Leaving mud and dirt on your shoes will also negatively impact their life. Hand washing and air drying them gives them the best chance for a long life.
• We recommend changing running or walking shoes after about 800 to 1000 km.