14 minute read
NUETECH PLATINUM NITROMOUSSE

by dirtbiketest

NUETECH PLATINUM NITROMOUSSE BY: JIMMY LEWIS
ROOST - No more flats! - Feeling is very similar to a tube so the motorcycle’s handling is not altered - Durability is good
Advertisement
ENDO - Difficult for most to mount, especially with standard tools - You have to treat any mousse as a wear item - Usually messy to install and remove
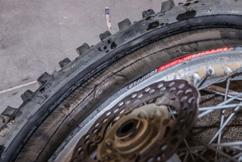
WHAT IT IS - A foam insert that replaces the tube in your tire
Nuetech is in the business of traction and that begins and ends with not having a flat tire. Inventors of the Tubliss system, they felt there was also the need for a better mousse. A mousse, for those unfamiliar, is a foam insert that replaces the air-filled inner tube inside the tire. Nitro Mousse combines a high concentration of nitrogen into a micro-matrix of proprietary elastomers that is claimed to be very tough. These elastomers are formed into a tube-shaped, foam-like ring that is installed into the tire and mounted on the rim with or without special tools. They make a Platinum version said to feel like 10-12 PSI and a Plushie for a 6-8 PSI feel. Nuetech claims the durability is up to double the life of other mousse options and is 100% flat-free. Included with the mousse is a lubricating gel.
HOW IT WORKS
The biggest issue with mousse inserts is the installation and removal for most. Like any tire change, there are techniques and even very specialized tools to make the job much easier. Yet, we have plenty of experience with changing tires so this was not a big concern for us. We even shot multiple videos of us installing and removing the mousse with very standard tools just to illustrate the technique. Though some cringe at the use of
channel locks on a rim. There are some simple tools like the Bead Buddies that help a lot. If changing a typical motorcycle tire is tough, this will be tougher in the beginning, but also look at the bright side–you can’t pinch the tube or get a flat once installed. We’ve also seen some riders break the bead of the tire by doing it wrong, so it is technique, not muscles. Like any mousse, you have to decide if this difference in procedure is better or worse for you as some riders do not mind the added complexity of changing a mousse because of the tradeoff of not incurring a failure during a race or on the trail. Or simply invest in a changing tool that makes the process less complex while also gaining a lot of riding buddies that now want to hang out at your house and use your tools.
That said, the Nitro Mousse is no different than any other mousse in installation difficulty or procedure. We did disagree with the suggestion of adding half the lube to the tire and half to the mousse before setting it in. Experience has taught us to put the majority of the lube inside the tire, spread out evenly, prior to placing the mousse inside then only a very thin even coat on the mousse itself. This allows for less lube to get scraped off the mousse while sliding it into the tire. However, it is better to use too much lube than not enough as it serves as the lifeline for the mousse. Also, sealing up the spoke nipples and former valve stem holes with a rim tape or even duct tape is a good idea to keep moisture and dirt out. In most applications we used a rim lock as well.
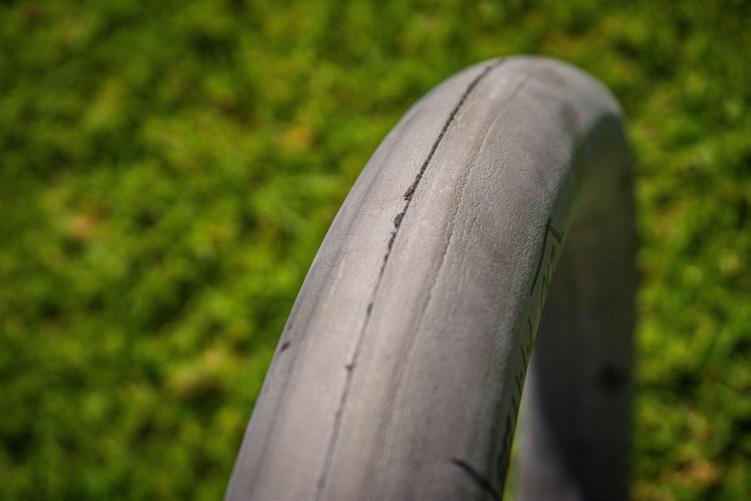
Tire selection plays a role in how a mousse works and we tried a variety of tires in both size and types to really get a feel for how the Nitro Mousse performed. How the mousse fits, tight or loose, is probably the biggest determining factor in overall performance and durability. The tighter the mousse fits, for the most part, the longer the mousse will last with one big exception–high speeds with lots of impacts. Extreme high speeds can kill a mousse in a matter of minutes if the tire is very tight or extremely loose. By “high speeds” we use 90 mph as a good speed to start at and it needs to be sustained for the speed (heat buildup) to be the factor, at least in our testing. Speed creates heat and it gets exponential as the speeds rise. The more powerful and heavier the bike, the harder it is on the mousse. We were not even concerned with the 70-75 mph suggested limit because we did not experience any degradation or excessive heat buildup even in 30-plus-minute runs on pavement. Our first sign of failure was on a 500+ mile mousse that was pushed at 90+ mph on a dry lake for 20 minutes immediately followed by pounding whoops and only then did we have slight tearing on the sides of the Nitro Mousse. Not the burning from the inside out like we have experienced with other types in a similar test. Tightness in fit also plays into how quickly the mousse breaks in and how long it lasts. If there is any gap in the fit you can cut the lifespan of the mousse in about half. We’d say it is loose if a new tire and new mousse feels like it has any less than 12 PSI with a Platinum, or if it feels like 9 PSI with the Plushie (by pressing with your fingers). If the tire feels loose or “floppy” anywhere on the tread surface or sidewall, that indicates a loose fit. A snug fit feels a lot more like 14 PSI for the standard Platinum and 10 PSI for the Plushie. An experienced hand should be able to tell the difference.
This comparison to PSI is also a good way to explain how the Nitro Mousse Platinum works. It has a feel that is much more like air than almost all of the other mousse brands out there. While most mousse’s have a dead or flat feeling to them, the Nitro has a little more spring to it most of the time. Other mousse that are very “dead feeling” also have a very exaggerated spring-back when they are really crushed on hard landings or when smacking a rock or root. Getting to this point on the Nitro is more progressive and the spring-back is not as amplified or sudden. Additionally, there is less roll or wallow when pushing the tires in turns so the handling and suspension are not affected as much and settings do not need to be altered in comparison to an air tube setup. But at a similar feeling using an air pressure figure, the Nitro Mousse provides a more cushioned or supple ride as if there were 2-3 less PSI in the tire on the bumps but not in the turns. What everyone who used the Nitro noticed was the additional bite it gave any tire, especially when under a load. The tires all seemed to flatten out more when compared to the usual 12 PSI of air pressure, and when hitting things (rocks, roots or bumps), the wheel did some of the suspension’s work to help the tire stick to the ground better. Not until the end of the mousse’s life cycle did the handling get sloppy or was there excessive tire roll or chassis wallow.
We tested the earlier and current Nitro Mousse mostly with Kenda tires we are very familiar with. We used them predominantly in the Parker DTs, but also in the Equilibrium, the new Ibex, and Dunlop AT81’s. In all but the Equilibrium (larger carcass), the Nitro started out with a feel that was in the 14-15 PSI feel zone. Additional testing on the new Platinum yielded the same results here but with a slightly less PSI pressure feel, say 2 PSI less. The mousse does break in initially, but in reality it fits better into the shape of the rim and the tire. This happens sooner and easier on the Platinum. The tire and the stiffness of the tire carcass plays a role in this. On the stiffer Parker it took a good couple of rides for it to get into that 11-12 PSI feeling that the mousse seems to settle into. On the soft carcass Ibex, it only took one quick ride. After that, the mousse seemed to settle into a very predictable


life cycle where performance was very consistent. The softer Plushie follows this trend but feels like 11 PSI when first installed, quickly dropping to a 9 PSI feeling, then settling at an 8 PSI feeling. Nuetech recommends storing the bike on a stand with both wheels elevated. We did not do this and did not notice any adverse effects from having the bike’s weight on the mousse for a few days or even when tied down in a truck for a day or two. But our test bikes rarely sat for more than a week with the mousse in one position. When tied down, the mousse/tire will have a flat spot initially, but it is nothing permanent.
Weight wise, the Nitro Mousse is about double of an average heavy-duty tube and similar in weight to some of the ultra-heavy-duty tubes. The rear is just shy of five pounds and the front was nearly three pounds. Picky riders can feel the weight increase in the wheels when spinning, but it is not as noticeable as you might think because of the dead or absorbing feeling the mousse gives.
Durability has been the biggest issue with mousse inserts since they have been in use. One of the biggest concerns is actually shelf life. They wear out just sitting in the open air. Lately manufacturers have been working on this and the Nitro Mousse is the latest iteration. The claim is that nitrogen is a big factor in this. In our testing, we found shelf life to be excellent and shrinkage was minimal. Our testing backed up the double lifespan claim if not a bit more on the older black Nitro Mousses. The newer Platinum and Plushie ones are showing about ¼ to less life based on our figures, which is largely a factor of the PSI feeling where we use them. Internally they showed less damage with splitting, while cuts and shrinkage were minimal. The actual life will depend on how you use it. On one set, we got 1200 miles of fast and hard dual-sport riding and then put an additional 700 miles of trail riding with the same mousse inside a new set of tires. The mousses were definitely softer when they went in (maybe 11 PSI feel) and wore to about 8 PSI feel in the end. The Plushie has the same life span as long as you don’t use it for higher speeds, we’d suggest staying under 70 mph here. The softer mousse heats up more with speed and it will quickly cut its lifespan. To combat some of the durability issues, Nitro Mousse now sells “Wedges” ($19.95) which can be cut to length and stuffed in with a used mousse to increase the life span. You just cut the used mousse and stuff in
the “wedge” that is about 2" longer than the space it needs to fit into. We are currently doing some tests on this and will have another test and explanation when we are finished.
For durability and to be abusive, we ran one set with an open valve stem hole and rode sand dunes and through water with no real adverse effects. The mousse survived with no signs of failure and the lube was surprisingly resilient. For us, a rear mousse was good for two tire life’s for racing or higher speed use then another tire’s life for only slower speed trail riding. Just trail riding we would not be surprised if an average rider could get five tires’ worth of life out of a rear as long as excessive time did not come into play. The front life seemed approximately 4-5 tire’s life spans–it seems to last just a bit longer than the rear as you would expect. Bikes with heavier front ends (large capacity gas tanks) cut this life a little. The hardest condition for the mousse to handle is getting the tire really hot from spinning a lot and then pound sharp, hard whoops. We did that and the Nitro Mousse held up as good as any, if not the best. It’s important to note that Nitro Cooling Gel, or other mousse lubes, work tremendously better than the old fashioned “tire soap.” Mousse lube will easily last the lifetime of a tire, if not more, while tire soap needs to be lubricated just about every ride when riding at average speeds or higher. For longevity in the mousse, you’re better off spending a little extra for mousse lube and saving a lot on mousses and installation time.
At $135.00 apiece, the Nitro Mousse is not cheap, not the easiest to install, and has zero bling factor (though they do come with rim stickers!), but it eliminates the issue of having a flat tire (we laugh at the thorns and spike sticks that used to guarantee flats) and provides better traction compared to an air-filled tube. Traction is especially better when nearing the end of the mousse’s life cycle or starting with a new or one-tire old Plushie where it is like a tube with 6-8 PSI in it, yet with zero chance of a flat. It is like cheating at extreme enduro conditions, makes for less worries when you smack a rock, and meets all claims given by the manufacturer. For racing it is eliminating one type of preventable mechanical failure. So if you want flat-free riding, here is an answer with few drawbacks.
KTM/HUSQVARNA TWO-STROKE POWERVALVE OIL LEAK REPAIR BY: JIMMY LEWIS
If your KTM 2-stroke (250 or 300) looks like it sprung an oil leak out the side of the cylinder, behind the expansion chamber, you are not alone. This is a pretty common issue and really does little harm. Other than make it a little messy in that area. But there is a simple cure.
First, unless something is really wrong (which is rare), this is a simple gasket sealing problem. If your bike is running fine and performing normally, none of these issues will be of concern. But if you have a leaking crankcase main seal, coolant getting into the clutch/transmission, severely overfilled transmission fluid, or a clogged transmission vent line, then the oil leaking out of the gasket is only a small part of the problem.
Here Is How You Fix It and What You Need: RTV Silicone Sealant: Permatex 82180 Ultra Black Maximum Oil Resistance RTV Silicone Gasket Maker.
There are some updated parts for older models and some owners even claim some of the older gasket parts provide a tighter seal. But we have never needed anything more than the sealant to make it right.
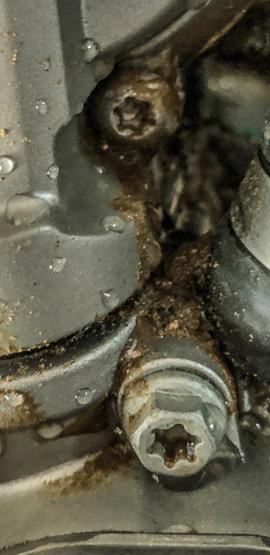
The simple way to do this is to remove the expansion chamber and then clean off the area. Then remove the cover for the powervalve actuator. It slides onto a rubber gasket that has a rounded lip that mates with the cover. The leak is usually coming from the seam between the cylinder, the powervalve gasket, and the cover–the fit isn’t perfectly tight here.
Further clean the area around here with a drying parts cleaner. Take care with the powervalve cover gasket as it will stay on the bike the whole time since you do not need to disconnect the powervalve actuator.
Apply a small smear of silicone seal along the back of the rubber gasket between the cylinder and gasket and rubber piece as shown in the photo. Then reassemble the cover to the bike. Put the pipe back on and while you have that Silicone (Even better if you use the more heat resistant Permatex 81160 High-Temp Red RTV Silicone Gasket) out it does not hurt to put some around the O-rings on the expansion chamber opening. Let it set and dry and you’ll not have a leak any longer–and a cleaner bike.


Then place the gasket back in place. Next apply silicone around the lip of
the lower part of the powervalve cover, but not too much to make a mess.


