11 minute read
Talking Tech
chassis
TECH
Photos & Text by Vahok Hill
JOINING TUBES
WITHIN THE REALM of chassis fabrication, maintenance and or making new parts for your race car, you will be required to join a plethora of tubes together. It may be round tubes to round tubes, round tubes to flat stock and round tubes to square tubes. For the purpose of this discussion, the majority of these tubes will be steel in a number of different alloys - 1010, or at the other end of the scale, 4130 tube stock.
There are many different ways to prepare a tube or a section of steel to be joined to another tube in preparation for the welding process. The level of preparation to the weld joint is often more or equally important as the method utilized to join the tubes from a strength or durability perspective. The quality of the weld will be greatly dependent on the quality of the tube joint and the preparation of the metal prior to any welding process. Even the best welder cannot make up for poorly fitting tubes joints.
You could just cut the tube, place it in the approximate position required and weld away with little or no regard for any precision of any fit between the tubes. As with most things, there is a right way and a wrong way to accomplish any given task. Notching a tube will give you the most area to weld and spread the loads over the greatest area of the tubes or possibly more than two tubes to be joined. This will give you the strongest joint possible and that is what we are trying to obtain.
The fit of the tubes is a critical component of the construction process. A poor fitting tube joint leads to poor weld joints and joints that are much lower in strength than joints that were properly welded with well-fitting tubes. There is more to welding a race car together than just having the manual dexterity to work the welder. The whole package includes developing the capability and capacity to make all of the correct fits. The fitting of the tubes is a major contributor to a strong weld joint. The process of preparing the tubes for welding the cutting of the fit is called notching or fish-mouthing or coping. The matter is not the nomenclature but the process for developing a quality fit is paramount to building a strong joint.
Notching tubes can be done in a number of different ways. Some methods are easier than others. The amount of time spent and the quality yielded are not dependent on each other as it was in days gone by. The quality of the notching has a good deal to do with the tooling used to make the notch. You do not have to have any power tools to notch tubes. You could perform the task with simple hand tools like a file or a handheld grinder or a nibbler, but the results are not always as good as they might be as with a more automated method. For the most part, the tool makers and marketers have made this task way too simple and the costs for the specific tooling required far too economical to ever use simple hand tools to accomplish this task. There is no good reason to not have tube joints on our race cars that are well executed.
For a very reasonable cost, you can purchase the tooling / tools required that will enable you to notch tubes in a first-class fashion. You may have many of the required tools in your shop right now. The local home improvement centers usually have the majority of the tools you need to notch tubing. The majority of tubes you will be notching for your race car will range in size from ¾ of an inch to 2 inches in diameter. If you spend a little time at the local Home Depot or Lowe’s in the tool section, you will find hole saws that can be used in the notching process; short of having a milling machine and an assortment of the correct sized end mills to notch tubes, a hole saw mounted in your drill press is a great way to get a first-class notch of the correct radius in a tube. Be forewarned that all hole saws are not compatible with metal, check to see that the hole saws you may be purchasing will work on metal. There are many fine brands of hole saws on the market that work on metal and given even minimal care they will last longer than the normal race car. Best of all, hole saws come in the same sizes as the tubes normally used in the construction of race cars. Using a 1 ½ inch hole saw on a 1 ½ inch tube will yield a notch with the perfect radius to mate up to the 1 ½ tube you are joining. This same hole saw will also work on a smaller tubing to give you the correct radius to mate up a variety of tubes together, that is a ¾ tube that may be joined to a 2-inch tube will
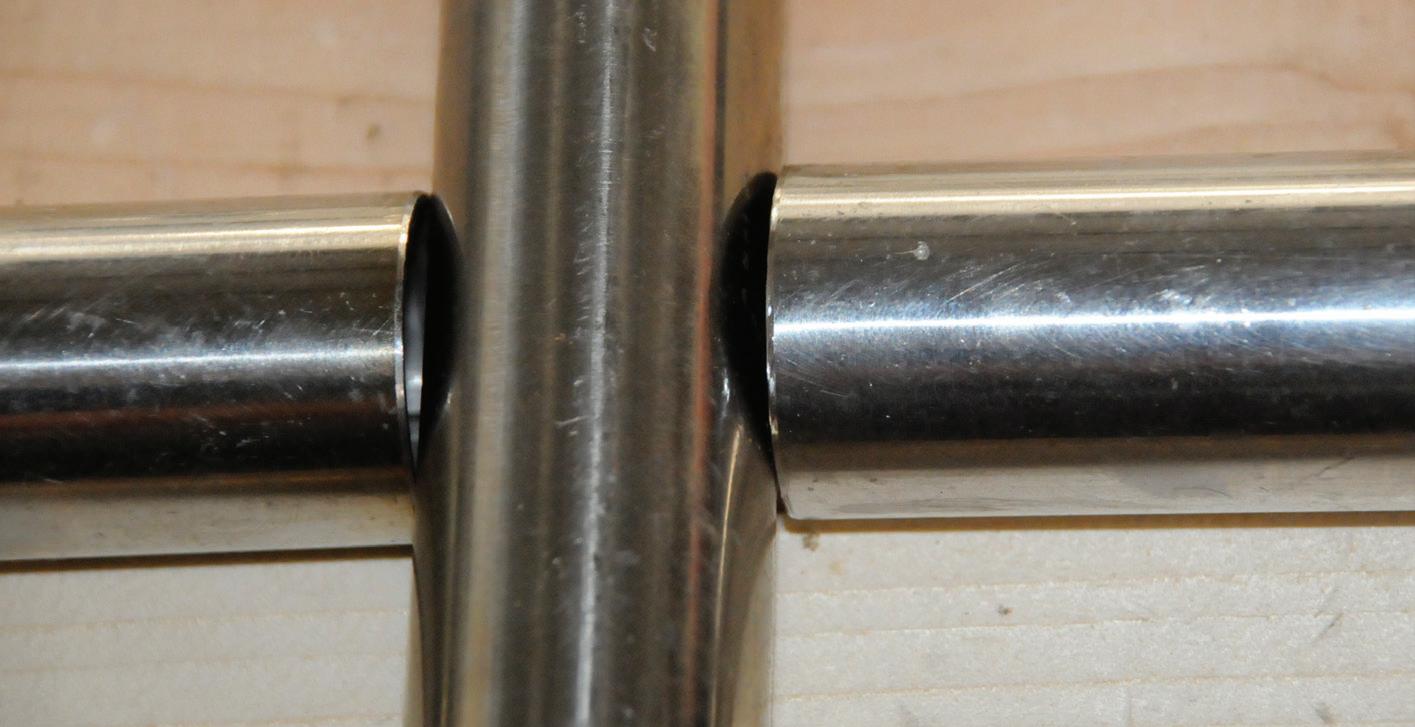
A selection of tubes that will be welded together to form a structural part of a race car, in this case a set of nerf bars. You can see that the tubes do not fit together in a way that would yield a strong weldment. The coping or fish mouthing of the tubes will allow a strong elegant weldment.
The cutting of the tube in preparation for welding. In this case the machine was set to a slow speed and plenty of cutting fluid was used to keep the part and the tool cool. Slow and steady wins this race. There is no need to hurry this process.

require a 2-inch radius rather than a ¾ radius.
If you are fortunate enough to have a milling machine in your shop, you own the ultimate in tube notchers. Using an end mill of the correct size makes a perfect notch. The cost of some of the larger sized end mills can be quite expensive which makes the hole saw option look even better. The mill is also a great way to hold hole saws. If you do not want to purchase specific cutters for large diameter tubes, they are expensive, very expensive and may require special holders at an even greater cost. I have even used my lathe to notch tubing, by placing an end mill in the head stock and fabricating a special holding fixture to mount the tube in the tool holder. While this is an extreme situation, it works.
For the average Saturday night racer, the equipment required to properly notch tubes is fairly short. You may have most of the prerequisites in your shop tool inventory right now. At the very least from a safety and quality perspective I would recommend that you use a drill press if you are going to use hole saws to do the notching. If you do not have a drill press, you can purchase one at the same home improvement warehouse where you get the hole saws; the orange one or the blue one both sell drill presses. I would be remiss if I did not mention Harbor Freight as a potential source for a drill press. I have seen some nice floor mounted drill presses on sale for under $400 dollars at all three of these stores. Be forewarned; if you plan on doing a good bit of fabrication, buy the best quality machine you can afford. This is a tool you need to have for other purposes not just tube notching, general shop usage comes to mind. So, purchase quality machines with a brand name you recognize.
The drill press needs to be or should be bolted to the floor, especially if you are going to be working with large lengths of tubing. Bolting the drill press down will give you greater stability not
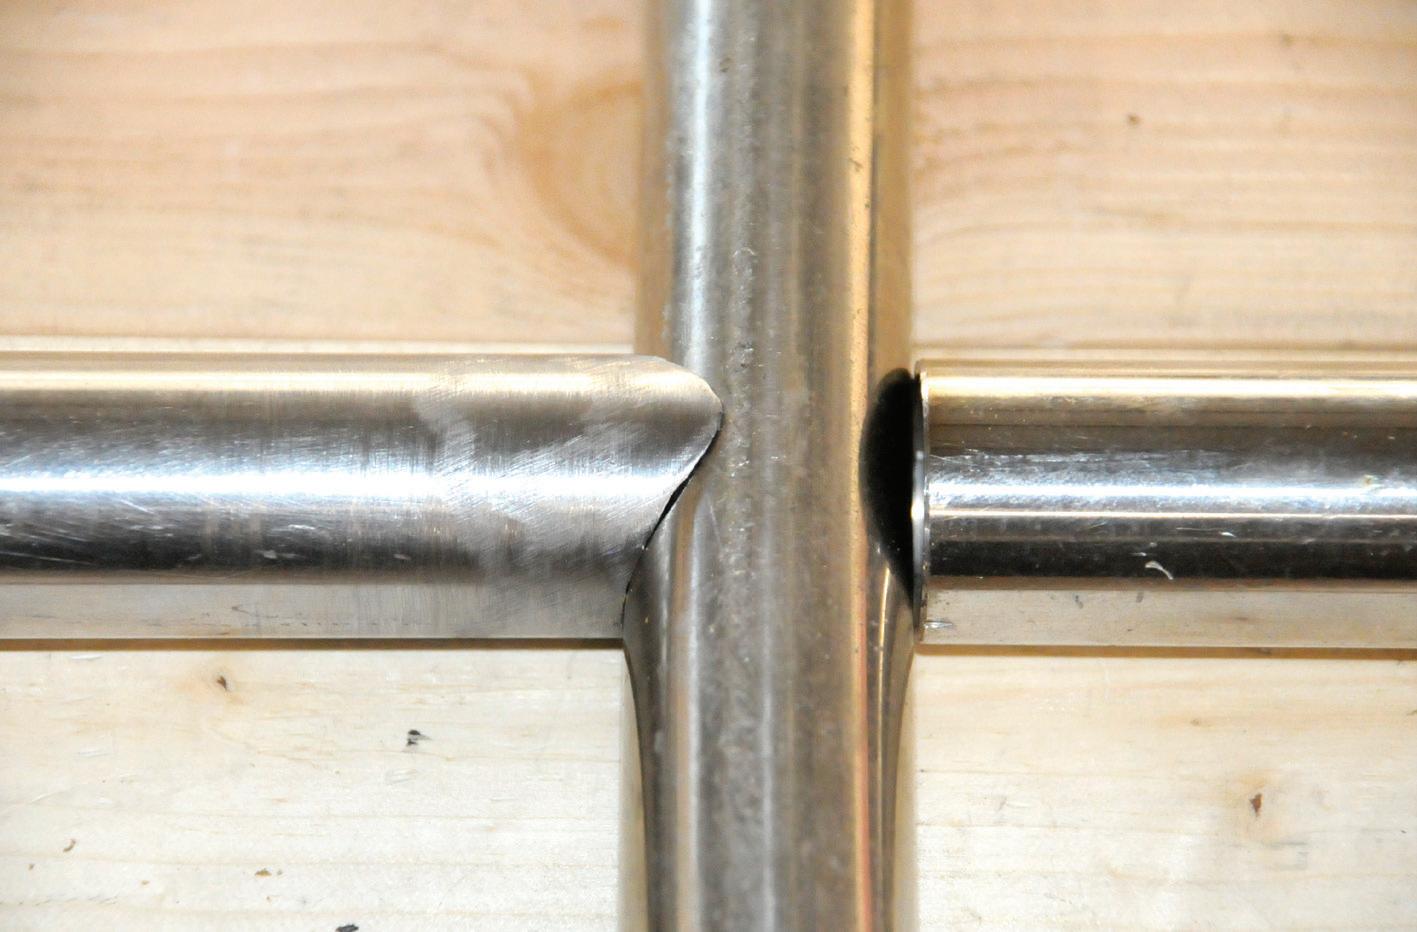
A direct comparison of the fish mouthed tube against the square cut tube. The fish mouthed tube fits and will offer the welder a better opportunity to get a strong good-looking weld.
to mention that it will be safer if you are not having to worry about your drill press falling over while you are notching a tube or for that matter any other drilling work you may be doing. This makes the operation much more stable and safer. Using a hand-held drill is not a viable option due to the possibility of the hole saw grabbing the work and causing some serious damage to your drill or the tooling. Worst case scenario, bolting the drill press to the floor will seem like an even better idea if you find yourself sitting in the emergency room with a serious injury. In all seriousness, there is a risk of personal injury if the work piece and the equipment is not securely held in place. I have seen hand drills used for this process and sometimes it works OK. The problem is that the possibility of the cutter grabbing and causing the cutter to lock into the tube and then the drill spins out of the hands of the operator, this becomes an issue due to the operator must now deal with a spinning drill motor. The message here is to avoid using a hand drill for this operation. A stationary drill press bolted to the floor is really the minimum for good safe drilling operations of this scale.
If you are going to be doing a good bit of fabricating it may make sense to purchase a dedicated machine for notching tubing. There are multiple tool vendors that make equipment that is specifically designed to notch tubing. These machines do a great job of notching tubing. They may be a bit of overkill if you are only going to notch several tubes but if you are planning on doing a good bit of fabrication, they do
A little planning and some good work processes will yield a stronger part for our race car.
a great job and the time required to set up and complete the notching process is quite fast, accurate and cost effective. As an added bonus these machines make obtaining the proper index position for the tube a very simple operation.
When joining a tube to a section flat stock or to a square tube, it a simple matter of matching the surface to be welded to the flat surface. This will require a weld surface on the tube that is parallel to the surface on the flat stock on square tube. This only requires a simple hack saw and some de-burring, it is just that simple. Or you could use a hand-held grinder with a medium grit flap wheel.
Remember, with any static structure, which in our application is a race car, the associated cage and suspension the cage is tying together, if we can spread the loads over a greater area the structure will hold up to greater loads prior to reaching any point where it would or may yield. Those loads would be the stresses that are a normal in our sport. Just welding the tubes together may not be enough. Notching the tubes takes the tube and spreads the load over a larger area. Notching the tube gives us the ability to make the welded joint stronger. It is just that simple.
TOOLS
• The drill press should be set to the speed that the hole saw manufacturer recommends. Other tools you will need: • The correct sized hole saw for the desired radius required, hole saws can be purchased in sets or individually. (purchasing the sets is a good way to go because they usually come with the mandrel) • A mandrel for the hole saw, the mandrel is the interface to the drill. The mandrel is the tool used to attach the hole saw to the drill motor. • A good vice for your drill press. The vice should be secured to the table of the drill press. Several clamps may to hold your vise to the drill press table.
The preferred method is to bolt the vice to the table. This keeps clamps from interfering with the tube depending on the size and shape of the tube. • A selection of hand files to help de-burr the tube after it is notched. • Some course emery paper to dress the tube after it is de-burred prior to welding.
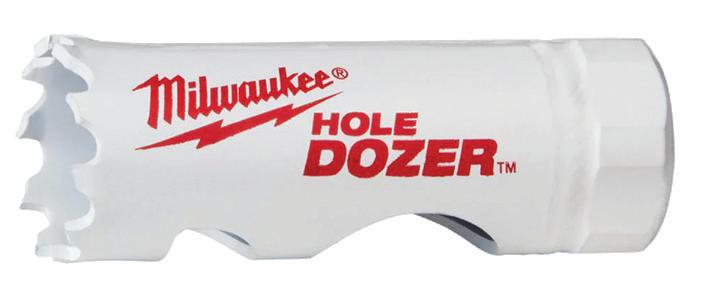

A collection of well used Hole Saws. With minimal care and proper lubrication, a quality hole saw will last for many uses.
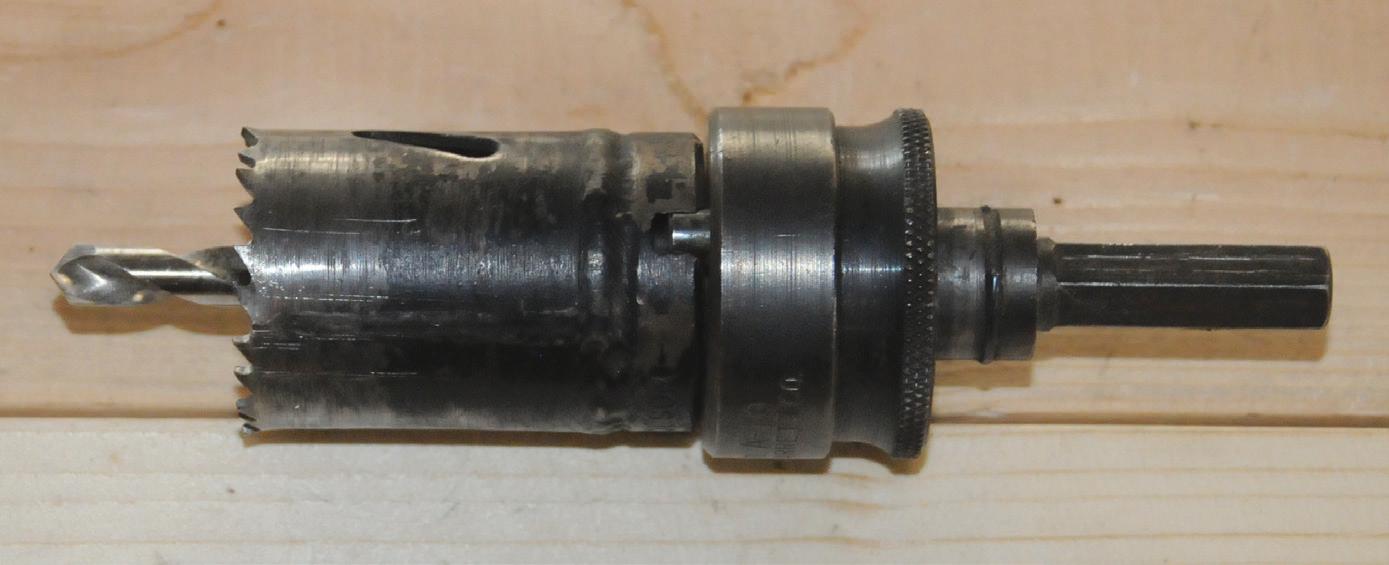
A hole saw mandrel. The same mandrel will work for many different sized hole saws, minimizing the number of tools you will be required to purchase.
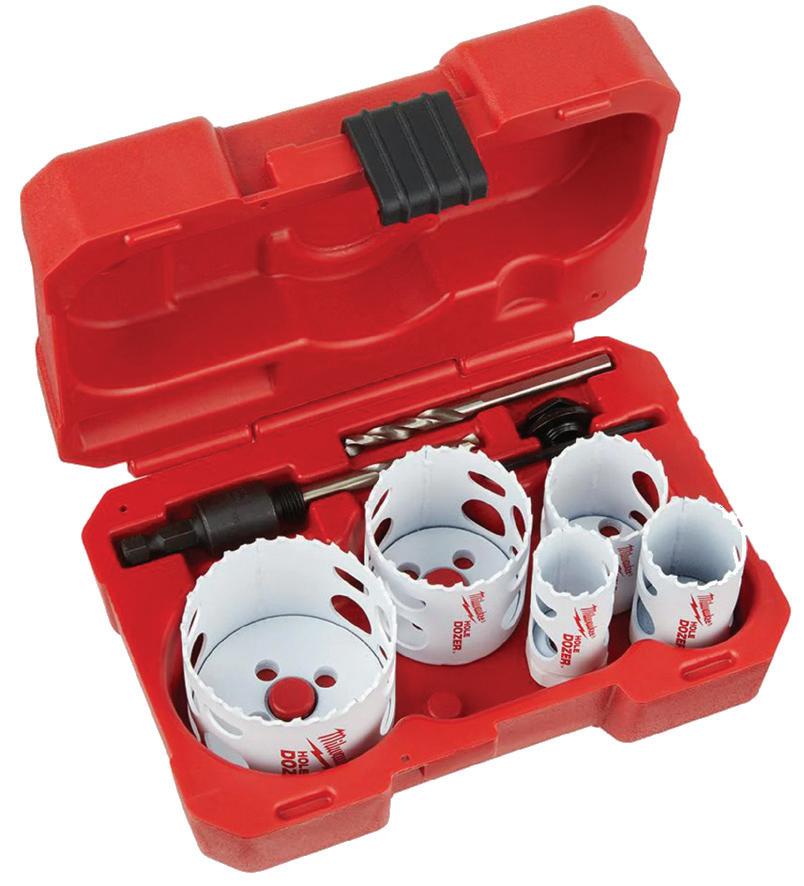
Sets, like this from Milwaukee, range in price from $39 - $139 at most hardware stores.


