20 minute read
2015 AUDI B8.5 ALLROAD
OWNER & PHOTOS: GENE PASCUA @DFFRENT_ALLROAD
My first vehicle was the 2nd Gen 1995 Toyota 4Runner when I was 17 years old. I didn’t know anything about cars and nothing about the off-road culture at the time. After high school, I left my hometown of Staten Island, New York, to attend the Academy of Art in California. It was here that I learned about the off-road community. I sold my 1995 4Runner to get a newer 3rd Gen 2001 4Runner, and then two years later, I bought the 4th Gen 2003 4Runner with the V8 motor. It was when I got the 4th Gen 4Runner that I gained interest in modifying my truck. I was still learning about the off-road community and didn’t want to go too crazy with it, so I just slapped on some Mickey Thompson tires and bought some miscellaneous aesthetic parts from Jaos. I was totally into the Jaos aesthetic at the time, and I think it was the look back then for a bit.
A few years later, I decided to let go of my 4Runner and wanted a fuel-efficient vehicle. I never owned a car before and was looking into something more sporty. So I started looking at Audi for an entry-level sports vehicle. It was a different world for me being lower to the ground than I was used to, but I instantly fell in love with the Audi A4, and so I bought one. I think I’ve gotten more speeding tickets in the Audi than any other vehicle I’ve owned. I fell in love with the Audi brand, then eight years later, I bought their Allroad model.
FORM THEN FUNCTION
After I bought my Allroad, I had no plans to do anything to it. I wanted it to be my daily driver and carry my dogs on road trips. I forgot about the off-road community and I was pretty naive with the street modding community for Euro vehicles. I decided to join an Audi club in the Bay Area to learn what people were doing with their Audis. I joined the Audi Gruppe of Silicon Valley, which I helped grow into what it is today. At that time, I met many helpful people who gave me ideas on what I should do with my Allroad. It was all about tuning the engine, lowering it, and exhaust. I was conflicted if I wanted to do that. Then it hit me; I’ll lift it! I started my research by looking at what aftermarket parts were being put on popular builds and what social media influencers were promoting on their pages. I usually decide based on design and then function. Coming from a design and photography background, I am heavily in favor of aesthetics and design. I then looked at the utilitarian aspects of the product and decided from there. I can love a product’s function and capabilities, but if the looks don’t work for me, then it’s a no-go. There has to be a middle ground between function and aesthetic design to decide to go with a particular product.

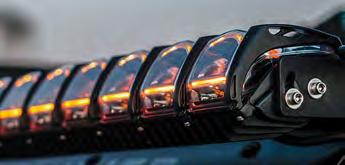
LIGHTING: Rigid Industries dual SR Pro for sidelighs, Rigid Industries dual SAE Midnight Edition lights for high beams in grill, Rigid Industries single 30” bottom SAE light bar, Rigid Industries single 40” ADAPT light bar, Rigid Industries dual Chase lights, Rigid Industries dual rear DSS lights, Rigid Industries dual 360 Series pillar lights
NO TURNING BACK
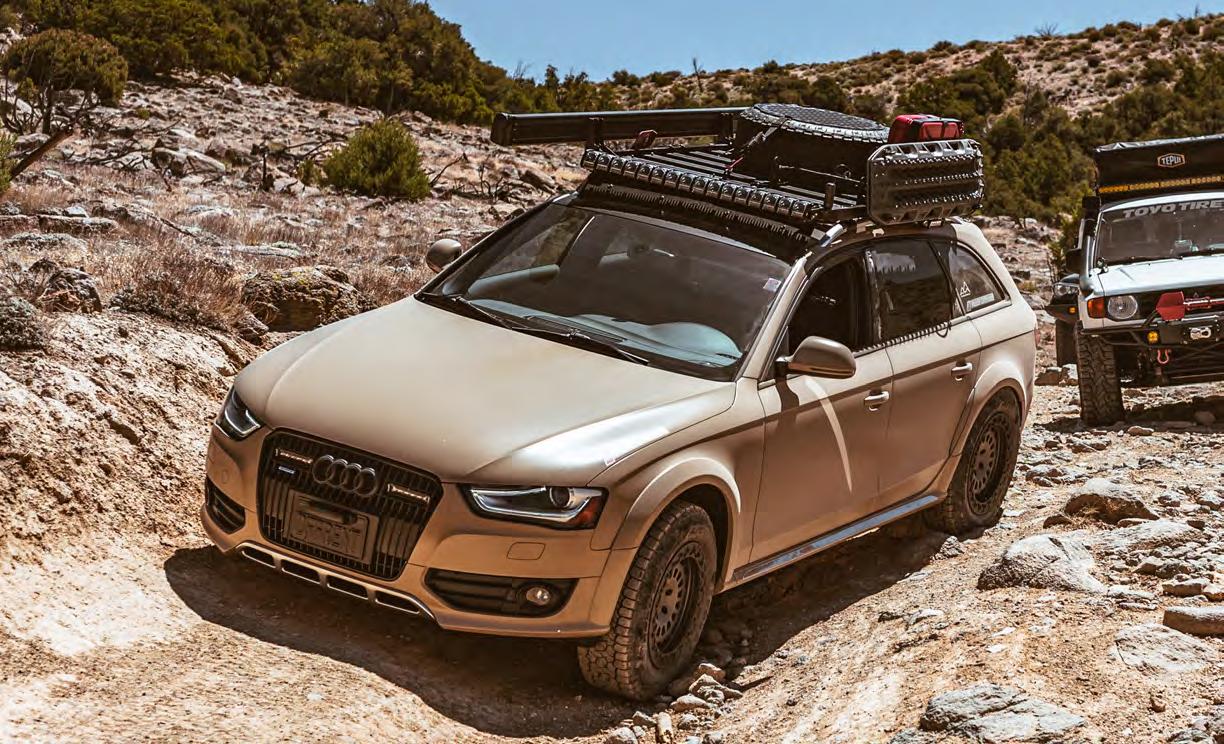
After deciding on a product, I always look up how difficult it is to install. If I have the tools and patience to do it, I will work on it in my garage. Sometimes I recruit friends to help me or teach me how to do the install since they have the tools to do so. If it is a little more technical and short on time, I will have a shop do it. For example, my suspension is custom because there are no off-the-shelf parts to lift an Audi Allroad. It had to be made by an experienced mechanic and fabricator. I initially asked the people I knew in the Overlanding community for referrals but the majority of the off-road shops didn’t want to touch an Audi with its delicate and complicated systems. Luckily, I found one shop that took a stab at it as a fun project. From CAtuned Motorsports in Sacramento, Max took on the task of building me a one-off suspension lift. He initially installed fabricated spacers that gave me close to 13” of clearance, but it was too much for the Allroad’s suspension. From there, it was trial and error to see what worked and what didn’t. It was unknown territory. But there was no turning back.

EXTERIOR MODS: Agency 6 rear accessory molle, Three Five Customs hatch rack, Front Runner Slim Line 1 roof rack, KPMF Stealth, Tundra wrap
After the new lift’s initial install, I researched what else I could do to normalize the suspension geometry. I decided to look more in-depth at fabricating more suspension parts. I had a local suspension shop R&D a lift spring to my specifications, adjustable control arms, and specific rally struts. From watching Max, I learned how to take apart my suspension, and I started doing it myself to get it dialed in. I took apart my suspension system seven times to correctly get it dialed in. It’s still not perfect, but for now, it works pretty well.
ONE THING LEADS TO ANOTHER
After getting the suspension all sorted out, I started hitting trails to test it. Doing so pushed me to photograph more and get into off-road vehicle photography. It also allowed me to be out in nature more and on the road. It started an obsession to obtain camping gear and outfit the Allroad for longer outdoor adventures. I also plan to fabricate some camera rigs for the Allroad for some production work I’d like to do on the side. I have so many ideas to expand my creativity and the Allroad helps build a platform for it.
Photography became part of my creative life back in 2006. It was a hobby that turned into a career. I started an apprenticeship as a black & white fine art photographer at EtsHokin Studios in San Francisco, I shot abstract photography and did wedding photography for income. Just like with any creative work, there will always be ups and downs in creativity. After a while, I fell out of it. Doing weddings and dealing with unruly clients
SUSPENSION, BRAKES: Custom suspension by CAtuned, Akebono ceramic brake pads, Akebono slotted brake rotors

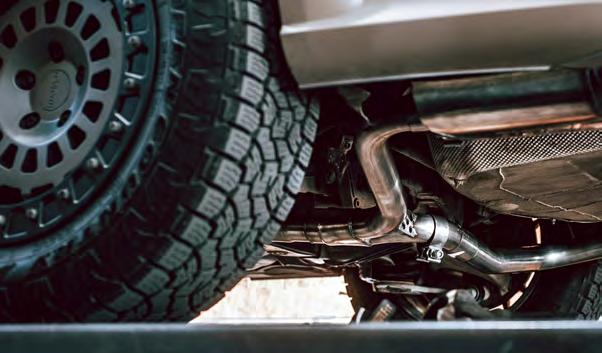

WHEELS/TIRES: Rotiform CCV-OR 17X9 wheels, Toyo AT3 235/65R17 tires
burnt me out. Eventually, I found myself in the automotive industry doing design, retouching, and advertising. It was at the last job that I discovered my passion for vehicle photography. I started networking in the industry and my photography eventually got published in Quattro Magazine, Adventure Rigs Magazine, and several automotive product sites. With owning an upfitted Audi Allroad, my job as an automobile photographer evolved into a lifestyle of sorts.
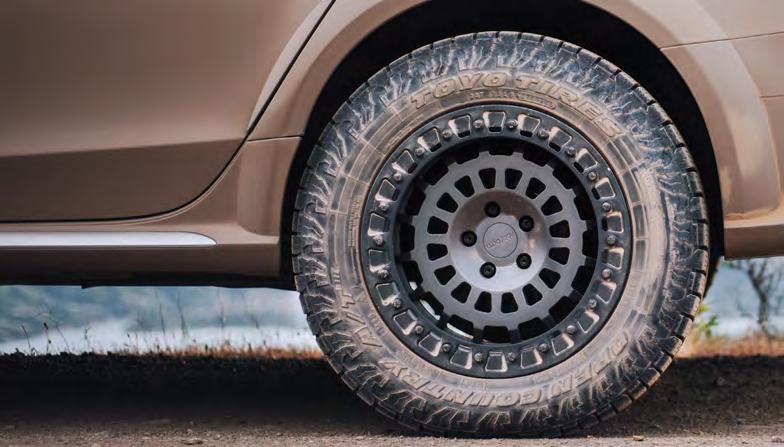
I learned light painting vehicles and that added to my love of night photography. With 13 Rigid Industries LEDs on my rig, it is a joy photographing my Allroad with all the lights on. It also became a challenge getting every element possible with all the intricate details from my Front Runner rack, Rotiform wheels, and my Tundra stealth matte wrap by SS Customs. So far, these are my favorite modifications to my build that are most noticeable.
DARE TO BE DIFFERENT
“I want this’’ and “I want that.” Modding the Allroad is a never-ending process. The next major mod is a taller lift and increasing suspension travel. I get the most hate because of the Allroad’s suspension limitations, and it’s not an official “off-road or Overland” vehicle. Although, a great majority of the community is enjoying the build and loves seeing me push it to its limits. I am inspired to continue to push my ride’s capabilities and it has been inspiring others to figure out how to do it with theirs. People ask me, “why don’t you just get a Jeep?” Because everyone has one and I wanted a Dffrent build. I wanted a challenge to outfit a rig with only allocating my resources to traveling and marketing its capabilities. I am aware of the Allroad’s limitations and I want to take it to the edge, but not to a point where I want to rock crawl with it. If I wanted to do that, then I’d buy something used.
RECOVERY GEAR: Husky Recovery Strap, Maxtrax recovery tracks
GEAR STORAGE, ORGANIZATION, RACKS: Front Runner Wolf Packs storage, Pelican 1535 Air Case for camera gear

One of my most memorable trips was the Signal Peak to Rubicon trail. I made it up 85% of the way until a “giant” boulder stood in my way that I couldn’t clear. The Allroad was clearly out of its league. I must say that I still did pretty well on the trail, considering that the terrain pushed my rig into the deep end that day. I did lose a tire going down. I rolled over a rock and it split in half, creating a sharp edge that sliced my tire’s sidewall. I was fortunate to have well-equipped and prepared friends on the trails with me. If I have to run solo, I have to do a fair amount of research and e-scouting on a trail before hitting the dirt, fully cognisant of my Audi’s limitations. Alternatively, I could go with friends who know the trail well enough to make me feel confident I can traverse safely. Luckily I haven’t been stuck.
The most enjoyable trails I’ve been to are far from the Bay Area where I live. There aren’t any local trails I can hit when I hear the call of the wild, but I’m currently still exploring different spots along Highway 395 in California. So far, I have visited the Alabama Hills area. It’s one of America’s most scenic locations that also offer endless trails to explore. It has become my favorite Golden State location to visit.
On the opposite side of scenic California, offroad destinations are the gnarly mountain trails that will test one’s rig and driving skills. I have recently traversed an unnamed trail here in my state. It was very challenging for my Allroad, but I’ve enjoyed it thoroughly with my friends, who escorted me with their oversized rigs. I’ve been careful enough not to suffer any significant damage, but there is the occasional trail carnage, such as the one on the front lip of my bumper. My approach clearance isn’t that great, so I’ve gotten a few battle scars under my bumper. My under panels are still factory, but I’m not too worried about scratching them as I am not senselessly “sending it” on the trails. I’m looking forward to going on more road trips and hitting the trails this year. Invitations from friends to join them on trips they’ve already planned always make their way into my cell phone. I have to be very selective and careful when I venture out on a solo trip because the Allroad will likely get stuck or badly damaged on very technical trails. So, I mostly enjoy the company of my friends when I go on Overlanding adventures. As I go on more trails and gain experience, I’d like to explore new areas out there by myself, such as the trails in and around the Mighty 5 (national parks) in Utah, Death Valley, and the Old Mojave Road. Although friends have warned me, I might not make it to some areas along the Old Mojave Road, but we’ll see.

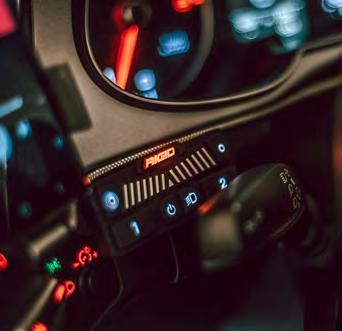

ELECTRONICS, COMMUNICATION, IN-CABIN ACCESSORY MOUNTS: Midland USA MXT400 micromobile Samsung Tablet
CAMPING GEAR: Columbia sleeping bags Kamp Rite tent cot


2020 FORD RANGER 4X4 XLT APG PRORUNNER
THE ULTIMATE OFF-ROAD READY FORD RANGER CONVERSION N34° 24’ 3” W117° 43’ 38”

The first time I saw the new Ford Ranger in person, I quite literally burst out in laughter from behind the wheel of my trusty Toyota truck. “That’s what they’re building to compete with the Tacoma?” was the first thought that came to me. It was awkward, with a tall and narrow aspect ratio, with goofy styling you’d expect from most late model European pickup trucks. It reminded me of an uglier Chevy Colorado, or maybe a poor imitation of one. But that was all before I knew anything about Automotive Performance Group and the ProRunner package that quite literally pushes this ugly duckling of a stock truck into a category of its own when it comes to off-roadready midsize pickup trucks. And did I mention how cool it looked?
In July of 2020, I joined the team at APG as their Director of Marketing. My passion for off-road trucks and media put me in a unique position to help get the word out about what APG was up to and the parts they were manufacturing to improve the new Ford Ranger platform’s aesthetics and off-road performance. As an aftermarket part manufacturer, dealer, and

installer, we aim to design, engineer, and install parts to address our customers’ needs. Whether that’s a truck built for camping in the woods for a few nights, blasting across the wide-open desert, or simply stealing the show at the local Cars and Coffee, we take our customer’s desires and manifest them in the form of real, purpose-built vehicles. And while we are an authorized dealer and installer for most major off-road aftermarket parts companies, our primary focus has been the U.S. Spec 2019+ Ford Ranger platform.
Our flagship product is in the form of a package called the ProRunner, which consists of a hefty list of parts, all engineered and manufactured in the U.S., installed onto a stock Ford Ranger that dramatically improves its aesthetic and performance qualities. Our goal for the ProRunner is to offer a package that gives U.S. Ford Ranger owners the styling and off-road prowess from the overseas Ranger Raptor they want, but can’t get. But merely matching the Ranger Raptor specs, which isn’t available in the U.S., was not enough for us. We felt the obligation to take it a step further and engineer a more robust, more capable truck than the Ranger Raptor, all at an attainable price point.

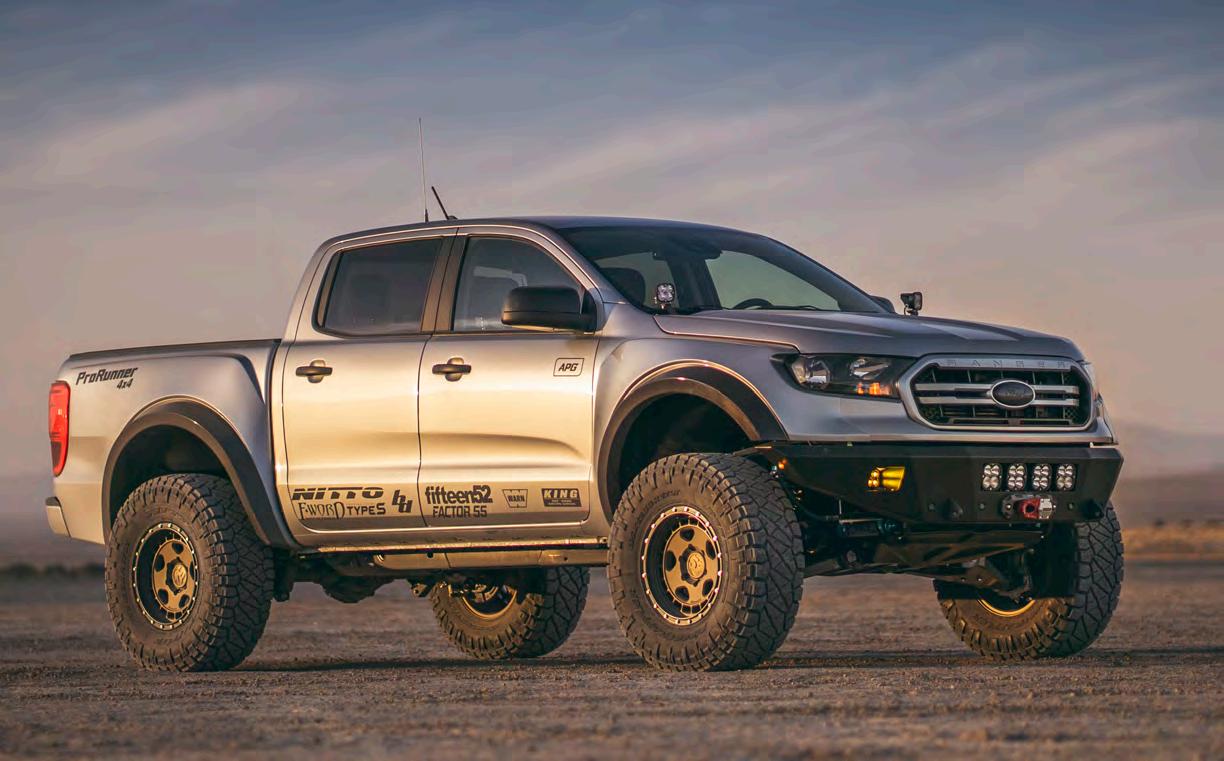
The ProRunner solves two crippling problems with the stock Ford Ranger; it’s ugly, and you can’t fit large tires in the fenders. The package basics include a wide-body system, long-travel suspension, and the ability to cycle a 35-inch tire under it fully. It also fixes a huge problem in the aftermarket off-road body panel industry; fiberglass parts never fit like OEM panels. We spent months developing carbon fiber body panels for the Ranger that feature a fit and finish that matches or exceeds OEM quality.
As Director of Marketing, I know the importance of practicing what you preach. To truly sell a product in this industry, you have to let your market know that this is something you believe in, something you would personally use and proudly stand behind. I decided to purchase my very own 2020 Ford Ranger 4x4 XLT in Iconic Silver, with the intention of installing our complete ProRunner package, in addition to a host of other aftermarket parts, and use the truck as my daily-driven weekend trail toy. With my Toyota undergoing a total overhaul, I needed a reliable, fun, and new truck to enjoy during my free time, and the ProRunner checked all the boxes. The build became known as “Project Quicksilver.”
The build began the same as any ProRunner conversion we’ve done - a full teardown. The front fenders, complete bed assembly, front and rear bumpers, front and rear suspension, and tailgate are removed from the truck. Next, the bedside skins are removed by drilling out the 50 or so spot welds that hold each side of the bed, leaving only the inner bed structure intact.
RECOVERY GEAR: Warn M8000-S winch, Warn Epic Hawse fairlead, Factor55 Flatlink E
LIGHTING: Baja Designs LED Lights
DRIVETRAIN: 10-speed automatic transmission, Advantek Dana 44 rear axle, Dana front IFS housing
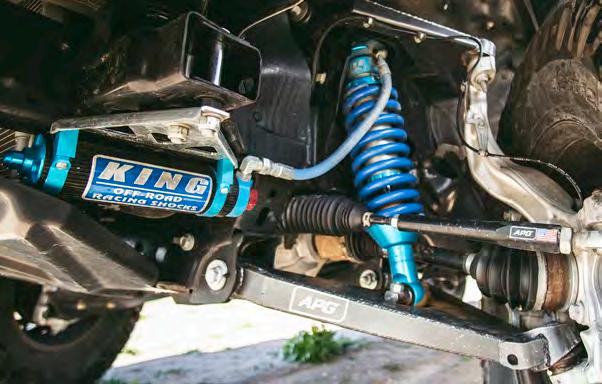
SUSPENSION: APG Long Travel Suspension, King Shocks 2.5 extended, travel front coilovers with compression adjusters, King 2.5 rear shocks with compression adjusters

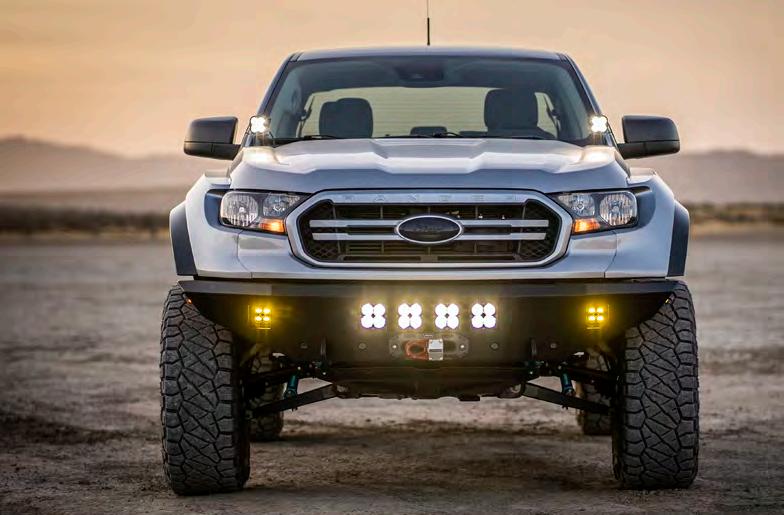
During this stage, the truck looks rather barren, but behind the scenes, there is a whole host of intelligent engineering to ensure our parts fit and work just as well or better than their factory counterparts.
The ProRunner suspension components consist of boxed upper and lower control arms, extended Chromoly axle shafts (if equipped with 4WD), and billet machined aluminum tie rods with FK spherical bearing rod-ends. The new control arms are 3 inches wider than stock, providing a 6-inch wider track width and retain the OEM Ford upper and lower ball joints and frame pivot bushings. Keeping some of the OEM parts was done to make them easily serviced, even by a Ford dealership, and to keep the cost of the kit down by reusing strong OEM components that provide a smooth, quiet ride on any terrain.
ProRunner customers have a choice of what shocks they’d like to run, as we designed our long-travel suspension system to accept nearly any aftermarket shock or coilover. As an avid desert traveler, I opted for a set of OEM replacement King 2.5 extended travel coilovers with remote reservoirs and compression adjusters. The rear suspension consists of OEM replacement King 2.5 shocks with remote reservoirs and compression adjusters. We modify the valving and spring rates to account for the larger tires and increased abuse in the dirt. The suspension achieves 13 inches of usable travel, while retaining full 4WD functionality, thanks to our extended Chromoly CV axle shafts, which replace the stock length CV axle shafts.
The stock rear leaf pack, which consists of a single leaf spring and overload spring, was also replaced by our progressive rate leaf spring kit developed in partnership with Deaver Spring in Santa Ana, California. The progressive leaf packs provide a much smoother rear suspension and increased payload in the bed with our optional HD leaf springs.
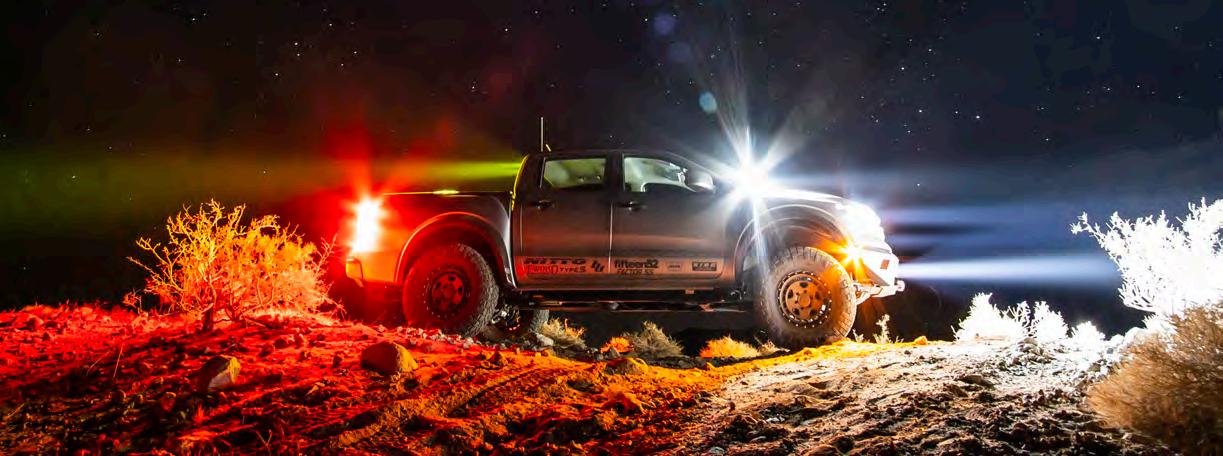
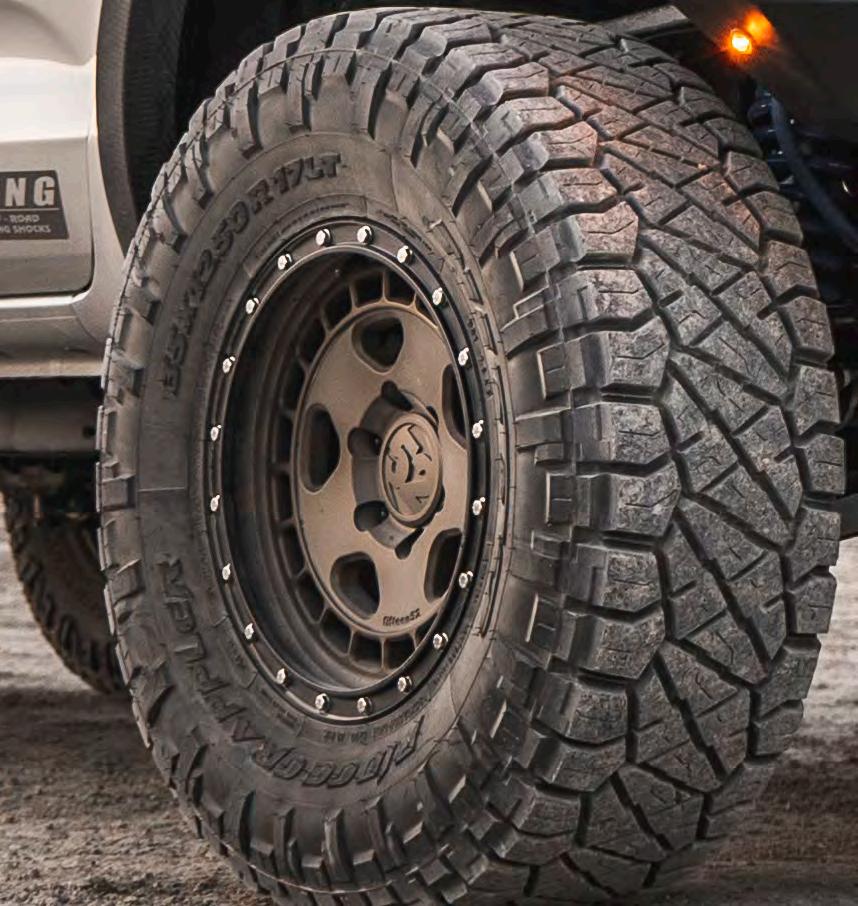
WHEELS / TIRES: Fifteen52 Turbomac HD Bronze, 17x8.5, Nitto Tire Ridge Grappler 35x12.50R17
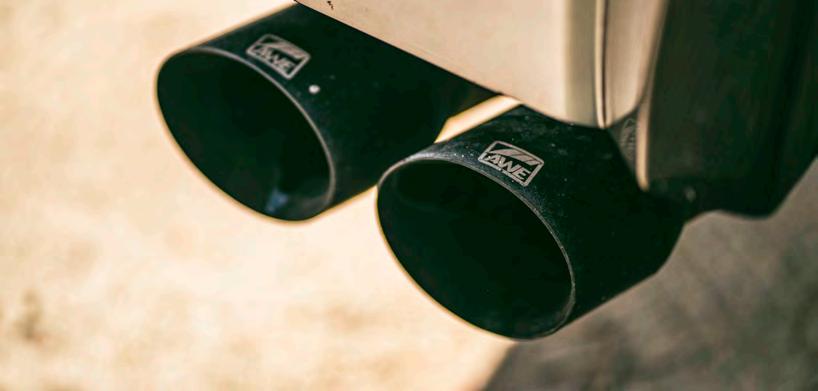
POWERTRAIN AND UNDER THE HOOD PERFORMANCE: 2.3L Ecoboost, AWE Tuning 0FG Exhaust Suite with Diamond Black tips, Pedal Commander
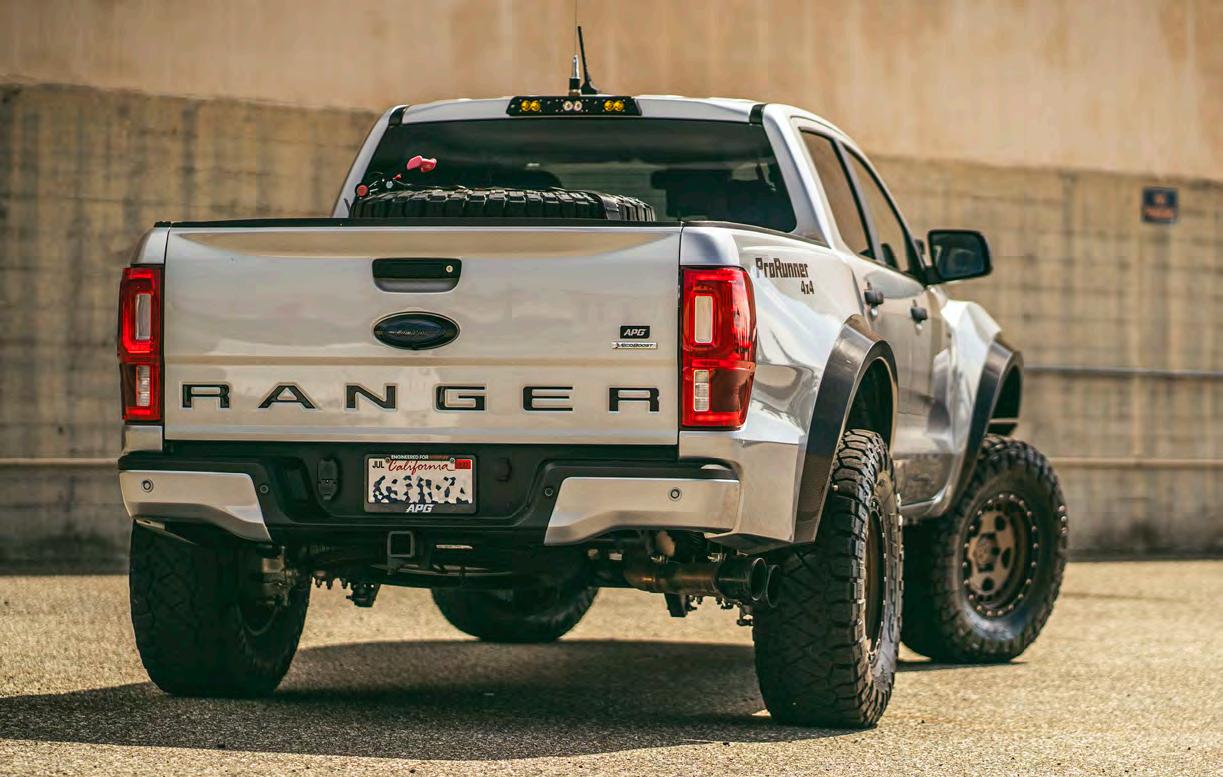
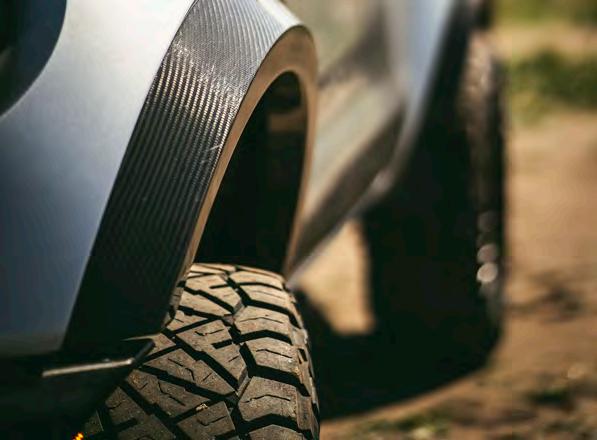
The 6-inch wider track width requires adequate coverage and clearance for up to 35-inch tires. Designing this feature on our body panels is where our in-house composite manufacturing team shines. We spent months designing and developing a complete set of aerospace-grade carbon fiber body panels for the ProRunner conversion, consisting of two front fenders, two bedside panels, and a fuel door. The most critical elements to our body panel manufacturing are fit and finish, and the material’s strength. Our fenders and bedsides are manufactured to the highest quality using a vacuum infusion process, allowing you to simply install them and paint to match without the weeks of bodywork needed to get most fiberglass panels to fit correctly. The front fenders are a bolt-on replacement, and the rear bedsides are installed by a panel-bolding process used by high-end collision repair shops when repairing the bed. Our in-house paint and body division did a fantastic job of paintmatching the body panels to an OEM finish.
As each carbon fiber widebody fender and bedside is 5-inches wider than stock, the ProRunner conversion package also comes with a wider, lightweight, 3/16-inch aluminum bumper capable of carrying a winch and auxiliary lights. The front bumper matches the carbon fiber panels’ width and even comes with recovery shackles installed onto the frame horns in the same manner as the OEM tow points. The bumper weighs 27 pounds, making it half as heavy as the stock front bumper, but able to carry a Warn M8000-S winch and Factor 55 Flatlink E for the occasional recovery.
ARMOR, BUMPERS, SLIDERS: APG aluminum plate bumper
EXTERIOR MODS: APG carbon fiber widebody system, Front fenders 5” flare, 1.5” rise, Rear bedsides 5” flare, 1.5” rise
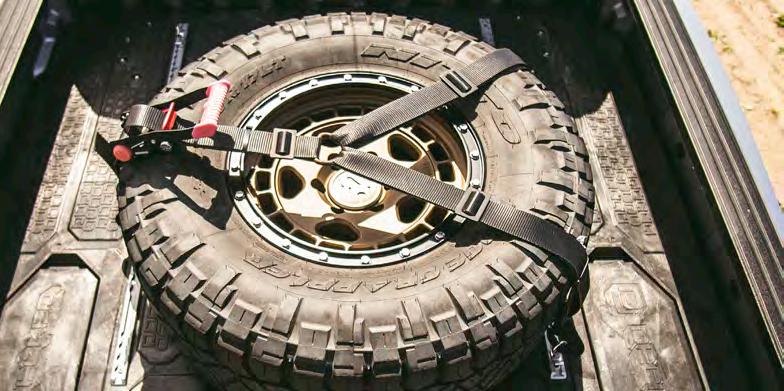
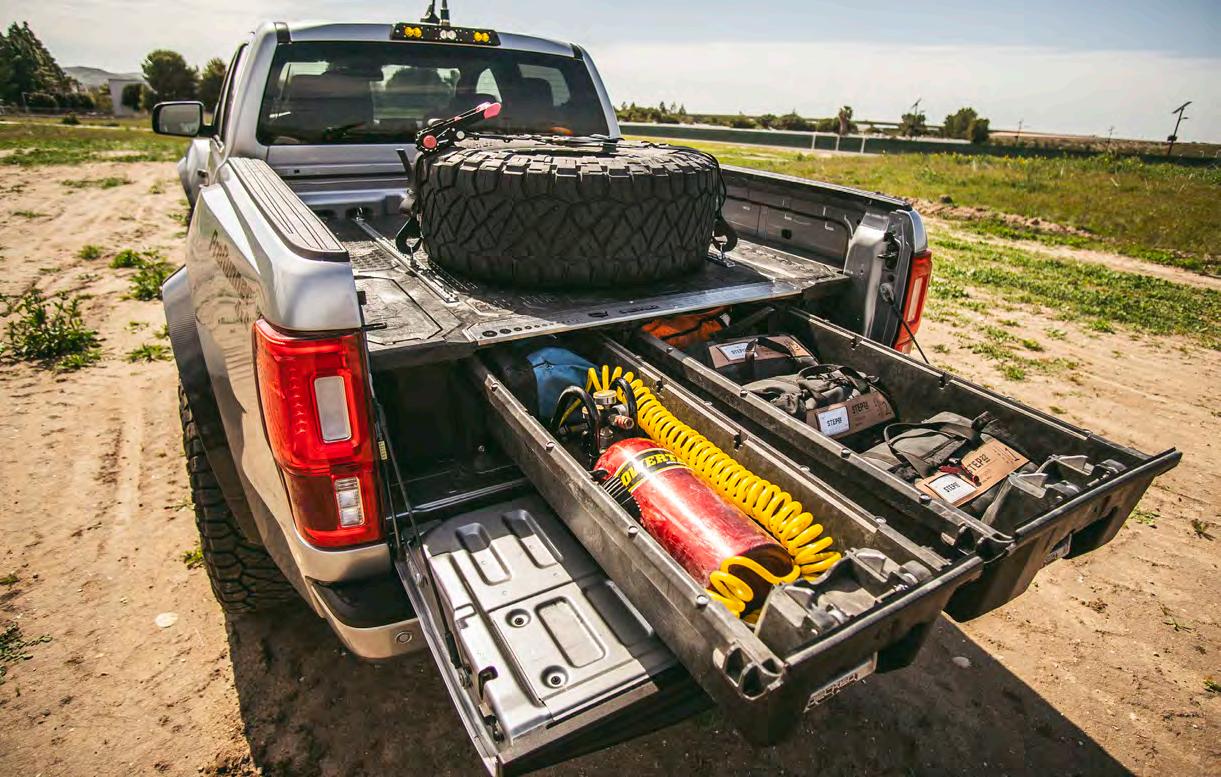
GEAR STORAGE, ORGANIZATION: Bed Rack, Decked USA bed drawer system with cargo tie-downs
As long-time off-road enthusiasts ourselves, we understood the benefit of running the largest tire you can fit on a truck while keeping the center of gravity low. That’s the core basis of why we opted for a wide-body and long-travel suspension. Being able to cycle a 35-inch tire from full droop to full bump is something that is simply not possible without these modifications. With that said, I opted for a set of 35x12.50R17 Nitto Tire Ridge Grapplers, wrapped around Fifteen52 Turbomac HD wheels in a bronze finish. I’ve been running the Ridge Grapplers for years on my other rigs and have been very happy with them. APG has had a close relationship with Fifteen52 since APG’s first ProRunner build, and I’ve always been a fan of their VW wheels from my tuner days. The Turbomac HDs in bronze set off the silver paint nicely, and the wheel design makes the tires look larger than they are. While the ProRunner package is complete and can easily stand alone on any Ranger build as a very capable off-road vehicle, it’s best paired with aftermarket components that complement it. I installed several aftermarket parts from other amazing companies that tie the build together. I was fortunate enough to partner with Baja Designs on this build and showcase their incredibly powerful lights on my truck’s front and rear. The front bumper has two pairs of XL Pro lights in both spot and driving/combo pattern. I installed their SAE Pocket Fog Light kit with amber lenses, operated with the OEM fog light switch. I also installed their ditch light kit, which uses a set of Squadron Pro lights, complete with hood mounting brackets and a wiring harness. I installed a GJ Motorsports third brake light mount on the rear of the truck that houses three Baja Designs S2 Pro lights, two in amber and one in white. The white light acts as a cargo light for the bed and is operated in the same way as the stock cargo light, while the other two are wired to a single switch as dust lights.
Other aftermarket parts and accessories include a Switch-Pros SP-9100 accessory management system, cleverly installed using SDHQ mounts under the hood and a bracket to house the switch panel in the center console. I installed a Decked USA drawer system to properly store all my tools, recovery gear, and camping equipment in the bed. Having just a 5-foot bed makes it difficult to properly keep my stuff locked down while driving fast through the desert, and the Decked system does a great job at adding utility and security to an otherwise empty space. I opted for their cargo tie-down system to hold a full-size spare tire on top as well, in the rare event that I ever puncture a tire.

