26 minute read
ITALIAN FAMILIES HOLIDAY TRADITIONS


Above: Andrea Bettini, Bettini Pasta. Right: Robert Knuckles, PGA Pro, Golf Club of Indiana. Opposite: Knuckles Family Sunday Italian Gravy (recipe page 25)
Advertisement
Ah, the holidays. Th e time of year when families gather to carry out honored traditions, to join one another for special meals, to reconnect and build memories—memories that not only last a lifetime, but become building blocks for future generations. “When we were kids, we spent every Christmas Eve at my grandmother and grandfather’s house,” said Robert Knuckles, head golf pro at the Indiana Golf Club in Lebanon and self-proclaimed food enthusiast. “My immediate family would join with my uncle’s family and spend the day cooking, eating and opening presents. My grandmother would be slaving away in the kitchen and my mom would join her putting together the giant feast that was to come.”
A feast, he said, that would begin around noon and last most of the day.
“It wasn’t until nearly 4 p.m.—when all the food was gone, the kitchen cleaned up and the men had had their smokes—that the presents could be passed out and opened.”
But, says Knuckles, the funny thing about their traditional Christmas Eve dinner was that it was anything but traditional in the usual sense. No turkey. And no ham.
“My grandfather was German and his favorite meal was chili, so our Christmas Eve dinner would consist of huge bowls of my grandmother’s famous chili, stuff ed with beef, onion, chili beans and crackers crushed on top of melted cheese. Th e recipe was given to her from her mom and eventually was passed to us.”
Pas sin g on the good s
Similar to the Knuckles family, the Lacabazzos know that family and food make an unparalleled combination.
“A lot of the time I’ve gotten to spend with my grandfather has been around food,” said Vinnie Salas. “He is not only a conduit of his family’s traditions but a gourmet in general.”
Salas’s grandfather was the fi rst of his family born in the United States. When he was younger, he dropped the Lacabazzo surname and changed his name to Jim Gerard. He was a radio broadcaster, said Salas, and felt he needed a name that sounded more American than foreign. But even without his Italian name, Salas’s grandfather taught his grandson to love and appreciate the foods he himself grew up eating. “He was the fi rst person to have me try blue cheese as well as drycured salami,” said Salas. “I remember thinking there must be something wrong with the salami for it to be so hard.” But he trusted his grandfather and soon developed a taste for the cured meat.
In addition to cherishing the times spent with his grandfather, Salas says he is particularly fond of the memories he has of his family preparing eggplant parmigiana over the holidays.
“My mother and her two sisters would plan the event of making it for weeks,” he said. “It’s still a favorite dish for me and more than any other reminds me of the biggest family gatherings of the year.” And although Salas isn’t yet allowed to assist in the making of the eggplant parmigiana, he does hope that one day he can fulfi ll one of the important duties that go into its preparation.
Fro m nort he rn Ita ly to the nort h side of Indy
Like Salas, Andrea Bettini’s love for good food grew from a childhood heavily infl uenced by his family, their holiday meal preparations and their commitment to passing on cooking techniques as well as recipes to the younger generations.
Bettini grew up in the small, rustic community of Correggioli— about an hour and a half north of Venice in northern Italy. And it was there, among the rich vegetation and fl ourishing agriculture, that Bettini developed an appreciation for the freshest ingredients.
“As I was growing up,” he said, “I remember we had our own garden,

Vinnie Salas, Capilnger’s Fresh Catch Seafood Market
Vinnie's 3 tips for making eggplant parmigiana
Although we weren’t able to get the exact recipe Vinnie’s family has mastered over the years, we were given the following three tips for making eggplant parmigiana:
1. The eggplants must be light purple with no brown spots. 2. Remove the skin from the eggplants before layering the dish. 3. Use good cheese—Salas recommends
Locatelli’s Romano or any of the new American small production Romano-style cheeses.
grew our own carrots, beans, tomatoes, peppers and a host of other vegetables. We also had our own fi g trees and a very small grape vineyard.”
And his family, he said, were fortunate to grow and harvest enough produce to keep their cellar stocked during the winter months—months that along with the cold would bring friends and family to visit for the holidays.
“My grandmother always enjoyed the holidays, spending time in the kitchen baking and preparing all sorts of foods,” he said adding that for Italians, the center of home is often around the dining table.
“One of my grandmother’s favorite dishes and a traditional dish for the Christmas holiday in Northern Italy is Tortelli di Zucca [Pumpkin Tortelli]. We still fi x it today and since I have been in the United States I still prepare it for holiday eating as it is a very unique dish not customary among Americans at the Christmas holiday season.”
Last year, Bettini, a onetime teacher of classical piano, shifted his love for music into his desire to chase what he called his American Dream and founded Bettini Pasta. His pasta is made fresh daily and served in some of the best restaurants in town, including Bluebeard, Ambrosia, Osteria Pronto, Shoefl y, Tavern on South, Marrow, Milktooth, Pioneer and many others. But you don’t have to go out to eat to get this authentic taste of Italy; now you can buy Bettini Pasta at Amelia’s Bakery, Goose the Market, R2Go and soon at Market District in Carmel.
The im porta nce of a fam il y meal
Clearly, the Knuckles, Lacabazzo and Bettini families know the importance of sharing a meal with loved ones. For them, family mealtime—be it over the holidays or not—gives everyone the chance to bond, to have conversations, to learn about what’s going on with one another. “My father,” said Knuckles, “instilled in us all that dinnertime was sacred and was never to be missed. Mealtime is more than the food we eat; it is reconnecting every day to recharge your soul with the ones you love. It keeps lines of communication open between family members, and ensures that all needs are addressed and recognized, and it keeps you grounded.”
And it’s this reconnecting of family relationships that the experts over at the Family Dinner Project—a nonprofi t organization operating through Harvard university’s Project Zero—believe is the foundation for healthy family relationships. Citing over 15 years’ worth of research, the project has shown a direct link between regular family meals and positive behaviors in children such as higher grade-point averages, resilience and self-esteem as well as lower rates of the mannerisms deemed less desirable. Family mealtime, according to the group, is good for the spirit, brain and health of all family members.
Bri ngi ng it all to get he r
Knowing all too well the importance of family mealtime, nowadays, when schedules will allow, the Knuckles family has dinner together every Sunday night.
“It has become much more diffi cult to do it every night as we did when I was a kid,” said Knuckles, but when Sundays roll around, they have a fi rm standing dinner date.
“No matter how busy we are, Sunday is family night. Most of the time we prepare a home-cooked meal of some kind,” a meal, he said, that he encourages his two daughters to cook with him.
“Sometimes it takes some prodding, but usually once they start preparing the meal with me, they really enjoy the experience, and I get to spend some wonderful quality time with each of them.”
Plus, they get to learn some family secret recipes like the meatballs they make to accompany their prized Sunday Italian Gravy.
As for the family’s Christmas Eve dinner, you can bet they’ll once again be enjoying his grandmother’s beloved chili just as they have for generations.
“Grandmother died about seven years ago,” he said, and so the tradition of preparing and serving this family-favorite dish has been passed on to him.
“When I cook her chili, the memories of those fun days spent with family lift my spirit,” says Knuckles, adding that it’s the food, especially food made from a recipe handed down for generations, that can rekindle memories of those who are no longer with us.
“Th e food we make and eat, the time spent together at mealtime, is family,” he said.
And the memories made, of times spent laughing and telling stories over a good meal, are the ones cherished for a lifetime.
Knuckles Family Sunday Italian Gravy
In recipes passed down generation to generation, measurements tend to get less precise and more to taste. In the Knuckles recipe, a pinch refers to /–¼ teaspoon of the ingredient. A heavy pinch refers to a ½ teaspoon. Really, it’s about getting comfortable with making the recipe to fit your palate.
Serves 8
2 celery stalks, including leaves 2 medium carrots, peeled 1 large onion 4–5 cloves of fresh garlic 2 tablespoons good olive oil, divided 6 fresh basil leaves 2 heavy pinches sea or kosher salt, divided Pinch crushed red pepper flakes ¼–½ cup Pinot Grigio 1 small can tomato paste 2–3 large cans crushed Roma tomatoes, preferably organic Pinch (each) dried basil, oregano and rosemary Small pinch white pepper Pinch fresh oregano Pinch garlic powder (optional) Handful grated Parmesan cheese
Chop celery, carrots, onion and garlic into small chunks. Place in food processor. Add 1 tablespoon olive oil, 2 fresh basil leaves and 1 heavy pinch of salt. Process until veggies become paste. In a heavy-bottom stockpot with a good lid, heat 1 tablespoon olive oil over medium heat. Add crushed red pepper flakes. Add veggie paste. Cook until paste heats through and becomes soft, about 5 minutes. Add the Pinot Grigio. Cook for about 5 more minutes over medium heat. Add tomato paste. Cook for about 1 minute, stirring constantly. Add crushed tomatoes. Stir to incorporate all ingredients. Add dried basil, oregano and a pinch of rosemary and 1 heavy pinch of salt and a small pinch of white pepper. Add a little bit of either water or wine to gravy if it is too thick. Stir gravy to incorporate spices. Cover with tight lid. Bring to light boil, stirring every couple of minutes to keep from sticking, then simmer and cover and cook for a minimum of 2 hours—up to 4 if you have time. Stir occasionally to keep from sticking. Remove the lid during the last 15–20 minutes of cooking to let it reduce. Add 3–4 fresh chopped basil leaves and oregano. Taste and adjust seasoning with sea salt and granulated garlic powder, if necessary. Just before serving, add about a handful of grated Parmesan cheese and stir. Serve over your favorite pasta. Add fresh homemade meatballs to make it extra special. (Unfortunately, that recipe is a family secret.)
• • Hosted by • •
Saturdays 10am - Noon
Georgetown Market 4375 Georgetown Rd. Indianapolis
Sign up today! Limited class size and classes will sell out!
$10 per child / $5 additional child or $20 per family (3+ children)
*Each child or family will receive a $10 Georgetown Gift Card
2017 Classes
February 25 No Bake Sweet Treats* Learn how to make great tasting treats without baking! May 13 Summer Smoothie-palooza Kick off the summer and learn to make fruit and vegetable smoothies. August 19 Healthy Lunchbox Eats Shelf the boring lunch. Kids will learn how to make salads, homemade lunchables and more! December 2 Bread in a Bag + Jam = Delicious Kids will create bread in a bag they can bake and home + homemade jam!
*Gluten- and dairy-free options available
For more information, visit EdibleIndy.com


Hoosiers share heritage recipes

Tortelli di Zucca (Pumpkin Tortelli)

Recipe courtesy Andrea Bettini, Bettini Pasta | Photography by Jennifer L. Rubenstein Pumpkin pasta along with few other unique dishes like pumpkin risotto and fried pumpkin remind me where I come from, memories of my grandparents. I remember Grandma spending days preparing large quantities of food; the incredible smell was all over the house, waking me up on Sunday morning or for Christmas. These are the things I took for granted then and they’ve been so precious since I moved here to the United States. The pumpkin is very popular in Italy, where I come from, and tortelli di zucca are one of my alltime favorites. —Andrea Bettini, Bettini Pasta

Pumpkin Filling:
2½ cups pumpkin purée ½ teaspoon nutmeg ½ teaspoon salt 1 (16-ounce) package amaretto cookies, crushed

Pasta:
2 cups all-purpose fl our 3 eggs
Sage Butter Sauce:
½ cup unsalted butter Pinch salt Pinch pepper ½ teaspoon garlic paste or garlic powder 6–8 leaves fresh sage Parmesan cheese to top

First, prepare pumpkin fi lling by mixing all the ingredients in a food processor. Set aside. Prepare the pasta dough by combining the fl our and eggs on a fl at surface and using your hands to mix them together. A stand mixer may also be used. Continue working the dough until it is smooth and elastic. Separate dough into 2 parts. Roll out each ball of dough using a rolling pin or a pasta attachment or machine, until the dough is / of an inch thick. Place a sheet of dough on a fl at work surface and place hazelnut-size balls of pumpkin fi lling on the sheet, about an inch away from each other. Place the second sheet of pasta on top of the pasta with fi lling. Use your fi ngers to seal the pasta around the fi lling, trying to remove any air bubbles. Use a ridged pasta cutter or sharp knife to cut out your tortelli. Cook pasta immediately. The tortelli can be also stored uncooked for months in the freezer as long as they are sealed well in airtight food containers or freezer bags.

Pasta Cooking Instructions
Bring a large pot of salted water to a boil. While water is boiling, make the Sage Butter Sauce: Melt the butter in a sauté pan over low heat. Add sage and some grated Parmesan cheese. Continue cooking for about 3 minutes. Once the pasta water is boiling, add the tortelli and cook for 5 minutes. Drain tortelli well, add sauce and top with grated Parmigiano-Reggiano.
Recipe and photography courtesy of Corrie Quinn, Smoking Goose and Goose the Market
When I say it, it sounds like she’s from south of Indianapolis. “Oh, your mom is from Brazil … Indiana?” But when she says it, there’s no question she’s from south of the equator. Folks generally pick up on my mom’s accent, but to me her voice isn’t foreign. It’s just the voice of my mother.
She must have experienced the same with her own mother: a Connecticut Yankee who raised five kids in the boondocks of southern Brazil and learned to speak Portuguese through her New England accent.
A new language wasn’t the only thing Grandma had to learn in her new home. Even the kitchen was new territory. She taught herself to bake in a wood-fired oven, brewed her own beer and let the milkman have it when she caught him diluting her share with water from the garden spigot.
When her children were grown, grandma moved back to the U.S. She packed up her kitchen along with a new repertoire of Brazilian recipes: feijoada, baño maría, brigadeiros, pão de queijo and more. Dishes like these have become staples at family reunions and dominate long-distance conversations between visits. Mom and her siblings keep the recipes alive by sharing tips on sourcing ingredients and adapting Grandma’s techniques to modern kitchens. A wild mix of Portuguese and English may waft from the kitchen, but when we sit down to the table together, it simply translates as delicious. —Corrie Quinn, Smoking Goose and Goose the Market
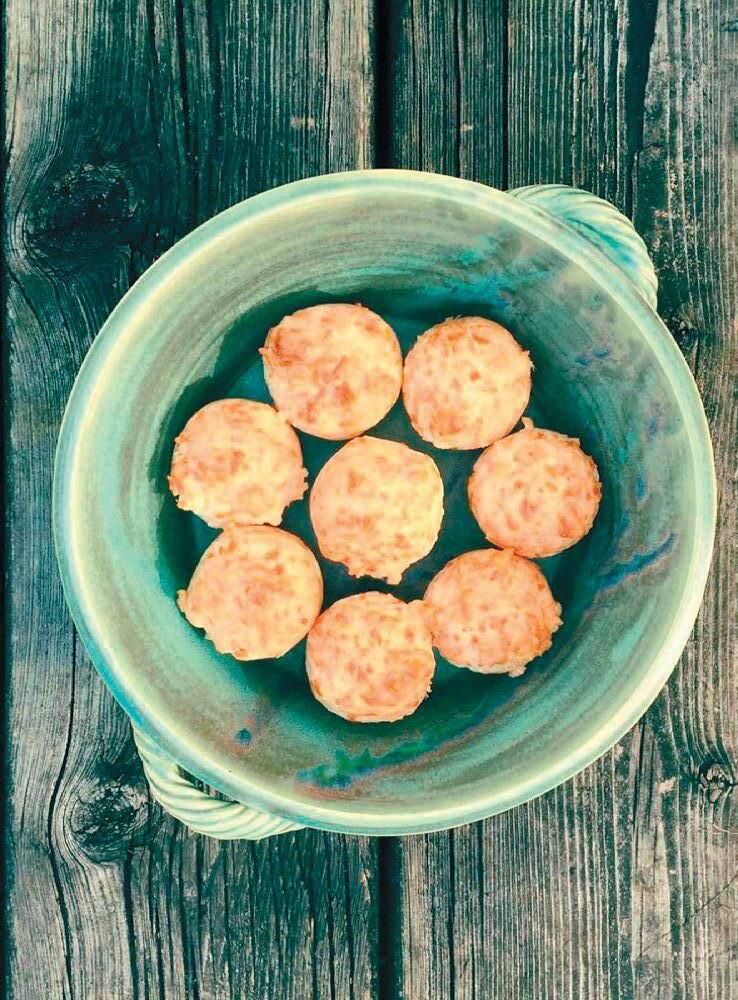
These Brazilian cheesy bread rolls have a crunchy outside and a chewy middle. They should be served hot and are best right out of the oven.
1½ cups sour cassava flour (look for packages marked “tapioca flour,” easily found at Saraga in Indianapolis and in most Asian groceries) ½ teaspoon salt ½ teaspoon baking powder / cup milk / cup water / cup either unsalted butter or olive oil 1 egg 1 cup finely shredded sharp, dry cheese—in the Midwest, try one of these regional brands: Jacobs & Brichford Everton Premium Reserve,
Kenny’s Farmhouse Dry Fork Reserve or Swiss Connection’s Pazia
Mix the cassava flour, salt and baking powder together in a large bowl. Heat the milk, water and butter or oil until the milk just begins to boil. Stir the hot liquid into the flour mixture with a spoon or with the dough hook of an electric mixer. Keep stirring until all the flour is incorporated and the mixture is warm but not hot. Touch the dough with the back of your fingers—they should feel comfortably warm against the dough. Beat the egg in a separate bowl then mix it into the dough. Keep blending until the dough is elastic and smooth, then fold in the shredded cheese. Cover the dough and chill—it should be colder than room temp before baking but can rest in the fridge up to 24 hours. Heat the oven to 375°F. Drop spoonfuls of dough about as big as a golf ball onto a lightly greased cookie sheet or spoon the dough into muffin tins, traditional size or mini. Bake until the tops are golden and a roll sounds hollow when you tap the bottom, about 20 minutes depending on size. Serve immediately. Baked rolls will hold up to a day, but reheat in the toaster oven before serving.
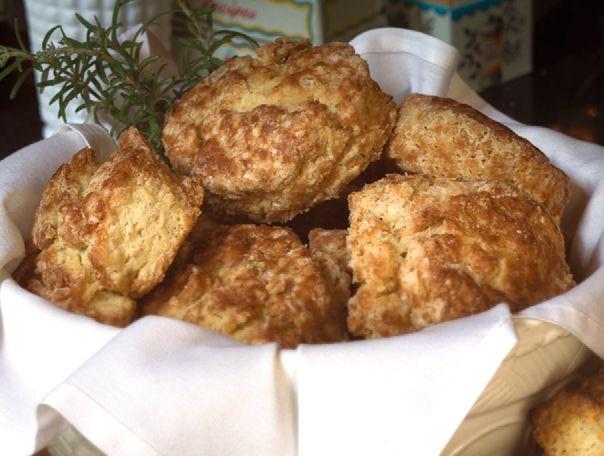
Recipe courtesy of Chef Daniel Orr, FARMbloomingtion, Photography by Sarah Baghdadi
With the holidays coming up I always remember my Gramma Kolb’s biscuits. She inherited the recipe from her mother, Great-Gramma Wolfe, who made them on the family farm in Gibson County near Princeton. Gramma Kolb taught my mom, Mary Lu, to fi x them, often serving them with her famous fried chicken. Mom fi xed them so often, she never measured a thing. I’m so happy I got to bake them with my mom enough to get the unmeasured recipe. Great-Gramma and Gramma Kolb are gone now, but they live on through my memories brought to me by the buttery smell of these freshly baked breakfast favorites. Now you can pass them down to your family! —Chef Daniel Orr, FARMbloomington
2 cups fl our 1 tablespoon baking powder ¼ teaspoon baking soda ½ teaspoon salt 1 teaspoon sugar ½ cup butter, cut into pea-sized pieces and chilled well (or grate the chilled butter on a box grater just before needed) ¾ to 1 cup buttermilk* Optional: Add dried raisins or currants to the mix, turning these biscuits into scones, or season the mix with grated Parmesan, scallions or cracked pepper for a savory biscuit. Sift dry ingredients into a stainless steel bowl and chill in the freezer. With a dough cuter, large fork or in the bowl of a food processor cut the butter into the dry ingredients, being careful not to overwork the dough. The butter should remain visible in the dough. Pour out the mixture and form a well in the center. Put ¾ of the buttermilk in the well and quickly incorporate it. Add more liquid if needed until the dough holds its shape. Press out to an even 1-inch thickness and cut into desired shape. Bake in a pre-heated 400°F oven for 10 minutes. Reduce heat to 350°F and bake until golden brown and light to the touch. * Use sour milk, or fresh milk with a little vinegar in it, when buttermilk isn’t available. These are great as the base for biscuits and gravy, but try them with FARMbloomington apple butter, peach and lavender preserves or strawberry rhubarb jam. They make great country ham sandwiches with good stoneground mustard. Leftover biscuits can be sliced and baked as savory biscotti to go with cheese and sliced charcuterie, or add a little extra sugar and some sweet spices for wild berry shortcake with a dollop of whipped cream. Leftover biscuits can be split in half and crisped in a slow oven for great croutons.
Roasted Chestnuts
I used to love roasting chestnuts with my grandfather, Jim (Lacabazzo) Gerard. We would eat them listening to tapes from his Indianapolis broadcasting career, which has always fascinated me.
Grandad was a fi rst-generation American. He honed his broadcasting craft at Kent State (Ohio) during WWII following his work in the U.S. Navy. Realizing the last name Lacabazzo was not going to be a popular name in broadcasting given the political climate of the time, he changed it to Gerard—launching his long, prosperous career.
I was too young to remember hearing the radio segment called “Sounds of the City,” a show in which he would interview celebrities as well as average Joes on the street. Years later, he had a local television program called “The Jim Gerard Show.”
My kindred memory is with him and here is my favorite recipe for roasting chestnuts as my grandfather would do it every holiday season. —Vincent Salas, Caplinger’s Fresh Catch Seafood Market

3 pounds Italian chestnuts Chestnut knife Chestnut roasting pan Salt
Take a chestnut shelling knife and score an X shape into the fl at side of each chestnut. Then they go into a copper chestnut roasting pan and over the fi replace. The pan has a long handle so you can hold it over the fl ames; Grandpa would just set it right on top of the burning logs. Stir the chestnuts often to keep from burning. They take about 20–30 minutes to roast. The shells bend away where scored and the chestnuts are tender when done. Here’s a Jim Gerard tip for you: Oftentimes when it was a casual aff air he would simply roast them in the oven on a baking sheet at 400°F for about 30 minutes. The chestnuts peel easily after roasting. Salt them to taste. While you’re roasting the chestnuts, it’s important to eat blue cheese and olives—or “olee-voes,” as my grandfather calls them.
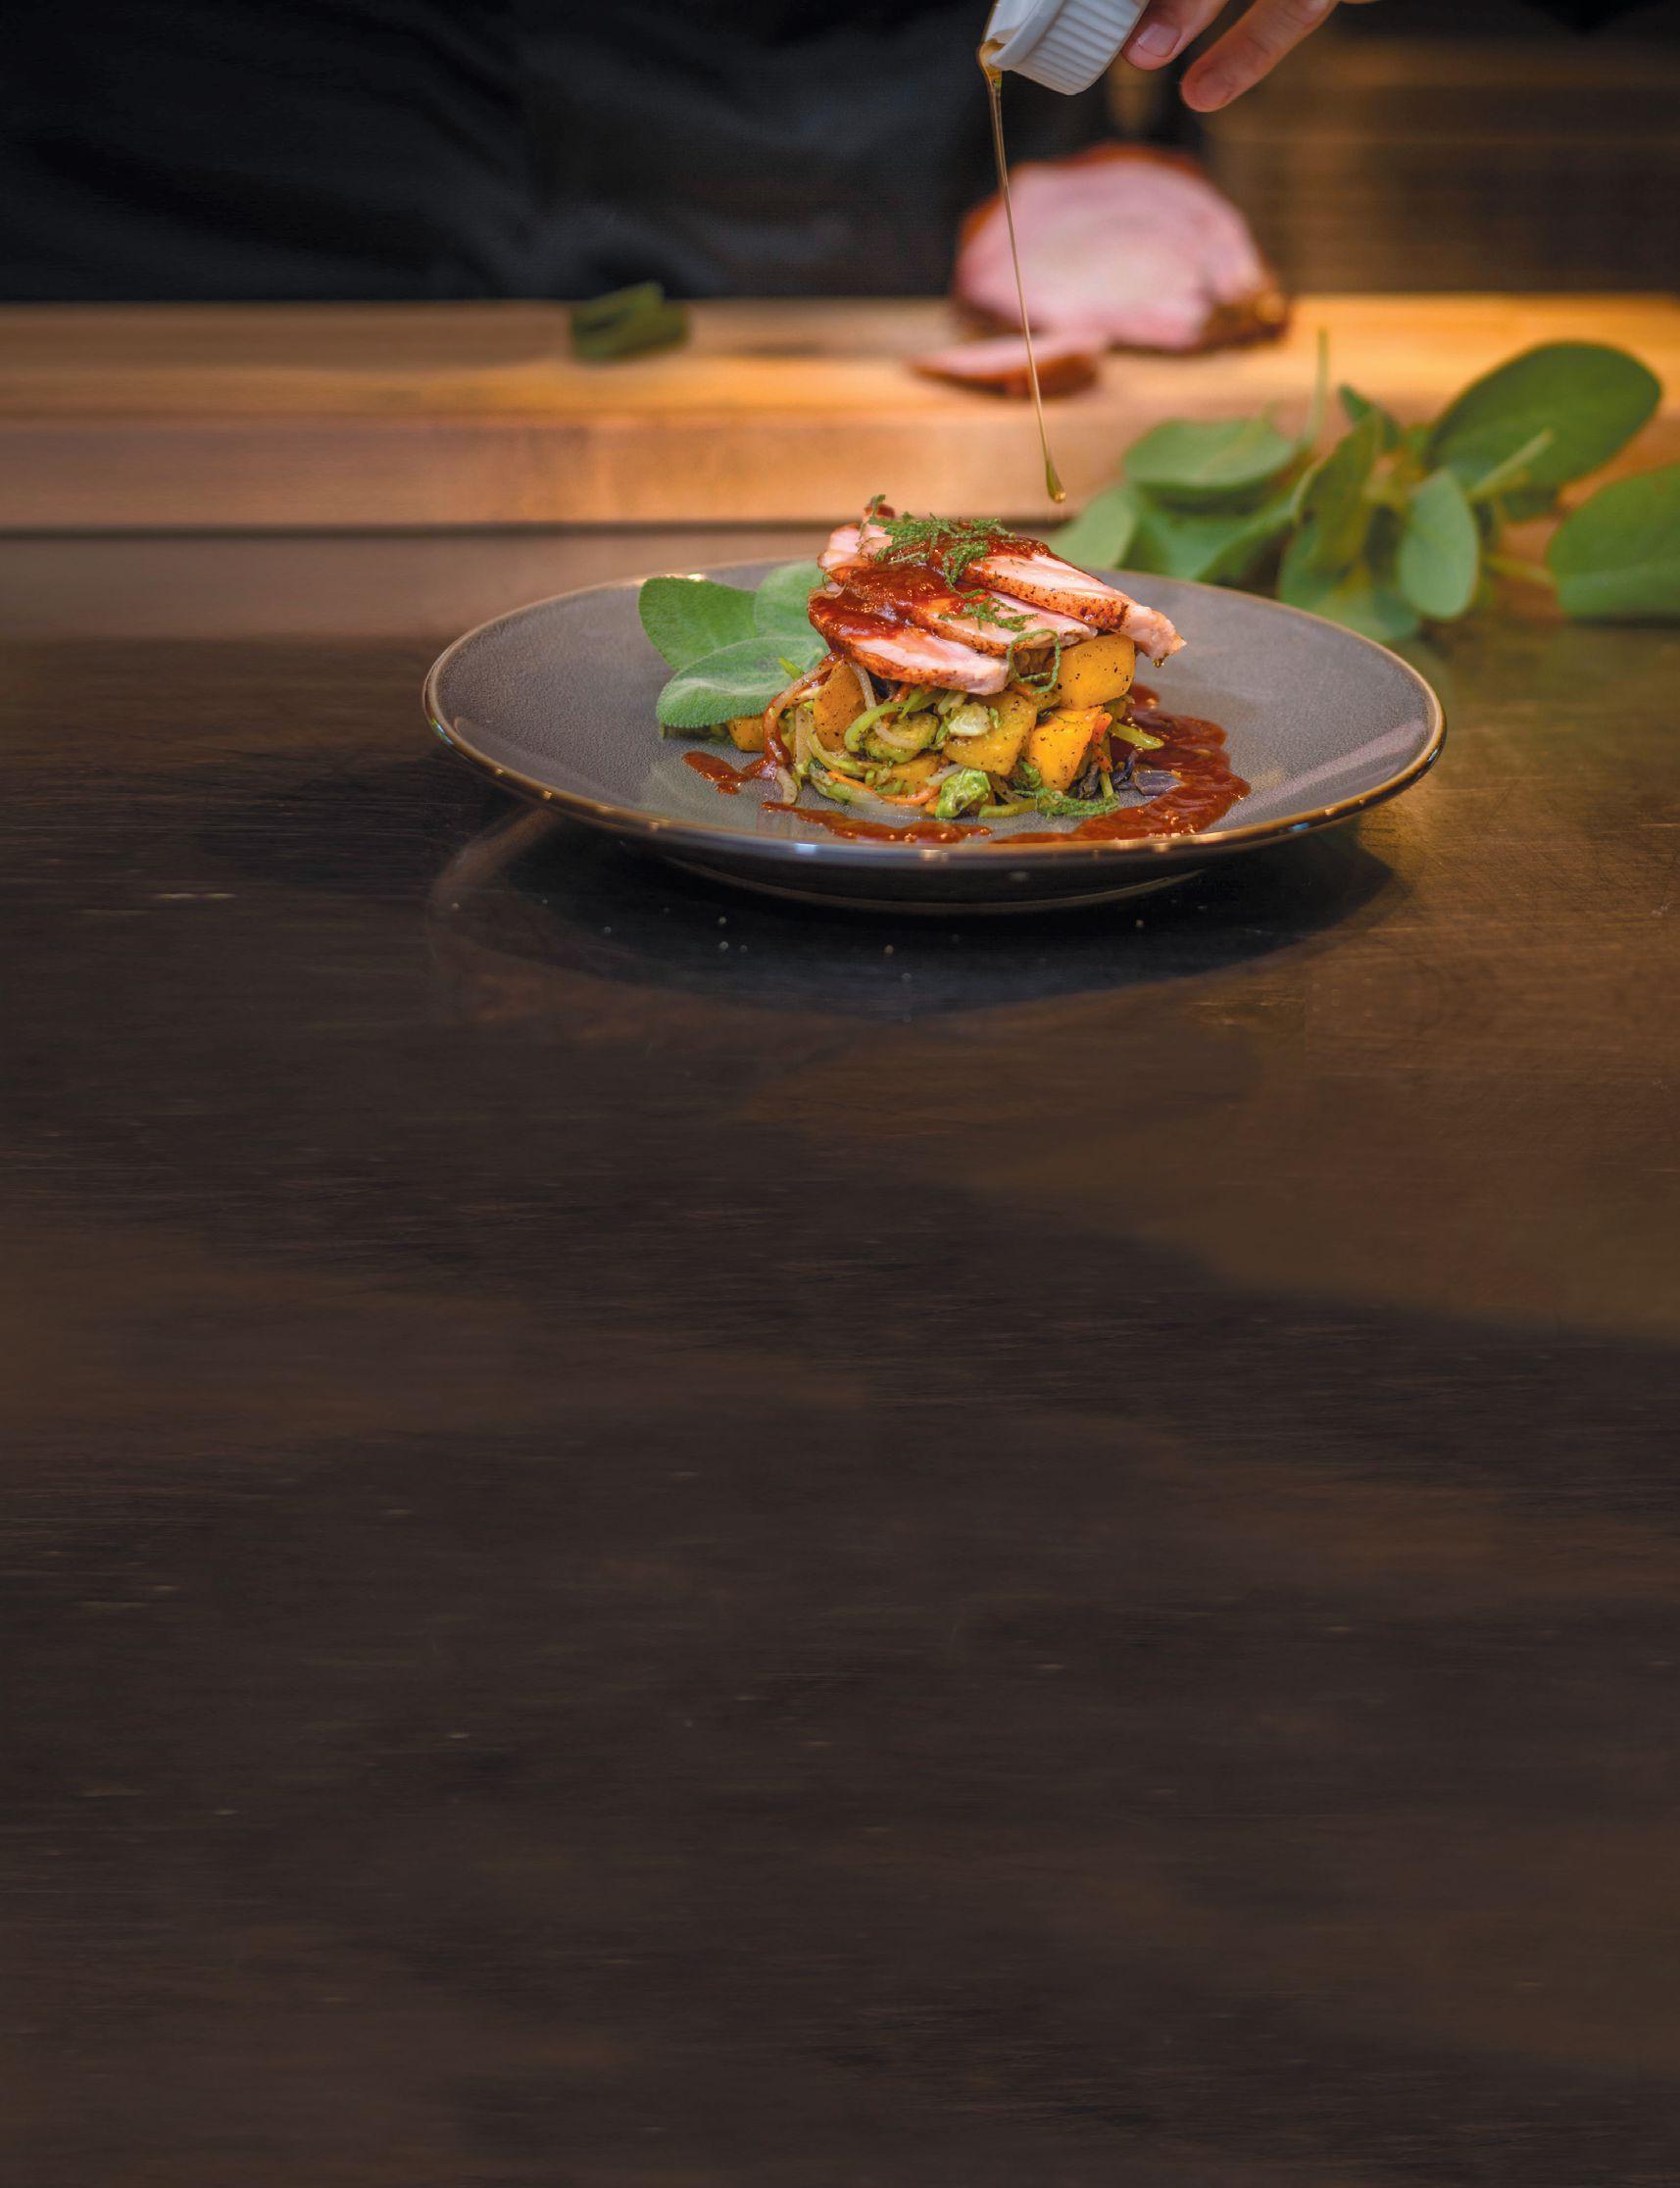
Great-Grandma’s Fig Gravy Becomes Maple Fig Balsamic BBQ Sauce
Recipes courtesy of Chef Kris Kraut of The Butler’s Pantry, Photography by Mike Gregory
On Christmas morning, memories of familiar scents fill our thoughts. For some, it may be sweet cinnamon rolls with cream cheese frosting; for others, roast turkey with homemade cranberries. For Certified Executive Chef (CEC) Kris Kraut of The Butler’s Pantry in Terre Haute, it’s fig pudding gravy on fresh roasted ham.
As a child, every Christmas Chef Kraut would travel with his family to New Jersey, where his great-grandmother lived. From Terre Haute originally, his family didn’t make the long drive often, but when they did, he remembered.
“My mother couldn’t cook to save her life, and my grandmother wasn’t much in the kitchen either,” said Kraut. “But my great-grandmother … she would make this amazing fig pudding gravy and drizzle it over a big roasted ham for the holidays. I will always remember that sauce.”
Chef Kraut has been the CEC of The Butler’s Pantry for over two years. The Red Barn at Sycamore Farm has proven to be a perfect venue for Kraut to pursue his passion as professional chef and caterer, and this year, he will bring his great-grandmother’s recipe to the people of the Wabash Valley.
This Maple Fig BBQ Sauce, a take on great-grandma’s pudding, is designed to complement a holiday roasted pork shoulder. With a sweet and savory flavor, this thick holiday topper tastes like the figgy pudding of yesteryear we all remember. Cheers!
Yield: 2½ cups
¼ cup fig preserves ¾ cup dark brown sugar ¾ cup ketchup ¼ cup balsamic vinegar ¼ cup maple syrup 1 tablespoon Worcestershire sauce 1 tablespoon dry mustard 1 teaspoon smoked paprika 1 teaspoon salt 1 teaspoon pepper
Combine all ingredients over low heat in a heavy-bottom sauce pan until sugar is dissolved and sauce is smooth. Store refrigerated for up to 2 weeks.
Holiday Roasted Pork Shoulder
Serves 6–8
1 boneless pork shoulder roast, about 5 pounds 2 tablespoons olive oil 2 tablespoons salt 1 tablespoon pepper 1 teaspoon dried rosemary 1 teaspoon cumin 1 yellow onion, sliced medium 1 bay leaf 2 bottles dark beer 1 cup water
Heat the olive oil in a skillet over medium-high heat. Preheat oven to 350°F Pat the pork roast dry with paper towels and rub with salt, pepper, rosemary and cumin. Sear the roast on all sides in the skillet and place in a large roasting pan, preferably a Dutch oven, with the fat side up. Add the sliced onion, bay leaves, beer and water to the pot with the roast. Bake covered with foil or lid. Roast for 1 hour, remove from oven and carefully flip the roast, then return to oven for an additional hour and a half. After an hour and a half, remove the lid and return to oven for 1 more hour. Remove from oven and allow to cool for 45 minutes before slicing and generously drizzling with sauce.
Recipe courtesy Paula Haney, Hoosier Mama Pie Company, reprinted with permission from The Hoosier Mama Book of Pie by Paula Haney (Agate Midway, 2013) Photography © Debbie Carlos, courtesy of The Hoosier Mama Book of Pie
Makes 1 (9-inch) pie
1 single-crust, blind-baked All-Butter
Pie Dough shell (see next page) ½ cup granulated sugar ½ cup dark brown sugar 2 tablespoons all-purpose flour Pinch kosher salt 2 cups heavy cream 1 teaspoon vanilla paste Confectioners’ sugar, for dusting Preheat oven to 400°F. Place the pie shell on a baking sheet. Set aside. Combine the granulated sugar, brown sugar, flour and salt in a medium bowl. Mix with a whisk or your hands to break up any clumps and to combine ingredients. Gently stir in the heavy cream with a wooden spoon or spatula. Do not overmix. Whipping the cream will prevent the pie from setting. Stir in the vanilla paste. Pour the filling into the prepared pie shell and bake for 20 minutes. Rotate 180° and bake for 20 to 25 more minutes, until large bubbles cover the surface. The pie will not appear to be set when it comes out of the oven. Cool to room temperature, then chill in refrigerator for at least 4 hours, or overnight, before slicing. Dust with confectioners’ sugar before serving. The baked pie can be stored in the refrigerator for 3 to 5 days. Hoosier Mama Pie makers like to throw leftover sugar creams in the freezer and snack on the frozen slices.

Makes 1 double-crust pie or 2 single-crust pies
1¾ sticks unsalted butter, divided 1 tablespoon red wine vinegar ½ cup cold water 2¼ cups all-purpose fl our 2¼ teaspoons kosher salt ½ tablespoon granulated sugar Cut the butter into ½-inch cubes. Freeze 5 tablespoons for 20 minutes or overnight; chill the remaining 1/ sticks in the refrigerator until ready to use. Stir the red wine vinegar into the cold water and set aside. Combine the fl our, salt and sugar in the bowl of a food processor and pulse 5 or 6 times to combine. Add the chilled butter and mix for 25 to 30 seconds, until the mixture resembles coarse meal. Add the frozen butter and pulse 15 to 20 times, until the butter is in pea-sized pieces. Add 6 tablespoons of the vinegar water and pulse 6 times. The dough should start to look crumbly. Test the dough by squeezing a small amount in the palm of your hand. If it easily holds together, it is done. If not, add ½ tablespoon of the vinegar water and pulse 3 more times. Repeat this process as needed until the dough holds together. Transfer the dough to a lightly fl oured work surface and knead together until smooth; dough should never come together in the food processor. Divide the dough into 2 equal parts and roll each into a ball. Flatten the balls slightly and wrap separately in plastic wrap. Let the dough rest in the refrigerator until ready to use, at least 20 minutes but preferably overnight. Once the dough has rested, it can be stored in the refrigerator for up to 3 days, or frozen for up to 1 week.


Blind Baking
Preheat oven to 400°F. Place a frozen, crimped pie shell on a baking sheet. Line the inside of the shell with parchment paper or a coff ee fi lter. Fill with uncooked beans until the beans are even with the top edge of the crimp. Press down on the beans to make sure they spread to the edges of the shell. Bake for 20 minutes, rotating 180° halfway through. The outer edge of the crimp should be dry and golden brown. Remove the shell from the oven and carefully remove the parchment paper or coff ee fi lter full of beans. If the paper sticks to the pie, bake it for 3 more minutes and try again. Once the parchment paper or coff ee fi lter is removed, prick the bottom of the shell all over with a fork. Bake for 3 more minutes, until the interior of the shell is dry and light golden brown.

A. Arnold is taking you places!

Call today for a free estimate on your home or office move!