10 minute read
Foreword
You are looking at the booklet for the crash course on 3D printing for electronics. Created by author Teun van Roessel and published by Elektor. Next to this booklet, the course consists of several videos which can be found on www.elektor.com.
As the name implies, during this course you will learn how to quickly build casings for electronic parts. This course is perfect for you if you just bought your (first) printer and want to print your own designs as soon as possible.
Information in the blue blocks is background information and is not necessary for printing, but it does help you to understand printing better and, in most cases, helps make better prints.
Modeling in this course is done on the computer, although the main modeling program (Tinkercad) is also available on tablet.
Hope you enjoy and learn something!
Cheers, Teun
1. Introduction
Goal of this course
During this course, you will learn to model a 3D object with software and how to convert it into a physical 3D object, using a 3D printer. The focus of this course will be on making a container (housing) for (custom) electronics. We will use the most accessible software to get great results quickly. In this course, the emphasis is therefore on the 3D printing of practical parts and not on the creation of art objects such as game characters.
3D printed objects are formed layer by layer, in most cases you can see the layers from production.
How 3D printing works
Despite 3D printers seeming like magic to some, the principle is quite simple. Material is hardened layer by layer in a certain shape so that slowly but surely a physical object is created from all those layers.
The simplest and most common form among hobbyists is fused deposition modeling (FDM). This involves pushing plastic filament (wire) through a hot piece of metal (hotend) by an extruder. The filament melts and is placed on a plate by a movable nozzle. When it lies on the plate, the filament hardens. Because the nozzle can move, it can lay the layer of plastic in any desired shape. When the entire layer is ready, the nozzle goes up relative to the plate and it is time for the next layer. Layers can easily melt into each other when they are placed on top of each other by the nozzle. This way, strong plastic parts can be built up from layers.

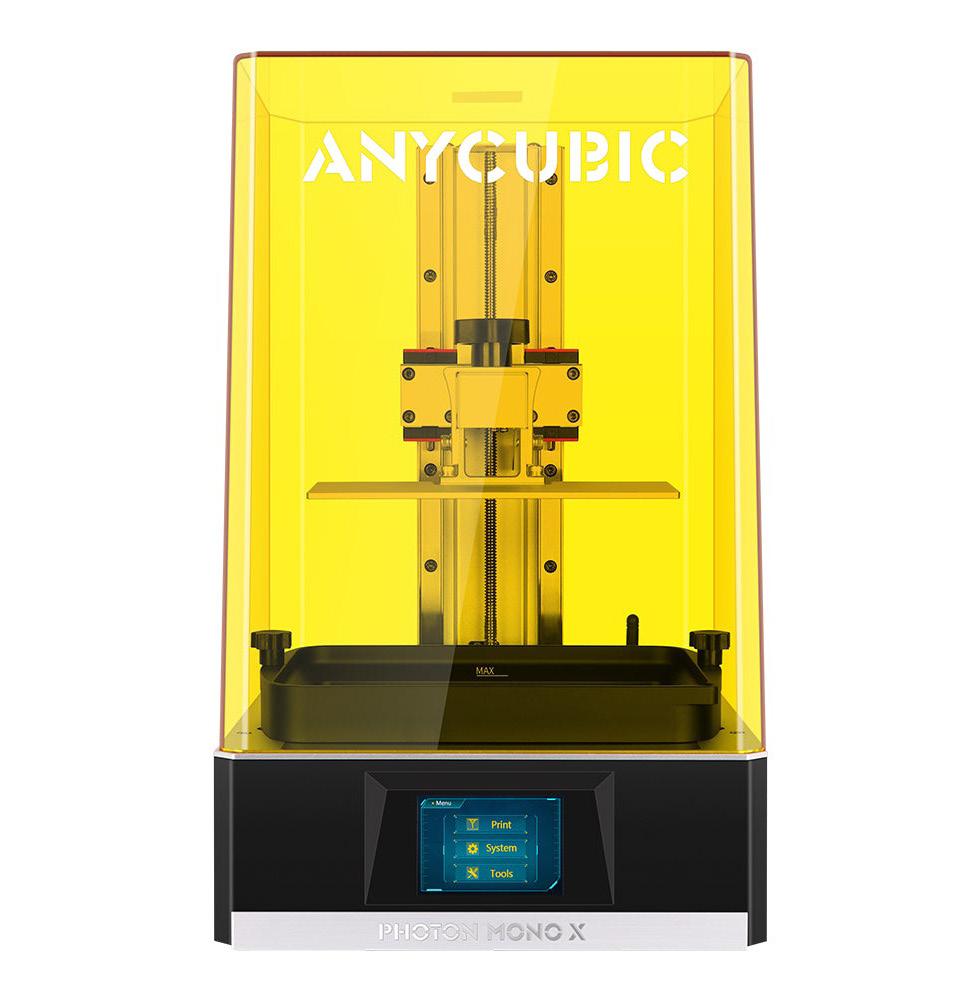
Another commonly used form is SLA printing, which uses a liquid that hardens when in contact with certain wavelengths of light. A beam of light is used to harden the material at specific points, layer by layer, to create the model.
With FDM printing, the object is built from bottom to top. With SLA printing, the object is built upside down as it is slowly being pulled out of the liquid.
SLA printing requires the use of chemical liquids, which require a well ventilated workspace and protective clothing/gear. Moreover, these printers tend to be a bit more pricey and they are a little less intuitive to understand. During this course we will use the most common print technique for hobby printers; FDM.
Another technique that is used in the industry a lot is SLS (Selective laser sintering). It uses layers of powder that are melted using a laser beam. SLS can print with less visible layers in the model, but the printers are a lot more expensive to buy and operate.
*Image courtesy of Anycubic website


FDM printer basic parts
To be able to FDM print something, you need to melt plastic filament and let it cool in a controlled way. The basic principle to do this requires at least the following parts.
Filament: the plastic material which will form your 3D printed model
Filament roll, the way filament is bought and placed on the printed
Extruder, this part pushes the filament through the printer
Hot end, this part heats up the filament until it is liquid
The nozzle, this part forces the filament through a small hole, making sure the printer can print accurately
The print bed, this is the place where your model is built. The nozzle can move freely over the bed because of motors and pulleys. This way it can create the shapes that will form your model.
Software
To be able to 3D print your self-designed 3D object, you need 3 pieces of software: the 3D modeling software, the slicer and the software on your printer.
3D modeling software

Before you can print something, you need a digital model. You can model this through 3D modeling software.
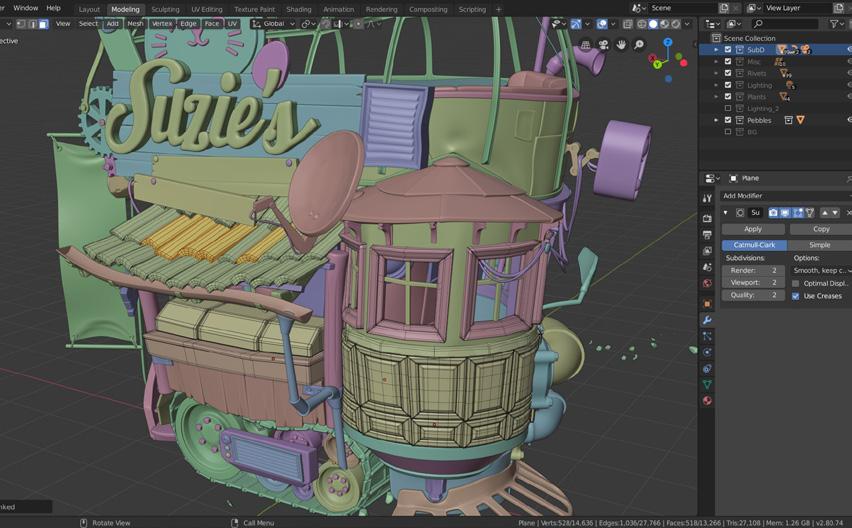
There are several ways to model 3D objects. For example, you can build an object using polygons (small dots in 3D space), by means of 3D sculpting and as a solid.
The first two methods are mainly used for modeling characters or objects in video games or animations. You can adjust the model very specifically with a focus on making it visually appealing and less on specific dimensions. These methods are ideal for curves and organic shapes.

Solid models are often used in industry because they allow you to quickly and precisely create shapes that are easy to produce. Solid models are made up of basic shapes that you put together or cut out from each other to get a unique shape.
3D modeled object**
Thingiverse.com is a website that has a ton of ready-to-print models. Make sure to download the right file type. Most slicer programs handle .STL files the best. Make sure to download a file type your slicer can handle.
Solid for industry
Solid models are also often used by engineers for all kinds production processes, such as (CNC) milling, punching or (laser)cutting. Solid works or AutoCAD are well-known software packages that work with solids. A way more accessible way to model solid models is using the Tinkercad software. This software is free to use and works in-browser so you don’t have to install anything. It uses the principles of solid modeling in the most basic ways and is easy to get into. In Lesson 2 we will get started on this.
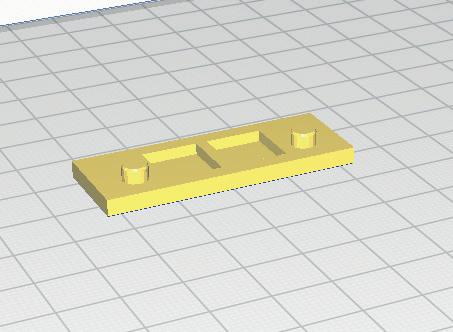
Tinkercad allows you to use simple shapes to form the basis of your design. They are easily transformed and combined to create custom shapes.

*Image courtesy of Blender website
** Image courtesy of Tinkercad website

Slicer software
If you have a 3D object, your printer still needs to know how to print that object. Which movements do the motors have to make to get the nozzle in the right place at the right time? How fast should the filament come through the nozzle? How hot should the nozzle get? How fast should everything go? These parameters differ per printer.
Fortunately, you do not have to estimate and enter all these parameters yourself. Slicer software is specifically designed to do this for you. This software usually comes standard with your printer. There is also software that can slice for multiple printers such as Simplify 3D or Cura (open source).
With Slicer software, you enter your 3D file (.STL) and you get a G-code (.gcode) file out. Your printer then knows exactly what to do to print the object.
A .STL file just describes all the surfaces of your 3D model. Not the colors or infill. Moreover, it builds the model from triangles only. The bigger the resolution of the file, the smaller the triangles are. If a curvy surface is made from triangles, a low resolution will be visible as the curve will be less smooth. STL files are widely used because they are simple, light, and easy to be handled by 3D machines and software.
A .gcode file is literally a piece of code that the 3D printer interprets. It tells the different motors, the hot end, and other parts of the printer what to do. You can open a G-code file using notepad or a coding program to see how it is built up.
Printer software
There are a variety of printers, and almost all of them come with software preinstalled. Most printers have an input port for a USB stick or (mini) SD card. You can put your Gcode file on this storage medium and put it in the printer. The printer recognizes the file and can print it. When the Gcode is correct, it will correctly instruct the printer on how to print.

It is also possible to set things manually through the software of your printer. For example, you can let the nozzle heat up so that you can change filament. How to do this exactly depends on the prints user interface.
Most printers have a touch screen or a rotary knob as input for the interface. This interface is used for all kinds of manual things like heating up the nozzle, using the extruder and moving the print head.
Before you start printing Filament
There are different types of filament, the most commonly used material is PLA. This material runs quite smoothly through the nozzle and has a small chance to get stuck. The PLA material is plant-based. There are also materials such as ABS (Lego blocks are made of this) and PET (from the PET bottles). Different materials require different settings for printing. Most slicers allow you to choose the material and then adjust these settings directly. In this course we will use PLA (see attachment 1 for an overview of the different types of filament).
Make sure the filament is dry. Most filaments like to absorb moisture. This will degrade their material properties. Store your filament in a dry area.
Inserting filament
Before you can print, you must have filament in your printer in the right way. The exact process for installing your filament varies per printer. In general the steps are roughly the same.
1. Heat up the nozzle.
2. Push the filament through the run-up tubes.
3. Put a little pressure on the filament when it touches the extruder. Activate the extruder using the menu of your printer. The extruder will now grip the material and push it in.
4. When the filament is in the extruder, make the extruder push the filament further forward until the filament comes out of the nozzle.
There are also printers with two nozzles, where you can print with multiple colors or materials in 1 model.
Leveling the bed
Before you can start printing with a new 3D printer, it is wise to level the bed first. It is important to make sure the filament will be able to flow onto, and stick to, the bed properly. If the distance between the nozzle and the bed is not correct, you will not get nice print results, or in some cases, you can even damage the printbed (because the nozzle will run into it). Setting the right distance in all corners of the bed will ensure the print results will be good.
With most simple printers you can use screws located on different corners of the bed to change the height of the bed easily. The printer almost always has a mode to conveniently find the right height. In this mode, the print head moves around all corners and places the nozzle at print height. You can then look/feel with a piece of paper whether the distance between the bed and the nozzle is okay.
More high-end printers have an automatic mode to level the bed with a probe and extra motors. You can often still manually determine the distance to the nozzle if necessary.
Things to consider while modeling
Depending on your printing method, there are different things to consider while modeling. The product is built up layer by layer. As a result, inclined and overhanging surfaces can collapse. In those cases, the printer tries to print on air instead of a previous layer and therefore the layer falls down. This is not desirable.


Support material (green) is generated when the overhang angle is too great, in which case layers can not stick to each other enough and extra material beneath the layer is needed.
To partially compensate for this, the printer can print support material. These are small pieces of printed material that only serve as support for your model. Support material is printed in a way that makes it come off your model easily. However, it usually does not give the best finish to the surface which is built upon it. To minimize the need for support, you can in some cases take into account that there are no (steep) slopes in your model. You can also play with which side you see as the ‘bottom’ of your model and place it on the plate during printing.
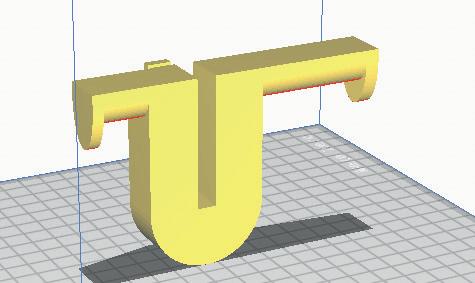
The orientation of the print can sometimes reduce the amount of support that is needed, creating a quicker and cleaner print. On the left is an example of a bad orientation when it comes to minimizing support materials, on the right is a better choice.
Some printers use a specially designed material for printing support. This material is printed using a second nozzle. This material dissolves in water. You can print your model with support, put it in a container of water, and after a while the support is gone, this often gives a better finish than breaking off fused support material.


Orientation
Also, keep in mind that your model has to stick to the plate during the entire printing process, a larger surface as the bottom stays in place better.
It is a good idea to choose the bigger side of the model as the bottom of your print because it will stick to the base plate better. On the left is a bad choice for making sure the model sticks to the base plate. On the right is a wiser choice.
Printer maintenance
Because your print bed wears out and slides with use, it is sometimes necessary to level your print bed again.
After a longer period of use, most printers require more maintenance, like lubricating the guidance tubes and replacing the nozzle or hot end. How to do this exactly differs greatly per type of printer. See your printer’s manual for these kinds of maintenance.
Safety
3D printers are devices with moving, hot parts. Never put your hand in the device when it is printing or heated up unless the manual suggests otherwise.
Carefully read your printers manual to find out all safety measures and be sure to comply.


