5 minute read
Put ‘Em Up: Preserve Your Garden Bounty


t is possible to have homegrown produce all winter long, even when your garden isn’t producing. If you preserve your fruits, vegetables, and herbs as you pick them, you’ll be able to enjoy the tastes and smells of spring, summer, and fall no matter how cold, gray, and bleak it gets outside. But which methods will give you the best retention of flavor and nutrients? Keep reading for my suggestions.
Advertisement
Use the short days and long nights of the winter season to read up further on food preservation; there are several wonderful books available. One of the best is Putting Food By by Ruth Hertzberg, a classic that the New York Times termed “the bible of home canning, preserving, freezing, and drying.” Then, once things start sprouting come spring, you’ll be ready to make the most of your harvest.
Chill Out
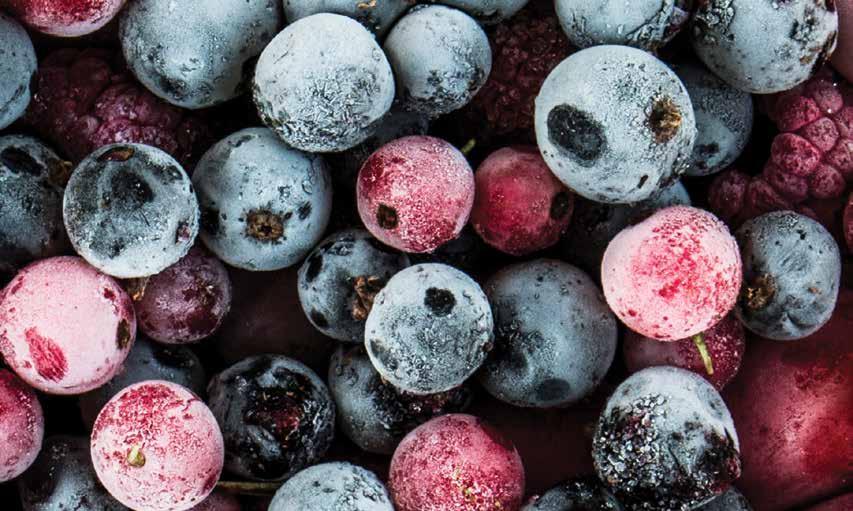
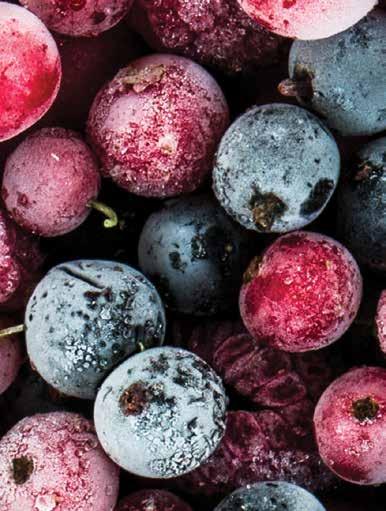
If you’re most concerned about preserving nutrients, your best option is freezing. The idea is to harvest your fruits and vegetables just before they reach their peak of ripeness; don’t select any foods that are bruised, damaged, or overripe to be preserved.
You’ll want to blanch vegetables before freezing to neutralize enzymes. Otherwise, the enzymes in them will break down vitamin C and convert sugars into starch, rendering your vegetables tasteless. You can find advice online about blanching and freezing garden edibles. Choose vegetables that you normally eat cooked, not those that you eat raw such as cucumbers, lettuce, and celery.
After boiling or steaming, stop the cooking process by plunging the vegetables into ice water. Then pat them dry. Next, pack them into freezer bags or freezer containers. If you use bags, make sure to press all of the air out before sealing and storing them.
It’s easy to freeze most fruits, especially berries. Wash and drain fresh berries, then simply scatter them in a single layer on a baking sheet and place the tray in the freezer. Once the berries have frozen solid, store them in a freezer bag or container. This method is known as dry pack freezing, and it helps you avoid having clumps of fruit that are impossible to separate without a long thaw. Try the same technique with apple slices and they’ll be ready for a delicious apple dessert. Although we think of them as vegetables, tomatoes are actually fruit, and can be successfully preserved whole with dry pack freezing.
An even better method is vacuum sealing, using a handy device (such as those made by FoodSaver and Cuisinart). It sucks all the air out of the bag of frozen berries before sealing it for storage in your freezer.
And don’t stop at just fresh, uncooked produce. Try whipping up and freezing batches of tomato sauce, applesauce, and pesto (I’ve included several alternatives to the traditional basil version in this publication; find a recipe for cilantro pesto on page 26 and recipes for beet pesto and kale pesto on page 91). Chefs and food bloggers even recommend freezing garden herbs in olive oil in ice cube trays (to be easily dropped in the pan as the start of a meal), or suspended in a frozen mixture of water and lemon juice, which keeps the leaves from turning brown. Either way, once frozen, remove the cubes and store them in freezer bags.
A CASE AGAINST CANNED?
Another alternative to freezing and drying is canning, but my personal sense is that canned produce just does not look or taste as good. Further, if not canned properly, foods can become contaminated with Clostridium botulinum, the bacterium that causes botulism. Since this disease can make you very sick or even kill you, you need to know what you’re doing. Be sure to get instructions on home canning from a reputable source, such as a university extension service, and follow them to the letter.
I am, however, a fan of pickling and fermentation, which is often best done at home in traditional canning jars. Find more information about this method of preservation beginning on page 115.
You can find more detailed instructions on freezing produce, including how long to blanch or cook specific vegetables, at the National Center for Home Food Preservation’s website, nchfp.uga.edu. This site, maintained by the U.S.D.A.’s cooperative extension service, also has detailed information on other preservation methods.
Stay Dry
As an alternative to freezing, you can easily dry many garden fruits and vegetables. This preservation method offers the added benefit of concentrating flavor.
When choosing vegetables for drying, select only those in pristine condition. You’ll need a dehydrator, or you can use your oven. A quick online search will turn up a selection of the top dehydrators you can purchase, as well as tips for oven-drying. As with freezing, you’ll have to prepare some vegetables by slicing and blanching them first, although I don’t do this with tomatoes and peaches. The trick is to cut pieces the same size so they’ll all dry at the same rate. Be sure you’re ready to dry as soon as you’ve prepared the vegetables—they’ll lose quality and nutrient value if you delay, even if you refrigerate them. Visit nchfp.uga.edu for more details about produce selection and the drying process.
Of course, garden-fresh herbs are great candidates for drying. As I shared on page 23, mint and other herbs can be dried on a drying screen (purchased or homemade). But I find it much simpler to wrap twine around fresh bundles: Tie the stems together and hang your herbs upside down. You can use twist-ties so that you can easily tighten the bundles; the stems shrink as they dry. Keep in mind that the kitchen may not be the best place to string them up. Seek out a warm, dry spot away from humidity. Some experts recommend tying a paper bag, mesh produce bag, or a piece of muslin around the herbs before hanging to prevent them from gathering dust. If you do, be sure to poke several holes in the bag or cloth. Good ventilation is key for successful drying.
Your herbs may be dried and ready for storage in as little as a week. I store a few bundles in a small paper bag and remove the leaves as needed while I’m cooking. Dried herbs keep for a couple years if stored in a cool, dark place. Throw them away when they have no scent even when crushed, as this means the volatile oils that provide flavor have completely evaporated.
I think some herbs taste infinitely better when used fresh, particularly basil. But many keep their character and aroma very well when dried, including thyme, sage, oregano, mint, rosemary, and tarragon.
Store Away
A great deal of your garden bounty can be preserved by simply handling and holding the produce properly after harvest. Potatoes, winter squash, and most root vegetables are classic storage crops, along with garlic and onions.
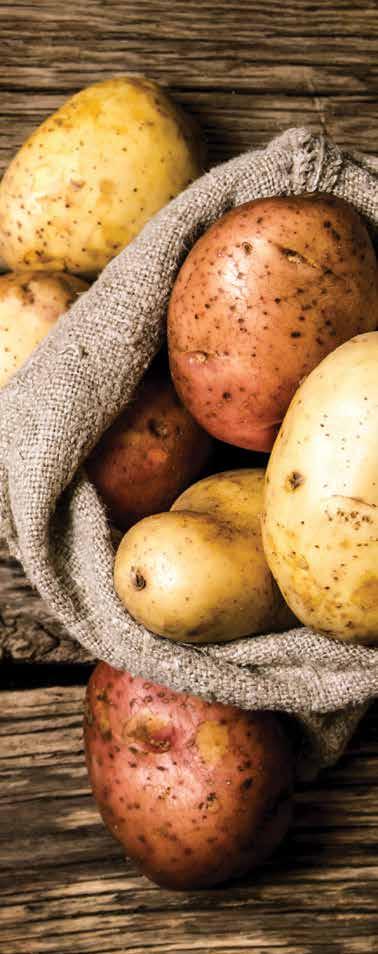
Many people shy away from storage, thinking they need a designated root cellar. But that’s not necessarily the case, as you may have root-cellar-like conditions in your garage, basement, or mudroom. You can even store produce in a cool bedroom—under the bed or in a spare dresser drawer. While optimal storage conditions include specific temperatures and other guidelines, you don’t have to maintain perfect conditions around the clock for successful preservation.
Some crops need to be cured before storage. During the curing process, potatoes and sweet potatoes, for example, go through a stage of self-healing, closing wounds to their skin, while garlic and onions form a seal where they have been cut from their stalk.
Several online sources provide charts with all the details you’ll need to know, including when to harvest, how to cure, and what temperatures are required. Go to motherearthnews.com and search the term “root cellar” for an especially useful list of articles. You can also talk with your county’s extension agents, who are well-versed in this arena.


