3 minute read
Fuel Injection Nozzles


Disassembling Nozzle Holder
Disassembling nozzle holder following order numbered in Fig. 4-38.
Fig.4-26
(1)Joint bolt & Gasket. (2) Fuel Leak pipe. (3) Injection pipe. (4)Nut. (5) Nozzle holder. (6) Gasket & Dust seal.
As the function of the injection nozzles greatly influences the engine performances, all the injection nozzles must be checked at every 3,000 km (2,000 miles) according to the following method.
Removing Nozzle Holder
Remove the nozzle holder following order numbered in Fig. 4-37.
Fig.4-27
(1)Nozzle nut. (2) Nozzle. (3) Body. (4) Cap nut. (5) Gasket. (6)Spring adjust screw. (7) Nozzle spring seat. (8)Nozzle spring. (9) Push rod.
NOTE: 1)Greatest possible care should be taken in handling the nozzles as they are the parts with high precision. 2)As the nozzle and the needle valve are in pairs, mixing up of the original combinations must be prevented by disassembling and washing one nozzle assembly after another separately. 3)Carbon deposit on the nozzle body must be removed with a piece of hard wood. However, it would be advisable not to clean the surrounding area of the nozzle orifice to avoid possible damage to the orifice.
After cleaning, wash the nozzle body in clean gasoline in a container.
CAUTION: Never assemble the nozzle needle valve and the nozzle body and slide them on each other in gasoline.
Daewoo D430 Engine Parts Contact: Email: EngineParts@HeavyEquipmentRestorationParts.com Phone: 269 673 1638 Website: www.HeavyEquipmentRestorationParts.com
Checking Injection Nozzle Testing Injection Nozzle
Test the nozzles using light oil under temperature of about 20°C (68°F).
Fig.4-28
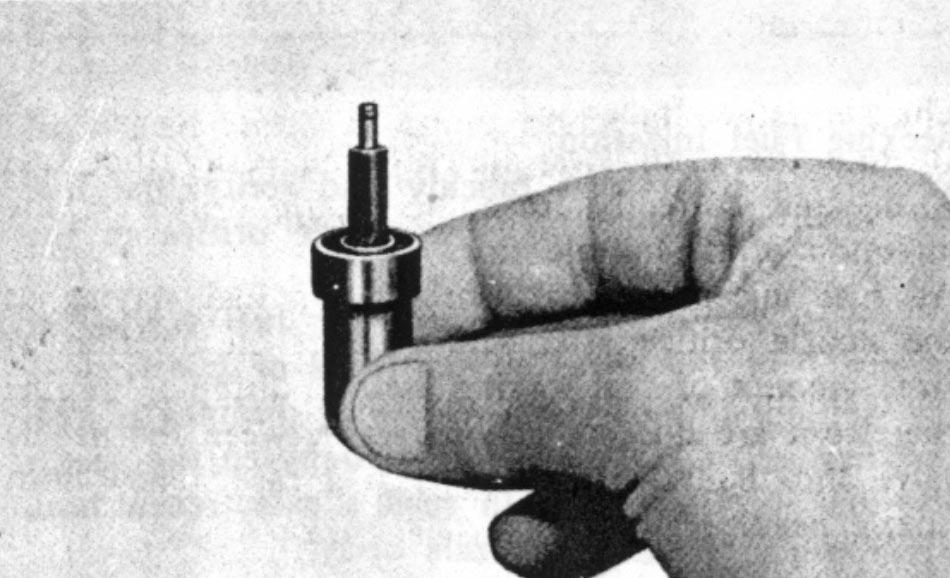
Make sure to needle valve comes down until the valve seat by its weight when it is pushed in the nozzle body about 18 mm (0.70 in). If any defect is found, always replace the needle valve and the nozzle body as a unit.
Assembling Injection Nozzle
Assemble the injection nozzle in the reverse order of disassemble.
Fig.4-29
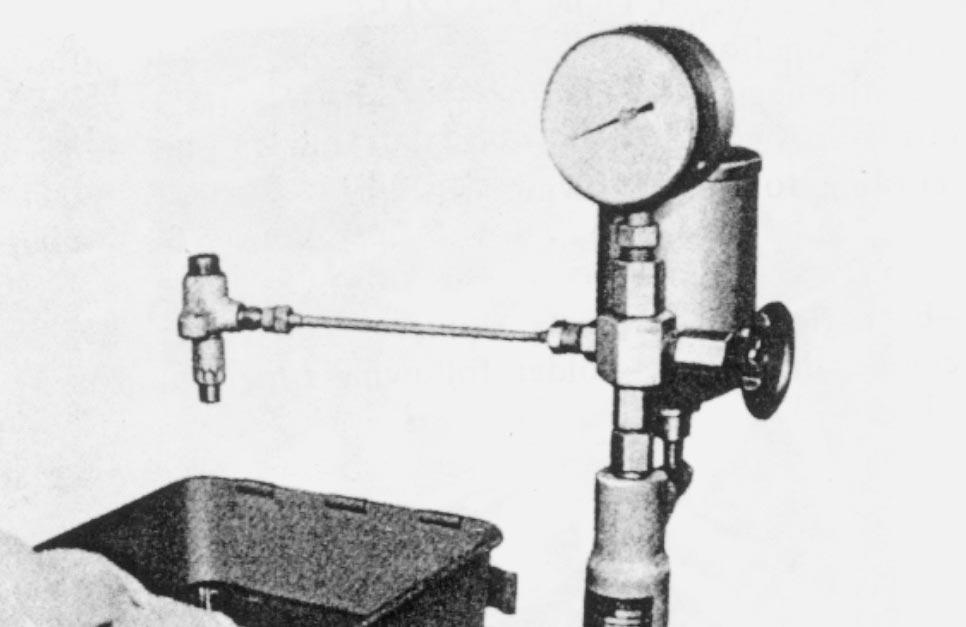
1)Checking Oiltightness of Sliding Portion of Nozzle
Needle Valve:
Set the adjusting screw and operate the hand lever to raise the pressure up to 250 kg/cm2 (3600 lb/in2) and see how soon the pressure drops from the level to 200 kg/cm2 (2800 lb/in2).
If it takes longer than 3 seconds, the oiltightness will be satisfactory. Aremarkably quick drop of pressure indicates an excessive clearance at the sliding portion between the needle valve and the nozzle body due to wear, so in such a case replace both needle valve and nozzle body.
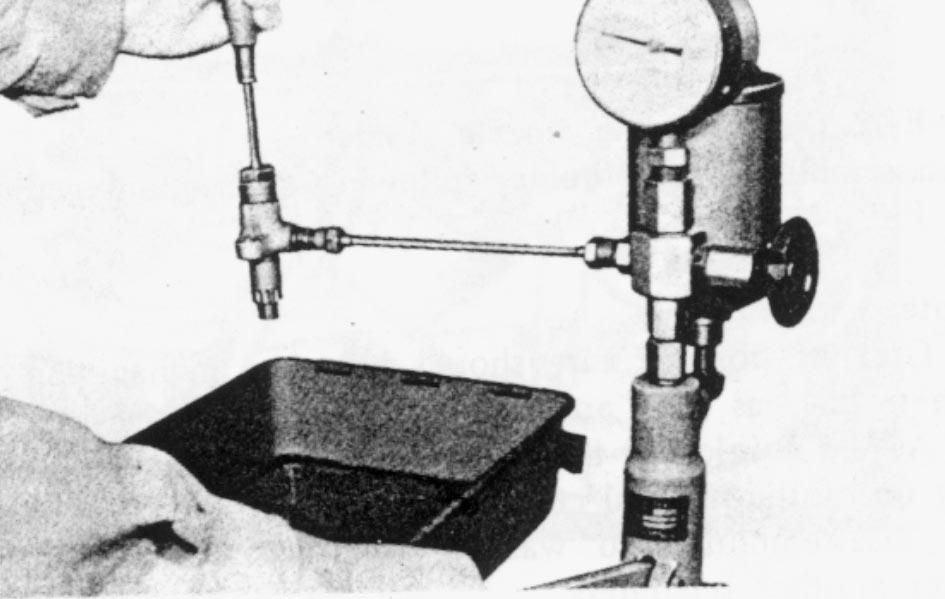
Fig.4-30
2)Checking Injection Starting Pressure:
Operate the hand lever at 60 st/min to check for the pressure under which injection is started.
Adjust the pressure to the prescribed value of 135 kg/cm2 (1,920 lb/in2) by turning the adjusting screw, and then tighten the cap nut with torque of 3.5 kg•m (25 lb•ft).
Installing Injection Nozzles
Fig.4-31
3) Checking Oiltightness of Needle Valve Seat:
Operate the hand lever to raise the pressure up to 115 kg/cm2 (1635 lb/in2), which is 20 kg/cm2 (280 lb/in2) lower than the injection starting pressure. If fuel does not drip from the nozzle orifice under the pressure, oiltightness is satisfactory. Dripping of fuel, on the other hand, is indicative of damage on the needle valve or the valve body, or mal-contact between both.
In that event, both needle valve and valve body must be replaced.
Checking Fuel Injection:
Fig.4-33
Install the injection nozzle holder in the reverse order of removing.
NOTE: When installing the nozzle holder, use the new gasket, and tighten the nuts to 1.6 ~ 2.4 kg•m (12 ~ 17 lb•ft).
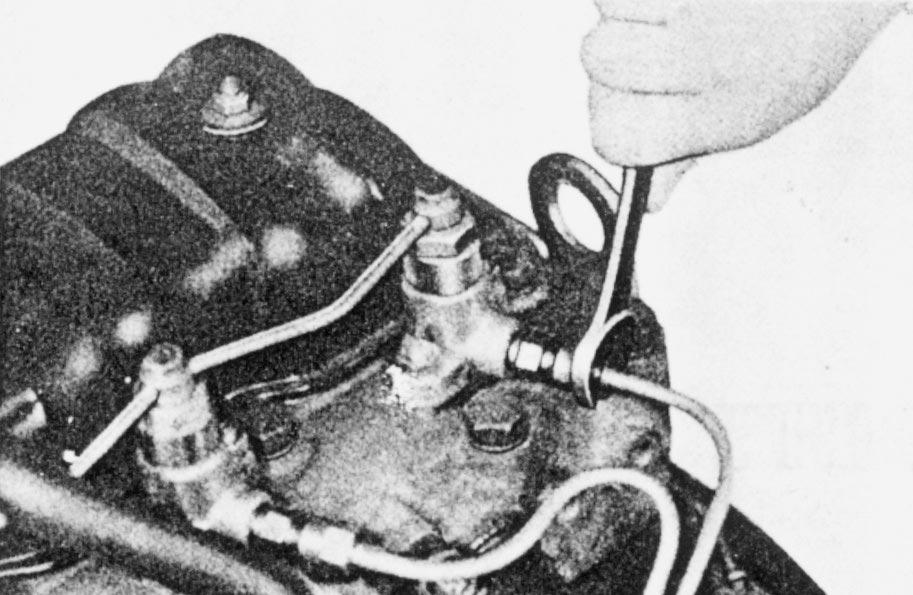
Fit the fuel pipe to the nozzle holder.
Fig.4-32
Operate the hand lever quickly and verify that fuel is injected correctly from the nozzle orifice in the direction of the nozzle axis. At fuel injection check, inspect for fuel staying at the nozzle orifice after several times of injection. Alarge amount of fuel staying there or dripping of fuel therefrom are due to mal-contact between the needle valve and the valve seat. In such a case, renew both nozzle needle valve and nozzle body.


