8 minute read
Special How do you assess the substrate?
A CHECKLIST IS NO LUXURY
CHOOSE THE RIGHT PRODUCTS TO IMPROVE THE SUBSTRATE
Advertisement
Photo – Thomsit
The success of an attractive parquet floor stands or falls with the fitting preparation. The approach to the substrate is crucial for the fitting. And so, it will be necessary in advance to inspect meticulously the substrate onto which the parquet is to be fitted and a number of steps must be respected.
The main thing to realise is that the available substrates are highly diverse and each one can have specific problems, such as rising damp, warping planks, or poor adhesion. An existing tile floor, a new screed, an anhydrite floor, or an old plank floor each require a unique approach. To ensure the right preliminary treatment follows, a (non-exhaustive) checklist must include the following: flatness and
angle, cleanliness and impurity, cracks and bursts, solidarity, porosity, dryness, and damp.
Flatness and angle
You absolutely must avoid excessive deviation from the flatness and the angle of the substrate. This means that you must eradicate any unevenness before you smooth the surface. For instance, you must fill in any major unevenness and slits, remove any loose-fitting sections, and ensure that the surface is free of dust before you apply the correct primer.
Cleanliness and impurity
You must remove completely elements such as residue of oil, wax, paint, grease, mortar, or gypsum and then clean the surface thoroughly. You need to take particular care if the substrate consists of ceramic tiles. In this case you not only have to clean the surface thoroughly, but also you need to eradicate the difference in height between the tiles and joints and you must never forget to degrease the surface before fitting parquet. Adhesive residue, too, must certainly be removed.
Cracks and bursts
Cracks and bursts can cause equally serious trouble. If you see that the subfloor shows static micro-cracks of less than 1mm, it will suffice to apply a suitable primer. If the cracks are bigger, you have to fill them in. First of all, you should grind the cracks open, then remove the dust, and then fill them in with a 2K epoxy cast resin sprinkled with quartz sand or with a dual-component silicate resin. You fill in bursts with an epoxy resin or a dual-component silicate resin. However never use a fast-drying repair mortar because that allows for a tiny hairline crack after pouring, just like a horizontal motion.
Solidarity
For the rest, the substrate needs to be solid enough. And so, the compressive strength has to be 8N/m² or more and the tensile strength 0.5N/m² or more. At the same time, the subfloor must not be powdery or gritty or bendable or flexible from an old wooden floor, for instance. You check the solidarity by means of a scratch test. To do this you make a grid of scratches with a grid scratch tester. If the subfloor crumbles, it is not ready. Moreover, you can use a wire brush to check whether or not the substrate shows excessive wear and tear. Finally, you carry out a hammer blow test. To do that, you use the hammer to tap gently on the surface sideways.
Porosity
If the floor isn’t porous enough, that can lead to adhesion problems. You check for porosity with a drop test. First of all, let a drop of water fall onto the surface. If the drop disappears in under five seconds, you can conclude that the subfloor is highly absorbent. If this takes 5 to 30 seconds, the subfloor is absorbent. If this takes longer than 30 seconds, the subfloor is weak to non-absorbent.
Dryness
It is absolutely essential for the subfloor to be dry enough with no risk of rising damp. Watch out for sultry damp when fitting on soil without a crawl space or onto an old tile floor. A new cement or concrete floor might well contain too much residual moisture.
First of all, you record the moisture content with a non-destructive meter. If you are in any doubt, use a calcium carbide meter. This leads to a sample from the substrate reacting to calcium carbide to form gas. Since this is done in a pressure bottle, the moisture content is recorded precisely. Do not drill this sample from the floor because the heat thereby generated will give a distorted picture.
Damp
If the moisture content exceeds the prescribed moisture percentages, a damp screen can be fitted. Note: You can only seal a watertight screed. A damp screen is usually applied with a roller in several coats onto a new and clean substrate with no adhesive, primer, or levelling agent residue.
Generally speaking, there are two types of damp screens. Firstly, there are the ready-for-use dispersion damp screens, which consist of polymer dispersion, additives, and water. Then there are also epoxy damp screens available with a polyamine hardened epoxy resin and two components. Source: Floor Tech
Some specialists
Bona

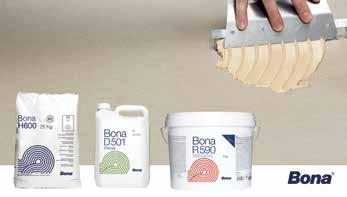
It will be necessary to inspect the condition of the substrate before fitting parquet. The substrate should be stable, level, dry, clean, and free of cracks and dust. The surface should be rough to some extent. If applicable, the subfloor must meet the requirements of local standards or practical guidelines. If you use Bona silane adhesives, a primer is usually not necessary. If the subfloor is a problem, a primer such as Bona D501, R540, or R590 can help. You will need to fill in any unevenness and holes with a stable levelling agent such as Bona H600, H610 (for filling holes) or H660. Damp covering floors? Bona R590 is suitable for priming and/or blocking residual moisture in cement or concrete covering floors (up to 5% CM/90% RH) before a wooden floor is fitted. You can also use it to reinforce weak subfloors somewhat. It is compatible with all Bona silane adhesives and levelling agents. Obviously, it’s always also important to choose the right adhesive. This depends on the subfloor and working method. Bona has designed various parquet adhesives for various situations.
Chimiver
PRYMER SF 1105 is a two-component water-based epoxy primer developed for dusty subfloor, with a multi-layer application, it works as a moisture barrier. It is resistant to the inverse hydrostatic pressure according to the law UNI 8298 part 8. PRYMER SF
1105 is suitable for consolidation of subfloors on radiant heating. It is also recommend as a promoter of adhesion for anhydrite subfloors.
Bostik

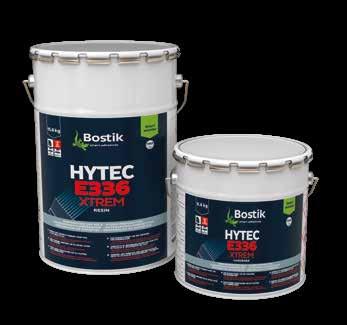
There are six essential criteria for preparing a substrate: The substrate must be flat and stable enough, free of shrink cracks, permanently 100% dry, without any risk of rising damp, and normally porous. Bostik has several products for use on difficult substrates. For instance, there is RENO P520 EASY. This is a solventless and 2-component repair resin for filling and repairing shrink cracks. HYTEC E336 XTREM is a 2-component epoxy damp screen for use with any moisture content and also with rising damp. To strengthen the top layer of fragile covering floors, Bostik offers HYTEC P510 RENORAPID, a fast-drying 1-component PU primer which is easy to apply. After repairing/cleaning up the covering floor with these products, you can level the covering floor provided that you use the correct primer (GRIP A500 MULTI for porous substrates and anhydrite covering floors, GRIP A936 XPRESS for sealed substrates, and GRIP X910 FILL&WOOD for wooden substrates). The choice of leveller depends on the purpose of the floor and the potential stress to which it will be exposed.

Emfi
Before you fit parquet to an existing bearer, the bearer must first be clean, dry, and sufficiently interlinked before fitting. To refine the bearer you can sandpaper and extract dust (this is obligatory for anhydrite screeds), apply a PU primer EMFIPRIM PU MONO, which reinforces the bearer surface, or use an epoxy primer EMFIPRIM EPOXY in one or two coats (you need to sandpaper after the last coat). Whilst you must respect the DTU 51.2 in France and other fitting rules in countries like Germany and Belgium, you can use a polyana film under the screed or apply an epoxy primer EMFIPRIM EPOXY to the bearer in two crossed coats (you need to sandpaper after the last coat). In the EMFI range we use EMFIPRIM PU MONO to reinforce the bearer surface and EMFIPRIM EPOXY to apply a damp screen. Thomsit
Thomsit has solutions for various problems like damp, frailty, cracks and splits, dirt, oil, or old glue residue. These products are usually compatible to those of other brands, yet Thomsit prefers works from a one-brand system. According to Thomsit, there are certainly universal primers to solve many of the aforementioned problems, but none to cover all problems in one product. The Thomsit best-sellers are Thomsit R 729 Silicate Cast Resin for filling cracks, Thomsit R 766 Multiprimer for priming, Thomsit R 755 Damp Screen for keeping out damp, Thomsit R 790 Filler and Primer for filling joints and priming in one operation, TF 201 Thomsit Floor membrane for covering a bad floor without dismantling it, and Thomsit RS Fix for removing unevenness and differences in height.
www.progressprofiles.com www.progressprofiles.com
A New evolution with the goal of flexibility, innovation and energy efficiency
PATENTED
PRODESO® HEAT GRIP SYSTEM
The system is composed of three elements: PRODESO® HEAT GRIP MEMBRANE, PRODESO® HEAT GRIP CABLE e PRODESO® HEAT GRIP THERMOSTAT KIT. The polyethylene membrane with uncoupling, waterproofing and vapour management features has a 8,5 mm thickness and a thermowelded non-woven fabric on the back side, which guarantees the adhesion to the substrate. The new membrane structure allows a perfect fixing of the heating cable and a crack-bridging ability 5 times more than the PRODESO HEAT. The cables of last generation are composed of many resistances, each one 60 cm long, in a parallel circuit. If the cable is damaged, only the broken resistance stops working but not the whole cable. The thermostat of last generation interfaces with Android and Apple devices, that is why it is possible to adjust all settings and time schedule using an application with internet connection as remote control.


