Bewitched Quilt

Featuring Nightshade - Déjà Vu by Tula Pink
Collection:
NightshadeDéjà Vu by Tula Pink
Technique: Pieced
Skill Level: Advanced Beginner
Finished Size: 96" x 96" (2.44m x 2.44m)
All possible care has been taken to assure the accuracy of this pattern. We are not responsible for printing errors or the manner in which individual work varies. Please read the instructions carefully before starting this project. If kitting, it is recommended a sample is made to confirm accuracy.
1 of 9 freespiritfabrics.com
M. Schmidt
Fabric Requirements







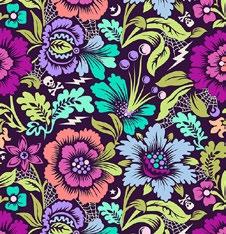
Additional Recommendations

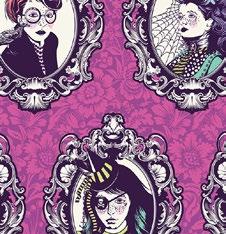
Bewitched Quilt 2 of 9 freespiritfabrics.com Copyright© 2023 All possible care has been taken to assure the accuracy of this pattern. We are not responsible for printing errors or the manner in which individual work varies. Please read the instructions carefully before starting this project. If kitting it is recommended a sample is made to confirm accuracy.
Project designed by Stacey Day | Tech edited by Alison
DESIGN COLOR ITEM ID YARDAGE (A) Coven Oleander PWTP205.OLEANDER 11⁄8 yards (1.03m) (B) Spider Blossom Equinox PWTP206.EQUINOX 31⁄4 yards (2.97m) (C) Raven Lace Oleander PWTP207.OLEANDER 11⁄3 yards (1.22m) (D) Storm Clouds Oleander PWTP208.OLEANDER 21⁄4 yard (2.06m) (E) Apothecary Nerium PWTP209.NERIUM 1⁄2 yard (0.46m) (F) Mini Coven Nerium PWTP210.NERIUM 2⁄3 yard (0.61m) (G) Mini Spider Blossom Nerium PWTP211.NERIUM 2⁄3 yard (0.61m) (H) Fishnet Equinox PWTP212.EQUINOX 5⁄8 yard (0.57m) (I) Pom Pom Myrtle PWTP118.MYRTL 1⁄4 yard (0.23m) (J) Wildflower Spring PWTP149.SPRING 7⁄8 yard (0.80m) (K) Hexy Chameleon PWTP150.CHAMELEON 1⁄2 yard (0.46m) (L) Tiny Dots Peacock PWTP185.PEACOCK 1⁄2 yard (0.46m) (M) Tiny Dots Meadow PWTP185.MEADOW 1⁄2 yard (0.46m) (N) Tiny Stripes Misty PWTP186.MISTY* 7⁄8 yard (0.80m) * includes binding Backing (Purchased Separately) 44" (1.12m) wide Mini Spider Blossom Nerium PWTP211.NERIUM 9 yards (8.23m) OR 108" (2.74m) wide Fairy Dust XL Cotton Candy QBTP011.COTTONCANDY 3 yards (2.74m)
cotton thread
colors to
104" x 104" (2.64m
(A)
(E) (I) (M)
(F) (J) (G) (K) (H) (L) Backing 108" Backing 44"
• 100%
in
match •
x 2.64m) batting
(B) (C) (D)
(N)
Cutting
WOF = Width of Fabric
HST = Half-square Triangle
HST Units in this quilt are made from squares cut in half diagonally into HSTs, and then sewn together in pairs, allowing for precise placement of directional prints. If you prefer to make your HST units slightly oversized and trim to size, increase the 6 7⁄ 8" cuts to 7" (or your desired amount of overage).
From Fabric A, fussy cut:
(3) 121⁄2" x 121⁄2" squares, each centered on a different cameo motif
From Fabric B, cut:
(2) 127⁄8" x WOF; subcut
(6) 127⁄8" x 127⁄8", then cut once diagonally to make (12) large HSTs
(1) 67⁄8" x WOF; subcut
(2) 67⁄8" x 67⁄8", then cut once diagonally to make (4) small HSTs
(14) 61⁄2" x WOF; subcut
(8) 61⁄2" x 251⁄2"
(4) 61⁄2" x 241⁄2"
(4) 61⁄2" x 181⁄2"
From Fabric C, cut:
(5) 61⁄2" x WOF; subcut
(8) 61⁄2" x 131⁄2"
(4) 61⁄2" x 121⁄2"
(4) 61⁄2" x 61⁄2"
(2) 43⁄4" x WOF strips; subcut
(4) 43⁄4" x 19"
Bewitched Quilt
From Fabric D, cut:
(1) 19" x WOF; subcut
(4) 43⁄4" x 271⁄2" from the WOF, and from the remaining WOF,
(1) 61⁄2" x 121⁄2"
(1) 9" x 9" square, then cut once diagonally to make (2) HSTs
(7) 61⁄2" x WOF; subcut
(8) 61⁄2" x 191⁄2"
(4) 61⁄2" x 181⁄2"
(3) 61⁄2" x 121⁄2"
From Fabric E, cut:
(2) 67⁄8" x 67⁄8"; subcut
(6) 67⁄8" x WOF, then cut once diagonally to make (12) HSTs
If you would like the directional fabrics cut so that all prints can be placed right-reading for their final orientation, follow the cutting diagram to cut half the squares in one direction and the other half in the opposite direction.
Fabrics E and F:
Directional Cutting Diagram
Fabric E and F Directional Cutting Diagram
From Fabric H, cut:
(2) 67⁄8" x WOF; subcut
(6) 67⁄8" x 67⁄8", then cut once diagonally to make (12) HSTs
(1) 31⁄2" x 31⁄2"
(1) 31⁄2" x WOF; subcut
(11) 31⁄2" x 31⁄2"
From Fabric I, cut:
(1) 67⁄8" x WOF; subcut
(4) 67⁄8" x 67⁄8", then cut once diagonally to make (8) HSTs
From Fabric J, cut:
(4) 67⁄8" x WOF; subcut
(16) 67⁄8" x 67⁄8", then cut once diagonally to make (32) HSTs
From Fabric K and M, cut from each:
(2) 67⁄8" x WOF; subcut
(8) 67⁄8" x 67⁄8", then cut once diagonally to make (16) HSTs
From Fabric L, cut:
(1) 67⁄8" x WOF; subcut
(4) 67⁄8" x 67⁄8", then cut once diagonally to make (8) HSTs
(1) 61⁄2" x WOF; subcut
From Fabrics F and G, cut from each:
(3) 67⁄8" x WOF; subcut
(12) 67⁄8" x 67⁄8", then cut once diagonally to make (24) HSTs
If you would like the directional Fabric F cut so that all prints can be placed right-reading for their final orientation, follow the cutting diagram to cut half the squares in one direction and the other half in the opposite direction.
(4) 61⁄2" x 61⁄2"
From Fabric N, cut: enough 21⁄2"-wide bias strips for 400" (10.2m) bias binding
3 of 9 freespiritfabrics.com Copyright© 2023 All possible care has been taken to assure the accuracy of this pattern. We are not responsible for printing errors or the manner in which individual work varies. Please read the instructions carefully before starting this project. If kitting it is recommended a sample is made to confirm accuracy.
Instructions
All seam allowances are 1⁄4" and pieces are sewn right sides together. Press seam allowances in the direction indicated by the black arrows.
1. Draw a diagonal line from corner to corner across the wrong side of each Fabric H 31⁄2" x 31⁄2" square. Pin one marked square to each corner of a Fabric A 121⁄2" x 121⁄2" square with the lines oriented as shown, sew along the line, trim the seam allowance to 1⁄4", and press away from the center to complete an A Unit 121⁄2" square including seam allowances. Make 3 total. (
3. Sew the A and B Units together to make the Center Section, making sure the motifs in the A Units are all oriented correctly. Press towards the center of the unit. (Fig. 3)
2. Sew a pair of Fabric G 67⁄8" HSTs to each short side of the Fabric D 9" HSTs. Press towards Fabric G to make (2) B Units. If needed, trim to 61⁄2" x 121⁄2". (Fig. 2)
4. Sew a Fabric G and Fabric E HST together along the long edges to make a G/E HST unit (Fig. 4a ). If needed, trim to square up to 61⁄2" x 61⁄2", keeping the diagonal seam centered in the corners. The HST units and blocks will be rotated in their final assembly, so if you prefer all right-reading directional prints, refer to the quilt layout diagram on page 9 and arrange the Fabric E HSTs in advance so there are 2 of each orientation as shown in Figure 4b. Repeat to make a total of 8 G/E HST Units (2 of each orientation).
4 of 9 freespiritfabrics.com Copyright© 2023 All possible care has been taken to assure the accuracy of this pattern. We are not responsible for printing errors or the manner in which individual work varies. Please read the instructions carefully before starting this project. If kitting it is recommended a sample is made to confirm accuracy.
Bewitched Quilt
Fig. 1
)
1 A Unit Make 3
1 A H
Fig.
Fig.
B Unit Make 2
Fig.
2
2 9” HST HST D G G
Fig.
Fig. 3
Center Section Make 1
A Unit motif
A Unit motif A Unit motif B Unit
G E
Fig. 4a
Fig. 4a
Fig. 4b
5. Again referring to the quilt layout diagram for final orientation if you prefer all right-reading directional prints, sew a Fabric G HST to the E side of a G/E HST Unit to make a C Unit. Repeat to make a second C Unit and 2 mirrored Cr Units as shown. Then sew G HSTs to both E sides of the remaining G/E HST Units as shown to make 4 D Units (Fig. 5).
7. Fold the Fabric D 43⁄4" x 271⁄2" and Fabric C 43⁄4" x 19" rectangles and 4 Fabric B small HSTs in half lengthwise to mark the center. Sew a Fabric D rectangle, a Fabric C rectangle, and a Fabric B small HST together as shown, matching centers. Trim both ends of the C and D strips even with the raw edges of the Fabric B triangle to complete an F Unit, making sure the short sides of the unit measure at least 181⁄2". Make 4. (Fig. 7)
6. In the same manner, make (4) D Units using Fabric E and Fabric H triangles as shown. Sew a Fabric B large HST to the diagonal side of these units to complete 4 E Units. (Fig. 6)
5 of 9 freespiritfabrics.com Copyright© 2023 All possible care has been taken to assure the accuracy of this pattern. We are not responsible for printing errors or the manner in which individual work varies. Please read the instructions carefully before starting this project. If kitting it is recommended a sample is made to confirm accuracy.
Bewitched Quilt
5 G G C/Cr Unit Make 2 each D Unit Make 4 G
Fig.
6 E H H H E B 12 7/8” H H H E Unit Make 4
Fig.
D 4 3/4” x 27” C 4 3/4” x 19” B F Unit Make 4
Fig. 7
8. Sew (1) each C, D, and E Unit together, then add the F Unit along the diagonal side as shown, to complete an A Block. Make 2 A Blocks (181⁄2" x 241⁄2"), then in the same manner, make 2 Ar Blocks as shown, replacing the C Unit with the Cr Unit. (Fig. 8)
Bewitched Quilt
9. Again referring to the quilt layout diagram for final orientation if you prefer all right reading directional prints, repeat step 4 using the Fabric F, J, and M HSTs to make 8 F/M HST Units and 16 F/J HST Units.
Then add M and I HSTs to the F sides of the F/M HST Units as shown to make 4 each G and Gr Units and add J and K HSTs to the F sides of the F/J HST Units as shown to make 8 each H and Hr Units (Fig. 9).
Make 8 each
10. Sew a Fabric B large HST to the long side of 4 each H/Hr units to make 4 each I/Ir Units (Fig. 10).
6 of 9 freespiritfabrics.com Copyright© 2023 All possible care has been taken to assure the accuracy of this pattern. We are not responsible for printing errors or the manner in which individual work varies. Please read the instructions carefully before starting this project. If kitting it is recommended a sample is made to confirm accuracy.
Ar Block Make 2 A Block Make 2 E Unit D Unit C Unit F Unit Cr Unit
Fig. 8
J J K F F M M I J J K F M M F I H/Hr
G/Gr Unit
Fig. 9
Unit
Make 4 each
J J K F B H Unit J J K F I/Ir Unit
4 each B Hr Unit
Fig. 10
Make
Bewitched Quilt
11. Sew 1 each Fabric B, D, and C 61⁄2" high rectangles together as shown with a Fabric L HST. Trim the offset ends of the strips aligned with the raw edge with the Fabric L triangle as shown to complete a J Unit. Repeat to make a a total of 4 each J Units and mirrored Jr Units as shown (Fig. 11).
12. Sew a G and an H Unit to the Fabric B sides of an I Unit as shown, then add a J Unit along the long sides, pinning to match seam intersections to complete a B Blocks (24 1⁄2" square including seam allowances). Repeat to make a total of 4 each B Block and mirrored Br Blocks, replacing all the units with reversed units as shown (Fig. 12).
7 of 9 freespiritfabrics.com Copyright© 2023 All possible care has been taken to assure the accuracy of this pattern. We are not responsible for printing errors or the manner in which individual work varies. Please read the instructions carefully before starting this project. If kitting it is recommended a sample is made to confirm accuracy.
11 L D 6 1/2” x 19 1/2” B 6 1/2” x 25 1/2” J Unit Jr Unit Make 4 each L D 6 1/2” x 19 1/2” B 6 1/2” x 25 1/2” C 6 1/2” x 13 1/2” C 6 1/2” x 13 1/2”
Fig.
12 Br Block Make 4 B Block Make 4 J Unit Jr Unit I Unit Ir Unit G Unit Gr Unit H Unit Hr Unit
Fig.
13. Arrange 1 each Fabric L and C 61⁄2" x 61⁄2" squares, Fabric C and D 61⁄2" x 121⁄2" rectangles, Fabric D and B 61⁄2" x 181⁄2" rectangles, and a Fabric B 61⁄2" x 241⁄2" rectangles as shown. Sew together, starting with the squares, to complete a C Block (241⁄2" square including seam allowances) (Fig. 13). Fig. 13
Bewitched Quilt
Quilt Top Assembly
Note: Follow the Quilt Layout diagram (page 9) while assembling the quilt. Pay attention to the orientation of directional prints in Fabrics E and F if you cut and assembled the blocks in that manner. Pin to match seam intersections and press seams open or to one side if you prefer.
14. Arrange the A, Ar, B, Br, and C Blocks and the Center Section in rows following the layout diagram, rotating blocks as needed.
15. Sew the A and Ar blocks together into pairs, then sew to the top and bottom of the Center Section.
16. Sew the B and Br Blocks together. Then sew blocks and sections together into rows.
17. Sew the rows together to complete the quilt top (961⁄2" x 961⁄2").
Finishing
18. Sew the 21⁄2" Fabric N bias binding strips together end-to-end. Press seams open. Press the binding strip in half wrong sides together.
19. Layer backing (wrong side up), batting, and quilt top (right side up). Baste the layers together and quilt as desired. Trim excess batting and backing even with the top after quilting is completed.
20. Leaving an 8" tail of binding, sew the binding to the top of the quilt through all layers matching all raw edges. Miter corners. Stop approximately 12" from where you started. Lay both loose ends of binding flat along quilt edge. Where the loose ends meet, fold them back on themselves and press to form a crease. Using this crease as your stitching line, sew the two open ends of the binding right sides together. Trim seam to 1⁄4" and press open. Finish sewing binding to quilt.
21. Turn the binding to the back of quilt and hand-stitch in place.
8 of 9 freespiritfabrics.com Copyright© 2023 All possible care has been taken to assure the accuracy of this pattern. We are not responsible for printing errors or the manner in which individual work varies. Please read the instructions carefully before starting this project. If kitting it is recommended a sample is made to confirm accuracy.
L 6 1/2” C 6 1/2” C 6 1/2” x 12 1/2” D 6 1/2” x 12 1/2” D 6 1/2” x 18 1/2” B 6 1/2” x 18 1/2” B 6 1/2” x 24 1/2” C Block Make 4
Bewitched Quilt 9 of 9 freespiritfabrics.com Copyright© 2023 All possible care has been taken to assure the accuracy of this pattern. We are not responsible for printing errors or the manner in which individual work varies. Please read the instructions carefully before starting this project. If kitting it is recommended a sample is made to confirm accuracy.
Quilt Layout
Center Section
A Block Ar Block
B Block Br Block
C Block
Family Magic Quilt
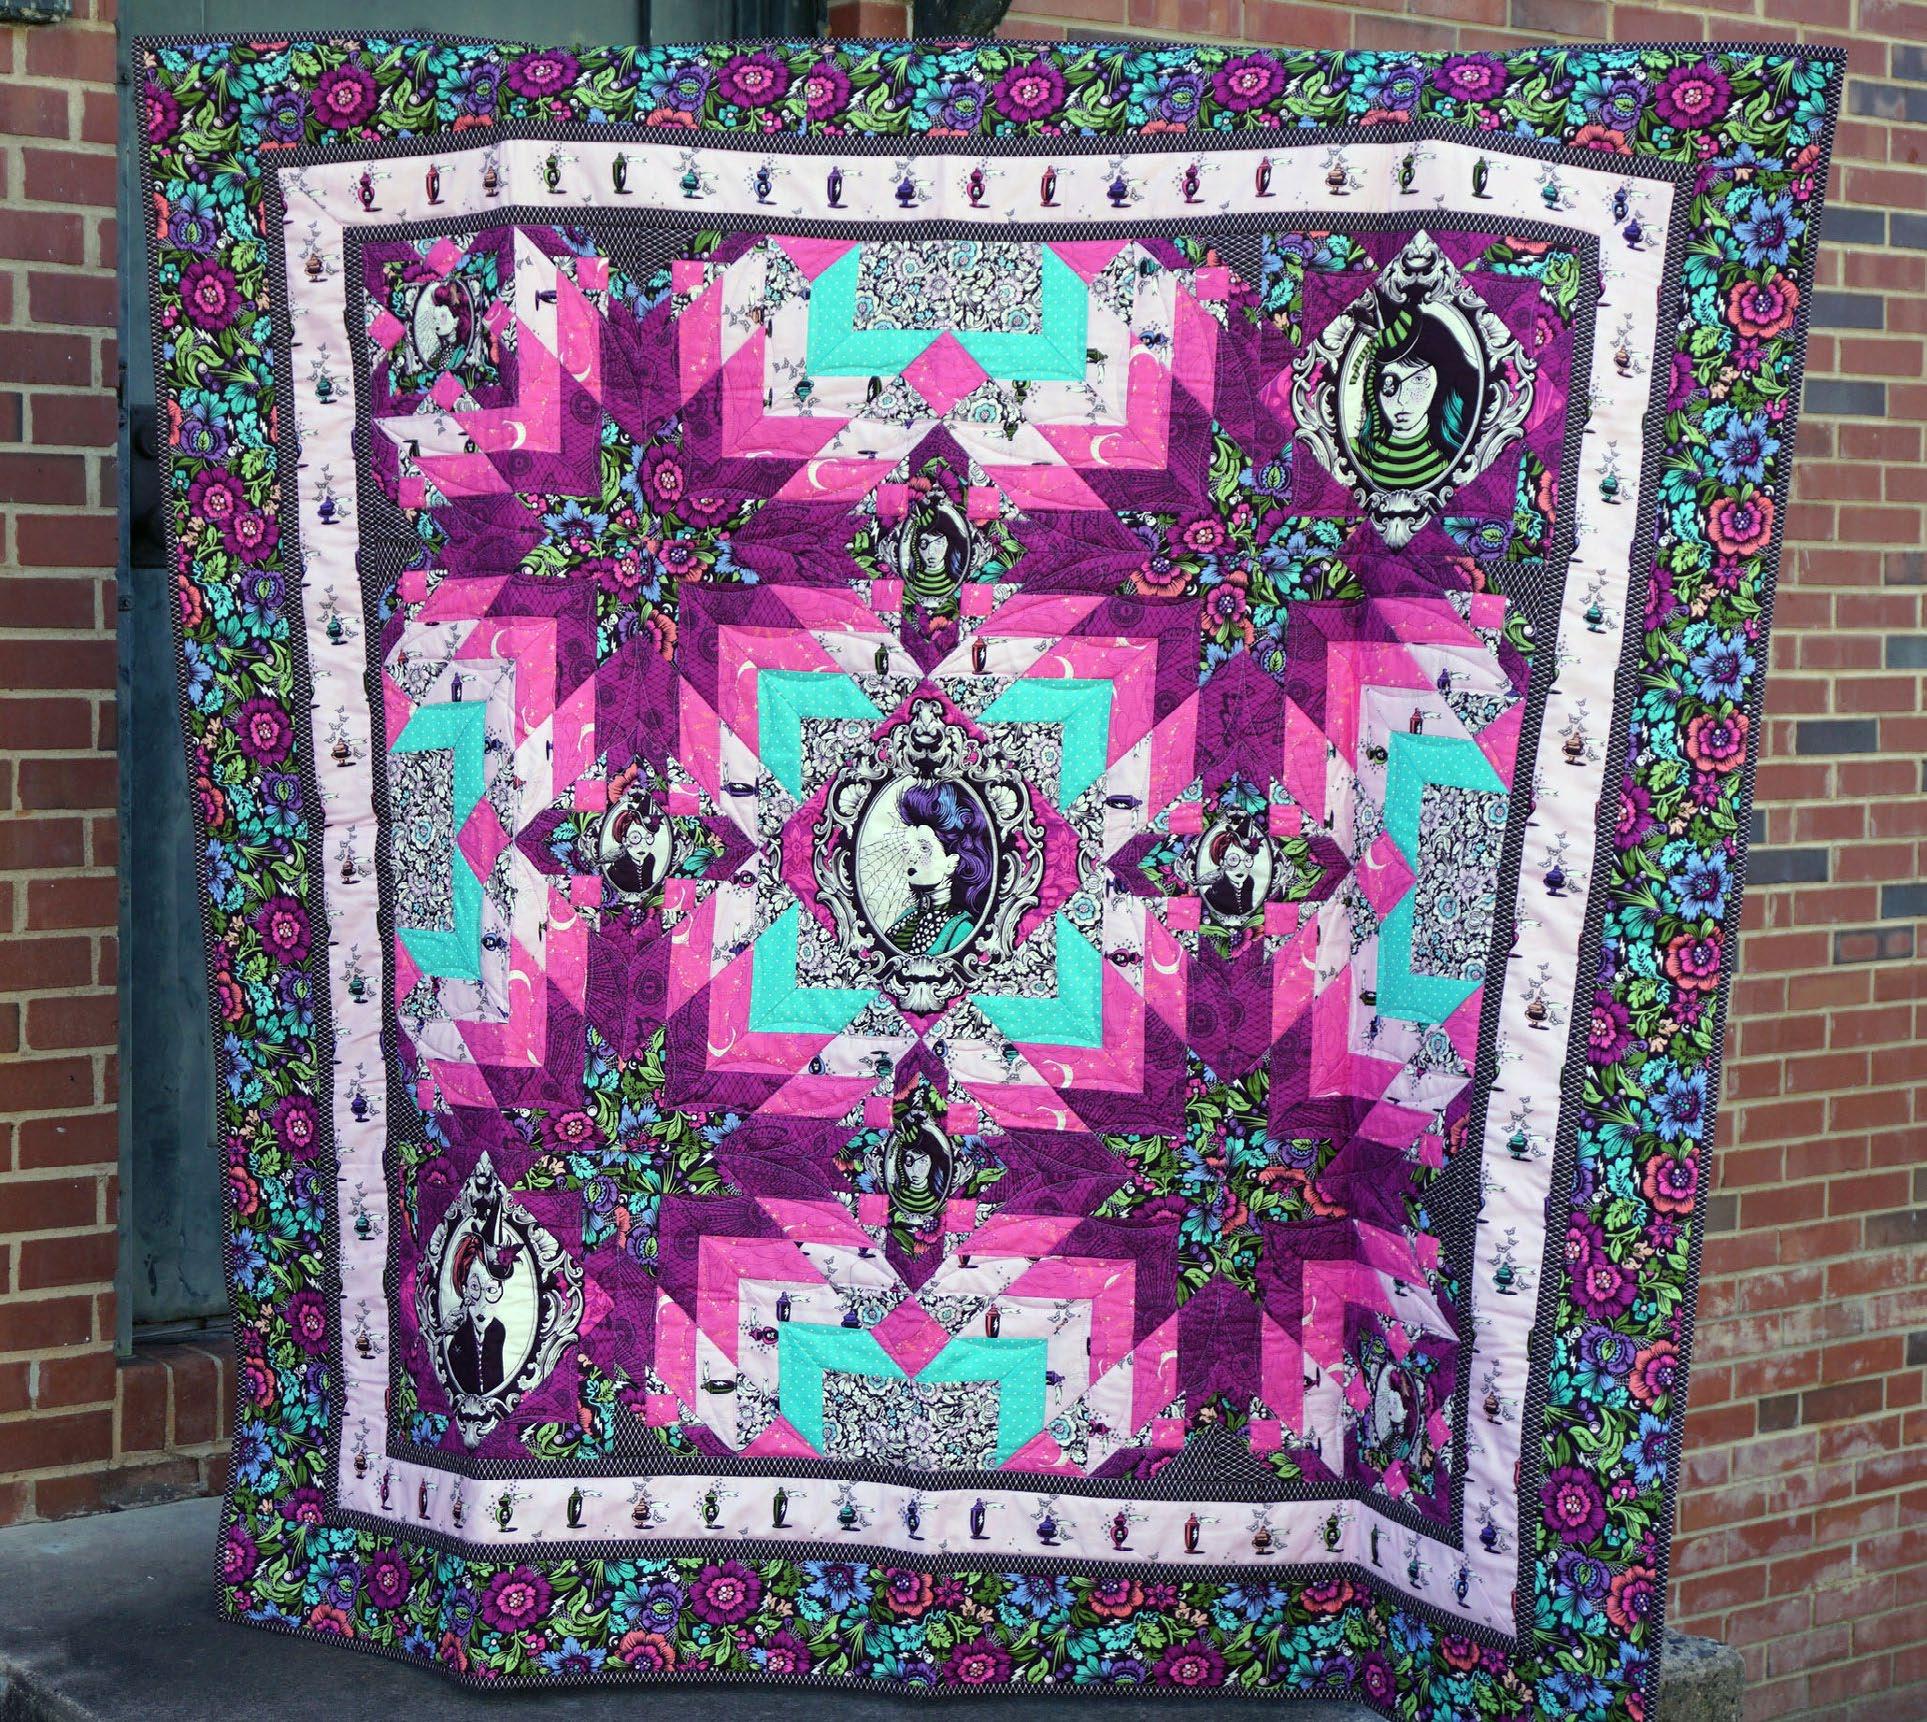
Featuring Nightshade - Déjà Vu by Tula Pink
Collection: NightshadeDéjà Vu by Tula Pink
Technique: Pieced
Skill Level: Intermediate
Finished Size: 65" x 65" (1.65m x 1.65m)
Finished Sizes:
Finished Block Sizes: 12" x 12" (30.48cm x 30.48cm) 12" x 24" (30.48cm x 60.96cm 24" x 24" (60.96cm x 60.96cm)
All possible care has been taken to assure the accuracy of this pattern. We are not responsible for printing errors or the manner in which individual work varies. Please read the instructions carefully before starting this project. If kitting, it is recommended a sample is made to confirm accuracy.
1 of 17 freespiritfabrics.com
Family Magic Quilt

Project designed by Stacey Day | Tech edited by Alison
M. Schmidt
Fabric Requirements



* includes binding
Backing (Purchased Separately)
44" (1.12m) wide

OR 108" (2.74m) wide
Additional Recommendations
• 100% cotton thread in colors to match


• 73" x 73" (1.85m x 1.85m) batting
• Rotary cutting ruler with a 45° line
2 of 17 freespiritfabrics.com Copyright© 2023 All possible care has been taken to assure the accuracy of this pattern. We are not responsible for printing errors or the manner in which individual work varies. Please read the instructions carefully before starting this project. If kitting it is recommended a sample is made to confirm accuracy.
DESIGN COLOR ITEM ID YARDAGE (A) Coven Oleander PWTP205.OLEANDER 2⁄3 yard (0.61m) (B) Spider Blossom Equinox PWTP206.EQUINOX 17⁄8 yards (1.71m) (C) Raven Lace Oleander PWTP207.OLEANDER 11⁄8 yards (1.03m) (D) Storm Clouds Oleander PWTP208.OLEANDER 1 yard (0.91m) (E) Apothecary Nerium PWTP209.NERIUM 21⁄4 yards (2.06m) (F) Mini Coven Nerium PWTP210.NERIUM 5⁄8 yard (0.57m) (G) Mini Spider Blossom Nerium PWTP211.NERIUM 1⁄2 yard (0.46m) (H) Fishnet Equinox PWTP212.EQUINOX* 11⁄2 yards (1.37m) (I) Tiny Dots Peacock PWTP185.PEACOCK 1⁄3 yard (0.30m)
Mini Coven Nerium PWTP210.NERIUM 41⁄8 yards (3.77m)
Rainbow Hexy XL Ink QBTP012.INK 21⁄8 yards (1.94m)
(A)
(E)
(I) Backing 108" Backing 44"
(B) (C) (D)
(F) (G) (H)
Family Magic Quilt
Cutting
WOF = Width of Fabric, cut from selvage to selvage
LOF = Length of Fabric, cut parallel to selvage
Notes:
• Press fabrics with starch or starch alternative and let dry before cutting to stabilize edges to be cut on the bias (especially fussy-cut on-point squares and strips for stripsets).
• Plan out all fussy cuts needed from a single fabric before beginning to cut.
• Cut pieces in order listed for most efficient use of fabric. It may be helpful to label pieces as you cut to stay organized.
• Handle bias-cut pieces carefully so as not to distort.
From Fabric A, fussy cut:
(1) 103⁄8" x 103⁄8" on-point square around the spiderweb cameo (from a row with 4 cameos)
(1) 9" x 9" on-point square around the eyepatch cameo (from a row with 3 cameos)
(1) 9" x 9" on-point square around the crow cameo
From Fabric B:
(6)* 5" x WOF for outer border
(5) 21⁄8" x WOF for stripsets
(2) 2" x WOF
(6) 13⁄8" x WOF for stripsets
*If joining strips with diagonal seams, cut 1 additional WOF strip
From Fabric C:
(1) 41⁄4" x WOF; subcut
(8) 41⁄4" x 41⁄4", then cut on both diagonals into 32 triangles
(9) 21⁄8" x WOF for stripsets
(6) 13⁄8" x WOF for stripsets
From Fabric D:
(9) 21⁄8" x WOF for stripsets
(2) 13⁄4" x WOF; subcut
(36) 13⁄4" x 13⁄4"
(1) 43⁄4" x WOF; subcut
(2) 43⁄4" x 43⁄4", then cut on both diagonals into 8 triangles
(4) 3" x 3"
From Fabric E:
(8) 21⁄8" x WOF for stripsets
(2) 4 1 ⁄ 2 " x LOF fussy cut along the length, centered vertically on the motifs, for side inner borders
(5) 41⁄2" x remaining WOF, fussy cut across the width, centered horizontally on the motifs, for top/bottom inner border
From Fabric F, fussy cut:
(2) 4" x 4" on-point squares around the spiderweb cameo
(2) 4" x 4" on-point squares around the crow cameo
(2) 4" x 4" on-point squares around the eyepatch cameo
From Fabric G:
(1) 43⁄4" x WOF; subcut
(8) 43⁄4" x 43⁄4", then cut on both diagonals into 32 triangles
(2) 3" x WOF; subcut
(18) 3" x 3", then cut on both diagonals into 72 triangles
(1) 57⁄8" x WOF; subcut
(2) 57⁄8" x 57⁄8", then cut on one diagonal into 4 triangles
(4) 43⁄8" x 43⁄8", then cut on one diagonal into 8 triangles
From Fabric H:
(8) 21⁄2" x WOF for binding
(2) 33⁄8" x WOF; subcut
(18) 33⁄8" x 33⁄8", then cut on one diagonal into 36 triangles
(13) 2" x WOF for inner border*
*Because the 2" strip is folded and then basted"on top of another border strip, not pieced to it, you can cut it narrower if desired. Just remember it will be folded in half, and then lose an additional 1⁄4" in the seam allowance, when determining your ideal cut size.
From Fabric I:
(4) 21⁄4" x WOF for stripsets
3 of 17 freespiritfabrics.com Copyright© 2023 All possible care has been taken to assure the accuracy of this pattern. We are not responsible for printing errors or the manner in which individual work varies. Please read the instructions carefully before starting this project. If kitting it is recommended a sample is made to confirm accuracy.
Instructions
Notes:
• All seam allowances are 1⁄4" and pieces are sewn right sides together. Test your seam allowance for accuracy to ensure correct finished sizes. Follow black arrows for pressing direction or press seam allowances open unless otherwise stated. Other colored arrows refer to print orientation as noted in the instructions.
• If desired, mark the quarter inch seam allowance on the wrong side of angled pieces at the corners to aid in piecing accuracy.
Block A
1. Place two Fabric B 2" x WOF strips right sides together and press with steam to help keep the strips from slipping as you cut. Move the paired strips together to your cutting mat and cut as one. Trim one end on a 45° angle as shown, then align the 25⁄8" line of a grid ruler with the angle, and cut, to yield 1 and 1 reversed trapezoid pieces. Repeat, cutting (8) total from each strip. (Fig. 1)
Family Magic Quilt
2. Sew a pair of Fabric C 41⁄4" triangles to adjacent sides of the Fabric B trapezoids as shown. Press towards Fabric C. Repeat to make a total of 8 each of Unit A and Unit Ar (reversed). (Fig. 2)
A
Make 8
Unit Ar
Make 8
3. Sew the Units A and Units Ar together along short sides, matching seam intersections, as shown, to make 8 of Unit A/Ar. (Fig. 3)
Make 8
4 of 17 freespiritfabrics.com Copyright© 2023 All possible care has been taken to assure the accuracy of this pattern. We are not responsible for printing errors or the manner in which individual work varies. Please read the instructions carefully before starting this project. If kitting it is recommended a sample is made to confirm accuracy.
25/8”line x8 each
Fig. 1
45° Fabric B: 2 strips RST
Fig. 2 Unit
C 4 1/4” C 4 1/4” C 4 1/4” C 4 1/4” Fabric B Fabric B
Fig.
3 Unit A/Ar
Unit A Unit Ar
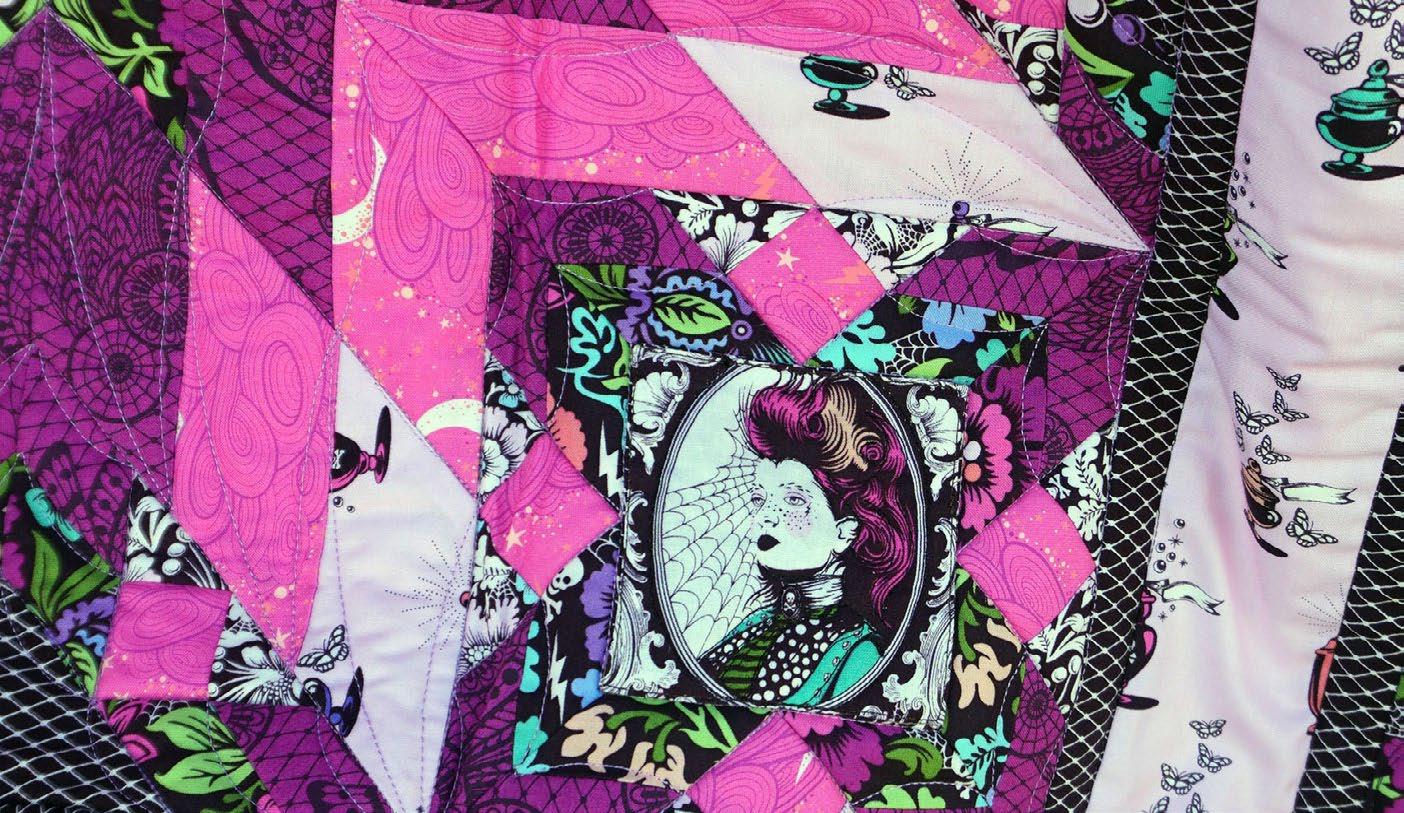
4. Sew a Unit A/Ar to two opposite sides of the Fabric A 9" x 9" fussycut bias square, then sew another pair to the two remaining sides to complete a Block A. Make 2 Block A ( 121⁄2" x 121⁄2" including seam allowances). (Fig. 4)
Family Magic Quilt
6. Sew a Fabric B and Fabric C 13⁄8" x WOF strip together as shown, offsetting the top strip by 13⁄8" to the right, to make an angled strip set. Press open. The stripset should measure 21⁄4" high. Repeat to make a total of 3 identical stripsets. Cut away the left-hand end of each stripset at a 45° angle as shown, and then cut angled units 13⁄4" wide, in the same manner as in step 1. Cut a total of 36 of Unit C - you should be able to cut 12 per strip set (Fig. 6a)
Block B
5. Sew a pair of Fabric G 3" triangles to adjacent sides of a Fabric D 13⁄4" x 13⁄4" square. Repeat to make a total of 36 of Unit B. (Fig. 5)
In the same manner, make 3 angled strip sets offset to the left, and cut 36 of Unit Cr. (Fig. 6b)
5 of 17 freespiritfabrics.com Copyright© 2023 All possible care has been taken to assure the accuracy of this pattern. We are not responsible for printing errors or the manner in which individual work varies. Please read the instructions carefully before starting this project. If kitting it is recommended a sample is made to confirm accuracy.
Fig. 4
9” x 9”
Block A Make 2
D 1 3/4” G 3” G 3”
Fig. 5
Unit B Make 36
45° Fabric
Motif Unit C Cut 36 Fabric B Fabric C 45° 13/4”
Fig.
6a
A
6b 45° 45° 13/4” Unit Cr Cut 36 Fabric B Fabric C
6b
Fig.
Fig.
7. Sew a Unit C to the left-hand side of a Unit B as shown, matching seam intersections, then add a Unit Cr to the adjacent short side. Sew a Fabric H 33⁄8" triangle to the top. Make 36 of Unit D and set aside for now. Note: 8 of the units will look different in the finished quilt top, as the Fabric H triangles will be hidden by appliquéd Fabric F pieces. (Fig. 7)
Family Magic Quilt
9. Repeat step 8 using a Fabric D, C, and B 21⁄8" x WOF strip, to make 1 angled strip set off set to the right (Fig. 9a), then from opposite ends as shown, make 45° angled cuts at 3" intervals to make 2 each of Unit F and Fr units (Fig. 9b)
8. Sew a Fabric E, D, and C 21⁄8" x WOF strip together into an angled strip set, offset to the right as in step 6. The stripset should measure 5 3⁄ 8" high including seam allowances. Make 2 stripsets, trim the left-hand ends at a 45° angle and cut 14 of Unit E, 3" wide, as shown (Fig. 8a). Repeat to make 2 stripsets offset in the opposite direction and cut 14 of Unit Er as shown. (Fig. 8b).
6 of 17 freespiritfabrics.com Copyright© 2023 All possible care has been taken to assure the accuracy of this pattern. We are not responsible for printing errors or the manner in which individual work varies. Please read the instructions carefully before starting this project. If kitting it is recommended a sample is made to confirm accuracy.
7 H 3 3/8” Unit D Make 36 Unit C Unit Cr Unit B
Fig.
E C D Unit E Make 14 3” Unit Er Make 14
Fig. 8a Fig. 8b
D B C 1 1/2” 1 1/2” Cut 2 3” Cut 2
9b D B C Unit F Unit Fr
Fig. 9a
Fig.
10. Arrange 3 of Unit D and 1 each of Unit E and F as shown. Sew together in sections as shown to make a right-triangle-shaped Unit G. Make 2. Repeat, using Unit Er and Fr, to make 2 of Unit Gr. (Fig. 10)
Family Magic Quilt
11. Sew a Unit G and Unit Gr together along long sides to make a B Block (121⁄2" x 121⁄2"). Make 2 (Fig. 11a). Fold and press raw edges of both Fabric F 4" x 4" spiderweb cameo fussy-cut squares over 1⁄4" to the wrong side. Pin one on each Block B, over area of Fabric H triangles that form a square, so folded edges align with the seam allowances, with motifs oriented as shown in Fig. 11b. Edgestitch around outside of square to complete 1 each appliquéd Block B and Block Br.
7 of 17 freespiritfabrics.com Copyright© 2023 All possible care has been taken to assure the accuracy of this pattern. We are not responsible for printing errors or the manner in which individual work varies. Please read the instructions carefully before starting this project. If kitting it is recommended a sample is made to confirm accuracy.
10 Unit D Unit D Unit D UnitEr UnitFr Unit G Make (2) Unit Gr Make (2) Unit D Unit D Unit D UnitE UnitF UnitEr UnitFr
Fig.
B Block Make 2 Unit G Unit Gr
Fig. 11a
11b
Block B Block Br *dashed lines indicate appliqué * *
Fig.
Motif Spiderweb Motif Spiderweb
Block C
12. Sew a Unit E to the long side of a Unit D as shown. Repeat with a Unit Er. Make 4 each of Unit H and Unit Hr. (Fig. 12)
Family Magic Quilt
14. Sew a Unit H and Hr together along the short sides as shown. Sew a Unit I to the top. Repeat to make a total of 4 of Triangle Unit C1. (Fig. 14)
13. Sew a pair of Fabric G 43⁄4" triangles to adjacent sides a Fabric D 3" x 3" square. Repeat to make 4 of Unit I. (Fig. 13)
Fig. 13
8 of 17 freespiritfabrics.com Copyright© 2023 All possible care has been taken to assure the accuracy of this pattern. We are not responsible for printing errors or the manner in which individual work varies. Please read the instructions carefully before starting this project. If kitting it is recommended a sample is made to confirm accuracy.
Unit H Make 4 Unit Hr Make 4 Unit D UnitE UnitEr
Fig. 12
D 3” G 4 3/4” G 4 3/4” Unit I Make 4
Unit I Unit H Unit Hr
Fig. 14 Triangle Unit C1 Make 4
15. Sew a Fabric I 21⁄4" x WOF strip and 1 each Fabric E, D, C, and B 21⁄8" x WOF strips together into an angled strip set measuring 83⁄4" high including seam allowances. Make 2 identical stripsets. Repeat step 8 to cut 8 of Unit J, 3" wide. Reserve the remainder of the second stripset to alter for the D Block. Repeat to make 2 more angled strip sets in the opposite direction and cut 8 of Unit Jr, reserving the remainder for Block D. (Fig. 15)
Family Magic Quilt
17. Sew a Fabric D and Fabric G 43⁄4" triangle together along short sides as shown to make a Unit K. Make 4. Repeat, reversing the fabric placement, to make 4 of Unit Kr. (Fig. 17) Fig. 17
16. Sew a Unit J to the left-hand side of a Triangle Unit C1 as shown, then add Unit Jr to the right-hand side. Press. Sew a Fabric G 57⁄8" triangle to the top to complete Triangle Unit C2. Make 4. (Fig. 16) Fig.
18. Sew a Unit K to the top of a Unit E as shown to make a Unit L. Make 4. Repeat with the Units Er and Kr units to make 4 of Unit Lr. (Fig. 18) Fig. 18
9 of 17 freespiritfabrics.com Copyright© 2023 All possible care has been taken to assure the accuracy of this pattern. We are not responsible for printing errors or the manner in which individual work varies. Please read the instructions carefully before starting this project. If kitting it is recommended a sample is made to confirm accuracy.
15 Unit J Cut 8 Unit Jr Cut 8 I E D C B
Fig.
G 5 7/8”
UnitJ UnitJr Triangle Unit C1 Triangle Unit C2 Make 4
16
Fig. 16
Unit K Make 4 Unit Kr Make 4 G 4 3/4” G 4 3/4” D 4 3/4” D 4 3/4”
Unit L Make 4 Unit Lr Make 4 Unit K Unit Kr UnitE UnitEr
Family Magic Quilt
19. Sew a Unit D, Unit L, and Unit J together as shown. Press, then sew a Fabric G 43⁄8" triangle to the Fabric I end of Unit J to complete a Triangle Unit C3. Make 4. Repeat, instead using Units Lr and Jr, to make 4 of Triangle Unit C3r. (Fig. 19)
20. Sew Triangle Unit C3 to the right-hand side of Triangle Unit C2, matching seam allowances. Then add Triangle Unit C3r to the left-hand side to complete a block. Make a total of 4 of Block C (121⁄2" x 241⁄2"). (Fig. 20)
10 of 17 freespiritfabrics.com Copyright© 2023 All possible care has been taken to assure the accuracy of this pattern. We are not responsible for printing errors or the manner in which individual work varies. Please read the instructions carefully before starting this project. If kitting it is recommended a sample is made to confirm accuracy.
G 4 3/8” Unit Lr Unit Jr G 4 3/8” Unit L Unit J Triangle Unit C3 - Make 4 Unit D Triangle Unit C3r - Make 4
Fig. 19
Fig. 20
Block C Make 4
Fig.
20 TriangleUnitC3r TriangleUnitC3
Triangle Unit C2
Family Magic Quilt
Block D
21. From the reserved J/Jr unit stripset, carefully remove the Fabric I and E WOF strips, then sew only the Fabric I strip, offset, back to the Fabric D strip. Repeat step 8 to cut 4 each of Unit M and Unit Mr, 3" wide, from each altered strip set (Fig. 21a).
Sew a Fabric G 43⁄4" triangle to the Fabric E end of all the remaining Units E and Er as shown. Repeat at the Fabric I end with all the remaining Units M and Mr units as shown. (Fig. 21b). Then sew 1 each Units E, Mr, M, and Er together as shown to make a Pentagon Unit D. Make 4. (Fig.
)
11 of 17 freespiritfabrics.com Copyright© 2023 All possible care has been taken to assure the accuracy of this pattern. We are not responsible for printing errors or the manner in which individual work varies. Please read the instructions carefully before starting this project. If kitting it is recommended a sample is made to confirm accuracy.
21c
Fig. 21c
Pentagon Unit D Make 4
G 4 3/4” G 4 3/4” G 4 3/4” G 4 3/4” Unit E Unit Er Unit M Unit Mr
Fig. 21b
Fig. 21a
Unit
4 Unit M
4 D B C I 3” D B C I E
Fig. 21a
Mr Cut
Cut
J/Jr unit stripsets remaining from Step 9
Family Magic Quilt
22. Arrange the remaining 8 of Unit D, all 4 of the Pentagon Unit D, and the Fabric A 103⁄8" x 103⁄8" fussy cut square, with the motif oriented as shown (Fig. 22a). Sew the Units D together in pairs along the short sides. Sew the paired Units D to opposite sides of 2 of the Pentagon Units D, matching seam intersections. Sew the 2 remaining Pentagon Units D to opposite sides of the Fabric A square (Fig. 22b). Then sew the 3 diagonal rows together to complete Block D (241⁄2" square). (Fig. 22c)
12 of 17 freespiritfabrics.com Copyright© 2023 All possible care has been taken to assure the accuracy of this pattern. We are not responsible for printing errors or the manner in which individual work varies. Please read the instructions carefully before starting this project. If kitting it is recommended a sample is made to confirm accuracy.
Fabric A 10 3/8”
10 3/8” motif Unit D Unit D PentagonUnitD
Fig. 22a
x
Fig. 22b
Fig. 22b
Block D Make 1 Block D - Make 1
Fig. 22c
Quilt Top Assembly
Measure the Quilt Center width and height before cutting and adding borders and adjust border measurements if necessary to match your measurements. However, extra length is included on the inner border to miter the corners, so it does not need to be cut to fit in advance.
23. Refer to the Quilt Center Layout diagram (page 16) to arrange all the Blocks A, C, B, and D in rows, making sure all the fussy-cut Fabric A and Fabric F motifs are right-reading in their final orientation.
24. Sew the blocks together into rows, then sew the rows together to complete the quilt center (481⁄2" square). Press.
25. If desired, staystitch around the entire perimeter of the quilt center within the seam allowances to stabilize the edges and keep any seams from opening up while adding the appliqués. Prep the remaining fussycut Fabric F 4" x 4" squares in the same manner as step 11. Referring to the Quilt Layout diagram (page 17) for placement, appliqué the prepped squares so that they completely cover the on-point squares formed by the joined Fabric H triangles where Block D meets each Block C.
26. Sew all the Fabric H strips together end to end (using diagonal seams if desired to reduce bulk) and cut 8 strips 61" long.
27. Trim only the 2 Fabric E LOF strips to 61" long. If needed, trim a small end amount off the ends of the fussy-cut Fabric E WOF strips so that there is at least 3⁄8" of only the pink background at the short, then join end to end with straight seams. Note: If you also want to match the rainbow order in the motifs, trim and piece as needed to recreate the order. Make 2 top/bottom border strips that finish at least 61" long, making sure all the motifs are oriented in the same direction – the seams will disappear if placed within the background. Extra length has been allowed to miter the corners.
Family Magic Quilt
28. The inner border on this quilt is a flanged border, similar to a flange binding. If you are not familiar with the technique, search for a tutorial online before beginning. This border is made of 3 strips of fabric that are not seamed together but are still treated as one single unit. The flanges are the narrow folded strips on the outer edges that give the border an extra bit of dimension. Fold all the Fabric H border strips in half along the length wrong sides together, so each strip becomes half the cut width, and press well to form a sharp crease. Pin a pair of folded Fabric H strips to the outer edges of a Fabric E border, aligning raw edges, with the fold towards the centers of the Fabric E strip. Baste both edges in places within the seam allowance. Do NOT sew down the folded inner edges of the Fabric H strips. Repeat to make a total of 4 H-E-H borders, 2 of each orientation. (Fig. 23)
13 of 17 freespiritfabrics.com Copyright© 2023 All possible care has been taken to assure the accuracy of this pattern. We are not responsible for printing errors or the manner in which individual work varies. Please read the instructions carefully before starting this project. If kitting it is recommended a sample is made to confirm accuracy.
fold baste fold baste Fabric H Fabric H Fabric E
Fig. 23
Make 4 H-E-H borders, 2 of each orientation
29. Refer to the Quilt Layout diagram (page 17) to orient the fussy cut Fabric E motifs in the inner border correctly. Mark the centers of the top and bottom of the quilt center. Repeat to mark the center along the inner edge of the top and bottom H-E-H borders, so that the fussycut Fabric E print will be right reading in both borders (so the inner edge of the top border is along the bottom of the motifs, and the inner edge of the bottom border is along the top edge of the motifs). Pin the top border to the top of the quilt center, matching the centers. Sew, beginning and ending the seam 1⁄4" from the sides of the quilt center. Repeat to add the bottom border. (Fig. 24a)
Family Magic Quilt
30. Press the top and bottom borders away from the quilt center. Repeat the previous step to add the side H-E-H borders so that the fussy-cut Fabric E print will have the top of the motifs right-reading on both the left and right sides (Fig. 24b)
H-E-H Border Right Side Up
14 of 17 freespiritfabrics.com Copyright© 2023 All possible care has been taken to assure the accuracy of this pattern. We are not responsible for printing errors or the manner in which individual work varies. Please read the instructions carefully before starting this project. If kitting it is recommended a sample is made to confirm accuracy.
Fig. 24a Center
Quilt center Right side up
Fabric H/E/H Top Border Wrong Side up
Fabric H/E/H Bottom Border Wrong Side up
Fig. 24b
Fabric H/E/H Side Border Wrong Side up Fabric H/E/H Side Border Wrong Side up
31. Fold the quilt top RST diagonally through a corner, making sure the border seams are aligned from the folded corner outwards. Draw a 45° line extending from the fold on the border piece that is on top, then stitch on the line (Fig. 24c). Open the corner up to check from the right side that the miter will lay flat when pressed open, then trim seam allowance to 1⁄4". Repeat the process to miter the remaining 3 corners. Press seam allowances open.
Family Magic Quilt
32. Sew all the Fabric B WOF strips together end to end into 1 continuous strip. Measure the quilt top vertically through the center and cut 2 outer side borders to fit (561⁄2" long). Sew to the sides of the quilt center and press. Repeat to measure, cut, and add the Fabric B outer top and bottom borders (641⁄2" long) Press towards Fabric B to complete the quilt top.
33. Sew together the 2 1⁄ 2" Fabric H binding strips end-to-end using diagonal seams. Press seams open. Press the binding strip in half wrong sides together.
34. Layer backing (wrong side up), batting, and quilt top (right side up). Baste the layers together and quilt as desired. Trim excess batting and backing even with the top after quilting is completed.
35. Leaving an 8" tail of binding, sew the binding to the top of the quilt through all layers matching all raw edges. Miter corners. Stop approximately 12" from where you started. Lay both loose ends of binding flat along quilt edge. Where the loose ends meet, fold them back on themselves and press to form a crease. Using this crease as your stitching line, sew the two open ends of the binding right sides together. Trim seam to 1⁄4" and press open. Finish sewing binding to quilt.
36. Turn the binding to the back of quilt and hand-stitch in place.
15 of 17 freespiritfabrics.com Copyright© 2023 All possible care has been taken to assure the accuracy of this pattern. We are not responsible for printing errors or the manner in which individual work varies. Please read the instructions carefully before starting this project. If kitting it is recommended a sample is made to confirm accuracy.
Sewalongthisline Wrong Side of Quilt Center Fold Wrong side of Border Mitred Border Corner Trim
Fig. 24c
Family Magic Quilt
16 of 17 freespiritfabrics.com Copyright© 2023 All possible care has been taken to assure the accuracy of this pattern. We are not responsible for printing errors or the manner in which individual work varies. Please read the instructions carefully before starting this project. If kitting it is recommended a sample is made to confirm accuracy.
Motif Spiderweb Motif Eyepatch
Block
Block
Block
Block
Block
Block C Block C *
Quilt Center Layout diagram Motif Web Motif Web Quilt Center Layout
Motif Crow
Block B
Br
A Block A
C
D
C
*interior Fabric H pieces will be covered by appliqué after quilt center is assembled
Family Magic Quilt
Quilt
17 of 17 freespiritfabrics.com Copyright© 2023 All possible care has been taken to assure the accuracy of this pattern. We are not responsible for printing errors or the manner in which individual work varies. Please read the instructions carefully before starting this project. If kitting it is recommended a sample is made to confirm accuracy.
lines indicate appliqué Motif Crow Motif Crow Motif Eyepatch Motif Eyepatch Fabric B side border Fabric B side border Fabric B top/bottom border Fabric B top/bottom border Fabric H/E/H top border Fabric H/E/H bottom border Fabric H-E-H side border Fabric H-E-H side border Quilt Layout diagram *
Layout *dashed
Gothic Splendor Quilt

Featuring Nightshade - Déjà Vu by Tula Pink
Collection: NightshadeDéjà Vu by Tula Pink
Technique: Pieced
Skill Level: Advanced Beginner
Finished Size: 80" x 100" (2.03m x 2.54m)
All possible care has been taken to assure the accuracy of this pattern. We are not responsible for printing errors or the manner in which individual work varies. Please read the instructions carefully before starting this project. If kitting, it is recommended a sample is made to confirm accuracy.
1 of 9 freespiritfabrics.com
Gothic Splendor Quilt


Project designed by Stacey Day | Tech edited by Alison
M. Schmidt
Fabric Requirements


* includes binding
Backing (Purchased Separately)
44" (1.12m) wide

OR 108" (2.74m) wide
Additional Recommendations
• 100% cotton thread in colors to match


• 88" x 108" (2.23m x 2.74m) batting

2 of 9 freespiritfabrics.com Copyright© 2023 All possible care has been taken to assure the accuracy of this pattern. We are not responsible for printing errors or the manner in which individual work varies. Please read the instructions carefully before starting this project. If kitting it is recommended a sample is made to confirm accuracy.
DESIGN COLOR ITEM ID YARDAGE (A) Coven Oleander PWTP205.OLEANDER 2⁄3 yard (0.61m) (B) Spider Blossom Equinox PWTP206.EQUINOX 13⁄8 yards (1.26m) (C) Raven Lace Oleander PWTP207.OLEANDER 3⁄4 yard (0.69m) (D) Storm Clouds Oleander PWTP208.OLEANDER 1 yard (0.91m) (E) Apothecary Nerium PWTP209.NERIUM 3⁄8 yard (0.34m) (F) Mini Coven Nerium PWTP210.NERIUM 21⁄8 yards (1.94m) (G) Mini Spider Blossom Nerium PWTP211.NERIUM 1 yard (0.91m) (H) Fishnet Equinox PWTP212.EQUINOX 3 yards (2.74m) (I) Tiny Stripes Mystic PWTP186.MYSTIC* 7⁄8 yard (0.80m)
Spider Blossom Equinox PWTP206.EQUINOX 6 yards (5.49m)
Hexy Rainbow XL Peacock QBTP012.PEACOCK 3 yards (2.74m)
(A)
(E) (I) (F)
Backing 108" Backing 44"
(B) (C) (D)
(G) (H)
Cutting
WOF = Width of Fabric, cut from selvage to selvage
HST = Half-Square Triangle (bias is on long side of triangle)
QST = Quarter-Square Triangle (bias is on both short sides of triangle)
Press fabrics with starch or starch alternative and let dry before cutting to stabilize edges to be cut on the bias. Handle bias-cut pieces carefully so as not to distort.
From Fabric A, fussy cut:
(3) 101⁄2" x 101⁄2" squares, each one focused on a different motif
From Fabric B, cut:
(4) 111⁄4" x WOF; subcut
(10) 111⁄4" x 111⁄4" squares and then cut twice diagonally to yield
(40) QSTs
(2) 107⁄8" x 107⁄8" squares and then cut once diagonally to yield (4) HSTs
From Fabric C, cut:
(2) 111⁄4" x WOF; subcut
(4) 111⁄4" x 111⁄4" squares and then cut twice diagonally to yield
(16) QSTs
(2) 107⁄8" x 107⁄8" squares and then cut once diagonally to yield (4) HSTs
From Fabric D, cut: (read NOTE below prior to cutting)
(3) 111⁄4" x WOF; subcut
(6) 111⁄4" x 111⁄4" squares and then cut twice diagonally to yield (24) QSTs.
(2) 107⁄8" x 107⁄8" squares and then cut one square once diagonally from bottom left to top right and cut the other square on the opposite diagonal to yield (4) HSTs
Note: The yardage and cutting directions allow for all crescent moons to be placed right-reading due to the directional nature of the fabric, so there will be extra triangles. If you do not plan to keep all the crescent moons right-reading, only cut 2 WOF strips, subcut 4 squares, then cut diagonally into 16 QSTs. The HSTs are still cut the same.
Gothic Splendor Quilt
From Fabric E, cut:
(1) 111⁄4" x WOF; subcut
(3) 111⁄4" x 111⁄4" squares and then cut twice diagonally to yield (12) QSTs
From Fabric F, fussy cut:
(5) 6" x WOF, centered on a row of 8 motifs
(4) 6" x WOF, centered on a row of 7 motifs
From Fabric G:
(1) 111⁄4" x WOF; subcut
(3) 111⁄4" x 111⁄4" squares and then cut twice diagonally to yield
(12) QSTs
(1) 57⁄8" x WOF; subcut
(4) 57⁄8" x 57⁄8 squares and then cut once diagonally to yield (8) HSTs Trim remaining strip down to 51⁄2" high and subcut
(1) 51⁄2" x 101⁄2"
(3) 51⁄2" x WOF; subcut
(4) 51⁄2" x 151⁄2"
(3) 51⁄2" x 101⁄2"
From Fabric H:
(4) 111⁄4" x WOF; subcut
(8) 111⁄4" x 111⁄4" squares and then cut twice diagonally to yield (32) QSTs
(2) 107⁄8" x 107⁄8" squares and then cut once diagonally to yield (4) HSTs
(17) 23⁄4" x WOF for borders
From Fabric I: enough 21⁄2"-wide** bias strips to make at least 375" (9.5m) of bias binding **or your preferred cut width for bias binding
3 of 9 freespiritfabrics.com Copyright© 2023 All possible care has been taken to assure the accuracy of this pattern. We are not responsible for printing errors or the manner in which individual work varies. Please read the instructions carefully before starting this project. If kitting it is recommended a sample is made to confirm accuracy.
Gothic Splendor Quilt
Instructions
Note: All seam allowances are 1⁄4" and pieces are sewn right sides together. If desired, mark 1⁄4" seam intersections on the wrong side of triangles to improve piecing accuracy. Handle pieces with bias edges carefully. Press after each seam as directed, lifting the iron to move it, rather than sliding it back and forth, which can cause stretching. Arrows on diagrams refer to right-reading orientation of directional prints so all will be right-reading in their final orientation if that is your preference.
1. Sew the Fabric A 101⁄2" x 101⁄2" fussy-cut squares together into a column, with the motifs oriented right-reading top to bottom as shown by the text direction. Press seams towards the bottom. Sew the long side of a Fabric E 111⁄4" triangle to the top and the bottom of the column, using triangles that will keep the directional print oriented right-reading as shown by the arrows. Press towards Fabric A to complete the Quilt Center.
4 of 9 freespiritfabrics.com Copyright© 2023 All possible care has been taken to assure the accuracy of this pattern. We are not responsible for printing errors or the manner in which individual work varies. Please read the instructions carefully before starting this project. If kitting it is recommended a sample is made to confirm accuracy.
E E motif motif motif Quilt Center Make 1 A A A
Fig. 1
Gothic Splendor Quilt
Quilt Top Assembly
2. Arrange Fabric C and directional Fabric E 111⁄4" triangles into 1 each Left and Right Side Border 1, following the arrows to use the Fabric E triangles with the correct print orientation. Sew together to complete Border 1 and press to the left when oriented as shown below.
In the same manner, use Fabrics B, C, D, and H to make Borders 2 -7 as shown.
When choosing and placing the Fabric D triangles, refer to the arrows in the middle triangle and place all the triangles in a single border in the same direction for all to be right-reading in the final quilt. Figure 4 ( page 7) and the finished quilt image (cover) may also be helpful.
Press the even-numbered borders to the right and the odd-numbered borders to the left.
Arrows show motif orientation
Left Side Border 1
Make 1
Right Side Border 1
Make 1
Border 4
Make 2 (1 of each D orientation) Border
5
Border 2
Make 2 (1 of each D orientation)
C C D D D D
Border 3
D D D D B B B B B B B B B B Border 6 Make 2 Border 7 Make 2 H H H H H H H H B B B B B B B B B B
5 of 9 freespiritfabrics.com Copyright© 2023 All possible care has been taken to assure the accuracy of this pattern. We are not responsible for printing errors or the manner in which individual work varies. Please read the instructions carefully before starting this project. If kitting it is recommended a sample is made to confirm accuracy.
Fig. 2
C E C E E
Make 2 (1 of each D orientation) C C C C
Make 2 (1 of each D orientation)
Gothic Splendor Quilt
3. Make Borders 8 and 9 using Fabric G and H 111⁄4" triangles and Fabric G 57⁄8" triangles and 51⁄2"-high rectangles as shown.
6 of 9 freespiritfabrics.com Copyright© 2023 All possible care has been taken to assure the accuracy of this pattern. We are not responsible for printing errors or the manner in which individual work varies. Please read the instructions carefully before starting this project. If kitting it is recommended a sample is made to confirm accuracy.
Make 2 Border 8 - sides Make 2 H H H H H H H H G G G 5 1/2” x 15 1/2” G 5 1/2” x 10 1/2” G G G G G 5 1/2” x 10 1/2” G 5 1/2” x 15 1/2” G G G G Border
Make 2 Border 8 - sides Make 2 H H H H H H H H G G G 5 1/2” x 15 1/2” G 5 1/2” x 10 1/2” G G G G G 5 1/2” x 10 1/2” G 5 1/2” x 15 1/2” G G G G
Fig.
3 Border 9 - top/bottom
9 - top/bottom
4. Sew Borders 1-7 to the Quilt Center in numerical order, odd borders on the sides, even borders on the top/bottom, pinning to match seam intersections carefully. After Border 1 is added to the sides, add the Fabric C 10 7⁄ 8" triangles at the corners. Continue adding even (top/bottom) and odd (side) borders as shown, then adding the corresponding fabric 107⁄8" triangles at the corners, ending with Border 7 and the Fabric H triangles.
Gothic Splendor Quilt
Then add Border 8 (the longer remaining triangle border) to the sides and Border 9 to the top and bottom edges.
7 of 9 freespiritfabrics.com Copyright© 2023 All possible care has been taken to assure the accuracy of this pattern. We are not responsible for printing errors or the manner in which individual work varies. Please read the instructions carefully before starting this project. If kitting it is recommended a sample is made to confirm accuracy.
B 10 7/8” B 10 7/8” B 10 7/8” B 10 7/8” H 10 7/8” H 10 7/8” H 10 7/8” H 10 7/8” D 10 7/8” D 10 7/8” D 10 7/8” D 10 7/8” C 10 7/8” C 10 7/8” C 10 7/8” C 10 7/8”
Fig. 4
Motifs
Gothic Splendor Quilt


Notes:
• Refer to the quilt assembly diagram on p.9 for final border placement.
• After adding Border 9, measure the quilt top vertically and horizontally through the center and adjust the Fabric H border cut lengths and pieced Fabric F border cut lengths to fit if necessary.
5. Sew together all the Fabric H 23⁄4" x WOF strips end to end. Cut the following border strips: (4) 801⁄2" long, (2) 96" long, (2) 65" long
6. Trim the 5 Fabric F strips with 8 cameos evenly from each end to 43" long as shown, making sure there is an equal amount of background on either side of the end cameos. In the same manner, trim the 4 Fabric F strips with 7 cameos evenly from each end to 381⁄2" long as shown.
7. Sew the trimmed Fabric F strips together, even number of cameos to odd, end to end using straight seams, to make one continuous strip of cameos. Subcut (2) 85" long side borders and (2) 76" long top/bottom borders.
8. Sew the Fabric H and F borders to the quilt center as shown in the diagram, sides first, then top and bottom for each round of border strips, pressing towards Fabric H each time, and orienting the faces right-reading following the arrows in the quilt layout diagram (page 9).
8 of 9 freespiritfabrics.com Copyright© 2023 All possible care has been taken to assure the accuracy of this pattern. We are not responsible for printing errors or the manner in which individual work varies. Please read the instructions carefully before starting this project. If kitting it is recommended a sample is made to confirm accuracy.
Fig.5
Cut (5) 6” x 43”
Cut (5) 6” x 43”
Cut (4) 6” x 38 1/2”
Gothic Splendor Quilt
Finishing
9. Sew together the 21⁄2" Fabric I bias binding strips end-to-end. Press seams open. Press the binding strip in half wrong sides together.
10. Layer backing (wrong side up), batting, and quilt top (right side up). Baste the layers together and quilt as desired. Trim excess batting and backing even with the top after quilting is completed.
11. Leaving an 8" tail of binding, sew the binding to the top of the quilt through all layers matching all raw edges. Miter corners. Stop approximately 12" from where you started. Lay both loose ends of binding flat along quilt edge. Where the loose ends meet, fold them back on themselves and press to form a crease. Using this crease as your stitching line, sew the two open ends of the binding right sides together. Trim seam to 1⁄4" and press open. Finish sewing binding to quilt.
12. Turn the binding to the back of quilt and hand-stitch in place.
9 of 9 freespiritfabrics.com Copyright© 2023 All possible care has been taken to assure the accuracy of this pattern. We are not responsible for printing errors or the manner in which individual work varies. Please read the instructions carefully before starting this project. If kitting it is recommended a sample is made to confirm accuracy.
Quilt Layout 6” x 76” motif 6” x 76” motif 6” x 85” motif 6” x 85” motif 2 3/4” x 80 1/2” 2 3/4” x 80 1/2” 2 3/4” x 80 1/2” 2 3/4” x 80 1/2” 2 3/4” x 65” 2 3/4” x 65” 2 3/4” x 96” 2 3/4” x 96” Quilt Center Motifs Fabric F Fabric H Fabric H
Magic Aura Quilt

Featuring Nightshade - Déjà Vu by Tula Pink
Collection: NightshadeDéjà Vu by Tula Pink
Technique: Pieced
Skill Level: Advanced Beginner
Finished Sizes:
Finished Size: 76" x 901⁄2" (1.93m x 2.30m)
Finished Block Size: 16" x 16" (40.64cm x 40.64cm)
All possible care has been taken to assure the accuracy of this pattern. We are not responsible for printing errors or the manner in which individual work varies. Please read the instructions carefully before starting this project. If kitting, it is recommended a sample is made to confirm accuracy.
1 of 7 freespiritfabrics.com
Magic Aura Quilt

 Project designed by Stacey Day | Tech edited by Alison M. Schmidt
Fabric Requirements


DESIGN COLOR ITEM ID
(A) Coven Oleander PWTP205.OLEANDER 62⁄3 yards (6.10m
(B) Spider Blossom Equinox PWTP206.EQUINOX 3 yards (2.74m)
(C) Raven Lace Oleander PWTP207.OLEANDER F8 (22.86cm x 53.34cm)
(D) Storm Clouds Oleander PWTP208.OLEANDER FQ (45.72cm x 53.34cm)
(E) Apothecary Nerium PWTP209.NERIUM FQ (45.72cm x 53.34cm)
(F) Mini Coven Nerium PWTP210.NERIUM FQ (45.72cm x 53.34cm)
(G) Mini Spider Blossom Nerium PWTP211.NERIUM FQ (45.72cm x 53.34cm)

(H) Fishnet Equinox PWTP212.EQUINOX 1⁄2 yard (0.46m)

(I) Tent Stripe Orchid
PWTP069.ORCHI* 3⁄4 yard (0.69m)




(J) Pom Pom Foxglove PWTP118.FOXGL F8 (22.86cm x 53.34cm)


(K) Pom Pom Iris PWTP118.IRISX F8 (22.86cm x 53.34cm)
(L) Pom Pom Myrtle PWTP118.MYRTL F8 (22.86cm x 53.34cm)
(M) Pom Pom Petunia PWTP118.PETUN FQ (45.72cm x 53.34cm)
(N) Fairy Dust Blush

(O) Fairy Dust Lime

(P) Fairy Dust Mint
(Q) Mineral Agate
(R) Mineral Amethyst
(S) Mineral Aquamarine
(T) Mineral Tourmaline
(U) Wildflower Anemone
(V) Wildflower Dahlia
(W) Wildflower Peony
(X) Wildflower Spring
PWTP133.BLUSH FQ (45.72cm x 53.34cm)
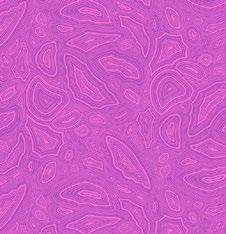


PWTP133.LIME F8 (22.86cm x 53.34cm)
PWTP133.MINT FQ (45.72cm x 53.34cm)
PWTP148.AGATE FQ (45.72cm x 53.34cm)
PWTP148.AMETHYST F8 (22.86cm x 53.34cm)
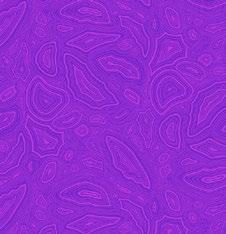
PWTP148.AQUAMARINE FQ (45.72cm x 53.34cm)
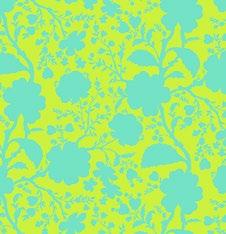

PWTP148.TOURMALINE F8 (22.86cm x 53.34cm)
PWTP149.ANEMONE FQ (45.72cm x 53.34cm)


PWTP149.DAHLIA F8 (22.86cm x 53.34cm)
PWTP149.PEONY FQ (45.72cm x 53.34cm)
PWTP149.SPRING F8 (22.86cm x 53.34cm)
* includes binding continued...
2 of 7 freespiritfabrics.com Copyright© 2023 All possible care has been taken to assure the accuracy of this pattern. We are not responsible for printing errors or the manner in which individual work varies. Please read the instructions carefully before starting this project. If kitting it is recommended a sample is made to confirm accuracy.
YARDAGE
(E)
(I) (M) (Q) (U) (J) (N) (R) (V) (K) (O) (S) (W) (L) (P) (T) (X)
(A) (B) (C) (D)
(F) (G) (H)
Fabric Requirements (continued...)
(Y) Hexy Chameleon PWTP150.CHAMELEON F8 (22.86cm x 53.34cm)
(Z) Hexy Deep Sea
PWTP150.DEEPSEA FQ (45.72cm x 53.34cm)
(AA) Hexy Juniper PWTP150.JUNIPER F8 (22.86cm x 53.34cm)
(AB) Hexy Thistle
(AC) Hexy Rainbow Peacock
PWTP150.THISTLE F8 (22.86cm x 53.34cm)
PWTP151.PEACOCK FQ (45.72cm x 53.34cm)
(AD) Tiny Dots Candy PWTP185.CANDY FQ (45.72cm x 53.34cm)


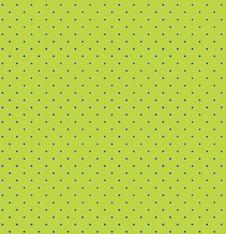

(AE) Tiny Dots Meadow
(AF) Tiny Dots Opal
(AG) Tiny Dots Peacock
(AH) Tiny Stripes Misty
(AI) Tiny Stripes Moonglow
(AJ) Tiny Stripes Songbird
Backing (Purchased Separately)
44" (1.12m) wide
PWTP185.MEADOW F8 (22.86cm x 53.34cm)
PWTP185.OPAL F8 (22.86cm x 53.34cm)
PWTP185.PEACOCK FQ (45.72cm x 53.34cm)
PWTP186.MISTY FQ (45.72cm x 53.34cm)
PWTP186.MOONGLOW F8 (22.86cm x 53.34cm)
PWTP186.SONGBIRD F8 (22.86cm x 53.34cm)
Magic Aura Quilt
Storm Clouds Oleander
PWTP208.OLEANDER 9 yards (8.23m)* OR 108" (2.74m) wide
Rainbow Hexy XL Ink
QBTP012.INK 3 yards (2.74m)






*9 yards of 44" backing allows for 3 WOF strips with the directional print right-reading in the backing. If you can piece a wide-enough backing with only 1 seam (i.e., 2 WOF strips), 53/4 yards will be enough.
Additional Recommendations
• 100% cotton thread in colors to match
• 84" x 99" (2.13m x 2.51m) batting
3 of 7 freespiritfabrics.com Copyright© 2023 All possible care has been taken to assure the accuracy of this pattern. We are not responsible for printing errors or the manner in which individual work varies. Please read the instructions carefully before starting this project. If kitting it is recommended a sample is made to confirm accuracy.
DESIGN COLOR ITEM ID YARDAGE
(Y) (Z) (AA) (AB)
(AC) (AD) (AE) (AF)
Backing 108" Backing 44"
(AG) (AH) (AI) (AJ)
Cutting
WOF = Width of Fabric
From Fabric A, fussy cut:
(18) 91⁄2" x 91⁄2" on-point squares, each around a cameo motif (6 of each motif)
From Fabric B, cut:
(3) 237⁄8" x 237⁄8" squares; cut on both diagonals to make (12) quarter-square triangles (QSTs)
(2) 121⁄4" x 121⁄4" squares, cut on one diagonal to make (4) half-square triangles (HSTs)
(5) 41⁄2" x WOF for side borders
From Fabrics C and K, cut:
(4) 21⁄2" x 61⁄2"
(2) 21⁄2" x 21⁄2"
From Fabrics D, U, W, and AG, cut:
(6) 21⁄2" x 61⁄2"
(3) 21⁄2" x 21⁄2"
From Fabrics E, N, S, and AH, cut:
(12) 21⁄2" x 61⁄2"
From Fabrics F, M, AC, and AD cut:
(9) 21⁄2" x 61⁄2"
(3) 21⁄2" x 41⁄2"
From Fabrics G, P, Q, and Z, cut:
(6) 21⁄2" x 61⁄2"
(3) 21⁄2" x 41⁄2"
(3) 21⁄2" x 21⁄2"
Magic Aura Quilt

From Fabric H, cut:
(9) 11⁄2" x WOF; subcut
(18) 11⁄2" x 101⁄2"
(18) 11⁄2" x 91⁄2"
TIP: For most efficient use of fabric, cut 2 of each length needed from each WOF strip.
From Fabric I, cut: enough 21⁄2"-wide** bias strips for 350" (8.9m) bias binding **or your preferred cut width
From Fabrics J and R, cut:
(6) 21⁄2" x 61⁄2"
(2) 21⁄2" x 41⁄2"
From Fabric L:
(2) 21⁄2" x 61⁄2"
(2) 21⁄2" x 41⁄2"
From Fabric O, X, Y, AE, and AI:
(4) 21⁄2" x 61⁄2"
From Fabrics T and V, cut:
(8) 21⁄2" x 61⁄2"
From Fabric AA, cut:
(2) 21⁄2" x 41⁄2"
(2) 21⁄2" x 21⁄2"
From Fabrics AB and AF, cut:
(4) 21⁄2" x 61⁄2"
(2) 21⁄2" x 41⁄2"
(2) 21⁄2" x 21⁄2"
From Fabric AJ, cut:
(2) 21⁄2" x 21⁄2"
4 of 7 freespiritfabrics.com Copyright© 2023 All possible care has been taken to assure the accuracy of this pattern. We are not responsible for printing errors or the manner in which individual work varies. Please read the instructions carefully before starting this project. If kitting it is recommended a sample is made to confirm accuracy.
Instructions
Note: All seam allowances are 1⁄4" and pieces are sewn right sides together. Press seam allowances in the direction shown by the arrows.
1. Referring to the table below for fabrics and Figure 1 for cut size and placement, sew pieces together in numerical order to make the quantities of A Units listed below (18 total).
Magic Aura Quilt
2. Referring to the table below and Figure 2 for fabrics and placement, use the 21⁄2" x 61⁄2" pieces to make the quantities of B Units listed below (18 total).
5 of 7 freespiritfabrics.com Copyright© 2023 All possible care has been taken to assure the accuracy of this pattern. We are not responsible for printing errors or the manner in which individual work varies. Please read the instructions carefully before starting this project. If kitting it is recommended a sample is made to confirm accuracy.
1 1 2 1/2” 2 2 1/2” 4 2 1/2” x 4 1/2” 3 2 1/2” x 4 1/2” 5 2 1/2” x 6 1/2” A Unit A Units Quantity Piece 1 Pieces 2, 3 Pieces 4, 5 A1 3 Fabric W Fabric G Fabric F A2 2 Fabric C Fabric AB Fabric J A3 3 Fabric U Fabric Z Fabric AC A4 2 Fabric AJ Fabric AA Fabric L A5 3 Fabric AG Fabric P Fabric M A6 2 Fabric K Fabric AF Fabric R A7 3 Fabric D Fabric Q Fabric AD
Fig.
Fig. 2 2 1/2” x 6 1/2” B Unit 1 2 3 4 5 B Units Quantity Piece 1 Piece 2 Piece 3 Piece 4 Piece 5 B1 6 Fabric D Fabric Q Fabric AD Fabric N Fabric E B2 4 Fabric K Fabric AF Fabric R Fabric V Fabric T B3 6 Fabric AG Fabric P Fabric M Fabric AH Fabric S B4 4 Fabric AI Fabric AE Fabric X Fabric O Fabric Y B5 6 Fabric U Fabric Z Fabric AC Fabric S Fabric AH B6 4 Fabric C Fabric AB Fabric J Fabric T Fabric V B7 6 Fabric W Fabric G Fabric F Fabric E Fabric N
Magic Aura Quilt
3. With the fussy cut Fabric A squares oriented with the top of the motif as indicated by the white arrow in Figure 3, sew the Fabric H 11⁄2" x 91⁄2" strip to the top edge. Then add the Fabric H 11⁄2" x 101⁄2" strip to the adjacent side to complete a C Unit. Repeat to make 18 total.
4. Arrange an A1 Unit with two B1 Units and a C Unit as shown in Figure 4a. Sew units into rows, then sew rows together to complete a Block 1. Repeat, using the motifs listed in Figure 4b, to make a total of 18 Blocks 1-7 as shown. Make (3) each of the odd numbered blocks, and (2) each of the even numbered blocks.
6 of 7 freespiritfabrics.com Copyright© 2023 All possible care has been taken to assure the accuracy of this pattern. We are not responsible for printing errors or the manner in which individual work varies. Please read the instructions carefully before starting this project. If kitting it is recommended a sample is made to confirm accuracy.
3 motifFabricA91/2’”x91/2” 1 1/2” x 9 1/2” 1 1/2” x 10 1/2” motif C Unit Fabric H Fabric H
Fig.
4a 1 1 2 3 4 5 3 2 4 5 A Unit C Unit B Unit B Unit
Fig.
4b C Unit Block 7 Make 3 motif (1 of each) D Q AD N E F G W Block 1 Make 3 Block 2 Make 2 motif (1 of each) motif (1 eyepatch) (1 web) D Q AD N E F G W K AF R V T J AB C Block 3 Make 3 motif (1 of each) AG P M AH S AC Z U Block 4 Make 2 motif (1 crow) (1 web) AI AE X O Y L AA AJ Block 6 Make 2 motif (1 crow) (1 eyepatch) K AF R V T J AB C Block 5 Make 3 motif (1 of each) U Z AC S AH M P AG
Fig.
Magic Aura Quilt
Quilt Top Assembly
Note: Follow the Quilt Layout diagram while assembling the quilt. Measure the Quilt Center width and height before cutting and adding borders and adjust border measurements if necessary to match your measurements.
5. Arrange the Fabric B triangles and all of Blocks 1-7 together into diagonal rows. Sew together into rows (there will be 2 extra Fabric B QSTs not used). Press open or press all seams in a row in the same direction, and alternate pressing direction from row to row so seams will nest.
6. Sew the rows together, then add the remaining 2 Fabric B HSTs to the last 2 corners to complete the quilt center. If needed, trim to square up 1⁄4" away from the points of the outermost blocks.
7. Sew the Fabric B 41⁄2" x WOF strips together end to end. Cut (2) side borders to fit the length of the completed quilt center. Sew to the sides of the quilt center and press towards borders to complete the quilt top.
Finishing
8. Sew together the 21⁄2" Fabric I bias binding strips end-to-end. Press seams open. Press the binding strip in half wrong sides together.
9. Layer backing (wrong side up), batting, and quilt top (right side up). Baste the layers together and quilt as desired. Trim excess batting and backing even with the top after quilting is completed.
10. Leaving an 8" tail of binding, sew the binding to the top of the quilt through all layers matching all raw edges. Miter corners. Stop approximately 12" from where you started. Lay both loose ends of binding flat along quilt edge. Where the loose ends meet, fold them back on themselves and press to form a crease. Using this crease as your stitching line, sew the two open ends of the binding right sides together. Trim seam to 1⁄4" and press open. Finish sewing binding to quilt.
11. Turn the binding to the back of quilt and hand-stitch in place.
7 of 7 freespiritfabrics.com Copyright© 2023 All possible care has been taken to assure the accuracy of this pattern. We are not responsible for printing errors or the manner in which individual work varies. Please read the instructions carefully before starting this project. If kitting it is recommended a sample is made to confirm accuracy.
Quilt Layout Web Web Web Web Web Eyepatch
Eyepatch Eyepatch Eyepatch Fabric B 12 1/4” HST Fabric B 23 7/8” QST Fabric B side border Fabric B 23 7/8” QST Fabric B side border Block 1 Block 2 Block 3 Block 6 Block 4 Block 5 Block 7
Crow Crow Crow Crow Crow Crow Web Eyepatch Eyepatch
Nightshade Skelly Wall Hanging
Featuring Nightshade - Déjà Vu by Tula Pink
Collection: NightshadeDéjà Vu by Tula Pink
Technique:
Raw-edge fusible appliqué, Needle-turn hand appliqué, or Machine turned-edge appliqué

Skill Level: Intermediate
Finished Size: 34" x 42" (86.36cm x 106.68cm)
All possible care has been taken to assure the accuracy of this pattern. We are not responsible for printing errors or the manner in which individual work varies. Please read the instructions carefully before starting this project. If kitting it is recommended a sample is made to confirm accuracy.
1 of 30 freespiritfabrics.com
Project designed by Stacey Day | Tech edited by Alison M.
Fabric Requirements (see page 3 for fabric swatches)
Nightshade Skelly Wall Hanging
Schmidt
Additional Recommendations
• 100% cotton thread in colors to match
• 40" x 48" (1.02m x 1.22m) batting
• Template material (or for fusible method, a light box or surface for tracing)
• Optional for all appliqué methods: 1 yard clear vinyl or 45"- wide lightweight sew-in interfacing such as Pattern Ease or Pellon Easy Pattern, or large sheets of tracing paper for appliqué placement pattern
• Optional for fusible raw-edge appliqué method: 4 yards paper-backed fusible web, such as Pellon 805 Wonder-Under
• Optional for machine turned-edge appliqué: 4 yards lightweight interfacing, such as Pellon 911F (fusible) or Pellon PLS36 (sew-in)

(I) Tula Pink Solid / Celestial CSFSESS.CELESTIAL 11⁄2 yards (1.37m
*binding included
Backing (Purchased Separately)
44" (111.76cm) wide
Spider Blossom / Equinox
PWTP206.EQUINOX 11⁄2 yards (1.37m)
Prep
1. The full-size Appliqué Placement Pattern will be used to place the prepped appliqués without any need to measure. Either send the copy shop version (download from FreeSpirit Fabrics Projects page) to a copy shop or online print service to be printed at full-size/100%, or print the appliqué placement pattern (pages 12-30) included here on 81⁄2" x 11" paper. For 81⁄2" x 11" pages, tape together as indicated. If desired, trace the placement pattern onto a translucent material like tracing paper, lightweight sew-in interfacing, or vinyl (use a dry-erase marker if you want to re-use the vinyl for a different project) to make it even easier to place the prepped appliqués precisely.
2. Print the Template Patterns (pages 7-11) at 100%/actual size.
3. Trace the individual template patterns onto your preferred template material and cut them out on the traced line. For fusible appliqué, skip this step if you plan to trace the shapes directly onto the fusible web. Mark the template number and the fabric letters as listed on the Fabric Layout Diagram (page 5) onto each template. Flip the template over to trace a reversed shape as the quilt is symmetrical.
2 of 30 freespiritfabrics.com Copyright© 2023 All possible care has been taken to assure the accuracy of this pattern. We are not responsible for printing errors or the manner in which individual work varies. Please read the instructions carefully before starting this project. If kitting it is recommended a sample is made to confirm accuracy.
DESIGN / COLOR ITEM ID YARDAGE (A) Coven / Oleander PWTP205.OLEANDER FQ (B) Spider Blossom / Equinox PWTP206.EQUINOX 3⁄8 yard (0.34m) (C) Raven Lace / Oleander PWTP207.OLEANDER 3⁄8 yard (0.34m) (D) Storm Clouds / Oleander PWTP208.OLEANDER 3⁄8 yard (0.34m) (E) Apothecary / Nerium PWTP209.NERIUM 3⁄8 yard (0.34m) (F) Mini Coven / Nerium PWTP210.NERIUM 3⁄8 yard (0.34m) (G) Mini Spider Blossom / Nerium PWTP211.NERIUM 3⁄8 yard (0.34m) (H) Fishnet / Equinox PWTP212.EQUINOX* 3⁄4 yard (0.69m)
Backing 44" (111.76cm)
Cutting
WOF = Width of Fabric
From Fabric I, cut: (1) 38" x 46" background rectangle
Nightshade Skelly Wall Hanging
Choose your preferred method of appliqué and follow the directions on the following page to cut and prep the pieces listed in the Appliqué Cutting table. For fabrics with many pieces, you may want to lay out all the template patterns first to check placement before cutting. For all shapes other than circles and hearts, you will need 1 and 1 reversed (1 + 1 r) of each template listed per fabric – any variations are listed in parentheses. Some shapes may be challenging for methods other than fusible appliqué so you may want to practice with scraps first. You can also mix methods based on the shape.
Appliqué Cutting

Tula Pink Nightshade Déjà vu





Fabric
Templates - For directional prints (Fabrics A, D, E, and F), refer to the Fabric Layout Diagram (p. 5) if you want to fussy cut or keep prints right-reading. (1+1r of each unless a different quantity is listed in parentheses)

3 of 30 freespiritfabrics.com Copyright© 2023 All possible care has been taken to assure the accuracy of this pattern. We are not responsible for printing errors or the manner in which individual work varies. Please read the instructions carefully before starting this project. If kitting it is recommended a sample is made to confirm accuracy.
A 3(1), 4, 5, 19 B 4, 10, 11, 12, 17(2+2r),18, 23, 24, 26, 34, 35(4) C 6, 7, 9, 10, 13, 15, 17(2+2r), 21, 25, 32 D 2 (1), 6(2+2r) 8, 14, 15, 16, 17, 20, 30 E 4, 6 (2+2r), 7, 10, 11, 12, 19, 22, 24, 28, 31, 33(1) F 1 (1), 4, 7, 35 (3) G 6, 7, 10 (2+2r), 17, 22, 27 H 6, 10, 17(2+2r), 29, 35 (9), 36 (2) (5) 2 1/4” x WOF strips for binding
Fusible Raw-edge Appliqué:
1. Use a pencil to trace each template marked (right) side down on the paper side of the fusible web as many times as needed for each fabric as shown on the Fabric Layout Diagram, leaving about a 1⁄2" between pieces. For the reversed shapes, place the template marked (right) side up so that the finished shape will be mirrored. If it’s simpler for you, just make reversed templates as needed. It can be helpful to group pieces to be cut from the same fabric together on the web when tracing. Make sure to mark the template number on each fusible piece as many look similar.
2. Cut the fusible web apart roughly 1 4" from the line. If you’ve grouped them by fabric, just cut around each group.
3. Follow the manufacturer’s instructions to fuse the web to the wrong side of the corresponding fabrics, then cut out on the drawn line. Leave the paper backing in place until ready to place the appliqués on the background.
Machine-turned Appliqué:
1. Repeat Step 1 for Fusible Raw-edge Appliqué, tracing onto interfacing instead (if using fusible interfacing, trace onto the non-fusible side). Work one fabric at a time.
2. Place the traced shapes, tracing side up, on top of the corresponding fabrics, right side up. Pin together, stitch on the marked line, and cut out through both layers 1⁄4" from stitching line. Trim corners and clip and notch curves, making sure not to cut the stitching.
3. Carefully cut a small slit in the interfacing and turn the piece right side out. If using fusible interfacing, use a turning tool, or for sew-in interfacing, an iron on low to gently press out any corners and smooth out curves.
Needle-turn Hand Appliqué:
1. Use a chalk pencil that can easily be removed from the fabric to trace the templates, right side up, as many times as needed for each fabric as shown on the Fabric Layout Diagram onto the right side of the corresponding fabrics. Trace reversed shapes by turning the template marked-side down before tracing. Leave at least 3 4" between shapes on the same fabric.
2. Cut out the shapes, adding about 3 16" (or your desired seam allowance) from the traced lines.
3. Finger press along the traced line to crease (the line should not be visible from the top once creased). This makes the edge easier to turn under when hand stitching.
Construction
1. Fold the background in half vertically and horizontally and crease to mark guidelines.
2. Use the full-size placement pattern and the Fabric Layout diagram (page 5), matching the dashed center lines to the creased background, to place the prepped appliqués onto the background, starting with pieces 1, 2, 3, and both 35s along the vertical center line. Fuse following manufacturer’s instructions or glue, pin, or thread baste in place as needed for your chosen method.
3. Appliqué in place using your desired technique. For fusible raw-edge appliqué, you can skip this step if you plan to quilt dense straight lines over the entire piece. Blanket stitch or a narrow zigzag stitch in a coordinating thread works well for machine-finishing.
4. Continue placing and appliquéing pieces a few at a time, following the layering shown in the placement pattern, until all have been appliquéd. If shapes are part of a mirrored pair, place both in the same step.
5. Press from the wrong side and square up to 341⁄2" x 421⁄2".
4 of 30 freespiritfabrics.com Copyright© 2023 All possible care has been taken to assure the accuracy of this pattern. We are not responsible for printing errors or the manner in which individual work varies. Please read the instructions carefully before starting this project. If kitting it is recommended a sample is made to confirm accuracy.
Nightshade Skelly Wall Hanging
Nightshade Skelly Wall Hanging
Finishing
6. Sew the 2 1 ⁄ 2 " x WOF Fabric H strips end-to-end using diagonal seams to make one continuous piece. Press the seams open. Press the binding strip in half wrong sides together.
7. Layer the backing (wrong side up), batting, and quilt top (right side up). Baste the layers together and quilt as desired. Trim excess batting and backing even with the quilt top after quilting is completed.
8. Leaving an 8" tail of binding, sew binding to top of quilt through all layers matching all raw edges. Miter corners. Stop approximately 12" from where you started. Lay both loose ends of binding flat along quilt edge. Where these two loose ends meet, fold them back on themselves and press to form a crease. Using this crease as your stitching line, sew the two open ends of the binding together right sides together. Trim seam to 1⁄4" and press open. Finish sewing binding to quilt.
9. Turn the binding to the back of the quilt and hand stitch in place.
5 of 30 freespiritfabrics.com Copyright© 2023 All possible care has been taken to assure the accuracy of this pattern. We are not responsible for printing errors or the manner in which individual work varies. Please read the instructions carefully before starting this project. If kitting it is recommended a sample is made to confirm accuracy.
1F 2D 3A 4A 4A 5A 5A 6G 6G 9C 9C 8D 8D 7F 7F 30D 30D 10C 6C 10C 6C 6D 6D 10G 10G 12E 12E 11E 11E 11B 11B 4E 4B 4E 4B 13C 14D 15C 16D 18B 7E 17B 13C 14D 15C 16D 18B 7E 17B 19A 19 12B 6E 6D 20D 21C 15D 17H 22E 23B 25C 24B 10E 17G 10H 24E 7G 26B 17H 6E 29H 28E 17C 22G 7C 27G 4F 10G 10B 17B 17C 6H 17D 34B 35B 35B 35F 35F 35F 31E 31E 33E 32C 32C 35H 35H 35H 35H 35H 35H 36H 36H 35H 35H 35H 21C 20D 25C 24B 35B 19A 6E 29H 28E 17G 10H 7G 10E 24E 26B 17H 34B 35B 12B 6E 6D 17B 10G 17C 4F 10B 17D 17C 22G 7C 27G 23B 22E 15D 17H 6H E 19 E
Fabric Layout Diagram

6 of 30 freespiritfabrics.com
Example of how pages 12-30 should be arranged for the full-size appliqué placement pattern.
Row 1 (1,2,3)
Row 2 (1,2,3,4,5)
Row 3 (1,2,3,4,5)
Row 4 (1,2,3)
Row 5 (1,2,3)
This square should measure 1" x 1" (2.54cm x 2.54cm) when printed.
*** Measure templates before cutting to confirm printing at 100%*** 7 of 30 freespiritfabrics.com Template 34 Template 1 TOP TOP Template 2 Template
Template
Template
Template 25 Template 11 T emplate 33 TOP 19Template Template 12 Template 35 T emplate 36 emplateT 3 The Skellingtons template patterns SEAM ALLOWANCE NOT INCLUDED. Add if needed for appliqué method. grain grain
4
10
5
Template 29
Template 32
Template 31
Template 18
Template 30
*** Measure templates before cutting to confirm printing at 100%*** 8 of 30 freespiritfabrics.com
The Skellingtons template patterns SEAM ALLOWANCE NOT INCLUDED. Add if needed for appliqué method. This square should measure 1" x 1" (2.54cm x 2.54cm) when printed.
*** Measure templates before cutting to confirm printing at 100%*** 9 of 30 freespiritfabrics.com
Template 21 The Skellingtons template patterns SEAM ALLOWANCE NOT INCLUDED. Add if needed for appliqué method. This square should measure 1" x 1" (2.54cm x 2.54cm) when printed.
Template 13 Template 26 Template 14
8 Template 9
*** Measure templates before cutting to confirm printing at 100%*** 10 of 30 freespiritfabrics.com
Template
Skellingtons template patterns SEAM ALLOWANCE
if
This square should measure 1" x 1" (2.54cm x 2.54cm) when printed.
Template 16 Template 15 Template
Template 22
23 The
NOT INCLUDED. Add
needed for appliqué method.
*** Measure templates before cutting to confirm printing at 100%*** 11 of 30 freespiritfabrics.com Template 27 Template 28 Template 24 Template 6 Template 17 Template 20 Template 7 The Skellingtons template patterns SEAM ALLOWANCE N OT INCLUDED. Add if needed for appliqué meth od. This square should measure 1" x 1" (2.54cm x 2.54cm) when printed.
*** Measure pattern before assembling to confirm printing at 100%*** 12 of 30 freespiritfabrics.com 7 17 17 10 22
square should measure 1" x 1" (2.54cm x 2.54cm) when printed. Row 1 (1)
This
*** Measure pattern before assembling to confirm printing at 100%*** 13 of 30 freespiritfabrics.com 1 17 6 10 This square should measure 1" x 1" (2.54cm x 2.54cm) when printed. Row 1 (2)
*** Measure pattern before assembling to confirm printing at 100%*** 14 of 30 freespiritfabrics.com This square should measure 1" x 1" (2.54cm x 2.54cm) when printed. Row 1 (3)
*** Measure pattern before assembling to confirm printing at 100%*** 15 of 30 freespiritfabrics.com 7 19 12 24 17 10 34 35 27 This
Row 2 (1)
square should measure 1" x 1" (2.54cm x 2.54cm) when printed.
*** Measure pattern before assembling to confirm printing at 100%*** 16 of 30 freespiritfabrics.com 17 19 17 10 35 26 28 10 4 27 This square should measure 1" x 1" (2.54cm x 2.54cm) when printed. Row 2 (2)
*** Measure pattern before assembling to confirm printing at 100%*** 17 of 30 freespiritfabrics.com 17 19 24 6 35 29 10 35 10 4 This square should measure 1" x 1" (2.54cm x 2.54cm) when printed. Row 2 (3)
*** Measure pattern before assembling to confirm printing at 100%*** 18 of 30 freespiritfabrics.com This square should measure 1" x 1" (2.54cm x 2.54cm) when printed. Row 2 (4)
*** Measure pattern before assembling to confirm printing at 100%*** 19 of 30 freespiritfabrics.com This square should measure 1" x 1" (2.54cm x 2.54cm) when printed. Row 2 (5)
This square should measure 1" x 1" (2.54cm x 2.54cm) when printed.
*** Measure pattern before assembling to confirm printing at 100%*** 20 of 30 freespiritfabrics.com 7 14 13 17
11 11
4 4
Row 3 (1)
*** Measure pattern before assembling to confirm printing at 100%*** 21 of 30 freespiritfabrics.com 7 6 6 21 18 16 15 14 12 9 This square should measure 1" x 1" (2.54cm x 2.54cm) when printed. Row 3 (2)
*** Measure pattern before assembling to confirm printing at 100%*** 22 of 30 freespiritfabrics.com 20 21 19 12 25 This square should measure 1" x 1" (2.54cm x 2.54cm) when printed. Row 3 (3)
This square should measure 1" x 1" (2.54cm x 2.54cm) when printed.
*** Measure pattern before assembling to confirm printing at 100%*** 23 of 30 freespiritfabrics.com
Row 3 (4)
*** Measure pattern before assembling to confirm printing at 100%*** 24 of 30 freespiritfabrics.com This square should measure 1" x 1" (2.54cm x 2.54cm) when printed. Row 3 (5)
*** Measure pattern before assembling to confirm printing at 100%*** 25 of 30 freespiritfabrics.com 7 10 6 6 10 8 15 17 5 35 35 36 This square should measure 1" x 1" (2.54cm x 2.54cm) when printed. Row 4 (1)
*** Measure pattern before assembling to confirm printing at 100%*** 26 of 30 freespiritfabrics.com 2 3 6 22 23 4 35 35 35 35 This square should measure 1" x 1" (2.54cm x 2.54cm) when printed. Row 4 (2)
*** Measure pattern before assembling to confirm printing at 100%*** 27 of 30 freespiritfabrics.com
Row 4 (3)
This square should measure 1" x 1" (2.54cm x 2.54cm) when printed.
This square should measure 1" x 1" (2.54cm x 2.54cm) when printed.
*** Measure pattern before assembling to confirm printing at 100%*** 28 of 30 freespiritfabrics.com 30
Row 5 (1)
*** Measure pattern before assembling to confirm printing at 100%*** 29 of 30 freespiritfabrics.com 33 32 31 This square should measure 1" x 1" (2.54cm x 2.54cm) when printed. Row 5 (2)
This square should measure 1" x 1" (2.54cm x 2.54cm) when printed.
*** Measure pattern before assembling to confirm printing at 100%*** 30 of 30 freespiritfabrics.com
Row 5 (3)
Featuring Nightshade - Déjà Vu by Tula Pink
Set Sail Quilt
Finished Size: 69" x 90" (1.75m x 2.29m)
Project designed by Julie Herman - Jaybird Quilts
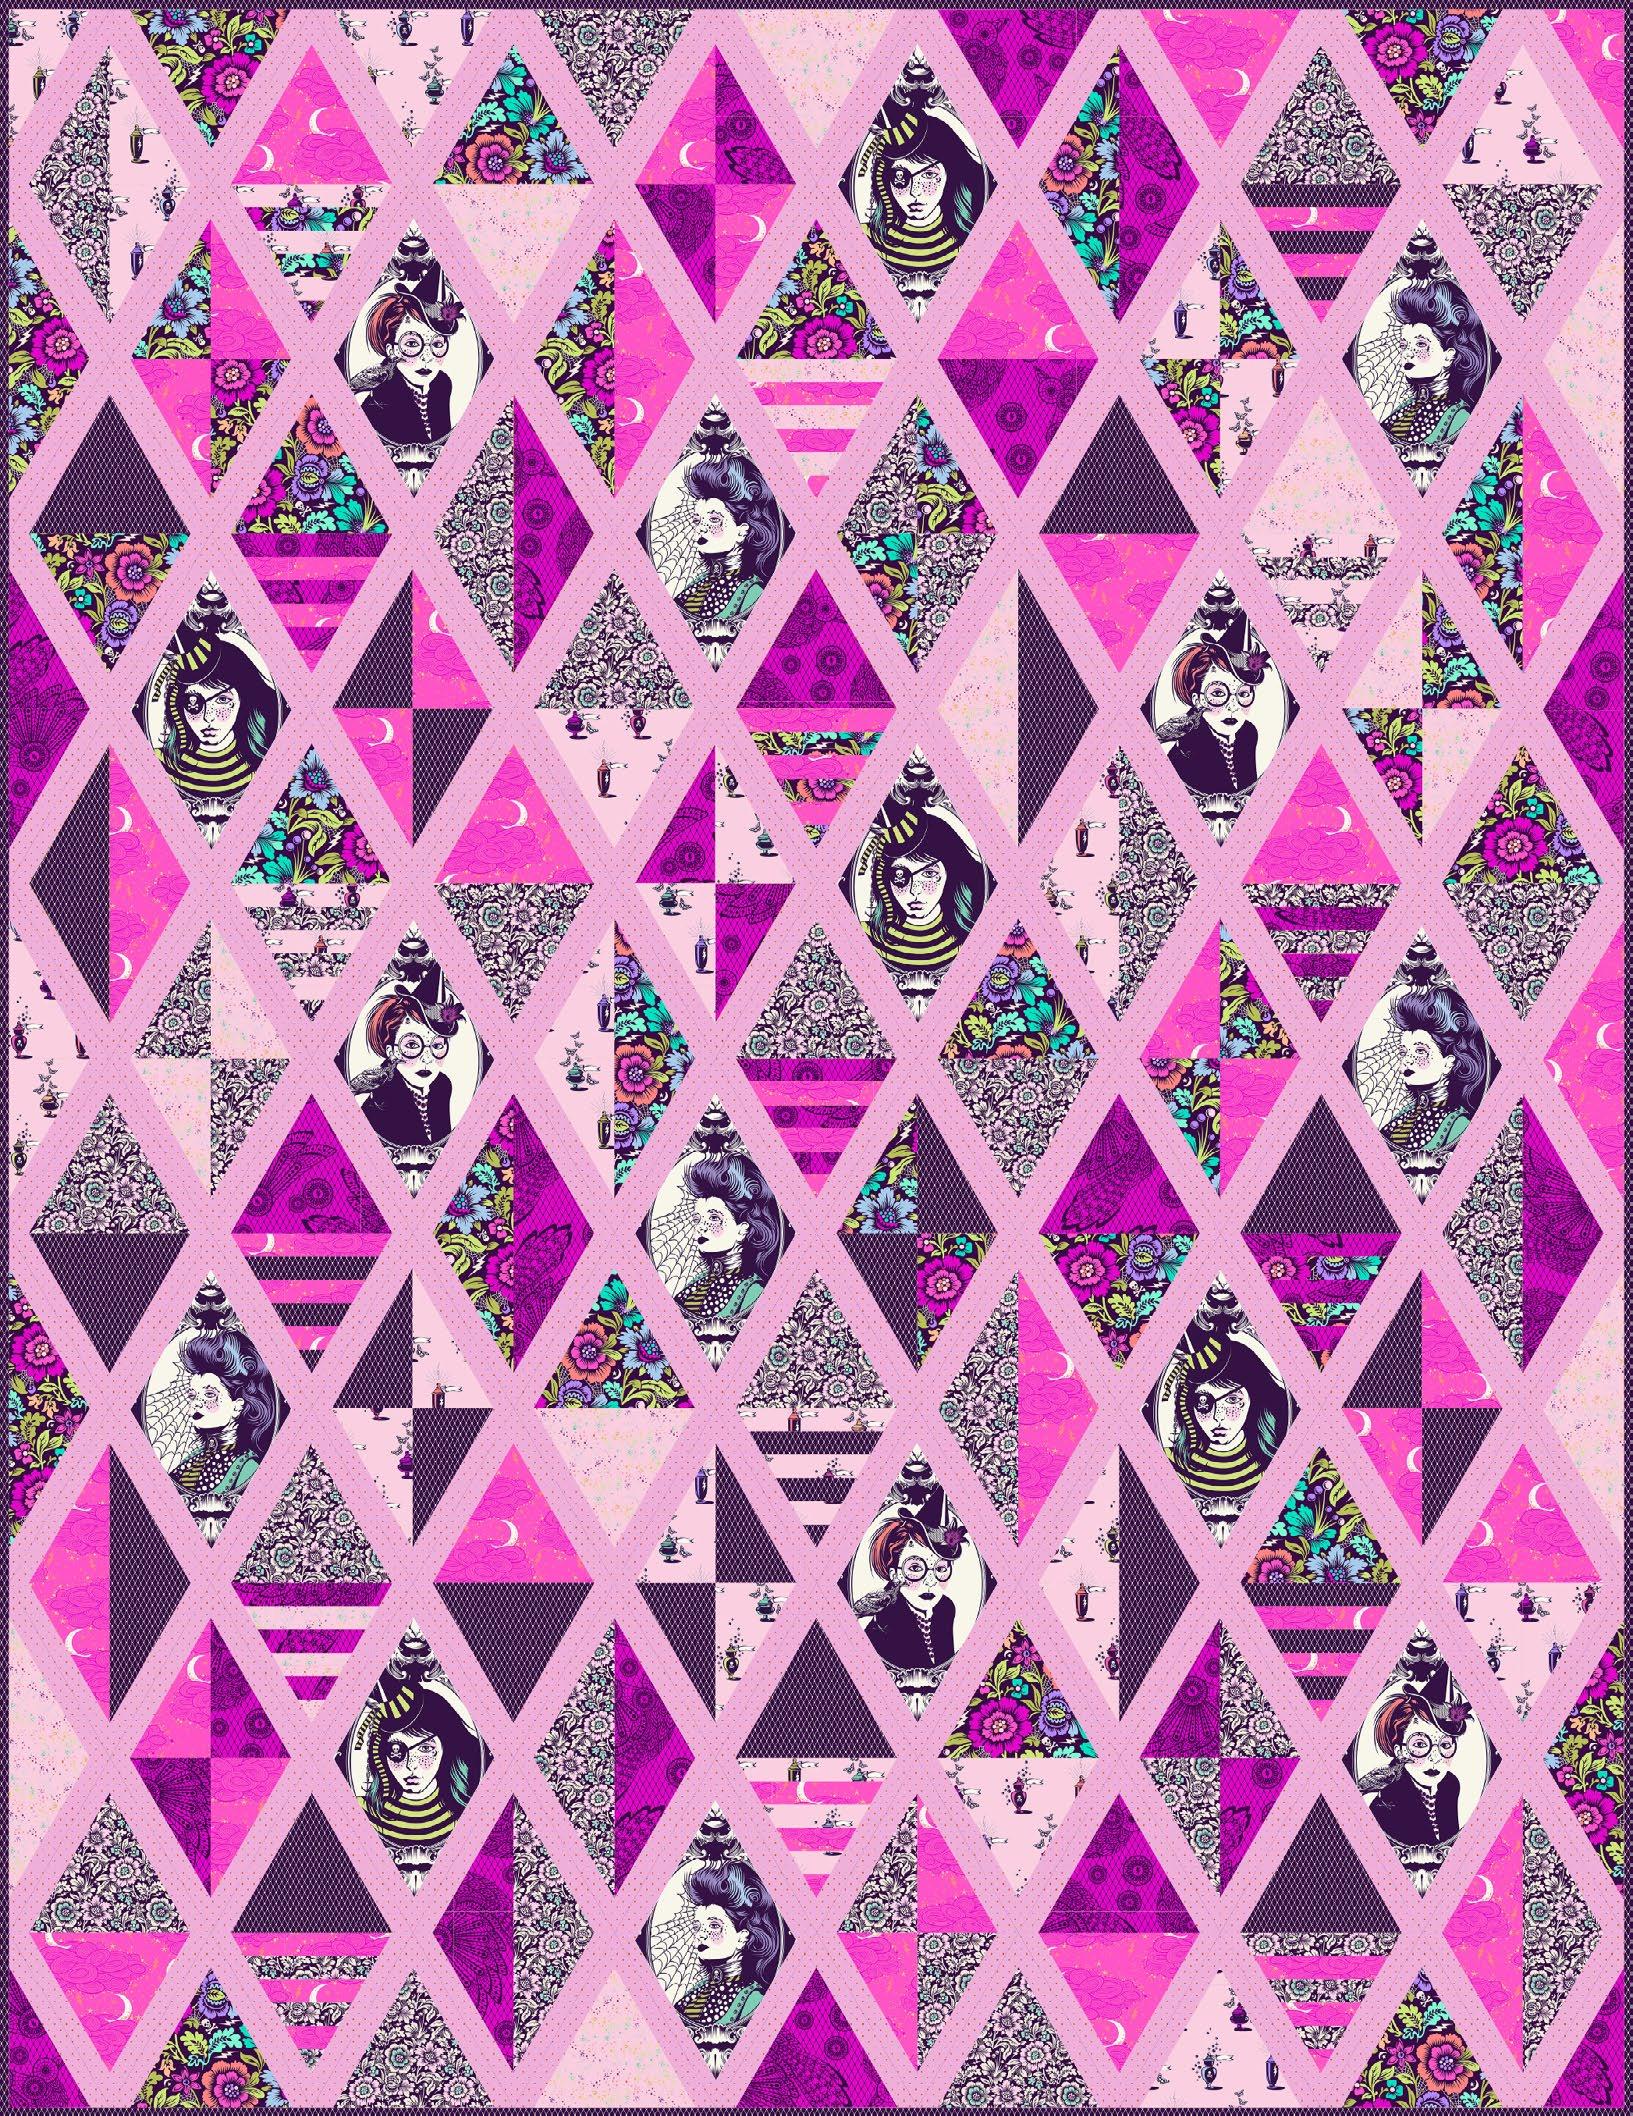
Purchase pattern at jaybirdquilts.com
Technique: Pieced, with Super Sidekick Ruler | Skill Level: Advanced Beginner
freespiritfabrics.com
Set Sail Quilt
Fabric Requirements
* includes binding
Backing (Purchased Separately)
If kitting, refer to the final pattern for yardage amounts, it is recommended that a sample is made to confirm accuracy.
freespiritfabrics.com


DESIGN COLOR ITEM ID YARDAGE (A) Coven Oleander PWTP205.OLEANDER 2 yards (1.83m) (B) Spider Blossom Equinox PWTP206.EQUINOX 1 yard (0.91m) (C) Raven Lace Oleander PWTP207.OLEANDER 1 yard (0.91m) (D) Storm Clouds Oleander PWTP208.OLEANDER 1 yard (0.91m) (E) Apothecary Nerium PWTP209.NERIUM 1 yard (0.91m) (F) Mini Spider Blossom Nerium PWTP211.NERIUM 1 yard (0.91m) (G) Fishnet Equinox PWTP212.EQUINOX* 13⁄4 yards (1.60m) (H) Fairy Dust Blush PWTP133.BLUSH 1 yard (0.91m) (I) Tiny Dots Candy PWTP185.CANDY 33⁄4 yards (3.43m)
44" (1.12m) wide Raven Lace Oleander PWTP207.OLEANDER 53⁄4 yards (5.26m) OR 108" (2.74m) wide Fairy Dust XL Whisper QBTP011.WHISPER 21⁄2 yards (2.29m)
(A)
(B)
(C)
(D) (E)
(F) (G) (H)
(I) Backing 44" Backing 108"
The Still Room
Quilt

Featuring Nightshade - Deja Vu by Tula Pink
Collection:
Nightshade - Deja Vu by Tula Pink
Technique: Pieced
Skill Level: Advanced Beginner
Finished Project Size: 68" x 86" (172.72cm x 218.44cm)
Finished Size:
Finished Block Sizes: 9" x 18", 8" x 18", 10" x 18", 5" x 18", 7" x 18", and 11" x 18"
All possible care has been taken to assure the accuracy of this pattern. We are not responsible for printing errors or the manner in which individual work varies. Please read the instructions carefully before starting this project. If kitting, it is recommended a sample is made to confirm accuracy.
1 of 15 freespiritfabrics.com
The Still Room Quilt


 M. Schmidt
Fabric Requirements












2 of 15 freespiritfabrics.com Copyright© 2023 All possible care has been taken to assure the accuracy of this pattern. We are not responsible for printing errors or the manner in which individual work varies. Please read the instructions carefully before starting this project. If kitting it is recommended a sample is made to confirm accuracy.
Project designed by Tula Pink | Tech edited by Alison
DESIGN COLOR ITEM ID YARDAGE (A) Coven Oleander PWTP205.OLEANDER 1 yard (0.91m) (B) Spider Blossom Equinox PWTP206.EQUINOX 11⁄8 yards (1.03m) (C) Storm Clouds Oleander PWTP208.OLEANDER 1⁄2 yard (0.46m) (D) Apothecary Nerium PWTP209.NERIUM 1⁄2 yard (0.46m) (E) Mini Coven Nerium PWTP210.NERIUM 1⁄3 yard (0.30m) (F) Mini Spider Blossom Nerium PWTP211.NERIUM 1⁄4 yard (0.23m) (G) Fishnet Equinox PWTP212.EQUINOX* 11⁄8 yards (1.03m) (H) Raven Lace Oleander PWTP207.OLEANDER 1⁄2 yard (0.46m) (I) Designer Essential Solid Mist CSFSESS.MISTX 15⁄8 yards (1.49m) (J) Neon Pom Pom Cosmic PWTP118.COSMIC 1⁄3 yard (0.30m) (K) Neon Pom Pom Karma PWTP118.KARMA 1⁄3 yard (0.30m) (L) Neon Pom Pom Mystic PWTP118.MYSTIC 1⁄3 yard (0.30m) (M) Neon Pom Pom Spirit PWTP118.SPIRIT 1⁄3 yard (0.30m) (N) Neon Fairy Flakes Cosmic PWTP157.COSMIC 1⁄8 yard (0.11m) (O) Neon Fairy Flakes Karma PWTP157.KARMA 1⁄8 yard (0.11m) (P) Neon Fairy Flakes Mystic PWTP157.MYSTIC 1⁄8 yard (0.11m) (Q) Neon Fairy Flakes Spirit PWTP157.SPIRIT 1⁄8 yard (0.11m) (R) Designer Essential Solid Julep CSFSESS.JULEP 1⁄8 yard (0.11m) (S) Designer Essential Solid Matcha CSFSESS.MATCHA 1⁄8 yard (0.11m) (T) Designer Essential Solid Sparkle CSFSESS.SPARKLE 1⁄8 yard (0.11m)
binding continued... (A) (B) (C) (D) (E) (F) (G) (H) (I) (M) (Q) (J) (N) (R) (K) (O) (S) (L) (P) (T)
* includes
The Still Room Quilt
Fabric Requirements (continued...)

Backing (Purchased Separately) 44" (1.12m) wide

(2.74m) wide

Additional Recommendations
• 100% cotton thread in colors to match
• 76" x 94" (1.93m x 2.39m) quilt batting


3 of 15 freespiritfabrics.com Copyright© 2023 All possible care has been taken to assure the accuracy of this pattern. We are not responsible for printing errors or the manner in which individual work varies. Please read the instructions carefully before starting this project. If kitting it is recommended a sample is made to confirm accuracy.
DESIGN COLOR ITEM ID YARDAGE (U) Designer Essential Solid Taffy CSFSESS.TAFFY 1⁄8 yard (0.11m)
Fairy Dust Cotton Candy PWTP133.COTTONCANDY 15⁄8 yards (1.49m)
Tiny Dots Cosmic PWTP185.COSMIC 15⁄8 yards (1.49m)
(V)
(W)
Spider Blossom Nerium PWTP211.NERIUM 51⁄3 yards (4.87m)
Dust XL Cotton Candy QBTP011.COTTONCANDY 23⁄8 yards (2.17m)
Mini
OR 108"
Fairy
Backing 108" Backing 44"
(U) (V) (W)
The Still Room Quilt
Cutting
WOF = Width of Fabric
Notes:
• Cut sizes are listed smaller x larger unless fabric is a directional print, in which case cut sizes are listed as width x height.
• Fussy cutting: Plan all the desired fussy cuts from Fabric A and Fabric E before cutting.
• The 4 large cameos needed from Fabric A can all be cut from 1 row of 4 cameos, but yardage amount listed allows for a second row of cameos in case of a cutting error or for additional choices of motif repeats.
• Group Fabrics I, V, and W together and treat as one fabric, called ‘Background Fabric’ below in the cut list and in the instructions. For added variety in the background, each time the instructions list another group of WOF strips, switch background fabric as you cut (for example, cut the first 7" x WOF from Fabric I, the second from Fabric V, and the third from Fabric W, or alternate as you desire), and subcut as directed
• Alternate fabrics randomly throughout the piecing process for a scrappy background.
• TIP: To stay organized, label cut pieces with the final Unit or Block number listed in brackets after the cut size. For example, [U1] means piece is used for Unit 1, and [B4] means piece is used for Block 4 (but not part of a unit). Keep cut pieces grouped either by fabric or by Unit/Block label.
Fabric A, fussy cut:
(4) 81⁄2" x 101⁄2" rectangles, centered on cameo* motifs [U11]
*2 eyepatch motifs and 1 each spiderweb and crow motifs if making like quilt shown
Fabric B, cut:
(1) 101⁄2" x WOF; subcut
(1) 51⁄2" x 101⁄2" [B4]
(1) 41⁄2" x 101⁄2" [U16]
(1) 71⁄2" x 71⁄2" [U26]
(8) 21⁄2" x WOF for outer border
Fabrics C, D, and H, cut from each:
(1) 101⁄2" x WOF; subcut
(1) 51⁄2" x 101⁄2" [B4]
(1) 41⁄2" x 101⁄2" [U16]
(1) 71⁄2" x 71⁄2" [U26]
Fabric E, fussy cut:
(4) 41⁄2" squares, centered on cameo* motifs [U5]
*2 spiderweb motifs and 1 each eyepatch and crow motifs if making like quilt shown
Fabric F, cut:
(2) 21⁄2" x WOF; subcut
(32) 21⁄2" x 21⁄2" [U4]
Fabric G, cut:
(1) 31⁄2" x WOF; subcut
(4) 31⁄2" x 31⁄2" [U2]
(4) 41⁄2" x 21⁄2" [U13]
(4) 21⁄2" x 11⁄2" [U8]
(1) 21⁄2" x WOF; subcut
(16) 21⁄2" x 21⁄2" [4: U7, 12: U28]
Fabric G, cut (continued):
(1) 11⁄2" x WOF; subcut
(4) 31⁄2" x 11⁄2" [U23]
(4) 21⁄2" x 11⁄2" [U18]
(4) 11⁄2" x 11⁄2" [U22]
(9) 21⁄2" x WOF for binding
Background* Fabric (Fabrics I, V, and W), cut:
*SEE CUTTING NOTE AT LEFT
(1) 7" x WOF; subcut
(1) 7" x 101⁄2" [B3]
(1) 71⁄2" x 61⁄2" [B5]
(2) 31⁄2" x 61⁄2" [U3]
(1) 41⁄2" x 41⁄2" [U17]
(1) 7" x WOF; subcut
(1) 7" x 101⁄2" [B3]
(1) 71⁄2" x 61⁄2" [B5]
(1) 41⁄2" x 41⁄2" [U17]
(1) 31⁄2" x 111⁄2" [B6]
(1) 31⁄2" x 61⁄2" [U3]
(1) 7" x WOF; subcut
(2) 7" x 101⁄2" [B3]
(2) 71⁄2" x 61⁄2" [B5]
(1) 41⁄2" x 41⁄2" [U17]
(1) 41⁄2" x WOF; subcut
(5) 41⁄2" x 41⁄2" [U17]
(4) 21⁄2" x 41⁄2" [U15]
(1) 31⁄2" x 61⁄2" [U3]
(2) 31⁄2" x WOF; subcut
(2) 31⁄2" x 111⁄2" [B6]
(8) 31⁄2" x 31⁄2" [4 each: U2, U8]
(4) 3" x 31⁄2" [U10]
(2) 11⁄2" x 31⁄2" [U22]
(2) 31⁄2" x WOF; subcut
(11) 31⁄2" x 31⁄2" [4: U8, 7: U12]
(6) 3" x 31⁄2" [4: U10, 2: U14]
4 of 15 freespiritfabrics.com Copyright© 2023 All possible care has been taken to assure the accuracy of this pattern. We are not responsible for printing errors or the manner in which individual work varies. Please read the instructions carefully before starting this project. If kitting it is recommended a sample is made to confirm accuracy.
Background* Fabric (Fabrics I, V, and W), cut
(continued):
(2) 31⁄2" x WOF; subcut
(1) 31⁄2" x 111⁄2" [B6]
(9) 31⁄2" x 31⁄2" [1: U12, 8: U27]
(6) 3" x 31⁄2" [U14]
(5) 21⁄2" x WOF for sashing and inner border
(4) 21⁄2" x WOF for inner border
(3*) 21⁄2" x WOF for inner border
*Cut 1 additional if joining with diagonal seams.
(8) 21⁄2" x WOF; subcut
(10) 21⁄2" x 181⁄2" for row sashing
(2) 21⁄2" x 13" [U32]
(2) 21⁄2" x 71⁄2" [U3]
(4) 21⁄2" x 51⁄2" [U3]
(2) 21⁄2" x 41⁄2" [U15]
(2) 21⁄2" x 3" [U20]
(20) 21⁄2" x 21⁄2" [4: U2; 8 each: U3, U12]]
(2) 2" x 21⁄2" [U25]
(5) 21⁄2" x WOF; subcut
(4) 21⁄2" x 181⁄2" for row sashing
(1) 21⁄2" x 13" [U32]
(1) 21⁄2" x 71⁄2" [U3]
(2) 21⁄2" x 41⁄2" [U15]
(4) 21⁄2" x 3" [U20]
(21) 21⁄2" x 21⁄2" [8 each: U13, U17; 5: U18]
(2) 2" x 21⁄2" [U25]
(5) 21⁄2" x WOF; subcut
(6) 21⁄2" x 181⁄2" for row sashing
(1) 21⁄2" x 13" [U32]
(1) 21⁄2" x 71⁄2" [U3]
(2) 21⁄2" x 3" [U20]
(19) 21⁄2" x 21⁄2" [3: U18, 8 each: U21, U27]
(4) 2" x 21⁄2" [U25]
The Still Room Quilt
(1) 11⁄2" x WOF; subcut
(1) 11⁄2" x 81⁄2" [B2]
(2) 11⁄2" x 21⁄2" [U23]
(14) 11⁄2" x 11⁄2" [U17]
(1) 11⁄2" x WOF; subcut
(2) 11⁄2" x 81⁄2" [B2]
(2) 11⁄2" x 31⁄2" [U22]
(2) 11⁄2" x 21⁄2" [U23]
(1) 11⁄2" x WOF; subcut
(1) 11⁄2" x 81⁄2" [B2]
(4) 11⁄2" x 31⁄2" [U22]
(10) 11⁄2" x 11⁄2" [8:U6, 2:U7]
(4) 11⁄2" x 21⁄2" [U23]
(4) 1" x WOF; subcut
(4) 1" x 13" [U32]
(4) 1" x 81⁄2" [U6]
(6) 1" x 21⁄2" [U9]
(4) 1" x 2" [U19]
(4) 1" x 11⁄2" [U29]
(24) 1" x 1" [U31]
(3) 1" x WOF; subcut
(2) 1" x 13" [U32]
(2) 1" x 81⁄2" [U6]
(10) 1" x 21⁄2" [2: U9, 8: U28]
(6) 1" x 2" [4: U19, 2: U24]
(2) 1" x 11⁄2" [U29]
(24) 1" x 1" [U1]
(2) 1" x WOF; subcut
(2) 1" x 13" [U32]
(2) 1" x 81⁄2" [U6]
(6) 1" x 2" [U24]
(2) 1" x 11⁄2" [U29]
(24) 1" x 1" [U1]
Fabrics J, K, L, and M, cut from each:
(1) 31⁄2" x WOF; subcut
(1) 31⁄2" x 101⁄2" [U16]
(1) 31⁄2" x 51⁄2" [U21]
(1) 31⁄2" x 2" [U25]
(1) 21⁄2" x 7" [U30]
(1) 21⁄2" x 5" [U30]
(2) 21⁄2" x 3" [1 each: U10, U30]
(1) 21⁄2" x 21⁄2" [U15]
(2) 11⁄2" x WOF; subcut
(1) 11⁄2" x 81⁄2" [U11]
(1) 11⁄2" x 71⁄2" [U26]
(1) 11⁄2" x 3" [U20]
(3) 1" x 41⁄2" [1 each: U9, U14, U24]
(3) 1" x 31⁄2" [U29]
(1) 1" x 21⁄2" [U19]
Fabrics N, O, P, and Q, cut from each:
(1) 21⁄2" x WOF; subcut
(1) 21⁄2" x 101⁄2" [U30]
(1) 21⁄2" x 81⁄2" [U30]
(1) 21⁄2" x 61⁄2" [U30]
Fabrics R, S, T, and U, cut from each:
(1) 21⁄2" x WOF; subcut
(4) 21⁄2" x 41⁄2" [U4]
(7) 21⁄2" x 21⁄2" [3 each: U1, 4 each: U5]
(1) 11⁄2" x WOF; subcut
(1) 11⁄2" x 91⁄2" [B1]
5 of 15 freespiritfabrics.com Copyright© 2023 All possible care has been taken to assure the accuracy of this pattern. We are not responsible for printing errors or the manner in which individual work varies. Please read the instructions carefully before starting this project. If kitting it is recommended a sample is made to confirm accuracy.
Instructions
Notes:
• Use an accurate 1 ⁄ 4 " seam allowance throughout - you may want to test your seam allowance with scraps before piecing all your blocks to make sure they come out to the correct finished size.
• Sew all pieces with right sides together and raw edges even using matching thread. Press after each seam in your preferred direction.
• Unit and block dimensions are listed as width x height including seam allowances.


Stitch-and-Flip Corners:
For all units with diagonal seams, follow this stitch and flip method:
a - Align marked square on corner, right sides together, with the line oriented as shown in the diagram.
b - Stitch along the marked line.
c -Trim seam allowances to 1⁄4". Press corner out.
Block 1 Assembly
1. Draw a diagonal line across the wrong side of 44 Background Fabric 21⁄2" squares [U2, 12, 13, 17, 21, and 27], 20 Background Fabric 31⁄2" squares [U2, 12, and 27], and all the Fabric F 21⁄2" squares and Background Fabric 1", 11⁄2", and 41⁄2" squares. These marked squares will be used throughout
Blocks 1 - 6.
The Still Room Quilt
2. Follow Stitch-and-Flip corners method detailed at left to add Background Fabric 1" squares to all 4 corners of a Fabric U 21⁄2" square as shown. Make a total of 3 Unit 1 (21⁄2" square unfinished). Note: Diagram is shown at a larger scale to show detail.
4. Arrange 3 Unit 1, 2 each Background Fabric 21⁄2" squares and 21⁄2" x 51⁄2" pieces, 1 each Background Fabric 21⁄2" x 71⁄2" and 31⁄2" x 61⁄2" pieces, and 1 Unit 2 in 4 columns as shown. Stitch into columns. Sew columns together to complete Unit 3 (91⁄2" square unfinished).
3. Follow Stitch-and-Flip corners method to add a Background Fabric 31⁄2" square to the upper-left corner of a Fabric G 3 1⁄ 2" square. Then add a Background Fabric 21⁄2" square to the opposite corner to complete Unit 2 (31⁄2" square unfinished). Fig. 3
5. Follow Stitch-and-Flip corners method to add Fabric F 21⁄2" squares to both ends of a Fabric U 21⁄2" x 41⁄2" rectangle as shown. Make a total 4 Unit 4 (21⁄2" x 41⁄2" unfinished).
6 of 15 freespiritfabrics.com Copyright© 2023 All possible care has been taken to assure the accuracy of this pattern. We are not responsible for printing errors or the manner in which individual work varies. Please read the instructions carefully before starting this project. If kitting it is recommended a sample is made to confirm accuracy.
Fig. 1
Fig. 1 Bg
Fig. 1
Fig. 2
U Bg Bg Bg Bg BgBg BgBg U Unit 1 - Make 3
Fig. 2 Fig. 2
Fig. 3
2 - Make 1 BgBg Bg G G G
Fig. 3 Unit
Fig. 4
Bg Bg U1 Bg Bg Bg Bg U1 U1 U2 Unit 3 - Make 1
Fig.
4 Fig. 4
5 U F F
Fig.
Fig.
5
6. Arrange 4 Unit 4, 4 Fabric U 21⁄2" squares, and 1 fussy-cut Fabric E 4 1 ⁄ 2 " square*, noting orientation of the cameo motif, in 3 rows as shown. Stitch into rows. Sew rows together to complete Unit 5 (81⁄2" square unfinished). Fig. 6 *If making like quilt shown, use the crow motif here.
The Still Room Quilt
8. Stitch a Fabric U 11⁄2" x 91⁄2" piece between Units 3 and 6 to complete Block 1a (91⁄2" x 181⁄2" unfinished). Fig. 8

9. Referring to Steps 2-8, make 1 each Blocks 1b-1d with the different Fabric E motifs shown and Fabrics R, S, and T in place of Fabric U. Fig. 9
7. Follow Stitch-and-Flip corners method to add Background Fabric 11⁄2" squares on both bottom corners of Unit 5 as shown. Then add Background Fabric 1" x 81⁄2" strips on right and left sides of unit to complete Unit 6 (91⁄2" x 81⁄2" unfinished). Fig. 7
7 of 15 freespiritfabrics.com Copyright© 2023 All possible care has been taken to assure the accuracy of this pattern. We are not responsible for printing errors or the manner in which individual work varies. Please read the instructions carefully before starting this project. If kitting it is recommended a sample is made to confirm accuracy.
E
Fig. 6 Fig. 6
Unit 5 - Make 1
Fig. 7 Bg Bg U5
Fig. 7
Unit 6 - Make 1 Bg Bg
Fig. 8
U U3 U6
Block 1a - Make 1
Fig. 8
Fig. 9
T T
Fig. 9
R R
Block 1b - Make 1
S S
Block 1d - Make 1
Block 1c - Make 1
Block 2 Assembly
10. Follow Stitch-and-Flip corners method to add Background Fabric 11⁄2" squares on 2 opposite corners of a Fabric G 21⁄2" square as shown. Repeat on remaining corners to complete Unit 7 (21⁄2" square unfinished). Note: Diagram is shown at a larger scale to show detail.
The Still Room Quilt
12. Stitch a Fabric M 1" x 41⁄2" piece between 2 Background Fabric 1" x 21⁄2" pieces to complete Unit 9 (8 1 ⁄ 2 " x 1" unfinished).
Fig. 12
Fig. 12
MBgBg
15. Follow Stitch-and-Flip corners method to add Background Fabric 3 1⁄ 2" squares to both top corners and Background Fabric 2 1⁄ 2" squares to both bottom corners of Unit 11 to complete Unit 12 (81⁄2" x 111⁄2" unfinished). Fig. 15
Unit 9 - Make 1
13. Stitch a Fabric M 21⁄2" x 3" piece between 2 Background Fabric 3" x 31⁄2" pieces to complete Unit 10 (8 1⁄ 2" x 3" unfinished).
Fig. 13
Fig. 13
11. Stitch a Fabric G 11⁄2" x 21⁄2" piece to the bottom of Unit 7. Sew Background Fabric 31⁄2" squares to opposite sides as shown to complete Unit 8 (8 1⁄2" x 31⁄2" unfinished).
Fig. 11
MBgBg
Unit 10 - Make 1
-
Fig. 11
Fig. 11
U7 G BgBg
Unit 8 - Make 1
14. Stitch a Fabric M 11⁄2" x 81⁄2" strip to the top of a fussy-cut Fabric A 8 1⁄ 2" x 10 1⁄ 2 " rectangle*, noting orientation of the cameo motif, to complete Unit 11 (81⁄2" x 111⁄2" unfinished). Fig. 14
*If making like quilt shown, use the eyepatch motif here.
14 Fig. 14


16. Arrange a Background Fabric 11⁄2" x 81⁄2" strip, Units 8 – 10, and Unit 12 in a column. Stitch together to complete Block 2a (81⁄2" x 181⁄2" unfinished). Fig. 16
Unit 11 - Make 1
8 of 15 freespiritfabrics.com Copyright© 2023 All possible care has been taken to assure the accuracy of this pattern. We are not responsible for printing errors or the manner in which individual work varies. Please read the instructions carefully before starting this project. If kitting it is recommended a sample is made to confirm accuracy.
Fig. 10
G G
Fig.10 Bg
Fig. 12
Fig. 13
Fig.
A
Fig. 15
Fig. 15
Unit
12
Make 1 U11 Bg Bg
Fig. 16
U8 U10 U12 U9 Block 2a -
Fig. 16
Bg
Make 1
17. Referring to Steps 10-16, make 1 each Blocks 2b-2d with the different Fabric A motifs shown and Fabrics J , K, and L in place of Fabric M.
Fig. 17
Fig. 17
Fig. 17
The Still Room Quilt
19. Sew a 1" x 4 " piece to the bottom of Unit 13. Sew Background Fabric 3" x 31 " pieces to opposites sides as shown to complete Unit 14 (10 " x 3" unfinished).
Fig. 19
Fig. 19
Fig. 19
Unit 13
BgBg L
Unit 14 - Make 1
20. Stitch a Fabric L 2 1⁄ 2" square between 2 Background Fabric 2 1⁄ 2" x 4 1⁄ 2 " pieces to complete Unit 15 (101⁄2" x 21⁄2" unfinished).
Fig. 20
Block 2b - Make 1 Block 2d - Make 1 Block 2c - Make 1
Block 3 Assembly
18. Follow Stitch-and-Flip corners method to add Background Fabric 11⁄2" squares on both bottom corners of a Fabric G 21⁄2" x 41⁄2" rectangle as shown to complete Unit 13 ( 4 1⁄ 2" x 2 1⁄ 2 " unfinished). Note: Diagram is shown at a larger scale to show detail.
Fig. 18
Fig. 18 G BgBg G BgBg
22. Follow Stitch-and-Flip corners method to add Background Fabric 41⁄2" squares to both top corners and Background Fabric 2 1⁄ 2" squares on both bottom corners of Unit 16 as shown to complete Unit 17 (101⁄2" x 71⁄2" unfinished). Fig. 22
Fig. 20
Fig. 20 Unit 15 - Make 1
BgBg L


21. Sew a Fabric L 31⁄2" x 101⁄2" piece lengthwise to a Fabric H 41⁄2" x 101⁄2" piece to complete Unit 16 (101⁄2" x 71⁄2" unfinished). Fig. 21
23. Arrange a Background Fabric 7" x 10 1⁄2" rectangle and Units 14, 15, and 17 in a column. Stitch together to complete Block 3a (101⁄2" x 181⁄2" unfinished). Fig. 23
H
9 of 15 freespiritfabrics.com Copyright© 2023 All possible care has been taken to assure the accuracy of this pattern. We are not responsible for printing errors or the manner in which individual work varies. Please read the instructions carefully before starting this project. If kitting it is recommended a sample is made to confirm accuracy.
L K J
Fig. 21 Fig. 21
Fig. 22 Fig. 22
Bg
Unit 17 - Make 1 U16 BgBg
Bg
Block 3a
Bg U17 U14 U15
Fig. 23 Fig. 23
- Make 1
24. Referring to Steps 18-23, make 1 each Blocks 3b-3d with the fabrics noted in place of Fabrics H and L, and making sure to orient directional motifs right-reading in Unit 16. Fig. 24
Fig. 24
Fig. 24
The Still Room Quilt
26. Stitch a Fabric J 1" x 21⁄2" piece between 2 Background Fabric 1" x 2" pieces to complete Unit 19 (5 1⁄ 2" x 1" unfinished).
Fig. 26
Fig. 26 Fig. 26
BgBgJ
Unit 19 - Make 1
27. Stitch a Fabric J 11⁄2" x 3" piece between 2 Background Fabric 21⁄2" x 3" pieces to complete Unit 20 (5 1⁄ 2" x 3" unfinished).
Fig. 27
Block 4 Assembly
25. Sew a Fabric G 11⁄2" x 21⁄2" piece between 2 Background Fabric 21⁄2" squares to complete Unit 18 (51⁄2" x 21⁄2" unfinished).
Fig. 25
Fig. 25 Fig. 25
Unit 18 - Make 1 BgBg G
29. Arrange Units 18-21 and a Fabric C 51⁄2" x 101⁄2" piece in a column. Stitch together to complete Block 4a (51⁄2" x 181⁄2" unfinished).
Fig. 29
Fig. 27
Fig. 27
BgBgJ
Unit 20 - Make 1
28. Follow Stitch-and-Flip corners method to add Background Fabric 2 1⁄ 2" squares on both top corners of a Fabric J 31⁄2" x 51⁄2" piece oriented as shown to complete Unit 21 (51⁄2" x 31⁄2" unfinished).
Fig. 28
Fig. 28
Fig. 28
Bg Bg J BgBg J


Unit 21 - Make 1

10 of 15 freespiritfabrics.com Copyright© 2023 All possible care has been taken to assure the accuracy of this pattern. We are not responsible for printing errors or the manner in which individual work varies. Please read the instructions carefully before starting this project. If kitting it is recommended a sample is made to confirm accuracy.
C B D
Fig. 29 Fig. 29
C U19 U20 U21 U18
Block 4a - Make 1
30. Referring to Steps 25-29, make 1 each Blocks 4b-4d with the fabrics noted in place of Fabrics C and J, making sure to orient directional motifs right-reading in Fabric D.
Fig. 30
Fig. 30
The Still Room Quilt
32. Stitch a Fabric G 11⁄2" x 31⁄2" piece between 2 Background Fabric 11⁄2" x 21⁄2" pieces to complete Unit 23 (71⁄2" x 11⁄2" unfinished).
Fig. 32
Fig. 30
Block 4b - Make 1 Block 4d - Make 1 Block 4c - Make 1
Block 5 Assembly
31. Sew a Fabric G 1 1⁄ 2" square between 2 Background Fabric 1 1⁄ 2" x 3 1⁄ 2 " pieces to complete Unit 22 (71⁄2" x 11⁄2" unfinished).
Fig. 31
Fig. 31
Fig. 31
Unit 22 - Make 1 BgBgG
35. Sew a Fabric K 11⁄2" x 71⁄2" piece to the top of a Fabric B 71⁄2" square to complete Unit 26 (71⁄2" x 81⁄2" unfinished).
Fig. 35
BgBgG


Unit 23 - Make 1
33. Sew a Fabric K 1" x 41⁄2" piece between 2 Background Fabric 1" x 2" pieces to complete Unit 24 (7 1⁄ 2" x 1" unfinished).
Unit 24 - Make 1 BgBgK
34. Sew a Fabric K 2" x 31⁄2" piece between 2 Background Fabric 2" x 21⁄2" pieces to complete Unit 25 (7 1⁄ 2" x 2" unfinished).
Unit 25 - Make 1 BgBgK
36. Follow Stitch-and-Flip corners method to add Background Fabric 2 1⁄ 2" squares on both top corners and Background Fabric 31⁄2" squares on both bottom corners of Unit 26 as shown to complete Unit 27 (71⁄2" x 81⁄2" unfinished).
11 of 15 freespiritfabrics.com Copyright© 2023 All possible care has been taken to assure the accuracy of this pattern. We are not responsible for printing errors or the manner in which individual work varies. Please read the instructions carefully before starting this project. If kitting it is recommended a sample is made to confirm accuracy.
B D H K L M
Fig. 32 Fig. 32
Fig. 33
Fig. 33 Fig. 33
Fig. 34
Fig. 34 Fig. 34
Fig. 35 Fig. 35 B
K
Fig. 36
Unit 27 - Make 1
U26 Bg
BgBg Bg
37. Arrange a Background Fabric 61⁄2" x 71⁄2" piece, Units 22 - 25, and U n it 27 in a column. Stitch together to complete Block 5a (71⁄2" x 181⁄2" unfinished). Fig. 37
The Still Room Quilt
38. Referring to Steps 31-37, make 1 each Blocks 5b-5d with the fabrics noted in place of Fabrics B and K, making sure to orient the Fabric C and D squares so the directional prints are right-reading. Fig. 38
40. Arrange 2 Background Fabric 1" x 1 1⁄ 2" pieces and 1 each Fabrics J, K, and L 1" x 3 1⁄ 2" pieces in a row as shown. Stitch together to complete Unit 29 (111⁄2" x 11⁄2" unfinished). Fig.
Block 6 Assembly
39. Arrange 2 each Background Fabric 1" x 21⁄2" and 21⁄2" squares with 3 Fabric G 21⁄2" squares in a row as shown. Stitch together to complete Unit 28 (111⁄2" x 21⁄2" unfinished).
41. Sew a Fabric K 21⁄2" x 7" piece to the top of a Fabric O 21⁄2" x 61⁄2" piece to complete Unit 30a (21⁄2" x 13" unfinished). In the same manner, make 1 Unit 30b with a Fabric L 21⁄2" x 3" piece above a Fabric P 21⁄2" x 101⁄2" piece and 1 Unit 30c with a Fabric J 21⁄2" x 5" piece above a Fabric N 21⁄2" x 81⁄2" piece.
Unit 28 - Make 1
Unit 30a Make 1 Unit 30b Make 1 Unit 30c Make 1


12 of 15 freespiritfabrics.com Copyright© 2023 All possible care has been taken to assure the accuracy of this pattern. We are not responsible for printing errors or the manner in which individual work varies. Please read the instructions carefully before starting this project. If kitting it is recommended a sample is made to confirm accuracy.
U27 U22 Bg U23 U24 U25
Fig. 37 Fig. 37
Fig. 38
D K C L H M
Fig. 38
Fig. 39
Fig. 39
Fig. 39
GGGBgBg Bg Bg
40
Fig. 40 Fig. 40
Unit 29 - Make 1 KJLBgBg
Fig. 41
Fig. 41
Fig. 41
KJL ONP
42. Follow Stitch-and-Flip corners method to add Background Fabric 1" squares on both bottom corners of Unit 30a as shown to complete Unit 31a (21⁄2" x 13" unfinished). In the same manner, add Background Fabric corners to Units 30b and 30c to make Units 31b and 31c. Fig. 42
The Still Room Quilt
43. Arrange 2 Background Fabric 1" x 13" strips and a 21⁄2" x 13" strip and Units 31a-31c in a row as shown. Stitch together to complete Unit 32 (111⁄2" x 13" unfinished). Fig. 43
45. Referring to Steps 39-44, make 1 each Blocks 6b-6d with the fabrics noted in place of Fabrics J, K, L, N, O, and P. Fig. 45
44. Arrange a Background Fabric 31⁄2" x 111⁄2" piece and Units 28, 29, and 32 in a column as shown. Stitch together to complete Block 6a (111⁄2" x 181⁄2" unfinished). Fig. 44
13 of 15 freespiritfabrics.com Copyright© 2023 All possible care has been taken to assure the accuracy of this pattern. We are not responsible for printing errors or the manner in which individual work varies. Please read the instructions carefully before starting this project. If kitting it is recommended a sample is made to confirm accuracy.
Fig. 42
Unit 31a Make 1 Unit 31b Make 1 Unit 31c Make 1 U30a U30c U30b Bg II Bg BgBg BgBg detail
Fig. 42
Fig. 43
Unit 32 -
1 Bg Bg U31b BgBg U31a U31c
Fig. 43
Make
Fig. 44
Block
Bg U28 U29 U32
Fig. 44
6a - Make 1
Fig. 45
Fig. 45
Block 6b - Make 1 Block 6d - Make 1 Block 6c - Make 1
MLJ
QPN
JMK NQO
LKM POQ
Quilt Top Assembly
Note: Follow the Quilt Layout diagram (page 15) while assembling the quilt. Press seam allowances towards the Sashing Strips. Measure the Quilt Center width and height before cutting and adding borders and adjust border measurements if necessary to match your measurements.}
46. Noting the Quilt Layout diagram for placement, arrange Blocks 1a-6a alternating with 5 Background Fabric 21⁄2" x 181⁄2" row sashing strips as shown. Sew the blocks and sashing strips into a row (181⁄2" x 601⁄2" unfinished). In the same manner, make 3 more block rows with Blocks 1b-6b, Blocks 1c-6c, and Blocks 1d-6d.
47. Sew the remaining 21⁄2" x WOF Background Fabric strips together end to end into 1 continuous strip, alternating fabrics as desired. From this, cut 3 strips 601⁄2".
48. Join the block rows with the 60 1 ⁄ 2 " Background Fabric strips between them. Sew together to complete quilt center (601⁄2" x 781⁄2" unfinished).
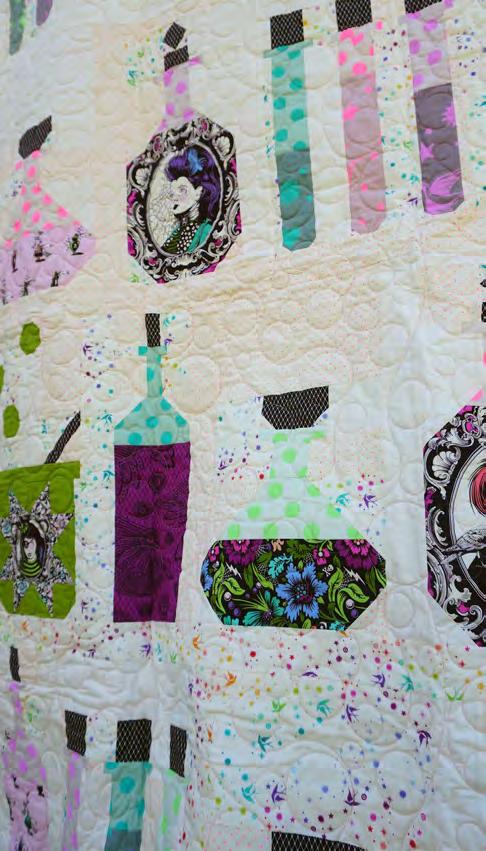
49. From the remaining continuous Background Fabric strip, cut 2 side inner borders 781⁄2" long and 2 top/bottom inner borders 641⁄2" long. Sew the longer borders to the left and right sides of the quilt center. Add the remaining borders to the top and bottom of the quilt center.
The Still Room Quilt
50. Sew the Fabric B 2 1 ⁄ 2 " x WOF strips together end to end into 1 continuous strip, using diagonal seams if desired. Cut 2 side outer borders 821⁄2" long and 2 top/ bottom borders 681⁄2" long. Sew the longer borders to the left and right sides of the quilt center. Add the remaining borders to the top and bottom of the quilt to complete it (681⁄2" x 861⁄2" including seam allowances.
Finishing
51. Sew together the 2 1⁄ 2" Fabric G binding strips end-to-end using diagonal seams. Press seams open. Press the binding strip in half wrong sides together.
52. Layer backing (wrong side up), batting, and quilt top (right side up). Baste the layers together and quilt as desired. Trim excess batting and backing even with the top after quilting is completed.
53. Leaving an 8" tail of binding, sew the binding to the top of the quilt through all layers matching all raw edges. Miter corners. Stop approximately 12" from where you started. Lay both loose ends of binding flat along quilt edge. Where the loose ends meet, fold them back on themselves and press to form a crease. Using this crease as your stitching line, sew the two open ends of the binding right sides together. Trim seam to 1⁄4" and press open. Finish sewing binding to quilt.
54. Turn the binding to the back of quilt and hand-stitch in place.
14 of 15 freespiritfabrics.com Copyright© 2023 All possible care has been taken to assure the accuracy of this pattern. We are not responsible for printing errors or the manner in which individual work varies. Please read the instructions carefully before starting this project. If kitting it is recommended a sample is made to confirm accuracy.
The Still Room - Diagram Page 7
The Still Room Quilt
Quilt Layout


15 of 15 freespiritfabrics.com Copyright© 2023 All possible care has been taken to assure the accuracy of this pattern. We are not responsible for printing errors or the manner in which individual work varies. Please read the instructions carefully before starting this project. If kitting it is recommended a sample is made to confirm accuracy. Block 1a Bg Bg Bg Bg Bg Bg 2-1/2” x 60-1/2” B 2-1/2” x 68-1/2” Bg 2-1/2” x 64-1/2” B 2-1/2” x 68-1/2” B 2-1/2” x 82-1/2” Bg 2-1/2” x 78-1/2” B 2-1/2” x 82-1/2” Bg 2-1/2” x 78-1/2”
Block 3a Block 2a Block 5a Block 3b Block 2b Block 5b Block 4b Block 3c Block 2c Block 5c Block 4c Block 3d Block 2d Block 6d Block 5d Block 4d Block 1b Block 1d Block 1c Block 6c Block 6b Block 6a Block 4a


 M. Schmidt


