Delight Quilt

Finished Size: 60" x 72" (1.52m x 1.83m) Project designed by Julie Herman - Jaybird Quilts Purchase pattern at jaybirdquilts.com Technique: Pieced | Skill Level: Advanced Beginner
freespiritfabrics.com
Delight Quilt
Fabric Requirements
DESIGN
COLOR
ITEM ID
(A) Moon Garden FQB Moon FB4FQTP.MOON
(B) Lazy Stripe Lunar PWTP022.LUNAR*
YARDAGE
1 Fat Quarter Pack

7⁄8 yard (0.80m)

(C) Baby Geo Dusk PWTP053.DUSK 1 yard (0.91m)
(D) Baby Geo Dawn PWTP053.DAWN 1 yard (0.91m)
* includes binding
Backing (Purchased Separately) 44" (1.12m) wide
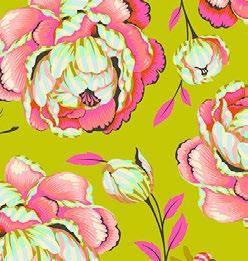


Dragon your Feet Dawn PWTP199.DAWN 4 yards (3.66m) OR 108" (2.74m) wide
Sonic Bloom Dawn QBTP009.DAWN 2 yards (1.83m)

(A) (B) (C) (D) Backing 44" Backing 108"
If kitting, refer to the final pattern for yardage amounts, it is recommended that a sample is made to confirm accuracy.
Hedge Maze Quilt Dawn
Featuring Moon Garden, True Colors and Cotton Solids by Tula Pink
A diagonal setting of four different blocks and a unique row assembly create a colorful challenge in this quilt.

Collection: Moon Garden, True Colors and Cotton Solids by Tula Pink Technique: Fussy Cut, Pieced
Skill Level: Advanced Beginner
Finished Sizes:
Finished Size: 763⁄8" x 763⁄8" (193.99cm x 193.99cm)
Finished Block Size: 10" x 10" (25.4cm x 25.4cm)
All possible care has been taken to assure the accuracy of this pattern. We are not responsible for printing errors or the manner in which individual work varies. Please read the instructions carefully before starting this project. If kitting, it is recommended a sample is made to confirm accuracy.
Project designed by Tula Pink | Tech edited by Alison M. Schmidt
Fabric Requirements
DESIGN COLOR ITEM ID
Hedge Maze Quilt - Dawn
YARDAGE
(A) Kabloom Dawn PWTP195.DAWN 11⁄4 yards (1.14m)
(B) Baby Geo Dawn PWTP053.DAWN 13⁄4 yards (1.60m)
(C) Lazy Stripe Moonlight PWTP022.MOONLIGHT 7⁄8 yard (0.80m)

(D) Baby Geo Lunar PWTP053.LUNAR 3⁄4 yard (0.69m)
(E) Designer Essential Solids Taffy CSFSESS.TAFFY 5⁄8 yard (0.57m)

(F) Hissy Fit Dawn PWTP196.DAWN 3⁄4 yard (0.69m)
(G) Night Owl Dawn PWTP197.DAWN 3⁄4 yard (0.69m)
(H) In a Finch Dawn PWTP198.DAWN 5⁄8 yard (0.57m)
(I) Dragon Your Feet Dawn PWTP199.DAWN 3⁄4 yard (0.69m)
(J) Oopsie Daisy Dawn PWTP200.DAWN 1⁄2 yard (0.46m)
(K) Lazy Stripe Lunar PWTP022.LUNAR 1⁄2 yard (0.46m)

(L) Wildflower Blossom PWTP149.BLOSSOM 3⁄8 yard (0.34m)


(M) Tiny Dots Peacock PWTP185.PEACOCK 3⁄8 yard (0.34m)
(N) Lazy Stripe Dawn PWTP022.DAWN* 3⁄4 yard (0.69m)


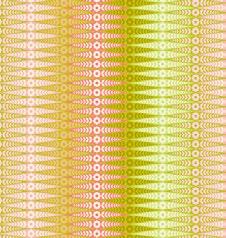
Owl Dawn PWTP197.DAWN 51⁄2 yards (5.03m)


Geo Dawn QBTP010.DAWN 21⁄2 yards (2.29m)


Additional Recommendations

Cutting
WOF = Width of Fabric
Notes:
• Press fabrics with starch or starch alternative and let dry before cutting to stabilize edges to be cut on the bias. Handle bias-cut pieces carefully, not to distort.
• Refer to the quilt image for aligning fussy-cut pieces, or spotlight motifs of your own choice. Label cut pieces with fabric letters for easier construction.
• Partial WOF strips can be cut around areas that have already been fussy-cut, then sub-cut, starting from largest to smallest, for the most efficient use of fabric.
Fabric A, cut:
(4) 15 1⁄2" squares; sub-cut each square twice diagonally, from corner to corner, to make a total of (16) side setting triangles
(2) 10 7⁄ 8" squares; sub-cut each square once diagonally, from corner to corner, to make a total of (4) corner setting triangles
Fabric B, cut:
(21) 21 2" x WOF; sub-cut:
(24) 21⁄2" x 101⁄2" rectangles
(16) 21⁄2" x 81⁄2" rectangles
(40) 21⁄2" x 61⁄2" rectangles
(16) 21⁄2" x 41⁄2" rectangles
(48) 21⁄2" squares
Hedge Maze Quilt - Dawn
Fabric C, cut:
(10) 21⁄2" x WOF; sub-cut:
(4) 21⁄2" x 101⁄2" rectangles
(32) 21⁄2" x 81⁄2" rectangles
Fabric D, cut:
(4) 21⁄2" x WOF; sub-cut (49) 21⁄2" squares
(6) 2" x WOF; sub-cut (104) 2" squares for star points
Fabric E, cut:
(7) 21⁄2" x WOF; sub-cut (104) 21⁄2" squares for star units
Fabrics F and G, fussy cut from each:
(2) 61⁄2" on-point squares
From remaining yardage, cut from each fabric:
(4) 21⁄2" x WOF; sub-cut: (4) 21⁄2" x 101⁄2" rectangles (4) 21⁄2" x 81 2" rectangles
(4) 21⁄2" x 61 2" rectangles
(4) 21⁄2" x 41 2" rectangles
(2) 21⁄2" squares
Fabrics H, I, and J, fussy cut from each:
(2) 61⁄2" on-point squares
From each remaining yardage, cut:
(3) 21⁄2" x WOF; sub-cut:
(3) 21⁄2" x 101⁄2" rectangles
(4) 21⁄2" x 81 2" rectangles
(3) 21⁄2" x 61 2" rectangles
(4) 21⁄2" x 41 2" rectangles
(2) 21⁄2" squares
Fabric K, cut:
(2) 61⁄2" squares
(3) 21⁄2" x WOF; sub-cut:
(3) 21⁄2" x 101 2" rectangles
(4) 21⁄2" x 81⁄2" rectangles
(3) 21⁄2" x 61⁄2" rectangles
(4) 21⁄2" x 41⁄2" rectangles
(2) 21⁄2" squares
Fabrics L and M, cut from each:
(3) 21⁄2" x WOF; sub-cut:
(3) 21⁄2" x 101 2" rectangles
(4) 21⁄2" x 81⁄2" rectangles
(3) 21⁄2" x 61⁄2" rectangles
(4) 21⁄2" x 41⁄2" rectangles
(2) 21⁄2" squares
Fabric N, cut:
(10) 21⁄2" x WOF for binding
Hedge Maze Quilt - Dawn
Instructions
All seam allowances are ¼" and pieces are sewn right sides together. Press seam allowances open, unless otherwise indicated.
Block One
1. Mark a diagonal line from corner to corner on the wrong side of all the Fabric D 2" squares. Place a marked Fabric D square right sides together on a Fabric E 21 2" square as shown. Sew along the marked line, then trim the excess corner fabric 1⁄4" from the seam. Press open. Repeat to add a second marked Fabric D square to the adjacent corner as shown (Fig. 1). Make a total of (52) Star Point units.
Fig. 1
2. Arrange (4) Star Point units, (1) 21⁄2" Fabric D square, and (4) 21 2" Fabric E squares in (3) rows of (3) elements each as shown (Fig. 2). Sew the elements in each row together along adjacent edges. Press. Sew the rows together along adjacent edges. Press. Make a total of (13) Star units 61 2" x 61⁄2" including seam allowances.

Fig. 2
3. Referring to the Block One Diagrams (page 5) for fabrics and placement, sew 21⁄2" x 61⁄2" rectangles to the left and right sides of a Star unit. Press the seam allowances toward the rectangles. Sew (1) 21⁄2" x 101⁄2" rectangle to the top, and another to the bottom edge to complete a block (Fig. 3). Make a total of (13) of Block One.
Fig. 3
Block Two
4. Sew a 21⁄2" x 61 2 " Fabric B rectangle to the left and right sides of a 61⁄2" square, noting the orientation of any directional print motifs. Press gently to avoid stretching any unsewn bias edges of the squares cut on-point.

5. Sew a 21⁄2" x 101⁄2" Fabric B rectangle to the top, and another to the bottom of the step 4 unit (Fig. 4). Press. Make a total of (12) of Block Two (2 each using Fabrics F, G, H, I, J, and K).

Fig. 4

Hedge Maze Quilt - Dawn
Block One Diagrams

Block Three
6. From Fabric B , gather (3) 2 1⁄2" squares and (1) each 2 1 2" x 4 1⁄ 2 " , 2 1⁄ 2" x 6 1 2 " , and 2 1⁄ 2" x 8 1⁄ 2 " rectangles. Refer to the Block Three Diagrams (page 7) to select (1) 21⁄2" print square and (2) each 21⁄2" x 41⁄2" and 21⁄2" x 81⁄2" print rectangles for each block or come up with your own combinations of prints.
7. Sew a 21⁄2" Fabric B square to the bottom edge of a 21⁄2" print square. Press. Sew a 21⁄2" x 41 2 " print rectangle to the right-hand edge of the joined squares. Press. Sew a 21⁄2" x 41⁄2" Fabric B rectangle to the upper edge of the unit (Fig. 5). Press.


Fig. 5
8. Sew a 21⁄2" Fabric B square to one short end of a 21⁄2" x 41⁄2" print rectangle. Press. Sew a 21⁄2" x 61 2 " Fabric B rectangle to the left-hand edge of the joined square/rectangle. Press. Sew this unit to the left-hand edge of the step 7 unit (Fig. 6). Press.
Fig. 6
the
Hedge Maze Quilt - Dawn
of this
9. Sew a 21⁄2" x 81⁄2" print rectangle to the lower edge of the step 8 unit. Sew a 21⁄2" x 81⁄2" Fabric B rectangle to the right-hand edge of the unit (Fig. 7). Press.
Fig. 7
10. Join a 21 2" Fabric B square to one short end of a 21 2" x 81 2 " print rectangle. Press. Sew the joined square/rectangle to the upper edge of the step 9 unit to complete the block (Fig. 8). Make a total of (8) of Block Three.

Fig. 8

Hedge Maze Quilt - Dawn
Block Three Diagrams

Hedge Maze Quilt - Dawn
Block Four
Note: These blocks are mirror images of Block 3.
11. From Fabric B , gather (3) 2 1⁄2" squares and (1) each 2 1 2" x 4 1⁄ 2 " , 21⁄2" x 61⁄2", and 21⁄2" x 81⁄2" rectangles. Refer to the Block Four Diagrams (page 9) to select (1) 21⁄2" print square and (2) each 21⁄2" x 41⁄2" and 21⁄2" x 81 2 " print rectangles for each block or come up with your own combinations of prints.
12. Sew a 21⁄2" Fabric B square to the bottom edge of a 21⁄2" print square. Press. Sew a 21⁄2" x 41 2 " print rectangle to the left-hand edge of the joined squares. Press. Sew a 21⁄2" x 41⁄2" Fabric B rectangle to the upper edge of the unit (Fig. 9). Press.
Fig. 9
13. Sew a 21⁄2" Fabric B square to one short end of a 21⁄2" x 41⁄2" print rectangle. Press. Sew a 21⁄2" x 61⁄2" Fabric B rectangle to the right-hand edge of the joined square/rectangle. Press. Sew this unit to the righthand edge of the step 12 unit (Fig. 10). Press.


Fig. 10
14. Sew a 21⁄2" x 81⁄2" print rectangle to the lower edge of the step 13 unit. Sew a 21⁄2" x 81⁄2" Fabric B rectangle to the left-hand edge of the unit (Fig. 11). Press.
Fig. 11
15. Join a 21 2" Fabric B square to one short end of a 21 2" x 81 2 " print rectangle. Press. Sew the joined square/rectangle to the upper edge of the step 14 unit to complete the block (Fig. 12). Make a total of (8) of Block Four.

Fig. 12

Hedge Maze Quilt - Dawn
Block Four Diagrams

Hedge Maze Quilt - Dawn
Quilt Top Assembly
16. Sew a 21 2" Fabric D square to one short end of a 21 2" x 81⁄2" Fabric C rectangle (Fig. 13). Press. Make a total of (32) D/C sashing units.

Fig. 13
17. Referring to the Row Layout diagram (page 11) for specific block placement and orientation, arrange the blocks into (9) diagonal rows, placing Blocks One and Three in the odd rows and Blocks Two and Four in the even rows. Noting orientation, place a D/C sashing unit at each end of rows 1–4 and 6–9. Place a 21⁄2" x 101⁄2" Fabric C rectangle at each end of row 5. Sew the blocks and sashing units or rectangles in each row together along adjacent edges. Press.
18. Sew (1) 21⁄2" Fabric D square to each short end of a 21 2" x 101⁄2" Fabric C rectangle. Press. Sew a Fabric A corner triangle to one long edge of the unit (Fig. 14). Press. Make (2) Corner units. Sew one Corner unit to the upper edge of Row 1, and the other to the lower edge of Row 9. Fig. 14
19. Noting the orientation of both the triangles and the D/C units, sew one D/C unit to the lower edge of each triangle (Fig. 15). Make a total of (16) Triangle units, (8) each Side and Top/Bottom.
Fig. 15
20. Referring to the Quilt Layout diagram (page 12) to orient each Triangle unit, add Side and Top/Bottom Triangle units and join rows as follows, pressing as you complete each row and after joining rows:

• Sew a Triangle unit to each end of Row 1. Aligning seam lines, sew Row 1 to Row 2 along adjacent edges.
• Sew a Triangle unit to each end of Row 2. Aligning seam lines, sew Row 2 to Row 3 along adjacent edges.
• Sew a Triangle unit to each end of Row 3. Aligning seam lines, sew Row 3 to Row 4 along adjacent edges.
• Sew a Triangle unit to each end of Row 4.

21. Repeat step 20 to sew rows 6–9 together, starting with Row 9 and working toward Row 6.
22. Sew the 2 joined row sections to the top and bottom of Row 5, then add the (2) remaining corner triangles to the upper right and lower left corners to complete the quilt top. Press.
Finishing
23. Sew together the 2½" Fabric N binding strips end-to-end using diagonal seams. Press the seams open. Press the binding strip in half wrong sides together.
24. Layer the backing (wrong side up), batting, and quilt top (right side up). Baste the layers together and quilt as desired. Trim excess batting and backing even with the quilt top after quilting is completed.
25. Leaving an 8" tail of binding, sew binding to top of quilt through all layers matching all raw edges. Miter corners. Stop approximately 12" from where you started. Lay both loose ends of binding flat along quilt edge. Where these two loose ends meet, fold them back on themselves and press to form a crease.
Using this crease as your stitching line, sew the two open ends of the binding together right sides together. Trim seam to ¼" and press open. Finish sewing binding to quilt.
26. Turn the binding to the back of the quilt and hand stitch in place.
Hedge Maze Quilt - Dawn
Row Layout
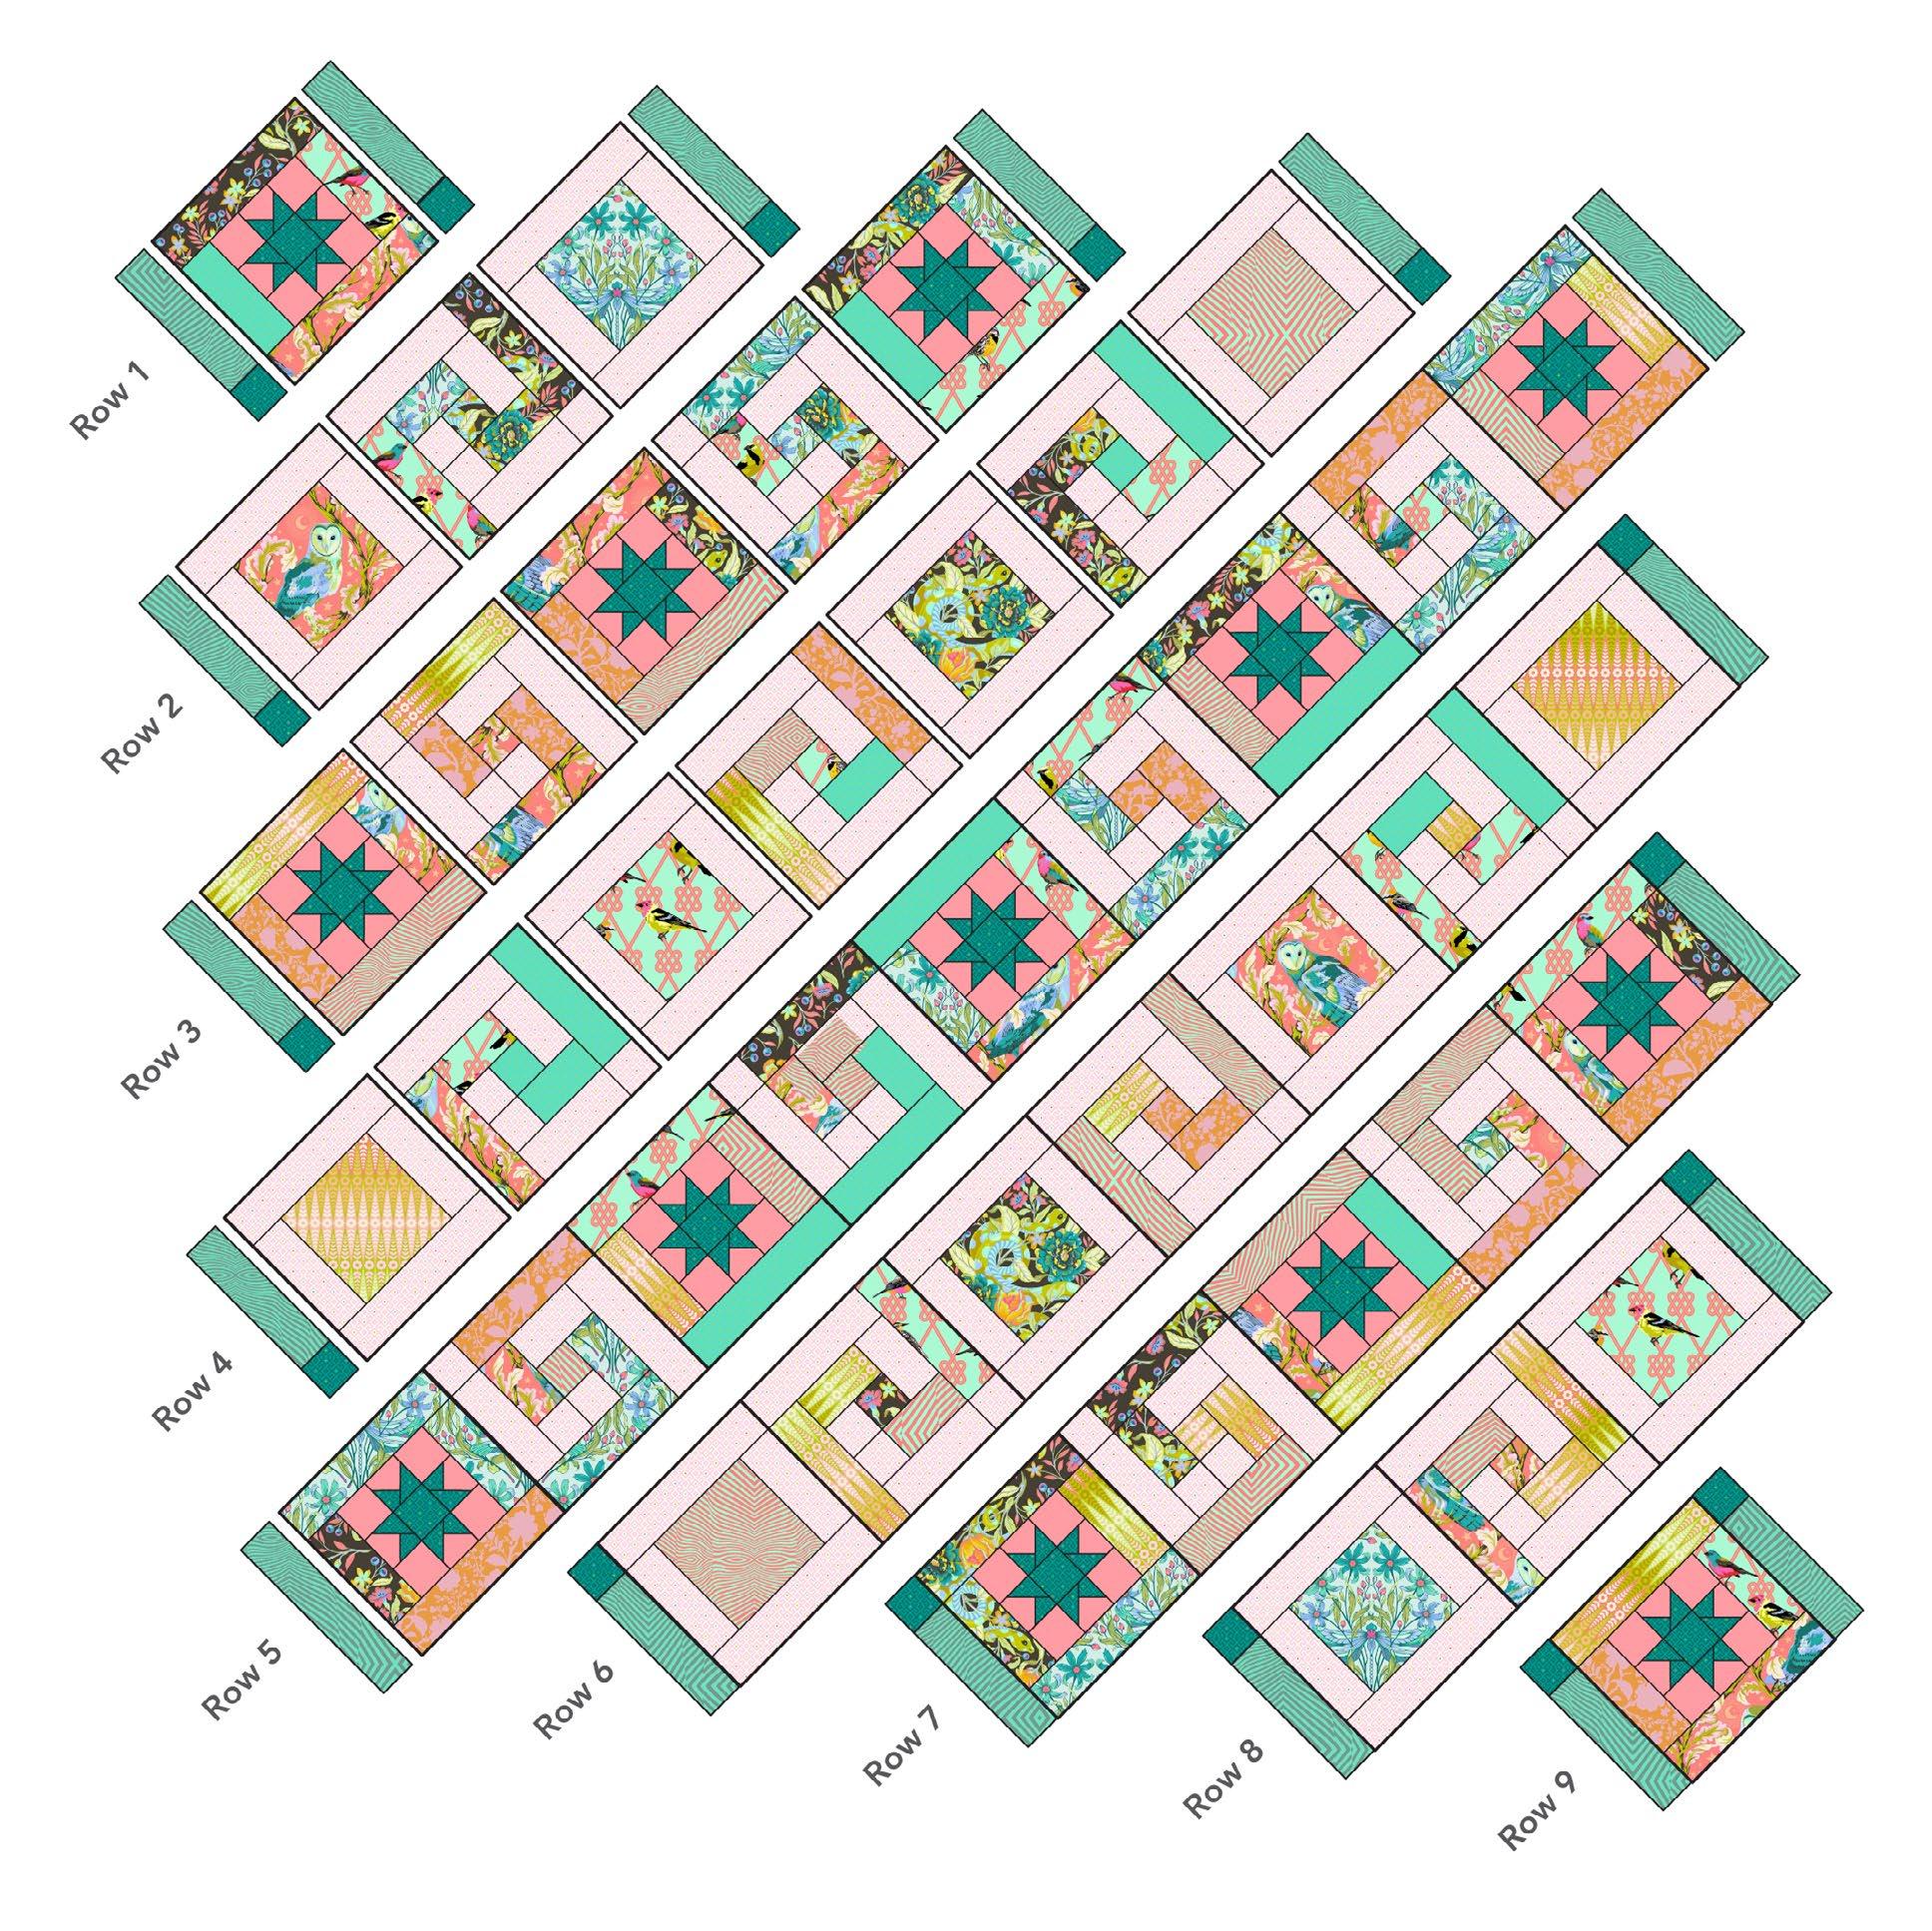
Hedge Maze Quilt - Dawn
Quilt Layout

Hedge Maze Quilt Dusk
Featuring Moon Garden, True Colors and Cotton Solids by Tula Pink
A diagonal setting of four different blocks and a unique row assembly create a colorful challenge in this quilt. Collection: Moon Garden, True Colors and Cotton Solids by Tula Pink Technique: Fussy Cut, Pieced

Skill Level: Advanced Beginner
Finished Sizes:
Finished Size: 763⁄8" x 763⁄8" (193.99cm x 193.99cm)
Finished Block Size: 10" x 10" (25.4cm x 25.4cm)
All possible care has been taken to assure the accuracy of this pattern. We are not responsible for printing errors or the manner in which individual work varies. Please read the instructions carefully before starting this project. If kitting, it is recommended a sample is made to confirm accuracy.
Hedge Maze Quilt - Dusk

Project designed by Tula Pink | Tech edited by Alison M. Schmidt
Fabric Requirements
DESIGN COLOR ITEM ID YARDAGE


(A) Hissy Fit Dusk PWTP196.DUSK 11⁄4 yards (1.14m)
(B) Baby Geo Dusk PWTP053.DUSK 13⁄4 yards (1.60m)
(C) Pom Poms Peony PWTP118.PEONY 7⁄8 yard (0.80m)


(D) Baby Geo Moonlight PWTP053.MOONLIGHT 3⁄4 yard (0.69m)

(E) Designer Essential Solids Dazzle CSFSESS.DAZZLE 5⁄8 yard (0.57m)


(F) Dragon Your Feet Dusk PWTP199.DUSK 7⁄8 yard (0.80m)
(G) Kabloom Dusk PWTP195.DUSK 3⁄4 yard (0.69m)
(H) Night Owl Dusk PWTP197.DUSK 2 3 yard (0.6m)1
(I) Oopsie Daisy Dusk PWTP200.DUSK 1⁄2 yard (0.46m)
(J) In a Finch Dusk PWTP198.DUSK 5⁄8 yard (0.57m)
(K) Lazy Stripe Moonlight PWTP022.MOONLIGHT 1⁄2 yard (0.46m)


(L) Hexy Rainbow Peacock PWTP151.PEACOCK 3⁄8 yard (0.34m)
(M) Tiny Stripes Honesty PWTP186.HONESTY 3⁄8 yard (0.34m)
(N) Lazy Stripe Dusk PWTP022.DUSK* 3⁄4 yard (0.69m)

Dusk PWTP198.DUSK 51⁄2 yards (5.03m)
Dusk QBTP010.DUSK 21⁄2 yards (2.29m)


Cutting
WOF = Width of Fabric
Notes:
• Press fabrics with starch or starch alternative and let dry before cutting to stabilize edges to be cut on the bias. Handle bias-cut pieces carefully, not to distort.
• Refer to the quilt image for aligning fussy-cut pieces, or spotlight motifs of your own choice. Label cut pieces with fabric letters for easier construction.
• Partial WOF strips can be cut around areas that have already been fussy-cut, then sub-cut, starting from largest to smallest, for the most efficient use of fabric.
Fabric A, cut:
(4) 15 1⁄2" squares; sub-cut each square twice diagonally, from corner to corner, to make a total of (16) side setting triangles
(2) 10 7⁄ 8" squares; sub-cut each square once diagonally, from corner to corner, to make a total of (4) corner setting triangles
Fabric B, cut:
(21) 21 2" x WOF; sub-cut:
(24) 21⁄2" x 101⁄2" rectangles
(16) 21⁄2" x 81⁄2" rectangles
(40) 21⁄2" x 61⁄2" rectangles
(16) 21⁄2" x 41⁄2" rectangles
(48) 21⁄2" squares
Hedge Maze Quilt - Dusk
Fabric C, cut:
(10) 21⁄2" x WOF; sub-cut:
(4) 21⁄2" x 101⁄2" rectangles
(32) 21⁄2" x 81⁄2" rectangles
Fabric D, cut:
(4) 21⁄2" x WOF; sub-cut (49) 21⁄2" squares
(6) 2" x WOF; sub-cut (104) 2" squares for star points
Fabric E, cut:
(7) 21⁄2" x WOF; sub-cut (104) 21⁄2" squares for star units
Fabrics F and G, fussy cut from each:
(2) 61⁄2" on-point squares
From remaining yardage, cut from each fabric:
(4) 21⁄2" x WOF; sub-cut: (4) 21⁄2" x 101⁄2" rectangles (4) 21⁄2" x 81 2" rectangles
(4) 21⁄2" x 61 2" rectangles
(4) 21⁄2" x 41 2" rectangles
(2) 21⁄2" squares
Fabrics H, I, and J, fussy cut from each:
(2) 61⁄2" on-point squares
From each remaining yardage, cut:
(3) 21⁄2" x WOF; sub-cut:
(3) 21⁄2" x 101⁄2" rectangles
(4) 21⁄2" x 81 2" rectangles
(3) 21⁄2" x 61 2" rectangles
(4) 21⁄2" x 41 2" rectangles
(2) 21⁄2" squares
Fabric K, cut:
(2) 61⁄2" squares
(3) 21⁄2" x WOF; sub-cut:
(3) 21⁄2" x 101 2" rectangles
(4) 21⁄2" x 81⁄2" rectangles
(3) 21⁄2" x 61⁄2" rectangles
(4) 21⁄2" x 41⁄2" rectangles
(2) 21⁄2" squares
Fabrics L and M, cut from each:
(3) 21⁄2" x WOF; sub-cut:
(3) 21⁄2" x 101 2" rectangles
(4) 21⁄2" x 81⁄2" rectangles
(3) 21⁄2" x 61⁄2" rectangles
(4) 21⁄2" x 41⁄2" rectangles
(2) 21⁄2" squares
Fabric N, cut:
(10) 21⁄2" x WOF for binding
Hedge Maze Quilt - Dusk
Instructions
All seam allowances are ¼" and pieces are sewn right sides together. Press seam allowances open, unless otherwise indicated.
Block One
1. Mark a diagonal line from corner to corner on the wrong side of all the Fabric D 2" squares. Place a marked Fabric D square right sides together on a Fabric E 21 2" square as shown. Sew along the marked line, then trim the excess corner fabric 1⁄4" from the seam. Press open. Repeat to add a second marked Fabric D square to the adjacent corner as shown (Fig. 1). Make a total of (52) Star Point units.
Fig. 1
2. Arrange (4) Star Point units, (1) 21⁄2" Fabric D square, and (4) 21 2" Fabric E squares in (3) rows of (3) elements each as shown (Fig. 2). Sew the elements in each row together along adjacent edges. Press. Sew the rows together along adjacent edges. Press. Make a total of (13) Star units 61 2" x 61⁄2" including seam allowances.

Fig. 2
3. Referring to the Block One Diagrams (page 5) for fabrics and placement, sew 21⁄2" x 61⁄2" rectangles to the left and right sides of a Star unit. Press the seam allowances toward the rectangles. Sew (1) 21⁄2" x 101⁄2" rectangle to the top, and another to the bottom edge to complete a block (Fig. 3). Make a total of (13) of Block One.
Fig. 3
Block Two
4. Sew a 21⁄2" x 61 2 " Fabric B rectangle to the left and right sides of a 61⁄2" square, noting the orientation of any directional print motifs. Press gently to avoid stretching any unsewn bias edges of the squares cut on-point.
5. Sew a 21⁄2" x 101⁄2" Fabric B rectangle to the top, and another to the bottom of the step 4 unit (Fig. 4). Press. Make a total of (12) of Block Two (2 each using Fabrics F, G, H, I, J, and K).


Fig. 4

Hedge Maze Quilt - Dusk
Block One Diagrams

Block Three
6. From Fabric B , gather (3) 2 1⁄2" squares and (1) each 2 1 2" x 4 1⁄ 2 " , 2 1⁄ 2" x 6 1 2 " , and 2 1⁄ 2" x 8 1⁄ 2 " rectangles. Refer to the Block Three Diagrams (page 7) to select (1) 21⁄2" print square and (2) each 21⁄2" x 41⁄2" and 21⁄2" x 81⁄2" print rectangles for each block or come up with your own combinations of prints.

7. Sew a 21⁄2" Fabric B square to the bottom edge of a 21⁄2" print square. Press. Sew a 21⁄2" x 41 2 " print rectangle to the right-hand edge of the joined squares. Press. Sew a 21⁄2" x 41⁄2" Fabric B rectangle to the upper edge of the unit (Fig. 5). Press.

Fig. 5
8. Sew a 21⁄2" Fabric B square to one short end of a 21⁄2" x 41⁄2" print rectangle. Press. Sew a 21⁄2" x 61 2 " Fabric B rectangle to the left-hand edge of the joined square/rectangle. Press. Sew this unit to the left-hand edge of the step 7 unit (Fig. 6). Press.
Fig. 6
possible care has been taken to assure the accuracy of this
Please
Hedge Maze Quilt - Dusk
carefully before starting this
9. Sew a 21⁄2" x 81⁄2" print rectangle to the lower edge of the step 8 unit. Sew a 21⁄2" x 81⁄2" Fabric B rectangle to the right-hand edge of the unit (Fig. 7). Press.

Fig. 7
If
10. Join a 21 2" Fabric B square to one short end of a 21 2" x 81 2 " print rectangle. Press. Sew the joined square/rectangle to the upper edge of the step 9 unit to complete the block (Fig. 8). Make a total of (8) of Block Three.

Fig. 8
We are not
is
for
a
to
the manner in which individual work
Hedge Maze Quilt - Dusk
Block Three Diagrams

Block Four
Note: These blocks are mirror images of Block 3.
11. From Fabric B , gather (3) 2 1⁄2" squares and (1) each 2 1 2" x 4 1⁄ 2 " , 21⁄2" x 61⁄2", and 21⁄2" x 81⁄2" rectangles. Refer to the Block Four Diagrams (page 9) to select (1) 21⁄2" print square and (2) each 21⁄2" x 41⁄2" and 21⁄2" x 81 2 " print rectangles for each block or come up with your own combinations of prints.
12. Sew a 21⁄2" Fabric B square to the bottom edge of a 21⁄2" print square. Press. Sew a 21⁄2" x 41 2 " print rectangle to the left-hand edge of the joined squares. Press. Sew a 21⁄2" x 41⁄2" Fabric B rectangle to the upper edge of the unit (Fig. 9). Press.

Fig. 9
13. Sew a 21⁄2" Fabric B square to one short end of a 21⁄2" x 41⁄2" print rectangle. Press. Sew a 21⁄2" x 61⁄2" Fabric B rectangle to the right-hand edge of the joined square/rectangle. Press. Sew this unit to the righthand edge of the step 12 unit (Fig. 10). Press.
Fig. 10
care
Hedge Maze Quilt - Dusk
to assure the
14. Sew a 21⁄2" x 81⁄2" print rectangle to the lower edge of the step 13 unit. Sew a 21⁄2" x 81⁄2" Fabric B rectangle to the left-hand edge of the unit (Fig. 11). Press.

Fig. 11
of this
15. Join a 21 2" Fabric B square to one short end of a 21 2" x 81 2 " print rectangle. Press. Sew the joined square/rectangle to the upper edge of the step 14 unit to complete the block (Fig. 12). Make a total of (8) of Block Four.


Fig. 12
which
Hedge Maze Quilt - Dusk
Block Four Diagrams

Hedge Maze Quilt - Dusk
Quilt Top Assembly
16. Sew a 21 2" Fabric D square to one short end of a 21 2" x 81⁄2" Fabric C rectangle (Fig. 13). Press. Make a total of (32) D/C sashing units.

Fig. 13
17. Referring to the Row Layout diagram (page 11) for specific block placement and orientation, arrange the blocks into (9) diagonal rows, placing Blocks One and Three in the odd rows and Blocks Two and Four in the even rows. Noting orientation, place a D/C sashing unit at each end of rows 1–4 and 6–9. Place a 21⁄2" x 101⁄2" Fabric C rectangle at each end of row 5. Sew the blocks and sashing units or rectangles in each row together along adjacent edges. Press.
18. Sew (1) 21⁄2" Fabric D square to each short end of a 21 2" x 101⁄2" Fabric C rectangle. Press. Sew a Fabric A corner triangle to one long edge of the unit (Fig. 14). Press. Make (2) Corner units. Sew one Corner unit to the upper edge of Row 1, and the other to the lower edge of Row 9. Fig. 14

19. Noting the orientation of both the triangles and the D/C units, sew one D/C unit to the lower edge of each triangle (Fig. 15). Make a total of (16) Triangle units, (8) each Side and Top/Bottom.
Fig. 15
20. Referring to the Quilt Layout diagram (page 12) to orient each Triangle unit, add Side and Top/Bottom Triangle units and join rows as follows, pressing as you complete each row and after joining rows:
• Sew a Triangle unit to each end of Row 1. Aligning seam lines, sew Row 1 to Row 2 along adjacent edges.
• Sew a Triangle unit to each end of Row 2. Aligning seam lines, sew Row 2 to Row 3 along adjacent edges.
• Sew a Triangle unit to each end of Row 3. Aligning seam lines, sew Row 3 to Row 4 along adjacent edges.
• Sew a Triangle unit to each end of Row 4.

21. Repeat step 20 to sew rows 6–9 together, starting with Row 9 and working toward Row 6.
22. Sew the 2 joined row sections to the top and bottom of Row 5, then add the (2) remaining corner triangles to the upper right and lower left corners to complete the quilt top. Press.
Finishing
23. Sew together the 2½" Fabric N binding strips end-to-end using diagonal seams. Press the seams open. Press the binding strip in half wrong sides together.
24. Layer the backing (wrong side up), batting, and quilt top (right side up). Baste the layers together and quilt as desired. Trim excess batting and backing even with the quilt top after quilting is completed.
25. Leaving an 8" tail of binding, sew binding to top of quilt through all layers matching all raw edges. Miter corners. Stop approximately 12" from where you started. Lay both loose ends of binding flat along quilt edge. Where these two loose ends meet, fold them back on themselves and press to form a crease.
Using this crease as your stitching line, sew the two open ends of the binding together right sides together. Trim seam to ¼" and press open. Finish sewing binding to quilt.
26. Turn the binding to the back of the quilt and hand stitch in place.
Hedge Maze Quilt - Dusk
Row Layout

Hedge Maze Quilt - Dusk
Quilt Layout

Moonbow Quilt

Featuring Moon Garden, True Colors and Cotton Solids by Tula Pink Collection: Moon Garden, True Colors and Cotton Solids by Tula Pink Techniques: Fussy Cut, Pieced Skill Level: Intermediate
Size:
All possible care has been taken to assure the accuracy of this pattern. We are not responsible for printing errors or the manner in which individual work varies. Please read the instructions carefully before starting this project. If kitting, it is recommended a sample is made to confirm accuracy.
Project designed by Tula Pink | Tech edited by Alison M. Schmidt
Fabric Requirements
DESIGN COLOR ITEM ID
YARDAGE
(A) Lazy Stripe Moonlight PWTP022.MOONLIGHT* 1 yard (0.91m)


(B) Kabloom Dusk PWTP195.DUSK 3⁄4 yard (0.69m)
(C) In a Finch Dusk PWTP198.DUSK 3⁄4 yard (0.69m)
(D) Dragon Your Feet Dawn PWTP199.DAWN 3⁄4 yard (0.69m)
(E) Kabloom Dawn PWTP195.DAWN 3⁄4 yard (0.69m)
(F) In a Finch Dawn PWTP198.DAWN 3⁄4 yard (0.69m)
(G) Hissy Fit Dawn PWTP196.DAWN 5⁄8 yard (0.57m)
(H) Hissy Fit Dusk PWTP196.DUSK 5⁄8 yard (0.57m)
(I) Night Owl Dawn PWTP197.DAWN 5⁄8 yard (0.57m)

(J) Night Owl Dusk PWTP197.DUSK 5⁄8 yard (0.57m)
Dragon Your Feet Dusk PWTP199.DUSK 5⁄8 yard (0.57m)
Oopsie Daisy Dusk PWTP200.DUSK 3⁄8 yard (0.34m)


Oopsie Daisy Dawn PWTP200.DAWN 3⁄8 yard (0.34m)


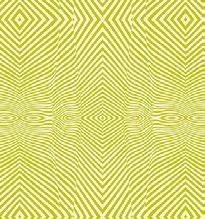


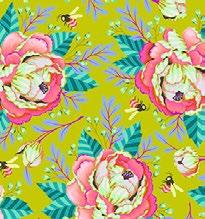


Lazy Stripe Dawn PWTP022.DAWN 3⁄8 yard (0.34m)
Lazy Stripe Dusk PWTP022.DUSK 3⁄8 yard (0.34m)


Lazy Stripe Lunar PWTP022.LUNAR 3⁄8 yard (0.34m)

Baby Geo Dawn PWTP053.DAWN 3⁄8 yard (0.34m)
Baby Geo Dusk PWTP053.DUSK
Baby Geo Lunar PWTP053.LUNAR
Baby Geo Moonlight PWTP053.MOONLIGHT
Hexy Chameleon PWTP150.CHAMELEON
Pom Poms Foxglove PWTP118.FOXGLOVE
Tiny Stripes Songbird PWTP186.SONGBIRD
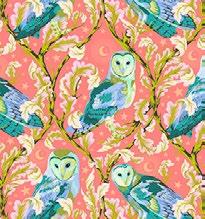


Tiny Stripes Honesty PWTP186.HONESTY
Moonbow Quilt
yard (0.34m)
yard (0.34m)
yard (0.34m)
yard (0.23m)
yard (0.23m)
yard (0.23m)
yard (0.23m)
Fabric Requirements (continued...)
DESIGN COLOR ITEM ID YARDAGE
(Y) Tiny Dots Bluebell PWTP185.BLUEBELL 1⁄4 yard (0.23m)


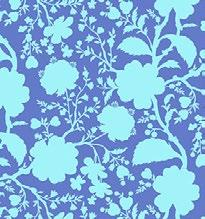


(Z) Tiny Dots Opal PWTP185.OPAL 1⁄4 yard (0.23m)

(AA) Wildflower Delphinium PWTP149.DELPHINIUM 1⁄4 yard (0.23m)
(BB) Wildflower Blossom PWTP149.BLOSSOM 1⁄4 yard (0.23m)
(CC) Wildflower Tiger Lily PWTP149.TIGERLILY 1⁄4 yard (0.23m)
(DD) Tiny Stripes Clarity PWTP186.CLARITY 1⁄4 yard (0.23m)
(EE) Tiny Stripes Mystic PWTP186.MYSTIC 1⁄4 yard (0.23m)
(FF) Tiny Dots Sky PWTP185.SKY 1⁄4 yard (0.23m)
(GG) Tiny Dots Peacock PWTP185.PEACOCK 1⁄4 yard (0.23m)
(HH) Tiny Dots Thistle PWTP185.THISTLE 1⁄4 yard (0.23m)
(II) Tiny Dots Candy PWTP185.CANDY 1⁄4 yard (0.23m)


(JJ) Mineral Amethyst PWTP148.AMETHYST 1⁄4 yard (0.23m)

(KK) Hexy Firefish PWTP150.FIREFISH 1⁄4 yard (0.23m)
(LL) Hexy Thistle PWTP150.THISTLE 1⁄4 yard (0.23m)
(MM) Hexy Peach Blossom PWTP150.PEACHBLOSSOM 1⁄4 yard (0.23m)


(NN) Pom Poms Peony PWTP118.PEONY 1⁄4 yard (0.23m)
(OO) Pom Poms Myrtle PWTP118.MYRTL 1⁄4 yard (0.23m)
(PP) Hexy Rainbow Peacock PWTP151.PEACOCK 1⁄4 yard (0.23m)
(QQ) Wildflower Spring PWTP149.SPRING 1⁄4 yard (0.23m)
(RR) Tiny Stripes Spark PWTP186.SPARK 1⁄4 yard (0.23m)

Fairy Dust Lime PWTP133.LIME 1⁄4 yard (0.23m)

(TT) Tiny Dots Meadow PWTP185.MEADOW 1⁄4 yard (0.23m)


(UU) Wildflower Azalea PWTP149.AZALEA 1⁄4 yard (0.23m)
(VV) Tiny Stripes Sunrise PWTP186.SUNRISE 1⁄4 yard (0.23m)


Moonbow Quilt
Moonbow Quilt
Fabric Requirements (continued...)
DESIGN COLOR ITEM ID YARDAGE
(WW) Tiny Stripes Petal PWTP186.PETAL 1⁄4 yard (0.23m)

(XX) Designer Essential Solids Aegean
CSFSESS.AEGEA 3⁄8 yard (0.34m)
(YY) Designer Essential Solids Iris CSFSESS.IRISX 3⁄8 yard (0.34m)


(ZZ) Designer Essential Solids Tanzanite CSFSESS.TANZANITE 3⁄8 yard (0.34m) (AAA) Designer Essential Solids Amethyst CSFSESS.AMETHYST 3⁄8 yard (0.34m) (BBB) Designer Essential Solids Hibiscus CSFSESS.HIBIS 3⁄8 yard (0.34m) (CCC) Designer Essential Solids Matcha CSFSESS.MATCHA 3⁄8 yard (0.34m) (DDD) Designer Essential Solids Legendary CSFSESS.LEGENDARY 3⁄8 yard (0.34m) (EEE) Designer Essential Solids Stargazer CSFSESS.STARGAZER 3⁄8 yard (0.34m)


(FFF) Designer Essential Solids Taffy
CSFSESS.TAFFY 3⁄8 yard (0.34m)


CSFSESS.LIMEA 3⁄8 yard (0.34m) (HHH) Designer Essential Solids Marigold CSFSESS.MARIGOLD 3⁄8 yard (0.34m)

(GGG) Designer Essential Solids Limeade


Backing (Purchased Separately) 44" (1.12m) wide

Fit Dusk PWTP196.DUSK 71 4 yards (6.63m)

108" (2.74m) wide
Dusk QBTP009.DUSK 25 8 yards (2.40m)

Additional Recommendations
Preparation
To make your own templates, rather than using a specialty ruler, print the Diamond, Half-diamond, Triangle, Half-triangle, Hexagon, and Halfhexagon patterns on pages 9-12, making sure that any “fit to size” options are de-selected, and scaling is set to 100% in the print dialog window. Measure the test square on each page to ensure the patterns have printed correctly. Tape the two sections of the Hexagon pattern together as indicated.
Tips:
• If using paper templates only, use the 60° line on a long rotary cutting ruler in combination with paper templates to keep from trimming the paper templates down with each cut.
• If using template plastic, trace patterns onto the plastic and transfer any desired markings. Note the suggested grainlines to cut for easier, more stable assembly. Carefully cut out the templates on the outer lines. Most template pieces have blunted edges for easier alignment when piecing. The Triangle template pattern has 2 points that have not been trimmed – when cutting triangles from strips, place the side opposite the blunt point along the upper or lower edge of the strip. That will make it easier to place the cut triangles correctly when sewing them into rows so that the more stable straight-of-grain edge will always be at the top or bottom of a row.
The Hex N More Ruler designed by Julie Herman of Jaybird Quilts (jaybirdquilts.com) makes quick work of cutting the hexagons, diamonds, and triangles needed for this quilt.
• Place the ruler over the desired motif for fussy-cutting hexagons.
• To cut triangles, cut 4 1⁄2" x WOF strips as directed below, then sub-cut triangles using the line marked ‘41⁄2" Triangle’.
• To cut diamond shapes, fold and press 81⁄2" x WOF strips in half lengthwise, so they are 41⁄4" high, then align the lower seamline (the long dashed line) of the ruler’s 41⁄2" triangle guide along the pressed edge of the strip, then cut along both angled sides of the ruler to cut the sides. Unfold the cut diamond.
Cutting WOF = Width of Fabric
• Press fabrics with starch or starch alternative and let dry before cutting. Pieces will have bias edges after cutting. Handle gently to avoid stretching bias-cut edges.
• Refer to the quilt image for the orientation of fussy-cut pieces, or spotlight motifs of your own choice.
• Label cut pieces with fabric letters for easier assembly.
• If desired, to aid in accurate piecing, mark the 1⁄4" seam intersections on the wrong side of each piece before sewing.
Quilt
All possible care has been taken to assure the accuracy of this pattern. We are not responsible for printing
Please
• Rotate the Half-hexagon template as needed to cut directional prints into left- or rightfacing Half-hexagons.
• Rotate the Triangle template 180° for each successive cut.
• To cut reversed Diamonds and Half-Triangles, flip the template over and cut with the wrong (unmarked) side up.
• Refer to the Diamond Cutting Diagram to cut Half-diamonds from full yardage first, placing the long straight sides along the more stable lengthwise grain, then subcut remaining yardage into WOF strips to cut diamonds as directed.
• Cut diamonds and reversed diamonds from unfolded (single layer of fabric) strips, following the grain placement on the template patterns. Use the regular (not reversed) diamonds for the vertically oriented and right-leaning diamonds, and the reversed diamonds for the left-leaning diamonds. Use a removable marker to temporarily mark the crosswise grain on cut pieces.
Diamond Cutting Diagram
- single layer of fabric
carefully before starting this project. If kitting it is
a sample
Diamond Cutting Diagram
the manner in which individual work
to confirm
Fabric A, cut:
(1) 41⁄2" x WOF strip, subcut (12) Triangles
(10) 21 2" x WOF for binding
Fabrics B, C, D, G, and H, fussy cut from each fabric:
(4) Hexagons
Fabrics E, I, and J, fussy cut from each fabric:
(3) Hexagons
(1) Half-hexagon
Fabric F, fussy cut:
(2) Hexagons (2) Half-hexagon
Fabrics K and L, fussy cut from each fabric: (3) Hexagons
Fabric M, fussy cut: (2) Hexagons (1) Half-hexagon
Fabrics N - T, cut from each:
(1) 41⁄2" x WOF strip, subcut (12) Triangles
Fabrics U - Z, cut from each:
(1) 41⁄2" x WOF strip, subcut (7) Triangles
Fabrics AA - OO, cut from each:
(1) 41⁄2" x WOF strip, subcut (6) Triangles
Fabric PP, cut:
(1) 41⁄2" x WOF strip, subcut (6) Triangles (1 reversed) Half-triangle
Fabric QQ, cut: (1) 41⁄2" x WOF strip, subcut (6) Triangles (1) Half-triangle
Fabrics RR and SS, cut from each: (1) 41⁄2" x WOF strip, subcut (2) Triangles (1 and 1 reversed) Half-triangles
Fabrics TT, VV and WW, cut from each: (1) 41⁄2" x WOF strip, subcut (3) Triangles (1 and 1 reversed) Half-triangles
Fabric UU, cut: (1) 41⁄2" x WOF strip, subcut (3) Triangles (1 and 2 reversed) Half-triangles
Fabric XX, cut: (2) 41⁄2" x WOF strips, subcut (9 and 4 reversed) Diamonds
Fabric YY, cut:
(2) 41⁄2" x WOF strips, subcut (13) Diamonds
Fabric ZZ, cut: (2) 41⁄2" x WOF strips, subcut (5 and 8 reversed) Diamonds
Fabric AAA, cut:
(2) 41⁄2" x WOF strips, subcut (12 and 1 reversed) Diamonds
Fabric BBB, cut: (2) 41⁄2" x WOF strips, subcut (8 and 5 reversed) Diamonds
Fabrics CCC and FFF, cut from each: (1) Half-diamond
From remaining yardage, cut (2) 41⁄2" x WOF strips, then subcut (9 and 4 reversed) Diamonds
Fabric DDD, cut: (1) Half-diamond
From remaining yardage, cut (2) 41⁄2" x WOF strips, then subcut (4 and 8 reversed) Diamonds
Fabric EEE, cut: (1) Half-diamond
From remaining yardage, cut (2) 41⁄2" x WOF strips, then subcut (5 and 7 reversed) Diamonds
Fabric GGG, cut: (2) Half-diamonds
From remaining yardage, cut (2) 41⁄2" x WOF strips, then subcut (6 and 5 reversed) Diamonds
Fabric HHH, cut: (2) Half-diamonds
From remaining yardage, cut (2) 41⁄2" x WOF strips, then subcut (6 and 4 reversed) Diamonds
All possible care has been taken to assure the accuracy of this pattern. We are not responsible for printing errors or the manner in which individual work varies. Please read the instructions carefully before starting this project. If kitting it is recommended a sample is made to confirm accuracy.
Instructions
Note: All seam allowances are 1⁄4" and pieces are sewn right sides together. Press the seam allowances open, unless otherwise indicated.
1. Referring to the quilt image and the Quilt Layout diagram (page 8) for fabric placement and orientation, arrange the Half-triangle, Diamonds, reversed Diamonds (marked r on the diagram), Triangles and reversed Halftriangle in Row 1 as shown. Remember to use the regular (not reversed) diamonds for the vertically oriented and right-leaning diamonds, and the reversed diamonds for the left-leaning diamonds. Make sure the straight-of-grain edges (indicated by the double-headed arrows) are placed towards the top and bottom of the row. Sew the pieces together along adjacent edges. Press.
2. Again referring to the Quilt Layout diagram for placement and grain orientation, arrange the Half-diamonds, Triangles, Hexagons, and Diamonds in Row 2 as shown. First sew units into short diagonal rows: each Half-diamond to the adjacent triangle as shown, then the Triangles at the lower left and upper right to each adjacent Hexagon or Diamond, making sure to sew to the bias edges of the Diamonds first. Sew the joined elements together along adjacent edges to complete Row 2. Press.
3. Repeat steps 1 and 2 to sew the remaining elements into rows. Press.
4. Matching seam lines and pinning at intersections, sew the rows together along adjacent edges to complete the quilt top. Press all the seam allowances in the same direction.
Finishing
5. Sew together the 21 2" Fabric A binding strips end-to-end using diagonal seams. Press the seams open. Press the binding strip in half wrong sides together.
6. Layer the backing (wrong side up), batting, and quilt top (right side up). Baste the layers together and quilt as desired. Trim excess batting and backing even with the quilt top after quilting is completed.
7. Leaving an 8" tail of binding, sew binding to top of quilt through all layers matching all raw edges. Miter corners. Stop approximately 12" from where you started. Lay both loose ends of binding flat along quilt edge. Where these two loose ends meet, fold them back on themselves and press to form a crease. Using this crease as your stitching line, sew the two open ends of the binding together right sides together. Trim seam to" and press open. Finish sewing binding to quilt.
8. Turn the binding to the back of the quilt and hand stitch in place.
Moonbow Quilt
possible care
Please
been
to assure the accuracy of this pattern. We are not responsible for printing
carefully before starting this project. If
is
a
the manner
to confirm
which individual work
Moonbow
Quilt Layout

Moonbow Quilt
Placeoncrosswisegrainfordiamondsandreverseddiamonds.
MoonbowQuilt Diamond
Moonbow Quilt Half-triangle
Placeoncrosswisegrainfordiamondsandreverseddiamonds.
Align with lengthwise grain.
This square should measure 1" x 1" (2.54cm x 2.54cm) when printed.
*** Measure templates before cutting to confirm printing at 100%***
All possible care has been taken to assure the accuracy of this pattern. We are not
read the
carefully before starting this
If kitting it is
for printing
a sample is
the manner in which individual work
to confirm
Moonbow Quilt
JointoMoonbowQuiltHexagonalongthisline.
Align with crosswise grain.
Moonbow Quilt Triangle Moonbow Quilt Half-diamond
This square should measure 1" x 1" (2.54cm x 2.54cm) when printed.
*** Measure templates before cutting to confirm printing at 100%***
Place on lengthwise grain if possible.
All possible care has been taken to assure the accuracy of this pattern. We are not responsible for printing errors or the manner in which individual work varies. Please read the instructions carefully before starting this project. If kitting it is recommended a sample is made to confirm accuracy.
Place on lengthwise grain if possible.
Moonbow
This square should measure 1" x 1" (2.54cm x 2.54cm) when printed.
*** Measure templates before cutting to confirm printing at 100%***
All possible care has been taken to assure the accuracy of this pattern. We are not responsible for printing errors or the manner in which individual work varies. Please read the instructions carefully before starting this project. If kitting it is recommended a sample is made to confirm accuracy.
Moonbow Quilt
This square should measure 1" x 1" (2.54cm x 2.54cm) when printed.
Moonbow Quilt Hexagon
Join to Moonbow Quilt Hexagon along this line. *** Measure templates before cutting to confirm printing at 100%***
2022 All possible care has been taken to assure the accuracy of this pattern. We are not responsible for printing errors or the manner in which individual work varies. Please read the instructions carefully before starting this project. If kitting it is recommended a sample is made to confirm accuracy.
Featuring Moon Garden by Tula Pink

Science Fair Quilt
Finished Size: 48" x 65" (1.22m x 1.65m)
Project designed by Julie Herman - Jaybird Quilts Purchase pattern at jaybirdquilts.com Technique: Pieced | Skill Level: Advanced Beginner
freespiritfabrics.com
Science Fair Quilt
Fabric Requirements
DESIGN

COLOR
ITEM ID
YARDAGE
(A) Moon Garden DR Moon FB4DRTP.MOON 1 Design Roll
(B) Baby Geo Dawn PWTP053.DAWN 15⁄8 yards (1.49m)
(C) Tiny Dots Cosmic PWTP185.COSMIC 1⁄8 yard (0.11m)

(D) Hexy Chameleon PWTP150.CHAMELEON 1⁄8 yard (0.11m)
(E) Tiny Stripes Moonglow PWTP186.MOONGLOW 1⁄8 yard (0.11m)


(F) Hexy Peach Blossom PWTP150.PEACHBLOSSOM 1⁄8 yard (0.11m)
(G) Wildflower Blossom PWTP149.BLOSSOM 1⁄8 yard (0.11m)

(H) Tiny Dots Peacock PWTP185.PEACOCK* 7⁄8 yard (0.80m)
* includes binding
Backing (Purchased Separately) 44" (1.12m) wide
Hissy Fit DUSK PWTP196.DUSK 33⁄4 yards (3.43m) OR 108" (2.74m) wide
Sonic Bloom Dusk QBTP009.DAWN 2 yards (1.83m)


If kitting, refer to the final pattern for yardage amounts, it is recommended that a sample is made to confirm accuracy.

