
O Winterberry Tree Quilt
Finished Size: 52" x 64" (1.32m x 1.63m)
Project designed by Coach House Designs
Purchase pattern at coachhousedesigns.com
Technique: Pieced and Applique | Skill Level: Intermediate
freespiritfabrics.com
Featuring Winterberry by Martha Negley
Fabric Requirements
O Winterberry Tree Quilt
DESIGN COLOR
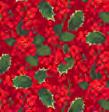
(A) Holly Berry CRIMSON
(B) Holly Berry GREEN
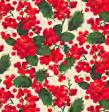
(C) Holly Berry RED
PWMN035.CRIMSON F8
PWMN035.GREEN F8
PWMN035.RED F8
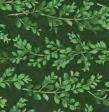
(D) Boxwood DARKGREEN PWMN036.DARKGREEN 3⁄8 yard (0.34m)
(E) Holly DARKGREEN PWMN037.DARKGREEN F8
(F) Winter Floral NATURAL PWMN038.NATURAL 1⁄4 yard (0.23m)
(G) Ribbon RED PWMN039.RED* 11⁄4 yards (1.14m)
(H) Winterberry RED PWMN040.RED 3⁄8 yard (0.34m)
(I) Poinsettia NATURAL PWMN041.NATURAL 3⁄4 yard (0.69m)
(J) Designer Essential Solid SHELL CSFSESS.SHELL
* includes binding
Backing (Purchased Separately)
44" (1.12m) wide
Holly Berry RED PWMN035.RED 35⁄8 yards (3.31m) OR 108" (2.74m) wide
Strawberry Thief Linen QBWM001.LINEN 2 yards (1.83m)


If kitting, refer to the final pattern for yardage amounts, it is recommended that a sample is made to confirm accuracy.
freespiritfabrics.com
ITEM ID YARDAGE
21⁄8 yards (1.94m)
(B)
(F)
(H)
(A)
(C) (D) (E)
(G)
(I) (J) Backing 44" Backing 108"
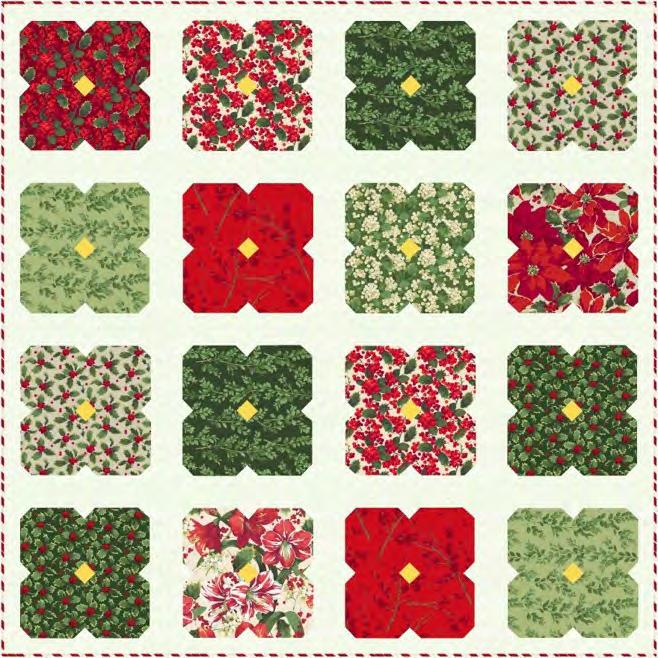
Sweet Pea Quilt
Finished Size: 60" x 60" (1.52m x 1.52m)
Project designed by Bonnie Osness - Lake Girl Quilts
Purchase pattern at lakegirlquilts.com
Technique: Pieced | Skill Level: Advanced Beginner
freespiritfabrics.com
Featuring Winterberry by Martha Negley
Sweet Pea Quilt
Fabric Requirements
DESIGN COLOR
(A) Holly Berry CRIMSON PWMN035.CRIMSON 1⁄4 yard (0.23m)
(B) Holly Berry GREEN PWMN035.GREEN 1⁄4 yard (0.23m)
(C) Holly Berry RED PWMN035.RED 3⁄8 yard (0.34m)
(D) Boxwood DARKGREEN PWMN036.DARKGREEN 3⁄8 yard (0.34m)
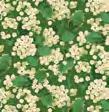
(E) Boxwood GREEN PWMN036.GREEN 3⁄8 yard (0.34m)
(F) Holly DARKGREEN PWMN037.DARKGREEN 3⁄8 yard (0.34m)
(G) Holly NATURAL PWMN037.NATURAL 3⁄8 yard (0.34m)
(H) Winter Floral NATURAL PWMN038.NATURAL 1⁄4 yard (0.23m)
(I) Ribbon RED PWMN039.RED* 3⁄4 yard (0.69m)
(J) Winterberry RED PWMN040.RED 3⁄8 yard (0.34m)
(K) Poinsettia NATURAL PWMN041.NATURAL 1⁄4 yard (0.23m)
(L) Seeds LIME PWCD012.XLIME 2 yards (1.83m)
(M) Designer Essential Solid YELLOW CSFSESS.YELLO 1⁄8 yard (0.11m)
* includes binding
Backing (Purchased Separately)
44" (1.12m) wide
Poinsettia NATURAL PWMN041.NATURAL 4 yards (3.66m) OR 108" (2.74m) wide 2 yards (1.83m)


If kitting, refer to the final pattern for yardage amounts, it is recommended that a sample is made to confirm accuracy.
freespiritfabrics.com
ITEM ID YARDAGE
(M) (K)
(L) (G)
(I) (J) Backing
(A) (B) (C) (D) (E)
(F)
(H)
44"

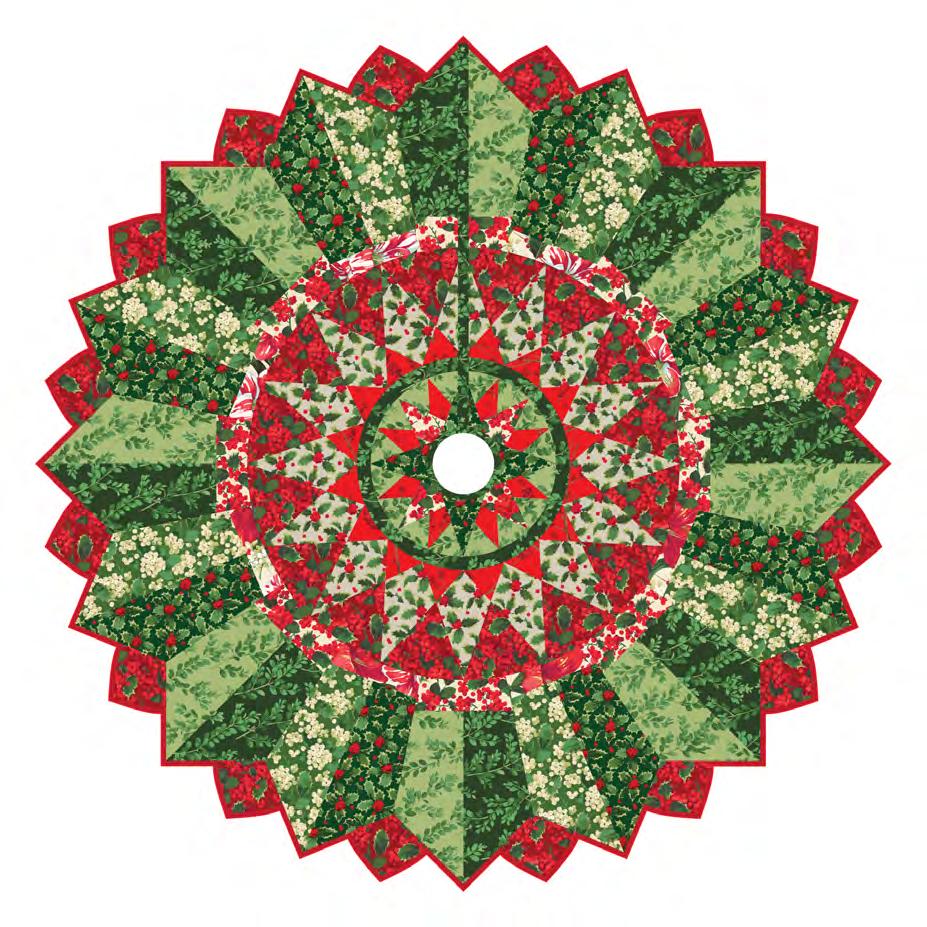
Table Topper or Tree Skirt
Finished Size: 40" Diameter
Project designed by Jenice Belling--Quilted Garden Designs
Purchase pattern at quiltedgarden.com
Technique: Machine Applique | Skill Level: Advanced Beginner
freespiritfabrics.com
Featuring Winterberry by Martha Negley
Trees All Around
Trees All Around Table Topper or Tree Skirt
Fabric
DESIGN
Requirements
(A) Holly Berry CRIMSON PWMN035.CRIMSON 3⁄8 yard (0.34m)
(B) Holly Berry GREEN PWMN035.GREEN 3⁄8 yard (0.34m)
(C) Holly Berry RED PWMN035.RED 3⁄8 yard (0.34m)
(D) Boxwood DARKGREEN PWMN036.DARKGREEN 3⁄8 yard (0.34m)
(E) Boxwood GREEN PWMN036.GREEN 3⁄8 yard (0.34m)
(F) Holly DARKGREEN PWMN037.DARKGREEN 3⁄8 yard (0.34m)
(G) Holly NATURAL PWMN037.NATURAL 3⁄8 yard (0.34m)
(H) Winter Floral NATURAL PWMN038.NATURAL 3⁄8 yard (0.34m)
(I) Ribbon RED PWMN039.RED 2⁄3 yard (0.61m)
(J) Winterberry RED PWMN040.RED 1⁄8 yard (0.11m)
(K) Poinsettia NATURAL PWMN041.NATURAL 3⁄8 yard (0.34m)
(L) Seeds Cloud PWCD012.XCLOUD 11⁄4 yards (1.14m)
* includes binding
Backing (Purchased Separately)
44" (1.12m) wide
Holly DARKGREEN PWMN037.DARKGREEN 11⁄4 yards (1.14m)

Backing 44"
If kitting, refer to the final pattern for yardage amounts, it is recommended that a sample is made to confirm accuracy.
freespiritfabrics.com
COLOR ITEM ID YARDAGE
(A) (B) (C) (D) (E)
(K) (F) (L)
(G) (H)
(I) (J)
Winter Wreath
Table Topper or Tree Skirt
Finished Size: 54"x 54" (1.37m x 1.37m)
Project designed by Robin Long - Robin Ruth Design
Purchase pattern at robinruthdesign.com
Technique: Strip Pieced Mariner’s Compass Blocks with the Fat Robin 16-Point Book/Ruler Combo
Skill Level: Intermediate
freespiritfabrics.com
Featuring Winterberry by Martha Negley
Fabric Requirements
DESIGN COLOR
(A) Holly Berry CRIMSON
(B) Holly Berry GREEN
Winter Wreath
Table Topper or Tree Skirt
PWMN035.CRIMSON 3⁄4 yard (0.69m)
PWMN035.GREEN 1⁄2 yard (0.46m)
(C) Holly Berry RED PWMN035.RED 1⁄3 yard (0.30m)
(D) Boxwood DARKGREEN PWMN036.DARKGREEN 11⁄4 yards (1.14m)
(E) Boxwood GREEN PWMN036.GREEN 5⁄8 yard (0.57m)
(F) Holly DARKGREEN PWMN037.DARKGREEN 5⁄8 yard (0.57m)
(G) Holly NATURAL
PWMN037.NATURAL 1⁄2 yard (0.46m)
(H) Winter Floral NATURAL PWMN038.NATURAL 1⁄4 yard (0.23m)
(I) Winterberry RED PWMN040.RED 1⁄4 yard (0.23m)
* includes binding
Backing (Purchased Separately)
72" Red Felt for Backing - See Pattern for Additional Information 12⁄3 yards (1.52m)
If kitting, refer to the final pattern for yardage amounts, it is recommended that a sample is made to confirm accuracy.
freespiritfabrics.com
ITEM ID YARDAGE
(E)
(A) (B) (C) (D)
(F)
(G) (H) (I)
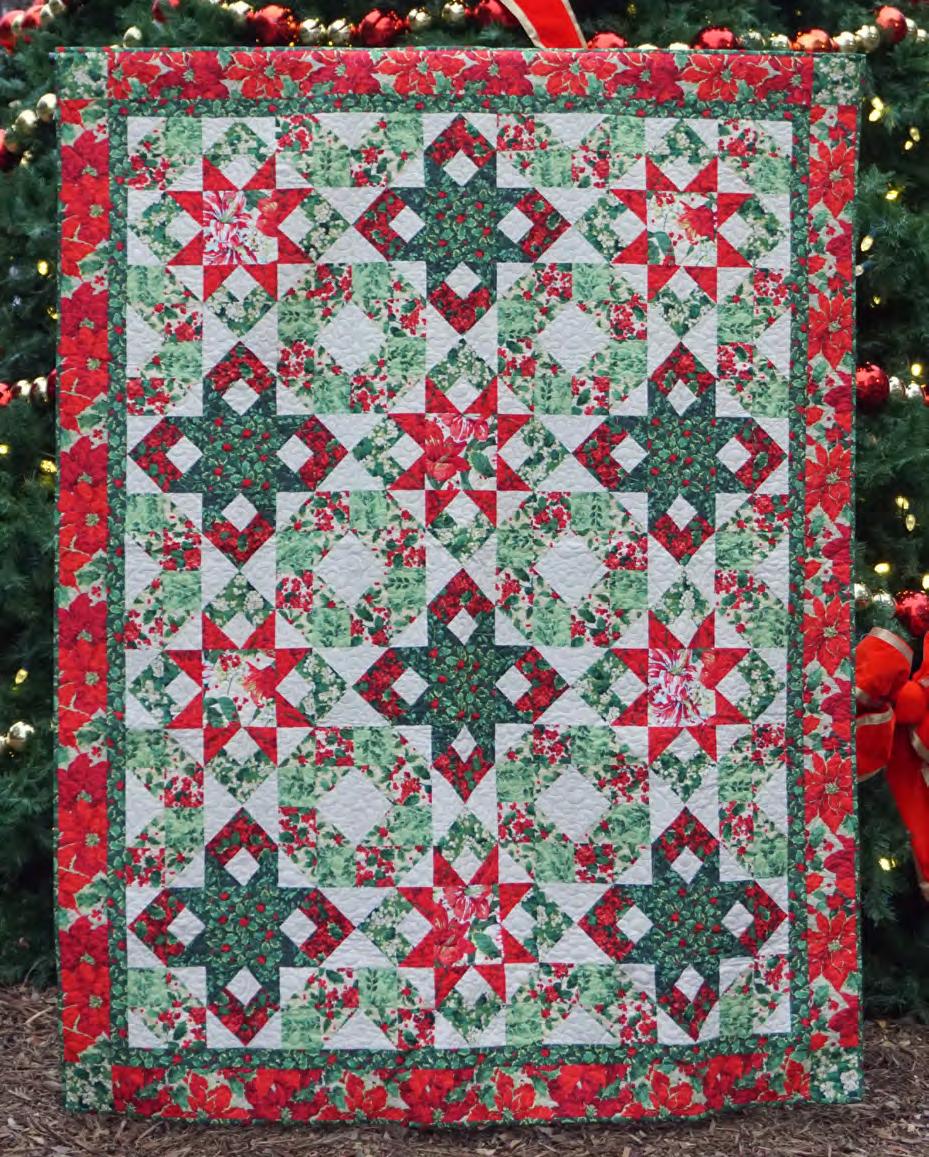
Stars of Christmas Quilt
Featuring Winterberry by Martha Negley
Collection: Winterberry by Martha Negley
Technique: Pieced
Skill Level: Advanced Beginner
Finished Size:
Finished Size: 65" x 83" (1.65m x 2.11m)
Finished Block Size: 18" x 18" (45.72cm x 45.72cm)
All possible care has been taken to ensure the accuracy of this pattern. We are not responsible for printing errors or the manner in which individual work varies. Please read the instructions carefully before starting this project. If kitting, it is recommended a sample is made to confirm accuracy.
1 of 8 freespiritfabrics.com
Stars of Christmas Quilt
Project designed by Heidi Pridemore | Tech edited by Alison M. Schmidt
Fabric Requirements
DESIGN COLOR
(A) Winter Floral Natural
(B) Winterberry Red
(C) Holly Berry Green
(D) Boxwood Green
(E) Holly Berry Red
(F) Holly Darkgreen
(G) Boxwood Darkgreen
PWMN038.NATURAL 1⁄4 yard (.23m)
PWMN040.RED 1⁄2 yard (.46m)
PWMN035.GREEN 7⁄8 yard (.80m)
PWMN036.GREEN 1⁄2 yard (.46m)
PWMN035.RED 1⁄2 yard (.46m)
PWMN037.DARKGREEN* 11⁄4 yards (1.14m)
PWMN036.DARKGREEN 1⁄2 yard (.46m)
(H) Holly Berry Crimson PWMN035.CRIMSON 3⁄4 yard (.69m)
(I) Designer Essential Solid Natural CSFSESS.NATUR 17⁄8 yards (1.71m)
(J) Holly Natural
(K) Poinsettia Natural
* includes binding
Backing (Purchased Separately)
44" (1.12m) wide Winter Floral Natural
Additional Recommendations
• 100% cotton thread in colors to match
• 73" x 91" (1.85m x 2.31m) quilt batting
PWMN037.NATURAL 2⁄3 yard (.61m)
PWMN041.NATURAL 21⁄4 yards (2.06m)

PWMN038.NATURAL 51⁄8 yards (4.69m)
2 of 8 freespiritfabrics.com Copyright© 2024 All possible care has been taken to ensure the accuracy of this pattern. We are not responsible for printing errors or the manner in which individual work varies. Please read the instructions carefully before starting this project. If kitting it is recommended a sample is made to confirm accuracy.
ITEM ID YARDAGE
(A) (B) (C) (D) (E) (F) (G) (J) (H) (K) (I) Backing 44"
Cutting
WOF = Width of Fabric
LOF = Length of Fabric
Note: The Fabric I and J 37⁄8" squares are used to make 2-at-a-time HST (half-square triangle) units that finish at 31⁄2" including seam allowances. If you prefer to make them oversized, then trim to size, start by cutting 4" squares instead.
Fabric A, cut:
(1) 61⁄2" x WOF; subcut
(6) 61⁄2" x 61⁄2"
Fabric B, cut:
(3) 37⁄8" x WOF; subcut
(24) 37⁄8" x 37⁄8", then cut across (1) diagonal for (48) 37⁄8" triangles
Fabric C, cut:
(1) 41⁄2" x WOF; subcut
(4) 41⁄2" x 41⁄2"
(2) 41⁄4" x WOF, subcut
(12) 41⁄4" x 41⁄4", then cut across both diagonals for (48) 41⁄4" triangles
(4) 31⁄2" x WOF; subcut
(24) 31⁄2" x 61⁄2"
Fabric D, cut:
(5) 31⁄2" x WOF; subcut
(48) 31⁄2" x 31⁄2"
Fabric E, cut:
(5) 31⁄2" x WOF; subcut
(48) 31⁄2" x 31⁄2"
Stars of Christmas Quilt
Fabric F, cut:
(1) 61⁄2" x WOF; subcut
(6) 61⁄2" x 61⁄2"
(7) 2" x WOF for inner border
(9) 21⁄2" x WOF for binding
Fabric G, cut:
(3) 37⁄8" x WOF; subcut (24) 37⁄8" x 37⁄8" then cut across (1) diagonal for (48) 37⁄8" triangles
Fabric H, cut:
(2) 41⁄4" x WOF; subcut
(12) 41⁄4" x 41⁄4" then cut across both diagonals for (48) 41⁄4" triangles
(4) 31⁄2" x WOF; subcut (24) 31⁄2" x 61⁄2"
Fabric I, cut:
(3) 41⁄4" x WOF; subcut (24) 41⁄4" x 41⁄4" then cut across both diagonals or (96) 41⁄4" triangles
(5) 37⁄8" x WOF; subcut
(48) 37⁄8" x 37⁄8"
(9) 31⁄2" x WOF; subcut (96) 31⁄2" x 31⁄2"
Fabric J, cut:
(5) 37⁄8" x WOF; subcut
(48) 37⁄8" x 37⁄8"
Fabric K, cut:
(4) 41⁄2" x LOF for outer border
3 of 8 freespiritfabrics.com Copyright© 2024 All possible care has been taken to ensure the accuracy of this pattern. We are not responsible for printing errors or the manner in which individual work varies. Please read the instructions carefully before starting this project. If kitting it is recommended a sample is made to confirm accuracy.
Stars of Christmas Quilt
Instructions
Note: Use a 1⁄4" seam allowance throughout. Sew all pieces with right sides together and raw edges even. Press after each seam, either open or towards the darker fabric.
1. Draw a diagonal line from corner to corner on the wrong side of all the 37⁄8" Fabric I squares. Pair each marked square right sides together with a 37⁄8" Fabric J square (Fig. 1a). Sew 1⁄4" from each side of the line, then cut apart on the line (Fig. 1b) to yield 96 of Unit 1 (Fig. 1c). Trim to square up to 31⁄2" x 31⁄2", keeping the diagonal seams centered in the corners.
1a Fig. 1b Fig. 1c
1a
2. Arrange two of Unit 1 with 1 each 3 1⁄2" Fabric D and E squares in 2 rows of 2 as shown. Sew together in rows, then sew the rows together to complete a Unit 2. Make 48 total (Fig. 2).
Fig. 2 Winterberry_Stars of Christmas Illustrations
Fig. 2


3. Draw a diagonal line from corner to corner on the wrong side of all the 31⁄2" Fabric I squares. Place a marked square on the left-hand side of a 31⁄2" x 61⁄2" Fabric C rectangle, right sides together, with the line oriented as shown (Fig. 3a). Sew along the line, then trim away the corner 1⁄4" from the stitching line. Press the corner open (Fig. 3b). Repeat to add a second Fabric I square to the right-hand corner (Figs. 3c and 3d). Make a total of 24 of Unit 3 ( 31⁄2" x 61⁄2").

4. Repeat Step 3 to make 24 of Unit 4, using 31⁄2" x 61⁄2" Fabric H rectangles, as shown (Fig. 4).
Fig. 4
5. Sew (1) each 41⁄4" Fabric C and Fabric I triangles together along short sides. Then sew a 37⁄8" Fabric B triangle to the long side of the paired triangles to make a Unit 5 (Fig. 5). Repeat to make (24) total of Unit 5 (31⁄2" square).

4 of 8 freespiritfabrics.com Copyright© 2024 All possible care has been taken to ensure the accuracy of this pattern. We are not responsible for printing errors or the manner in which individual work varies. Please read the instructions carefully before starting this project. If kitting it is recommended a sample is made to confirm accuracy.
Fig.
I J
Fig.
Unit 1 make 96
Unit 2
D E
I Unit
make 24
Fig.
3b Fig. 3c Fig. 3d
3
H
Unit 5 make 24
5 B
Fig.
6. Repeat step 5, mirroring the placement of the Fabric C, I, and B triangles as shown (Fig. 6) to make a total of 24 Unit 5r.
Fig. 6
5r
24
Fig. 6
7. Arrange 1 each Units 3, 5, and 5r as shown (Fig. 7). Sew Units 5 and 5r together along the Fabric I side, then add Unit 3 to the top to make a Unit 6. Make 24 total (61⁄2" square). Fig. 7
Stars of Christmas Quilt
9. Repeat step 8, mirroring the placement of the Fabric H, I, and G triangles as shown (Fig. 9) to make a total of 24 Unit 7r.
Fig. 9
Fig. 9
7r
24
10. Arrange 1 each Units 4, 7, and 7r as shown ( Fig. 10). Sew Units 7 and 7r together along the Fabric I side, then add Unit 4 to the top to make a Unit 8. Make 24 total (61⁄2" square).
Fig. 10
6
Fig. 7
8. Sew (1) each 41⁄4" Fabric H and Fabric I triangles together along short sides. Then sew a 37⁄8" Fabric G triangle to the long side of the paired triangles to make a Unit 7 (Fig. 8). Repeat to make (24) total of Unit 7 (31⁄2" square).
Fig. 10
8
5 of 8 freespiritfabrics.com Copyright© 2024 All possible care has been taken to ensure the accuracy of this pattern. We are not responsible for printing errors or the manner in which individual work varies. Please read the instructions carefully before starting this project. If kitting it is recommended a sample is made to confirm accuracy.
Unit
make
Unit
make
24
Unit 7 make 24 Fig. 8 G H I
Unit
make
Unit
make
24
11. Arrange 4 each of Unit 2 and Unit 6 and (1) 61⁄2" Fabric A square in 3 rows of 3 as shown (Fig. 11), rotating the units as needed to match the diagram. Sew together in rows, then sew the rows together to complete Block 1 (181⁄2" x 181⁄2" including seam allowances). Make 6 total.
Stars of Christmas Quilt
12. Arrange 4 each of Unit 2 and Unit 8 and (1) 61⁄2" Fabric F square in 3 rows of 3 as shown (Fig. 12), rotating the units as needed to match the diagram. Sew together in rows, then sew the rows together to complete Block 2 (181⁄2" x 181⁄2" including seam allowances). Make 6 total.
6 of 8 freespiritfabrics.com Copyright© 2024 All possible care has been taken to ensure the accuracy of this pattern. We are not responsible for printing errors or the manner in which individual work varies. Please read the instructions carefully before starting this project. If kitting it is recommended a sample is made to confirm accuracy.
Fig. 11
Block 1 make 6
A
Fig. 11
Fig. 12
Block 2 make 6
F
Fig. 12
Stars of Christmas Quilt
Quilt Top Assembly
Note: Follow the Quilt Layout diagram (page 8) while assembling the quilt. Measure the Quilt Center width and height before cutting and adding borders and adjust border measurements if necessary to match your measurements.
13. Sew a Block 1 to the left and right sides of (1) Block 2 to make Row 1, pinning to match seam intersections. Press towards Block 2. Repeat to make Row 3.
14. Sew a Block 2 to the left and right sides of (1) Block 1 to make Row 2, pinning to match seam intersections. Press towards Block 2. Repeat to make Row 4.
15. Sew the (4) pieced rows together lengthwise and in numerical order from the top to the bottom to make the 541⁄2" x 721⁄2" quilt center.
16. Sew the Fabric F 2" x WOF strips together end to end with diagonal seams. Then cut (2) side borders 721⁄2" long and (2) top/bottom borders 571⁄2" long.
17. Pin, matching ends and centers, then sew the Fabric F side borders to the left and right sides of the quilt center. Press towards Fabric F. Repeat to add the Fabric F top/bottom borders.
18. Trim the Fabric K 41⁄2" x LOF strips into (2) side borders 751⁄2" long and (2) top/bottom borders 571⁄2" long.
19. Sew (1) 41⁄2" Fabric C square to each end of (1) 41⁄2" x 571⁄2" Fabric K strip to complete the top/bottom border. Repeat to make a second.
20. Repeat step 16 to add the outer borders to complete the quilt top.
Finishing
21. Sew together the 21⁄2" Fabric F binding strips end-to-end. Press seams open. Press the binding strip in half wrong sides together.
22. Layer backing (wrong side up), batting, and quilt top (right side up). Baste the layers together and quilt as desired. Trim excess batting and backing even with the top after quilting is completed.
23. Leaving an 8" tail of binding, sew the binding to the top of the quilt through all layers matching all raw edges. Miter corners. Stop approximately 12" from where you started. Lay both loose ends of binding flat along quilt edge. Where the loose ends meet, fold them back on themselves and press to form a crease. Using this crease as your stitching line, sew the two open ends of the binding right sides together. Trim seam to 1⁄4" and press open. Finish sewing binding to quilt.
24. Turn the binding to the back of quilt and hand-stitch in place.
7 of 8 freespiritfabrics.com Copyright© 2024 All possible care has been taken to ensure the accuracy of this pattern. We are not responsible for printing errors or the manner in which individual work varies. Please read the instructions carefully before starting this project. If kitting it is recommended a sample is made to confirm accuracy.
Stars of Christmas Quilt

8 of 8 freespiritfabrics.com Copyright© 2024 All possible care has been taken to ensure the accuracy of this pattern. We are not responsible for printing errors or the manner in which individual work varies. Please read the instructions carefully before starting this project. If kitting it is recommended a sample is made to confirm accuracy.
Quilt Layout
F K C
Quilt Layout
