


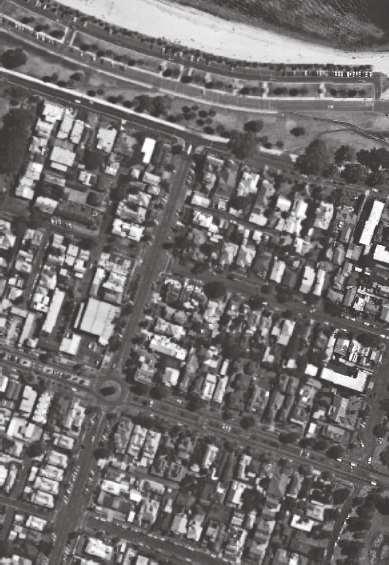


The Geelong Public Realm Framework provides direction for new capital works in Central Geelong including the materials palette and character and the hierarchy and application of streetscape design elements.

Endorsed by City of Greater Geelong Council
September 2017
Update - November 2019


Asummary of the Public Realm Framework and guidelines on its usage.


The Public Realm Framework (PRF) was adopted by the City of Greater Geelong Council in 2017. As part of the implementation of the Central GeelongAction Plan, it articulates Council and State Government aspirations to revitalise Central Geelong through the creation of a strong, highquality and unique identity.
What will it achieve?
The framework outlines a cohesive palette of materials, designs, finishes and furniture for the public realm and provides a guide to using the palette throughout Central Geelong.
This framework has been developed to reinforce identity and to ensure accessibility for users of all ages and abilities. Its application ensures a consistency and clarity around the design and delivery of new and revision capital works within Central Geelong, particularly in relation to the interface between private developments and the public realm.
The framework provides a design benchmark that will result in a level of cohesion for Central Geelong, while still allowing for the manifestation of unique spaces.
The framework will be implemented over time as major projects are delivererd or when routine replacement of assets or new private/public interfaces are required.
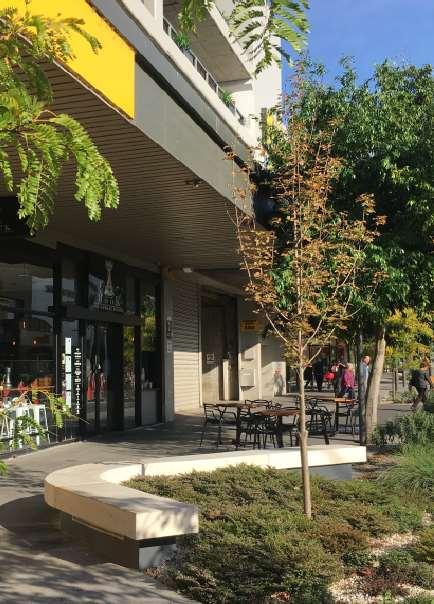

The Public Realm Framework is a set of guidelines that establishes standards for projects in Central Geelong. It provides a suite of furniture elements, material palettes and approaches to streetscape detailing, and references to other design policies.
In applying this document, users should make themselves aware of otherrelevant reports and strategies in place to achieve the overarching aims of the Central GeelongActon Plan.
Street and Public Place Lighting Policy, 2008
PUBLIC REALM FRAMEWORK
OTHER RELEVANT POLICIES

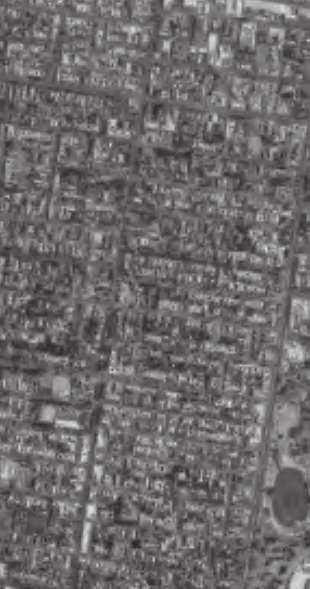
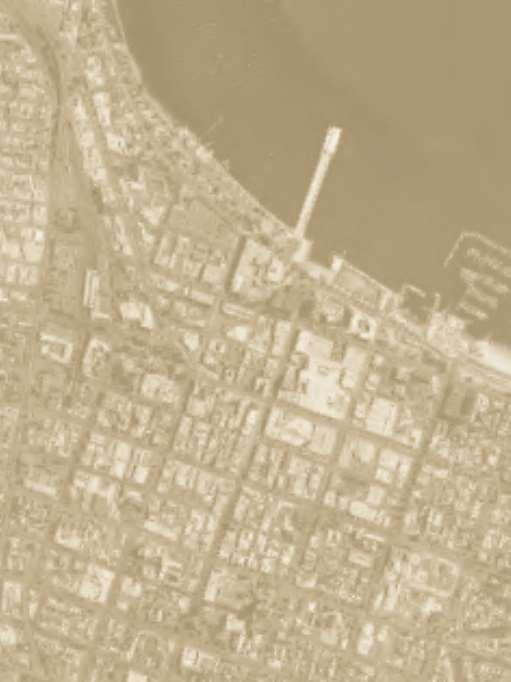
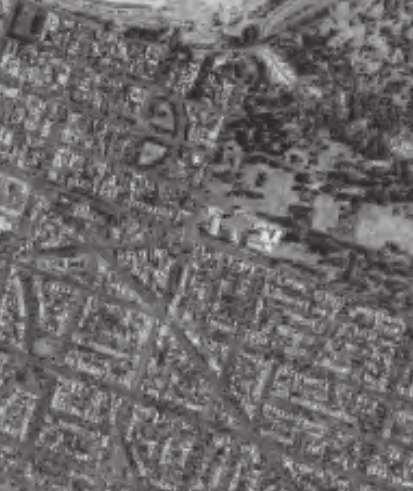
The study area includes Central Geelong as shown within the dashed boundary below. Generally the boundary extends from Latrobe Terrace to Swanston Street and from McKillop Street to Corio Bay.





The following key principles underpin and define the selection of materials, furniture and their application:
Manufacturing, industrial heritage, authentic to Geelong to be translated through materials palette through restrained abstract references
The palette reflects a worldclass city, presenting a contemporary, refined and sophisticated aesthetic while respecting heritage and preserving character
The materials are to be resilient, sustainable, integrated and enduring and represent the distinct and unique authenticity and integrity of Geelong
The natural environment and green spaces are preserved and enhanced through site specific interventions
Form, textures, colours and materials works together with subtle variations to differentiate precinct characters
Central Geelong presents as a cohesive overall language with moments of ‘surprise’ along the way
Furniture is to be multi-use where appropriate and use custom elements to link
Art is facilitated through various platforms and provides a richness and interest to Central Geelong
The shape and form are to be seamless, clean, simple, timeless and uncluttered

‘complementary materials that work together in any combination’


MATERIALS
Above is an abstract representation of the character of the materials palette, reflecting the selected materials’texture, colour and contrast qualitites. From bluestone, asphalt, refined timber, concrete and steel, the pproach is of an overall cohesion with complementary and integrated materials punctuated by selective use of colour and decoration.
‘a
neutral and uncomplicated ‘base’ palette that allows expression and richness through art, vegetation, bespoke elements and splashes of colour’

Standard approaches for the design and delivery of streetscapes and public spaces in Central Geelong
Pavement selections are focussed upon quality, hard wearing, versatile materials with an urban, refined character.Accessible and comfortable. Consistent across entire city centre to give a coherent identity and uniform character.
Subtle changes to occur across street typologies/precincts. The materials allow for variety of combinations that support more economical applications. Versatility in application of bluestone and asphalt combinations allowing for different levels of priority and investment. Granite is used in limited strategic areas for contrast and definition.
Consider use of permeable paving where tree watering or ground water recharge is required.
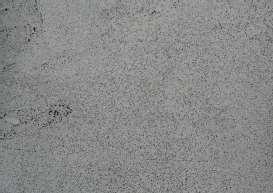


The standard pavement materials palette has been selected with regard to:
• durability
• cost-effectiveness
• serviceability and maintenance
• visualintegration
• expression of pedestrian hierarchy
Supply Requirements
Proposed products must be submitted for approval under the following conditions:
• Acceptable availability in regards to lead times and available volume
• Quality and density of stone, unit size and compressive strength
• Alocal contact point
• Certified slip rating
• Colour variation with the product, or colour consistency in product
• Intensity and size of grain in stone
• Product substitutions or equivalent products may be submitted for approval.
Requirements for Surface Finish
Paving shall be shaped to match the level of existing fixtures, (e.g. pit covers, kerb, edgings, existing building line) to within 3 mm.
Typical Requirements of Service Pits Unit PavementAreas
• Typically, stormwater junction, sewer, services andTelstra pits should be neatly integrated with infill covers.
• All pit lids and surrounds to be engineered and installed to meet vehicele rating requirements.
• Align all rectilinear pit lids to the direction of unit pavement
• Grated stormwater pits or trench grates should always be anti-slip heelguard finish with low profile stainless steel frame.
• Other pits such as water valves, gas valves and electrical pits should be neatly integrated into unit pavement with a max 10mm gap with colour matched caulking.

Material:
Standard
Large Format
Material: Bluestone Paver
Size: 495 x 800mm
Finish: Sawcut with 50um finish
Pattern: Stretcherbond
Joints:Align with base slab joints below Grout: 5mm grout flush joint
Small Format
Material: Bluestone Paver
Size: 245 x 400mm
Finish: Sawcut with 50um finish
Pattern: Stretcherbond
Joints:Align with base slab joints below Grout: 5mm grout flush joint
Secondary Square Format
Material: Bluestone Paver
Size: 245 x 245mm
Finish: Sawcut with 50um finish
Pattern: Stack
Joints:Align with base slab joints below Grout: 5mm grout flush joint
Use: Square format pavers are only for use in vehicle crossovers to secondary streets and laneways, e.g. Little Malop Street crossovers.
Thicknesses dependant on loads, pavement design and civil engineer specification.
Stone performance specification
(a)The bluestone materials shall be free from any injurious defect relating to strength, durability and appearance.
(b)All bluestone materials shall be the product of machining of sound basaltic stone. Stone shall be considered sound only if it has less than 2% secondary minerals as determined by methods of microscopic examination and quarry sampling.
(c) The bluestone materials shall not be supplied from a quarry used for aggregate and shall be quarried only with black powder or other approved soft blasting technique and governed by currentAustralian Extractive Industry laws, WorkAuthorities and Mining licences. Current WorkAuthority number for the Dimension stone quarry must be provided.
(d) Cut bluestone materials shall be clear of all clay, overburden, soft, friable or weathered material and other foreign matter. Its wearing qualities shall be determined by the LosAngelesAbrasionTest and the percentage loss permitted shall not exceed 30. With a ramp slip resistance factor of R13.
(e) Bluestone materials with vesiculations, veining or fracture lines considered injurious to strength will be rejected.
(f) Colourvariation, vesiculation and veining shall be of the equivalent standard to works associated with the Malop Street pedesrian paved area.
(g) Flint or other discolourations are to be avoided.The total area of top surface perforation “catspaws” must not exceed 40 percent of the total slab area.
(h) Exact individualpaver unit sizes must be confirmed prior to ordering / cutting. Dimensions are required to factor in grout joint dimensions where an overall critical dimension is required such as for spoon drain width.
(i) The stone must be able to withstand a test for acid resistance and a sample tested to prive as much.
(a)The surface finish of all bluestone materials shall be diamond sawn and must be free from saw cut markings.
(b)The face edge of the top surface of the kerbing (straights and radials) shall be finished with a 20mm radius.
(c) Unless otherwise specified, edges of all bluestone materials shall be finished with a 1mm chamfer/arris.

Use:
Bluestone pavers are to be used in Central Geelong by locations shown on plan, page 17.
Installation:
Large format pavers are to be laid in stretcherbond pattern.Align paver courses perpendicular to direction of travel. Carry pattern through east/west streets with straight joint to delineate north/south streets.
Where circumstances warrant secondary smaller unit pavers (eg invert line in pavement) alternative size may be used, e.g. Malop Street between Moorabool andYarra Streets.
Use: High Priority Corner Typical paver direction with transition at corner
Shop Front
High Priority Street - East / West
Use: High Priority Corner Typical paver direction with small format pavers to invert line.
Shop Front
High Priority Street - East / West Invert Line

Use:
Highlight bluestone bands are to be used at corners with contrasting asphalt pavements to low priority streets in Central Geelong. Refer to locations on page 17.
Installation:
Large format pavers are to be laid in stack bond as a single course where adjacent asphaltResidential Fringe. Large format pavers are to be laid in stretcher bond pattern to extent of low priority corners.
Use: Low Priority Corner

Front

Granite Paving:
Granite unit pavers can be used in limited locations requiring a contrasting material for demarcation of road/footpath users. Size and format is to be developed by function and location. Example; Little Malop Street is a 300mm wide at-grade kerb. Colour: ‘Salt & Pepper’
Format Bluestone
Low Priority Street - East / West
Use: Residential Fringe Interface Typical paver direction and transition at corner
Front


Low Priority Street - East / West


Use:
Pit ids are to be infilled with surrounding pavement materials to create a seamless, trafficable pavement surface.To be used on stormwater junction pits, services pits, circular sewerpits,Telstra pits.
Note:All products to be approved by relevant service authority as early as possible during design phase.
Installation:
Match lid infillto surrounding pavements, trim pavers to fit within infill frame. Pit lid class to Engineers site specific load requirements. Size lid and surround to suit paver depth.
Material:
316 Stainless Steel or galvanised steel surround. Infill material to match adjacent surface.
Standard Infill Pit Lid
Seal perimeter of pit surround and infill pavers with polyurethane sealant.
Align with paver courses where possible.
Where position of pit results in paver silvers of less than 50mm, add length to adjacent paver unit.
No paver silvers less than 50mm from edge.
Supplier
ACOAustralia
www.acodrain.com.au
Product: Urban Infill or approved equivalent
ORCACivil
www.orcacivil.com.au
Product: ORCAFlexfill cover
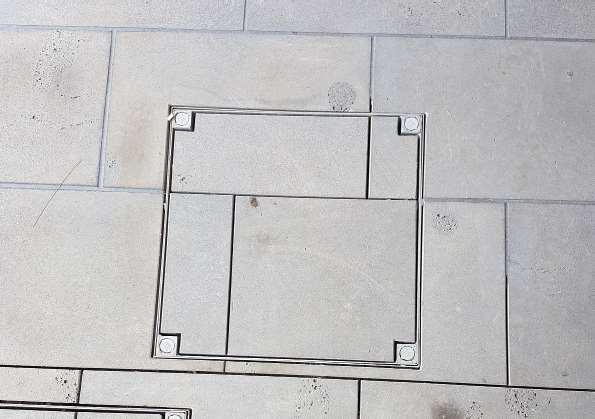


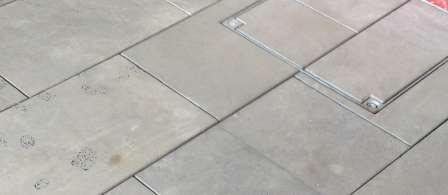
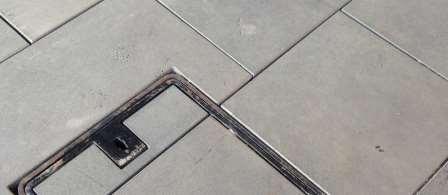
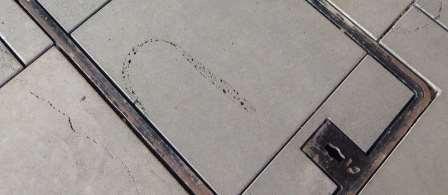
Size& format may differ inthese examples from Central Geelong formats.

Use:
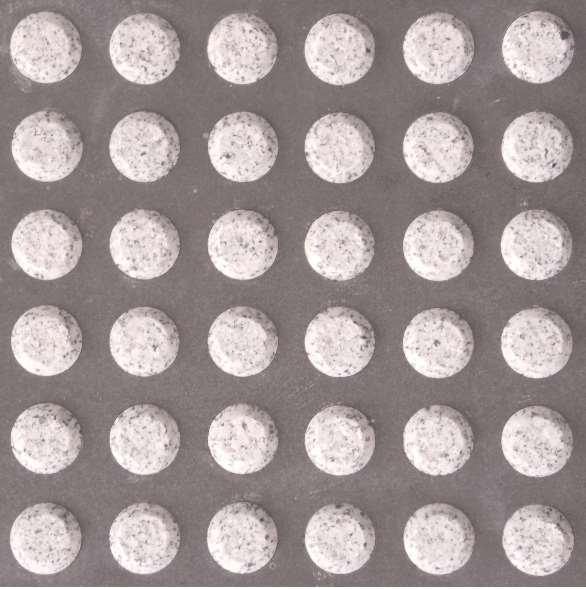
Granite inlayTGSIs are to be used in areas with bluestone unit pavers to Central Geelong. Stainless steelTGSI are to be used in asphalt and concrete pavements to CentralGeelong.
Installation:
All locations as required byAS1428.1(2009). Not to be installed in vehicle zones without confirmation of loading.All designs to be reviewed and approved by a Disability DiscriminationAct (DDA) Consultant.
Material:
HazardTGSI
Material: Granite button inlay to custom bluestone paver Size: 300x300mm
Finish: Exfoliated granite, honed bluestone Pattern: Stack bond, grid Grout: 5mm grout flush joint
DirectionalTGSI
Material: Granite strip inlay to custom bluestone paver Size: 300x300mm
Finish: Exfoliated granite, honed bluestone Pattern: Stack bond, grid Grout: 5mm grout flush joint
Note:
Where TGSIs are to required for asphalt surfaces, use 316 Stainless steel button inserts.
Refer to Section 4.0 for further information relating to TGSIs.
Granite inlayTGSI to be used in areas with bluestone paving

Steel
to be used in areas with asphalt or coloured concrete pavements
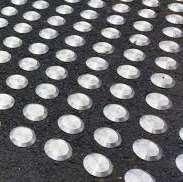
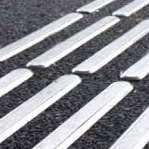
TGSI / pavement combinations are to meet luminance contrast requirements ofAS 1428.1 (2009).

Note: Laneways and small streets not indicated on the map are generally low priority unless marked as a unique space (refer 3.1 and Section 5 - Implementation Framework)

Use:
Sawn bluestone kerb units are designated for Central Geelong as a robust and urban pavement material. Kerb and tray units are to adhere to the performance requirements set out on pages 11 & 12 of this document.
Installation:
Installation of type 1 & 2 kerbs is to be in line with all City of Greater Geelong Infrastructure Design Manual specifications.
Material:
Type 1
300mm wide, 300mm high kerb stone on engineered base. Kerb stone lengths vary. Grout: 5mm grout flush joint Bullnose edge facing carriageway.
Asphalt may be laid up gainst raised kerb as a channel where specified and detailed by Civil engineer.
300
Adjacent pavements vary

300mm wide sawn bluestone channel min. 150mm depth.
Asphalt (typ.)
Top of kerb
300mm wide, 300 thick sawn bluestone kerb. 20mm bullnose.
Adjacent pavements vary
Base by civil engineer
DO NOT SCALE DRAWINGS

Type 2
Recycled or refinished bluestone pitchers may be used as a channel.
E.g. 200x300mm nom. pitchers set flush adjacent road to achieve civil design.
Option:
Recycled and refurnished bluestone pitchers may be used in channel, e.g. 200x300mm nom. pitchers set flush to achieve civil design detail. An asphalt tray may be used as an appropriate option where deemed suitable by civil engineer.
Recycled rough sawn bluestone pitcher channel
200
Adjacent pavements vary
Raised kerb
Adjacent pavements vary Asphalt
Base by civil engineer
DO NOT SCALE DRAWINGS

Format
Typically stone unit pavers per section 2.1
Use:
Pram crossings to be located where at-grade and DDAcompliant access is required from a footpath to a lower street level at a crossing point, in line withAS1428.1&2 (2009). Size is particular to situation and must be designed by suitably qualified professional.
Installation:
Installation of type 1 & 2 kerbs is to be in line with all City of Greater Geelong Infrastructure Design Manual specifications.
Typical Plan
Width varies.
Top of ramp max. 1:8
Bottom of ramp
transition from single stone Kerb transition from separate stones
300mm


Type 1 Kerb and Channel
Type 2 Kerb and Channel
Note: All laneways to be applied with type 2 kerb & channel.

Design
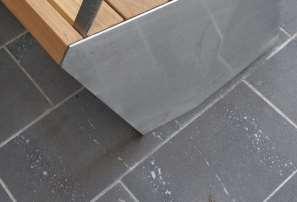
Contemporary, angled profile seat with subtle ‘pencil’edge rounds to all materials. Stainless steeland timber with flush fixings and interface with pavements.
Use:
Seat types by location on page 25. Plate stainless steel to ends fortype 1 seat and open sided, stainless steel bar frame for type 2. Both have identical profile, scale and proportions. Armrests as standard.
Installation:
• Locate at intervals to suit streetscape layout
• Face seats away from carriageway and towards pedestrian zones - typ.
• Minimum offsets apply to shop fronts, carriageways and other furniture
• Fix to below ground footing, not paver units
• Ensure pavement finish is continuous below furniture and that footing is not visible
Material:
316 Stainless steel, no.4 finish KDHW timber. eg. Blackbutt


Designer
Outlines LandscapeArchitecture (03) 9326 5692
Supplier
Previously supplied by J.C.Brown (03) 5221 3177
Refer to City of Greater Geelong furniture suite drawings for full sizes, finishes & specifications.
INSTALLED EXAMPLES

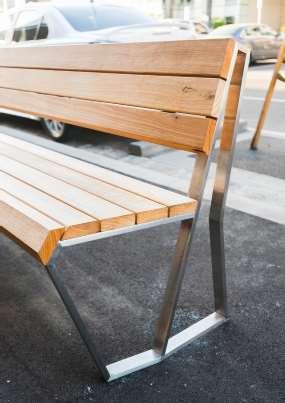
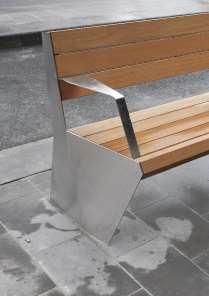

Design
Contemporary, angled profile seat with subtle ‘pencil’edge rounds to all materials. Stainless steeland timber with flush fixings and interface with pavements.
Use:
Bench types by location on page 25. Plate stainless steel to ends fortype 1 seat and open sided, stainless steel bar frame for type 2. Both have identical profile, scale and proportions. Armrests as standard.
Installation:
• Locate at intervals to suit streetscape layout
• Face seats away from carriageway and towards pedestrian zones - typ.
• Minimum offsets apply to shop fronts, carriageways and other furniture
• Fix to below ground footing, not paver units
• Ensure pavement finish is continuous below furniture and that footing is not visible
Material:
316 Stainless steel, no.4 finish KDHW timber. eg. Blackbutt
Designer Outlines LandscapeArchitecture (03) 9326 5692
Supplier
Previously supplied by J.C.Brown (03) 5221 3177
Refer to City of Greater Geelong furniture suite drawings for full sizes, finishes & specifications.
Type 1 Bench


Type 2 Bench



Variation:
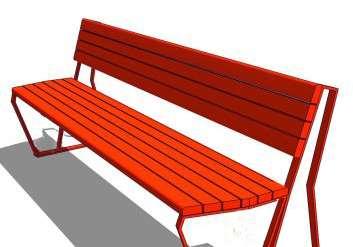
Variations on the standard seat and bench should be explored and adapted to appropriate situations. Design should always adhere to the form, style and detailing of the standard suite for consistency throughout Central Geelong. Custom variations are to be approved by City of Greater Geelong project officers prior to installation.
Custom colour treatment of type 2 seat
Longer version of the type 1 bench

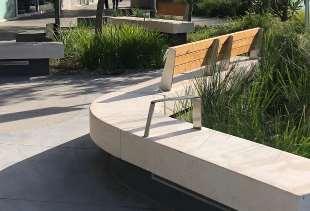
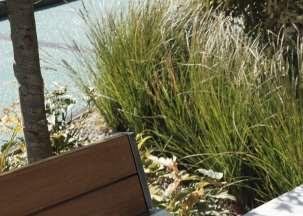
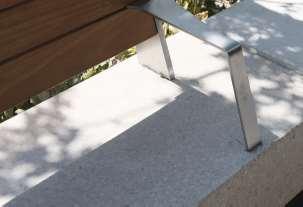

Custom variation of back rest installed on pre-cast concrete seat.


Type 1
Type 2
Residential Fringe
Moorabool Street

Design
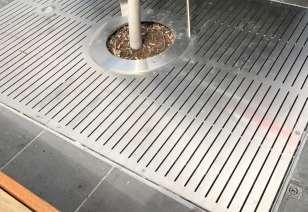
Stainless steel frame, 316 stainless steel plate with laser cut slots, flush fixings to achieve flush finish with adjacent pavements. Fabricate grate in 2-parts with locking points to achieve flush finish between parts.
Use:
Install to new and existing trees where in pedestrian areas requiring trafficable surface.
Installation:
Below ground footings to support base frame. Recess base frame to achieve flush finish of top grate with adjacent pavement.
Custom installation:
Run slots in top grate perpendicular to dominant pedestrian travel direction where uplights installed, provide cut-out for specified light and breaking grate slots.
Material:
8mm thick 316 Stainless steel, no.4 finish 1500x1500m - typ.
Variation:
Where format and size of grate varies from standard, the same detailing of slots etc. should be used.
All grates and grated pit covers are to be P4 slip reisitance rated. Provide evidence ofslip resistance by manufacturer or have grates tested underAS 4586-2013.
Designer Outlines LandscapeArchitecture (03) 9326 5692
Supplier
Previously supplied by J.C.Brown (03) 5221 3177
Refer to City of Greater Geelong furniture suite drawings for full sizes, finishes & specifications.
Typical

Dominant direction of travel by pedestrians
Optional uplight installation


Base frame
INSTALLED EXAMPLES


Typical grate to existing tree
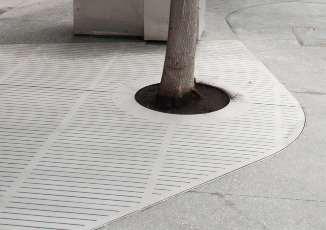
Variation installed to Malop Street Green Spine with bead blast finish
Inset uplight

Design
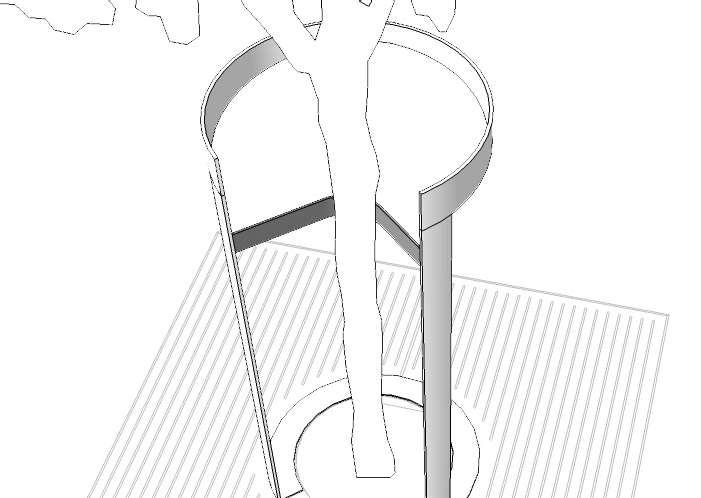
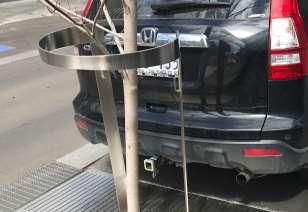
Circular form, stainless steel tree guard to be used and integrated with tree grate.
Use:
To be used in conjunction with tree grate (pg.26) for all new trees.
Installation:
Fix tree guard down to tree grate with countersunk fixings to achieve flush finish.
Material:
8mm thick 316 Stainless steel, no.4 finish 50mm polyester webbing. Colour: Red

INSTALLED EXAMPLES
Designer
Outlines LandscapeArchitecture (03) 9326 5692
Supplier
Previously supplied by J.C.Brown (03) 5221 3177
Refer to City of Greater Geelong furniture suite drawings for full sizes, finishes & specifications.

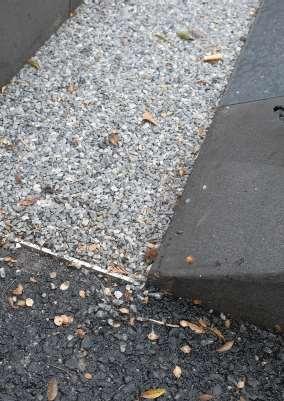
Use:
Use a poured permeable pavement to locations within existing street trees in pedestrian zones where a tree grate is not viable.Tree grates (pg. 26) should be used to new tree installations where possible.
Installation:
Install a 2-part galvanised collar around the trunk. Install perimeter galvanised surround to extent of paving. Ensure pavement is installed on base course to manufacturers specifications and local site conditions.
Material:
Pebble pave on approved equivalent. Colour: ¹ SilverAsh, 1/4 Dove, 1/4 Black


Design
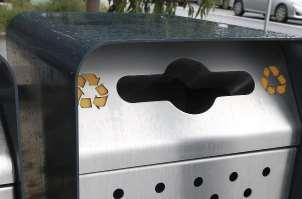
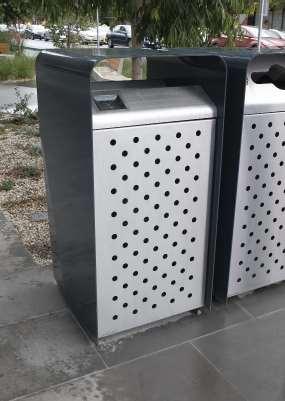
Matching external profiles to suit a standard 120Lbin.
Use:
Recycle and rubbish bins are to be installed as a pair throughout Central Geelong.
Installation:
Adjustable feet allow for levelinstallation on uneven surfaces. Fixings are to be installed to structural slab or footings.
Material:
Mild steel surround, with 3-part protective paint finish. 316 stainless steel internal frame and perforated front and rear faces.
Option:
Externally mounted cigarette receptical
Designer Outlines LandscapeArchitecture (03) 9326 5692
Supplier
Previously supplied by J.C.Brown (03) 5221 3177
Refer to City of Greater Geelong furniture suite drawings for full sizes, finishes & specifications.


Use:
Bollards to be installed where pedestrian and vehicle users require temporarily or permanent separation. 316 SS bollards to Central Geelong
Material:
316 Stainless Steel with no.4 finish 125 OD x 1000 (h) RHS with custom top
Installation:
• Install fixed bollard in concrete pad footing. Install sleeve in concrete pad footing for removable bollards
• Ground fixing method to suit application and as approved by City of Greater Geelong
• Minimise use and maximise spacing where ever possible
• Consider use in conjunction with other fixed elements such as trees and furniture to provide a collective barrier to vehicles.
• Where installed parallel to traffic flow place at 2.5m centres to act as a deterrent to vehicle access or encroachment into pedestrian areas during parking and protection against errant vehicles
• Where installed perpendicular to vehicle travel closer placement may be required
• Install a minimum 600mm from traffic lanes or parking bays
• Can lock to removable bollard and cap
Galvanised steel finish may be considered and confirm with City of Greater Geelong for perimeter areas and residential interface.
Designer
Outlines LandscapeArchitecture (03) 9326 5692
Refer to City of Greater Geelong furniture suite drawings for full sizes, finishes & specifications.

Sleeve and cap for removable bollard underground underground


Use:
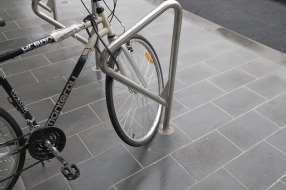
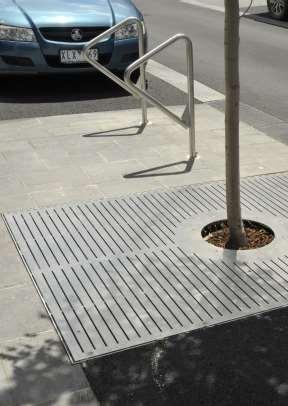
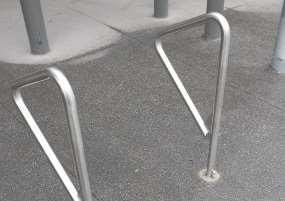
Install throughout Central Geelong
Installation:
• Install bike rack in groups at 1m centres. Align to each other.
• Minimum offsets apply to shop fronts, carriageways and other furniture
• Ensure bike rack is installed vertical (independent of fall of pavement)
• Below ground footing to Engineers requirements.
• Fix with stainless steel gib key
• Where core into pavement is required, patch with same colourand mix of pavement to base
Material:
42 OD 316 Stainless Steel Pipe
Dimension:
810 (W) x 885 (H) x 42 OD Pipe 2.7
CODE - TBC
Typical


Designer Outlines LandscapeArchitecture (03) 9326 5692
Supplier
Previously supplied by J.C.Brown (03) 5221 3177
Refer to City of Greater Geelong furniture suite drawings for full sizes, finishes & specifications.

CODE - TBC
Outdoor Cafe Screen - Fixed alfresco areas will be assessed on an individual basis as to how they address and enhance the streetscape, maintenance, aesthetics and context.

Use:
Markers are to be used to delineate footpath trading zones for traders who utilize footpaths within Central Geelong.
Installation:
• Prepare rebate in pavement by routing to achieve flush finish when marker is installed
• Epoxy fixing of spigot and disc
• Install in stone, concrete or asphalt pavement
• Install at approx. 1m spacing. Confirm with City of Greater Geelong officer prior to installation
Material:
10mm thick, 316 Grade Stainless Steel disc and spigot
Option:
City of Greater Geelong logo or other approved graphic etched into disc 0.5mm deep etching.
CODE - TBC
35mm dia.


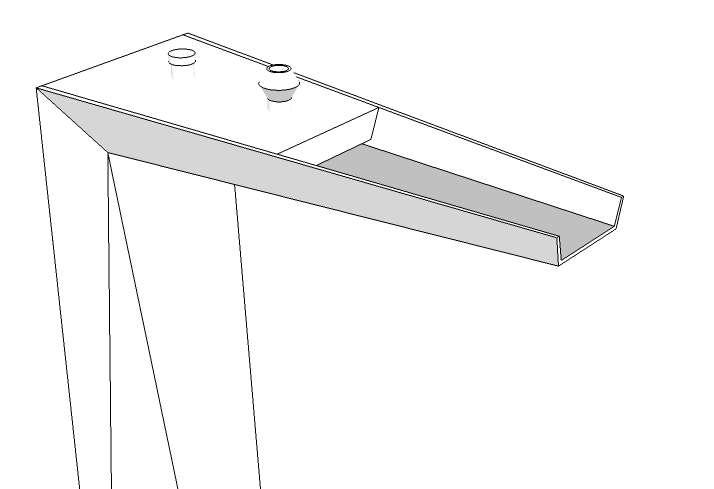
Use:
Drinking fountains are to be located in high use streets and focussed around key public spaces and facilities including; parks, transport nodes and civic buildings throughout Central Geelong.
Installation:
• Install fountain in location with adequate water supply and proximity to drainage point.Always connect to plumbed drainage point
• Separate base plate fixed down to slab or footing with valve and armeture as detailed in City of Greater Geelong Furniture Suite drawings
• Inbuilt drainage grate and sump connected to plumbed drainage point
• Minimum 600mm offset to all carriageways and other furniture
• Ensure wheelchair access clearance is achieved to all sides toAS1428.1 (2009)
• Install out of main thoroughfares and not abutting into dominant travel paths
• Install with shut-off valve inside fountain as-detailed
• Install external shut-off valve in nearby pit
• Include footing for fountain and drainage sump
Material:
Body 316 stainless steel no.4 finish
Stainless steel fasteners and all internal hoses and other accessories
2 part bubbler & button
Dimension (nom.):
450(L) x 175(W) x 800 (H)
CODE - TBC
Designer
Outlines LandscapeArchitecture (03) 9326 5692
Supplier
Previously supplied by J.C.Brown (03) 5221 3177
Refer to City of Greater Geelong furniture suite drawings for full sizes, finishes & specifications.
Option:
Where adjacent garden bed and with falls to bed, fountain may be installed without sump and grate. Face rear of drinking fountain to garden bed.
Typical


Skate deterrents will be assessed on an individual needs basis.

Use:
Drainage pit grates and trench grates to be 316 stainless steel grid and edge surround. Heel guard protection and non-slip finish in pedestrian areas.
Installation:
Pit and grate class is to be nominated by Civil Engineer and specific to location All installations to pedestrian areas should be tested for slip resistance where product data is not available
Seal perimeterofpit surround with polyurethane sealant colour matched to adjacent pavement finish.
Option:
Galvanised steel may be appropriate in specific areas or for economical applications, e.g. roads, garden beds.
Ductile iron, grates may be used in vehicle areas in asphalt pavements.
All grates and grated pit covers are to be P4 slip reisitance rated. Provide evidence ofslip resistance by manufacturer or have grates tested underAS 4586-2013.
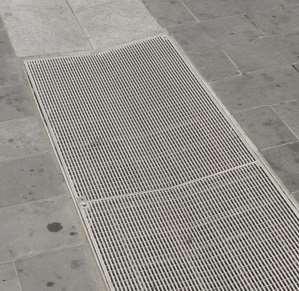
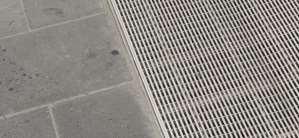


Custom stainless steel Heelguard grate with central invert.
Vehicle grade. Little Malop Steet

Banners and Flagpoles will be assessed on a needs basis.
Banner locations

Aconsistent approach to lighting within the Central GeelongArea is an important part of realising the objectives of the P.R.F.
An approach that focusses on well-lit public roads and spaces to facilitate activity and public safety is the goal of this guide. Importantly this should not result in an overly-lit environment but rather a nuanced and holistic lighting strategy ultimately providing users with an enjoyable and safe nighttime experience.
Express ‘spill’from lighting in any direction should be avoided as should glare as well as excessive contrast between lit and unlit areas.Alighting philosophy focusses on the beneficial effects of lighting rather than light fittings should be pursued in all public realm installations.
Athree tier hierarchy of lighting is proposed to cover the general range of lighting types;
(A) Street Lighting
(B) Pedestrian Lighting
(C) Custom LightingApplication
(A) Street Lighting
Street lighting should be determined by the application, location and road lighting category required. Relevant authorities should be consulted where responsible for lighting and pole assets prior to any installations. Continuation of preferred asset ownership should be sought as CoGG have recently taken an ownership of some lighting infrastructure in the central GeelongArea.
(B) Pedestrian Lighting
Pedestrian level lighting has the function of providing illumination to higher intensity activity areas where after hours use is being actively promoted. Pedestrian safety including sufficient lighting for effective CCTV operation is equally important and design for this tier of lighting should support this function.
(C) Custom LightingApplication
Custom lighting applications depend largely on the broader project aspirations and the location. Examples include:
-Architectural feature lighting
-Artwork / sculptural illumination
- Interactive lighting
-Tree uplighting
- Illumination of landscape / streetscape features
These three levels of lighting should be explored and coordinated holistically in a project’s lighting design to achieve an efficient and site responsive illumination of the public realm.
Design Principles
The following guiding principles from the basis of the basis of P.R.F. recommendations:
This P.R.F. proposes the use of White Light only and recommends the ultimate removalof all orange HPS and pale blue MV light sources in the project scope area.
The required lighting technical performance criteria for each space in terms of compliance withAS1158 are outlines; all are based on the V Category (Vehicular traffic) recommendations withinAS:1158.1.1, AS1158:1.2 and PCategory (pedestrian) recommendations withinAS1158.3.1.
The variation of lighting levels commensurate with the above and also public safety, visual guidance and night-time focus is outlines.
Luminaires to be NEM 7PIN compatible
The lighting of vertical surfaces (building facades) in a systematic and consistent mannercoordinated with the requirements for City of Greater Geelong.
Aplan for the considered use of light colour temperature as a means of adding variety to the night-time vista is presented.
The placement of ‘one-off’lighting features as visual drawcards and place-makers is supported.
Aset of benchmark luminaire types and mounting heights is proposed.
Ahierarchy plan for luminaire mounting heights is proposed.
The principaldesign objectives withinAS1158.1 for Category V lighting are to provide the following:
Luminance and luminance uniformity of the carriageway surface to a specified level.
Glare controlto a specified level.
Illuminance on intersections, carriageway verges and other nominated locations to a specified level.
Limitation of upward light from luminaries to a specified level.
Amaintenance regime such that the lighting scheme complies at all times during each maintenance cycle over the life of an installation.
Minimising energy consumption.
The differences between V Category and PCategory lighting are fundamentally the following:
V Category is primarily concerned with the carriageway luminance (essentially surface brightness) which is a different concept than illuminance (lux), and is also position dependent (i.e. taken from the driver’s point of view)

V Category only takes illuminance into account at intersections, verges and the like – in other words, places where pedestrians might exist.
Poles
Height:To be confirmed by lighting designer for given project
Format: Tapered round pole with minimal cross-section to meet structural requirements. Frangible where deemed necessary by traffic engineerbut otherwise non-frangible construction.
Footings: Structural engineer by location.All structural connections (e.g. gusset plate) to be set below finished pavements.
Access: Secure, flush finish access match at base of pole. Service pit ≤ 1m from base of pole with connections to pole.
Colour: To be confirmed
Colour temperature: ToAustralian standards generally close to daylight.All lighting selections to be made as part of custom lighting design by qualified electrical engineer or lighting designer.
Luminaire: Model to be confirmed with council officer by application and location.
High performance efficiency, LED, IP65 rated fixtures.All street lights to have integrated NEMAsockets, e.g.AldridgeAero V-led or Bega 99599 pole top luminaire. Colour to be confirmed, generally to match poles.
High performance efficiency, LED, IP65 rated fixtures, e.g. Bega 99446 pole top luminaire or WE-EF FLC 141 pole mounted luminaire.
Colour temperature: typ. 3000K
Note: Models listed are generic only and do not provide specific output or modeldetails.
Custom applications:Type, format and arrangement will differ by project and location. Tree uplights luminaires should be specified with all housing and controls required to install as per manufacturer’s specifications. Lights should have internal angle adjustment for fine tuning of illuminated area, e.g. Bega 77133 or WE-EF ETC320-FS LED. Uplight luminaires should have colour change (RGBW)capability and data cabling run back to the switchboard.

Street Lighting
Pedestrian Lighting
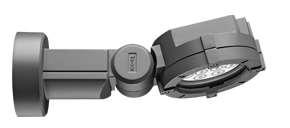
AldridgeAero V-led street light (Powercor compliant) WE-EF
LED
Custom Lighting Applications
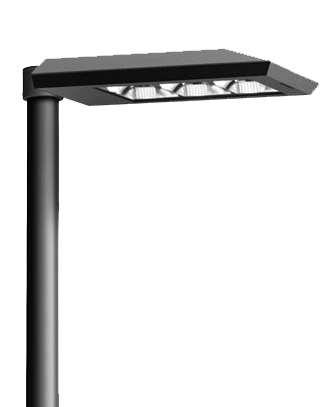
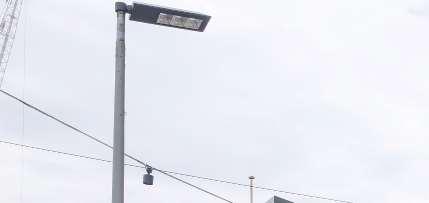


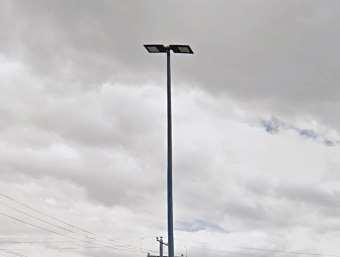

Back to back arrangement installed in Myer Street


Custom pedestrian level installations by precinct

Potential back-toback arrangement
Pedestrian lighting potentially mounted off main poles of street lighting
Street Lighting
Oversize pole by nom. 800mm typical from luminaire height
Potential back-toback arrangement
Pedestrian Lighting
Custom Lighting Application
e.g. Tree uplights
INSTALLED EXAMPLES
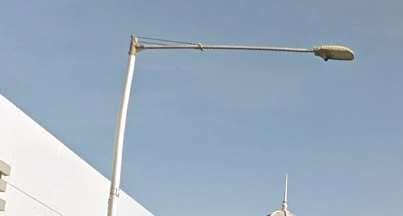


StreetLighting - typical
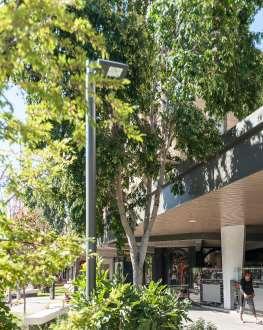


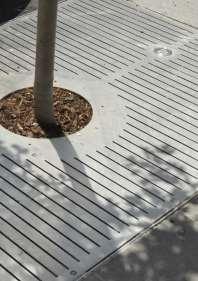

Tree selection location and size decision matrix (below)
Decisions around species selection and placement hould be informed by the below diagram and by CoGG standards relating to urban tree selection. Where trees cannot be installed in the proposed location an alternative location shall be determined. Where the proposed tree species cannot be installed in the nominated location, an alternative species from the Standard List list must be determined for approval by Council.
Note: Street trees selected for bespoke design areas must also consider this selection criteria.
Underground service(s)?


Powerlines overhead?
Narrow > 1.0m Ø (diameter) planting? area?

Consider alternative location


Services Deeper Than 600mm?

Tree Planting Not Possible


Aim
An increase in tree canopy cover across Central Geelong to align with City of Greater Geelong urban forest strategy, 2015-2025. Tree planting hould aim to provide a large canopy and wide form wherever possible. Passive watering should be explored in all situations in line with the City in a Park strategy.
Large evergreen trees should be planted in median strips where possible, to take full advantage of the breadth of space. A mixture of medium sized evergreen and deciduous trees should be planted in the footpath and preferably in-road kerbside, to allow for additional circulation in the footpath pedestrian areas. Smaller deciduous and evergreen trees with a splash of colour should be planted in laneways where little space is available for tree planting.
In order of preference : Where:
Median planting opportunity exists
Application:
Typology of one planting to median Typology two planted in footpath or in-road kerbside.
Where:
Median planting is not achievable or no median exists
Outcome:
Typology one planting in footpath or in-road kerbside.
Note: the same tree species and application of typologies should apply to the entire length of any one street from one end of the Central Geelong area to the other.
• Design conscientiously and holistically for tree planting by ensuring sufficient above and below ground space and conditions to thrive. Well planned trees are one of the best long term investments a city can have.
• Make the most of areas with no overhead obstruction or powerlines and plant large trees.
• Plant appropriately scaled species below powerlines.
• Avoid trees with a low canopy which obscures site lines and clutter streetscapes.
• Consider passive irrigation of trees with stormwater wherever practicable.
• Plant appropriate trees for the situation to minimise maintenance, pruning and damage to infrastructure
• All tree pits must include sub-surface drainage connected to the stormwater system
In order of preference : Where:
Opportunity for planting to both sides of the street Application: Typology two or three planting to footpath or in-road kerbside
Where:
Opportunity for planting to one side of the street Application: Typology two or three planting to footpath or in-road kerbside
Note: the same tree species and application of typologies should apply to the entire length of any one street from one end of the GeelongAction Plan area to the other.
Laneways
Where: Planting opportunity exists
Application:
Typology fourplanting to one or both sides of the laneway
Note: the same tree species and application of typologies should apply to the entire length of the laneway.

Typology 1
Large evergreen 12-15m height
A - Angophora costata
Smooth BarkedApple Myrtle


B - Lophostemon confertus
Queensland Box

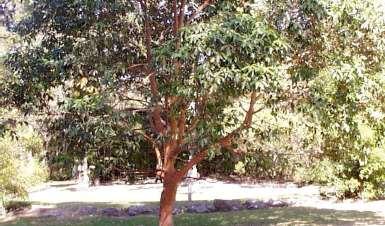


Typology 2
Medium deciduous 6m-8m height
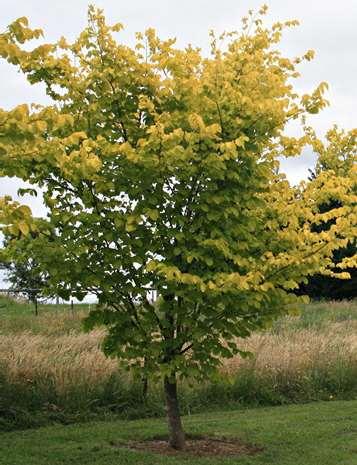
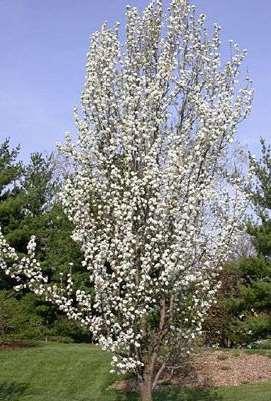


Typology 2
Medium deciduous 6m-8m height


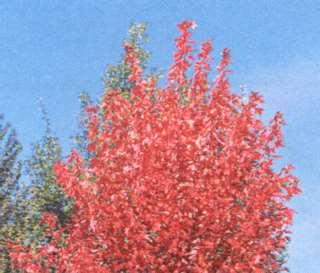



Typology 3
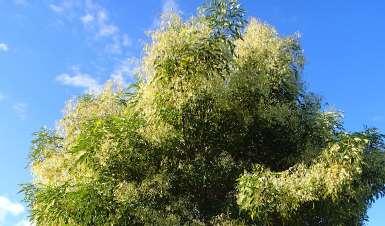
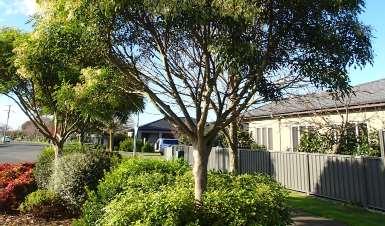
Medium evergreen 6m-8m height
EvergreenAsh
B - Angophora
DwarfApple


Typology 3
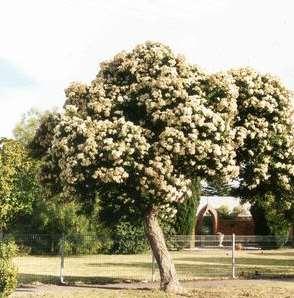
Medium evergreen 6m-8m height
C - Corymbia citriodora
Lemon Scented Gum


D - Waterhousia floribunda
Weeping Lilypily


Typology 4
Medium 6m height


Typology 4
Medium 6m height
Capital Pear


Palette
Hardy, drought tolerant and low maintenance. Generally simple, mass planting, at low sight line heights within streetscapes.
Opportunity for some unique, special and interesting species and combinations, colour and variety in textures and heights. Use of colour in plantings is to highlight focal points within Central Geelong and at key gateway locations.


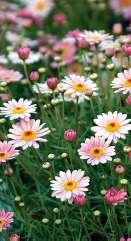



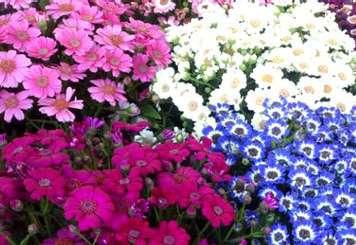

The following suggested species are recommended but not limited to what could be used.
General Planting
More greening to larger pedestrian zones
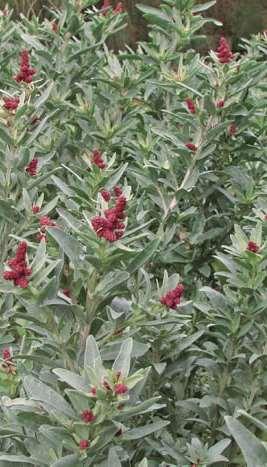

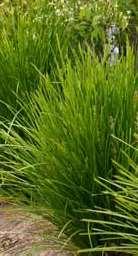
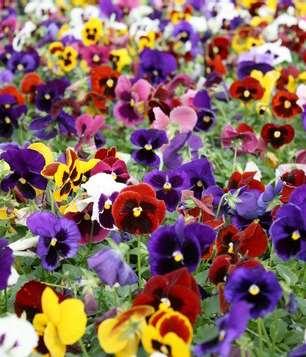
SummerAnnuals
Greater use of annuals in raised planters

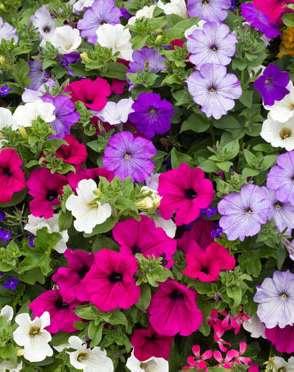
WinterAnnuals
Greater use of annuals in raised planters

Rhoeo spathacea ‘Nana’
Brachyscome multifida
Argyranthemum sp.
Atriplex cinerea
Correa glabra
Lomandra ‘Lime tuff’
Salvia sp.
Marigold sp.
Celosia sp.
Petunias sp.
Polyanthus sp.
Cineraria sp.
Pansies sp.
Impatiens sp.

Surrounding Areas
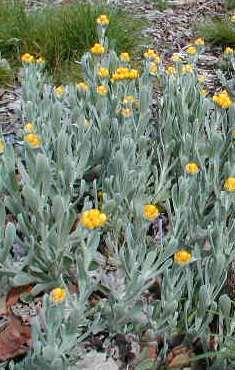

Surrounding Areas

Smaller areas of varied species



Chrysocephalum apiculatum
Coreopsis sp.
Correa ‘Dusky Bells’
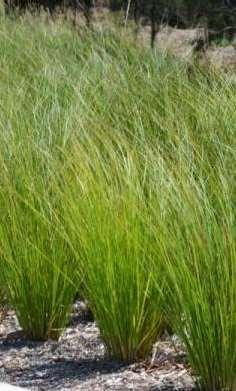
Poa morrisii
Carex appressa
Leucophyta brownii
Larger areas of mass planting
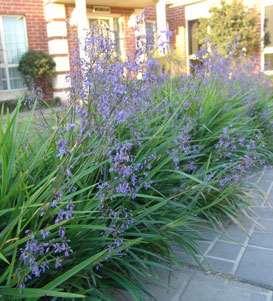
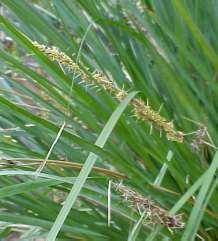
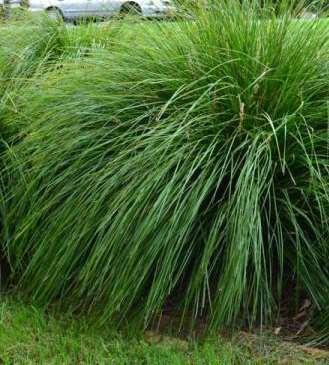
Surrounding Areas
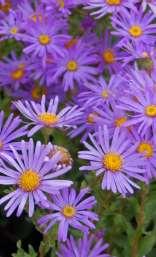
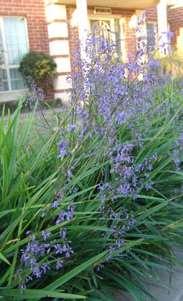
Colour and vibrancy
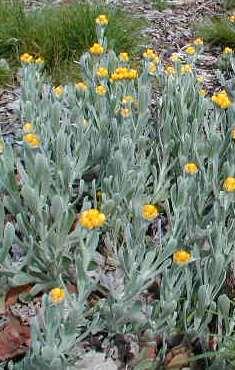


Myoporum parvifolium
Dianella ‘Little Jess’
Lomandra filiformis
Lomandra ‘Tanika’
Aster sp.
Dianella ‘Little Jess’
Chrysocephalum apiculatum
Salvia sp.
Osteospermum sp.

Surrounding Areas

Surrounding Areas

Coastal species


Larger areas of mass planting

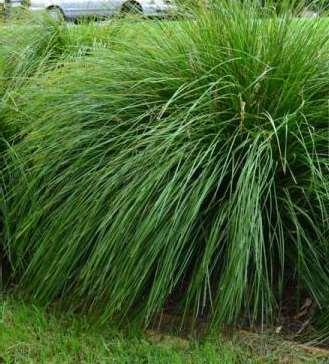
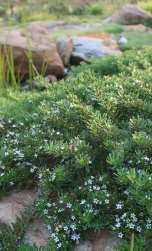
Leucophyta brownii
Carpobrotus rossii
Erigeron karvinskianus
Lomandra filiformis
Dianella ‘Little Jess’
Lomandra ‘Tanika’
Myoporum parvifolium
Surrounding Areas
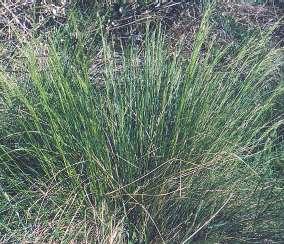
Pocket areas of planting
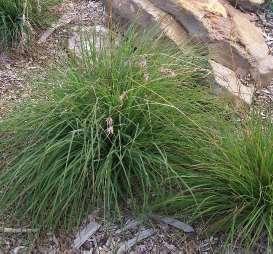
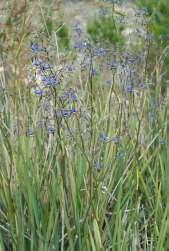
Poa labillardieri
Themeda triandra
Dianella revoluta

Guideleines for the creation of interesting, interactive, engaging and stimulating places throughout the City Centre


The public realm framework recognises the need for an element of surprise to be used sparingly to allow for some amount of individuality for unique or special projects.
Unique spaces will provide an opportunity to design a ‘twist’on the standard palette within a section of streetscape or public space.
Unique spaces may develop quite distinctively from the standard palette and are anticipated to be more comprehensive designs than just the installation of a unique piece of furniture or art. It is anticipated that these unique spaces would build on the use of standard materials (e.g. 800mm x 500mm standard paver) perhaps utilising them in a different way as well as designing in integrated and/or unique furniture.
Public art opportunities are directed by Council’s PublicArt Strategy: Connecting people, place & environment : a public art strategy for the City of Greater Geelong, adopted 11 September 2012, and fourplatforms for delivery including:
• Permanent Elements
• Lighting/ Projection/ Interactive
• StreetArt
• Flexible/Temporary
In addition, the following opportunities have been identified.
• Allow for a range of different forms and interpretations of art
• Experimental art should be encouraged as well as monumental
• Ephemeral, performative or temporary as well as permanent.
• Works with local reference to history, and the built environment narratives, to articulate identity as well as references back to the GeelongArt Gallery and other permanent collections.
• Interactive works provide connection and interest.
• Children should be considered and viewed/ experienced at a lower eye level.
• The collection willbe diverse, challenging, beautiful, thought provoking, site responsive and dynamic
• Some works should respond specifically to a youth sensibility


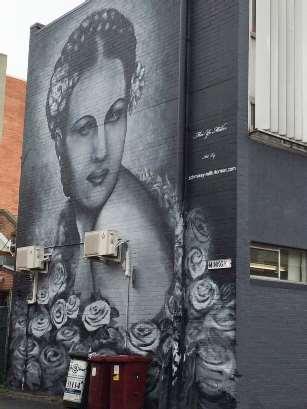
Asample of commissions n Central Geelong


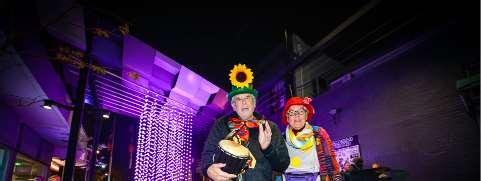


Guidelines for realising better streetscape amenity outcomes and raising the level of access compliancy within Central Geelong.
The emphasis on this section is surfaces. Grates and utility covers are commonly integrated within the surface finish affecting surface tolerances. Types of surfacing affects textures and tolerances. Service access covers take many forms depending on the utility provider.
Key Design Features
Ground surfaces
• Slip resistant
• Texture for use by wheelchair user, person with ambulant or visualimpairment
• Surface abutments
• +/-3mm square edged
• +/- 5mm bevel/round edge
• Paving joints 1-12mm
• Paving texture <2mm
Grates
• ≤13mm diameter, long dimension perpendicular to path of travel
• Slot ≤150mm long
Summary of Recommendations
• The aesthetic impact of utility access points/trenches can be significant. With substantial proposed investment in infrastructure upgrade and streetscape renewal, this represents a significant risk to the aesthetic and entire new streetscapes can be reduced to patchwork.This is a matter for high level policy making to work with the utilities to develop innovative specifications and protocols for make good, trenching, stylised covers etc.
• Renewal of surfaces, such as overpaving asphalt, to consider interface with service covers to maintain required surface tolerances.
• Heritage is an important part of our culture, but where conflicts occur, alternative access ways to be provided.
• Maintenance of pavings is crucial to avoid slip/trip risk
• Specification of asphalt mix to ensure appropriate texture is achieved
• Specification of paving joints can achieve a ‘heritage’ look and still be accessible.

Tactile surface ground indicators (TGSIs) are used to assist people with a vision impairment navigate the environment.There are 2 basic types ofTGSI; hazard and directional.TGSIs are required to be used in stairways, ramps, escalators, moving walkways, carriageways, and to warn of hazards. In a transport setting,TGSIs are also deployed at bus/tram stops, stations, wharves and so on. AS1428.4.1 states “…in the absence of any indication orwarning to the contrary, there will be a clear, safe continuous path of travel in front of them 2000mm high, a minimum of 1200mm in width and a depth of 900mm before the hazardous situation.”
One of the most important features of the use of TGSIs, is that they should be predictable. For this reason, it is important to conform to the relevant Australian Standard. The relevant standard can be confusing as theAustralian Standard appendices have multiple scenarios and this often leads to variable implementation. This is especially so at road crossings.
Further confusion can arise as in transport settings, the prescribed standard isAS1428.4, whereas in all other settings, it isAS1428.4.1. Finally, to add another layer of compliance, there are 3 main styles of construction of TGSIs and each has a different requirement for achieving a minimum standard of luminance contrast.
Key Design Features
HazardTGSIs required for:
• Stairways
• Ramps
• Escalators
• Moving walkways
• Required top and bottom, 300mm from hazard
• At landings if >3000mm, depth of 600-800mm
• At landings if < 3000mm, depth of 300-400mm
• If handrails provided both sidesAND continuous, NO TGSI
• Overhead hazard
• Depth of 600-800mm, allows 300mm splay
• Carriageways
• Depth of 600-800mm
TGSI style and luminance contrast:
• Integrated: 30%
• Discrete: 45%;
• Composite: 60%
• 300-400mm = 6no studs/600-800mm = 12no discrete studs
• 25mm dia top, 35mm max base/ 4-5 mm height
• Placement = perpendicular to direction travel
• Set back 300mm +-10mm edge hazard
• If angled approach 600-800mm required
• DirectionalTGSIs
• Parallel with and along centreline path of travel
• 300-400mm wide if in line path of travel
• 600-800mm if across path of trave
• Discrete and composite type TGSIs require maintenance if damaged, missing or dirty.
• For areas where directionalTGSIs are considered important, adequate lighting should also be provided.
• Planning policy should provide building owners guidance on whetherTGSIs can be provided on the footpath.
• Bus stops to provideTGSIs to meet DDATransport Standards.
• Application of TGSIs requires careful planning to ensure safe wayfinding in the environment.
• For upgrade works to pedestrian crossings, hazard TGSIs should also be provided to adjoining (nonupgraded) areas to create a predictable environment.

In this section pedestrian paths / walkways are considered in terms of their dimensions and geometry. Key words are width, height, cross falls and obstructions, all of which can adversely affect accessibility.
Key Design Features
• Gradient shallower than 1:33, crossfall shallower than 1:40min (or 1:33 asphalt) walkways to have:
• Kerb/Kerb rail min 65mm high or >150mm
• Wall >450mm high
• Or, different material 600mm horizontally (To assist shorelining)
• Height - min 2000mm
• Width - min 1000mm; 1200mm preferred
• Passing space 1800 x 2000mm
• If path of travel <1800mm wide every 6m
• Circulation space
• 60 degrees – 90 degrees turn = 1500 x 1500mm
• 90 degrees - 180 degrees turn = 2070 x 1540mm
• 360 degrees turn = 2250mm diameter
• If width of path of travel < 1200mm, for 300-600 turn, add 500 x 500mm splay
• Geelong benefits from wide footpaths which allows for minimum widths to be achieved on most streets. The exception is in the laneway precinct where challenges from poles, bins, etc may reduce the accessible path of travel.
• Add TGSI’s/other protection such as a significant visual aid where reduce height hazard.
• Regular maintenance required to footpaths adjacent planted areas.
• Potential policy consideration regarding building owners planting and designs to avoid/minimise potential damage.

Pedestrian road crossing points are a crucial part of the urban infrastructure. Pedestrian crossings may be controlled, e.g. at traffic lights, or noncontrolled, with a suggested crossing point provided by a kerb ramp, median and so on.
Common forms of crossing are:
• kerb ramp withTGSIs at traffic light crossing; with push button assembly (PBA);
• kerb ramp at traffic light crossing with push button assembly, noTGSIs;
• kerb ramp withTGSI;
• kerb ramp;
• footpath graded to carriageway with TGSIs at traffic light crossing and PBA; and
• footpath graded to carriageway.
Push button assemblies (PBAs) are either mounted to the side of the path of travel, i.e. the side of a pole with a horizontalarrow indicating direction of travel, or facing the path of travel and fitted to the front of the pole with a vertical arrow indicating direction of travel. Vic Roads guidelines indicate that a horizontal arrow should be used. Both arrow positions are clear, however future upgrades will adopt a consistent approach.
Key Design Features
• Types kerb ramp: Inserted/Attached / Inline
• Aligned in direction travel
• Top and bottom of kerb ramp at 900 to direction travel
• Sharp transition gradient
• Rise 190mm, max grad 1:8, length 1520mm
• Slip resistant
Kerb ramp landings
• No change direction = 1200mm
• T junction = 1500 x 2000mm
• Single change direction = 1500 x 1500mm
• TGSIs required if >3m from top of ramp to building line, ie .4520mm wide (3000mm + 1520mm), for single entry crossing
The geometry of kerb ramps requires achieving a level sharp transition to provide a gradient of 1:8 – 1:8.5, with splayed sides at an angle of 450. The ramp itself needs to be in the direction of travel and must line up with the crossing point on the other side.Acompliant kerb ramp of gradient 1:8 will have a length of 1.52m. If the distance from the top of the kerb ramp to the building line is >3m,TGSIs are also required, (ieTGSIs required if the footpath is >4.52m wide). Many footpaths are more than 4.52m wide and thus where kerb ramps are provided, compliant TGSIs are required too. For footpaths less than 4.52m wide, a compliant kerb ramp at a single crossing point, provides sufficient information andTGSIs are not required.
• Single entry, single crossing point
• Dual entry, single crossing point
• Dual entry, separate crossing point
• Time delay not more than 0.4m/s
Push ButtonAssembly (PBA)
• Height 1000 +-100mm
• Zone of common reach 300-400mm fromAPT
• Audio/tactile device
• >2m from another audio/tactile device
• Horizontal arrow direction travel
• It is recommended that a detailed audit is undertaken of pedestrian crossings within the Central Geelong area.
• Push button assemblies (PBAs) are mounted either on the face of the pole with a vertical arrow indicating direction, or are side mounted with a horizontalarrow mounted on the approaching face of the pole, ie facing accessible path of travel. Vic Roads guidance refers only to the side mounted PBAand horizontal arrow. Both styles may be acceptable, but this should be clarified with Vic Roads.
• Where a conflict arises with utility cover, a graded transition to the carriageway could be provided with appropriateTGSIs.
• Acommon conflict inTGSI placement occurs from the width of the crossing and arc of the road.The road line markings the pedestrian crossing need to align with the footpath so that TGSIs can be placed correctly.

Vehicle crossovers to loading bays and car parks arise in various locations.The conflict here is to preserve the rights of the building owner to access their property (over the footpath) but protect the needs of pedestrians. In the context of accessibility, key issues are the width of the crossover, cross falls, visibility and luminance contrast, hazard warning. Vehicle users may also have reduced visibility, creating hazard for driver and pedestrian alike.
• Gradient shallower than 1:33,
• Cross fall shallower than 1:40min (or 1:33 asphalt)
• Hazard warningTGSIs for path of travel crossing ‘carriageway’
• Width - min 1000mm; 1200mm preferred
• Surface abutments
• +/-3mm square edged
• +/- 5mm bevel/round edge
• Paving joints 1-12mm
• Paving texture <2mm
• Wide crossovers at grade represent a significant hazard to pedestrians and adequate warning should be provided.
• Definition of carriageway usually considered to be public road between kerbs. Planning guidance to consider width of vehicle crossovers and the width at which they are deemed ‘carriageways’to provide guidance on whenTGSIs should be applied.
• Heritage - heritage and accessibility requirements are often in conflict. If a heritage feature, such as a cobbled driveway, cannot be suitably mitigated, then alternative accessible route will need to be provided.
• It is harder to provide ‘accessible’
• crossovers across narrow footpaths.
• Planning policy to provide building owners guidance on acceptable outcomes.

Angled parking
• Between 45 and 90 degrees, comprising:
• Dedicated space 2400 x 5400mm, line marked,
• and
• Shared space to the side 2400 x 5400mm; line marked; and
• Shared space to the end of dedicated space, 2400 x 2400mm, not line marked.
• Kerb ramp provided at end corner (if required)
• Bollard in shared space 800mm +/- 50mm from
• front
Parallel parking
• Dedicated space 3200 x 7800mm long
• Shared space (to non-trafficked side) 1600 x 7800mm, may be at higher level, but kerb ≤190mm high and include kerb ramp
• Kerb ramp provided at end corner
Parking meters
• Parking in designated bays is free with a displayed disability badge
Surface
• Dedicated and shared spaces to be at same level; max cross falls 1:40 (1:33 bitumen); slip resistant.
Space identification
• White symbolfor access on blue background, centred and 500-600mm from entry point
• Dedicated parking – unbroken lines
• Shared walkways – unbroken longitudinal lines
• Vacant non-trafficked areas (capable of obstruction) unbroken diagonal stripes.
Headroom
• For vehicular path of travel 2200mm
• Above dedicated spaceAND shared area 2500mm (may reduce for angled space)
• The display screen on parking meters to have anti-glare properties, so the screen can be read in bright light conditions
• Consistent specification to be applied to on-street parking spaces, as far as practicable.
• On-street parking spaces at grade with the footpath may encourage ‘shared space’thinking which is of benefit to pedestrians, but needs to be kept under review, as vehicle users may have a different expectation. It is recommended that these spaces are formally designated as shared spaces to ensure all users share the same expectation of mutual respect.

Signage and information are crucial to wayfinding and is beneficial to all users, especially visitors.
Key
• Use of International symbol disability/deafness
• Use of Braille
• Use of tactile
• Size of symbols/viewing distance
• Height of letters
• Illumination of signs
• Style, Consistency, Font
• Symbols
• Intuitive
• Talking maps
• Information points
• Avoid reflections,
• 30% luminance contrast letters/background
• Inset name strips set into footpath should not be a substitute for wall or pole mounted street names.
• Maintenance required to maintain good legibility of inset strips to and to emphasise the feature
• Specification considerations inset street
• names -
• Visibility and slip resistance of inset name strips compared to footpath material
• Specification considerations for signage and information -
• Anti-reflective covers, printing inks, maintenance, renewal of information sheet, ease of removalof graffiti; contrast of map features, avoid visual ‘clutter’/too much information on maps
• Awayfinding audit is recommended to gather information to inform a wayfinding strategy.This is important to ensure good wayfinding outcomes when multiple infrastructure projects are planned and delivered separately.
• Provide audible information points
• Embrace new technology, including use of wayfinding apps.

Street furniture may include items such as seats, drinking fountains, bins, bicycle stands and repair.
Key Design Features
• Seats set back 500mm fromAPT
• Seats to be provided with arms and without
• Seat heights varied
• Spaces for wheelchairs or prams adjacent to seating
• Objects achieve 30% luminance contrast with background
• Prefer street furniture on one side path of travel
• only
• Locate on areas with minimalcross falls, ie shallower than 1:40
• Achieve minimumAS1428.1 circulation spaces
• Seating at max 60m intervals
Summary of Recommendations
• Street furniture requires careful siting to ensure it is accessible.
• Luminance contrast of new street furniture should be considered against the proposed surface finishes to ensure min 30% contrast is achieved.

The proximity of staircases to the building line and footpath can create unnecessary hazards.
Stairs
• Set back 900mm from path of travel
• Opaque risers
• Nosing not project beyond riser
• Nosing profile 5mm radius/chamfered
• Nosing strip 50-75mm/ full width/max 15mm from edge/30% Luminance Contrast
• If nosing not set back, ≤ 10mm down riser
• TGSIs
• Rise 150-165mm; going 275-300mm preferred
Stair handrails
• Continuous
• Both sides
• Follow angle of stairway
• Extend 1 tread depth parallel nosing line +300mm horizontally
• Extend 300mm past top riser
• Extension NOT required for continuous handrail at intermediate landing
• Not encroach
• 30-50mm cross section circular/elliptical
• Top of handrail 865 – 1000mm
• Handrail ends returned to wall, floor, post
• 50mm clearance between handrail and adjacent surface
• No obstruction to hand movement
• If handrail not continued, ‘dome button’150mm
• from end
• Handrail achieve 30% luminance contrast from wall
• Deterring anti-social use with handrail rings conflicts with accessibility. It can be addressed by providing handrails on each side of the staircase which are continuous.The handrail proximity to the side should prevent anti-social use as there is no room to slide.
• If buildings are refurbished, building owner may seek to placeTGSIs on the footpath and project handrails over the footpath. If no policy exists, then a policy should be made with regards to placement of TGSIs on footpaths, for features such as stairs and ramps.TGSIs can pose a trip hazard and placement in trafficked areas, such as footpaths should be discouraged, with the onus placed onto the building owner to provide a compliant building.
• For public realm stairs and ramps, ifTGSIs (and/ or compliant handrails) cannot be provided, it is important to include as many accessible features as possible to mitigate risk. Contrasting handrails with a dome button and contrasting nosings can assist, as can good colour contrast of surfaces and lighting. Design decisions should be documented with justifications to support non-conforming design outcomes. This may be important in the event of a claim under the DDA.
• Shadows on steps can create visual confusion for users. Whilst shadows cannot be avoided, it is a reminder of the importance of luminance contrast for nosing strips, handrails etc, for safety in use.
• Mitigation strategies are also necessary where there are accessibility/ heritage conflicts.

Many buildings are entered from entrances built at, or close to, the building line. For many heritage buildings, this means there willbe a step up from the footpath into the building.The following photographs show how footpaths have accommodated entrances to provide a ‘level’ entry. In larger (typically retail) buildings, there is more street frontage within which to provide an alternative accessible entrance. Smaller units on sloping footpaths and with narrow frontage have considerable constraints trying to provide ‘level’ access. Footpath upgrades offer potential to improve accessibility into individualbuildings.
Key Design Features
• The principal pedestrian entrance to a building shall be accessible
Summary of Recommendations
• Footpath and streetscape upgrades offer potential to improve accessibility into individual buildings.This is especially important for narrow frontage (typically small) retail units.Activating laneways requires buildings to be accessible. Policy and streetscape design to include this.

Bus stops and features associated with bus stops, such as bus shelters, seating, bus timetable information etc, are covered by the Disability Standards forAccessible PublicTransport (DSAPT or Transport Standards). Design features such as ground surfaces, circulation spaces are as covered in earlier sections.The design of TGSIs to comply with theTransport Standards is required to be toAS1428.4 (1992), which is slightly different to AS1428.4.1 (2009). Often, disability interest groups express a preference for the newerTGSI standard to be utilised, however this is not strictly compliant with DSAPT, and should be a policy level decision, made with relevant stakeholder consultation, including disability groups.
Streetscape upgrade works adjacent bus stop works should be carried out in consultation with the Bus Operator.
Key Design Features
• Designs requirements are the same as for other design elements; the exception isTGSIs
Summary of Recommendations
• All streetscape works in and around bus stops to be carried out in conjunction with the travel operator
• DDATransport Standards apply to bus stops.
• TGSI design to be toAS1428.4:1992 unless policy level decisions made to use the
