› › › TIPS AND TRICKS
USING THE GYROSCOPE
BUILDING TIPS
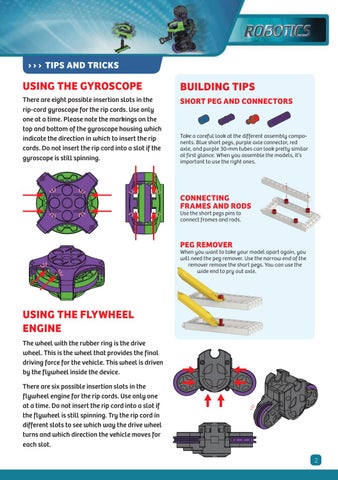
There are eight possible insertion slots in the rip-cord gyroscope for the rip cords. Use only one at a time. Please note the markings on the top and bottom of the gyroscope housing which indicate the direction in which to insert the rip cords. Do not insert the rip cord into a slot if the gyroscope is still spinning.
SHORT PEG AND CONNECTORS
Take a careful look at the different assembly components. Blue short pegs, purple axle connector, red axle, and purple 30-mm tubes can look pretty similar at first glance. When you assemble the models, it’s important to use the right ones.
CONNECTING FRAMES AND RODS Use the short pegs pins to connect frames and rods.
PEG REMOVER
When you want to take your model apart again, you will need the peg remover. Use the narrow end of the remover remove the short pegs. You can use the wide end to pry out axle.
USING THE FLYWHEEL ENGINE The wheel with the rubber ring is the drive wheel. This is the wheel that provides the final driving force for the vehicle. This wheel is driven by the flywheel inside the device. There are six possible insertion slots in the flywheel engine for the rip cords. Use only one at a time. Do not insert the rip cord into a slot if the flywheel is still spinning. Try the rip cord in different slots to see which way the drive wheel turns and which direction the vehicle moves for each slot. 2

