If you have used Teams at school before please skip to EXISITNG USERS at the bottom of the page (provided you have given us the email address you used to connect to Teams in the past eg your Glow email address)
If you are totally new to Teams, or do not know the email address you logged into Teams with previously, follow the NEW USERS steps below:
NEW USERS
• Ensure you have the Microsoft Teams app downloaded on the device you are going to use (eg smartphone)
• On the same device, check your emails for our Teams invite and click the link
• Make sure you sign in to Teams with the email address you received the invite to (ie the one you provided to us).
• If asked – follow steps to send a code to your email, and enter this code.
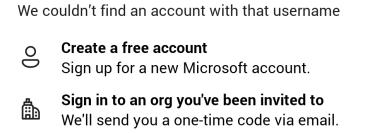
• You may be required to ‘Sign up for a new Microsoft account’ using your email address. Follow the instructions on screen to do this. This might also require a further code to be sent to your inbox. After the verification steps you should now be logged in to Teams.
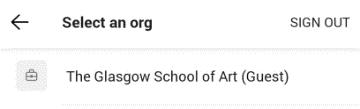
• When prompted, select The Glasgow School of Art (Guest) from the list of Accounts and Orgs.
• If you cannot find The Glasgow School of Art (Guest) account, click on the circle with your initial in it on the top left of the home screen on Teams, and chose it from the list of accounts and orgs connected to your account at the bottom of the screen.
• You should now be connected to your course Team
• If you have any problems, contact us at wp@gsa.ac.uk as soon as possible.
EXISTING
USERS
• Ensure you have the Microsoft Teams app downloaded on the device you are going to use (eg smartphone)
• On the same device, check your emails for our Teams invite and click the link
• Sign in to Teams with the same email address you received the invite to.
• When prompted, select The Glasgow School of Art (Guest) from the list of Accounts and Orgs.
• If you cannot find The Glasgow School of Art (Guest) account, click on the circle with your initial in it on the top left of the home screen on Teams, and chose it from the list of accounts and orgs connected to your account at the bottom
• You should now be connected to your course Team
• If you have any problems, contact us at wp@gsa.ac.uk as soon as possible.
Using Teams: The Basics
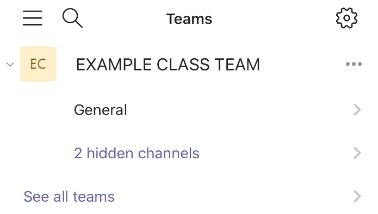
• To access the Team for your class, firstly click on the ‘Teams’ icon in middle of the menu bar at bottom of your screen.
• This should show you the Portfolio Class team you are part of (and any other Teams you are connected to). The first place to go to is the ‘General’ section. Click on the link below the name of your class Team.
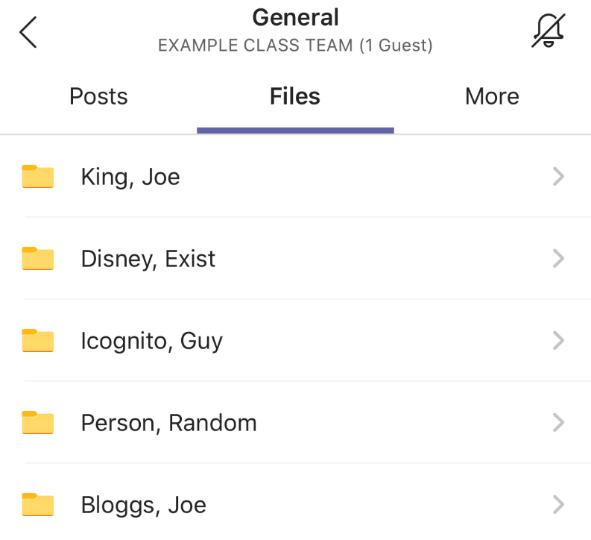
• In the General section you will see tabs for ‘Posts’ and ‘Files’
• Click on the ‘Posts’ tab
• To get started, and let us know you are connected, you were asked to type “Hello” in the General class feed. Do this before your course begins if you haven’t already You can also add images, emojis, attachments and gifs into Teams feeds, and comment and react to other people’s posts.
Using Your ‘Files’ Folder
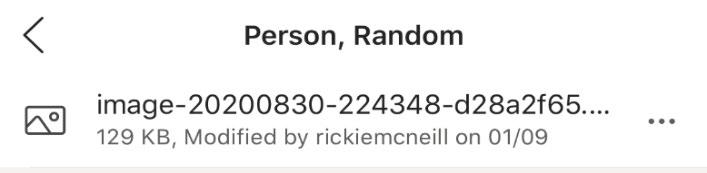
• Within the ‘General’ channel, there is also tab at the top called ‘Files’. This is where you will collect all the images of your work throughout the duration of the course. Think of this like a digital version of a portfolio case – this will need to be full of work in order for us to help you build your digital portfolio for application at the end of the course!
• If you click on this ‘Files’ tab, you will see a list of folders. There is one for each of you in the class.
• We want you to store every photo you take during the course in this folder. This ensures WP staff have access to all of the photos you take, and can help you build your digital portfolio with these at the end of the course.
• During class or when you get home, please upload all your photos of your work from that week’s session into your Files folder. This ensures we are collecting an organised archive of your work as we go, and don’t need to go back and find images frantically at a later date!
Next Section:
Uploading to Teams
Uploading to Teams
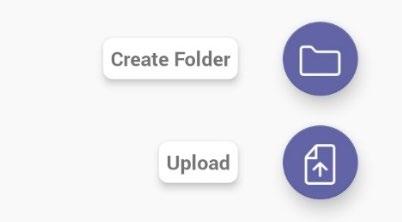
• Uploading photos to this Files folder is very easy. Firstly, take a photograph as normal using your phone’s camera. Then open your Teams ‘Files’ folder and click +
• Select ‘Upload’ and choose the photo from your camera roll
• Wait for it to upload into your folder
• You can also use the ‘Create Folder’ option to organise your images into each week/project.
• Remember, to help us build the best possible digital portfolio you should do this with every photo you take during classes, including sketches, tests and work in progress, not just ‘finished’ bits of work
Files Folder: Guidelines
The ‘Files’ folder is going to be incredibly important in helping you to build your digital portfolio this year. This is the place where we will collect every image of everything you make throughout the course. This is the only way that WP staff can help you build your digital portfolio. It is mandatory that every picture you take of your work, before, during and at the end of an activity is uploaded into this folder
Alongside images of the work you make during class, your Files folder should also be used to collect any additional photographs you take of your work during the week. You can also add images of other relevant bits of work, such as sketchbooks or other self-directed projects you are working on.
Note: You must not upload anything inappropriate or offensive into this folder. You must also be careful not to upload anything into this folder that reveals personal, private or sensitive information and data, such as bills, receipts, official documents or letters
• If you are having any difficulty accessing or using Teams, email the WP Team at wp@gsa.ac.uk