THE SKINT COOK
Over 80 easy, tasty recipes that won’t break the bank
Ian Bursnall


Pear and Stilton is always a great flavour combo. Adding the oaty biscuits not only elevates it to the next level, it adds different textures to your palate. This makes a great starter.
1 tbsp olive oil, plus 1 tsp
1 tbsp cider vinegar
1/2 tbsp honey
1/2 tbsp wholegrain mustard
1 ripe pear
2 handfuls of mixed salad leaves
2 spring onions, chopped
50g Stilton cheese
2 sweet and crunchy oat biscuits (I like Hobnobs), crumbled
salt and pepper
Make the dressing first. In a bowl, mix together 1 tablespoon of the olive oil, the vinegar, honey and mustard. Add a good pinch each of salt and pepper, mixing well to emulsify. Put to one side.
Now cut the pear in half. Take out the core with a melon baller, then cut each half into three lengthways. Place in a bowl and coat the pears with the remaining 1 teaspoon of oil.
Now heat a griddle pan or frying pan over a medium-high heat until hot. Place the pear slices in the pan and cook for around 5–8 minutes, turning occasionally. They are done when you start to get charring on both sides.
To serve, place a handful of salad leaves onto each plate. Arrange the griddled/fried pears on top and sprinkle with the spring onions. Crumble the Stilton over. Spoon the dressing all over and around. Finish by sprinkling over the crumbled biscuits.

Serves 2
Such a nice dish. You have the crispy duck skin and tender meat. The sesame salad cuts through the fattiness of the duck so perfectly, contrasting flavour at the highest level. I love it. Adding the crispy seaweed gives it a restaurant vibe!
2 duck legs
1 tsp five spice powder
3/4 tsp salt
3/4 tsp pepper
150g red cabbage, shredded
4 large spring onions, sliced
120g beansprouts
2 tbsp olive oil
2 tbsp cider vinegar
2 tbsp soy sauce
2 tbsp honey
2 tsp sesame oil
1/2 tsp chilli flakes
1/2 tsp caster sugar
1 tbsp sesame seeds
1/2 x quantity Crispy ‘Seaweed’ (see page xx), to serve
Preheat the oven to 160°C fan/180°C/gas mark 4.
Take your duck legs and prick them all over with a cocktail stick. This helps to release the fat and get a crispy skin. Now mix together the five spice powder and 1/2 teaspoon each of the salt and pepper. Rub this all over the duck legs, top and bottom. Now place them into an ovenproof dish and cook in the oven for 11/2 hours. Check and baste them from time to time. The skin should be nice and crisp when done.
Meanwhile, put your cabbage and spring onions into a bowl and set aside. Bring a saucepan of water to the boil, then add the beansprouts. Bring back to the boil, then drain and cool under cold running water for 30 seconds. Drain and add to the cabbage mixture and mix well.
Now in a separate bowl, add all the other ingredients, minus the sesame seeds and crispy seaweed. Give them all a good mix to emulsify. Set aside.
Put a frying pan over a low heat, add the sesame seeds and toast for a minute or two. Tip the toasted seeds into the dressing, give it a mix, then pour over the salad veg. Stir well to coat.
When the duck is ready, spoon the salad onto the middle of two plates. Take the duck out of the oven and shred the meat off the bone. Place on top of the salad and sprinkle over the crispy ‘seaweed’. Enjoy.

Serves 4
Such an easy maintenance dish. Easy prep. Once in the oven, you’re pretty much free to do anything for a few hours, and the smells coming from the oven are divine.
1 tbsp vegetable oil, plus 1 tsp
1/2 onion, cut into chunks
1/2 red pepper, deseeded and cut into chunks
1/2 yellow pepper, deseeded and cut into chunks
4 garlic cloves, chopped
1 x 400g can chopped
tomatoes
1 x 200g can sweetcorn
kernels, drained
2 tbsp tomato ketchup
2 tsp honey
zest and juice of 1/2 lime
1 tbsp smoked paprika
2 tsp ground cumin
1 tsp ground coriander
1/2 tsp chilli powder
1 tsp dried oregano
1/4 tsp salt
1/4 tsp pepper
4 pork shoulder steaks, about 170g each
1–2 tsp chopped coriander, to garnish (optional)
Preheat the oven to 160°C fan/180°C/gas mark 4.
In a medium saucepan, heat 1 tablespoon of the vegetable oil over a medium heat. Add the onion and cook for 2 minutes, stirring. Now add the peppers and cook for another 3 minutes, then add the garlic and cook for 1 minute. Add the tomatoes and sweetcorn, then turn the heat down to low and stir. Now add the rest of the ingredients, except the pork and coriander, along with 50ml of water. Give it a good stir, then keep over a low heat while you brown the pork.
Heat the remaining 1 teaspoon of oil in a frying pan over a medium-high heat. Add the pork steaks and cook on one side for around 3 minutes, then turn and repeat. Once you have a good colour on both sides, take them out and place in an ovenproof dish – mine was 30 x 15 x 6cm, but I think a 20 x 20 x 5cm would work as well. Now pour the veg sauce all over the pork, making sure you have some under the pork and all the pork is covered.
Cover tightly with foil and bake in the oven for around 2–21/4 hours. Halfway through, take it out of the oven and stir, making sure the pork is still covered in sauce. It’s done when the pork is almost falling apart and is melt-in-the-mouth. Garnish with the chopped coriander.
I serve mine with some simple boiled rice to soak up all the amazing sauce. Enjoy.

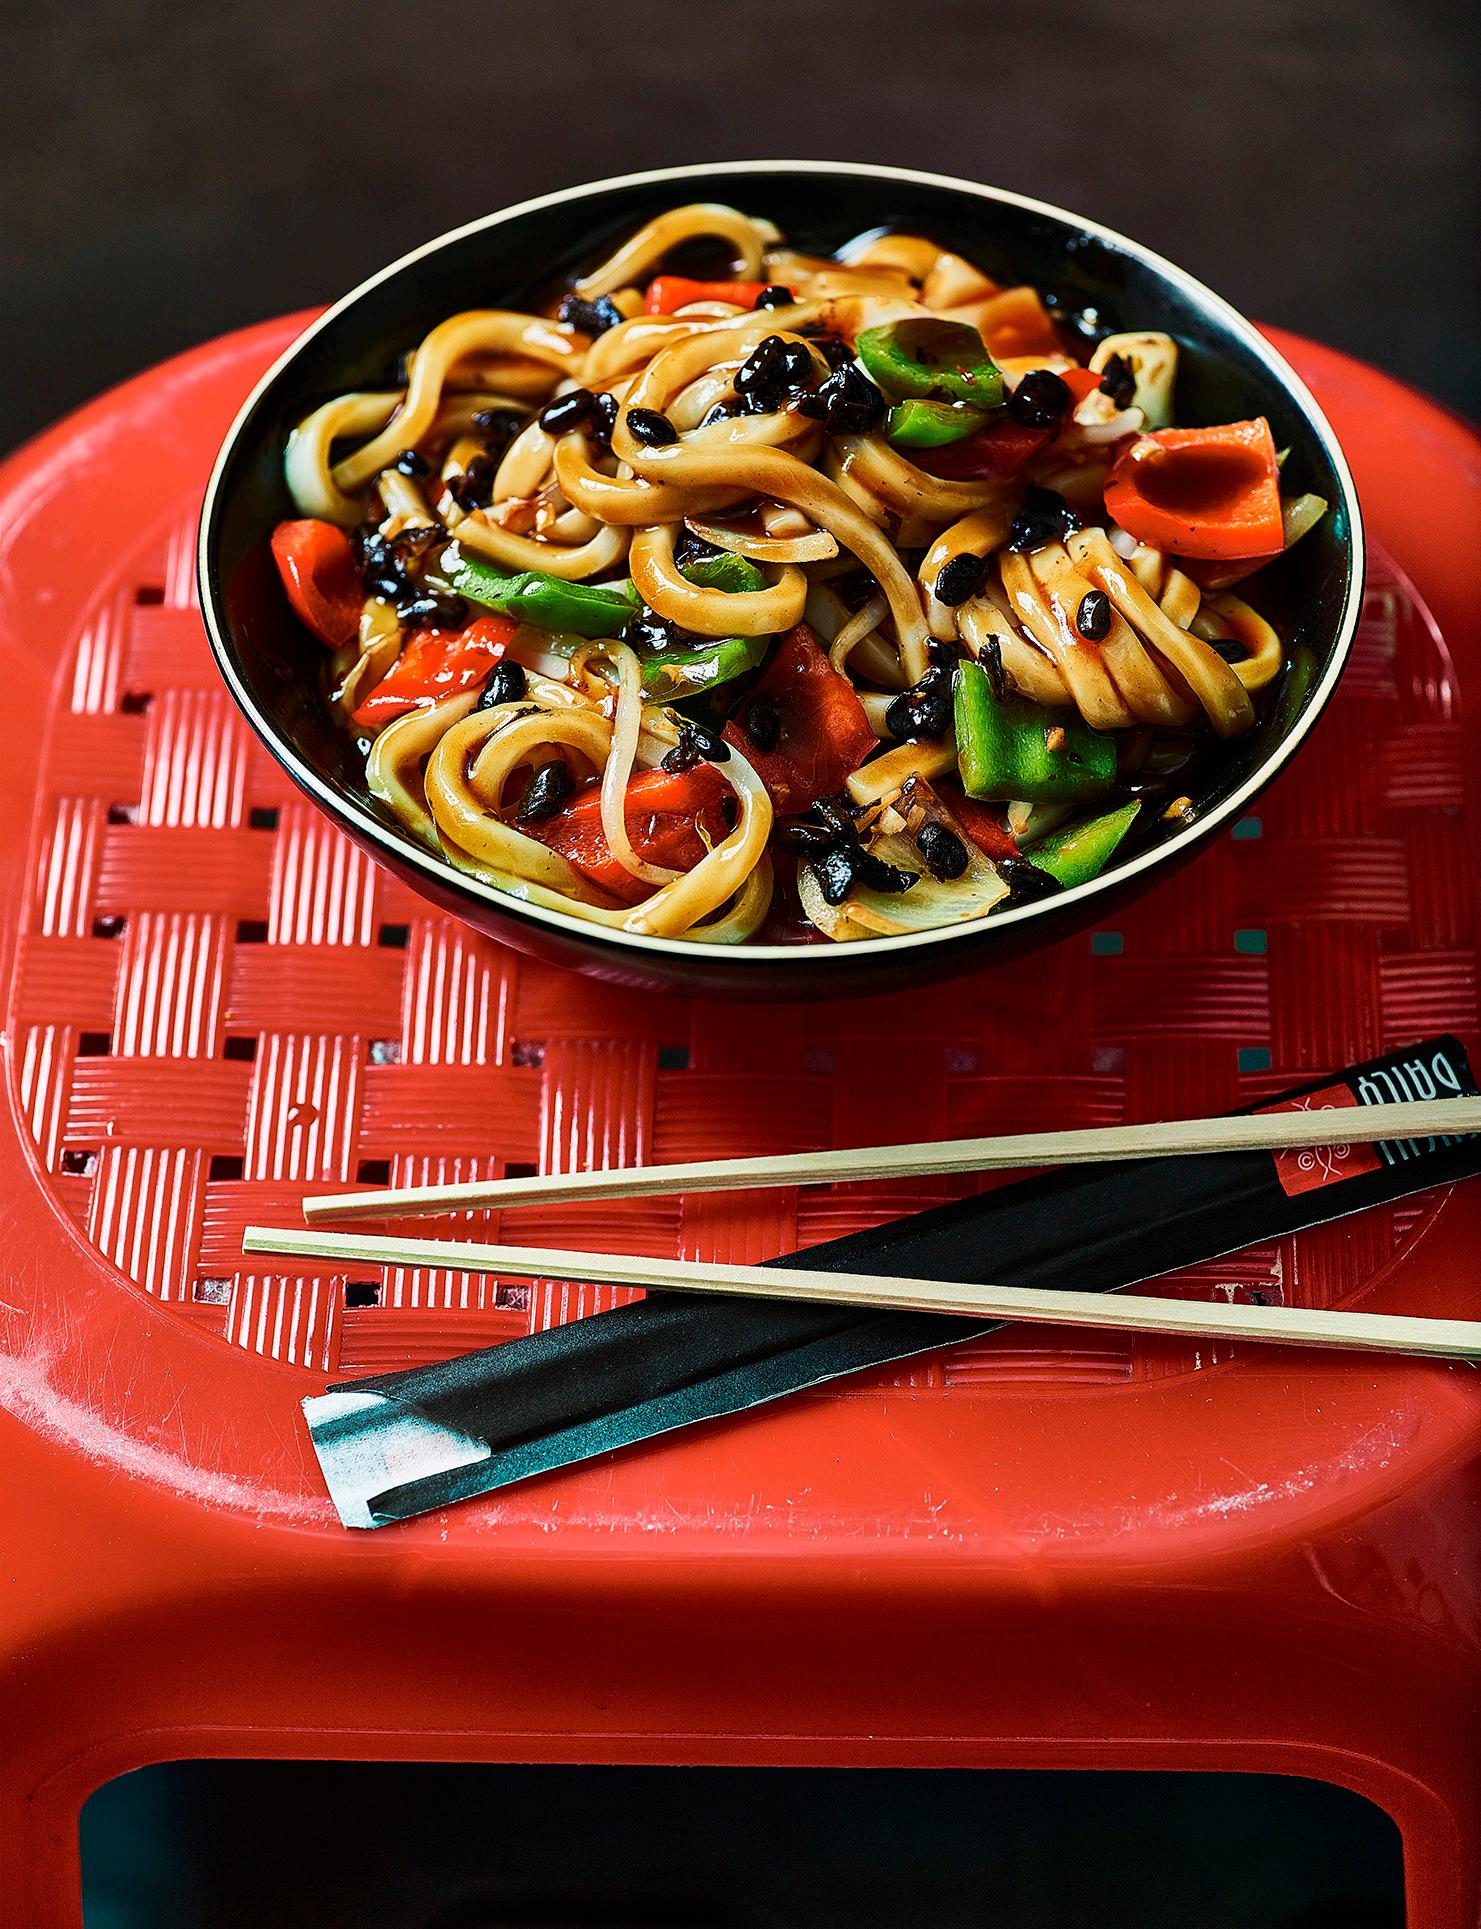
This is a great one if you love your noodles – there is something so satisfying about a big bowl of juicy noodles, especially udon noodles. I would advise purchasing the fermented black beans from an Asian or Chinese supermarket. Trust me, you will thank me later. They last forever in the cupboard as well, so it’s money well spent.
3 tbsp fermented black beans
4 x 150g packs pre-cooked udon noodles (600g in total)
boiling water, to cover
4 tbsp soy sauce
2 tbsp oyster sauce
1 tbsp hoisin sauce
1 tsp sesame oil
1 tsp Shaoxing wine
1 tsp caster sugar
1/4 tsp salt
1/4 tsp pepper
1/4 tsp chilli flakes
1 tbsp cornflour
1 tbsp vegetable oil
1/2 onion, cut into chunks
1/2 red pepper, deseeded and cut into chunks
1/2 green pepper, deseeded and cut into chunks
4 garlic cloves, chopped
1/2 tsp peeled and chopped fresh ginger
Rinse the black beans in water, drain, then slightly crush them. Put to one side.
Put the noodles into a heatproof bowl and add enough boiling water to cover. Leave for a minute, then start to separate them. Drain and put to one side.
Now mix together the soy sauce, oyster sauce, hoisin sauce, sesame oil, Shaoxing wine, sugar, salt, pepper and chilli flakes in a bowl. Blend the cornflour with 50ml of water in a cup, then add it to the sauce bowl along with another 50ml of water. Give it a good mix.
Heat the vegetable oil in a wok or frying pan over a mediumhigh heat. When it starts to smoke, add the onion and peppers. Keep stirring. When you start to get colour, after about 5 minutes, turn the heat down, add the garlic and ginger and fry for a minute. Add the black beans and fry for another minute. Keep stirring. Now add the beansprouts and stir-fry for 1 more minute. Add the sauce mixture to the pan and stir-fry until the sauce has reduced and thickened, about 2–3 minutes. Fold in the noodles and stir-fry for another minute or two. The noodles should all be coated with the sauce clinging to them.
Spoon into bowls and dig in.

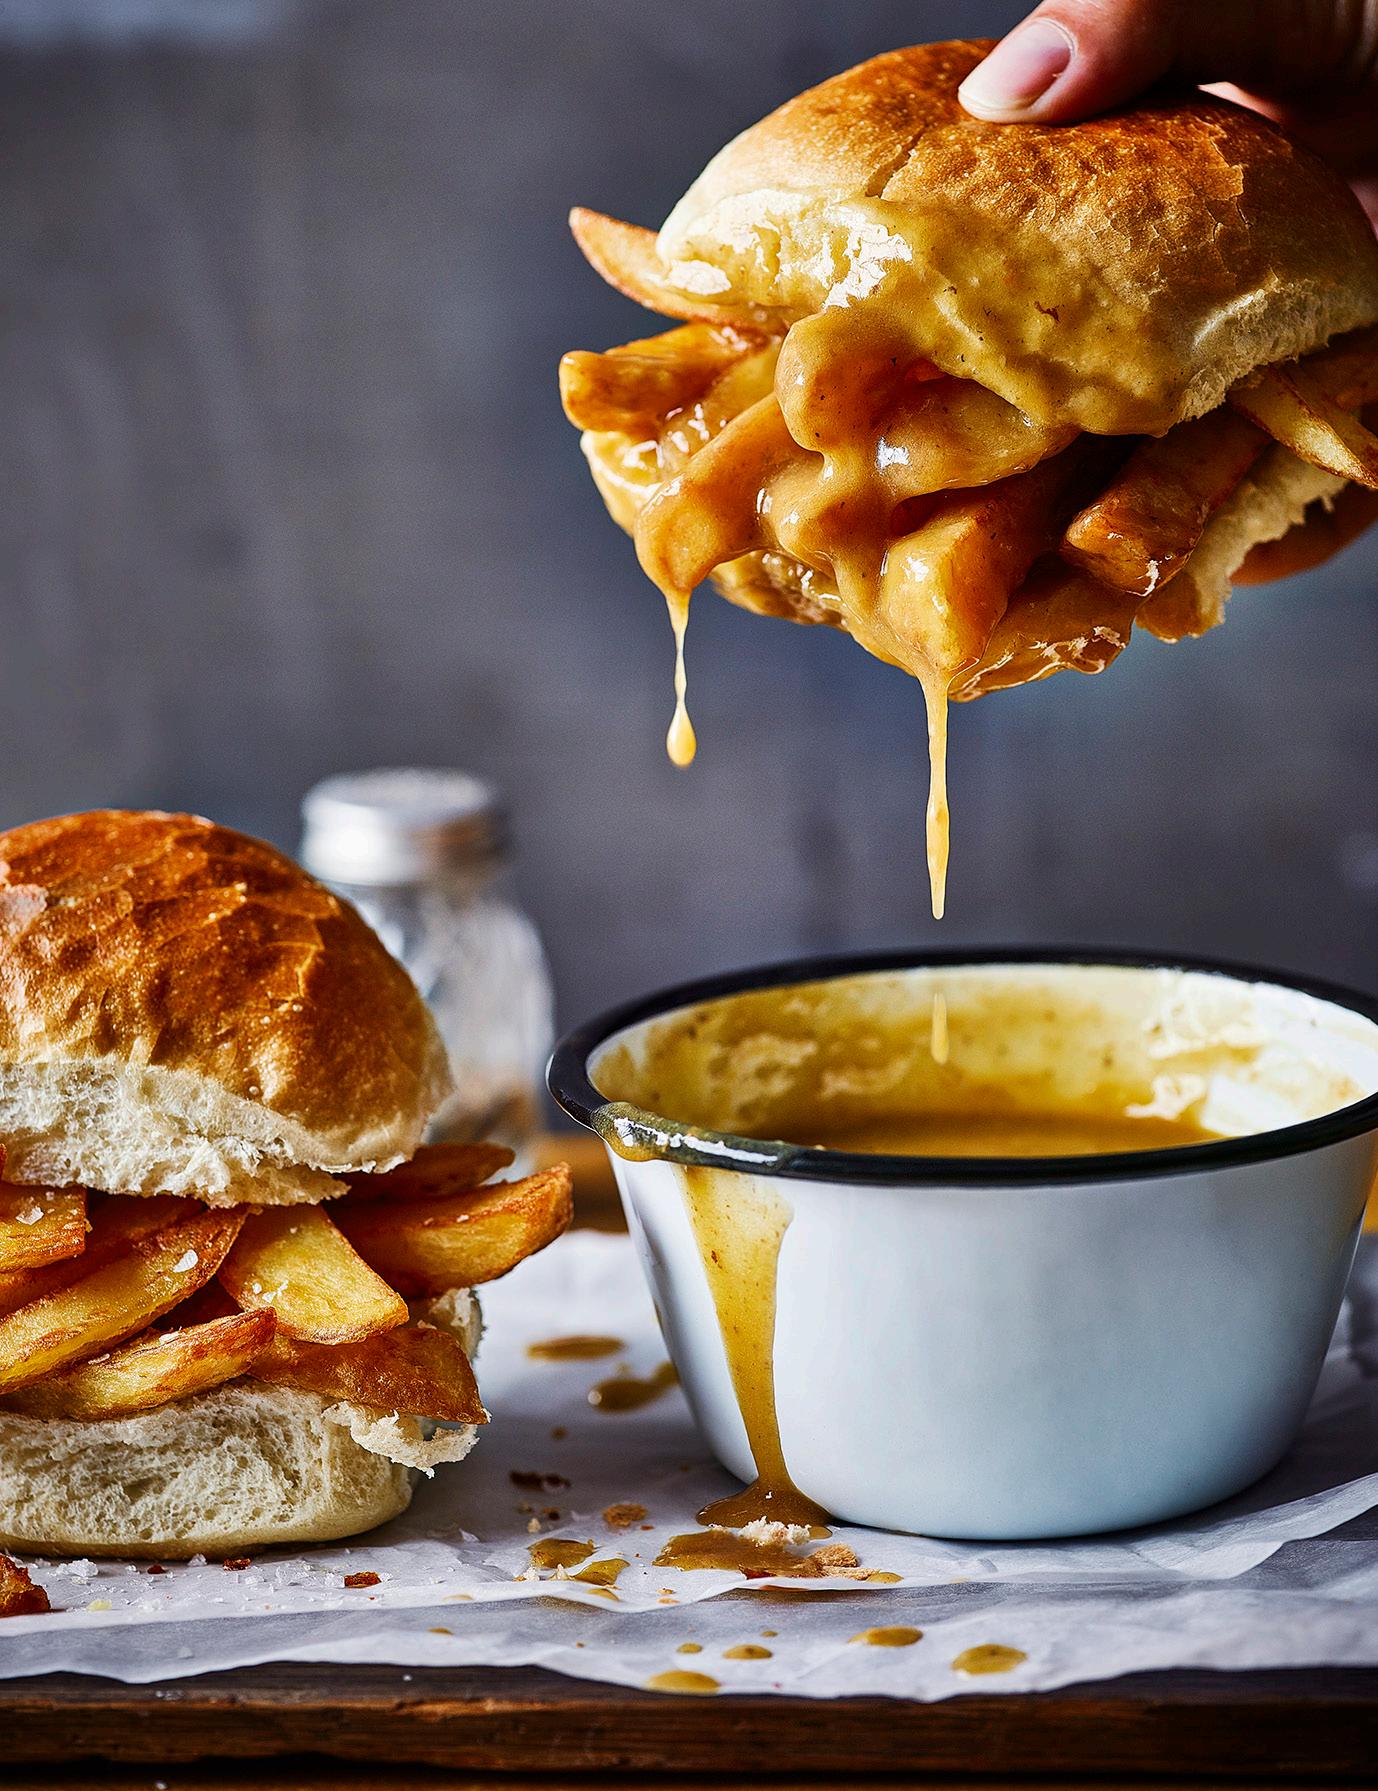
Roasting the leftover chicken carcass is the key for this. Gives it such flavour to build on. Building flavour is what’s it all about. This is nectar in a cob. Don’t be shy adding the liquid gold to ya cobs. Enjoy.
1 leftover chicken carcass, roughly chopped/broken into a few pieces
1 onion, quartered
1 small garlic bulb, cut in half
1 carrot, peeled and cut into chunks
drizzle of vegetable oil
2 tbsp plain flour
300ml dry cider
½ tbsp Worcestershire sauce
½ tsp caster sugar
¼ tsp salt, plus extra for the chips
¼ tsp pepper, plus extra for the chips
1 x quantity home-made plain Chips (from the Chip Shop Curry Sauce and Chips recipe on page xx)
4 crusty cob rolls, split in half
Preheat the oven to 180°C fan/200°C/gas mark 6.
Place the chicken carcass into a roasting tin with the onion, garlic and carrot. Drizzle with a little vegetable oil, then roast in the oven for 30 minutes. This gives the gravy depth of flavour.
Remove from the oven and place the tin on the hob over a low heat. Add the flour and mix well, then stir in the cider, scraping up all the bits from the bottom of the tin. Bring to a simmer, stirring. Transfer the mixture to a large saucepan, then add 1 litre of water, bring to a simmer and simmer uncovered for 1 hour.
Strain the gravy into another saucepan, making sure you push all the flavour out of the chicken and vegetables (then discard these). Return to the heat and add the Worcestershire sauce, sugar, salt and pepper. Stir and simmer until nice, smooth and thickened, about 8–10 minutes.
To serve, I recommend you make plain chips (see the Chips part of the Chip Shop Curry Sauce and Chips recipe on page xx), simply seasoned with salt and pepper. Pile a load of chips into the cobs. You will have enough chips for the side as well. Now pour the gravy into four small bowls. Place on the plates alongside the chip-cobs and chips. Dip your chip-cob into the gravy and enjoy the fruits of your labour. This is a mind-blowing gravy!
You can freeze this gravy for up to 3 months, as well. Just defrost and reheat until hot before serving.


Serves
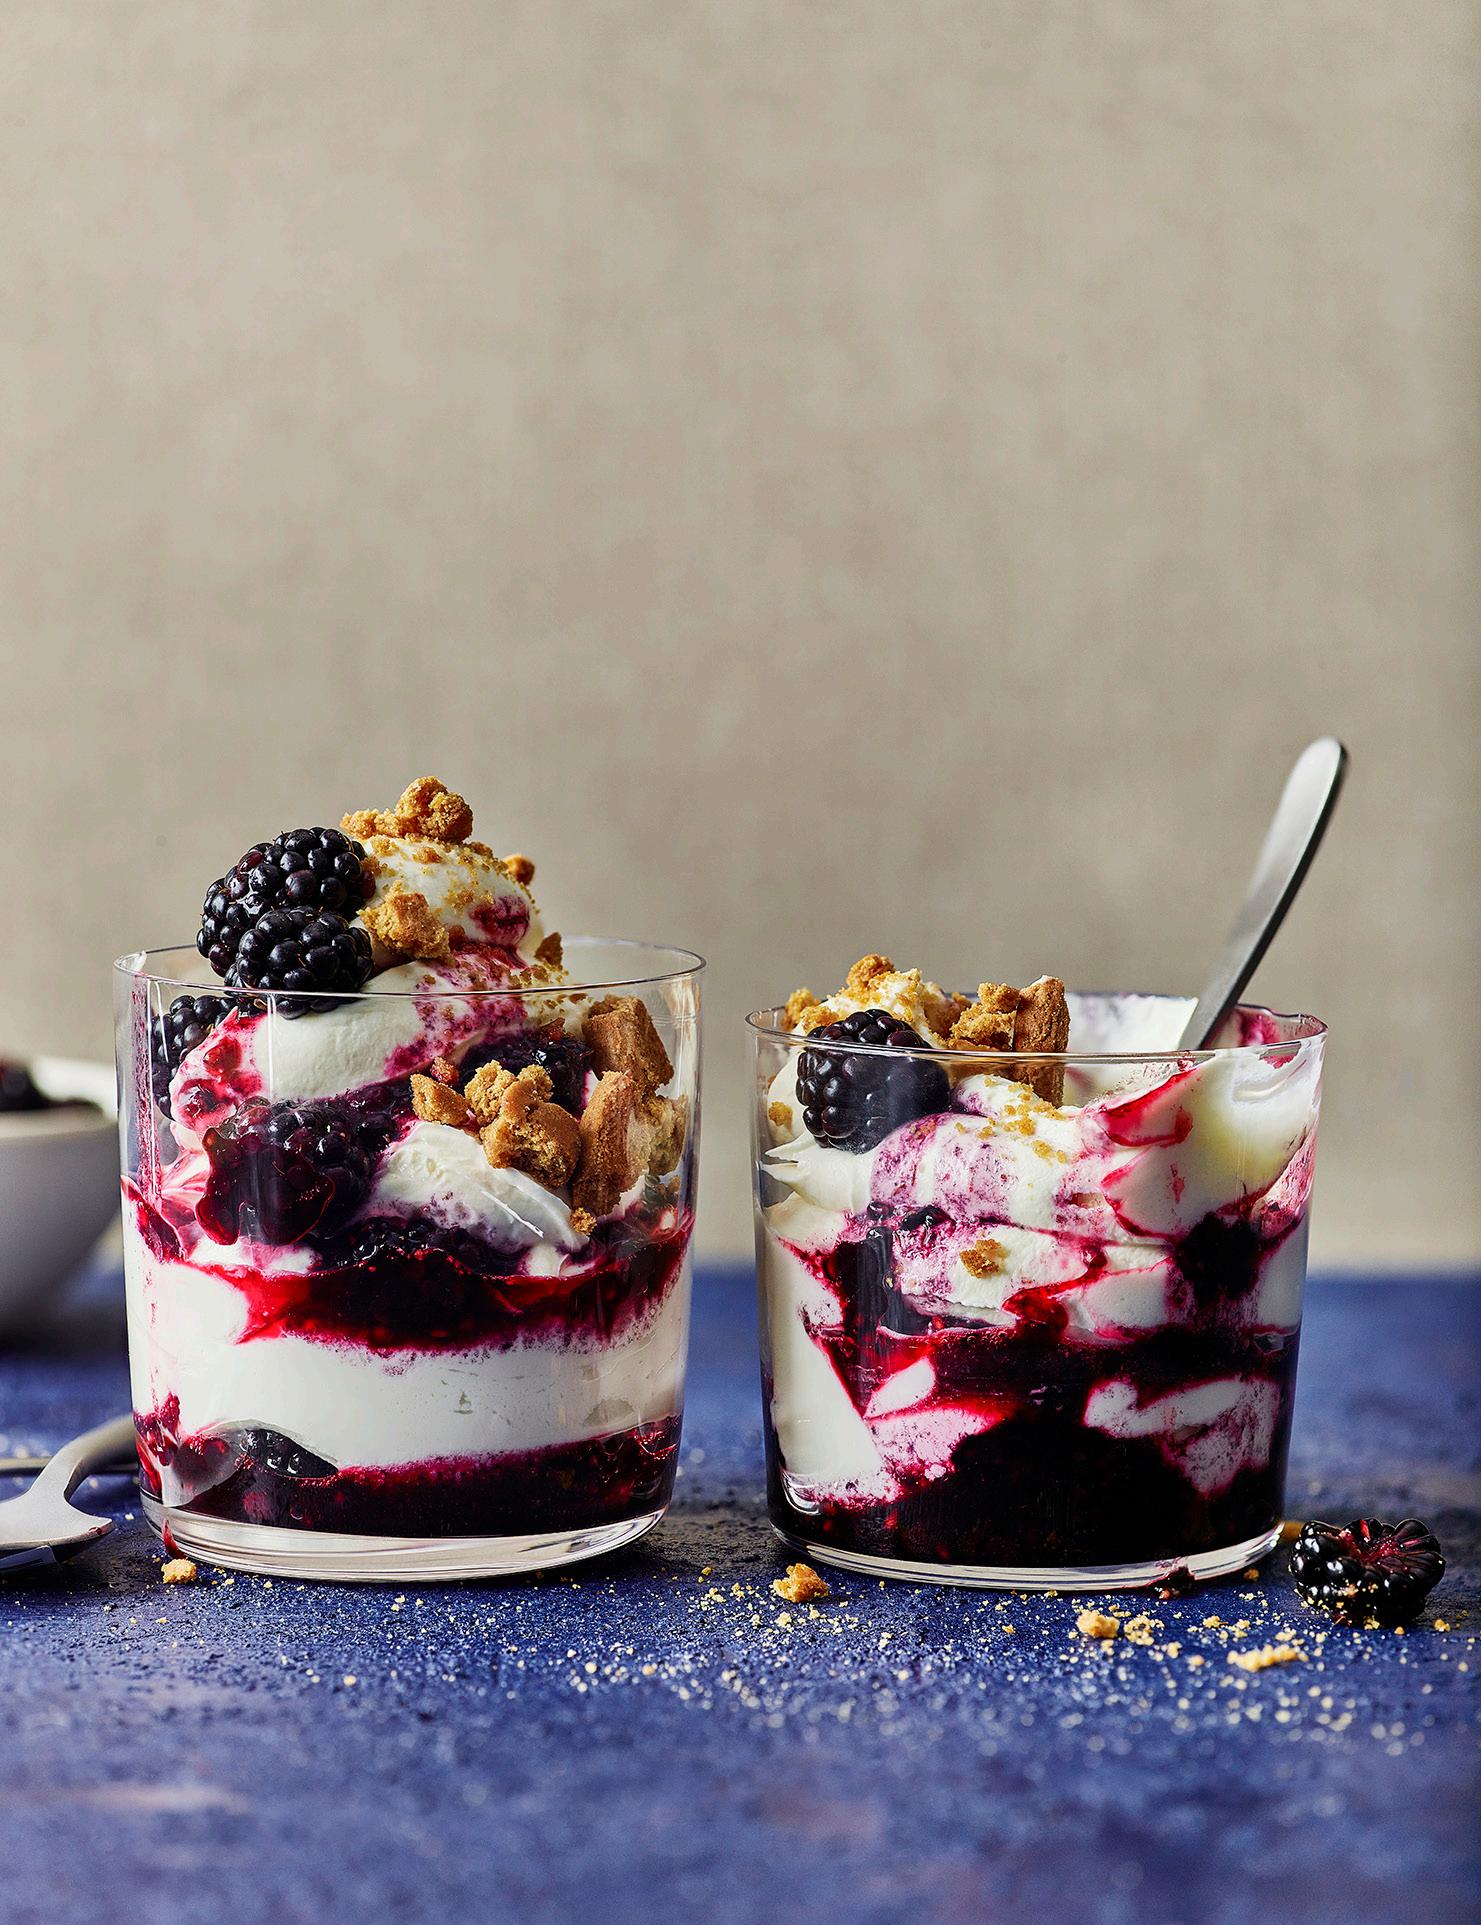
The cream cheese gives this such a silky smooth feeling. Topped with gingernut biscuits adds texture. Spot on.
250ml double cream
3 tbsp icing sugar
1 tsp vanilla extract
150g cream cheese
100g Greek yogurt
200g fresh blackberries
2 tsp caster sugar
4 crunchy ginger biscuits (I use Ginger Nuts)
Take the cream cheese out of the fridge 30 minutes in advance to let it soften.
Add the double cream to a large bowl with the icing sugar and vanilla. Whip together until the cream starts to stiffen (soft peak stage), but don’t over-whip it. Now add the cream cheese and whisk until combined, then add the yogurt and fold it through. Set aside.
Place the blackberries in a separate bowl, putting a few aside to decorate. Sprinkle the caster sugar over the blackberries, then mush them up a bit with a fork, leaving some chunky.
Now spoon some of the mushed berries into the bottom of four clear glass ramekins or wine glasses, then spoon some cream mixture on top. Repeat three or so times, ending with a layer of the cream mixture.
Take your biscuits, put them into a food bag and smash into crumbs with a rolling pin, but leave them quite chunky. Decorate the desserts with the reserved blackberries, then sprinkle each dessert with the biscuit crumbs and serve.
You could make these ahead and chill in the fridge, then add the biscuit crumbs just before serving. I might try this again adding a splash of balsamic vinegar to the blackberries before mushing them up.
Discover over 80 simple, delicious and budget-friendly recipes, packed with clever tricks and twists, that will take your everyday cooking to the next level, no matter your budget or skill-level.
• Ian Bursnall is on a mission to make cooking as accessible as possible.
• Ian – aka The Skint Cook – was a finalist on Jamie Oliver’s Great Cookbook Challenge on Channel 4, where he won the judges over with his inventive twists on crowd-pleasing, budget-friendly family recipes, such as ‘Pimped-up Pigs in Blankets’ and ‘Donna’s Spuds: Roasties with Stilton’.
• His recipes have appeared in Asda’s Good Living magazine, Delicious magazine and Sainsbury’s magazine and he has appeared on Channel 4’s Steph’s Packed Lunch

• Ever since learning to cook at 16, Ian’s passion has been helping and encouraging people to understand flavours and find confidence in the kitchen.
• The Skint Cook will be launched with an unmissable campaign featuring high-profile brand partnerships, digital advertising, features and reviews.
18th January 2024
Hardback | 9780008580186 | UK £20.00
eBook | 9780008580193
For publicity enquiries please contact: UK: HQPressOffice@harpercollins.co.uk
Australia: jo.munroe@harpercollins.com.au
New Zealand: sandra.noakes@harpercollins.co.nz