

Dr. Dan Fischer Founder, Ultradent Products, Inc.


Dr. Dan Fischer Founder, Ultradent Products, Inc.


In 1976, after graduating from Loma Linda University and beginning his own practice, Dr. Dan Fischer invented his groundbreaking Astringedent™ hemostatic solution in response to the need for a tissue management product that achieved more rapid, profound hemostasis. Astringedent hemostatic with the Metal Dento-Infusor™ tip and Ultrapak™ cord became the backbone of Ultradent’s chemical tissue management system. For the first time, clinicians could quickly and predictably achieve profound hemostasis. The success of Astringedent hemostatic fueled Dr. Fischer’s desire to continue developing innovative, advanced solutions — leading to the founding of Ultradent Products, Inc. Now, marking its 45th year as a familyowned, international dental supply and manufacturing company, Ultradent has continued its vision to improve oral health globally by creating better dental products that continue to set new industry standards. Dr. Fischer has numerous patents to his name.
Ultradent currently researches, designs, manufactures, and distributes more than 500 materials, devices, and instruments used by dentists around the world. This includes its renowned, industry-leading Opalescence™ Tooth Whitening System, and the groundbreaking Opalescence Go™ professional take-home whitening system. Ultradent’s product family also includes the award-winning VALO™ LED curing light, UltraSeal XT™ hydro pit and fissure sealant, and Ultra-Etch™ etchant.
Ultradent has been the recipient of Small Business Administration’s Exporter of the Year and Direct Distributor of the Year awards. Most recently, Ultradent was the recipient of the Health Care Heroes award in the category of Corporate Achievement. Ultradent and Dr. Fischer have been recognized for outstanding industry leadership and for making defining contributions to the dental community. In 2013, the Utah Governor’s Office of Economic Development named Dr. Fischer “International Man of the Year” for his contributions to sustaining economic and cultural relations between the state of Utah and the European Union.
Dr. Fischer strives continuously to “Improve Oral Health Globally.” Beyond the dental community, Ultradent donates products to humanitarian efforts locally, nationally, and internationally. Additionally, Ultradent sponsors a nonprofit organization, the Diversity Foundation, a progressive outreach program committed to preventing hate crimes and intolerance. This program promotes diversity and fosters multicultural awareness among individuals from all backgrounds.
Dr. Fischer lives his life according to the same values that guide Ultradent: integrity, quality, hard work, innovation, and care. When he isn’t working, he enjoys tending to his garden and spending time with his wife, children, and lots of grandchildren.
Follow us on our social channels! Scan a QR code to follow our Ultradent Facebook and Instagram for the best deals and updates!
WHITEN • 3–26
Home Whitening with Custom Trays
Block-Out Resin
Tray Sheets
Accessories
Pre-Loaded Whitening Trays
In-Office Whitening
Microabrasion Paste
Desensitizing Gel
PREVENT & HYGIENE • 27–34
Pit and Fissure Sealant
Drying Agent
Sodium Fluoride Varnish
Desensitizing Varnish Whitening Toothpastes
PREPARE • 35–44
Caries Indicator
Tongue-, Lip-, and Cheek Rectractor
Rubber Dams
Interproximal Tooth Guard
Caulking and Putty
Sectional Matrix Systems
Disposable Retainer and Matrix
TISSUE MANAGEMENT • 45–56
Ferric Sulfate
Aluminum Chloride
Iron Solution
Cleaning Solution Knitted Cord Packing Instruments
ETCH & BOND • 57–66
Self-Etch-System (“No-Rinse”)
Total-Etch-System (“Etch and Rinse”)
Phosphoric Acid Gel
Self-Etching-Primer
Bonding Material
Light-Cured Adhesive
Zirconia/Metal Primer
Porcelain Etching
Hydrofluoric Acid Gel
Silane Solution
Calcium Hydroxide Liner
COMPOSITES • 67–76
Universal Composite
Flowable Composite
Composite Wetting Resin
Direct Composite Template System
CEMENTS • 77–86
Polycarboxylate & Resin-Base, Non-Eugenol Temporary Cements
Temporary Veneer Cement
Light-Cure Veneer Luting Resin
Dual-Cure Composite Luting/Restorative Resin
Resin-Reinforced Glass Ionomer Cement
FINISH • 87–98
Single-Use Polishers
Shaping and Finishing Disks
Original Composite Polishing System
Natural Composite Polishing System
Natural Universal Ceramic Polishing System
Universal Ceramic Polishing System
Polishing Brushes
Diamond Polish Paste
Drying Agent
EQUIPMENT • 99–116
Curing Light Accessories
LED Broadband Curing Lights
Diode Lasers
Finishing Strips
Composite Sealer
Protective Eyewear Cutters and Scissors
ENDODONTICS • 117–132
Mineral Trioxide Aggregate Repair
Cement
Canal Sealer
Resin-Coated Gutta Percha
File Lubricants
Calcium Hydroxide Paste
Citric Acid
Endodontic Tips Posts and Drills
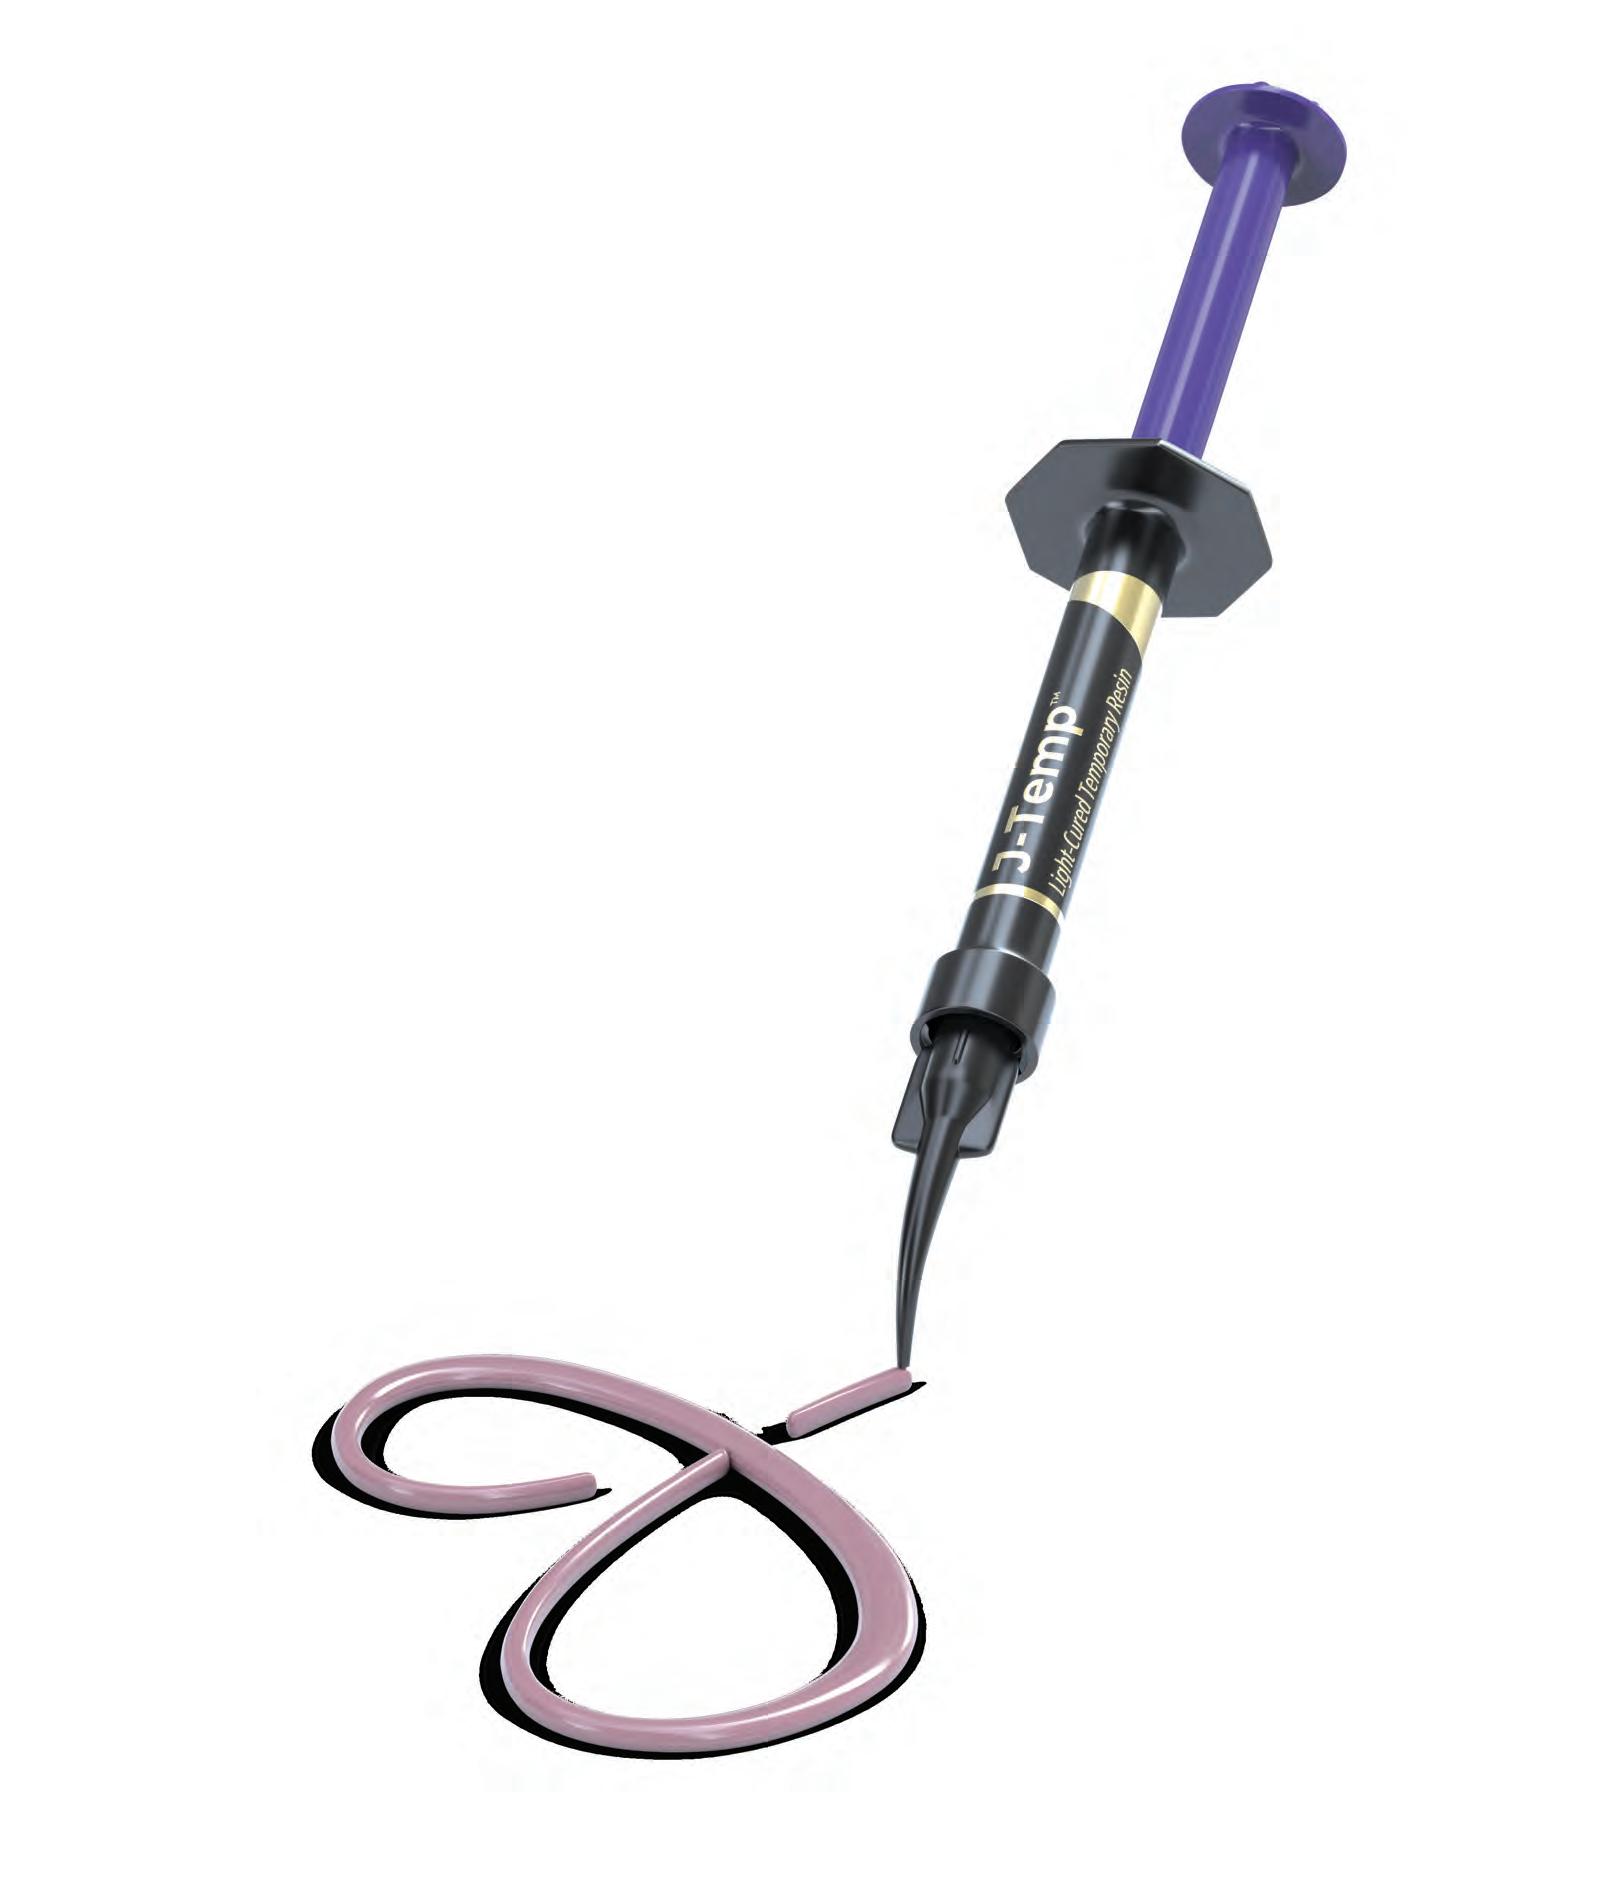
Light-cured temporary resin
TIPS & SYRINGES • 133-142
Restorative Tips
Endodontic Tips
Syringes and Covers
Accessories
Bite Ramps & Temporary Occlusal Buildups
Structure for Isolation Clamping
Restorations
See page 132.


Questions Behind Tooth Whitening Whitening Treatment Protocol
Opalescence Tooth Whitening Reference Guide
Home Whitening with Custom Trays
Block-Out Resin Tray Sheets Accessories
Pre-Loaded Whitening Trays
In-Office Whitening
Resin Barriers
Microabrasion Paste
Desensitizing gel
Lip Retractors
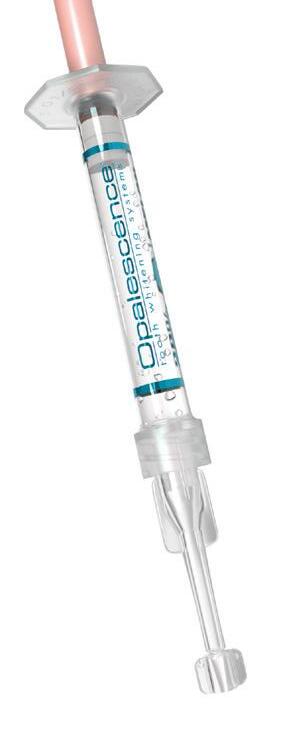
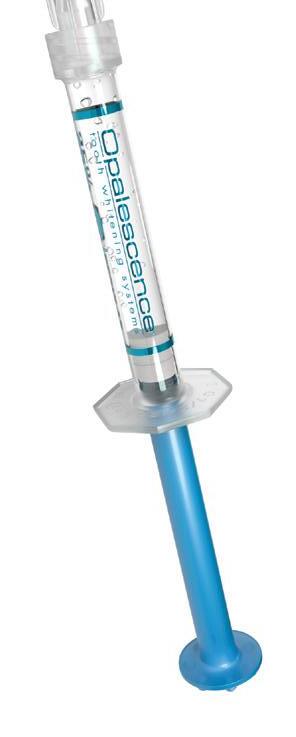

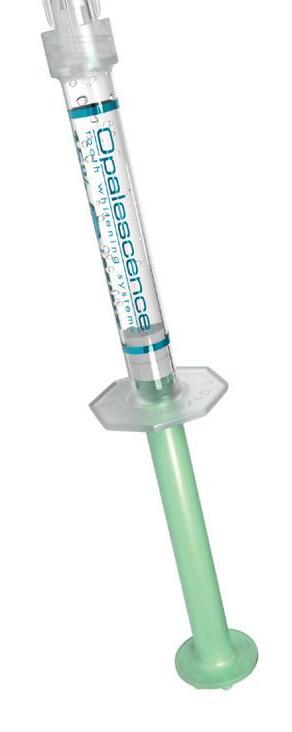
There are many causes of tooth staining. Certain medicines, tooth trauma, root fillings, and foods and beverages can cause tooth discoloration over time. Some discolorations are superficial, while others are internal. Both can be effectively treated by a dentist. Professional whitening is the best option to safely lighten discolored teeth.
Lightening of these discolorations is cosmetic and can be achieved with proven cosmetic whitening products formulated for superior results in our Opalescence™ PF whitening gels that are used with custom trays or in our pre-filled disposable trays offered in Opalescence Go™ with the new UltraFit tray. A brighter, whiter smile is the result. In cases of re-darkening, a short touch-up restores the perfect smile.
Other types of stains can penetrate into enamel and dentin from the inside, as a consequence of diseases, injury or medical treatment, e.g. congenital, systemic, metabolic, pharmacological, traumatic, or iatrogenic factors such as dental fluorosis, jaundice, tetracycline, and adult minocy-cline stains, porphyria, trauma, and erythroblastosis fetalis. To treat staining from these causes, a medical, in-office whitening system is needed. In many cases such focused whitening may make restorations, veneers or crowns unnecessary or postpone them for a long time.
Professional whitening is the best and most minimally invasive option to safely lighten discolored teeth.
Opalescence whitening gels contain an active whitening ingredient, either carbamide peroxide or hydrogen peroxide. Peroxide gels break down into water, oxygen, and reactive oxygen molecules. These reactive oxygen molecules treat both the enamel and the dentin, oxidizing the bonds of discolored stain molecules. By changing the stained molecules, the tooth becomes lighter.1
Reactive oxygen molecules permeate the entire tooth, so there is no need for the whitening agent to be in contact with every surface of the tooth for the entire tooth to be whitened. Because the reactive oxygen molecules need to dissipate from the tooth before bonding, it is necessary to wait 7–10 days before any bonding procedure.2–4
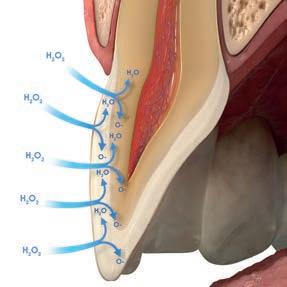
Even though whitening agents release oxygen into the tooth, existing bonds are not weakened.
Note: Allow a period of 7–10 days after whitening treatment before placing any resin. The high concentration of oxygen in the tooth could have a significant adverse effect on polymerization of the resins.
HOW LONG DO WHITENING RESULTS LAST?
Whitening results are very stable. However, depending on the patient’s diet and lifestyle habits, whitening may need to be redone periodically. Due to the safety of the whitening agents, this should not cause any concerns.
WILL WHITENING CAUSE TOOTH SENSITIVITY?
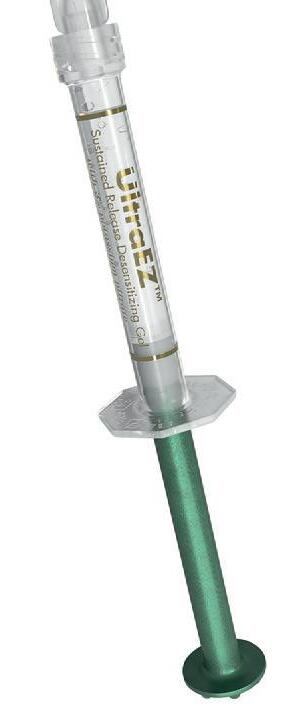
Tooth sensitivity can occur as a result of whitening. If sensitivity occurs, it is transient and disappears after the completion of whitening treatments. If desensitizing treatments are desired, we recommend the use of UltraEZ™ desensitizing gel or Enamelast™ fluoride varnish. Opalescence™ Whitening Toothpaste Sensitivity Relief can also be used to help to prevent or lessen sensitivity if it occurs.
WILL WHITENING WITH OPALESCENCE WHITENING PRODUCTS WEAKEN THE TOOTH’S ENAMEL?
No. Opalescence whitening has not been shown to weaken tooth enamel.5,6,7
IMPORTANT: DENTIST SUPERVISION IS THE BEST WAY TO WHITEN!
Opalescence tooth whitening treatments are effective and safe if they are used appropriately and with the correct materials. This includes a comprehensive exam, briefing on the chosen whitening process, and monitoring of the patient during the treatment phase. Self-treatment by the patient with store-bought products often does not provide the results desired, and leaves the patient without options for managing potential sensitivity or other concerns.
1. Kwon SR, Wertz PM. Review of the Mechanism of Tooth Whitening. J Esthet Restor Dent. 2015 Sep-Oct;240-57. 2. Da Silva Machado J, et al. The influence of time interval between bleaching and enamel bonding. J Esthet Restor Dent. 2007;19(2):111-8; discussion 19. 3. Spyrides GM, et al. Effect of whitening agents on dentin bonding. J Esthet Restor Dent. 2000;12(5);264-70. 4. Unlu N, Cobankara FK, Ozer F. Effect of elapsed time following bleaching on the shear bond strength of composite resin to enamel. J Biomed Mater Res B Appl Biomater. 2008 Feb;84(2);363-8. 5. Metz MJ, Cochran MA, Matis BA, Gonzalez C, Platt JA, Pund MR. Clinical evaluation of 15% carbamide peroxide on the surface microhardness and shear bond strength of human enamel. Oper Dent. 2007;32(5):427-436. doi:10.2341/06-142
6. Cadenaro M, Navarra CO, Mazzoni A, et al. An in vivo study of the effect of a 38 percent hydrogen peroxide in-office whitening agent on enamel. J Am Dent Assoc. 2010;141(4):449-454. doi:10.14219/jada.archive.2010.0198
7. Cadenaro M, Breschi L, Nucci C, et al. Effect of two in-office whitening agents on the enamel surface in vivo: a morphological and non-contact profilometric study. Oper Dent. 2008;33(2):127-134. doi:10.2341/07-89
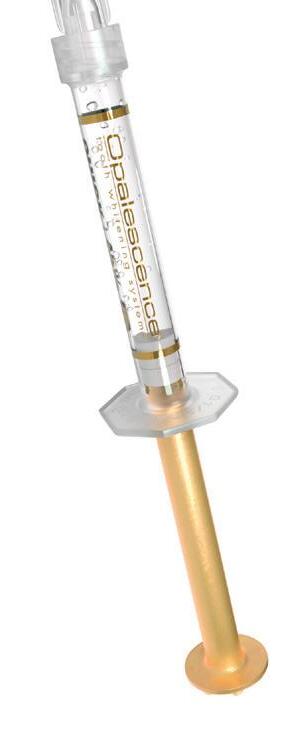
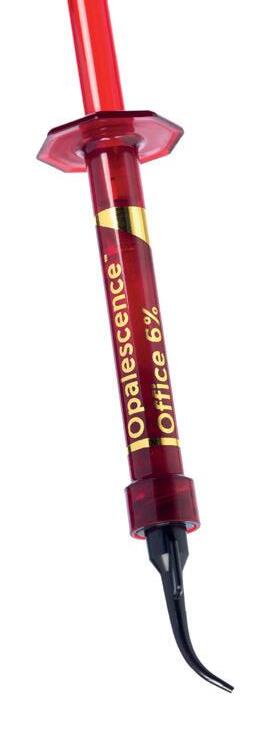


We recommend the following steps for professional whitening evaluation and treatment.
Evaluate the origin of tooth staining and check for restorations that could affect the final result (use X-Ray if needed). Assess the intention of whitening system (cosmetic for generic “day-by-day” discoloration; medical devices for teeth discolored by disease, injury or medical treatment). Consider amending your periodical medical history by adding a question about the patient’s satisfaction with their oral esthetics. Explain to the patient that restorations will not whiten, and discuss the possible need for new restorations after whitening. Check existing sensitivities, and perform an adequate treatment before starting a whitening procedure. Pregnant or breastfeeding women should not whiten. Patients with serious health concerns should consult their primary care provider prior to treatment. Cosmetic teeth whitening treatments are not permited under the age of 18.
Determine origin of staining, evaluate gingival and dental health. Check for restorations in the esthetic zone that may not match after whitening. Discuss changing them out or resurfacing after whitening.
Discuss the possibilities and limitations of whitening for their specific circumstance and help them to establish realistic expectations.
4. PERFORM HYGIENE TREATMENT
Proceed to the hygiene treatment. Use polishing paste to remove all plaque. For patients with known sensitivity, apply Enamelast™ fluoride varnish after polishing.
5. DETERMINE THE INITIAL TOOTH COLOR
Identify the initial tooth color with the aid of a shade guide. Take a photograph with shade tab after hygiene treatment.
6. EDUCATE PATIENT
Tooth whitening results can last a year or more.1,2 Depending on the patient’s nutrition and lifestyle habits, whitening may need to be repeated periodically to maintain the look they desire. Instruct patient how to use the chosen whitening products and answer any questions or concerns.
7. CREATE WHITENING TREATMENT PLAN
Multiple Opalescence™ whitening products may be used as part of the whitening treatment plan to help the patient achieve their desired results. If patient has a history of tooth sensitivity, add a desensitizing protocol prior to the whitening treatment, consider using a lower concentration of gel and/or reduced wear time. Patients can also
use Opalescence™ Whitening Toothpaste Sensitivity Relief before and throughout their whitening treatment. Additionally, if patient tolerates whitening treatments without sensitivity, consider providing a higher concentration gel for more rapid results.
Have the patient sign a whitening consent form that outlines the whitening treatment and cost involved.
Identify the final tooth color using the shade guide. Take a photograph with initial and final shade tab. A definitive color change should only be recorded a few days after the end of the treatment, as the teeth may continue to whiten after the final whitening treatment.
10.
Some patients may experience lingering sensitivity. We recommend using UltraEZ™ desensitizing gel or Enamelast™ fluoride varnish. Opalescence ™ Whitening Toothpaste Sensitivity Formula can also be used to help minimize sensitivity.
Note: Allow a period of 7–10 days after whitening treatment before placing any resin. The high concentration of oxygen in the tooth could have a significant adverse effect on polymerization of resins.
1. de Geus JL, de
Attin T. 12-month color stability of enamel, dentine, and enamel-dentine samples after bleaching. Clin Oral Investig 2008;12(4):303-310.
Opalescence™ Tooth Whitening Reference Guide
PRODUCT NAME CONTENTSINDICATIONS FOR USE
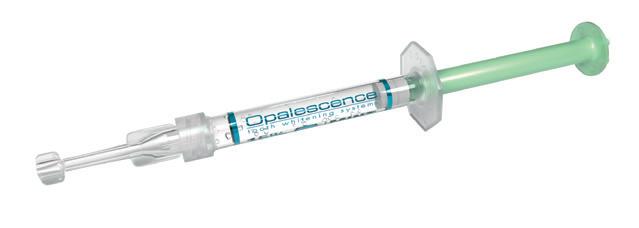
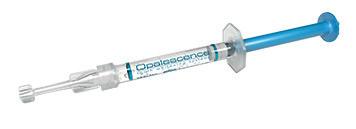

Opalescence™ PF 10 %
Opalescence™ PF 16 %
Opalescence Go™ 6 %
Opalescence™ Office 6 %
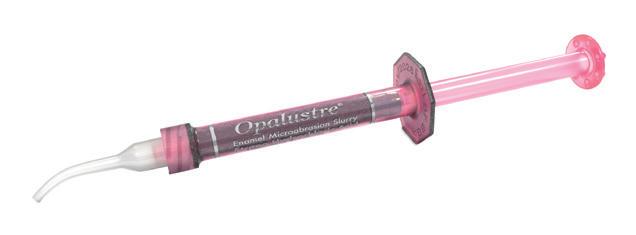
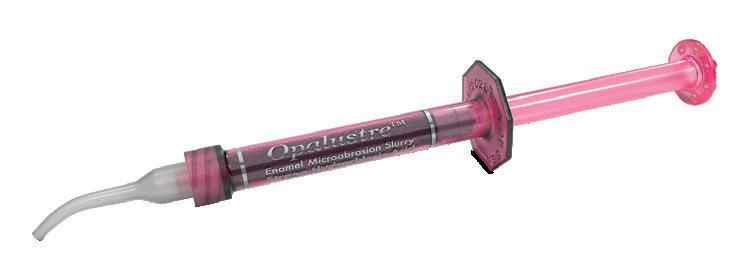
Opalustre™ Microabrasion Slurry

UltraEZ™ Desensitizing Gel
Potassium Nitrate, Fluoride, and Xylitol
Potassium Nitrate, Fluoride, and Xylitol
Potassium Nitrate, Fluoride, and Xylitol
Potassium Nitrate and Fluoride
COSMETIC, TAKE-HOME
Patients with sensitivity concerns; can be worn day or night
COSMETIC, TAKE-HOME
Faster whitening, recommended to wear during the day
COSMETIC TAKE-HOME
Ready-to-go, an alternative to store-bought products
COSMETIC, DENTIST-ADMINISTERED Fast chairside treatment
DENTIST-ADMINISTERED Chairside treatment to remove superficial enamel imperfections
Potassium Nitrate and Fluoride TAKE-HOME Sensitivity treatment
Note: To determine HP equivalence from a labeled CP concentration, divide by three. For example, 45% CP is equivalent to ~15% HP. This is important to know in order to correctly assess the intensity of whitening products.
10 % Mint
10 % Melon
10 % Regular 8–10 hours a day 10 % Carbamide Peroxide
16 % Mint
16 % Melon
16 % Regular 4–6 hours a day 16 % Carbamide Peroxide
6 % Mint
6 % Melon 60–90 minutes a day 6 % Hydrogen Peroxide
5x 20-minute applications DO NOT exceed 6 applications per visit 6 % Hydrogen Peroxide
Hydrogen Peroxide vs. Carbamide Peroxide Concentrations
Office visit
% Hydrochloric Acid Silicone Carbide 15–60 minutes a day 3 % Potassium Nitrate and 0,25 % Neutral NaF
30+

50+
100 years of experience industry awards in whitening million smiles brightened


It is one of the oldest dreams of mankind - to have whiter teeth. In ancient times, people tried it with many ingredients and techniques; mostly in vain or they had to put up with severe damage to their teeth. Today we are able to whiten teeth effectively without adverse effects. But the prerequisites are two-fold: you need the right materials - like our Opalescence gels, containing the PF formula (potassium nitrate and fluoride), which helps mantain the health of enamel thorough the whitening process. On the other hand, the correct handling is essential.
The EU amendment for the Cosmetic Directive* stipulates a procedure which we have always practiced: the involvement of a dentist in the cosmetic whitening process. Thus, the whole treatment is carried out under the care of a dental professional and the patient’s teeth are in safe hands.
“For each cycle of use, the first use to be only done by dental practitioners or under their direct supervision if an equivalent level of safety is ensured. Afterwards to be provided to the consumer to complete the cycle of use.”*
PRODUCT NAMEINDICATIONS FOR USEACTIVE INGREDIENT

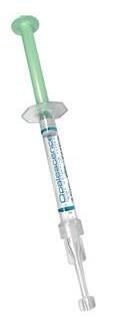


Opalescence™ PF 10 %
COSMETIC, TAKE-HOME
Patients with sensitivity concerns; can be worn day or night 10 % Carbamide Peroxide
COSMETIC, TAKE-HOME
Opalescence™ PF 16 %
Opalescence Go™ 6 %
Opalescence™ Office 6 %
Faster whitening, recommended to wear during the day 16 % Carbamide Peroxide
COSMETIC TAKE-HOME
Ready-to-go, an alternative to OTC products 6 % Hydrogen Peroxide
COSMETIC, DENTIST-ADMINISTERED Fast chairside treatment 6 % Hydrogen Peroxide
Peroxide vs. Carbamide Peroxide Concentrations 10% CP 16% CP
~3% HP ~5,8% HP 6% HP 6% HP

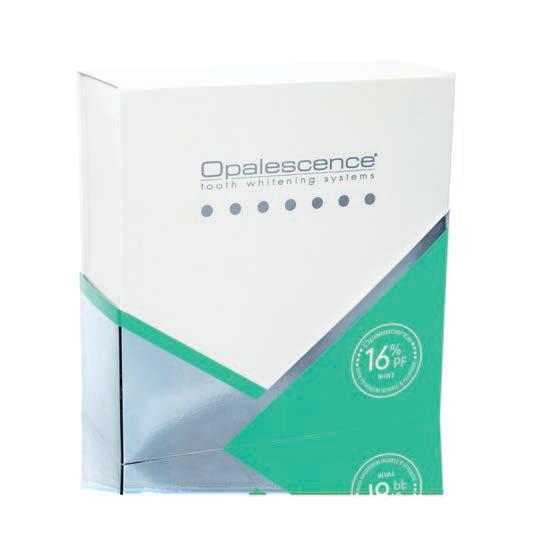
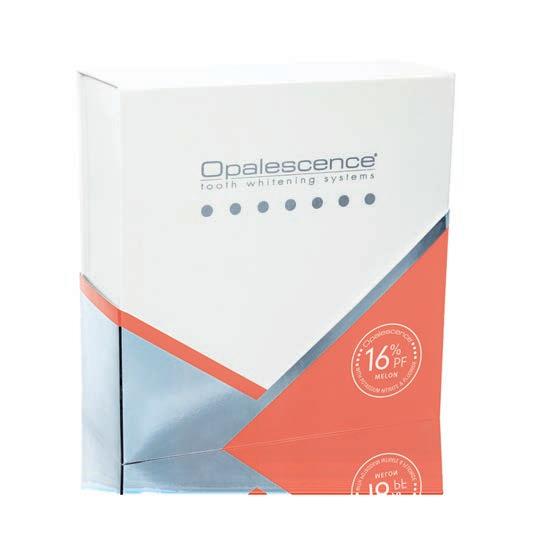
Opalescence™ PF 10% and 16%
CARBAMIDE PEROXIDE WITH POTASSIUM NITRATE AND FLUORIDE
•Cosmetictoothwhiteningwithcustomtrays
•OpalescencePFtoothwhiteninggelscontain PF(potassiumnitrateandfuoride)
•OpalescencePFcosmeticwhiteninggelis designedtomaximizepatientcomfort
•Sticky,viscousgelwon’tmigratetosofttissues andensurestraystayssecurelyinplace
•Formulatedtopreventdehydrationandshaderelapse
•Twoconcentrationsfortreatmentfexibility
•AvailableinMint,Melon,andRegularfavors
•Dayornightwear
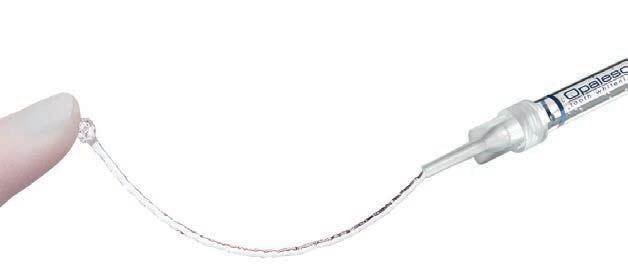
The sticky, viscous formula of Opalescence whitening gel does not leach from the tray like other whitening agents2, and the sticky gel holds the comfortable tray securely in place. Opalescence PF gel contains potassium nitrate and fluoride. Opalescence is effective in helping reduce shade relapse as compared to competitor tooth whitening products.3 Opalescence whitening gel is made up of at least 20% water which helps prevent dehydration. A university study proves that the gel stays active for 8–10 hours during overnight whitening,5 which means patients experience results quickly, increasing compliance. Opalescence gel is available in a variety of concentrations, formulations, flavors, and kit configurations to meet all your patients’ whitening needs.
Opalescence whitening gel is recommended for whitening discolored teeth prior to placement of composite, veneers, and/or crowns. It is effective in breaking down some or all internal tooth discolorations due to factors such as congenital, systemic, pharmacologic, traumatic, etc., as well as aging. It is successful with staining from fluorosis and tetracycline.3,6


THROUGH THE NIGHT!
Indiana University: Small quantities of Opalescence 10% gel were removed and analyzed at various intervals.4
1. realityesthetics.com. 2. Cordeiro D, Toda C, Hanan S, et al. Clinical evaluation of different delivery methods of athome bleaching gels composed of 10% hydrogen peroxide. Oper Dent. 2019;44(1):13–23. doi:10.2341/17-174-C 3. Caughman WF, DMD, Frazier KB, Haywood, VB. Carbamide peroxide whitening of non-vital single discolored teeth: Case reports. Quintessence Int. 1999;30(3):155-61. 4. Grobler, S.R., et al. A Clinical Study of the Effectiveness of Two Different 10% Carbamide Peroxide Bleaching Products: A 6-Month Follow-up; Int J Dent. May 5, 2011: 167525; doi: 10.1155/2011/167525. 5. Matis BA, Gaiao U, Blackman D, Schultz FA, Eckert G. In vivo degradation of bleaching gel used in whitening teeth. J Am Dent Assoc. 1999;130(2):227-35. 6. Morgan J, Presley S. In-office “power” bleaching of vital teeth as an adjunct to at-home bleaching. Pract Perio Aesthet Dent. 2002;14(2):16–23.
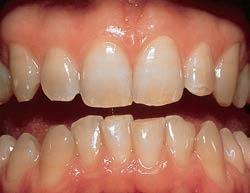
Before whitening.

Upper teeth after 5 nights of treatment with Opalescence PF 10% whitening gel, approximately 40 hours.
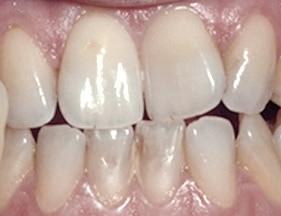
Before whitening.
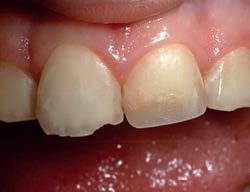
Before whitening; new restorations are planned.
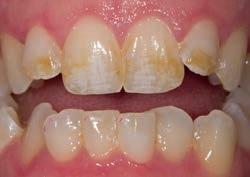
Before whitening.

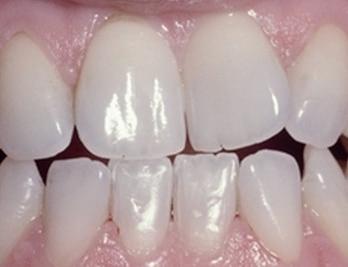
After 8 days of treatment with Opalescence PF 16% whitening gel, every day for 3 hours.
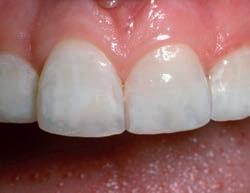
After 6 days of treatment with Opalescence PF 10% whitening gel, every night for 8 hours. New composite restorations in place.
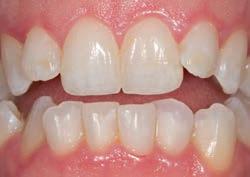
After one month of whitening.

Moderate to advanced tetracycline stains. Improvement in 2 weeks. With tetracycline stains, treatment can require 2 to 6 months.1

1. Instruct the patient to brush their teeth prior to loading and inserting tray. Go over instructions with the patient that are provided in the whitening kit. Explain the process of loading the tray by expressing one continuous bead of gel approximately halfway up from the incisal edge on the facial side of the tray from molar to molar. Explain that this should use about 1/3 to 1/2 of a syringe.
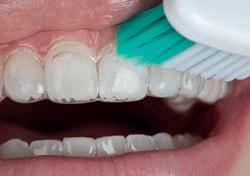
3. If too much gel has been placed or gel has been forced from tray, gently wipe off with a toothbrush.
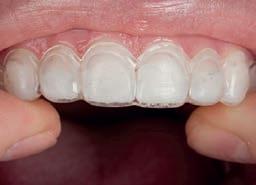
2. Place tray over teeth. Gently press tray to move gel into place. Pressing too firmly will force gel out of tray.
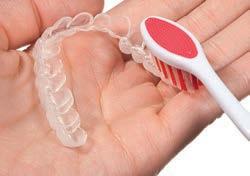
4. Clean tray with toothbrush and water. Store tray in appliance case when not in use. Remind patient to follow the whitening regimen you have established.

1. Pour impression with fast-set plaster or dental stone. Pour alginate shortly after making impression to ensure accuracy. Trimming is less work if quantity of stone is kept to a minimum. Palate and tongue areas are not poured or should be removed after plaster has set. Allow model to dry two hours.

3. Use the vacuum former to heat Sof-Tray Classic tray material until it sags approximately 5 to 15 mm (1/4 to 1/2 inch) for the 0,9 mm (0.035”) sheets, and 25 mm (1”) for the 1,5 mm (0.060”) and 2,0 mm (0.080”) sheets. Adapt plastic over model. Cool and remove model from vacuum former.
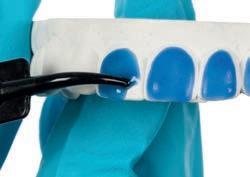
2. For reservoir spaces, apply Ultradent™ LC Block-Out Resin approximately 0,5 mm thick onto labial surfaces and approximately 1,5 mm shy of the gingival margin. DO NOT extend onto incisal edges or occlusal surfaces. Using VALO™ curing light, cure each tooth 5 seconds. Wipe off oxygen inhibition layer.
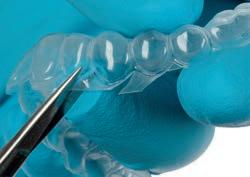
4. With tactile scissors (Ultra-Trim Scalloping Scissors), carefully and precisely trim tray to clear line which is at gingival height. Scallop edges to avoid contact with gingival tissue.
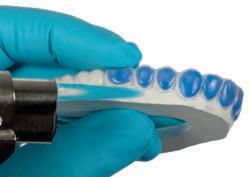
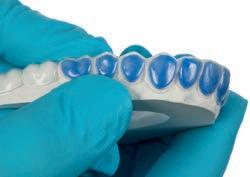
5. Return tray to model; check tray extensions. Gently flame polish the edges one quadrant at a time, if necessary, with a butane torch. While still warm, immediately hold periphery of each segment firmly against model for three seconds with water-moistened gloved finger. If this over-thins the tray material, fabricate a new tray.
4845 - Opalescence Refill Sleeves 10pk
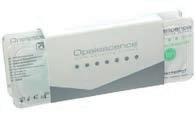
Opalescence PF Patient Kits

Flavor 10%16%
Mint53644480
Melon53654481
Regular53664482
8 x 1,2 ml (1,50 g) Opalescence PF syringes 1 x 20 ml (28 g) Opalescence Whitening Toothpaste 1 x Tray case 1 x Shade guide
Opalescence PF Doctor Kits
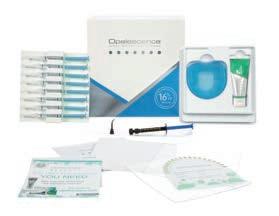
Flavor 10%16%
Mint53794483
Melon53804484
Regular53814485
8 x 1,2 ml (1,50 g) Opalescence PF syringes 1 x 1,2 ml (1,38 g) Ultradent LC Block-Out Resin syringe 2 x Sof-Tray 0,9 mm sheets 1 x Black Mini tip
1 x 20 ml (28 g) Opalescence Whitening Toothpaste 1 x Tray case 1 x Shade guide
Opalescence PF Syringe Refills
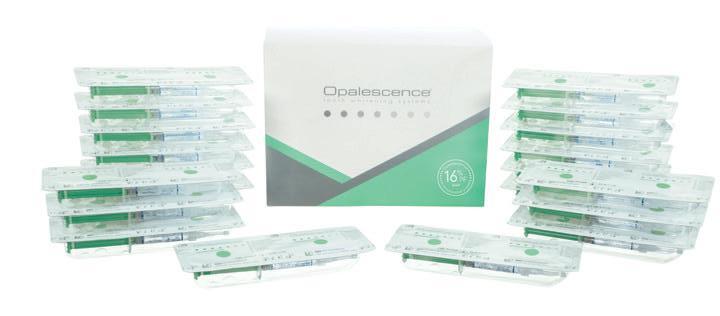
Flavor 10%16%
Mint53944486
Melon53954487
Regular53964488
40 x 1,2 ml (1,50 g) Opalescence PF syringes


• Optimal viscosity for proper application
• Blue pigment for visibility during application
• Great utility resin with multiple uses
Ultradent LC Block-Out Resin provides reservoir space for whitening trays and is useful for other laboratory procedures such as model and die repairs. Ultradent LC Block-Out Resin can be rapidly and efficiently delivered with the Black Mini tip. It must be light cured and is not intended for intraoral use.
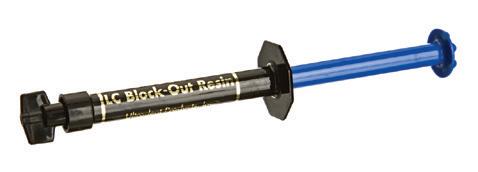

240 - Ultradent LC Block-Out Resin Kit 4 x 1,2 ml (1,38 g) Ultradent LC Block-Out Resin syringes 20 x Black Mini tips


242 - Ultradent LC Block-Out Resin Econo Kit 20 x 1,2 ml (1,38 g) Ultradent LC Block-Out Resin syringes 20 x Black Mini tips
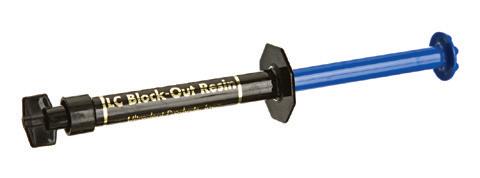
241 - Ultradent LC Block-Out Resin Refill 4 x 1,2 ml (1,38 g) Ultradent LC Block-Out Resin syringes
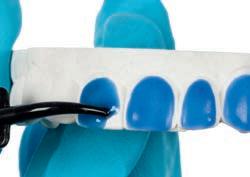
For reservoir spaces, apply Ultradent LC
Resin approximately 0,5 mm
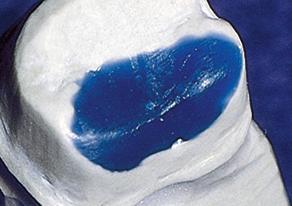
LC
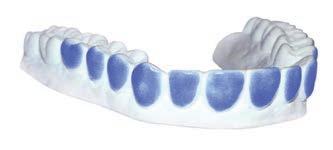
Use for reservoir spaces.
“Ultradent LC Block-Out Resin is the original resin block-out product for extraoral use and it’s still the best.” —REALITY RATINGS

Also use for periodontal trays.

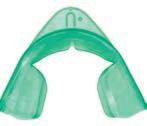
Select the 0,9 mm for most whitening trays, and the 1,5 mm or the 2,0 mm for whitening patients who are bruxers.

Use the vacuum former to heat Sof-Tray™ Classic tray material until it sags approximately 5 to 15 mm (1/4 to 1/2 inch) for the 0,9 mm (0.035”) sheets, and 25 mm (1”) for the 1,5 mm (0.060”) and 2,0 mm (0.080”) sheets. Adapt plastic over model. Cool and remove model from vacuum former.
226 - Sof-Tray Sheets Regular 25pk 0,9 mm (0.035ʺ) - 127 x 127 mm
• Use for precise trimming of border around interdental papilla
• Spring loaded to minimize finger fatigue
• Grips tray material easily
• Made of durable stainless steel
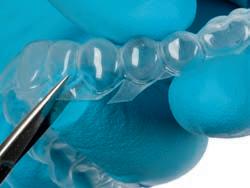

605 - Ultradent Ultra-Trim Scalloping Scissors 1pk

227 - Sof-Tray Sheets Medium 20pk 1,5 mm (0.060ʺ) - 127 x 127 mm
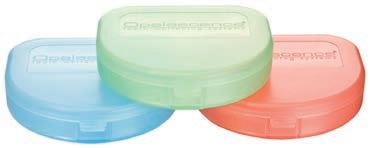
• Protect trays when they are not in use
• Flat, pocket-sized design
• Inside dimensions: 7,5 x 7 x 1,5 cm
707 - Pocket Tray Cases (Variety) 20pk 6 x blue, 7 x green, 7 x melon
284 - Sof-Tray Sheets Heavy 20pk 2,0 mm (0.080ʺ) - 127 x 127 mm


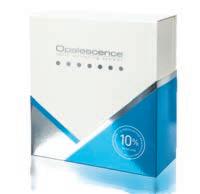


PREFILLED WHITENING TRAYSHYDROGEN PEROXIDE
1


• Cosmetic tooth whitening in prefilled trays
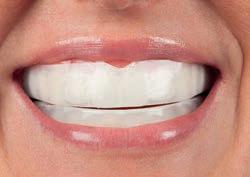
• Unique UltraFit™ tray material offers a remarkably comfortable fit and easily conforms to any patient’s smile
•Molar-to-molarcoverageensuresthegelcomes incontactwithmoreposteriorteeth
•OpalescenceGocosmeticwhiteninggelis designedtomaximizepatientcomfort
•Convenientprefilledtrayscanbewornrightoutofthepackage
•Optimalgelquantityallowseasycleanupafterwhitening
•Wear60–90minutespertray
•OpalescenceGotoothwhiteninggelcontains PF(potassiumnitrateandfuoride)
•DeliciousMintandMelonfavors
Opalescence Go take-home whitening system is recommended for patients looking for professional whitening to go or as an alternative to store-bought whitening products. With no impressions, models, or lab time required, Opalescence Go whitening trays are also a perfect follow-up to in-office whitening.

tray for insertion and placement only
Soft, thin, adaptable tray material adapts to tooth anatomy for a more comfortable fit
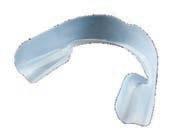

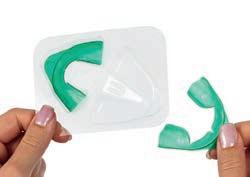
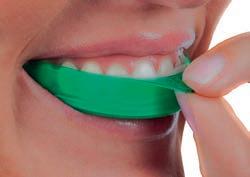
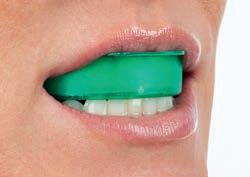
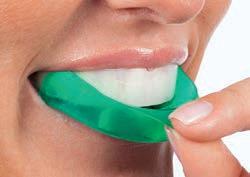
1. Remove product from packaging.
Upper whitening tray
Lower whitening tray
REFRIGERATE
Opalescence Go Patient Kits

Each kit contains 10 blister packs w/1upper/1 lower tray 1 x 20 ml (28 g) Opalescence Whitening Toothpaste
REFRIGERATE
Opalescence Go Patient Kits Case of 6
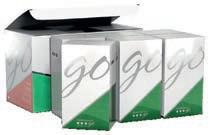
10 x Each upper/lower trays in each kit 1 x 20 ml (28 g) Opalescence Whitening Toothpaste
REFRIGERATE
Opalescence Go Mini Kits


Each kit contains 4 blister packs w/1upper/1 lower tray
REFRIGERATE
Opalescence Go Mini Kits Case of 12
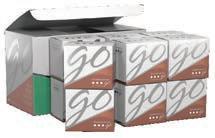
4 x Each upper/lower trays in each kit
IN-OFFICE WHITENER
HYDROGEN PEROXIDE

• Cosmetic tooth whitening with 6% hydrogen peroxide
• NO LIGHT NEEDED!
• Up tp five 20-minute applications, not exceeding 6 applications in one visit
• Opalescence Office whitening gel is designed to maximize patient comfort
• Precise delivery; Easy to see for complete removal
• Contains PF (potassium nitrate and fuoride)
Opalescence Office in-office whitening is a cosmetic tooth whitening system designed for a first-contact chairside whitening treatment. The beginning of the whitening treatment is under full control or supervision of the dentist, in accordance with the European Cosmetic Directive. Opalescence Office whitening can be used as a exclusive whitening treatment from start to finish. Set realistic expectations with your patients, as several in-office appointments may be needed. Opalescence Office gel is chemically activated, it does not require a light for whitening. Syringe-to-syringe mixing activates the product just prior to application. The activated 6% hydrogen peroxide is conveniently delivered via syringe and applied to teeth for whitening.
REFRIGERATE
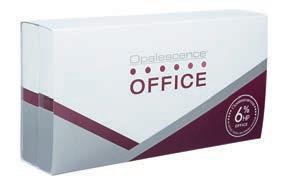
4740 - Opalescence Office 6% Intro Kit
4 x 1,2 ml (1,49 g) Opalescence Office/Activator syringes
2 x 1,2 ml (1,34 g) OpalDam Green syringes
2 x Ultradent Luer Vacuum Adapters
2 x IsoBlocks, 2 x Shade guide cards
2 x SST tips
20 x Black Mini tips
REFRIGERATE

4757 - Opalescence Office 6% Patient Kit
2 x 1,2 ml (1,49 g) Opalescence Office/Activator syringes
1 x 1,2 ml (1,34 g) OpalDam Green syringe
1 x IsoBlock, 1 x Shade guide card 10 x Black Mini tips


1. Check to see that the syringes are securely attached. Depress the small clear plunger (A) into the middle small clear syringe (B) to rupture the internal membrane and combine whitening agent and activator.


2. Press the plunger of the red syringe (C) in, pushing all contents into the clear syringe (B).
REFRIGERATE


3. Press the clear plunger completely back into the purple syringe (C). To thoroughly mix activator with whitening gel, push stems back and forth continually with thumbs and mix a minimum of 50 times rapidly (25 times each side).

4. Press all mixed gel into the PURPLE syringe. Separate the two syringes and attach the Micro 20 ga FX™ tip onto the purple syringe. Check the flow on a cotton gauze or mixing pad prior to applying it intraorally. If resistance is met, replace the tip and recheck the flow.

4759 - Opalescence Office 6% Mini Kit
2 x 1,2 ml (1,49 g) Opalescence Office/Activator syringes
1 x Shade guide card
5 x Black Mini tips


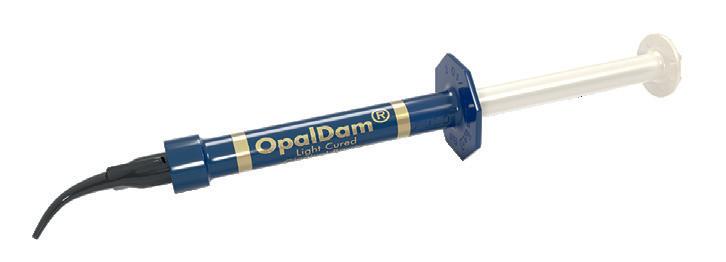


• Protects soft tissue with excellent seal
• Removes easily
• Applies directly
OpalDam light-cured resin barrier is a passively adhesive (sealing) methacrylate-based resin barrier used for isolating tissue adjacent to teeth being whitened. For single-tooth whitening, it may be used to protect adjacent teeth. OpalDam resin barrier is light reflecting to minimize heat and tissue sensitivity during curing. OpalDam Green resin barrier ensures a safe, unmistakable barrier every time.
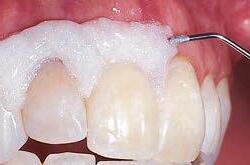
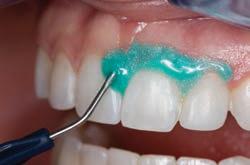
1. Apply OpalDam resin barrier 4–6 mm wide on gingiva. Seal interproximal spaces. Overlap resin approximately 2-3 mm onto dry enamel to seal. Extend resin one tooth beyond last tooth to be whitened. Light cure using a scanning motion for 20 seconds.
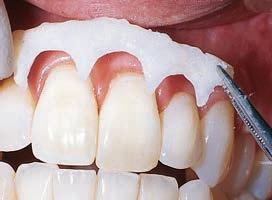

2. Remove cured resin quickly and easily in one piece or a few large pieces. Check interproximally for retained resin. Designed to remove easily from embrasures and undercuts.

OpalDam Green resin barrier offers effective coverage of oral tissues, making in-office whitening easier than ever before.
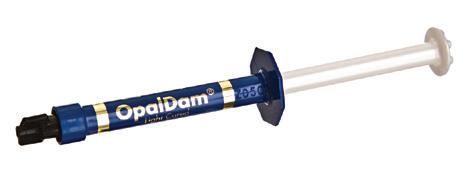


4 x 1,2 ml (1,34 g) OpalDam syringes
10 x Black Mini tips
10 x Micro 20 ga tips

325 - OpalDam Refill 4pk
326 - OpalDam Econo Refill 20pk 1,2 ml (1,34 g) OpalDam syringes
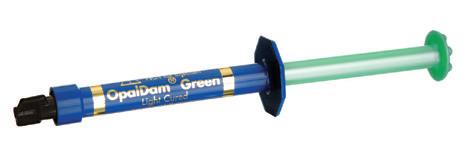


1824 - OpalDam Green Kit
4 x 1,2 ml (1,34 g) OpalDam Green syringes 10 x Black Mini tips 10 x Micro 20 ga tips

1825 - OpalDam Green Syringe 4pk
1826 - OpalDam Green Syringe 20pk 1,2 ml (1,34 g) OpalDam syringes


or

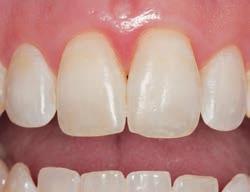


• Permanently removes superficial enamel imperfections
• Provides minimally invasive, permanent treatment
• Low 6,6% hydrochloric acid concentration aids in removal of surface imperfections
• Silicon carbide microparticles provide gentle mechanical abrasion
• OpalCups cups minimize splatter
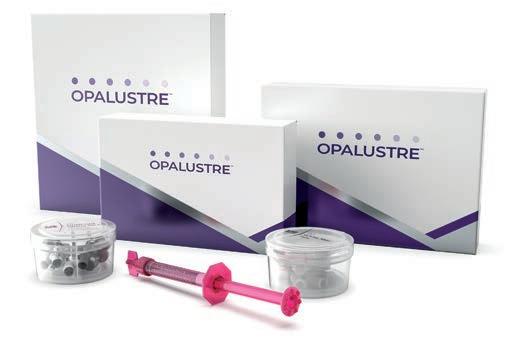
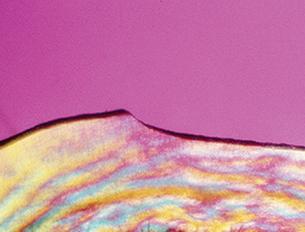
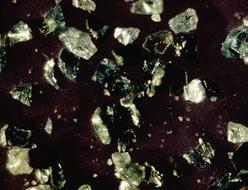
Opalustre 6,6% hydrochloric acid slurry contains carbide microparticles to treat surface imperfections through gentle mechanical abrasion and chemical means. OpalCups Bristle cups are latch-type bristle polishing cups that are used with the Opalustre slurry microabrasion technique to facilitate a more aggressive action and minimize splatter. OpalCups Finishing cups are used with Opalustre slurry for micropolishing the newly treated enamel surface.
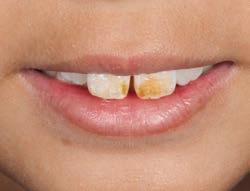
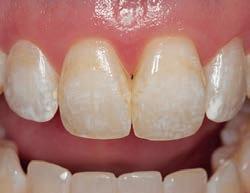
Use Opalustre slurry and OpalCups cups to quickly remove unsightly enamel decalcification defects that are less than 0,2 mm in depth. Opalustre is effective in treating mild fluorosis and stains in the superficial layer of the enamel.2 We recommend using Opalescence teeth whitening products prior to an Opalustre abrasion slurry treatment, as this procedure can sometimes be avoided. Additionally, please be aware that because the reactive oxygen needs to dissipate from the tooth before bonding, it is necessary to wait 7–10 days before any bonding procedure3–5 following a teeth whitening treatment.
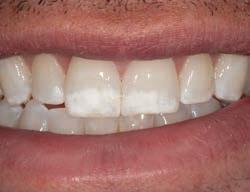
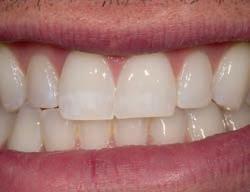
Remove or significantly reduce mild to moderate decalcification with a few applications of
1. realityesthetics.com. 2. Celik EU, et al. Clinical performance of a combined approach for the esthetic management of fluorosed teeth: three-year results. Niger J Clin Pract. 2017:20(8);943–951. 3. Da Silva Machado J, Cândido MS, Sundfeld RH, De Alexandre RS, Cardoso JD, Sundefeld ML. The influence of time interval between bleaching and enamel bonding. J Esthet Restor Dent. 2007;19(2):111–119. doi:10.1111/j.1708-8240.2007.00077.x. 4. Spyrides GM, Perdigão J, Pagani C, Araújo MA, Spyrides SM. Effect of whitening agents on dentin bonding. J Esthet Dent. 2000;12(5):264–270. doi:10.1111/j.1708-8240.2000.tb00233. 5. Unlu N, Cobankara FK, Ozer F. Effect of elapsed time following bleaching on the shear bond strength of composite resin to enamel. J Biomed Mater Res B Appl Biomater. 2008 Feb;84(2):363–368. 1

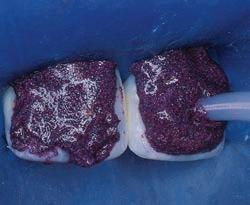
2. After rubber dam placement, apply Opalustre slurry to discolored enamel using the syringe.

3. Use OpalCups™ Bristle cup to compress Opalustre slurry on tooth surface using medium to heavy pressure. Suction the paste from the teeth then rinse, evaluate, and repeat as necessary. Finish treatment by polishing with OpalCups™ Finishing cup.
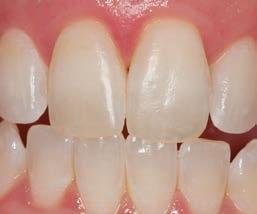
4. After enamel microabrasion and 21 days of using Opalescence™ whitening gel.
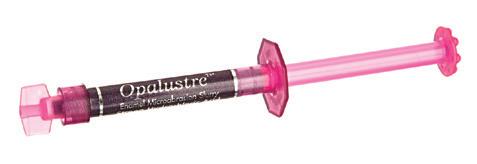


5554 - Opalustre Kit
2 x 1,2 ml (1,87 g) Opalustre syringes 5 x Each OpalCups bristle and finishing 10 x White Mac tips
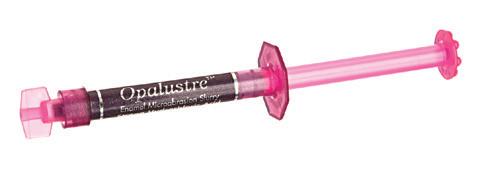
555 - Opalustre Refill 4 x 1,2 ml (1,87 g) syringes

5800 - OpalCups Bristle 20pk

Isolate

Press the cup against the surface at a

3. Remove Opalustre slurry with an air/ water spray. Please pay attention to careful vacuuming. Check to see if repeating the treatment is appropriate. Follow with OpalCups Finishing cup.


5799 - OpalCups Finishing 20pk
DESENSITIZING GEL WITH POTASSIUM NITRATE AND FLUORIDE

• Provides immediate results
• Treats sensitivity
• Non-favored gel available in syringes or disposable trays
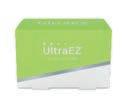
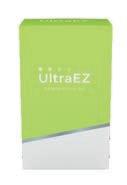
UltraEZ gel is a sustained-release 3% potassium nitrate desensitizing gel with fluoride (0,25% neutral NaF). This sustained-release formula quickly treats sensitivity from toothbrush abrasion, thermal and chemical changes, tooth whitening, and root exposure.

1007 - UltraEZ Econo Econo Refill 20pk 1,2 ml (1,48 g) UltraEZ syringes

Featuring the UltraFit™ tray
5743 - UltraEZ Mini Tray Combo 4pk 4 x Each upper/lower trays

Featuring the UltraFit tray
5721 - UltraEZ Tray Combo 10pk 10 x Each upper/lower trays

Umbrella™ TONGUE, LIP, AND CHEEK RETRACTOR
• Naturally and gently helps the patient hold their mouth open without pulling or stretching their lips
• A new, innovative tongue-retraction design allows the tongue to comfortably rest behind the tongue guard, keeping it back and away from the working area
• Designed with anatomically placed/shaped bumpers, so clinicians can rest a hand on the patient’s mouth without causing discomfort
Tongue, lip, and cheek retractor, page 37.
AND LIP RETRACTOR
KleerView cheek and lip retractors are perfect for in-office tooth whitening, bonding, composites, and clinical photography.
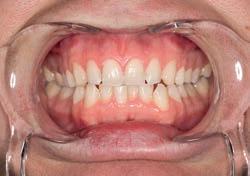

1821 - Kleerview 1pk

• Designed to be comfortable for patients
• Provides bilateral support with tongue restraint
These disposable IsoBlock bite blocks relax the lips and cheeks, allowing full access to facial and buccal surfaces for in-office whitening, Class V restorations, veneers, cementation,etc.


331 - IsoBlock 10pk
Use our professional marketing materials for cosmetic teeth whitening to promote whitening treatments with Opalescence™ whitening products at your dental practice.
Flyer Dispensers
Opalescence PF/ Go design

Waiting Room Brochures
Whitening Instructions

Get the new waiting room video produced by Ultradent Products to promote the Opalescence™ tooth whitening system to your patients. Free Download! Please contact your local dealer.


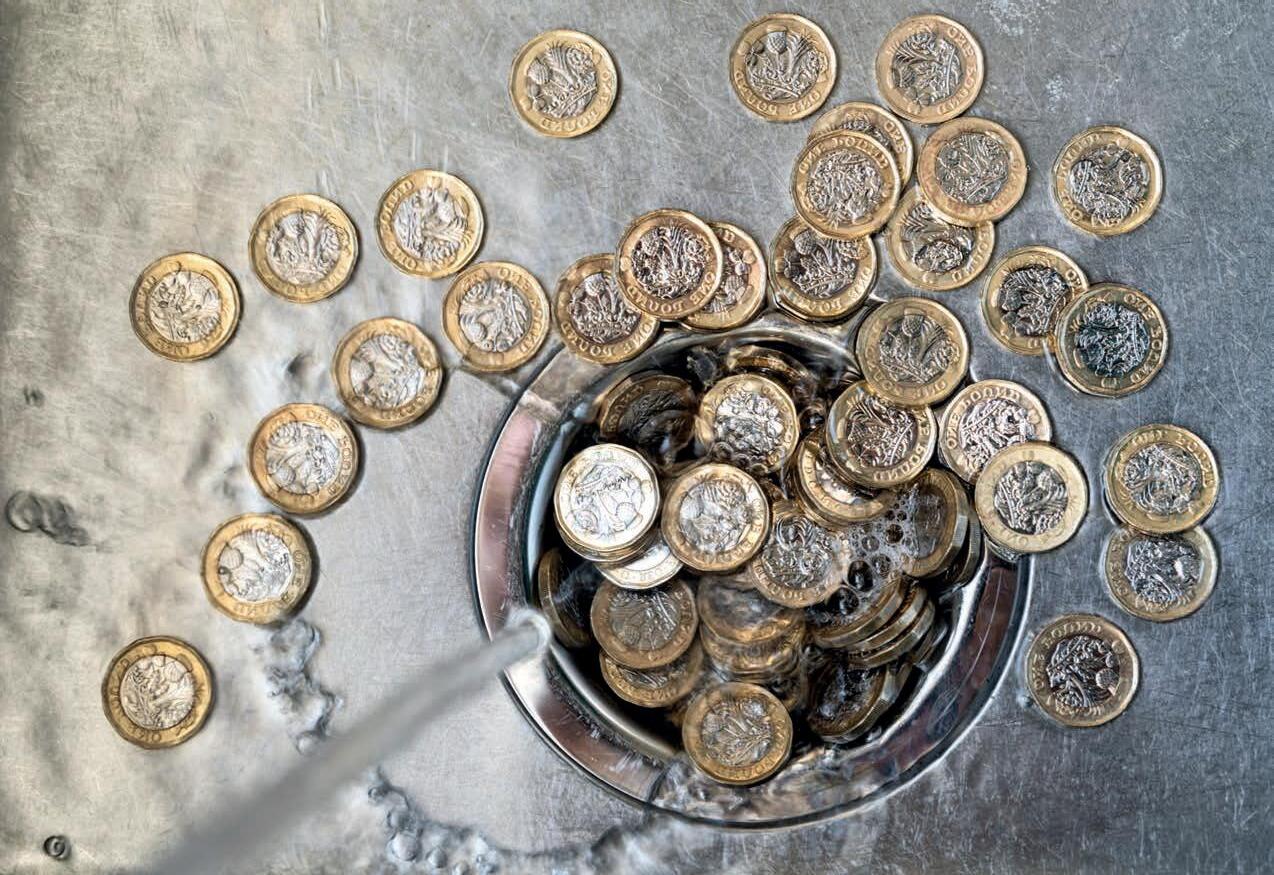

Dental practices, like yours, are overlooking a large underlying problem preventing them from business growth: inventory management. What’s most alarming and what practices are missing, is that they have lost control of inventory management and purchasing strategies because they haven’t changed them to account for changes in patient numbers.
Following a MediEstates business review, out of 280 practices, the average material spend as a percentage of turnover was found to be 7.2%*. One-third of the practices were spending more than the average, and some were spending double that - twice as much as they needed to!
We also found that many practices were spending significant time placing their orders and were not managing the ordering process efficiently, with 20% placing more than 8 orders per month*!
Take back control by following the QR code on the right!
*MediEstates business review of 280 practices in 2019




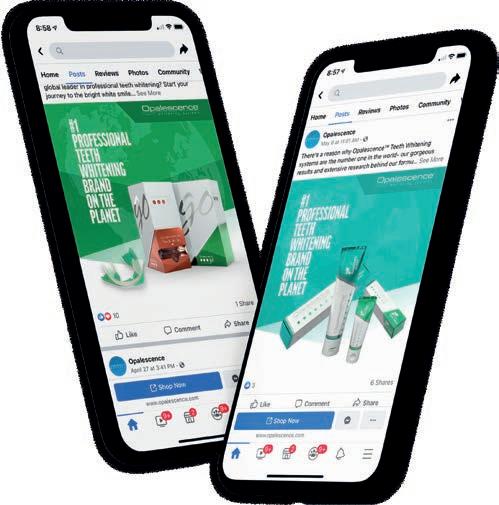

Share your cases on social media and tag our Facebook and/or Instagram accounts below. We would be pleased to reshare your cases with our social media community.



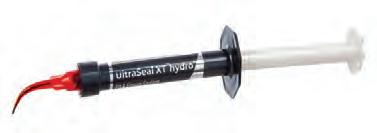
• Hydrophilic before it is cured, hydrophobic once cured, and has a self-adhesive quality
• Advanced adhesive technology
• Fluoresces under black light to ensure sealant is still in place
• Highly filled resin - 53%
• Thixotropic/ideal viscosity fowability2
• Two shades: Opaque White and Natural
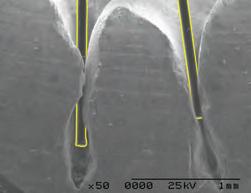
UltraSeal XT hydro hydrophilic pit and fissure sealant is a light-cured, radiopaque composite sealant that contains fluoride. It is stronger and more wear resistant because it is a 53%-filled resin and has less polymerization shrinkage than competitive products.3 Used with the Inspiral™ Brush Tip, the thixotropic nature of UltraSeal XT hydro sealant causes itself to thin as it’s expressed from the tip, allowing complete penetration deep into the pits and fissures. When the resin stops flowing the shear thinning ceases and placement is complete4 — preventing it from running before it can be light cured. The advanced hydrophilic chemistry works when all visible moisture has been removed. UltraSeal XT hydro sealant is more forgiving of moisture deep inside pits and fissures.
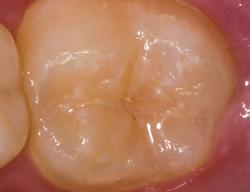
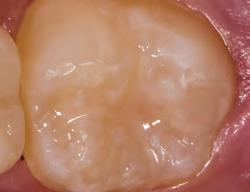
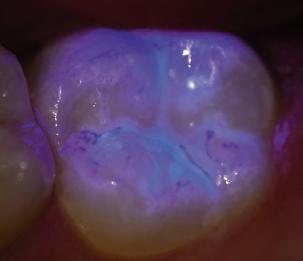
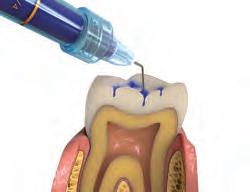
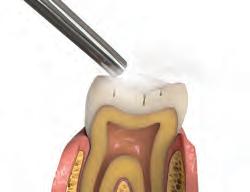
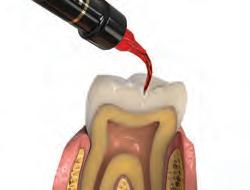
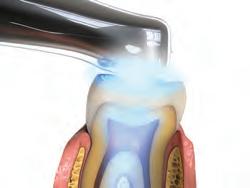
MARGINAL RETENTION AND MICROLEAKAGE
UltraSeal XT hydro Sealant

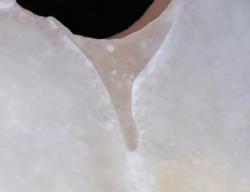
No microleakage. Sealed margins.
Competitor Hydrophilic Sealant
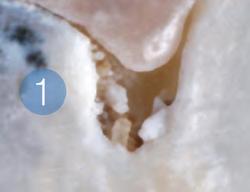
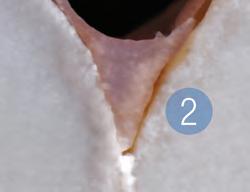
Microleakage. Peeling from margins.


x 1,2 ml (2,04 g) UltraSeal XT hydro syringe
x 1,2 ml (1,58 g) Ultra-Etch syringe


HYDROPHOBIC PIT AND FISSURE SEALANT


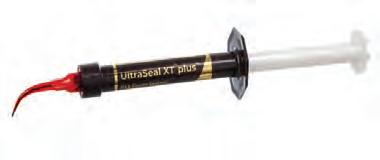
• Resin based sealants have high retention rates2
• Direct delivery into difficult-to-access areas
• Drip-free placement
• Penetrates deepest pits and fissures3
• Thixotropic/ideal viscosity fowability4
• Four shades: Opaque White, Clear, A1, and A2
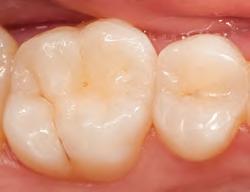
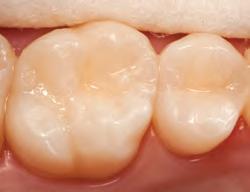

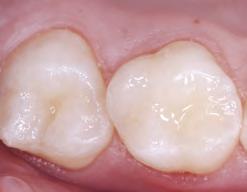
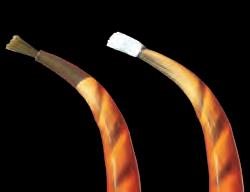
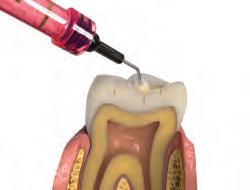
UltraSeal XT plus hydrophobic pit and fissure sealant is a light-cured, radiopaque composite sealant that contains fluoride. It is stronger and more wear resistant because it is a 58%-filled resin and has less polymerization shrinkage than competitive products.5 Used with the Inspiral™ Brush Tip, the thixotropic nature of UltraSeal XT plus sealant causes itself to thin as it’s expressed from the tip, allowing it to penetrate deep into the pits and fissures. When the resin stops flowing the shear thinning ceases and placement is complete6 — preventing it from running before it can be light cured. Using PrimaDry™ drying agent with UltraSeal XT plus sealant allows complete penetration into pits and fissures by eliminating moisture that can cause failure in hydrophobic sealants.




* Reality Ratings. Reality. Reality Publishing Company 1998–2017. 1. realityesthetics.com. 2. Alirezaei M, Bagherian A, Sarraf Shirazi A. Glass ionomer cements as fissure sealing materials: yes or no?: A systematic review and metaanalysis. J Am Dent Assoc. 2018; 149(7):640.649.e9. doi:10.1016/j.adaj.2018.02.001 3. Data on file. 4. Data on file. 5. Data on file, tested to internal procedures. 6. Data on file.
PHYSICAL PROPERTY COMPARISON SHEAR BOND 1


High shear bond strength is essential for retaining the sealant under normal use.
HARDNESS 1
High hardness indicates a strong, durable sealant that won't break away or wear down.
SHRINKAGE 1
Low shrinkage reduces the risk of marginal gaps which can lead to microleakage.
1. Data on file, tested to internal procedures.
PrimaDry™ DRYING AGENT
• For use with UltraSeal XT plus pit and fissure sealant • Reduces microleakage in hydrophobic sealants
PrimaDry drying agent is optimal for pit and fissure drying and prior to placement of hydrophobic sealants. It contains 99% organic solvents and 1% primer. PrimaDry drying agent rapidly volatilizes moisture content of pits and fissures after rinsing off etchant with water spray and air drying. The ultrafine primer film allows UltraSeal XT™ plus pit and fissure sealant to flow perfectly into every pit and fissure. Do not use on dentin.

(2,04 g) syringes

- PrimaDry Syringe Econo Refill

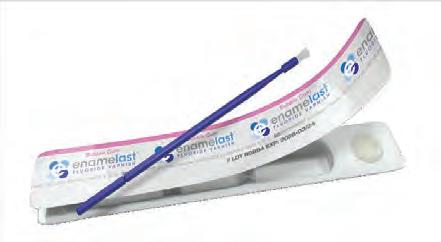
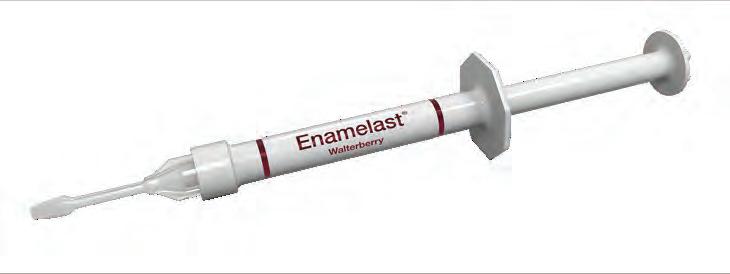
• Patented adhesion-promoting formulation for enhanced retention
• Superior fuoride release and uptake2
• Smooth, nongritty texture
• Nearly invisible appearance
• Nut free and gluten free
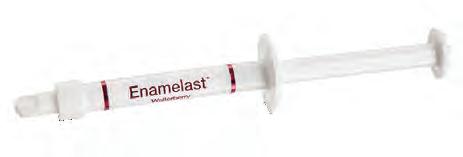
Enamelast fluoride varnish is a xylitol-sweetened, 5% sodium fluoride in a resin carrier. Its unique formula is made with a patented adhesionpromoting formulation for enhanced retention, while providing superior fluoride release and uptake.2 Available in syringe applications in Walterberry™ flavor and unit-dose applications in Walterberry, Orange Cream, Cool Mint, Bubble Gum, and Caramel flavors, and Flavor-Free
Enamelast fluoride varnish produces a mechanical occlusion of the dentinal tubules in the treatment of tooth hypersensitivity. The AAPD recommends fluoride varnish for use as a preventative adjunct to reduce the risk of caries.3 The use of fluoride varnish for caries prevention has also been endorsed by the ADA.4
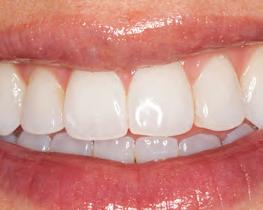
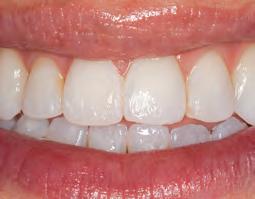
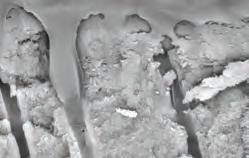
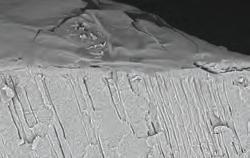
Enamelast varnish produces a mechanical occlusion of the dentinal tubules in the treatment of tooth hypersensitivity. This makes it ideal to use before or after whitening to help ease patient discomfort in the cervical area.
FLUORIDE UPTAKE (µg F/cm3 ) 5

Ultradent™ Universal Dentin Sealant FOR TRANSIENT ROOT SENSITIVITY
4521 - Enamelast Walterberry Syringe Kit
2 x 1,2 ml (1,23 g) syringes 4 x SoftEZ tips

Black Mini™ Brush Tip
• Quick application — paint and dry
• Great for hygienists' "tool box"
• Ideal following scaling and root planing
• Temporary blockage of tubules
4523 - Enamelast Walterberry Syringe Econo Kit
20 x 1,2 ml (1,23 g) syringes
Enamelast Unit-Dose 0,4 ml ( 0,41 g)
Flavor 50pk200pk
Walterberry45184528
Orange Cream43444343
Cool Mint43534352
Bubble Gum43634362
Caramel48194822
Flavor-Free 51885187
50 ea - W, OC, CM, BG 4368
50 ea - W,CM, BG, C 4821


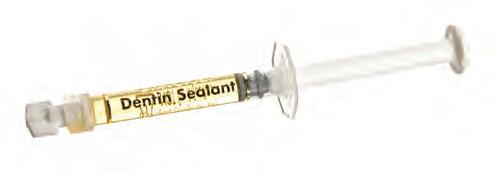
Ultradent Universal Dentin Sealant is a biocompatible, nonpolymerizable, high-molecular-weight resin in a volatile organic solvent.
Coat sensitive roots with Ultradent Universal Dentin Sealant to seal tubules and reduce discomfort after root planing or scaling.



265 - Universal Dentin Sealant Kit
4 x 1,2 ml (1,08 g) syringes 20 x Black Mini Brush tips

266 - Universal Dentin Sealant Refill
4 x 1,2 ml (1,08 g) syringes
Note: Ultradent Universal Dentin Sealant is NOT a bonding agent. For unsurpassed bonding products, see page 60. If base or liner is needed, use Ultra-Blend™ plus liner, page 66.

• Results in as little as one week1
• Proven to whiten teeth in four weeks1
• Contains hydrated silica which is proven to remove staining1
• Gentle on gums1
• Safe for long-term daily use
• Contains sodium fuoride to help prevent cavities and strengthen enamel2
• Exceptional fuoride uptake3
• 78 RDA4
• Triclosan and TiO2 free
• Vegan - no animal products are used
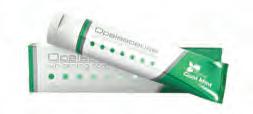
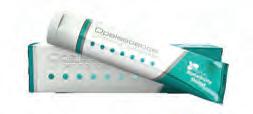
Opalescence™ whitening is the leader in professional tooth whitening. Part of that product family is Opalescence™ Whitening Toothpaste5 , which was developed by a dentist. It actively removes surface stains6 and is gentle enough to use every day, thanks to its unique silica blend.
• Three kinds of exotic mint are blended into a fresh, clean, cool flavor
• Sweetened with xylitol, which may reduce the risk of tooth decay
• Our Sensitivity Relief formula provides all the whitening benefits of the Original, with the added benefit of maximum strength 5% potassium nitrate

Results in as little as one week1


1. Çakmakçioğlu O, Yilmaz P, Topbaşi BF. Clinical evaluation of whitening effect of whitening toothpastes: A pilot study. OHDMBMC. 2009: 8(4);613. 2. Sivapriya E, Sridevi K, Periasamy R, Lakshminarayanan L, Pradeepkumar AR. Remineralization ability of sodium fluoride on the microhardness of enamel, dentin, and dentinoenamel junction: An in vitro study. J Conserv Dent. 2017;20(2):100–104. doi:10.4103/JCD.JCD_353_16. 3. Schemehorn, BR. Enamel Fluoride Uptake 09-107. Data on File. 4. Attin, T. Assessment of relative dentin abrasion (RDA) of two toothpastes from Ultradent Products, Inc., Universitat Zurich: Zurich, Switzerland. 2021. Data on file. 5. This toothpaste does not contain peroxide. 6. Gultz J, Kaim J, Scherer W. Whitening efficacy of a whitening toothpaste creme [IADR abstract 2747]. J Dent Res. 1998;77(suppl 2):975.

Interproximal
Caulking and Putty
Sectional Matrix Systems
Disposable Retainer and Matrix


• Stains carious and demineralized dentin
• Provides precise, mess-free delivery
• Available in dark green for working near pulp
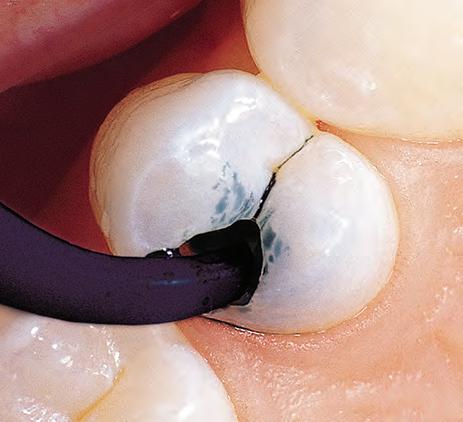
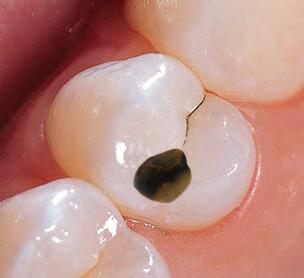
Sable Seek caries indicator contains FD&C dyes, and Seek caries indicator contains D&C dyes in a glycol base. Both are used to stain carious and demineralized dentin.
Seek and Sable Seek caries indicators stain carious and demineralized dentin and can be very useful for difficult-to-see areas, for example; undercuts of preparations, dark dentin, areas along the DE junction, etc. Green Sable Seek caries indicator helps visualization of decay in deep caries cases to help avoid pulp exposures.

4 x 1,2 ml (1,22 g) syringes
20 x Black Mini Brush tips


234 - Sable Seek Refill
4 x 1,2 ml (1,22 g) syringes

1805 - Econo Refill
20 x 1,2 ml (1,22 g) syringes
PROCEDURE
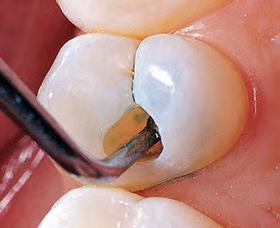
dentin) with slow-speed round bur or excavator. To control overexcavating near the pulp, remove final portion of caries with hand excavator.


4 x 1,2 ml (1,25 g) syringes
20 x Black Mini Brush tips


210 - Seek Refill
4 x 1,2 ml (1,25 g) syringes

1804 - Seek Econo Refill
20 x 1,2 ml (1,25 g) syringes
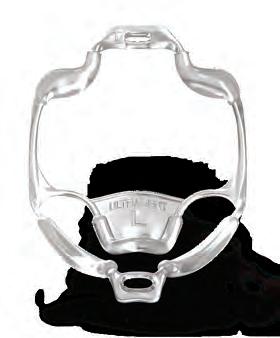
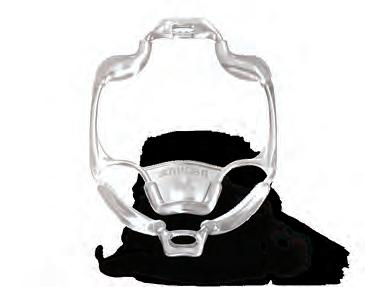
• Developed to give you a clear treatment field while making patient comfort a top priority
• Easy to place
• Disposable
• Naturally and gently helps the patient hold their mouth open without pulling or stretching their lips
• A new, innovative tongue-retraction design allows the tongue to comfortably rest behind the tongue guard, keeping it back and away from the working area
• Designed with anatomically placed/shaped bumpers, so clinicians can rest a hand on the patient’s mouth without causing discomfort
• Provides relief and comfort to gaggers — it doesn’t initiate the gag refex for most
• Can be kept in place when checking bite
The Umbrella cheek retractor is ideal for a variety of procedures that require clear access without compromising patient comfort, including but not limited to: in-office whitening, scanning, impressions, bite registrations, surgical procedures and more.
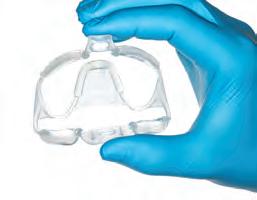
• If you would use a size XS, S, M impression tray for the patient, use the medium retractor.
• If you would use a size L, XL impression tray for the patient, use the large retractor.
• If in doubt, err on the side of going large.


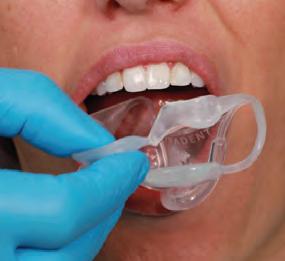
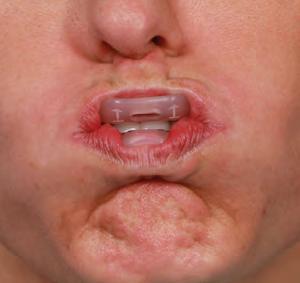
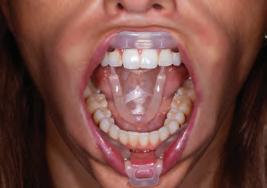

4870 - Umbrella Retractor Medium 5pk
4871 - Umbrella Retractor Medium 20pk
5162 - Umbrella Retractor Medium 40pk
5256 - Umbrella Retractor Large 5pk
5257 - Umbrella Retractor Large 20pk
5258 - Umbrella Retractor Large 40pk

• Low dermatitis potential
• Strong and tear resistant
• Powder free to reduce allergic reactions
DermaDam rubber dam is made from pure latex rubber and is powder free, which reduces the possibility of latex reactions. Quality processing ensures a low content of surface proteins.

311 - DermaDam Medium 0,20 mm 36pk
- DermaDam Heavy 0,25 mm 36pk 15 cm x 15 cm


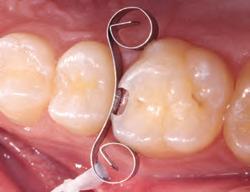
The InterGuard interproximal tooth guard reduces risk of iatrogenic damage by protecting adjacent teeth.2,3 Stable curls at each end leave transition angles clear for full access. The 0,1016 mm thick stainless steel InterGuard tooth guard is great for tunnel preparations and protecting the adjacent tooth during air abrasion.


DermaDam Synthetic dental dam is not made with natural rubber latex, but is designed to be just as flexible and durable as dams that are composed of natural rubber latex.


- InterGuard Kit
Refills


AND PUTTY


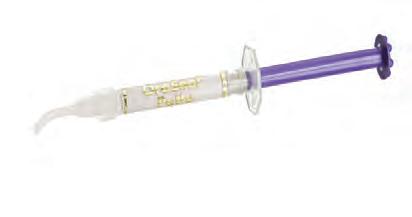
• Adheres under water and saliva
• Provides a protective seal against gingival exposure to peroxide or hydrofuoric acid
• Ideal for blocking out unwanted spaces for impressions
• Effectively adheres to wet rubber dams, tissue, teeth, and metal
• OraSeal Putty material has a stiffer consistency than the Caulking material, which some doctors prefer
Use OraSeal Caulking material when an adequate seal is difficult to obtain with compromised teeth or roots. It may also be used to repair rubber dam leaks. It seals the rubber dam when performing a porcelain repair, protecting gingiva from hydrofluoric acid. Deliver into undercuts and below implant bars, precision attachments, etc. to prevent cold cure acrylic or impression material from locking into empty spaces. Fill in gingival embrasures of splints and bridges to facilitate easy cleanup of permanent cement. Also used to fill in screw holes on implant impressions prior to making impressions.
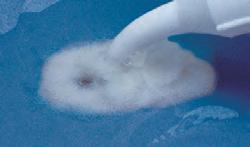
OraSeal Caulking material can seal leaks in a rubber dam, even when submerged. Apply around border, then criss-cross over hole until seal is complete.


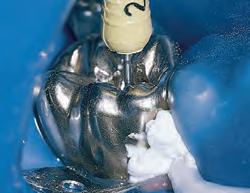
Apply OraSeal Caulking material with Black Mini™ or White Mac delivery tips to prevent leakage of rubber dam during treatment.2 Shape with wet gloved finger, wet cotton swab, or instrument. Procedure can then be performed in a clean, dry field.
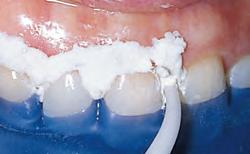
Ensure rubber dam seal when using strong peroxide for vital whitening, or when porcelain etching with hydrofluoric acid.
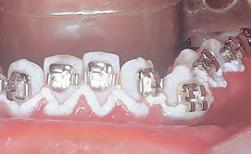
Ensure moisture control when bonding lower orthodontic brackets. Seal with Caulking or Putty to prevent saliva from seeping through embrasures and contaminating area.
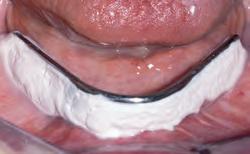
Use under fixed partial or implant bar prior to making an impression.
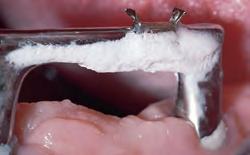
Block out undercuts below and around prosthetic implant clip. Flexing component of clip is covered with putty to accommodate clip flexure during insertion and removal.

Block out large interproximal spaces for easy and distortion-free removal of impression.
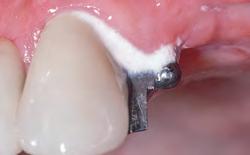
Use as a block-out medium prior to anchoring attachments, clips, etc. with cold cure acrylic.
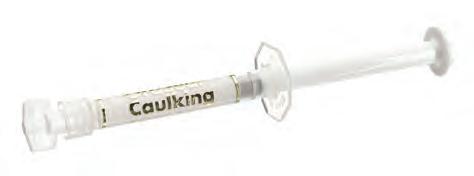


2 x 1,2 ml (1,28 g) OraSeal Caulking syringes
2 x 1,2 ml (1,44 g) OraSeal Putty syringes
4 x Black Mini tips
20 x White Mac tips


OraSeal Refills
1,2 ml syringe
4pk20pk Caulking (1,28 g) 351354 Putty (1,44 g) 353355

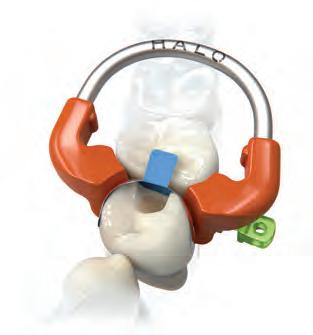
Maximum tooth separation is achieved through the force of the nitinol ring and active wedging provided by the wedges. This ideal system of separation allows you to restore a single tooth or back-to-back restorations with ease. The unique beak design of the Halo ring allows the band to fully adapt to the prep from the gingival margin to the marginal ridge and maintain its shape even in large preparations, helping you achieve anatomically shaped restorations. When you have ideal contacts and well-adapted bands with anatomical curvature, you will see a reduction in the time spent shaping and finishing. The Halo system does exactly that with every restoration.
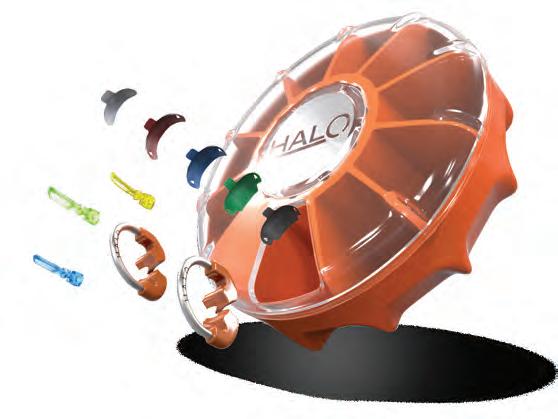
The easy-to-use Halo sectional matrix system allows you to create beautiful, anatomically contoured composite restorations in less time.


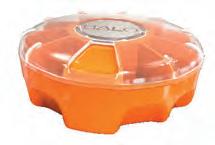


4831 - Halo Original Bands with Instruments Kit
2 x Each Universal Rings
25 x Each Original Matrices 3,5 mm, 4,5 mm, 5,5 mm, 6,5 mm, and 7,5 mm
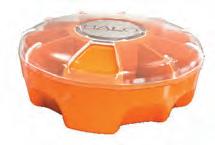
25 x Each Wedges Small, Medium, and Large 1 x Halo Carousel
1 x Tweezers 1 x Forceps



4832 - Halo Original Bands Kit

2 x Each Universal Rings
25 x Each Original Matrices 3,5 mm, 4,5 mm, 5,5 mm, 6,5 mm, and 7,5 mm
25 x Each Wedges Small, Medium, and Large 1 x Halo Carousel
4835 - Halo Original Bands Mini Kit
2 x Each Universal Rings
5 x Each Original Matrices 3,5 mm, 4,5 mm, 5,5 mm, 6,5 mm, and 7,5 mm 5 x Each Wedges Small, Medium, and Large 1 x Halo Carousel
4833 - Halo Firm Nonstick Bands Kit
2 x Each Universal Rings
20 x Each Firm Nonstick Matrices 3,5 mm, 4,5 mm, 5,5 mm, 6,5 mm, and 7,5 mm
25 x Each Wedges Small, Medium, and Large 1 x Halo Carousel
4834 - Halo Firm Bands Kit
2 x Each Universal Rings
25 x Each Firm Matrices 3,5 mm, 4,5 mm, 5,5 mm, 6,5 mm, and 7,5 mm
25 x Each Wedges Small, Medium, and Large 1 x Halo Carousel

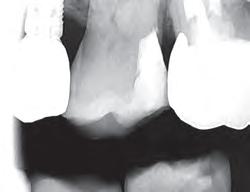
• Large food trap above
• Fails to restore proximal anatomy
• Thin contact at the marginal ridge
• Likelihood of fracture, occlusal interference, recurrent caries, and periodontal disease

• User-friendly system
• Natural contours
• Tight, anatomically correct contact points at correct height of contour
DISTO-OCCLUSAL CLINICAL CASE

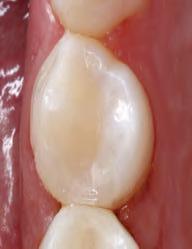
DISTO-OCCLUSAL CLINICAL CASE


1. Select an appropriate matrix band based on required occlusogingival height. Using tweezers, grip the matrix band tab and bend as needed, then place interproximally with the concave surface facing the tooth to be restored.

Select wedge that best adapts matrix band to the gingival portion of the preparation. Grip wedge with cotton pliers.
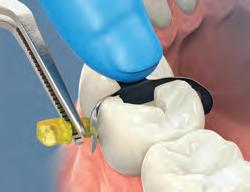
3. Light finger pressure may need to be applied to the matrix band to prevent it from being dislodged during wedge placement.
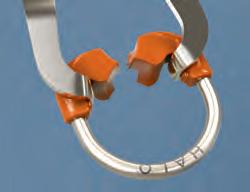
5. Carefully place Halo ring using the ring forceps.
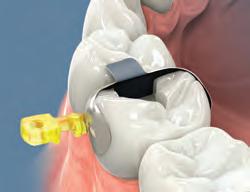
4. If needed, an additional wedge may be used to provide greater adaptation to gingival cavosurface.
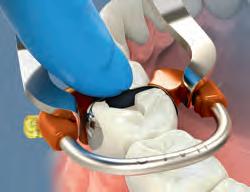
The ring should be placed as low as possible with the tine ends of the ring straddling the wedge on each side of the

7. Inspect matrix band, wedge, and ring placement to ensure that the matrix band is well adapted to the cavosurface margins and that it is in intimate contact with the adjacent tooth.

MATRIX BANDS
• Anatomically shaped for ideal contacts
• Curve at marginal ridge creates ideal occlusal embrasure, reducing finishing1
• Tweezer holes for easy placement
• Bendable tab allows for easy placement and removal with increased visibility
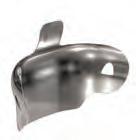

• Optional color coding according to size for easy identification (tefon™ coating thickness 0,013 mm)
• Original bands allow for more adaptability and burnishing, while Firm bands resist deformation and are ideal for tight interproximal spaces
• Original and Firm bands are composed of ultra-thin 0,038 mm stainless steel
Original 50pk100pk
3,5 mm 54485449
4,5 mm 54505451
5,5 mm 54525453
6,5 mm 54545455
7,5 mm 54565457
Firm 50pk100pk
3,5 mm 5059—
4,5 mm 50625063
5,5 mm 50645065
6,5 mm
50665067
7,5 mm 5068—
Firm Nonstick
50pk100pk
3,5 mm 5049—
4,5 mm 50515052
5,5 mm 50535054
6,5 mm 50555056
7,5 mm 5057—


Halo™ Tweezers
CROSSOVER ACTION TWEEZERS
• Passively hold wedges and matrices
• Simplify placement and removal of Halo matrices
• Ball tip for burnishing
• Crossover action
• Positive mechanical connection for secure handling and powerful grip

• Super-elastic nitinol metal maintains force during procedures and reduces cyclic fatigue
• Rings will last over 1.000 uses
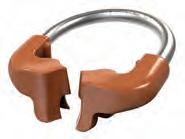
• Glass-filled nylon tines won’t easily break, and won’t collapse into the prep and create under-contoured restorations
• Ring contours secure the band in a natural and anatomical shape, helping to eliminate fash and reducing the amount of finishing needed1
• Stackable design allows for use with MODs and other Class II restorations
• Provides ideal separation for back-to-back restorations


• Firm wedge creates active wedging for enhanced separation, while being less traumatic to the papillae
• Hollow design makes wedges easy to place and allows wedges to be stacked when multiple wedges are needed
• Easy to distinguish colors help identify sizes of wedges
• Collapsible center for anatomical adaptation of the band Size


Halo™ Forceps
RING-PLACEMENT FORCEPS
The locking function and angled grip arms of the Halo forceps ensure maximum stability of the ring during placement both mesially and distally.

5047 - Halo Forceps 1pk

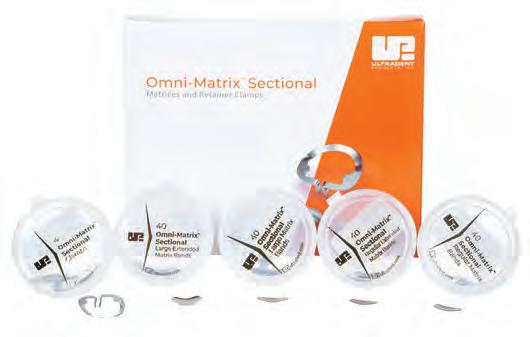
• Creates restorations with natural anatomy
• Thin, fexible bands easily conform to any surface
• No special matrix pliers required
• One clamp fits all teeth
• Clamps are stackable
Omni-Matrix Sectional bands conform to the natural anatomy of the tooth, while the clamp tines provide multiple contact points. The specialized band contour ensures the edge of the matrix will not catch on the gingival margin during placement. The retainer clamps stack easily, allowing both sides of the tooth to be held in a matrix at the same time. The retainer can be placed with any rubber dam forceps or sectional matrix forceps. The bands are interchangeable with all brands of sectional retainers.
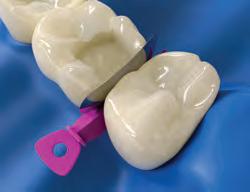

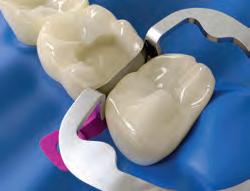
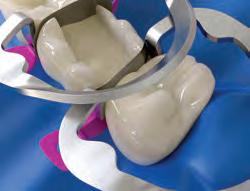
Traditional sectional matrices often catch on the gingival margin. This prevents you from being able to position the matrix readily and often deforms it.
318 - Omni-Matrix Sectional Kit 4 x Matrix clamps
40 x Each Regular, Regular Extended, Large, and Large Extended

317 - Omni-Matrix Sectional Clamps 4 x Matrix clamps


DISPOSABLE RETAINER AND MATRIX

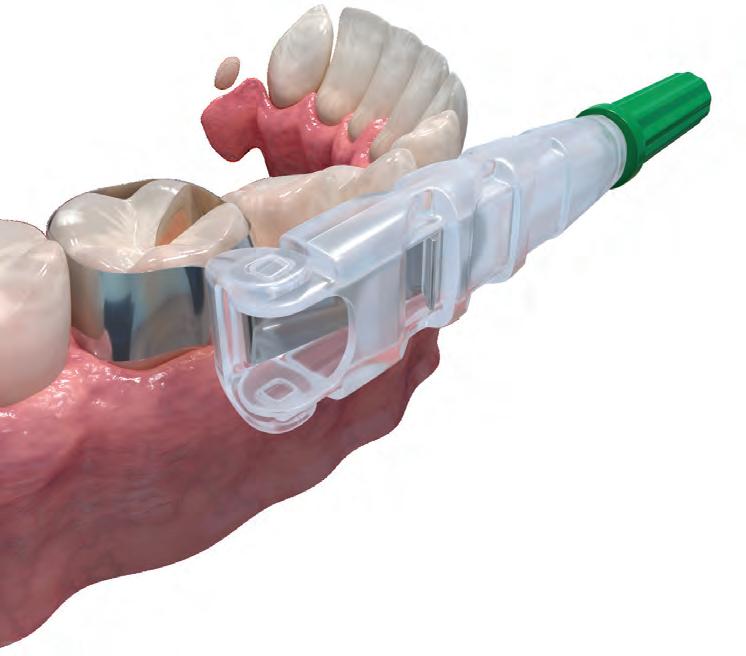


• Innovative shape allows procedural visibility and patient comfort2
• Ultra-thin burnishable stainless steel adapts to preparations3
• Unique winged and wingless styles meet individual case needs
• Disposable design saves you time and money
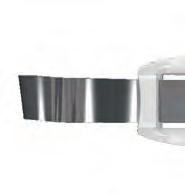
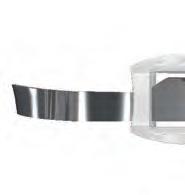
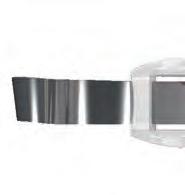
The Omni-Matrix disposable retainer and matrix is a superior circumferential matrix band solution. It’s a simple restorative tool designed to perfectly customize to any preparation. The band’s circumference can be easily adjusted simply by twisting the handle and the pivoting head allows it to access any quadrant of the mouth. Once the restoration is complete, the Omni-Matrix band easily releases without disturbing the restorative material.
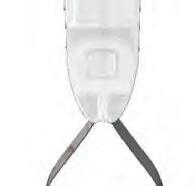
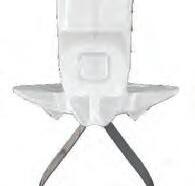
WINGLESSWINGED


Unparalleled tissue management starts with rapid, profound hemostasis. For more than 40 years, dentists have trusted the immediate hemostatic power, detailed margins, and elimination of surface bleeding and sulcular fuid provided by Ultradent’s tissue management products.
Our complete line of solutions continuously sets the standard for superior control and predictability while offering dentists fast, reliable, and affordable products.
For continuous control of bleeding and sulcular fluid, no one offers a more complete line of solutions.
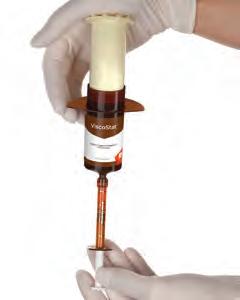
Reduce cross-contamination and need for sterilizing by loading unit dose syringe directly from the IndiSpense™ syringe.
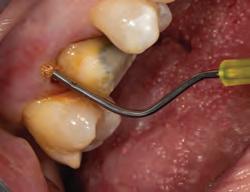

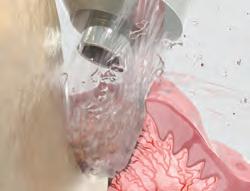
2. Give firm air/water spray to remove residual coagulum and to test for profound hemostasis. If bleeding continues, repeat.

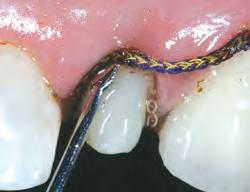
3. After complete hemostasis has been attained, excellent retraction is achieved using Ultrapak™ knitted cord placed with the Ultrapak™ packer.
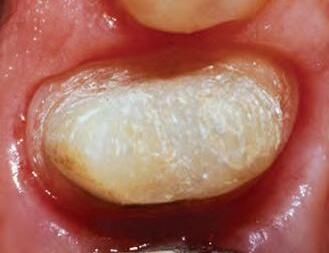
1. Well-healed tissue 2 weeks post-op.

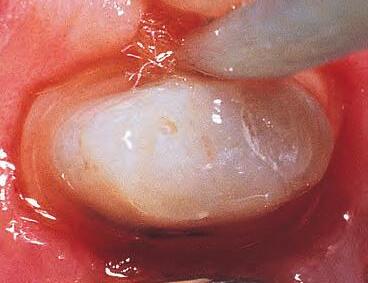

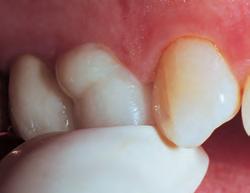
Note: Perfect sulcular fluid control is mandatory if bonding and luting is adjacent to gingival sulcus.1
MICROLEAKAGE
PROVISIONAL REMOVED STAINING
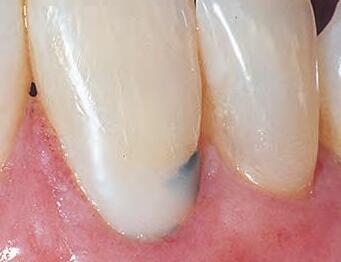
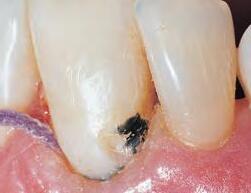
2. Upon removing some of the composite, the extent of leakage is more evident. Contamination has occurred, therefore compromising the seal. Hemostatic, blood, sulcular fluid, saliva, and byproducts from anerobic bacteria can be sources of contamination. Retreatment is necessary.


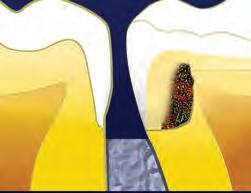
1. For restorations, Astingedent™ X hemostatic and Ultrapak cord are ideal for controlling blood and sulcular fluids and can also protect tissue from burs. Use a firm air/water spray to remove excess hemostatic solution.

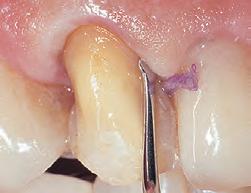
1. Packing Ultrapak cord quickly displaces tissues and improves access for indirect veneer luting.
FOR IMPRESSION TAKING
An astringent is a substance that eliminates permeability of epithelium to tissue fluid flow. The result is a dry field, an important tissue management solution. An ideal impression for successful crowns, veneers, and bridges must accurately capture the preparation margins. This can be ensured only through reliable hemostasis and gingival displacement.

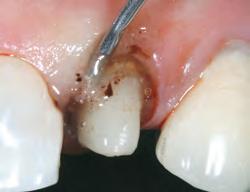
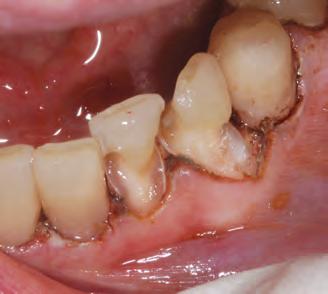
1. Subgingival preparation with bleeding. BLEEDING HEMOSTASIS
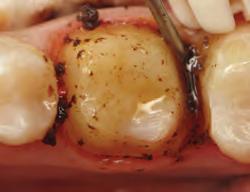
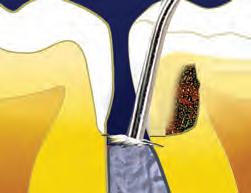
2. Scrub Astringedent™ X hemostatic firmly against bleeding tissues with Metal DentoInfusor™ tip.
CLEANING/TESTINGDISPLACEMENT
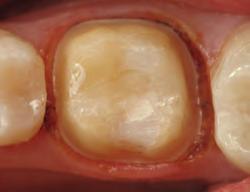
3. Firm air/water spray removes residual
and tests tissue for quality, profound hemostasis.
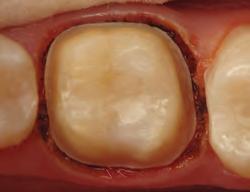
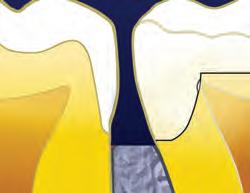
Remove

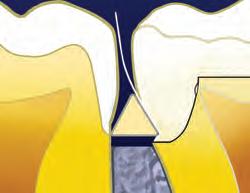
4. Soak Ultrapak™ knitted cord in Astringedent™ X hemostatic, pack, and leave for 5 minutes.
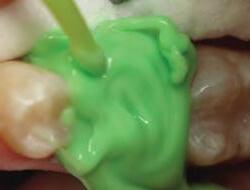
FOR VITAL PULPOTOMY IN PRIMARY TEETHEXPANDED APPLICATION


1. Control bleeding. Use Dento-Infusor tip with ViscoStat or Astringedent™ hemostatics.1 Use sterile water for this procedure.
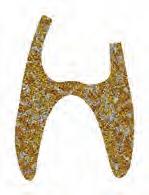
3. Apply a thin layer of Ultra-Blend™ plus liner.

4. Apply Ultra-Etch™ phosphoric acid or Peak™ SE Primer.

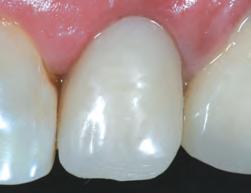
7. Predictable quality impressions. RESULT
“We have many products and procedures in dentistry that are technique sensitive — tissue management is especially so. Done right, it’s gorgeous! You see results almost immediately. Done wrong, the bleeding doesn’t stop, and you end up with that awful coagulum everywhere.
— DR. DAN FISCHER, DDS

5. Apply Peak™ Universal Bond bonding agent.
6. Use your preferred restorative material for definitive restoration. PROTECTION

1. Fei AL, Udin RD, Johnson R. A clinical study of ferric sulfate as a pulpotomy agent in primary teeth. Pediatr Dent. 1991;13(6):327-32.

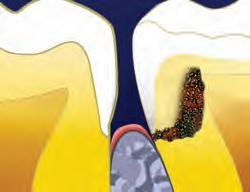
2. Remove old amalgam. Keep caries as a barrier for the time being, in case
DO NOT
and bond with Peak™ Universal Bond adhesive.



Using the correct tip is essential to achieving profound, dependable hemostasis and sulcular fluid control.
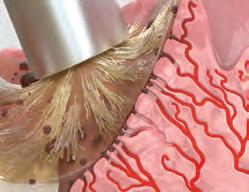
Hemostatic agents are only as good as their delivery systems. DentoInfusor tips infuse hemostatic agents into bleeding capillaries. The padded brush end rubs the agent into capillaries and wipes coagulum away. The result is a clean, dry preparation ready for impressions.

As a rule, the Metal Dento-Infusor is the tip of choice for use with ViscoStat™, ViscoStat™ Clear, Astringedent™ and Astringedent™ X hemostatic agents. It can be used with enough pressure to infuse the capillaries with the hemostatic agent. If control of only sulcular fluid is required, the softer tip end of the plastic Blue Mini™ Dento-Infusor™ tip may be gentler on the newly healed epithelium at the time of bonding subgingival definitive restorations.
Both infusors allow hemostatic agents to be scrubbed into the tissue in a targeted and sparing way, which is not possible with other means such as cotton pellets, micro brushes, and special brushes.


Dento-InfusorTips,seepage135. Tip infuses ferric sulfate hemostatic agent into capillaries, forming a cork-like “plug,” then cleans coagulum away.
The flared brush padded end on the Metal Dento-Infusor™ tip enables hemostatic to temporarily close off capillary ends by causing collagen in them to swell.

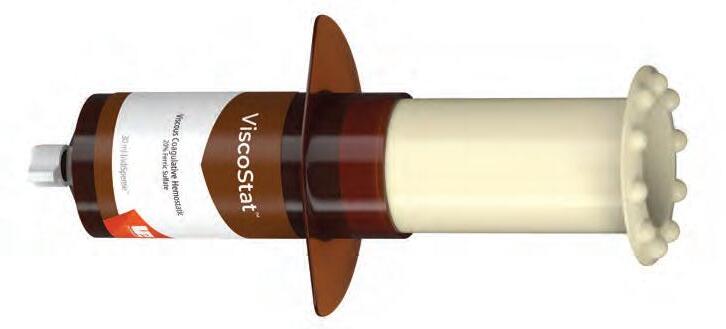

• Provides profound hemostasis
• Stops moderate bleeding
• Saves chair time
• Does not impede hard or soft tissue healing
• Eliminates sulcular fuid contamination for optimal bonding
• Decreases costly impression remakes
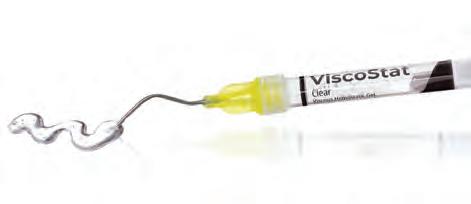
ViscoStat hemostatic is a 20% ferric sulfate equivalent hemostatic agent with inert binding agents in a viscous, aqueous solution. It contains fumed silica to limit the acidic activity, making it kind to hard and soft tissue.
ViscoStat hemostatic solution is suited for a variety of dental and oral surgery procedures to arrest surface capillary bleeding. Such procedures include fixed prosthodontics, restorative-operative, periodontal treatment, etc. ViscoStat hemostatic is also recommended for retrofillings, canine impactions, gingivectomies, and as a “fixative” for pulpotomies.
Tip: Prevent leakage caused by sulcular fluid contamination during direct bonding procedures. Soak an Ultrapak™ knitted cord in a hemostatic and isolate the tissues. Follow with a firm air/water spray.
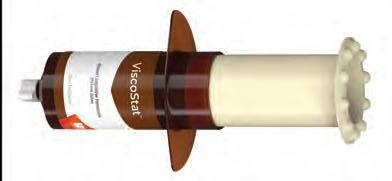


647 - ViscoStat Dento-Infusor IndiSpense™ Syringe Kit 1 x 30 ml (36,69 g) IndiSpense syringe
20 x Metal Dento-Infusor tips with Comfort Hub™ 20 x 1,2 ml empty syringes

645 - ViscoStat IndiSpense Syringe 1pk 30 ml (36,69 g) syringe
Note: Do not use epinephrine preparations with ferric sulfate products (ViscoStat, Astringedent, Astringedent X), as blue/black precipitate will occur. !


Subscribe to Ultradent’s free e-newsletters to receive the latest news on products, events and more. Ultradent’s e-newsletters Scan QR code to sign up today!


• Does not discolor the gingiva
• Stops minor bleeding
• Rinses easily
• Viscous gel
• Does not interfere with bonding2
ViscoStat Clear hemostatic is a 25% aluminum chloride gel in a viscous, aqueous solution. Its tissue-kind silica formula temporarily eliminates minor bleeding. No coagulum is formed, nor does residue adhere to the preparation, which is especially critical in the esthetic zone. ViscoStat Clear hemostatic will not stain the hard or soft tissues.
ViscoStat Clear hemostatic is intended for sulcus retraction prior to impression making and to control bleeding and gingival fluid in restorative and operative dentistry. It is designed to be used with Ultrapak retraction cord and the Dento-Infusor tip. The gel facilitates the insertion of the cord into the sulcus.

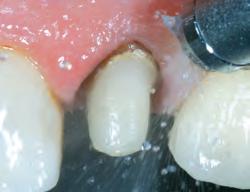


6409 - ViscoStat Clear Dento-Infusor Syringe Kit
4 x 1,2 ml (1,42 g) syringes
20 x Metal Dento-Infusor tips with Comfort Hub™
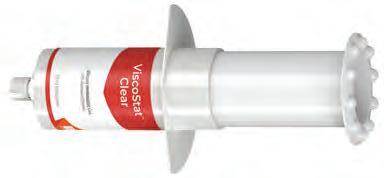


6407 - ViscoStat Clear Dento-Infusor IndiSpense™ Syringe Kit
1 x 30 ml (38,52 g) IndiSpense syringe
20 x Metal Dento-Infusor tips with Comfort Hub™
20 x 1,2 ml empty syringes

6408 - ViscoStat Clear IndiSpense Syringe 1pk
30 ml (38,52 g) syringe
15,5% FERRIC

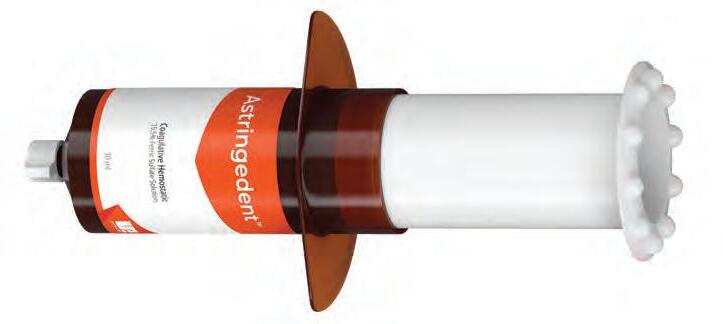

• The “Classic” hemostatic agent for profound hemostasis
• Stops bleeding in seconds
• Eliminates sulcular fuid contamination for optimal bonding
• Decreases costly impression remakes
Astringedent hemostatic is an aqueous 15,5% ferric sulfate hemostatic solution with a pH of ~1,0.
Astringedent hemostatic solution is well suited for a variety of dental and oral surgery procedures to arrest bleeding. Astringedent hemostatic can be used to prevent leakage caused by sulcular fluid contamination during direct bonding procedures.
Listed as a “CAN’T LIVE WITHOUT” product by a prominent independent research institute.2
Note: ViscoStat™ and Astringedent hemostatic agents should be used with a Metal Dento-Infusor™ tip. The plastic Blue Mini™ Dento-Infusor™ tip should be used when you are dealing with newly healed epithelium, as the softer tip is slightly less aggressive.

12,7% IRON SOLUTION

• Clinicians “go-to” hemostatic for all case situations
• Ultradent’s fastest and most powerful hemostatic1
• Stops minor to severe bleeding
Astringedent X hemostatic is an aqueous 12,7% iron solution that works quickly to stop difficult bleeding. It contains equivalent ferric sulfate and ferric subsulfate. Note: Diluted Astringedent X hemostatic does not equal ViscoStat or Astringedent hemostatics.
Use when a stronger, more potent hemostatic is required and when the attainment of quality hemostasis may be more challenging (e.g., in cases of difficult-to-stop, problem bleeding).



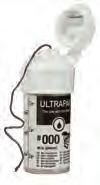
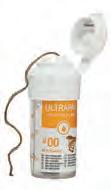

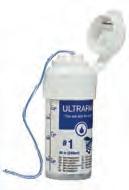

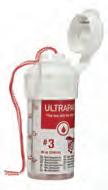
• The original knitted cord
• Provides optimal tissue displacement and detailed margins for quality impressions
• Facilitates easy packing and stays in place better than twisted or braided cord
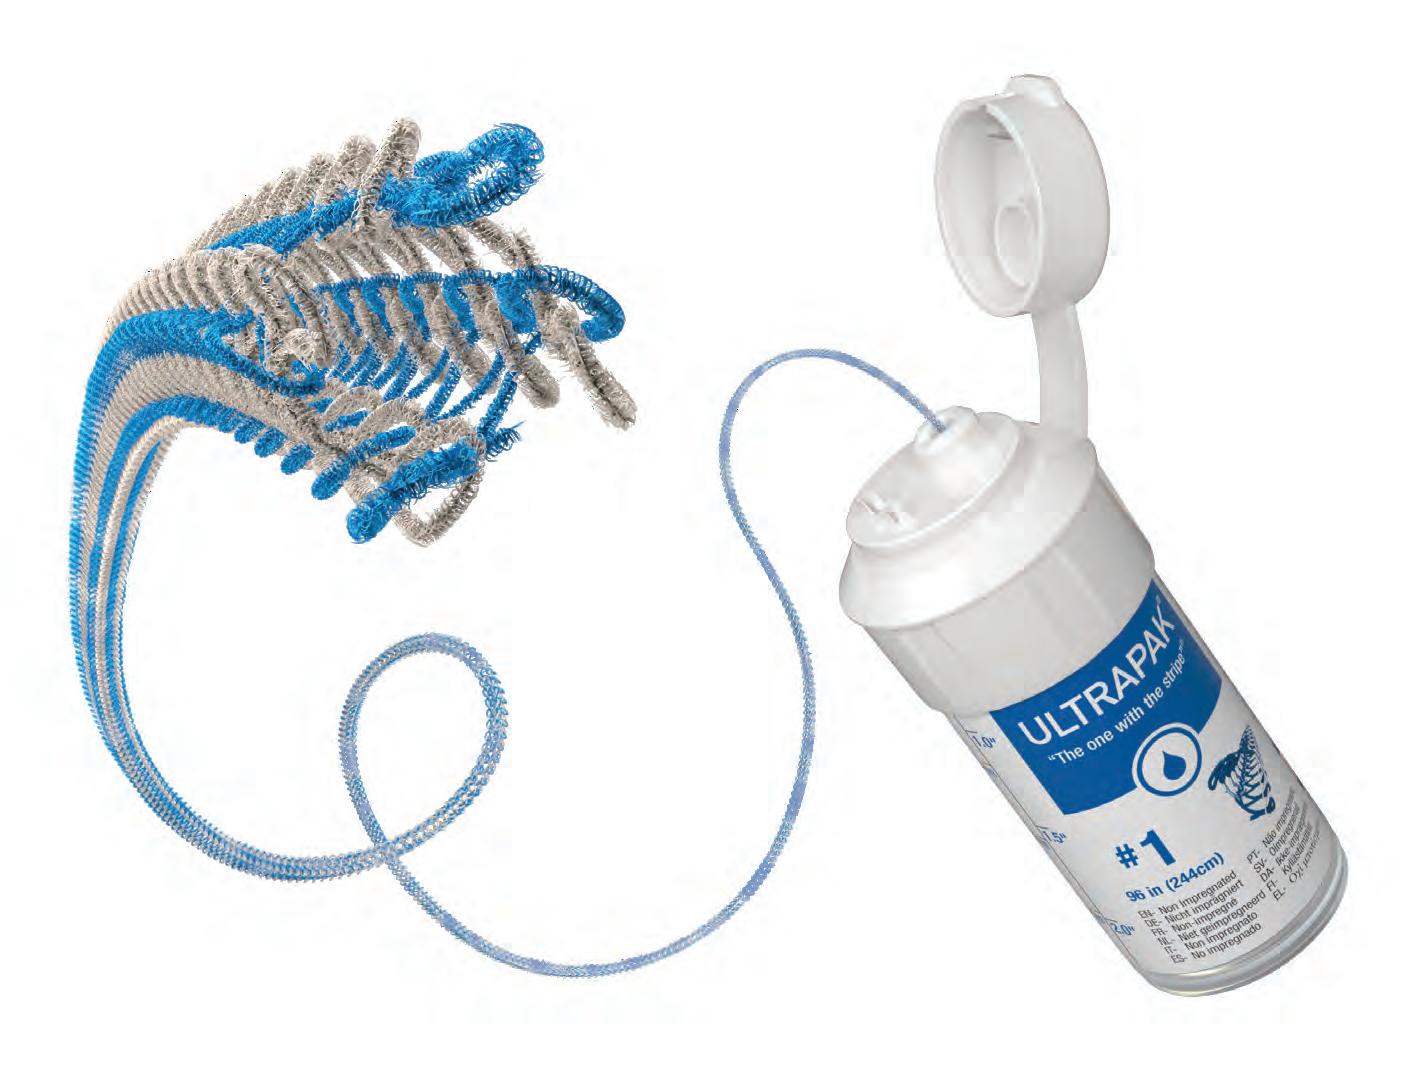
• Compresses upon packing then expands for optimal retraction
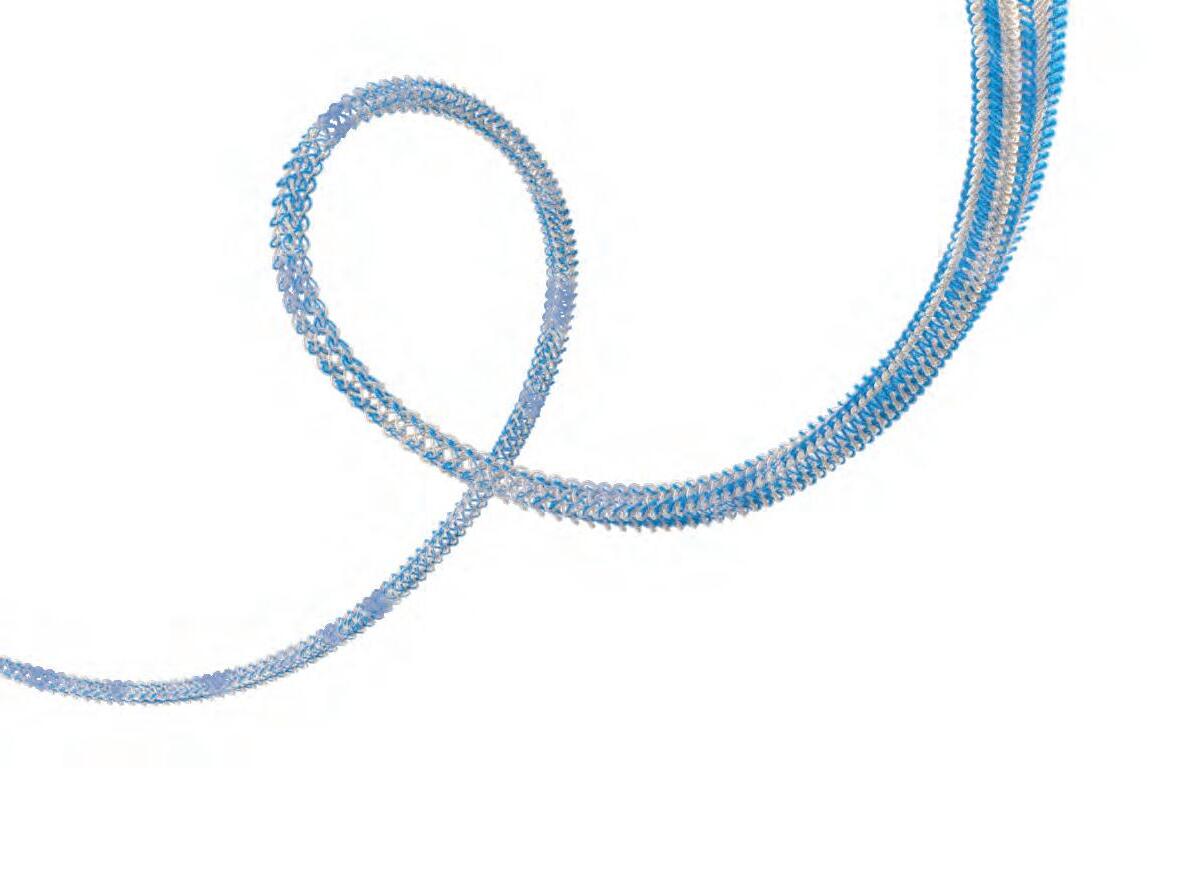
Ultrapak cord is made of 100% cotton which has been knitted into thousands of tiny loops to form long, interlocking chains. After hemostasis is achieved, this unique knitted design exerts a gentle, continuous outward force following placement as the knitted loops seek to open. Optimal tissue displacement occurs in 5 minutes.
Ultrapak cord can also be used to deliver ferric sulfate solutions subgingivally for sulcular fluid control. Ultrapak cord is designed to enhance tissue management techniques that use ViscoStat™ and Astringedent™ hemostatics. Conventional techniques using alum, aluminum chloride, etc. are also enhanced when using Ultrapak plain knitted cords, which carry significantly greater quantities of hemostatic solution than conventional cords.
Listed as a “CAN’T LIVE WITHOUT” product by a prominent independent research institute.2
knitted cord vs. leading competitors’ absorption abilities.*
PRE-PREPARATION PACKING TECHNIQUE
To ensure cord retention during preparation, use a cord large enough to firmly compress into sulcus.
PREPACK
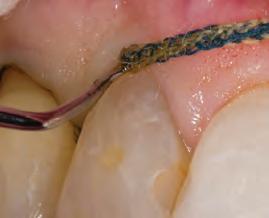
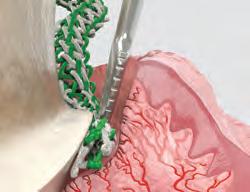
1. Place Ultrapak™ knitted cord soaked in hemostatic solution using a cord size that appears slightly too large to ensure cord retention. The thin Ultrapak™ Packer quickly slips cord into position. The knitted cord’s unique design (interlocking loops) facilitates easy packing and locks it into place.
PREPARATION

2. Extend margin subgingivally by cutting partway into knitted cord, which won’t entangle in diamond bur. Remove remnant of cord with an explorer or other instrument. Bleeding is minimal if at all. A small portion of uncut tooth above gingival attachment is preserved to record in impression. If additional retraction is required, repack with appropriately sized cord. Rinse, air dry, and make impression.
FOR DIGITAL IMPRESSIONS - COMPLETE HEMOSTASIS
HEMOSTASIS CLEAR FIELD


After
The most common challenges in getting a quality impression are adequate tissue retraction and sufficient moisture control. Try a double retraction cord technique combined with effective hemostatic agents to alleviate both.
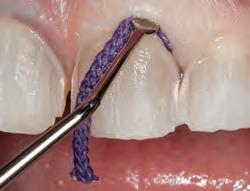
1. Once hemostasis is achieved, carefully place a single cord — such as Ultrapak™ knitted cord #0, #00, or #000 — to the bottom of the sulcus. Use Fischer’s Ultrapak Packers to place cords properly and efficiently.
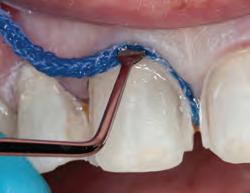
2. Place a second, thicker cord soaked in a hemostatic agent to expand the tissue laterally.
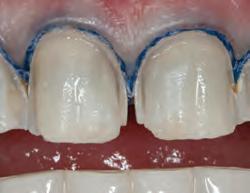
3. Rinse the area well, lightly dry, and make impression.
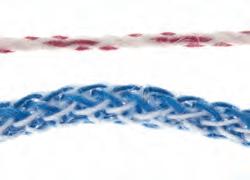
Knitted Ultrapak cord is composed of thousands of tiny, interlocking loops so it compresses and expands easier than other cords. 100% cotton fibers provide high absorption1 of hemostatic agents and sulcular fluids.
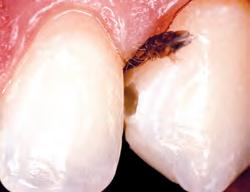
Ultrapak cord, saturated with hemostatic solution, controls bleeding and sulcular fluid near gingival and subgingival preparations.
Ultrapak cord compresses upon packing and then expands for optimal tissue displacement.


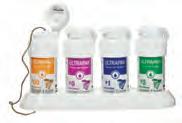
CleanCut design features a blade in the cap for efficient cutting. A special dispensing orifice prevents cord from falling into the bottle.
Each bottle contains 244 cm of cord.
9330 - Ultrapak Kit 1 x Each #00, 0, 1, and 2 cord 1 x Ultrapak organizer
CORD COMPARISON CHART
#000 - 0,889 mm
#00 - 1,041 mm
#0 - 1,143 mm
#1 - 1,245 mm
#2 - 1,422 mm
#3 - 1,6 mm
• Lower cord in the “double-cord” technique
• Anterior teeth
9331 - Ultrapak Cord #000 1pk #000 - 0,889 mm


• Preparing and cementing veneers
• Restorative procedures dealing with thin, friable tissues
9332 - Ultrapak Cord #00 1pk #00 - 1,041 mm


• Lower anteriors
• When luting near gingival and subgingival veneers
• Class III, IV, and V restorations
• Upper cord for use with the “double-cord” technique
9333 - Ultrapak Cord #0 1pk #0 - 1,143 mm


• Non-impregnated #1 and #2 sizes are particularly effective for tissue control and/or displacement when soaked in coagulative hemostatic solution prior to and/or after crown preparations
• Protective “pre-preparation” cord on anteriors
9334 - Ultrapak Cord #1 1pk #1 - 1,245 mm


• Upper cord for “double-cord” technique
• Protective “pre-preparation” cord
9335 - Ultrapak Cord #2 1pk #2 - 1,422 mm


• Areas that have fairly thick gingival tissues where a significant amount of force is required
• Upper cord for use with the “double-cord” technique
9336 - Ultrapak Cord #3 1pk #3 - 1,6 mm


Note: Do not use epinephrine preparations with ferric sulfate solutions, including ViscoStat, Astringedent, and Astringedent X hemostatics, as blue/black precipitate will occur.
These specially designed packers ease the packing of Ultrapak™ knitted cord. Their thin edges and fine serrations press into the cord, preventing it from slipping off and reducing the risk of cutting the gingival attachment.
45° TO HANDLE: Our most popular packers, with heads at 45° to the handle and three packing sides. Circular packing of the prep can be completed without the need to flip the instrument end to end. Use the small packer on lower anteriors and upper lateral incisors.
90° AND PARALLEL TO HANDLE: Same size design as the 45º to handle packer, except one of the heads is in line with the shank and the other is at a right angle to the shank.
171 - Small Packer - 45º to handle 1pk
170 - Regular Packer - 45º to handle 1pk
174 - Small Packer - 90º to handle 1pk
172 - Regular Packer - 90º to handle 1pk
and #171 (45º to handle)
and #174 (90º and parallel to handle)


Self-Etch-System (“No-Rinse”)
Total-Etch-System (“Etch and Rinse”)
Phosphoric Acid Gel
Self-Etching-Primer
Bonding Material
Light-Cured Adhesive
Zirconia/Metal Primer
Porcelain Etching
Hydrofluoric Acid Gel
Silane Solution
Calcium Hydroxide Liner
ETCH AND RINSE ETCHANT


Inspiral™ Brush Tip

• Self-limiting2 on dentin
• Penetrates smallest fissures and won’t run on a vertical surface3
• Precise placement
• Etch and rinse
• Rinses cleanly leaves no residue
Ultra-Etch etchant 35% phosphoric acid solution features ideal viscosity, which facilitates precise placement and superior control. It is selflimiting in its depth of etch (average depth of 1,9 μm with 15-second etch)2, creating an etch pattern that adhesives can penetrate for increased bond strength. Studies demonstrate Ultra-Etch etchant’s unique self-limiting chemistry on dentin creates an optimal surface to receive resin.4 Though Ultra-Etch etchant is viscous, it can penetrate into the occlusal fissures or vertical surfaces due to physical and chemical properties that promote capillary action. Its ideal viscosity maintains a layer that is thick enough to prevent premature drying.
Ultra-Etch etchant is indicated for use on dentin and enamel to create optimal bonding surfaces. Ultra-Etch etchant can be used for 5 seconds to remove the salts created by etching porcelain.
Note: Do not use phosphoric etchant on metals or zirconia, as this will reduce bond strength.

Clinical experience and SEM evaluations
both dentin and cut enamel provides optimal conditioning of both substrates.4
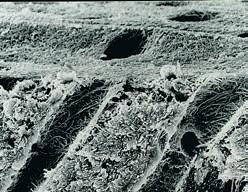
1,9 µm depth
Ultra-Etch etchant’s phosphoric acid is proven to be uniquely self-limiting in its depth of etch.2 Acids with greater depth of etch go beyond the optimum level and increase the potential for incomplete resin impregnation.4
Listed as a “CAN’T LIVE WITHOUT” product by a prominent independent research institute for more than 20 years.5

4 x 1,2 ml (1,58 g) syringes 20 x Blue Micro tips

167 - Ultra-Etch Econo Kit 20 x 1,2 ml (1,58 g) syringes 40 x Blue Micro tips
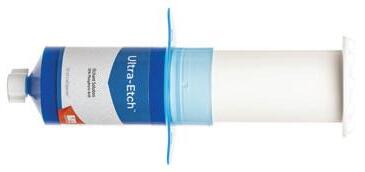

383 - Ultra-Etch IndiSpense Syringe Kit
1 x 30 ml (39,60 g) IndiSpense syringe 20 x 1,2 ml empty syringes 20 x Blue Micro tips


164 - Ultra-Etch 4pk
168 - Ultra-Etch Syringe 20pk 1407 - Ultra-Etch Syringe 50pk 1,2 ml (1,58 g) syringes

685 - Ultra-Etch IndiSpense Syringe 1pk 30 ml (39,60 g) syringe

129 - Ultra-Etch Empty Syringe 20pk 1,2 ml empty syringes
1. realityesthetics.com. 2. Perdigão J, Lopes M. The effect of etching time on dentin demineralization.
Volume 21, Issue 7, July 1997.


• When used with Peak Universal Bond adhesive, provides top-rated bond strengths by an independent non-profit dental education and product testing institute2
• Delivers fresh, stable chemistry
• Easy, one-coat technique
• Precise and convenient application
• No rinse needed
Peak SE Primer is a self-etching primer mixed and delivered in the unique JetMix™ syringe. JetMix technology separates precise quantities of strong acid (pH 1,2) and optimized priming resin to prevent the hydrolytic breakdown and degradation that occurs with other self-etch chemistries. Components are kept separate until the clinician activates them. The mixed chemistry is stable and can be used for 120 days. Peak SE Primer is used prior to Peak Universal Bond adhesive to achieve unsurpassed bond strengths.
Ideal for all light-accessible bonding procedures, the Peak Self-Etch Adhesive System can also be used for immediate dentin sealing prior to impressions and temporization in order to decrease post-op and cementation sensitivity.
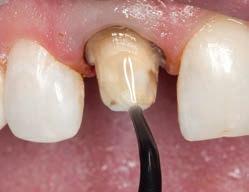
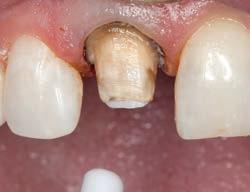

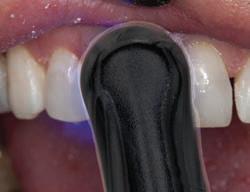
COMPARISON OF 3 SELF-ETCH ADHESIVE SYSTEMS, UNIVERSITY OF IOWA COLLEGE OF DENTISTRY4


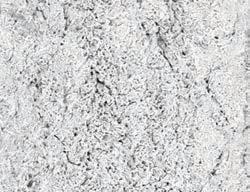

5135 - Peak SE Primer Refill 4pk 1,0 ml (1,19 g) syringes 4554 - Peak™ Universal Bond Self-Etch Syringe Kit
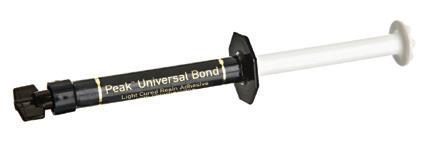


x 1,2 ml (1,35 g) Peak Universal Bond syringe
x 1,0 ml (1,19 g) Peak SE Primer syringe
x Black Mini Brush tips
x Inspiral Brush tips 4541 - Peak Universal Bond Self-Etch Bottle Kit


x 4 ml (4,5 g) Peak Universal Bond bottle
x 1,0 ml (1,19 g) Peak SE Primer syringes
x Black Mini Brush tips 50 x Mixing Wells 50 x Micro Applicator brushes


• Features Ultradent’s Dymetech™ phosphate monomer blend for enhanced strength and greater versatility
• Contains 0,2% chlorhexidine to help ensure long-term bond strength2
• Bonds to all dental substrates
• Ideal for direct and indirect bonding, as well as post and core procedures
• Works with self-etch and total-etch techniques
• Available in syringe or bottle delivery
The versatile formulation of Peak Universal Bond adhesive is ideal for direct and indirect bonding, including post and core procedures. With a 7,5% filler content and a blend of custom-synthesized phosphate monomers, its viscosity has been optimized for minimal film thickness and superior strength. It contains an ethyl alcohol solvent carrier and will cure with any dental curing light, including LEDs.
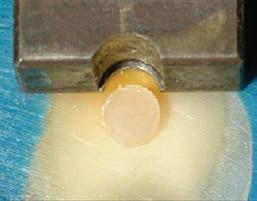
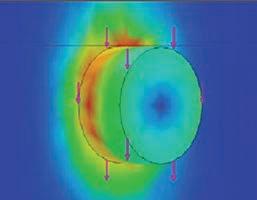


4551 - Peak Universal Bond Total-Etch Syringe Kit 1 x 1,2 ml (1,35 g) Peak Universal Bond syringe 1 x 1,2 ml (1,58 g) Ultra-Etch syringe 20 x Blue Micro tips 20 x Inspiral Brush tips


4542 - Peak Universal Bond Total-Etch Bottle Kit

1 x 4 ml (4,5 g) Peak Universal Bond bottle 4 x 1,2 ml (1,58 g) Ultra-Etch syringes
40 x Blue Micro tips
50 x Mixing Wells 50 x Micro Applicator brushes
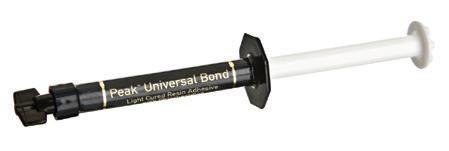
4553 - Peak Universal Bond Syringe Refill 4pk
4552 - Peak Universal Bond Syringe Econo Refill 20pk 1,2 ml (1,35 g) syringes
4543 - Peak Universal Bond Bottle 1pk 4 ml (4,5 g) bottle


• High bond strengths2 to dentin, creating long-lasting bonds
• Ideal for direct bonding procedures
• Highly filled for convenient placement and ease of use
• Chemistry is radiopaque
• Cures with all dental curing lights
PQ1 resin is a syringe-delivered, single-component, light-cured bonding resin that uses ethyl alcohol as a solvent. It is 40% filled and radiopaque.
The unique, patented chemistry of PQ1 resin bonds to dentin/enamel, cast metal, porcelain, zirconia, amalgam, and composite. PQ1 resin is also effective for indirect procedures where light curing is possible.
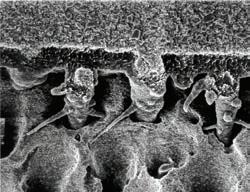
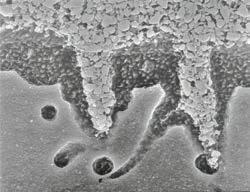
Note: Exceptional filler penetration for high-strength bonding.
Peak™-ZM


Zirconia and metal have met their match!
• Includes a unique blend of phosphate monomers, as well as the MDP monomer
• Convenient syringe and bottle delivery options
• Significantly enhances bond strengths to resin cements1
• Strong bond strengths to zirconia, alumina, and metal restorations
Peak-ZM Zirconia/Metal primer is specifically designed to provide high adhesion between the zirconia or metal surface and the luting material. Thanks to a chemistry containing the MDP monomer, Peak-ZM primer can increase bond strengths 5 times compared to using a resin cement alone.2 With Peak-ZM primer, you can feel confident in your zirconia and metal restorations.
Note: Not for use with RMGI or GI.
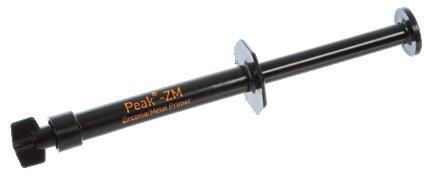

2464 - Peak-ZM Zirconia Primer Kit 2 x 1,2 ml (0,79 g) Peak-ZM syringes 20 x Black Mini Brush tips
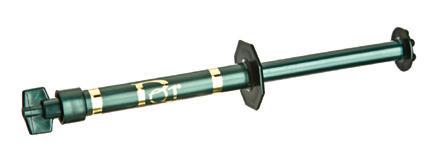
641 - PQ1 Syringe Refill 4pk
1806 - PQ1 Syringe Econo Refill 20pk 1,2 ml (1,67 g) syringes

2463 - Peak-ZM Zirconia Primer Bottle 1pk 4 ml (3,2 g) bottle
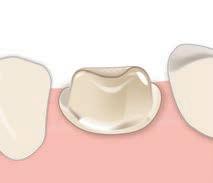
1. Clean, rinse, and dry preparation. Verify fit of zirconia or metal prosthesis.

2. Air abrade internal surface with 50μ AI02, at 50–80 psi. Look for uniform dull surface. Air clean and set aside.
NOTE: Contamination to the internal surface of the prosthesis will cause a decrease in bond strength. Keep area clean and free of phosphoric acid etch and saliva.

3. Clean tooth surface by applying an abrasive that is both oil and fluoride free.

4. Scrub abrasive with an intercoronal brush to clean and remove any residual cement. Rinse and then air dry.


5. Apply Ultra-Etch™ etchant for 15 seconds. Rinse for 5 seconds, lightly dry, leave slightly damp. Recommended: Apply antibacterial solution to preparation, suction off excess.

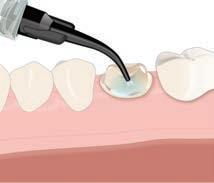

6. Apply a puddle coat of Peak Universal Bond adhesive in a scrubbing motion for 10 seconds.


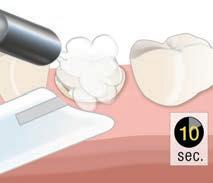




7. Thin aggressively with air and vacuum.


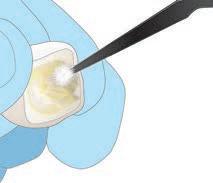


-ZM primer to the air-abraded prosthesis for 3 seconds and air thin/dry using full pressure.
NOTE: Do not use a zirconia primer if glass ionomer or resin modified glass ionomer.
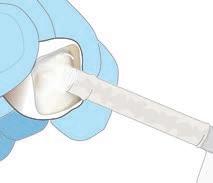
10. Apply a thin layer of a resin-based cement (PermaFlo™ DC resin) to the prosthesis and firmly seat in place. Cure according to instructions. Remove excess cement. For syringe application use the Black Mini
Transcend universal composite provides unprecedented shade matching with just one Universal Body shade due to its patented Resin Particle Match™ technology that eliminates the need for a blocker.
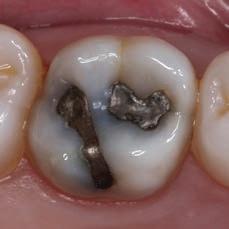
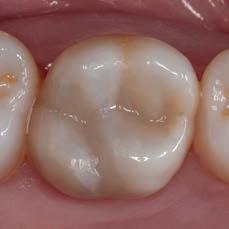
Deep amalgam staining presents one of the most difficult restoration situations to clinicians. In this case only the Transcend composite Universal Body shade was used to replace the amalgam, no blocker needed. Note the excellent color blending of the preserved oblique ridge.



Scan the QR code to learn more about Transcend Universal Composite or go to ultradent.eu/transcend


• Etch is easy to control and place
• Yields highest porcelain-to-resin bond strengths2
• Silane is a single component
• Use on feldspathic and lithium disilicate (IPS e.max®*) restorations
Ultradent Porcelain Etch is a viscous, buffered 9% hydrofluoric acid. Silane is a single-component solution.
Porcelain Etch is designed for intraoral or extraoral porcelain etching. Use it for in-office etching of indirect restorations, such as veneers, inlays, etc. After porcelain etching, clean residual debris with UltraEtch™ etchant for 5 seconds and rinse thoroughly; follow with Silane application. Studies have demonstrated that Silane, when used with Porcelain Etch and a quality bonding resin, yields the highest bond strength to porcelain when compared with other porcelain bonding products.
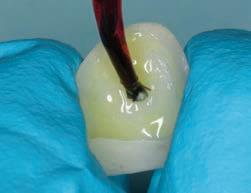
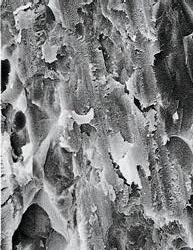

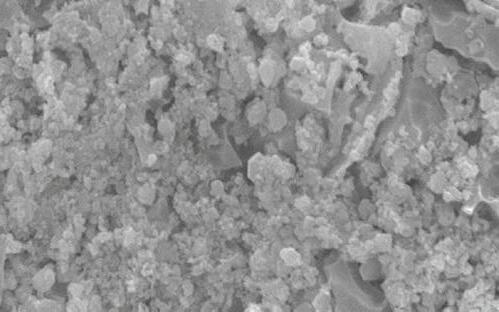
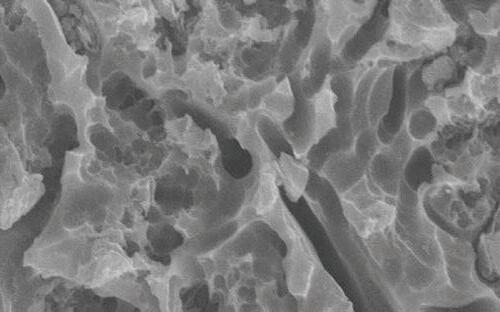

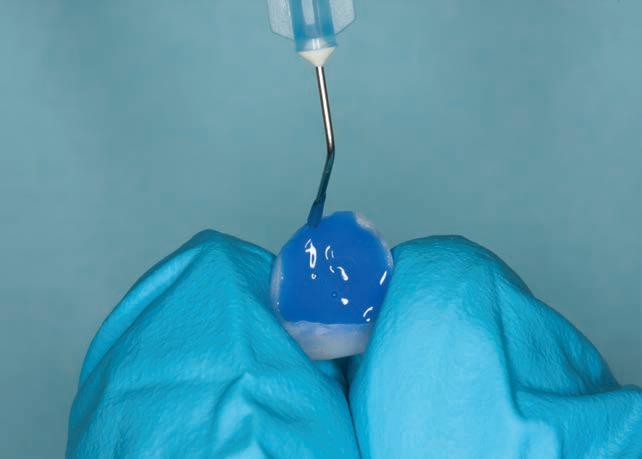


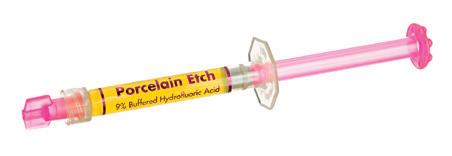
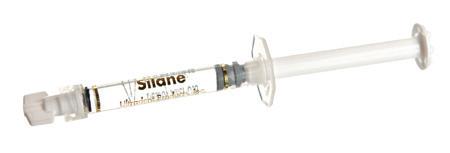


Kit
2 x 1,2 ml (1,33 g) Porcelain Etch syringes 2 x 1,2 ml (0,96 g) Silane syringes
20 x Black Mini Brush tips
20 x Inspiral Brush tips

406 - Porcelain Etch 2pk
407 - Porcelain Etch Syringe

1,2 ml (0,96 g) syringes
* Trademark of a company other than Ultradent. 1. realityesthetics.com. 2. Pameijer CH, Louw NP, Fischer D. Repairing fractured porcelain: how surface preparation affects shear force resistance. J Amer Dent Assoc. 1996;127(2):203-9.
ETCH, SILANE, BOND RESIN, AND FLOWABLE COMPOSITE


• Includes all necessary pre-composite placement materials
• Yields the highest porcelain-to-resin bond strengths2
• Provides quick, easy repairs without mixing
Note: This Quick Guide is meant only to provide an overview; it is not a substitute for instructions provided with individual products. Please carefully read instructions and warnings delivered with products before using them.
Place rubber dam if necessary, and/or cover surrounding teeth and gingival tissue with OpalDam™ light-cured resin barrier using a Black Mini™ tip. Light cure 10 seconds on Standard Power mode with VALO™ curing light.
Roughen ceramic and/or metal surfaces to be repaired using a microabrasion system with 50 µm aluminum oxide particles for at least 60 seconds. Alternatively (although less effective), use a diamond bur.
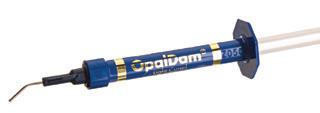
Porcelain repair procedures are becoming more common. It is financially advantageous and less invasive to repair a chipped porcelain restoration rather than replace it. The Ultradent Porcelain Repair Kit contains all the products and tips needed for composite-to-porcelain, porcelain-to-metal, and porcelain-to-porcelain repairs. 1. realityesthetics.com. 2. Pameijer CH, Fischer D. Repairing fractured porcelain: how
Option: Apply Porcelain Etch with an Inspiral™ Brush tip onto the fractured porcelain surface.
Etch surface for 90 seconds; then suction off gel and carefully rinse with water spray.
Rated excellent by a prominent independent research institute.3
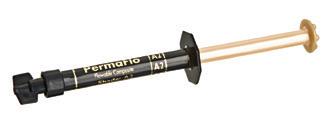
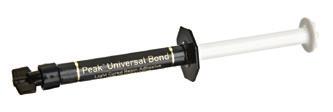

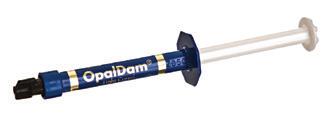
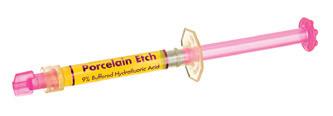
Option: Apply Ultra-Etch™ etchant for 5 seconds to remove porcelain salts.
Rinse and thoroughly air dry fractured surface.
Apply Silane onto fractured porcelain surface with a Black Mini™ Brush tip.

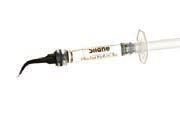
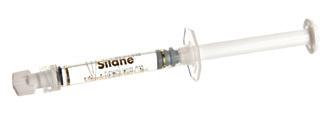


1108 - Ultradent Porcelain Repair Syringe Kit
1 x 1,2 ml (2,30 g) PermaFlo Dentin Opaquer syringe
1 x 1,2 ml (1,58 g) Ultra-Etch syringe
1 x 1,2 ml (1,34 g) OpalDam syringe
1 x 1,2 ml (1,35 g) Peak Universal Bond syringe
1 x 1,2 ml (1,33 g) Porcelain Etch syringe
1 x 1,2 ml (0,96 g) Ultradent Silane syringe
20 x Black Mini Brush tips
20 x Blue Micro tips
20 x Micro 20 ga tips
20 x Inspiral Brush tips
Let evaporate for 1 minute, and blow with a gentle stream of air until completely dry.
Apply Peak™ Universal Bond adhesive with an Inspiral Brush tip onto fractured surfaces. Air thin gently but thoroughly. DO NOT scrub.
Light cure Peak Universal Bond adhesive for 10 seconds with a VALO LED curing light.
Cover exposed metal with a thin layer of PermaFlo™ Dentin Opaquer composite using a Micro 20 ga tip, then light cure with VALO™ curing light 10 seconds on Standard Power. If using other curing light, cure according to manufacturer’s instructions.
Restore fracture by layering light-cured composite.
Finish and polish repaired area.
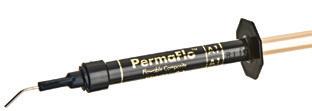

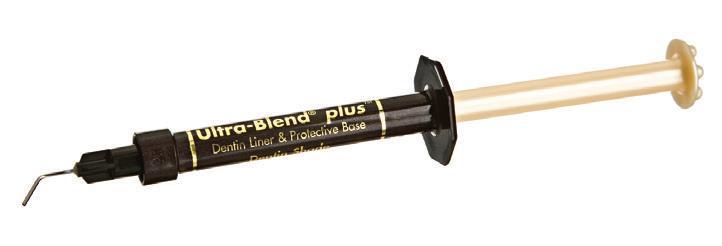


• Bioactive1 liner and pulp-capping material
• Superior calcium release2
• Light curable
• Controlled, precise syringe delivery
• No mixing necessary
• Will not dissolve over time
• Radiopaque
• Highly filled
• Use to cover MTAFlow cement for pulp capping prior to restoration
Ultra-Blend plus liner is a light-activated, radiopaque material with calcium hydroxide in a urethane dimethacrylate (UDMA) base. It’s perfect for pulp capping and will not dissolve over time. Ultra-Blend plus liner is highly filled for minimal shrinkage.
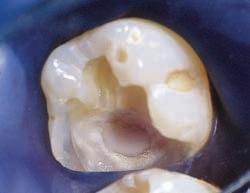

1. Small exposure - Use Ultra-Blend plus liner near pulp (pink) and for small nonhyperemic exposure. For larger exposure and/or hyperemic pulp, endodontic therapy should be considered.

Antibacterial solution - Apply antibacterial solution with plastic Blue Mini™ DentoInfusor or Black Mini brush tip for 60 seconds. Do not scrub. Air dry.

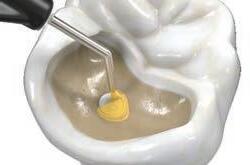
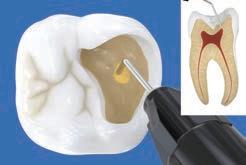
Ultra-Blend plus liner - With Black Micro™ tip, apply Ultra-Blend plus liner to dry dentin for direct or indirect pulp caps and light cure. Minimize dentin coverage to maximize available dentin for bonding.
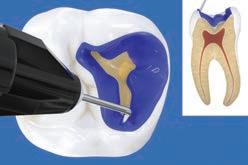
5. Ultra-Etch etchant - Apply Ultra-Etch™ 35% phosphoric acid etchant solution for 15 seconds. Suction, rinse, and dry until damp. NOTE: If desired, apply antibacterial solution prior to bonding, then place again for 60 seconds. Dry until dentin is slightly moist and proceed to the bonding agent.

Dentin Bonding/Peak Universal
adhesive - With the Inspiral™
Universal Bond adhesive,
and scrub into dentin for 10 seconds. Air thin at half pressure for 10 seconds and light cure for 10 seconds with the VALO™ curing light on Standard Power mode. Restore with a quality composite.

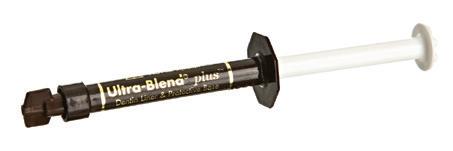


415 - Ultra-Blend plus Syringe Kit
2 x 1,2 ml (1,64 g) Dentin syringes
2 x 1,2 ml (1,64 g) Opaque White syringes
20 x Black Micro tips
20 x Black Mini tips

416 - Ultra-Blend plus Syringe 4pk

417 - Ultra-Blend plus Opaque White Syringe 4pk 1,2 ml (1,64 g) syringes


• Universal Body shade beautifully blends with most any tooth color
• No blocker required
• Proprietary Resin Particle Match™ technology
• Universal Body shade continues to match the surrounding dentition even after whitening1
• Excellent mechanical and optical properties
• Ideal working consistency is easy to sculpt1
• High polishability1
• Additional Enamel and Dentin shades for more esthetically demanding anterior cases
• Fluoresces similarly to natural dentition1
Transcend composite allows you to complete restorations with just one shade. Thanks to Ultradent’s Resin Particle Match technology, the refraction indices of the resin and particles work together to allow Transcend composite to blend with the surrounding tooth color. That means you can use Transcend composite Universal Body shade almost anywhere in the mouth and know that it will look natural and beautiful, even in larger restorations. Plus, Transcend composite features ideal handling for manipulation and sculptability.2

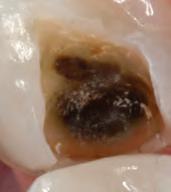
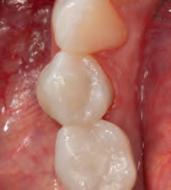
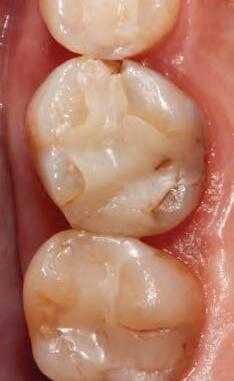
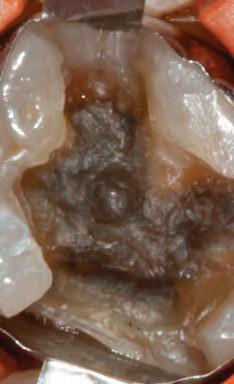
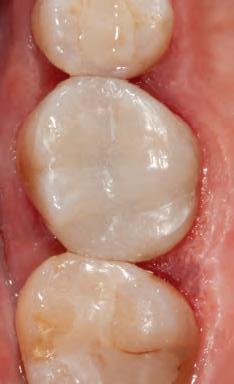
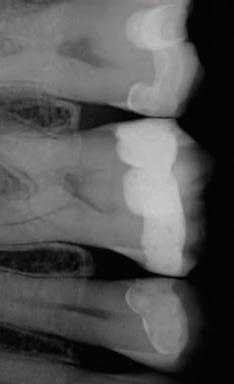
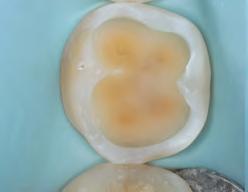
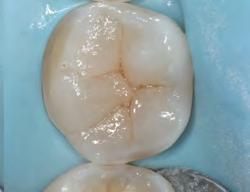

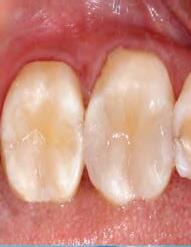
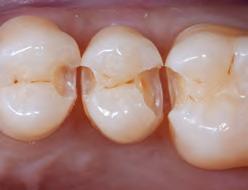

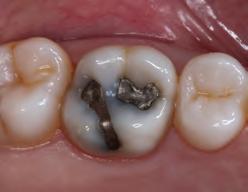
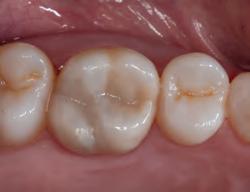

TECHNICAL OVERVIEW 4
Compressive Strength
Hardness
Flexural Strength
Flexural Modulus
TRANSCEND UB
MPa
HK
MPa
GPa Volumetric Shrinkage
Initial Gloss
GU
4733 - Transcend UB Syringe 1pk 1 x 4 g syringe Universal Body shade UNIVERSAL BODY SHADE

4734 - Transcend UB Syringe 4pk 4 x 4 g syringes Universal Body shade
4757 - Transcend UB Singles 1pk 10 x 0,2 g singles Universal Body shade
4817 - Transcend UB Singles 4pk 40 x 0,2 g singles Universal Body shade
Pair Composite Wetting Resin with any Ultradent composite to improve instrument and composite glide when sculpting and contouring.

3059 - Composite Wetting Resin Syringe 2pk 2 x 1,2 ml (1,85 g) syringes

Transcend Syringe 4 g
Dentin 1pk Enamel 1pk
A1D4727Enamel Neutral4731
A2D4728Enamel White4732
A3D4729
B1D4730
1 x 4 g syringe

Transcend Singles 0,2 g
Dentin 1pk Enamel 1pk
A1D4744Enamel Neutral4748
A2D4745Enamel White4749
A3D4746
B1D4747
10 x 0,2 g singles

4726 - Transcend Syringe Intro Kit
1 x 4 g syringe of each shade: A1D, A2D, A3D, B1D, EN, EW, UB

4814 - Transcend Singles Intro Kit
10 x 0,2 g singles of each shade: A1D, A2D, A3D, B1D, EN, EW, UB

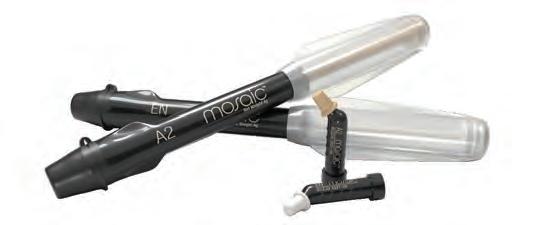
• Smooth, pliable consistency
• Cuts easily and doesn’t stick to instruments
• Won’t fow or slump out of place after being shaped
• Allows ample working time under ambient light
Mosaic universal composite balances beauty and performance for lasting, lifelike results. Mosaic composite can be used for all restorative purposes: basic or complex. Its nanohybrid formula is composed of zirconia-silica glass ceramic and 20 nanometer silica. Filler load is 68% by volume for dentin shades and 56% for enamel shades. The exceptional handling, natural esthetics, and high durability of Mosaic composite enable clinicians to create restorations of the highest quality.
Mosaic composite is used for direct and indirect restorations (inlays, onlays, and veneers) in both the anterior and posterior regions.


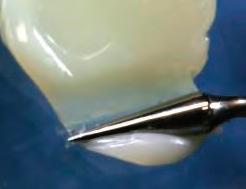
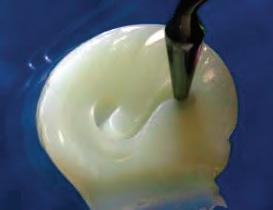


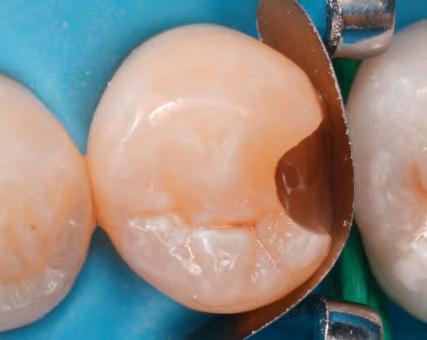

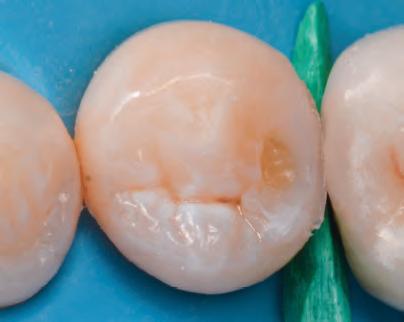
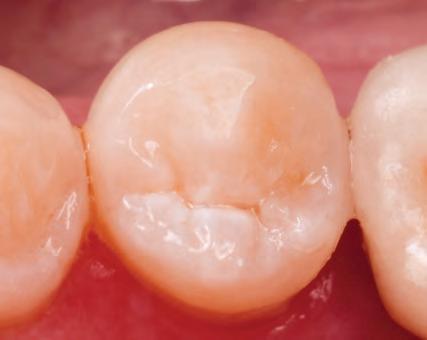

4803 - Mosaic Shade Guide—20 shades
A0.54760 Enamel Yellow 4773 A14761Enamel Blush4774
A24762Enamel Gray 4775 A34763Enamel Neutral4776
A3.54764Enamel White4777 A44765Enamel Trans4779
A54766Opaque White4778
G-aenial Sculpt®* (AE)
Mosaic™ composite (Enamel Neutral) Mosaic™ composite (A2 Dentin) x 1 Dentin 1pk Enamel 1pk
Mosaic™ Single Capsules 10pk 0,2 g
Dentin 10pk Enamel 10pk
A0.54799 Enamel Yellow 4792
A14780Enamel Blush4793
A24781Enamel Gray4794
A34782Enamel Neutral4795
A3.54783Enamel White4796 A44784Enamel Trans4798

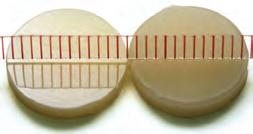
B0.54767 B14768 B24769 C24770 C34771 D24772 Mosaic™ Syringe 1pk 4 g x 10
A54785Opaque White4797
B0.54786 B14787 B24788 C24789 C34790 D24791


• High-fill, high-fow formula
• Highly radiopaque2
• Fluoride-releasing formulation3
• Superior polishability
• Strong and wear resistant
• Available in 8 shades
PermaFlo flowable composite is light-cured, radiopaque, methacrylatebased, and available in 8 shades. Its thixotropic properties impart ideal flowability for improved adaptation.
PermaFlo composite is 67–68% filled by weight, 42–44% filled by volume4, and has an average particle size of 0,7 μm.4
Use PermaFlo flowable composite for anterior and posterior restorations: Class I, II, III, IV, and V. It can also be used to restore missing subgingival tooth structure prior to endodontic procedures (the “Donut Technique”). FILM THICKNESS


2. The flowable composite offers unsurpassed adaptation as it fills from preparation floor up.
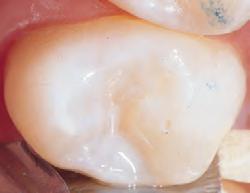
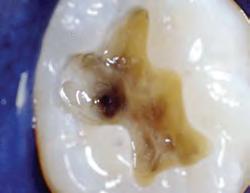


Masking dark colors with PermaFlo composite initially facilitates gorgeous esthetics at surface.
PermaFlo composite exhibits very low film thickness.
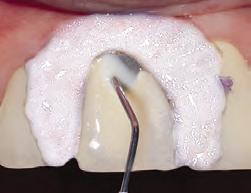
Place a thin layer of PermaFlo Dentin Opaquer over exposed metal and light cure for 10 seconds on Standard Power mode with VALO™ curing light.
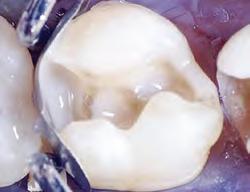
After bonding agent, apply a thin layer of PermaFlo composite at gingival margin, proximal box axial margins, and internal line angles to ensure quality adaptation of composite.
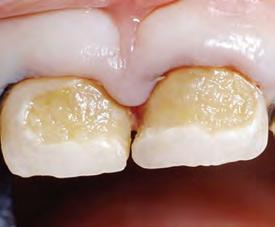


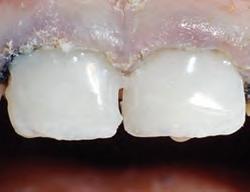
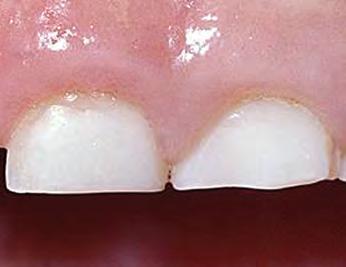











PermaFlo Syringe Kits
2 x 1,2 ml (2,30 g) syringes 4 x Micro 20 ga tips




• Facilitates composite adaptation
• Moistens dry composite during contouring
• Hydrophobic and solvent-free resin
Composite Wetting Resin is a 45%-filled, light-cured, liquid resin. It is significantly superior to single-component adhesives, which contain solvents and inhibit composite polymerization.
Use Composite Wetting Resin during incremental layering of composite materials, and when the oxygen-inhibited layer has been removed or disturbed (e.g., washing the composite surface following contamination). Composite Wetting Resin may be placed on the composite surface if it has become dry during contouring. Use Composite Wetting Resin on an instrument or brush to enhance glide. Composite Wetting Resin greatly facilitates adaptation of the composite restoration and preparation.
• Acts as an attractive solution for esthetic gingival substitute
PermaFlo Pink composite is an excellent alternative to gingival grafting, which is not always an option. Use as a masking agent in Class V restorations where root structure is exposed. Also use to mask gingival recession.
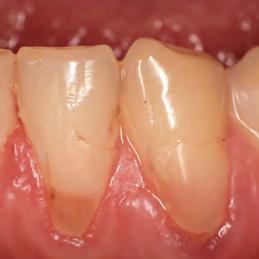
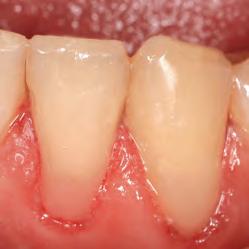




• Allows for predictable, high-quality, naturallooking composite restorations
• Prevents the oxygen inhibition layer during curing, resulting in a hard, glossy surface
• Allows light to pass through the template to the composite for effective curing
• Works with any preferred composite
• Releases easily from cured composite resin
• Requires minimal adjusting or polishing, saving time
• Facilitates application on individual or multiple teeth
• Is autoclavable and reusable, making it a cost-effective choice


Patient wanted something quick, conservative, and affordable. Treatment time was 1,5 hours for teeth 33-43 using *Vit-l-escence™ PN composite, and required no prep. Tissues still a bit irritated as this photo was taken immediately post-op after removing the retraction cords. Patient extremely satisfied.


is happy and satisfied with results.

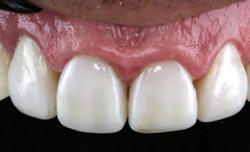
The original Uveneer template kit has everything you need to create a highly esthetic restoration with a perfect finish on both uppers and lowers. The templates help make procedures quick, cost effective, and minimally invasive. Templates from the original kit were designed to create beautiful, symmetrical smiles. The templates create a blank canvas for the dentist to add custom contours and anatomy to fit each patient’s needs.
Uveneer Extra templates expand on this one-of-a-kind system, offering an innovative new esthetic in a wider variety of sizes for more versatility and less finishing time. Uveneer Extra templates are made from scans of actual teeth with mamelons and other tooth contours built right into the templates. The new system also offers additional sizes for more patients, including Extra Large, Large, Medium, and Square.
Both Uveneer template systems can be used for mock-ups, shade matching, provisionals, and composite veneers.

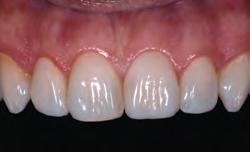
Each reusable, autoclavable template is designed to mimic ideal tooth anatomy according to the rules of smile design and the “golden proportion.” The system incorporates ideal height to width ratio, contour, embrasure, and center midline. Due to the precise anatomical facial tooth contour of the templates, the final result will yield different thicknesses of composite. The composite will be thinner toward the incisal third and gingival areas and will be thicker toward the middle of the facial surface. Because this varied thickness creates different effects and values, only one shade of composite is needed to achieve a natural gradient effect. However, multiple shades of composite can still be used depending on the clinician’s preferred technique.
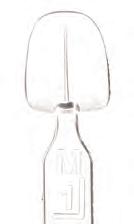
Gingival portion
Mid-section
Midline
Incisal edge
Handle with tooth position, size, and arch


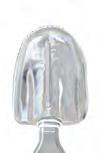

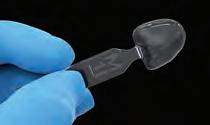

the tooth.

Rinse etchant and air dry according to manufacturer’s instructions. Do not rinse if using Peak SE Primer; air thin.

5. Apply Peak Universal Bond adhesive or preferred adhesive to tooth surface.
SINGLE SHADE TECHNIQUE LAYERING TECHNIQUE
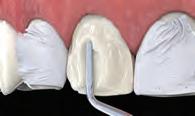
OR
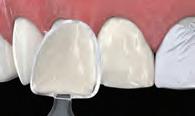

3. Place interproximal separating matrices and apply Ultra-Etch™ etchant, Peak™ SE Primer, or preferred etchant.
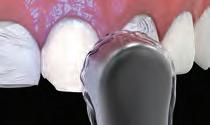
6. Light cure with VALO™ curing light 10 seconds on Standard Power. If using other curing light, cure according to manufacturer instructions.

8. Place selected template
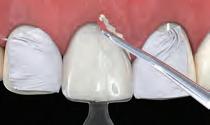
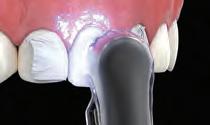
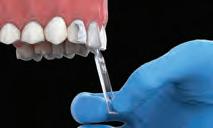
to manufacturer’s instructions.

according to manufacturer’s instructions.
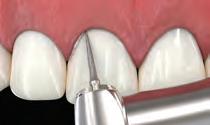
13. Avoiding the glossy facial surface, trim bulk of cured composite from periphery with a fine flame-shaped bur from the Jiffy Composite Finishing Bur Kit. Use a blade for anything next to the margin to avoid altering the margin of the permanent restoration. Use Jiffy Composite Polishers or Brushes for minimal finishing and adjusting if desired.


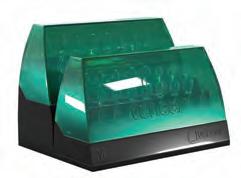
UVKV3 - Uveneer Kit
16 x Medium upper and lower arch templates
16 x Large upper and lower arch templates
Medium and large templates provide 2 central incisors, 2 lateral incisors, 2 canines, and 2 premolar templates for both the upper and lower arches.
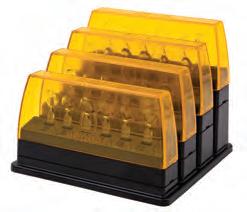
UVKEV1 - Uveneer Extra Kit
6 x Extra Large upper anterior templates
6 x Large upper anterior templates
6 x Medium upper anterior templates
6 x Square upper anterior templates
Uveneer Extra kits include canine to canine templates.
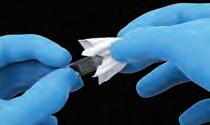
14. Immediately after use, thoroughly wipe template with an alcohol pad and then dry, bag, and autoclave according to Uveneer template IFU. Do not leave any composite residue on the template in order to maintain translucency and shine.
Do not autoclave the black base.
UVKEXLSQV1 - Uveneer Extra XL & SQ Kit
6 x Extra Large upper anterior templates
6 x Square upper anterior templates
UVKELMV1 - Uveneer Extra L & M Kit
6 x Large upper anterior templates
6 x Medium upper anterior templates

Polycarboxylate & Resin-Base, Non-Eugenol Temporary Cements Temporary Veneer Cement
Light-Cure Veneer Luting Resin
Dual-Cure Composite Luting/Restorative Resin
Resin-Reinforced Glass Ionomer Cement


Description Temporary luting cementTemporary luting cementTemporary veneer


glass ionomer luting

Veneer cement Chemistry Paste-to-paste, noneugenol polycarboxylate Paste-to-paste, noneugenol resin-based
Indications for Use Temporary cementation of provisional crowns, bridges, inlays, and onlays
Delivery 5 ml dual-barrel syringe with mixing tip
Temporary cementation of provisional prosthesis or restorative procedures (i.e., provisional crowns, bridges, inlays, and onlays)
ml dual-barrel syringe with mixing tip
filled composite resin
Temporary cementation of provisional veneers
0,67 g contra-angle syringe
Permanent cementation of crowns, inlays, onlays, bridges, endodontic post cementation, and fabrication of core buildups
5 ml dual-barrel syringe with mixing tip. Additional intraoral tip for precise delivery.
Permanent cementation of restorations (including inlays, onlays, crowns, and bridges) made of metal, PFM, zirconia, and resin to natural teeth
Permanent cementation of porcelain, zirconia, composite, and other indirect anterior veneers
Hand-mix bottle kit: 15 g powder / 8,6 ml liquid
0,95 g contra-angle syringe Cure Type
minutes working time, full set in 5–8 minutes. Light cure with VALO™ curing light according to instructions. 1–3 minute working time, full set in 5 minutes
2-second tack cure to avoid shifting. Light cure with VALO curing light for 10 seconds.
Viscosity Flowable Flowable Medium Flowable Very flowable Medium
Shades Off-white Off-white Translucent
Differentiation
Indications
Mixes and delivers in one action. Hydrophilic polycarboxylate nonirritating formula is kind to pulp. Ideal for sealing the access opening of walking bleach cases. Designed to flake off easily.
Mixes and delivers in one action. Hydrophilic resin-based formula is well-suited for cases when longer retention is required. Available in Regular and Fast Set times. Is radiopaque and fluoresces to ensure full cement removal. Provides the additional strength necessary to keep provisional veneers in place. Fluoresces under a UV light for easy detection. Adheres more to the provisional than the tooth.
Lowest film thickness (8 µm) known for a luting cement.1 Higher compressive bond strength than other quality luting cements.2 Economically priced.
Features highest bond strengths to metal or dentin compared to other cements in its category.3
Low shade shift for a lasting esthetic result. Unique contraangle delivery for added precision and convenience. Low shrinkage stress reduces strain on veneers at polymerization.
POLYCARBOXYLATE & RESIN-BASE, NON-EUGENOL TEMPORARY CEMENTS


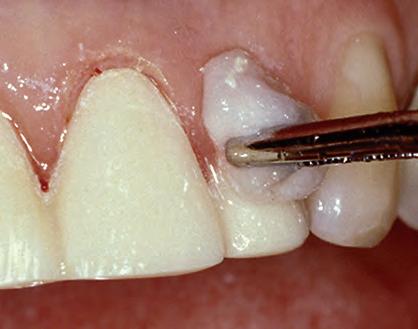
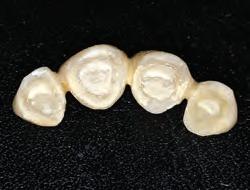
• Non-eugenol formula won’t interfere with resin bonding
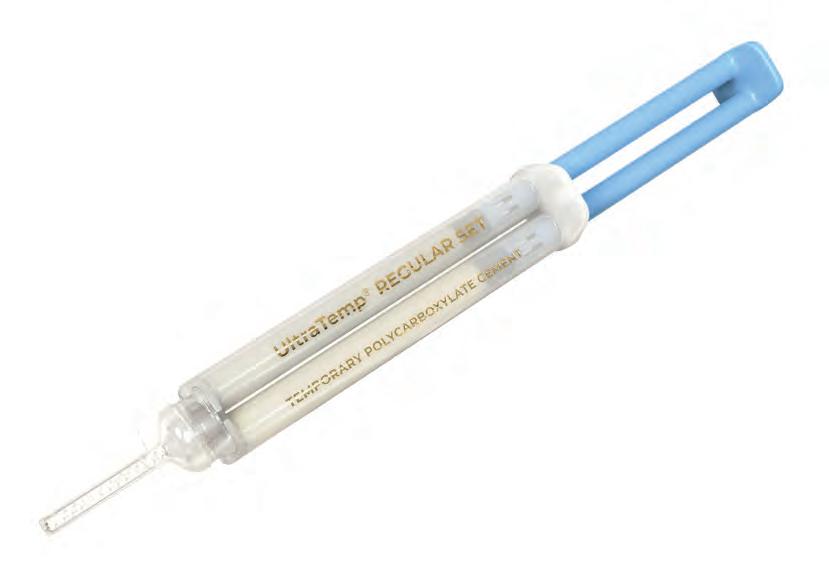
• Easily removed by water prior to setting/curing
• Convenient dual-barrel syringe delivery of paste-to-paste formulas
• Mixing tips provide even mixing for reliable adhesion
• Provides optimal sealing capabilities once cured
• Able to withstand normal biting and chewing forces
• Hydrophilic chemistry ensures a quality seal
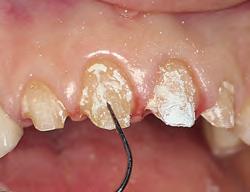
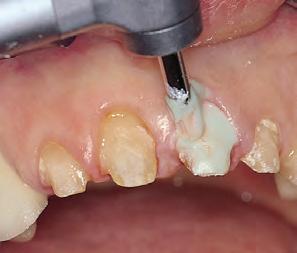
UltraTemp™ temporary cement is a hydrophilic, polycarboxylate chemistry that ensures low irritation to pulp and a quality seal. It can be easily removed with water prior to setting. UltraTemp temporary cement is suggested for routine 1–2 week temporization of customfabricated provisionals or standard preformed provisionals.


5


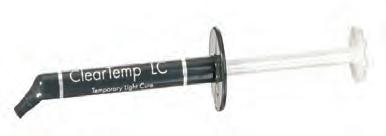
• Translucent shade is designed for temporary anterior veneers
• Light-cured resin formula provides a quality seal and exceptional retention
• Fluoresces under black light, facilitating complete removal
• Ergonomic contra-angle syringe delivery aids in precise placement
ClearTemp LC temporary veneer cement is designed specifically for temporary veneers. Its proprietary, light-cured resin formula provides the additional strength required to keep provisional veneers in place. For luting temporary veneers, nothing will hold as strong or look as natural as ClearTemp LC temporary veneer cement.
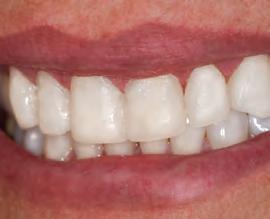
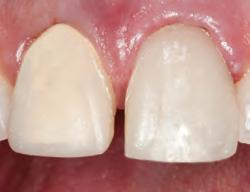
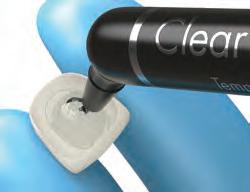
1. Remove product from refrigerator and bring to room temperature. Clean, rinse, and lightly dry preparation. Express enough ClearTemp LC cement to coat inside surface of provisional.

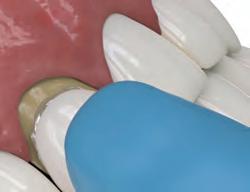
2. Seat temporary veneer.
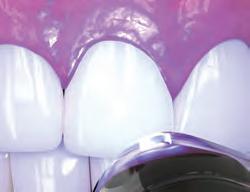
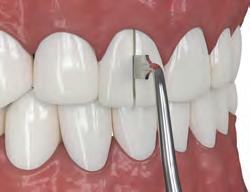
5. Use a hand instrument at acrylic margin to break seal and remove provisional. ClearTemp LC cement is very strong and has high adhesion, so temporary veneers may break upon removal. Flake off bulk residual cement with a blunt hand instrument.

6. Illuminate tooth surface with black light to reveal remaining ClearTemp LC cement. Remove any remaining cement and recheck. Scour prep with pumice-type slurry and cup or brush. Rinse thoroughly and prepare for final cementation.
Note: Due to its high bond strength compared to other temporary cements, ClearTemp LC temporary veneer cement should be used for temporary veneers ONLY and never for temporization of permanent restorations, full coverage crowns, inlays, or onlays.
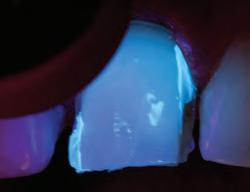
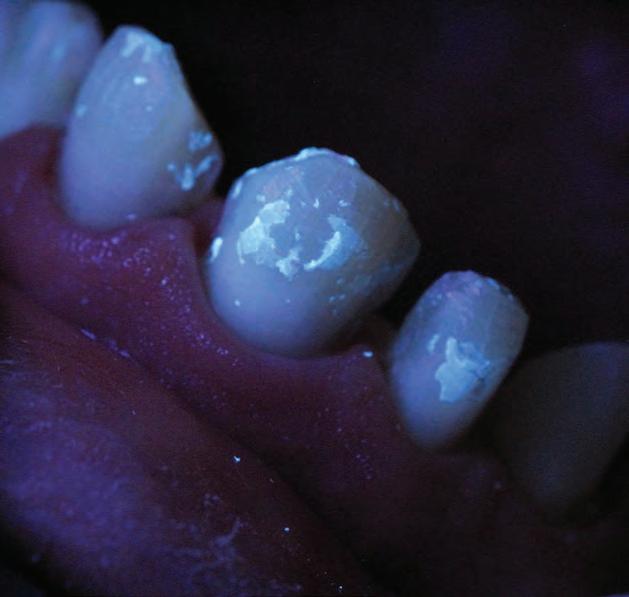
Note: We recommend PermaShade LC veneer cement for luting permanent veneers. See the next page.

PermaShade™ LC LIGHT-CURE VENEER LUTING


• Medium viscosity keeps veneer from drifting prior to cure
• Use for porcelain, zirconia, composite, and other indirect veneers
• Upon curing, low shrinkage stress prevents strain on the veneer1
• Available in four VITA™* shade options: Translucent, Opaque White, A2, and B1
PermaShade LC luting resin is a light-cured luting resin used exclusively for cementing translucent prosthetics where light can transmit and shade matching is important. Its ergonomic contra-angle syringe makes luting delicate prosthetics more convenient than other delivery methods. With enduring color stability and low shrinkage, PermaShade LC luting resin is ideal for creating a long-lasting, esthetic smile.

Unique and ergonomic contra-angle syringe allows for precise, controlled delivery.
Note: for optimal handling, bring PermaShade LC resin to room temperature before use.
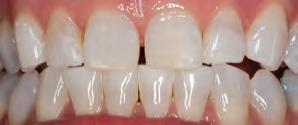


PermaShade LC Syringe 4pks
Subscribe to Ultradent’s free e-newsletters to receive the latest news on products, events and more.


• Multiple uses including post cementation, core buildup, and luting
• Wear resistant
• Maximum strength
• Radiopaque
• Low polymerization shrinkage
• Self-mixing
• Redesigned syringe for easy dispensing
• 2,5-minute working time, 5 to 8-minute chemical set time
• Total-etch or self-etch compatible
PermaFlo DC luting resin is a highly filled, small-particle, dual-cure resin that flows easily through a small-orifice tip, making post luting simple and convenient. It has the lowest film thickness of only 8 μm.1
PermaFlo DC luting resin is recommended for permanent cementation of transparent or opaque crowns, etc. You can use the same mix and delivery method to lute posts and fabricate core buildups. Its optimal viscosity flows easily into the depths of the post preparation and then intimately around protruding, direct-placed posts. To stop material flow during core buildup, tack with a curing light. PermaFlo DC resin is compatible with Peak™ Universal Bond adhesive for light-cured bonding and luting. DUAL-CURE COMPOSITE LUTING/RESTORATIVE RESIN
Shear Bond Strength to Enamel (Total-Etch)
Shear Bond Strength to Dentin (Total-Etch)
Flexural Strength
Flexural Modulus
Compressive Strength
Compressive Modulus

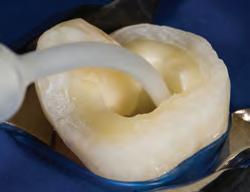
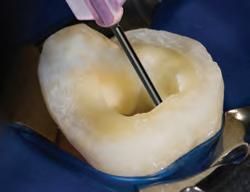
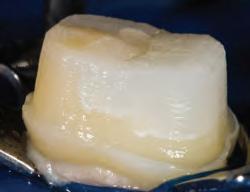
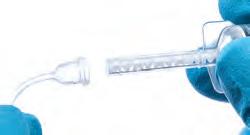
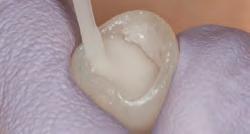
MPa
MPa
MPa
GPa
MPa
GPa
DC resin has the lowest film thickness known for a composite luting resin.


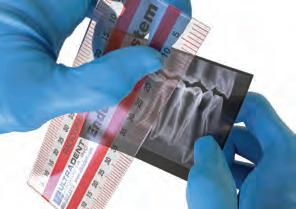
Determine
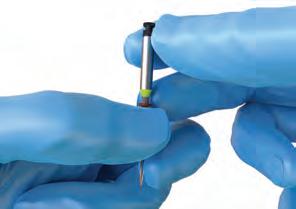
3. Position UniCore tip in the pilot hole. Using light pressure, follow the obturation material to the length indicated by rubber stop. Keeping the drill at full speed, withdraw from the canal. ENDODONTIC
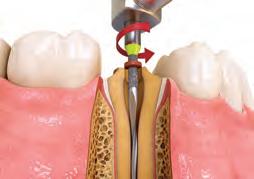
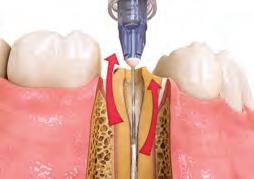
4. Use TriAway Adapter* with EndoEze™ 22 ga tip to clean debris out of post space from bottom up with water and suction.
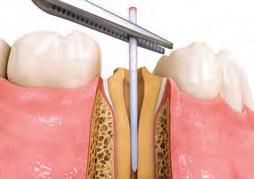
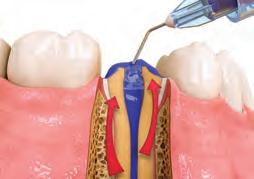
6. Etch space for 15 seconds with Ultra-Etch™ etchant using the EndoEze 22 ga tip. Start apically and fill coronally.
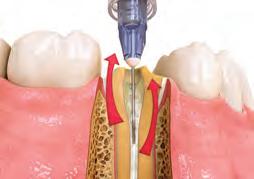
Use TriAway Adapter* and Endo-Eze 22 ga tip to rinse thoroughly with water and lightly air dry, leaving the post space slightly damp.
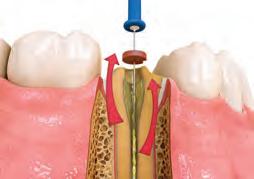
6a. Attach 30 ga NaviTip™ FX™ Brush tip to Peak™ SE primer syringe. Apply to post space and coronal

Blow out excess from bottom up using TriAway Adapter* with EndoEze 22 ga tip and suction. Do not over-dry.


8. Remove excess Peak Universal Bond adhesive using the TriAway Adapter* with Endo-Eze 22 ga tip and suction. Continue for 10 seconds using full air pressure, then air thin adhesive on coronal surface for 10 seconds.
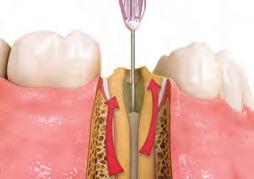
* TriAway Adapters are not available in the EU.
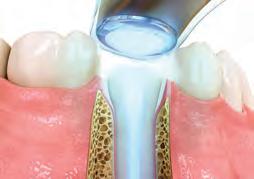
9. Light cure adhesive for 20 seconds. If close to gingiva, use two 10-second intervals or 6 seconds Xtra Power mode on VALO™ curing light.
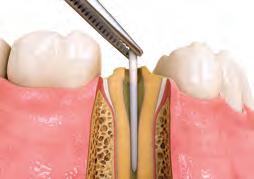
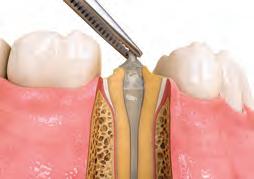
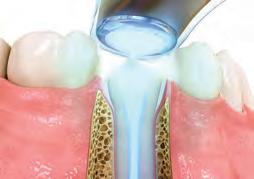
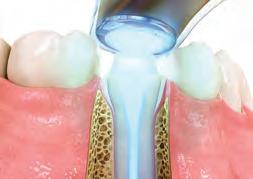
15. Express PermaFlo DC cement around post for core buildup. Incrementally build up core and light cure for 10 seconds between layers. If cement starts to slump, tack cure between layers. Incrementally build up core.
RESIN-REINFORCED GLASS IONOMER CEMENT

• High bond strengths
• Sustained fuoride release
• Flowable viscosity and low film thickness won’t compromise fit or occlusion
• 1- to 3-minute working time, 5-minute set time
• Radiopacity >1 mm aluminum
• More retentive than other leading RMGI cements on precious alloy crowns2
UltraCem resin-reinforced glass ionomer cement offers the best of both worlds in a luting cement: efficient delivery and unsurpassed performance. Its advanced chemistry boasts the highest bond strengths in its category. UltraCem cement is available in a traditional hand-mix bottle kit, an economical choice that gives clinicians control over the viscosity and amount of material used.
UltraCem resin-reinforced glass ionomer cement is used as a luting cement for indirect restorations (including inlays, onlays, crowns, and bridges) made of metal, porcelain fused to metal, zirconia, and resin. It may also be used for cementation of orthodontic bands.
Note: Never use phosphoric acid to clean zirconia, as it will significantly reduce bond strengths. Do not use a zirconia primer with UltraCem cement.
COMPARATIVE TESTING 1
cement GC Fuji PLUS™* FLUORIDE RELEASE - ONE WEEK3

2056 - UltraCem Liquid-Powder Bottle Kit 1 x 15 g bottle of powder 1 x 8,6 ml bottle of liquid 1 x Mixing pad 1 x Measuring spoon 1 x Spatula


• Features Ultradent’s Dymetech™ phosphate monomer blend for enhanced strength and greater versatility
• Bonds to all dental substrates
• Ideal for direct and indirect bonding, as well as post and core procedures
• Works with self-etch and total-etch techniques
• Available in syringe or bottle delivery Peak™ Universal Bond LIGHT-CURED ADHESIVE


• Allows for predictable, high-quality, naturallooking composite restorations
• Prevents the oxygen inhibition layer during curing, resulting in a hard, glossy surface
• Allows light to pass through the template to the composite for effective curing
• Works with any preferred composite
• Releases easily from cured composite resin
• Requires minimal adjusting or polishing, saving time
• Facilitates application on individual or multiple teeth
• Is autoclavable and reusable, making it a cost-effective choice
Adhesive, see page 60.


The easy-to-use Halo sectional matrix system allows you to create beautiful, anatomically contoured composite restorations in less time.


Single-Use Polishers
Shaping and Finishing Disks
Original Composite Polishing System
Natural Composite Polishing System
Natural Universal Ceramic Polishing System
Universal Ceramic Polishing System
Polishing Brushes
Diamond Polish Paste
Drying Agent
Finishing Strips
Composite Sealer
SINGLE-USE POLISHERS

• No need to re-process the polishers
• Get the luster you and your patients expect with specially formulated diamond grit
• No chance of cross-contamination
• No need to worry about accidentally throwing out multi-use polishers
SIMPLE, STRAIGHTFORWARD, AND SAFE
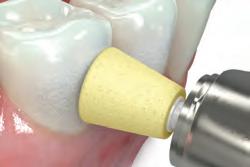
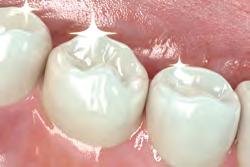
For a one-step polish, start with Medium. Need more luster? Use the Fine. Maximum two-step system for quick and easy polishing. The Jiffy One single-use polishing system delivers a beautiful, natural shine while saving you time.
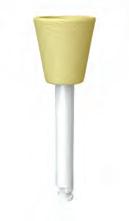
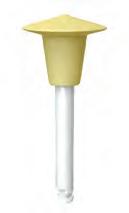
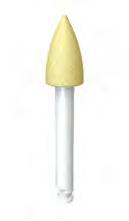
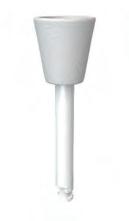
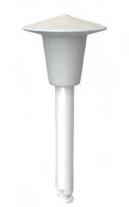
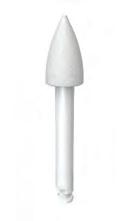


• Ultra-thin disks are perfect for interproximal finishing and shaping
• Every component of the Jiffy system will assist clinicians in providing the esthetic restoration patients want
• Aluminum-oxide-coated disks range from coarse to fine for smoothing and polishing
• Extra-coarse diamond grit for rapid shaping and gross removal
• Suitable for use on composite and ceramic materials
• This new addition to the Jiffy family of products will be sure to bring the pristine finish patients love
The Jiffy Spin shaping and finishing disk system is a high-quality solution to shape and finish restorations, at a smart price, rapidly and efficiently. Clinicians love the finished results of any set in the Jiffy product line; but if you’d like a faster polish in your repertoire, this is the one to pick out of the lineup.
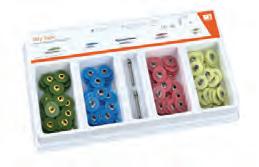
5570 - Jiffy Spin
10 mm Shaping & Finishing Disk Kit
2 x Mandrels, 50 x Extra-Coarse Disks, 50 x Coarse Disks, 50 x Medium Disks, 50 x Fine Disks
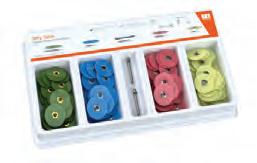
14 mm Shaping & Finishing Disk Kit
2 x Mandrels, 50 x Extra-Coarse Disks, 50 x Coarse Disks, 50 x Medium Disks, 50 x Fine Disks


ORIGINAL COMPOSITE SYSTEM

• Unique disk shape gives you leverage on working surfaces
• Polishing cups feature a fared, fexible thin-wall design that is ideal for polishing near the gingiva
• Available with or without autoclavable aluminum blocks*
• Jiffy grit gives a beautiful finish on any composite material
• Not made with natural rubber latex
Recommended speed: 3.000–8.000 RPM

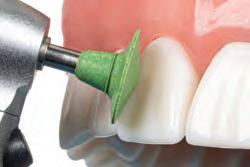
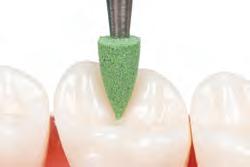
Use Jiffy Coarse Green point to shape occlusal and labial/buccal surfaces.


1. Gross to Fine Shaping
Use the green (coarse), yellow (medium), and then the white (fine) Jiffy polishers for quick shaping of composites with overbuilds and slight irregularities.
Recommended speed: 3.000–8.000 RPM
2. High Shine Polish
Use the blue (ultrafine) Jiffy HiShine system as an additional polishing step to provide an extra smooth and highly polished finish.

Use Jiffy Medium Yellow cup to polish margins and labial/buccal surfaces.
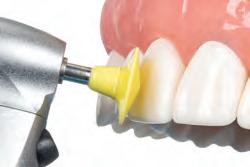
3. Final Finish
Polishing Brush used with Ultradent™ Diamond Polish Mint gives a final esthetic finish to composite or ceramic restorations.
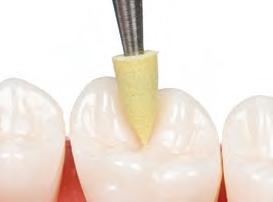
INTRAORAL POLISHING CONT.
Recommended speed: 3.000–8.000 RPM
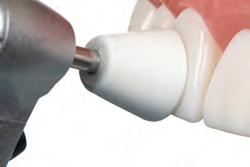
Fine White cup creates final polish on cusp, labial/buccal, and cervical areas.
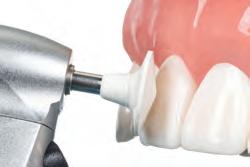
Jiffy Fine White disk creates final polish on labial/buccal surfaces.
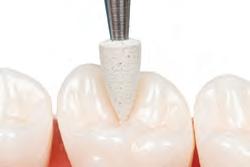
Jiffy Fine White point creates final polish on occlusal and labial/buccal surfaces.
INTRAORAL FINAL POLISHING
Recommended speed: 3.000–8.000 RPM
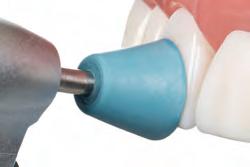
Use Jiffy Ultrafine Blue HiShine cup as an additional step to create an extra smooth and highly polished finish on cusp, labial/buccal, and cervical areas.

Use Jiffy Ultrafine Blue HiShine disk as an additional step to create an extra smooth and highly polished finish on labial/buccal surfaces.
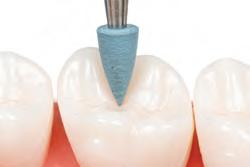
Use Jiffy Ultrafine Blue HiShine point as an additional step to create an extra smooth and highly polished finish on occlusal and labial/buccal surfaces.
* Ultradent recommends the use of an aluminum block when autoclaving to prevent warping and deformation. 1. realityesthetics.com.


7010 - Jiffy Original Polisher Variety Pack 18pk
6 x Jiffy RA Original Cups (2 coarse, 2 medium, 2 fine)
3 x Jiffy RA Original Disks (1 coarse, 1 medium, 1 fine)
9 x Jiffy RA Original Points (3 coarse, 3 medium, 3 fine)
7023 - Jiffy Original Adjusting & Polishing Kit 9pk
3 x Jiffy RA Original Fine (1 cup, 1 disk, 1 point)
3 x Jiffy RA Original Medium (1 cup, 1 disk, 1 point)
3 x Jiffy RA Original Coarse (1 cup, 1 disk, 1 point)


Cups


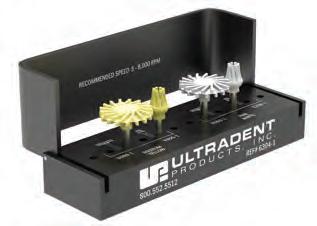
• Easily re-creates the luster of natural enamel
• Specially formulated Ultradent diamond grit gives a beautiful finish on any composite material
• Ideal for finishing Ultradent’s Mosaic™ universal composite
• Available with or without autoclavable aluminum blocks*
The Jiffy Natural composite finishing and polishing system consists of malleable spiral-shaped wheels that are designed to easily conform to all tooth surfaces, and a twirl shaped polisher that is ideal for occlusal surfaces.
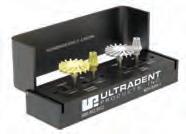
6304-1 - Jiffy Natural Composite Polishing Kit (Aluminum Block)
6384-1 - Jiffy Natural Composite Polishing Kit (Plastic Block)
2 x Jiffy Natural Wheels (1 Medium, 1 Fine)
2 x Jiffy Natural Twirl (1 Medium, 1 Fine)


6089-1 - Jiffy Natural RA Medium Spiral Polishing Wheel 3pk 6090-1 - Jiffy Natural RA Fine Spiral Polishing Wheel 3pk 14 mm wheels
Recommended speed: 5.000–8.000 RPM

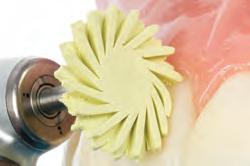
used.
Recommended speed: 5.000–8.000 RPM
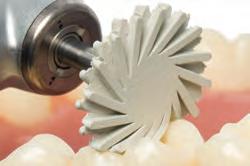
Jiffy
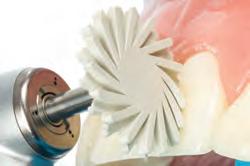
Note: Do not use Jiffy Natural Universal polishing wheels to polish the labial surface near the gingival line. This can tear the gingiva.


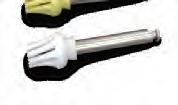
6305-1 - Jiffy Natural Occlusal Twirl Medium 3pk
6306-1 - Jiffy Natural Occlusal Twirl Fine 3pk
* Ultradent recommends the use of an aluminum block when autoclaving to prevent warping and deformation. 1. realityesthetics.com.
UNIVERSAL CERAMIC POLISHING SYSTEM

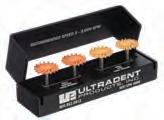
• Naturally adapts to any tooth surface, including occlusal anatomy
• Specially formulated Ultradent diamond grit allows for efficient polishing on any ceramic material, including zirconia
• Can be used to refresh older prosthetic cases
• Optimal two-step polishing sequence
• Available with or without autoclavable aluminum blocks*
The Jiffy Natural Universal ceramic system consists of malleable spiral-shaped wheels that are designed to easily conform to tooth anatomy. Their pliable finger-like extensions easily reach where cups and points can’t, and soften super high-gloss finishes for a natural enamel-like result. They are designed to be used in conjunction with the Jiffy Universal ceramic adjusting and polishing system to easily achieve a natural, high-quality finish on all ceramic restorations. The diamond-impregnated wheels are available in extraoral and intraoral in both medium and fine grits. The efficient two-step process allows you to easily achieve the most natural finish on any ceramic material including zirconia, lithium disilicate, and porcelain.
* Ultradent recommends the use of an aluminum block when autoclaving to prevent warping and deformation.
EXTRAORAL POLISHING
Recommended speed: 7.000–10.000 RPM

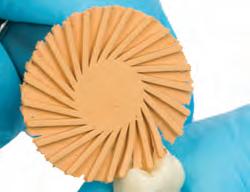
INTRAORAL POLISHING
Recommended speed: 5.000–8.000 RPM
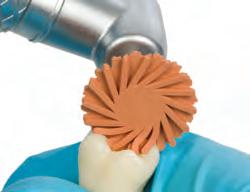
near the gingiva, where a Jiffy RA Medium Universal cup should be used.
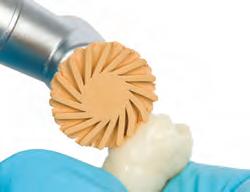
Use Jiffy Natural Universal RA Fine 14 mm wheel to create final polish on all areas except near the gingiva, where a Jiffy Fine Universal cup should be used.

to polish the labial surface near the gingival line. This can tear the gingiva.

6081-1 - Jiffy Natural Universal Extraoral Polishing Kit (Aluminum Block)

6085-1 - Jiffy Natural HP Medium Spiral Polishing Wheel 1pk
6086-1 - Jiffy Natural HP Fine Spiral Polishing Wheel 1pk 26 mm wheel

6080-1 - Jiffy Natural Universal Intraoral Polishing Kit (Aluminum Block)


6082-1 - Jiffy Natural Universal RA Polishing Wheel Variety Pack 6pk 3 x Each Jiffy RA Medium and Fine Natural Universal 14 mm wheels


6083-1 - Jiffy Natural Universal RA Medium Spiral Polishing Wheel 3pk
6084-1 - Jiffy Natural Universal RA Fine Spiral Polishing Wheel 3pk 14 mm wheels
UNIVERSAL CERAMIC ADJUSTING AND POLISHING SYSTEM
1

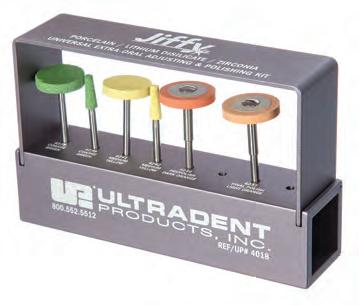
• Universal application on all ceramic materials eliminates the need for multiple adjusters and polishers, saving you time and money
• Specially formulated Ultradent diamond grit provides optimal smoothness and outstanding polishing results while still being gentle on any ceramic material including zirconia
• Multi-grit diamond particles allow for effective adjustment of ceramics for a truly smooth and high-gloss finish2
• Optimized two-step adjusting and polishing sequence
• Maximum diamond retention ensures a long service life
• Autoclavable aluminum block extends the life of the system
• Use light hand pressure
• Coarse diamond instruments and traditional abrasive stones can generate high heat, causing microfractures, and are not recommended
Recommended speed: 8.000–12.000 RPM

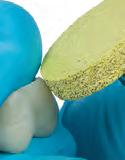

• Use light hand pressure
• Reduce speed with each step to achieve an ultra-smooth surface
Recommended speed: 7.000–10.000 RPM
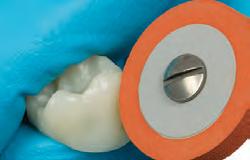
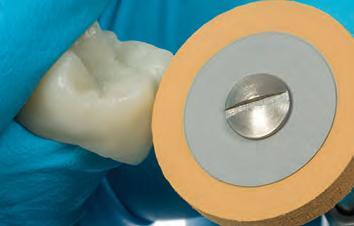


Extraoral Kit for Gross Adjustments and Polishing
Use the green (coarse) and yellow (medium) Jiffy grinder tapers for adjusting of ceramics. The orange Universal wheels and Natural wheels are used to polish.
• Use light hand pressure
• Reduce speed with each step to achieve an ultra-smooth surface
Intraoral Kit for Minor Adjustments and Polishing
Use the dark orange medium points, cups, and Natural wheels to pre-polish followed by the light orange for a final polish.
Final Finish Polishing Brush used with Ultradent™ Diamond Polish Mint gives a final esthetic finish to ceramic restorations.
Recommended speed: 5.000–7.000 RPM
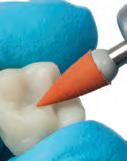
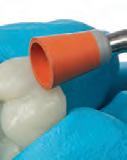

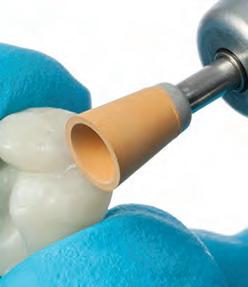


Each bristle is a polishing instrument. Special fibers are impregnated with abrasive silicon carbide particles.
Easily recognizable by their golden shafts.

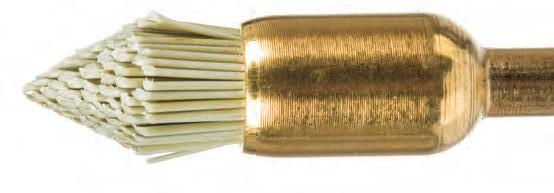
• Each bristle contains thousands of silicon carbide polishing particles
• Access and polish occlusal fissures of composites or ceramics
• For composite polishing, “whip” bristles with firm pressure and high RPM in a slow-speed handpiece

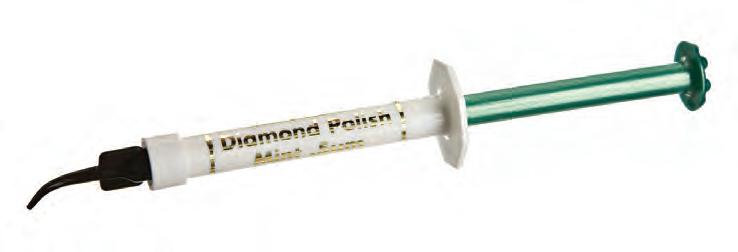
Mini™ Tip
• High-grade white microcrystalline diamond particles
• Unsurpassed esthetic polish
• Ideal for porcelain or composite restorations
Recommended speed: 1.000–3.000 RPM

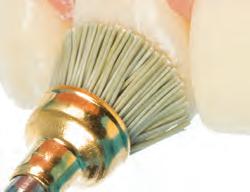
Use Jiffy Composite brushes to create a final finish on all surfaces. For best results, apply pressure during polishing.


850 - Jiffy Regular Brush 10pk
1009 - Jiffy Pointed Brush 10pk
1. realityesthetics.com.
5540 - Diamond Polish Mint Refill 0,5 µm

5541 - Diamond Polish Mint Refill 1 µm 2 x 1,2 ml (1,40 g) syringes

PrimaDry drying agent contains 99% organic solvents and 1% primer and is optimal for pit and fissure drying and preparation. It rapidly volatilizes moisture content of pits and fissures and microcracks of existing restorations following the etching process. The ultrafine primer film allows UltraSeal XT™ plus sealant to flow perfectly into every pit and fissure. Also useful prior to placing composite repairs. Do not use on dentin.
1. realityesthetics.com.

716 - PrimaDry Syringe Refill 4 x 1,2 ml (0,95 g) syringes
717 - PrimaDry Syringe Econo Refill 20 x 1,2 ml (0,95 g) syringes
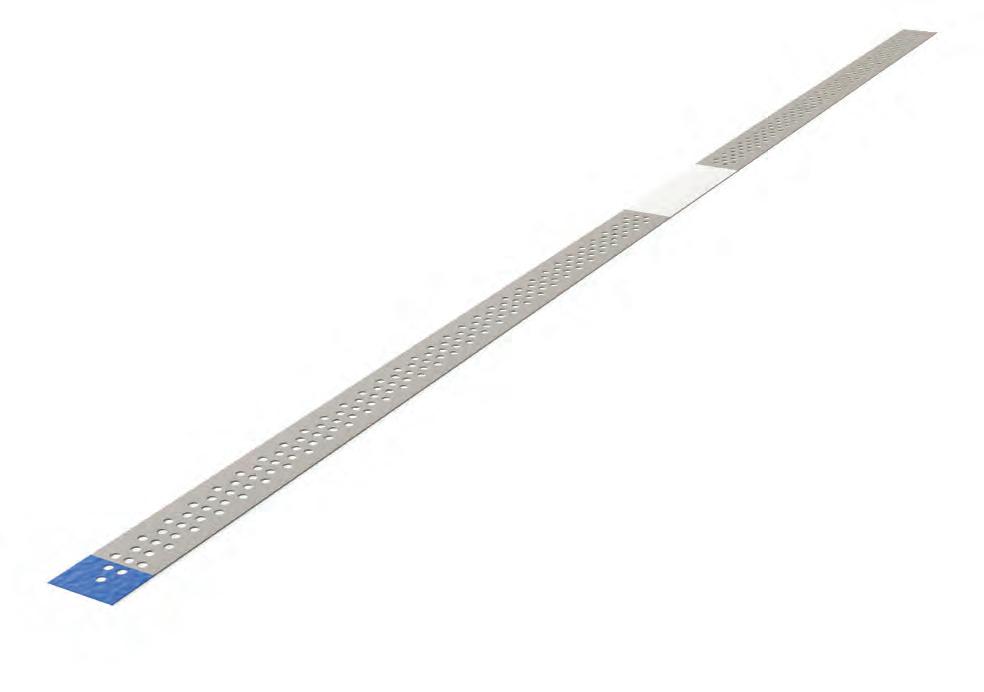
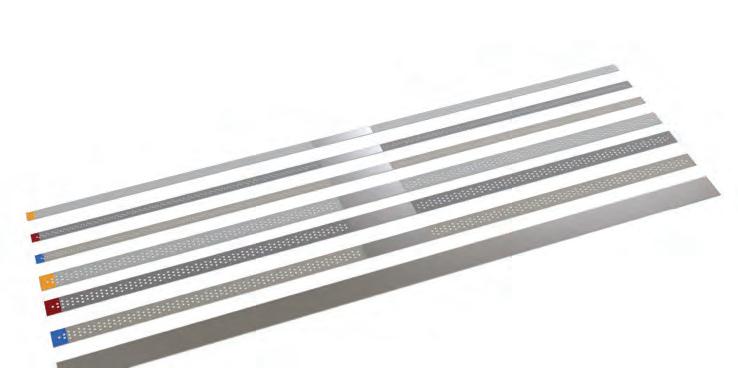
4670 - Jiffy Diamond Strips Perforated Narrow Assorted 15pk
4674 - Jiffy Diamond Strips Perforated Wide Assorted 15pk
5 x Each Stainless Steel electroplated diamond strips (5 Medium, 5 Fine, and 5 Xfine)
Jiffy™ Proximal Saw
The Jiffy Proximal Saw is a very thin stainless steel strip with serrations on one edge. It may be sterilized by autoclave or dry heat.

4680 - Jiffy Proximal Saw Stainless Steel 10pk 10 x Stainless Steel Ribbon Saw
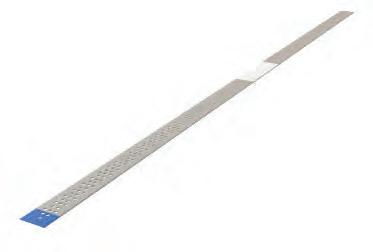
Subscribe to Ultradent’s free e-newsletters to receive the latest news on products, events and more.
4671 - Jiffy Diamond Strips Perforated Narrow Medium 10pk
4683 - Jiffy Diamond Strips Perforated Wide Medium 10pk 10 x Stainless Steel electroplated diamond strips
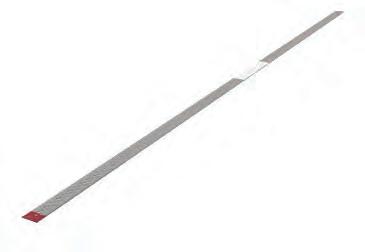

4672 - Jiffy Diamond Strips Perforated Narrow Fine 10pk
4676 - Jiffy Diamond Strips Perforated Wide Fine 10pk 10 x Stainless Steel electroplated diamond strips
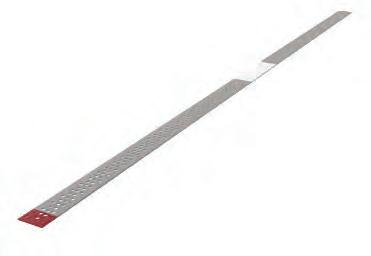
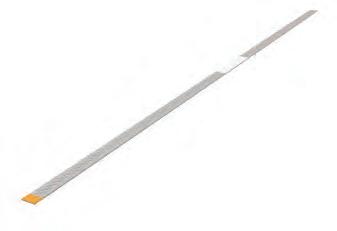
4673 - Jiffy Diamond Strips Perforated Narrow Xfine 10pk
4677 - Jiffy Diamond Strips Perforated Wide Xfine 10pk 10 x Stainless Steel electroplated diamond strips


Scan QR code to sign up today!
PENETRATING COMPOSITE


• Bonds to composite and etched enamel
• Seals microcracks
• Protects and revitalizes composite restorations
PermaSeal composite sealer is a light-cured, methacrylate-based, unfilled resin. Its low viscosity allows excellent penetration, and the ultrathin layer minimizes the need for occlusal adjustment.
PermaSeal composite sealer seals voids and irregularities created during the polishing process, minimizing staining and wear. Place on Class V composite margins to reduce microleakage.2 For the final glazetype finish of resin provisionals, cover PermaSeal sealer with oxygen barrier solution prior to light curing. PermaSeal sealer bonds well to composite-type provisional restorations and can be used to revitalize old composites as well.
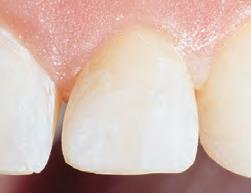
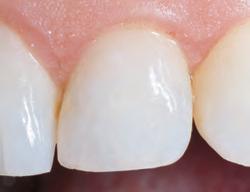
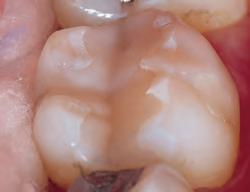
and

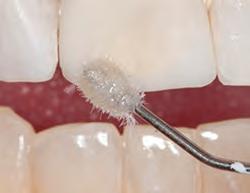
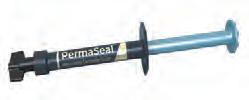
4 x 1,2 ml (1,30 g) syringes 10 x Black Micro FX tips

2 x 1,2 ml (1,30 g) syringes 10 x Black Micro FX tips REFRIGERATE


Note: PrimaDry drying agent is great in conjunction with air drying just prior to PermaSeal composite sealer placement.


• Ultra-high-energy broadband LEDs cure all dental materials
• Optimally collimated beam delivers consistent, uniform power
• Versatile curing modes accommodate your preferences and needs
• Extremely durable build, crafted with high-grade aerospace aluminum, allows for excellent thermal management
• Slim, unibody design and ergonomic shape allows unprecedented access to all restoration sites2
• Unique unibody design is extremely durable and lightweight
• Highly efficient LEDs and aerospace unibody aluminum keep wand body cool to the touch
The collimation and uniformity of a curing light’s beam affects the amount of energy that reaches the restoration site. A beam that disperses will deliver less power than a beam that remains collimated; a dispersed beam can lead to undercured restorations and eventual failures. A beam’s uniformity affects energy delivery across the restoration site. A beam with hot or cold spots yields inconsistent curing, which can compromise restorations and cause sensitivity.
The VALO Grand light contains multiple LEDs and specialized optics to produce evenly distributed energy to deliver consistent results, regardless of the restoration type, size, or location. VALO™ curing lights have custom LED packs that contain chips in three wavelengths, which enable VALO lights to cure all dental materials, even those containing proprietary photoinitiators such as Lucirin TPO, PPD, or more commonly found camphorquinone.

1. realityesthetics.com. 2. Moreira RJ, de Deus RA, Ribeiro MTH, et al. Effect of light-curing unit design and mouth opening on the polymerization of bulk-fill resin-based composite restorations in molars. J Adhes Dent. 2021;23(2):121–131. doi:10.3290/j.jad.b1079561.
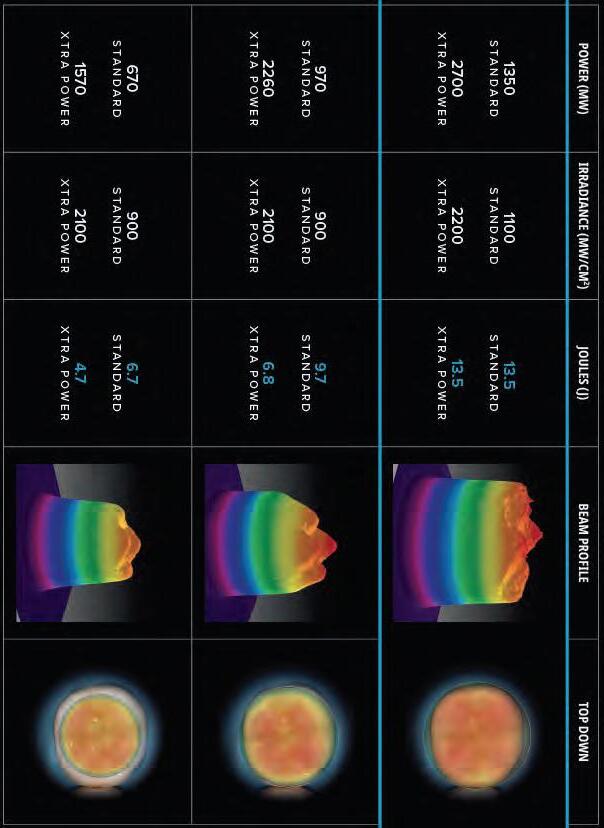
The VALO family of curing lights have a low-profile design to allow for easy access to posterior restorations without sacrificing patient comfort.1 The slim heads allows them to be placed directly over the curing site, no matter where it is in the mouth, ensuring light can reach all aspects of the preparation. The larger lenses give a larger curing surface area, so you can get the right light in the right place.


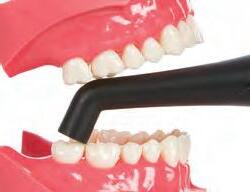
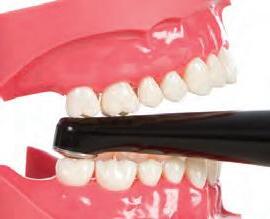
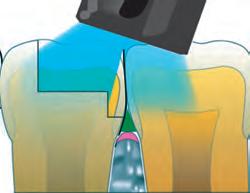

All VALO curing lights are created from a solid bar of high-grade aerospace aluminum, making the VALO light virtually indestructible. The unibody construction creates a sealed, strong light that eliminates weak connection points and increased bioburden.
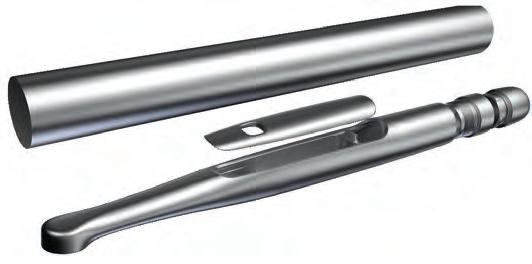
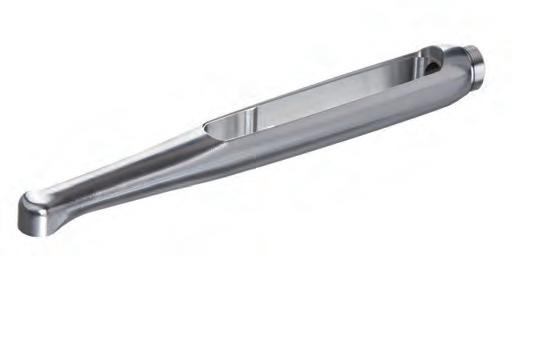
heat dissipation, and facilitates the elegant, ergonomic, streamlined design that enables the VALO light to access areas other curing lights simply cannot reach.
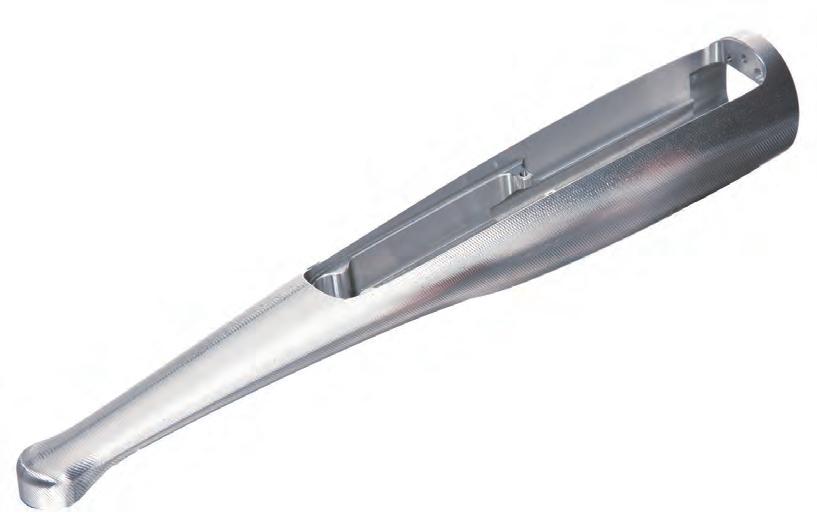

Unique glass lens system forms the light’s collimated blended beam
The VALO curing light family is made to last, and we stand behind it. Each VALO light comes with a 5-year manufacturer’s warranty, so you can be confident in the value of your purchase.
Wand Weight
Cordless
Corded
Power Operation
Battery
Cordless/Battery or Corded
Protected, Rechargeable, Lithium-Ion Battery 1IMR14/65 3.7V, 900mAH 3.33WH
Cordless/battery unit Corded Unit
Rechargeable, Safe chemistry Lithium Iron Phosphate Battery (LiFePO4) RCR123A, 3.2V, 400mAH 1.28WH
Cordless/battery unit Corded Unit
Rechargeable, Safe chemistry Lithium Iron Phosphate Battery (LiFePO4) RCR123A, 3.2V, 400mAH 1.28WH
*Irradiance conforms to ISO 10650 when measured with a Gigahertz spectrum analyzer.

Lenses are reusable and should be disinfected using an intermediate-level disinfectant.
PointCure™ Lens
The PointCure lens is a clear, 2,5 mm diameter lens used for pinpoint curing of small composites, to aid in positioning, and tack curing.
ProxiCure™ Ball Lens

The ProxiCure Ball

helps to hold the matrix band in interproximal contact during polymerization.
TransLume™ Lens
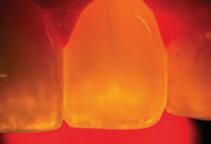
The TransLume lens facilitates the visualization and location of cracks, defects in teeth, or restorative materials.
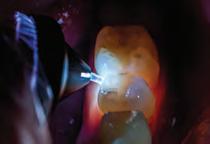
The Interproximal lens is a 1 mm white light lens that allows white light to be placed between teeth for observation of shadows, anomalies, or caries in the interproximal spaces.
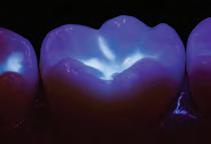
The Black Light lens aids in detecting fluorescent particles in resins for easy differentiation from natural enamel.
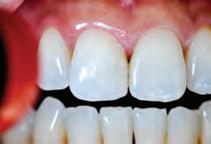
The
VALO 2pk
PointCure Lens5934
VALO Grand 2pk
PointCure Lens4082


VALO 2pk
ProxiCure Ball Lens5936
VALO Grand 2pk
ProxiCure Ball Lens4081


VALO 2pk
TransLume Lens5937
VALO Grand 2pk
TransLume Lens4084


VALO 2pk
Interproximal Lens4629
VALO Grand 2pk
Interproximal Lens4658


VALO 1pk Black Light Lens5939
VALO Grand 1pk Black Light Lens4319


VALO Grand 2pk White Light Lens4628

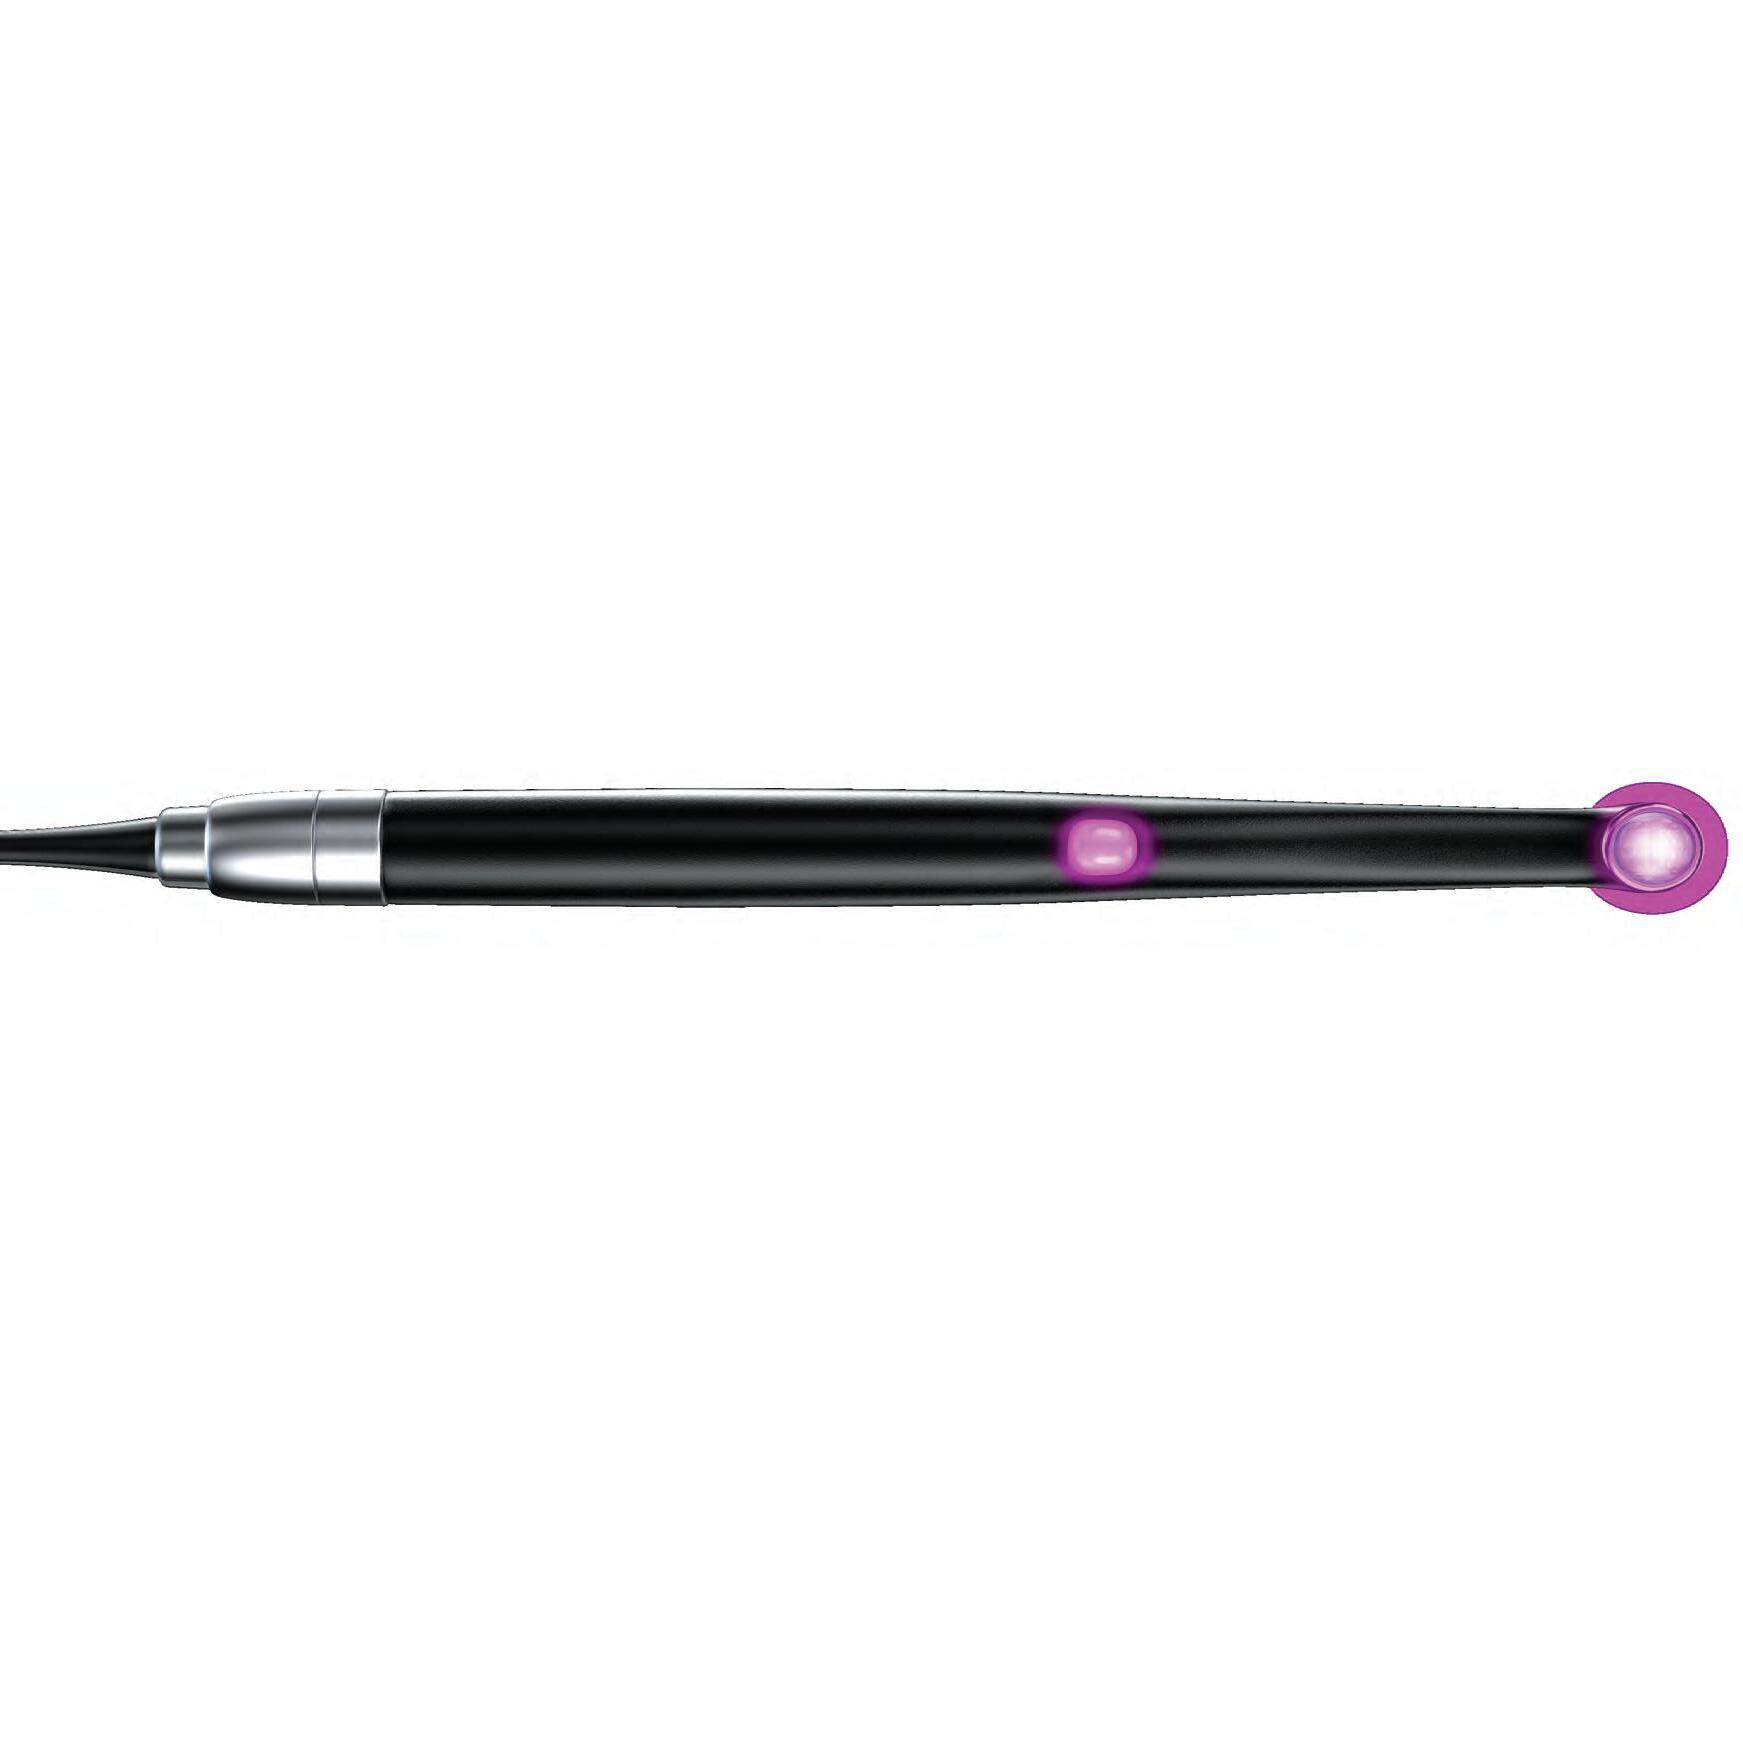
COMPLETELY REDESIGNED
• Rebuilt from the ground up to create the most innovative curing light available
INCREASED LENS SIZE
• 12,5 mm lens covers any tooth while maintaining accessibility and patient comfort
MULTI-CONFIGURATION
• Can be used in a corded or cordless configuration (battery and cord adapter included in kit)
ACCELEROMETER FUNCTION
• Allows you to quickly and easily move through curing and diagnostic modes

HIGH-GRADE AEROSPACE ALUMINUM
• Unibody design is exceptionally durable and allows for excellent thermal management
SIMPLIFIED INTERFACE
• Curing and diagnostic modes are indicated, operated, and activated with top and bottom buttons or by Accelerometer Function
5-YEAR WARRANTY
• Includes a 5-year manufacturer warranty
12 LED CHIPSET
• Provides high-intensity, broadband light for excellent beam uniformity, curing depth, and beam collimation
CURING MODES: Standard Power Mode, Xtra Power Mode | DIA GNOSTIC LIGHT MODES: White Light Diagnostic Aid Mode, Black Light Diagnostic Aid Mode CYCLING BETWEEN MODES INCLUDED LENS ACCESSORIES
TWO CURING LENSES THREE DIAGNOSTIC LENSES CURING MODES: Move the VALO X light forward in a drum tap motion to access and cycle through curing modes.
DIAGNOSTIC LIGHT MODES: Move the VALO X light in a drum tap motion to the side to access and cycle through diagnostic light modes.
• 12 ultra-high-energy broadband LEDs cure all dental materials
• Optimally collimated beam delivers consistent, uniform power
• Two curing modes — Standard Power and Xtra Power — accommodate your preferences
• Extremely durable build, crafted with high-grade aerospace aluminum, allows for excellent thermal management
• Simplified interface with diagnostic and curing modes included
• Slim, unibody design and ergonomic shape allows unprecedented access to all restoration sites1
• New Accelerometer Feature allows you to quickly change between modes with a drum-tap motion
• Second activation button on the underside allows for intuitive operation
• Five accessory lenses included with the kit for diagnostic and curing purposes
• Included power adaptor allows clinicians to use the light as cordless or corded
• International power supply is suitable for power outlets from 100 to 240 volts; no batteries needed


The VALO X light is the curing light reimagined. Its simplified design allows for one button activation and its Accelerometer Function allows the clinician to cycle between power and diagnostic modes with a simple wave of the wand. This eliminates awkward fumbling during a procedure, reduces the likelihood of dropping the instrument, and helps clinicians keep their minds on the task at hand. It uses a custom, multiwavelength light-emitting diode (LED) for producing high-intensity light at 380–515 nm, which is capable of polymerizing all light-cured dental materials while providing excellent breadth of cure and consistent performance. This intensity will also penetrate porcelain and is capable of curing underlying resin cements. The handpiece is designed to rest in a standard dental unit bracket or can be custom-mounted using the bracket included in the kit.





• Ultra-high-energy broadband LEDs cure all dental materials
• Optimally collimated beam delivers consistent, uniform power
• Three curing modes — Standard Power, High Power, and Xtra Power — accommodate your preferences
• Extremely durable, slim, ergonomic shape allows unprecedented access to all restoration sites2
• Unique unibody design is both extremely durable and lightweight
• Highly efficient LEDs and aerospace unibody aluminum keep wand body cool to the touch
• Second activation button on the underside allows for intuitive operation
• Battery-operated, cordless wand design provides optimal convenience and fexibility
• Operates on environmentally responsible, safe, inexpensive, rechargeable batteries


5972 - VALO Grand Cordless Kit - Black
4866 - VALO Grand Cordless Kit - Midnight 4864 - VALO Grand Cordless Kit - Sapphire 4865 - VALO Grand Cordless Kit - Red Rock
1 x VALO Grand Cordless LED curing light
4 x Rechargeable batteries
1 x Battery charger
1 x Charging unit power supply
1 x Handpiece bracket holder
1 x Blue light blocking light shield
1 x Sample pack of barrier sleeves
WARNING: Only use rechargeable batteries stated in the instructions. Some rechargeable batteries can affect the function of the VALO curing light.


VALO Grand Cordless curing light uses a custom, multiwavelength light-emitting diode (LED) for producing high-intensity light at 385–515 nm, which is capable of polymerizing all light-cured dental materials. This intensity will also penetrate porcelain and is capable of curing underlying resin cements similar to a quality halogen light. The VALO Grand Cordless curing light uses VALO rechargeable batteries and a battery charger suitable for power outlets from 100 to 240 volts. The handpiece is designed to rest in a standard dental unit bracket or can be custom-mounted using the bracket included in the kit. It can also be stored on a countertop or in a drawer. The VALO Grand curing light is equipped with a sensor that registers movement of the light; when the light is not being used, the VALO Grand curing light will automatically go into sleep mode and when moved will return to the most recently used setting.


1. realityesthetics.com. 2. Moreira RJ, de Deus RA, Ribeiro MTH, et al. Effect of light-curing unit design and mouth opening on the polymerization of bulk-fill resin-based composite restorations in molars. J Adhes Dent. 2021;23(2):121–131. doi:10.3290/j.jad.b1079561.

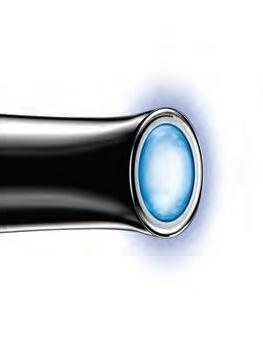


• Ultra-high-energy broadband LEDs cure all dental materials
• Optimally collimated beam delivers consistent, uniform power
• Three curing modes — Standard Power, High Power, and Xtra Power — accommodate your preferences
• Extremely durable, slim, ergonomic shape allows unprecedented access to all restoration sites2
• Unique unibody design is both extremely durable and lightweight
• Highly efficient LEDs and aerospace unibody aluminum keep wand body cool to the touch
• Battery-operated, cordless wand design provides optimal convenience and fexibility
• Operates on environmentally responsible, safe, inexpensive, rechargeable batteries


VALO Cordless curing light uses a custom, multiwavelength lightemitting diode (LED) for producing high-intensity light at 385–515 nm, which is capable of polymerizing all light-cured dental materials. This intensity will also penetrate porcelain and is capable of curing underlying resin cements similar to a quality halogen light. The VALO Cordless curing light uses VALO rechargeable batteries and a battery charger suitable for power outlets from 100 to 240 volts. The handpiece is designed to rest in a standard dental unit bracket or can be custommounted using the bracket included in the kit. It can also be stored on a countertop or in a drawer. The VALO Cordless curing light is equipped with a sensor that registers movement of the light; when the light is not being used, the VALO Cordless curing light will automatically go into sleep mode and when moved will return to the most recently used setting.


5941


1 x VALO Cordless LED curing light 4 x Rechargeable batteries 1 x Battery charger 1 x Charging unit power supply
1 x Handpiece bracket holder
1 x Blue light blocking light shield
1 x Sample pack of barrier sleeves


• Ultra-high-energy broadband LEDs cure all dental materials
• Optimally collimated beam delivers consistent, uniform power
• Three curing modes — Standard Power, High Power, and Xtra Power — accommodate your preferences
• Extremely durable, slim, ergonomic shape allows unprecedented access to all restoration sites2
• Unique unibody design is both extremely durable and lightweight
• Highly efficient LEDs and aerospace unibody aluminum keep wand body cool to the touch
• Second activation button on the underside allows for intuitive operation
• International power supply is suitable for power outlets from 100 to 240 volts; no batteries needed


VALO Grand Corded LED curing light uses a custom, multiwavelength light-emitting diode (LED) for producing high-intensity light at 385–515 nm, which is capable of polymerizing all light-cured dental materials. This intensity will also penetrate porcelain and is capable of curing underlying resin cements similar to a quality halogen light. The VALO curing light has a medical-grade, international power supply and is suitable for power outlets from 100 to 240 volts. The handpiece is designed to rest in a standard dental unit bracket or can be custommounted using the bracket included in the kit.

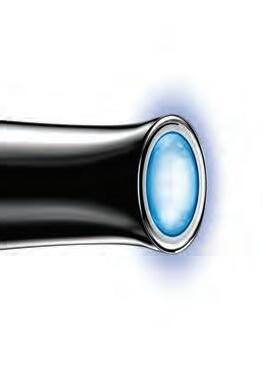


• Ultra-high-energy broadband LEDs cure all dental materials
• Optimally collimated beam delivers consistent, uniform power
• Three curing modes — Standard Power, High Power, and Xtra Power — accommodate your preferences
• Extremely durable, slim, ergonomic shape allows unprecedented access to all restoration sites2
• Unique unibody design is both extremely durable and lightweight
• Highly efficient LEDs and aerospace unibody aluminum keep wand body cool to the touch
• International power supply is suitable for power outlets from 100 to 240 volts; no batteries needed


VALO Corded LED curing light uses a custom, multiwavelength lightemitting diode (LED) for producing high-intensity light at 385–515 nm, which is capable of polymerizing all light-cured dental materials. This intensity will also penetrate porcelain and is capable of curing underlying resin cements similar to a quality halogen light. The VALO curing light has a medical-grade, international power supply and is suitable for power outlets from 100 to 240 volts. The handpiece is designed to rest in a standard dental unit bracket or can be custommounted using the bracket included in the kit.


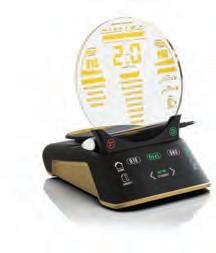
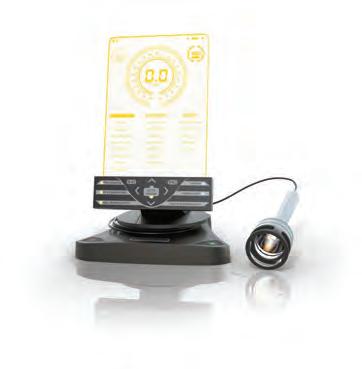
• 3-in-1 design allows you to choose the optimal wavelengths for coagulation, ablation, or a combination of both
• Super-pulsed peak power for faster, gentler cutting with greater clinical predictability and effective treatment7
• Stunning design with a simple user interface featuring preset procedures organized in non-surgical, surgical, and photobiomodulation for more intuitive and user-friendly control
• Battery operation and wireless foot pedal allow for convenient movement from operatory to operatory
• Patented single-use tips and autoclavable handpiece for easy laser use and simple sterilization between procedures
• Innovative photobiomodulation options for pain relief so your patients can take full advantage of laser benefits
• Designed/assembled in the U.S. from U.S./imported components
Soft tissue diode lasers offer several advantages over traditional methods, making them an excellent addition to any dental practice. Soft tissue diode lasers are minimally invasive and can perform many procedures without the need for incisions or sutures, resulting in less trauma, bleeding, and discomfort for patients.
Additionally, they often result in less pain and swelling than procedures performed using traditional methods, such as electrocautery or a scalpel, leading to reduced healing time for increased patient comfort and satisfaction. The ability to precisely target and treat specific areas of soft tissue with great accuracy leads to more predictable and consistent outcomes.
Dental soft tissue diode lasers work by emitting a focused beam of light (non-ionizing infrared radiation of 800–980 nm wavelength) that is absorbed by the water, hemoglobin, and pigment molecules within soft tissue. This causes the molecules to heat up and vaporize, allowing the laser to cut through the tissue with great precision. The laser also coagulates, cauterizes nerve endings, and decontaminates surrounding tissue, resulting in improved hemostasis, reduced patient discomfort, and a lower risk of post-op infections.
Selecting the optimal wavelength is important for maximizing the laser’s efficacy in soft tissue applications. The Gemini family of lasers 810 nm, 980 nm, and dual wavelength options allow for combining the best absorption in melanin, hemoglobin, and water to provide the greatest clinical versatility.3,4
The desired results with the least risk of unwanted thermal damage can be achieved with very short pulses at the highest power density for the shortest time possible.1,2 Gemini laser’s high peak pulse power allows for efficient ablation, while the short pulses allow soft tissues to cool during the procedure, reducing charring and thermal damage to the collateral tissues, resulting in increased patient comfort without compromising the speed or effectiveness of the treatment.1,2


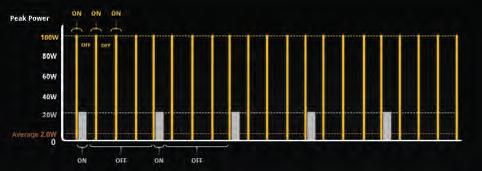
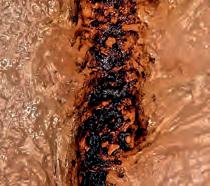
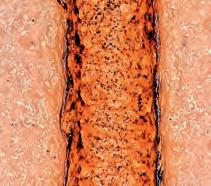
• Excisional and incisional biopsies • Exposure of unerupted teeth • Fibroma removal • Frenectomy • Frenotomy • Gingival troughing for crown impression • Gingivectomy • Gingivoplasty • Gingival incision and excision • Hemostasis and coagulation • Implant recovery • Incision and drainage of abscess • Lesion (tumor) removal • Leukoplakia • Operculectomy • Oral papillectomies • Pulpotomy • Pulpotomy as an adjunct to root canal therapy • Reduction of gingival hypertrophy • Soft tissue crown lengthening • Treatment of canker sores, herpetic, and aphthous ulcers of the oral mucosa • Vestibuloplasty
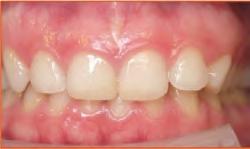
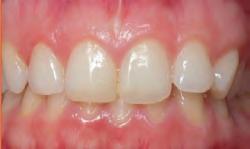

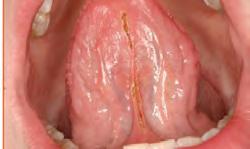

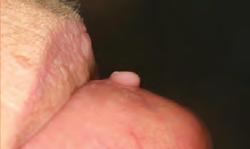

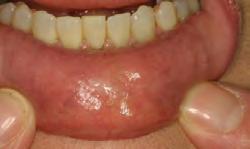


• Laser soft tissue curettage • Reduction of bacterial level (decontamination) and inflammation • Removal of diseased, infected, inflamed, and necrosed soft tissue within the periodontal pocket • Removal of highly inflamed edematous tissue affected by bacterial penetration of the pocket • Sulcular debridement (removal of diseased, infected, inflamed, and necrosed soft tissue in the periodontal pocket to improve clinical indices including gingival index, gingival bleeding index, probe depth, attachment loss, and tooth mobility)
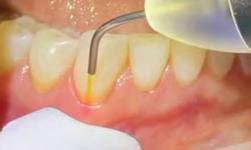

Decontamination or Laser Bacterial Reduction Laser Curettage/Debridement


Gemini and Gemini EVO lasers offer photobiomodulation (PBM) therapy options, allowing clinicians to provide pain relief to patients with various dental conditions or post-operative discomfort. The integrated PBM attachments make it easy for clinicians to deliver light energy to improve cellular function, reduce pain, inflammation, and promote accelerated healing.5,6 Notably, only the Gemini EVO laser fully integrates PBM as a standard feature.
1. Goharkhay K, Moritz A, Wilder-Smith P, et al. Effects on oral soft tissue produced by a diode laser in vitro. Lasers Surg Med. 1999;25(5):401–406. doi:10.1002/(sici)1096-9101(1999)25:5<401::aid-lsm6>3.0.co;2-u 2. R Borchers. Comparison of diode lasers in soft tissue surgery using CW and superpulsed mode, an in vivo study. Int J Laser Dent. 2011; 1(1):17–27. 2. Goharkhay K, Moritz A, Wilder-Smith P, et al. Effects on oral soft tissue produced by a diode laser in vitro. Lasers Surg Med. 1999;25(5):401–406. 3. S Pirnat. Versatility of 810 nm laser in dentistry. J Laser Health Academy, 2007; (4). 4. Akbulut N, Kursun ES, Tumer MK, Kamburoglu K, Gulsen U. Is the 810-nm diode laser the best choice in oral soft tissue therapy?. Eur J Dent. 2013;7(2):207-211. doi:10.4103/1305-7456.11017. 5. Ross G, Ross A. Photobiomodulation: an invaluable tool for all dental specialties. J Laser Dent. 2009;17(3):117–124. 6. Mármora BC, Brochado FT, Schmidt TR, et al. Defocused high-power diode laser accelerates skin repair in a murine model through REDOX state modulation and reepithelization and collagen deposition stimulation. J Photochem Photobiol B. 2021;225:112332. doi:10.1016/j.jphotobiol.2021.112332 7. R Borchers. Comparison of diode lasers in soft tissue surgery using CW and superpulsed mode, an in vivo study. Int J Laser Dent. 2011; 1(1):17–27.
VOLUME
PRESET PROCEDURES
810 + 980 DIODE LASER
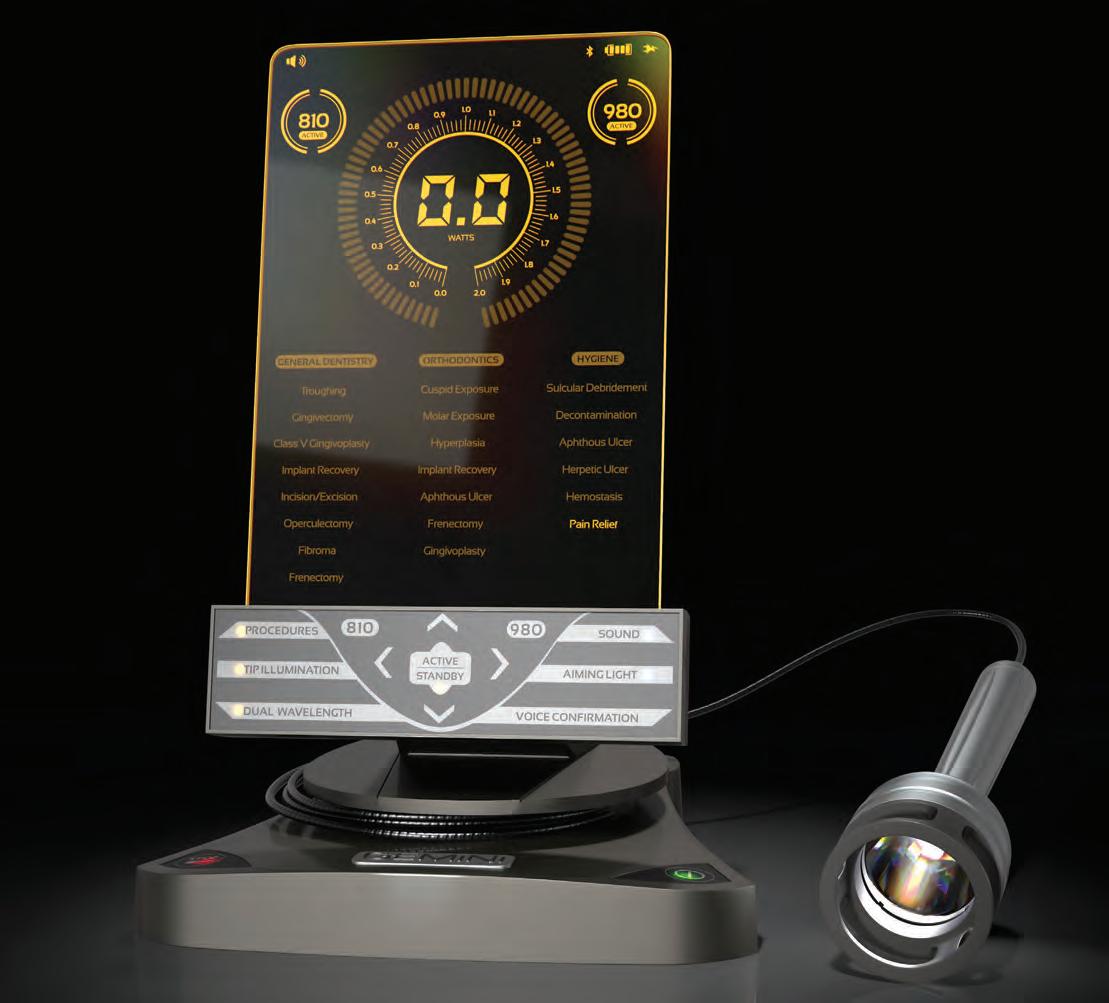
• 20 watts of peak super-pulsed power for faster, smoother cutting1
• Dual wavelength technology combines the optimal melanin absorption of the 810 nm wavelength and the optimal water absorption of the 980 nm wavelength in diode lasers2,3
• Sleek, innovative design features a stunning transparent electroluminescent display
• Simple user interface and 20 preset procedures enhance ease of use (Pain Relief preset available with PBM adapter kit)
• Wireless foot pedal and battery operation allow for convenient movement from operatory to operatory
• Autoclavable handpiece for simple sterilization between procedures
• Designed/assembled in the U.S. from U.S./imported components
BATTERY INDICATOR

POWER INDICATOR
TOUCH KEYPAD
Scan here to connect with other Gemini laser fans on our website
The Gemini™ laser features the utility of a PBM adaptor. Photobiomodulation (PBM) is a photo-chemical reaction where light energy of a certain wavelength, intensity, and duration is absorbed at a cellular level, improving local circulation oxygenation, and enzyme activity.
The benefits of PBM include:
• Temporary pain relief
• Improved local blood circulation
• Relaxation of muscle
• Infammation decrease
• Faster healing
• Improved cellular function, especially in stressed cells
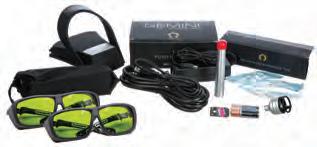

8999 - Gemini PBM Spacer Tip Kit 5pk 8990 - Gemini Laser Kit
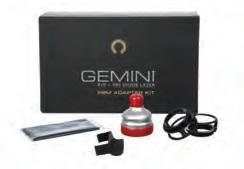
8998 - Gemini PBM Adapter Kit 1 x Photobiomodulation (PBM) adapter 2 x Spacers 1 x Handpiece holder clip 1 x Cleaning cloth
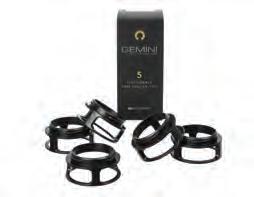


8991 - Gemini Power Supply 1pk

ILLUMINATION provides better visibility at surgical site 8992 - Gemini Foot Pedal 1pk


8993 - Gemini 5 mm Pre-Initiated Tip 25pk 8994 - Gemini 7 mm Uninitiated Tip 25pk

8995 - Gemini Safety Glasses 1pk

- Handpiece Shell 1pk
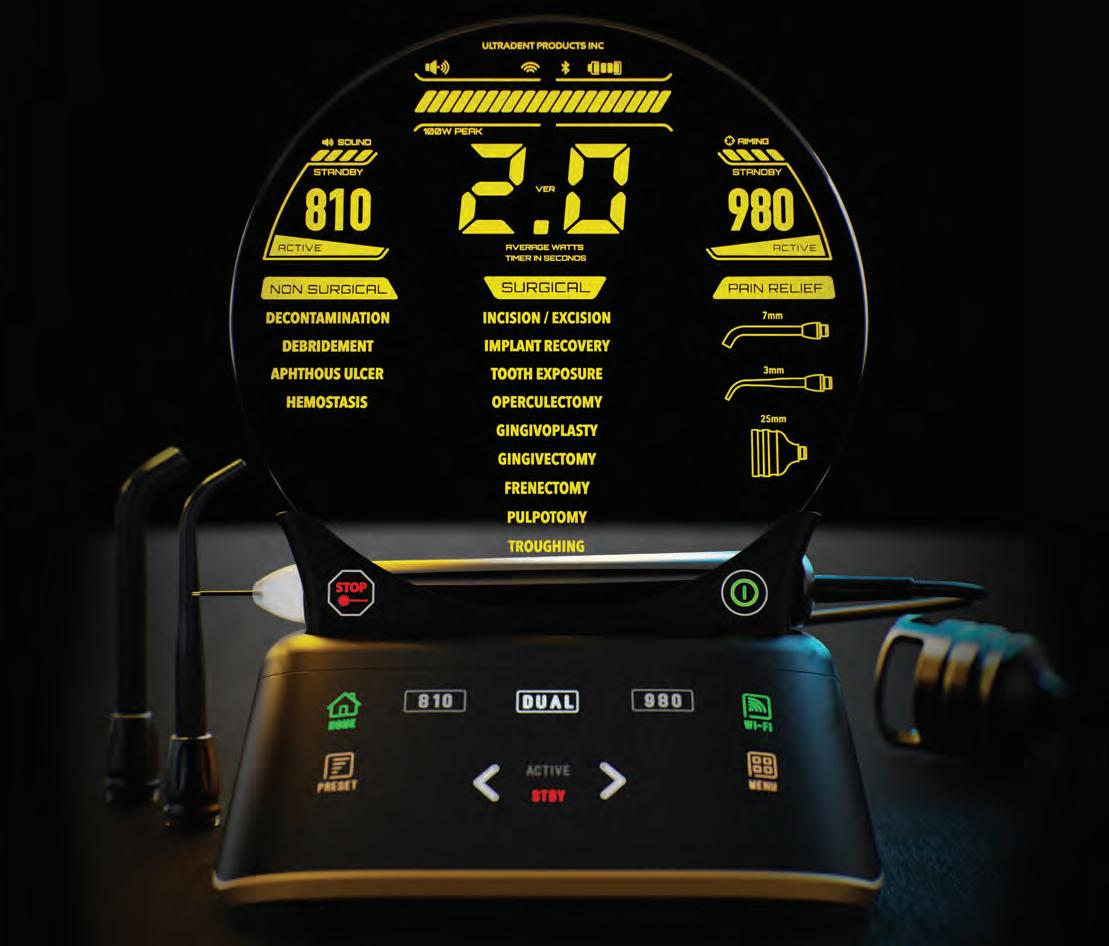
BATTERY INDICATOR
POWER INDICATOR
PRESET PROCEDURES
• Delivers 100 watts of peak power for faster cutting, less heat, and ultra-clean incisions in soft tissue1
• Wi-Fi connectivity allows for over-the-air updates and dedicated tech support
• Mobile app and Dashboard monitor usage statistics, including ROI and procedure data
• Three photobiomodulation adapters (3 mm, 7 mm, and 25 mm) are included so you can take full advantage of laser benefits
• Streamlined display and user interface for more intuitive and user-friendly control
• Three wavelength modes
• 16 preset procedures are divided into three categories for efficient, intuitive use
• Uses the same tips as the original Gemini laser
• Two-year warranty with an option to extend up to a five-year warranty
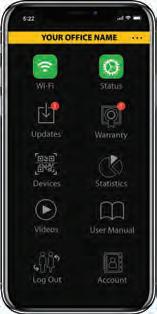
With the Gemini EVO Dashboard, you can view the number of procedures you perform, track ROI, ensure your software is up to date, download procedure reports, monitor full usage statistics, and more!

9121 - Gemini EVO Laser Kit
1 x Gemini EVO Laser 1 x Foot pedal
3 x Safety glasses sets 10 x 5 mm disposable fiber tips 1 x DC Power supply
3 x PBM Adapters (25 mm, 7 mm, 3 mm)
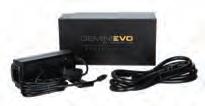
9126 - Gemini EVO Power Supply 1pk

9127 - Gemini EVO Handpiece Shell 1pk

8995 - Gemini EVO Safety Glasses 1pk
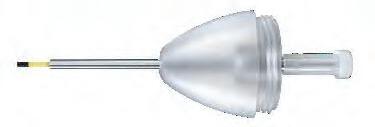

8993 - Gemini EVO 5 mm Pre-Initiated Tip 25pk
8994 - Gemini EVO 7 mm Uninitiated Tip 25pk
Note: If you would like to order the PBM adapters or Gemini EVO foot pedal, please contact your Ultradent Products Customer Service.

9123 - Gemini EVO Intraoral PBM Adapter Kit 1 x 3 mm Photobiomodulation (PBM) adapter 1 x 7 mm Photobiomodulation (PBM) adapter
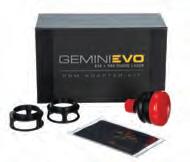
9124 - Gemini EVO Extraoral PBM Adapter Kit 1 x 25 mm Photobiomodulation (PBM) adapter 2 x Spacers 1 x Cleaning cloth

8999 - Gemini PBM Spacer Tip Kit 5pk

5764 - Gemini EVO Foot Pedal Rechargeable Li-Ion Battery and USB Kit 1pk


UltraTect protective eyewear is made for the modern dental environment. The high-quality, lightweight frames and polycarbonate lenses are both comfortable and durable, and they meet ANSI and CE safety standards for protection against impact injuries and chemical exposure. Clinicians, assistants, and patients all benefit from the safety and comfort of UltraTect eyewear.
Note: Do not use for laser protection.


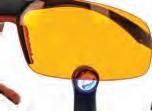


• Precisely trims tray border around interdental papilla
• Spring-loaded to minimize finger fatigue
• Grips tray material easily
• Made of durable stainless steel
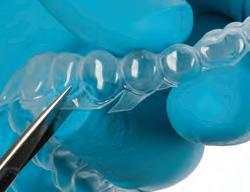

605 - Ultradent Ultra-Trim Scalloping Scissors 1pk
Subscribe to Ultradent’s free e-newsletters to receive the latest news on products, events and more.


Scan QR code to sign up today!

MTAFlow™ White and MTAFlow™
MINERAL TRIOXIDE AGGREGATE REPAIR CEMENT


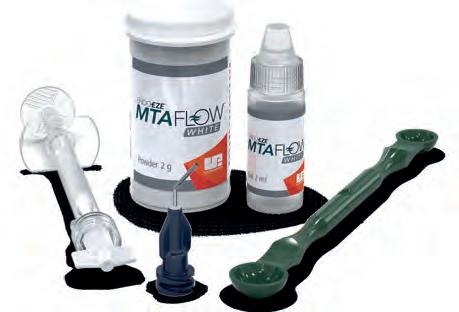
• Has bioactive apatite-forming properties2
• Mixes into a smooth consistency
• Resists washout
• Can be delivered with 29 ga NaviTip™ tip depending on consistency
• Predictable quick setting
• Has an adaptable mixing ratio based on procedure
• Available in white nonstaining formula
Endo-Eze MTAFlow and MTAFlow White mineral trioxide aggregate repair cements have the same unique properties. Both are designed to mix and deliver easily with your desired consistency. When using the NaviTip 29 ga tip you’re assured precise placement for apexification, apical plug, resorption, and perforation. MTAFlow White repair cement is ideal for use above the clinical margin because it contains a radiopacity agent that is nonstaining–it will not be visible in the esthetic zone of the tooth.
“MTA cement is a bioactive material. The formation of hydroxyapatite (HA) will cover the surface of the MTA exposed to body fluids, and that layer of HA will no longer look like a foreign material to the living cells. Therefore, the MTA will support healing.”3
Warning: MTA has limited antimicrobial properties. When MTAFlow cement is used in primary dentition vital pulpotomy, use only sterile water during the procedure.
THE DIFFERENCE YOU CAN FEEL
MTAFlow repair cements have a smooth consistency due to the ultrafine powder and proprietary gel medium. The formulation is resistant to washout, which helps to ensure that the mixture stays right where you place it. Plus, it can be delivered using Ultradent’s syringes and tips, ensuring precise placement for effective treatment.
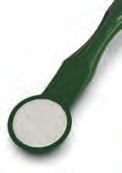

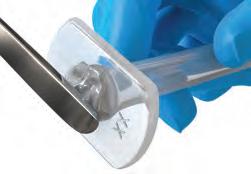
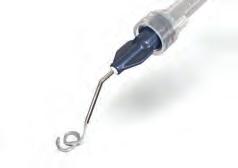
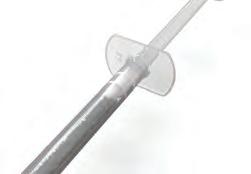

After 5 minutes you can lightly rinse and air dry the area and it will not dislodge the MTAFlow cement. MTAFlow cement, mixed and placed inside the Skini syringe, can be used for up to 15 minutes after mixing. Full setting is one hour. Complete cure and strengthening is 4 weeks.
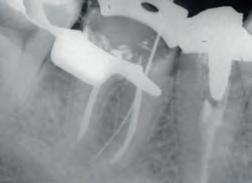

THE RIGHT CONSISTENCY FOR THE RIGHT PROCEDURE
The mixing ratio of the powder and gel components of MTAFlow repair cements are adaptable based on the procedure. MTAFlow White cement’s nonstaining formula is specifically designed to be used for procedures like primary dentition vital pulpotomy and pulp capping. After placing MTAFlow repair cement, allow an initial set time of 5 minutes, then cover with UltraBlend™ plus liner and restore.
Whatever consistency you need, you can be sure MTAFlow repair cement will be effective, non-gritty, and easy to deliver accurately. More gel or powder may be added at any time during mixing to achieve the desired consistency.
MIXING PROPORTION SUGGESTIONS (POWDER AND GEL)*
Applications
Pulp Capping, Pulp Chamber Perforation, Primary Dentition Vital Pulpotomy Resorption, Apexification, Apical Plug Root End Filling
Powder (Measuring Spoon) 2
Gel Drops3 drops 3 drops1 drop**
ConsistencyThick Thin Putty
* More powder or gel can be added to achieve desired consistency. ** Depends on the desired consistency.
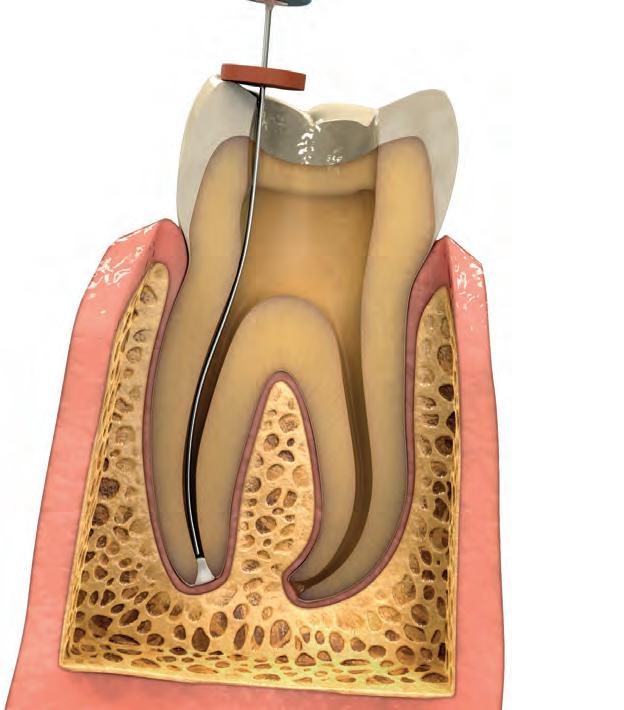
EVERYTHING YOU NEED IN ONE PLACE
MTAFlow repair cement kits come with the essential tools you’ll need to mix and deliver cement. The kits contain enough MTA powder and gel to complete 8–10 applications.
5980 - MTAFlow White Repair Cement Kit
1 x Each Technique guide, instructions for use, 2 g MTAFlow powder, 2 ml MTAFlow gel, and measuring spoon
10 x Skini syringes
10 x Luer Lock caps 20 x Micro 20 ga tips
3980-1 - MTAFlow Repair Cement Kit
1 x Each Technique guide, instructions for use, 2 g MTAFlow powder, 2 ml MTAFlow gel, and measuring spoon
10 x Skini syringes
10 x Luer Lock caps 20 x Micro 20 ga tips

3981 - MTAFlow Repair Cement Refill
1 x Each Technique guide, instructions for use, 2 g MTAFlow powder, 2 ml MTAFlow gel, and measuring spoon
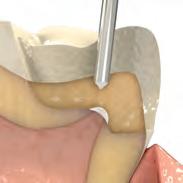
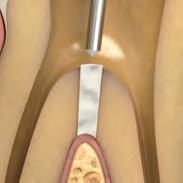
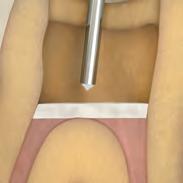
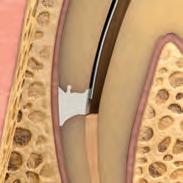

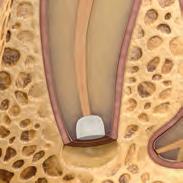
EndoREZ ™ CANAL SEALER


20–30 minute regular set
5–12 minute set when used with accelerator
• The world’s first hydrophilic and self-priming resin sealer
• More effective obturation in less time
• Provides a complete, thorough seal2
• Has the same radiopacity as gutta percha
• Bonds to resin-based core/composite materials
• Retreatable when combined with gutta percha3
• Provides syringe delivery to the apical third
EndoREZ canal sealer minimizes the amount of chair time required for obturation. This thixotropic material has an affinity for the moisture found deep in dentinal tubules and lateral canals4 and provides the most complete seal available. Since methacrylate-based EndoREZ canal sealer relies on chemistry rather than heat or pressure to fill the canal, the risk of additional root trauma/fracture is greatly reduced. Additionally, studies show that EndoREZ canal sealer is versatile enough to be used as the sealer with any obturation method, e.g., master cone, lateral condensation, or warm gutta percha. Create a “monobloc” by using EndoREZ resin-coated gutta percha points.
EndoREZ canal sealer contains a special hydrophilic organophosphate methacrylate monomer that increases its hydrophilicity and produces a resin with a strong affinity for moisture with resin penetration of 1.000µm into tubules.5

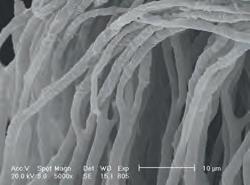

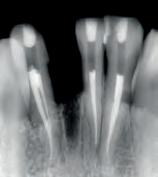
Note: The following lubricants contain peroxides that are not compatible with EndoREZ canal sealer: EndoGel,* EndoSequence,* Glyde,* ProLube,* RC-Prep,* and SlickGel ES.*
The improved flowability of EndoREZ canal sealer allows the sealer to reach the isthmus and intracanal areas during the obturation procedure without using any special device.


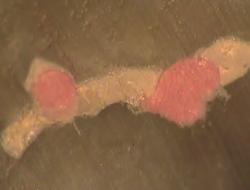


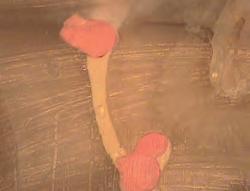
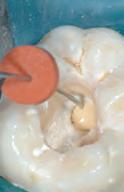
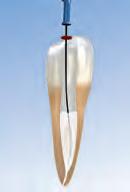
EndoREZ resin-based canal sealer is designed with enhanced flowability properties. The delivery technique using a Skini syringe and NaviTip tip allows for insertion of EndoREZ canal sealer at the apical third. Insertion level is based on the final instrument used. For small diameters (from 25 to 30), final instrumentation (left) allows insertion at 2 mm before working length. For large diameters (from 60 to 80), final instrumentation it is recommended for insertion 4 mm less than the working length.
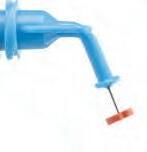


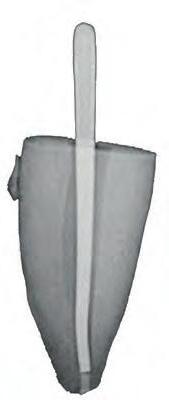
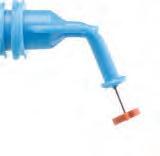
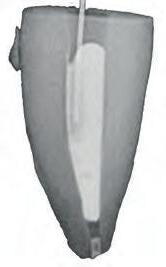
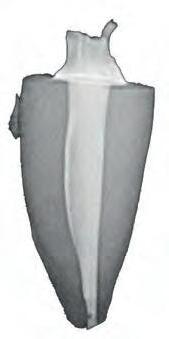
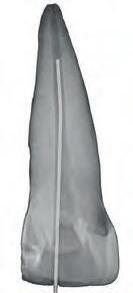
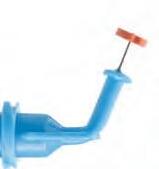

Cases of incomplete formation of apex or reabsorbed foramens can be treated in one visit with an apical MTAFlow cement plug. This will prevent the extrusion of the EndoREZ canal sealer and create a biological seal at apical foramen.
* Trademark of a company other than Ultradent. 1. realityesthetics.com. 2. Zmener O, Pameijer CH. Clinical and radiographic evaluation of a resin-based root canal sealer: an eight-year update. J Endod. 2010;36(8):1311-4. 3. Zmener O, Banegas G, Pameijer C. Efficacy of an automated instrumentation technique in removing resin-based, zinc oxide and eugenol endodontic sealers when retreating root canal: an in vitro study. Endod Pract. 2005;8:29-33. 4. Zmener O, Pameijer CH, Serrano SA, Vidueira M, Macchi RL. Significance of moist root canal dentin with the use of methacrylate-based endodontic sealers: an in vitro coronal dye leakage study. J Endod. 2008;34(1):76-9. 5. Data on file.
ENDOREZ CANAL SEALER SEQUENCE OF CLINICAL USE
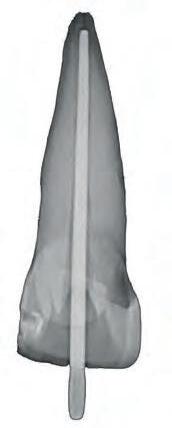
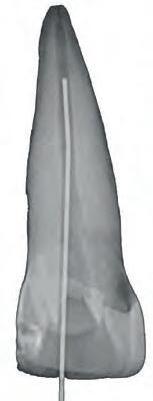

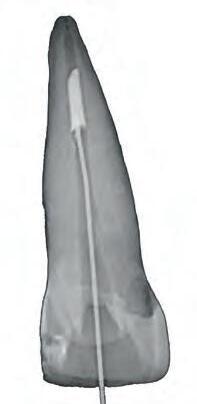

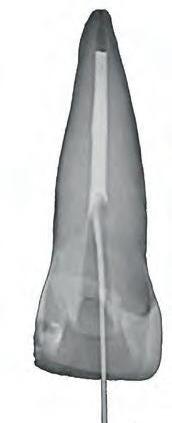
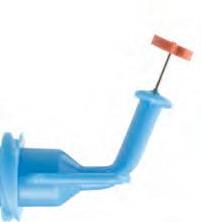
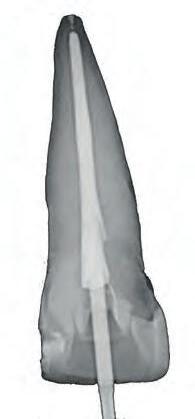

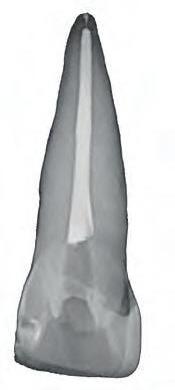
1. Fit an EndoREZ™ gutta percha point to working length. Verify radiographically.

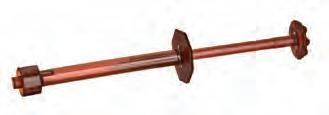


5901 - EndoREZ Obturation .02 Taper Kit
5902 - EndoREZ Obturation .04 Taper Kit
5903 - EndoREZ Obturation .06 Taper Kit
1 x 5 ml (8,15 g) syringe
20 x Skini syringes
20 x Mixing tips
20 x 29 ga Variety NaviTip tips
120 x EndoREZ Points

2. Remove moisture from canal space using Capillary tip and Ultradent Luer Vacuum Adapter, followed by a paper point (paper point should be damp 1–3 mm at tip). Canal should be damp, not desiccated, prior to obturating with hydrophilic EndoREZ sealer. Deliver hydrophilic EndoREZ sealer using a NaviTip™ tip 29 ga, inserting the tip 2–4 mm short of working length.


5900 - EndoREZ Kit
1 x 5 ml (8,15 g) syringe
20 x Mixing tips
3. Express EndoREZ canal sealer with light pressure into canal while withdrawing tip. Keep the NaviTip tip orifice buried in material while expressing EndoREZ canal sealer and withdrawing tip.
4. Slowly insert master EndoREZ gutta percha point cone to working length. Be sure to use a single gentle movement toward apical area. Avoid using a “pump” movement with cone. Passive or cold lateral compactions can be used. Without using accelerator, EndoREZ canal sealer will set in about 20–30 minutes.
5. Light cure EndoREZ canal sealer with VALO™ LED curing light for 40 seconds. Initial surface polymerization with curing light (without EndoREZ Accelerator) is less than 0,3 mm thick and aids in immediate restoration. Trim excess gutta percha with a very hot instrument . Complete restorations following obturation to properly seal canal entrance. Do not leave cotton pellets between obturation and temporary restoration.
EndoREZ canal sealer sets in 5–12 minutes!
• Accelerates EndoREZ sealer polymerization
• Enables post preparation in the same appointment
EndoREZ Accelerator reduces EndoREZ canal sealer set time from 20–30 minutes to about 5–12 minutes before the commencement of post-endo restorative procedures, enabling the start of definitive post restorations right away. It is designed to work hand in hand with the groundbreaking EndoREZ canal sealer for reliable obturation and minimized chair time.
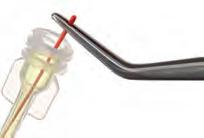
399 - EndoREZ Single Use Accelerator 20pk 0,035 ml vials

EndoREZ ™ Points
RESIN-COATED GUTTA PERCHA POINTS
• The ONLY resin-coated gutta percha
• Chemically bonds to EndoREZ canal sealer and other resin-based sealers

EndoREZ Points are standard ISO-sized gutta percha points coated with a thin resin coating, which bonds chemically to EndoREZ canal sealer. They are the first gutta percha points to achieve a chemical bond with the sealer, providing a more effective seal than traditional gutta percha.

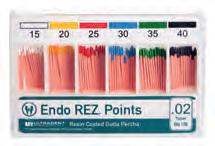
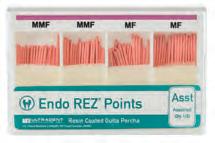
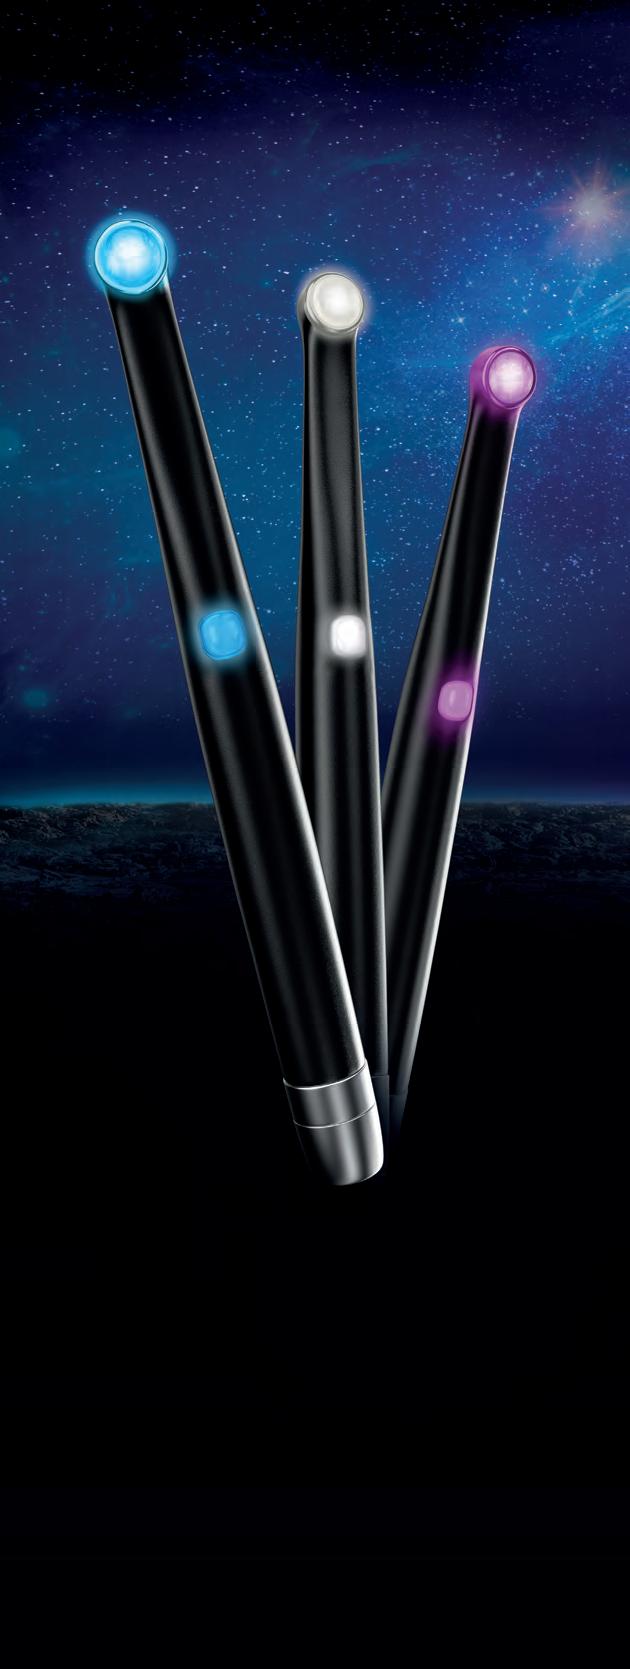


In dentistry, air often gets in the way of the materials used in canals. Displacing that air is essential for achieving a predictable seal and completely filling the canal preparation. The EndoREZ delivery system is optimized to displace air and create the highest seal possible by delivering materials from the bottom of the canal up, achieving bubblefree and complete application.
1. Transfer EndoREZ barrel syringe into back of a Skini syringe using the Mixing tip.
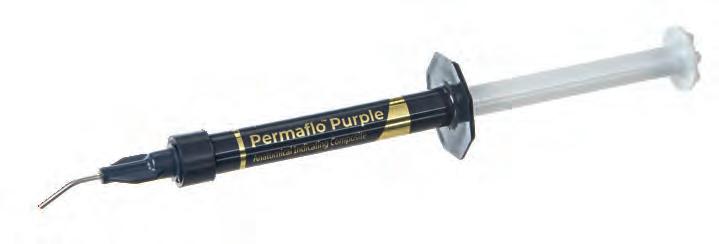
PermaFlo Purple is used with an adhesive system to create an easily identified coronal seal. The purple color simplifies location of the pulp chamber floor when accessing the pulp chamber for future therapy.
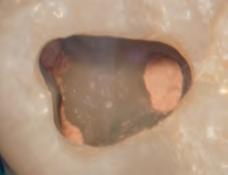
1. Root canal has just been completed and cleaned of excess EndoREZ canal sealer in the pulp chamber. (If significant unset EndoREZ canal sealer is exposed at canal orifice, coat with thin layer of Ultra-Blend™ plus liner and light cure.) Blot or air dry. Note: If eugenol or similar-based sealers have been used, wait until set and freshen all chamber and/or preparation surfaces with diamond bur prior to bonding.

3. Attach a 29 ga NaviTip length. Express a small amount of EndoREZ canal sealer extraorally to verify flow. Make sure tip end is not bound in the apical region before expressing sealant.
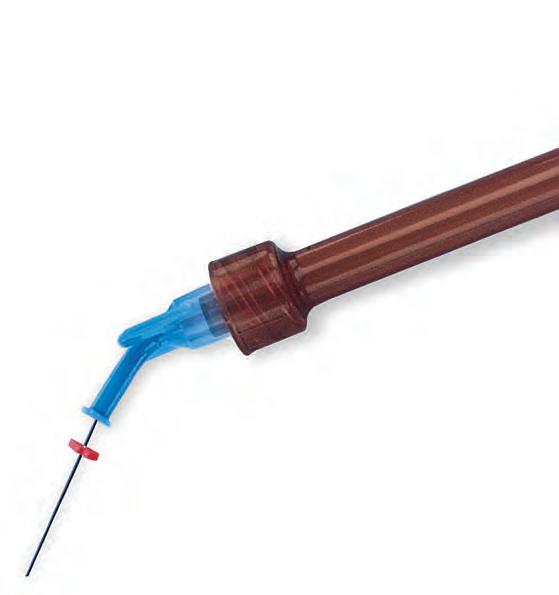

0,5 ml 20pk

Skini Delivery Syringe 1680
Clear Skini Delivery Syringe 1880


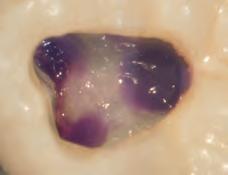
3. Apply ≤ 1,0 mm-thick layer of PermaFlo Purple. Light cure 20 seconds to create an immediate “coronal seal.” When a post and/or core is prepared, the purple identifies the position of root canal preparation. The contrast shows the clinician the pulp chamber floor in relation to the canal orifices, minimizing risk of perforation.
Note: Apply dentin bonding agent first. Remember that eugenolcontaining sealers can prevent polymerization of bonding resins. We recommend EndoREZ™ hydrophilic resin sealer.
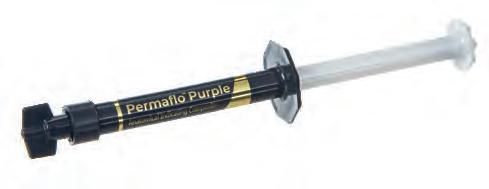

962 - PermaFlo Purple Syringe Kit 2 x 1,2 ml (2,28 g) syringes 4 x Micro 20 ga tips


Note: Capillary Tips should never be used to deliver irrigating materials or endodontic sealers.
• A great time saver for any practice
• Dries canals quickly and efficiently
• Minimizes paper point use
Slide Ultradent’s Luer Vacuum Adapter onto any chairside HVE unit to efficiently remove irrigants and debris. Compatible with any Luer tip, the Luer Vacuum Adapter saves time and minimizes the use of paper points. It can be used with Capillary tips, which have tapered, flexible cannulae that reach deep into canals for enhanced cleaning and drying.


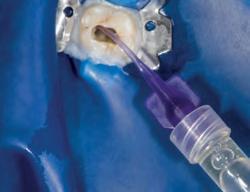
identifying its content.
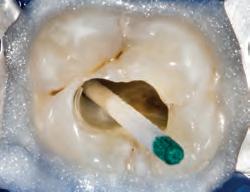


• Low dermatitis potential
• Strong and tear resistant
• Powder free to reduce allergic reactions

311 - DermaDam Medium 0,20 mm 36pk
- DermaDam Heavy 0,25 mm 36pk 15 cm x 15 cm
DENTAL DAM

DermaDam Synthetic dental dam is not made with natural rubber latex, but is designed to be just as flexible and durable as dams that are composed of natural rubber latex.

DermaDam rubber dam is made from pure latex rubber and is powder free, which reduces the possibility of latex reactions. Quality processing ensures a low content of surface proteins. 1. realityesthetics.com.
NaviTip™ Reference Guide
•Provide controlled delivery close to the apical third •Flexible, stainless steel cannulae easily navigate curved canals
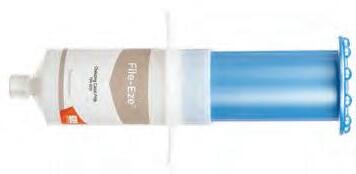
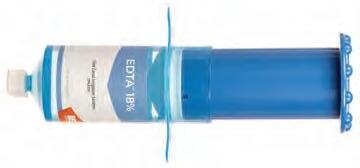

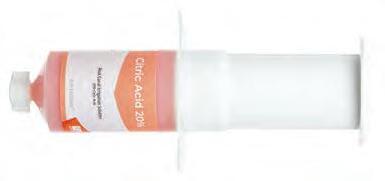


ProductRecommended TipCompatible Tips
File-Eze™
EDTA 18%
UltraCal™ XS
NaviTip™ 29 ga or 30 ga
NaviTip™ 31 ga Double Sideport Irrigator
NaviTip™ 30 ga and NaviTip™ FX™
NaviTip™ 29 ga Single Sideport
For direct pulp capping and pulp floor perforation application, use Micro 20 ga tip
Citric Acid NaviTip™ FX™ NaviTip™ 31 ga Double Sideport Irrigator
EndoREZ™ NaviTip™ 29 ga
NaviTip™ 29 ga Single Sideport
FILE LUBRICANT
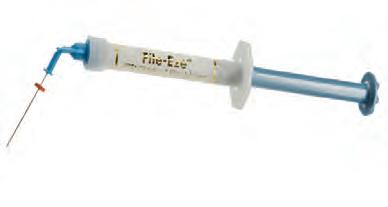


• Peroxide free; will not affect the set of resin sealers
File-Eze file lubricant is an effective 19% EDTA in a water-soluble, viscous solution for chelating, lubricating, and debriding root canal preparations.
Note: The following lubricants contain peroxides that are not compatible with EndoREZ canal sealer: EndoGel,* EndoSequence,* Glyde,* ProLube,* RC-Prep,* and SlickGel ES.*


1075 - File-Eze Kit
4 x 1,2 ml (1,43 g) syringes
5 x Each 30 ga NaviTip tips 17 mm, 21 mm, 25 mm, and 27 mm
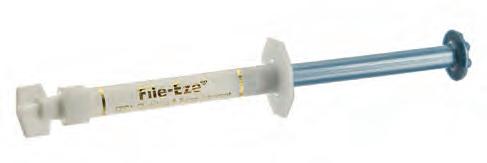
297 - File-Eze Refill
4 x 1,2 ml (1,43 g) syringes

682 - File-Eze IndiSpense™ Syringe 1pk 30 ml (35,64 g) syringe
* Trademark of a company other than Ultradent.
All of Ultradent’s irrigants, lubricants, and medicaments are compatible with methacrylate resin sealers.
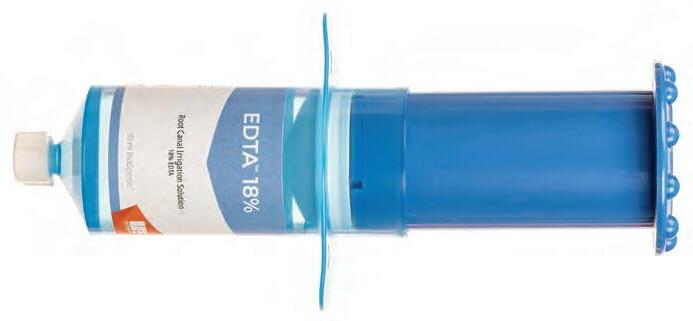


A root canal chelating agent that conditions/cleans through a chelation process, Ultradent EDTA 18% Solution is the irrigant of choice for smear layer removal and can be used as a final irrigant prior to obturation.
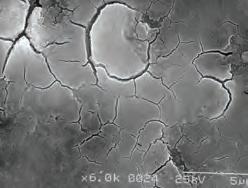
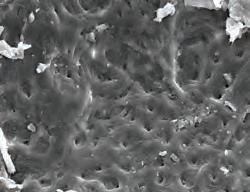
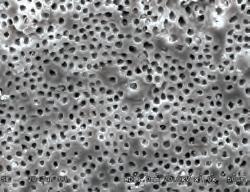
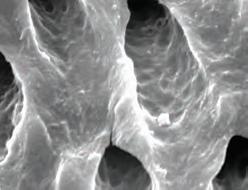

162 - EDTA IndiSpense Syringe 1pk 30 ml (33,27 g) syringe
All of Ultradent’s irrigants, lubricants, and medicaments are compatible with methacrylate resin sealers.
UltraCal™ XS
30%–35% CALCIUM HYDROXIDE PASTE

• Radiopaque
• High pH
• Superior delivery control
UltraCal XS calcium hydroxide paste is a uniquely formulated calcium hydroxide paste that is both aqueous and radiopaque, with a high pH (12,5). It is recommended to use the larger 29 ga NaviTip Single Sideport tip for predictable flow, enabling direct placement. UltraCal XS paste can be thoroughly removed from the canal using Ultradent Citric Acid and a NaviTip™ FX™ tip.
UltraCal XS paste elevates the dentin pH to alkaline, making it the ideal medium to be used as an interappointment dressing in clinical situations involving root resorption, dressing material, pulp capping, apexification, and perforations.1

5145 - UltraCal XS Refill 4 x 1,2 ml (1,76 g) syringes

5149 - UltraCal XS Econo Refill 20 x 1,2 ml (1,76 g) syringes
1. Pedrinha VF, Cuellar MRC, de Barros MC, et al. The vehicles of calcium hydroxide pastes interfere with antimicrobial effect, biofilm polysaccharidic matrix, and pastes’ physicochemical properties. Biomedicines 2022;10(12):3123. doi:10.3390/biomedicines10123123.
Ultradent™ Citric Acid 20% Solution


Empty 1,2 ml syringe

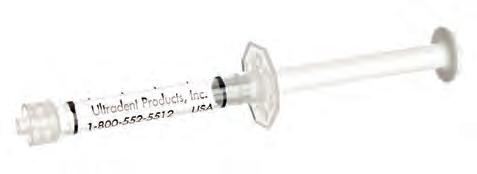
• Recommended as a cleanser/conditioner of prepared root canals
• Removes mineral and smear layers
• Slightly viscous formula facilitates lubrication
• Removes calcium hydroxide paste
Ultradent Citric Acid is a mild acidic material that is effective at dissolving/cleaning calcium hydroxide from canals (e.g., UltraCal XS paste). It is also recommended as a cleanser/conditioner to remove smear layer from dentinal walls.

- Citric Acid IndiSpense™ Syringe 1pk 30 ml (31,26 g) syringe
WARNING:
• Use recommended endodontic tip • Make sure rubber stopper is in position
• Take extra precaution when not using sideport tips • Make sure tip is not wedged in the canal


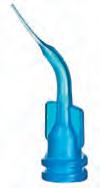


• Evacuates canals and substantially minimizes use of paper points
• Narrow, fexible taper accesses curved canals
• Great for dental abscess procedures
Attach to the Ultradent™ Luer Vacuum Adapter for moisture removal from endodontic canals. Never use to delivery irrigating materials or endodontic chemistries.
• Bright color is easily identified against soft tissues
• The world’s smallest molded tips
Designed for: Periodontal materials, Endodontics, and the Ultradent™ Luer Vacuum Adapter.
• Provides ideal reach while expressing chemicals towards the canal wall, reducing pressure directly towards the apex
• Comes with a fexible, blunt cannula with a unique, antiobturating end
• Non-sterile
Designed for: Ultradent™ 5 ml syringe.
• Great for endodontic procedures such as post cementation and core buildups
• Flexible, strong cannulae
• Bend easily
• Length 19 mm
Designed for: Luting materials and air/water delivery. Use with: PermaFlo™ DC (20 ga) and other Ultradent syringes.
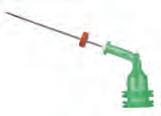
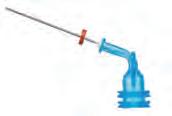
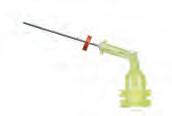
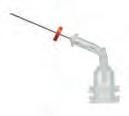
NaviTip™ 29 ga Tips with Single Sideport
• Designed to direct the fow of chemistry through the sideport of the tip before fowing down into the area of the apex, thus reducing the risk of product extrusion
• Flexible, stainless steel cannula easily navigates curved canals
• Bendable tip 0,33 mm
29 ga delivers paste materials: MTAFlow™, MTAFlow™ White, EndoREZ™, and UltraCal™ XS.
Micro Capillary5 mm1120 Micro Capillary10 mm1121
22 ga Endo-Eze0,70 mm3481431
20 ga Endo-Eze0,90 mm3471430
19 ga Endo-Eze1,06 mm3461429
18 ga Endo-Eze1,25 mm3451428
NOTE: UltraCal™ XS calcium hydroxide paste should only be used with NaviTip 29 ga Single Sideport tips.
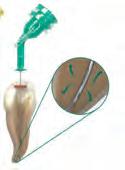
• Use recommended endodontic tip • Make sure rubber stopper is in position • Take extra precaution when not using sideport tips • Make sure tip is not wedged in the canal
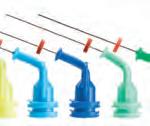
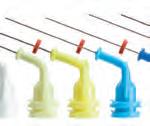

• Provide controlled delivery to the apex
• Flexible, stainless steel cannulae easily navigate curved canals
• Bendable tip 0,33 mm
29 ga delivers paste materials: MTAFlow™, MTAFlow™ White, and EndoREZ™.

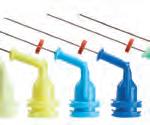

• Provide controlled delivery to the apex
• Flexible, stainless steel cannulae easily navigate curved canals
• Bendable tip 0,30 mm
30 ga delivers solutions/gels: File-Eze™, Ultradent™ EDTA 18% Solution, and Ultradent™ Citric Acid 20% Solution.
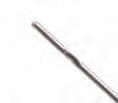
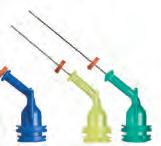
Irrigator
• Double sideports deliver irrigants safely, minimizing the possibility of chemicals being expressed past the apex
• One of the world’s smallest cannula navigate the most intricate canal spaces
Designed for: Ultradent™ EDTA 18% Solution and Ultradent™ Citric Acid 20% Solution.
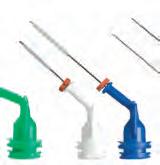
• One-of-a-kind brush cleans, scrubs, and irrigates simultaneously
• Rigid cannula
Designed for: Ultradent™ Citric Acid 20% Solution.
Research Associates Newsletter. Volume 29, Issue 1, January 2005. Listed as an “EXCELLENT” product by a prominent independent research institute.1


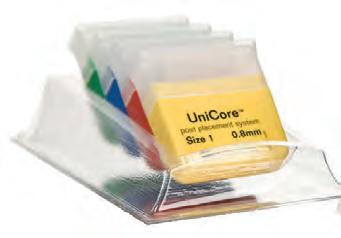
• Superior strength
• Esthetic and radiopaque
• Color-matched drills and posts
• Ultradent’s UniCore “Kit of Kits” provides all items needed for post requirements
UniCore Posts are composed of glass fibers. Unidirectional UniCore glass fiber posts have a flexural strength similar to dentin.2 The gentle taper of the UniCore Post corresponds to the natural anatomy of the tooth and perfectly matches the post space created by the UniCore Drill. The five sizes and colors of UniCore Posts correspond to those of the UniCore Drill. The UniCore Drill is unique in its ability to remove obturators while preparing a post chamber that perfectly corresponds to its post. The UniCore Drill features a patented heat-generating tip, which facilitates the removal of fiber posts, rigid carriers, and traditional gutta percha. It’s heat-dissipating, diamond-coated collar preserves tooth structure, and its specially designed flutes cut canal walls laterally instead of vertically.
Modulus of elasticity at 30° (GPa)13 (similar to dentin) Interlaminate shear strength (MPa) 70–80

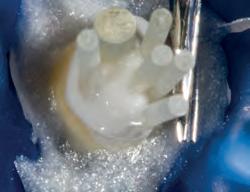
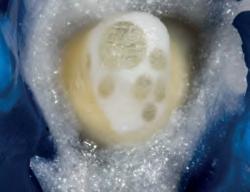

UNICORE™ DRILL
Ultrasafe
• Durable drill can be used to up to 15 times to remove gutta percha during post preparation or rigid carrier removal, and up to 5 uses on preexisting fiber post removal
• Drills and posts are color coded according to size, simplifying chairside use
• Patented diamond-coated collar prevents binding in access openings
• Uniquely designed flutes ensure rapid and consistent removal of debris from canal

• Heat-generating tip eases all obturator removal procedures

UNICORE™ POST
Prestressed fibers and bondable
• Microporous surface ensures micromechanical retention
• No chairside chemical treatment required
• Radiopaque beyond highest ISO standards
• Translucent post transmits light to the complete depth of preparation
• Gently tapered design follows natural tooth anatomy
• Can be removed if endodontic retreatment is required

UniCore Post is noticeably more radiopaque than the leading competitor.

7132 - UniCore Starter Kit 1 x Each drill sizes 1 and 2 5 x Each posts sizes 1 and 2

7120 - UniCore Kit “Kit of Kits”
1 x Each drill sizes 1, 2, 3, and 4 5 x Each posts sizes 1, 2, 3, and 4
7133 - UniCore Size 0 Supplement Kit 1 x Drill size 0 5 x Posts size 0

UniCore Drills
1pk 0 0,6 mm 7134
10,8 mm7121
21,0 mm7122
31,2 mm7123 41,5 mm7124

UniCore Posts
mm 5pk
0,6 mm 7135
10,8 mm7125
21,0 mm7126
31,2 mm7127
41,5 mm7128


Four clinical indications for use:
• Temporary restorations (endodontics, walking bleach technique, inlay/onlay, cusp buildup)
• Splinting between multiple implant copings for impressions to resist impression material distortion
• Provide structure for isolation clamping and to act as a barrier to endodontic irrigants
• Bite ramps and temporary occlusal buildups during orthodontics
• Self-leveling1
• Less than a 5% shrinkage rate2
• Purple color for ease of identification and removal
• Dye free
J-Temp temporary resin is a radiopaque, light-cured, flowable, methacrylate-based resin that provides a durable, temporary material for multiple clinical indications. J-Temp resin is self-leveling,1 has less than a 5% shrinkage rate,2 and its distinctive purple color is easy to distinguish from enamel and dentin without being too noticeable to the patient. With such versatility and quality, J-Temp temporary resin will quickly become a mainstay in your practice.

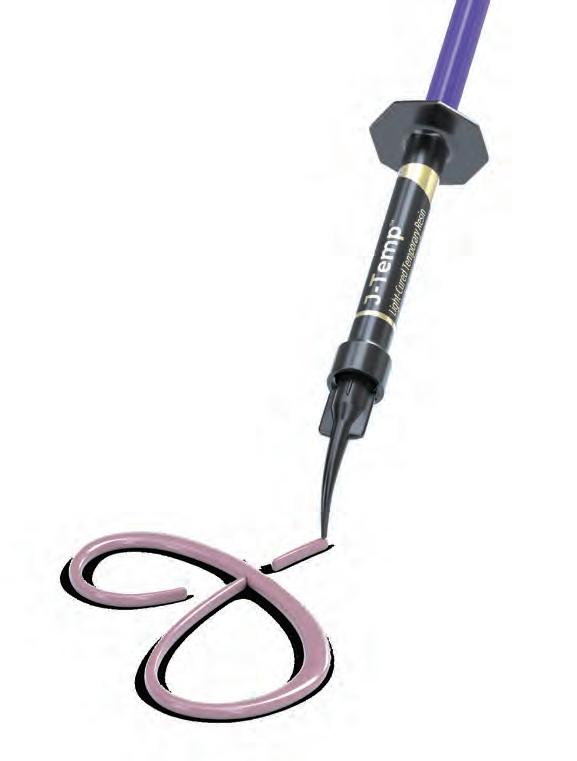
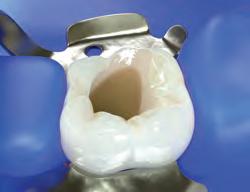

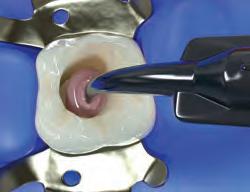
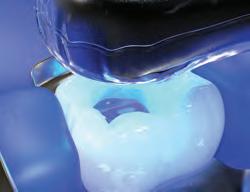


Luer Lock tips with Lok-Tite feature double threads that lock the tip into place for increased security and wings for easy attachment and removal.
Tips with the Comfort Hub feature include larger ergonomic wings that provide a secure, comfortable grasp of the tip.


• Accommodates various viscosities
• Flocked tip fans out to spread materials in a thin, uniform layer
Designed for: PrimaDry™ and PermaSeal™.

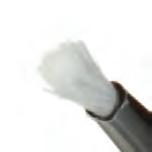

• Dispenses large volumes
• Opaque plastic preserves fow of light-cured materials
Designed for: Ultra-Blend™ plus, Ultradent™ LC Block-Out Resin, PermaFlo™, Opalescence™ Boost™, Ultradent™ Diamond Polish Mint, OpalDam™, OpalDam™ Green, Opalescence™ Endo, and OraSeal™ Caulking.
• Precise, controlled delivery of aqueous materials
• Tight, adjustable brush fibers minimize bubbles
• Unique to Ultradent
Designed for: Peak™ SE, Peak™-ZM, Seek™/Sable™ Seek™, Ultradent™ Silane, and Ultradent™ Universal Dentin Sealant.

• Provides pinpoint precision
• Narrow cannula accurately delivers materials
Designed for: Ultra-Blend™ plus.
The chemistries you use are different. Some are chemically activated, needing to be mixed immediately before delivery. Others have varying viscosities. Some work in pits and fissures, some inside canals, and some on smooth surfaces. Each chemistry you use is designed for a specific purpose. Shouldn’t the same be true for your tips?
Ultradent makes tips designed to deliver each chemistry we create. Whether you’re delivering a solution, a flowable composite, or a viscous gel, we make the perfect tip for the job. And since our tips are engineered on-site, we test each design to ensure it works perfectly with the chemistry it’s intended for.


Blue Micro™ Tip
• Provides pinpoint precision
• Narrow cannula accurately delivers materials
Designed for: Ultra-Etch™.
Blue Mini™ Dento-Infusor™ Tip
• Offers the same tissue management benefits as the Metal Dento-Infusor™ tip
• Allows controlled fow of drop-sized quantities
• Outer diameter 1,2 mm
Designed for: Astringedent™ and Astringedent™ X.
• Delivers viscous or filled materials smoothly via an internal helical channel and ridge
• Tight, adjustable brush fibers minimize bubbles
Designed for: Composite Wetting Resin, Peak™ Universal Bond, PQ1™, Ultradent™ Porcelain Etch, Ultra-Etch™, UltraSeal XT™ plus, and UltraSeal XT™ hydro.
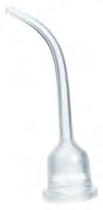
• Allows precise placement
• Attaches to dual-barrel mixing tips
Designed for: PermaFlo™ DC.


Metal Dento-Infusor™ Tip with Comfort Hub™
• Comfort Hub™ design allows for secure, comfortable control while attaching or removing
• Places hemostatic agents precisely and effectively removes superficial coagulum
• Blunt, bent cannula with padded brush enables gentle pressure in the sulcus
• Ultradent’s first tip, the “MDI” remains paramount for successful tissue management
Designed for: Astringedent™, Astringedent™ X, ViscoStat™, ViscoStat™ Clear, PQ1™, and Peak™ Universal Bond.

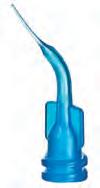
• Bright color is easily identified against soft tissues
• The world’s smallest molded tips
Designed for: Periodontal materials, Endodontics, and the Ultradent™ Luer Vacuum Adapter.

• Large-gauge cannula enables consistent fow
• Standard fowable composite delivery tip
Designed for: Opalescence™ Boost™, MTAFlow™, MTAFlow™ White, PermaFlo™, PermaFlo™ Purple, PermaFlo™ Pink, OpalDam™, OpalDam™ Green, and UltraCal™ XS.


• Tip fibers provide visible, controlled delivery
• Brush fibers facilitate smooth application
Designed for: Enamelast™

• Ideal for delicate surgeries
• Large-diameter tip opening
Designed for: Ultradent™ Luer Vacuum Adapter for small periodontic or endodontic procedures and controlled suction of Opalescence™ Boost™

• Mixes and delivers in one action
Designed for: UltraTemp™, UltraTemp™ REZ II, EndoREZ™, and PermaFlo™ DC.

• Dispenses large volumes
• All-plastic delivery tip
• Greater angle for easy intraoral delivery
Designed for: OraSeal™ Caulking, OraSeal™ Putty, Opalustre™, and thicker paste chemistries.

• Dispenses large volumes
• All-plastic delivery tip
• Easily dispenses viscous chemistries
Designed for: Thicker paste chemistries.
20pk100pk
White Mac6611361
White Mini1247
WARNING:
• Use recommended endodontic tip
• Make sure rubber stopper is in position
• Take extra precaution when not using sideport tips
• Make sure tip is not wedged in the canal


Never use to delivery irrigating materials or endodontic chemistries.
• Evacuates canals and substantially minimizes use of paper points
• Narrow, fexible taper accesses curved canals
Attach to the Ultradent™ Luer Vacuum Adapter for moisture removal from endodontic canals.


• Bright color is easily identified against soft tissues
• The world’s smallest molded tips
Designed for: Periodontal materials, Endodontics, and the Ultradent™ Luer Vacuum Adapter.
™ Internal diameter
20pk50pk
Capillary0,36 mm3413099
Capillary0,48 mm1861425
™ Tip length 20pk
Micro Capillary5 mm1120
Micro Capillary10 mm1121
WARNING:
• Use recommended endodontic tip • Make sure rubber stopper is in position
• Take extra precaution when not using sideport tips • Make sure tip is not wedged in the canal


Endo-Eze™ Irrigator Tip
• Provides ideal reach while expressing chemicals towards the canal wall, reducing pressure directly towards the apex
• Comes with a fexible, blunt cannula with a unique, anti-obturating end
• Non-sterile
Designed for: Ultradent™ 5 ml syringe.
Tips
• Great for endodontic procedures
• Flexible, strong cannulae
• Bend easily
• Length 19 mm
Designed for: Luting materials and air/water delivery. Use with: Ultradent syringes.
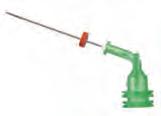
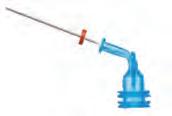
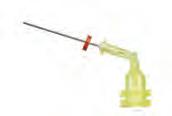
with Single Sideport
• Designed to direct the fow of chemistry through the sideport of the tip before fowing down into the area of the apex, thus reducing the risk of product extrusion
• Flexible, stainless steel cannula easily navigates curved canals
• Bendable tip 0,33 mm
29 ga delivers paste materials: MTAFlow™, MTAFlow™ White, EndoREZ™, and UltraCal™ XS.


• Provide controlled delivery to the apex
• Flexible, stainless steel cannulae easily navigate curved canals
• Bendable tip 0,33 mm
29 ga delivers paste materials: MTAFlow™, MTAFlow™ White, File-Eze™, Ultradent EDTA 18% Solution, and EndoREZ™.
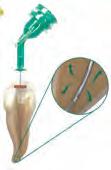
NOTE: UltraCal™ XS calcium hydroxide paste should only be used with NaviTip 29 ga Single Sideport tips.
WARNING:

• Use recommended endodontic tip • Make sure rubber stopper is in position
• Take extra precaution when not using sideport tips • Make sure tip is not wedged in the canal
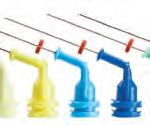


• Provide controlled delivery to the apex
• Flexible, stainless steel cannulae easily navigate curved canals
• Bendable tip 0,30 mm
30 ga delivers solutions: File-Eze™ and Ultradent™ EDTA 18% Solution.


31
with Double Sideport Irrigator
• Double sideports deliver irrigants safely, minimizing the possibility of chemicals being expressed past the apex
• One of the world’s smallest cannula navigates the most intricate canal spaces
Designed for: Ultradent™ EDTA 18% Solution, and Ultradent™ Citric Acid 20% Solution.

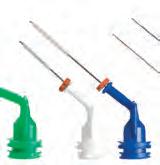
™
• One-of-a-kind brush cleans, scrubs, and irrigates simultaneously
• Rigid cannula
Designed for: Ultradent™ Citric Acid 20% Solution and Ultradent EDTA 18% Solution.
Listed as an “EXCELLENT” product by a prominent independent research institute.1
• Generates pressure in the syringe with low force to the plunger, resulting in more precise apical delivery
• Low waste
Designed for: EndoREZ™, MTAFlow™, and PermaFlo™ DC.
• Snug Luer Lock threads prevent tips from popping off
• Colored plastic is light sensitive to preserve chemistry
Designed for: 30 ml IndiSpense™ syringes of ViscoStat™, ViscoStat™ Clear, Astringedent™, and Astringedent™ X.
• Snug Luer Lock threads prevent tips from popping off
• Blue color makes identification easy
Designed for: 30 ml IndiSpense syringes of Ultra-Etch™
• Snug Luer Lock threads prevent tips from popping off
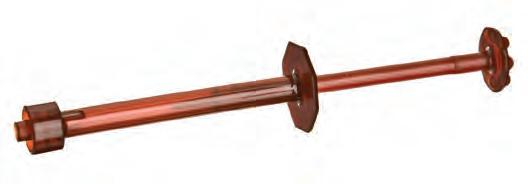


20pk
Designed for: All 30 ml IndiSpense™ syringes. 20pk100pk
• Syringe barrel fange is positioned for optimum control/ leverage
Designed for: Irrigants for in-office or dentist-supervised procedures, as well as Ultradent™ Citric Acid, and Ultradent™ EDTA 18% Solution.
• Provides an easy, reliable barrier
• Ensures asepsis of syringe during cleanup
Designed for: All 1,2 ml syringes.
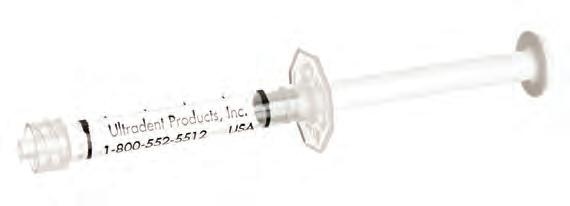
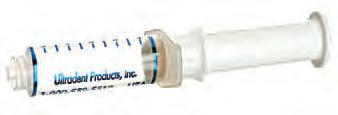

• Winged, polypropylene, plastic luer lock cap
• Use to seal syringes loaded in the office
Designed for: All Ultradent™ plastic syringes.
Ultradent™ Luer Vacuum Adapter
• A great time saver for any practice
• Dries canals quickly and efficiently
• Minimizes paper point use
Syringe Organizer
• Holds 14 syringes
• Made of clear acrylic




830 + 1062 Diode Lasers 110–113
A ccelerator ........................ 119
Acid, Citric ......................... 125
Acid Etchant 58, 64
Acid, Hydrofluoric 64
Acid, Phosphoric .................... 58
Adjusters and Polishers, Ceramic ..... 92–93
Adjusters and Polishers, Composite 90– 91, 94
Aluminum Chloride 51
Amelogen Plus ................... 70–71
Amelogen Plus Singles ................ 71
Astringedent Hemostatic 52
Astringedent Spot Remover 52
Astringedent X Hemostatic 52
B arrier Sleeves, VALO ............ 104–109
Base and Liner ...................... 66
Bilater al Support 22
Bite Block 22
Black Light ......................... 29
Black Light Lens ..................... 103
Black Micro FX Tip 132
Black Micro Tip 132
Black Mini Brush Tip ................. 132
Black Mini Tip ...................... 132
Block-Out Resin 13
Blue Micro Tip 133
Blue Mini Dento-Infusor Tip 49, 133
Bonding Material ................. 60–61
Bonding Resins 61
BOND SECTION 57– 66
Broadband LED Curing Light 100–109
Brushes, Polishing ................... 96
Brush Tips ..................... 132–134
C alcium Hydroxide Paste 125
Canal Sealer 118–119
Capillary Tips ................... 126, 135
Caps, Luer Lock ..................... 139
Carbamide Peroxide 10–12
Carbamide vs Hydrogen Peroxide 6–7
Caries Indicator 36
Caulking Material .................... 39
Cement Resins 81–82
CEMENTS SECTION 77–86
Cement, Temporary (Provisional) 79
Cement, Temporary (Veneer) ........... 80
Cheek Retractors .................. 22, 37
Chelating Agent 124
Chelating and Filing Lubricant 124
Chemical Abr asion Slurry ........... 20–21
Chemical Cur e Cement ............. 82–83
Citric Acid 20% Solution 125
Clamps, Matrix 42–43
Classic Sheets ....................... 14
Cleaning Solution .................... 52
ClearTemp LC 80
Coated Gutta Percha 120
Composite, Mosaic 68–69
Composite Polishers ................ 91, 94
Composite Polishing Brushes ........... 96
Composite Restorative Material 68–71
Composite Sealant 98
Composite Shade Guides ............ 69, 71
COMPOSITES SECTION .............. 67–76
Composite Veneer Templates 75–76
Composite Wetting Resin 74
Cor d, Displacement ............... 53–55
Cor dless LED Curing Light ......... 104–105
Cor d Packers 56
Cosmetic Tooth Whitening 9–15
Co ver, Syringe 138
Cr ossover Action Tweezers ............. 42
Cups, Finishing ................... 90–91
Curing Lights 100–109
Custom Tray Fabrication 12
Custom Trays 10–12
Cutters ............................ 114
D ams .......................... 38, 122
Delivery Syringes 121, 138
Dentin, Liner and Base 66
Dentin Sealant ...................... 33
Dento-Infusor Tips ................ 49, 133
DermaDam 38, 122
DermaDam Synthetic 38, 122
Desensitizing Gels ................... 22
Diamond Polish Mint ................. 96
Diamond Strips 97
Diode Lasers 110–113
Dir ect Composite Template System 75–76
Dir ect Composite Veneers ........... 75– 76
Disks, Finishing .................. 90–91
Displacement Cord 53–55
Disposable Matrix Bands 44
Double-Cor d Technique ............... 54
Double Sideport Irrigator Tips ...... 127, 137
Drills 128–129
Drying Agent 31, 96
Dual Cure Resin Sealer ............. 82–83
E D TA Lubricant ..................... 124
ED TA Solution 124
Empty Syringes 138 Enamelast 32–33
Enamel Bonding Agents ............ 58–60
ENDODONTICS SECTION 115–130
Endodontic Tips 135– 137
Endo-Eze Irrigator Tips 126, 136
Endo-Eze Luer Vacuum Adapter ..... 122, 139
Endo-Eze MTAFlow ............... 116–117
Endo-Eze Tips 126, 136
EndoREZ 118–119
EndoREZ Accelerator .................. 119
EndoREZ Points ...................... 120
EQUIPMENT SECTION 99–114
Etchants 58–59
ET CH SECTION 57–66
Eye wear ........................... 114
F abricated Whitening Trays 10–12
Ferric Sulfate Hemostatic 50, 52
File-Eze EDTA 124
Filing Lubricant ..................... 124
Filling/Luting Material ................ 79
Filling/Sealer, Canal 118–119
Finishing Strips 97
Finishing System, Ceramic .......... 92– 93
Finishing System, Composite ...... 90–91, 94
FINISH SECTION 87–98
Fischer ’s Ultrapak Packers 56
Fissur e Sealant ................... 28–31
Flo wable Composite ................ 72, 74
Fluid Control 46
Fluoride Gel ........................ 22
Fluoride Varnish .................. 32–33 For ceps 42
G emini Diode Laser 110–111
Gemini Evo Diode Laser 112– 113 Gemini PBM Adapter ......... 110–111, 113 Gemini Protective Eyewear ......... 111, 113 Glasses 114 Glass Ionomer Cement 84
Mosaic Singles
Mounting Br acket ................ 104–107
MTAFlow and MTAFlow White ....... 116–117
N atur al Composite Polishing System 92
Natur al Universal Ceramic
Polishing System .................... 93
NaviTip 29 ga Tips ............... 126, 136
NaviTip 31 ga Tips 127, 137
NaviTip FX Tip 127, 137
NaviTip Reference Guide .............. 123
NaviTip Tips .................... 127, 136
Nitinol
Opalustr
PrimaDry
Primers, Metal
R epair Cement 116–117
Resin Barrier ....................... 19
Resin Coated Gutta Percha Points ....... 120
Resin-Reinfor ced Glass Ionomer Cement 84
Restor ative Material 68– 71
Restorative Resins 82–83
Restor ative Tips ................. 132–135
Retr action Cords .................. 53–55
Ring Placement Forceps 42
Root Sensitivity 33
Rubber Dams .................... 38, 122
S able Seek and Seek ................. 36
Safety Glasses 114
Scalloping Scissors 14, 114
Scissors ........................ 14, 114
Sealant Material .................. 28–31
Sealer, Composite 98
Sealer/Filler, Canal 118–119
Sectional Matrix Kits 40, 43
Sectional Matrix System ............ 40– 43
Self-Etching-Primer 59
Sensitivity Toothpaste 34
Sheet Material 14
Sideport Irrigator Tips ............ 127, 137
Silane ............................. 64
Single Resin Bonding 61
Singles, Composite 69, 71
Single Sideport Tips .............. 126, 136
Single-use polishers .................. 89 Skini Syringe 121, 138
Smear Layer Remover 124
Sodium Fluoride 33–34
SoftEZ Tip .......................... 134
Sof-Tray Classic Sheets
Remover
Step-b y-Step Guide for Porcelain Repair .. 65
Sur gical Suction Tip .................. 134
Synthetic Rubber Dam
Syringe Covers
Syringe Organizes ...................
Syringes, 1,2 ml Plastic ...............
Syringes, 5 ml Plastic
Syringes, Empty
SYRINGES SECTION ............... 131–140
Syringes, Skini ...................... 138
T ake-Home Cosmetic Whitening
Putty Material
Q uestions Behind Tooth Whitening 4
Ultradent is committed to products that strengthen the clinician’s ability to administer professional, state-of-the-art patient care. This may involve the development of new products or a refinement of existing materials and techniques. Our highest priority is meeting your needs with quality products and service. We appreciate your suggestions, questions, and comments. In certain countries, differing legal requirements may limit the availability of certain products, or require different product indications and claims under labeling compatible with local conditions. For more detailed procedures and precautions, refer to individual product instructions or packaging. At Ultradent, we are committed to environmental concerns. However, the shipping of chemicals often requires a secondary plastic package. All products are latex-free with the exception of DermaDam latex rubber dam. Ultradent is ISO 13505 certified, which signifies that we have developed and implemented a comprehensive quality system, and is audited and certified by a CAN/CSA recognized independent European notified body. Where appropriate, Ultradent products sold in Europe bear the CE mark, indicating that our products comply with the strict European Community laws (directives).
All product shelf life is based on date of manufacture. See product packaging for more information and storage instructions.
Please see product IFU for warranty information if applicable.
At Ultradent we are committed to environmental concerns. For that reason we try to use as little plastic as possible in our packaging. However, for your safety and the proper preservation of our chemicals, many times we must include a secondary plastic package.
Find the latest information and news about Ultradent Products on the internet. Visit WWW.ULTRADENT.EU for general information on Ultradent Products, the corporate history and philosophy, product information or downloads of the Ultradent Products catalog, material safety data sheets or instructions for use. By the country selection tab, detailed contact information about your local distribution partner can be found.
Reproduction and copying of text or pictures, whether in part or in full, only with the written permission of Ultradent Products GmbH, Germany. January 2024.


BKP85 = Lot number
2023-03 = Month, March
2023-03 = Year, 2023
BL2DC = Lot number 02-24 = Month, February 02-24 = Year, 2024
All UPI syringes are stamped with an expiration date consisting of one letter and 3 numbers. The letter is a lot number used for manufacturing purposes, and the 3 numbers are the expiration date. The first 2 numbers are the month, and the third number is the last number of the year.
This year, we are humbled to celebrate Ultradent’s 45th anniversary, a significant milestone in our journey. Reflecting on this achievement fills us with a deep sense of pride and gratitude. Over the years, we have been fortunate to build a close-knit community — a family of employees, customers, and partners who have played an integral role in our story. Together, we have forged a legacy that goes beyond the products we create; it’s a legacy grounded in trust, integrity, and unwavering commitment to our vision of improving oral health globally.
Our beginnings were modest, and yet, through the years we have grown to become a prominent global presence in our industry. This remarkable journey, initiated and inspired throughout the years by Ultradent’s founder, Dr. Dan Fischer, has been characterized by innovation. On the pages of this latest edition of our Products and Procedures Manual, you’ll find many of the innovations that you are familiar with, plus several new innovations, such as our new Transcend™ universal composite which exhibits unprecedented shade matching with just one Universal Body shade and our latest addition to the VALO™ curing light family, the VALO™ X light!
Our journey to 45 years would not have been possible without the steadfast support of you, our valued customers. Your loyalty has been the cornerstone of our success, and we are profoundly grateful for it.
Looking forward, our commitment to our core values remains more vital than ever. We remain dedicated to providing the highest quality products while continuing our tradition of giving back to those communities we serve. Our journey is far from complete, and we are eager to continue evolving with your continued support.
Together, we will persist in our mission to innovate and contribute to improving oral health globally.
