Treatment Center
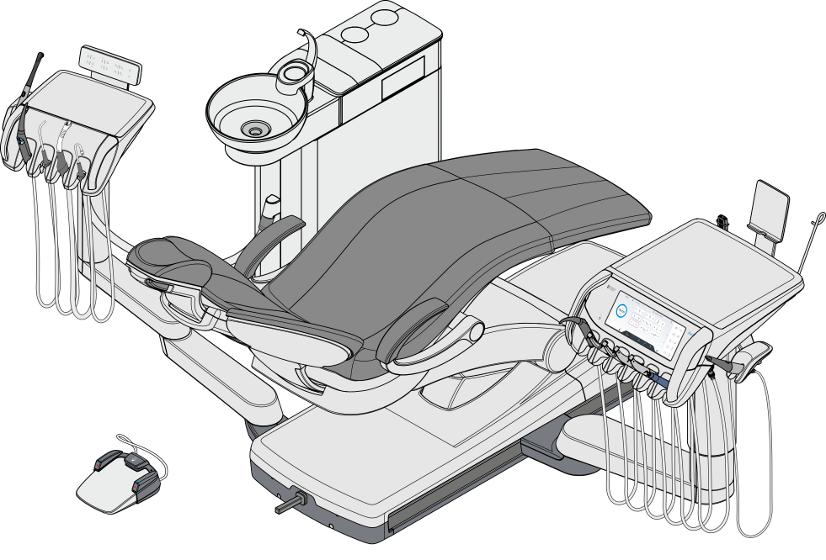
Axano
Instructions for Use (not valid for USA)
English
New as of:
2023-06
Table of contents Dentsply Sirona Instructions for Use Treatment Center Axano 2 67 17 396 D3685 D3685.201.01.04.02 2023-06 Table of contents 1 General information 10 1.1 Dear customer, 10 1.2 Contact information 10 1.3 General information about these instructions for use 11 1.4 Scope of these instructions for use 11 1.5 Other valid documents 11 1.6 Warranty and liability ................................................................................................... 12 1.7 Usage data .................................................................................................................. 12 1.8 Intended use................................................................................................................ 12 1.9 Indications for use ....................................................................................................... 13 1.10 Contraindication by the treatment center .................................................................... 13 1.11 Contraindication by instruments and other combined devices .................................... 14 1.12 Patient population........................................................................................................ 14 1.13 Intended users............................................................................................................. 14 1.14 Obligation to notify authorities ..................................................................................... 15 1.15 Formats and symbols used ......................................................................................... 15 2 Safety notices 16 2.1 Identification of danger levels 16 2.2 Information on the unit 16 2.3 On-site installation 17 2.4 Installation of the treatment center 17 2.5 Media quality 17 2.6 Connection to the public drinking water system 17 2.7 Maintenance and repair 18 2.8 Trouble-free operation 18 2.9 Vacuum system 18 2.10 Patient chair 19 2.11 Intermittent operation 19 2.12 Service life of Dentsply Sirona instruments 19 2.13 Care, cleaning, and disinfecting agents 19
Care and cleaning instructions for the practice team 20 2.15 Modifications and extensions of the system 20 2.16 Cybersecurity 20 2.17 Electromagnetic compatibility 20 2.18 Electrostatic discharge 21 2.19 Dismantling/Installation 21
2.14
4
Dentsply Sirona Instructions for Use Treatment Center Axano Table of contents 67 17 396 D3685 D3685.201.01.04.02 2023-06 3
Unit description 22 3.1 Operating principle 22 3.2 Standards/Approvals 24 3.3 Technical data 26 3.4 System overview 28 3.5 Patient chair 29 3.6 Motor-driven headrest 30 3.7 Foot control 31 3.7.1 Smart Control 31 3.7.2 Classic foot control 32 3.8 Dentist element 33 3.8.1 Instrument positions 34 3.8.2 Smart Touch user interface 35 3.9 Assistant element 36 3.9.1 Instrument positions 37 3.9.2 User interface 37 3.9.3 Fixed keys on the assistant element 37 3.10 Water unit 39 3.11 External device connection ......................................................................................... 41 3.12 Digital services ............................................................................................................ 43 3.13 Combination with other devices .................................................................................. 44 3.14 Consumption of water, Dentosept, and the agent for suction hose and cuspidor cleaning 46
3
Operation 47 4.1 Starting up the treatment center 47 4.1.1 Switching the treatment center on/off 47 4.1.1.1 Power switch 47 4.1.1.2 Standby switch 47 4.1.1.3 Clinic mode 48 4.1.2 Initial startup 49 4.1.3 Logging user in/out 51 4.2 Operating concept of the Smart Touch 52 4.2.1 Virtual function and fixed keys 52 4.2.2 Main dialogs 53 4.2.3 Expanded dialogs 54 4.2.4 Headers and footers 55 4.3 Foot control 56 4.3.1 Wireless foot control 56 4.3.1.1 Setting the wireless foot control on the treatment center 56 4.3.1.2 Battery voltage message 56 4.3.2 Operating the foot control 56
Table of contents Dentsply Sirona Instructions for Use Treatment Center Axano 4 67 17 396 D3685 D3685.201.01.04.02 2023-06 4.3.3 Using the cursor control 58 4.3.3.1 Functionality 58 4.3.3.2 Using cursor control with Comfort foot control 59 4.3.3.3 Using cursor control with Classic foot control 61 4.4 Patient chair 63 4.4.1 Safety instructions 63 4.4.2 Safety stop 64 4.4.3 Triggering an immediate movement stop 65 4.4.4 Armrests 66 4.4.5 Vario footrest 66 4.4.6 Adjusting the motor-driven headrest 67 4.4.6.1 Moving the headrest in/out 67 4.4.6.2 Inclining the headrest 68 4.4.7 Moving the patient chair via chair programs 70 4.4.7.1 Moving the patient chair to the entry/exit position 70 4.4.7.2 Moving the patient chair to the mouth rinsing position 71 4.4.7.3 Using the last position memory function 72 4.4.7.4 Moving the patient chair to a treatment position 72 4.4.8 Moving the chair manually 74 4.4.8.1 Opening the expanded start dialog 74 4.4.8.2 ErgoMotion – Tilting the patient couch and inclining the backrest 74 4.4.8.3 Adjusting the chair height 75 4.4.8.4 Moving the patient chair with the fine adjustment 75 4.4.9 Configuring chair programs and shock positioning 77 4.4.10 Treatment while standing 78 4.4.11 Patient-specific chair programs 78 4.4.12 Setting the Massage/Active lumbar support functions 80 4.5 Dentist element 81
Safety notices 81 4.5.2 Maximum load capacity 81 4.5.3 Smart Delivery motorized sliding track 82 4.5.4 Motorized height adjustment for Smart Delivery Pro 83 4.5.5 Fixed keys on the dentist element 84 4.5.5.1 Standby switch 84 4.5.5.2 Shock positioning 84 4.5.5.3 Purge function 84 4.5.5.4 Operating light 84 4.5.5.5 Composite function 85 4.5.5.6 Tumbler filling 85 4.5.5.7 Cuspidor flushing ......................................................................... 85 4.5.5.8 Cuspidor ...................................................................................... 85 4.5.5.9 Timer and multitimer .................................................................... 85
4.5.1
Dentsply Sirona Instructions for Use Treatment Center Axano Table of contents 67 17 396 D3685 D3685.201.01.04.02 2023-06 5 4.5.5.10 Massage function 86 4.5.5.11 Freely selectable function 87 4.5.6 Placing the instruments in their holders 88 4.5.7 Saving settings 89 4.5.8 General instrument functions 91 4.5.8.1 Selecting a coolant 91 4.5.8.2 Switching the preselected coolant on/off 91 4.5.8.3 Activating the chip blower 91 4.5.8.4 Setting the amount of spray water 92 4.5.8.5 Switching the instrument light on/off and adjusting the brightness .................................................................................... 93 4.5.8.6 Setting the foot control as a direct starter or speed foot control 93 4.5.8.7 Preparing for use of NaCl saline solution 93 4.5.8.8 Setting the NaCl flow rate 95 4.5.9 Sprayvit multifunctional syringe 96 4.5.9.1 Structure 96 4.5.9.2 Product labeling 96 4.5.9.3 Media supply 96 4.5.9.4 Safety notices 96 4.5.9.5 Connecting the instrument hose 97 4.5.9.6 Attach/remove the housing and nozzle 97 4.5.9.7 Applying air, water, or spray 98 4.5.9.8 Switching instrument light and water tempering on/off 98 4.5.10 Turbine / air motor / other air-driven instruments 100 4.5.11 Motor 101 4.5.11.1 Motor versions 101 4.5.11.2 Product labeling 103
Technical Data 103 4.5.11.4 Safety instructions 104 4.5.11.5 Connecting the instrument hose 105 4.5.11.6 Changing an instrument 105 4.5.11.7 Setting the speed 106 4.5.11.8 Changing direction of rotation 107 4.5.12 SiroSonic TL ultrasonic handpiece 109 4.5.12.1 Safety instructions 109 4.5.12.2 Setting the intensity 109 4.5.13 External HF surgical device 111 4.5.14 Endodontic and implantology treatments 112 4.5.14.1 Endodontics 112 4.5.14.2 Implantology 127 4.6 Assistant element 135 4.6.1 Maximum load capacity 135 4.6.2 Positioning 135
4.5.11.3
4.15
Table of contents Dentsply Sirona Instructions for Use Treatment Center Axano 6 67 17 396 D3685 D3685.201.01.04.02 2023-06
Fixed keys on the assistant element 136 4.6.3.1 Tumbler filling 136 4.6.3.2 Flushing of the cuspidor bowl 136
Operating light 136
Composite function 136 4.6.3.5 Chair programs 137 4.6.3.6 Headrest 137 4.6.3.7 Timer 137 4.6.3.8 Bell 137 4.6.3.9 Function key 137 4.6.4 Suction handpieces 138 4.6.5 SmartLite Pro curing light 139 4.6.6 12 V connection for medical equipment 139 4.7 Water unit 140 4.7.1 Swiveling the cuspidor bowl 140
Filling the tumbler 140 4.7.3 Tumbler filling with automatic sensor control 140 4.7.4 Adjusting the water amount for flushing 141 4.7.5 Self-sufficient water supply 141 4.8 Tray 145 4.9 Cup holder 146 4.10 Smart device holder 147 4.11 Panoramic X-ray viewer 148 4.11.1 Switching the X-ray viewer on/off 148 4.11.2 Attaching the anti-glare film 148 4.12 Operating light 149
Switching the operating light on/off 149 4.12.2 Switching the composite function on/off 149 4.13 X-ray tube unit 151 4.14 Sivision video system 152 4.14.1 Patient monitor 152 4.14.2 SiroCam AF+ intraoral camera 153 4.14.2.1 Safety instructions 153 4.14.2.2 Functional description 153 4.14.2.3 Connecting the intraoral camera 154 4.14.2.4 Operating the intraoral camera 154
Technical data of camera 158
4.6.3
4.6.3.3
4.6.3.4
4.7.2
4.12.1
4.14.2.5
Operation with a PC 159
Touchpad and Sidexis 4 control 159 4.15.2 Media Player ................................................................................................. 161 4.15.3 USB port ....................................................................................................... 163
4.15.1
5.2
5.1.4
5.1.5
5.2.1
5.2.7
5.2.8
Dentsply Sirona Instructions for Use Treatment Center Axano Table of contents 67 17 396 D3685 D3685.201.01.04.02 2023-06 7 4.16 Configuration of the treatment center (setup) 164 4.16.1 Opening the setup dialog 164 4.16.2 Notifications 165 4.16.3 User profiles 166 4.16.4 Bluetooth 167 4.16.5 Settings 168 4.16.5.1 General 169 4.16.5.2 Treatment chair 171 4.16.5.3 Instruments 172 4.16.5.4 Operation 175 4.16.5.5 Operating light 180 4.16.5.6 Hygiene 181 4.16.5.7 User settings 186 4.16.6 User interface 187 4.16.7 Maintenance 190 4.16.7.1 Network 190 4.16.7.2 Device settings 191 4.16.7.3 Instruments 192 4.16.7.4 Service functions 193 4.16.7.5 Software & functions 196 5 Care, cleaning and maintenance by the practice team ................................... 198 5.1 Basics 198 5.1.1 Intervals 198 5.1.2 General processing instructions 200 5.1.2.1 Pre-disinfection 200 5.1.2.2 Cleaning and disinfection 200 5.1.2.3 Sterilization 201
Overview of the parts to be reprocessed 201
Care, cleaning, and disinfecting agents 202
5.1.2.4
5.1.3
Inspection, maintenance and testing 202
Microbiological water test 203
Surfaces 205
Clean/disinfect plastic surfaces 205
Disinfect user interfaces 206
Sterilizing the protective cover of the smart device holder 207
Disinfect handles and instrument holders and sterilize silicone mats 208 5.2.5 Disinfecting the tray 210 5.2.6 Disinfecting the cup holder 210
5.2.2
5.2.3
5.2.4
Care for, clean, and disinfect upholstery 211
Clean the foot control 212
5.3 Instruments and instrument hoses
5.3.1
5.3.2
5.3.3 Lubricate, disinfect/sterilize the treatment instruments
5.3.3.1
5.3.3.2
5.3.3.3
5.7
5.3.4
5.3.5
5.3.6
5.4.1
5.4.2
disinfecting/sterilizing the Sprayvit multifunctional syringe .........................................................................................
motors and adapters ................................
5.3.3.4 Clean and disinfect/sterilize the components of the ApexLocator
5.3.3.5 Disinfecting/sterilizing the SmartLite Pro curing light...................
5.3.3.6 Cleaning/disinfecting the SiroCam AF+ intraoral camera
5.3.4.1
5.3.4.2
or
5.4.2.1
5.4.3
5.5.1
5.5.2
5.5.5
5.5.6
5.5.7
5.5.8
5.6.3
5.7.1
5.7.2
Table of contents Dentsply Sirona Instructions for Use Treatment Center Axano 8 67 17 396 D3685 D3685.201.01.04.02 2023-06
213
213
Purge the water lines (purge function)
217
Automatically purge water lines (autopurge function)
223
223
Treatment instruments with separate instructions for use
223
Cleaning,
226
Disinfecting/sterilizing
232
233
233
............
Maintaining treatment instruments 234
Maintenance of the Sprayvit multifunctional syringe 234
Maintaining the motors 235
the cotton wool roll on the turbine hose 236
Changing
Clean, disinfect, and replace instrument hoses 237
Suction system 238
5.4
Cleaning the suction hoses 238
241
Cleaning the suction system using the suction hose adapter for the cuspidor
via an external tank
the cuspidor ................................................................................. 241
Cleaning
suction
external container .................... 242
Cleaning the suction system using the suction hose adapter for
5.4.2.2
the
system via
Sterilizing, disinfecting and lubricating the suction handpieces .................... 243
Clean the filter in the suction hoses and disinfect the suction hoses ............ 244
Components of the water unit ..................................................................................... 246
5.4.4
5.5
Empty the gold trap ....................................................................................... 246
Clean/disinfect the cuspidor .......................................................................... 247
Cleaning the outlet lines of the cuspidor ....................................................... 248
Refill disinfectant for the water lines ............................................................. 250
5.5.3
5.5.4
Disinfect cartridges for sanitization adapters
suction hose cleaning...... 252
and
Change the water and air filters .................................................................... 253
Changing the amalgam rotor ........................................................................ 255
Check the message system of the amalgam separator ................................ 258
Emptying the sediment container.................................................................. 259 5.5.10 Cleaning the filter insert of the standard wet suction .................................... 261 5.6 Sanitization.................................................................................................................. 263
Sanitizing the treatment center 263
Read out hygiene data 270
5.5.9
5.6.1
5.6.2
Biofilm removal by the service technician 270
Foot control and connection box 271
Changing the battery of the wireless foot control 271
Changing the fuse of the external device connection 272
Dentsply Sirona Instructions for Use Treatment Center Axano Table of contents 67 17 396 D3685 D3685.201.01.04.02 2023-06 9 6 Maintenance by the service engineer 274 6.1 Inspection and maintenance 274 6.2 Safety checks 274 6.3 Maintenance manual 275 7 Spare parts and consumables......................................................................... 276 8 Disposal 278 8.1 Battery disposal 279 8.2 Disposal of disinfectants 279 9 Overview of all function keys........................................................................... 280 9.1 Fixed Keys................................................................................................................... 280 9.1.1 Dentist element ............................................................................................. 280 9.1.2 Assistant element.......................................................................................... 281 9.2 Start dialog .................................................................................................................. 282 9.3 Instrument dialog......................................................................................................... 283 9.4 Endodontics dialog ...................................................................................................... 285 9.5 Implantology dialog ..................................................................................................... 286 9.6 Sivision dialog ............................................................................................................. 288 9.6.1 Sidexis 4 ....................................................................................................... 288 9.6.2 Media Player ................................................................................................. 289 9.6.3 Camera ......................................................................................................... 290 Index 292
1 General information
1.1 Dear customer,
We are pleased that you have equipped your practice with the Axano treatment center from Dentsply Sirona.
Our aim is to identify our customers' needs early and create innovative solutions. Together with your trade partner, you have configured the treatment center most suitable for you. The new hub of your treatment room has been tailored to your personal needs.
These instructions for use are designed to assist you prior to initial use and whenever you require information later on.
We wish you success and enjoyment with the Axano treatment center.
Your Axano team
1.2 Contact information
Dentsply Sirona Product service Log in to register your units and make service requests: https://dentsplysirona.service-pacemaker.com/
Manufacturer's address Sirona Dental Systems GmbH Fabrikstrasse 31 64625 Bensheim Germany
Tel.: +49 (0) 6251/16-0 Fax: +49 (0) 6251/16-2591
E-Mail: contact@dentsplysirona.com www.dentsplysirona.com
Representative Switzerland Maillefer Instruments Holding Sàrl Chemin du verger 3 CH-1338 Ballaigues
Representative Great Britain / Northern Ireland
Dentsply IH Limited, Building 3.The Heights, Brookland’s, Surrey, Weybridge,KT13 ONY England, UK
1 General information 1.1 Dear customer, Dentsply Sirona Instructions for Use Treatment Center Axano 10 67 17 396 D3685 D3685.201.01.04.02 2023-06
1.3 General information about these instructions for use
Follow the instructions for use
Please familiarize yourself with the unit by reading through these instructions for use before putting it into operation. It is essential that you comply with the warning and safety information listed.
Retain documents Keep the instructions for use so that they are always at hand in case you or another user requires information at a later point in time. Save the instructions for use on the PC or print them out.
If you sell the unit, make sure that the instructions for use are included with it either as a hard copy or on an electronic storage device so that the new owner can familiarize himself with its functions and the specified warning and safety information.
"Download Center" for technical documents
We have set up a "Download Center" or the technical documents at dentsplysirona.com/ifu. From here, you can download these instructions for use along with other documents. Please complete the online form if you would like a hard copy of the instructions for use or operator's manual. We would be happy to send you a printed copy, free of charge.
Help If you need help despite having thoroughly studied the instructions for use, please contact your dental depot.
1.4 Scope of these instructions for use
Equipment options This document describes the full version of your unit. It may therefore cover components that are not included in the system you purchased.
Firmware This document is valid for a device with a software version from:
Version 1.0
The current software version is displayed in the setup, see "Maintenance/Software & functions/Software [→ 196]".
1.5 Other valid documents
WARNING
Your treatment center can be equipped with additional components that are described in separate instructions for use. The instructions as well as all warning and safety notices they contain must also be followed.
The following Dentsply Sirona products have separate instructions for use:
● Straight and contra-angle handpieces
● Turbines
● SiroSonic TL ultrasonic handpiece
● LEDview Plus operating light
● 22" monitor DC model 2017
● Heliodent Plus X-ray tube unit
● Hugo, Theo, Carl and Paul dental working stools
The document “Installation Requirements” is also available. It contains detailed technical specifications, dimension sheets, and information
Dentsply Sirona Instructions for Use Treatment Center Axano 1 General information 1.3 General information about these instructions for use 67 17 396 D3685 D3685.201.01.04.02 2023-06 11
about operating the treatment center with regard to electromagnetic compatibility.
1.6 Warranty and liability
Maintenance In the interest of the safety and health of patients, users or third parties, it is necessary that maintenance work is carried out at fixed time intervals to ensure the operational safety and reliability of your product. For more information, please refer to "Maintenance by the service engineer" [→ 274]
The operator must ensure the implementation of the maintenance work.
WARNING
As a manufacturer of medical electrical equipment, we can consider ourselves responsible for the safety characteristics of the device only if maintenance and repairs are carried out by us or by companies authorized explicitly by us for this purpose and if components are replaced with original spare parts in case of failure.
Exclusion of liability If the operator does not meet the obligation to carry out such maintenance or error messages are ignored, Dentsply Sirona or its authorized dealer does not assume any liability for resulting damage.
1.7 Usage data
The treatment center saves usage data for quality and product improvement and for efficient remote support when servicing is needed. Only general device data are collected, no personal data.
At initial startup, agree to the remote service agreement and have your treatment center registered with Dentsply Sirona by your service technician, see "Initial startup" [→ 49]. Please note that the full extent of functions of the service software, firmware updates, and license activation are available only if you have agreed to the remote service agreement and your treatment center is registered, see "Digital services" [→ 43].
1.8 Intended use
The Treatment Center is intended to supply power to and serve as a base for dental devices.
The Treatment Center supports diagnostic and therapeutic application in human dentistry.
The Treatment Center includes a dental chair which is intended to position the patient for dental treatment.
WARNING
The Treatment Center is intended for use in the dental clinic environment and is used by trained dentists and/or dental assistants.
The Treatment Center is intended for use in the area of human dentistry and may be used for treatment of adults and children.
1 General information 1.6 Warranty and liability Dentsply Sirona Instructions for Use Treatment Center Axano 12 67 17 396 D3685 D3685.201.01.04.02 2023-06
1.9 Indications for use
The Treatment Center is suitable for indications from the following specialist fields of human dentistry:
● Preventive dentistry
● Restorative dentistry
● Parodontology
● Endodontics
● Prosthetics
● Orthodontics
● Surgery
● All other applications within dentistry
The product is provided for diagnostic and therapeutic application.
1.10 Contraindication by the treatment center
Magnet in the head pad
The magnet in the head pad should not be in the immediate vicinity of any patients, users or third parties wearing a pacemaker.
Intraoral camera and patient monitor
The intraoral camera and patient monitor may only be used for taking images of patients. The images of the intraoral camera serve only to improve patient communication, not for diagnosis by the dentist.
Handling the treatment center water
DANGER
Highly immunosuppressed patients should not come into contact with water from the treatment center. The use of sterile solutions is recommended.
The maximum load capacity of the patient chair is 185 kg (407.9 lbs)
Patients heavier than 180 kg (396.8 lbs) should not be seated on the chair. The maximum weight of the accessories on the patient chair is an additional 5 kg (11 lbs).
Range of movement
The treatment unit may only be operated if no objects impede the chair’s range of movement.
Environment
This unit is not intended for operation in areas subject to explosion hazards.
CAUTION
This unit is permanently installed. Operation is not permitted in mobile vehicles.
Dentsply Sirona Instructions for Use Treatment Center Axano 1 General information 1.9 Indications for use 67 17 396 D3685 D3685.201.01.04.02 2023-06 13
1.11 Contraindication by instruments and other combined devices
Contraindications for the following tools, which can be operated on the product (combined devices), are to be taken from the separate documentation provided for this purpose:
● Straight and contra-angle handpieces
● Turbines
● Powder jet handpieces
● SiroSonic TL scaler
● Suction cannulas
● Disinfectant for the water lines Dentosept
● Operating light LEDview Plus
● Heliodent Plus X-ray tube assembly
● Dental work chairs Hugo, Theo, Carl and Paul as well as any other applied part which could be connected and/or supplied by the Treatment Center by using a standardized interface (e.g. USB port).
1.12 Patient population
The patient population for the treatment center includes children from the age of 3 to adults over age 80. The patient chair is designed for a patient height of 1.2 m up to 2.05 m and a patient weight of up to 180 kg.
The patient chair is suitable for patients with limited mobility.
1.13 Intended users
Intended users of the treatment center are:
● Dentist
The dentist diagnoses and treats diseases of the teeth, mouth, and jaws. He or she has studied dentistry and/or medicine. Users include general dentists and oral surgeons, orthodontists, dental radiologists, and ENT specialists. The dentist has been trained by the manufacturer or a certified partner and is responsible for all employees who work with this product. He or she ensures that this medical device is used as intended and that the service intervals are adhered to.
● Assistant
The assistant is a dental professional who assists the dentist during examinations and treatments or prepares for them. This job requires several years of training. The assistant carries out all maintenance to be done by the practice team, e.g. changing filters.
● Hygiene expert
The hygiene expert assists the dentist in hygiene and reprocessing of medical devices. He or she cleans, disinfects, and/or sterilizes the products according to the manufacturer's specifications and documents this. He or she has extensive knowledge on complying
1 General information 1.11 Contraindication by instruments and other combined devices Dentsply Sirona Instructions for Use Treatment Center Axano 14 67 17 396 D3685 D3685.201.01.04.02 2023-06
with the legal and normative standards for infection prevention in dentistry.
● Cleaning personnel
The cleaning personnel carry out the general cleaning and disinfection in the dental practice according to a work schedule. They have no direct contact with patients.
● Service technician
The service technician carries out the installation, maintenance, repair, safety inspection, and disassembly of the treatment center. He or she conducts biofilm removal when necessary. He or she has been trained by the manufacturer or a certified partner. As a technical professional, he or she has knowledge of mechanics, electrical engineering, electronics, and information technology and is familiar with medical technical requirements. Knowledge of technical English is recommended.
1.14 Obligation to notify authorities
In the European Union, operators or users must report all serious events related to medical devices to the competent authority of the Member State in which they are established.
1.15 Formats and symbols used
The formats and symbols used in this document have the following meaning:
Prerequisite
1. First action step
2. Second action step or
➢ Alternative action
Result
➢ Individual action step
see “Formats and symbols used [→ 15]”
● List
"Command / menu item"
Request for action.
Identifies a reference to another text passage and specifies its page number.
Identifies a list.
Indicates commands, menu items or quotations.
Dentsply Sirona Instructions for Use Treatment Center Axano 1 General information 1.14 Obligation to notify authorities 67 17 396 D3685 D3685.201.01.04.02 2023-06 15
2 Safety notices
2.1 Identification of danger levels
To prevent personal injury and material damage, please observe the warning and safety information provided in these operating instructions. Such information is highlighted as follows:
DANGER
An imminent danger that could result in serious bodily injury or death.
WARNING
A possibly dangerous situation that could result in serious bodily injury or death.
CAUTION
A possibly dangerous situation that could result in minor or moderate bodily injury.
NOTICE
A possibly harmful situation which could lead to damage of the product or an object in its environment.
IMPORTANT
Application instructions and other important information.
Tip: Information on making work easier.
2.2 Information on the unit
Accompanying documents
This symbol can be found next to the rating plate on the unit.
Meaning: Observe the Operating Instructions when operating the unit.
This symbol can be found on the rating plate on the unit.
Meaning: The accompanying documents are available on the manufacturer's homepage.
Electrostatic discharge (ESD) Connector pins or sockets bearing ESD warning labels must not be touched or interconnected without ESD protective measures. See also ‘Electrostatic discharge’ [→ 21] and ‘Electromagnetic compatibility’ [→ 20]
2 Safety notices 2.1 Identification of danger levels Dentsply Sirona Instructions for Use Treatment Center Axano 16 67 17 396 D3685 D3685.201.01.04.02 2023-06
2.3 On-site installation
The on-site installation must be carried out according to our requirements. The details are described in the document "Installation requirements" REF 67 21 836.
2.4 Installation of the treatment center
Installation must be carried out by authorized personnel according to the installation instructions.
2.5 Media quality
The air and water supplies must meet the requirements specified in the installation requirements.
To ensure compliance with the medical and national legal requirements for water from treatment centers, the treatment center must be equipped with a disinfection system.
As the operator of the treatment center, you are generally responsible for the water quality.
The bacterial count must comply with the national regulations for drinking water and must not exceed 500 CFU/ml under any circumstances (CFU: colony forming unit).
If the bacterial count is too high, the building water system must be checked and the cause of contamination eliminated. It may be necessary to install an external system for self-contained water supply or reprocessing of the process water.
Before installation of the treatment center, an acceptable microbiological water quality for the domestic water supply must be ensured and documented in the form of the bacterial count. Sampling and bacterial counts should be performed by a competent laboratory.
DANGER
Risk of infection and poisoning
Poor water quality in the public water supply can lead to infections and poisoning. Dentsply Sirona cannot influence the water quality. The operator is responsible for water quality. Test the water quality from the treatment center at regular intervals and after it has not been used for >1 week, see "Microbiological water test" [→ 203].
Please contact your specialized dealer or your dental association for the respective national requirements and measures.
For immunosuppressed patients, please note the section "Contraindication“ [→ 13]
2.6 Connection to the public drinking water system
The treatment center complies with the requirements of EN 1717 (free discharge with an isolation distance ≥ 20 mm) and of the DVGW German Gas and Water Association). It is intrinsically safe in accordance with worksheet W540 and therefore fulfills, among others, the W270 requirements as well as the requirements for plastics used in
Dentsply Sirona Instructions for Use Treatment Center Axano 2 Safety notices 2.3 On-site installation 67 17 396 D3685 D3685.201.01.04.02 2023-06 17
the transport of drinking water. It can be connected directly to the public drinking water supply.
The treatment center bears the DVGW label.
Always adhere to the national requirements with regard to connecting treatment centers to the public drinking water supply.
2.7 Maintenance and repair
Authorized technical personnel and spare parts
As manufacturers of dental medical units and in the interest of the operational safety of your system, we stress the importance of having maintenance and repair of this unit performed only by ourselves or by agencies expressly authorized by us. Furthermore, failed components must always be replaced with original spare parts.
We suggest that you request a certificate showing the nature and extent of the work performed from those who carry out such work; it must contain any changes in rated parameters or working ranges (if applicable), as well as the date, the name of the company and a signature.
Maintenance intervals Despite the outstanding quality of your treatment center and regular care by the practice team, in the interest of operational safety, it is essential to have preventive maintenance performed at scheduled intervals.
DANGER
In order to ensure the operational safety and reliability of your treatment center and to avoid damage due to natural wear, as the system owner you must have your system checked regularly by an authorized service technician from your dental depot. Furthermore, safety checks must be performed. Please contact your dental depot to obtain a maintenance offer. For more information, please refer to "Maintenance by the service engineer" [→ 274].
2.8 Trouble-free operation
This unit may only be used in proper working condition. If trouble-free operation cannot be ensured, e.g., due to malfunctions, noticeable or different noises, or damage, the unit must be taken out of service, checked by authorized technicians for malfunctions and, if necessary, repaired or replaced.
WARNING
If the display malfunctions or the Smart Touch or cannot be used, the center may not be used for treatment. Please inform your service technician.
2.9 Vacuum system
The suction removal of aluminum and other metal oxides from blasting devices via the amalgam separator and the automatic separator installed in the treatment center is prohibited! This would cause extreme wear and clogging of the suction and water lines. A separate vacuum
2 Safety notices 2.7 Maintenance and repair Dentsply Sirona Instructions for Use Treatment Center Axano 18 67 17 396 D3685 D3685.201.01.04.02 2023-06
system must be used in connection with metal oxide blasting devices. Otherwise, only water soluble blasting material may be used.
Treatment centers equipped with a central standard wet suction are generally suitable for suction removal of the above material. However, make sure to observe the instructions provided by the manufacturer of your suction system.
No restrictions apply when using salt blasting devices in connection with Dentsply Sirona treatment centers. However, in such cases, make sure that the system is subsequently flushed with an adequate amount of water.
2.10 Patient chair
CAUTION
Please observe the maximum load capacity of 185 kg (407.9 lbs) for the patient chair.
The maximum permitted load capacity is indicated on a label next to the rating plate of the treatment center.
The weight distribution complies with ISO 7494-1. The mechanical stability is tested with a multiple safety factor acc. to IEC 60601-1.
The maximum permissible weight of accessories mounted on the patient chair is 5 kg (11 lbs).
2.11 Intermittent operation
The motors of the treatment center and of the treatment instruments are designed for intermittent operation corresponding to the mode of dental treatment.
CAUTION
Drive motors for raising the patient chair and backrest: max. 6 % duty cycle (max. 25 s "ON" / 400 s "OFF")
2.12
Service life of Dentsply Sirona instruments
Please refer to the specific instrument Instructions for Use for service life.
2.13 Care, cleaning, and disinfecting agents
Unsuitable care and cleaning agents or disinfectants may corrode the surface of the unit or accessories or impair functioning.
DANGER
Use only care, cleaning, and disinfecting agents approved by the manufacturer. For more information, please refer to the section "Care, cleaning, and disinfecting agents" [→ 202]
Dentsply Sirona Instructions for Use Treatment Center Axano 2 Safety notices 2.10 Patient chair 67 17 396 D3685 D3685.201.01.04.02 2023-06 19
2.14 Care and cleaning instructions for the practice team
DANGER
Inappropriate care and cleaning of the device can result in malfunction or damage. Qualified personnel must be trained in the handling of medical devices.
2.15 Modifications and extensions of the system
Use only original Dentsply Sirona parts or parts approved by Dentsply Sirona. Safe operation is not guaranteed for parts that have not been approved by Dentsply Sirona. In the event of unintended modifications, Dentsply Sirona is not liable for resulting damages.
DANGER
All devices connected to this product must comply with the applicable standards:
• IEC 60601-1, Medical electrical equipment
• IEC 60950-1, Information technology equipment
• IEC 62368-1, Audio/video, information and communication technology equipment
2.16 Cybersecurity
The treatment center is protected against security threats from the network by the following features:
● connections are encrypted with SSL/TLS and are only established with a valid certificate
● connections must be allowed by the user on the Smart Touch
● only software signed by Dentsply Sirona can be installed on the treatment center
Despite these measures, we recommend:
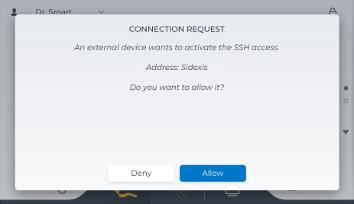
● only allow devices that you know to establish a connection to the treatment center (Connection request on the Smart Touch)
● restrict physical access to the IT infrastructure of your practice or clinic and the treatment center
● have your internal network reviewed by a data processing specialist regarding cybersecurity
2.17 Electromagnetic compatibility
Medical electrical devices are subject to special precautionary measures with regard to electromagnetic compatibility (EMC). They must be installed and operated as specified in the document "Installation Requirements".
Portable HF communication equipment (including its accessories), as well as diathermy and HF surgical devices should not be used in the
2 Safety notices 2.14 Care and cleaning instructions for the practice team Dentsply Sirona Instructions for Use Treatment Center Axano 20 67 17 396 D3685 D3685.201.01.04.02 2023-06
vicinity of the treatment center. Non-compliance can lead to a reduction in the performance features of the treatment center.
Sivision View and USB interface
The presence of electromagnetic interference in the vicinity of the treatment center may cause image interference and interruptions in the data transmission via the USB interface to the PC. In such cases, repeat the image recording or other operations.
In the event of strong interference, it may be necessary to restart the PC and treatment center. Therefore, do not use the PC for controlling other devices that perform essential tasks.
Wireless foot control
WARNING
The wireless foot control may interfere with other devices in the same frequency band (2.4 GHz) or receive interfering signals from them. The safe condition of the treatment center is guaranteed even if the wireless transmission is compromised.
2.18 Electrostatic discharge
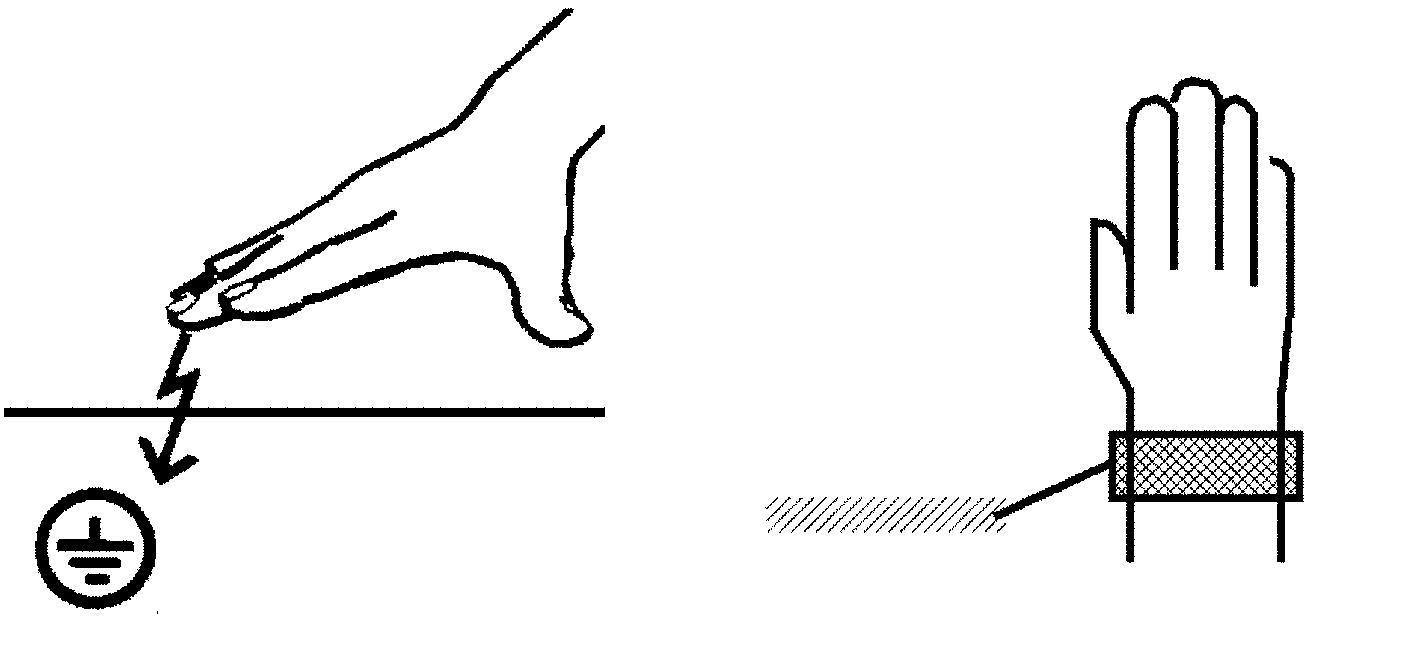
ESD stands for Electro Static Discharge
Electrostatic discharge from people can damage electronic components when the components are touched. Damaged components usually have to be replaced. Repairs must be performed by qualified personnel.
Measures to protect against ESD include:
● Procedures to avoid electrostatic charging via
– air conditioning
– air humidification
– conductive floor coverings
– non-synthetic clothing
● Discharging the electrostatic charges from your own body through contact with
– a metallic unit casing
– a larger metallic object
– any other metal part grounded with the protective ground wire
● wearing an antistatic band that creates a connection between the body and a protective ground wire
Areas at risk are indicated on the unit with the ESD warning label.
2.19 Dismantling/Installation
When dismantling and reinstalling the unit, proceed according to the installation instructions for new installation in order to guarantee its functioning, stability and safety.
Dentsply Sirona Instructions for Use Treatment Center Axano 2 Safety notices 2.18 Electrostatic discharge 67 17 396 D3685 D3685.201.01.04.02 2023-06 21
3 Unit description
3.1 Operating principle
The device is designed to bring a patient into an ergonomic and comfortable position to perform dental treatment procedures.
Patient chair
For this purpose, the patient chair can be brought into an appropriate position, either by activating the chair positioning motors or by recalled programmed positions set by the user.
Headrest
The headrest is to be adjusted manually or motor-driven according to patient height and the area in the patient’s oral cavity to be treated. The headrest can be moved via the Smart Touch, via fixed keys of the assistant element, a 4-way switch at the back side of the headrest or the 4-way foot switch. The motor-driven headrest allows the following adjustments: extension/retraction to adapt to the patient’s stature, tilting for maxillary/mandibular treatment. Also a mechanical adjustment of headrest tilt is possible.
Moreover the removable head pad with magnetic holder allows shifting/ rotation of the head support.
Foot control
The instruments of the dentist element are activated via the pedal of the foot control. The speed or intensity of the instrument can be controlled via the pedal position. Additional elements on the foot control allow most chair and instrument related functions to be operated hands-free. The foot control is also available with wireless transmission.
Instruments
The treatment is performed by the instruments placed in the designated instrument holders. The required parameters (e.g. speed, intensity, torque, cooling media) can be adjusted on the user interface or recalled from settings programmed by the user beforehand. After taking an instrument from its respective holder, it can be activated via the foot control.
To place dental hand instruments and materials required during treatment tray surfaces are provided.
Suction system
To dispose fluids and particles deriving from the oral cavity during treatment, suction hoses with attached handpieces are provided on the assistant element. According to the suction system provided by the user, picking the suction handpieces activates the vacuum.
Cuspidor bowl
For disposal also a cuspidor bowl is available. The cuspidor can be manually swilled towards the patient chair. The cuspidor bowl automatically returns beforehand to ensure that the patient does not collide with it during chair movements.
3 Unit description 3.1 Operating principle Dentsply Sirona Instructions for Use Treatment Center Axano 22 67 17 396 D3685 D3685.201.01.04.02 2023-06
Operating light
An operating light providing illumination to the oral cavity can be switched via the Smart Touch or is operated automatically in accordance to preset adjustments in connection with the preprogrammed chair positions.
Operation via Smart Touch and foot control
Most chair and instrument related functions can be activated hands-free via foot control. The foot control is also available with wireless transmission. The Smart Touch style user interface applies contextsensitivity; i.e. according to the actual operational state, varying buttons and functions are displayed and provided for use.
Water unit
Prescribed procedures and supporting components apply to facilitate infection control and maintaining water quality, such as automated suction hose and instrument hose purge, automatic dosage of waterline disinfection and suction cleaning agents, integrated cleaning adapters for hoses. Water supply is also possible using self-containing systems.
Therapy packages
Therapy packages consisting of an endodontic and/or implantology function can optionally be integrated into the device. The therapy packages include an electronic torque limitation, as well as libraries of the most common file and implantology systems with torque settings for the various instruments.
Apex Locator
The Apex Locator can be used to measure the working length of the root canal file in endodontic treatments using electrical impedance. A distance display on the Smart Touch of Treatment Center shows the distance from the root canal file to the physiological apex (apical constriction).
Peristaltic pump
Also a peristaltic pump and a NaCl bottle holder can be attached to the dentist element. The peristaltic pump prepares a sterile saline solution instead of spray water for cooling.
Dentsply Sirona Instructions for Use Treatment Center Axano 3 Unit description 3.1 Operating principle 67 17 396 D3685 D3685.201.01.04.02 2023-06 23
3.2 Standards/Approvals
The Axano treatment center complies with the following standards, among others:
● IEC 60601-1 (electrical, mechanical, and software safety)
● IEC 80601-2-60 (safety of dental equipment)
● IEC 60601-1-2 (electromagnetic compatibility)
● IEC 62366-1 (usability)
● IEC 62304 (software process)
● ISO 7494-1 (dental treatment units)
● ISO 7494-2 (dental treatment units, water and air supply)
● ISO 9680 (operating light)
● ISO 10993-1 (biocompatibility)
● ISO 11143 (amalgam separator), see also below (provided amalgam separator option is available)
● ISO 17664-1 (hygiene)
● EN 1717 (connection to the drinking water system), see also below and section “Connection to the public drinking water supply” [→ 17]
Original language of this document: German
This product bears the CE marking in accordance with the provisions of the Regulation (EU) 2017/745 of April 5, 2017 concerning medical devices.
This product is a medical device.
The treatment center complies with the requirements of the RoHS Directive 2011/65/EU.
The treatment center meets the requirements of CAN/CSA-C22.2 No. 60601-1 And AAMI/ANSI ES 60601-1.
The amalgam separator achieves a separation efficiency of > 95%. The unit thus fulfills the requirements of ISO 11143. Separating procedure type 1: Centrifuge system
The amalgam separator is approved by the German Institute for Building Technology (DIBt).

The treatment center complies with the technical regulations and requirements on safety and hygiene for connection to the public drinking water supply. The unit is certified according to the requirements of the German Technical and Scientific Association for Gas and Water (DVGW). It is intrinsically safe in accordance with worksheet W540. The unit thus also meets the requirements of standard EN 1717; see also
3 Unit description 3.2 Standards/Approvals Dentsply Sirona Instructions for Use Treatment Center Axano 24 67 17 396 D3685 D3685.201.01.04.02 2023-06
0123

the chapter entitled "Connection to the public drinking water system" [→ 17].
The wireless modules in the wireless foot control and in the treatment center meet the requirements of the RED Directive 2014/53/EU.
Standards:
● EN 62368-1, EN 62479
● EN 301489-1, EN 301489-17, ETSI EN 300328
The BlueMod+S42 wireless module used is a qualified design according to the Bluetooth Qualification Program Reference Document (PRD)
V2.3 (Declaration ID D032121, Qualified Design ID 88139).
EU Type Examination Certificate No. T818775M-01-TEC
The wireless modules meet the requirements of the Federal Communications Commission (Part 15 of the FCC Rules).
FCC ID of the foot control modules: RFRMS42
FCC ID of the WLAN module: TE7WN725N
Industry Canada The wireless modules meet the requirements of Industry Canada (RSS210).
IC ID of the foot control modules: 4957A-MS42
IC ID of the WLAN module: 8853A-WN725N
Dentsply Sirona Instructions for Use Treatment Center Axano 3 Unit description 3.2 Standards/Approvals 67 17 396 D3685 D3685.201.01.04.02 2023-06 25
3.3 Technical data
Model designation: Treatment Center Axano
Power connection: 100 – 240 V AC ± 10 % 50/60 Hz
Permanently connected unit
Nominal current: 6 – 2.5 A plus max. 6 A for external devices
Type of ground connection: TN-C-S system or TN-S system (acc. to IEC 60364-1)
Overvoltage category: 2 acc. to IEC 60664-1
Average power consumption (for dimensioning an air conditioning system): 0.11 kW
Power consumption in Standby mode: 3 W
Main building fuse: Automatic circuit breaker type B 100 – 115 V AC: 20 A medium time-lag 220 – 240 V AC: 16 A medium time-lag
Protection class: Class Idevice
Device class according to Regulation (EU) 2017/745: Class IIa device
Accessory according to Regulation (EU) 2017/745: None
Degree of protection against electrical shock:
Degree of protection against ingress of water:
Type B applied parts
External intraoral camera SiroCam AF+. Namely:
Applied part type BF
Ordinary equipment (without protection against ingress of water)
The foot control is protected against dripping water according to IP X1.
Mode of operation: Continuous operation with intermittent loading corresponding to the dental mode of working. [→ 19]
Transportation and storage conditions
Temperature: -40 °C – +70 °C (-40 °F – 158 °F)
Relative humidity: 20% – 85% Air pressure: 500 hPa – 1060 hPa
3 Unit
3.3 Technical data Dentsply Sirona Instructions for Use Treatment Center Axano 26 67 17 396 D3685 D3685.201.01.04.02 2023-06
description
-40 +70 1060 500 85 20 WARNING
WARNING
Operating conditions
Ambient temperature: 10 °C – 40 °C (50 °F – 104 °F)
Relative humidity: 30% – 85%, no condensation Air pressure: 700 hPa – 1060 hPa
Installation location: ≤ 3000 m above sea level
Operation is not permitted in mobile vehicles.
WARNING
This treatment center is not suitable for operation in areas subject to explosion hazards.
Pollution degree: 2 acc. to IEC 60664-1
Tests/Approvals: See "Standards/Approvals“ [→ 24]
Date of manufacture: on the rating plate
Foot control wireless interface
Model name: BlueMod+S42
Frequency: 2.4 – 2.480 GHz
Transmitting power: < 2 mW (short-range device)
Modulation type: GFSK
Range: approx. 10 m
Approval: See "Standards/Approvals“ [→ 24]
WLAN interface
The WLAN interface is available only to the service technician and is automatically deactivated at the end of the day.
Power: max. 240 mW
Wireless Standard: IEEE 802.11b/g/n
Modulation type: DBPSK, DQPSK, CCK, OFDM, 16-QAM, 64QAM
Frequency: 2,412 – 2,462 GHz
Range: approx. 30 m
The WLAN interface use WPA2 as encryption.
Dentsply
Instructions for Use Treatment Center Axano 3 Unit description 3.3 Technical data 67 17 396 D3685 D3685.201.01.04.02 2023-06 27 +10 +40 1060 700 85 30
Sirona
3.4 System overview
The treatment center comprises the following main components:
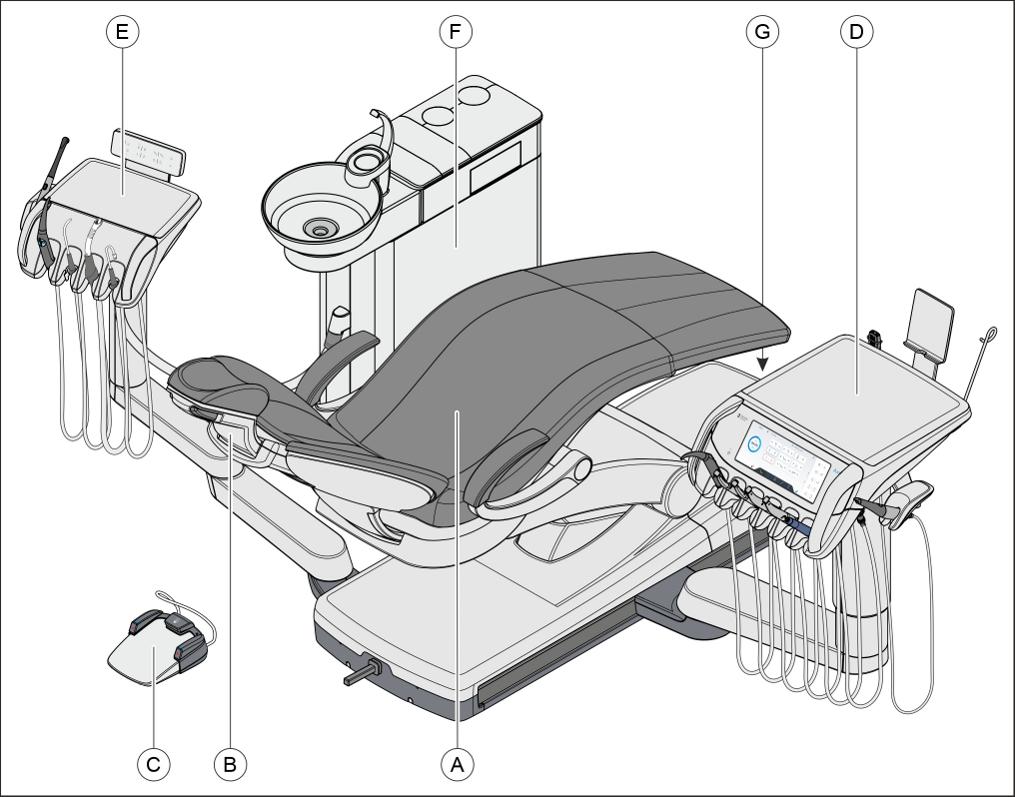
3 Unit description 3.4 System overview Dentsply Sirona Instructions for Use Treatment Center Axano 28 67 17 396 D3685 D3685.201.01.04.02 2023-06
A
B
C
D
E
F
G
Patient chair
Motorized headrest
Smart Control (depicted) or Classic foot control
Dentist element
Assistance element
Water unit
External device connection and power switch
3.5 Patient chair
The patient chair features a variety of adjustment options to optimally adapt the patient's position for the given treatment.
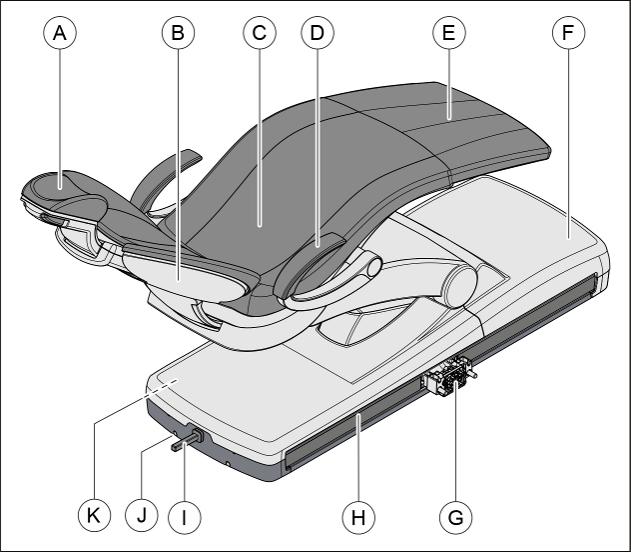
A Motorized headrest
B Backrest
C Seat
D Armrest
E Footrest
F Chair base
G Flange on the dentist element sliding track
H Ambient Light on the sliding track (optional)
I 4-way foot switch
J Foot control connector (optional)
K Rotary joint for assistant element (concealed)
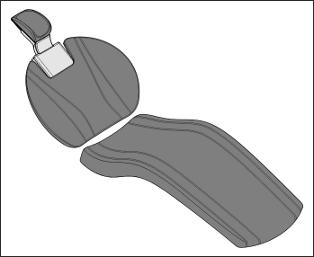
The patient chair can be equipped with lounge upholstery featuring enhanced comfort and double seams. The lounge upholstery has no footrest; the padded surface is continuous.
Dentsply Sirona Instructions for Use Treatment Center Axano 3 Unit description 3.5 Patient chair 67 17 396 D3685 D3685.201.01.04.02 2023-06 29
3.6 Motor-driven headrest
The headrest allows for the following adjustment options:
● Motorized extension/retraction to adapt to the patient's height
● Motor-driven tilting for maxillary/mandibular treatment
● Manual tilting via quick mechanical adjustment
● Shifting/rotation of the head support via the magnetic holder
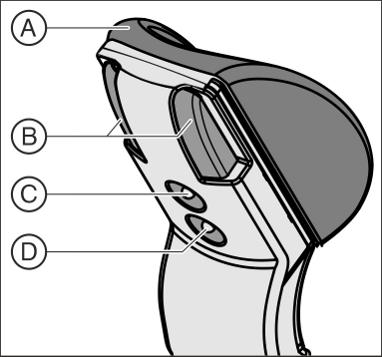
A Removable head pad with magnetic holder
B Quick mechanical adjustment of headrest tilt
C Upper 4-way switch for headrest functions
D Lower 4-way switch for chair functions
With Sidexis 4, the last set height of the motorized headrest can be saved and then automatically reset when the patient is logged in again.
For details, see "Adjusting the motorized headrest" [→ 67]
3 Unit description 3.6 Motor-driven headrest Dentsply Sirona Instructions for Use Treatment Center Axano 30 67 17 396 D3685 D3685.201.01.04.02 2023-06
3.7 Foot control
The foot control enables hands-free control of the treatment center. Via the integrated cursor control, virtually all functions of the treatment center can also be controlled via the foot control as an alternative to the Smart Touch.
The foot control transmits the signals to the treatment center wirelessly. Power is supplied by a battery, see "Changing the battery of the wireless foot control" [→ 271]. Optionally, the Smart Control can be used with a cable connection. The Classic foot control is available only as a wireless foot control.
3.7.1 Smart Control
The left and right buttons (B) and (D) can be moved vertically from up to down and horizontally from out to in. When activating the middle button (C), there is a difference between pressing and holding.
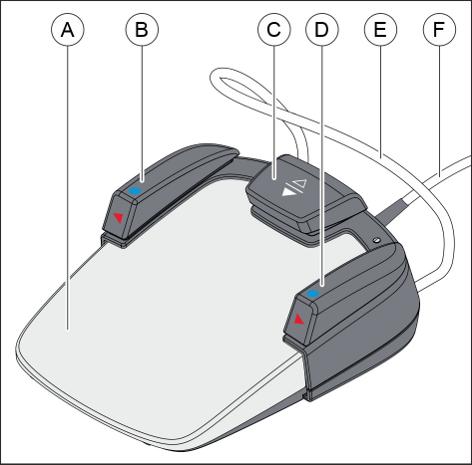
A Foot pedal as foot control switch or direct starter
B Left key (program key S or Spray) Left swivel key for cursor control
C Middle button for cursor control
D Right button (program key 0 or chip blower) Right swivel button for cursor control
E Positioning bar
F Connection cable (optional)
Dentsply Sirona Instructions for Use Treatment Center Axano 3 Unit description 3.7 Foot control 67 17 396 D3685 D3685.201.01.04.02 2023-06 31
3.7.2 Classic foot control
The foot control has a left and right key (B) and (D). The 4-way control plate (C) is activated by moving it to the left/right and up/down.
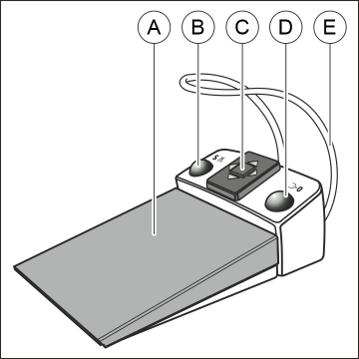
A Foot pedal as foot control switch or direct starter
B Left key (program key S or spray)
C 4-way foot control plate for cursor control
D Right key (program key 0 or chip blower)
E Positioning bar
3
3.7 Foot control Dentsply Sirona Instructions for Use Treatment Center Axano 32 67 17 396 D3685 D3685.201.01.04.02 2023-06
Unit description
3.8 Dentist element
All functions of the treatment center can be controlled via the Smart Touch control panel on the dentist element. The dentist element is moved along the motorized Smart Delivery sliding track.
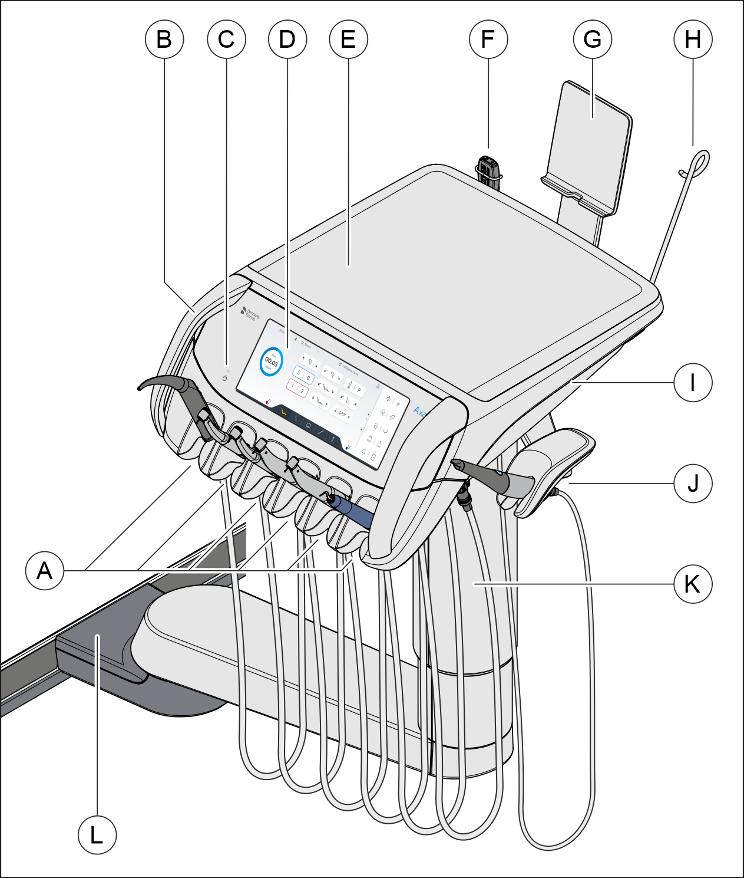
A Removable instrument holder (max. 6 instruments)
B Removable handles (left/right)
C Standby switch
D Smart Touch for display and operation
E Skid-proof silicone mat
F Holder for the adapter of the integrated ApexLocator (optional)
G Magnetic holder for a smart device (depicted) or panoramic X-ray viewer (both optional)
H Removable NaCI bottle holder (optional)
I Ambient Light (optional)
J Side holder for intraoral camera (optional)
K Height-adjustable support arm or support arm with motorized height adjustment
L Slide of motorized sliding track
Dentsply
Instructions for Use Treatment Center Axano 3 Unit description 3.8 Dentist element 67 17 396 D3685 D3685.201.01.04.02 2023-06 33
Sirona
Position 1
Position 2
Sprayvit
BL E motor
BL ISO F motor
Turbine hose
SiroSonic TL Camera
3.8.1 Instrument positions
The following instrument position assignments are possible on the dentist element:
Position 3
BL E motor
BL ISO F motor
Turbine hose
Position 4
BL E motor
BL ISO F motor
Turbine hose
SiroSonic TL
Position 5
BL E motor
BL ISO F motor
Turbine hose
SiroSonic TL
Position 6 At the side of the dentist element
SiroSonic TL Camera Camera
Maximum two SiroSonic TLs can be connected.
Maximum one camera can be connected.
The BL Implant E motor is connected at the underside of the dentist element to a dedicated flange and placed on a silicone holder for sterile instruments on the dentist element.
3.8 Dentist element Dentsply Sirona
Use
Axano 34 67 17 396 D3685 D3685.201.01.04.02 2023-06
3 Unit description
Instructions for
Treatment Center
3.8.2 Smart Touch user interface
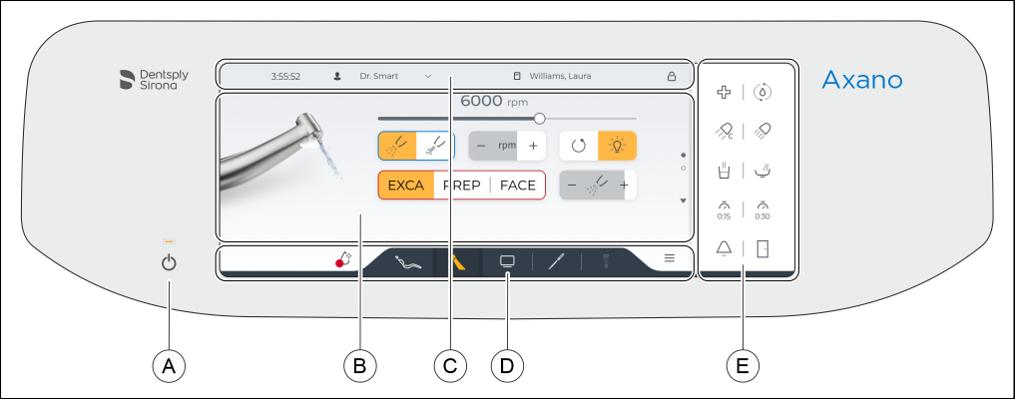
A Standby switch
B Dialog area
Shows the main dialogs and their extensions. The functions keys displayed depend on the operating context.
C Header
Time, name of current user, name of patient registered in Sidexis 4, lock symbol to lock the Smart Touch for cleaning the surface
D Footer
Dialog change keys, drop symbol to activate the hygiene cockpit, setup symbol for messages and settings
E Fixed keys
These functions can always be selected regardless of the operating context.
Dentsply Sirona Instructions for Use Treatment Center Axano 3 Unit description 3.8 Dentist element 67 17 396 D3685 D3685.201.01.04.02 2023-06 35
3.9 Assistant element
The functional scope of the assistant element is adapted to the dental assistant's field of activity. It can, however, also be positioned so as to enable unassisted treatment by the dentist.
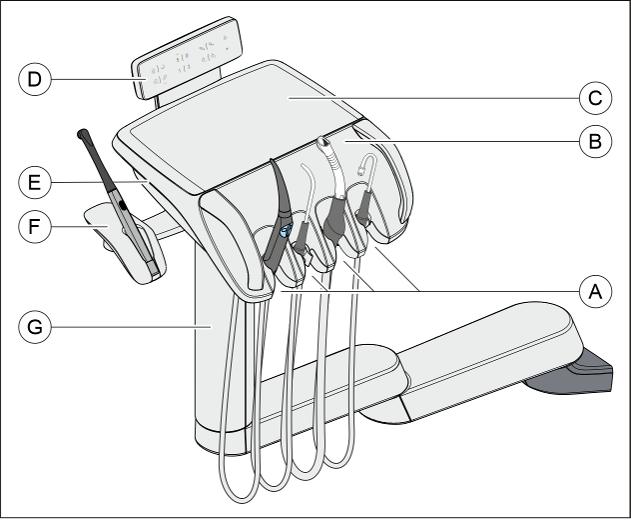
A Holders 1 to 4 (from left to right) for instruments
B Removable instrument holder
C Skid-proof silicone mat
D User Interface
E Ambient Light (optional)
F Side holder for curing light (optional)
G Support arm, height adjustable by service technician
3 Unit
3.9 Assistant element Dentsply Sirona Instructions for Use Treatment Center Axano 36 67 17 396 D3685 D3685.201.01.04.02 2023-06
description
3.9.1
Instrument positions
The following instrument position assignments are possible on the assistant element:
Position 1
Sprayvit
Position 2
Sprayvit
Surgical suction
2nd large suction device
3.9.2
Position 3
Position 4 At the side of the assistant element
Suction device Saliva ejector SmartLite Pro holder
Maximum one Sprayvit can be connected.
The SmartLite Pro curing light is battery operated. There is no power connection to the treatment center.
On the underside of the assistant element, a medical power supply for Type BF applied parts is available (12 V DC, max. 1 A), e.g. for supplying light for a suction handpiece.
User interface

3.9.3 Fixed keys on the assistant element
For a more detailed description of the fixed key functions, see "Fixed keys on the assistant element" [→ 136].
Tumbler filling
On/Off
Cuspidor flushing
On/Off
Composite function
Switches the composite function for the operating light on/off. This function can delay the curing of composite materials.
Operating light
On/Off
Chair program S
Mouth rinsing position with last-position memory function (programmable)
Dentsply
Instructions for Use Treatment Center Axano 3 Unit description 3.9 Assistant element 67 17 396 D3685 D3685.201.01.04.02 2023-06 37
Sirona
Chair program 0
Entry/exit position (programmable)
Chair programs 1 and 2 (programmable)
Headrest
Moves the motorized headrest in/out to adjust the patient's height.
Timer function
Starts the timer on the assistant element. The timers on the assistant element are preset in the setup dialog, see "SettingsOperation/Timer [→ 178]".
Bell
Freely available relay 240 VAC, 6 A (connected by the service technician)
This function can be preset as a button or a switch in the setup dialog, see "Maintenance/Device settings [→ 191]/Bell relay mode".
Function key
The function of the starkey on the assistant element can be configured in the setup dialog, see "Settings/Operation [→ 175]/Assistant: Function key".
3 Unit description 3.9 Assistant element Dentsply Sirona Instructions for Use Treatment Center Axano 38 67 17 396 D3685 D3685.201.01.04.02 2023-06
3.10 Water unit
The water unit is equipped with a disinfection system. In normal operation, this will automatically inoculate the water that comes in contact with the patient (also called treatment water) with a disinfectant for the water lines. The disinfection system can be used to sanitize the water lines, see "Sanitizing the treatment center" [→ 263]
DANGER
Microorganisms can multiply in the water. These microorganisms could be a health risk.
➢ Never operate the treatment center without the disinfectant for the water lines.
The water unit can be optionally equipped with an automatic separator (separation of suction air and waste water) combined with an amalgam separator/sediment container or with a standard wet suction.
Sanitization adapters for water-carrying instruments and suction hoses are integrated in removable cartridges in the top cover of the water unit. The dentist element and assistant element instruments are plugged into these adapters on both sides of the water unit. The openings are covered with flaps. The sanitization adapters are required for sanitizing the treatment center and automatic purge of the water lines (autopurge); the suction hose adapters for chemical suction hose cleaning.
To clean the suction system, water is pumped into a tank behind the suction hose intake and suctioned off from there. A cleaning agent is automatically added to the water. For more information, see "Cleaning the suction hoses" [→ 238]
Dentsply Sirona Instructions for Use Treatment Center Axano 3 Unit description 3.10 Water unit 67 17 396 D3685 D3685.201.01.04.02 2023-06 39
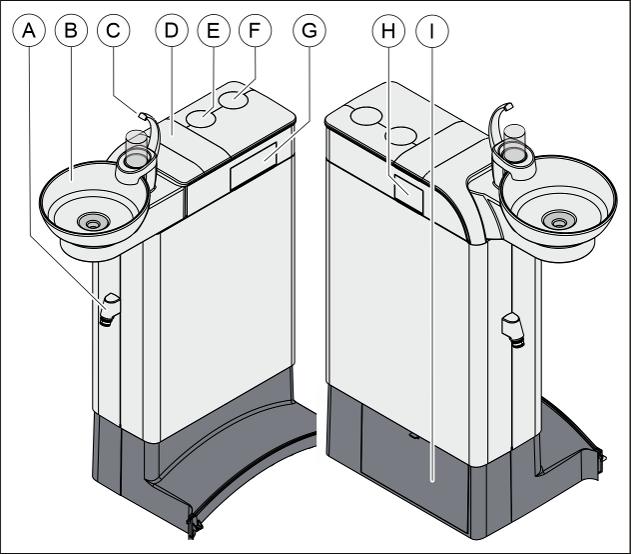
A Suction hose connection for assistant element
B Swiveling cuspidor
C Tumbler filling (depicted) or tumbler filling with automatic sensor control for automatic tumbler filling
D Cover of the storage tank for the disinfectant for the water lines or for the self-contained water supply
E Mount for support arm of the operating light and monitor
F Mount for tray support arm
G Sanitization adapter for water-carrying instruments of the dentist element for sanitizing and autopurge
H Adapters for the suction hoses to conduct suction hose cleaning
I Maintenance flap for accessing the cleaning agent tank for chemical suction hose cleaning, the cuspidor flushing valve, the potentiometer of the automatic sensor control, the amalgam separator or sediment container, or filter insert for standard wet suction
3 Unit
3.10 Water unit Dentsply Sirona Instructions for Use Treatment Center Axano 40 67 17 396 D3685 D3685.201.01.04.02 2023-06
description
3.11
External device connection
DANGER
External medical additional devices can be connected to the external device connection. They must comply with the requirements of IEC 60601-1.
NOTICE
While adding disinfectant to the water, additional devices are exposed to a hydrogen peroxide concentration (H2O2) of up to 0.5‰ at the external device connection.
If the additional devices are not suitable for the specified hydrogen peroxide concentration, they may be damaged.
➢ Before connecting any additional devices, check to make sure that they can be exposed to this hydrogen peroxide concentration. Contact the manufacturer of the relevant additional device, if necessary.
WARNING
➢ Prior to sanitization, additional devices must be unplugged from the external device connection (water connection), see "Sanitizing the treatment center" [→ 263]
IMPORTANT
DVGW approval
Due to the design of the treatment center according to EN 1717 (DVGW requirements), the connected additional devices also fulfill the requirements of the above standards, see "Standards and Approvals" [→ 24]
DANGER
Self-contained power supply in standby mode
The IEC socket and connections for air and water are switched off with the power switch. The IEC socket is live in standby mode. The connected external devices must therefore have their own power switch. However, the air and water connections are switched off in standby mode.
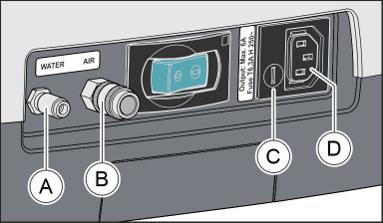
Dentsply Sirona Instructions for Use Treatment Center Axano 3 Unit description 3.11 External device connection 67 17 396 D3685 D3685.201.01.04.02 2023-06 41
A Quick coupling for water B Quick coupling for air
C Fuse for IEC socket (6.3 A slow-blow)
D IEC socket with power supply (max. 6 A)
IMPORTANT
Media removal at the external device connection can reduce the performance of integrated consumers, e.g., the filling quantity of the tumbler or the high-speed handpiece. Integrated consumers can also reduce the pressure at the external device connection.
device
Dentsply Sirona Instructions for Use Treatment Center Axano 42 67 17 396 D3685 D3685.201.01.04.02 2023-06
3 Unit description 3.11 External
connection
Pressure Flow rate Water 2 to 3 bar max. 300 ml/min Air 4.7 ± 0.5 bar max. 70 Nl/min
3.12 Digital services
We recommend connecting the treatment center to the internet via the practice network. Only this ensures that you can utilize the full potential of your new treatment center.
Firmware updates
The latest firmware updates and upgrades of treatment databases are available at all times through the internet connection.
Features on demand
New functions can be activated quickly and easily directly via the internet connection of the treatment center using an activation code.
Remote diagnosis
If servicing is needed, you can get remote support quickly and easily through access to the device status, the service codes, and service history.
Service software
The service software is a PC application for your technician and your practice. It facilitates access to the treatment center, creates transparency, and supports your technician for troubleshooting. If the software is installed on a practice PC, you can view the device status of your treatment center at any time.
Sivision View
Sivision View is a PC application that allows camera images to be exported to Sidexis 4 and the playback and control of media via the user interface of the treatment center. In addition, the following functions are included: Visualization of the Apex function on the patient monitor, implant terminal and implant report, automatic headrest adjustment and patient-specific chair programs.
Dentsply Sirona Instructions for Use Treatment Center Axano 3 Unit description 3.12 Digital services 67 17 396 D3685 D3685.201.01.04.02 2023-06 43
3.13 Combination with other devices
Straight and contra-angle handpieces
Straight and contra-angle handpieces are medical devices which are connected to a standardized interface.
Therefore it is not possible to list all possible combinations.
Turbines
Turbines are medical devices which are connected to a standardized interface.
Therefore it is not possible to list all possible combinations.
SmartLite Pro
The SmartLite Pro curing light is a pen-style, LED light polymerization and illumination device for use by dental professionals in dental offices or dental laboratories.
SmartLite Pro will be adapted only mechanically with a holder at the assistant element. It is powered internally.
SmartLite Pro is a product of Dentsply LLC, 38 West Clarke Avenue Milford, DE 19963, USA
EC Rep: Dentsply DeTrey GmbH, De-Trey-Strasse 1, 78467 Konstanz, Germany
SiroCam
SiroCam AF+ is an intraoral camera that generates digital image data with the help of a CMOS sensor. The camera SiroCam AF+ features automatic focus and can thus be used for both intraoral and extraoral images.
Sirocam is a product of Sirona Dental Systems
Suction Cannulas
Cannulas are medical devices which are connected to a standardized interface.
Therefore it is not possible to list all possible combinations.
Tubing set for peristaltic pump
Delivered sterile. Not reusable.
Product of Omnia S.p.A., Via F. Deinovo, 190sx, 43036 Fidenza, Italy
Dentosept
Disinfecting agent. 1.41% hydrogen peroxide solution for disinfecting treatment water in dental treatment units
Dentosept is a product of Alpro medical GmbH; Mooswiesenstraße 9; 78112 St. Georgen; Germany
LEDview Plus
LEDview Plus is used for Illumination of the work area in dental treatment. The LEDview Plus can be operated as a unit model with the
3 Unit description 3.13 Combination with other devices Dentsply Sirona Instructions for Use Treatment Center Axano 44 67 17 396 D3685 D3685.201.01.04.02 2023-06
Axano, Teneo, Sinius range and Intego range treatment centers. The LEDview Plus is attached to the lamp support tube of the treatment center. It is operated via the user interface of the treatment center and the proximity sensor.
LEDview Plus is a product of Sirona Dental Systems
Heliodent Plus
Heliodent Plus adapted to Treatment Center. The TC serves as a mechanical basis for the Heliodent Plus. Heliodent Plus is not controlled via TC
Heliodent Plus is a product of Sirona Dental Systems
Sidexis 4
Sidexis 4 is software that offers functions for the acquisition, administration, analysis, diagnosis, presentation, and transfer of digital or digitized image data, e.g. X-ray images or videos recordings, for medical use, predominantly in dentistry.
Sidexis 4 is a product of Sirona Dental Systems
Dentsply
Instructions for Use Treatment Center Axano 3 Unit description 3.13 Combination with other devices 67 17 396 D3685 D3685.201.01.04.02 2023-06 45
Sirona
3.14 Consumption of water, Dentosept, and the agent for suction hose and cuspidor cleaning
Sirona Instructions for Use Treatment Center Axano
3.14 Consumption of water, Dentosept, and the agent for suction hose and cuspidor cleaning
During treatment and hygiene activities, the treatment center uses water, Dentosept, the agent for disinfecting the water lines, and a cleaning agent for chemical suction hose and cuspidor cleaning.
The following are typical values.
Instruments
To ensure a mixing ratio of 100:1 of water to the agent for disinfecting the water lines (1 liter water, 10 ml Dentosept) in normal operations with a possible deviation of ±30 %, a ratio of 70:1 is set.
Cuspidor flushing
Water 2 l/min
Tumbler filling
Water 0.1 l
Dentosept 1 ml
Chemical suction hose cleaning
Cleaning agent 2 ml at a 2% dosage, can be set from 0 to 5%
Chemical cuspidor cleaning
Cleaning agent 2 ml
Purging water lines
Water 100 ml at 20 s purging time, depending on the handpieces used (2x Sprayvit, 2 drilling handpieces)
Dentosept 1 ml at a 1% setting
Automatically purge water lines (autopurge function)
Water 2.5 l at 2 min purging time, consecutively, not parallel, completely loaded
Dentosept 25 ml at a 1% setting
Sanitizing the water lines
Water 1 l
Dentosept 400 ml
3 Unit
description
46 67 17 396 D3685 D3685.201.01.04.02 2023-06
Dentsply
Water in ml/min Dentosept in ml/min Sprayvit 150 2 Motor and turbine 70 1 Ultrasonic handpiece 100 1.4
4 Operation
4.1 Starting up the treatment center
4.1.1 Switching the treatment center on/off
The treatment center is equipped with a standby system for enhanced convenience when switching it on and off at the dentist element.
The treatment center therefore has a power switch at the base of the chair and a standby switch at the dentist element.
4.1.1.1 Power switch
The power switch connects the treatment center to the power supply. During longer periods of disuse, the treatment center should be disconnected from the power supply. It then no longer consumes any energy.
IMPORTANT
System and data security after a hard shutdown via the power switch or central shutdown
It is generally recommended to switch off the center via the standby switch on the dentist element. Only this allows data to be systematically backed up and systems shut down in an orderly manner.
Hard shutdown can lead to loss of data or integrity errors in the system. After switching on again, a recovery process is started to restore system integrity.
Connecting the treatment center to the power supply
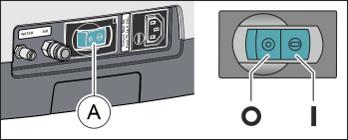
ü The treatment center is installed by authorized technical personnel according to the "Installation instructions".
➢ Turn on the power switch (A)
Ä The treatment center is connected to the power supply.
Disconnecting the treatment center from the power supply
ü The treatment center is powered down, see "Standby switch" [→ 47]
➢ Turn off the power switch (A)
Ä The treatment center is disconnected from the power supply.
4.1.1.2 Standby switch
Switching the treatment center on
The standby switch switches the treatment center from standby mode to operational readiness.
After switching it on, the operating system is booted and an automatic self-test is conducted.
Dentsply Sirona Instructions for Use Treatment Center Axano 4 Operation 4.1 Starting up the treatment center 67 17 396 D3685 D3685.201.01.04.02 2023-06 47
ü The power switch is turned on.
➢ Press the standby switch on the dentist element.
Ä The LED of the standby switch lights up on the dentist element.
Ä The treatment center powers up and establishes operational readiness.
Switching the treatment center to the standby mode
At the end of the working day, the treatment center should be switched off via the standby switch on the dentist element to reduce energy consumption and for safety reasons. Air and water supply and all electronic components are switched off by activating the standby switch. This also applies to the external device connection. Only the standby circuit is still supplied with current. Power consumption in standby mode is approx. 3 W.
➢ Press the standby switch on the dentist element until a beep is heard. Then release the key.

Ä The treatment center saves all data while powering down and switches to standby mode.
Ä The LED of the standby switch on the dentist element goes out.
4.1.1.3 Clinic mode

The power supply unit of the treatment center can be switched to clinic mode by the service technician. This allows several treatment centers to be switched to standby mode via a central switch. After powering down the treatment centers, the adjacent message appears on their Smart Touch. The treatment centers can now be disconnected from the power supply either via the power switch at the base of the chair or a central switch for the clinic. When the treatment centers are reconnected to the power supply, they power up without activating the standby switch and establish operational readiness.
4 Operation 4.1 Starting up the treatment center Dentsply Sirona Instructions for Use Treatment Center Axano 48 67 17 396 D3685 D3685.201.01.04.02 2023-06
4.1.2 Initial startup
Select language and agree to the remote service agreement
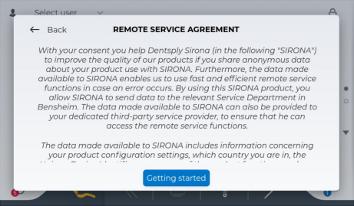
After the first system start or after resetting the treatment center to the factory settings, the language for the user interface must be selected and the remote service agreement and data directive must be agreed to.
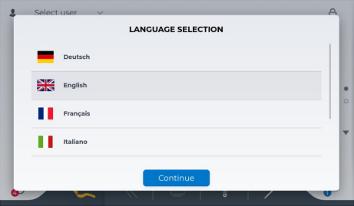

1. Select a language.
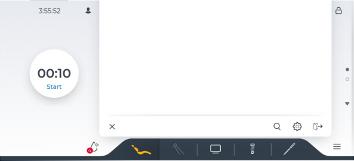

2. Tap on the "Getting started" button to agree to the remote service agreement. For further details, please refer to the section "Usage data [→ 12]".
Registering the treatment center
➢ Have your treatment center registered with Dentsply Sirona by your service technician.
Please note that the full extent of functions of the service software, firmware updates, and license activation are available only if you have agreed to the remote service agreement and your treatment center is registered with Dentsply Sirona, see "Digital services" [→ 43]
Your registration data are displayed in the setup dialog, see "Settings/ Operation/General [→ 169]/Registration" and in the service software when you log in as a practice employee.
Creating a user profile
If a user is not logged in, the treatment center can be used only with a default profile. However, the settings stored there are reset when the treatment center is switched off or a user logs in. You should therefore create a user profile before using the treatment center.
1. Tap on the "Select user" text in the header.
Ä The user selection opens.
2. Tap on the gear icon.
Ä The "User profiles" setup dialog is opened.
Dentsply Sirona Instructions for Use Treatment Center Axano 4 Operation 4.1 Starting up the treatment center 67 17 396 D3685 D3685.201.01.04.02 2023-06 49
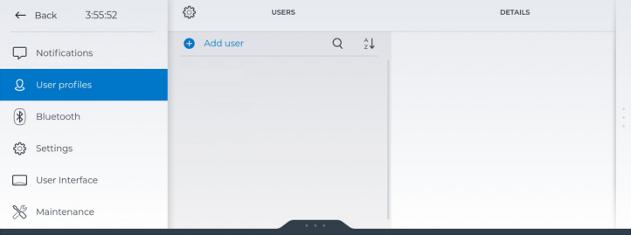
3. Tap on the blue text "Add user".
4. Enter your name and email address. A keyboard appears when you tap on the fields. You may optionally protect your user profile with a password.
5. Tap on the "Back" button at the top left.
Ä Your user profile was created and is active. Your name appears in the header. Changed settings are saved in the user profile.
For further details on this setup dialog, see the section "User profiles [→ 166]".
Registering the wireless foot control
The wireless foot control is connected to the treatment center via the Bluetooth interface. It must be assigned to the treatment center by registering it see "Bluetooth [→ 167]" setup dialog.
Sanitizing the water lines
Prior to initial startup of your treatment center, sanitization must be performed. For sanitizing, the water-carrying lines are filled with the undiluted disinfectant for the water lines.
If the service technician skipped the sanitization procedure after installing your treatment center based on an agreement with you or no sanitization has been conducted for more than one week, please conduct sanitization yourself, see "Sanitizing the treatment center" [→ 263]
Sanitization takes at least 24 hours.
Care and disinfection
Maintain, disinfect and sterilize the treatment center in accordance with the instructions in the section "Care, cleaning and maintenance by the practice team" [→ 198] prior to initial startup and after longer periods of disuse.
The steps for initial startup must be carried out again after a factory reset.
4 Operation 4.1 Starting up the treatment center Dentsply Sirona Instructions for Use Treatment Center Axano 50 67 17 396 D3685 D3685.201.01.04.02 2023-06
4.1.3 Logging user in/out
The active user profile is displayed in the header of the Smart Touch. The user profile used last is automatically loaded when the treatment center is switched on.
Change user profile
1. Tap on the name of the active user profile in the header. Ä The user selection opens.
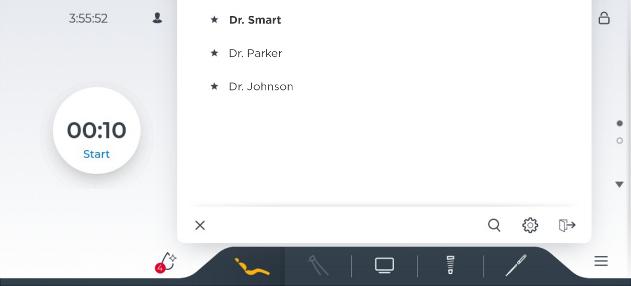
2. Select the desired user profile. Touch the name of the desired profile.
Ä The User selection closes. The user profile displayed in the header is active.
Log off a user


Tap on the Logout key in the User selection for manual logout.
Managing users
Tapping the gear icon opens the Userprofiles setup dialog. New users can be added and profiles copied or deleted here, see "User profiles [→ 166]".
Use default user profile
If a user is not logged in, the treatment center can be used only with a default profile. "Select user" is then displayed in the header as username. However, the settings stored in this profile are reset when the treatment center is switched off or a user logs in.
Dentsply Sirona Instructions for Use Treatment Center Axano 4 Operation 4.1 Starting up the treatment center 67 17 396 D3685 D3685.201.01.04.02 2023-06 51
4.2 Operating concept of the Smart Touch
On the Smart Touch user interface, the desired functions can be activated either by tapping them with your finger or via the cursor with the foot control.
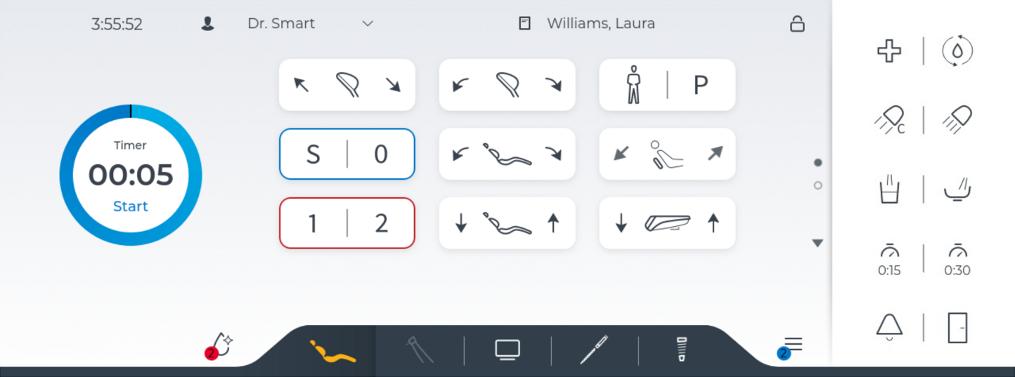
4.2.1
Virtual function and fixed keys
Virtual function keys
Virtual function keys are displayed in Smart Touch dialogs depending on the operating context. The start dialog, for example, has the keys for positioning the patient, the instrument dialog has only keys for setting the instrument removed from the holder. Switching between dialogs is sometimes automatic.
The main dialogs are briefly introduced in the following section, see "Main dialogs" [→ 53]
Fixed keys


On the dentist element, the fixed keys are on the right of the Smart Touch. The keys placed here can always be selected, regardless of the dialog selected.

In the setup, hygiene cockpit and Sivision dialog, the fixed keys are hidden to allow more room on the screen for a clearer display. The fixed keys can be made visible at any time by tapping on the three dots at the right of the screen.
For details in the fixed key functions, please refer to the section "Fixed keys on the dentist element" [→ 84]. Most of these functions can also be used via the user interface of the assistant elements, see "Fixed keys on the assistant element" [→ 136].
Key background color
Function keys are shown with white keys. When the corresponding function is switched on or is active, the key is displayed in orange.
4 Operation 4.2 Operating concept of the Smart Touch Dentsply Sirona Instructions for Use Treatment Center Axano 52 67 17 396 D3685 D3685.201.01.04.02 2023-06
StartdialogontheSmartTouchuserinterface
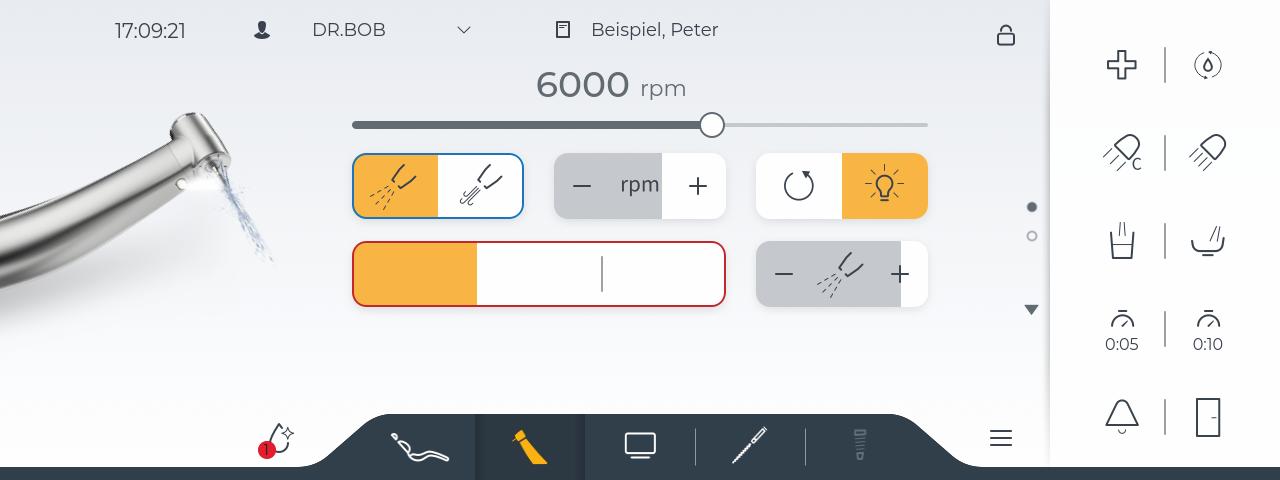


When moving the chair into position, the selected program key has a gray background. The key is displayed in orange when the chair
If the value of a programmed quick setting key is changed, the background color changes (light orange); if the changed value is reached again, the original color (deep orange) is displayed. The key status is thus visible at all times.
Adjustment keys
For adjustment keys such as for the instrument light or coolant, the current setting is marked by a key colored gray.
When tapping on an adjustment key, the selected setting is displayed on the upper edge of the Smart Touch.
Missing function keys
Function keys for functions not included with the treatment center are not displayed on the Smart Touch.
A list of all function keys is provided in the appendix of this document, see "Overview of all function keys" [→ 280]
4.2.2 Main dialogs
Some dialogs are divided into main dialogs and expanded dialogs. The main dialogs are briefly introduced below:
Start dialog
The keys for positioning the patient are shown in the start dialog.
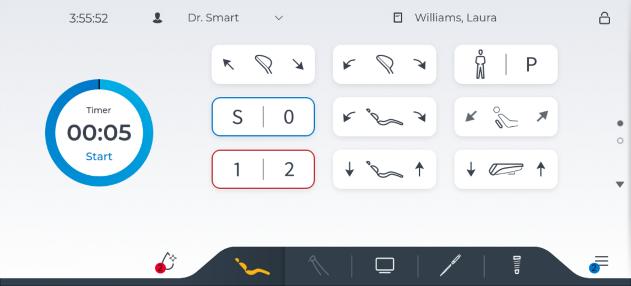
Instrument dialog
The instrument dialog that corresponds to the removed instrument is displayed.
4 Operation Operating concept of the Smart Touch 67 17 396 D3685 D3685.201.01.04.02 2023-06 53
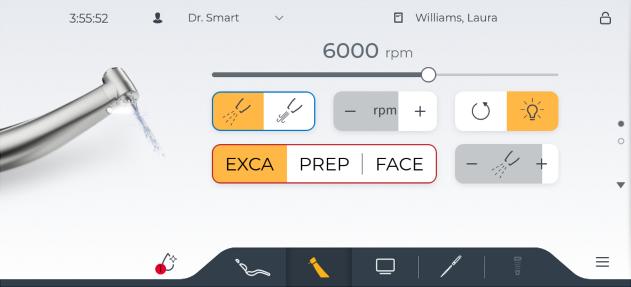
Sivision dialog
The integrated video application is operated in the Sivision dialog, allowing the practice PC to be controlled. For details, see "Operation with a PC" [→ 159]
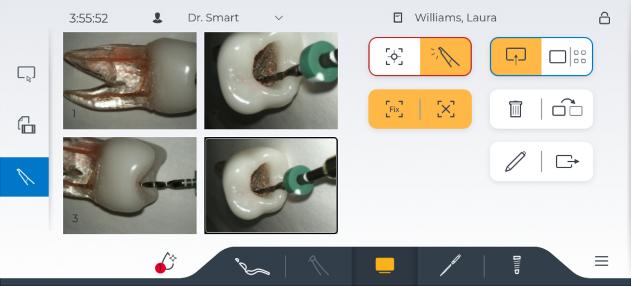
Customizing the Smart Touch dialogs
The dialogs can be customized for each user, e.g. function keys can be removed from dialogs, added to them, or positioned in a different place, see "User interface [→ 187]" setup dialog.
4.2.3 Expanded dialogs
Some programs are divided into a main dialog and expanded dialogs. Swipe up or down or tap on the arrows to switch between the main and expanded dialogs. The filled-in dot shows whether the first, second, or third dialog is displayed.
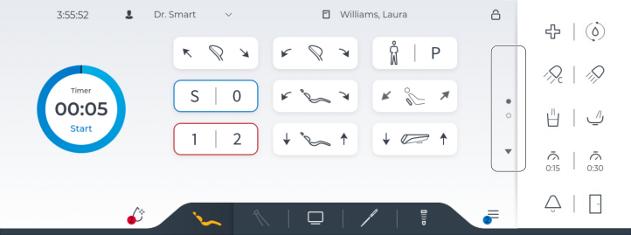
4 Operation 4.2 Operating concept of the Smart Touch Dentsply Sirona Instructions for Use Treatment Center Axano 54 67 17 396 D3685 D3685.201.01.04.02 2023-06
4.2.4 Headers and footers
Heading
At the left of the header, the time and the name of the current user are shown; next to this the name of the patient registered in Sidexis 4.
Tapping the active user profile displays the user selection. The user can be changed there, see "Logging user in/out" [→ 51]

A lock icon is displayed on the right of the header. Pressing the key > 2 sec locks the Smart Touch user interface of the dentist element and the user interface of the assistant element. This is used to make sure that no unwanted functions can be accidentally triggered while cleaning the surface, see "Disinfecting user interfaces" [→ 206]
Footer
The dialog change keys on the lower edge of the Smart Touch can be used to switch between the main dialogs:
● Start dialog
● Instrument dialog
● Sivision dialog
If the license for endodontic and implantology treatment is activated, two additional main dialogs are displayed. The number shows the position of the motor that was assigned to treatment.
The selected main dialog is marked by an icon on an orange background.
To the left and right of the dialog change keys, a drop icon and a setup icon are displayed:


Tapping the drop icon activates the hygiene cockpit. There, the treatment center lists hygiene tasks to be carried out, such as purge, autopurge, sanitization and suction hose cleaning. Depending on the urgency, the actions are marked yellow or red. The number of actions to be carried out is displayed on the drop icon. The purge and autopurge function and sanitization can be started in the hygiene cockpit.
The key opens the setup dialog. There, the treatment center can be individually set up and configured, see "Configuration of the treatment center (setup)" [→ 164]. If there are unread messages, a blue dot is displayed with the number of unread messages. They are listed when the setup icon is tapped.
Dentsply Sirona Instructions for Use Treatment Center Axano 4 Operation 4.2 Operating concept of the Smart Touch 67 17 396 D3685 D3685.201.01.04.02 2023-06 55
4.3 Foot control
The treatment center can be operated using a wireless foot control or a foot control with a cable connection.
4.3.1 Wireless foot control
Technical data of the wireless module, see Foot control wireless interface" [→ 27]
4.3.1.1 Setting the wireless foot control on the treatment center
The wireless foot control is connected to the treatment center via the Bluetooth interface, see the "Bluetooth [→ 167]" setup dialog.
4.3.1.2 Battery voltage message
The wireless foot control is powered by a battery. An almost empty battery is detected by the system and displayed in the setup dialog under Messages. Replace the battery as soon as possible to prevent system failure.

The battery can be changed by the user, see "Changing the battery of the wireless foot control" [→ 271]
4.3.2 Operating the foot control
The foot control operating elements are assigned different functions, depending on whether the instruments are all deposited or an instrument is removed from its holder.
Foot pedal
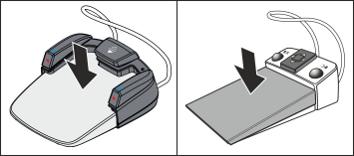
ü All instruments are in their holders
➢ Press the foot pedal.
Ä The dentist element moves toward the user as long as the foot pedal is activated.
ü An instrument is removed from its holder.
➢ Press the foot pedal.
Ä The instrument is activated. If the start dialog was opened when an instrument is removed, the instrument dialog automatically appears again on the Smart Touch. The intensity is regulated according to the pedal movement if necessary (if the foot control switch is set, see "General instrument functions" [→ 93]).
When the intraoral camera is removed, a photo is taken.
4 Operation 4.3 Foot control Dentsply Sirona Instructions for Use Treatment Center Axano 56 67 17 396 D3685 D3685.201.01.04.02 2023-06

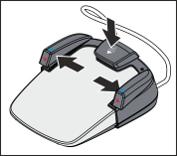
Middle button and swivel buttons of the Smart Control
If the cursor control is switched on, it is operated via the middle button and swivel buttons, see "Using the cursor control" [→ 58]
If the cursor control is switched off, then:
ü All instruments are in their holders
➢ Press and hold the middle button.
Ä The dentist element moves toward the foot end as long as the button is activated.
ü An electric motor is taken from the holder.
➢ Activate the middle button or the left or right swivel button.
Ä The clockwise/counterclockwise rotation of the electric motor is activated.
The allocation of functions may differ if a treatment function is active. Note the position of the red and blue cursor.
4-way control plate of the Classic foot control
If the cursor control is switched on, it is operated via the 4-way control plate, see "Using the cursor control" [→ 58]
If the cursor control is switched off, then:
ü All instruments are in their holders
➢ Move the 4-way foot control plate in any direction.
Ä The dentist element moves toward the foot end as long as the button is activated.
ü An electric motor is taken from the holder.
➢ Slide the 4-way control plate to the right or left.
Ä The clockwise/counterclockwise rotation of the electric motor is activated.
The allocation of functions may differ if a treatment function is active. Note the position of the red and blue cursor.
Left key
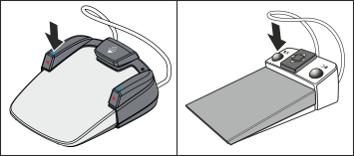
ü All instruments are in their holders
➢ Press the left key.
Ä The chair moves to mouth rinsing position S.
ü An instrument (motor, turbine, SiroSonic TL) is removed from its holder.
➢ Press the left key.
Ä Cooling (spray, air, NaCl, or water) is switched on/off.
When the intraoral camera is taken from the holder, the images displayed on the Smart Touch are shown on the patient monitor.
Dentsply Sirona Instructions for Use Treatment Center Axano 4 Operation 4.3 Foot control 67 17 396 D3685 D3685.201.01.04.02 2023-06 57
S 0
0
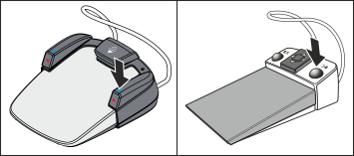
Right key
ü All instruments are in their holders
➢ Press the right key.
Ä The chair moves to entry/exit position 0.
ü An instrument (motor, turbine) is removed from its holder
➢ Press the right key.
Ä The chip blower remains switched on as long as the button is pressed.
When the intraoral camera is taken from the holder, the system switches between single image and overview image.
4.3.3
4.3.3.1
Using the cursor control
Functionality
Cursor control as an alternative mode of operation
The Smart Touch can also be operated hands-free via the foot control. This mode of operation supports ergonomic work, as you can carry out functions efficiently with your foot without losing sight of the treatment area. In addition, contact surfaces are reduced for hygienic work, especially for workflows that require a sterile environment.

For cursor control, the Smart Control has a middle button and a left and right swivel button. The cursor can be moved on the Smart Touch and functions activated with these buttons.
The Classic foot control has a 4-way control plate that can be moved in four directions.
For easy navigation, the buttons of the Smart Control are marked according to the color of the blue and red cursor.
Cursor control is reserved for the start, instrument, and Sivision dialogs. Setup and sub-dialogs cannot be used with cursor control.
Cursor control setting options
The preferred cursor control can be set in the setup dialog, see "Settings/Operation/Cursor control" [→ 175]:
● off: No hands-free operation

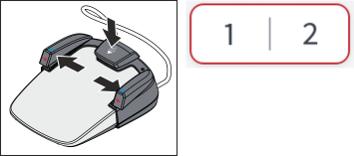
● Blue cursor: Keys with a blue border can be activated with the left and right foot control button. In the start dialog, these are the keys for the chair programs mouth rinsing position (S) and entry/exit position (0), and in the instrument dialog, the keys for coolant on/off and chip blower.
● Standard: hands-free operation in the main dialogs In addition to the blue cursor, a red cursor is displayed. It can be moved to other keys with the foot control. In this way, all keys of the dialog can be reached and activated with the foot control. When the red cursor is moved, the pairs of keys with a blue border are skipped for faster navigation.
● Advanced: in addition to the standard mode, hands-free operation of the user selection, dialog change keys, and fixed keys area
4 Operation 4.3 Foot control Dentsply Sirona Instructions for Use Treatment Center Axano 58 67 17 396 D3685 D3685.201.01.04.02 2023-06

Cursor path
The cursor path runs along the pairs of keys, generally moving from top to bottom and from left to right, usually in multiple loops. The cursor path can be traversed either in a forward or a reverse direction.
With the Smart Control, the cursor path is run through by briefly pressing the middle button (< 300 ms). Holding the middle button (> 300-600 ms) brings the cursor back one position. Holding the middle button longer (> 600 ms) brings the cursor back to its starting position, see "Cursor return" (below).
With the Classic foot control, the cursor path is run through by sliding the 4-way control plate up and down.
With instrument dialogs, the cursor path is started with the quick setting keys. The cursor selects all quick setting keys simultaneously. This is indicated by the red borders. The individual quick setting keys are activated using the Smart Control by pressing the swivel buttons and the middle button, with the Classic foot control by moving the 4-way control plate to the left or right. See "Using cursor control with Smart Control [→ 59] or Classic foot control [→ 61]".
Cursor return
The red cursor automatically returns to its starting position after activating or deactivating a function using cursor control. However, if a setting is changed, e.g. when moving the patient chair, it remains in its position.
The starting position of the red cursor in the start and Sivision dialog is the position after the blue cursor, in the instrument dialog, the quick setting keys.
4.3.3.2

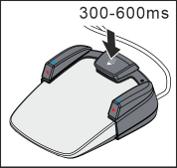
Using cursor control with Comfort foot control
Moving the cursor
➢ Press the middle button briefly.
Ä The red cursor moves forward one cursor position.
➢ Press and hold the middle button (> 300 to 600 ms).
Ä The red cursor moves back one position.
Dentsply Sirona Instructions for Use Treatment Center Axano 4 Operation 4.3 Foot control 67 17 396 D3685 D3685.201.01.04.02 2023-06 59
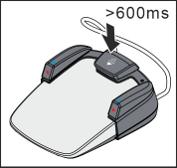
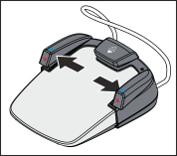
➢ Press and hold the middle button (> 600 ms).
Ä The red cursor moves back to its starting position. In the start and Sivision dialog, this is the position after the blue pair of keys, in the instrument dialog the quick setting keys.
Activating a function or fixed key
➢ To activate the left or right key on the Smart Touch, move the left or right swivel button outwards.
Ä The selected key is marked red on the Smart Touch (if switched on) or is white (if switched off).

Ä The red cursor automatically returns to its starting position after activating or deactivating a function. However, if a setting is changed, e.g. when moving the patient chair, it remains in its
Ä The quick setting keys have a red border.


Ä The selected quick setting key is marked red. The speed or intensity is displayed on the Smart Touch.
Changing the main dialog
ü The cursor control is switched on in normal mode (with dialog change).
1. Position the cursor on the dialog change keys.
Ä The dialog change keys have a red border.
2. Select the desired main dialog using the swivel buttons.
Ä The selected main dialog is marked red.
4 Operation 4.3 Foot control Dentsply Sirona Instructions for Use Treatment Center Axano 60 67 17 396 D3685 D3685.201.01.04.02 2023-06

3. Confirm your selection by pressing the middle button.
Ä The selected main dialog is displayed on the Smart Touch.
4.3.3.3 Using cursor control with Classic foot control
Moving the cursor
S ➢ Briefly slide the 4-way control plate up or down.
Ä The red cursor moves forward or back one cursor position.
S 0 ➢ Hold the 4-way control plate up or down (auto cursor).
Ä The red cursor slowly moves from one cursor position to the next.
Activating a function or fixed key
S 0 ➢ To activate the left or right key on the Smart Touch, move the 4-way control plate to the left or right.
0
Ä The selected key is marked red on the Smart Touch (if switched

The red cursor usually returns to the starting position of the
Ä The quick setting keys have a red border.
2. Slide the 4-way control plate to the right or left to select a value.
Ä The selected quick setting key is marked red. The speed or intensity is displayed on the Smart Touch.
Changing the main dialog
ü The cursor control is switched on in normal mode (with dialog change).
1. Position the cursor on the dialog change keys.
Dentsply Sirona Instructions for Use Treatment Center Axano 4 Operation 4.3 Foot control 67 17 396 D3685 D3685.201.01.04.02 2023-06 61

0
Ä The dialog change keys have a red border.
2. Slide the 4-way foot control plate to the right or left to select the desired main dialog.
Ä The next or previous main dialog is displayed.
4 Operation 4.3 Foot control Dentsply Sirona Instructions for Use Treatment Center Axano 62 67 17 396 D3685 D3685.201.01.04.02 2023-06
4.4 Patient chair
4.4.1
Safety instructions
WARNING
The free space under the patient couch and up to the water unit can be decreased due to chair movements.
Parts of the patient's or user's body may be pinched or crushed.
➢ Do not allow any limbs to stick out in the space between the chair upholstery, armrests and chair base. Please make sure that the patient’s arms and legs rest on the upholstery of the chair.
➢ Do not place any objects on the base of the chair.
CAUTION
The maximum load capacity of the patient chair is 185 kg (407.9 lbs) according to ISO 7494-1 (tested with multiple safety according to IEC 60601-1).
If the maximum load capacity is exceeded, there is a risk of damage to the treatment chair and injury to the patient.
➢ Never allow any persons who weigh more than 180 kg (396.8 lbs) to sit on the patient chair. The maximum permitted load capacity is indicated on a label next to the rating plate of the treatment center.
➢ The maximum additional weight of accessories mounted on the patient chair is 5 kg (11 lbs).
WARNING
Objects may protrude into the movement range of the chair. There is a risk of crushing the patient and damaging the objects.
➢ Make sure that no objects such as e.g. windows, drawers or other devices protrude into the movement range of the treatment chair.
IMPORTANT
Chair interlock
As long as a treatment instrument is activated, all functions for moving the patient chair are disabled for safety reasons.
If chair movement is permanently blocked, please contact your service technician.
Dentsply Sirona Instructions for Use Treatment Center Axano 4 Operation 4.4 Patient chair 67 17 396 D3685 D3685.201.01.04.02 2023-06 63
4.4.2 Safety stop
The treatment center is equipped with various safety stops to prevent crushing and damage:
● Cuspidor
● Lift frame
● Assistant element
● Rear cover, right/left
● Footrest
● Backrest
● Motor for height adjustment or backrest of the chair overheats
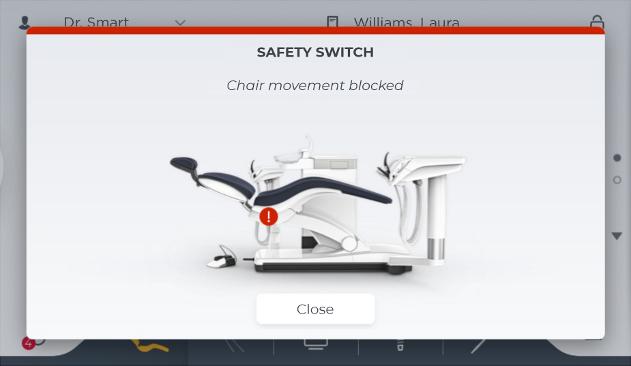
The following occurs when one or more safety switches are triggered:
● For all safety switches, a beep sounds twice each time a movement stops or starts.
● All chair movements stop immediately
● The triggered safety switches are displayed on the Smart Touch
● When the patient chair moves (this does not apply to the assistant element), a corrective movement is carried out in the opposite direction for approx. two seconds. Exception: lift frame – the corrective movement is always upward
As long as a safety switch is activated, further operation of the treatment center is limited!
If a safety switch is permanently blocked, please contact your service technician.
4 Operation 4.4 Patient chair Dentsply Sirona Instructions for Use Treatment Center Axano 64 67 17 396 D3685 D3685.201.01.04.02 2023-06
Triggeredsafetyswitch"Backrest"displayed
4.4.3 Triggering an immediate movement stop
WARNING
You can stop the movement of the chair to a programmed position as follows:
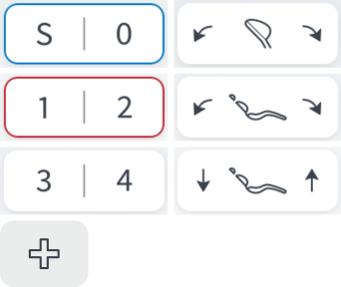
➢ Tap on a key for the patient chair on the Smart Touch, a key to tilt the motorized headrest. or the Shockpositioning fixed key.
➢ Press one of the patient chair keys on the control panel of the assistant element.
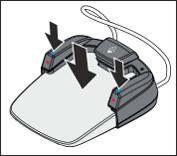


➢ Press the standby switch on the user interface of the dentist element.
➢ When all instruments are in place, press the pedal or the left or right button of the foot control.
➢ With an instrument removed, press the pedal of the foot control.
➢ With the cursor control switched off, activate middle button or one of the two swivel buttons on the foot control.
➢ With the cursor control switched on, move the cursor to any of the keys relating to the patient chair.
➢ Activate one of the 4-way switches on the motorized headrest in any direction. Exception: The upper 4-way switch up/down, see note below.
Ä All movements of the treatment center are stopped immediately.
IMPORTANT
The function keys and switches for adjusting the headrest to the height of the patient can be used during the program run. This does not trigger a movement stop.
Dentsply Sirona Instructions for Use Treatment Center Axano 4 Operation 4.4 Patient chair 67 17 396 D3685 D3685.201.01.04.02 2023-06 65
4.4.4 Armrests
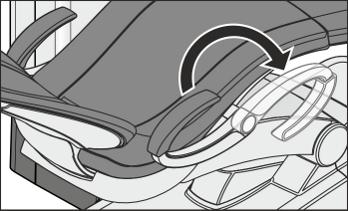
4.4.5
Armrests are available for the patient chair. The armrest nest to the dentist element can be swiveled forward to make it easier for patients to enter and exit the chair.
CAUTION
Always swivel the armrest completely to one of the stops. Do not leave the armrest in a middle position to prevent injuries.
Vario footrest
The footrest can be folded forward by approximately 10 cm to adjust it to the patient's height.

➢ Lift the foot end and pivot the footrest forward or backwards.
CAUTION
Make sure while adjusting that the footrest is locked securely in place of the corresponding end position. Make sure to avoid trapping fingers while adjusting.
If the patient chair features lounge upholstery, there is no footrest. The entire reclining surface is upholstered.
4 Operation 4.4 Patient chair Dentsply Sirona Instructions for Use Treatment Center Axano 66 67 17 396 D3685 D3685.201.01.04.02 2023-06
4.4.6 Adjusting the motor-driven headrest
The motor-driven headrest can be adjusted via the Smart Touch or directly on the headrest.
WARNING
Fine objects can enter the mechanism of the motorized headrest through the gap.
Long hair, dangling jewelry or loosely fitting clothing can be pulled in.
➢ Position the patient so that hair or other objects cannot be pulled in while the head rest is in motion.

4.4.6.1
DANGER
A strong magnet is integrated into the bottom of the head pad. The magnet could affect any active implant located nearby. Furthermore, direct contact of the head pad with magnetic cards can delete data stored on the cards.
➢ Therefore, make sure that the magnet is never located in the immediate vicinity of any patients, users or technical personnel with an active implant. If necessary remove the head pad from the headrest.
➢ Make sure that no magnetic cards or any other data storage media are located in the immediate vicinity of the head pad.
Moving the headrest in/out
The treatment chair is adjusted to the patient's height by moving the headrest in or out.
Depending on how far the motorized headrest is moved in/out to adjust for the patient's height, the height of the patient's mouth would be changed in chair programs 1 to 4. This is automatically corrected by a slight adjustment of the chair height when moving into a treatment position. Therefore, first adjust the headrest to the patient's height before using one of the program keys 1 to 4, see "Moving patient chair into a treatment position" [→ 72]
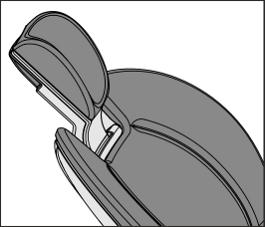

Tip: If the head pad cannot be moved down far enough, especially for short patients, the pad can be rotated 180°. The headrest should then be tilted/lowered to compensate for the angle.
Via Smart Touch
ü The startdialog is displayed on the Smart Touch.
➢ Tap on the Headrestin/out keys.
Dentsply Sirona Instructions for Use Treatment Center Axano 4 Operation 4.4 Patient chair 67 17 396 D3685 D3685.201.01.04.02 2023-06 67
Via the assistant element
➢ Press the Headrestin/out fixed keys.
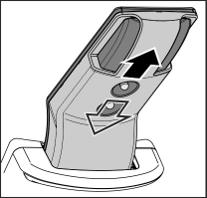

Via the 4-way switch
➢ Move the upper 4-way switch up or down.
Via the 4-way foot switch
In the setup dialog, you can set whether the function move headrest in/ out can be used via the 4-way foot switch, see Settings/Operation/4way foot switch [→ 177]
IMPORTANT
A setting can also be made in the setup dialog to enable interruption and/or reactivation of the suction flow of the spray aspirator by pressing the 4-way foot switch in any direction. If this function is activated, the spray aspirator must first be returned to the holder.
Patient-specific automatic headrest adjustment
The last height of the motorized headrest set can be saved in Sidexis 4 and then automatically applied when the patient is logged in again. For this, Sidexis 4 and Sivision View must be installed on the PC.
For details, please refer to the "Sivision View" user manual REF 68 00 143
4.4.6.2 Inclining the headrest
The headrest can be tilted either via motor drive or manually (quick mechanical adjustment).
Via Smart Touch


ü The expandedstartdialog is displayed on the Smart Touch.
➢ Touch the Tilt headrest keys.
Via the 4-way switch
➢ Slide the upper 4-way switch to the left or right.
4 Operation 4.4 Patient chair Dentsply Sirona Instructions for Use Treatment Center Axano 68 67 17 396 D3685 D3685.201.01.04.02 2023-06
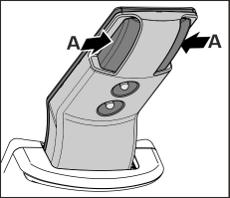

Via quick mechanical adjustment
1. Hold the headrest securely in place before unlocking it.
2. Press buttons (A) together.
Ä The headrest is thus disconnected from the motor drive and can be tilted manually.
Via the 4-way foot switch
In the setup dialog, you can set whether the tilt headrest function can be used via the 4-way foot switch, see "Settings/Operation/4-way foot switch [→ 177]". The spray aspirator must be put in the holder if it has been set in the setup dialog that the suction flow can be switched on/off via the 4-way foot switch.
Dentsply Sirona Instructions for Use Treatment Center Axano 4 Operation 4.4 Patient chair 67 17 396 D3685 D3685.201.01.04.02 2023-06 69
4.4.7 Moving the patient chair via chair programs
The chair programs can be selected via the Smart Touch or via the control keys of the assistant element. The entry/exit and mouth rinsing positions can also be selected via the foot control.
You can individually re-program the factory preset chair programs to suit your own requirements, see "Configuring chair programs and shock positioning" [→ 77]
In the setup dialog, you can set which chair program is used for moving the dentist element toward the treatment center can be set, see "Settings/Treatment chair [→ 171]/Saving position of dentist element".
IMPORTANT
The cuspidor automatically swivels out The cuspidor automatically returns beforehand to ensure that the patient does not collide with it during chair movements. This return travel depends on the chair movement and is executed only if a collision hazard exists.
4.4.7.1 Moving the patient chair to the entry/exit position
The following functions are triggered to facilitate patient entry and exit in the entry/exit position:
● The patient chair moves to an upright position
● The dentist element moves to the foot end
● The operating light switches off
● The cuspidor bowl swivels out
● The massage or active lumbar support function switches off
For the chair program entry/exit position (0), the following can be configured:
● The position of the patient chair can be changed, see "Configuring chair programs and shock positioning" [→ 77]
● The tumbler heater can be switched off automatically, see the "Settings/Hygiene/Tumbler [→ 181]/Water heater" setup dialog.
● The image transmitted to the patient monitor can be automatically replaced by a default display, see "Settings/General/Patient monitor [→ 171]" setup dialog.
CAUTION
The patient's feet may get caught in the instrument hoses of the dentist element when they enter or leave the patient chair.
The patient may trip or fall.
➢ Turn the dentist element outward before the patient enters or leaves it.
Via Smart Touch

ü The startdialog is displayed on the Smart Touch.
➢ Tap on the 0 key (< 2 s).
4 Operation 4.4 Patient chair Dentsply Sirona Instructions for Use Treatment Center Axano 70 67 17 396 D3685 D3685.201.01.04.02 2023-06

Via foot control
ü All instruments are in their holders.
➢ Press the right button of the foot control.
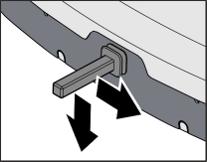
Via the assistant element
➢ Press the 0 key on the assistant element briefly (< 2 s).
Via the 4-way foot switch
In the setup dialog, you can set whether the chair program enter/exit position (0) can be moved to via the 4-way foot switch, see "Settings/ Operation/4-way foot switch [→ 177]". The spray aspirator must be put in the holder if it has been set in the setup dialog that the suction flow can be switched on/off via the 4-way foot switch.
4.4.7.2 Moving the patient chair to the mouth rinsing position
The following functions are triggered in the mouth rinsing position:
● The operating light switches off
● The chair moves the patient to an upright position
In the Setup dialog, the tumbler filling and cuspidor flushing function can be set to switch on automatically when the mouth rinsing position (S) is activated, see "Settings/Hygiene/Tumbler [→ 181] and Cuspidor [→ 182]". In addition, the cuspidor can be set to swivel in automatically.
Via Smart Touch


ü The startdialog is displayed on the Smart Touch.
➢ Tap on the S key (< 2 s).
Via foot control
ü All instruments are in their holders.
➢ Press the left button of the foot control.
Via the assistant element
➢ Press the S key on the assistant element briefly (< 2 s).
Dentsply Sirona Instructions for Use Treatment Center Axano 4 Operation 4.4 Patient chair 67 17 396 D3685 D3685.201.01.04.02 2023-06 71
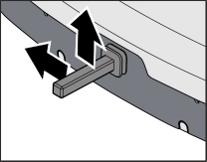
4.4.7.3
Via the 4-way foot switch
In the setup dialog, you can set whether the chair program mouth rinsing position (S) can be moved to via the 4-way foot switch, see "Settings/Operation/4-way foot switch [→ 177]". The spray aspirator must be put in the holder if it has been set in the setup dialog that the suction flow can be switched on/off via the 4-way foot switch.
Using the last position memory function
The last chair position is stored before the patient chair moves to mouth rinsing position S. When mouth rinsing position key S is pressed again, the treatment center returns to the previously set treatment position.
ü The patient chair can be in any treatment position.
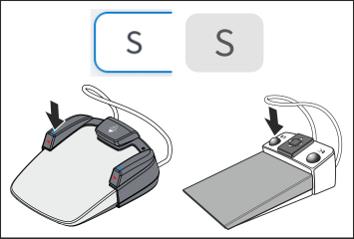

1. Tap on the S key on the Smart Touch, or press the S key on the user interface of the assistant element, or press the left button of the foot control (with all instruments in place in their holders).
Ä The treatment center moves to the mouth rinsing position.
2. Press the button S again.
Ä The treatment center automatically returns to the position where the patient chair was located prior to the mouth rinsing position.
In the setup dialog, you can set whether the chair program mouth rinsing position (S) can be moved to via the 4-way foot switch, see "Settings/Operation/4-way foot switch [→ 177]". The spray aspirator must be put in the holder if it has been set in the setup dialog that the suction flow can be switched on/off via the 4-way foot switch.
4.4.7.4 Moving the patient chair to a treatment position
Depending on how far the motorized headrest is moved in/out to adjust for the patient's height, the height of the patient's mouth would be changed in chair programs 1 to 4. This is automatically corrected by a slight adjustment of the chair height when moving into a treatment position. Therefore, first adjust the headrest to the patient's height before using one of the program keys 1 to 4, see "Moving headrest in/ out" [→ 67]
Via Smart Touch
ü The startdialog is displayed on the Smart Touch.
➢ Tap on key 1, 2, or if applicable, 3, 4 briefly (< 2 s).
4 Operation 4.4 Patient chair Dentsply Sirona Instructions for Use Treatment Center Axano 72 67 17 396 D3685 D3685.201.01.04.02 2023-06

Via the assistant element
Chair programs 3 and 4 cannot be selected on the assistant element. ➢ Press key 1 key or 2 on the assistant element briefly (< 2 s).
Via the 4-way foot switch
In the setup dialog, you can set whether the chair programs 1 and 2 plus 3 and 4 can be moved to via the 4-way foot switch, see "Settings/ Operation/4-way foot switch [→ 177]". The spray aspirator must be put in the holder if it has been set in the setup dialog that the suction flow can be switched on/off via the 4-way foot switch.
Dentsply Sirona Instructions for Use Treatment Center Axano 4 Operation 4.4 Patient chair 67 17 396 D3685 D3685.201.01.04.02 2023-06 73
4.4.8 Moving the chair manually
IMPORTANT
The cuspidor automatically swivels out
The cuspidor automatically returns beforehand to ensure that the patient does not collide with it during chair movements. This return travel depends on the chair movement and is executed only if a collision hazard exists.
4.4.8.1 Opening the expanded start dialog

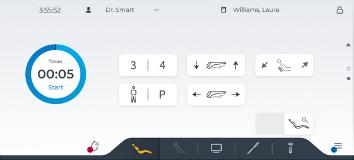
ü The startdialog is displayed on the Smart Touch.
1. Swipe the startdialog up on the Smart Touch.
or
➢ Tap on the arrow at the right edge of the dialog.
Ä The expandedstartdialog is displayed.
2. Make the settings described in the following sections.
4.4.8.2 ErgoMotion – Tilting the patient couch and inclining the backrest
Compensated motion of the seat surface and backrest without any compression or stretching effects for the patient
Via Smart Touch

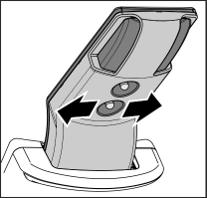

ü The expandedstartdialog is displayed on the Smart Touch.
➢ Touch the ErgoMotion keys.
Via the 4-way switch
➢ Move the lower 4-way switch to the left or right.
Via the 4-way foot switch
In the setup dialog, the ErgoMotion function can be set so it can also be operated via the 4-way foot switch, see "Settings/Operation/4-way foot switch [→ 177]". The spray aspirator must be put in the holder if it has been set in the setup dialog that the suction flow can be switched on/off via the 4-way foot switch.
4 Operation 4.4 Patient chair Dentsply Sirona Instructions for Use Treatment Center Axano 74 67 17 396 D3685 D3685.201.01.04.02 2023-06
4.4.8.3 Adjusting the chair height
Via Smart Touch

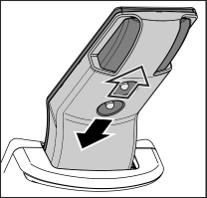

ü The expandedstartdialog is displayed on the Smart Touch.
➢ Touch the Chairheightadjustment keys.
Via the 4-way switch
➢ Move the lower 4-way switch up or down.
Via the 4-way foot switch
In the setup dialog, the chair height function can be set so it can also be operated via the 4-way foot switch, see "Settings/Operation/4-way foot switch [→ 177]". The spray aspirator must be put in the holder if it has been set in the setup dialog that the suction flow can be switched on/off via the 4-way foot switch.
4.4.8.4 Moving the patient chair with the fine adjustment
Depending on the type of treatment, it may be necessary to adjust the patient chair more slowly and more precisely (e.g. minute corrections for treatment under a microscope).
Switching fine adjustment on/off

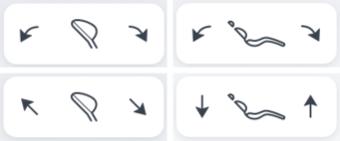
ü The expandedstartdialog is displayed on the Smart Touch.
➢ Tap on the Fineadjustment key.
Ä If the key is marked orange, the headrest and the patient chair move at reduced speed.
Movement via Smart Touch
➢ Touch the Tilt headrest, Moveheadrestin/out, ErgoMotion, or Chair heightadjustment key.
Dentsply Sirona Instructions for Use Treatment Center Axano 4 Operation 4.4 Patient chair 67 17 396 D3685 D3685.201.01.04.02 2023-06 75

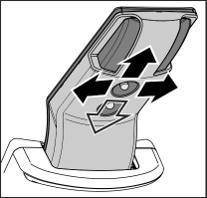

Movement via 4-way foot switch
ü The 4-way foot switch is assigned to the Inclination of headrest, Extension of headrest, Backrest, or Chair lift functions in the setup dialog, see "Settings/Operation/4-way foot switch [→ 177]".
➢ Slide the 4-way foot switch depending on the configuration in the setup dialog to the left/right or up/down.
Movement via 4-way switch
➢ Slide the upper 4-way switch to the left/right to tilt the headrest or up/down to move it in/out.
➢ Move the lower 4-way switch to the left/right for ErgoMotion or up/ down to adjust the chair height.
4 Operation 4.4 Patient chair Dentsply Sirona Instructions for Use Treatment Center Axano 76 67 17 396 D3685 D3685.201.01.04.02 2023-06
4.4.9 Configuring chair programs and shock positioning
Chair programs
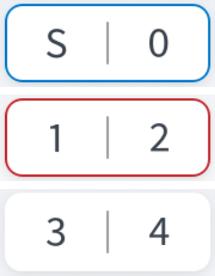
The six factory set chair programs:
● Mouth rinsing position S
● Entry/exit position 0
● 1 and 2
● 3 and 4
can be individually reprogrammed for each user profile.
The placement of the chair programs in the start dialog can be changed in the setup dialog, see "User interface [→ 187]".
ü The startdialog is displayed on the Smart Touch.
1. Move the patient chair to the required treatment position; see "Moving the chair manually" [→ 74]
2. Tilt the headrest to the required treatment position; see "Tilting the headrest" [→ 68]
3. Switch the operating light on or off (will be programmed), see "Switching the operating light on/off" [→ 149]
4. In the setup dialog, you can set for which chair programs the position of the dentist element on the sliding track should be programmed, see "Settings/Treatment chair [→ 171]/Saving position of dentist element".
5. Press and hold (>2 s) the desired program key (S, 0, 1, 2 or 3, 4).
Ä A beep sounds. Your settings are now stored under the desired program key.
Note: Chair programs S, 0, 1, 2 can also be programmed on the assistant element side.
Shock positioning
When the Shockpositioning key is pressed, the patient chair immediately moves to a position suitable for shock positioning of the patient.
The factory preset position for shock positioning can be reprogrammed.
1. Move the patient chair to the desired position.
2. Press and hold the Shockpositioning key (> 2 s).
NOTICE
Program this key exclusively for shock positioning the patient, never use as a treatment position.
Dentsply Sirona Instructions for Use Treatment Center Axano 4 Operation 4.4 Patient chair 67 17 396 D3685 D3685.201.01.04.02 2023-06 77
4.4.10 Treatment while standing
For treatment while standing, a second level can be activated for the chair programs 1 to 4.
ü The startdialog is displayed.


1. Tap on the Treatmentwhilestanding" key.
Ä If the key is marked orange, the chair programs 1 to 4 are switched to the second level.
2. Tap one of the program keys 1 to 4 briefly (<2 s).
Ä The treatment chair moves to the saved position for treatment while standing. The dentist element moves upward.
3. To move back to the chair positions for treatment while sitting, the Treatmentwhilestanding function must first be deactivated. Tap again on the Treatmentwhilestanding key.
Ä If the key has a white background, the chair programs 1 to 4 are switched back to the first level. When the program keys 1 to 4 are tapped, the chair moves to the saved positions for treatment while sitting.
The positions preset at the factory can be reprogrammed individually for each user profile by pressing and holding the program keys 1 to 4 (> 2 s), see "Configuring chair programs and shock positioning" [→ 77]
As long as the Treatmentwhilestanding function is activated, the chair moves to the positions for treatment while standing when the program keys 1 and 2 are pressed on the assistant element as well.
4.4.11
Patient-specific chair programs
With Sidexis 4, users can save the patient-specific chair positions for each patient using the program keys (S, 0, 1, 2, and if applicable 3, 4). The next time the patient is logged in, the chair positions are available again. For this, Sidexis 4 and Sivision View must be installed on the PC. For details, please refer to the "Sivision View" user manual REF 68 00 143.
Activate and retrieve patient-specific chair programs
ü The patient-specificchairprograms function is activated in Sidexis 4.
ü A patient is registered in Sidexis 4. The patient name is displayed in the header of the Smart Touch.
ü The startdialog is displayed.

1. Tap on the Patient-specificchairprograms key briefly (< 2 s).
Ä If the key is orange, the Patient-specificchairprograms function is activated.
4 Operation 4.4 Patient chair Dentsply Sirona Instructions for Use Treatment Center Axano 78 67 17 396 D3685 D3685.201.01.04.02 2023-06
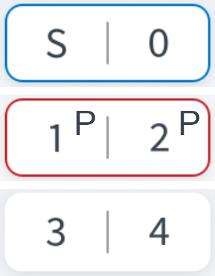
Ä If chair positions are already saved in Sidexis 4 for the registered patient, a "P" will be shown on the respective program keys.
2. Touch key S, 0, 1, 2 or, if applicable, 3, 4 briefly (< 2 s).
Ä If a "P" is shown on the pressed program key, the patientspecific chair program saved in Sidexis 4 will be activated. If there is no "P" on the key, the chair program saved in the active user profile of the treatment center will be activated.
3. Switch the function on/off to switch between the two operating modes.
Save patient-specific chair programs
Patient-specific chair programs are programmed the same way as conventional chair programs, see section "Configuring chair programs and shock positioning" [→ 77]. Switching the treatment light on/off and the position of the dentist element on the motorized sliding track are also saved.
ü The patient-specificchairprograms function is activated in Sidexis 4.
ü The patient chair is in the desired position.
➢ Press and hold the desired program key (S, 0, 1, 2 or, if applicable, 3, 4) (> 2 s).
Ä A beep sounds. The settings are now stored in the Sidexis 4.
With Sidexis 4, the last height of the motorized headrest that was set can be saved and then automatically activated when the patient is logged in again, see "Automatic patient-specific headrest adjustment" [→ 67]
Overwrite and delete patient-specific chair programs
The patient-specific chair programs saved in the Sidexis 4 can be overwritten by reprogramming the program key. They can be deleted in the setup dialog, see"Settings/Treatment chair [→ 171]/Patient-specific chair programs".
After deletion, the "P" is removed from the program keys. When a program key is tapped, the chair program saved in the active user profile of the treatment center will be activated in both operating modes.
Dentsply Sirona Instructions for Use Treatment Center Axano 4 Operation 4.4 Patient chair 67 17 396 D3685 D3685.201.01.04.02 2023-06 79
4.4.12
Setting the Massage/Active lumbar support functions
A back massage and/or active lumbar support can be set for the patient chair.
Switching the massage function on/off
ü The massage function can be placed in the expandedstartdialog or as a fixed key on the Smart Touch.


➢ Tap on the Massagefunction key.
Ä When the massage function is switched on, the key is marked orange.
CAUTION
Do not use the massage function during treatment.
Adjusting the active lumbar support function
ü The expandedstartdialog is displayed on the Smart Touch.
➢ Adapt the lumbar support to the patient's spinal curvature. Tap on the Decreaseactivelumbarsupport / Increase active lumbar support keys.
IMPORTANT
Switching the massage / active lumbar support function on/off automatically
The massage and active lumbar support functions automatically switch off when the chair approaches the entry/exit position 0 or the mouth rinsing position S
When the mouthrinsingpositionS key is pressed again (memory function, see "Use the last position memory function" [→ 72]), the massage function is switched back on following the chair movement. The active lumbar support can then be readjusted.
4 Operation 4.4 Patient chair Dentsply Sirona Instructions for Use Treatment Center Axano 80 67 17 396 D3685 D3685.201.01.04.02 2023-06
4.5 Dentist element
4.5.1 Safety notices
WARNING
The free spaces near the patient can be reduced when the dentist element is moved.
Parts of the patient's or user's body may be pinched or crushed.
➢ Do not allow any limbs to protrude into the space between the chair upholstery, armrests and chair base while the dentist element is moving. Please make sure that the patient’s arms and legs rest on the upholstery of the chair.
4.5.2 Maximum load capacity
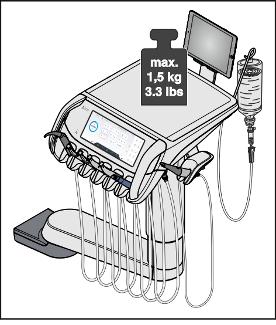
WARNING
The maximum load of the dentist element is 2 kg (4.4 lbs).
A silicone mat, a smart device, and an NaCl bottle with the corresponding accessories (weighing approx. 1.0 kg or 2.2 lbs) can also be attached; see "Preparing for use of NaCl saline solution" [→ 93]
WARNING
The silicone mat reduces the likelihood that instruments and treatment accessories can slide around.
Dentsply Sirona Instructions for Use Treatment Center Axano 4 Operation 4.5 Dentist element 67 17 396 D3685 D3685.201.01.04.02 2023-06 81
4.5.3 Smart Delivery motorized sliding track
The treatment center is equipped with a motorized sliding track for the dentist element. In combination with the rotary joints on the support arm, the dentist element can be perfectly adjusted to suit any treatment situation.
CAUTION
The patient's feet may get caught in the instrument hoses of the dentist element when they enter or leave the patient chair.
The patient may trip or fall.
➢ Turn the dentist element outward before the patient enters or leaves it.
NOTICE
Sudden movements can cause instruments to fall out of the holder in the dentist element.
➢ Try to avoid sudden movements of the dentist element.
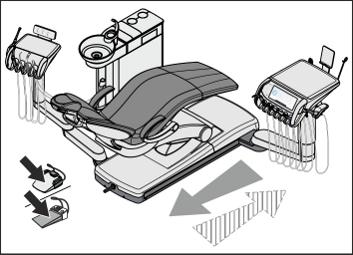
CAUTION
Moving the dentist element toward the user
ü With the exception of the Sprayvit and SmartLite Pro, all instruments must be in their holders.
➢ Step on the pedal of the foot control.
Ä The dentist element moves toward the dentist as long as the foot pedal is activated.
At the end of treatment, the dentist element can be moved back to the foot end by pressing the Entry/exit position (0) key, see "Moving the patient chair to the entry/exit position" [→ 70].
In the setup of the treatment center, the operating light can be set to switch on automatically when the dentist element is moved towards the patient chair, see "Settings/Operating light [→ 180]/Switching the operating light on after moving the dentist element in close".
4 Operation 4.5 Dentist element Dentsply Sirona Instructions for Use Treatment Center Axano 82 67 17 396 D3685 D3685.201.01.04.02 2023-06
4.5.4
Motorized height adjustment for Smart Delivery Pro
The height of the support arm of the dentist element can be adjusted by motor to achieve an ergonomic instrument height. This optimally supports switching between sitting and standing treatment, see "Treatment while standing" [→ 78]


ü The startdialog or expandedstartdialog is displayed on the Smart Touch.
➢ Touch the Raise/lowerdentistelement keys.
Ä The dentist element moves up or down as long as the key is pressed.
The changed height of the dentist element is automatically saved in the user profile. There is a difference between sitting and standing treatment, depending on which mode is active (key with person standing), see "Treatment while standing" [→ 78]. The height of the dentist element is not saved in chair programs 1-4.
Manual height adjustment
If the treatment center is not equipped with the Smart Delivery Pro motorized height adjustment function, the support arm of the dentist element can be adjusted manually.
CAUTION
With manual height adjustment, the height of the dentist element can be set during installation or while being serviced by the service technician.
Dentsply Sirona Instructions for Use Treatment Center Axano 4 Operation 4.5 Dentist element 67 17 396 D3685 D3685.201.01.04.02 2023-06 83
4.5.5 Fixed keys on the dentist element
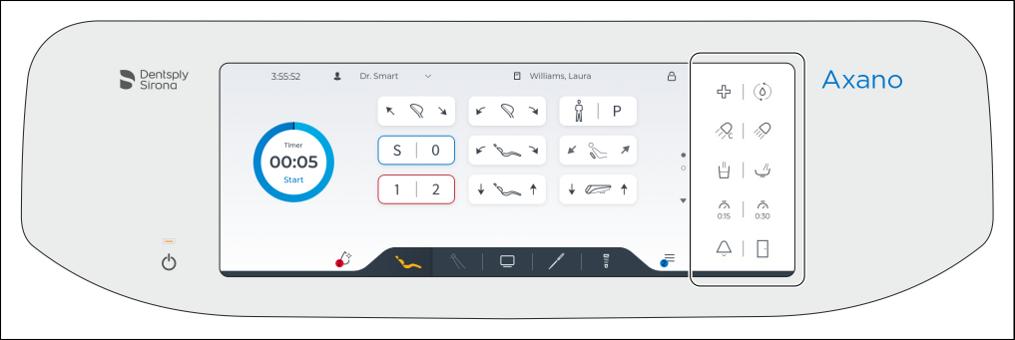
The keys to be displayed in the fixed key area can be set in the setup dialog. The position of the fixed keys can be changed. See "User interface [→ 187]".
4.5.5.1 Standby switch
The treatment center is switched on/off with the standby switch. To switch off, press and hold the key until an acoustic signal sounds. Then release the key.
IMPORTANT
Power switch
The treatment center also features a power switch on the base of the chair that separates the treatment center from the power supply, see "Switching the treatment center on/off" [→ 47]
4.5.5.2 Shock positioning
Immediately moves the patient chair to a position for shock positioning of the patient.
To program the position of the shock positioning function, see "Configuring chair programs and shock positioning" [→ 77]
4.5.5.3 Purge function
After every patient, the water-carrying instruments should be purged. The Purge key is placed in the fixed key area to access this function quickly.
For details, please refer to section “Purging water lines (purge function)” [→ 213].
4.5.5.4 Operating light
➢ Press the Operatinglight fixed key on the dentist or assistant element.
Ä When the operating light is switched on, the key is marked orange on the Smart Touch. The LED of the fixed key on the assistant element lights up.
For details, please refer to the section "Operating light" [→ 149]
4 Operation 4.5 Dentist element Dentsply Sirona Instructions for Use Treatment Center Axano 84 67 17 396 D3685 D3685.201.01.04.02 2023-06
4.5.5.5
Composite function
The composite function delays the curing of composite materials.
➢ Press the Compositefunction fixed key.
Ä When the composite function is switched on, the key is marked orange on the Smart Touch. The LED of the fixed key on the assistant element lights up.
4.5.5.6
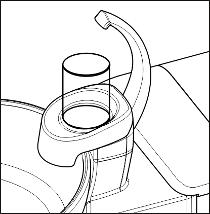
Tumbler filling
If the tumbler filling system of your treatment center is equipped with automatic sensor control, see “Tumbler filling with automatic sensor control” [→ 140]
1. Place a tumbler under the tumbler filling.
4.5.5.7
2. Press the Tumblerfilling fixed key.
Ä The preset quantity of water is filled into the tumbler.
Pressing the fixed key again stops the tumbler filling function immediately.
In the setup dialog, the filling quantity of the tumbler can be set, see "Settings/Hygiene/Tumbler [→ 181]". It can also be set so the tumbler filling switches on automatically after moving to the mouth rinsing position (S). Water temperature can also be set.
Cuspidor flushing
The flushing function is used for rough cleaning of the cuspidor bowl during treatment.
➢ Press the Cuspidorflushing fixed key.
Ä The cuspidor flushing will be switched on for the preset time.
In the setup dialog, the cuspidor flushing time can be set, see "Settings/ Hygiene/Cuspidor [→ 182]". It can also be set that the cuspidor flushing switches on automatically after moving to the mouth rinsing position (S).
4.5.5.8

Cuspidor
The cuspidor can be swiveled in and out by motor.
In the setup dialog, you can set the cuspidor to automatically move inward when the mouth rinsing position is reached by activating the mouth rinsing position (S) chair program. When the patient chair is moved, the cuspidor swivels out again. See "Settings/Hygiene/Cuspidor [→ 182]".
4.5.5.9
Timer and multitimer
A set time counts down to zero with the timer function. In setup, six timers can be set for the dentist element and two for the assistant element, see "Settings/Operation/Timer [→ 178]".
Dentsply Sirona Instructions for Use Treatment Center Axano 4 Operation 4.5 Dentist element 67 17 396 D3685 D3685.201.01.04.02 2023-06 85
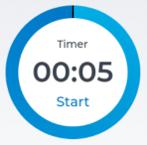
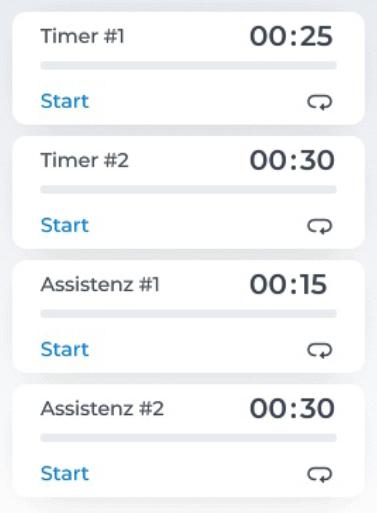
Multitimerwidget
Two displays are available for timers, as a single timer and as a multitimer. The display can be configured as a widget, see User interface [→ 187]/widget.
The timers can be started consecutively.
➢ Press the Timer fixed key on the Smart Touch.
Ä The selected timer is started. The timer key flashes. The timer is displayed as a widget on the Smart Touch.
Ä When the time is up, a short beep sounds.
Pressing the key again stops the timer and resets the timer setting. The timer can then be restarted.
The timer displayed on the widget can be stopped and continued with the Stop and Start keys.
The setting of the active timer can be changed directly via the widget. Press and hold the widget (<2 s) until the settings dialog appears.

To operate the two timers of the assistant element, see "Timer" [→ 137] in the "Assistant element" section.
4.5.5.10 Massage function
A massage function can be set on the patient chair.
➢ Tap on the Massagefunction fixed key.
Ä When the massage function is switched on, the key is marked orange on the Smart Touch.
IMPORTANT
Switching the massage function on/off automatically
The massage function switches off automatically when the chair approaches the entry/exit position 0 or the mouth rinsing position S
If the mouthrinsingpositionS key is pressed again (Memory function, see "Use the last position memory function" [→ 72]), the massage function is switched back on following the chair movement.
CAUTION
Do not use the massage function during treatment.
The lumbar support can be adjusted in the expandedstartdialog, see "Setting the massage/active lumbar support function" [→ 80].
4 Operation 4.5 Dentist element Dentsply Sirona Instructions for Use Treatment Center Axano 86 67 17 396 D3685 D3685.201.01.04.02 2023-06
4.5.5.11 Freely selectable function
Bell
Freely available relay 240 V, 6 A (connected by service technician)
This function can be preset as a button or a switch in the setup dialog, see "Maintenance/Device settings [→ 191]/Bell relay mode".
AUX key
Freely available relay 240 V, 6 A (connected by service technician)
This function can be preset as a button or a switch in the setup dialog, see "Maintenance/Device settings [→ 191]/AUX relay mode".
An icon can be assigned to the key corresponding to its function, see "User interface" [→ 187]
Dentsply Sirona Instructions for Use Treatment Center Axano 4 Operation 4.5 Dentist element 67 17 396 D3685 D3685.201.01.04.02 2023-06 87
4.5.6 Placing the instruments in their holders
Automatic opening of instrument dialogs
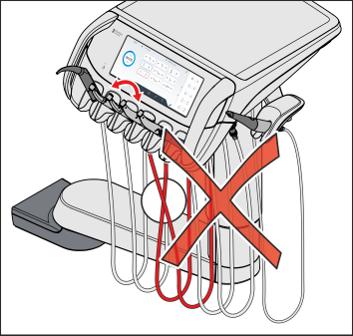
The instrument dialog that corresponds to the instrument taken from the holder, with the exception of the Sprayvit and SmartLite Pro, is automatically displayed on the Smart Touch.
CAUTION
Therefore, always make sure that all instruments are placed in the correct instrument holders. If any instruments are placed in the wrong holders, the wrong instrument dialog will be opened when they are removed from the holders.
A turbine quick coupling is very light without the handpiece. Ensure when the handpiece is taken out of the holder that the quick coupling is correctly positioned in the instrument holder.
If more than one instrument is removed, the instrument dialog of the instrument removed first is displayed.
Instruments that were taken out of the holder before system start must be returned briefly before they can be used.
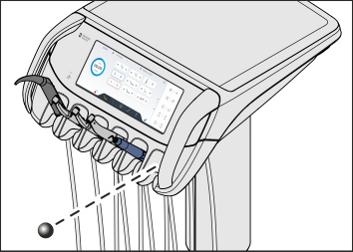
CAUTION
A ball stopper for an unoccupied instrument holder is included with the dentist element.
Insert the ball stopper into an unassigned instrument holder. This prevents accidental deposit of an instrument in this holder.
To reorder the ball stopper, see "Spare parts and consumables" [→ 276].
Instrument hoses NOTICE
The instrument hoses contain electrical cables and media pipes. Over-tensioning or pinching the hoses may cause the electrical cables to break and the media pipes to leak.
➢ Ensure that you do not pull or bend the instrument hoses too much.
4 Operation 4.5 Dentist element Dentsply Sirona Instructions for Use Treatment Center Axano 88 67 17 396 D3685 D3685.201.01.04.02 2023-06
Ball stopper

Instrument settings can be saved and accessed on the quick setting keys individually for each user profile.
In the Setup dialog, you can set whether the settings coolant, instrument light, foot control switch, and direction (depending on the instrument) can be saved on the quick setting keys in addition to speed and intensity values, see "Settings/Instruments [→ 172]/Expanded favorites storage".

Expandedfavoritestorageactivated;thequicksettingkeyscanbelabeled individually.
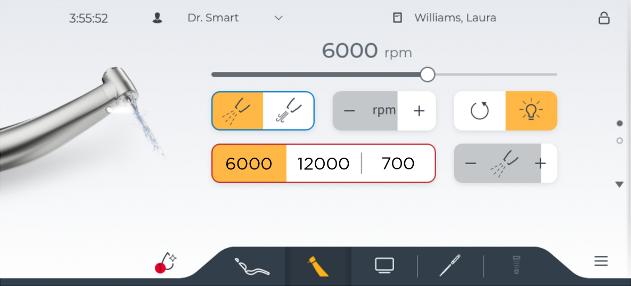
Expandedfavoritestoragedeactivated;thesavedspeedandintensity valuesaredisplayedonthequicksettingkeys.
Automatic or manual saving
In the setup dialog, you can set whether each change of the settings in the dialogs and configurations should be automatically saved in setup or only after pressing a save key, see "Settings/User settings [→ 186]Automatic saving".
If automatic saving is deactivated in setup, two arrows appear in the header when changes to settings are made. With the first arrow (down), the changes are discarded, with the second arrow (up), the changes are saved in the user profile. Exceptions are saving instrument settings on quick setting keys and programming chair positions.
4 Operation 4.5 Dentist element 67 17 396 D3685 D3685.201.01.04.02 2023-06 89

4 Operation 4.5 Dentist element Dentsply Sirona Instructions for Use Treatment Center Axano 90 67 17 396 D3685 D3685.201.01.04.02 2023-06
4.5.8 General instrument functions
Settings for the coolant, instrument light, and foot control can be made in the expanded instrument program of the instrument removed from the holder.
The instrument programs vary according to the instrument removed. Functions not available for the respective instrument are not displayed in the instrument program.
4.5.8.1
Selecting a coolant
Depending on the instrument and the equipment of the treatment center, spray, air, NaCl, or water can be preselected as coolant in the expanded instrument dialog. The preselected coolant can then be switched on or off in the instrument dialog.
ü The expandedinstrumentdialog of the removed instrument is displayed on the Smart Touch.

➢ Select the desired coolant for the instrument removed from the holder. Tap on the spray, air, NaCl, or water key.
Ä The key of the preselected coolant is marked orange. The key of the preselected coolant is displayed in the instrumentdialog
4.5.8.2 Switching the preselected coolant on/off
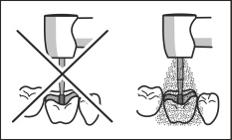

WARNING
Instruments can be operated without coolant.
Tooth substance can be damaged by frictional heat.
➢ Make sure that the treatment area does not overheat if you have switched the coolant off. Effective cooling is achieved only with spray or NaCl solution (at least 50 ml/min).
Via Smart Touch
ü An instrument is taken from the holder and the instrumentdialog is displayed on the Smart Touch.
➢ Tap on the key of the preselected coolant (spray, air, NaCl, or water).
Ä If the key of the preselected coolant is marked orange, it will be switched on with the instrument when the foot pedal is activated. If the key is white, the coolant is switched off.
Via foot control

4.5.8.3
ü An instrument is removed from its holder.
➢ Press the left button of the foot control.
Ä If the key of the preselected coolant (spray, air, NaCl, or water) is marked orange on the Smart Touch, it will be switched on with the instrument when the foot pedal is activated.
Activating the chip blower
With the chip blower, an air jet comes out of the nozzle of the bur instrument.
Dentsply Sirona Instructions for Use Treatment Center Axano 4 Operation 4.5 Dentist element 67 17 396 D3685 D3685.201.01.04.02 2023-06 91


4.5.8.4
ü A turbine or motor is removed from the holder.
➢ Tap on the Chipblower key on the Smart Touch. or
➢ Press the right button of the foot control.
Ä The chip blower remains switched on as long as the button is pressed.
Setting the amount of spray water
The quantity of spray air or water is factory preset for the instruments. This basic setting and the compressed air for the turbines can be changed by the service technician.
The water quantity in the spray can be adjusted individually via the Smart Touch for turbines, motors, and the ultrasonic handpiece.

WARNING
Instruments can be operated without coolant.
Tooth substance can be damaged by frictional heat.
➢ Make sure that the treatment area does not overheat if you have switched the coolant off. Effective cooling is achieved only with spray or NaCl solution (at least 50 ml/min).
ü The expandedinstrumentdialog of the removed turbine, motor, or ultrasonic handpiece is displayed on the Smart Touch.


ü Spray is preselected as the coolant, see "Preselecting coolant" [→ 91]
1. Set the spray water quantity with the arrow keys.
Ä The selected setting is displayed on the upper edge of the Smart Touch. In addition, the set quantity is indicated by a gray filling of the key.
2. Test the spray water quantity set for the instrument. Correct the setting if necessary. 1234 5 0
The small amount of spray water in the low settings 0 to 4 is realized by spray bursts of different lengths and pauses.
If the spray water quantity cannot be adjusted appropriately, especially at low settings, there is the option to calibrate the spray water valve in the setup dialog, see "Maintenance/Service functions [→ 193]/ Instruments". This takes approx. 20 minutes.
4 Operation 4.5 Dentist element Dentsply Sirona Instructions for Use Treatment Center Axano 92 67 17 396 D3685 D3685.201.01.04.02 2023-06
4.5.8.5 Switching the instrument light on/off and adjusting the brightness
Switch instrument light on/off
ü The instrumentdialog of the removed turbine, motor, or ultrasonic handpiece is displayed on the Smart Touch.


➢ Switch the instrument light on or off with the Instrumentlight key. Ä If the key is highlighted orange, stepping on the foot pedal will switch on the instrument light at the set brightness.
Adjusting
the brightness
ü The expandedinstrumentdialog of the removed turbine, motor, or ultrasonic handpiece is displayed on the Smart Touch.
1. Use the – and + keys to adjust the brightness of the instrument light.
Ä The selected setting is displayed on the upper edge of the Smart Touch. In addition, the set intensity is indicated by a gray filling of the key.
2. Test the brightness set for the instrument. Correct the setting if necessary.
4.5.8.6 Setting the foot control as a direct starter or speed foot control
For the motor, turbine, and the SiroSonic TL ultrasonic handpiece, the foot control can be set as a direct starter or a foot control switch:
● Direct starter
When the foot control is actuated, the instrument is switched on with the set speed and intensity.
● Foot control switch
Depending on the setting of the foot control pedal, the instrument controls the speed and intensity continuously up to the maximum value set.
ü The expandedinstrumentdialog of the turbine, motor, or ultrasonic handpiece is displayed on the Smart Touch.

➢ Tap on the Directstarter/footcontrolswitch key.
Ä If the key is white, the direct starter function is set. If the key is marked orange, the foot control switch is set.
4.5.8.7 Preparing for use of NaCl saline solution
A sterile saline solution instead of spray water is provided for cooling via the peristaltic pump.
The peristaltic pump hose is a disposable item. To reorder it, see "Spare parts and consumables" [→ 276]
Two symbols are on the NaCl pump.
Meaning: When operating the unit, observe the instructions for use.
Dentsply Sirona Instructions for Use Treatment Center Axano 4 Operation 4.5 Dentist element 67 17 396 D3685 D3685.201.01.04.02 2023-06 93
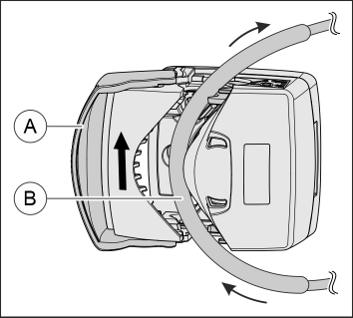
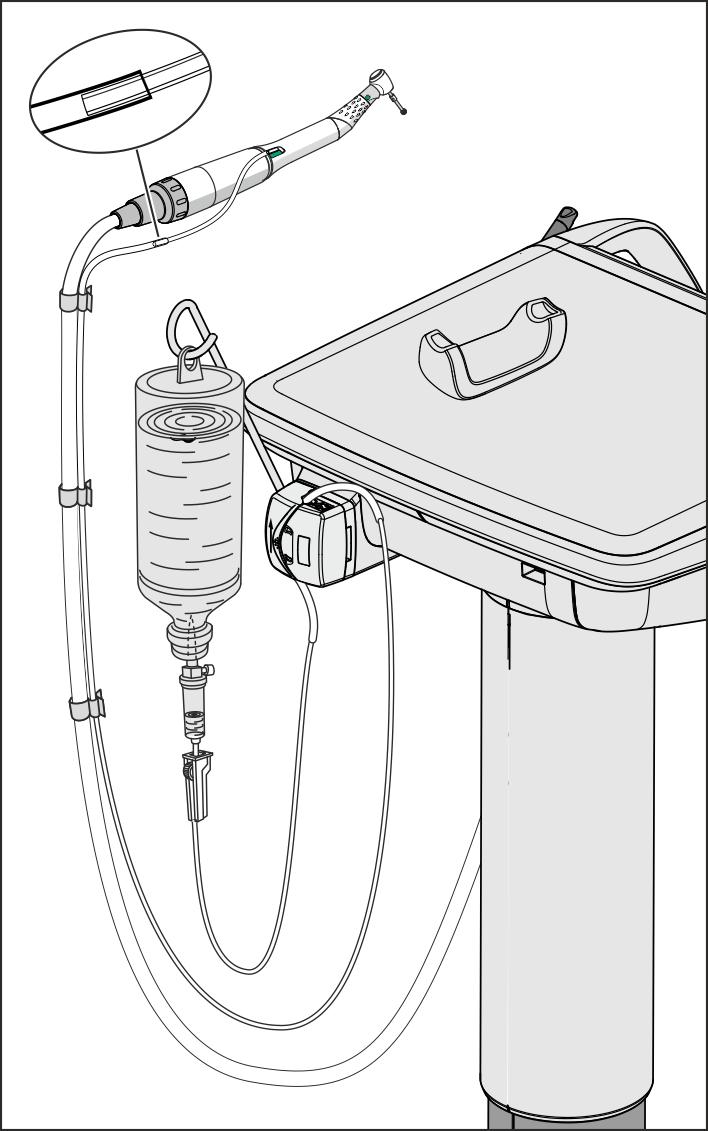
Meaning: Caution, risk for fingers in contact with moving parts
Close cover (A) before operating the NaCl pump.
WARNING
Fine objects can enter the mechanism of the NaCl pump via openings.
Long hair, dangling jewelry or loosely fitting clothing can be pulled in.
➢ Only replace the NaCl hose when the pump is at a standstill.
ü The drive of the peristaltic pump and an NaCl bottle holder are attached to the dentist element. Please contact your local distributor if necessary.
ü A new peristaltic pump hose is available.
1. Hang the NaCl bottle (max. 1 liter) on the bottle holder of the dentist element.
2. Open cover (A). Lay the silicone hose (B) without prestress, with the thickened part wrapped around the pump wheel. See the adjacent drawing. Close cover (A).
IMPORTANT
Direction of flow of the peristaltic pump
The shorter end of the hose with the cannula must be at the top of the pump, the longer end of the hose that goes to the handpiece at the bottom. Compare with the adjoining illustration.
3. Push the short end of the hose with the cannula through the stopper and into the NaCl bottle. The regulator in the hose clip must be completely open (regulating wheel in top position).
4. Run the long end of the hose alongside the Implant motor hose up to the contra-angle handpiece. Fasten the hose with clips.
5. Plug a thin silicone hose into the NaCl connector of the contra-angle handpiece. For details, see the instructions for use for the contraangle handpiece.
6. Then plug the thin silicone hose of the contra-angle handpiece into the thicker hose of the NaCl pump.
7. Place the contra-angle handpiece on the separate silicone holder for sterile instruments.
4 Operation 4.5 Dentist element Dentsply Sirona Instructions for Use Treatment Center Axano 94 67 17 396 D3685 D3685.201.01.04.02 2023-06
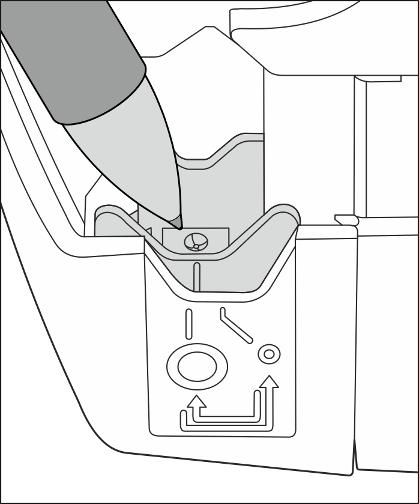
4.5.8.8


The NaCl pump has two settings for peristaltic pump hoses of different diameters. For the Dentsply Sirona peristaltic pump hoses, the wide setting must be selected. This ensures an optimal supply rate. The NaCl pump is therefore delivered with the wide default factory setting.
The hose setting can be changed when needed by pressing on it with a pen. The setting must always be adjusted on both sides.
Setting the NaCl flow rate
ü The expandedinstrumentdialog of the motor or ultrasonic handpiece is displayed on the Smart Touch.
ü NaCl is preselected as the coolant, see "Preselecting coolant" [→ 91]
1. Use the arrow keys to set the flow rate of the NaCl pump.
Ä The selected setting is displayed on the upper edge of the Smart Touch. In addition, the set flow rate is indicated by a gray filling of the key.
2. Test the flow rate set for the instrument. Correct the setting if necessary.
WARNING
Ultrasonic scaler tips of third-party manufacturers do not always have a sufficient flow rate in conjunction with the NaCl function.
➢ Use only ultrasonic scaler tips from Dentsply Sirona. See also the SiroSonic TL instructions for use.
Dentsply Sirona Instructions for Use Treatment Center Axano 4 Operation 4.5 Dentist element 67 17 396 D3685 D3685.201.01.04.02 2023-06 95
4.5.9 Sprayvit multifunctional syringe
The Sprayvit multifunctional syringe is used for dental treatment with air and water. The Sprayvit multifunctional syringe is also used to illuminate the preparation field.
The spray water is heated to a physiological temperature.
4.5.9.1 Structure A Media lever B
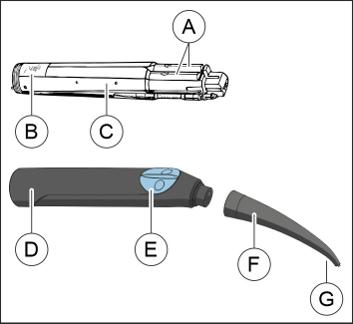
Year of manufacture
Valve body
Housing
Keyboard F Nozzle G Light aperture
4.5.9.2 Product labeling
Can be thermally disinfected
20XX Date of manufacture
Order number
4.5.9.3 Media supply
Can be sterilized at 135 °C (275 °F)
Serial number
At the supply hose inlet, unit end: Temperature of input medium in °C max. 38 Water pressure in bar (flowing)
± 0.1 Water flow rate in ml/min ≥130
pressure in bar (flowing)
± 0.1 Air flow rate in Nl/min ≥ 13
4.5.9.4 Safety notices
Protect yourself, the patient and any third parties from danger. To do this, observe the following safety information:
4 Operation 4.5 Dentist element Dentsply Sirona Instructions for Use Treatment Center Axano 96 67 17 396 D3685 D3685.201.01.04.02 2023-06
SN xxxxx
20xx
Serial Number
C
D
E
2
Air
3.2
WARNING
A small metal tube protrudes at the tip of the nozzle. Risk of injury and contamination!
➢ Avoid contact with the tip of the nozzle. Do not attempt to handle with the nozzle attached.
➢ Remove the nozzle after every patient and carry out reprocessing.
IMPORTANT
Air and water must be able to flow out of the nozzle freely. Do not place the nozzle against a tooth or other object. Do not press the nozzle into the impression material.
4.5.9.5 Connecting the instrument hose
WARNING
Risk of electric shock
➢ Do not operate the media lever when the housing is removed!

1. Attach the valve body (A) to the supply hose, observing the various tube diameters. The valve body may also remain in the housing.
2. Screw the cap nut (B) onto the valve body and tighten it.
4.5.9.6 Attach/remove the housing and nozzle
Attaching
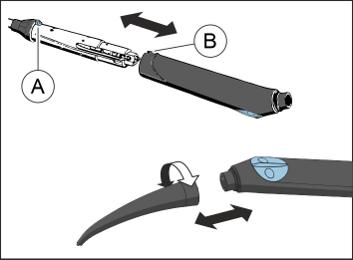
1. Align knob (A) and recess (B) so they face each other.
2. Attach the housing until it clicks into place.
3. Twist the nozzle onto the housing.
4. Check to make sure the nozzle is firmly attached.
WARNING
If the nozzle is not locked in place, it can come loose when the Sprayvit is operated and fall into the patient's throat.
Removal
1. Twist the nozzle to detach it from the housing.
2. Press the lock knob and pull the valve body out of the housing at the cap nut. Do not hold or pull on the supply hose!
Dentsply Sirona Instructions for Use Treatment Center Axano 4 Operation 4.5 Dentist element 67 17 396 D3685 D3685.201.01.04.02 2023-06 97
4.5.9.7
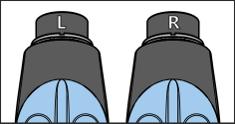

Applying air, water, or spray
In the standard design, the water button for the Sprayvit multifunctional syringe is located on the right. A Sprayvit with inverted media (water on the left) is available as an option.
When the nozzle is taken out of the holder, you can see which design it is. If the water button is on the right, it is marked "R", for Sprayvit with the water button on the left, "L".
The following instructions apply to the standard design of Sprayvit (water on the right).
➢ Press the Air key (A).
Ä Air flows out of the instrument tip.
➢ Press the Water key (B)
Ä Water flows out of the instrument tip.
➢ Press the Air key (A) and the Water key (B) simultaneously.
Ä Spray flows out of the instrument tip.
➢ Twist the nozzle (C) to reach the desired spray direction.
4.5.9.8 Switching instrument light and water tempering on/off
The instrument light and water tempering of the two Sprayvit multifunctional syringes on the dentist and assistant elements can be switched on and off independently. Switching on/off refers to the multifunctional syringe that has been removed from the dentist element or the assistant element. If both multifunctional syringes are removed from their holders, the setting applies only to the multifunctional syringe of the dentist element.
If the Sprayvit is not operated for 10 s, the instrument light turns off automatically.
The Sprayvit does not have its own dialog. The keys for switching the instrument light and water tempering on/off are displayed in the start dialog when it is taken from the holder.
ü The startdialog or expandedstartdialog is displayed on the Smart Touch.
1. Take the Sprayvit from the holder of the dentist or assistant element.
4 Operation 4.5 Dentist element Dentsply Sirona Instructions for Use Treatment Center Axano 98 67 17 396 D3685 D3685.201.01.04.02 2023-06
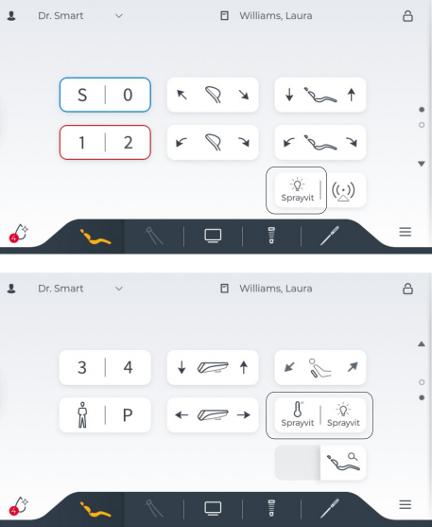
Ä In the startdialog, the Sprayvitinstrumentlight is displayed; in the expandedstartdialog, the Sprayvitwatertempering key is also displayed.
2. Tap on the keys to switch on/off.
Ä If the key is marked orange, the instrument light or water tempering function of the Sprayvit is activated.
Dentsply Sirona Instructions for Use Treatment Center Axano 4 Operation 4.5 Dentist element 67 17 396 D3685 D3685.201.01.04.02 2023-06 99
4.5.10 Turbine / air motor / other air-driven instruments
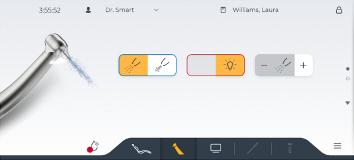
WARNING
Excessive speed can cause damage to the teeth.
➢ Note speed limit for the tool. The permissible speed is indicated in the tool documentation.
IMPORTANT
Please see the instructions for use for the various turbines, air motors, or air-driven instruments.
The turbine hose is equipped with a standardized ISO 9168 coupling. In the expandedturbinedialog, spray can be preselected as coolant and the instrument light can be set. The water quantity in the spray can be adjusted individually on the Smart Touch. See "General instrument functions" [→ 91]. Depending on the turbine type, the quick coupling can be equipped with a setting ring for water quantity.
If your treatment center is equipped with the driving air control option, the driving air of the turbine can be controlled using the foot pedal.
4 Operation 4.5 Dentist element Dentsply Sirona Instructions for Use Treatment Center Axano 100 67 17 396 D3685 D3685.201.01.04.02 2023-06
4.5.11
Motor
The motor drives rotating and oscillating straight and contra-angle handpieces. Depending on the model, a 405 nm diode supports the visualization of fluorescent materials, e.g. for removing carious tooth substance or fluorescent synthetic fillings. In addition, motorized endometric measurement is supported.
The motors meet the ISO 14457 standard.
4.5.11.1
Motor versions
Different brushless motors are available depending on the type of use and the coupling of the handpiece and contra-angle handpiece. Brushless motors are designed as three-phase motors (without carbon brushes). They feature precise controllability and longevity. The speed range lies between 90 and 40,000 rpm.
For information on apex measurements using the instrument, refer to the section “Preparing to use the ApexLocator” [→ 118]
For reprocessing the motors, please refer to the section "Disinfecting/ sterilizing motors and adapters" [→ 226].
Hose coding
The motor hose of the BL E and BL ISO F motors is different from that of the BL Implant E implantology motor. However, mechanical coding rules out the possibility of mixing up the two hoses. The treatment center recognizes the connected motor type using this and configures the control system accordingly.
IMPORTANT
When changing between the motor variants BL E and BL ISO F, the motor must be started once so the system can recognize the new motor type. This does not apply to the BL Implant E motor.
BL E motor

A Motor shaft including carrier
B Product labeling
C Coupling connection (green / 3 guide lugs)
The BL E motor is designed for the direct operation of the T1 Classic handpieces. In order to use the straight and contra-angle handpiece with an ISO interface, either the ISO adapter (no apex measurement, spray) or the Basic Apex adapter (apex measurement, no spray) have to be used as a connector.
Dentsply Sirona Instructions for Use Treatment Center Axano 4 Operation 4.5 Dentist element 67 17 396 D3685 D3685.201.01.04.02 2023-06 101

ISOadapter(left)andBasicApexadapter(right)
BL ISO F motor

A Handpiece holder
B O-ring 8.4 x 0.7
C Product labeling
D BL ISO F motor sleeve
E Coupling connection (green / 3 guide lugs)
The BL ISO F motor is equipped with an ISO interface. This allows all straight and contra-angle handpieces with an ISO interface to be used without an adapter.
BL Implant E motor

A Handpiece holder
B O-ring 8 x 1
C Product labeling
D BL Implant E motor sleeve
E Coupling connection (violet / 3 guide lugs)
The BL Implant E motor has been specially designed for surgical use. The air/water supply (spray) is therefore not present. It has a very high torque.
The motor is equipped with an instrument light.
4 Operation 4.5 Dentist element Dentsply Sirona Instructions for Use Treatment Center Axano 102 67 17 396 D3685 D3685.201.01.04.02 2023-06
4.5.11.2
Product labeling
The motors or the motor sleeves and the adapters are labeled with the following information:
Manufacturer and product name Sterilizable at 135 °C (275 °F) 20XX
Year of manufacture
Serial Number
4.5.11.3
Technical Data
Motors
Data Matrix code
Length in mm
diameter in mm ~ 16 ~ 22 ~ 22 Max. speed in rpm ~ 40000 ~ 40000 ~ 30000 Torque in N/cm ~ 2.4 ~ 3.0 ~ 5.0
Limiting current in A, short term ~ 7 ~ 7 ~ 7
Max. power in W
45 ~ 61 ~ 80 Spray function
Handpiece holder – ISO 3964
* INTRAmatic Lux® interface
Adapter for BL E motor
Handpiece holder – ISO 3964
Media supply
Dentsply Sirona Instructions for Use Treatment Center Axano 4 Operation 4.5 Dentist element 67 17 396 D3685 D3685.201.01.04.02 2023-06 103
BL E BL ISO F BL Implant E
~
40 ~ 45 ~ 61 Max.
x xLight
x x* x*
x x -
~
function
Apex measurement function
- x x
ISO adapter Basic Apex adapter Light function x x Spray function xApex
- x
measurement function
x x
BL E and BL ISO F BL Implant E Cooling air pressure in bar 2.2 - 3 2.2 - 3 Cooling air supply in l/min 20 ±2.5 20 ±2.5 Spray air pressure in bar 2.7±0.2 –
BL E and BL ISO F BL Implant E
Spray air flow in L/min > 1.5 –
Spray water pressure in bar 2 ±0.2 –
Spray water flow in ml/min > 100 –
Recommended water content in spray in ml/min > 50 –
4.5.11.4 Safety instructions
WARNING
Speed setting
Speed set too high can cause damage to the teeth.
➢ Note speed limit for the tool. The permissible speed is indicated in the tool documentation.
WARNING
Prevent eye damage
The LED is in risk class 2 according to the IEC 62471:2006 standard. The LED emits optical radiation that is potentially hazardous and may be harmful to the eyes. Potential damage to the retina from the blue light emission.
➢ Do not look at the LED for longer periods of time while in operation.
WARNING
Cooling of the preparation site
The BL Implant E motor and Basic Apex adapter do not provide cooling spray.
➢ Ensure sufficient cooling of the preparation site via a sterile external media supply, e.g. NaCl.
WARNING
Motor cooling
➢ If the motor overheats under high load, let it cool off by idling at half speed before continuing treatment. No more than 4 implants should be prepared at one time.
➢ Never operate the motor without cooling air (except BL Implant E motor).
WARNING
Lubricating straight and contra-angle handpieces
The instructions for use for straight and contra-angle handpieces provide information on the type of lubrication.
CAUTION
Risk of injury when changing the hose
➢ Do not detach the motor from the instrument hose during operation!
4 Operation 4.5 Dentist element Dentsply Sirona Instructions for Use Treatment Center Axano 104 67 17 396 D3685 D3685.201.01.04.02 2023-06
NOTICE
Protecting the motor shaft/axis
A bent motor shaft on the BL E motor causes irregular operating noises or strong vibrations. This can damage instruments.
➢ Do not let the motor fall to the floor.
NOTICE
Never lubricate electric motors!
➢ Remove the handpieces from the electric motors at the end of the working day so that no oil can run into the motor overnight.
4.5.11.5 Connecting the instrument hose
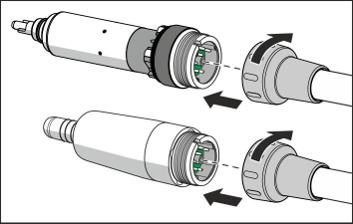
ü Colored marks and position of guide lugs on motor and hose coupling of the instrument hose match.
1. Slide back the cap nut at the hose coupling.
2. Attach the motor onto the hose coupling up to the stop, observing the contact pins and tubes. Make sure the hose coupling does not tilt.
Ä The arrow on the hose coupling and the notch on the motor must face each other.
3. Press the cap nut gently onto the thread; then turn it counterclockwise until a faint click is heard.
4. Screw the cap nut tightly onto the motor clockwise
Does water leak out between the motor and the hose connection?
1. Remove the motor from the instrument hose.
2. Reconnect the motor to the instrument hose. Make sure it is connected properly.
3. If water still leaks, replace the sealing washer.
4.5.11.6 Changing an instrument
WARNING
The instrument should be attached or removed only when the motor is at standstill.
Attach the instrument/adapter to the BL E motor
WARNING
Do not operate the BL E motor with an exposed motor shaft and attachments (removed instrument/adapter). Risk of injury!
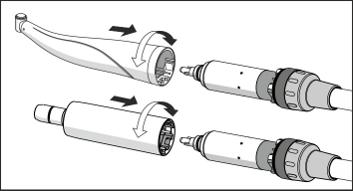
ü The motor is at a standstill.
➢ Attach the instrument or adapter. Lock the instrument or adapter into place by turning it.
Dentsply Sirona Instructions for Use Treatment Center Axano 4 Operation 4.5 Dentist element 67 17 396 D3685 D3685.201.01.04.02 2023-06 105

Attach the instrument to the BL ISO F motor and BL Implant E motor or adapter
ü The motor is at a standstill.
1. Align the nib (A) of the instrument with the groove (B) of the motor.
2. Insert the instrument until it snaps into place.
Removing instrument/adapter
ü The motor is at a standstill.
➢ Detach the instrument or adapter. Do not pull on the instrument hose while doing this.
4.5.11.7 Setting the speed

Speeds are saved on the quick setting keys that can be accessed by pressing them. Individual speeds can be saved for each user profile on the quick setting keys.
The settings for coolant, instrument light, foot control switch, and direction can be saved if the expandedfavoritesstorage function is not deactivated in the setup dialog, see "Settings/Instruments [→ 172]". The quick setting keys can be labeled individually.

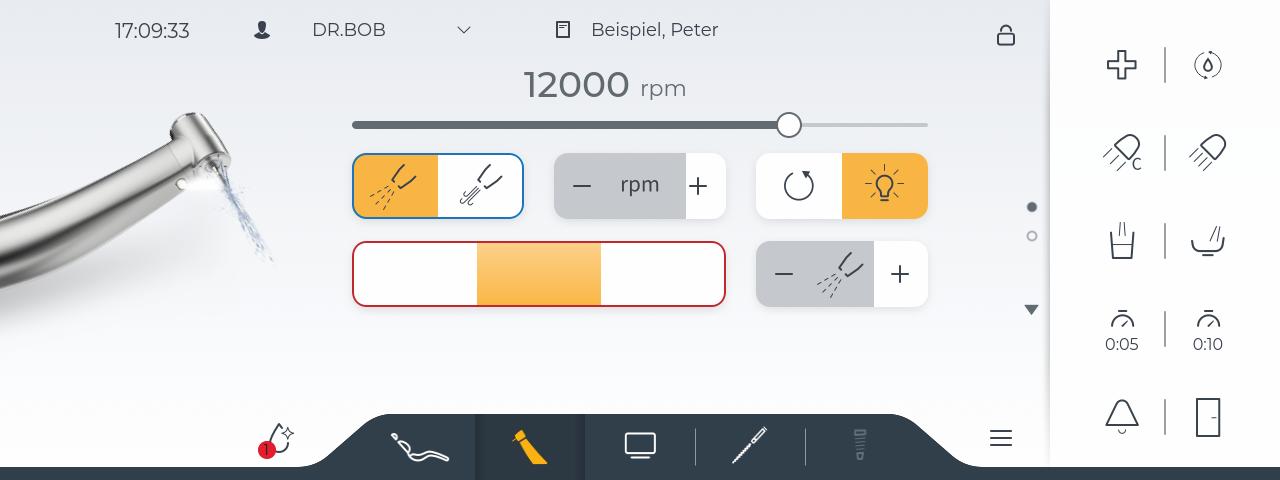
Please note that the speed of the bur depends on the selected is displayed on the Smart Touch.
➢ Tap on one of the quick setting keys (<1 s).
Ä The quick setting keys are marked orange. The selected speed is displayed in rpm (revolutions per minute).


or
➢ The quick setting keys are the starting position for the red cursor. You can activate the quick setting keys consecutively using the swivel buttons of the foot control.
Changing the speed
➢ Set the desired speed using the slider.
or
➢ Tap on the - or + keys in the rpm field.
Ä The speed is increased or reduced.
4 Operation 4.5 Dentist element Dentsply Sirona Instructions for Use Treatment Center Axano 106 67 17 396 D3685 D3685.201.01.04.02 2023-06

or
➢ Position the cursor on the rpm field by pressing and holding the middle button. Then press the swivel buttons.

The size of the increments depends on the speed range set:

If the value of a programmed quick setting key is changed, the background color changes (light orange); if the changed value is reached again, the original color (deep orange) is displayed. The key status is thus visible at all times.


function is activated: The settings for coolant, instrument light, foot control switch, and
1. Press and hold the desired quick setting key (> 2 s).

4.5.11.8
2. When the expandedfavoritesstorage function is activated, a keyboard is displayed. Enter a name and confirm with OK.
Ä The set speed and any other instrument settings are saved on the quick setting key.
Changing direction of rotation
The direction of rotation can be changed only when the motor is stopped.
After the electric motor is started with the foot control, an audible warning signal sounds if counterclockwise rotation is activated.
ü An electric motor is removed from its holder.
ü The motordialog is displayed on the Smart Touch.

➢ Tap on the CCWrotation key.
Ä The key is marked orange when CCW rotation is activated.
Dentsply Sirona Instructions for Use Treatment Center Axano 4 Operation 4.5 Dentist element 67 17 396 D3685 D3685.201.01.04.02 2023-06 107

➢ Position the red cursor on the CCWrotation key by pressing the middle button briefly. Then, depending on the position of the key, press the left or right swivel button of the foot control. The cursor automatically moves back to the starting position (quick setting keys).
4 Operation 4.5 Dentist element Dentsply Sirona Instructions for Use Treatment Center Axano 108 67 17 396 D3685 D3685.201.01.04.02 2023-06 or
4.5.12 SiroSonic TL ultrasonic handpiece
The SiroSonic TL ultrasonic handpiece is used for removing plaque and for endodontic treatments.
WARNING
See also the SiroSonic TL instructions for use.
4.5.12.1
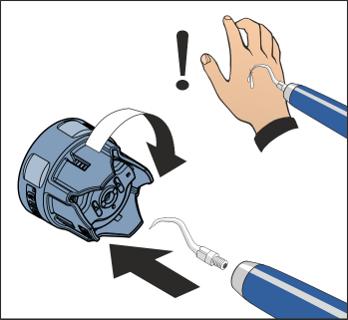
Safety instructions
The torque wrench is used as a tool for screwing in instrument tips and, at the same time, to protect against injury.
CAUTION
Ultrasonic tips are are very sharp. There is a risk of injuring the hand when the ultrasonic handpiece is in the holder.
➢ Always attach the torque wrench to the ultrasonic handpiece for protection as soon as you deposit the handpiece.
CAUTION
Ultrasonic tips from other manufacturers do not guarantee safe operation and can lead to harm.
➢ Use only original Dentsply Sirona parts or parts/tips approved by Dentsply Sirona. Safe operation is not guaranteed for parts/tips that have not been approved by Dentsply Sirona and the handpiece may be damaged.
4.5.12.2

Setting the intensity
Intensity values are saved on the quick setting keys that can be accessed by pressing them. Individual intensity values can be saved for each user profile on the quick setting keys.
The settings for coolant and instrument light can be saved if the expandedfavoritesstorage function is not deactivated in the setup dialog, see "Settings/Instruments [→ 172]". The quick setting keys can be labeled individually.
Accessing intensity settings
ü The SiroSonic TL ultrasonic handpiece is removed from the holder.
ü The Ultrasonicdialog is displayed on the Smart Touch.


➢ Tap on one of the quick setting keys (<1 s).
Ä The quick setting key is marked orange. The selected intensity is displayed in percent. or
➢ The quick setting keys are the starting position for the red cursor. You can activate the quick setting keys consecutively using the swivel buttons of the foot control.
Dentsply Sirona Instructions for Use Treatment Center Axano 4 Operation 4.5 Dentist element 67 17 396 D3685 D3685.201.01.04.02 2023-06 109


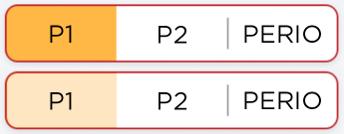
Changing the intensity
1. Set the desired intensity with the slider. or
➢ Tap on the - or + keys in the Ultrasonicintensity field.
Ä The intensity value is increased or reduced. or
➢ Position the red cursor on the Ultrasonicintensity field by pressing and holding the middle button. Then press the swivel keys.
The size of the increments depends on the intensity range set.
From 1 to 5% = 1% increments
From 5 to 100% = 5% increments
If the value of a programmed quick setting key is changed, the background color changes (light orange); if the changed value is reached again, the original color (deep orange) is displayed. The key status is thus visible at all times.
Saving intensity
ü The desired intensity is set.
ü When the expandedfavoritesstorage function is activated: The settings for coolant and instrument light have been made (will be saved).


1. Press and hold one of the five quick setting keys (> 2 s).
2. When the expandedfavoritesstorage function is activated, a keyboard is displayed. Enter a name and confirm with OK
Ä The set intensity and any other instrument settings are saved on the quick setting key.
4 Operation 4.5 Dentist element Dentsply Sirona Instructions for Use Treatment Center Axano 110 67 17 396 D3685 D3685.201.01.04.02 2023-06
4.5.13 External HF surgical device
External HF surgical units may interfere with the treatment center and patient monitor. The treatment center should therefore be protected against interference caused by the external HF surgery unit whenever the latter is used.
As long as the suction removal system is required with the external HF surgery unit during the treatment, the suction handpiece must be removed from the holder before blocking the treatment center. The suction system remains switched on until the block is removed and the suction handpiece is returned to its holder.
ü The expandedstartdialog is displayed on the Smart Touch.

1. Tap on the externalHFsurgeryunit key.
Ä If the function is activated, the key is marked orange. The instruments of the dentist and assistant elements can no longer be activated. The patient monitor and camera system are switched off.
2. You can now start using the external HF surgery unit. Tap on the externalHFsurgeryunit key again after using it.
Ä The treatment center is once again enabled.
Electromagnetic interference can often be reduced by operating the external HF surgery unit with a neutral electrode.
Dentsply Sirona Instructions for Use Treatment Center Axano 4 Operation 4.5 Dentist element 67 17 396 D3685 D3685.201.01.04.02 2023-06 111
4.5.14

Endodontic and implantology treatments
The treatment functions support endodontic and implantology treatments.
A selection of the most common file and implantology systems with the manufacturer's recommended speed and torque values is stored in a database. The database is updated when there are changes or upgrades. The update must be confirmed by each user. The update can be made independently of a firmware update.
The programmed parameters of the database are recommendations of the respective manufacturers and can be changed by them. Therefore, please make sure to always check the specifications of the respective manufacturer prior to use.
The complexity of the root canal can be set and is taken into consideration for motor control in endodontic treatments. The treatment center can be equipped with an integrated ApexLocator for electric apex measurements.
In order to supply the bur drive with a sterile saline solution during implantology treatments, a peristaltic pump must be attached to the dentist element; see "Preparing for use of NaCl saline solution" [→ 93]
4.5.14.1 Endodontics
WARNING
Only the Dentsply Sirona Endo 6:1 and Endo 6 L contra-angle handpieces may be used for endodontic treatment.
Instruments from other manufacturers can lead to malfunctions or be incorrectly calibrated.
4.5.14.1.1

Switching endodontic treatment on/off
Switching endodontic treatment on and assigning a motor
1. Tap on the endodontics dialog change key.
Ä The endodonticsdialog is displayed. The endodontics dialog change key is marked orange.
Ä In the endodontics dialog, a difference is made between the standard and advanced dialog. The advanced dialog is intended for experts who wish to change the speeds and torque values recommended by the manufacturers of the file systems and saved in the file database. The currently measured torque is then displayed in the widget instead of the stored file parameters. You can set the variant you would like to work with in the setup dialog, see "User interface [→ 187]".
4 Operation 4.5 Dentist element Dentsply Sirona Instructions for Use Treatment Center Axano 112 67 17 396 D3685 D3685.201.01.04.02 2023-06

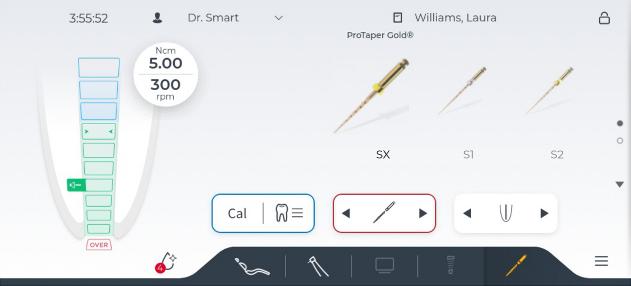
Standardendodonticsdialog
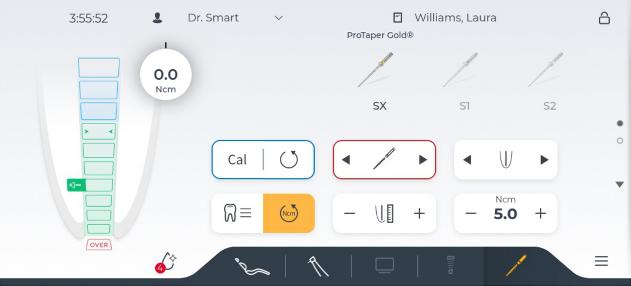
Advancedendodonticsdialog
2. Take the motor that you wish to assign to the endodontic treatment from the instrument holder.
Ä Next to the symbol of the endodontics dialog change key, a number is displayed that shows the instrument position of the motor removed. This motor is now assigned to endodontics treatment.
Ä You can return the assigned motor to the holder, take another instrument, or open the start and Sivision dialog by tapping the dialog change keys.
Ä When you take the motor assigned to the treatment from the holder, the endodontics dialog automatically appears instead of the motor dialog.
Switching endodontic treatment off
In order for the Motordialog to be displayed again when the assigned motor is removed, the endodontic treatment function must be switched off beforehand.
1. Take the motor assigned to endodontic treatment from the instrument holder. The number next to the endodontics dialog change key indicates the position of the assigned instrument.
Ä The endodonticsdialog is displayed on the Smart Touch.

2. Tap on the instrument dialog change key.
Ä The motordialog is displayed and the instrument dialog change key is marked orange.
Ä Endodontics treatment is switched off.
Dentsply Sirona Instructions for Use Treatment Center Axano 4 Operation 4.5 Dentist element 67 17 396 D3685 D3685.201.01.04.02 2023-06 113
4.5.14.1.2 Calibrating the burr drive
WARNING
Calibration must be performed each time you start treatment and each time you change or lubricate the contra-angle handpieces. Recalibration is not necessary when a file is changed.
The contra-angle handpiece is automatically checked during calibration. This includes a measurement of motor current at different speeds to assess the properties of the system.
WARNING
Use only Dentsply Sirona instruments to guarantee correct calibration.
ü The endodonticsdialog is displayed on the Smart Touch.
1. Attach the contra-angle handpiece that you would like to use for the treatment to the electric motor.
2. Insert a file in the contra-angle handpiece. This ensures that the file is taken into account in the measurement.

3. Tap on the Cal key.
or
➢ Press the left button of the foot control.
Ä The button flashes orange. During calibration, increasing speeds are set on the motor. When the bur drive is calibrated, the key is permanently marked orange. Calibration is then finished.
4.5.14.1.3 Select favorite file system
ü The endodonticsdialog is displayed on the Smart Touch.

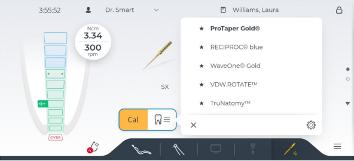
1. Tap on the Selectfilesystem key.
Ä A list of favorite file systems is displayed.
2. Select one of the file systems listed. If the desired system is not on the list, it has not yet been marked as a favorite, see "Managing file systems" [→ 125]
Ä After tapping on a file system, the list is hidden. The files of the selected system are displayed in the endodontics dialog.
4.5.14.1.4 Selecting a file
ü The files of the selected file system are displayed in the endodontics dialog.

➢ Select the desired file. Tap on the File selection keys or one of the files displayed. Swipe left and right to display other files for the selected file system.
4 Operation 4.5 Dentist element Dentsply Sirona Instructions for Use Treatment Center Axano 114 67 17 396 D3685 D3685.201.01.04.02 2023-06

or
➢ The file selection is the starting position for the red cursor. Press the left or right swivel button of the foot control.
Ä The selected file is marked.
Ä The speed and torque values recommended by the manufacturer are displayed in fine gray print.
WARNING
Root canal files are subject to material fatigue.
Fatigued files may break during treatment.
➢ Use files only for the service life specified by the manufacturer.
WARNING
The parameters of the filing systems can be changed by the respective manufacturer. Therefore, please make sure to always check the specifications of the respective manufacturer prior to use.
4.5.14.1.5

Selecting the complexity of the root canal
Using the root canal complexity, the maximum torque can be reduced in increments according to the anatomical conditions of the root canal:
1. Low complexity, maximum torque (standard)
2. Medium complexity, moderate reduction
3. High complexity, strong reduction
The value changed according to complexity is displayed at the top on the torque key, below it the stored value. The change is also displayed in the widget. For reciprocating files, it is displayed only on the key symbol for root canal complexity.
ü The endodonticsdialog is displayed on the Smart Touch.
1. Select the complexity of the root canal using the arrow keys.
Ä Depending on the selection, the key symbol changes.
2. Press the foot pedal.
Ä The file rotates at the set speed, see "Changing speed and torque" [→ 115]
Ä When the maximum torque is reached, the bur drive stops, or even sooner depending on the complexity of the root canal that was set. If the torque reverse function is switched on, it switches automatically to counterclockwise rotation, see "Switching torque reverse function on/off" [→ 117]
Ä The torque stop or torque reverse function can be combined with the measurement of the ApexLocator, see "Setting apex distance and function when reached" [→ 122].
4.5.14.1.6
Changing speed and torque
If you do not want to use the stored standard file parameters, you can change them.
In endodontic treatment, the speed and torque values of the contraangle handpiece, and not those of the motor, are specified. The control electronics of the bur drive calculate motor control based on the specified gear reduction and the speed and torque settings.
Dentsply Sirona Instructions for Use Treatment Center Axano 4 Operation 4.5 Dentist element 67 17 396 D3685 D3685.201.01.04.02 2023-06 115
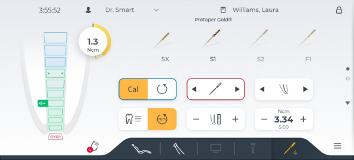
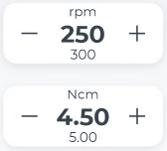
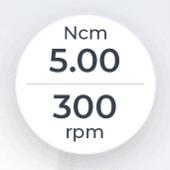
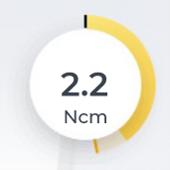
ü The desired file is selected in the advancedendodonticsdialog
➢ Use the – and + keys to set the speed and torque of the contraangle handpiece. You can also press and hold the keys to do this.
Ä In the first line, the set value is displayed, in the second line, the value stored according to the manufacturer's specifications.
An acoustic signal sounds when 75% of the maximum torque is reached.
In the standard endodontics dialog, the torque and speed stored in the file database are displayed in the widget.
In the advanced endodontics dialog, the measured torque is displayed in the widget. The yellow ring shows the current torque, the drag anchor and numerical display show the maximum torque of the step.
You can set the variant you would like to work with in the setup dialog, see "User interface [→ 187]".
IMPORTANT
Torque adjustment
The maximum adjustable torque depends on the system motor and the speed settings.
WARNING
Improperly selected speeds and torque values endanger the patient. Treatment errors, e.g. breaking of a file, may result from incorrect settings.
➢ Observe the manufacturer's instructions regarding file systems.
4.5.14.1.7 Switching the torque signal on/off
This can be used to set the beep that sounds whenever approx. 75% of the set torque value is exceeded.
ü The expandedendodonticsdialog is displayed on the Smart Touch.

➢ Touch the beep key.
Ä If the key is marked orange, the torque beep is switched on.
4.5.14.1.8 Changing direction of rotation
The direction of rotation can be changed only when the motor is stopped.
4 Operation 4.5 Dentist element Dentsply Sirona Instructions for Use Treatment Center Axano 116 67 17 396 D3685 D3685.201.01.04.02 2023-06

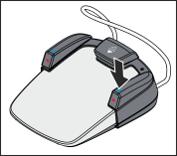
After the electric motor is started with the foot control, an audible warning signal sounds if counterclockwise rotation is activated.
ü The endodonticsdialog is displayed on the Smart Touch.
➢ Tap on the CCWrotation key. or
➢ Press the right button of the foot control.
Ä The key is marked orange when CCW rotation is activated.
4.5.14.1.9 Switching the torque reverse function on/off
When the torque reverse function is switched on, the bur drive automatically switches to counterclockwise rotation when the set torque value is reached. When the foot pedal is pressed again, the bur drive switches back to clockwise rotation.
The torque reverse function can be combined with the function when reaching the set distance to the apex, see "Setting apex distance and function when reached" [→ 122]
ü The endodonticsdialog or expandedendodonticsdialog is displayed on the Smart Touch.

4.5.14.1.10
➢ Tap on the Ncm reverse key.
Ä If the key is marked orange, the torque reverse function is switched on.
Using the ApexLocator
The ApexLocator can be used to measure the working length of the root canal file in endodontic treatments using electrical impedance.
The ApexLocator can be used as follows:
● For manual measurement using a file clamp
● For measurement during treatment with the motor for endodontic treatment
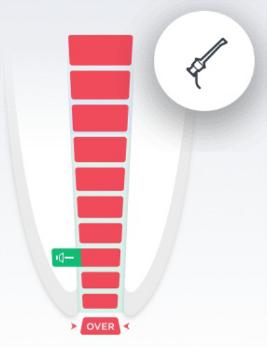
WARNING
The ApexLocator can be influenced by electromagnetic fields. This may lead to measurement errors. Strong interference is indicated by a flashing red bar in the distance display. A warning signal sounds.
➢ Ensure that there are no sources of electromagnetic interference close to the treatment center.
If the ApexLocator detects a defect, the distance display and Apex operating keys are not shown on the Smart Touch. An error message is then displayed.
For more information about the distance display, see "Distance display" [→ 119]
Dentsply Sirona Instructions for Use Treatment Center Axano 4 Operation 4.5 Dentist element 67 17 396 D3685 D3685.201.01.04.02 2023-06 117
4.5.14.1.10.1 Preparing to use the ApexLocator
Apex adapter, mucosal electrode and file clamp

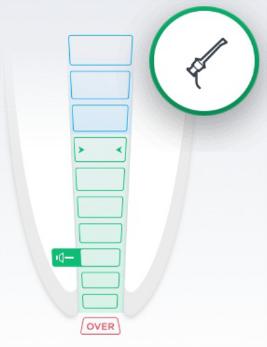
The mucosal electrode and the file clamp are connected to the socket below the dentist element using the apex adapter.
1. First, connect the apex adapter at the bottom of the dentist element first.
2. Then, insert the connector of the mucosal electrode into the large socket of the apex adapter.
3. After that, insert the connector of the file clamp into the small socket of the Apex adapter.
4. Check the measuring system: Before starting the apex measurement, the electrical measuring system must be checked by shorting the electrodes. To do this, hold the plugged in files directly against the mucosal electrode.
Ä If a short beep sounds and the circle on the distance display is bordered in green, the test was successful. If not, check the electrical connections for signs of damage.
WARNING
The apex adapter must be placed in the apex holder during treatment.
WARNING
If the file clamp and mucosal electrode are put down during treatment, they must be removed from the apex adapter or put down under sterile conditions.
WARNING
Following treatment with the ApexLocator, the Apex adapter must be disconnected from the dentist element.
Care and cleaning of the ApexLocator components is described in the “Care and cleaning instructions for the practice team” section, see “Cleaning and disinfecting/sterilizing the components of the ApexLocator” [→ 232]
Apex measurement via the instrument
The apex is measured by means of an impedance measurement between the root canal file and mucosal electrode. The apex measurement signal is conducted as follows:
● Apex cable in the instrument hose
● Metal housing of the motor
● Endodontic handpiece
● Root canal file
● Mucosal electrode
● Apex adapter
4 Operation 4.5 Dentist element Dentsply Sirona Instructions for Use Treatment Center Axano 118 67 17 396 D3685 D3685.201.01.04.02 2023-06
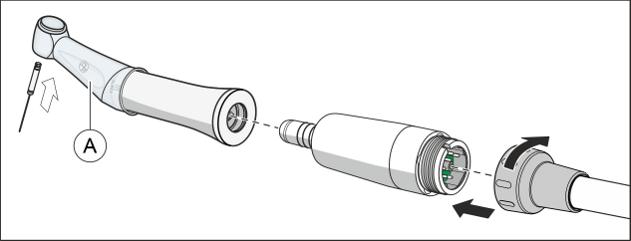
For endodontic treatments with the ApexLocator, the Dentsply Sirona Endo 6:1 or Endo 6 L contra-angle handpieces are required for the treatment function.
WARNING
Pull the silicone isolation sleeve (A) over the contra-angle handpiece and wear insulating gloves to prevent faulty measurements due to leakage current. During the measurement, the instrument must not come into contact with the patient's mucosa or the mucosal electrode.
We recommend the use of a cofferdam for treatment.
WARNING
The silicone isolation sleeve is a single-use item and must be sterilized before use.
Details can be found in the section "Cleaning and disinfecting/ sterilizing the components of the ApexLocator" [→ 232]
WARNING
Moisture in the motor influences the measurement behavior.
4.5.14.1.10.2 Distance display
The measured root canal depth is shown in the distance display on the Smart Touch. This shows the distance from the root canal file to the physiological apex (apical constriction). The root canal is divided into three colored regions in the distance display.
WARNING
The distance display is not a metric specification of length.
The ApexLocator should be used as an additional aid to supplement the usual root canal treatment measures. It is not intended to replace the radiological determination of the working length.
➢ To determine the exact length, also make the relevant X-ray images.
Measuring is started when current flows between the root canal file and the mucosal electrode.
Dentsply Sirona Instructions for Use Treatment Center Axano 4 Operation 4.5 Dentist element 67 17 396 D3685 D3685.201.01.04.02 2023-06 119
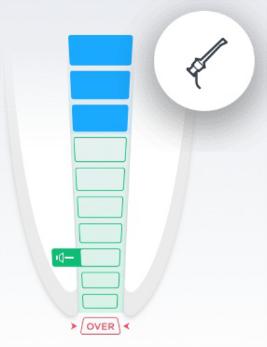
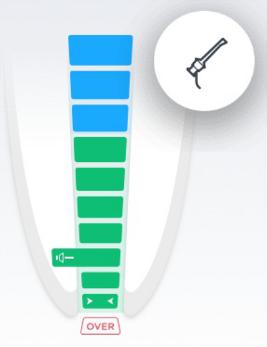

Colored regions of the distance display
Blue region
The tip of the root canal file is near the apex.
Green region
The tip of the root canal file has reached the physiological apex.
Red region
The tip of the root canal file has pierced the physiological apex. The instrument overshoot is displayed.
In the event of electromagnetic interference, the red bar flashes.
Acoustic output of the distance display
The distance display can be supported by an acoustic output. This can be set in the setup, see "Settings/Operation/Sounds [→ 179]/Apex locator".
Distance display on the patient monitor
The distance display on the Smart Touch can also be shown on the patient monitor. This is displayed/hidden in Sidexis 4 by tapping the distance display. For this, Sidexis 4 and Sivision View must be installed on the PC.
For details, please refer to the "Sivision View" user manual REF 68 00 143
4 Operation 4.5 Dentist element Dentsply Sirona Instructions for Use Treatment Center Axano 120 67 17 396 D3685 D3685.201.01.04.02 2023-06
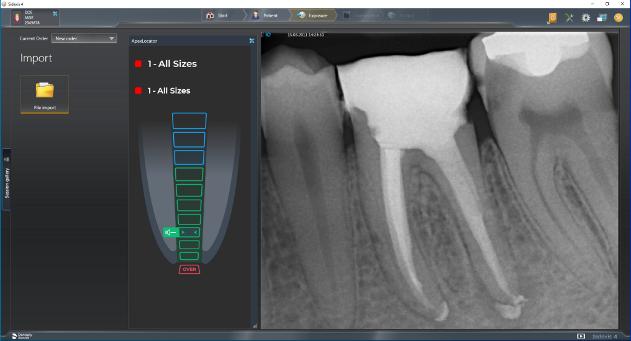
4.5.14.1.10.3 Apex and endodontics beeps
Apex beeps
In addition to the graphical distance display on the Smart Touch, the position of the file in the root canal can also be indicated as an acoustic signal.
● No beep is played if the file is at least five display levels from the apex on the distance display.
● Beeps with long intervals are played if the file is three or four display levels away from the apex.
● Beeps with short intervals are played if the file is one or two display levels away from the apex.
● A continuous beep is played when the file has reached or passed the apex.
The volume of the beeps for apex measurement can be set in three levels, see "Settings/Operation/Sounds [→ 179]/Apex locator". You can also switch off the beeps.

Tip: In the expanded endodontics dialog, keys can also be placed to adjust the volume of the Apex beeps, see "User interface [→ 187]".
Endodontics beeps
The following endodontics beeps are emitted:
● One beep sounds when the set torque value is reached.
● A beep sounds if the physiological apex is reached when the motor stop function is switched off.
● A beep sounds when the motor stops automatically once it has reached the preset motor stop position (loudspeaker symbol on the distance display).
● Three beeps sound when the motor switches to counterclockwise rotation if the auto-reverse function is activated and the foot pedal is pressed again.
The endodontics signals can be switched on/off in the Setup dialog, see "Settings/Operation/Sounds [→ 179]/Endodontics sounds".
Dentsply Sirona Instructions for Use Treatment Center Axano 4 Operation 4.5 Dentist element 67 17 396 D3685 D3685.201.01.04.02 2023-06 121
4.5.14.1.10.4
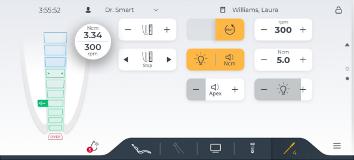

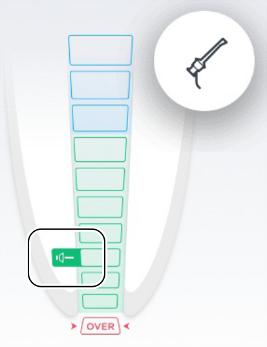
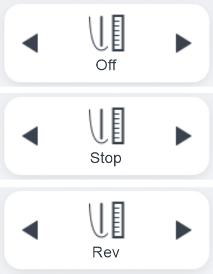
The sounding of a signal when 75% of the set torque value is reached can be switched on/off in the expanded endodontics dialog, see "Switch torque signal on/off" [→ 116]
Setting apex distance and function when it is reached
A distance to the physiological apex can be set.
If it is not switched off in the setup dialog, see "Settings/Operation/ Sounds [→ 179]/Apex locator", apex beeps will sound in addition to the graphic distance display. The intervals between the beeps vary according to the measured distance to the set apex distance.
Apex settings are stored automatically when the treatment is completed.
Setting distance to the apex
ü The expandedendodonticsdialog is displayed on the Smart Touch.
➢ Use the arrow keys to set the desired apex distance. Please note that the distance values are not a metric length measurement!
Ä The set distance is displayed with a loudspeaker symbol on a green background. A continuous beep is played when the file has reached or exceeded the apex or the set distance to the apex.
Selecting function when apex distance is reached
It can be set so that when the bur drive reaches the set distance to the apex, it:
● Continues,
● Stops automatically, or
● Stops automatically and switches to counterclockwise rotation when the foot pedal is pressed again.
➢ Tap the arrow keys to select the desired setting.
The function when the apex distance is reached can be combined with the torque reverse function, see"Switching torque reverse function on/ off" [→ 117]
4 Operation 4.5 Dentist element Dentsply Sirona Instructions for Use Treatment Center Axano 122 67 17 396 D3685 D3685.201.01.04.02 2023-06
4.5.14.1.10.5 Performing manual measurements with the file clamp
For an endodontic examination, a manual measurement can be taken using the file clamp and a root canal file.
ü The treatment center is prepared for manual measurements using the file clamp, see section "Preparing to use the ApexLocator" [→ 118].
ü The endodonticsdialog or expandedendodonticsdialog is displayed on the Smart Touch.
WARNING
Preventing incorrect measurements
When performing the apex measurement, wear non-conductive gloves to avoid measurement errors caused by unwanted leakage current.
During the measurement, the root canal file must not come into contact with the patient's mucosa, metallic tooth restorations, or the mucosal electrode. We recommend the use of a cofferdam for treatment.
1. Attach a root canal file to the file clamp.
2. Before starting the apex measurement, a functional test can be conducted by shorting the electrodes. Hold the plugged in files directly against the mucosal electrode.

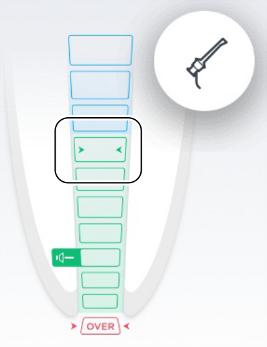
Ä If a short beep is heard and the circle on the distance display is bordered in green, the test was successful. If not, check the electrical connections for signs of damage.
3. Place the mucosal electrode in the patient's mouth and perform the measurement.
Ä The actual measured root canal depth is shown in the distance display. For more information, please refer to "Distance display" [→ 119]
Ä The maximum root canal depth reached is displayed by two green arrowheads.
Dentsply Sirona Instructions for Use Treatment Center Axano 4 Operation 4.5 Dentist element 67 17 396 D3685 D3685.201.01.04.02 2023-06 123
4.5.14.1.11 Switching the instrument light on/off and adjusting the brightness The Dentsply Sirona ENDO 6 L handpiece is equipped with a fiber optic.

ü The expandedendodonticsdialog is displayed on the Smart Touch.
1. Use the – and + keys to adjust the brightness of the instrument light. To switch it off, set the brightness to minimum.
Ä The selected setting is displayed on the upper edge of the Smart Touch. In addition, the set intensity is indicated by a gray filling in the key itself.
2. Test the brightness set for the instrument. Correct the setting if necessary.
4 Operation 4.5 Dentist element Dentsply Sirona Instructions for Use Treatment Center Axano 124 67 17 396 D3685 D3685.201.01.04.02 2023-06
4.5.14.1.12 Managing file systems
4.5.14.1.12.1


Opening the endodontic management dialog
ü The endodonticsdialog is displayed on the Smart Touch.
1. Tap on the Selectfilesystem key.
Ä A list of favorite file systems is displayed.
2. Tap on the gear icon.
Ä The endodonticsmanagement dialog is opened.
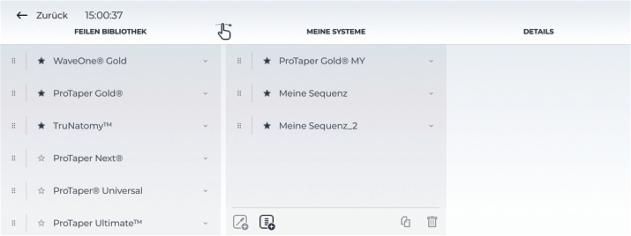
Here, you can adapt an existing file system to your needs and rename it.


1. To do this, press and hold an element in the list and move it to the middle column.
Ä Release the moved element to add it to your favorites.
2. Under details, assign a name to your individual file system and adapt the files used.
You can also create your own file system.
1. Tap on the Createfilesystem key.
2. Assign a name to your individual file system.
Ä The system created appears under Mysystems.
You can add existing files from the file library to your system.
➢ To do this, press and hold an element in the list and move it to your file system.
Ä Release the moved element to add it to your file system.
Dentsply Sirona Instructions for Use Treatment Center Axano 4 Operation 4.5 Dentist element 67 17 396 D3685 D3685.201.01.04.02 2023-06 125
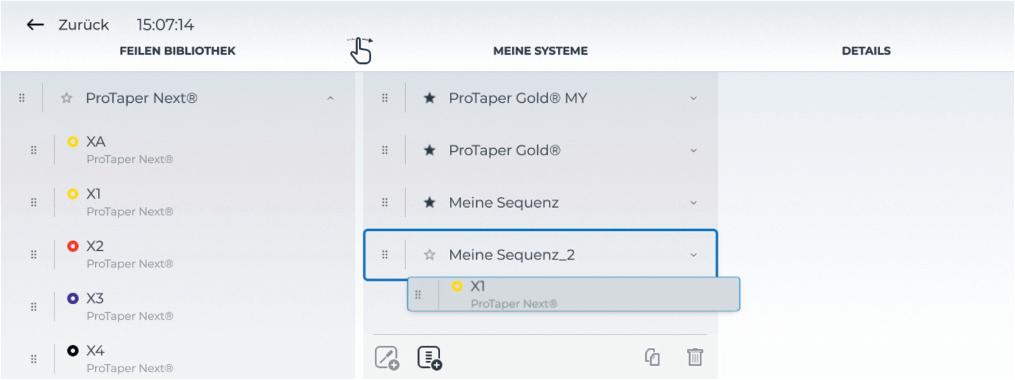

You can add your own files to your system.
1. Tap on the Createinstrument key.
2. Assign a name to your individual file under Details and set the desired values.
Ä Your individual file will be added to your file system.

4.5.14.1.12.2
Marking a file system as favorite
File systems must be marked as favorite in order to open them in the endodontics dialog using the Selectfilesystem key, see "Selecting favorite file system" [→ 114]. Individually created systems are saved automatically as favorite.
Up to ten file systems can be marked as favorites.
ü The Endodonticsmanagement dialog is displayed.
➢ Tap on the star in front of the name of the file system in the File library column.
Ä File systems with a filled in star are marked as favorites.
4 Operation 4.5 Dentist element Dentsply Sirona Instructions for Use Treatment Center Axano 126 67 17 396 D3685 D3685.201.01.04.02 2023-06
4.5.14.2 Implantology
WARNING
Only the Bien-Air CA 20:1 L implant contra-angle handpiece may be used for the implantology treatment.
Instruments from other manufacturers can lead to malfunctions or be incorrectly calibrated.
4.5.14.2.1 Switching implantology treatment on/off

➢ Tap on the implantology dialog change key.
Ä The Implantologydialog is displayed. The Implantology dialog change key is marked orange.
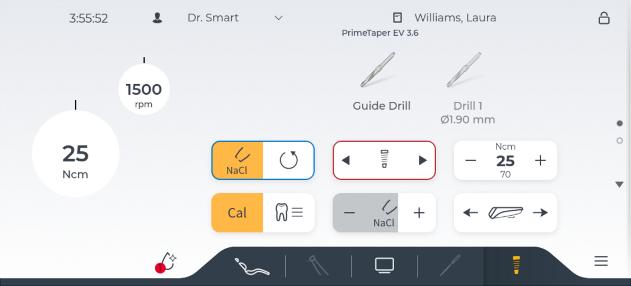
When the hose of the BL Implant E motor is connected to the side connector of the dentist element, the Smart Touch switches automatically to the implantology dialog. The motor is placed on the dentist element in a silicone holder for sterile instruments.
During active implantology treatment, you can switch to the start or Sivision dialog using the dialog change keys.
Tip: Place the keys for moving the dentist element in the implantology dialog as shown, see "User interface [→ 187]“. This allows you to move the dentist element toward you by cursor control after the patient has been seated.
Finish implantology treatment by detaching the hose of the implantology motor from the side connector on the dentist element.
4.5.14.2.2 Calibrating the bur drive
WARNING
Calibration must be performed each time you start treatment and each time you change or lubricate the contra-angle handpiece. When the implant instrument is changed, recalibration is not necessary.
The contra-angle handpiece is automatically checked during calibration. This includes a measurement of motor current at different speeds to assess the properties of the system.
WARNING
Use only Dentsply Sirona instruments to guarantee correct calibration.
Dentsply Sirona Instructions for Use Treatment Center Axano 4 Operation 4.5 Dentist element 67 17 396 D3685 D3685.201.01.04.02 2023-06 127

ü The implantologydialog is displayed on the Smart Touch.
1. Attach the contra-angle handpiece that you would like to use for the treatment to the electric motor.
2. Insert the implant instrument in the contra-angle handpiece. This is then also taken into account for measurements.
3. Tap on the Cal key.
Ä The button flashes orange. During calibration, increasing speeds are set on the motor. When the bur drive is calibrated, the key is permanently marked orange. Calibration is then finished.
4.5.14.2.3 Select favorite implantology system
ü The implantologydialog is displayed on the Smart Touch.

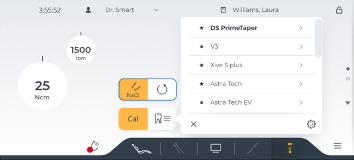

1. Tap on the Selecttreatment key.
Ä A list of favorite implantology systems is displayed.
2. Select one of the displayed implantology systems. In the submenu, various diameters can be selected. If the desired system is not on the list, it has not yet been marked as a favorite, see "Managing implantology systems" [→ 132]
Ä After tapping on an implantology system, the list is hidden. The implantology dialog displays the instruments of the selected system.
4.5.14.2.4 Selecting implant instrument
ü The instruments of the selected implantology system are displayed in the implantology dialog.


➢ Select the desired implant instrument. Tap on the Instrument selection keys or one of the instruments displayed. Swipe left and right to display other instruments for the selected implantology system.
or
➢ The instrument selection is the starting position for the red cursor. Press the left or right swivel button of the foot control.
Ä The selected instrument is marked.
Ä The speed and torque values specified by the manufacturer are displayed.
WARNING
The parameters of the implantology instruments can be changed by the respective manufacturer. Therefore, please make sure to always check the specifications of the respective manufacturer prior to use.

You can return to the start of implantology treatment using the Restart treatment key. The first implant instrument is selected.
4 Operation 4.5 Dentist element Dentsply Sirona Instructions for Use Treatment Center Axano 128 67 17 396 D3685 D3685.201.01.04.02 2023-06
4.5.14.2.5 Changing speed and torque
If you do not want to use the stored standard file parameters of the implant instruments, you can change them.
In implantology treatment, the speed and torque values of the contraangle handpiece, and not those of the motor, are specified. The control electronics of the bur drive calculate motor control based on the specified gear reduction and the speed and torque settings.

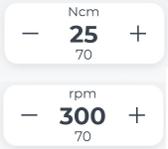
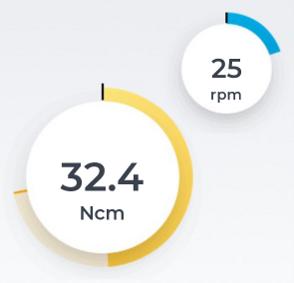
ü The desired implant instrument is selected in the implantology dialog.
➢ Use the – and + keys to set the speed and torque of the contraangle handpiece. You can also press and hold the keys to do this.
Ä In the first line, the set value is displayed, in the second line, the value stored according to the manufacturer's specifications.
When the bur drive is activated, the speed and measured torque are displayed in the widget. The yellow ring shows the actual torque, the drag anchor and the numerical display show the maximum torque of the step.
It can be set that a beep sounds whenever 75% of the set torque value is exceeded, see "Switching torque signal on/off" [→ 129]
4.5.14.2.6 Switching the torque signal on/off
This can be used to set the beep that sounds whenever approx. 75% of the set torque value is exceeded.
ü The expandedimplantologydialog is displayed on the Smart Touch.

➢ Touch the beep key.
Ä If the key is marked orange, the torque beep is switched on. Generally, one beep sounds when the torque value is reached and three beeps sound when the motor switches to counterclockwise rotation if the auto-reverse function is activated and the foot pedal is pressed again. The volume of the beeps can be adjusted in the setup dialog, see "Settings/Operation/Sounds [→ 179]/Sounds Implantology".
4.5.14.2.7 Changing direction of rotation
The direction of rotation can be changed only with the motor stopped.
After the electric motor is started with the foot control, an audible warning signal sounds if counterclockwise rotation is activated.
Dentsply Sirona Instructions for Use Treatment Center Axano 4 Operation 4.5 Dentist element 67 17 396 D3685 D3685.201.01.04.02 2023-06 129


ü The implantologydialog is displayed on the Smart Touch.
➢ Tap on the CCWrotation key. or ➢ Press the right button of the foot control.
Ä The key is marked orange when CCW rotation is activated.
4.5.14.2.8 Switching the torque reverse function on/off
When the torque reverse function is switched on, the bur drive automatically switches to counterclockwise rotation when the set torque value is reached. When the foot pedal is pressed again, the bur drive switches back to clockwise rotation.
ü The implantologydialog is displayed on the Smart Touch.

➢ Tap on the Ncm reverse key.
Ä If the key is marked orange, the torque reverse function is switched on.
4.5.14.2.9 Implantology beeps
The following implantology beeps are emitted:
● One beep sounds when the set torque value is reached.
● Three beeps sound when the motor switches to counterclockwise rotation if the auto-reverse function is activated and the foot pedal is pressed again.
The implantology signals can be switched on/off in the Setup dialog, see "Settings/Operation/Sounds [→ 179]/Sounds Implantology".
The sounding of a signal when 75% of the set torque value is reached can be switched on/off in the expanded implantology dialog, see "Switch torque signal on/off" [→ 129]
4.5.14.2.10 Setting the foot control as a direct starter or foot control switch

The foot control can be set as a direct starter (white key) or as a foot control switch (orange key).
For details, see "Setting the foot control as a direct starter or foot control switch" [→ 93]
4.5.14.2.11 Activating/deactivating and setting the NaCl, activating the NaCl rinsing
In order to supply the bur drive with a sterile saline solution during implantology treatments, a peristaltic pump must be attached to the dentist element; see "Preparing for use of NaCl saline solution" [→ 93]

1. Tap on the NaCl key.
Ä If the key is marked orange, the pump can be activated using the foot pedal.
4 Operation 4.5 Dentist element Dentsply Sirona Instructions for Use Treatment Center Axano 130 67 17 396 D3685 D3685.201.01.04.02 2023-06
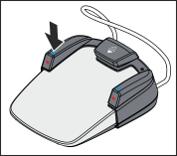

or ➢ Press the left button of the foot control.

2. Use the arrow keys to set the flow rate of the NaCl pump.
Ä The selected setting is displayed on the upper edge of the Smart Touch. In addition, the set flow rate is indicated by a gray filling of the key.
3. Test the flow rate set for the instrument. Correct the setting if necessary.
Via the NaClrinsing key, the treatment area can be rinsed with sterile saline solution whenever the bur stops as long as key is actuated.
Dentsply Sirona Instructions for Use Treatment Center Axano 4 Operation 4.5 Dentist element 67 17 396 D3685 D3685.201.01.04.02 2023-06 131
4.5.14.2.12 Managing implantology systems
4.5.14.2.12.1 Opening the implantology management dialog


ü The implantologydialog is displayed on the Smart Touch.
1. Tap on the Selectimplantologysystem key.
Ä A list of favorite implantology systems is displayed.
2. Tap on the gear icon.
Ä The Implantologymanagement dialog is displayed.
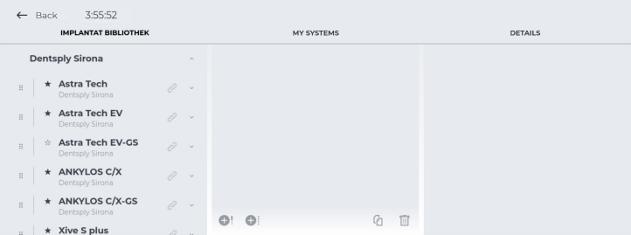
Here, you can adapt an existing implantology system to your needs and rename it.


1. To do this, press and hold an element in the list and move it to the middle column.
Ä Release the moved element to add it to your favorites.
2. Under details, assign a name to your individual implantology system and adapt the implant instrument used.
You can also create your own implantology system.
1. Tap on the Createsystem key.
2. Assign a name to your individual file system.
Ä The system created appears under Mysystems
You can add existing implant instruments from the instrument library to your system.
➢ To do this, press and hold an element in the list and move it to your implantology system.
Ä Release the moved element to add it to your implantology system.
4 Operation 4.5 Dentist element Dentsply Sirona Instructions for Use Treatment Center Axano 132 67 17 396 D3685 D3685.201.01.04.02 2023-06


You can add your own implant instruments to your system.
1. Tap on the Createinstrument key.
2. Assign a name to your individual implant instrument under Details and set the desired values.
Ä Your individual implant instrument will be added to your implantology system.

4.5.14.2.12.2 Marking an implantology system as favorite
Implantology systems must be marked as favorite in order to open them in the implantology dialog using the Selecttreatment key, see "Selecting favorite implantology system" [→ 128]. Individually created systems are saved automatically as favorite.
Up to ten implantology systems can be marked as favorites.
ü The implantologydialog is displayed.
➢ Tap on the star in front of the name of the implantology system in the "Implant library" column.
Ä Implantology systems with a filled in star are marked as favorites.
Dentsply Sirona Instructions for Use Treatment Center Axano 4 Operation 4.5 Dentist element 67 17 396 D3685 D3685.201.01.04.02 2023-06 133
4.5.14.2.13
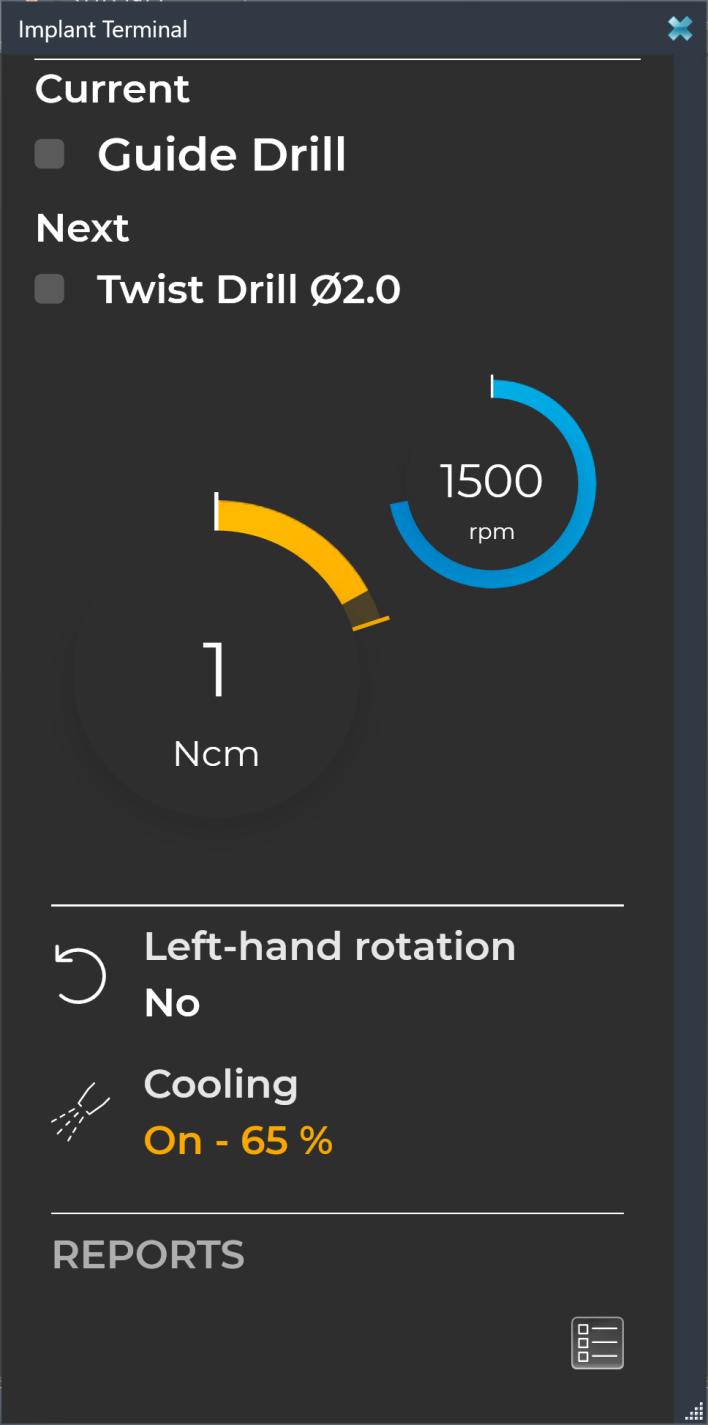
Sivision View "Implant terminal"
The most important parameters for implantology treatment can also be displayed on the patient monitor. The current speed and torque values measured by the control electronics are also sent to the monitor. Based on the treatment settings and the measured values, a report of the treatment can be compiled. For this, Sidexis 4 and Sivision View must be installed on the PC.
For details, please refer to the "Sivision View" user manual REF 68 00 143.
4 Operation 4.5 Dentist element Dentsply Sirona Instructions for Use Treatment Center Axano 134 67 17 396 D3685 D3685.201.01.04.02 2023-06
4.6 Assistant element
4.6.1
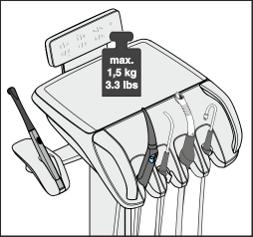
4.6.2
Maximum load capacity
WARNING
The maximum load capacity of the assistant element is 1.5 kg (3.3 lbs.).
Additionally, a skid-proof silicone mat can be placed on it. The silicone mat reduces the likelihood that instruments and treatment accessories can slide around.
CAUTION
To prevent injuries caused by falling objects, never place anything on the support arm of the assistant element.
Positioning
WARNING
The assistant element can be positioned above or below the patient chair.
The patient could be pinched during chair movements or the chair could be damaged.
➢ Move the assistant element out of the collision zone before moving the patient chair.
IMPORTANT
Safety stop
In case of collision, a safety system in the assistant element stops the chair movement.
Dentsply Sirona Instructions for Use Treatment Center Axano 4 Operation 4.6 Assistant element 67 17 396 D3685 D3685.201.01.04.02 2023-06 135
4.6.3
Fixed keys on the assistant element

4.6.3.1 Tumbler filling
If your treatment center is equipped with the tumbler filling option with automatic sensor control, see "Tumbler filling with automatic sensor control" [→ 140].

1. Place a tumbler under the tumbler filling.
2. Press the Tumblerfilling fixed key.
Ä The tumbler is filled with water for the preset time. The LED in the fixed key lights up during the tumbler filling process. The key is marked orange on the Smart Touch.
Pressing the Tumblerfilling fixed key again stops the tumbler filling function immediately.
4.6.3.2 Flushing of the cuspidor bowl
The flushing function is used for rough cleaning of the cuspidor bowl during treatment.
➢ Press the Cuspidorflushing fixed key.
Ä The cuspidor flushing will be switched on for the pre-set flushing time. The LED for the fixed key lights up during the flushing process. The key is marked orange on the Smart Touch.
4.6.3.3 Operating light
The operating light is always switched on at the set brightness level.
➢ Press the Operatinglight fixed key.
Ä If the operating light is switched on, the LED of the fixed key lights up on the assistant element. The key is marked orange on the Smart Touch.
For details, please refer to the "Operating light" [→ 149] section.
4.6.3.4 Composite function
The composite function delays the curing of composite materials.
4 Operation 4.6 Assistant element Dentsply Sirona Instructions for Use Treatment Center Axano 136 67 17 396 D3685 D3685.201.01.04.02 2023-06
4.6.3.5
4.6.3.6
➢ Press the Compositefunction fixed key.
Ä If the composite function is switched on, the LED of the fixed key lights up on the assistant element. The key is marked orange on the Smart Touch.
Chair programs
The following chair programs can be selected and programmed on the assistant element:
● Mouth rinsing position (S)
● Entry/exit position (0)
● Chair programs 1 and 2
For details, see "Moving the patient chair via chair programs" [→ 70]
Chair programs can also be programmed from the assistant element side; see "Programming chair programs and shock positioning" [→ 77]
Headrest
The treatment chair is adjusted to the patient's stature by moving the headrest in or out.
4.6.3.7
Timer
Two timers can be activated on the assistant element. They are set in the setup dialog, see "Settings/Operation/Timer [→ 178]".
➢ Press the Timer1 or Timer2 fixed key on the assistant element.
Ä The selected timer is started. The timer key flashes. The timer is shown as a widget on the user interface of the dentist element.
Ä When the time is up, a short beep sounds.
Pressing the key again stops the timer and resets the timer setting. The timer can then be restarted.
4.6.3.8
Bell
Freely available relay 240 VAC, 6 A (connected by the service technician)
This function can be preset as a button or a switch in the setup dialog, see "Maintenance/Device settings [→ 191]/Bell relay mode".
4.6.3.9
Function key
The function of the Starkey on the assistant element can be configured in the setup dialog, see "Settings/Operation [→ 175]/Assistant: Function key".
Dentsply Sirona Instructions for Use Treatment Center Axano 4 Operation 4.6 Assistant element 67 17 396 D3685 D3685.201.01.04.02 2023-06 137
4.6.4 Suction handpieces
The assistant element can be equipped with a maximum of three suction handpieces. Suction cannulas with a diameter of 11 mm and 6 mm can be used.
DANGER
The tip attaches itself to the oral mucosa.
The patient's oral mucosa can be irritated by the vacuum.
➢ Make sure that you hold the suction tip in such a way that the opening cannot accidentally attach to the oral mucosa. Dentsply Sirona recommends using spray aspirator tips with lateral air intake, see "Spare parts, Consumables" [→ 276]
DANGER
The spray aspirator can be switched off with the 4-way foot control. Due to the lack of suction flow, fluid may run back out of the spray aspirator and into the patient's mouth.
➢ It must be ensured that there is a suction flow before holding the spray aspirator in the mouth.
➢ Always remove the spray aspirator from the patient's mouth before switching it off.
NOTICE
Suction removal of metal oxides from blasting devices
Observe the safety information on the "Vacuum system" [→ 18]
Tip: The factory-set suction power can be adjusted in the water unit by a service technician.
Spray aspirator
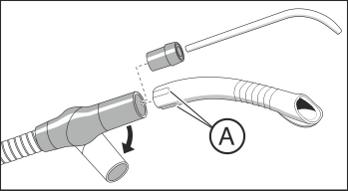

The suction handpiece can be angulated by turning it.
To prevent completely interrupting the suction flow when the cannulas attach to the oral mucosa, spray aspirator cannulas with lateral air intakes (A) should be used. This prevents backflow from the hose into the oral cavity if the tip attaches itself.
The thick suction hose can be used for surgical suction. To attach a surgical cannula, please use the adapter supplied.
In the setup dialog, you can enable interruption and/or reactivation of the suction flow of the spray aspirator via the 4-way foot switch on the base of the chair in any direction, see "Settings/Operation/4-way foot switch [→ 177]". Note that this function can also be assigned to the star key on the assistant element in the setup dialog, see "Settings/ Operation [→ 175]/Assistant: Function key".
If the treatment center is equipped with two spray aspirators, you can select in the setup dialog whether only one or both aspirators can be switched on/off with the 4-way foot switch or the star key on the assistant element.
4 Operation 4.6 Assistant element Dentsply Sirona Instructions for Use Treatment Center Axano 138 67 17 396 D3685 D3685.201.01.04.02 2023-06


Saliva ejector
A curved cannula can be placed in the corner of the mouth to aspirate saliva. The cannulas can be ordered from a specialized dealer.
Surgical suction
The surgical cannula can be inserted directly into the saliva ejector handpiece. The surgical cannulas can be ordered from a specialized dealer.
4.6.5 SmartLite Pro curing light
Power is supplied to the SmartLite Pro curing light from a replaceable battery. The batteries are recharged in a charging station equipped with a radiometer.
The SmartLite Pro can be stored in the side holder on the assistant element.
IMPORTANT
The SmartLite Pro curing light is described in separate instructions for use enclosed with the product.
4.6.6 12 V connection for medical equipment
On the underside of the assistant element, a medical power supply for Type BF applied parts is available (12 V DC, max. 1 A), e.g. for supplying light for a suction handpiece.
Dentsply Sirona Instructions for Use Treatment Center Axano 4 Operation 4.6 Assistant element 67 17 396 D3685 D3685.201.01.04.02 2023-06 139
4.7 Water unit
4.7.1 Swiveling the cuspidor bowl
The cuspidor on the water unit can be swiveled manually or automatically by approx. 110 mm toward the patient chair.
Using keys in the start dialog or fixed keys, the cuspidor can be automatically swiveled in and out, see "Configuring the user interface" [→ 187]
In the setup dialog, you can set the cuspidor to automatically move inward when the mouth rinsing position is reached by activating the mouth rinsing position (S) chair program. When the patient chair is moved, the cuspidor swivels out again. See "Settings/Hygiene/Cuspidor [→ 182]".
IMPORTANT
The cuspidor automatically swivels out
The cuspidor automatically returns beforehand to ensure that the patient does not collide with it during chair movements. This return travel depends on the chair movement and is executed only if a collision hazard exists.
The cuspidor is equipped with a safety switch, see "Safety switch-off" [→ 64]
4.7.2 Filling the tumbler

1. Place a tumbler under the tumbler filling.
2. Press the Tumblerfilling fixed key.
Ä The preset quantity of water is filled into the tumbler.
Pressing the fixed key again stops the tumbler filling function immediately.
In the setup dialog, the filling quantity of the tumbler can be set, see "Settings/Hygiene/Tumbler [→ 181]". It can also be set so the tumbler filling switches on automatically after moving to the mouth rinsing position (S). Water temperature can also be set.
4.7.3 Tumbler filling with automatic sensor control
The automatic sensor control is not available in all countries. With this tumbler filler, the sensor control automatically detects the filling level of the tumbler.
If the tumbler is removed before the preset filling level has been reached, the water flow stops immediately.
4 Operation 4.7 Water unit Dentsply Sirona Instructions for Use Treatment Center Axano 140 67 17 396 D3685 D3685.201.01.04.02 2023-06
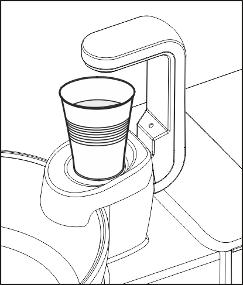
ü The tumbler may not be transparent.
ü The tumbler must always be placed in the center of the area provided for it.
➢ Place the tumbler under the tumbler filler.
Ä The tumbler is filled automatically.
Ä After the preset filling level has been reached, the water flow stops automatically.
IMPORTANT
Tumbler filling after switch-on
If an empty tumbler is standing below the tumbler filler when the treatment center is switched on, the tumbler will not be filled automatically. To activate automatic tumbler filling, remove the tumbler briefly and then put it back again.
4.7.4 Adjusting the water amount for flushing
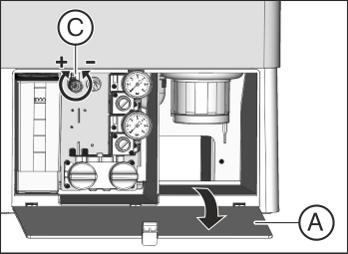
The water quantity and water pressure for flushing can be set using a throttle.
1. Open the maintenance flap (A) on the base of the water unit.
2. Adjust the water quantity with the control knob (C)
4.7.5 Self-sufficient water supply
If the water quality of the public drinking water is not suitable for patient treatment, the treatment center can be operated with a self-contained water supply.
In this case, food-grade water is mixed with the disinfectant for the water lines in a ratio of 100:1 (1 liter of water, 10 ml of the agent) and filled into the disinfectant tank of the water unit. The disinfectant reduces bacterial growth in the water lines.
The self-contained water supply should be a temporary operating condition only if public drinking water is contaminated, not a permanent operating condition.
If self-contained water supply should continue more than 28 days in exceptional cases, the treatment center must be manually sanitized. The cuspidor is still flushed using public drinking water.
Dentsply Sirona Instructions for Use Treatment Center Axano 4 Operation 4.7 Water unit 67 17 396 D3685 D3685.201.01.04.02 2023-06 141

WARNING
Microorganisms can multiply in the water.
These microorganisms could be a health risk.
➢ Mix fresh water for the self-contained water supply every day. At the end of the work day, the remaining water must be flushed out of the disinfectant tank using the tumbler filling function.
➢ Check the bacteria count in the water of the treatment center at regular intervals, in particular if no disinfectant can be used for disinfecting the water lines. See"Microbiological water test" [→ 203]
NOTICE
Always fill food-grade distilled water (< 100 colony forming units/ml), never drinking water, e.g. from beverage bottles, due to the minerals it contains.
Aqua purificata or aqua destillata can be used as distilled water.
The desired operating mode is set in the setup dialog.
Opening the water supply Setup dialog
ü The start, instrument, or Sivision dialog is displayed.
1. Tap the Setup key in the footer.
Ä The setup dialog opens.
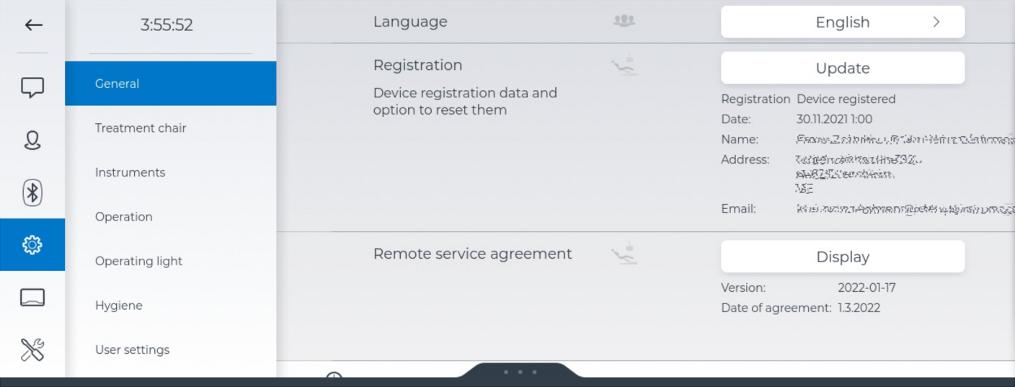
2. Tap on Settings, Hygiene, and then Watersupply
Ä The setting Self-containedwatersupply is displayed.
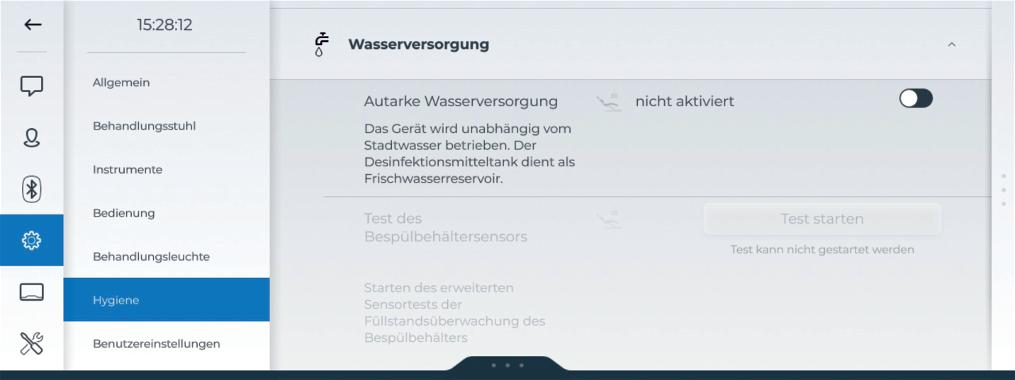
Switching disinfection system to self-contained water supply
1. Activate the switch at the right next to Self-containedwatersupply
4 Operation 4.7 Water unit Dentsply Sirona Instructions for Use Treatment Center Axano 142 67 17 396 D3685 D3685.201.01.04.02 2023-06
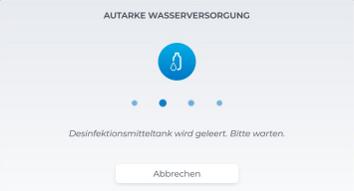

Ä The disinfectant tank is drained. The switch to self-contained water supply is indicated by four blue dots on the touchscreen.
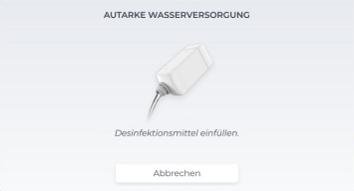
Ä If there is still undiluted disinfectant for the water lines in the tank, it is rinsed down the drain. This can take up to 6 minutes. Then the Fill water message is displayed.
2. Mix distilled water with the agent for disinfecting the water lines in a ratio of 100:1 (1 liter of water, 10 ml of the agent) and fill this into the disinfectant tank of the water unit. The tank has a capacity of approx. 1.3 liters. It is full when the surface of the water is visible on the filter of the filling funnel.
Ä The Fill water message is hidden. The disinfection system is now switched to the self-contained water supply.
When the treatment center is switched to self-contained water supply, the autopurge and sanitization functions are grayed out in the hygiene cockpit. The purge function must be used to purge the instruments, see "Purging water lines (purge function)" [→ 213]. The purging time is then limited to 20 seconds per instrument. Without the disinfectant for the water lines, it is no longer possible to sanitize the water lines. The disinfection system must be reset to operation with public drinking water.
Resetting the disinfection system to operation with public drinking water and the disinfectant for the water lines
The disinfection system is reset to public drinking water mode in the same manner as switching to self-contained water supply. Instead of the Fill water display, the Filldisinfectant display appears on the touchscreen.
➢ Sanitize the water lines after switching to the public drinking water supply, see “Sanitizing treatment center” [→ 263]
Dentsply Sirona Instructions for Use Treatment Center Axano 4 Operation 4.7 Water unit 67 17 396 D3685 D3685.201.01.04.02 2023-06 143
1HO+10Desinf. l 2 ml
Level check
If the Fill water or Filldisinfectant display appears during treatment, the tank is almost empty (< 400 ml). By tapping the OK key, the display can be hidden and treatment can be continued. Refill the tank as soon as possible.
IMPORTANT
400 ml are approximately sufficient for: ➢ 6.5 min. spray operation (motor, high-speed handpiece, scaler) or ➢ 2.5 min. Sprayvitoperation or ➢ 5 x tumbler fillings
The actual values depend on the instrument types and settings used.
4 Operation 4.7 Water unit Dentsply Sirona Instructions for Use Treatment Center Axano 144 67 17 396 D3685 D3685.201.01.04.02 2023-06
4.8 Tray
Maximum load capacity
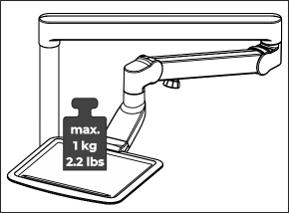
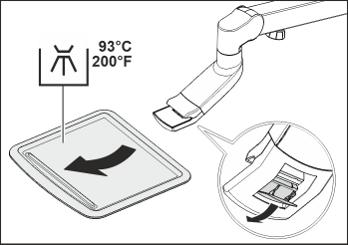
WARNING
The maximum load is 1 kg (2.2 lbs).
Removing the tray
1. Hold the tray tightly.
2. Open the lock by swiveling the lever downwards.
3. Remove the tray.
4. Let the lever fall back into its original position.
To insert the tray, simply guide it into the mount. The mechanism engages automatically.
CAUTION
If the tray is not locked in place, it can disengage from the tray holder.
➢ After installing the tray, make sure it is securely attached to the tray holder.
Adjusting the height of the tray
The tray is positioned to rotate on a height-adjustable support arm.
NOTICE
A locking brake blocks the height adjustment.
The support arm may be damaged if you adjust the height with the locking brake applied.
➢ Never, under any circumstances, try to adjust the support arm with the locking brake securely tightened. Release the locking brake first.

CAUTION
➢ Loosen the brake knob (A) slightly.
➢ Move the tray to the desired position.
➢ Turn on the brake knob slightly.
Ä The tray can be subjected to different loads within limits without lowering its position.
Dentsply Sirona Instructions for Use Treatment Center Axano 4 Operation 4.8 Tray 67 17 396 D3685 D3685.201.01.04.02 2023-06 145
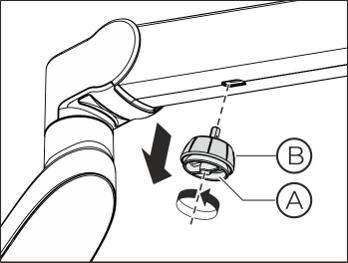
Removing the brake knob
If the brake knob of the support arm is considered annoying, this can be removed from the support arm.
1. Gently loosen the brake knob on safety bolt (B)
2. Remove the brake knob (B)
To re-attach it, insert the hexagonal pin of the brake knob (B) into the plug device on the support arm. Re-tighten the safety screw (A) firmly.
4.9 Cup holder
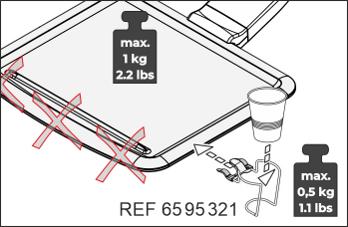
A cup holder can be attached to the tray to collect waste. It is suitable for disposable 0.2-liter cups.
The cup holder may not be attached to the front edge of the tray. The maximum load of the cup holder is 0.5 kg (1.1 lbs). The load on the tray and the cup holder may not exceed a total of 1 kg (2.2 lbs).
The cup holder can be ordered from a specialized dealer.
4 Operation 4.9 Cup holder Dentsply Sirona Instructions for Use Treatment Center Axano 146 67 17 396 D3685 D3685.201.01.04.02 2023-06
4.10 Smart device holder
The dentist element can be equipped with a holder for a smart device.
WARNING
It must be possible to disinfect the smart device. Use a smart device that can be wipe disinfected or one that has a hygienic protective sleeve that can be wipe disinfected. Please note the manufacturer's information on cleaning and disinfecting the smart device.
DANGER
Strong magnets are integrated in the holder. The magnets can affect any active implant located nearby, e.g. a cardiac pacemaker. If the holder comes in direct contact with magnetic cards, data stored on the cards can be deleted.
➢ Ensure that the magnets are not in the immediate vicinity of any patients, users, or technical personnel with an active implant.
➢ Make sure that no magnetic cards or any other data storage media are located in the immediate vicinity of the holder.
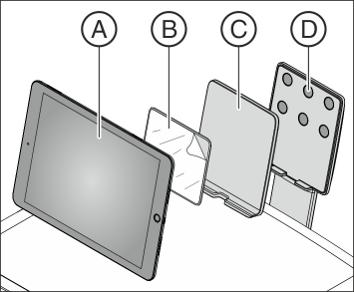
The enclosed adhesive plate can be glued onto the back of the smart device for magnetic fixation on the holder. There is an adhesive pad on the adhesive plate for this purpose. The adhesive surfaces must be clean, dry, and free of dust and grease.
The smart device can be positioned in portrait or landscape format.
A Smart device up to 10.5"
B Adhesive plate with adhesive film
C Sterilizable silicone protective mat
D Holder with six magnets
Dentsply Sirona Instructions for Use Treatment Center Axano 4 Operation 4.10 Smart device holder 67 17 396 D3685 D3685.201.01.04.02 2023-06 147
4.11 Panoramic X-ray viewer

The dentist element can be equipped with an X-ray viewer.
4.11.1 Switching the X-ray viewer on/off
ü The expandedstartdialog is displayed on the Smart Touch.

➢ Tap on the X-rayviewer key.
Ä If the key is marked orange, the X-ray viewer is switched on.
4.11.2 Attaching the anti-glare film
An anti-glare film is supplied with the X-ray viewer for viewing intraoral dental images.
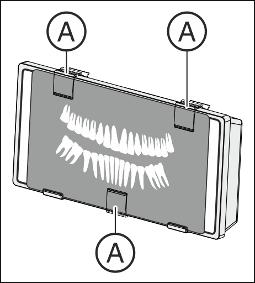
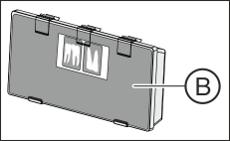
1. Remove the three retaining clips (A)
2. Use two of the retaining clips to clamp the anti-glare film (B) to the upper edge of the X-ray viewer on the left and right.
3. Use the third retaining clip to clamp the intraoral dental image at the middle of the X-ray viewer.
4 Operation 4.11 Panoramic X-ray viewer Dentsply Sirona Instructions for Use Treatment Center Axano 148 67 17 396 D3685 D3685.201.01.04.02 2023-06
4.12 Operating light
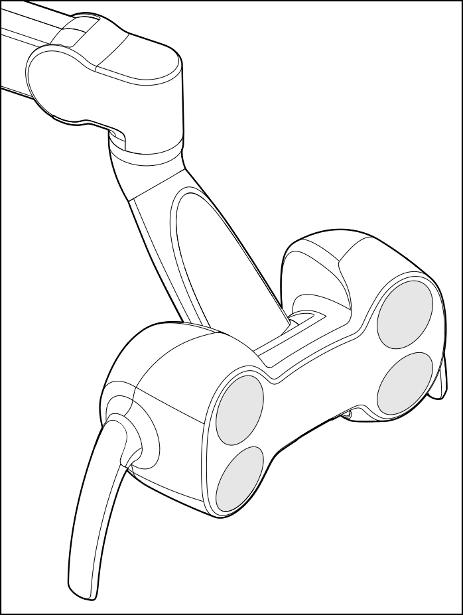
4.12.1
The operating light is mounted on a multi-joint support arm. It can be easily adjusted to the operating field using the handles. Brakes in the support arm hold the operating light in the position to which it has been adjusted.
The clearly defined light field illuminates the treatment area without blinding the patient.
Tip: The ideal working distance between the light and the patient's mouth is 70 cm/27.5 inches.
NOTICE
Also observe the instructions for use of your operating light.
Switching the operating light on/off
➢ Briefly press the Operatinglight fixed key on the dentist or assistant element.
Ä When the operating light is switched on, the key on the Smart Touch is marked orange; on the assistant element, the LED of the fixed key lights up.
The operating light is always switched on at the set brightness level. The brightness, color temperature and sensor control can be set via the dentist element user interface, in the "Settings/Operating light [→ 180]" setup dialog.
A non-contact sensor is installed at the bottom of the operating light. It can be used to switch the operating light on/off or switch to the composite function with a hand movement. The sensor control can be switched on/off in the setup dialog. Additionally, it is possible to set the distance at which the non-contact sensor should react to movement.
In addition, in the setup dialog the operating light can be set to automatically switch on when the dentist element is moved toward it.
4.12.2
Switching the composite function on/off
The composite function delays the curing of composite materials.
➢ Press the Compositefunction fixed key on the dentist or assistant element.
Ä When the composite function is switched on, the key on the Smart Touch is marked orange; on the assistant element, the LED of the fixed key lights up.
Dentsply Sirona Instructions for Use Treatment Center Axano 4 Operation 4.12 Operating light 67 17 396 D3685 D3685.201.01.04.02 2023-06 149

In the setup dialog, the composite function can be set so it can be switched on/off via the 4-way foot switch, see "Settings/Operation/4-way foot switch [→ 177]". The spray aspirator must be put in the holder if it has been set in the setup dialog that the suction flow can be switched on/off via the 4-way foot switch.
4 Operation 4.12 Operating light Dentsply Sirona Instructions for Use Treatment Center Axano 150 67 17 396 D3685 D3685.201.01.04.02 2023-06
4.13 X-ray tube unit
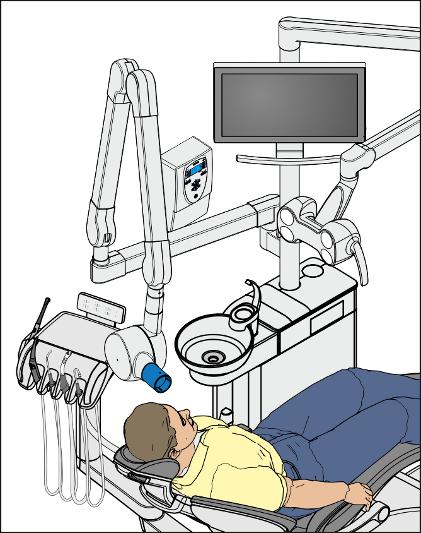
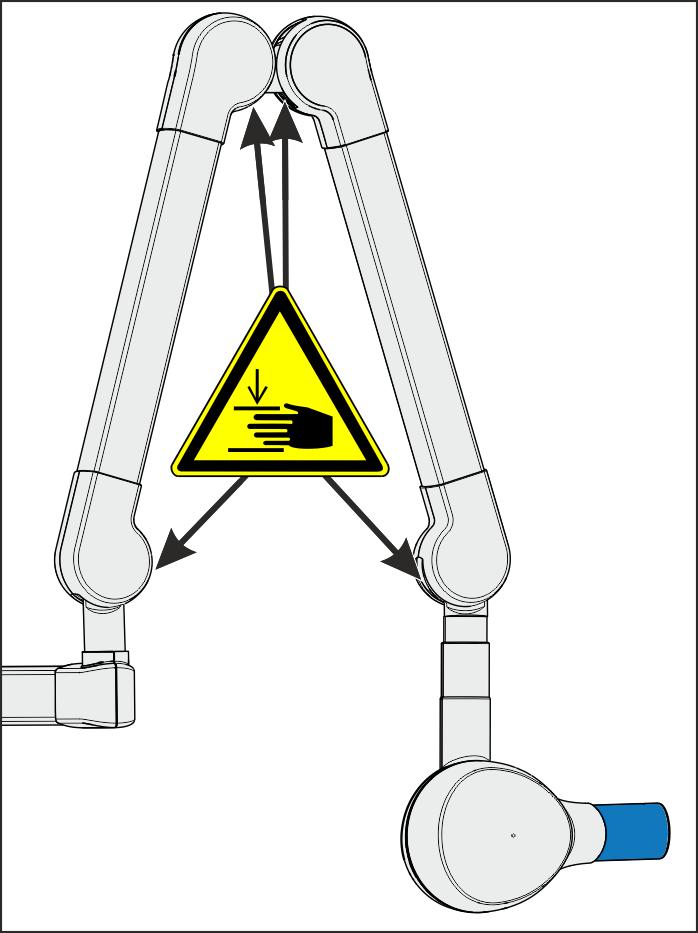
The treatment center can be equipped with the Heliodent Plus X-ray tube unit.
The X-ray tube unit is attached to the light post of the treatment center using a multi-jointed support arm that can be adjusted both horizontally and vertically. Brakes in the support arm hold the X-ray tube unit in the position to which it has been adjusted.
The X-ray parameters are set on the wall adapter of the X-ray tube unit or on a "remote timer".
The USB module of the Xios XG intraoral X-ray system can be connected to the PC via the USB interface on the dentist element. For details, please refer to the section "USB interface" [→ 163]
WARNING
The X-ray tube unit can be positioned within the movement range of the patient chair.
Moving the patient chair may cause the patient to collide with the Xray tube unit or its support arm. The patient could be injured.
➢ Before moving the patient chair, position the X-ray tube unit to make a collision with the patient or the patient chair impossible.
CAUTION
Gaps appear between the internal hinges when moving the support arm.
Fingers may be crushed in these gaps.
➢ Ensure that you never place your fingers in the gaps between the hinges, neither during operation nor for cleaning purposes.
IMPORTANT
See also the Heliodent Plus instructions for use.
Dentsply Sirona Instructions for Use Treatment Center Axano 4 Operation 4.13 X-ray tube unit 67 17 396 D3685 D3685.201.01.04.02 2023-06 151
4.14 Sivision video system
The integrated Sivision video system enables intraoral and extraoral images to be made. The SiroCam AF+ intraoral camera generates digital image data that can be transmitted via a USB 2.0 port (highspeed universal serial bus) to the treatment center and stored there. A separate PC is not required. The images can be displayed on the Smart Touch of the treatment center and on the patient monitor.
The video images are an outstanding option for improving patient communication.
WARNING
The video images are not suitable for diagnosis.
WARNING
Misdiagnoses of X-ray images are possible
Use the white screen of the Sivision monitor not for diagnosis of X-ray images. The light intensity of the monitor is not sufficient.
4.14.1 Patient monitor
22" DC monitor (REF 64 97 452 D3655)
The monitor is equipped with loudspeakers and a glass screen to facilitate cleaning. For details, see "instructions for use for the 22" DC monitor".
DANGER
Monitors which have not been approved must not be connected. They endanger the product safety of the treatment center.
➢ Use only monitors that are approved according to IEC 60950-1, IEC 62368-1 (office equipment) or IEC 60601-1 (medical devices).
DANGER
Unsuitable devices can be connected to the loudspeaker port of the monitor.
The connection of unsuitable devices endangers the product safety of the treatment center.
➢ The loudspeaker port of the monitor may be connected only to a device that complies with IEC 60950-1, IEC 62368-1 (office equipment such as PCs) or IEC 60601-1 (medical devices). Under no circumstances should it be connected to a stereo system for example.
4 Operation 4.14 Sivision video system Dentsply Sirona Instructions for Use Treatment Center Axano 152 67 17 396 D3685 D3685.201.01.04.02 2023-06
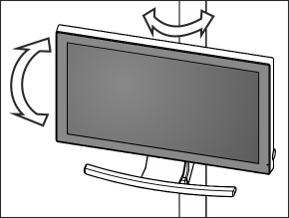
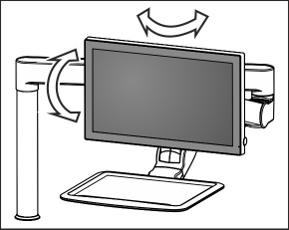
Attachment versions
Monitor on lamp support tube
The monitor can be rotated and swiveled.
Monitor on tray arm
The monitor can be rotated and swiveled.
CAUTION
The patient can collide with the monitor.
The patient's head could collide with the monitor during movement of the patient chair or during use of the cuspidor.
➢ Make sure that the patient does not collide with the monitor. Swivel the monitor out of the collision zone as soon as it is no longer required.
4.14.2 SiroCam AF+ intraoral camera
4.14.2.1 Safety instructions
The SiroCam AF+ intraoral camera is a sensitive optical instrument and must therefore always be handled with care.
NOTICE
The lens window is sensitive to scratches. The lens window can be damaged by hard objects. Deep scratches in the lens window impair image quality.
➢ Always place the intraoral camera in the designated holder and clean the lens window with a soft cloth.
CAUTION
The intraoral camera heats up during operation due to the LEDs in the camera head.
The following temperatures are reached at a room temperature of 23 °C: Operation time 1 min Continuous operation
4.14.2.2 Functional description
The camera generates digital image data using a CMOS sensor. The camera allows the acquisition of intraoral and extraoral images.
Dentsply Sirona Instructions for Use Treatment Center Axano 4 Operation 4.14 Sivision video system 67 17 396 D3685 D3685.201.01.04.02 2023-06 153
46°C 50°C
4.14.2.3


4.14.2.4

A Lens window (covered)
B Configurable camera key for Delete last image, Focusing, or Without function, see in the "Settings/Instruments [→ 172]/ Camera button“ setup
C Connection cable
Connecting the intraoral camera
The intraoral camera is connected on the bottom of the dentist element.
Connecting the intraoral camera
On the dentist element, the intraoral camera can be operated at instrument position 2, 6 or in the side holder, depending on the variant.
➢ Plug the connector of the intraoral camera into the socket on the dentist element.
Ä The connector locks into place.
Removing the intraoral camera
The plug of the intraoral camera is secured against unintentional removal.
➢ Grasp the plug by its locking device (A) and pull this out without tilting, if possible.
Operating the intraoral camera
To view the video images of the SiroCam AF+ intraoral camera on the patient monitor, an integrated image processing system is used. The camera images are transmitted from the treatment center via HDMI (High Definition Multimedia Interface) to the patient monitor .
Opening the Sivision dialog of the camera
➢ Take the intraoral camera from the holder.
Ä The Sivision dialog Camera is displayed on the Smart Touch. The live image is displayed on the patient monitor.
4 Operation 4.14 Sivision video system Dentsply Sirona Instructions for Use Treatment Center Axano 154 67 17 396 D3685 D3685.201.01.04.02 2023-06

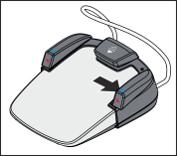
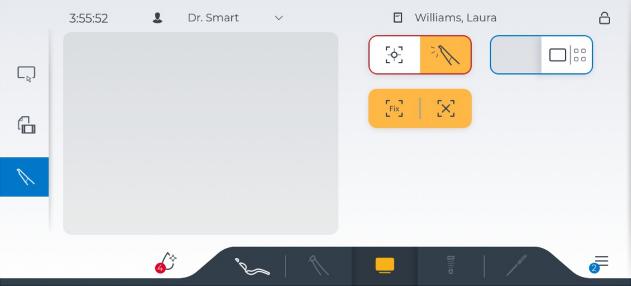
Switch camera light on/off
➢ Tap on the Cameralight key on the Smart Touch.
or
➢ Press the right swivel button of the Smart Control.
Focusing the live image
1. Point the camera at the object to be imaged.
Ä The live image is displayed on the patient monitor.

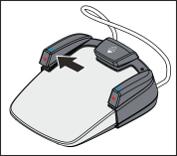
2. Tap on the Focusliveimage key on the Smart Touch.
or
➢ Press the left swivel button of the Smart Control.
Ä The intraoral camera adjusts the focus according to the distance from the object to be imaged.
Taking a photo
➢ Point the camera at the desired subject and press on the foot pedal.
Ä A photo is taken and displayed on the Smart Touch.
Dentsply Sirona Instructions for Use Treatment Center Axano 4 Operation 4.14 Sivision video system 67 17 396 D3685 D3685.201.01.04.02 2023-06 155


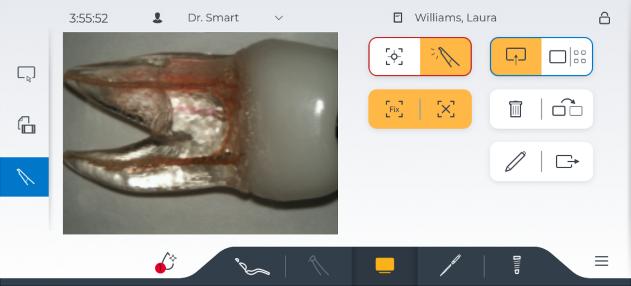
Switching autofocus and focus frame on/off
When the key is not marked orange, the image is automatically refocused after each exposure. This takes a short moment. If the key is not marked, the image is saved immediately without refocusing. If the distance to the object is changed, refocusing must be activated manually.
During the focusing process, a white rectangle appears in the middle of the patient monitor. It marks the focused image area. Objects outside the focus frame may be unclear.
Displaying images on the patient monitor
The Sivision dialog Camera distinguishes whether the camera has been removed or is in the holder.
➢ Return the camera to the instrument holder.


The images displayed on the Smart Touch are shown on the patient monitor.
You can also switch exporting to the patient monitor on/off using the left foot control button.
You can switch between single image and overview. The image is changed on the Smart Touch and patient monitor.
4 Operation 4.14 Sivision video system Dentsply Sirona Instructions for Use Treatment Center Axano 156 67 17 396 D3685 D3685.201.01.04.02 2023-06


You can also use the right foot control button to switch between the views.


Deletes the currently marked image. In the Setup dialog, you can set that the current images can also be deleted by the button on the camera, see "Settings/Instruments [→ 172]/Camera button".
In single view, it displays the next image on the Smart Touch and patient monitor. In overview, the next image is marked.
Editing images
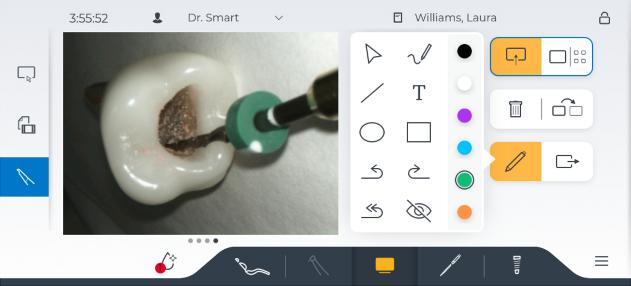
A new toolbar for image processing is displayed by tapping on the pencil symbol. Different colored lines, rectangles, circles, and free-hand lines can be drawn on the image and text can be added.
With the pointer tool, a small blue circle is displayed on the patient monitor. Move your fingertips over the image on the Smart Touch. The pointer follows your movements on the patient monitor like on a touchpad.
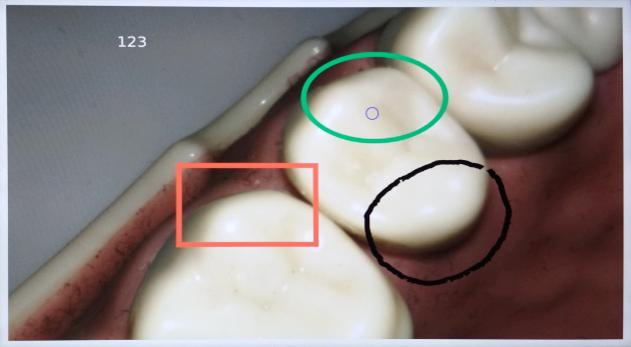
Dentsply Sirona Instructions for Use Treatment Center Axano 4 Operation 4.14 Sivision video system 67 17 396 D3685 D3685.201.01.04.02 2023-06 157
Exporting image to Sidexis 4

The key exports the current photo to Sidexis 4. The images can be assigned to a patient and saved in the patient database via file import, see "Sidexis 4" user manual REF 64 47 028
After the successful export to Sidexis 4, the images are deleted on the treatment center. No more images are then displayed in the camera dialog. Without exporting to Sidexis 4, max. 18 images can be saved on the treatment center. To save the images permanently, you need Sidexis 4 in combination with Sivision View.

In the setup dialog, you can set whether the edited images should also be exported to Sidexis 4, see "Settings/Instruments [→ 172]/Export camera images".
4.14.2.5 Technical data of camera
General technical data
Model: SiroCam AF+ intraoral camera
Weight of handpiece without cable: approx. 85 g
Dimensions:
Characteristics of the image acquisition
diam. 27.5 x 207 mm
Working temperature: +10 to +40 °C
Power supply and signal output: 5 V via USB 2.0 interface (modified plug-in connection)
Lighting:
2 white light LEDs
Image sensor: 1/4" CMOS
Live image resolution: 824 x 514
Resolution of saved images: 1276 x 796
White balance: Permanently set to 4800 K
4 Operation
Sivision video system Dentsply Sirona Instructions for Use Treatment Center Axano 158 67 17 396 D3685 D3685.201.01.04.02 2023-06
4.14
4.15 Operation with a PC
The treatment center can be connected to a PC via an Ethernet cable. The network connection to the treatment center can be configured in the "Maintenance/Network [→ 190]" setup dialog. The Sidexis 4 and Sivision View PC applications enable communication between the treatment center and the PC.
For details, please refer to the "Sivision View" user manual REF 68 00 143
CAUTION
The integration of the Treatment Center in an IT network that includes other devices can lead to risks that were not previously known.
The following changes to an IT network can lead to new risks:
• Changes to the IT network configuration
• Connecting additional elements to the IT network
• Removing elements from the IT network
• Updating devices that are connected with the IT network
• Upgrading devices that are connected with the IT network
The creator of the IT network must determine, analyze, assess, and control these risks (e.g. IEC 80001-1).
IMPORTANT
The PC's HDMI outlet and graphics card should be hot-plug capable. When the PC is switched on before the treatment center, the patient monitor may remain black in some PC models.
➢ In this case, switch the treatment center on first, then the PC.
➢ Equip your PC with a hot-plug capable HDMI outlet. Then the devices can be switched on in any order.
4.15.1 Touchpad and Sidexis 4 control
The Sidexis 4 PC applications can display X-ray and intraoral camera images on the patient monitor. You can save images taken with the SiroCam AF+ intraoral camera in the patient database. For details, please refer to the "Sidexis 4" user manual REF 64 47 028

A touchpad is displayed on the Sidexis 4 Sivision dialog. You can use this to move the computer mouse and make mouse clicks.
The touchpad is behind a hygienic glass surface. Comfortable operation of the mouse cursor depends on the quality of the medical gloves. Not all gloves move equally well across the glass surface. The best results are achieved with gloves that are latex-free and fit tightly.
Dentsply Sirona Instructions for Use Treatment Center Axano 4 Operation 4.15 Operation with a PC 67 17 396 D3685 D3685.201.01.04.02 2023-06 159


A few Sidexis 4 function keys are also displayed on the Smart Touch. These functions can be controlled directly from the treatment center:
Readiness for intraoral X-ray exposure
Establishes readiness for an X-ray exposure. A Sidexis 4 window then opens where the image type can be selected and the image can be described in detail.
Full frame
The active image window is enlarged so that it covers the entire display area. The control elements of the Sidexis 4 user interface are not concealed in the process.
Tiled layout
All open image windows are scaled to a uniform size in the display area and arranged without overlapping.
Cascaded layout
The opened windows are "cascaded", i.e. arranged slightly displaced behind one another. All image window titles are thus visible.
Close current media window
Close all media windows
Previous/Next image
Rotate image
Rotates the image 90° counterclockwise or clockwise.
Zoom in/out
This increases and decreases the active image window and the size of the image displayed in it on the patient monitor.
Contrast optimization filter
This image filter analyses and optimizes the current grayscale distribution of an image. In this way, for instance, details within a very low-contrast, “faint” image can be made visible.
Relief display filter
Image details with high contrast are displayed brighter or darker. Edges or contours within the image are thus clearly accentuated. The result is a relief-like image distortion.
Smooth image
To mitigate high-contrast or high-interference effects in images, the contrast between neighboring pixels is reduced or averaged. The overall sharpness of the image is reduced.
4 Operation 4.15 Operation with a PC Dentsply Sirona Instructions for Use Treatment Center Axano 160 67 17 396 D3685 D3685.201.01.04.02 2023-06


4.15.2
Sharpen image
Contrasts between neighboring pixels are increased. This function helps to accentuate edges or contours. This gives the impression of a sharper image.
Undo
The effect of the last filter operation is undone.
Restore original image
The changes previously made, e.g. via filters, are canceled. The most recently saved version of the image is restored.
Media Player
The treatment center has the option of displaying images, videos, PDFs and PowerPoint presentations saved on the PC on the patient monitor via an integrated media player. Sound can be played via the monitor loudspeaker. The files are selected and the media player is operated from the treatment center
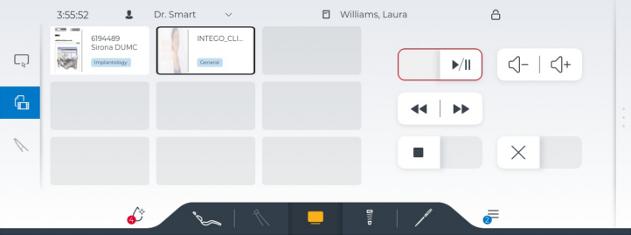
A connection to treatment center must be set up in Sidexis 4. In addition, the folder pathway for the folder with the media files must be specified. For details, please see the "Sivision View" user manual REF 68 00 143.
Files that can be displayed on the patient monitor by the treatment center on the are shown in gray fields. A preview graphic, the file name, and a category are shown in these fields. The categories can be created in Sidexis 4 and the files assigned to them. The color coding simplifies selecting the file at the treatment center.
➢ Tap on one of the displayed files.
Ä The file is displayed on the patient monitor.
Depending on the file type, the corresponding control keys are displayed on the Smart Touch:


Playback/Pause
Stop playback
Dentsply Sirona Instructions for Use Treatment Center Axano 4 Operation 4.15 Operation with a PC 67 17 396 D3685 D3685.201.01.04.02 2023-06 161
.


Enlarge/reduce view
Show previous/next /page
Adjust to page size
Adjust to page width
Close file
4 Operation 4.15 Operation
a PC Dentsply Sirona Instructions for Use Treatment Center Axano 162 67 17 396 D3685 D3685.201.01.04.02 2023-06
with
Forward/Back
Adjust volume Mute
4.15.3 USB port
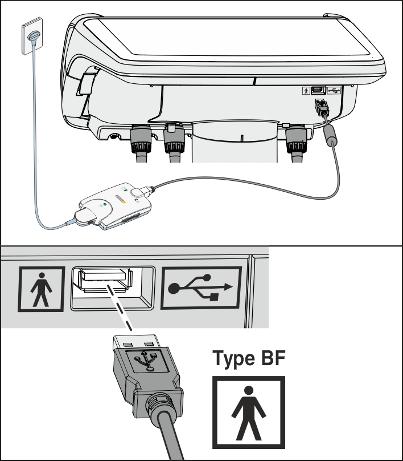
The dentist element can be equipped with a USB 2.0 interface that can be used to connect USB devices with the practice PC.
The USB interface provides 5.1 V with 2 A.
DANGER
In the event of electrical faults, the supply voltage could be conducted to the USB interface via the ground wire.
There is a risk of electric shock.
➢ Only type BF medical devices and applied parts according to IEC 60601-1, e.g., the Dentsply Sirona Xios XG USB module intraoral X-ray system, may be connected to the USB interface.
➢ Do not connect a USB hub or extension cables to the USB interface.
DANGER
USB devices with their own power supply (e.g., via a power supply unit) may lead to increased leakage current.
This endangers the safety of patients and users.
➢ Connect only USB devices that use the USB connection as their sole power source.
WARNING
The USB interface is not suitable for charging a smart device. The absence of air and creepage paths in the smart device can lead to higher leakage current when charging.
Dentsply Sirona Instructions for Use Treatment Center Axano 4 Operation 4.15 Operation with a PC 67 17 396 D3685 D3685.201.01.04.02 2023-06 163
4.16 Configuration of the treatment center (setup)
In the setup screen, the treatment center can be individually set up and configured.
4.16.1 Opening the setup dialog
ü The start, instrument, or Sivision dialog is displayed.


1. Tap on the Setup key in the footer.
Ä If there are no unread messages (no blue dot on the setup key). the "Settings" setup dialog will be displayed. However, if there are any unread messages (blue dot with a number), the "Notifications" dialog is displayed. "Settings"setupdialog

4 Operation 4.16 Configuration of the treatment center (setup) Dentsply Sirona Instructions for Use Treatment Center Axano 164 67 17 396 D3685 D3685.201.01.04.02 2023-06
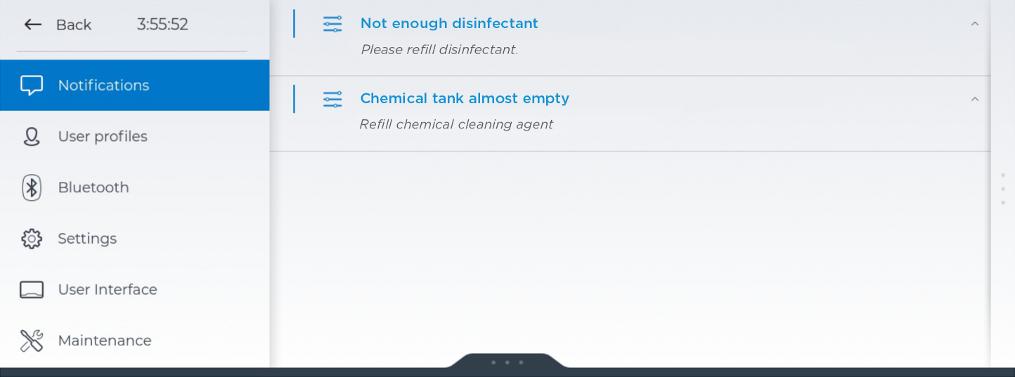
"Notifications"dialog
2. The setup is divided into six dialogs. Select the desired dialog on the left side of the Smart Touch.
4.16.2 Notifications
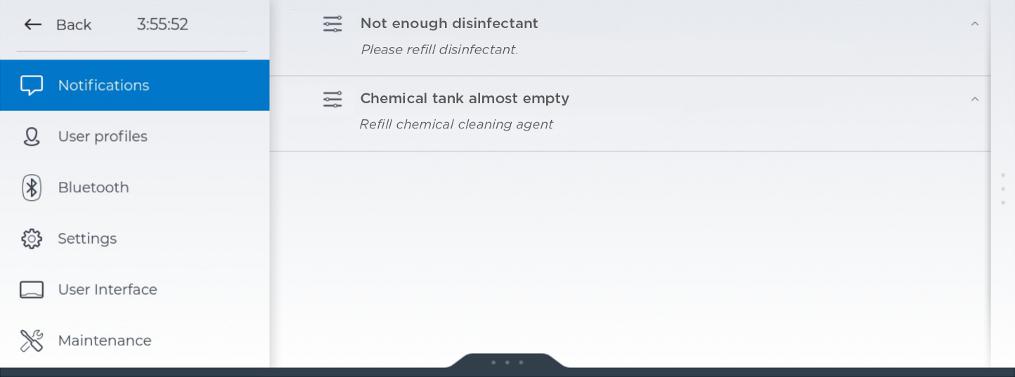
Incidents or errors of the treatment center that cannot be immediately recognized by the user or which require user action are displayed in the "Notifications" dialog.
New messages that were not yet shown to the user are displayed in blue letters, already shown messages in gray.

If there are unread messages, a blue dot is displayed with the number of unread messages on the setup key in the footer of the Smart Touch.
Dentsply Sirona Instructions for Use Treatment Center Axano 4 Operation 4.16 Configuration of the treatment center (setup) 67 17 396 D3685 D3685.201.01.04.02 2023-06 165
4.16.3 User profiles
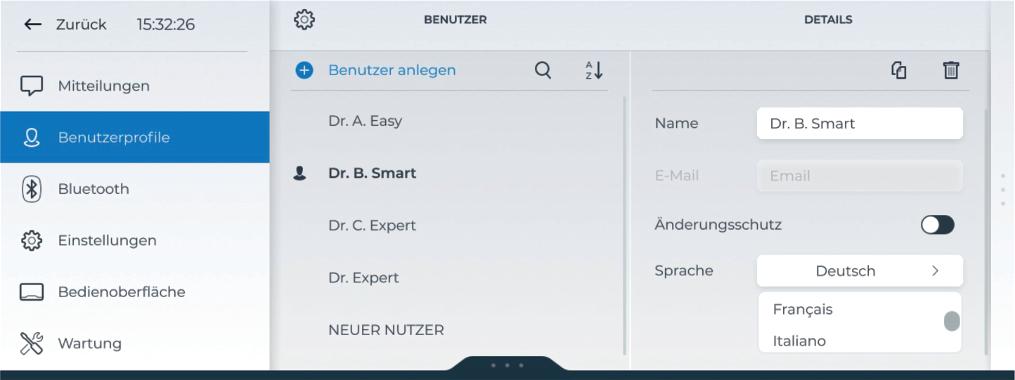
Multiple users can use the treatment center with their own individual treatment and operating settings.
The following is stored in the user profiles:
● Programming of chair programs, see "Programming chair programs and shock positioning" [→ 77]
● Settings in the Instrument programs, see "Saving the instrument settings" [→ 89]
● Some of the settings in the setup dialog, see "Settings" [→ 168]
● Customization of the Smart Touch dialogs, see "User interface" [→ 187]
● User-specific language setting
When the user profile has been selected, the preset configurations and settings are available.
If a user is not logged in, the treatment center can be used only with a default profile. "Select user" is then displayed in the header as username. However, the settings stored in this profile are reset when the treatment center is switched off or a user logs in.
Add user
The treatment center can save up to 10 user profiles.
User profiles must each have a different name.
To set up a new user, a new profile with default values is created. Alternatively, already existing profiles can be copied and then customized.
Sort user names
The following display sequences are available for selecting a user:
● Alphanumeric order by user name
● Sorting by last login
4 Operation 4.16 Configuration of the treatment center (setup) Dentsply Sirona Instructions for Use Treatment Center Axano 166 67 17 396 D3685 D3685.201.01.04.02 2023-06
Deleting user profile
User profiles can be deleted completely.
It is also possible to reset only the data of the current user, see "Settings/User settings [→ 186]".
4.16.4 Bluetooth
The wireless foot control is connected to the treatment center via the Bluetooth interface. It must be assigned to the treatment center by registering it.
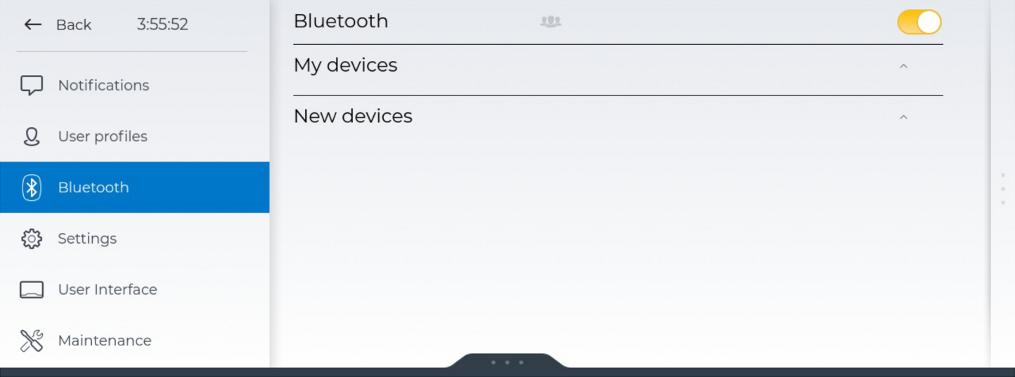
➢ Switch the "Bluetooth" function on.
Ä Bluetooth devices that are already assigned to the treatment center are displayed under "My devices".
Ä Bluetooth devices that were detected by the treatment center, but have not yet been assigned to it, are displayed under "New devices".
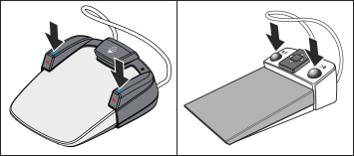
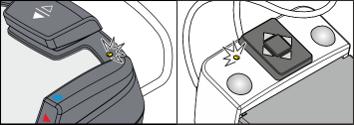

1. Simultaneously press and hold the left and right buttons of the foot control (> 2 s).
Ä If the wireless foot control is in login mode, the yellow LED flashes.
Ä The serial number of the wireless foot control is displayed under "New devices". It can be found on the rating plate of the foot control.
2. Tap on the "Connect" key.
Dentsply Sirona Instructions for Use Treatment Center Axano 4 Operation 4.16 Configuration of the treatment center (setup) 67 17 396 D3685 D3685.201.01.04.02 2023-06 167

Ä If the wireless foot control is listed under "My devices", it is registered to the treatment center.
Ä After registration, the foot control may automatically receive a firmware update. This may take several minutes.
Ä If a wireless foot control is registered of a different type than the previously registered one (a Classic foot control is replaced by a Smart Control or vice versa), the treatment center must be restarted after registration to ensure the new foot control functions properly.
3. Check the function of the foot control.
4.16.5 Settings
In the "Settings" setup dialog, a number of functions of the treatment center can be switched on/off or adjusted.

The settings are grouped by category. You can scroll through the list by swiping up and down. Tap on the desired line to open the category. Tapping it again closes the category. Changed settings are saved automatically.

The settings marked with the adjacent symbol apply to all users. Settings not marked with this symbol are saved in the user profile.
Functions not included with the treatment center are not displayed on the Smart Touch.
4 Operation 4.16 Configuration of the treatment center (setup) Dentsply Sirona Instructions for Use Treatment Center Axano 168 67 17 396 D3685 D3685.201.01.04.02 2023-06
4.16.5.1
General
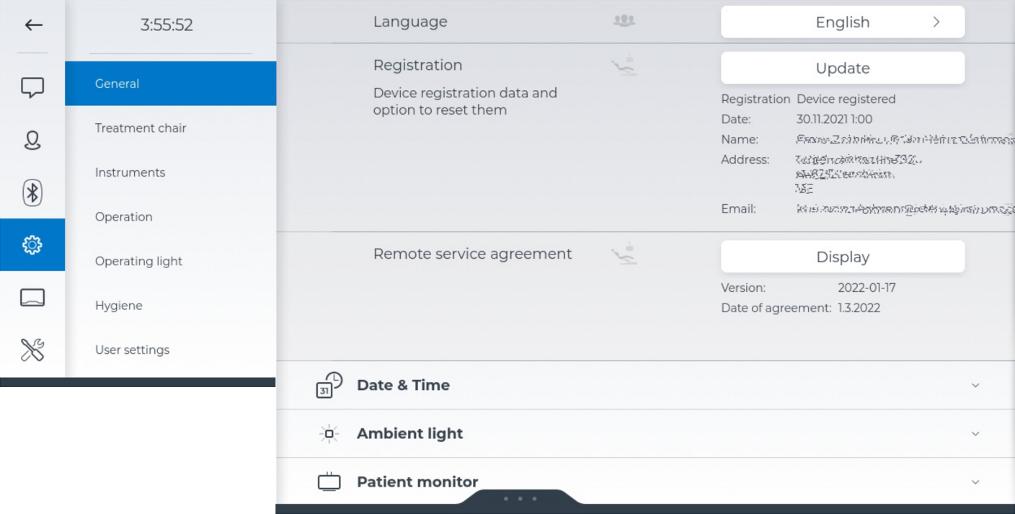
Language
The texts on the Smart Touch can be displayed in different languages.
Registration
Have your treatment center registered with Dentsply Sirona by your service technician. Registration is required for service offers such as firmware updates, product improvements, and expanded functions. Your registration data filed with Dentsply Sirona are displayed in the setup dialog and in the DS service software when you log in as a practice employee. If the treatment center is connected to the internet, the registration data can be retrieved from Dentsply Sirona by tapping on the "Update" key. If the contact data are incorrect, please contact your service technician.
4.16.5.1.1
Date & time

Dentsply Sirona Instructions for Use Treatment Center Axano 4 Operation 4.16 Configuration of the treatment center (setup) 67 17 396 D3685 D3685.201.01.04.02 2023-06 169
Time format
You can select either a 12-hour or 24-hour format. The 12-hour display is shown only in the header of the Smart Touch. The 24-hour format will still be used in the setup dialog.
Set time automatically
If this function is activated, the date and time are automatically retrieved from an NTP server (Network Time Protocol).
Time zone
You must set your time zone to display the time correctly.
Current date and Current time
The date and time can also be set manually. The 24-hour format is always used in the setup dialog.
4.16.5.1.2 Ambient Light

Activation
When Ambient Light is activated, the lamps on the dentist and assistant elements and sliding track are switched on with the set color and brightness.
Color
The color of the Ambient Light is preset on delivery to match the upholstery color. The preset color can be changed.
Brightness
The brightness of the Ambient Light can be changed from 0 to 100% using the slider control.
4 Operation 4.16 Configuration of the treatment center (setup)
Sirona Instructions for Use Treatment Center Axano 170 67 17 396 D3685 D3685.201.01.04.02 2023-06
Dentsply
4.16.5.1.3 Patient monitor

Default display on patient monitor in exit position
If the function is activated, the Dentsply Sirona logo is displayed when the chair program entry/exit position 0 is activated.
4.16.5.2 Treatment chair

Patient-specific chair programs
For details, please refer to the section "Patient-specific chair programs" [→ 78].
Dentsply Sirona Instructions for Use Treatment Center Axano 4 Operation 4.16 Configuration of the treatment center (setup) 67 17 396 D3685 D3685.201.01.04.02 2023-06 171
Velocity
The travel speed for ErgoMotion and the chair height can be changed for manual chair settings and programmed chair movements.
The following settings can be selected:
● normal
● increased
● high
Please note that motor noises are louder with faster travel speeds.
In addition, manual chair adjustments can be made slowly and precisely using the fine adjustment, see "Move patient chair with fine adjustment" [→ 75].
Saving position of dentist element
You can set which chair programs the position of the dentist element on the sliding track should be programmed for.
The following settings can be selected:
● Never
The position is not added to any chair program.
● Except at S
The position is added to every chair program except for the mouth rinsing position (S).
● Always
The position is added to every chair program.
See also :"Configuring chair programs and shock positioning" [→ 77]
4.16.5.3 Instruments
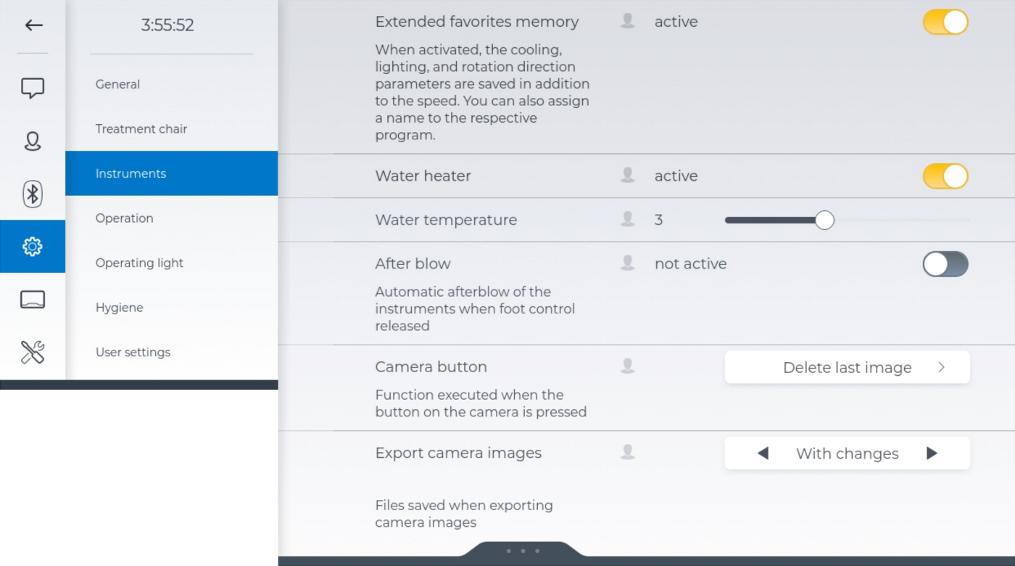
4 Operation 4.16 Configuration of the treatment center (setup) Dentsply Sirona Instructions for Use Treatment Center Axano 172 67 17 396 D3685 D3685.201.01.04.02 2023-06


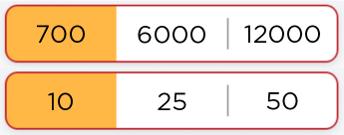
Instrument settings can be saved and accessed individually on the
● active
In addition to speed and intensity values, the settings for coolant, instrument light, foot control switch, and direction of rotation (depending on the instrument) are saved on the quick setting keys. The quick setting keys can be labeled individually.
● not active
Only speed and intensity values are saved on the quick setting keys. They are labeled with the speed or intensity values.
Automatic reactivation of a favorite
One of the favorite positions can be automatically reactivated when changing the user or patient or when moving to the exit position.


This setting causes the cursor to jump to the first or middle position of a quick setting key. This is especially useful for a person using a foot control with a quick setting key with 5 positions.
Water heater
The heaters for the treatment water in the dentist and assistant elements can be switched on/off.
Dentsply Sirona Instructions for Use Treatment Center Axano 4 Operation 4.16 Configuration of the treatment center (setup) 67 17 396 D3685 D3685.201.01.04.02 2023-06 173
Water temperature
The temperature of the treatment water for the instruments on the dentist and assistant element can be set in 5 increments. Check the water temperature after filling a cup. The mixing temperature is in the range of 35 °C to 45 °C.
WARNING
The heater power is adjustable.
Check the water temperature. The heater power should be reduced if the water input is unusually warm.
After blow
After the foot control pedal has been released, the cooling spray remaining in the instrument head or in the tip of the instrument can be automatically blown out by briefly switching on the chip blower.
Camera button
The function of the camera key can be set: Delete last image, Focusing, or Without function
Export camera images
The photos and videos can be exported to Sidexis 4. You can set whether the edited images should also be exported:
● Originals only
Only the original image made by the camera is exported.
● With changes
The original image and the edited image are exported.
● All
The original image, the edited image, and the edited image as a scalable vector graphic (SVG) are exported.
4 Operation 4.16 Configuration of the treatment center (setup) Dentsply Sirona Instructions for Use Treatment Center Axano 174 67 17 396 D3685 D3685.201.01.04.02 2023-06
4.16.5.4 Operation
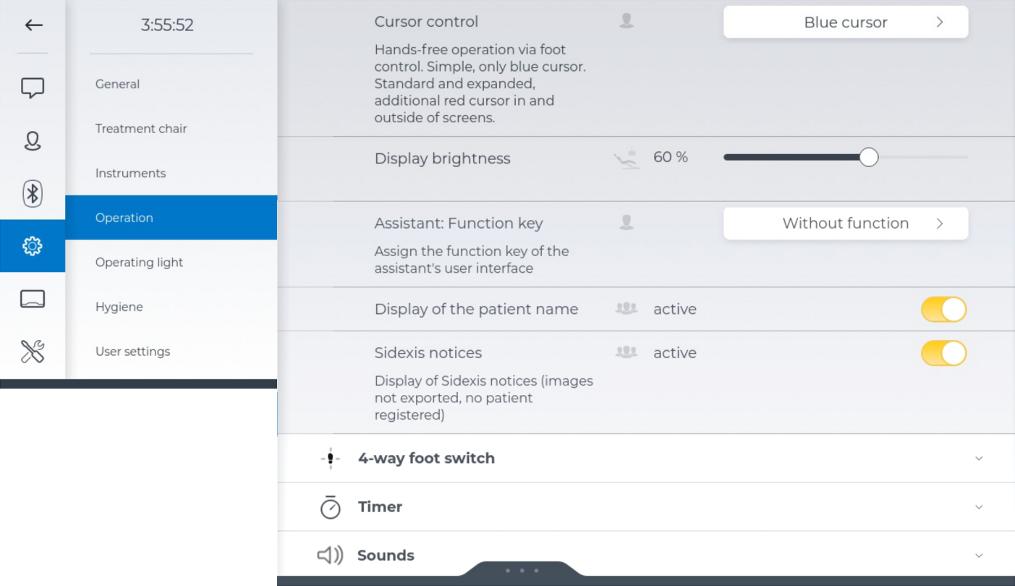
Cursor control
The hands-free operation of the user interface via cursor control can be set as follows:
● off: No hands-free operation
● Blue cursor: Keys with a blue border can be activated with the left and right foot control button. In the start dialog, these are the keys for the chair programs mouth rinsing position (S) and entry/exit position (0), and in the instrument dialog, the keys for coolant on/off and chip blower.
● Standard: hands-free operation in the main dialogs
In addition to the blue cursor, a red cursor is displayed. It can be moved to other keys with the foot control. In this way, all keys of the dialog can be reached and activated with the foot control. When the red cursor is moved, the pairs of keys with a blue border are skipped for faster navigation.
● Advanced: in addition to the standard mode, hands-free operation of the user selection, dialog change keys, and fixed keys area
For more information, please refer to "Using the cursor control" [→ 58]
Dentsply Sirona Instructions for Use Treatment Center Axano 4 Operation 4.16 Configuration of the treatment center (setup) 67 17 396 D3685 D3685.201.01.04.02 2023-06 175
Display brightness
The brightness of the Smart Touch will decrease after a few years of operation. This aging effect is normal and can be offset by adjusting the brightness. The lighting of the Smart Touch has sufficient reserves for this.
To reduce the aging effect, the Smart Touch should not be brighter than necessary. A red exclamation mark is displayed if the maximum recommended brightness is exceeded.
Assistant: Function key
The star key on the assistant element can be assigned the following functions:
● Without function
● Shock positioning
● Massage
● Suction device
● Purge
Selecting the Suction device option sets that the suction flow of the spray aspirator can be interrupted and/or reactivated by pressing the star key. This function cannot be used on the saliva ejector or on the surgical suction device. See also the safety information, see "Suction handpieces" [→ 138]
If you deposit the spray aspirator in its holder while the suction flow is interrupted, the suction flow is automatically restarted when you pick it up again.
Note that this function can also be assigned to the 4-way foot switch in the setup dialog, see "Settings/Operation/4-way foot switch [→ 177]/4way foot switch suction stop".
4 Operation 4.16 Configuration of the treatment center (setup) Dentsply Sirona Instructions for Use Treatment Center Axano 176 67 17 396 D3685 D3685.201.01.04.02 2023-06
4.16.5.4.1 4-way foot switch

4-way foot switch horizontal and 4-way foot switch vertical
You can select which function the 4-way foot switch triggers in the directions left/right and up/down:
● Without function
● Chair programs S/0
● Chair programs 1/2
● Chair programs 3/4
● Chair lift
● Backrest
● Inclination of headrest
● Extension of headrest
● LEDview Plus Composite
4-way foot switch suction stop
A setting can be made to enable interruption and/or reactivation of the suction flow of the spray aspirator by pressing the 4-way foot switch in any direction. This function cannot be used on the saliva ejector or on the surgical suction device. See also the safety information, see "Suction handpieces" [→ 138].
If you deposit the spray aspirator in its holder while the suction flow is interrupted, the suction flow is automatically restarted when you pick it up again.
Note that this function can also be assigned to the star key on the assistant element in the setup dialog, see "Settings/Operation [→ 175]/ Assistant: Function key".
Dentsply Sirona Instructions for Use Treatment Center Axano 4 Operation 4.16 Configuration of the treatment center (setup) 67 17 396 D3685 D3685.201.01.04.02 2023-06 177
4.16.5.4.2
Suction stop for large suction devices
If the treatment center is equipped with two spray aspirators, you can select in the setup dialog whether only one or both aspirators can be switched on/off with the 4-way foot switch or the star key on the assistant element.
Timer
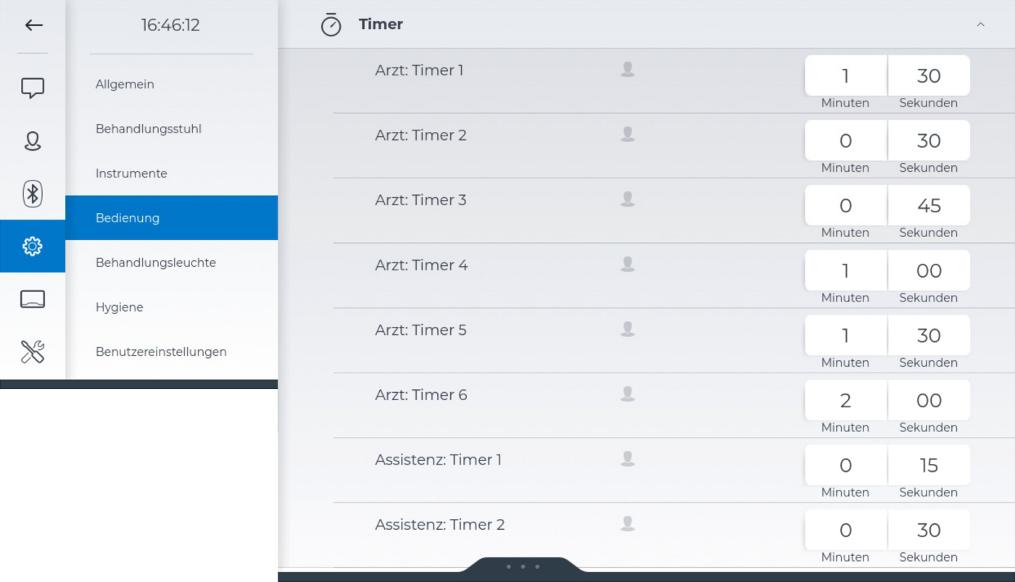
Six timers can be preset for the dentist element and two for the assistant element. They are started by tapping on the Timer fixed keys on the Smart Touch [→ 85] and the User interface of the assistant element [→ 137]. The activated timer is displayed in a widget in the start and instrument dialog.
4 Operation 4.16 Configuration of the treatment center (setup) Dentsply Sirona Instructions for Use Treatment Center Axano 178 67 17 396 D3685 D3685.201.01.04.02 2023-06
4.16.5.4.3
Sounds
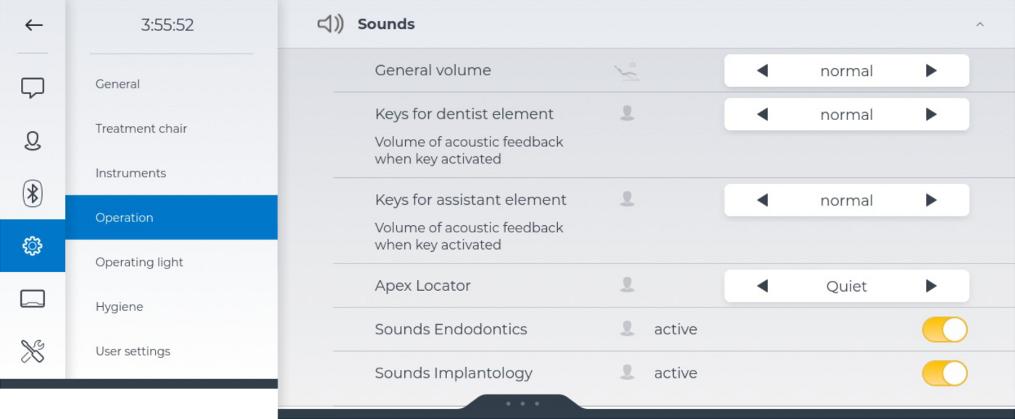
General volume
The general device volume for non-critical system sounds such as moving up and down, confirmations, or notification sounds can be set in three levels. You can also switch off the sounds. Critical system sounds such as error messages or warning sounds required by law will still be played at a volume that cannot be changed.
Keys for dentist element and Keys for assistant element
The volume of the acoustic feedback when activating a key can be set in three levels. You can also switch off the key sound.
Apex locator
The volume of the beeps of the ApexLocator can be set in three levels. You can also switch off the beeps. For details, please refer to the section "Apex and endodontics beeps" [→ 121]
Endodontics sounds
If no beeps are desired during endodontic treatment, they can be deactivated. For details, please refer to the section "Apex and endodontics beeps" [→ 121].
Sounds Implantology
If no beeps are desired during implantology treatment, they can be deactivated. For details, please refer to the section "Implantology beeps" [→ 130]
Dentsply Sirona Instructions for Use Treatment Center Axano 4 Operation 4.16 Configuration of the treatment center (setup) 67 17 396 D3685 D3685.201.01.04.02 2023-06 179
4.16.5.5 Operating light

Brightness
The brightness of the operating light in normal mode (not composite) can be set in up to seven levels. If fewer than seven levels can be set, brightness has been limited in the setup dialog "Maintenance/Device settings [→ 191]/Limitation of brightness".
Color temperature
The color temperature of the operating light can be set in three levels.
No-Touch sensor
When the function is activated, the sensor control under the operating light is switched on. For details, please refer to the section "Operating light" [→ 149]
Sensitivity
of non-touch sensor
The desired operating distance of the non-contact sensor can be set in 5 levels. You can check the setting directly on the operating light without leaving the setup dialog. The setting should be selected so that the noncontact sensor cannot be inadvertently activated.
Switching the operating light on after moving the dentist element in close
When the function is activated, the operating light is automatically switched on by the foot control pedal after the dentist element is moved closer.
4 Operation 4.16 Configuration of the treatment center (setup) Dentsply Sirona Instructions for Use Treatment Center Axano 180 67 17 396 D3685 D3685.201.01.04.02 2023-06
4.16.5.6
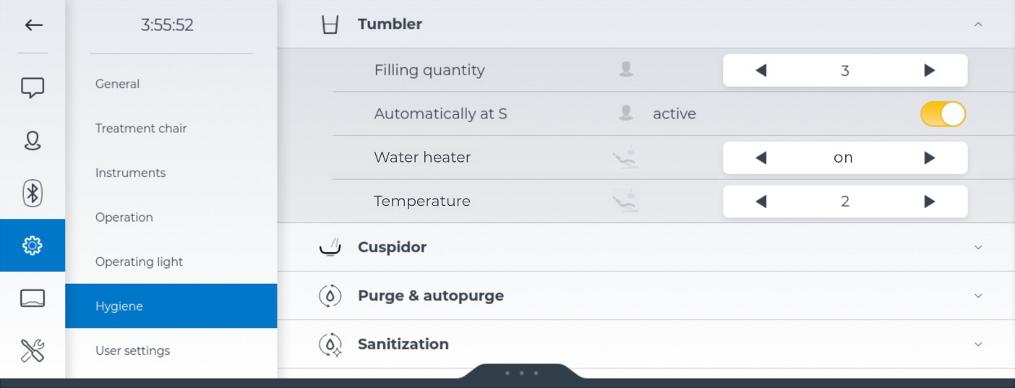
Filling quantity
The filling quantity of the tumbler can be set in increments. For tumbler filling with automatic sensor control, the water volume is regulated by the filling level, see "Tumbler filling with automatic sensor control" [→ 140]
Automatically at S
When the function is activated, the tumbler filling function is automatically switched on when the mouth rinsing position (S) chair program is activated.
By activating the Tumblerfilling fixed key, automatic filling can be stopped.
Water heater
The water heater for tumbler filling can be set as follows:
on
off ● off in exit position
The water heater for tumbler filling switches off automatically when the entry/exit position (0) chair program is activated. The tumbler heater switches back on as soon as the patient chair leaves the entry/exit position. This makes it possible for the patient to drink cold water during waiting periods and to save energy.
Temperature
The water temperature for tumbler filling can be adjusted in increments.
Dentsply Sirona Instructions for Use Treatment Center Axano 4 Operation 4.16 Configuration of the treatment center (setup) 67 17 396 D3685 D3685.201.01.04.02 2023-06 181
Hygiene 4.16.5.6.1 Tumbler
●
●
4.16.5.6.2
Cuspidor

Automatically at S
When the function is activated, cuspidor flushing is switched on for the set time when the mouth rinsing position S is approached. By activating the Cuspidorflushing fixed key, automatic rinsing can be stopped.
Swivel in with rinsing position S
When the function is activated, the cuspidor bowl is automatically moved inward when the mouth rinsing position (S) chair program is selected as soon as the mouth rinsing position is reached. When the patient chair is moved, the cuspidor swivels out again.
Duration
The cuspidor flushing time can be set.
Concentration of chemical cleaning agent
For chemical cuspidor cleaning, a cleaning agent is automatically added to the water for cuspidor flushing. For details, please refer to the section "Cleaning the drain lines of the cuspidor" [→ 248]
You can set how much cleaning agent should be added to the water for chemical cuspidor cleaning in increments.
Cuspidor flushing
Manual start of cuspidor flushing with cleaning agent added
4 Operation 4.16 Configuration of the treatment center (setup) Dentsply Sirona Instructions for Use Treatment Center Axano 182 67 17 396 D3685 D3685.201.01.04.02 2023-06
4.16.5.6.3
Purge
& autopurge

Purge time
For manual purging of the instruments, the purging time can be set between 20 and 180 seconds. The default setting is 20 seconds. For details on the purging process, please refer to section “Purging water lines (purge function)” [→ 213]
Purge with operation lock
When the purge function is started, the user interfaces can be automatically blocked. The user interfaces can then be wipe disinfected during or after flushing without inadvertently triggering functions. Unblock them afterwards.
Auto purge duration in morning and Auto purge duration in evening
For automatic purging of the instruments, the purging time can be set between 20 and 300 seconds. A purge time of 120 seconds is recommended for mornings and evenings. The purge time for tumbler filling and cuspidor flushing is permanently set in the autopurge function and cannot be changed. For details on the autopurge process, please refer to section “Automatic purging of water lines (autopurge function)” [→ 217]
Switch off automatically
When the function is activated, the treatment center switches automatically to standby mode in the evening after the autopurge process.
Dentsply Sirona Instructions for Use Treatment Center Axano 4 Operation 4.16 Configuration of the treatment center (setup) 67 17 396 D3685 D3685.201.01.04.02 2023-06 183
Emptying of mixing tank
After the autopurge process in the evening, the treatment center always empties the mixing tank of the disinfection system. When this function is activated, this is also done in the morning after the autopurge process. This prevents stagnant water during longer periods of disuse.
Autopurge notification evening
When the function is activated, when the standby switch is activated, a reminder is displayed on the Smart Touch if the autopurge function is not active in the evening. The options are then to select the autopurge function or switch off the treatment center.
When the treatment center is first switched on during the working day, this is interpreted to be autopurge mornings. When it is switched off the same day, this is detected as autopurge evenings. 4.16.5.6.4
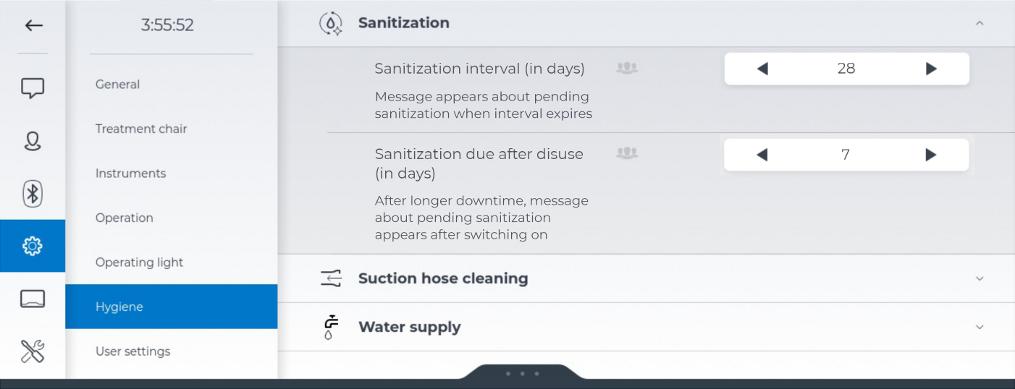
Sanitization interval (in days)
You can set the number of days since the last sanitization that a sanitization due notification should be displayed. A value from 7 to 28 days can be set in increments of 7 days. The default setting is 28 days. Three days before the due date, a message in the hygiene cockpit indicates the approaching sanitization date. If a sanitization interval of 7 days has been set, the message is not displayed until the due date. For details, please refer to section "Sanitization" [→ 263]
Sanitization due after disuse (in days)
You can set after how many days of disuse that a sanitization due notification should be displayed. A value of 1 to 7 days can be set.
4 Operation 4.16 Configuration of the treatment center (setup) Dentsply Sirona Instructions for Use Treatment Center Axano 184 67 17 396 D3685 D3685.201.01.04.02 2023-06
Sanitization
4.16.5.6.5
Suction hose cleaning
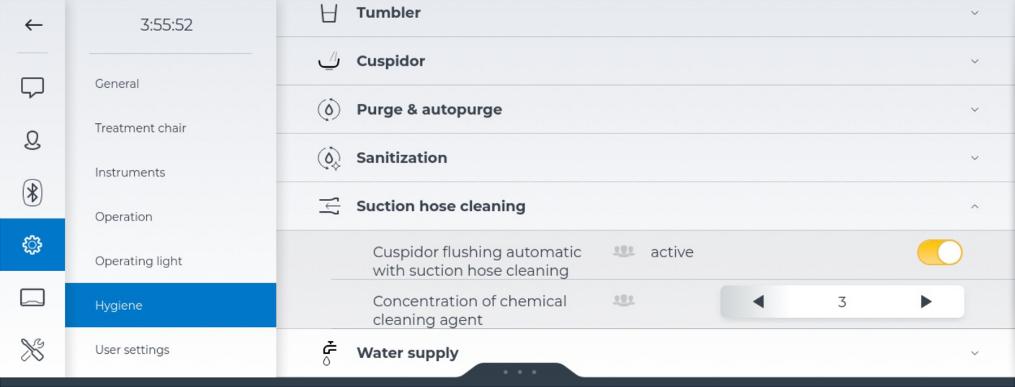
Automatic cuspidor flushing with suction hose cleaning
When the function is activated, chemical cuspidor cleaning is automatically carried out after every suction hose cleaning.
Please note that the flushing time is 45 seconds in this case and cannot be changed. This time is necessary to add the cleaning agent to the water, apply it the drain line, and then flush with water.
Concentration of chemical cleaning agent
You can set how much cleaning agent should be added to the water for chemical suction hose cleaning in increments. For details, please refer to section "Conduct suction hose cleaning" [→ 238]
CAUTION
Note the concentration of cleaning agent
The quantity is dependent on the cleaning agent used and the type of treatment. Please follow the manufacturer’s instructions for the cleaning agent.
4.16.5.6.6 Water supply

Dentsply Sirona Instructions for Use Treatment Center Axano 4 Operation 4.16 Configuration of the treatment center (setup) 67 17 396 D3685 D3685.201.01.04.02 2023-06 185
Test of the rinsing tank sensor
The service function can be used to check the function of the filling level sensor of the rinsing tank in the assistant element. The disinfectant tank is drained.
4.16.5.7 User settings
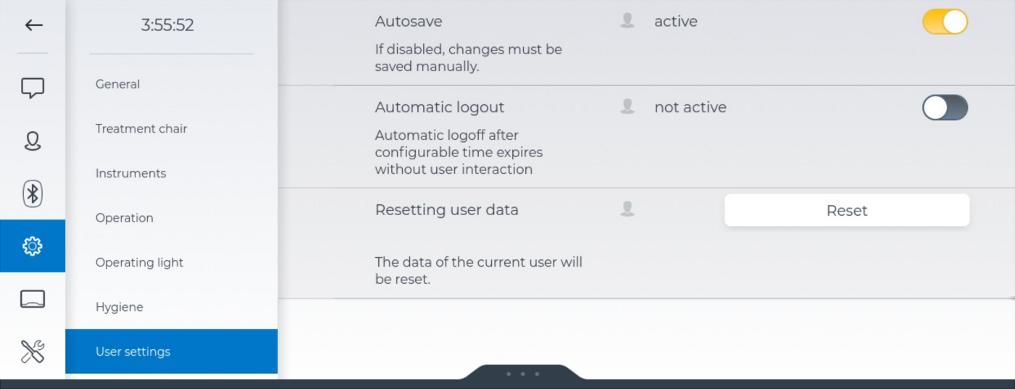
Automatic saving
There are two options for saving the instrument settings:
● active
Each change of the settings in the dialogs and configurations in setup is automatically saved. No keys for discard or save are displayed in the header.
● not active
Two arrows appear in the header when changes to settings are made. With the first arrow (down), the changes are discarded, with the second arrow (up), the changes are saved in the user profile. Exceptions are saving instrument settings on the quick setting keys and programming chair positions.

Automaticsavenotactivated,thediscard(arrowdown)andsave(arrowup) keysaredisplayedintheheader.
Reset user data
After tapping on the key and confirming a warning, the data of the current user such as instrument settings, settings in the setup dialog,
4 Operation 4.16 Configuration of the treatment center (setup) Dentsply Sirona Instructions for Use Treatment Center Axano 186 67 17 396 D3685 D3685.201.01.04.02 2023-06
and customization of the user interface are reset to the default settings preset in the factory.
4.16.6 User interface
To optimally support the workflow of each user, the keys in the main dialogs can be customized. Keys can be removed, added, or moved to a different position. The adjustments are saved in the user profile.
Program
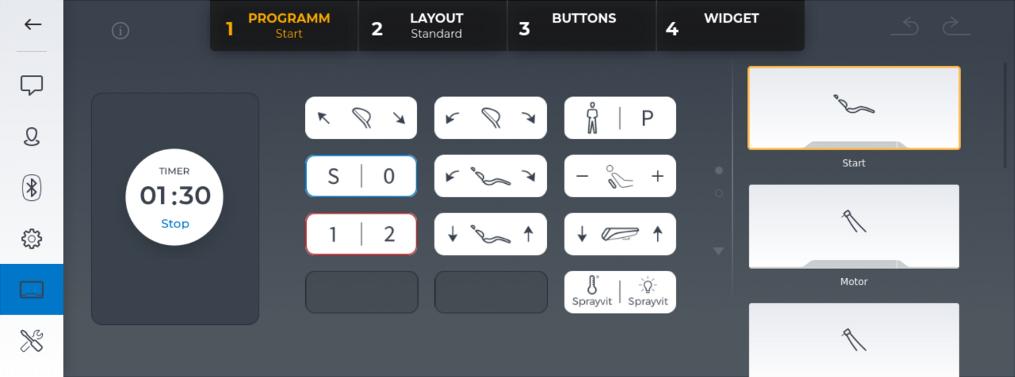
On the right side, select the dialog where you wish to make changes. The keys in the fixed keys area can also be changed.
Layout

In the endodontics dialog, a difference is made between the standard and advanced dialog. The advanced dialog is intended for experts who wish to change the speeds and torque values recommended by the manufacturers of the file systems and saved in the file database. The currently measured torque is then displayed in the widget instead of the stored file parameters.
Dentsply
Instructions for Use Treatment Center Axano 4 Operation 4.16 Configuration of the treatment center (setup) 67 17 396 D3685 D3685.201.01.04.02 2023-06 187
Sirona
Buttons
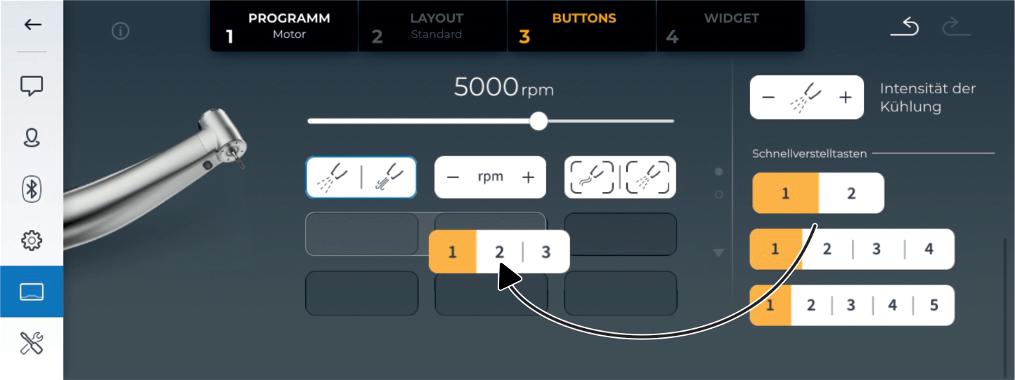
Changethenumberofquicksettingkeysinthemotordialog
You can add keys, remove them, or move them to a different position. Press and hold a key and move it. The unplaced keys are listed on the right side.
As usual, you can change to the expanded dialog by swiping up on the screen or tapping on the small lower arrow. The keys for preselecting the coolant are listed in the expanded dialog.
Note that the keys in the blue cursor cannot be configured. The keys in the red cursor can be configured depending on context and dialog. The starting position of the red cursor is the position after the blue cursor in the start and Sivision dialog and the quick setting keys in the instrument dialog.
Quick setting keys can be placed only in the middle row, the required place must be free. The quick setting keys with 4 and 5 places require the entire width of the row.
Widget
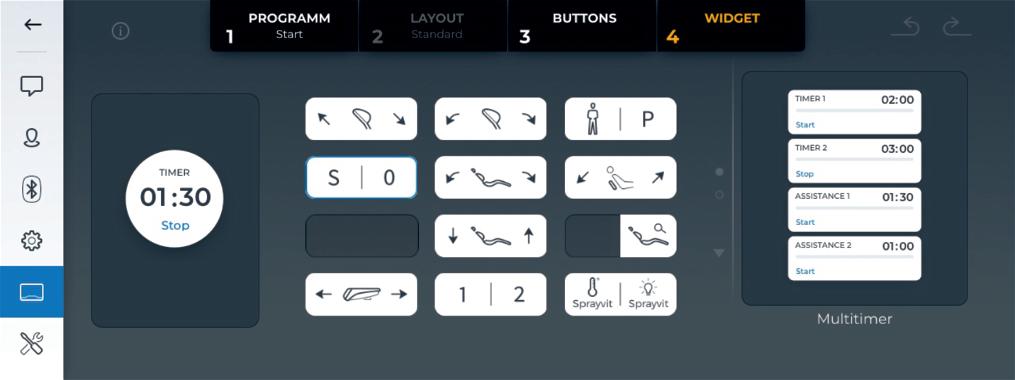
4 Operation 4.16 Configuration of the treatment center (setup)
Sirona Instructions for Use Treatment Center Axano 188 67 17 396 D3685 D3685.201.01.04.02 2023-06
Dentsply
A widget can be positioned at the left side of the start dialog. Widgets are used for a quick start of a function or show other relevant
information. At the moment, the widget for the timer and the multitimer can be selected here.
Dentsply
Instructions for Use Treatment Center Axano 4 Operation 4.16 Configuration of the treatment center (setup) 67 17 396 D3685 D3685.201.01.04.02 2023-06 189
Sirona
4.16.7 Maintenance
In the "Maintenance" area, relevant functions and settings are provided for your service technician.
4.16.7.1
Network
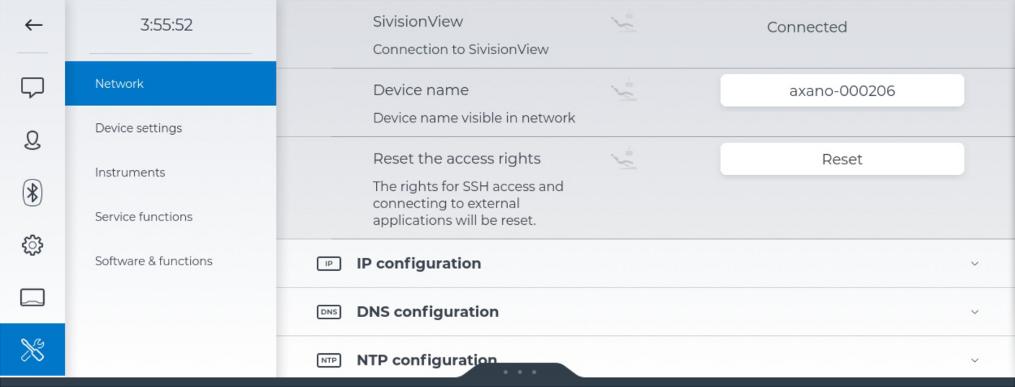
Sivision
Indicates the connection status of the treatment center to Sivision View.
Device name
You can change the name of the treatment center displayed in the practice network. The name must have at least 4 characters. In the factory settings, the name consists of the product name and serial number.
Reset the access rights
The first time an external application such as Sivision View on the practice PC is connected to the treatment center, it must have been granted access to the treatment center in a message window on the Smart Touch. Resetting deletes authorizations that have been granted. Access to the treatment center can then be granted to external applications again or prohibited.
IP configuration, DNS configuration, NTP configuration and WLAN configuration
Consult your data processing specialist for network configuration. Network configuration is described in detail in the "Axano installation instructions" REF 67 21 885
When servicing, a direct connection to the treatment center can be established via the WLAN configuration if the treatment center cannot be accessed via the practice network. Access is available via the DS service software.
4 Operation 4.16 Configuration of the treatment center (setup) Dentsply Sirona Instructions for Use Treatment Center Axano 190 67 17 396 D3685 D3685.201.01.04.02 2023-06
4.16.7.2 Device settings
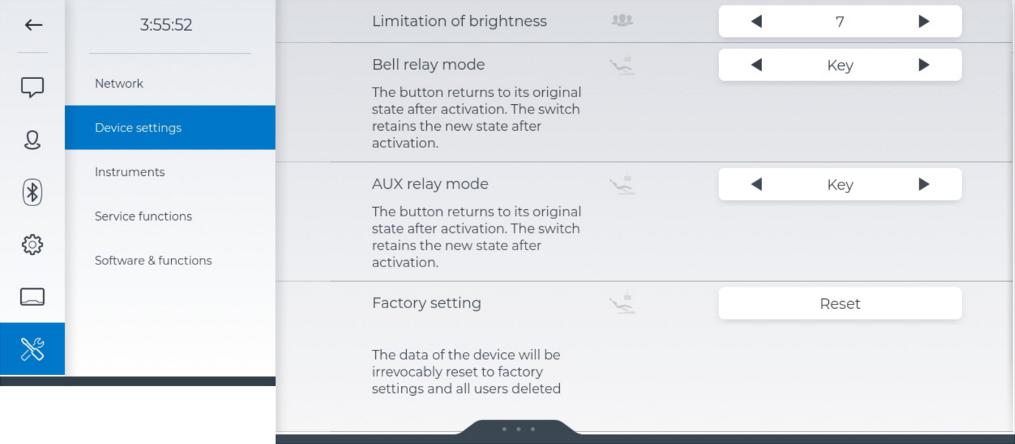
Limitation of brightness
The maximum brightness of the operating light in normal mode (not composite) can be limited to one of the 7 levels.
Bell relay mode and AUX relay mode
The relays assigned to the bell and hash keys can be operated as pushbuttons or as switches.
Reset settings to factory defaults
After resetting to the factory setting, the treatment center shuts down automatically. Please note that all configuration data are reset to the original settings.
It is also possible to reset only the data of the current user, see "Settings/User settings [→ 186]".
Dentsply Sirona Instructions for Use Treatment Center Axano 4 Operation 4.16 Configuration of the treatment center (setup) 67 17 396 D3685 D3685.201.01.04.02 2023-06 191
4.16.7.3 Instruments
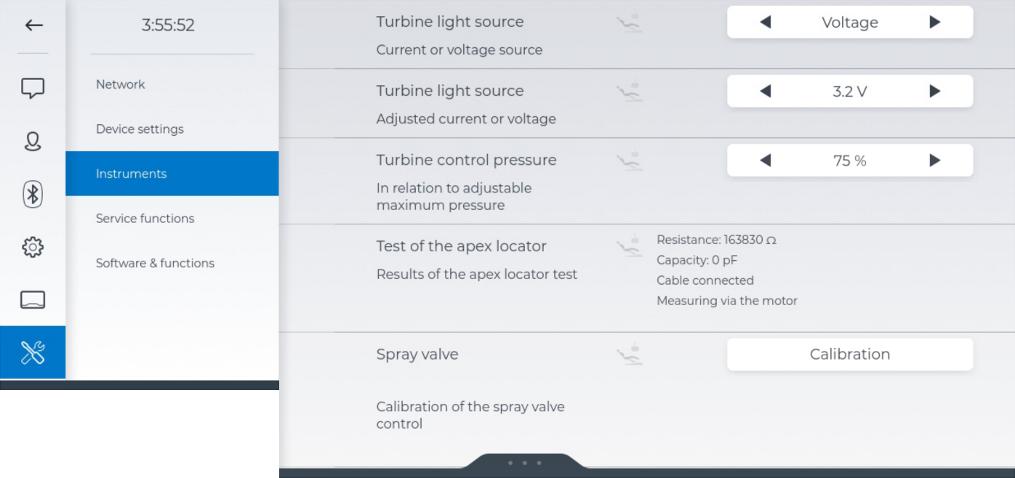
Turbine light source
Halogen lamps cannot be operated with the Axano treatment center. For the LED lamp of each individual turbine, either the voltage or the current strength must be limited.
The original Dentsply Sirona LED lamp is usually operated at 3.6 V. For lamps made by other manufacturers, the settings may have to be adjusted.
NOTICE
The operating voltages and operating currents of different lamps may vary.
Overvoltages or excess current can lead to damage.
➢ When changing lamps, make sure that the operating voltage or operating current is properly set for the new lamp.
1. Take the turbine to be set from the holder.
2. Select the value "Voltage" or "Current", depending on which values should be limited.
Ä In the following line "Turbine light source", the voltage is indicated in volts or the current in milliamperes.
3. Set the maximum permissible voltage or current for the turbine light.
4. Return the turbine to the holder.
Ä When the turbine is removed from the holder again, the changed value is set.
5. Repeat the procedure for other turbines.
Turbine control pressure
The drive air for each individual turbine can be reduced to up to 60% of the set maximum pressure.
1. Take the turbine to be set from the holder.
4 Operation 4.16 Configuration of the treatment center (setup) Dentsply Sirona Instructions for Use Treatment Center Axano 192 67 17 396 D3685 D3685.201.01.04.02 2023-06
2. Reduce the pressure of the turbine drive air. Check the setting by activating the foot pedal.
3. Return the turbine to the holder.
4. Repeat the procedure for other turbines.
Test of the ApexLocator
The ApexLocator can be tested by shorting the electrodes, see "Preparing to use the ApexLocator" [→ 192]. The electrical values measured are displayed here as well as the connection status of the cable and measuring mode.
Spray valve
If you carry out treatments an multiple Axano centers, you may notice a slightly different spray water quantity over time although you use the same setting on all treatment centers. These differences are offset by calibrating the spray valve. The measuring process takes a few minutes.
4.16.7.4 Service functions
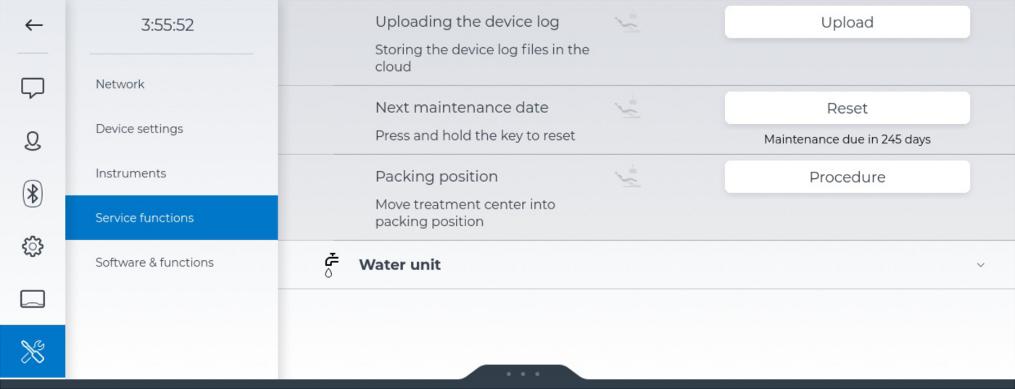
Uploading the device log
When servicing, the log data of the treatment center can be sent to Dentsply Sirona for analysis and troubleshooting. They contain only setting and configuration data. To provide the data, the treatment center must have an internet connection, the remote service agreement must have been agreed to, and the treatment center must be registered via Siroforce Mobile.
Next maintenance date
The treatment center must undergo an inspection and maintenance and a safety check at regular intervals, see "Maintenance by the service technician" [→ 274].
When the next maintenance date is less than 42 days away, a message is displayed in the "Notifications" dialog. If maintenance is overdue, the number of days since maintenance was due is displayed. Press and hold the key to reset the counter to 365 days.
Dentsply Sirona Instructions for Use Treatment Center Axano 4 Operation 4.16 Configuration of the treatment center (setup) 67 17 396 D3685 D3685.201.01.04.02 2023-06 193
Packing position
Before disassembling the treatment center, it should be moved to the packing position for safe transport.
The patient chair is moved down and the backrest moves to a flat position. The height adjustment of the headrest and the motorized support arm of the dentist element are moved to a middle position. The headrest tilt and the position of the sliding track can be moved to the desired position manually.
4.16.7.4.1 Water unit

4 Operation
Configuration of the treatment center (setup)
Sirona Instructions for Use Treatment Center Axano 194 67 17 396 D3685 D3685.201.01.04.02 2023-06
4.16
Dentsply
Time cuspidor valve remains open
If the treatment center is equipped with a cuspidor valve for central wet suction, the opening time of the valve can be extended between 0 and 2 seconds in 0.1-second increments.
NOTICE
Too short opening time of the cuspidor valve
If the opening time of the cuspidor valve is too short, water can remain in the cuspidor if flow is high. If this is the case, a longer opening time must be set.
Emptying the mixing tank
When the key is activated, the mixing tank for the disinfection system is emptied.
Emptying the disinfectant tank
When the key is activated, the disinfectant tank and mixing tank are emptied.
Empty tank of the Dürr wet suction system
As long as the key is lit up orange, water is being extracted from the water unit. A slurping noise indicates that the water unit is completely empty. When the key turns white, the extraction process is finished. For details, please refer to the section "Cleaning the filter insert of the wet suction device" [→ 261]
Leak test of the main cut-off valve
When the key is activated, the cuspidor bowl flushing function is started 2 times. The cuspidor flushing function must stop without any dripping in between the two starts.
If cuspidor flushing still drips, the main cut-off valve must be replaced.
Error signal of the amalgam separator
When the key is activated, the error signal output of the amalgam separator is tested.
If the water heater repeatedly overheats above the set level, the water heater is permanently deactivated.
Permanent deactivation can be reversed by pressing the key.
IMPORTANT
After eliminating the error, permanent deactivation must be reversed by activating the key.
Dentsply Sirona Instructions for Use Treatment Center Axano 4 Operation 4.16 Configuration of the treatment center (setup) 67 17 396 D3685 D3685.201.01.04.02 2023-06 195
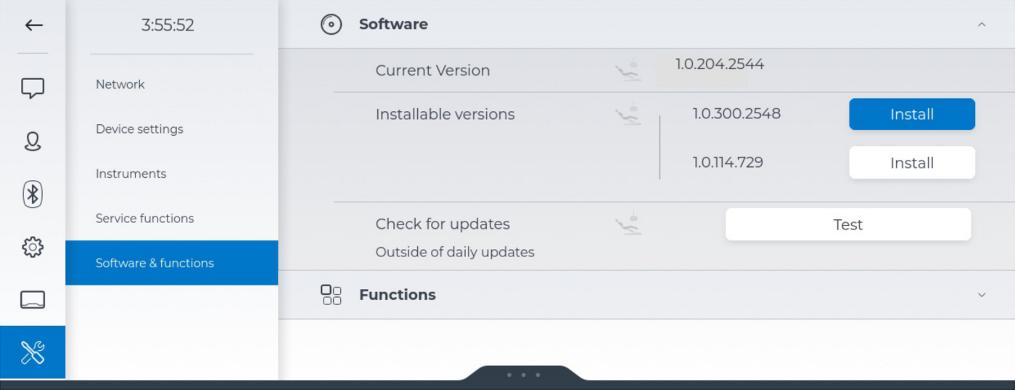
Current version
Display of software version currently on the treatment center
The list shows whether newer or alternative software versions are available that can be installed on the treatment center. The latest software version is marked by an installation key with a blue background; for alternative versions, the key is white.
Installation cannot be canceled. Do not switch the treatment center off. The treatment center cannot be used during installation.
Checking for updates
When the treatment center is switched on and connected to the DS cloud, a check for new updates is made daily. If this is the case, the update will be downloaded automatically, saved, and displayed in the "" list.
If your treatment center is not connected to the DS cloud, updates can be loaded by the service technician.
4 Operation 4.16 Configuration of the treatment center (setup) Dentsply Sirona Instructions for Use Treatment Center Axano 196 67 17 396 D3685 D3685.201.01.04.02 2023-06
Software & functions
Software
4.16.7.5
4.16.7.5.1
4.16.7.5.2
Functions
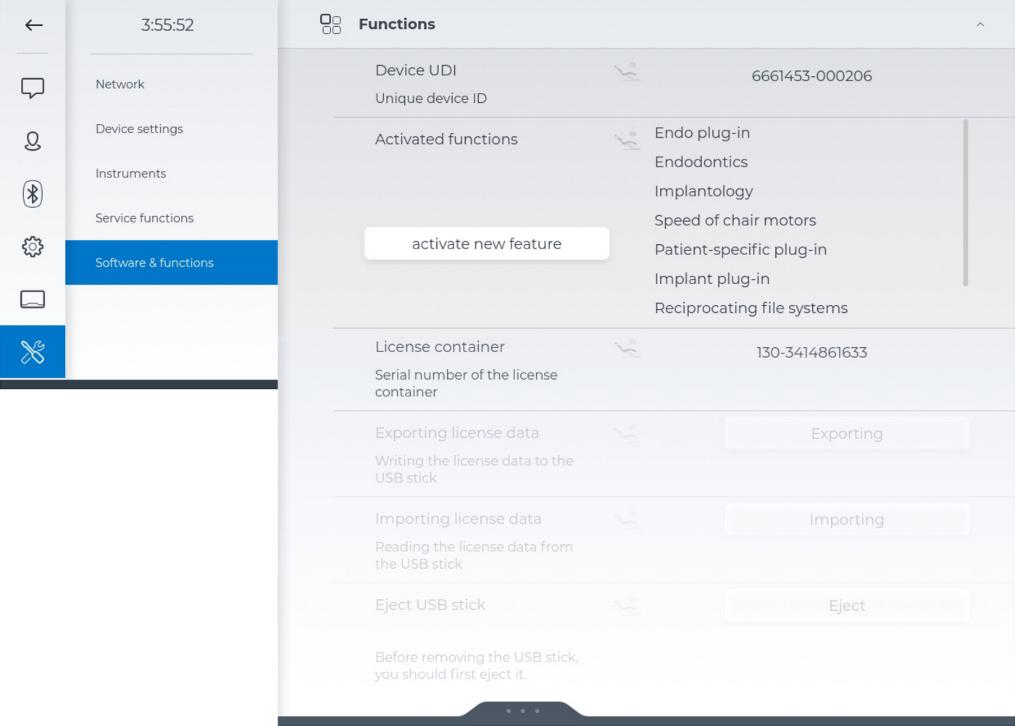
Device UDI
It is composed of the material number (REF) and the serial number of the treatment center.
Activated functions
Functions requiring a license can be activated using an activation code. For this, the treatment center must be connected to the internet. Already activated functions are listed on the Smart Touch.
For software updates, you can obtain the activation codes at your dental depot; for hardware updates, the required code is included with the retrofit kit. An activation code can be used only once for one treatment center. No deactivation is planned.
License container
The license container is valid only for this treatment center. It cannot be transferred to another center.
Exporting license data and Importing license data
If the treatment center is not connected to the DS cloud, functions requiring a license can also be activated offline.
Dentsply Sirona Instructions for Use Treatment Center Axano 4 Operation 4.16 Configuration of the treatment center (setup) 67 17 396 D3685 D3685.201.01.04.02 2023-06 197
5 Care, cleaning and maintenance by the practice team
5.1 Basics
5.1.1
Intervals
To maintain the value and safe functioning of your treatment center, it is necessary to have it regularly cared for, cleaned, and disinfected by the practice team. This will minimize the risk of contamination for patients and users and ensure proper functioning.
The national requirements and recommendations for hygiene and disinfection must be observed, e.g. Robert Koch Institute (RKI), American Dental Association (ADA), Centers for Disease Control and Prevention (CDC), etc.
WARNING
Maintenance, cleaning, and disinfecting intervals
The time intervals specified for maintenance, cleaning, and disinfection/sterilization are reference values. Please adapt the time intervals to suit your personal method of working and your national requirements.
In the morning
● Automatically purge the water lines (autopurge function) [→ 217]
After each patient
● Purge the water lines (purge function) [→ 213]
● Clean the gold trap [→ 246]
● Clean/disinfect the cuspidor [→ 247]
● Maintain and disinfect/sterilize the treatment instruments [→ 223]
● Clean and disinfect/sterilize the components of the ApexLocator [→ 232]
● Clean and disinfect instrument hoses [→ 237]
● Perform the suction hose cleaning [→ 238]
● Disinfect, sterilize and lubricate suction handpieces [→ 243]
● Clean/disinfect plastic surfaces [→ 205]
● Disinfect the upholstery [→ 211]
● Disinfect user interfaces [→ 206]
● Disinfect handles [→ 208]
● Care and clean the operating light (see separate instructions for use for the operating light)
In the evening
● Automatically purge the water lines (autopurge function) [→ 217]
● Clean the suction system using the suction hose adapter for the cuspidor or via an external tank [→ 241] (if chemical suction hose cleaning is not conducted regularly)
5 Care, cleaning and maintenance by the practice team 5.1 Basics Dentsply Sirona Instructions for Use Treatment Center Axano 198 67 17 396 D3685 D3685.201.01.04.02 2023-06
● Clean the filter in the suction hoses and disinfect the suction hoses [→ 244]
● Disinfect handles and instrument holders and sterilize silicone mats [→ 208]
● Disinfect the tray [→ 210]
● Disinfect the cup holder [→ 210]
Weekly
● Care, clean, and disinfect upholstery [→ 211]
● Clean the foot control [→ 212]
● Change the cotton wool roll on the turbine hose [→ 236]
● Disinfect, sterilize and lubricate suction handpieces [→ 243]
● Disinfect cartridges for sanitization adapters and suction hose cleaning [→ 252]
● Clean the drain lines of the cuspidor [→ 248] (if chemical cuspidor cleaning is deactivated or not conducted regularly)
Monthly or as required
● Change the water and air filters [→ 253]
● Microbiological water test [→ 203]
● Maintain the treatment instruments [→ 234]
● Refill the cleaning agent tank of the chemical suction hose cleaning [→ 238]
● Sanitize the treatment center [→ 263]
● Change the amalgam rotor [→ 255] or empty the sediment container [→ 259] or clean the filter insert of the standard wet suction [→ 261]
● Check the message system of the amalgam separator [→ 258]
● Change the battery of the wireless foot control [→ 271]
For a quick overview of the tasks to be carried out, see the “Care and cleaning plan” for the Axano treatment center.
Dentsply Sirona Instructions for Use Treatment Center Axano 5 Care, cleaning and maintenance by the practice team 5.1 Basics 67 17 396 D3685 D3685.201.01.04.02 2023-06 199
5.1.2 General processing instructions
The general reprocessing instructions apply to the treatment center in general provided there are no other product-specific reprocessing instructions in these instructions for use.
DANGER
Inappropriate care and cleaning of the device can result in malfunction or damage. Qualified personnel must be trained in the handling of medical devices.
Reprocessing involves the following steps:
● Pre-disinfection
● Cleaning
● Disinfection
● Sterilization if appropriate
Perform reprocessing immediately after treatment, after 1 hour at the latest.
Wear suitable protective clothing.
5.1.2.1 Pre-disinfection
Perform a pre-disinfection directly at the treatment center. Wipe the corresponding surface with a disinfectant cloth. Observe the disinfectant manufacturer's instructions. The disinfectant used must be approved in your country and must have proven bactericidal, fungicidal and virucidal properties. Only use disinfectants with no protein-fixing properties. Afterwards, start the hygienic reprocessing with cleaning.
5.1.2.2 Cleaning and disinfection
Perform automated reprocessing. Manual reprocessing may be possible in exceptional cases in compliance with the respective national/local requirements.
Manual cleaning with a brush
Brush the product under running water (< 38 °C, < 100 °F, at least drinking water quality) until no more contamination is visible in good lighting (min. 500 lux), but at least 10 seconds. Use a soft, clean and disinfected brush for cleaning. Subsequently, disinfect/sterilize the product.
Manual wipe cleaning and disinfection
Wipe the respective surface with a clean wet cloth and afterwards with a disinfectant cloth. Observe the disinfectant manufacturer's instructions. The disinfectant used must be approved in your country and must have proven bactericidal, fungicidal and virucidal properties. Use only disinfectants with no protein-fixing properties. Wipe off the disinfectant with a cloth after it has taken effect. If necessary, perform sterilization afterwards.
93°C 200°F Automated reprocessing with a washer-disinfector
The washer-disinfector must be approved by its manufacturer for cleaning and disinfecting these products and comply with
5 Care, cleaning and maintenance by the practice team 5.1 Basics Dentsply Sirona Instructions for Use Treatment Center Axano 200 67 17 396 D3685 D3685.201.01.04.02 2023-06
5.1.2.3

ISO 15883-1/-2, e.g. 93 °C (200 °F) and 10 min holding time. Refer to the instructions for use of the device for the respective use. After the process, check in good lighting (min. 500 lux) whether the product is clean. If there is any contamination, repeat the process. If necessary, perform sterilization afterwards.
Sterilization
Unwrapped sterilization
The products are reprocessed according to section "Cleaning and disinfection" [→ 200]. Use a steam sterilizer that complies with EN 13060 Class B (e.g. DAC Premium / DAC Professional). Sterilize at 134 °C (274 °F), 3 minutes holding time and 1 minute drying time.
Wrapped sterilization
The products are reprocessed according to section "Cleaning and disinfection" [→ 200] and wrapped in packaging suitable for sterilization and storage (paper/laminate packaging or ISO 11607 compliant container). Use a steam sterilizer that complies with EN 13060 Class B (e.g. DAC Premium / DAC Professional). Sterilize at 134 °C (274 °F), 3 minutes holding time and 1 minute drying time.
The specified holding time of 3 minutes is the minimum. Please observe the relevant national regulations and recommendations.
5.1.2.4
Overview
of the parts to be reprocessed Cleaning and
Surfaces
Smart Touch user interface [→ 206]
Dentist and assistant element as well as plastic surfaces [→ 205]
Detachable parts of the dentist element [→ 208]
Silicone mat of the dentist and assistant element [→ 208]
Ball stopper [→ 208]
Tray [→ 210]
Cup holder [→ 210]
Upholstery [→ 211]
Handles of the LEDview Plus (see separate LEDview Plus instructions for use)
Instruments
Housing, keyboard and nozzle of the Sprayvit [→ 223]
Motors [→ 226]
Dentsply Sirona Instructions for Use Treatment Center Axano 5 Care, cleaning and maintenance by the practice team 5.1 Basics 67 17 396 D3685 D3685.201.01.04.02 2023-06 201
Sterilization Manual Automated Brush (only cleaning) Wipe Washerdisinfector* unwrapped wrapped
disinfection
– x – – –
– x – – –
– x x – –
– x – x –
x x x – –
– x x – –
x x – – –
– x – – –
– x – x –
x – x – x
x x – x x
Cleaning and disinfection Sterilization
Manual Automated
Adapter [→ 226]
Ultrasonic handpiece and tips see separate Sirosonic TL instructions for use
Intraoral camera [→ 233]
Instrument hoses [→ 237]
Cartridges for sanitization adapters and suction hose cleaning [→ 252]
Suction
Suction hoses [→ 244]
Suction handpieces [→ 243]
Stop clip for the small suction hose [→ 208]
Apex Locator
Silicone isolation sleeve for endodontics [→ 232]
Mucosal electrode [→ 232]
Mucosal electrode cable [→ 232]
File clamp [→ 232]
5.1.3
* Cleaning and disinfection equipment
Care,
cleaning, and disinfecting agents
WARNING
Approved care, cleaning, and disinfecting agents
Use only care, cleaning, and disinfecting agents that have been approved by Dentsply Sirona!
A continuously updated list of approved agents can be downloaded from the internet on the online portal for technical documents. You can reach this portal at: www.dentsplysirona.com/ifu Search for REF 59 70 905.
5.1.4 Inspection, maintenance and testing
Unless otherwise specified in this instructions for use, test all components of the treatment center for proper functioning on a regular basis and carry out a visual inspection for damage and wear. Exchange damaged components if necessary.
Inspect all parts after cleaning, disinfection and/or sterilization processes. Should the parts be visibly affected after these processes, they should be discarded and replaced. Signs of visible damage may include discoloration, corrosion, cracks, and other forms of damage.
cleaning
maintenance by the practice team
Basics Dentsply Sirona Instructions for Use Treatment Center Axano 202 67 17 396 D3685 D3685.201.01.04.02 2023-06
5 Care,
and
5.1
un-
Brush (only cleaning) Wipe Washerdisinfector*
wrapped wrapped
x x x x x
– x – – –
– x – – –
x x x – –
– x – – –
x x – x –
x x x – –
– – – – x
x x – – x
– x – x –
– x – x –
5.1.5 Microbiological water test
Perform the microbiological test of the water from the treatment center at regular intervals and after longer periods of disuse > 1 week; see "Media quality" [→ 17]. Start the tests in intervals of no more than two weeks and adjust the time intervals depending on the results. In addition to running laboratory tests, you can also use the "total count tester" as a simple means of performing this test.
To order the total count tester, see "Spare parts and consumables" [→ 276]
IMPORTANT
Shelf life of the total count tester
The maximum shelf life of the total count tester is 1 year after the date of receipt.
The cardboard disk contains a dehydrated nutrient medium. It is activated by the sample and serves as a culture medium for a number of bacteria. The bacterial count provides information on the hygienic condition of the water.
Be careful not to touch the inside of the test container or the part of the tester to be immersed in the nutrient medium prior to incubation.
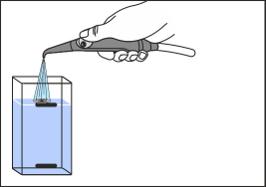
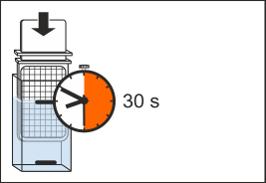
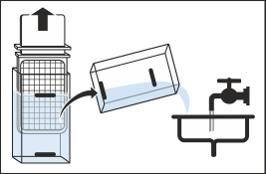
1. Allow water to run out of the Sprayvit multifunctional syringe into the cuspidor bowl for about 1 minute.
2. Use the Sprayvit multifunctional syringe to fill cold water into test container up to its upper mark.
3. To neutralize the disinfecting agent of the water sample, add approx. 1.5 g of fixing salt (sodium thiosulfate). Fixing salt can be obtained in pharmacies or from chemical dealers.
4. Immerse the tester in the filled container for 30 seconds. Ä The cardboard disk with the culture medium will now absorb 1 ml of the water sample.
5. Remove the tester from the container. Shake out any excess water. Empty the tank.
6. Place the tester in the container for incubation either for two days at a room temperature of 20°C/68°F or for 24 hours at a temperature of 35°C/95°F.
Dentsply Sirona Instructions for Use Treatment Center Axano 5 Care, cleaning and maintenance by the practice team 5.1 Basics 67 17 396 D3685 D3685.201.01.04.02 2023-06 203
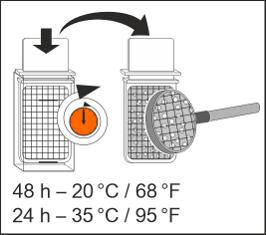
7. Count all bacterial colonies found on the surface of the tester.
the practice team 5.1 Basics Dentsply Sirona Instructions
Treatment Center Axano 204 67 17 396 D3685 D3685.201.01.04.02 2023-06
5 Care, cleaning and maintenance by
for Use
5.2 Surfaces
5.2.1
Clean/disinfect plastic surfaces
The plastic surfaces can be wiped with surface disinfectants. Observe the "General reprocessing instructions" [→ 200]
NOTICE
Drugs have a chemical reaction with the surface of the unit. Due to their high concentrations and the substances they contain, many drugs can dissolve, etch, bleach, or stain surfaces.
➢ Wipe any drug residues off the unit immediately with a moist, white cloth!
NOTICE
Liquids can enter the unit during cleaning or disinfection. Electrical components of the treatment center can be destroyed by liquids.
➢ Do not spray any liquids into the unit.
➢ To clean near openings, first spray the liquid onto a cleaning cloth. Then wipe over the unit with the cleaning cloth.
NOTICE
Disinfectants can dissolve dyes in cleaning clothes. The outer surface of the unit may then be discolored by the dye.
➢ Do not clean or disinfect the unit with colored cleaning cloths.
➢ Remove any dirt and disinfectant residues regularly using a mild commercial cleaning agent.
Dentsply Sirona Instructions for Use Treatment Center Axano 5 Care, cleaning and maintenance by the practice team 5.2 Surfaces 67 17 396 D3685 D3685.201.01.04.02 2023-06 205
5.2.2 Disinfect user interfaces
The Smart Touch user interface of the dentist element and the user interface of the assistant element can be blocked for input for cleaning and disinfection. This prevents the inadvertent triggering of unwanted functions.
WARNING
Approved care, cleaning, and disinfecting agents
Use only care, cleaning, and disinfecting agents that have been approved by Dentsply Sirona, see "Care, cleaning, and disinfecting agents" [→ 202]!
Surface disinfectants require application time, they dry off and leave streaks, especially on glass surfaces. Remove the residues with a soft moist cloth. Then wipe the glass surface dry.

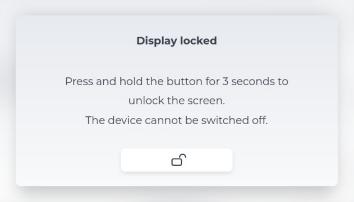

1. Press and hold the lock symbol on the Smart Touch > 2 s.
Ä The Smart Touch shows that the user interfaces are blocked.
2. Disinfect the user interfaces of the dentist and assistant elements by wipe disinfection. Observe the "General reprocessing instructions" [→ 200].
3. Press and hold the key with the open lock (> 3 s).
Ä The user interfaces are now reactivated.
The user interfaces can also be blocked in the hygiene cockpit.
In the setup dialog, you can automatically block the user interfaces when the purge function starts, see "Settings/Hygiene/Purge & autopurge [→ 183]/Purge with user interface block". The user interfaces can then be wipe disinfected during or after flushing without inadvertently triggering functions. The block is reversed at the end of the purging process when the instruments are in their holders and the foot control pedal is activated.
5 Care, cleaning and maintenance by the practice team 5.2 Surfaces Dentsply Sirona Instructions for Use Treatment Center Axano 206 67 17 396 D3685 D3685.201.01.04.02 2023-06
5.2.3 Sterilizing the protective cover of the smart device holder

The silicone protective mat of the smart device holder can be cleaned with a brush and wipe disinfected. It can be sterilized unwrapped. Observe the "General reprocessing instructions" [→ 200].
Use a smart device that can be wipe disinfected or one that has a hygienic protective sleeve that can be wipe disinfected. Please note the manufacturer's information on cleaning and disinfecting the smart device.
Dentsply Sirona Instructions for Use Treatment Center Axano 5 Care, cleaning and maintenance by the practice team 5.2 Surfaces 67 17 396 D3685 D3685.201.01.04.02 2023-06 207
5.2.4 Disinfect handles and instrument holders and sterilize silicone mats
WARNING
The handles and instrument holders of the dentist and assistant element can be removed for wipe-disinfection and automated reprocessing.
WARNING
The removable silicone mats on the dentist and assistant element can be sterilized.
WARNING
Approved care, cleaning, and disinfecting agents
Use only care, cleaning, and disinfecting agents that have been approved by Dentsply Sirona, see "Care, cleaning, and disinfecting agents" [→ 202]!
Dentist element
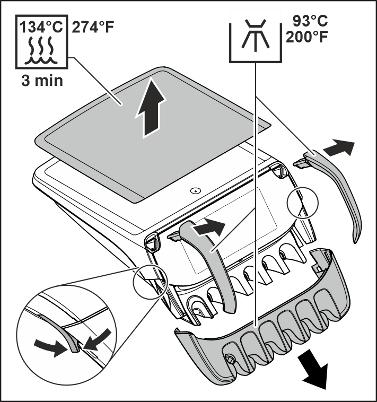
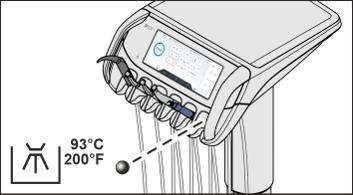
1. Take the silicone mat off the dentist element.
2. Take the instruments out of the instrument holders.
3. To unlock the instrument holder, push the lever forward on both sides of the dentist element. Then pull the instrument holder down to remove it.
4. To unlock the handles, hold the respective lever down. Then pull the handle out of the dentist element.
5. The instrument holder and the handles can be wipe disinfected and undergo automated reprocessing. The silicone mat can be wipe disinfected and sterilized unwrapped. Clean and wipe disinfect the dentist element, see also "Clean/ disinfect plastic surfaces" [→ 205].
Observe the "General reprocessing instructions" [→ 200]
6. Slide the instrument holder after automated reprocessing back onto the dentist element until it locks in place. Insert the two reprocessed handles back in place.
7. Place the sterilized silicone mat on the dentist element. Return the instruments to the instrument holders.
Ball stopper
If a ball stopper is inserted in an unused instrument holder of the dentist element, it can be pushed out of the holder from the rear.
The ball stopper can be cleaned with a brush and wipe disinfected. It can undergo automated reprocessing. Observe the "General reprocessing instructions" [→ 200]
5 Care, cleaning and maintenance by the practice team 5.2 Surfaces Dentsply Sirona Instructions for Use Treatment Center Axano 208 67 17 396 D3685 D3685.201.01.04.02 2023-06
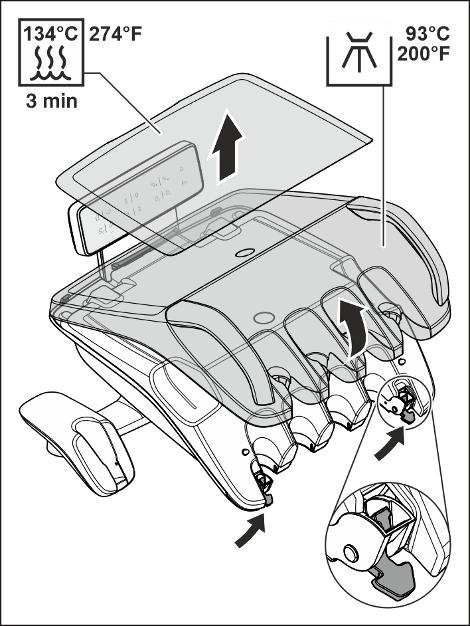
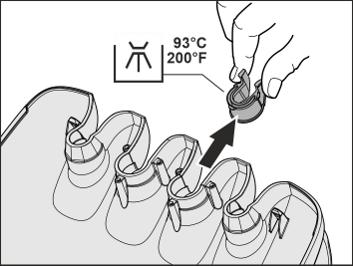
Assistant element
1. Lift the silicone mat from the assistant element.
2. Take the instruments out of the instrument holders.
3. To unlock the instrument holder, push the lever up on both sides of the assistant element.
Ä The holder is released from the attachment and can be removed.
4. The instrument holder can be wipe disinfected and can undergo automated reprocessing.
The silicone mat can be wipe disinfected and sterilized unwrapped. Clean and wipe disinfect the assistant element, see also "Clean/ disinfect plastic surfaces" [→ 205]
Observe the "General reprocessing instructions" [→ 200].
5. First insert the instrument holder into the holder underneath the user interface after reprocessing. Then push the holder forward and downward until it locks in place.
6. Place the sterilized silicone mat on the assistant element. Return the instruments to the instrument holders.
Stop clip for the small suction hose
Depending on the assignment of the instrument positions, a stop for the small suction hose may by clipped onto it. It can be removed from the instrument holder by pressing the wings together and then attached again.
The stop clip can be cleaned with a brush and can be wipe disinfected. It can undergo automated reprocessing. Observe the "General reprocessing instructions" [→ 200]
Dentsply Sirona Instructions for Use Treatment Center Axano 5 Care, cleaning and maintenance by the practice team 5.2 Surfaces 67 17 396 D3685 D3685.201.01.04.02 2023-06 209
5.2.5 Disinfecting the tray
The tray can be removed for reprocessing.
WARNING
Approved care, cleaning, and disinfecting agents
Use only care, cleaning, and disinfecting agents that have been approved by Dentsply Sirona, see "Care, cleaning, and disinfecting agents" [→ 202]!

1. Take the silicone mat off the tray.
2. Hold the tray tightly.
3. Open the lock by swiveling the lever downwards.
4. Remove the tray.
5. Let the lever fall back into its original position.
6. If a cup holder is attached to the tray, it must be removed, see "Disinfect the cup holder" [→ 210]
7. The tray can be wipe disinfected and can undergo automated reprocessing. The silicone mat can be sterilized unwrapped. Observe the "General reprocessing instructions" [→ 200]
To insert the tray, simply guide it into the mount. The mechanism engages automatically.
CAUTION
If the tray is not locked in place, it can disengage from the tray holder.
➢ After installing the tray, make sure it is securely attached to the tray holder.
5.2.6 Disinfecting the cup holder
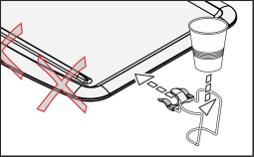
The cup holder can be cleaned with a brush and can be wipe disinfected. Observe the "General reprocessing instructions" [→ 200].
The disposable cup must be replaced after each patient.
WARNING
Approved care, cleaning, and disinfecting agents
Use only care, cleaning, and disinfecting agents that have been approved by Dentsply Sirona, see "Care, cleaning, and disinfecting agents" [→ 202]!
5 Care, cleaning and maintenance by the practice team 5.2 Surfaces Dentsply Sirona Instructions for Use Treatment Center Axano 210 67 17 396 D3685 D3685.201.01.04.02 2023-06
5.2.7 Care for, clean, and disinfect upholstery
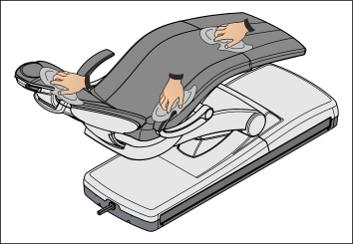
Special care, cleaning, and disinfecting agents are recommended by Dentsply Sirona for the care, cleaning, and disinfection of the upholstery.
WARNING
Approved care, cleaning, and disinfecting agents
Use only care, cleaning, and disinfecting agents that have been approved by Dentsply Sirona, see "Care, cleaning, and disinfecting agents" [→ 202]!
The upholstery of the patient chair and the headrest can be wipe disinfected. Observe the "General reprocessing instructions" [→ 200]
The armrests can also be wipe disinfected using the recommended surface disinfectant. After use, wipe the chair down with an absorbent cloth so no disinfectant remains on the upholstery.
The imitation leather upholstery, especially light colors, must be cared for and cleaned regularly (at least once a week).
NOTICE
The special sponge included with FD 360 may not be used on lounge upholstery.
Lounge upholstery could be damaged by the special foam.
Tip: The upholstery of the Hugo, Theo, Carl, and Paul dental working stool is identical to that of the patient chair. It can therefore be cleaned in the same way; refer to the instructions for use for the respective dentist stool.
Dentsply Sirona Instructions for Use Treatment Center Axano 5 Care, cleaning and maintenance by the practice team 5.2 Surfaces 67 17 396 D3685 D3685.201.01.04.02 2023-06 211
5.2.8 Clean the foot control


Regular cleaning of the foot control improves its stability.
➢ Clean the anti-slip coating on bottom plate with a moist cloth (water).
With the Smart Control, the two swivel buttons at the sides can be turned outward. This allows the area under the swivel buttons to be cleaned.
1. Hold the swivel button at the pivot axis.
2. Pull the swivel button up and rotate it outward.
After cleaning, the swivel buttons can be swiveled back without lifting them again. They lock into place on their own.
5 Care, cleaning and maintenance by the practice team 5.2 Surfaces Dentsply Sirona Instructions for Use Treatment Center Axano 212 67 17 396 D3685 D3685.201.01.04.02 2023-06
5.3 Instruments and instrument hoses
5.3.1
Purge the water lines (purge function)
To reduce bacteria, the water lines of the water-carrying instruments of the dentist element and the Sprayvit multifunctional syringe of the dentist and assistant element are purged with water.
Purge the water-carrying instruments after every patient with the purge function before detaching the handpieces from the hose couplings for hygienic reprocessing.
For the purge function, individual instruments are removed from their holders and held over the cuspidor for purging. If your treatment center is not equipped with a cuspidor, hold the instruments over a suitable container. The water lines of all removed instruments are then purged simultaneously. To purge the Sprayvit, its water button must be pressed.
In the setup dialog, you can automatically block the user interfaces when the purge function starts, see "Settings/Hygiene/Purge & autopurge [→ 183]/Purge with operation lock". The user interfaces can then be wipe disinfected during or after flushing without inadvertently triggering functions. Unblock them afterwards.
It is also possible to purge the water lines automatically, see "Purging water lines automatically (auto-purge function)" [→ 217]
Preparation
The following preparations should be made before you begin to purge the water lines.
1. Set the quick couplings of the turbines to maximum water flow.
2. Place all instruments in the instrument holders. Ensure that all instruments are placed in the correct holders. When the purge program is active, instruments that are detected to be taken from the holder are automatically purged, i.e. also instruments that were inadvertently put in the wrong holder.
Open the "Purge" dialog
ü The start, instrument, or Sivision dialog is displayed.

1. Tap the Hygiene key in the footer to access the hygiene cockpit.

2. Tap on the "Purge" field.
Ä The "Purge" dialog appears.
Dentsply Sirona Instructions for Use Treatment Center Axano 5 Care, cleaning and maintenance by the practice team 5.3 Instruments and instrument hoses 67 17 396 D3685 D3685.201.01.04.02 2023-06 213
5
5.3 Instruments and instrument hoses
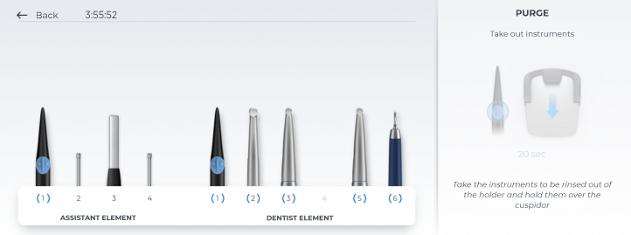
Ä The purge time is displayed in blue on the right side (here 20 sec). It can be changed in the "Settings/Hygiene/Purge & autopurge [→ 183]" setup dialog.
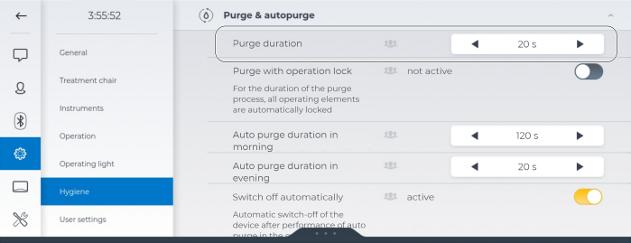
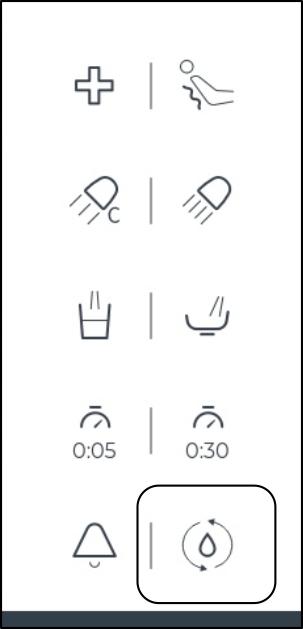
Tip: In the fixed keys area, a key for quickly opening the purge function can be positioned. For details on customizing the Smart Touch, please see the "User interface [→ 187]“ section.
Care, cleaning and maintenance by the practice team
214 67 17 396 D3685 D3685.201.01.04.02 2023-06
Dentsply Sirona Instructions for Use Treatment Center Axano
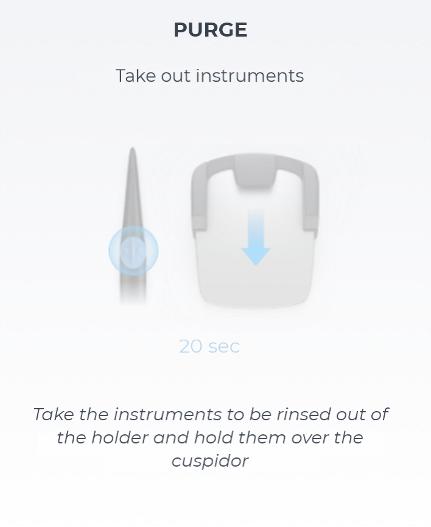
Graphic grayed out
If the Activatefootpedal graphic is grayed out in the "Purge" dialog on the right side, the treatment center has detected that the waste water cannot drain away. If using a wet suction device, check whether the suction device is switched on. Inform your service technician if necessary.

Purging water lines
1. Remove the instruments to be purged from the holder. Hold the instruments over the cuspidor or a suitable container. To purge the Sprayvit, its water button must be pressed.
Ä The removed instruments are highlighted in the graphic on the Smart Touch.
2. Press the foot control pedal.
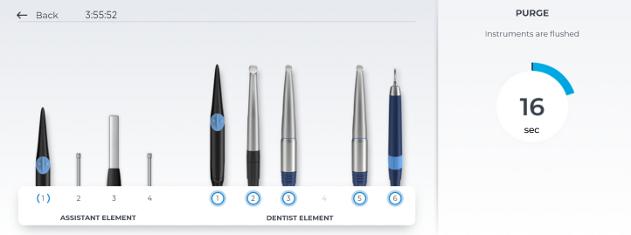
Ä The instruments are purged with water for the duration of the set purging time. The remaining time displayed on the Smart Touch refers to the instrument last taken from the holder. The instruments marked with a blue circle are currently being purged.
3. Keep the water button of the Sprayvit pressed until the remaining time displayed on the Smart Touch has elapsed.
If no water flows from an instrument:
● Set the quick couplings of the turbines to maximum water flow.
● Check the nozzle of the contra-angle handpiece for calcification. In this case, purge the concerned instrument without the contra-angle handpiece. Clean and care the contra-angle handpiece afterwards.
Dentsply Sirona Instructions for Use Treatment Center Axano 5 Care, cleaning and maintenance by the practice team 5.3 Instruments and instrument hoses 67 17 396 D3685 D3685.201.01.04.02 2023-06 215
● Check whether an endo contra-angle handpiece is attached on the motor. It has no spray and blocks the water flow.
● Tip no. 6L blocks the water flow on the SiroSonic TL ultrasonic handpiece. Twist this tip out to purge the instrument.
After the purging process, the following message appears:


All instruments that have been successfully purged are marked with a green check mark. If an error has occurred during purging, the instrument is marked with a red exclamation mark.
1. Return the instruments to their holders.
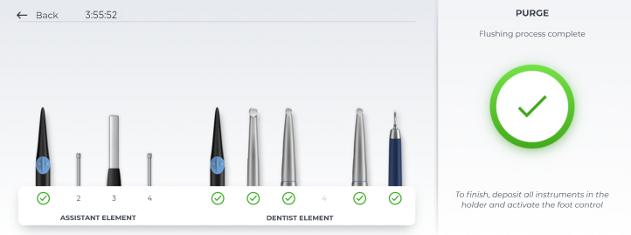
Ä The instruments are displayed as in their holders on the Smart Touch.
2. As long as the purge function is active, you can take additional instruments from their holders and purge them. The purging process begins when the foot pedal is activated.

3. You can interrupt and restart the purging process by pressing the foot control pedal.
4. After the instruments have been purged and returned to the holders, press the foot control pedal again.
Ä The purge program has ended. The treatment center is again ready for operation.
Stopping, continuing, and canceling the purge function
Purging can be stopped by pressing the foot pedal. Pressing it again restarts the purging process.
If the operating block is deactivated for purging in the setup dialog, see "Settings/Hygiene/Purge & autopurge [→ 183]/Purge with operation lock“, the purge function can be interrupted at any time using the "Back“ key at the upper left of the header. If the block is activated, purging must first be stopped by pressing the foot pedal. Then return all instruments to the holders and press the foot pedal again. The purge function is then ended and the user interface unblocked.
Care, cleaning and maintenance by the practice team
Instruments and instrument hoses Dentsply Sirona Instructions for Use Treatment Center Axano 216 67 17 396 D3685 D3685.201.01.04.02 2023-06
5
5.3
5.3.2 Automatically purge water lines (autopurge function)
The autopurge function enables automatic purging of all water-carrying instruments in the dentist element, the Sprayvit multifunctional syringe in the dentist and assistant elements, the suction hoses, tumbler filling, cuspidor flushing and external device connection.
The water-carrying instruments are inserted into sanitization adapters on the water unit for purging. If the instruments remain in the water unit after the treatment center is switched off, the purging process will automatically be started again the next time the treatment center is switched on.
Run the auto-purge function:
● Before starting work
● At the end of the work day
Preparation
The following preparations must be made before you start purging the water lines:
1. Set the quick couplings of the turbines to maximum water flow.
2. Place all instruments in the instrument holders.
3. Do not remove the tumbler holder from the cuspidor.
Open the "Autopurge" dialog
ü The start, instrument, or Sivision dialog is displayed.

1. Tap the Hygiene key in the footer to access the hygiene cockpit.
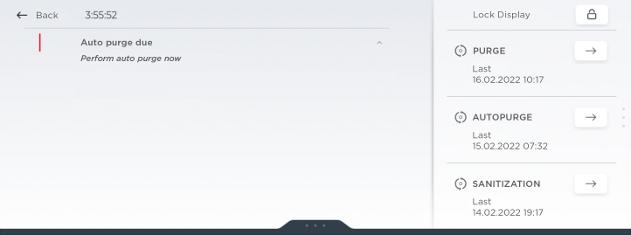
2. Tap on the "Autopurge" field.
Ä The "Autopurge" dialog appears.
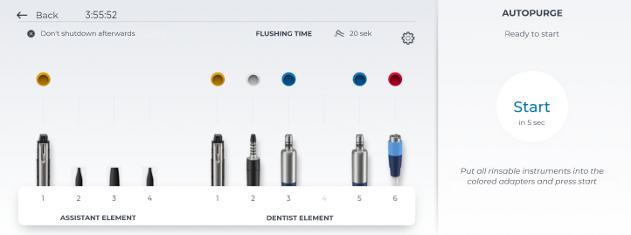
If the "Start" key is grayed out in the "Autopurge" dialog, the treatment center has detected that the waste water cannot drain away. If using a wet suction device, check whether the suction device is switched on. Inform your service technician if necessary.
Dentsply Sirona Instructions for Use Treatment Center Axano 5 Care, cleaning and maintenance by the practice team 5.3 Instruments and instrument hoses 67 17 396 D3685 D3685.201.01.04.02 2023-06 217

Error message: Instruments must be in the correct position to start

If this message appears after the autopurge function has been opened, the treatment center has detected that not all of the instruments have been placed in the instrument holders.
➢ Check the instruments in the instrument positions marked with a red exclamation mark.
Ä When all of the instruments have been put in the holders, the purge program will continue.
Changing purge time
The instrument purge time set in the setup dialog can be changed. A purge time of 120 seconds is recommended for mornings and evenings. The purge time for tumbler filling and cuspidor flushing is permanently set in the autopurge function and cannot be changed.
1. Tap on the gear icon.
Ä The Settings/Hygiene/Purge & autopurge [→ 183] setup dialog is displayed.
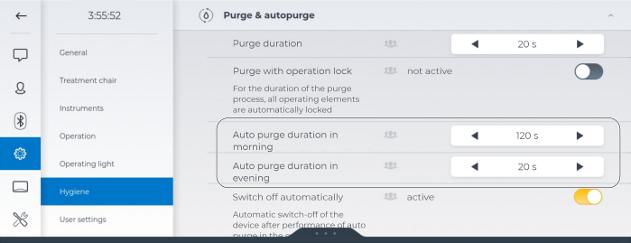
2. Set the desired purge time for mornings and evenings.
Ä Tap the "Back" key at the upper left of the header to return to the "Autopurge" dialog. The changed purge time is displayed there.
Automatic shutdown and autopurge reminder, evening
In the setup dialog you can set the treatment center to automatically switch to standby mode in the evening after the autopurge process, see "Settings/Hygiene/Purge & autopurge [→ 183]/Switch off automatically". If the function is active, the text "Then shut down" is displayed in the "Autopurge" dialog.
In addition, you can set in the setup dialog that when the standby switch is activated, a reminder is displayed on the Smart Touch if the autopurge function is not active in the evening, see "Settings/Hygiene/ Purge & autopurge [→ 183]/Autopurge notification evening".
cleaning
maintenance by the practice team
Instruments and instrument hoses
Instructions for Use Treatment Center Axano 218 67 17 396 D3685 D3685.201.01.04.02 2023-06
5 Care,
and
5.3
Dentsply Sirona
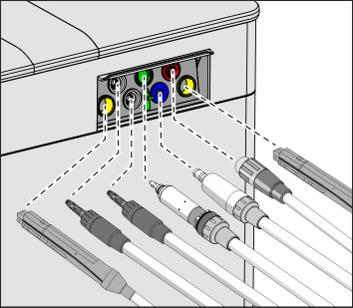
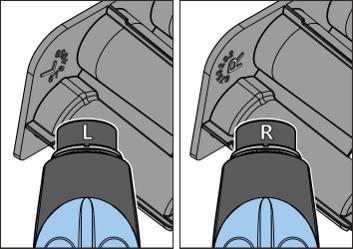
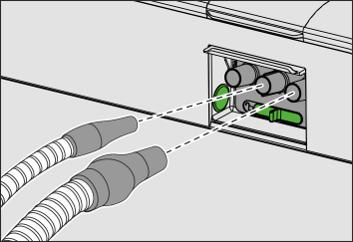
When the treatment center is first switched on during the working day, this is interpreted to be autopurge mornings. When it is switched off the same day, this is detected as autopurge evenings.
Insert water-carrying instruments and suction hoses into the water unit
The water unit has integrated sanitization adapters for water-carrying instruments and adapters for suction hoses. They enable all instruments to be purged with water. For this purpose, water-carrying instruments must be inserted into the sanitization adapters and the suction hoses into the adapters for suction hose cleaning.
ü The Remove instruments message is displayed.
1. Remove the Sprayvit sleeves from the valve bodies, the straight and contra-angle handpieces from the water-carrying instruments, and the suction tips from the suction hoses.
2. Dentist element side: Plug the couplings of all water-carrying treatment instruments into the sanitization adapters in the water unit (for Sprayvit: valve lever pointing up, locking knob pointing down). Always ensure that the instruments are positioned correctly to avoid errors during the flow rate check or leakages.
IMPORTANT
Colors of the sanitization adapters
The sanitization adapters for the instrument couplings are color coded. The assignment is also displayed on the Smart Touch.
Yellow on left = Sprayvit of the assistant element
Yellow on right = Sprayvit of the dentist element
White = turbine
Green = BL E motor
Blue = BL ISO F motor (ISO interface)
Red = SiroSonic TL ultrasonic handpiece
IMPORTANT
Water button of the Sprayvit
Depending on the position of the Sprayvit water button, the removable sanitization cartridge is marked on the back. When the nozzle is taken from the holder, this mark can also be seen on the Sprayvit. If the water button is on the right, the marking is an "R", for the Sprayvit with water button on the left "L". The marking on the removable sanitization cartridge must match that on the Sprayvit
3. Assistant element side: Attach the suction hoses to the adapters. When using two large and one small suction hose, the small suction hose must be placed in the middle.
Ä When an instrument has been taken from the holder, this is displayed on the Smart Touch by a highlighted instrument and a gray circle around the instrument position.
Dentsply Sirona Instructions for Use Treatment Center Axano 5 Care, cleaning and maintenance by the practice team 5.3 Instruments and instrument hoses 67 17 396 D3685 D3685.201.01.04.02 2023-06 219
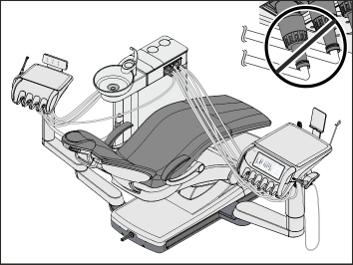
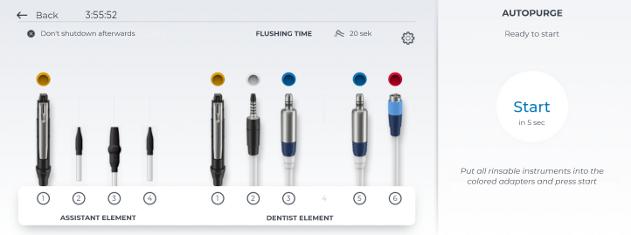
IMPORTANT
Pinching the instrument hoses
Be careful not to pinch the instrument hoses when inserting the instruments.
If the hoses are pinched, the water flow will be obstructed during purging.
Ä All water-carrying instruments are inserted into the sanitization adapters. The suction hoses are inserted in the adapters for suction hose cleaning.
4. Tap on the "Start" key on the Smart Touch.
Ä The purging process begins.
Ä The treatment center checks whether there is water flow through the instruments. This will take a moment.
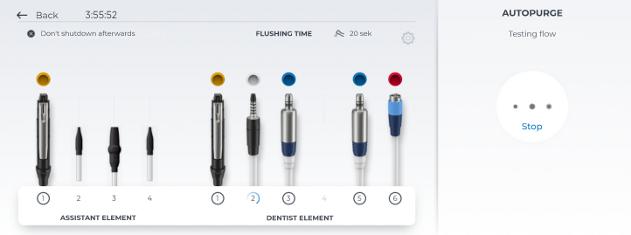
Error message: water flow test failed
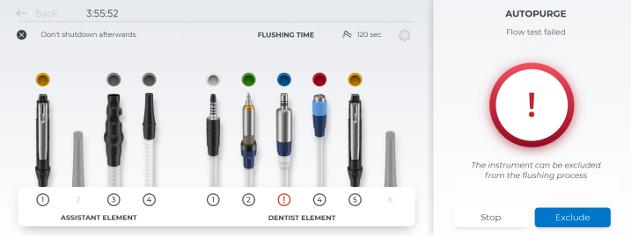
If the water flow test fails, the affected instrument can be excluded from the purging process. Affected instruments are marked with a red exclamation mark on the Smart Touch. If no input is given (stop or Exclude) after a failed water flow test, the affected instruments will be automatically excluded after a certain time and the program will continue.
Care, cleaning and maintenance by the practice team 5.3 Instruments and instrument hoses Dentsply Sirona Instructions for Use Treatment Center Axano 220 67 17 396 D3685 D3685.201.01.04.02 2023-06
5

Set the quick couplings of the turbines to maximum water flow.
Purging water lines
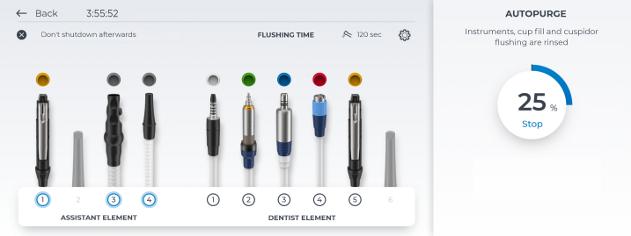
The removed instruments are purged with water for the duration of the set autopurge time. This is followed by suction hose cleaning and purging the tumbler filling and cuspidor. The percentage displayed on the Smart Touch refers to the entire autopurge program, not to the set instrument purge time. The instruments marked with a blue circle are currently being purged.
Following the purging process and suction hose cleaning, the following message is displayed:
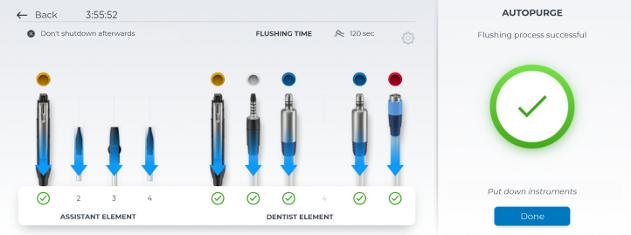
Instruments that have been successfully purged are marked with a green check mark, instruments not successfully purged with a red exclamation mark. If an interruption of purging was detected or an instrument excluded, an orange check mark is displayed as the overall result.
After a successful autopurge without limitation, the system automatically changes to the start dialog after the instruments are placed in the holders.
Leaving the auto-purge function active for the next working day or ending it
There are now two options for continuing:
● Leave the instruments in the water unit
The autopurge function remains activated provided the "Stop" or "Back" keys are not pressed.
The instruments remain in the water unit and the treatment center can be switched off. Unless this function is deselected, the treatment center automatically shuts down in the evening after autopurge. On the next day, immediately after the treatment center is switched on, the autopurge function is automatically conducted again on all of the instruments remaining in the water unit as well as on tumbler filling,
Dentsply Sirona Instructions for Use Treatment Center Axano 5 Care, cleaning and maintenance by the practice team 5.3 Instruments and instrument hoses 67 17 396 D3685 D3685.201.01.04.02 2023-06 221
suction hose cleaning, and cuspidor flushing. On the next day, the autopurge function is automatically performed again on all of the instruments remaining in the water unit as well as on the tumbler filling, the suction hose cleaning, and cuspidor immediately after the treatment center is switched on.
Then you can prepare the treatment center for daily practice operation.
● Deposit instruments
Ending the autopurge function
1. Remove the instruments from the water unit and place them back in their holders.
Ä The instruments are displayed as in their holders on the Smart Touch.
Ä After a successful autopurge without limitation, the system automatically changes to the start dialog after the instruments are placed in the holders.
2. If an interruption of purging was detected or an instrument excluded, tap on the "Done" button.
Ä The autopurge program has ended. The treatment center is again ready for operation and can be prepared for the working day.
Canceling the autopurge function
The autopurge function can be canceled at any time using the "Back" key at the upper left of the header.
maintenance by the practice team
Instruments and instrument hoses
Instructions for Use Treatment Center Axano 222 67 17 396 D3685 D3685.201.01.04.02 2023-06
5 Care, cleaning and
5.3
Dentsply Sirona
5.3.3 Lubricate, disinfect/sterilize the treatment instruments
5.3.3.1 Treatment instruments with separate instructions for use
WARNING
The procedures required for the following treatment instruments are described in the following separate instructions for use:
• Straight and contra-angle handpieces in various versions
• Turbines
• SiroSonic TL ultrasonic handpiece
5.3.3.2 Cleaning, disinfecting/sterilizing the Sprayvit multifunctional syringe
NOTICE
Approved care, cleaning, and disinfecting agents
Use only care, cleaning, and disinfecting agents that have been approved by Dentsply Sirona, see "Care, cleaning, and disinfecting agents" [→ 202]!
All disinfectants must be approved in your country and have proven bactericidal, fungicidal and virucidal properties. Use only disinfectants with no protein-fixing properties.
Do not use agents that are strongly acidic ,(pH < 5), alkaline (pH > 9) or contain a lot of chlorine.
NOTICE
Never clean in an ultrasonic bath! Never immerse in disinfectants!
After each treatment session
NOTICE
Perform reprocessing immediately after treatment, after 1 hour at the latest.
ü Wear suitable protective clothing.
1. Remove any residue, e.g., from impression material or caustic chemicals, immediately.
2. Purge the water and air channels on the treatment center for 30 seconds.
3. Predisinfect directly at the treatment center [→ 224]
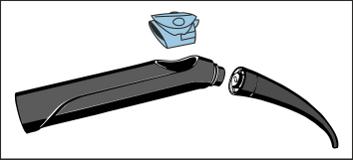
4. Remove the nozzle and the housing [→ 97].
5. Transport the nozzle and housing to the hygiene room in a suitable transport container.
6. Perform automated reprocessing [→ 224] Manual reprocessing [→ 225] is possible in exceptional cases if national/local regulations are followed.
7. If necessary, sterilize the housing, keyboard and nozzle [→ 225]
Dentsply Sirona Instructions for Use Treatment Center Axano 5 Care, cleaning and maintenance by the practice team 5.3 Instruments and instrument hoses 67 17 396 D3685 D3685.201.01.04.02 2023-06 223
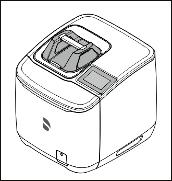
Conduct pre-disinfection
ü Wear suitable protective clothing.
ü All disinfectants must be approved in your country and have proven bactericidal, fungicidal, and virucidal properties. Use only disinfectants with no protein-fixing properties.
1. Wipe the surface with disinfectant cloths.
2. Wipe the disinfectant off with a cloth.
Ä For further reprocessing, the Sprayvit should be dry and free of residue.
Automated cleaning and disinfecting
We recommend using the Dentsply Sirona DAC Universal for automated cleaning and disinfection (inside and outside) of the nozzles.
For further details, please refer to the instructions for use supplied with the unit.
NOTICE
The housing and keyboard are not suitable for reprocessing in the Dentsply Sirona DAC Universal.
ü The nozzle is reprocessed using the DAC Universal.
1. Check whether the nozzle is clean after reprocessing under good lighting (min. 500 lux) and color rendering index (min. 80 Ra).
2. If still dirty, repeat the process.
Ä For further reprocessing, the nozzle should be dry and free of residue.
3. If necessary, pack the housing, keyboard and nozzle in packaging suitable for sterilization and storage, e.g. paper/plastic composite packaging or a container in accordance with ISO 11607.
4. Perform sterilization [→ 225]
The housing, keyboard and nozzle can also be cleaned and disinfected in suitable cleaning and disinfection equipment. The cleaning and disinfection equipment used must comply with ISO 15883-1/-2 and be approved by its manufacturer for the cleaning and disinfection of dental instruments (e.g., 95°C (203 °F) and 10 min holding time).
IMPORTANT
Use suitable adapters for automated reprocessing in a washerdisinfector. For the nozzle, we recommend the A865 adapter for Miele washer-disinfectors.
For further details, please refer to the instructions for use supplied with the respective unit.
ü The housing, keyboard and nozzle are reprocessed with a cleaning and disinfection device.
1. Check whether the housing, keyboard and nozzle are clean after reprocessing under good lighting (min. 500 lux) and color rendering index (min. 80 Ra).
2. If still dirty, repeat the process.
Ä For further reprocessing, the housing, keyboard and nozzle should be dry and free of residue.
5 Care, cleaning and maintenance by the practice team 5.3 Instruments and instrument hoses
Instructions for Use Treatment Center Axano 224 67 17 396 D3685 D3685.201.01.04.02 2023-06
Dentsply Sirona
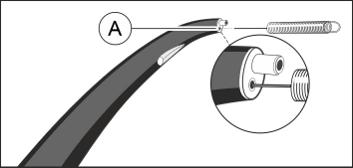
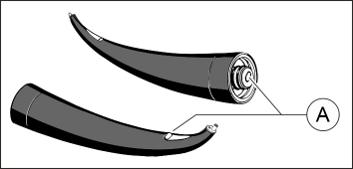

3. Blow the nozzle with 2.5 - 3 bar until no more moisture exits, but at least 10 seconds.
4. If necessary, pack the housing, keyboard and nozzle in packaging suitable for sterilization and storage, e.g. paper/plastic composite packaging or a container in accordance with ISO 11607.
5. Perform sterilization [→ 225]
Manual cleaning and disinfection
Manual reprocessing is possible in exceptional cases if the national/ local regulations are followed. The national/local regulations must be checked in advance.
NOTICE
The valve body of Sprayvit is not suitable for cleaning or disinfection.
ü All disinfectants must be approved in your country and have proven bactericidal, fungicidal, and virucidal properties. Use only disinfectants with no protein-fixing properties.
1. Brush the housing, keyboard and nozzle under running water (< 38°C, < 100°F, at least drinking water quality) and good lighting (min. 500 lux) and color rendering index (min. 80 Ra) until no more dirt can be seen, for at least 10 seconds.
2. Conduct thermal disinfection or unwrapped steam sterilization.
3. If necessary, pack the housing, keyboard and nozzle in packaging suitable for sterilization and storage, e.g. paper/plastic composite packaging or a container in accordance with ISO 11607.
4. Perform sterilization [→ 225].
Maintaining the cooling nozzle outlet
CAUTION
The media temperatures may become too high if the water line in the nozzle is clogged. Risk of burns!
➢ Clean the water line (A) regularly.
ü The nozzle is removed.
➢ Insert the cleaning wire provided through the water line in the nozzle to clean it.
Cleaning the light guide surfaces
1. In order to avoid scratching the surfaces (A), blow off any dirt particles with air.
2. Wipe the surfaces with a Q-tip or a soft cloth and alcohol.
Sterilizing
Intervals:
● Prior to initial operation
● Prior to each subsequent use
Dentsply Sirona Instructions for Use Treatment Center Axano 5 Care, cleaning and maintenance by the practice team 5.3 Instruments and instrument hoses 67 17 396 D3685 D3685.201.01.04.02 2023-06 225
Procedure:
NOTICE
The valve body is not suitable for use in the steam sterilizer.
ü The housing, keyboard and nozzle are cleaned and disinfected.
➢ Sterilize the housing, keyboard and nozzle in the steam sterilizer with saturated water vapor.
Overpressure: 2.04 bar (29.59 psi)
Temperature: 134 °C (274 °F)
Minimum holding time: 3 min
Steam sterilizers that comply with the requirements of either EN 13060 Class B (for example, DAC Premium / DAC Professional) or EN 13060 Class S and are suitable for the sterilization of multi-functional syringes are approved.
NOTICE
Do not exceed 140 °C (284 °F) even during the drying phase.
Please observe the instructions for use for the sterilizer.
After sterilizing:
1. Remove the housing, keyboard and nozzle from the steam sterilizer immediately.
CAUTION
These parts are hot. Risk of burns!
NOTICE
Do not try to accelerate the cool-down process by placing the parts in cold water. This will damage the parts!
2. Store all components so that they are protected against contamination.
3. Sterilize again once the storage period has elapsed.
5.3.3.3 Disinfecting/sterilizing motors and adapters
NOTICE
Approved care, cleaning, and disinfecting agents
Use only care, cleaning, and disinfecting agents that have been approved by Dentsply Sirona, see "Care, cleaning, and disinfecting agents" [→ 202]!
All disinfectants must be approved in your country and have proven bactericidal, fungicidal and virucidal properties. Use only disinfectants with no protein-fixing properties. Do not use agents that are strongly acidic ,(pH < 5), alkaline (pH > 9) or contain a lot of chlorine.
and maintenance by the practice team 5.3 Instruments and instrument hoses
5 Care, cleaning
Instructions for Use Treatment Center Axano 226 67 17 396 D3685 D3685.201.01.04.02 2023-06
Dentsply Sirona
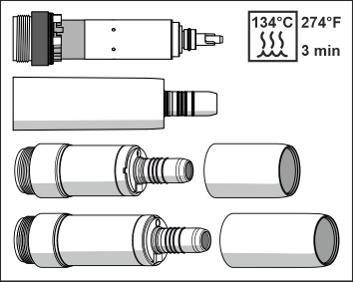
NOTICE
Never clean in an ultrasonic bath!
Never immerse in disinfectants!
NOTICE
Never lubricate the motors!
➢ Remove the handpieces from the motors at the end of the working day so that no oil can run in overnight.
After each treatment session
NOTICE
Perform reprocessing immediately after treatment, after 1 hour at the latest.
ü Wear suitable protective clothing.
1. Purge the water and air channels on the treatment center for 30 seconds.
2. Remove the instrument.
3. Predisinfect directly at the treatment center [→ 227]
4. Remove the adapter/motor [→ 105].
5. Transport the motor/adapter to the hygiene room in a suitable transport container.
6. Perform automatic reprocessing of the adapter [→ 227] Manual reprocessing [→ 230] is possible in exceptional cases if national/ local regulations are followed.
7. Conduct manual conditioning of the motor following national/local regulations [→ 230].
8. Sterilize the motor, adapter, and accessories [→ 230]
Conduct pre-disinfection
ü Wear suitable protective clothing.
ü All disinfectants must be approved in your country and have proven bactericidal, fungicidal, and virucidal properties. Use only disinfectants with no protein-fixing properties.
ü To prevent corrosion, do not use agents that are strongly acidic (pH < 5), alkaline (pH > 9), or contain chlorine.
1. Wipe the surface with disinfectant cloths.
2. Wipe the disinfectant off with a cloth.
Ä For further reprocessing, the motor/adapter should be dry and free of residue.
Automated cleaning and disinfecting of the adapter
Apply the following steps for the adapter only.
NOTICE
Do not use automated cleaning for the BL E and BL ISO F motor.
Dentsply Sirona Instructions for Use Treatment Center Axano 5 Care, cleaning and maintenance by the practice team 5.3 Instruments and instrument hoses 67 17 396 D3685 D3685.201.01.04.02 2023-06 227

We recommend using Dentsply Sirona DAC Universal for automated cleaning, disinfection, and care.
For further details, please refer to the instructions for use supplied with the unit.
ü The adapter is reprocessed using the DAC Universal.
1. Check whether the adapter is clean after reprocessing under good lighting (min. 500 lux) and color rendering index (min. 80 Ra).
2. If still dirty, repeat the process.
Ä For further reprocessing, the adapter should be dry and free of residue.
3. If necessary, pack the adapter in packaging suitable for sterilization and storage, e.g. paper/plastic composite packaging or a container in accordance with ISO 11607.
4. Perform sterilization [→ 230]
The adapter can also be cleaned and disinfected in suitable cleaning and disinfection equipment. The cleaning and disinfection equipment used must comply with ISO 15883-1/-2 and be approved by its manufacturer for the cleaning and disinfection of dental instruments (e.g., 95°C (203 °F) and 10 min holding time).
For further details, please refer to the instructions for use supplied with the respective unit.
ü The adapter is reprocessed with a cleaning and disinfection device.
1. Check whether the adapter is clean after reprocessing under good lighting (min. 500 lux) and color rendering index (min. 80 Ra).
2. If still dirty, repeat the process.
Ä For further reprocessing, the adapter should be dry and free of residue.
3. If necessary, pack the adapter in packaging suitable for sterilization and storage, e.g. paper/plastic composite packaging or a container in accordance with ISO 11607.
4. Perform sterilization [→ 230]
Cleaning and disinfecting BL Implant E motor and Implant motor hose
For reprocessing the BL Implant E motor and the Implant motor hose in one cleaning and disinfecting unit, we recommend using:
● E 468 strainer (Miele),
● E 476 holders (Miele),
● E 131/1 insert (Miele) or comparable
5 Care, cleaning and maintenance by the practice team 5.3 Instruments and instrument hoses Dentsply Sirona Instructions for Use Treatment Center Axano 228 67 17 396 D3685 D3685.201.01.04.02 2023-06

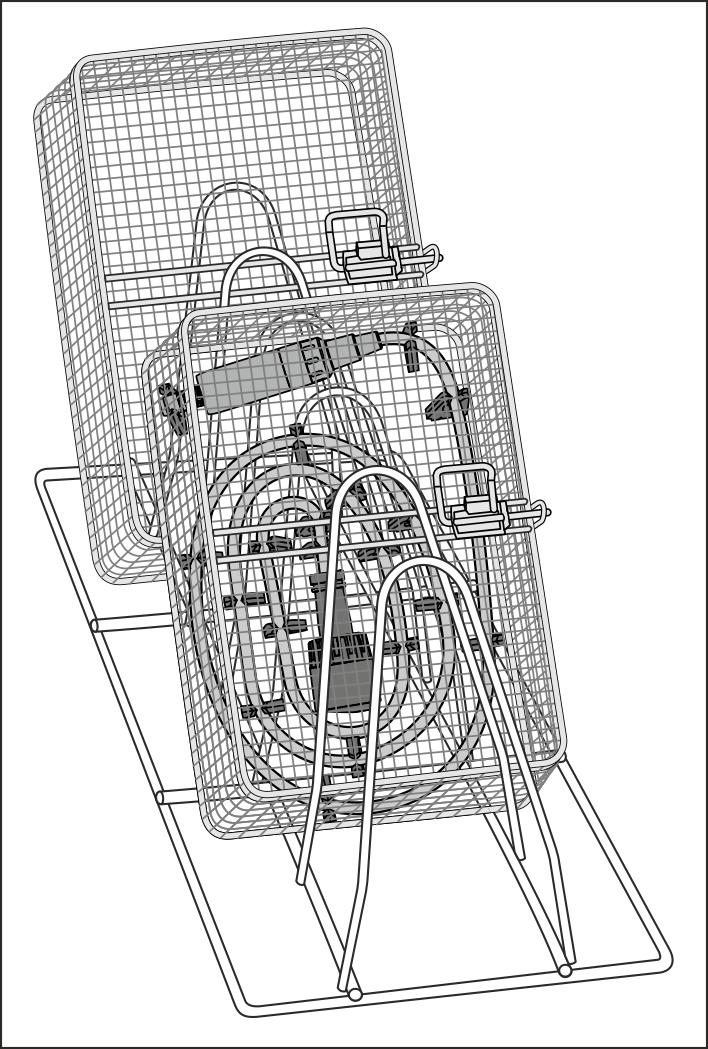
1. When loading the strainer, note the position of the holder to ensure every surface is cleaned.
IMPORTANT
The latch of the BL Implant E motor and the hose connection point down in the cleaning and disinfecting unit.
The hose must be positioned correctly – no contact points – so that every surface is cleaned.
For cleaning and disinfection, the Implant motor hose and the BL Implant E motor do not need to be separated/disassembled.
2. Fasten the BL Implant E motor and the Implant motor hose on the holders.
3. Close the strainer.
4. Position the strainer in the cleaning and disinfecting unit so the latch of the BL Implant E motor and the hose connection point down.
5. Reprocess the BL Implant E motor and the Implant motor hose with a cleaning and disinfection unit.
6. Open the strainer and check whether the BL Implant E motor and the Implant motor hose are clean after conditioning under good lighting (min. 500 lux) and color rendering index (min. 80 Ra).
7. If still dirty, repeat the process.
Ä For further conditioning, the BL Implant E motor and the Implant motor hose should be dry and free of residue.
8. If necessary, pack the BL Implant E motor and the Implant motor hose in packaging suitable for sterilization and storage, e.g. paper/ plastic composite packaging or a container in accordance with ISO 11607.
9. Perform sterilization [→ 230]
Dentsply Sirona Instructions for Use Treatment Center Axano 5 Care, cleaning and maintenance by the practice team 5.3 Instruments and instrument hoses 67 17 396 D3685 D3685.201.01.04.02 2023-06 229
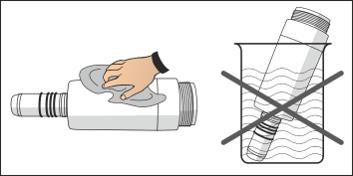

Manual cleaning and disinfection
Manual reprocessing is possible in exceptional cases if the national/ local regulations are followed. The national/local regulations must be checked in advance.
ü All disinfectants must be approved in your country and have proven bactericidal, fungicidal, and virucidal properties. Use only disinfectants with no protein-fixing properties.
ü To prevent corrosion, do not use agents that are strongly acidic (pH < 5), alkaline (pH > 9), or contain chlorine.
1. Moisten a clean, lint-free cloth with disinfectant.
2. Wipe the motor/adapter with the moist cloth. When doing so, also wipe any hard-to-reach places.
3. Observe the application time for the disinfectant.
4. Wipe the motor/adapter dry.
Ä The motor/adapter is disinfected and clean.
5. When the motor/adapter is dirty, repeat the cleaning process.
Sterilizing
ü The motor/adapter is cleaned and disinfected.
ü The motor sleeve is unscrewed from the BL ISO F and BL Implant E motor.
ü If necessary, the adapter, motor and motor sleeve can be packed in packaging suitable for sterilization and storage, e.g. paper/plastic composite packaging or a container in accordance with ISO 11607.
➢ Sterilize the adapter, motor and motor sleeve in the steam sterilizer with saturated water vapor.
Overpressure: 2.04 bar (29.59 psi)
Temperature: 134 °C (274 °F)
Minimum holding time: 3 min

Steam sterilizers that comply with either EN 13060 Class B (for example, DAC Premium / DAC Professional) or EN 13060 Class S and are suitable for the sterilization of motors are approved.
NOTICE
Do not exceed 140 °C (284 °F) even during the drying phase.
Please observe the instructions for use for the sterilizer.
After sterilizing:
1. Remove the adapter, motor and motor sleeve from the steam sterilizer immediately.
CAUTION
The adapter, motor and motor sleeve are hot. Risk of burns!
NOTICE
Do not try to accelerate the cool-down process by placing the parts in cold water. This will damage the parts!
5 Care, cleaning and maintenance by the practice team 5.3 Instruments and instrument hoses Dentsply Sirona Instructions for Use Treatment Center Axano 230 67 17 396 D3685 D3685.201.01.04.02 2023-06
2. Store all motors/adapters so that they are protected from contamination.
3. Sterilize again once the storage period has elapsed.
Sterilize regularly and have the motors serviced after approx. 2 years in a workshop authorized by Dentsply Sirona.
Dentsply
Use Treatment Center Axano 5
5.3
67 17 396 D3685 D3685.201.01.04.02 2023-06 231
Sirona Instructions for
Care, cleaning and maintenance by the practice team
Instruments and instrument hoses
5.3.3.4 Clean and disinfect/sterilize the components of the ApexLocator
WARNING
Approved care, cleaning, and disinfecting agents
Use only care, cleaning, and disinfecting agents that have been approved by Dentsply Sirona, see "Care, cleaning, and disinfecting agents" [→ 202]!
Observe the "General reprocessing instructions" [→ 200] when reprocessing the ApexLocator components.

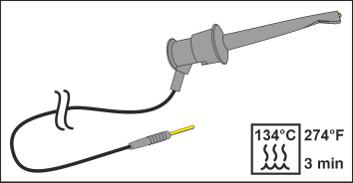

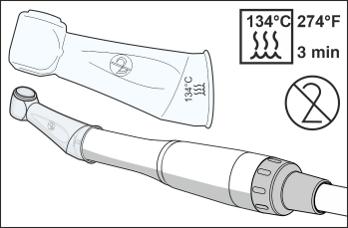
➢ Disconnect the mucosal electrode from the connection cable.
The mucosal electrode can be cleaned with a brush. The mucosal electrode and the connecting cable can be wipe disinfected. The mucosal electrode can be sterilized wrapped, the connecting cable unwrapped.
The file clamp for manual measurement and its connecting cable can be wipe disinfected and sterilized unwrapped.
The apex adapter and its connection cable can be wipe disinfected.
IMPORTANT
To guarantee conductivity, no disinfectant must be allowed to penetrate the electrical contacts.
The silicone isolation sleeve can be sterilized wrapped.
WARNING
The silicone isolation sleeve is a disposable item. It must be changed after each patient. The silicone isolation sleeve must be sterilized prior to initial use.
To reorder the silicone isolation sleeve, see "Spare parts and consumables" [→ 276]
Sterilize the root canal files according to the manufacturer's instructions.
maintenance by the practice team
Instruments and instrument hoses
Instructions for Use Treatment Center Axano 232 67 17 396 D3685 D3685.201.01.04.02 2023-06
5 Care, cleaning and
5.3
Dentsply Sirona
5.3.3.5
Disinfecting/sterilizing the SmartLite Pro curing light
Disinfecting/sterilizing the SmartLite Pro curing light is described in separate instructions for use enclosed with the product.
5.3.3.6

Cleaning/disinfecting the SiroCam AF+ intraoral camera
The shape of the SiroCam AF+ intraoral camera complies with hygienic requirements and therefore has no areas that are difficult to reach.
WARNING
The SiroCam AF+ intraoral camera can only be wipe disinfected. Use protective covers.
WARNING
Approved care, cleaning, and disinfecting agents
Use only care, cleaning, and disinfecting agents that have been approved by Dentsply Sirona, see "Care, cleaning, and disinfecting agents" [→ 202]!
NOTICE
The lens window is sensitive to scratches.
Deep scratches in the lens window impair image quality.
➢ Protect the lens window against scratching. Disinfect it with a soft, lint-free cloth.
Dentsply
Instructions for Use Treatment Center Axano 5 Care, cleaning and maintenance by the practice team 5.3 Instruments and instrument hoses 67 17 396 D3685 D3685.201.01.04.02 2023-06 233
Sirona
5.3.4 Maintaining treatment instruments
5.3.4.1 Maintenance of the Sprayvit multifunctional syringe
5.3.4.1.1 Replacing O-rings


Replace the O-rings every 3 months.
1. Unscrew ring (A) from the nozzle.
2. Remove O-rings (B) with a hook probe.
3. Slide tool (C), with the new O-ring attached, up to just in front of the corresponding groove.
4. Insert the O-ring. Do not use any sharp objects.
5. Repeat steps 3-4.
6. Screw ring (A) tightly onto the nozzle.
Protect O-rings regularly
1. Soak a Q-tip in Dentsply Sirona's T1 spray.
2. Wipe the housing at the separating joint with the Q-tip.
5.3.4.1.2 Replacing lamps

NOTICE
The lamp may be hot.
Risk of burns!
➢ Allow the lamp to cool down.
1. Switch the treatment center off at the standby switch.
2. Remove the housing from the valve body.
3. Use a probe or the like to pry the lamp out of the socket from the button side.
4. Insert the new lamp, observing the contact surface. The Sirona logo (A) on the LED must face upward. The logo must be legible after inserting it into the slit in the valve body. Tip: Insert a probe into the hole of the LED and pull the LED into the valve body up to the stop.
5 Care, cleaning and maintenance by the practice team 5.3 Instruments and instrument hoses
Instructions for Use Treatment Center Axano 234 67 17 396 D3685 D3685.201.01.04.02 2023-06
Dentsply Sirona
5.3.4.2 Maintaining the motors
5.3.4.2.1 Lubricate the lock washer
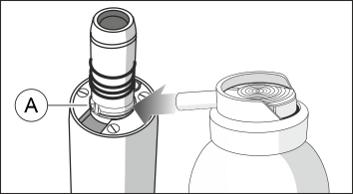
Lubricate the lock washer once a week.
1. Spray some T1 Spray on the lock washer (A).
2. Turn the lock washer to distribute the T1 Spray.
5.3.4.2.2 Replacing lamps
NOTICE
An LED is built into the motors. This LED is designed for the service life of the motor and may be replaced only by Dentsply Sirona or a service technician trained by Dentsply Sirona. Safe operation is no longer guaranteed in case of improper replacement.
5.3.4.2.3 Replace the sealing washer
If water leaks out between the motor and the hose connection, replace the sealing washer.
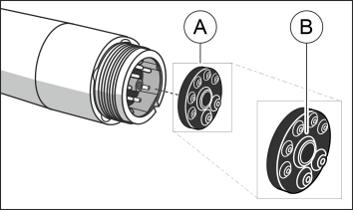
ü The color of the new sealing washer matches the colored mark of the hose coupling that fits the motor.
1. Remove the motor from the instrument hose.
2. Use a probe or the like to remove the defective sealing washer (B) from the rear of the motor.
3. Fit the new sealing washer observing the position of the small tubes and contact pins and slide it as far as it will go.
IMPORTANT
The bulging side (A) of the sealing washer faces the instrument hose.
5.3.4.2.4 Replacing O-rings
NOTICE
Do not use any sharp tools and do not stretch the new O-rings.
If the handpiece coupling leaks, the O-rings must be replaced.
IMPORTANT
The Basic Apex adapter has only one O-ring.
Dentsply Sirona Instructions for Use Treatment Center Axano 5 Care, cleaning and maintenance by the practice team 5.3 Instruments and instrument hoses 67 17 396 D3685 D3685.201.01.04.02 2023-06 235
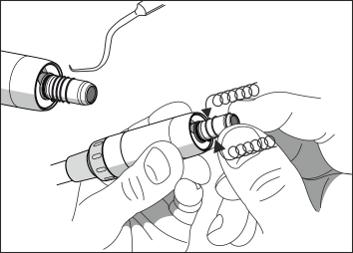
1. Remove the defective O-rings.
2. Insert the O-rings one after another. Start with the first groove.
3. Lightly oil the O-ring with T1 Spray.
NOTICE
Do not use Vaseline or silicone grease on the O-rings.
5.3.5 Changing the cotton wool roll on the turbine hose
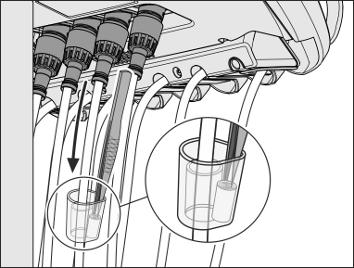
Return air containing a small amount of high-speed handpiece oil is emitted at the unit end of the high-speed handpiece hose. This oil is absorbed by the cotton wool roll in the transparent collecting cup.
1. Push the cup down and remove the cotton wool roll.
2. Insert new cotton wool roll and again push the container up.
Care,
and maintenance by the practice team
Instruments and instrument hoses
Instructions for Use Treatment Center Axano 236 67 17 396 D3685 D3685.201.01.04.02 2023-06
5
cleaning
5.3
Dentsply Sirona
5.3.6 Clean, disinfect, and replace instrument hoses
WARNING
The instrument hoses and the connecting cable of the intraoral camera can be wipe disinfected.
WARNING
Approved care, cleaning, and disinfecting agents
Use only care, cleaning, and disinfecting agents that have been approved by Dentsply Sirona, see "Care, cleaning, and disinfecting agents" [→ 202]!
1. Remove any dirt and disinfectant residues regularly using a mild commercial cleaning agent.
2. Disinfect the instrument hoses with a wipe disinfectant for dental instruments and hoses. This can also be used to disinfect the connecting cable for the intraoral camera. Observe the "General reprocessing instructions" [→ 200]
The instrument hoses can be replaced by the user.
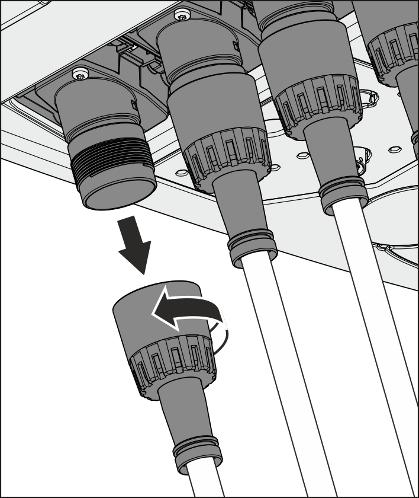
1. Detach the instrument from the instrument hose.
2. Twist the connecting nut of the instrument hose under the dentist and assistant element loose. Grasp the hose at the coupling nut and detach it.
NOTICE
When changing the hose, small quantities of water may leak out. Make sure the electrical contacts are dry before reconnecting the instrument hose.
3. Reattach the instrument hoses under the dentist and assistant element at the respective instrument position. Twist the connecting nuts tight again.
Dentsply
Instructions for Use Treatment Center Axano 5 Care, cleaning and maintenance by the practice team 5.3 Instruments and instrument hoses 67 17 396 D3685 D3685.201.01.04.02 2023-06 237
Sirona
5.4 Suction system
5.4.1
Cleaning the suction hoses
The suction system is exposed daily to secretions, saliva, and blood that contain bacteria. Therefore, for reasons of hygiene, the used suction hoses must be cleaned after each patient, in particular after every treatment involving blood. For prolonged treatments, the suction hose must be cleaned every 60 minutes.
The suction system can be cleaned by pumping water into a tank behind the adapter of the suction hoses and extracting it from there. A cleaning agent is automatically added to the water (chemical suction hose cleaning). The cleaning agent tank can be accessed via the maintenance flap on the base of the water unit.
In the setup dialog of the treatment center, you can set the amount of cleaning agent to be added to the water, see "Settings/Hygiene/Suction hose cleaning [→ 185]".
Cleaning suction hoses and suction system
1. Remove the suction cannulas from the suction hoses to be cleaned.
2. Disinfect the suction handpieces before connecting the suction hoses to the adapters on the water unit.
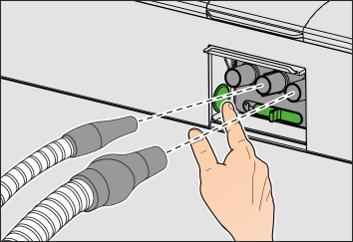
3. Swivel up the cover flap on the water unit to attach the suction hoses.
4. Connect the suction hoses to the adapters. When using two large and one small suction hose, the small suction hose must be placed in the middle.
5. Press the button.
Ä The mixture of water and cleaning agent (optional) is pumped into the suction hose cleaning tank and drawn off by the suction hoses. An acoustic signal will sound after completing the suction hose cleaning.
6. The process can be repeated if necessary by pressing the key again. If the button is pressed longer than 2 seconds, three consecutive rinsing cycles are automatically triggered (extended cleaning mode).
NOTICE
The suction hose cleaning must not be interrupted to ensure that no water remains in the tank.
7. Then place the suction hoses back into their holders on the assistant element.
If another suction hose is added in the extended cleaning mode (three rinsing cycles), it is also rinsed in the remaining cycles.
Suction hose cleaning of individual hoses during treatment is not recommended.
Perform automated reprocessing of the cartridge for the suction hoses weekly, see "Disinfect cartridges for sanitization adapters and suction hose cleaning" [→ 252]
5 Care, cleaning and maintenance by the practice team 5.4 Suction system Dentsply Sirona Instructions for Use Treatment Center Axano 238 67 17 396 D3685 D3685.201.01.04.02 2023-06

Refilling the cleaning agent
If there are unread messages, a blue dot is displayed with the number of unread messages on the setup key in the footer of the Smart Touch.
➢ Tap the adjacent symbol to open the "Notifications" dialog.

Ä When the cleaning agent for cleaning the suction system is nearly depleted, it should be refilled as soon as possible. If the cleaning agent tank is empty, no cleaning agent is added to the water for suction hose and cuspidor cleaning.
If no message is displayed, the cleaning agent should not be refilled.
IMPORTANT
Ensure when refilling that the old cleaning agent is mixed with the new cleaning agent.
WARNING
It is possible that the cleaning agent for the suction system and the agent for disinfecting the water lines could get mixed up.
➢ Do not fill the disinfectant for the water lines into the cleaning agent tank for chemical suction hose cleaning! Use only agents for the suction lines approved by Dentsply Sirona, see "Care, cleaning and disinfecting agents" [→ 202].
WARNING
Wear gloves when performing the following tasks.
Dentsply Sirona Instructions for Use Treatment Center Axano 5 Care, cleaning and maintenance by the practice team 5.4 Suction system 67 17 396 D3685 D3685.201.01.04.02 2023-06 239
!
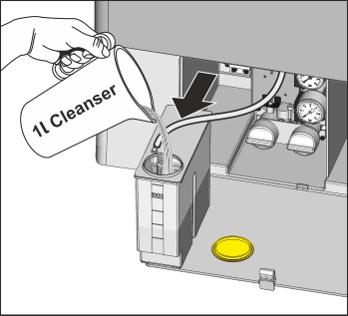
1. Open the maintenance flap on the base of the water unit. The cleaning agent tank for chemical suction hose cleaning is located on the left side.
2. Pull the tank slightly out of the water unit. At the same time, check the hose line.
3. Open the lock of the tank and add the cleaning agent. The cleaning agent tank has a capacity of 1 liter.
by the practice team
Dentsply
240 67 17 396 D3685 D3685.201.01.04.02 2023-06
5 Care, cleaning and maintenance
5.4 Suction system
Sirona Instructions for Use Treatment Center Axano
5.4.2 Cleaning the suction system using the suction hose adapter for the cuspidor or via an external tank
If chemical suction hose cleaning is not conducted regularly or only with water, the suction system must be cleaned daily via the suction hose adapter for the cuspidor or an external tank.
The suction system is exposed to secretions, saliva, and blood that contain bacteria. Cleaning at regular intervals is therefore absolutely mandatory for hygiene reasons.
WARNING
Approved care, cleaning, and disinfecting agents
Use only care, cleaning, and disinfecting agents that have been approved by Dentsply Sirona, see "Care, cleaning, and disinfecting agents" [→ 202]!
NOTICE
Domestic cleaning agents foam up.
Foaming cleaning agents cause foam and water to be sucked into the dry suction system. This can cause damage to the suction machine.
➢ Use only care, cleaning and disinfecting agents approved by Dentsply Sirona, see "Care, cleaning, and disinfecting agents" [→ 202]
5.4.2.1 Cleaning the suction system using the suction hose adapter for the cuspidor
Preparation for cleaning
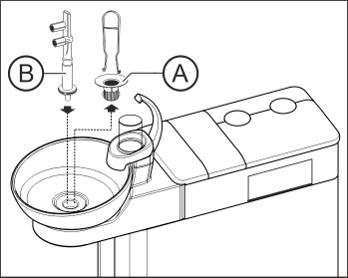
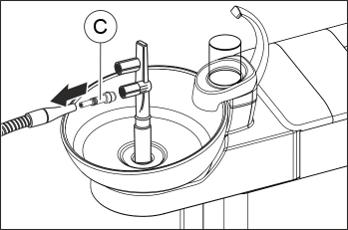
1. Prepare 1 liter of cleaning solution in a separate container according to the manufacturer's instructions and mix it thoroughly.
2. Remove the gold trap (A)
3. Clean the cuspidor.
4. Insert the suction hose adapter for the cuspidor (B) up to the stop.
5. Remove the suction tips from the suction hoses.
6. Attach the adapter (C) to the saliva ejector.
Dentsply Sirona Instructions for Use Treatment Center Axano 5 Care, cleaning and maintenance by the practice team 5.4 Suction system 67 17 396 D3685 D3685.201.01.04.02 2023-06 241
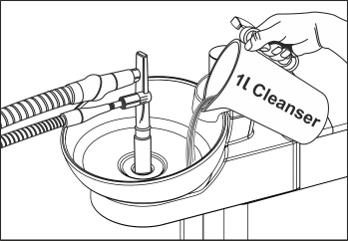
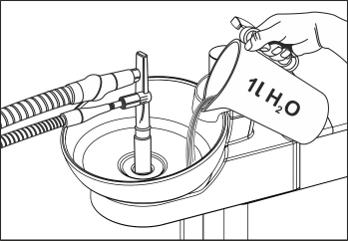
Cleaning procedure
1. Pour 1 liter of cleaning solution into the cuspidor.
2. Remove the suction hoses from their holders and attach them to the side of the suction hose adapter for the cuspidor as simultaneously as possible.
Ä Two thirds of the cleaning solution will be suctioned off by the suction hoses; one third will flow into the drain of the cuspidor.
3. Allow the cleaning solution to act. Observe the reaction time specified for the cleaning solution by the manufacturer.
Rinsing the cleaning agent
1. Following the cleaning process, pour at least 1 liter of water into the cuspidor.
Ä The water is suctioned off, thus preventing any cleaning agent residues from remaining in the suction hoses.
2. When the aspiration process has been completed, detach the hoses. Place the suction hoses back in their holders.
3. Remove the suction hose adapter for the cuspidor and put the gold trap back in.
If the treatment center is equipped with a third suction hose, repeat the procedure.
If the water unit is equipped with a standard wet suction, the filter insert of the standard wet suction must also be cleaned once a month after cleaning the suction system; see "Cleaning the filter insert of the wet suction device" [→ 261].
5.4.2.2 Cleaning the suction system via external container
If the treatment center is not equipped with a cuspidor, the suction system must be cleaned using an external tank.
1. Prepare 1 liter of cleaning solution in a separate container according to the manufacturer's instructions and mix it thoroughly.
2. Fill the cleaning solution into a suitable container.
3. If the container is equipped with suitable adapters for the suction hoses, remove the suction tips from the suction hoses. Otherwise, the cleaning solution must be aspirated with the suction tips in place.
4. Remove the suction hoses from their holders and aspirate the cleaning solution from the container with all suction hoses simultaneously.
5. Allow the cleaning solution to act. Observe the reaction time specified for the cleaning solution by the manufacturer.
6. Following the cleaning process, pour at least 1 liter of water into the container. Aspirate the water in the same way to ensure that no cleaning agent residues remain in the suction hoses.
7. After finishing, place the suction hoses back in their holders.
5 Care, cleaning and maintenance by the practice team 5.4 Suction system Dentsply Sirona Instructions for Use Treatment Center Axano 242 67 17 396 D3685 D3685.201.01.04.02 2023-06
5.4.3 Sterilizing, disinfecting and lubricating the suction handpieces
Automated reprocessing and sterilization
WARNING
All parts of the suction handpieces can be automated reprocessed and sterilized. The suction cannulas must be detached from the suction handpieces for reprocessing.
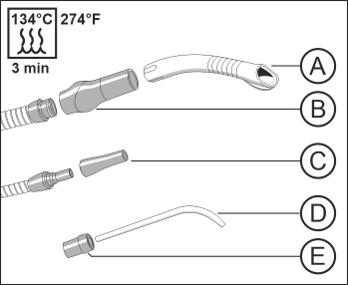
A Suction cannula (not in scope of delivery)
B Suction handpiece
C Saliva ejector handpiece
D Surgical suction cannula (not in scope of delivery)
E Intermediate piece
The suction cannula (A) and the surgical suction cannula (D) can be ordered from a specialty trader. Please observe the manufacturer's reprocessing instructions.
The parts of the suction handpieces (B), (C) and (E) can be cleaned with a brush, reprocessed automatically and sterilized unwrapped. Observe the "General reprocessing instructions" [→ 200]
Lubricate suction handpieces
The disconnection points of the suction handpieces must be lubricated once a week and after each reprocessing.
CAUTION
Unsuitable lubricants
Lubricants that are not food safe may endanger the patient's health. Rubber materials such as O-rings are corroded by unsuitable lubricants.
➢ Never use petroleum jelly or similar lubricants.
➢ Use only lubricants approved by Dentsply Sirona.
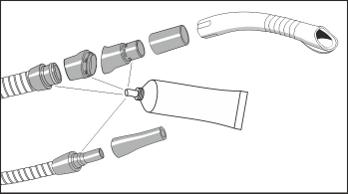
1. Detach the handpiece of the spray aspirator, the saliva ejector and, if installed, the surgical suction device from their suction hoses.
2. Take apart the handpiece of the spray aspirator at its joints.
3. Lubricate the separation joints and O-rings of the handpieces.
Dentsply
Instructions for Use Treatment Center Axano 5 Care, cleaning and maintenance by the practice team 5.4 Suction system 67 17 396 D3685 D3685.201.01.04.02 2023-06 243
Sirona
5.4.4 Clean the filter in the suction hoses and disinfect the suction hoses
The hoses of the spray aspirator, saliva ejector and surgical suction device as well as the connection hose to the water unit can be detached for rinsing under running water.
Filter inserts are placed between the suction hoses and the assistant element to filter out solid particles. Depending on the treatment involved, it may be necessary to remove the trapped solid particles (e.g. amalgam) from the collector periodically due to a decrease in suction power.
NOTICE
Amalgam residues must not enter the public sewage system. Amalgam is a mercury compound that is hazardous to water.
➢ Do not dispose of amalgam residues in a sink.
➢ Collect amalgam residues in a closed container with water. Dispose of amalgam residues, e.g. when replacing the amalgam rotor by filling the amalgam residues into the amalgam rotor or when emptying the sediment container.
The outside of the suction hoses can be disinfected by wiping.
NOTICE
Powdering suction hoses with talcum
If the surfaces of the hoses have become sticky from disinfectants, clean them with a commercially available dishwashing liquid and then powder them with a light coat of talcum if necessary.
!WARNING
Wear gloves when performing the following work.
If the treatment center is equipped with a third suction hose, the following instructions apply by analogy.
1. Switch the treatment center off at the standby switch.
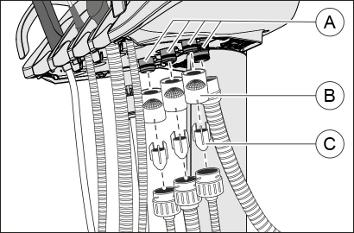
2. Pull the filter housing (B) off of the connectors on the assistant element.
3. Disconnect the suction hoses from the filter housings (B)
5 Care, cleaning and maintenance by the practice team 5.4 Suction system Dentsply Sirona Instructions for Use Treatment Center Axano 244 67 17 396 D3685 D3685.201.01.04.02 2023-06
4. Take the collectors (C) out of the suction hoses. Collect the amalgam residues in a glass filled with water.
5. Take off the suction tips and purge the suction hoses with clean water.
6. Disinfect the suction hoses with a wipe disinfection agent for dental instruments and hoses. Observe the "General reprocessing instructions" [→ 200]
Assemble in reverse order. Lubricate the O-rings (A) before reconnecting the suction hoses. For lubricants see "Care, cleaning, and disinfecting agents" [→ 202]. Make sure that the suction hoses snap into place.
Dentsply Sirona Instructions for Use Treatment Center Axano 5 Care, cleaning and maintenance by the practice team 5.4 Suction system 67 17 396 D3685 D3685.201.01.04.02 2023-06 245
5.5 Components of the water unit
5.5.1
Empty the gold trap
The gold trap retains larger solid particles to prevent them from being washed down the drain in the cuspidor bowl. The amalgam rotor must thus be replaced and the sediment container emptied less often.
NOTICE
Amalgam residues must not enter the public sewage system. Amalgam is a mercury compound that is hazardous to water.
➢ Do not dispose of amalgam residues in a sink.
➢ Collect amalgam residues in a closed container with water. Dispose of amalgam residues, e.g. when replacing the amalgam rotor by filling the amalgam residues into the amalgam rotor or when emptying the sediment container.
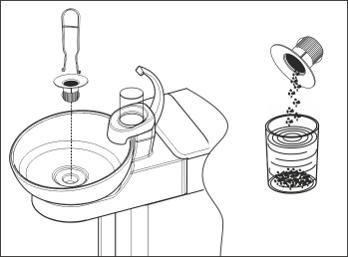
1. Remove the gold trap from the drain of the cuspidor bowl.
2. Remove the amalgam residues from the gold trap. Amalgam residues must be disposed of separately.
3. Empty and clean the gold trap.
4. Reinsert the gold trap.
Care, cleaning and maintenance by the practice team 5.5 Components of the water unit Dentsply Sirona Instructions for Use Treatment Center Axano 246 67 17 396 D3685 D3685.201.01.04.02 2023-06
5
5.5.2 Clean/disinfect the cuspidor
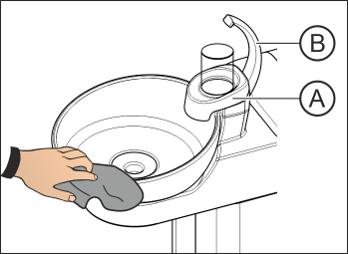
The cuspidor bowl, the tumbler holder (A) and the tumbler outlet (B) can be wiped with surface disinfectants.
Clean and disinfect the cuspidor bowl with a special cleaning agent. This agent will also clean the drain lines of the cuspidor.
NOTICE
Domestic cleaning agents foam up.
Foaming cleaning agents cause foam and water to be sucked into the dry suction system. This can cause damage to the suction machine.
➢ Use only care, cleaning and disinfecting agents approved by Dentsply Sirona, see "Care, cleaning, and disinfecting agents" [→ 202]
The cuspidor bowl is attached to the water unit via a bayonet catch and can be removed for thorough cleaning. The tumbler holder (A) can remain attached when doing this.
WARNING
When the treatment center is switched on, the flushing and tumbler filling functions can be activated even if the cuspidor bowl is removed. In this case, water would run onto the floor and could enter the treatment center.
➢ Switch the treatment center off at the standby switch before removing the cuspidor bowl.
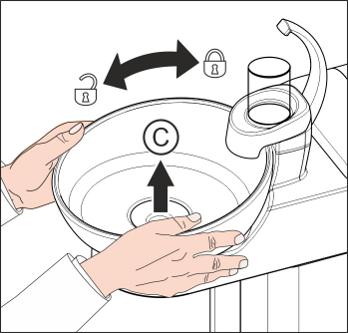
1. Remove the gold trap(C)
2. Hold the cuspidor bowl firmly with both hands. Loosen the bayonet catch by twisting the cuspidor bowl counterclockwise.
A rubber gasket is attached to the bayonet catch of the water unit to seal its closure. Lubricate this gasket before reinserting the cuspidor bowl. For lubricants, see "Lubrication, cleaning, and disinfecting agents" [→ 202].
Make sure that the bayonet catch snaps into place when you reinsert it. After snapping into place, the higher side of the cuspidor bowl must be located below the tumbler outlet.
Dentsply Sirona Instructions for Use Treatment Center Axano 5 Care, cleaning and maintenance by the practice team 5.5 Components of the water unit 67 17 396 D3685 D3685.201.01.04.02 2023-06 247
5.5.3 Cleaning the outlet lines of the cuspidor
For chemical cuspidor cleaning, a cleaning agent is added to the water for cuspidor flushing.
Chemical cuspidor cleaning can be started manually in the setup dialog. It can also be set to conduct chemical cuspidor cleaning automatically with every suction hose cleaning. In addition, the duration and concentration of the chemical cuspidor cleaning can be set, see "Settings/Hygiene/Suction hose cleaning [→ 185]".
The cleaning agent tank can be accessed via the maintenance flap on the base of the water unit. If the treatment center detects that the cleaning agent tank is almost empty, addition to water for cuspidor flushing is stopped. The cleaning agent is then used only for chemical suction hose cleaning until the tank is refilled.
If the chemical cuspidor cleaning function is deactivated or not carried out regularly, the drain lines are also not cleaned. In this case, the drain lines must be cleaned manually once a week, see also "Cleaning the suction system via the suction hose adapter for the cuspidor" [→ 241]. Use the same agent as for the suction lines.
WARNING
Approved care, cleaning, and disinfecting agents
Use only care, cleaning, and disinfecting agents that have been approved by Dentsply Sirona, see "Care, cleaning, and disinfecting agents" [→ 202]!
NOTICE
Domestic cleaning agents foam up.
Foaming cleaning agents cause foam and water to be sucked into the dry suction system. This can cause damage to the suction machine.
➢ Use only care, cleaning and disinfecting agents approved by Dentsply Sirona, see "Care, cleaning, and disinfecting agents" [→ 202]
1. Prepare 1 liter of cleaning solution in a separate container according to the manufacturer's instructions and mix it thoroughly.
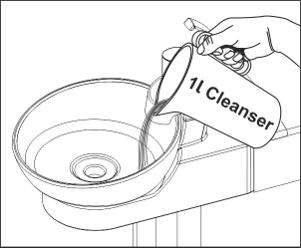
2. Fill the cuspidor with the cleaning solution and leave it to take effect. Observe the reaction time specified for the cleaning solution by the manufacturer.
5 Care, cleaning and maintenance by the practice team 5.5 Components of the water unit
Instructions for Use Treatment Center Axano 248 67 17 396 D3685 D3685.201.01.04.02 2023-06
Dentsply Sirona
Dentsply Sirona Instructions for Use Treatment Center Axano 5 Care, cleaning and maintenance by the practice team 5.5 Components of the water unit

3. Rinse the cleaning solution away. To do this, pour at least 1 liter of water into the cuspidor.
67 17 396 D3685 D3685.201.01.04.02 2023-06 249
5.5.4
Refill disinfectant for the water lines
The water unit is equipped with a disinfection system. In normal operation, this will automatically inoculate the water that comes in contact with the patient (also called treatment water) with a disinfectant for the water lines. The disinfection system can be used to disinfect the water lines, see "Sanitizing the treatment center" [→ 263]
The mixing ratio is fixed and cannot be changed.
If necessary, the disinfectant tank can be emptied. See the "Settings/ Hygiene/Water supply [→ 185]" setup dialog.

If there are unread messages, a blue dot is displayed with the number of unread messages on the setup key in the footer of the Smart Touch.
➢ Tap the adjacent symbol to open the "Notifications" dialog.
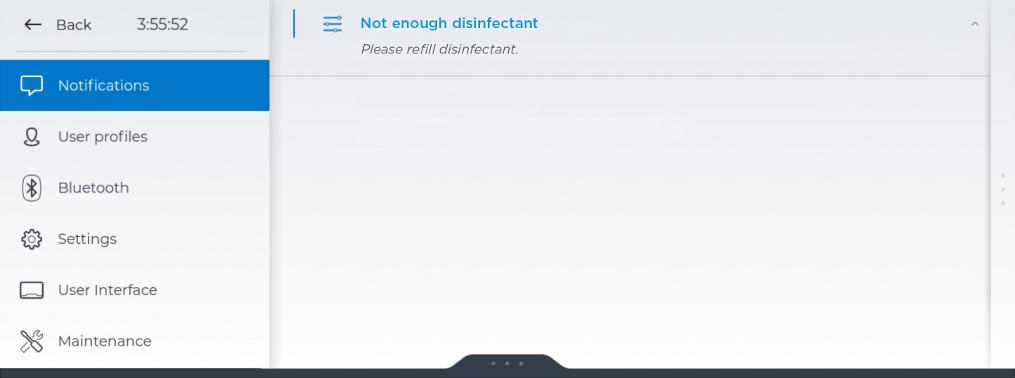
Ä If the disinfectant for the water lines in the tank is low (< 300 ml), treatment can still be completed. Refill the disinfectant as soon as possible. If the tank is empty, no disinfectant is added to the treatment water. Refill with disinfectant immediately.
If no message is displayed, the disinfectant for the water lines should not be refilled. The treatment center may detect that consumption of disinfectant is too low due to regular refilling and report an error.

1. Open the lid of the disinfectant tank.
2. Refill the disinfectant for the water lines. The tank has a capacity of approx. 1.3 liters. It is full when the disinfectant is visible at the filter of the filling funnel.
WARNING
It is possible that the disinfectant for the water lines could be mistaken for a cleaning agent for the suction system.
➢ Do not fill the agent for chemical suction hose cleaning into the disinfectant tank of the water unit. Use the disinfectant for the water lines, see “Care, cleaning, and disinfecting agents” [→ 202]
5 Care, cleaning and maintenance by the practice team 5.5 Components of the water unit Dentsply Sirona Instructions for Use Treatment Center Axano 250 67 17 396 D3685 D3685.201.01.04.02 2023-06
WARNING
Approved care, cleaning, and disinfecting agents
Use only the disinfectant for the water lines that has been approved by Dentsply Sirona for the disinfection system; see "Care, cleaning, and disinfecting agents" [→ 202].
Dentsply
Instructions for Use Treatment Center Axano 5
team 5.5
water unit 67 17 396 D3685 D3685.201.01.04.02 2023-06 251
Sirona
Care, cleaning and maintenance by the practice
Components of the
5.5.5 Disinfect cartridges for sanitization adapters and suction hose cleaning
The sanitization adapters are placed in a cartridge and can be removed with it from the water unit for cleaning and automated reprocessing. The cartridge for the suction hose adapter is also removable.
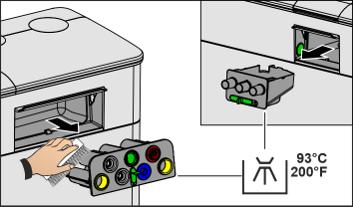
1. Move the green lever to release the locking of the cartridges on the dentist and assistant side. Note the open and closed lock symbol. Pull the cartridges out of the water unit.
2. Wipe out the two openings on the water unit with a moist cloth.
3. Clean the cartridges with a moist cloth and brush. Then perform automated reprocessing of the cartridges, leaving the sanitization adapters inserted in the cartridge. Observe the "General reprocessing instructions" [→ 200]
4. Slide the cartridges back into the water unit. Lock them by moving the green lever.
To reorder the cartridges and sanitization adapters, see "Spare parts and consumables" [→ 276]
Care, cleaning and maintenance by the practice team
Components of the water unit
5
5.5
Instructions for Use Treatment Center Axano 252 67 17 396 D3685 D3685.201.01.04.02 2023-06
Dentsply Sirona


5.5.6 Change the water and air filters
If you notice any changes in media flows, check that the water and air filters are permeable. The filters must be replaced if necessary.
Filter overview
Please note that the filters for water and air are different:


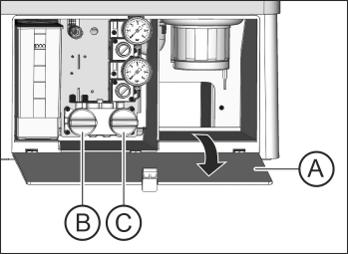
To reorder the filters, see "Spare parts and consumables" [→ 276].
1. Switch the treatment center off at the standby switch. Ä The water and air supply are switched off.
2. Open the maintenance flap (A).
3. Any remaining water flows out of the water filter when it is opened. You should therefore place an absorbent cloth underneath the filter. Then unscrew and remove the screw cap of the water filter (B) and/ or the air filter (C)
4. Check the filters and replace them if necessary.
practice team
the water unit 67 17 396 D3685 D3685.201.01.04.02 2023-06 253
5 Care, cleaning and maintenance by the
5.5 Components of
Filter Color B Water AF2 white C Air AF1 blue
5 Care, cleaning and maintenance by the practice team
5.5 Components of the water unit
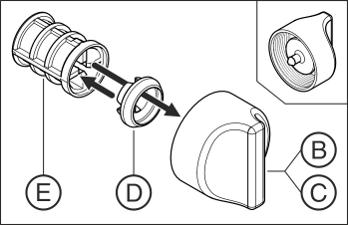
Sirona
Instructions for Use Treatment Center Axano
5. Put the seal (D) back on the filter (E). Then insert both into the screw cap (B ), (C) as shown.
Ä The filter (E) clicks into the screw cap (B), (C)
6. Screw the screw-on cap(s) (B), (C) back onto the water unit.
Dentsply
254 67 17 396 D3685 D3685.201.01.04.02 2023-06
5.5.7 Changing the amalgam rotor
Amalgam residues and other solid particles are trapped in the amalgam rotor according to the centrifugal principle.

If there are unread messages, a blue dot is displayed with the number of unread messages on the setup key in the footer of the Smart Touch.
➢ Tap the adjacent symbol to open the "Notifications" dialog.
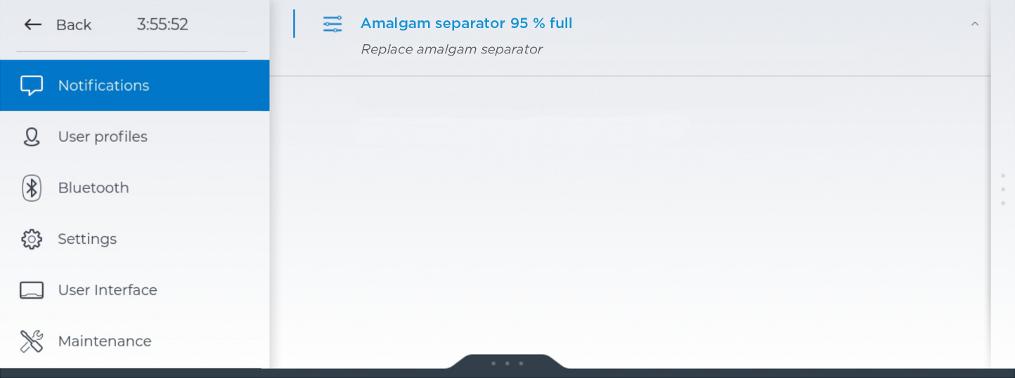
Ä If the amalgam rotor is nearly filled it must be replaced as soon as possible. If the rotor is completely full, an acoustic signal also sounds. A safety shutoff function ensures that the treatment center cannot be used again until the rotor is replaced.
CAUTION
Regardless of any message in the hygiene cockpit, the amalgam rotor must be replaced at least once a year
NOTICE
Amalgam residues must not enter the public sewage system. Amalgam is a mercury compound that is hazardous to water.
➢ Do not dispose of amalgam residues in a sink.
➢ Collect amalgam residues in a closed container with water. Dispose of amalgam residues, e.g. when replacing the amalgam rotor by filling the amalgam residues into the amalgam rotor or when emptying the sediment container.
WARNING
Disposal of the amalgam rotor
When a replacement rotor is supplied, a package for the return shipment of the filled amalgam rotor is attached.
Authorize only certified waste management companies to dispose of rotors.
Dentsply Sirona Instructions for Use Treatment Center Axano 5 Care, cleaning and maintenance by the practice team 5.5 Components of the water unit 67 17 396 D3685 D3685.201.01.04.02 2023-06 255
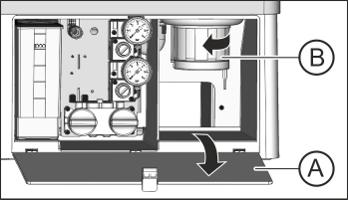
!Cleaning the drain lines of the cuspidor
The amalgam rotor is exposed to secretions, saliva and blood that contain bacteria. It is therefore important to clean the drain lines before replacing the amalgam rotor, see "Cleaning the drain lines of the cuspidor" [→ 248]
Removal and disposal of the amalgam rotor
WARNING
Wear gloves when performing the following work.
ü The treatment center is switched on.
1. Open the flap (A) on the base of the water unit.
2. Loosen the bayonet catch by turning the lower part of the amalgam separator (B) counterclockwise. Remove the lower part of the amalgam separator along with the amalgam rotor located inside it.
Ä A message appears on the Smart Touch and an acoustic signal sounds.

3. Dispose of the amalgam residues from the cuspidor bowl and from the suction hoses collected in the amalgam rotor; see "Cleaning the gold trap" [→ 246] and "Cleaning the filters in the suction hoses and disinfecting the suction hoses" [→ 244]. Put the amalgam residues into the amalgam rotor.
4. Hold the lower part of the amalgam separator upright. Attach the transport cap to the amalgam rotor.
Ä The transport cap latches in. Do not remove the transport cap after closing it.
5. Remove the amalgam rotor with the transport cap from the lower part of the amalgam separator.
6. Place the container in the special packaging and ship it for disposal or authorize a certified waste management company.
Installing the amalgam rotor
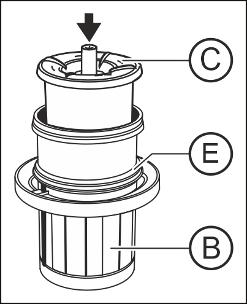
Use only original Dentsply Sirona accessories. Never use a used or recycled amalgam rotor.
To reorder the amalgam rotor, see "Spare parts and consumables" [→ 276].
1. Grease the O-ring (E) on the lower part of the amalgam separator. For lubricants, see "Lubrication, cleaning, and disinfecting agents" [→ 202]
2. Insert the new amalgam rotor (C) in the lower part of the amalgam separator (B)
5 Care, cleaning and maintenance by the practice team
Components of the water unit Dentsply Sirona Instructions for Use Treatment Center Axano 256 67 17 396 D3685 D3685.201.01.04.02 2023-06
5.5

3. Hold the lower part of the amalgam separator (B) so that the latching noses of the bayonet catch are positioned transverse to the water unit. Screw the lower part of the amalgam separator (B) onto its upper part by rotating it clockwise.
NOTICE
Amalgam separator message
If the message is still displayed on the Smart Touch and the acoustic signal persists after the amalgam rotor has been inserted, the lower part of the amalgam separator is not properly locked.
4. Close the flap (A)
5. In Germany: Document the exchange of the amalgam rotor in the "D3181 II amalgam separator operation log".
International: Document in accordance with the national regulations.
Amalgam separator operation log
In Germany, users are obligated by law to keep an operation log for the amalgam separator. This log is included with the treatment center.
CAUTION
Please note the user duties as described in the operation log:
➢ Document the replacement of the amalgam rotor
➢ Check the function of the amalgam separator system annually
➢ Arrange for a 5-year inspection
Dentsply Sirona Instructions for Use Treatment Center Axano 5 Care, cleaning and maintenance by the practice team 5.5 Components of the water unit 67 17 396 D3685 D3685.201.01.04.02 2023-06 257
5.5.8 Check the message system of the amalgam separator
An electronic control device monitors the function of the amalgam separator. It detects any mechanical blocking or failure of the drive motor. The error is indicated by an acoustic signal.
The function of this message system must be checked at least once per year
1. Start the amalgam test in the setup dialog "Maintenance/Service functions/Water unit [→ 194]/Error signal of the amalgam separator" by long pressing the "Start test" key.
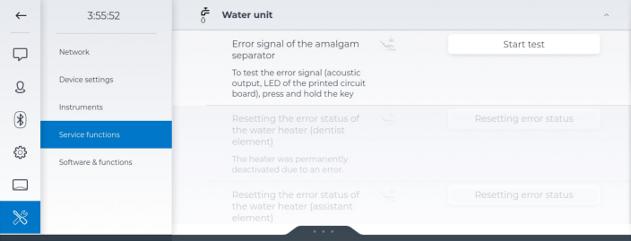
Ä A buzzer tone should sound. The amalgam test remains active for 10 seconds.
2. During this time, open the Notifications setup dialog.
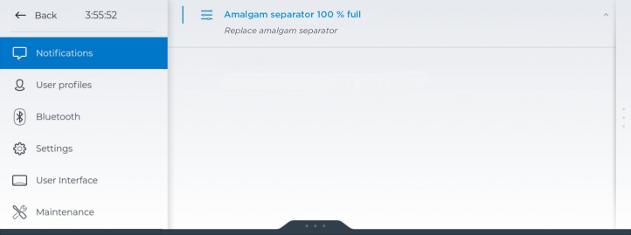
Ä As long as the amalgam test is active, the message "Amalgam separator 100 % full - Replace amalgam separator" should appear.
Ä The display and message systems are OK when a buzzer tone sounds and the message appears.
Inform your service technician if the error occurs during regular operation.
In Germany: Document the test in the operation log of the amalgam separator in the "Testing the function of display and message systems" section.
by the practice team
the water unit Dentsply
Use Treatment Center
258 67 17 396 D3685 D3685.201.01.04.02 2023-06
5 Care, cleaning and maintenance
5.5 Components of
Sirona Instructions for
Axano
5.5.9 Emptying the sediment container
In addition to other solid particles, a large portion of the amalgam residues are trapped in the sediment container by gravitational force.
WARNING
Empty the sediment container in cycles that are appropriate for your work method, but at least every 4 weeks.
The sediment container is installed only if neither an amalgam separator nor a standard wet suction is installed.
Cleaning the drain lines of the cuspidor
The sediment container is exposed to secretions, saliva and blood that contain bacteria. It is therefore important to clean the drain lines before replacing the sediment container, see Cleaning the drain lines of the cuspidor" [→ 248].
Removing and emptying the sediment container

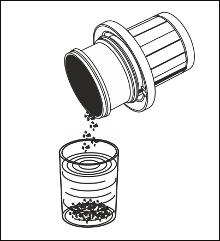

!WARNING
Wear gloves when performing the following work.
1. Open the flap (A) on the base of the water unit.
2. Loosen the bayonet catch by turning the sediment container (B) counterclockwise.
3. Pour the excess water out of the sediment container and collect the amalgam residues. Dispose of these properly together with the amalgam residues collected from the cuspidor bowl and the suction hoses; see "Cleaning the gold trap" [→ 246] and "Cleaning the filters in the suction hoses and disinfecting the suction hoses" [→ 244] Authorize a certified waste management company for this purpose.
Installing the sediment container
1. Lubricate the O-ring (C) on the sediment container. For lubricants, see "Lubrication, cleaning, and disinfecting agents" [→ 202]
Dentsply Sirona Instructions for Use Treatment Center Axano 5 Care, cleaning and maintenance by the practice team 5.5 Components of the water unit 67 17 396 D3685 D3685.201.01.04.02 2023-06 259
5 Care, cleaning and maintenance by the practice team
5.5 Components of the water unit

Dentsply Sirona
Instructions for Use Treatment Center Axano
2. Hold the sediment container (B) so that the latching noses of the bayonet catch are positioned transverse to the water unit. Turn the sediment container (B) clockwise to insert it.
Ä The sediment container is locked in place.
3. Close the flap (A)
260 67 17 396 D3685 D3685.201.01.04.02 2023-06
5.5.10
Cleaning the filter insert of the standard wet suction
With the wet suction system, the automatic separator and amalgam separator or sediment container are not installed in the water unit. Air and water separation and amalgam separation are conducted centrally in this case.
In order to ensure that larger solid particles nevertheless cannot enter the separating unit, the suction line in the cuspidor is equipped with a filter. The filter insert must be cleaned when the suction power decreases.
!WARNING
Wear gloves when performing the following work.
Cleaning the drain lines of the cuspidor
Before the filter insert of the wet suction device is cleaned, the drain lines should be cleaned, see "Cleaning the drain lines of the cuspidor" [→ 248]
Extracting all remaining water
As long as the treatment center is switched on, some water remains in the drain line for technical reasons. The water must first be completely extracted to allow the filter insert to be cleaned, otherwise the remaining water will flow out when the filter housing is opened. The remaining water is automatically extracted when the treatment center is switched off at the standby switch on the user interface.
The function for extracting the remaining water from the wet suction device is activated in the setup dialog, see "Maintenance/Water unit [→ 194]/Empty tank of the Dürr wet suction system".
Removing and cleaning the filter insert
NOTICE
The flushing and tumbler filling functions may not be activated when the filter housing is open.
Otherwise, water could escape from the open filter housing.
➢ Do not switch the flushing and tumbler filling functions on whenever the filter housing is open.
Dentsply Sirona Instructions for Use Treatment Center Axano 5 Care, cleaning and maintenance by the practice team 5.5 Components of the water unit 67 17 396 D3685 D3685.201.01.04.02 2023-06 261
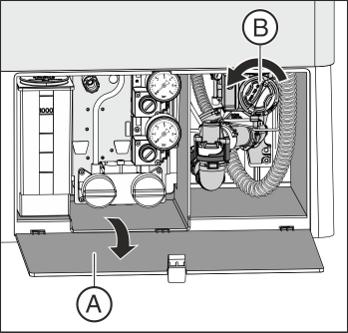
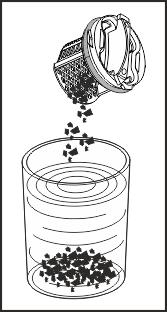
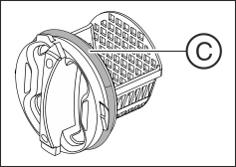
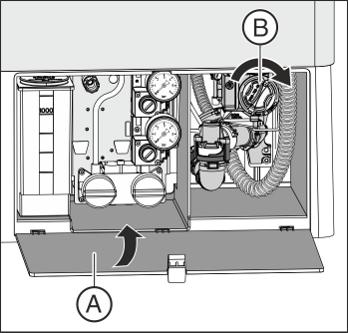
ü The water is completely extracted from the water unit.
1. Open the flap (A) on the base of the water unit.
2. Loosen the bayonet catch of the filter insert (B). Unscrew the filter insert from the filter housing of the wet suction device counterclockwise.
3. Properly dispose of the amalgam residues from the filter insert together with the amalgam residues collected from the cuspidor bowl and from the suction hoses. Then clean the filter insert under running water in a sink (not in the cuspidor bowl!).
4. Grease the O-ring (C) of the filter insert. For lubricants, see "Lubrication, cleaning, and disinfecting agents" [→ 202]
5. Reinsert the filter insert in the filter housing. Rotate the filter insert (B) clockwise.
6. Close the flap (A) Ä The treatment center is again ready for operation.
practice
5 Care, cleaning and maintenance by the
team
Dentsply
262 67 17 396 D3685 D3685.201.01.04.02 2023-06
5.5 Components of the water unit
Sirona Instructions for Use Treatment Center Axano
5.6 Sanitization
Please use only approved agents for disinfecting the water lines, e.g. Dentosept Clean.
5.6.1 Sanitizing the treatment center
Sanitization can be conducted using the disinfection system. During sanitization, the treatment water is first emptied according to a predefined process, then the disinfectant for the water lines is filled undiluted into the treatment water lines and flushed out again at the end. Sanitization takes at least 24 hours.
In the Setup dialog, you can set the number of days since the last sanitization and after how many days of disuse a sanitization due notification should be displayed, see "Settings/Hygiene/Sanitization [→ 184]".
Sanitization must be performed:
● Regularly every 4 weeks
Three days before the due date, a message in the hygiene cockpit indicates the approaching sanitization date. If a sanitization interval of 7 days has been set in the Setup dialog, the message is not displayed until the due date.
● After longer periods of disuse (> one week)
● If the bacterial count exceeds 100 CFU/ml; see "Microbiological water test" [→ 203]
NOTICE
Additional devices connected to the external device connection must not be sanitized with the treatment center.
The additional devices could be damaged. Residues of the agent for disinfecting the water lines can remain in the additional devices.
➢ Disconnect any additional devices from the treatment center prior to sanitization.
Preparation
The following preparations should be made prior to beginning sanitization:
1. Set the quick couplings of the turbines to maximum water flow.
2. Place all instruments in the instrument holders.
Opening the sanitization dialog
ü The start, instrument, or Sivision dialog is displayed.

1. Tap the Hygiene key in the footer to access the hygiene cockpit.
Dentsply Sirona Instructions for Use Treatment Center Axano 5 Care, cleaning and maintenance by the practice team 5.6 Sanitization 67 17 396 D3685 D3685.201.01.04.02 2023-06 263
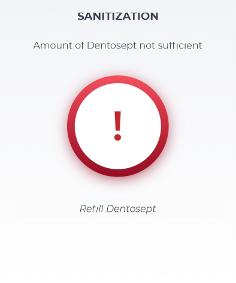

2. Tap on the "Sanitization" field.
Ä The "Sanitization" dialog appears.
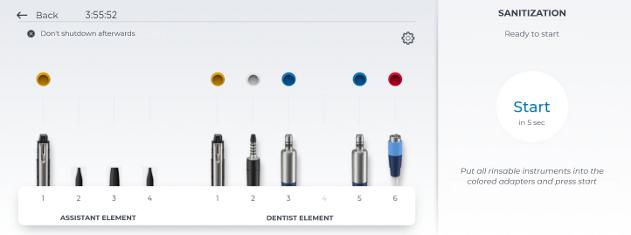
If the "Start" key is grayed out in the "Sanitization" dialog, the treatment center has detected that the waste water cannot drain away. If using a wet suction device, check whether the suction device is switched on. Inform your service technician if necessary.
Error message: Refill disinfectant for water lines
If this message appears after opening the "Sanitization" dialog, the disinfectant for the water lines in the tank of the water unit is not sufficient to sanitize the treatment center. Sanitization cannot be started with too little disinfectant, see "Refilling disinfectant for the water lines" [→ 250].
Error message: Instruments must be in the correct position to start
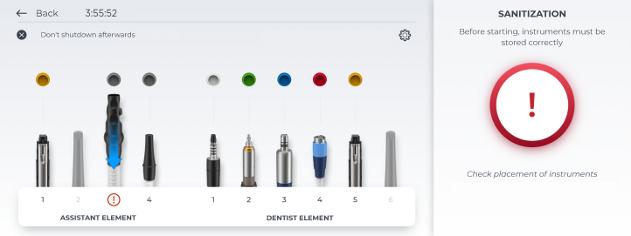
If this message appears after the "Sanitization" dialog has been opened, the treatment center has detected that not all of the instruments have been placed in the instrument holders.
Care, cleaning and maintenance by the practice team 5.6 Sanitization Dentsply Sirona Instructions for Use Treatment Center Axano 264 67 17 396 D3685 D3685.201.01.04.02 2023-06
5


➢ Check the instruments in the instrument positions marked with a red exclamation mark.
Ä When all of the instruments have been put in the holders, the sanitization program will continue.
Insert water-carrying instruments and suction hoses into the water unit
The water unit has integrated sanitization adapters for water-carrying instruments and adapters for suction hoses. This allows all instruments and suction hoses to be simultaneously treated with a high concentration of sanitization solution and then rinsed with water. For this purpose, sanitizable instruments must be inserted in the sanitization adapters and suction hoses must be inserted into the adapters for suction hose cleaning.
ü The message "Put all rinsable instruments into the colored adapters and press start" is displayed.
1. Detach the Sprayvit sleeves from the valve bodies, the straight and contra-angle handpieces from the instruments that can be sanitized, and the suction tips from the suction hoses.
2. Dentist element side: Insert the couplings of all water-carrying treatment instruments into the sanitization adapters in the water unit (for Sprayvit: valve lever pointing up, locking knob pointing down). Always ensure that the instruments are seated correctly to avoid errors during the flow rate check or leakages.
IMPORTANT
Colors of the sanitization adapters
The sanitization adapters for the instrument couplings are color coded. The assignment is also displayed on the Smart Touch. Yellow on left = Sprayvit of the assistant element
Yellow on right = Sprayvit of the dentist element
White = turbine
Green = BL E motor
Blue = BL ISO F motor (ISO interface)
Red = SiroSonic TL ultrasonic handpiece
IMPORTANT
Water button of the Sprayvit
Depending on the position of the Sprayvit water button, the removable sanitization cartridge is marked on the back. When the nozzle is taken from the holder, this mark can also be seen on the Sprayvit. If the water button is on the right, the marking is an "R", for the Sprayvit with water button on the left "L". The marking on the removable sanitization cartridge must match that on the Sprayvit
Dentsply Sirona Instructions for Use Treatment Center Axano 5 Care, cleaning and maintenance by the practice team 5.6 Sanitization 67 17 396 D3685 D3685.201.01.04.02 2023-06 265

3. Assistant element side: Attach the suction hoses to the adapters. When using two large and one small suction hose, the small suction hose must be placed in the middle.
Ä When an instrument has been taken from the holder, this is displayed on the Smart Touch by a highlighted instrument and a gray circle around the instrument position.
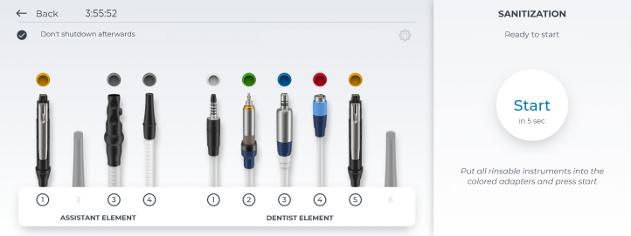

IMPORTANT
Pinching the instrument hoses
Be careful not to pinch the instrument hoses when inserting the instruments.
If the hoses are pinched, the water flow will be obstructed during purging.
Ä The sanitization adapters for the water-carrying instruments and adapters for the suction hoses are all loaded.
4. Tap on the "Start" key.
Ä The purging process begins.
Ä The treatment center checks whether there is water flow through the instruments. This will take a moment.
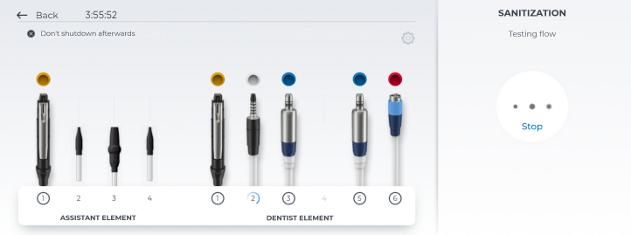
Error message: water flow test failed
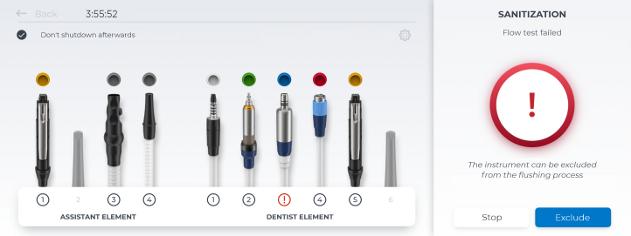
5 Care, cleaning and maintenance by the practice team 5.6 Sanitization Dentsply Sirona Instructions for Use Treatment Center Axano 266 67 17 396 D3685 D3685.201.01.04.02 2023-06

If the water flow test fails, the affected instrument can be excluded from the purging process. Affected instruments are marked with a red exclamation mark on the Smart Touch. If no input is given (stop or Exclude) after a failed water flow test, the affected instruments will be automatically excluded after a certain time and the program will continue.
Set the quick couplings of the turbines to maximum water flow.
Applying disinfectant for water lines to the water lines
The water is pumped out of the mixing tank of the disinfection system through the tumbler filling. Then the mixing tank is automatically filled with the undiluted disinfectant for the water lines. The instrument hoses, the Sprayvit hoses, and the tumbler filling are then purged with the disinfectant. The suction hoses are cleaned.
Allow 24 hours reaction time
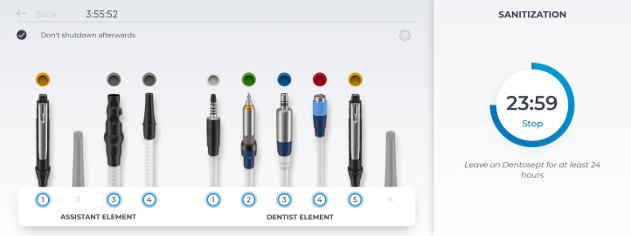
You must let the disinfectant for the water lines react for at least 24 hours but not longer than 3 days (maximum sanitization time). If sanitization takes longer than 3 days, it is not documented, see "Reading out hygiene data" [→ 270]. The disinfectant for the water lines becomes ineffective after 3 days in the lines.
ü The remaining reaction time is displayed on the Smart Touch, starting at 24 hours.
ü The treatment center has automatically switched to standby mode.
1. Leave all instruments plugged into the water unit.
2. Make sure that the treatment center is switched off for at least 24 hours, but not longer than 3 days (maximum sanitization time). If necessary, you can also turn off the power switch on the base of the treatment center patient chair.
IMPORTANT
Blocking water and air supply
If the treatment center is turned on again after 24 hours, the sanitization process continues automatically. However, if the water and air supplies are blocked, the agent for disinfecting the water lines cannot be rinsed out of the water lines.
Switch the treatment center back on after 24 hours only when the water and air supply lines are open.
3. Switch the treatment center on again after 24 hours and before 3 days have elapsed.
Dentsply Sirona Instructions for Use Treatment Center Axano 5 Care, cleaning and maintenance by the practice team 5.6 Sanitization 67 17 396 D3685 D3685.201.01.04.02 2023-06 267
Error message: Insert instruments in the sanitization adapters
If an instrument is accidentally deposited in its holder during the reaction time, the message "Put all rinsable instruments into the colored adapters and press start" is displayed on the Smart Touch after the treatment center is switched on. Sanitization is then completed anyway.
1. Take the accidentally removed instrument out of the instrument holder and place it back in the sanitization adapter on the water unit so that it can be purged.
2. If you want to exclude an instrument from sanitization, tap on the "Exclude" key.
Ä Excluded instruments will not be purged.
Purging water lines with water
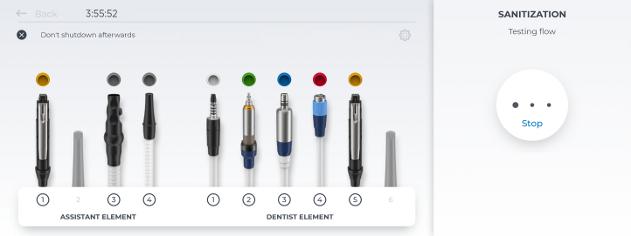
The disinfectant for the water lines is rinsed from the instrument hoses, Sprayvit hoses, and tumbler filling unit using water. This takes several minutes.
Returning instruments to their holders

After the water lines have been purged, the instruments and suction hoses can be removed from the water unit and returned to their holders.
➢ Put the Sprayvit sleeves, the straight and contra-angle pieces, and the suction tips back on the instruments or suction hoses. Return all instruments and suction hoses to the instrument holders.
Ä The sanitizing process is finished. The treatment center is again ready for operation.
5 Care, cleaning and maintenance by the practice team 5.6 Sanitization Dentsply Sirona Instructions for Use Treatment Center Axano 268 67 17 396 D3685 D3685.201.01.04.02 2023-06

Messages for incomplete sanitization
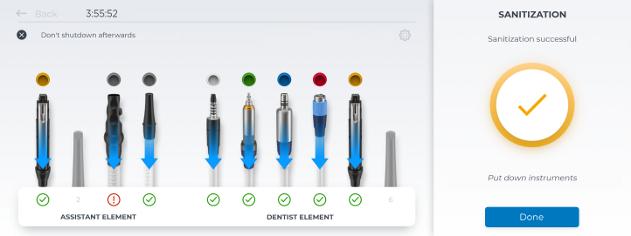
Instruments that have been successfully sanitized are marked with a green check mark, instruments not successfully purged with a red exclamation mark. If an interruption of purging was detected or an instrument excluded, an orange check mark is displayed as the overall result.
The water lines for instruments that are marked with an orange check mark or red exclamation mark may still be filled with disinfectant for the water lines.
➢ Rinse these instruments manually after sanitization.
Canceling the sanitizing process
Sanitization can be canceled, e.g. if it is necessary to switch the treatment center on again before 24 hours have passed. The option for cancellation is displayed on the "Stop" key.
ü The sanitizing process has started.
➢ Tap on the "Stop" key.
Ä The sanitizing process is canceled. If the water lines have not yet been treated with the disinfectant for the water lines, the instruments can be returned to the holder immediately. If sanitization is canceled during the reaction time, the water lines are first rinsed with water.
Dentsply Sirona Instructions for Use Treatment Center Axano 5 Care, cleaning and maintenance by the practice team 5.6 Sanitization 67 17 396 D3685 D3685.201.01.04.02 2023-06 269
5.6.2 Read out hygiene data
Purge, autopurge and sanitization processes as well as suction hose cleanings performed are logged by the treatment center and saved. The hygiene data can be read out via the PC with the service software and saved to a file.
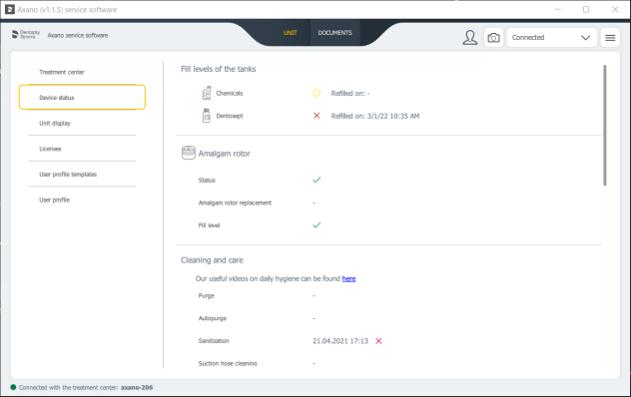
5.6.3
Biofilm removal by the service technician
If the microbiological test of the water from the treatment center does not correspond with the hygiene requirements in spite of regular sanitization of the water lines and/or regular purge/autopurge cycles, the biofilm must be removed using special chemicals.
Biofilm removal should be performed if the bacterial count is significantly above 100 colony forming units per mililiter.
Biofilm removal may only be done by a trained service technician. In this case, please contact your dental depot.
Before initiating biofilm removal it must be ensured that the reason for the raised bacterial count is not due to inflowing water.
5 Care, cleaning and maintenance by the practice team 5.6 Sanitization Dentsply Sirona Instructions for Use Treatment Center Axano 270 67 17 396 D3685 D3685.201.01.04.02 2023-06
5.7 Foot control and connection box
5.7.1
Changing the battery of the wireless foot control
The wireless foot control is powered by a battery. An empty battery is detected and reported by the system. The battery can be replaced by the user.
For the battery type, see "Spare parts and consumables" [→ 276]
➢ Switch the treatment center off at the standby switch before changing the battery. This prevents the inadvertent triggering of unwanted functions.
Changing the battery of the Smart Control
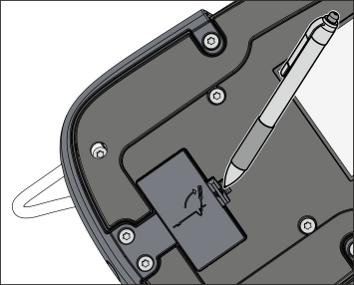
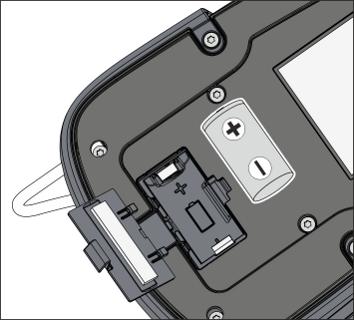
1. Open the battery cover with a pen or screwdriver.
2. Take the battery out of the battery compartment and replace it with a new one. Be careful to insert it with the correct polarity.
3. Note the flashing signal of the LED after replacing the battery, see "Check battery" (below).
4. Close the battery cover.
Changing the battery of the Classic foot control
The housing of the wireless foot control must be opened to change the battery. Touch a grounded metal part before opening the housing to prevent damage to the PC board due to electrostatic discharge.
Dentsply Sirona Instructions for Use Treatment Center Axano 5 Care, cleaning and maintenance by the practice team 5.7 Foot control and connection box 67 17 396 D3685 D3685.201.01.04.02 2023-06 271
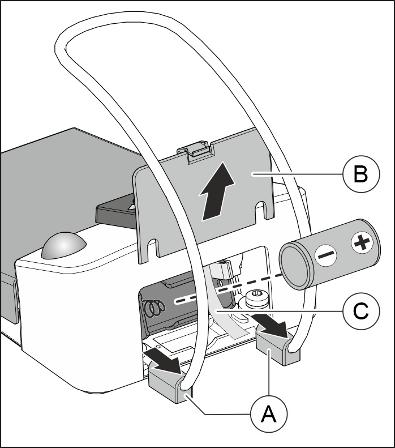
1. If the adjustable feet A are close to the battery cover B, move them outward slightly.
2. Open the battery cover B
3. Take the battery out of the battery compartment by pulling the cloth strap C and replace it with a new one. Be careful to insert them with the correct polarity (minus pole facing spring). The cloth strap C must again lie under the battery.
4. Note the flashing signal of the LED after replacing the battery, see "Check battery" (below).
5. Close the battery cover B

Using the wireless foot control again
IMPORTANT
After changing the battery, start the treatment center and check the complete functionality of the foot control. It is not necessary to register the foot control again at the treatment center after changing batteries.
Checking battery charge
The battery charge is indicated by the yellow LED.
● LED lights up for approx. 10 s after battery is inserted – Battery OK
● LED flashes after battery is inserted – Battery too weak, must be replaced
● LED does not light up – Battery empty, must be replaced
Battery disposal
To protect the environment, batteries may not be disposed with household waste. Please observe the applicable national regulations for battery disposal.
5.7.2 Changing the fuse of the external device connection
The IEC socket is live in standby mode. It is switched on/off by the power switch.
To reorder the fuse, see "Spare parts and consumables" [→ 276]
5 Care, cleaning and maintenance by the practice team 5.7 Foot control and connection box Dentsply Sirona Instructions for Use Treatment Center Axano 272 67 17 396 D3685 D3685.201.01.04.02 2023-06

ü The IEC outlet socket is not supplying any power.
1. Pull the plug of the connected device out of the IEC outlet socket.
2. Use a screwdriver to unscrew the fuse sleeve.
3. Replace the fuse (T 6.3 A, 250 VAC) and screw the fuse sleeve back in.
4. Reconnect the external device to the IEC outlet socket.
Ä If the inlet connect still is not supplying any power, contact the manufacturer of the connected device or your local distributor.
Dentsply
Instructions for Use Treatment Center Axano 5 Care, cleaning and maintenance by the practice team 5.7 Foot control and connection box 67 17 396 D3685 D3685.201.01.04.02 2023-06 273
Sirona
6 Maintenance by the service engineer
6.1 Inspection and maintenance
In order to ensure the operational safety and reliability of your treatment center and to avoid damage due to wear and tear, annual inspection and maintenance must be performed on your treatment center. This is done by an authorized technician from your dental depot.

Maintenance due is displayed in the footer of the Smart Touch.
When the next servicing date is less than 42 days away, this is displayed on the Smart Touch. The days until the servicing date are counted down. Contact your dental depot now and make an appointment.
The next maintenance date can also be viewed in the DS service software:
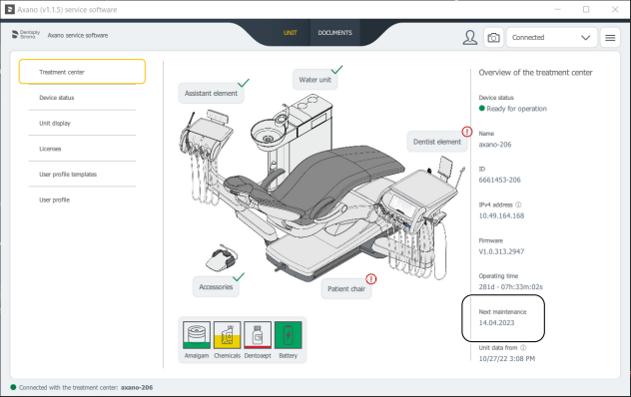
DANGER
The treatment center should be cleaned and disinfected by the practice personnel before the maintenance deadline.
The steps to be performed and the parts to be replaced are specified in the "Maintenance log" document.
An overview of the inspection and servicing carried out is additionally recorded by the service technician in the "Maintenance manual".
6.2 Safety checks
Medical equipment is designed in such a way that the first occurrence of a fault does not create a hazard to the safety of patients, users or other persons. Hence it is important to identify such faults before a second fault occurs, which might then lead to safety hazards.
6 Maintenance by the service engineer 6.1 Inspection and maintenance Dentsply Sirona Instructions for Use Treatment Center Axano 274 67 17 396 D3685 D3685.201.01.04.02 2023-06
DANGER
It is essential to perform safety checks every 2 years in which electrical faults (e.g. defective insulation) in particular can be detected. This is done by an authorized service technician from your dental depot. The treatment center must not be operated if it has failed to pass the safety tests!
The safety tests can be carried out in connection with work performed for "Inspection and maintenance" [→ 274]
Safety tests must also be performed and documented at initial startup, after extensions/upgrades (retrofitting) of your treatment center, and after repair work that could affect the electrical safety of the system.
The safety test includes a visual inspection as well as measurements of the protective ground wire connections and the equivalent leakage currents. The inspections and measurements to be performed are specified in the "Maintenance Manual". The measured values must be documented there by the service technician.
6.3 Maintenance manual WARNING
Keep this Maintenance Manual near your treatment center. Any inspection and maintenance work as well as all safety tests are documented by the service engineer in the Maintenance Manual.
We recommend to the user to always keep the documentation in the chapter "Reporting of incidents to authorities / manufacturers" up to date, regardless of any legal requirements.
Dentsply Sirona Instructions for Use Treatment Center Axano 6 Maintenance by the service engineer 6.3 Maintenance manual 67 17 396 D3685 D3685.201.01.04.02 2023-06 275
7 Spare parts and consumables
Use only original spare parts and original consumables from Dentsply Sirona.
Please order the materials listed below from a specialized dental dealer.
Care, cleaning, and disinfecting agents
A continuously updated list of approved agents can be downloaded from the internet on the online portal for technical documents. You can reach this portal at: www.dentsplysirona.com/ifu .Search for REF 59 70 905.
treatment center
Total count tester
Water filter, white
Air filter, blue
Amalgam rotor
Peristaltic pump hose set (5 pcs)
Spray aspirator with additional air intake, saliva ejector
A spray aspirator as well as a saliva ejector from the Dürr Dental company is attached to the treatment center on delivery. They can be ordered from specialty traders.
Suction hose cleaning cartridge triple
Purge/sanitization cartridge, water button on Sprayvit right
Purge/sanitization cartridge, water button on Sprayvit left
Turbine sanitization adapter
Motor BL sanitization adapter
ISO motor sanitization adapter
SiroSonic TL sanitization adapter
Ball stopper
For sealing the instrument holder of the dentist element
Fuse for the external device connection
100 V – 240 V~ (T 6.3 A, 250 V~)
Battery for wireless foot control 1x type alkaline baby (C or LR14) with 1.5 V (commercially available)
Always use high-quality batteries!
Sprayvit multifunctional syringe
Sprayvit nozzle G, long, curved, with fiber optic
Casing, right water line
Casing, left water line
58 53 775
14 43 436
67 98 784
14 34 138
66 25 953
–
67 53 391
67 53 409
67 64 067
67 66 872
67 66 880
67 66 898
67 66 856
58 99 575
10 77 452
52 52 002
59 92 180
60 02 179
60 02 187
Spare
consumables Dentsply
Instructions for Use Treatment Center Axano 276 67 17 396 D3685 D3685.201.01.04.02 2023-06
7
parts and
Sirona
Keyboard
Small cleaning wires
LED
O-ring set Sprayvit nozzle
1 x attachment tool and 10 x O-rings 5.5x1.03
Dentsply Sirona T1 Spray (6 x 250 ml cans)
BL E motor
BL ISO C/E/S sealing washer, green
Basic Apex adapter
ISO adapter
BL ISO F motor
BL ISO F motor sleeve
BL ISO C/E/F sealing washer, green
O-ring 8.4 x 0.7
T1 spray (6 x 250 ml cans)
BL Implant E motor
BL Implant E outer sleeve, long
BL Implant E sealing washer, violet
O-ring 8.4 x 0.7
T1 spray (6 x 250 ml cans)
ISO adapter / Basic Apex adapter
O-ring 8.4 x 0.7
O-ring 8 x 1
T1 spray (6 x 250 ml cans)
Endodontics/implantology
Silicone isolation sleeve for endodontics with the ApexLocator (5 pcs)
Peristaltic pump hose set (5 pcs)
Hose clamp for saline hose (recommended quantity: 5)
Silicone holder for sterile instruments
63 21 728
24 00 232
63 22 007
41 76 751
59 01 665
63 11 240
59 83 072
60 00 793
64 69 204
63 11 240
58 60 390
59 01 665
66 75 131
67 05 607
58 60 390
59 01 665
58 60 390
70 36 189
59 01 665
63 24 631
66 25 953
89 28 392
67 37 535
Axano 7
consumables 67 17 396 D3685 D3685.201.01.04.02 2023-06 277
Dentsply Sirona Instructions for Use Treatment Center
Spare parts and
8 Disposal
In accordance with Directive 2012/19/EU and national disposal regulations regarding old electrical and electronic devices, please be advised that such items must be disposed of in a special way within the European Union (EU). These regulations require the environmentally friendly recycling/disposal of old electrical and electronic devices. Such items must not be disposed of as domestic refuse. This is indicated by the printed icon of the "crossed out trash can".
Disposal procedure
We feel responsible for our products from the first idea to their disposal. For this reason, we give you an option to return our old electronic and electrical devices.
If you wish to dispose of your equipment, please proceed as follows: In Germany
To initiate return of the electrical equipment, please send a disposal request to enretec GmbH. You have the following options for this:
● Tel.: +49 800 805 432 1
● Email: services@enretec.de
You can arrange the transport to enretec GmbH yourself or commission enretec GmbH with the organization.
Prepare the device for transport in accordance with the "Important regulations for the return of old electrical equipment". Available online at (www.enretec.de).
In accordance with the national disposal regulations regarding old electrical and electronic devices (ElektroG), we as the manufacturer assume the costs for disposing of the electrical and electronic devices in question that were purchased from us on or after August 13, 2005. Disassembly, transport and packaging costs shall be borne by the owner/operator.
By using this return option, we jointly ensure that any substances harmful to the environment and health contained in the devices are disposed of in compliance with the law and that the equipment is recycled in the best possible way.
If your unit is movable, it will be collected from the practice. If it is permanently installed, it will be picked up curbside at your address by appointment.
WARNING
Before disassembling and disposing of the device, all parts must be properly prepared (cleaned, disinfected, sterilized).
Other countries
For country-specific information on disposal, contact your local dental dealer.
8 Disposal 6.3 Maintenance manual Dentsply Sirona Instructions for Use Treatment Center Axano 278 67 17 396 D3685 D3685.201.01.04.02 2023-06
IMPORTANT
Operators of equipment with storage functions for customer and patient data are responsible for deleting all personal data before disposing of the equipment.
8.1 Battery disposal
Note for disposal company:
Prior to disposal, remove the following batteries from the treatment center:
● Battery in the wireless foot control
● Lithium battery on the ABK circuit board (REF 66 36 372) in the control unit of the dentist element. Remove the CR2032 button cell from the battery holder.
8.2 Disposal of disinfectants
Please see the respective safety datasheets for the products for information on disposal.
Dentsply Sirona Instructions for Use Treatment Center Axano 8 Disposal 8.1 Battery disposal 67 17 396 D3685 D3685.201.01.04.02 2023-06 279
9 Overview of all function keys
The following contains a brief description of the function keys on the Smart Touch of the dentist element and the user interface of the assistant element to provide a quick overview of the significance of the symbols on the keys. Detailed descriptions can be found in the corresponding sections of this document.
9.1 Fixed Keys
9.1.1
Dentist element
Standby switch
Switches the treatment center on/off.
To switch off the treatment center, press and hold the key until an acoustic signal sounds. Then release the key.
IMPORTANT
Power switch
The treatment center also features a power switch on the base of the chair that separates the treatment center from the power supply, see "Switching the treatment center on/off" [→ 47]
Shock positioning
Immediately moves the patient chair to a position for shock positioning of the patient.
To program the position of the shock positioning function, see "Configuring chair programs and shock positioning" [→ 77]
Operating light
Switches the operating light on/off.
Composite function
Switches the composite function for the operating light on/off. This function can delay the curing of composite materials.
Tumbler filling
Starts or stops the tumbler filling function.
Cuspidor flushing
Starts or stops cuspidor flushing.

Cuspidor
Swivels the cuspidor in/out by motor.
Timer function
Counts a set time down to zero.
9 Overview of all function keys 9.1 Fixed Keys Dentsply Sirona Instructions for Use Treatment Center Axano 280 67 17 396 D3685 D3685.201.01.04.02 2023-06


Massage function
Starts or stops back massage.
Bell
Freely available relay 240 V, 6 A (connected by service technician)
This function can be preset as a button or as a switch in the setup dialog.
AUX key
Freely available relay 240 V, 6 A (connected by service technician)
This function can be preset as a button or as a switch in the setup dialog.
A symbol can be assigned to the key corresponding to its function.
Smart Touch block
Locks the Smart Touch and prevents triggering inadvertent functions when cleaning and disinfection
Hygiene cockpit
In the hygiene cockpit, the treatment center lists the hygiene tasks to be carried out. The purge and auto-purge function and sanitization can be started.
Setup
In the setup dialog, the treatment center can be individually set up and configured. Additionally, messages about the treatment center are displayed to the user. See "Configuration of the treatment center (setup)" [→ 164].
9.1.2 Assistant element
Tumbler filling
On/Off
Cuspidor flushing
On/Off
Composite function
Switches the composite function for the operating light on/off. This function can delay the curing of composite materials.
Operating light
On/Off
Chair program S
Mouth rinsing position with last-position memory function (programmable)
Dentsply
Instructions for Use Treatment Center Axano 9 Overview of all function keys 9.1 Fixed Keys 67 17 396 D3685 D3685.201.01.04.02 2023-06 281
Sirona
Chair program 0
Entry/exit position (programmable)
Chair programs 1 and 2 (programmable)
Headrest
Moves the motorized headrest in/out to adjust the patient's height.
Timer function
Starts the timer on the assistant element. The timers on the assistant element are preset in the setup dialog, see "SettingsOperation/Timer [→ 178]".
Bell
Freely available relay 240 VAC, 6 A (connected by the service technician)
This function can be preset as a button or a switch in the setup dialog, see "Maintenance/Device settings [→ 191]/Bell relay mode".
Function key
The function of the starkey on the assistant element can be configured in the setup dialog, see "Settings/Operation [→ 175]/Assistant: Function key".
9.2 Start dialog


Chair program S
Mouth rinsing position with last-position memory function (programmable)
Chair program 0
Entry/exit position (programmable)
Chair programs 1, 2 and, if required, 3, 4 (programmable)
Treatment while standing
For treatment while standing, a second level can be activated for the chair programs 1 to 4.
Patient-specific chair programs
With Sidexis 4, users can save the patient-specific chair positions for each patient using the program keys (S, 0, 1, 2, and if applicable 3, 4).
The next time the patient is logged in, the chair positions are available again.
9 Overview of all function keys 9.2 Start dialog Dentsply Sirona Instructions for Use Treatment Center Axano 282 67 17 396 D3685 D3685.201.01.04.02 2023-06


Moving the headrest in/out
Inclining the headrest
ErgoMotion – Tilting the patient chair and inclining the backrest
Compensated movement of the seat surface and backrest without any compression or stretching effects for the patient
Adjusting the chair height
Fine adjustment
The patient chair moves at reduced speed during for the movements tilt headrest, moving headrest up/down, ErgoMotion, and adjusting chair height.
Sprayvit instrument light on/off
When the Sprayvit is taken from the holder, the key is displayed in the startdialog and expandedstartdialog.
Sprayvit water tempering
When the Sprayvit is taken from the holder, the key is displayed in the expandedstartdialog
Cuspidor
Swivels the cuspidor in/out by motor.
X-ray viewer
External HF surgical unit
Activation of the protection against interference caused by an external HF surgery unit
Massage function
Starts or stops back massage
Active lumbar support function
Adjusting the lumbar support function
9.3 Instrument dialog

Speed quick setting keys without expanded favorites storage
Setting stored speeds of the electric motor min. 90 rpm, max. 40,000 rpm
Dentsply Sirona Instructions for Use Treatment Center Axano 9 Overview of all function keys 9.3 Instrument dialog 67 17 396 D3685 D3685.201.01.04.02 2023-06 283


Intensity quick setting keys without expanded favorites storage
Setting stored intensity values of the SiroSonic TL ultrasonic handpiece
Speed quick setting keys with expanded favorites storage
In addition to the speeds of the electric motor, the settings for coolant, instrument light, foot control switch, and direction are saved on the quick setting keys. The quick setting keys can be labeled individually.
Intensity quick setting keys with expanded favorites storage
In addition to the intensity values of the SiroSonic TL ultrasonic handpiece, the settings for coolant, instrument light, Endo mode, and foot control switch (not in Endo mode), are saved on the quick setting keys. The quick setting keys can be labeled individually.
Motor speed
Adjusts the speed of the electric motor. The set speed is indicated by a gray filling of the key.
Ultrasound intensity
Adjusts the intensity of the SiroSonic TL ultrasonic handpiece. The set ultrasound intensity is indicated by a gray filling of the key.
Direction of rotation
Switches counterclockwise rotation on/off
Chip blower
Used to dry treatment areas or blow off drilling chips by emitting air blasts from the treatment instrument
Activate preselected coolant
Switches the preselected coolant, spray, air, or NaCl on/off in the instrument dialog. They are preselected in the expandedinstrument dialog, see below:
Preselecting spray coolant
Used to cool the treatment area with spray
Preselecting air coolant
For cooling the treatment area with air
Preselect NaCl coolant
For cooling the treatment area with sterile saline solution
Spray water quantity
Adjusts the water quantity in the spray for every turbine, motor, and the SiroSonic TL ultrasonic handpiece. The set spray water quantity is indicated by a gray filling of the key.
Water quantity
The set water quantity is indicated by a gray filling of the key.
Dentsply Sirona Treatment Center Axano 284 67 17 396 D3685 D3685.201.01.04.02 2023-06


NaCl flow rate
The set flow rate is indicated by a gray filling of the key.
Instrument light
Switches the instrument light on/off
Instrument light intensity
Adjusts the brightness of the instrument light. The set intensity is indicated by a gray filling of the key.
Direct starter / foot control switch
Direct starter (on a white background): Switches the instrument on at the set speed or intensity
Foot control switch (highlighted orange): Controls instrument up to the maximum set speed or intensity depending on the position of the foot control pedal.

External HF surgical unit
Protects the treatment center against interference from an external HF surgery unit
9.4 Endodontics dialog


Calibrate bur drive
A calibration must be performed each time you change or lubricate the contra-angle handpiece.
The contra-angle handpiece is automatically checked during calibration. This includes a measurement of motor current at different speeds to assess the properties of the system.
Direction of rotation
Switches counterclockwise rotation on/off
Select file system
Lists the file systems marked as favorites.
Touching the gear icon opens the Endodonticsmanagement dialog. File systems can be marked as favorites here.
By touching the Createsystem button, a customized file system can be set up.
By touching the Createinstrument button, a customized file can be set up.
File selection
Selects the previous/next file from a of the file system.
Dentsply Sirona Instructions for Use Treatment Center Axano 9 Overview of all function keys 9.4 Endodontics dialog 67 17 396 D3685 D3685.201.01.04.02 2023-06 285


Speed and torque
In the first line, the set value is displayed, in the second line, the value stored according to the manufacturer's specifications.
Root canal complexity
Using the root canal complexity, the maximum torque can be reduced in increments according to the anatomical conditions of the root canal:
1. Low complexity, maximum torque (standard)
2. Medium complexity, moderate reduction
3. High complexity, strong reduction
Torque reverse function
When the torque reverse function is switched on, the bur drive automatically switches to counterclockwise rotation when the set torque value is reached. When the foot pedal is pressed again, the bur drive switches back to clockwise rotation.
Apex distance
Sets the desired distance from the physiological apex.
Volume of the apex beeps
In addition to the graphic distance display, apex beeps are emitted. The intervals between the beeps vary according to the measured distance to the set apex distance.
Selecting function when apex distance is reached
This can be set so that when the set distance to the apex is reached, the motor:
● Continues to run,
● Stops automatically, or
● Stops automatically and switches to counterclockwise rotation when the foot pedal is pressed again.
9.5 Implantology dialog


Switch NaCl on/off
Supplies the bur drive with sterile saline solution
Activate NaCl rinsing
Flushes the treatment area with a sterile saline solution when the bur instrument is stopped for as long as the key is activated
Direction of rotation
Switches counterclockwise rotation on/off
9 Overview of all function keys 9.5 Implantology dialog Dentsply Sirona Instructions for Use Treatment Center Axano 286 67 17 396 D3685 D3685.201.01.04.02 2023-06


Calibrate bur drive
A calibration must be performed each time you change or lubricate the contra-angle handpiece.
The contra-angle handpiece is automatically checked during calibration. This includes a measurement of motor current at different speeds to assess the properties of the system.
Select an implantology system
Lists the implantology systems marked as favorites.
Tapping the gear icon opens the Implantologymanagement dialog. Implantology systems can be marked as favorites here.
By touching the Createsystem button, a customized implantology system can be set up.
By touching the Createinstrument button, a customized implant instrument can be set up.
Select implant instrument
Selects the previous/next work step of the drilling process.
Restarting treatment
Moves back to the first step of implantology treatment. The first implant instrument is selected.
NaCl flow rate
The set flow rate is indicated by a gray filling of the key.
Torque and speed
In the first line, the set value is displayed, in the second line, the value stored according to the manufacturer's specifications.
Torque beep
A beep is issued when approx. 75% of the set torque value is exceeded.
Direct starter / foot control switch
Direct starter (white key): Switches the instrument on at the set speed or intensity
Foot control switch (orange key): Controls the instrument up to the maximum set speed depending on the position of the foot control pedal
Dentsply
Instructions for Use Treatment Center Axano 9 Overview of all function keys 9.5 Implantology dialog 67 17 396 D3685 D3685.201.01.04.02 2023-06 287
Sirona
9.6 Sivision dialog
9.6.1 Sidexis 4


Open touchpad and Sidexis 4 control
Readiness for intraoral X-ray exposure
Establishes readiness for an X-ray exposure. A Sidexis 4 window then opens where the image type can be selected and the image can be described in detail.
Full frame
The active image window is enlarged so that it covers the entire display area. The control elements of the Sidexis 4 user interface are not concealed in the process.
Tiled layout
All open image windows are scaled to a uniform size in the display area and arranged without overlapping.
Cascaded layout
The opened windows are "cascaded", i.e. arranged slightly displaced behind one another. All image window titles are thus visible.
Close current media window
Close all media windows
Previous/Next image
Rotate image
Rotates the image 90° counterclockwise or clockwise.
Zoom in/out
This increases and decreases the active image window and the size of the image displayed in it on the patient monitor.
Contrast optimization filter
This image filter analyses and optimizes the current grayscale distribution of an image. In this way, for instance, details within a very low-contrast, “faint” image can be made visible.
Relief display filter
Image details with high contrast are displayed brighter or darker. Edges or contours within the image are thus clearly accentuated. The result is a relief-like image distortion.
9 Overview of all function keys 9.6 Sivision dialog Dentsply Sirona Instructions for Use Treatment Center Axano 288 67 17 396 D3685 D3685.201.01.04.02 2023-06


9.6.2


Smooth image
To mitigate high-contrast or high-interference effects in images, the contrast between neighboring pixels is reduced or averaged. The overall sharpness of the image is reduced.
Sharpen image
Contrasts between neighboring pixels are increased. This function helps to accentuate edges or contours. This gives the impression of a sharper image.
Undo
The effect of the last filter operation is undone.
Restore original image
The changes previously made, e.g. via filters, are canceled. The most recently saved version of the image is restored.
Media Player
Access media player
Playback/Pause
Stop playback
Forward/Back
Adjust volume
Mute
Enlarge/reduce view
Show previous/next /page
Adjust to page size
Dentsply
Instructions for Use Treatment Center Axano 9 Overview of all function keys 9.6 Sivision dialog 67 17 396 D3685 D3685.201.01.04.02 2023-06 289
Sirona


Adjust to page width
Close file
9.6.3 Camera


Open camera dialog
Focus the live image
Switch camera light on/off
Stop image transmission on patient monitor
Switch between single image and overview
Automatic focus before triggering
Show focus frame
Delete current image
Show next image
Display keys for image editing
9 Overview of all function keys 9.6 Sivision dialog Dentsply Sirona Instructions for Use Treatment Center Axano 290 67 17 396 D3685 D3685.201.01.04.02 2023-06


Keys for image editing
Dentsply Sirona Instructions for Use Treatment Center Axano 9 Overview of all function keys 9.6 Sivision dialog 67 17 396 D3685 D3685.201.01.04.02 2023-06 291
Export image to Sidexis 4
Index
Numeric
4-way control plate, 61
A
Accessory, 26
Active lumbar support function, 80
Adapter, 241
Additional devices, 41
Additional holder, 34, 37
After blow, 174
Agent for disinfecting the water lines, 250
Air, 91
Air blast, short, 91
Air connection for external device, 41
Air intakes on the spray aspirator, 138
Air vents on the spray aspirator, 138
Amalgam separator
Changing the rotor, 255
Dispose of rotor, 255
Message system, 258
Operation log, 257
Amalgam separator operation log, 257
Amalgam separators
Standards/Approvals, 24
Anti-glare films for X-ray viewer, 148
Apex distance, 122
ApexLocator, 117
Apex distance, 122
Beeps, 121
Distance display, 119
File clamp, 118
Instrument hose, 118
Manual measurement using a file clamp, 123
Motor, 118
Mucosal electrode, 118
Approvals, 24
Armrest, 66
Assistant element
Handles, 208
Instrument positions, 37
Maximum load capacity, 135
Overview, 36
Sprayvit, 96
Suction handpieces, 138, 243
Use of blasting devices, 19
Water heater, 173
Automatic separator, 39
Autopurge function, 217
AutoReverse function, 117, 130
AUX key, 87, 281
B
Ball for instrument holder, 88, 208
Ball stopper, 88, 208
Battery change, wireless foot control, 271
Battery disposal, 279
Beeps, 121
Bell key, 87
Biofilm removal, 270
Blasting device, 19
Bottle holder for saline solution, 93
CCal key, 114, 127
Calibrating the bur drive, 114, 127
Calibrating the motor, 114, 127
Calibration of the bur drive, 127
Call key, 87
Camera, 21, 152, 153, 154, 233
Canadian Standard Association (CSA), 24
Care, cleaning, and disinfecting agents, 202
Care, cleaning, and disinfecting intervals, 198
CCW/CW rotation, 107
CE marking, 24
Chair height, 75
Chair programs, 70, 72, 77, 137
Index Dentsply Sirona Instructions for Use Treatment Center Axano 292 67 17 396 D3685 D3685.201.01.04.02 2023-06
Sirona
Chemical cuspidor cleaning, 182
Chemical suction hose cleaning, 238
Chip blower, 91
Cleaning agent for suction hose cleaning, 239, 255
Coding of motor hoses, 101
Collapse position, 77, 84
Collecting amalgam residues, 245, 246, 256, 259, 262
Composite function, 85, 136, 149
Configuration of the Smart Touch, 187
Conformity mark, 24
Consumables, 276
Contra-angle handpiece inertia, 114
Contraindication, 13
Coolant, 91
Countertop unit for |HF surgery, 111
Couplings, 101
Cup holder, 146, 210
Cursor control, 58
Cursor path, 59
Cursor return, 59
Cuspidor, 85, 140, 247
Cuspidor bowl flushing, 85, 136
Cuspidor cleaning, chemical, 182
Cuspidor flushing, 85, 136, 141, 182
Cuspidor valve, 195
Customer Service, 10
Customizing dialogs, 187
D
Declaration of conformity, 24
Dentist element
Fixed keys, 84
Handles, 208
Height adjustment, 83
Instrument holder, 88
Instrument positions, 34
Maximum load capacity, 81
Moving, 56, 172
Overview, 33
Smart Delivery sliding track, 82
Sprayvit, 96
Standby switch, 47
Water heater, 173
Dentsply Sirona Product service, 10
Deutscher Verein für Gas und Wasser (DVGW) = German Gas and Water Association, 25
Dialog change, 55, 60, 61
Dialogs
Expanded dialogs, 54
Instrument dialog, 88
Direct starter, 93
Disinfectant residues, 205
Disinfectant tank, 195
Disinfection system, 39, 141, 250
Disposal of old electrical and electronic devices, 278
Distance display, 119
Distance display in Sidexis 4, 120
Drinking water supply, 141
Drive air of the turbine, 192
Driving air control, 100
Driving air proportional valve, 100
Drop icon, 55
EElectric motor, 101
Electricity consumption, 48
Electromagnetic compatibility, 20, 21
Electronic torque limitation, 115, 129
Electrosurgery, external unit, 111
Endodontics (treatment), 112
enretec GmbH, 278
Entry/exit position 0, 70, 137
ErgoMotion, 74
Expanded dialogs, 54
External device connector, 41
External HF surgery unit, 111
External PC, 159
Extracting residual water, 261
FFCC, 25
File clamp, 118
Filling quantity of the tumbler, 181
Dentsply
Instructions for Use Treatment Center Axano Index 67 17 396 D3685 D3685.201.01.04.02 2023-06 293
Filter
Air and water, 253
Gold trap, 246
Suction hoses, 244
Wet suction device, 261
Fine adjustment, 75
Firmware, 11
Fixed key
AUX key, 87, 281
Bell key, 87
Chair programs, 137
Composite function, 85, 136, 149
Cuspidor bowl flushing, 85, 136
Headrest, 137
Operating light, 84, 136, 149
Shock positioning, 77, 84
Standby switch, 47, 84
Star key, 137
Timer, 86, 137
Tumbler filling, 85, 136, 140
Fixed keys, 52
Flat screen monitor, 152
Focusing the intraoral camera, 155, 156
Foot control
Battery (wireless foot control), 56, 271
Cleaning, 212
Cursor control, 58
Direct starter / foot control switch, 93
Electromagnetic compatibility , 21
Operating , 56
Overview, 31
Registering (wireless foot control), 167
Standards/approvals, 25
Wireless interface (wireless foot control), 27
Foot control switch, 93
Foot pedal, 56
Footer, 55
G
Gold trap, 246
HHandles on the dentist and assistant element, 208
Hands-free operation, 58
Headrest
Disinfecting, 211
Motorized headrest, 30, 67
Patient-specific automatic headrest adjustment, 68
Headrest
Motor-driven headrest, 137
Height adjustment
Dentist element, 83
Heliodent Plus, 151
Heliodent Plus X-ray tube unit, 151
HF surgery unit, external, 111
Hose coding, 101
Hygiene measures, 55
IIEC socket, 41
Indications, 13
Industry Canada, 25
Inertia of contra-angle handpiece, 127
Initial startup, 50
Inspection and maintenance, 274
Instrument holder, 88
Dentist element, 208
Tray, 145, 210
Instrument hose, 118, 236
Instrument light, 93, 98, 192
Instruments
After blow, 174
Automatic purging (autopurge function), 217
Ball stopper, 88
Care and cleaning, 223
CCW/CW rotation, 57, 107
Chip blower, 91
Coolant, 91
Drive air of the turbine, 192
Drive motors, 19
Intensity, 109
Light, 93, 192
Index Dentsply Sirona Instructions for Use Treatment Center Axano 294 67 17 396 D3685 D3685.201.01.04.02 2023-06
Motor and coupling versions, 101
Positions on the assistant element, 37
Positions on the dentist element, 34
Purging (purge function), 213
Save settings, 89, 173, 186
Side holder, 34, 37
SiroSonic TL, 109
Speed, 106, 115, 129
Spray water quantity, 92
Sprayvit, 96, 98
Switch on/control, 56
Torque limitation, 115, 129
Treatment function, 112
Turbine, 100
Water heater, 173
Intended use, 12
Intensity, 109
Intermittent operation, 19
Intervals for care, cleaning, and disinfecting, 198
Intraoral camera, 21, 152, 153, 154, 233
K
Key color, 52
Keys with red and blue borders, 58
Keys, missing, 53, 168
L
LEDview Plus, 149
Load capacity
Assistant element, 135
Cup holder, 146
Dentist element, 81
Patient chair, 19
Tray, 145
Lock treatment center (HF surgery), 111
M
Main switch, 47
Maintenance deadline, 274
Maintenance log, 274
Maintenance Manual, 274, 275
Maintenance Service, 12
Manual measurement using a file clamp, 123
Manufacturer's address, 10
Massage function, 80, 86
Maximum load capacity
Assistant element, 135
Dentist element, 81
Patient chair, 19
Tray, 145
Media player, 161
Media quality, 17
Medical Product Log, 275
Message system of the amalgam separator, 258
MET Labs, 24
Metal oxide blasting device, 19
Microbiological test, 203
Middle button of the foot control, 59
Mixing tank, 195
Monitor, 152
Motor versions, 101
Motorized height adjustment of the dentist element, 83
Mouth rinsing position S, 71, 137, 182
Mucosal electrode, 118
N
NaCl, 91, 130
NaCl flow rate, 95, 130
NaCl pump, 93
O
Operating conditions, 27
Operating light, 136, 149
Original parts, 20
PPanoramic X-ray viewer, 148
Patient chair
Chair programs, 70, 77
Drive motors, 19
External device connector, 41
Fine adjustment, 75
Manual movement, 74
Massage function, 86
Dentsply Sirona Instructions for Use Treatment Center Axano Index 67 17 396 D3685 D3685.201.01.04.02 2023-06 295
Massage/Active lumbar support function, 80
Maximum load capacity, 19
Overview, 29
Patient-specific chair programs, 78
Power switch, 47
Safety switch, 64
Shock positioning, 77
Stop movement, 65
Velocity, 172
Patient monitor, 152
PC, 21, 159
PC control, 159
Sidexis 4, 159
Peristaltic pump, 93
Plastic surfaces, 205
Power consumption, 26
Power switch, 47
Program position of the dentist element, 172
Prolonged treatment, 238
Proportional valve, 100
Protection class, 26
Purge function, 213
R
Red and blue borders, 58
Relay, freely selectable, 87
RoHS Directive, 24
S
Safety checks, 274
Safety instructions, 16
Safety switch, 64
Saline solution pump, 93
Saliva ejector, 139, 243
Salt blasting device, 19
Sanitizing the water lines, 50, 263
Save settings, 89, 173, 186
Sediment container, 259
Self-contained water supply, 141
Setting functions, 168
Settings in the setup dialog, 168
Setup, 168
Shock positioning, 77, 84
Side instrument holder, 34, 37
Sidexis 4, 159
Sidexis 4 plugins, 68, 120
Sidexis 4 plugins, 78
SiroCam, 152, 233
SiroSonic TL ultrasonic handpiece, 109
SiroSonic TL, 109
Sivision, 152
Sivision video system, 152
Sivision View, 21, 233
Sivision View video system, 21, 233
Sivision View
ApexLocator distance display, 120
Patient-specific automatic headrest adjustment, 68
Patient-specific chair programs, 78
Slow travel, 75
Smart Delivery, 82
Smart Delivery motorized sliding track, 82
Smart Delivery sliding track, 82
Smart Touch user interface, 52, 187, 206
SmartLite Pro, 139
SmartLite Pro curing light, 139
Socket on external device connection, 41
Software version, 11
Sounds, 121
Spare parts, 276
Speed, 106, 115, 129
Speed of the patient chair, 172
Spray, 91
Spray aspirator, 138, 243
Spray water quantity, 92
Sprayvit, 96, 98
Sprayvit multifunctional syringe, 96
Standard wet suction with cuspidor valve, 195
Standardization of the ApexLocator, 118
Standards, 20, 24
Standby mode, 47
Standby switch, 47
Star key, 137
Index Dentsply Sirona Instructions for Use Treatment Center Axano 296 67 17 396 D3685 D3685.201.01.04.02 2023-06
Status bar, 55
Sterile operation, 58
Stop clip for the small suction hose, 209
Stop movement, 65
Storage conditions, 26
Suction handpieces, 138, 243
Suction hose adapter for the cuspidor, 241
Suction hoses, 238, 244
Suction system, 241
Adding cleaning agent, 185
Blasting device, 19
Cleaning, 238
Disinfection, 244
Filter, 244
Support arm, 145, 210
Surfaces, 205
Surgical light, 149
Surgical suction, 138, 139, 243
TTaking a photo, 155
Tap water, 141
Technical data, 26
Tempering
Sprayvit, 98
Tumbler filling, 181
Test ApexLocator, 118
Timer, 86, 137
Torque beep, 116, 129
Torque indicator, 116, 129
Torque limitation, 115, 129
Torque reverse function, 117, 130
Total count tester, 203
Touchscreen, 52
Transport conditions, 26
Travel speed of the patient chair, 172
Tray, 145, 210
Treatment function, 112
Treatment light, 149
Tumbler filling, 85, 136, 140, 181
Tumbler filling with automatic sensor control, 140
Tumbler heater, 181
Turbine, 100
Turbine control pressure, 192
Turbine hose, 236
U
Upholstery, 211
USB interface, 163
User interface, 187
User profile, 166
Using the last position memory function, 72
VVionex View, 159
Virtual function keys, 52
Voltage and current of the instrument light, 192
W
Warranty, 274
Water and air connection, 41
Water as coolant, 91
Water connection for external device, 41
Water heater for treatment water, 173
Water heater for tumbler filling, 181
Water quality, 17
Water unit
Amalgam separator, 255, 258
Cuspidor, 85, 140
Cuspidor bowl flushing, 85, 136
Cuspidor flushing , 141
Overview, 39
Sediment container, 259
Self-contained water supply, 141
Suction hose cleaning, 238, 241
Tumbler filling, 85, 136, 140, 181
Tumbler filling with automatic sensor control, 140
Wet suction device, 261
Water, microbiological test, 203
Wet suction device, 261
White balance for intraoral camera, 158
Wireless phones, 21
WLAN interface, 27
Dentsply Sirona Instructions for Use Treatment Center Axano Index 67 17 396 D3685 D3685.201.01.04.02 2023-06 297
X-ray viewer, 148
Index Dentsply Sirona Instructions for Use Treatment Center Axano 298 67 17 396 D3685 D3685.201.01.04.02 2023-06 X
We reserve the right to make any alterations which may be required due to technical improvements.
© SIRONA Dental Systems GmbH Sprache: englisch Printed in Germany D3685.201.01.04.02 2023-06
132 672
SIRONA Dental Systems GmbH
Fabrikstraße 31 64625 Bensheim Germany
www.dentsplysirona.com
Order No 67 17 396 D3685
Ä.-Nr.:


