
27 minute read
Feature: Restore old photos
from _Issue_15
by Hiba Dweib
Reader’s profile
Merging photos with graphic elements is not only great fun, it also happens to be the driving force behind this issue’s Reader’s Profile!
Advertisement
make yourself known!
If you would like to be featured in these pages, send us an email to pcr@ imagine-publishing. co.uk with a few lines about who you are and what sort of Photoshop work you do.
N
ina Ostensen-Hocevar has been using Photoshop for approximately four years, after a friend dazzled her with what he had created with the program. Although she had always had an interest in art, it was only when she began using Photoshop that she started creating images herself.
We caught up with Nina to discover more about her and her work.
What is your favourite Photoshop tool? At the moment I love brushes. I love creating my own brushes and integrating them into an image. This adds a spark to whatever I am creating. You can use them either in a very minimalist way or make a statement with them.
Do you have a favourite image-editing task? At the moment I am very much into creating new patterns – therefore I love deconstructing shapes and merging them into these new creations of mine. I also love mixing photography and graphics. What’s your favourite piece of work? I don’t think I have a favourite. Whenever I learn and create something new and different, I always think it’s much better than anything else I’ve done so far. I’m always upgrading my work. But if I had to pick something I’m most proud of, it would be a logo that I created for my DJ friend. People said I was crazy doing it all in Photoshop, but that’s what I know best, and I did it for a real person and not just for myself.
What inspires you? I get inspiration from simple things around me. Since I started with graphic design I am always looking for new things, whether they are from high street fashion, interior decorations or nature. layers and things going on. They just make it more pleasant to work.
Is there anything you would like to try? Lately I see a lot of Art Deco re-emerging. I would like to try and create (or maybe even re-create) some sort of Art Deco piece and make it look more modern. Very often, new emerging styles are pieces of an old form sprinkled with something new and modern – I will just try to be experimental.
What’s your most helpful Photoshop tip? Folders are great! They help you to get organised when you have lots and lots of To see more of Nina’s work, or get in contact with her, pay a visit to her website at www.ninocka.com
Image bReakdowN
How Nina created her Mask-eye image
“I wanted to create a dark and magical side of an eye – an eye that is dramatic and theatrical, almost like a mask. I have decorated the eye with a new shape-composition”
01 the eye source First I took a picture of my sister’s face with focus on one of her eyes. I created a new document and placed the picture on it. Then I used the Pen tool to crop out the eye. I copied and pasted it on a new layer. 02 eye work I tidied the eye by erasing some small bits left behind, and next I adjusted the colours and contrast before trying out different filters to get a painted feel. For the background I used black to really emphasise the eye.

Notes | DoN’T Be ShY, geT IN Touch AND reVeAL A BIT ABouT Your WorkINg PrAcTIceS To oTher reADerS
Kim (opposite page) “This summer I organised a small photoshoot using a colleague as a model. I took many pics, so I could choose the best for my next Photoshop task. I wanted to play with composition and colour, and have the image use as few colours as possible.”

Flower Skull (above)
“Skulls are quite ‘in’ these days, but I wanted something other than just dry bones – so I decorated a skull and bones with fl owers. I kept it simple because just using the fl owers is enough to make a statement.”
03 Final touches To decorate the eye I used a shape, deconstructed it, added a purple-toblack gradient and used the Bevel and Emboss layer style to make it stand out. My last task was to make a composition out of shapes to form a whole new pattern.

Spring and Autumn
“I wanted to show the seasons through the life of a butterfl y. In winter we have a cocoon, spring is full of pastel colours, in summer the colours are stronger and in autumn everything is laid to rest with blue, brown and washed-out yellows. I did most of it in Photoshop but imported trees, leaves, etc from Illustrator.”
Two Sides
“Over recent years my sister and I have kept on hearing how much we look or do not look alike, so I wanted people to stop guessing and decide once and for all! I have put half of my face and half of her face into one.”
Energise Juice
“This was to advertise healthy drinks. This is one of three fl yers I made. I wanted it to look healthy and vibrant and full of energy, so chose colours that are ‘fruity’. I show how the goodness fi lls up the brain.”
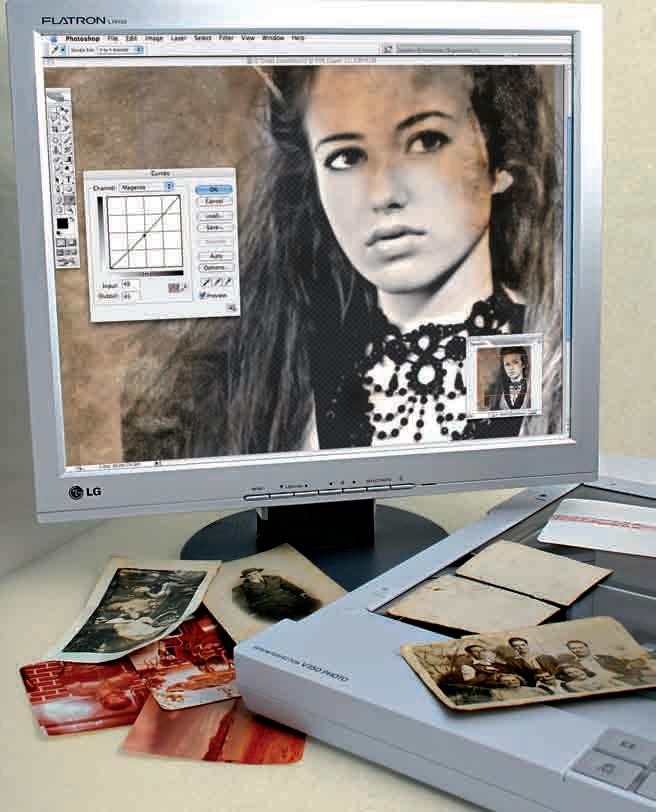

Rescue your old, damaged photographs and make them as sharp and full of life as the day they were taken…




ost of us have collections of M old family photos hoarded away. And even though we try to protect them from damage, over time they can become discoloured, worn and torn.
Now there’s no excuse for keeping them hidden in a box at the back of your cupboard, because they can be returned to their full glory using Photoshop’s powerful restoration capabilities. But before you can begin clicking away in before you can begin clicking away in Photoshop, cleaning up your photos, they Photoshop, cleaning up your photos, they need to be in a digital format which is need to be in a digital format which is done through the magic of scanning. done through the magic of scanning.
When scanning old photos there are When scanning old photos there are many handy techniques to get the best many handy techniques to get the best quality from your images. These will be quality from your images. These will be revealed in our step-by-step tutorials on revealed in our step-by-step tutorials on how to tackle the most common problems how to tackle the most common problems that occur with old photos. Most scanners that occur with old photos. Most scanners come with software, but getting your come with software, but getting your photos on-screen and ready to repair is photos on-screen and ready to repair is just as easily done using Photoshop’s just as easily done using Photoshop’s Import function in the File menu. Import function in the File menu. Photoshop can take you all the way from Photoshop can take you all the way from scanning to the fi nal restored image. scanning to the fi nal restored image.
Software that comes with scanners Software that comes with scanners normally features adjustments such normally features adjustments such as dust removal and colour restoration as dust removal and colour restoration which generally do a good job. However, which generally do a good job. However, Photoshop is not only excellent when it Photoshop is not only excellent when it
ost of us have collections of old family photos hoarded also excels in its restoration capabilities, And even though we giving you greater control over its try to protect them from comes to producing artistic projects, it also excels in its restoration capabilities, giving you greater control over its adjustment settings. Therefore our main focus will be on restoring your photographs using Photoshop rather than the software that comes with your scanner. Remember that both stages of the process are equally important. There’s no point in selecting the correct settings to achieve optimum scan quality and then doing a poor retouching job in Photoshop.
Selecting your scanner
The fi rst thing to consider when buying a scanner is the type of documents you will scan most often. If you have lots of old, damaged photographs stashed away in need of restoration, it’s best to choose a high quality scanner offering a better resolution. If it’s old negatives and slides you want to scan, select a model with a transparent media adaptor.
Modern scanners are easy to connect to your computer. They’re also becoming more slimline all the time and feature software that’s straightforward to install. If you’ve looked at scanner specs you may have seen they feature two numbers describing their resolution, for example 1200dpi x 2400dpi. The fi rst, smaller number refers to optical resolution, or how many colour samples are taken per inch. The second number is the enhanced resolution that can be achieved by manipulating the scanner’s software. You only need focus on the fi rst one, as it specifi es the true resolution in dots per inch.
The main scanner types available are fl atbed, photo, drum and slide. Drum scanners are the most expensive and best quality but are mostly used in the publishing industry. Some models are in the region of £30,000 and not ideal for home users. Flatbed scanners are made up of glass through which a bright light is shone and a moving sensor which reads the image according to the amount of refl ected light.
Photo scanners did have a reputation for producing scans of unimpressive resolution, but recent models are much improved. The old photos we’ve used in this feature were scanned


Assessing the damage
Can a photograph be beyond repair?
Photoshop works wonders on a variety of photographic problems such as colour casts, scratches, stains, dust and large rips. After scanning your image, assess the faults onscreen then plan your renovation. If the photo is in pieces and a large section is missing, it may be irreparable. But if the missing area is part of the background and doesn’t have much detail, crafty cloning techniques and a bit of imagination can help fill the gaps.
How successful you are also depends on the time you invest. You need to spend more than a few minutes piecing together an old photo torn into many pieces. If your photo has several problems, rectifying them could be time-consuming. However, in addition to repairing problems such as large creases, simple adjustments of contrast using the Levels feature can work wonders.
Photoshop retouching techniques aren’t just limited to photos. This painted photo on thick board had broken into pieces, but with a little care and attention it was restored to its original state.
Remove dust and scratches
Give your old damaged photos a digital dusting…
One of the most common problems that appear over time in photographs is dust and scratches. Photoshop comes equipped with the perfect tools for you to tackle this with surprisingly little e ort. This black-and-white photo was scanned in at 300dpi with Color Photo selected as the Document Type to keep as much of the detail as possible. Levels were used when we rst entered Photoshop to enhance the contrast of the image before moving on to clone away the dust, stains and cracks. As with any image enhancements, it’s a good idea to make a copy of the image to protect it in case you make a mistake. Using our techniques you’ll be able to revive your own photos and make them look as good as the day they were captured…


using a photo scanner and the results were of a high quality, making this the most recommended type of scanner for damaged photos in affordability and quality. Epson makes some very affordable but high quality photo scanners which are ideal for restoration projects.
Many scanners now come with adaptors letting you scan transparent media such as slides and negatives – see the boxout on page 22 for more on these. Another feature worth looking at when choosing a scanner, especially if you plan to scan slides or negatives, is dynamic range. This is the ratio of the lightest signal a scanner can measure to the darkest signal. A higher dynamic range just means the scanner captures the areas of brightness and darkness better – and this tends to indicate that it’s pricier. Some scanner models such as the Epson Perfection 4490, have a special feature called DIGITAL ICE Technology to reduce surface defects from scanned images, and are the ideal choice for repairing transparencies.


The Epson Perfection 4490 has DIGITAL ICE Technology which reduces dust and scratches on slides and negatives
Scanning fundamentals
After placing the image face down, aligned straight on the scanner bed, ensure you select the correct document type to achieve the highest quality. Even if you’re restoring old black-and-white photos, it’s worth setting the Document Type to Color Photo when scanning to make sure maximum detail is retained. The same applies to black-and-white slides or negatives which can later be converted into greyscale using Photoshop’s Mode menu.
Resolution is the key term when it comes to scanning. It relates to the number of pixels or dots sampled from the image. Resolution is measured in dots per inch (dpi) and the higher the setting, the greater the quality of your image. A higher setting also
01 Straighten it up Open ‘dust and scratches. jpg’ from the disc. As you can’t rotate the background layer, right-click the background layer thumbnail and hit Layer From Background. In Photoshop we straightened the photo using Free Transform to rotate it, then used the Rectangular Marquee tool to select just the inner photo area and chose Image>Crop.
05 Take a closer look Zoom in to the image and choose the Clone tool. Click the arrow beside the Brush title in the Options bar and move the Hardness slider to its minimum setting. Reduce the opacity to 50% and check Sample All Layers. Now click the Create a New Layer icon in the Layers palette – this is where you’ll do your cloning.
02 Retain the detail There are many small and large scratches on the image. You can reduce the small ones with the Dust and Scratches lter, but it can reduce the detail, making areas look slightly blurred. Therefore pick the Lasso tool, enter a Feather value of 10 and select Add to Selection in the top Options bar. 03 Select dusty background areas Now you can go around the areas that have the most detail in them. This is usually not the background, but areas such as faces. We chose to select these areas here. The feather will also soften the edge. Choose Select>Inverse in order to select the part of the photograph you will apply the lter to. 04 Adjust your fi lter settings In Filter> Noise>Dust and Scratches, set Amount to 100%, Radius to 2 pixels and Threshold to 1 pixel. Turn the Preview on and o to see the e ect of the lter on certain areas of the image. If it’s too severe increase Threshold or reduce Radius to 1. Hit OK to see your specks and scratches fade.
Layer it up
We do recommend you save a copy of your image in case you make a mistake when cloning. However, it’s also a good idea to create a new layer to carry out your cloning on so you have your original document protected. If you do this, you need to check Sample All Layers in the top Options bar when the Clone tool is selected. This is so you are using all the data. the data.

06 Tools to turn back time Alt/Optionclick to select the source area you want to copy. Now click on the scratch or dust to paint over it with the sample you just selected. For seamless cloning try to sample regularly and from either side of a scratch or speck. Prevent it from looking too smudgy by avoiding large strokes and building up using single clicks. 07 Reduce brush size for detailed areas The Dust and Scratches lter reduces smaller defects, but larger cracks will still need removing with the Clone tool. For areas with more detail, zoom in and reduce your brush size in the Options bar, but for less detailed background areas use a larger brush. Use this method to erase all trace of scratches and specks. 08 Convert the image Choose Image>Mode>Grayscale. You will be asked if you want to discard the colour information – click OK. This will transform your cleaned up and despeckled image into black and white. When you save your photograph, if saving as a JPEG also make sure that you choose the highest quality.
means you’ll be able to enlarge your means you’ll be able to enlarge your image later. For example, if you image later. For example, if you scan an image with sides of eight inches scan an image with sides of eight inches at 100dpi, it will be made up of 800 dots. at 100dpi, it will be made up of 800 dots. So when you set the output size and So when you set the output size and resolution, think whether you’ll need resolution, think whether you’ll need to enlarge it when you print. If you’re to enlarge it when you print. If you’re scanning damaged photos, resolution scanning damaged photos, resolution should be set no lower than 300dpi and should be set no lower than 300dpi and they should be saved using the highest they should be saved using the highest quality setting. When scanning old quality setting. When scanning old photos at such high resolution, they will be large fi les so make sure you have enough space to store them. If you plan to scan a large quantity of images, perhaps it’s worth investing in an external hard drive to keep them all on.
It’s also useful to hit Preview fi rst to see a quick, low-res overview of your image on-screen before you commit it to scan, in case of problems – eg being placed at an angle on the scan bed.


Most scanning software lets you crop the region scanned at the Preview stage using the mouse to mark out the selection area. When you hit Scan, only this segment of the screen is scanned, which saves having to crop it later in Photoshop. If you’re carrying out other adjustments in the scanning software such as dust removal, the results usually don’t show in the Preview window – only when the fi nal image appears.
Filter away the fl aws
Now you’ve created a digital copy of your old photo you can get to work on it in Photoshop. Once you take your scan
Your scanner should come with software for getting images into a digital format, but these options are also in Photoshop into the program you can clean up the imperfections using the app’s tools and fi lters. If the image is covered in dust specks and scratches, Photoshop has a fi lter perfectly suited to getting rid of them – the Dust and Scratches fi lter. Although it does a great job of reducing them, it also has a blurring effect that reduces detail. You should therefore use it carefully or only apply it to areas with detail that can afford to be lost.
Filters such as Unsharp Mask bring detail back and enhance images. Again, this should be applied with care to avoid over-sharpening, which can look just as
bad as blurring. Another highly useful fi lter which many people avoid because they don’t understand it is the Custom fi lter which also helps bring back detail and is good at fi xing underexposed images. See page 23 where we use this fi lter after fi xing a photo’s colour cast to create a high-pass version of the image to overlay, adding more contrast.
Whether photos have dust and scratches, colour casts or tears, Photoshop can rescue them with its lters and tools
Bring back colour and contrast
Not all Photoshop’s restoration powers lie in its fi lter selection. Colour casts are a common curse of old photos. Colour tinges are easily removed from photos with some crafty tweaking using Curves. By selecting the image’s problem colour channel in the Curves dialog window, adding a few points to the line on the graph and moving them slightly, the original vibrant colours are brought back as if by magic.


01 Timesaving scanning techniques Open ‘ripped.jpg’ from the disc and right/Ctrlclick the background layer thumbnail in the Layers palette. Choose Layer From Background. Select one half with the Marquee tool. Choose Layer>New>Layer via Cut, placing them on independent layers. If they are too large, scan them separately and copy and paste them both into a new larger document.


Piecing together a ripped photograph ripped photograph
Use our digital method of reattaching ripped photos; it’s far better than using sticky tape…
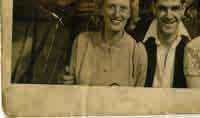
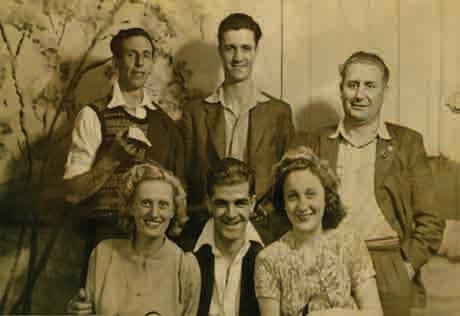
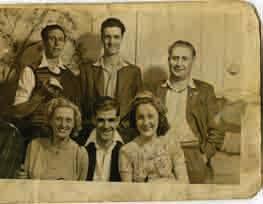
Some severely damaged photographs are beyond repair. For example, if your photograph has a large chunk missing it can be di cult to make up what was there before, unless it is a fairly plain area of landscape or at colour that you are cloning. A photograph such as the one on the left, however, is easily pieced together in Photoshop. The tear is quite a clean one and there are no sections missing, making it even more straightforward to x. Although using the Clone tool is very simple, there are a few handy techniques to make sure you produce a seamless area where the two halves meet. For example, by checking Aligned in the Options bar the clone source moves in accordance with where your cursor is placed, creating the perfect cover-up.
02 Delete unwanted areas Click on one of the layer thumbnails and pick the Magic Wand tool. Click on the white background area around the edge of the photograph and hit Delete. Repeat this for the other layer so you have two halves of the photograph on separate layers with no white around them. 03 All in the layer order When piecing together parts of a photo check that it displays according to the way it was ripped. Experiment with the layer order by dragging one above the other in the Layers palette to see which ts best. In this case the layer with the lower half of the photo should be higher in the Layers palette. 04 Precise alignment If the halves don’t align, select one of the layers, choose If the halves don’t Edit>Free Transform and rotate it. Use the Move tool and arrow keys to align the photographs precisely and then select both layers in the Layers precisely and then select both layers in the Layers palette by Shift-clicking. Choose Layer>Merge Layers. Create a new layer for your cloning. Move it to the top of the Layers palette.
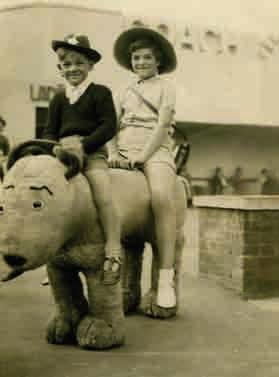
05 Clone on a separate layer Zoom in and pick the Clone tool. Set Size to 45 pixels, Opacity to 50%, check Sample All Layers and Aligned. Hold Alt/Option while clicking one side of the tear. This is your sample area. Now click the tear, painting over it with the sample. Click rather than stroke to avoid smudging. 06 Keep on cloning Keep repeating this method of cloning for both sides of the tear and build it up until you’ve concealed the rip. For fairly at areas such as the animal’s fur you can use a larger brush, whereas a smaller brush is needed to clone in areas such as the edges. 07 Scrub out the scratches We used the same method as in the previous tutorial, using the Dust and Scratches lter and Clone tool to remove scratches and creases. Although it was tricky, the Clone tool was also used to paint over the red mark. After cropping it is up to you whether you choose Image>Mode> Grayscale or keep the original colouring.
Enhancing the details
Poor quality scans may not be because of your scanning technique, but rather the original photo. To bring back detail to blurred faces, use the Lasso tool with a Feather value of 10 to select them. Choose Filter>Sharpen> Unsharp Mask. Enter an Amount of 100%, Radius of 1 and Threshold of 1.
Photoshop’s tools allow a higher level of Photoshop’s tools allow a higher level of control than those in scanning software. control than those in scanning software. One useful tool to enhance old photos’ One useful tool to enhance old photos’ faded colours is Levels. A histogram faded colours is Levels. A histogram is displayed in the centre of the Levels is displayed in the centre of the Levels dialog. The left slider is for shadows and dialog. The left slider is for shadows and the right one is for highlights. Dragging the right one is for highlights. Dragging them towards the middle to meet the point them towards the middle to meet the point where the histogram raises, enhances where the histogram raises, enhances an image’s shadow and highlight areas. an image’s shadow and highlight areas. The contrast can then be improved by The contrast can then be improved by experimenting with the middle slider.

Attack of the clones
A familiar problem in old photos is creases or tears where photo collections have been moved from place to place. Don’t dismiss
these as irreparable, even if they’re ripped in half. Photoshop’s Clone tool enables you to repaint over a damaged area with a nearby sample from the image, making it miraculously disappear. By doing this you’re sampling the detail and colour of an area that’s intact and using it to cover a damaged section. This is also handy for removing unwanted objects and even attaching pieces of a ripped photo. To use the tool, hold down Alt/Option while clicking the source point you want to sample from, then click in the problem area to paint over it with your sample.
You can customise how the Clone tool works in the Options bar. If working on a multi-layered image, checking Sample All Layers means your source is taken from all the document’s layers. For your sample points to update according to where your cursor is, check Aligned. areas, you may have to try many times, and this is therefore an indispensable tool offering a high level of control.

Previewing a scan gives a speedy, low-res example of your image, then use the Marquee to crop/select the area to scan


Scanning slides and negatives
Apply the scanning and restoration techniques you’ve used for your old photographs to the original negative fi lm and slides
Developments in scanning technology mean the quality of scanned slides and negatives is impressive. However, a severely scratched transparency can be challenging due to its small size. Scanners can be transformed in seconds, as attaching transparent media adaptors is very simple, but this type of model can be more expensive. Most include a holder that transparencies are inserted into and placed on the scanner bed. Some of the latest even feature automatic film loaders where film is inserted into the top of the scanner then fed into the scanner bed.
When selecting a model to scan negatives, check it has a resolution high enough to capture the right number of pixels if you want to enlarge the scanned negatives to print. A high dynamic range is also vital when scanning transparencies to capture shadows and highlights accurately. After scanning, save your scanned negatives as TIFFs. You can then apply the same restoration techniques as to photos. Adjust the resolution to give an appropriate file size in pixels, and for scans for print, multiply the print size in inches by 300 to give the size in pixels, eg for a 6 x 4-inch print you need 1800 x 1200 pixels.
Many scanners can now handle slides and negatives
You want the areas of the image you’ve repaired to be as unnoticeable as possible, so a softer, more realistic effect is essential. This is easy by making sure your brush size is suitable and the brush’s hardness is on a minimum setting. A delicate effect can also be created by reducing the opacity in the Options bar. Once you’ve fi nished your cloning and adjustments, it’s also important to save the document on a high quality setting or all your hard work will be wasted.
Make use of the History feature
When retouching old photos you’ll carry out many enhancement techniques and experiment with a selection of tools and settings. It’s therefore a good idea to back up your image and work on adjustment layers when applying adjustments such as Curves or Levels. This means your changes are made on a separate layer, keeping your original scan intact.
When cloning to cover up marks and tears, it’s also worth doing this on a separate layer. One of the most essential tools when carrying out operations like this is the History function and multiple undo capabilities. The History palette has a record of all your actions. By clicking one of them you revert to an earlier stage in the restoration process. When using the Clone tool to cover up marks on detailed

This shows a crease and marks being cloned away using the Clone tool
Do it yourself
Many companies offer ‘professional’ photo repair services, but the methods they use are no more expert than the techniques we’ve shown here. Some of them may not even accept severely damaged images which we know can be repaired if you’re familiar with Photoshop’s tool and fi lters. All you need is a scanner, Photoshop and some time to invest in restoring your worse-for-wear photos to make them sharp, shiny and new. The beauty of fi xing old photos using Photoshop is you now have a digital copy of a pristine-looking image that you can print out as many times as you like on high-quality photo paper for your friends and family to enjoy.


