The wetlands, creeks and remnant grasslands of Hobsons Bay are important habitat for native plants and animals – and some of them need your help. Locally indigenous plants in your garden create an extension of habitat and food resources. Some species, such as the Greenish Grass-dart, may take up residence in your garden. Other species, like the Superb Fairywren, might benefit from a brief visit.
You can grow your own native plants from seed. That way you can be sure that your plants are of local provenance and well-suited to the conditions. Growing plants from seed is also economical – especially if you collect your own. Collecting seed makes us pay attention to the life cycles of our native plants – it is a lesson in nature!
REMEMBER
• You can collect seed from your garden
seed collection
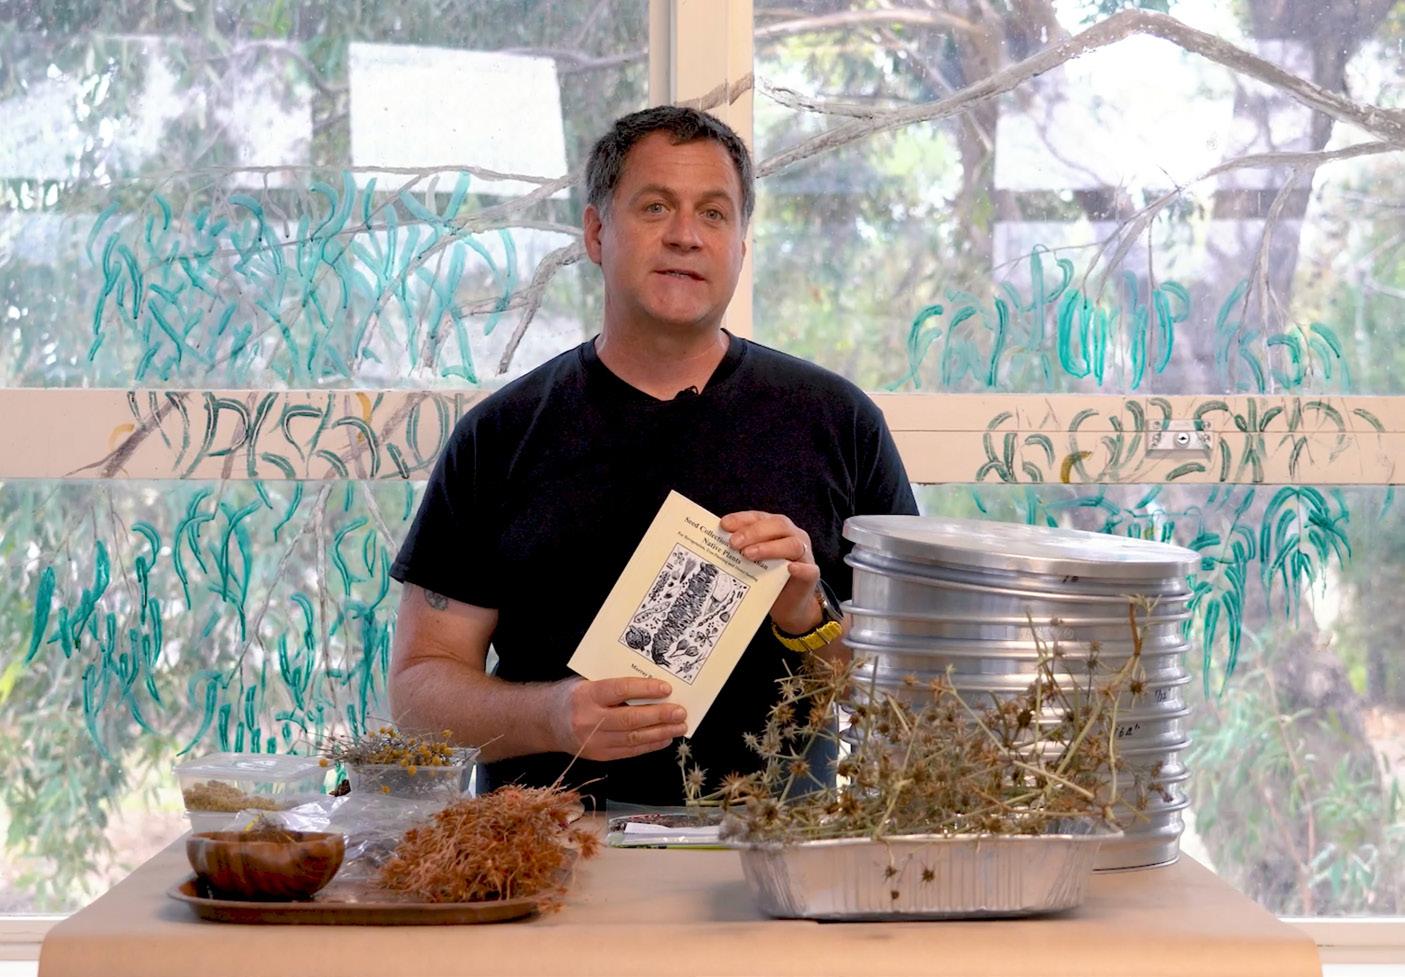
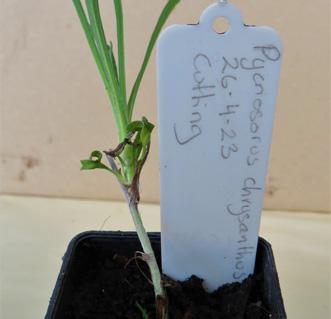
Seed collection from locally indigenous plants for the home garden in Hobsons Bay
WHAT DO I NEED?
• Plant identification guide
• Paper bags
• Collection labels
• Clean secateurs
• Carry tubs
WHEN SHOULD I COLLECT?
Seeds are produced after flowers have been pollinated. If you notice your plants in flower, then check frequently to see if seeds are forming. Only ripe seeds should be collected – they will look firm and plump, and may start to fall from the plant.
The Rule of Thumb – ripe seed will easily come away from the plant when it is lightly brushed by a fingertip.
Tip: aim to collect dry seed. Avoid wet and windy days.
GET COLLECTING!
Temporarily place your seed in a paper bag. Use one bag for each species on each collection occasion.
If you are collecting cones, pods, bunches of seedheads or seeds from prickly species, it may be easier to use a collection tub or bucket.
Tip: To prevent mould, allow your seeds to air-dry before you clean and package them for storage.
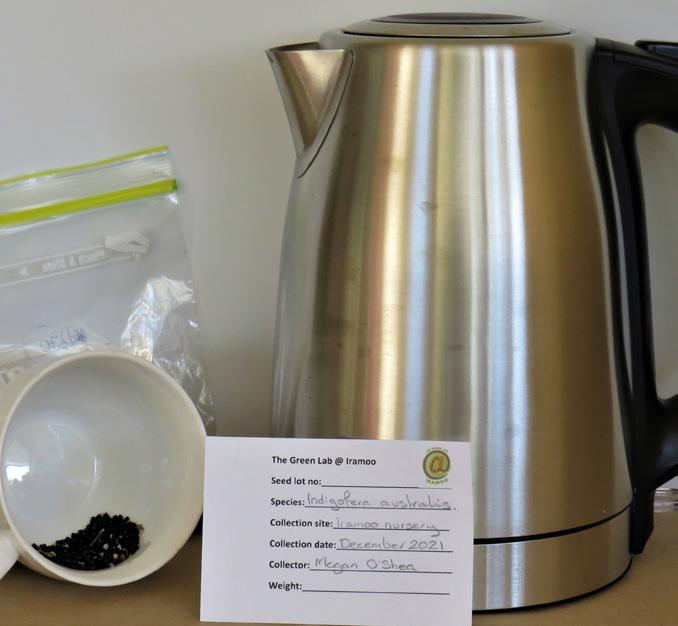
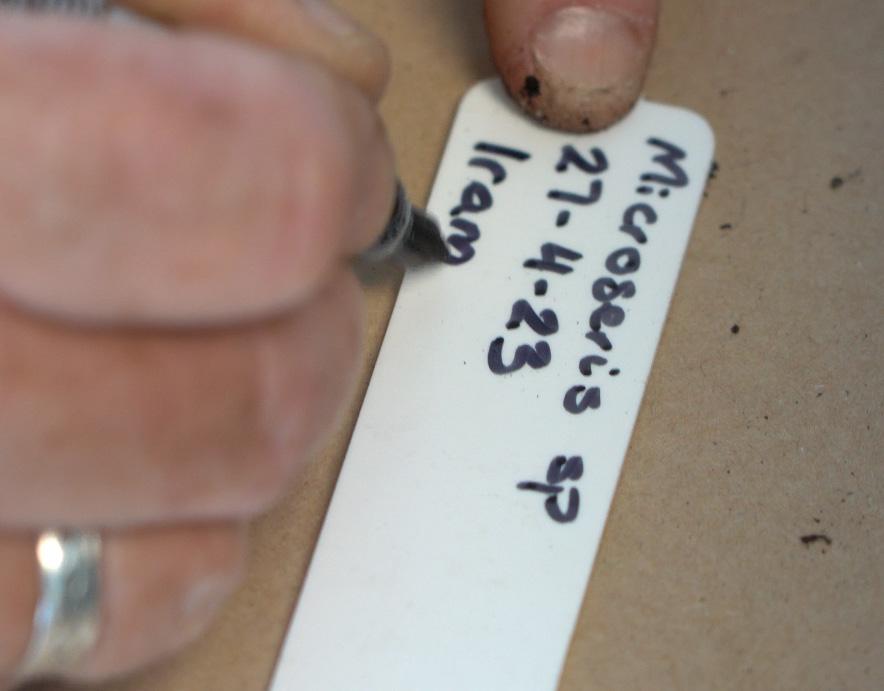
LABEL, LABEL, LABEL
Insert a collection label in the bag with the seeds. It can be transferred to the final packaging once the seed has been cleaned. A collection label should include the following:
• Scientific name of plant
• Date of collection
• Collection location
• Name of collector
You could also record the number of parent plants and the weight of cleaned seed.
• Ask before collecting from other people’s garden/property
• Do not collect seed from parks and reserves.
Tip: buy starter plants from a local native plant nursery – they will provide your seed source
FURTHER INFORMATION
R. Murray – Seed Collection of Australian Native Plants
WHAT TO COLLECT?
Pods, cones, capsules, nuts and berries. Seeds come in a variety of packages. Here are some seed collecting examples:
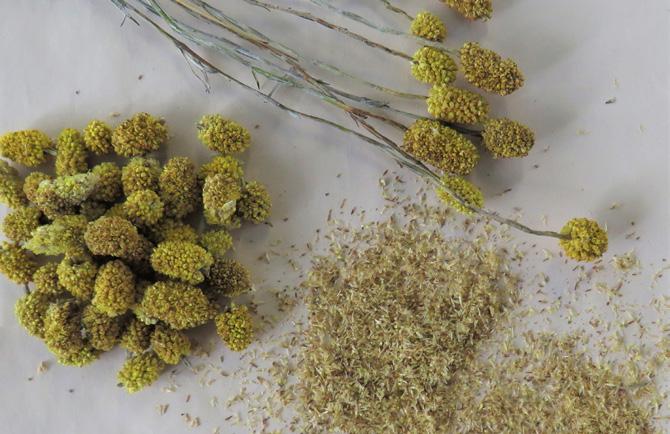
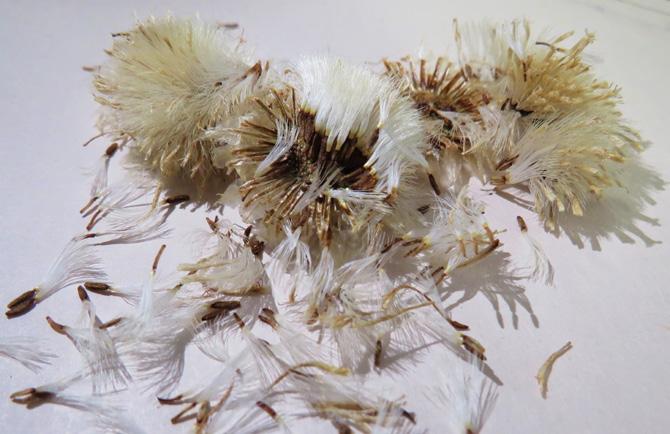
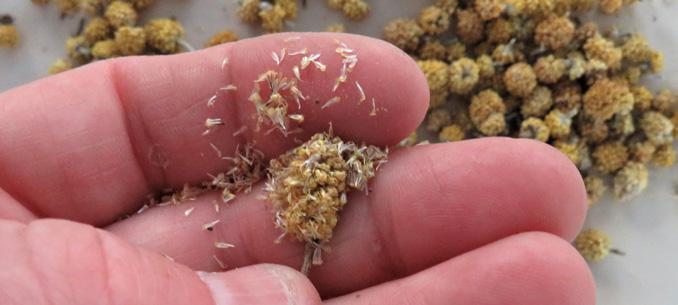
COLLECTING FROM DAISIES
Daisies with compact flowerheads require a firm squeeze and roll between the fingers
The flowerhead will crumble if the seed is ripe
Bunches of flowerheads can be trimmed from the plant or crumbled seed can be collected into a paper bag.
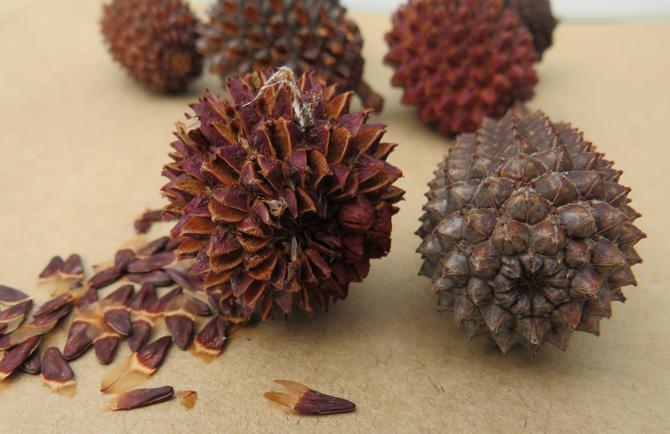
COLLECTING FROM CONES
Remove whole Drooping She-oak cones by hand or using secateurs
Leave them in a warm dry place for the valves to slowly open and release the seeds.
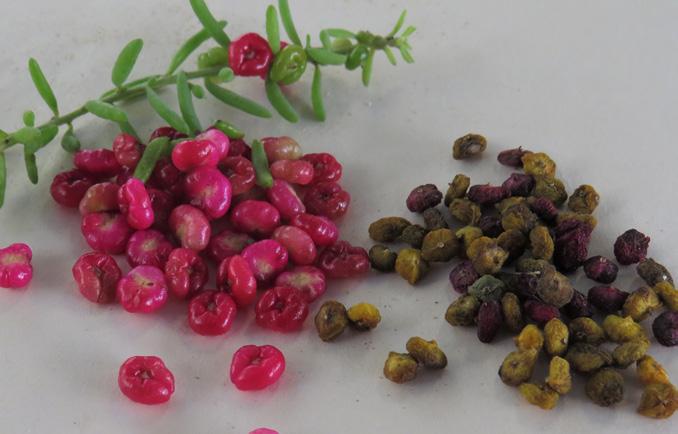
COLLECTING FROM BERRIES
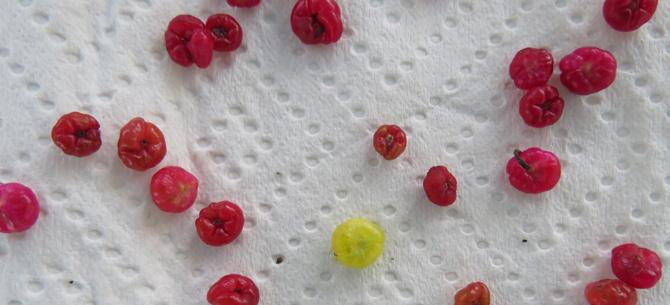
Pick ripe red or yellow berries from Ruby Saltbush
Berries can also be shaken off into a collection tray under the plant
To prevent mould, spread berries on a tray to dry.
COLLECTING FROM DAISIES
Use the Rule of Thumb to determine if the seed is ripe on daisies with open flowerheads
Pluck seed or remove the whole flowerhead from Basalt Podolepis.
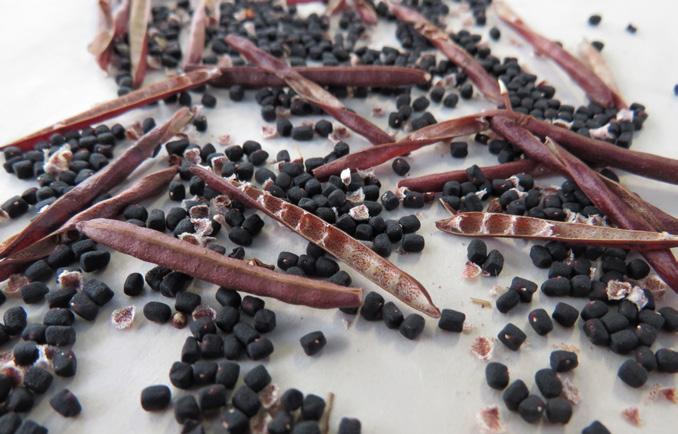
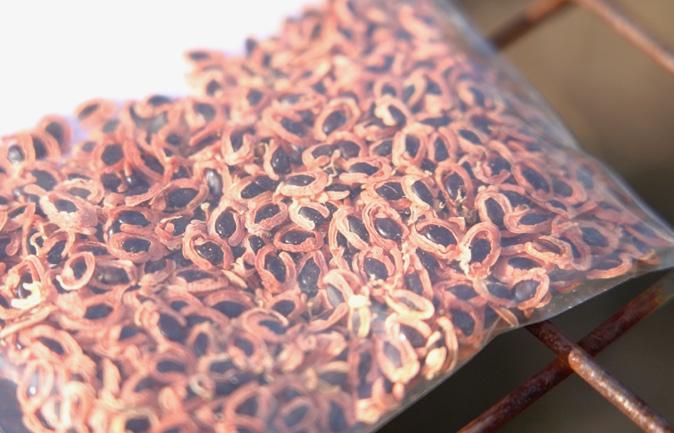
COLLECTING FROM PODS
Austral Indigo seed pods turn a bronze colour and dry out as they develop
Ripe seeds are hard and black
Collect in December when pods are starting to split
Whole pods can be collected (and processed later) or place a collection tarp under the tree.
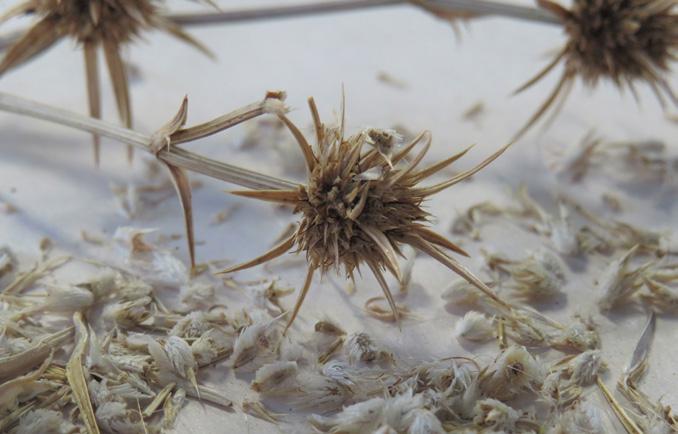
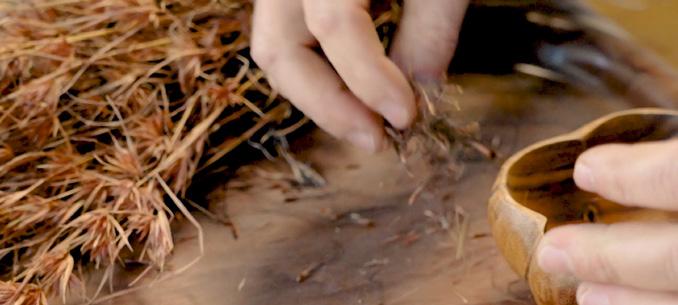
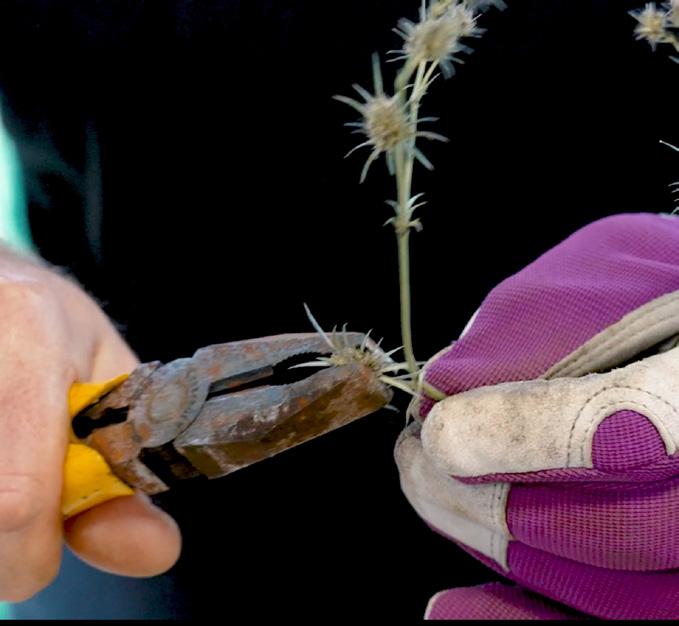
COLLECTING FROM PRICKLY PLANTS
The seeds of the Blue Devil are ripe when the entire flower stem has dried, turned brown and is starting to come away from the base of the plant
Using secateurs, prune whole flower stems into a tub or bucket.
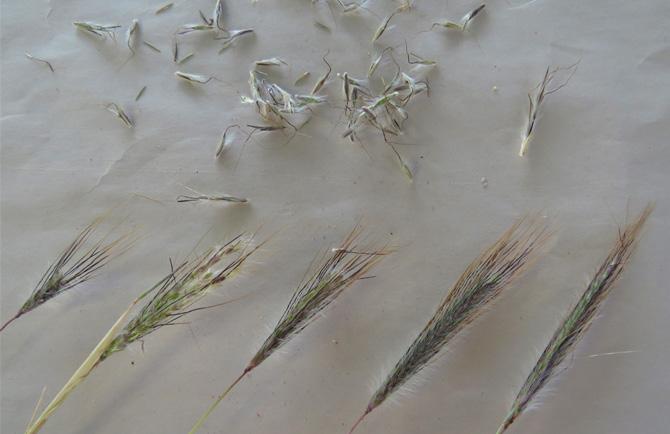
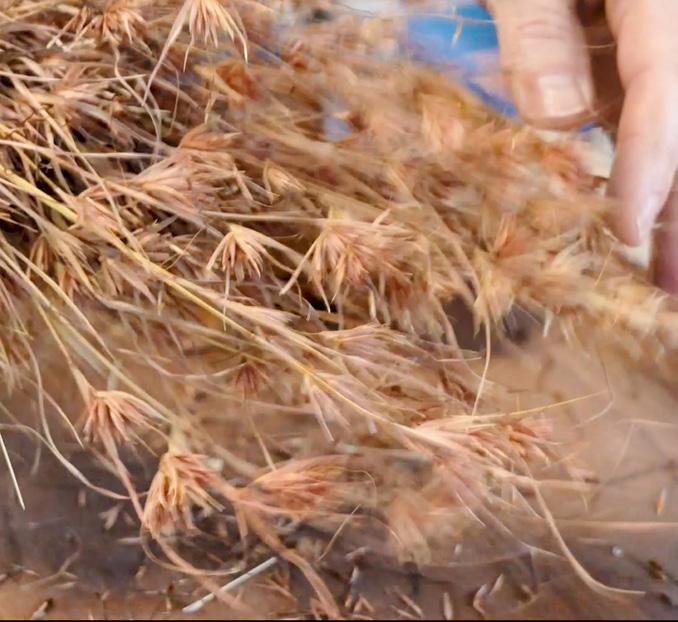
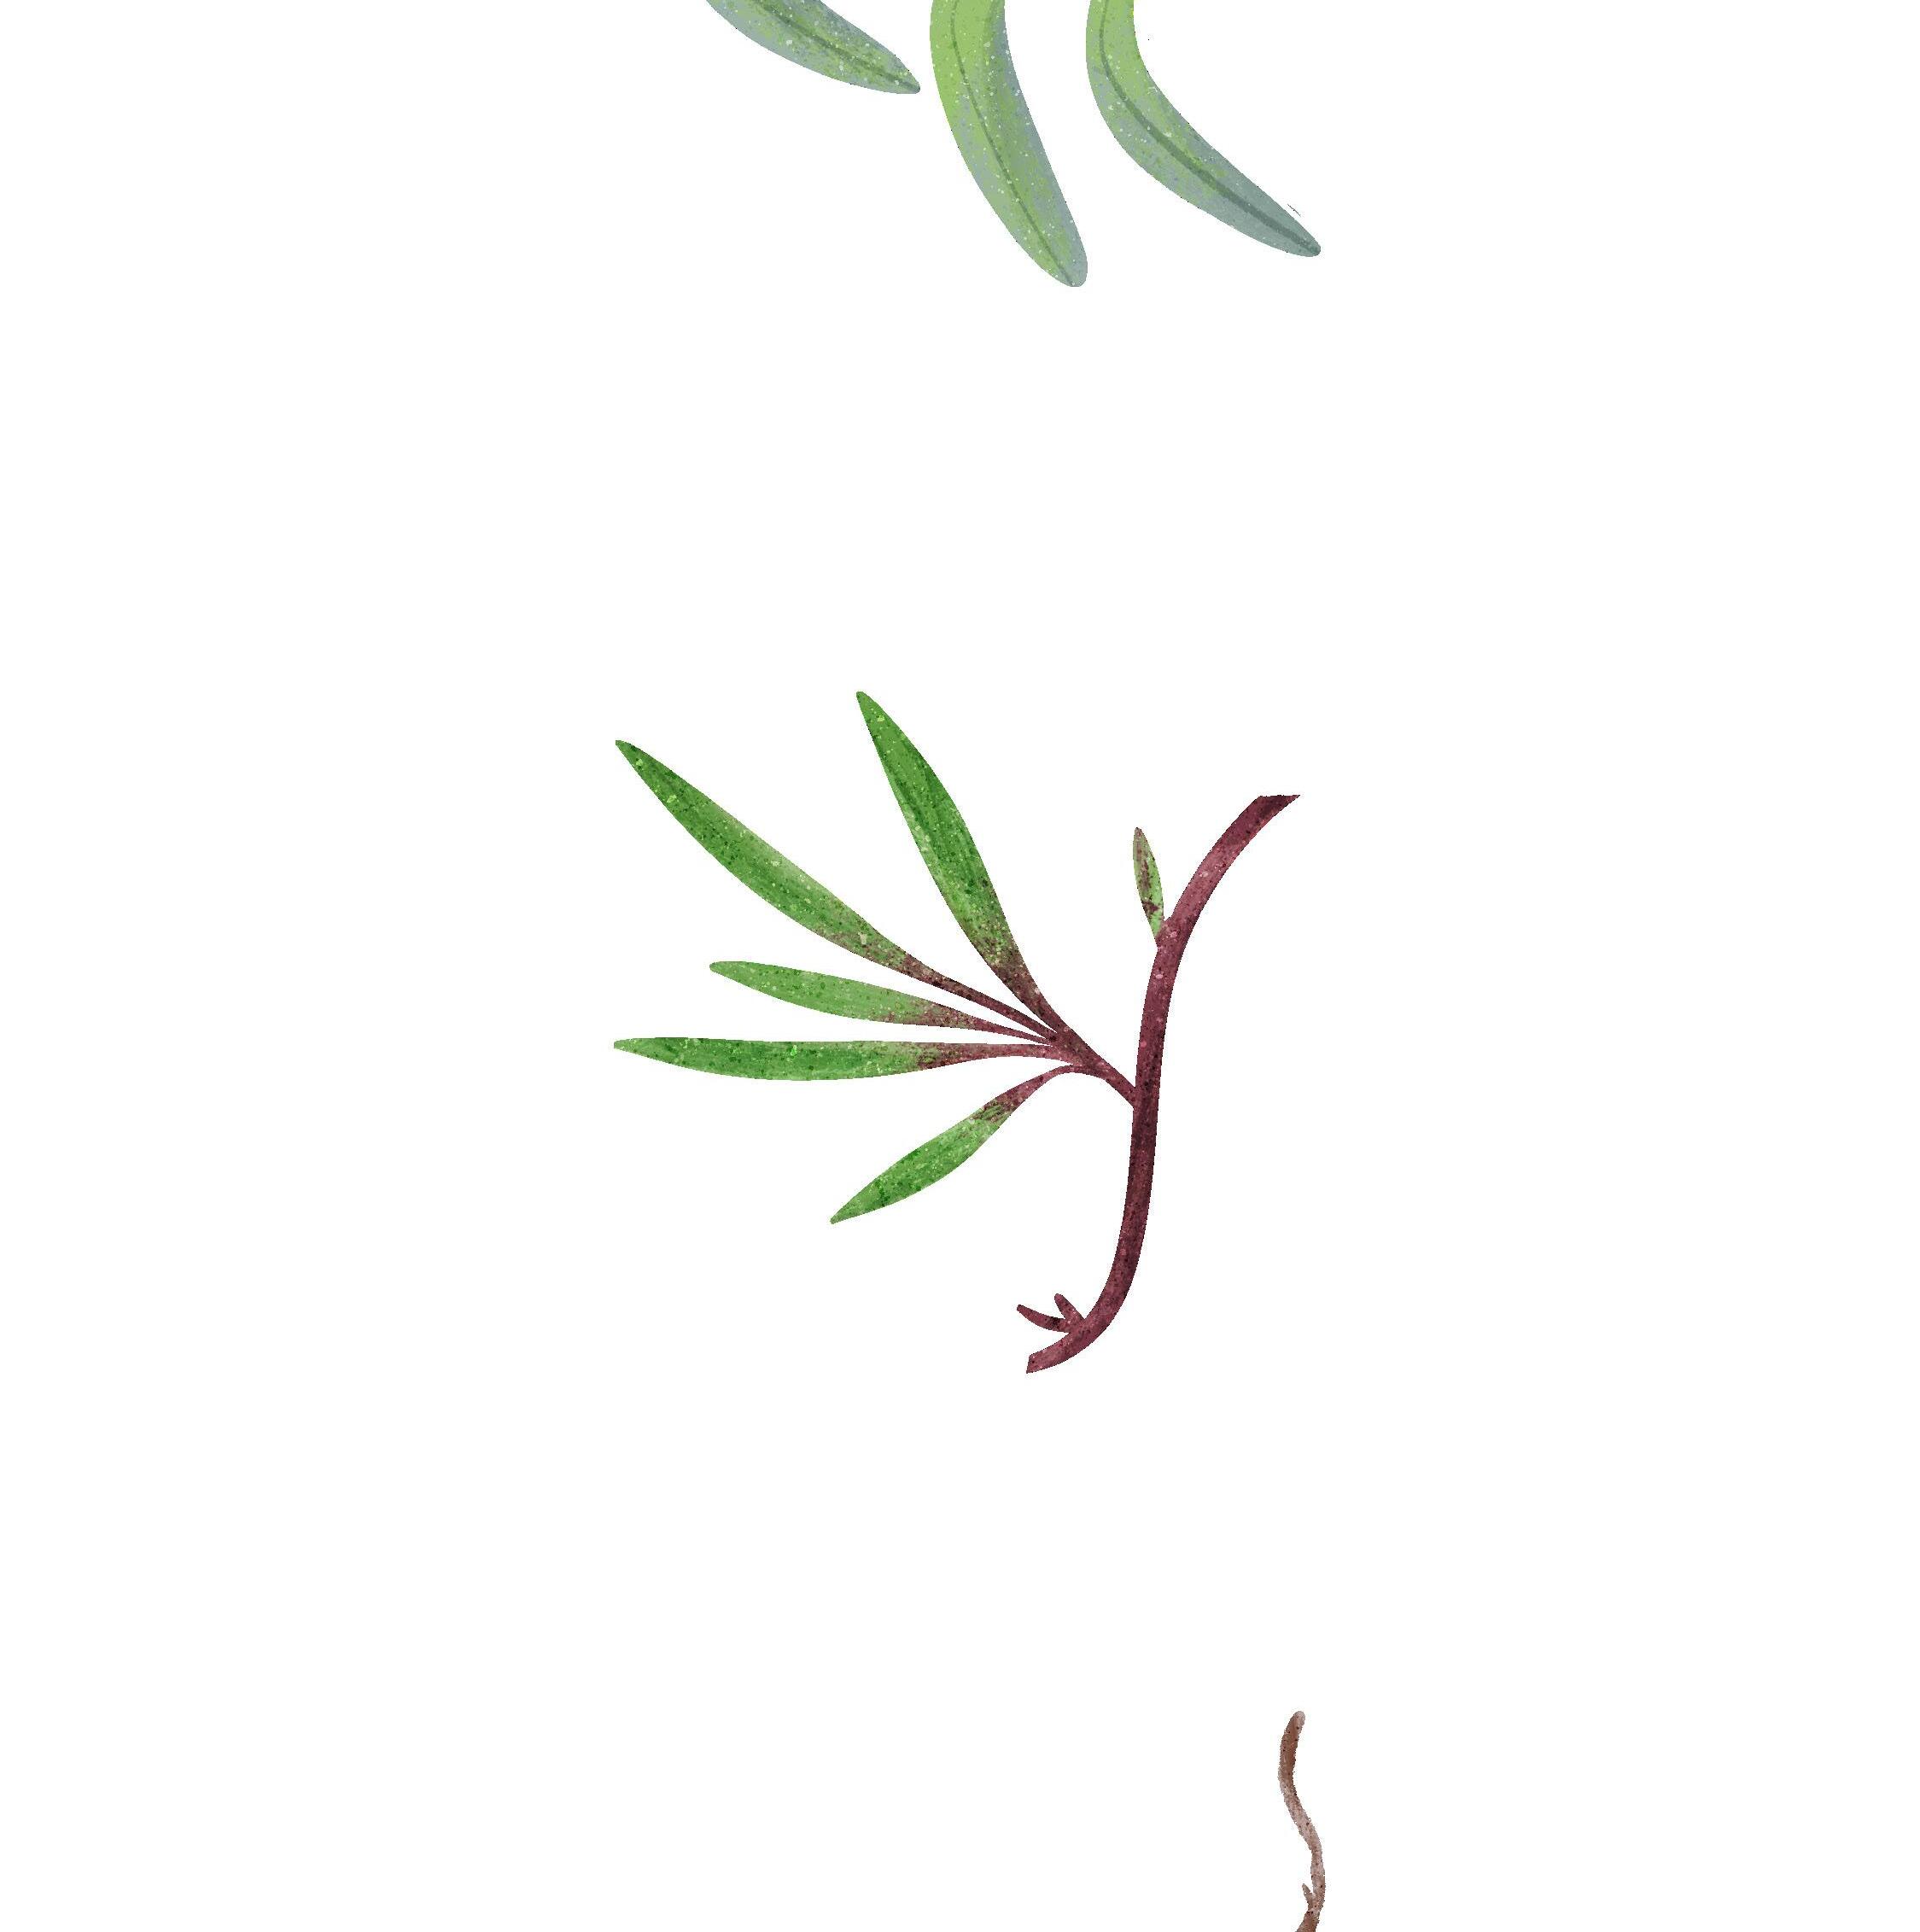
COLLECTING FROM GRASSES
Run a closed hand up the flowering stem of Silky Blue-grass
Ripe seeds will come away in your hand.
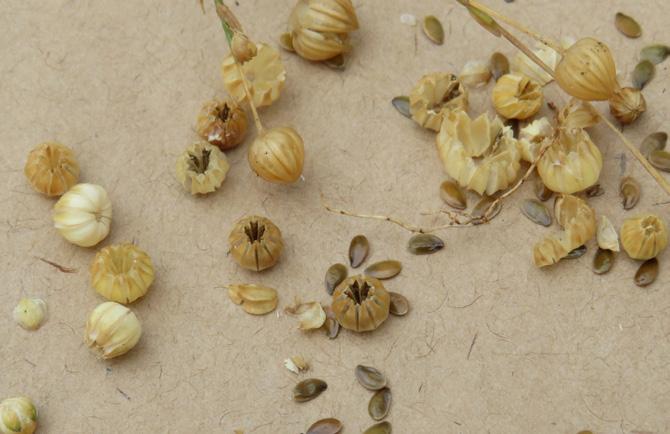
COLLECTING FROM CAPSULES
The capsules of Native Flax turn papery and straw-coloured as they develop
Ripe seeds are shiny and brown
Seed can be collected when the capsules start to open – but be quick!
Remove whole capsules or stems into a paper bag.
STORING SEEDS FOR HABITAT GARDENS
Your habitat garden is a haven for local wildlife. There could be Hover Flies visiting the Austral Stork’s Bill, and White-browed Scrub-wrens nesting in the Small-leaved Clematis. So, what’s the next step? Perhaps you have room for some more Golden Billy Buttons or maybe the Austral Indigo will work better in a slightly different location.
If you have collected seed from your habitat garden, you can use it as a backup source to grow replacement plants, experiment with planting locations in the garden, and be creative with your planting design. But you need to clean and store the seed, so that it remains viable for future use.
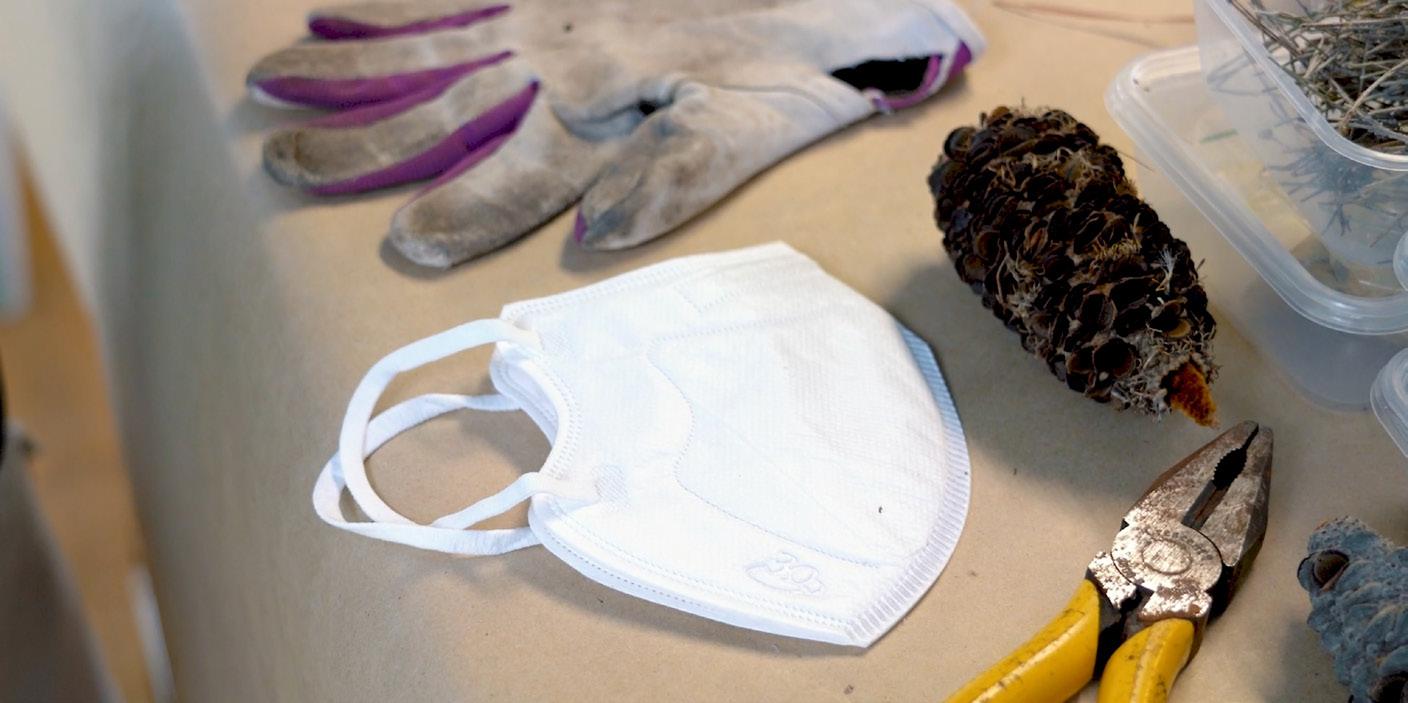
STAY SAFE
Seed cleaning can be dusty work, so it is best to wear a mask. As some fruits contain toxins, you should also wear a pair of waterproof gloves.
seed cleaning & storage
Cleaning and storage of seed from indigenous plants in Hobsons Bay
WHAT DO I NEED?
• Airtight containers or zip-lock bags
• Trays
• Sieves
• Paper towel
DRY SEED IS GOOD SEED
To avoid mould, dry your seed before packaging it for storage. Leave the seed in a paper bag or spread on a tray for a few days to air dry.
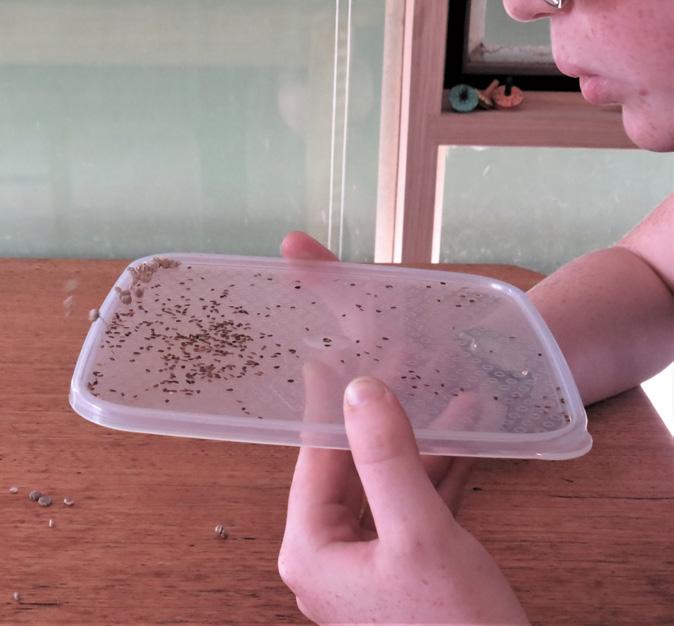
CLEAN YOUR SEEDS
There are five techniques that are often used to clean seed:
• Sieving
• Drying
• Washing
• Winnowing
• Threshing
Many species will not require much cleaning or drying.
SEED PACKAGING
Seeds should be stored in airtight containers, such as a screw-top jar. Zip-lock bags are good space-savers.
STORAGE
The viability of seeds differs among the species – some seeds can last for years, whereas others need to be sown within a few months.
Seed viability will be maximised with proper storage. Keep your packaged seed out of direct sunlight in a dry location that has a relatively stable temperature. Avoid locations, such as tin garden sheds, that can experience large temperature fluctuations over short periods of time.
MONITOR
Periodically check your stored seed. If there is any evidence of mould or fungus, remove and dispose of the affected seed.
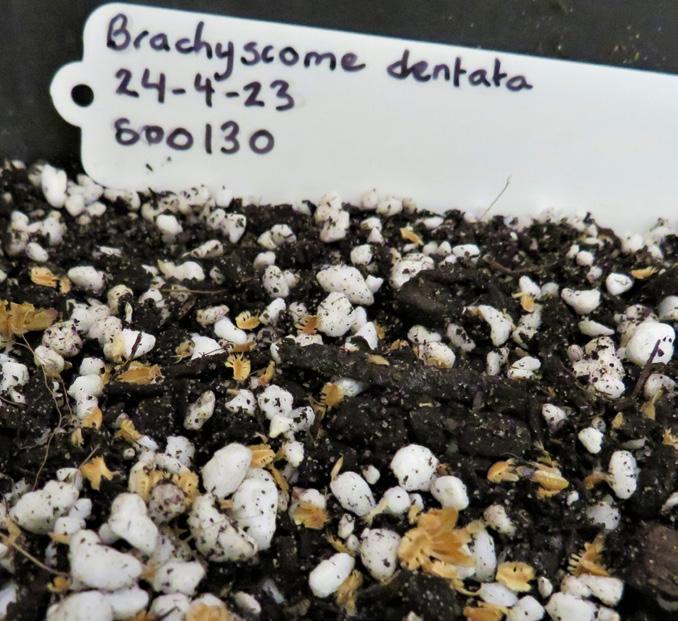
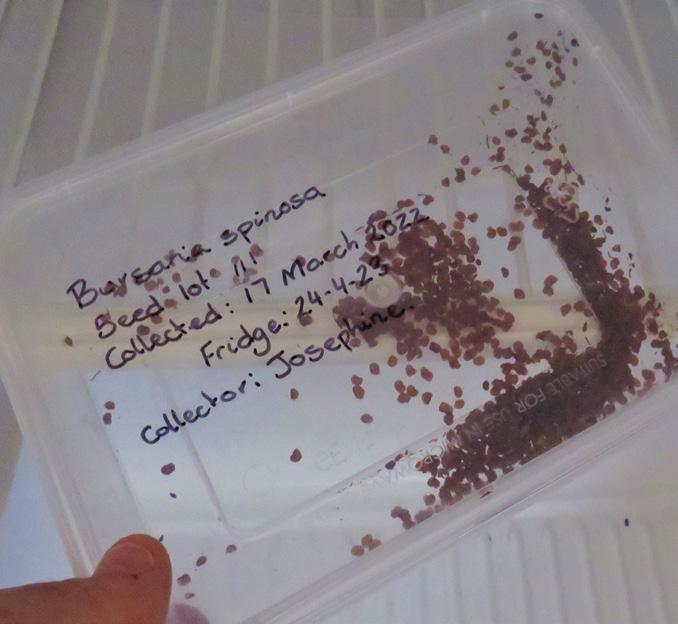
Don’t forget to include the collection label with your seeds inside the container or bag.
FURTHER INFORMATION
R. Murray – Seed Collection of Australian Native Plants
Cobwebs or piles of dust at the bottom of the bag/container indicate that insects may be eating your seeds. Treat infestations by tipping seeds into a large sealable container and inserting a pest strip for a few days. The seed can then be returned to its normal packaging.
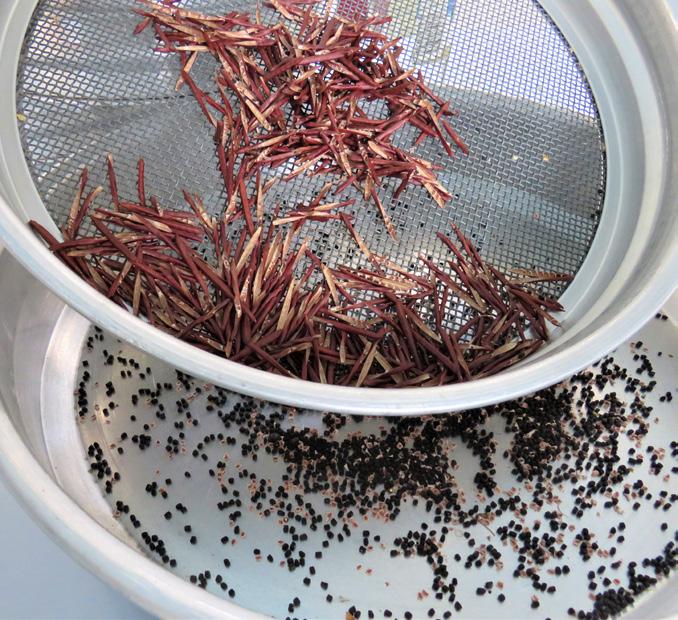
SIEVING
Sieve Austral Indigo seed to separate the pods from the seed.
cleaning techniques
Sometimes you might use a combination of techniques:
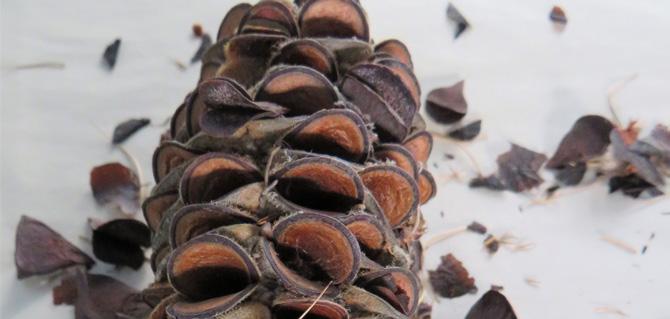
DRYING
Leave Silver Banksia cones in warm position on a tray. The valves will slowly open to release the papery seeds.
Air-dry the small fleshy fruit of Ruby Salt-bush on paper towel. To prevent mould, ensure that it is properly dry and insert a sachet of desiccant when packaging.
THRESHING
Gently shake or beat bunches of Kangaroo Grass to dislodge seeds.
THRESHING
Squeeze the flowers of Lemon Beauty-heads and Blue Devils to release the seeds.
WINNOWING
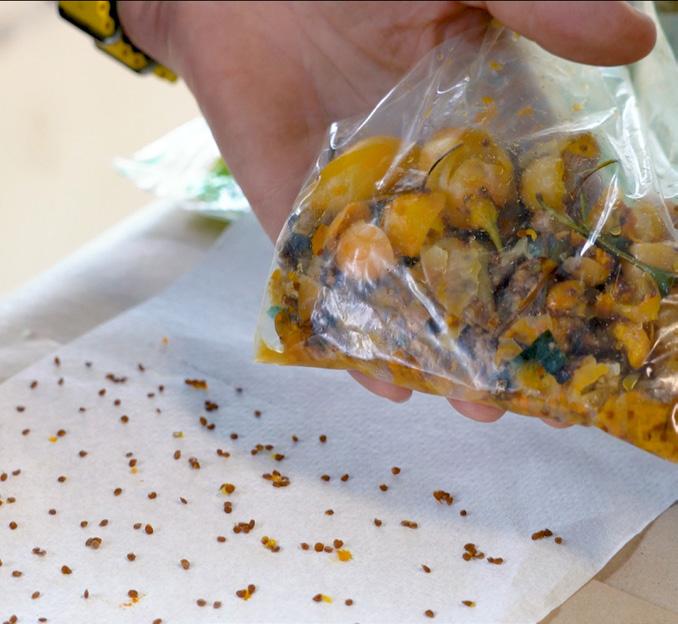
Gently blow across Native flax seed to remove the light chaff from the heavier seed.
WASHING
Put the harvested fruit of Kangaroo Apple in a zip-lock bag to compost in the sun. After a few days, wash the seed from the pulp and dry before packaging.
SOWING SEEDS FOR HABITAT
Growing native plants from seed is a rewarding experience. It is exciting to see the first seed leaves (cotyledons) emerging and to study how the true leaves develop to form the mature plant that you are familiar with. It is an experience that will help to build your plant identification skills. Once you have grown your own plants from seed, you will start to notice self-sown seedlings in your garden.
Other benefits associated with growing plants from seed:
• It is cheaper than purchasing mature plants
• Numerous plants can be grown (excess can be shared with friends and neighbours)
• There is certainty regarding the origin and form of the parent plants
STAY SAFE
Seed propagation and potting mixes are dusty and can harbour Legionella bacteria. Stay safe by:
Propagation from seed
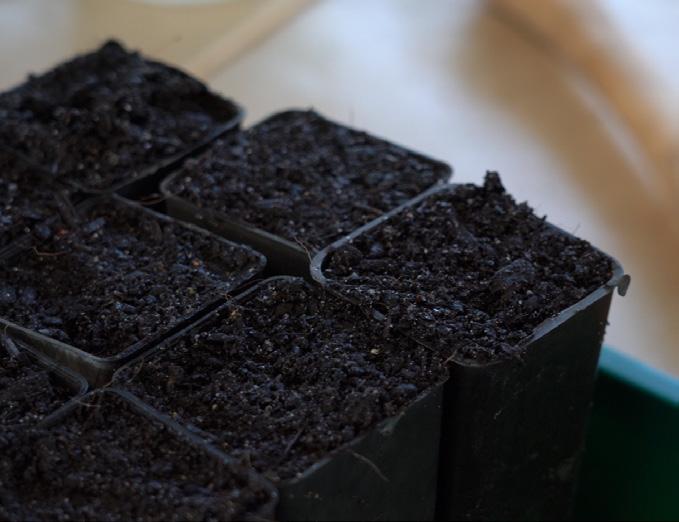
Seed propagation of locally indigenous plants for the home garden in Hobsons Bay
Autumn and spring are best for sowing, as most seeds germinate at around 20°C. Species specific information can be found in the book: Growing Australian Native Plants from Seed by Ralph Murray.
WHAT SEED TREATMENTS ARE REQUIRED?
Many species do not require any treatment prior to sowing. However, some species do require special treatments to trigger germination or to encourage more vigorous germination. Turn over for examples of the following treatments:
• After-ripening
• Cold scarification
PREPARING TO SOW
Brush debris from re-usable seed raising trays and sterilise them in a bleach solution (one part bleach: nine parts water) for 10 minutes. Rinse before use.
• Sieve large woody chunks from the potting mix. Use the finer particles to fill the seed raising tray to about two thirds depth.
Tip: You could also add pearlite to the mix to assist with aeration and drainage.
SOWING SEEDS
Spread seeds across the seed raising medium. Aim for evenly spread seeds that are spaced 3-5mm apart so that they have room to grow.
Gently press down so that the seeds are in close contact with the potting medium.
Many wildflower species have very small seed and therefore only need to be sown on the surface. For species with larger seeds, the sow depth should be roughly equivalent to the width of the seed.
Lightly water the tray so that the seed raising medium is damp but ensuring that the seed is not dislodged or washed away.
• Following safety instructions on the packaging
• Damping down potting media to reduce airborne dust
• Wearing a dust mask
• Washing hands after use
• Heat scarification
• Smoke treatment
WAITING FOR GERMINATION
Place trays in a warm position that is out of the wind. A mini greenhouse is ideal. Avoid positions that are in direct sunlight.
It is important that the seeds do not dry out. Mist regularly to keep the seed raising media damp but not wet.
Most seeds will germinate within six weeks, although it may be quicker for some species and much longer for others.
AFTER-RIPENING
Better germination results will be achieved if Kangaroo Grass is put into storage for 12 months after harvest.
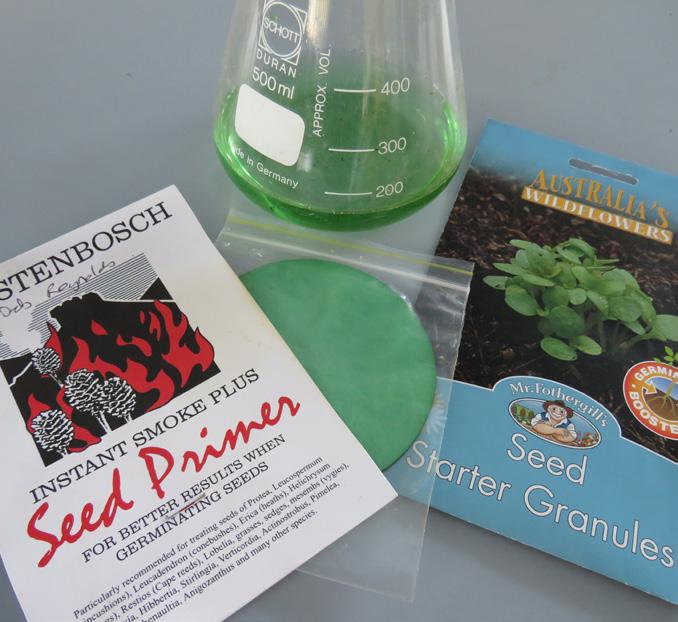
SMOKE TREATMENT
Ruby Saltbush seed may germinate more readily if they are treated with smoke water. Smoke granules and smoke infused paper can be purchased – follow the directions on the label. The chemicals in smoke may trigger germination for a range of native plants.
seed treatment
HEAT SCARIFICATION
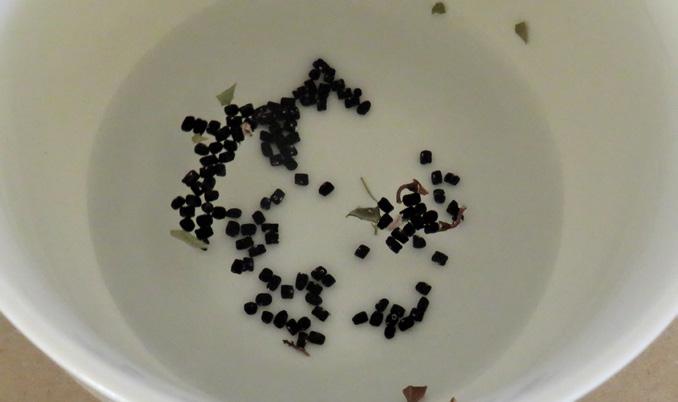
Pour near-boiling water over Austral Indigo seeds and leave them to soak for a few hours before sowing. Many of the hard-coated peas (including Acacias) require this treatment.
NO PRE-TREATMENT
Lobe-seed Daisy can be directly sown onto the seed raising media without pre-treatment.
COLD SCARIFICATION
Germination of Sweet Bursaria seed is triggered by cold conditions. One month prior to sowing, place the seed in a container in the refrigerator.
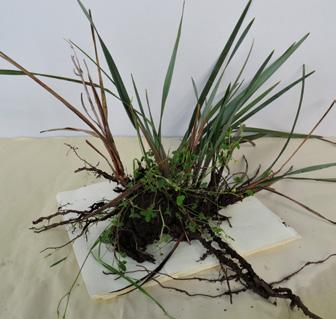
EXPANDING YOUR HABITAT GARDEN
Who is visiting your habitat garden? Do the Pobblebonks frogs need more ground foliage to hide in? Or do the Fantailed Cuckoos need more shrubs for foraging?
Now that you have started, expanding your habitat garden is easy. You can grow you own locally indigenous plants from seeds harvested from your garden. If you miss the seed collection period or have a plant that is difficult to grow from seed, you can use
tip Propagation
Growing locally indigenous plants from tips and division for the home garden in Hobsons Bay
WHAT DO I NEED?
• Trowel
• Secateurs
• Bucket with water
• Rooting hormone gel
• Premium native potting media
• Coarse sand or perlite
• Dibber
• Plant tubes
• Plant labels
• Propagation house (can be homemade).
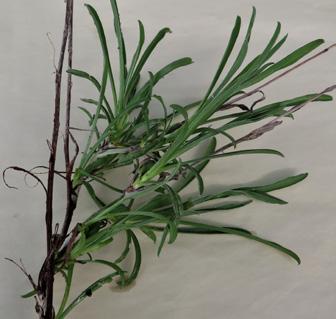
VEGETATIVE PROPAGATION
TIPS
Vegetative propagation produces clones of the parent plant – they have exactly the same set of genes. To maintain genetic diversity, collect propagation material from a range of parents.
Not all cuttings will strike. Remove any dead or unhealthy material to prevent problems with pathogens.
Successful vegetative propagation may be dependent on a range of factors, including time of year, age of parent material or the mix of potting media. Use a trial-anderror approach to find out which methods work best for your plants.
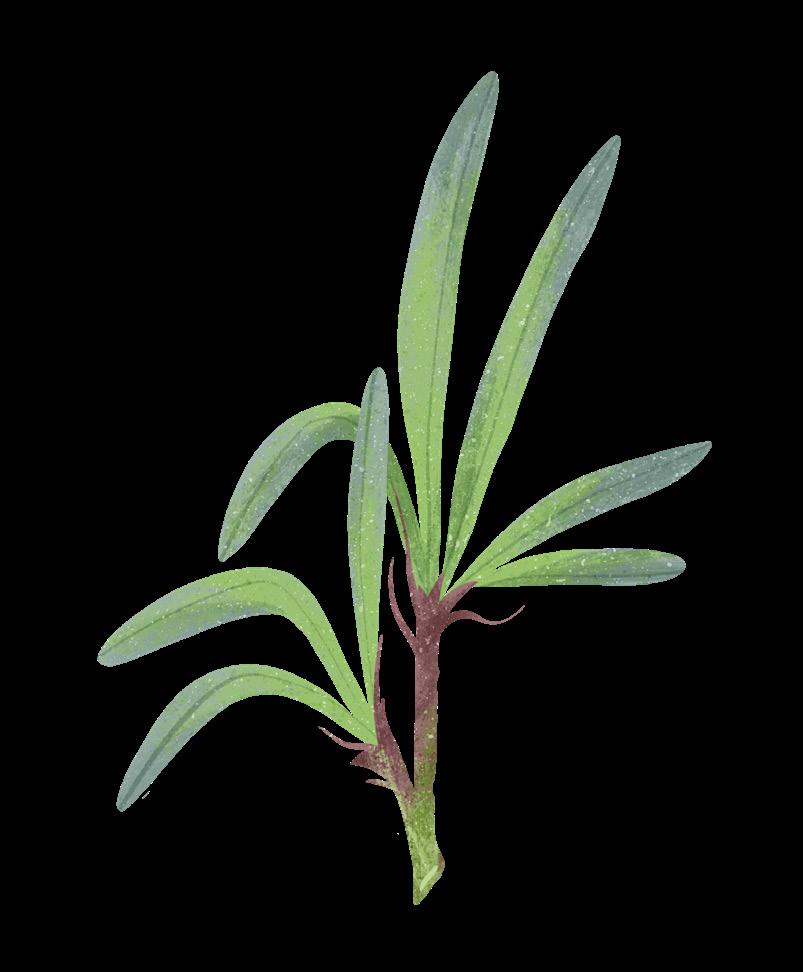
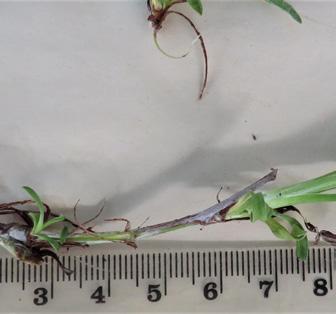
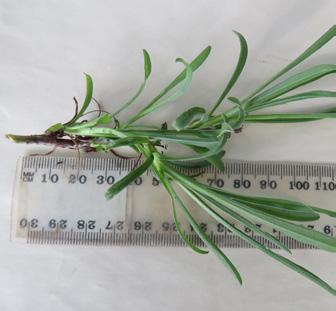
STRIKE CUTTINGS
When: Late summer and autumn
What: One-year old stems that are firm and without flowers
How:
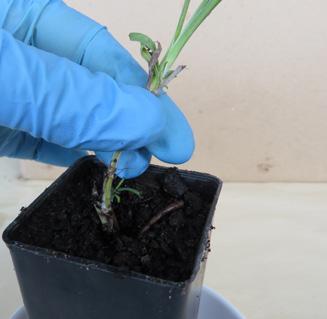
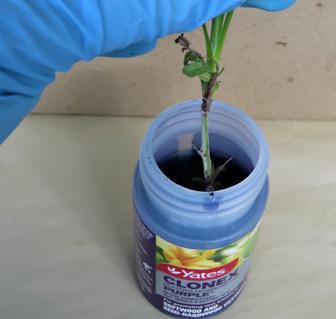
• Cut 50-75mm stem sections at a 45° angle below the leaf node
• Place cuttings in water to prevent dehydration before potting
• Fill tubes or pots with a 1:1 mix of native potting media and perlite (or coarse sand)
• Water and then make holes in the potting media (1cm wide, 2cm deep)
• Remove lower leaves from stem
• Dip 1cm of the cutting base into rooting hormone gel
• Carefully insert cuttings into holes (avoid knocking off gel)
• Press potting media around cuttings
• Place pots in a warm and humid position
• Water the following day and keep moist until roots form.
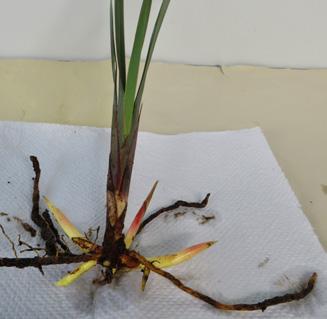
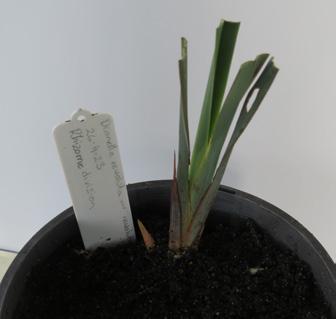
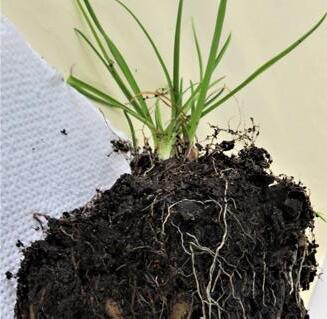
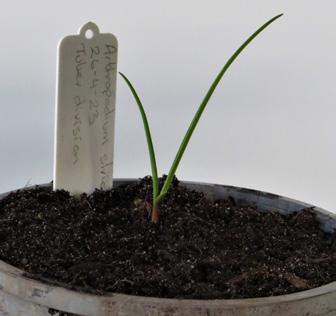
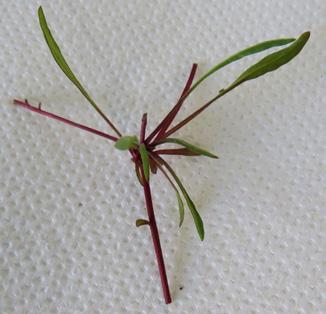
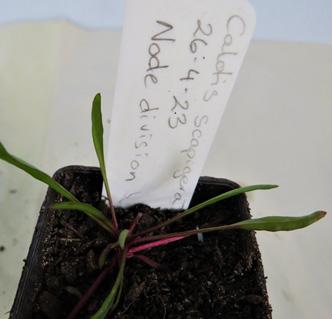
RHIZOME DIVISIONS
When: Spring and autumn
What: Underground stems with leaf and root shoots
How:
• Water the parent plant to soften the soil
• Dig up a clump of the parent plant
• Select rhizome sections that have two nodes and cut them from the clump
• Plant the rhizome just below the surface of damp potting media
• Cut the leaf in half to reduce water loss
• Water with seaweed solution
• Place in a warm position and keep moist.
ROOTING NODES
When: Spring and autumn
What: Runners with leaf and root nodes
How:
• Cut the stem between the nodes
• Gently press nodes into damp premium native potting media
• Water lightly
• Place in a warm position and keep moist.
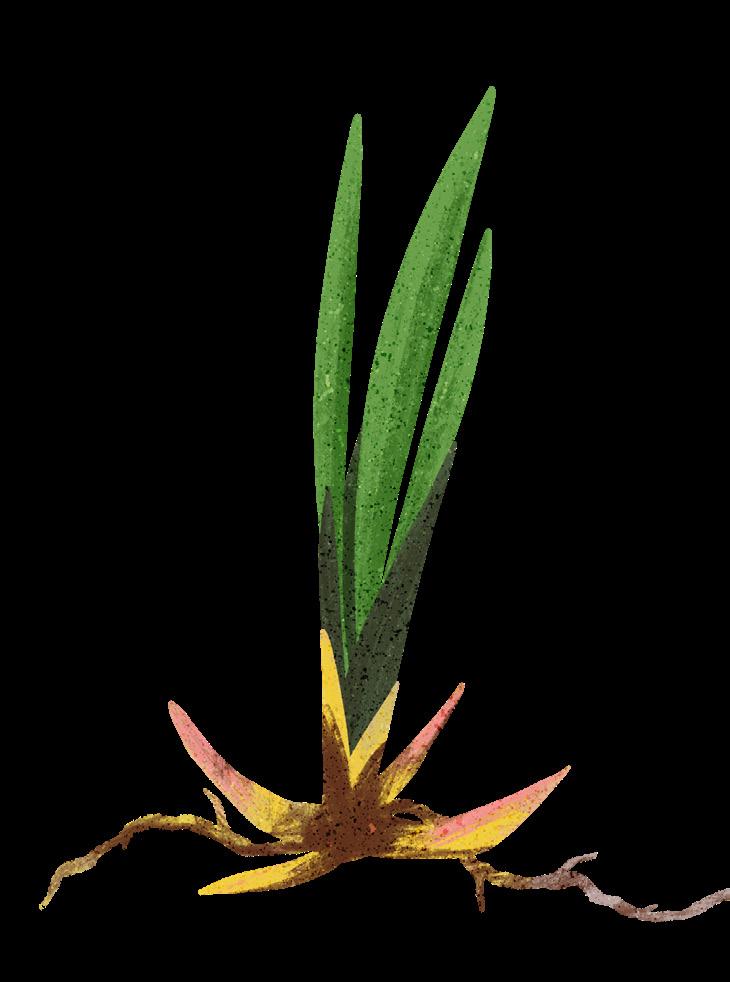
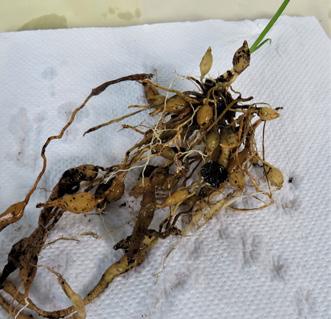
BULBS, CORMS & TUBERS
When: Autumn to spring
What: Tubers with roots
How:
• Tip parent plant out of the pot
• Separate out tubers with above ground vegetation attached
• Pot individual tubers or small clumps of tubers into premium native potting media
• Water with seaweed solution
• Place in a warm position and keep moist.
Tufted Burr Daisy
Golden Billy Buttons
FROM SEEDLINGS TO HABITAT
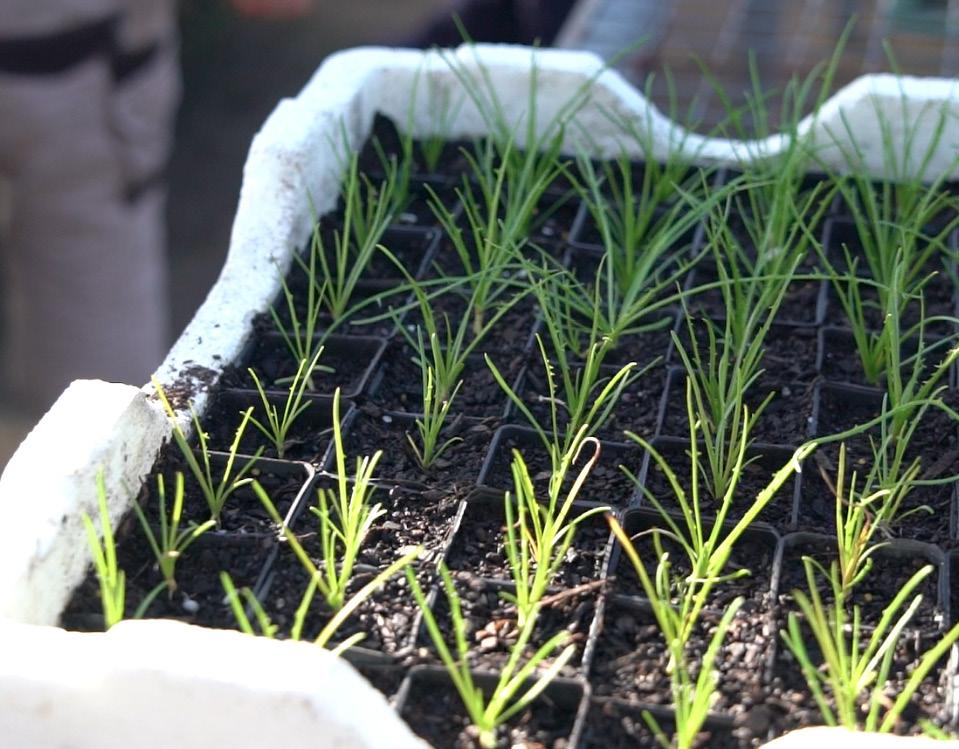
You’ve sown seeds of locally indigenous plants, watered and waited patiently. A week later, there are some tiny green pin-pricks on the surface of the seed-raising mix. The next day, the seed leaves are starting to emerge and after that, strong seedlings are standing up and starting to grow true leaves. These seedlings are going to make great plants for Bluetongued Lizard habitat!
But how do you get them from the seedling stage to plants that are ready to find a home in your garden?
STAY SAFE
Seed propagation and potting mixes are dusty and can harbour Legionella bacteria. Stay safe by:
• Following safety instructions on the packaging
• Damping down potting media to reduce airborne dust
• Wearing a dust mask
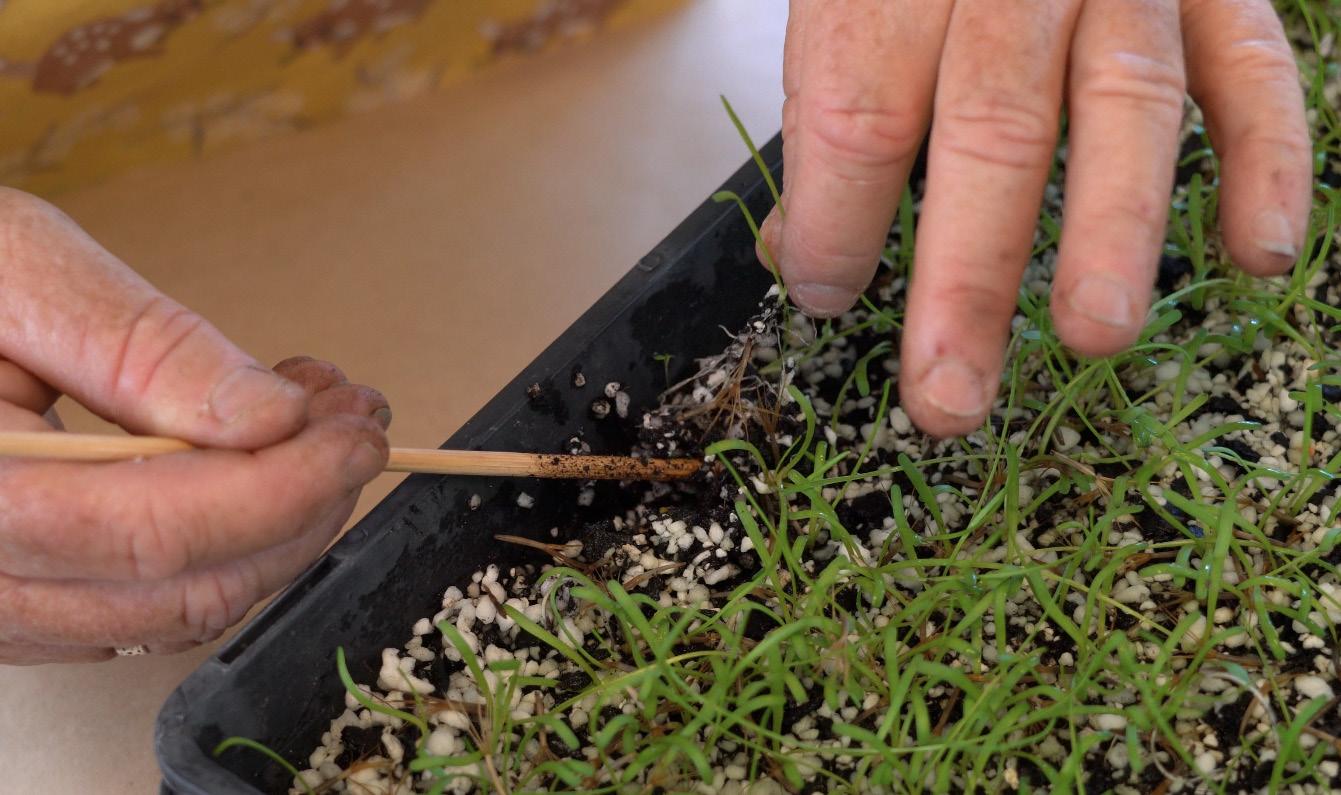
Pricking out
Pricking out and potting up seedlings of locally indigenous plants for the home garden in Hobsons Bay
• A tray of seedlings
• Plant tubes
• A crate
• Native plant potting media
• A dibber
• Plant labels
• A watering can of seaweed solution
HYGIENE FOR HEALTHY PLANTS
Clean potting equipment by brushing off debris. To destroy pathogens, soak pots for 10 minutes in a solution of one part bleach to nine parts water. Rinse with clean water.
• Washing hands after use. Pricking out and potting up can be repetitive work, so ensure that you maintain good ergonomic practices.
PREPARING TUBES AND POT
Fill tubes or small pots with premium native plant potting media. Gently tap the tube/pot on the bench to settle the soil and then top up.
Load the tubes/pots into a crate, so that they are stable.
Damp down the potting media and use a dibber to make a deep hole for the seedling – about 1cm wide. Plant only one seedling per pot/tube.
FINISHING TOUCHES
Label individual tubes or batches of tubes of the same species. Include:
• Species name
• Date potted
• Provenance (source location of parent plants).
Gently water the potted seedlings with a seaweed solution (follow instructions on label).
POtting up
Pricking out and potting up seedlings of locally indigenous plants for the home garden in Hobsons Bay
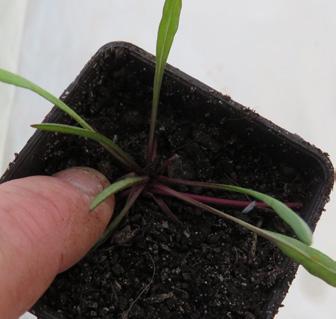
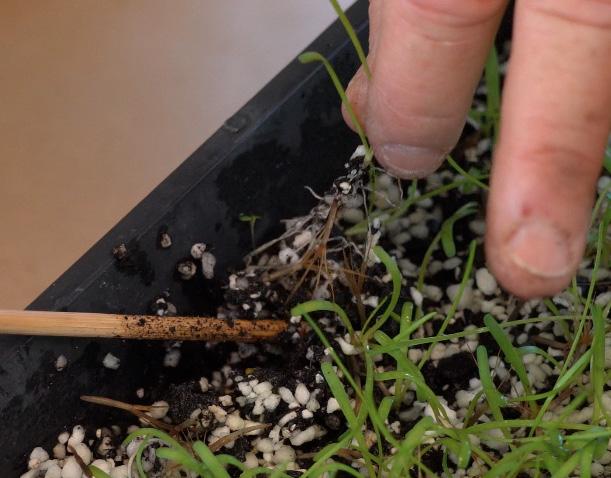
PRICKING OUT
To make pricking out easier, damp down the tray of seedlings.
Use the dibber to carefully loosen the soil around seedlings that have at least two well-formed leaves. Gently lever the seedling out of the potting media without breaking the roots.
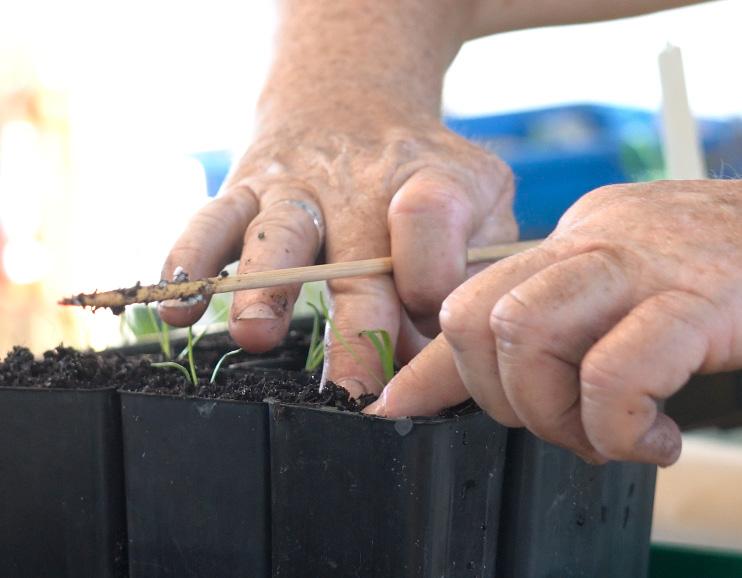
POTTING UP
To prevent damage and drying out of the roots, only ever handle seedlings by the leaves and stems.
Gently lower the roots of the seedling into the hole. Make sure that the roots go straight down and are not curled or bent. Also check that the bottom of the stem is level with the surface of the soil.
Firm the potting media around the roots of the seedling, so that it stands up straight.
RECOVERY
Place potted seedlings in a shady location to recover for a couple of weeks and then move them into a sunny position.
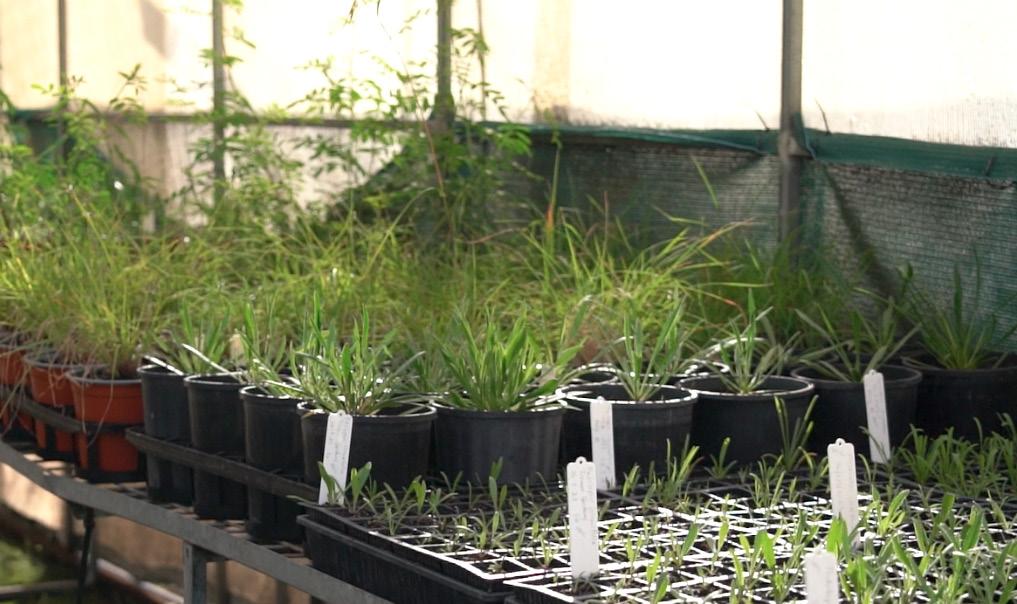
Water regularly, so that pots/tubes remain damp (not wet). They will be ready to plant in the garden in 2-4 months when there are well-formed roots that fill most of the tube/pot.
Tip: Potting up is stressful for seedlings. Avoid hot or windy conditions and regularly mist the seedlings while you work.