7 minute read
STEP-BY-STEP HANDBOOK
INSTALL SHIPLAP SIDING ON A CEILING
By Matt Weber
Like many other homeowners, my wife and I had grown weary of the sea of cottage cheese
that covered our ceiling. Acoustical “popcorn” texture is no longer in style, and we had never really liked it in the first place. To get a new look, we either had to scrape it off (an enormous mess) or conceal it with something more attractive. We chose the second option.
Shiplap siding has become popular for interiors thanks in part to its prevalent use as a decorative accent on certain cable TV shows. Not only do the boards offer a different look than the usual painted plaster/drywall surfaces of a home, but shiplap’s simple overlapping installation means DIY remodelers don’t have to tape and mud drywall joints. That is a huge selling point, considering that finishing the joints is the most difficult and time-consuming drywall skill to master. Shiplap can be used to create accent walls, barn doors, headboards, mirrors, frames and wall art.
After some consideration, we settled on installing a shiplap ceiling once we found a material with a “rustic” finish. Shanna and I have three young kids--ages 9, 5 and 3--which means our home takes major abuse. Finely finished furniture does’t stand a chance of survival, but a rustic interior tends to disguise the dents and dings our children regularly inflict on the home. Since our house is decked out in a rustic style, the “Rustic Collection" of the UFPEdge shiplap material seemed to fit right in. The UFP-Edge boards are made from genuine lumber that has been distressed, primed and painted to have the authentic look and
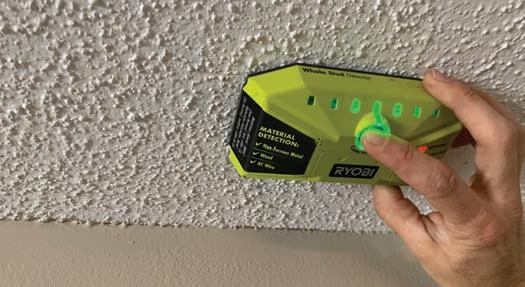
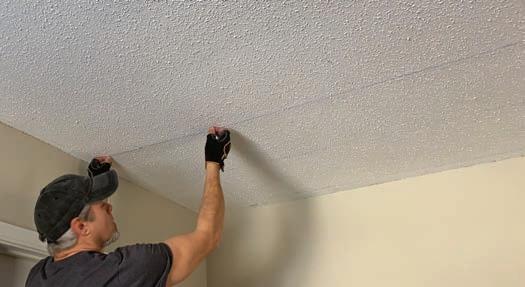
[STEP 1]. First step is to locate and mark the ceiling joists. [STEP 2]. Snap a chalk line along each joist to show where to drive nails.
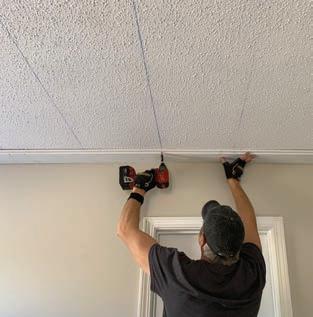
[STEP 3] I tacked up the first board using trim-head screws to test the fit and layout of the shiplap to the ceiling. [STEP 4] As with any boardpattern installation, you’ll have to measure and cut some pieces to fit.
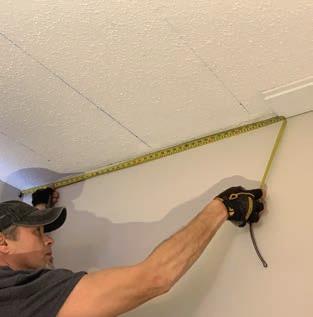
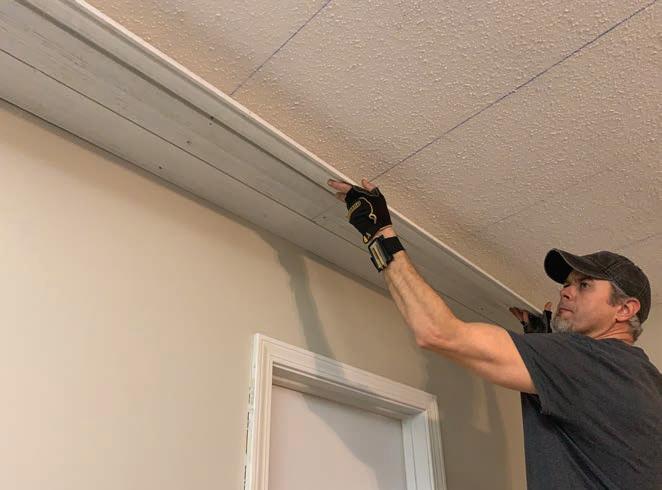
[STEP 5] The boards simply overlap to conceal the tongue of the previous row.
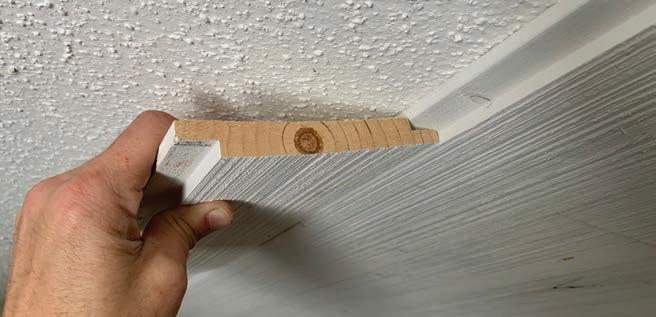
[STEP 6] The shiplap must be nailed through the tongue and the face of the board 1-1/2” into solid framing.The board tongues measure roughly 1/4“, but the board face is 1/2” thick. texture of vintage rustic barn wood. The boards are also consistently sized to eliminate any sorting or guesswork during installation.
HOW IT’S HANGING
At the time of installation, I did not find specific guidelines on fastening the shiplap boards to a ceiling. I phoned the manufacturer, who said the most critical element was to adhere to the specific recommendations for fastener depth. The instructions called for trim nails (15 or 16 gauge) long enough for 1-1/4- to 1-1/2-in. of penetration into solid wood framing.
Because these boards would be defying gravity, I decided the smart move was to aim for 1-1/2-in. fastener penetration into the ceiling joists. The fasteners should be driven through the tongue of the shiplap (1/4 in. thick) as well as the face of the shiplap (1/2 in. thick). Avoid nailing through the overlaps.
So, to determine the required fastener length, I used the following equation:
5/8” textured ceiling thickness + 4/8” shiplap thickness = 1-1/8”
1-1/8” + 1-4/8” penetration depth into framing = 2-5/8” fastener length
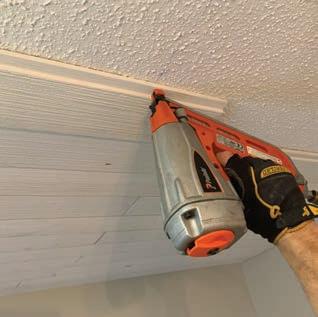
[STEP 7] As the installation progressed, I fastened the board tongues with 2-1/2” 16-gauge finish nails.
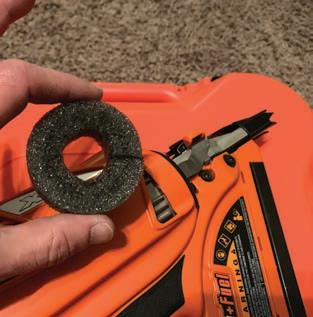
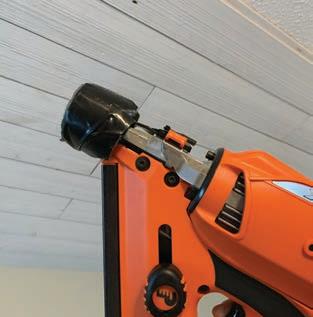
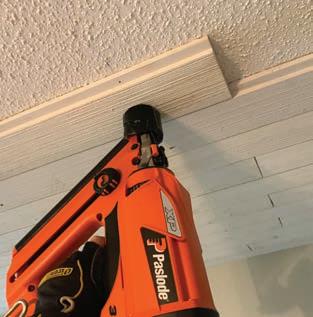
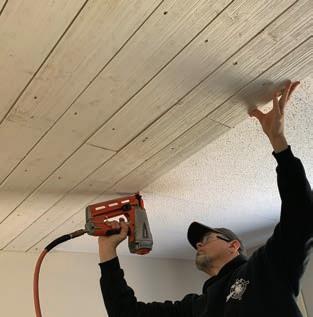
[STEP 8] To fasten through the board faces, I first equipped my framing nailer with a home-made protective tip made from pipe insulation. The tip prevents damage to the boards as I fire 3” framing nails through the thickest part of the shiplap roughly 1” from the bottom edge.
Now, here’s where things get fun. I was planning to nail all the boards in place with a 16-gauge finish nailer, but the nails for a 16-gauge gun are only sold up to 2-1/2-in. long. That nail size works fine when nailing the thin tongue of the shiplap boards, but it would be 1/8-in. short of my ideal fastener length when nailing through the face. Could I get away with using shorter nails and have no problems with the boards detaching? Very possibly, yes. But since I did not know for sure, I decided to play it safe and take a different route.
One option is to hand-nail 10d finish nails through the shiplap and into the framing. These 3-in. nails work well and leave only a small nail hole to repair, but the work is a slow process, and the repetitive motion can really wear on your neck and shoulders.
I did not have that kind of patience and went with bigger bullets. Although, pneumatic finish nails are generally only sold in 2-1/2-in. sizes, pneumatic framing nails are a different story. Because this was a rustic paintgrade project, I face-nailed the boards with 3-in. framing nails using a cordless Paslode gun. This allowed me to quickly fire the boards into the framing with little effort, knowing the nail size and penetration depth would
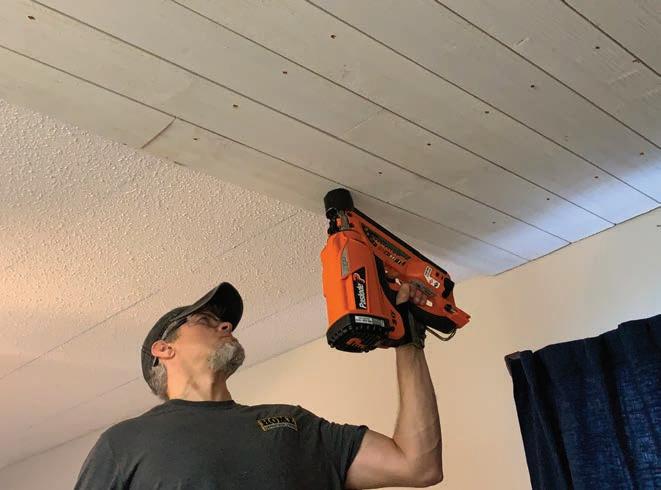
[STEP 9] The framing nailer proved to be a fast and strong way to face-nail the boards overhead.
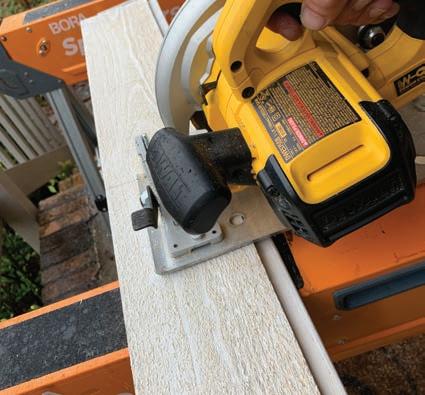
[STEP 10] You’ll need to set up a nearby workbench or saw-horses to make all the board cuts. Use a circular saw with a fine-tooth blade. Keep a jigsaw handy if you have any cutouts to make for ceiling penetrations, such as light fixtures or ceiling fans.
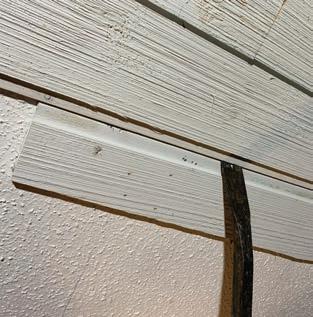
[STEP 11] If you encounter a bowed board that is difficult to fit, you can temporarily tack up a cut-off piece alongside it and use a pry bar to lever the bent board into position while nailing it in place. [STEP 12] Stagger the board joints from row to row. Due to the light weight of the material, I could lift a board into place with one hand and fasten with the other, making this job suitable for one-man installation.

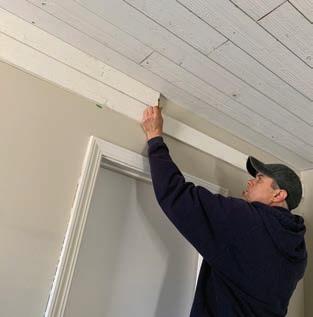
[STEP 14] To repair the nail holes, we applied color-matched wood putty and brushed it in to blend with the board texture. [STEP 15] To ensure the tightest fit, I held the trim boards in place and marked the cut lines directly on the work pieces. [STEP 13] I concealed the rough edges of the board with some simple matching trim available from UFP-Edge which I nailed into the wall studs.


hold the shiplap to the ceiling with rock-solid strength.
To protect the boards from being damaged by the tip of the nailer, I duct-taped a homemade “no-mar tip” onto the gun made from a ringlet of foam pipe insulation.
Note that I DO NOT recommend the use of framing nails for stain-grade shiplap in which the woodgrain will be exposed, because the large nails will riddle the finish with holes that will be impossible to fully conceal with wood filler. However, the painted and textured surface of our rustic white boards meant I could apply a colormatched wood filler to the nail holes and then brush the spackling repairs to match the factory texture.
In the end, this approach to installation worked very well-finish nails through the tongue, framing nails through the face. After installing some simple matching molding along the edges, we had a cool, new shiplap ceiling with a rustic appearance and no cottage cheese in sight.
Find out more about the rustic shiplap planks at www.ufpedge.com. H


