17 minute read
SKILL SET


DIY FUNDAMENTALS FOR TRIM AND MOLDING
By Carter Swift Trimming out a room is a popular
project for homeowners who want to accent lackluster ceilings, walls or
windows. Along with traditional baseboards, chair rails, casings and crown moldings, a homeowner can consider options such as fireplace mantels, ceiling medallions, exterior enhancements and more. Although a trim carpenter knows all the tricks of the trade, a DIY’er can accomplish a basic installation using the right tools, attention to detail, and a little advance research.
MATERIAL OPTIONS
For interior trimwork, home-improvers have many options in materials.
MDF (medium-density fiberboard) is often the material of choice for DIY’ers because it’s less expensive than solid wood, it lays straight, resists warping, is easy to cut and simple to fasten. It’s usually available in long runs of trim with no visible joints. However, due to the nature of MDF, you won’t find some of the same crisp profiles as real wood, plus the edges are relatively delicate, so it might not be the best choice for high-traffic areas which are more susceptible to damage. Furthermore, water absorption (from prolonged exposure to a wet bathroom floor, for example) can cause MDF to swell and ruin.
Trim products made from finger-jointed wood present another tried-and-true alternative. This type of trim is widely used because it doesn’t have knots and imperfections like solid wood pieces can have.
Most home centers sell both MDF and finger-jointed trim pieces in factory-primed standard lengths.
An experienced carpenter can also fashion unique moldings made from solid woods, such as pine, poplar and maple. One advantage of solid wood is that it can be stained instead of painted to reveal the natural grain.


Homeowners often upgrade the appearance of interior doors and windows with the elegant look of built-up trim. DIY’ers can combine layers of different moldings for a custom look or make use of prefabricated options like the new Craftsman Crosshead from Ornamental Decorative Millwork. The one-piece prebuilt crosshead shown comes in five common widths and can be installed in less than 10 minutes. www.ornamental.com
Outdoor applications present another set of material options. To enhance a home’s curb appeal, window and door trim and corner wraps can really make your house stand apart, but the material must stand up to Mother Nature.
An excellent choice for exterior trim, KDAT lumber indicates wood that is “kiln-dried after treatment,” which provides the benefits of composite material with real wood. After pressure treatment, KDAT products are placed in a large
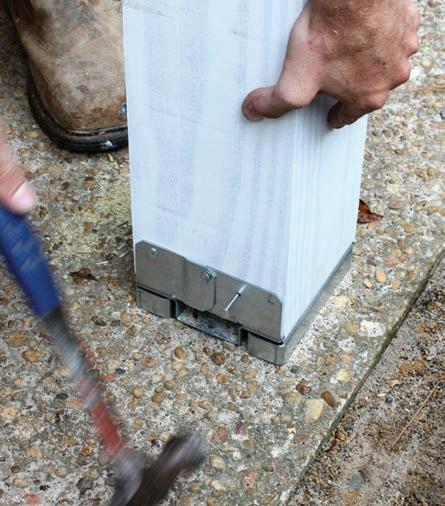
For outdoor curb appeal, these KDAT porch columns feature a hollow core which makes them lighter weight than solid posts, provides increased structural stability, and allows hidden electrical wiring. The columns are less likely to twist, are easier to install than solid timbers, and have strength ratings that rival more expensive PVC and composite options.
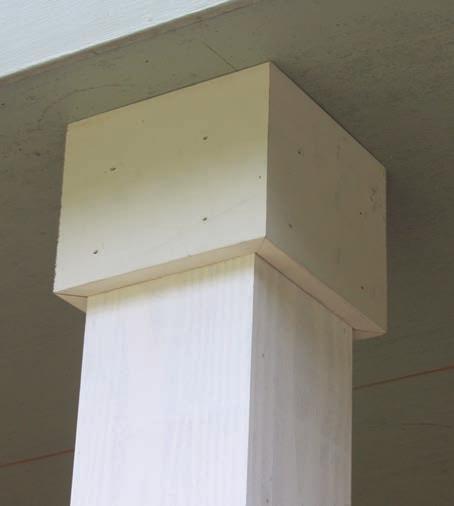
oven, or kiln, to remove moisture so the wood dries evenly. As a result, the KDAT lumber is more dimensionally stable, easier to handle, cut and install, and it weighs less than freshly treated lumber. Trim pieces can be made from dimensional boards such as 1x4, 2x2, 2x4, 5/4 thickness, as well as column wraps, which offer true square edges and are treated for ground contact. KDAT products are usually backed by a lifetime warranty. (Note: KDAT products must be primed and painted or stained upon installation.)
Alternative materials for outdoor applications include trim products made from composites, urethane, and other synthetic materials such as PVC. These products are available in wide range of decorative shapes and profiles, including intricate shapes and complex stylings that would be very expensive and labor-intensive to produce with wood. Furthermore, synthetic trim doesn’t have wood’s maintenance problems for outdoor use. Synthetics and composites resist insects, cracking, peeling, chipping, swelling, splitting and rotting, making them ideal for exteriors and any areas exposed to moisture, like baseboards in a bathroom, or crown above a shower.
SIZE MATTERS
Trim that is too small or too large can detract from a room’s overall décor. Trim sizes should be selected based on proportion to a room’s height. For example, crown molding that is too thin can make the room feel top-heavy, whereas molding that is too large can make the ceiling look like it’s encroaching down into the living space. Here are the optimal sizes for the crown molding drop (distance from the ceiling to the lower edge of the crown) on various wall heights: • 8-ft. ceiling: 3- to 5-in. drop • 9-ft. ceiling: 5- to 10-in. drop • 10- to 12-ft. ceiling: 10-to 20-in. drop • 16-ft. ceiling: 18- to 25-in. drop
For baseboards, most heights run between 3-1/4 inches to 8 inches. Most designers choose the taller trims for rooms with taller walls. The most common retail sizes are 3-1/4 inches and 5-1/4 inches. Typically, baseboards are 5/8 inches thick and come in lengths up to 16-foot strips. If you plan for crown molding, its size should be factored into the selection of baseboard height so the overall décor looks proportional.
Chair rail size should also be considered when selecting baseboards. For example, in a small room, a 3-in. baseboard height may keep the most appealing amount of space between the baseboard and chair rail. However, in rooms with higher ceilings, taller baseboard may help bring everything together.
The easiest way to determine baseboard height is to purchase different sample sizes and bring them home. Place samples around the house to visualize how the baseboard will look
Synthetic moldings made from PVC or urethane perform well for outdoor applications because they resist insects, cracking, peeling, chipping, swelling, splitting and rotting.
Finish nails (left) are thicker than 18-gauge brad nail (right). Brad nails work best in thinner cuts of lumber, shoe molding, and small trim around windows or doors.
in your room. (Note: Also consider the tools you have at your disposal, because some taller baseboards cannot be cut using standard miter saws.)


KNOW YOUR FASTENERS
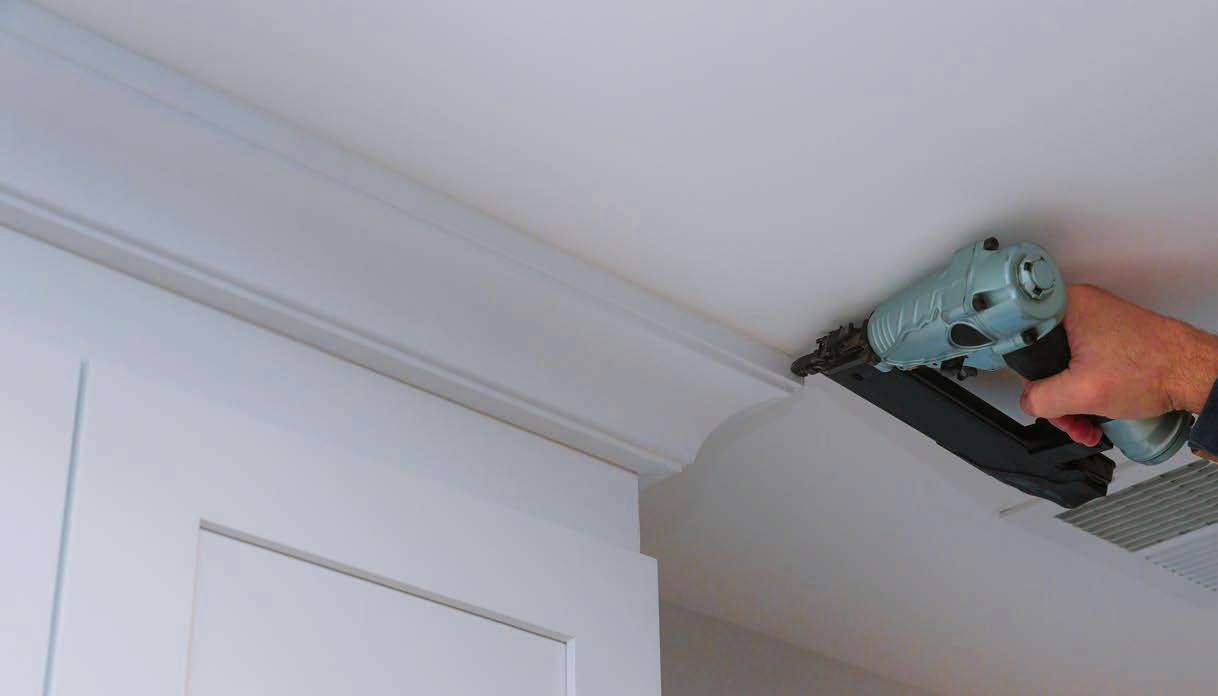
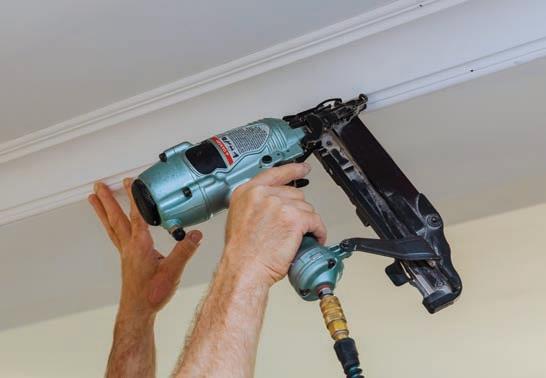
When installing trim, first use a stud finder to mark the house framing (studs, floor and ceiling plates), then nail the trim pieces using fasteners long enough to extend 1 inch into solid wood.
Most pros install trim with a nail gun, and if you have an air compressor and a lot of trim-work in your future, you’ll find an air nailer to be a worthy time-saving investment. These days, you’re likely to find a cordless brad nailer which operates using the lithiumion battery you already own for other power tools.
When installing trim with a nail gun, you have the choice of a finish nailer or a brad nailer.
Although they look similar, brads are slightly thinner than finish nails. Nail gauge sizes indicate the thickness of the nail, and thinner nails have higher gauge numbers.
Brad nails are made of 18-gauge steel wire, and the thin diameter (and smaller head) makes them easy to mask with a filler in wood trim or paneling. The slender profile of brad nails helps to prevent the wood from splitting in delicate material. (If the nail gun doesn’t fire with adequate pressure, however, brads can bend on entry and damage the workpiece.) Brads work best in thinner cuts of lumber, small


YOUR FAVORITE NON-SCRATCH SCRAPER WIDER!TOOL JUST GOT
Save Time and Effort When Cleaning Small Surfaces, Edges & Grooves!
ORIGINAL MODEL AND NEW WIDE BLADE FEATURES: ROUNDED TIPS —BETTER SCRAPER THAN A FINGERNAIL FLAT-EDGED TIPS—WON’T SCRATCH LIKE A SCREWDRIVER POINTED TIPS—BETTER THAN A TOOTHPICK FOR CLEANING GROOVES AND CORNERS
Remove stickers, tape,caulk, putty, grime & more!
Available in original 2-packs, 5-packs and new wide blade 3-packs
Brad nails in action: Pro installers use a combination of fasteners. For example, crown is typically nailed to the wall with 2-in. finishing nails, but the more delicate outside corners are usually fastened with 1-in. brad nails and glue.
trim around windows, shoe molding, as well as fiberboard and plywood.
Finish nails are generally made of 15- or 16-gauge steel wire, making them slightly thicker and more robust than brad nails. They create a stronger hold than brads, which makes finish nails more versatile and useful for heftier applications with thicker material, such as crown molding, chair rails, cabinets or baseboards.
However, the larger diameter of finish nails leaves a larger hole to conceal, and finish nails are more likely to split thin or delicate pieces of wood trim.
If you need to draw two pieces tightly together, you can skip the nails and use trim-head screws, such as the Fine Screws from U2 Fasteners. They offer exceptional holding power but have a tiny head that’s easy to conceal with filler.
A high-quality adhesive is critical to use at every mating trim joint to ensure the best hold. A strong wood glue such as Titebond will work well when joining wood trim, but plastics or a synthetic material might require a polyurethane-based adhesive. Refer to the manufacturer’s indications to choose the right glue.
SAW SETUP
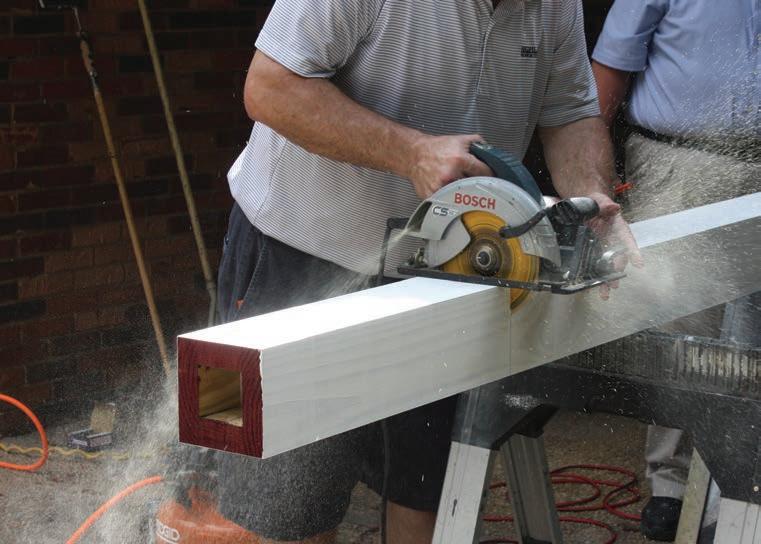
The most versatile tool for cutting the linear strips of molding will be a powered miter saw with a quality blade.
The quantity of teeth plays a significant role in the blade’s performance. Blades best suited for rough work (such as ripping 2x stock lengthwise along the grain) have fewer teeth with large gullets for

easy chip removal. Blades meant for crosscutting boards into shorter lengths have more teeth with a smaller gullet for a smoother cut.
When cutting trim, an even higher number of teeth translates into smoother cuts for finish applications. The type of material is also a factor; for cutting PVC product HIR recommends using a carbide toothed blade with 80 teeth or more to prevent chipping. A blade designed specifically for trim-work can increase your cutting accuracy, which helps when mating the joints. A rough cut might require you to sand the cut smooth, but the act of sanding can alter the shape of the cut, so it may no longer fit perfectly during assembly. Spare yourself the frustration on trim projects and use fine-toothed blade intended for trim.
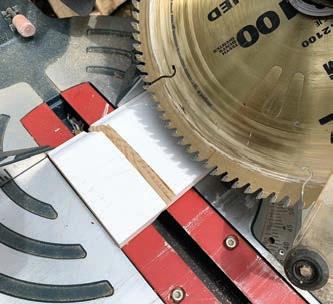
A miter saw’s reliability to cut an accurate angle should also be checked and maintained, because a little misalignment can cause major headaches for a carpentry project. Calibrating the saw is an Check the saw blade to make sure it cuts at a true 90-degree miter.
If the blade is misaligned, refer to the saw’s manual to adjust calibration, which often involves loosening set screws to reposition the blade angle.
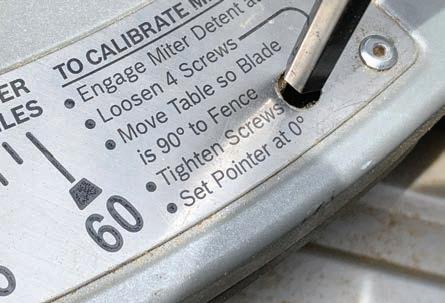
For compound miter saws that can make bevel cuts, use a combination square to check bevel alignment and adjust if necessary. important step because a difference as small as 1° over a 1-in. span will result in a 1/32-in. gap in the finished miter joint. Similarly, 3° over 5-in. span gives you a 3/8-in. gap. The misaligned pieces won’t join together tightly if the cuts have been made at an incorrect angle.
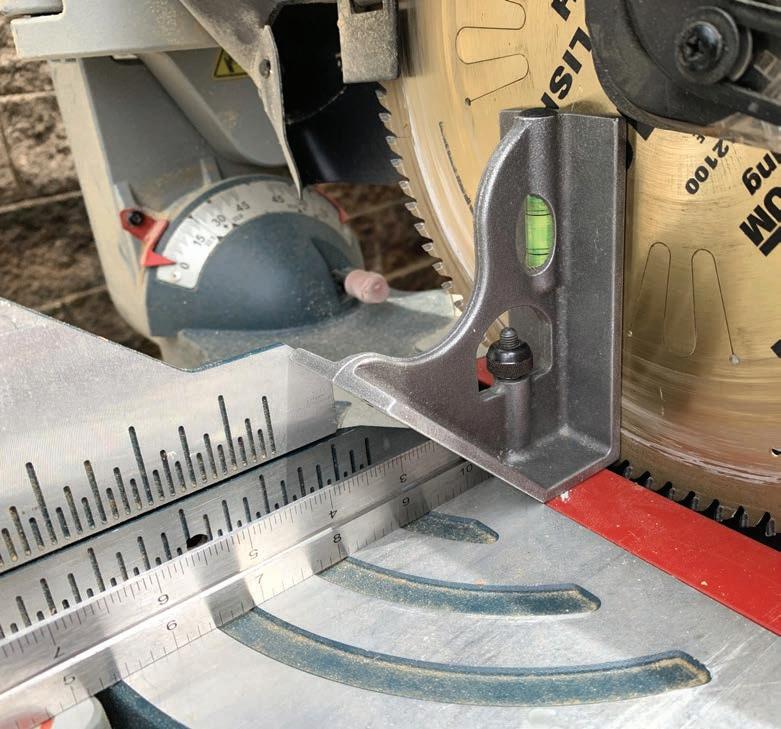
Miter Angle—A combination square makes a handy tool for confirming the saw blade’s miter alignment, ensuring the blade is set exactly at 90 degrees to the saw’s fence (which should register as 0 degrees on the saw blade’s angle indicator). There should be no gap between the edges of the square and the blade or fence.
If there is a gap, you’ll need to refer to your saw’s operation manual for specific steps on how to adjust the blade angle. To adjust alignment on the Bosch compound miter saw shown in the photos, I had to loosen four set screws with a hex key, move the table so the blade was a perfect 90 degrees to the fence, then retighten the screws. Once the blade aligned with the combo-square calibration check, I knew I could rely on my saw to cut accurate miter angles.
Bevel Angle—Compound miter saws offer a bevel adjustment feature which should also be calibrated. You can verify the vertical tilt of the blade by aligning the combo-square with the saw base and the blade. Check for any gaps between the square and the blade.
If the bevel requires adjustment, follow the steps in the owner’s manual, which usually requires loosening some set screws or bolts at the bevel post of the saw’s cutting head.
PAINTING AND FINISHING
Most paint-grade trim products are sold preprimed. If your selection is not pre-primed, you might consider both priming and painting all the trim pieces before you install them. This will reduce the time you spend working on your knees (for baseboards) or a ladder (for crown molding) and limit your post-installation painting to touchup work.
Trim is usually top-coated with a semi-gloss or high-gloss paint sheen, which highlights the decorative shapes and shadow lines of the trim while it also protects the surface from grease and grime, making it easier to clean than a flatter paint sheen.
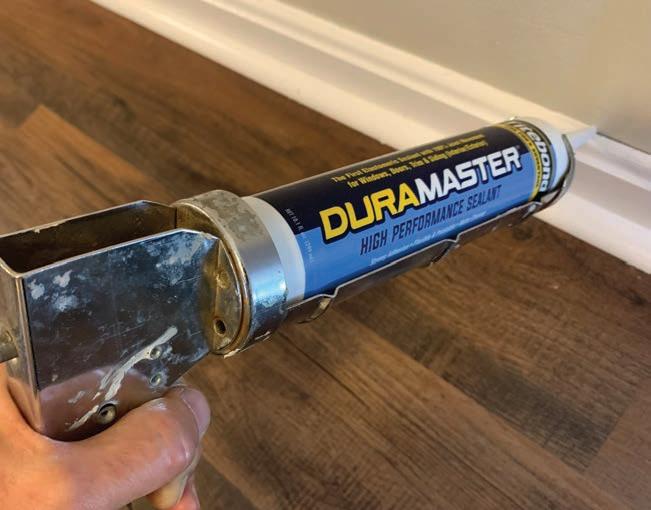
Use a paintable or color-matched caulk at all joints and the top and bottom of your crown and trim. A flexible or elastomeric caulk will best resist shrinking or cracking over time. To fill nail holes, use a shrink-free spackling. (Caulking nail holes will leave visible dimples.) Use the right stuff. For long-term performance in new trim, stick with a high-quality elastomeric caulk to seal the joints, but to conceal nail holes, fill them with shrink-free vinyl spackling.
Trim Terms at a Glance
Here are some common trim-carpentry terms you should know before you start.
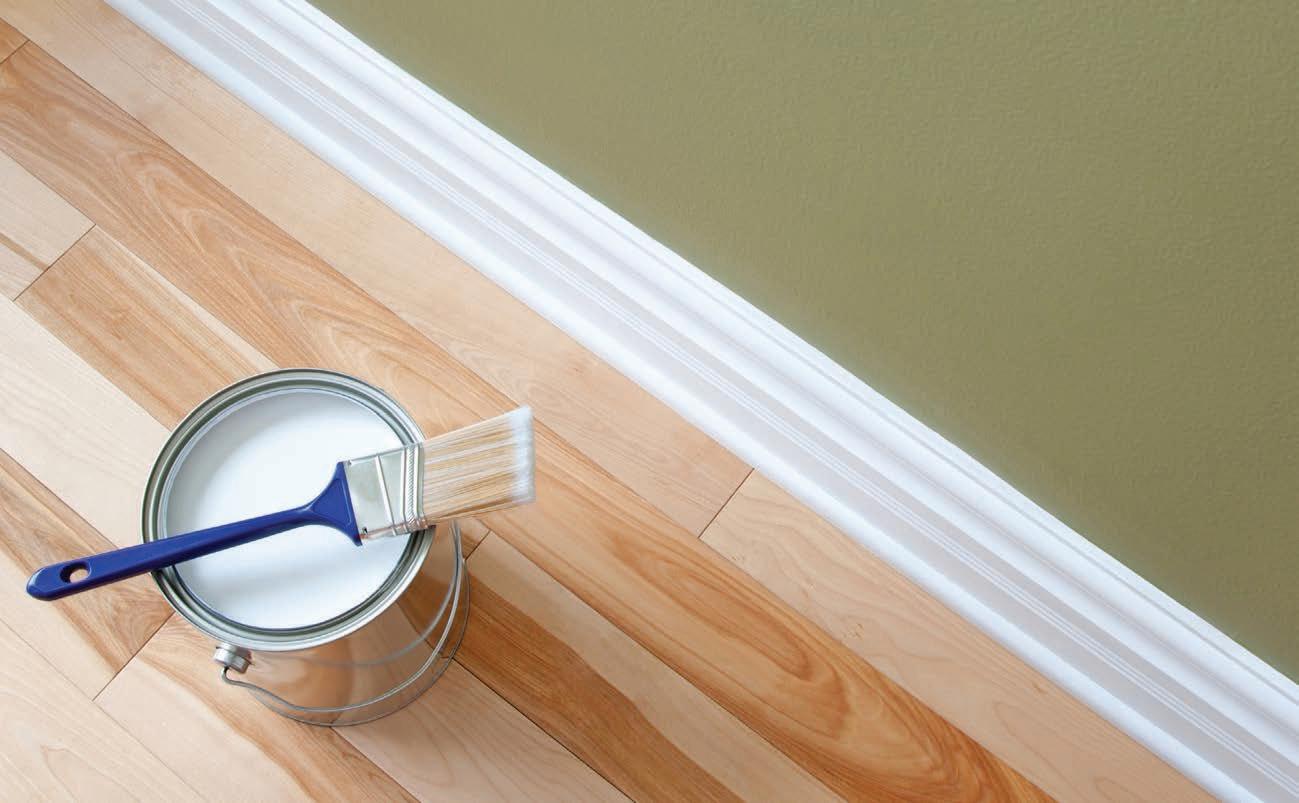
Baseboard molding hides gaps and imperfections at the floor-to-ceiling transition. Various sizes and profiles are available. Baseboards are generally fastened to the wall studs, footplate and wallboard with finish nails.
Chair rail is a horizontal molding often placed above wainscoting or used to divide two wall colors. Usually set near the height of chairs, its original purpose was to protect the wall from the scuffing of chair backs, but today it’s commonly used as a decorative element.
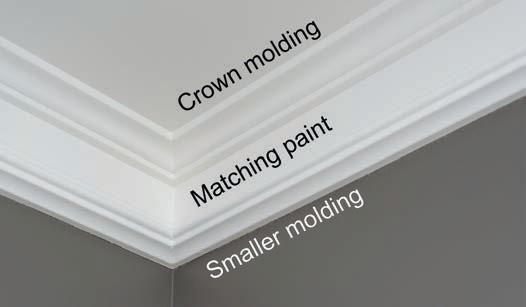
Crown molding covers the transition between the wall and ceiling. Available in many shapes and sizes, it can be installed as a simple trim profile or combined with other pieces of molding to produce elaborate architectural displays.
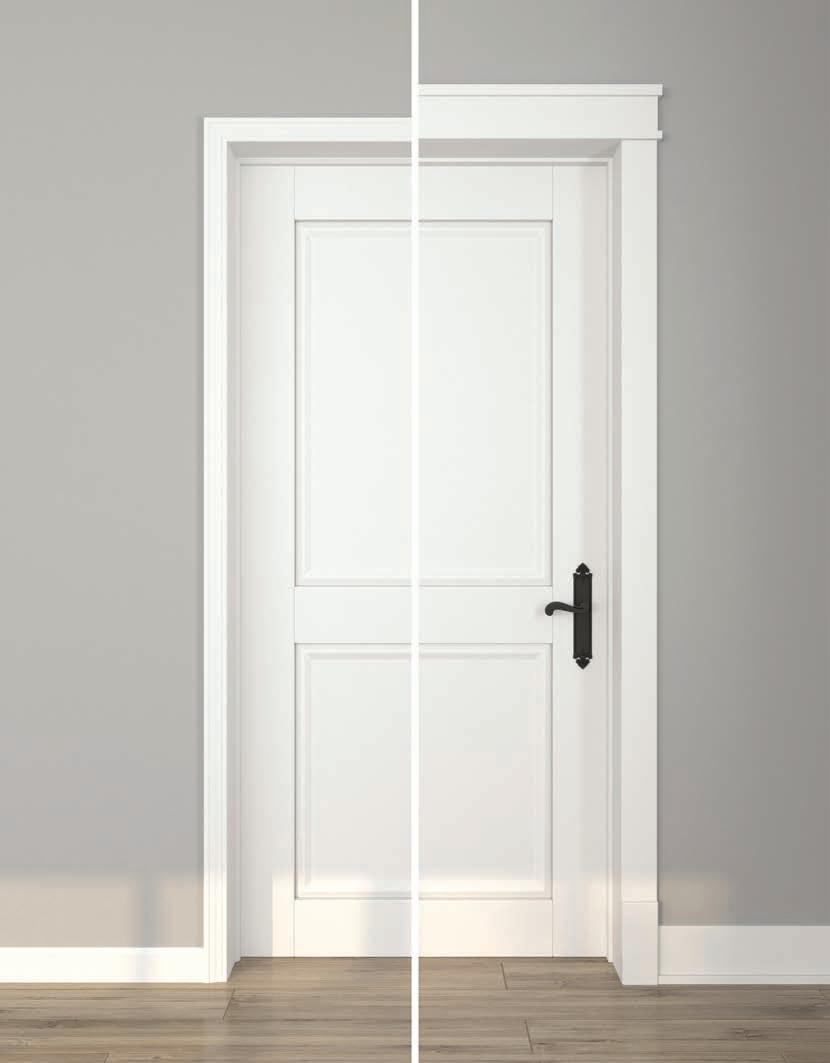
Casing is the trim that surrounds windows or doors and is available in options ranging from simple craftsman style trim to multipiece moldings and crossheads for a more elegant appearance.
GET CREATIVE
Don’t feel limited by the standard uses of trim profiles. Instead of crown- ing a wall, use crown molding to create skirting for a mantel shelf. Or, create a chair rail by combining upside-down baseboard capped with ogee molding. Built-in bookshelves, bar areas, and fireplace mantels make great candidates for creative trim enhancements. You can combine multiple layers of molding for a larger, more complex profile. Shop around and think outside the box when selecting and designing your trim installations.
H
Trim installation provides the opportunity to design creative molding combinations that can achieve a look and style all your own.
Quick Tips for Trim
LONG & SHORT— For long pieces of trim or molding, avoid nailing closer than 6 inches to the board ends until it’s time to fasten the joint. For short trim pieces, you can avoid nails and just glue the joint and/or use adhesive behind the board.
CUT WITH CARE—When cutting the molding or trim to length, make the first cut at 1/2 inch into the waste side of the board, and then approach the cutline with small cuts until you reach your length mark.
USE GLUE FOR FEWER HOLES—You can reduce the number of nail holes to fill by installing the trim using fewer fasteners and relying more on construction glue.
MARK IN PLACE—When possible, mark your trim pieces in place on the wall rather than taking measurements and transferring those measurements to the work piece. This saves time and reduces errors that can happen when transferring the measurements.
SHIMS ARE YOUR FRIENDS—On door and window casings, uneven drywall or plaster surrounding the door can prevent the casing from laying flat against the wall. To keep the trim boards aligned flush with each other, use shims inserted behind a recessed piece to push it forward until the joint is smooth, nail in place, then cut off the excess shim material and conceal it with caulk.
How to Skip the Miters on Casing


If assembling mitered corners absolutely gives you the fits, consider simplifying window and door casing by incorporating pre-made rosette blocks at the corners. Rosette blocks assemble with simple butt joints against square cross-cuts, so there’s no need to measure, cut, and join miter angles. The blocks are carved from solid wood or MDF, usually 3/4-in. thick, and the standard 3-1/2-in. block works well with 1x4 trim or 3-1/4-in. moldings. Install them with glue, finish with a little caulk and paint, and the blocks can add a decorative touch to the corners.
Looking for a fast way to upgrade baseboard or crown molding? The CoverTrim product from Ornamental Decorative Millwork offers a unique solution with a line of molding designed to install over existing moldings. Made of medium density fiberboard (MDF), CoverTrim comes primed and ready to paint. Available transition blocks and spacers make installation easy. Each piece of CoverTrim is 5-1/4” high, and adhesive-backed spacers act as a buffer between the face of the old molding and the new. Available nationwide through The Home Depot and Wayfair, CoverTrim products are made in America. Visit www.ornamental.com
Cover Your Old Trim

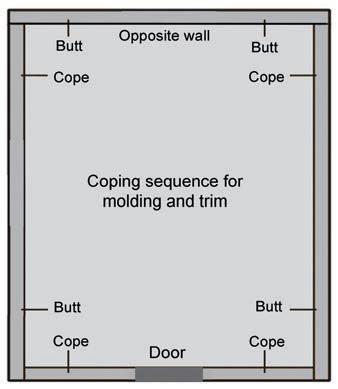
Learning to Cope
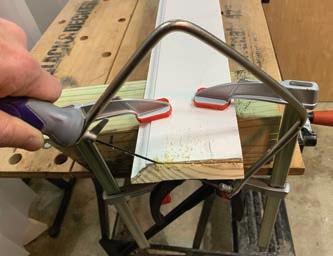
When installing baseboards or crown molding, it's tough to avoid miters on outside corners, but for inside corners, you have the option to make a cope joint. Although joining two 45-degree miters may give you a 90-degree joint, a square joint may not work well for corners that are out of square. Even a perfect miter joint can end up developing gaps when the wood dries and contracts in winter. Unlike miter joints, cope joints have one trim piece butted against the adjacent wall at the corner. The mating trim piece is carefully cut with a coping saw to nest against the profile of the first. These joints work well for out-of-square corners and are less likely to reveal a gap when the wood shrinks.
STEP 1: Butt the first piece of molding into the corner of the room and fasten in place.
STEP 2: On the intersecting end of the second piece of molding, cut a 45-degree inside miter. Use a carpenter’s pencil to darken the edge of the mitered profile for better visibility.
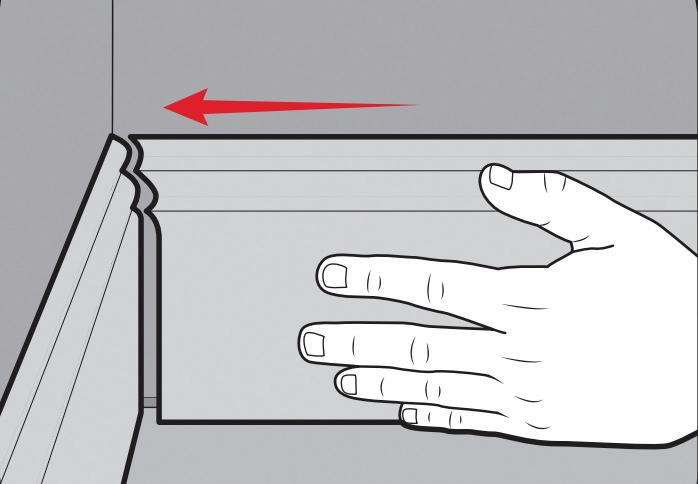
STEP 3: Clamp the second piece of molding to a work surface and use the coping saw to cut along the pencil line. Angle the blade to back-cut the molding. Keep the blade about 1/16 inch to the waste side of the cutline.
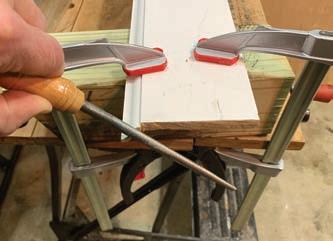
STEP 4: When most of the wood is removed, use a file or sanding block to finish the cut and clean up the profile, revealing a shaped edge that will be the only point of contact between the intersecting pieces of molding.
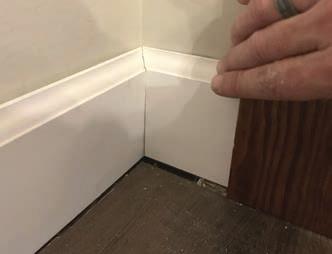
STEP 5: Test-fit the molding against the first piece and make adjustments as necessary.
STEP 6: Nail and/or glue the molding into place and finish by caulking the seam.
STEP 7: Proceed around the room to complete the installation, using the installation sequence shown in the diagram.