4 minute read
STEP-BY-STEP HANDBOOK


REPLACE A LIGHT FIXTURE
By Matt Weber
Here are the basic steps to replace a flushmount light fixture on a ceiling, using standard tools almost any DIY homeowner will have in
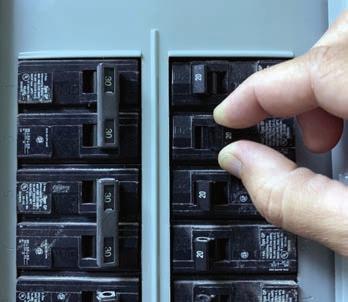
their toolbox. Why pay an electrician for simple upgrades you can do yourself? First step is to turn off the light fixture’s power at the breaker box by flipping a circuit breaker or unscrewing a fuse. Use a voltage tester to make sure the power is off.
Disassemble the old light fixture. This task varies based on the fixture design but is rarely complicated. It can require removing a retaining nut, the fixture glass, and the mounting screws that hold the electrical box to the ceiling.
Many such components and fasteners unthread by hand.
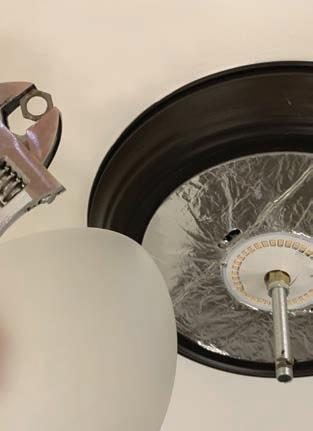
In some cases, you might need a screwdriver or wrench. In the example shown in Step 3, after removing the hex nut from the threaded rod, the glass feature of the old light slides right off the fixture.
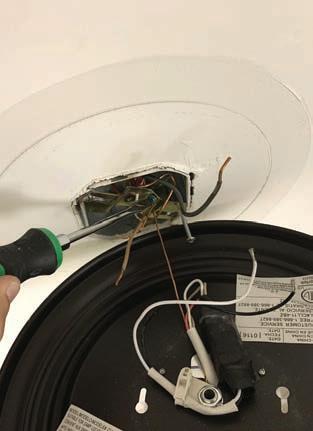
Next, remove the canopy (AKA box cover). It is common to find two screws in slotted holes holding the canopy to the mounting strip of the electrical box. Loosen the screws enough to turn the canopy so the large holes in the slots align with the screw heads, allowing you to lower the canopy.
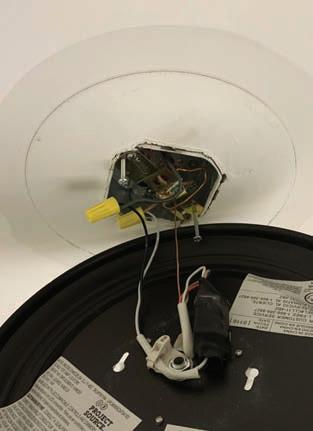
With the canopy out the way, the wires are exposed, and you can see how you'll need to make the electrical connections when installing the new fixture. This will also reveal any discoloration in the ceiling that might need your attention later.
Disconnect the wiring by unscrewing the wire nuts and untwisting the wire pairs.
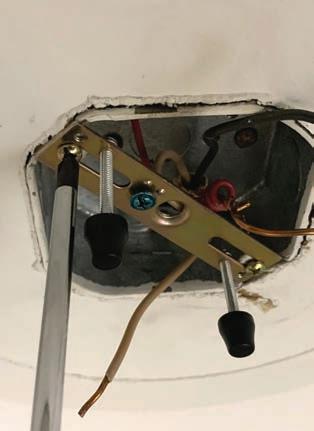
Remove the two screws that fasten the metal mounting strap and remove the strap from the electrical box. Replace it with the one


[STEP 4]
[STEP 6]
[STEP 8] [STEP 5]

[STEP 7]

[STEP 9] included with the new light, which will be shaped to fit the fixture. Ceiling fixtures vary greatly in style and construction, and so do the related components and the assembly process. The lighting manufacturer will include assembly instructions for the model, and you usually only need to use a screwdriver and wire strippers to complete the job.
Strip 3/4-in. insulation from the end of each wire of the new fixture.
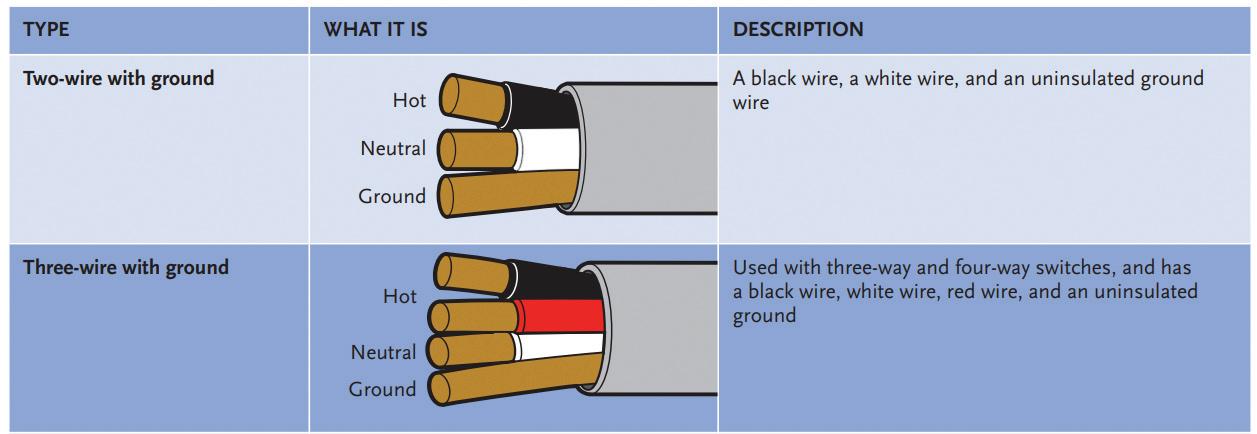
Match the fixture wires to the supply wires by matching insulation color (white wires to white wires; black to black; green insulation or bare wire indicates a ground wire). Twist the exposed ends of the wires together clockwise, securing them with a UL-listed wire nut. Ground wires can be connected to a ground screw on the junction box or joined to the supply ground using a wire nut.
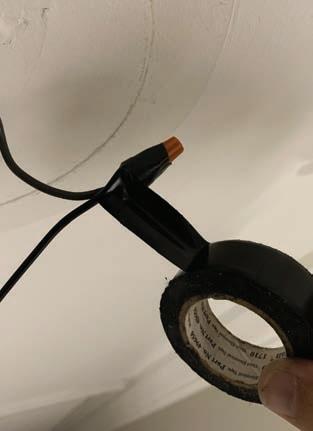
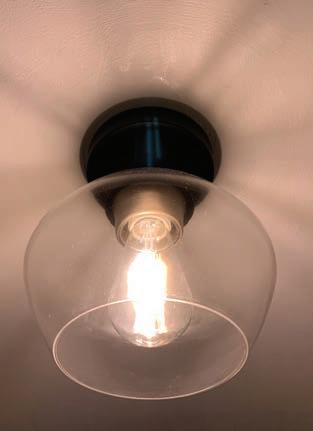
Install a light bulb, turn on the breaker, then flip the light switch to test the connection before installing the fixture. If it won’t light up, you probably have a loose connection. Once the light functions, protect connections by wrapping electrician’s tape around the wire nuts. Tuck the wires and wire nuts into the electrical box and out of the way.
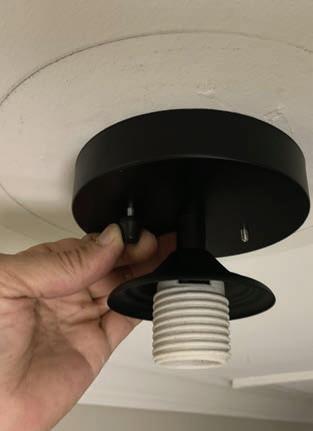
It might be necessary to install a threaded rod into the mounting strap before installing the canopy. On the model shown, however, the canopy makes use of a wider threaded collar integrated into the canopy, so no rod was used. For this light, the next step is to remove the decorative screw caps, slip the canopy over threaded fasteners that extend down from the strap, then twist back on the screw caps. Very simple.
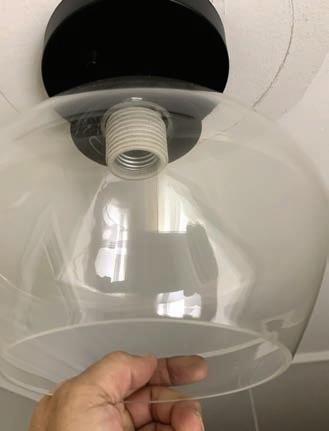
The glass feature will typically install over a threaded rod or collar, which will be held in place by a nut. On this fixture, the nut that fastens the glass feature is a decorative component of the light.
For first-timers, it’s wise to have all your work professionally inspected when you’re done with installation.
DON'T FORGET TO USE THE RIGHT BULB
When purchasing a lighting fixture, check its maximum wattage. A bulb with more wattage than necessary can present a fire hazard from the excess heat. Wattage indicates the power a bulb consumes—not the light that it generates, measured in lumens. If you’re getting excess light from the bulb, use a lower-lumen bulb.
H
[STEP 12] [STEP 10]

[STEP 13] [STEP 11]
[FINAL]