17 minute read
LIVING ON THE EDGE


LIVINGON THEEDGE
LIVE EDGE WOOD SLABS FOR HOME DÉCOR
By Matt Weber
Live edge wood slabs can blend raw beauty with a refined appearance for
countertops, shelves, tables and more. The term “live edge” refers to the natural edge that has been left uncut along the bark-side of a wood piece, preserving its unique look and character.
SELECTING A SLAB
You probably won’t find wood slabs at a “big box” home center. Local sawmills and lumber yards can supply them, but a kiln-dried slab will best reduce shrinking and swelling of the wood, so you might need to purchase from a hardwood supplier. You’ll also find many slab suppliers online and on social-media marketplaces.
The required thickness of your slab will depend on how it will be used. Thickerslabs usually look more natural. Tables and countertops should be 3 to 4 inches thick, but shelving can be as thin as 1 to 2 inches, depending on how they’re fastened to the wall. Ask your lumber supplier to cut the slab, and choose as flat of a workpiece as possible, because slabs are often too large to fit into a planer.
You’ll find a huge assortment of wood species available as slabs, and they vary greatly in appearance and price. Keep in mind that a hardwood species will better withstand scratches and dents than a softwood variety. Choices include Sweet/Red Gum, Eastern Red Cedar, Cypress, Sassafras, Walnut, Maple, Cherry, Red Oak, Poplar, White Oak and other species.
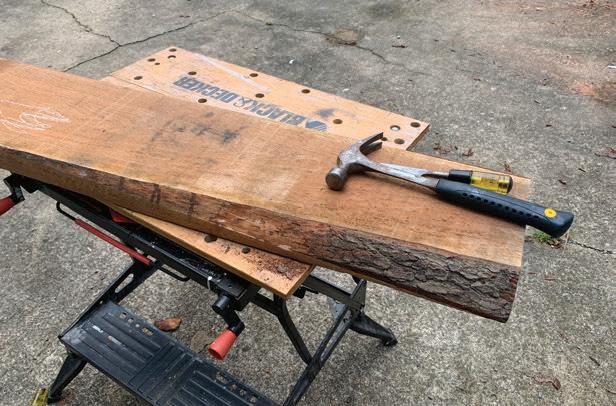
Available from sawmills, lumber yards, and hardwood suppliers, live-edge slabs retain the natural outer edge of the tree on at least one side. The cherry slabs shown were purchased from City Hardwoods of Birmingham, Alabama.
FLOATING SHELVES
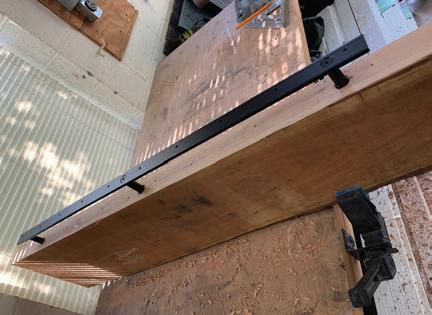
Shelves can be installed in many ways, but metal hardware will help when anchoring “floating” slabs to a wall so no fasteners are visible. Live Edge shelves will need to have the opposite edge cut straight to mount flush against a wall.
The Floating Shelf Brackets shown in this article are sold by SemiExact.com and each consists of a 1/4-in. steel bracket that is screwed into the wall studs. To carry the shelves, 6-in. steel rods bolted to the bracket will slide into holes drilled into the back of the wood slab, which conceals the hardware when the shelf is pushed flush to the wall. The slabs should be at least 1-1/2 in. thick if using this method of installation.
The installation process is fairly simple, but it’s important to use the right tools. The rods are 5/8-in. diameter, and a lot of power is required to drill a 5/8-in. hole 6 inches deep into hardwood, as shown with the solid cherry shelves shown here. An entry-level cordless drill might not cut it, so I recommend using a high-torque drill with a side handle. A 5/8-in. auger bit or spiral bit will do the best job of making accurate holes.
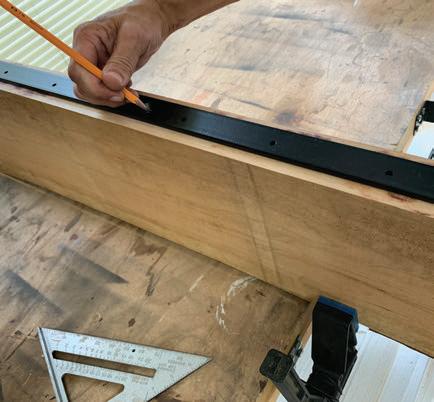
You’ll need to align the metal bracket along the lengthwise center-line of the rear shelf edge. Once in place, mark the holes for the steel rods.
Note that the holes drilled in the wood must be perfectly square to the bracket and aligned with the rod locations, or the wood will bind against the metal and resist sliding over the rods. For this reason, avoid trying to drill the holes free-handed. Using a drill press would be ideal, but the length of drill bit plus the depth of the shelf (10-1/2”) means only a large, floormodel drill press will have the capacity to drill the shelf edge. Most people don’t have that tool at their disposal, but you can use a homemade “guide block” as an alternative.

You can strip off the bark and sand the wood smooth, or preserve the bark and the rough surface texture for a more rugged appearance.
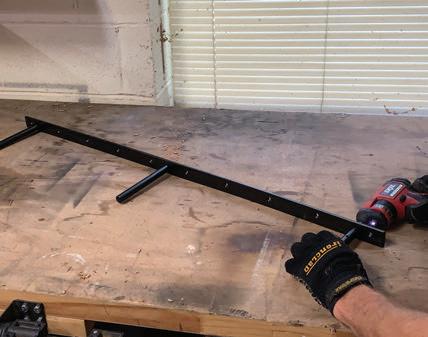
The shelf brackets we installed are sold by SemiExact.com in lengths from 10 to 78 inches.

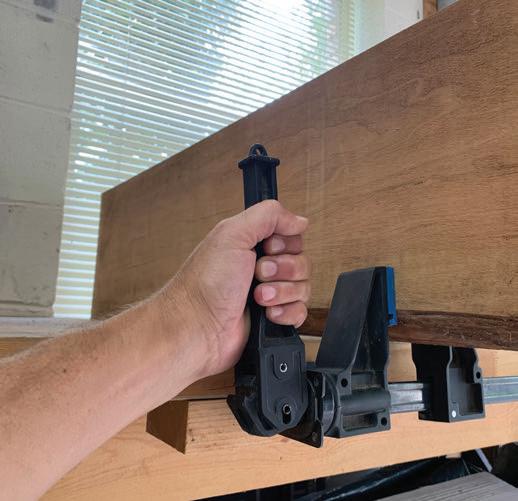
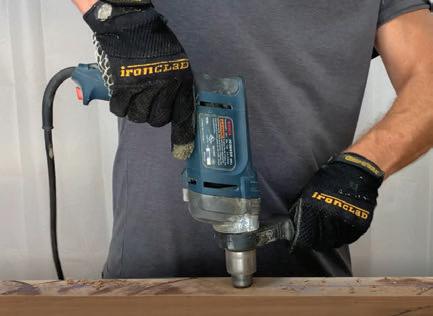
To drill the shelves for the hardware, it’s important to arrange a stable work surface and to clamp the shelves securely in place.
Avoid drilling the slabs with the plunge-type accessory that guides a drill-chuck down to the workpiece along parallel bars. We tried that method, but the torque was too much for the 1/4-inch drive of the accessory chuck, and it broke before we completed two holes.
You can, however, use one of those dual-bar drill guides or a small drill press to fashion your own “guide block” with which to drill your shelves. To do so, first drill a 5/8-in. hole at 90-degrees through a square block of hardwood that is a couple of inches thick. Then, screw or clamp the hardwood block to the rear edge of the shelf and use the 5/8-in. hole as a sleeve to guide your drill bit in a perfectly square trajectory through the back of the shelf. The only downfall of this method is that with repeat use, the guide hole will wear around the edge and lose its accuracy, requiring you to drill new guide holes.
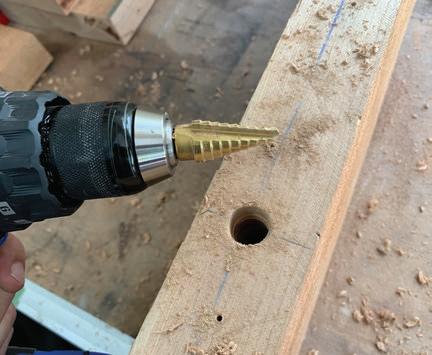
After drilling the rod holes a little more than 6 inches deep, work the bit along the inside of the holes to widen them slightly and create extra clearance to fit the shelves. You can also flare out the openings with a step bit to help the rods slide inside more easily.
Be sure to test-fit the brackets onto the backs of the shelves before mounting them to the walls, because it will be much easier to make any necessary adjustments from your workbench. For the tightest fit against the wall, use a router to create a recess in the shelf as deep as your bracket to hide the hardware.
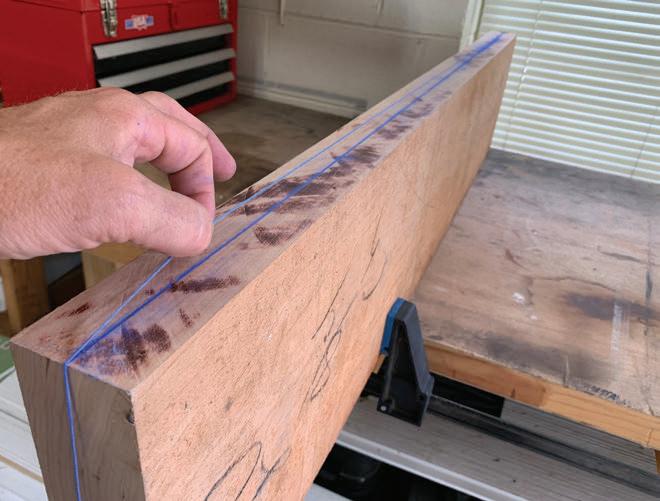
A chalk-line can help mark the mid-point along the rear of the shelf slabs.
Center the metal bracket and mark the holes for the metal rods.
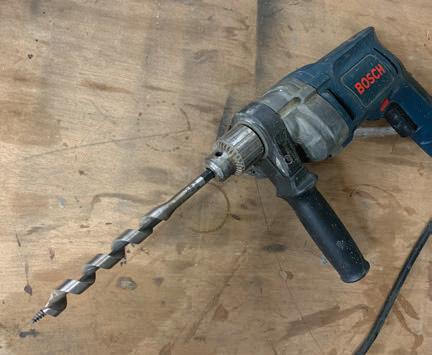
To drill the 6” deep 5/8” diameter holes in hardwood, we recommend using a high-torque drill with a side handle. An auger or spiral bit will work best.
To keep the drill bit at a 90-degree angle, we first drilled a 5/8” hole in a scrap hardwood block and screwed it to the shelf. The 5/8-in. hole serves as a sleeve to guide the drill bit into the shelf back.

You’ll need to remove the guide block to finish drilling the last couple of inches deep.
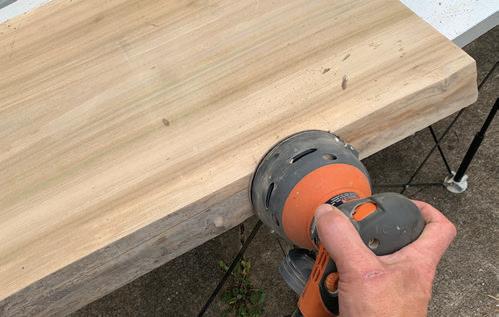
After prepping the shelves for installation, sand the surface, clean it thoroughly, and apply your finish of choice. You can strip all bark from the live edge and sand it smooth, or leave some bark and even add distressed texture for more rustic appeal. Apply a durable clear-coat to the wood finish to protect the surface from moisture damage or stains.
When hanging the shelves, you’ll get the strongest hold by mounting the Floating Shelf Brackets into wall studs. Use a stud finder to find the solid framing. Otherwise, use the appropriate wall anchors or screws (i.e., drywall, masonry, concrete).
For stud mounting, carefully level the bracket at your desired height and drive 3-in. wood
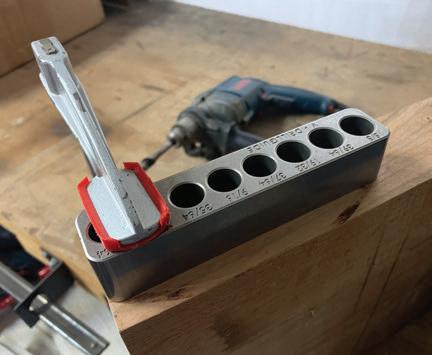
If you plan to make a lot of floating shelves, we recommend using the metal V-Drillguide from Big Gator Tools. It matches eight different bit sizes—up to 5/8 inch—and its durable steel construction won’t wear out from repeat use.
Before mounting to the wall, you should test-fit the hardware on the shelves and make any necessary adjustments. A step bit provides a handy way to flare out the mouths of the holes for an easier fit over the rods.
When bolting the rods to the bracket, you might find it helpful to leave the rods slightly loose, which allows a degree of movement that can help when sliding the slabs over the rods.
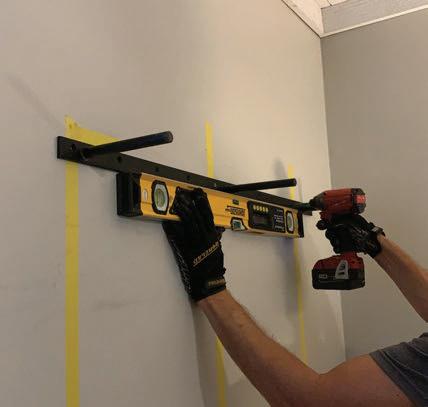
Mark the studs, align the mounting holes, and carefully level the shelf hardware. When hanging multiple shelves, I prefer to mark the studs with vertical strips of painter’s tape.
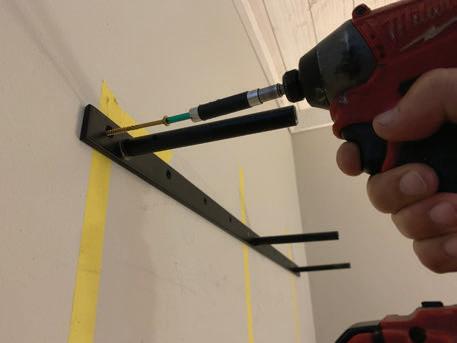
When driving screws close to a mounting rod, a bit extender can be helpful to keep the screw aligned with the wall studs.
This vertical shelf application can be used with virtually any number and size of shelves that match the hardware, and the wood can be finished in wide assortment of colors and finishes to suit your home’s décor. This coffee table was made from a slab of poplar purchased from Rustic Lodge Works of Cullman, Alabama.
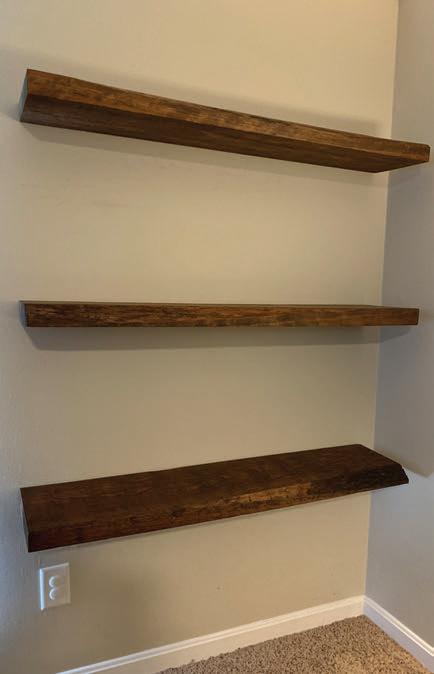
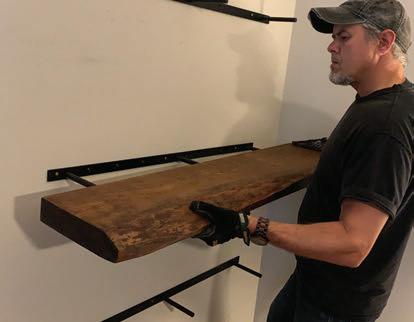
To hang the shelves, align the rods with the mounting holes and slide the slabs in place.
screws through the holes provided in the hardware into the solid wall framing. Repeat this for each shelf bracket. Slide the slabs onto the bracket rods and enjoy your new shelves.
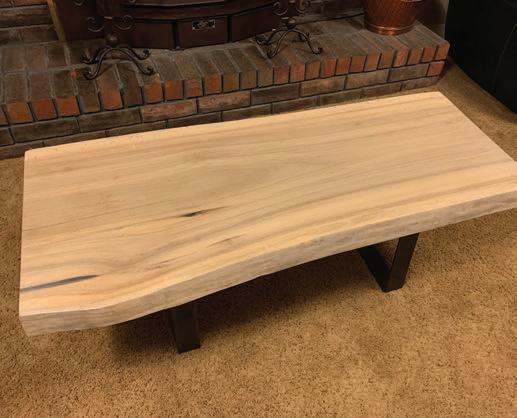
LIVE EDGE COFFEE TABLE
Table construction is another trending application for live-edge slabs. The slab alone can serve as the table top. You can build a wooden leg support structure, or reduce your labor and give the table an industrial touch

My first step was to cut the ends square, although I left a live edge along both long sides.
On this project, I sanded off the tree bark but left the natural shape intact.
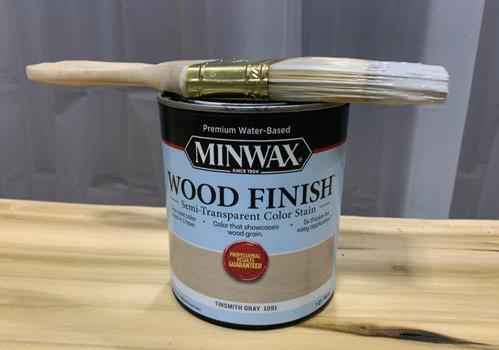
Finish to your preference. For the table, I used a combination of teak oil and a semi-transparent gray wood stain.


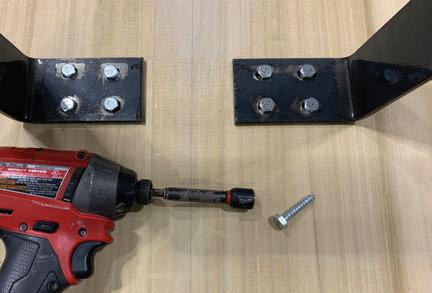
Fasten the hardware in place. On this project, I used quarter-inch lag screws. Make sure your drill bit and fasteners are not long enough penetrate the top surface of your table. Use a square and tape measure to carefully position the legs on the underside of the table.

Mark the fastener holes and predrill pilot holes to avoid risk of splitting the wood.
Place a level on the legs in each direction to make sure your table will have a level surface when upright. Correct any minor problems by inserting shims between the table and the legs before screwing the legs in place.
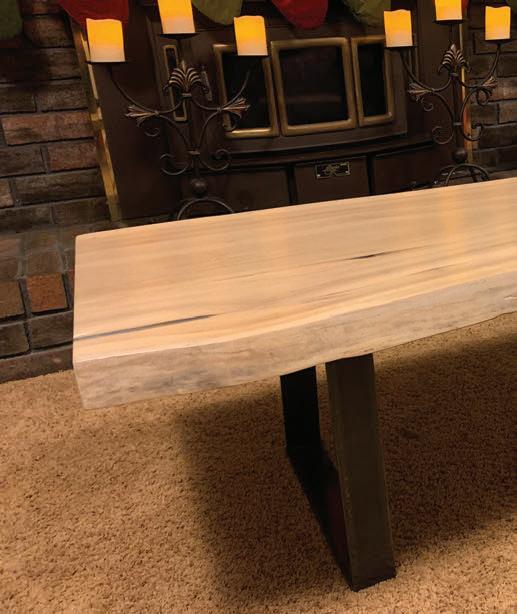
by attaching prefabricated metal legs, as shown on this coffee table.
The U-shaped metal legs from DIYhairpinlegs.com fasten directly onto the underside of the slab. With the table top upside-down, use a tape measure to position the legs where you’d like them, typically centered on the bulk of the slab and parallel to each other. Mark the legs’ mounting holes with a pencil.
Predrill the fastener holes to avoid splitting the wood. On this table, I used 1/4-in. lag screws to attach the metal legs.
Before final assembly, move the table to a very level work surface. Position a bubble level across the bottoms of the legs in each direction to make sure the table will sit flat when upright. Slight deviations in the slab thickness or construction of the legs can cause problems. If you see any issues, insert shims as needed between the slab and the metal legs until you achieve level in each direction. Drive the fasteners through the mounting holes in the hardware. Make sure all fasteners are cinched down tight and the legs are secure before turning your table upright for use.
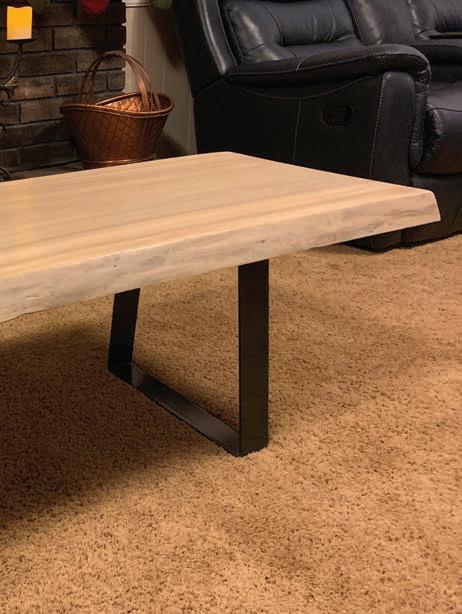
The final step was to apply a clear Polycrylic finish to protect the wood from water and stains.
H
TOOLS AND MATERIALS FOR DECKS & PORCHES
As the seasons change and folks spend more time outdoors, deck and porch construction ramp up to meet the demand. Here’s a look at materials and tools to consider for your next backyard home-improvement project.
DECKORATORS MINERAL-BASED COMPOSITE (MBC) DECKING AND CLADDING
Deckorators patented mineral-based composite technology provides the deck industry’s best strength-to-weight ratio with boards that have virtually no thermal expansion or contraction. Featuring a fiber-like structure similar to wood, MBC decking is stronger and 35% lighter than traditional composites, similar in weight to PVC. It's powerful, stable, doesn't absorb moisture and is warranted for installation in the ground or water. The MBC boards can also be used as exterior cladding. As cladding, it provides style and structural integrity with stain- and fade-resistant cap stock, backed by a 50-year structural warranty. Deckorators MBC decking lines— Voyage, Vault and picture frame boards — can be installed as wall cladding in horizontal, vertical and angled applications. Each line offers its own unique color, variegation and texture.
www.deckorators.com
RAILING KITS FOR DECORATIVE SCREEN PANELS
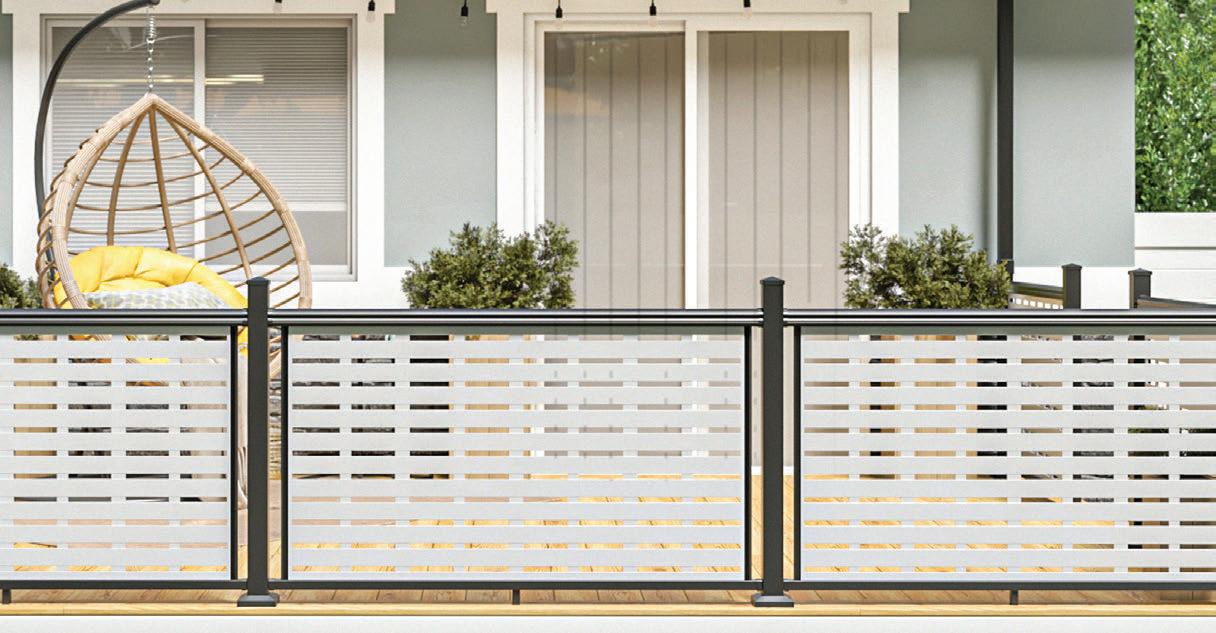
Barrette Outdoor Living, Inc., now offers kits that allow for the company’s Decorative Screen Panels (DSPs) to be used as infills with select aluminum and vinyl railing products. The kits present a customizable, code-compliant, semi-private infill option for the RDI Collection Finyl Line Vinyl Railing, Avalon Aluminum Railing and Privacy Rail. Homeowners can also use DSPs under decks in place of traditional lattice or as an interior or exterior wall hanging. Decorative Screen Panels sold separately.
www.barretteoutdoorliving.com
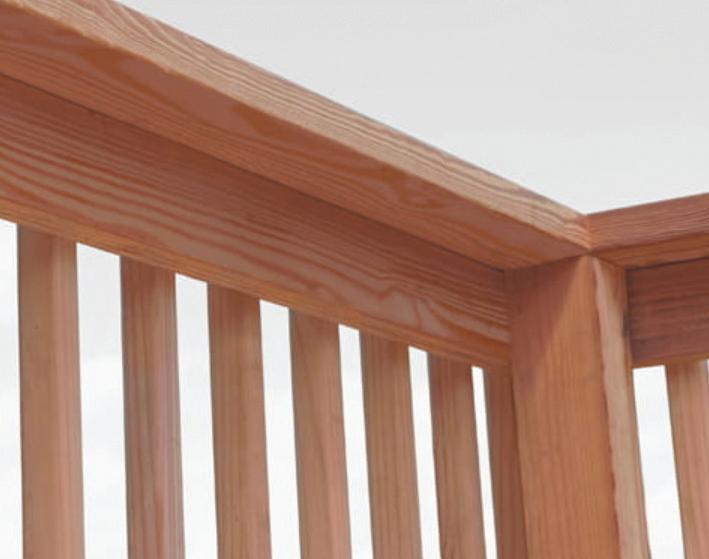
PROWOOD DURACOLOR LUMBER
ProWood color-treated lumber allows the unique, natural beauty of the wood to remain visible. It's the look you want without the work of staining. ProWood Color Treated doesn't use a topical finish or stain that quickly fades away. The lumber employs in-solution colorant that penetrates the wood during the pressure-treating process. It also features a natural tint that allows the wood's characteristics to remain visible. With Color-Treated lumber, decks, railings, lattice and timbers look better longer, backed by the industry's first two-year color assurance limited warranty against fading.
www.prowoodlumber.com

RYOBI 18V ONE+ POWER SCRUBBER ATTACHMENTS
With attachments soft enough for delicate surfaces like glass and stainless steel to abrasive brushes that can scrub dirt and grime off decks, brick, concrete, and rusted metal, RYOBI has a scrubbing solution to fit your needs. With hex shank compatible options available for the P4400 4V Compact Scrubber as well as larger heads perfect for the P4500 and P4510 18V ONE+ cordless scrubbers, harness the power to do more with RYOBI cleaning solutions. Available exclusively at Home Depot.
www.homedepot.com
SCREENEZE SNAPTRACK

The original ScreenEze is a two-part, no-spline, self-stretching system that allows for large screen-porch panels and easy repair. The base secures to the post/column and the cap, when pressed on, secures and stretches the screen fabric. For the DIY installer, the new SnapTrack System uses the same ScreenEze technology but has some notable differences. SnapTrack installs to the face of your post/column. The aluminum base is a “T” shape and the screws are hidden under the vinyl cap.
www.screeneze.com
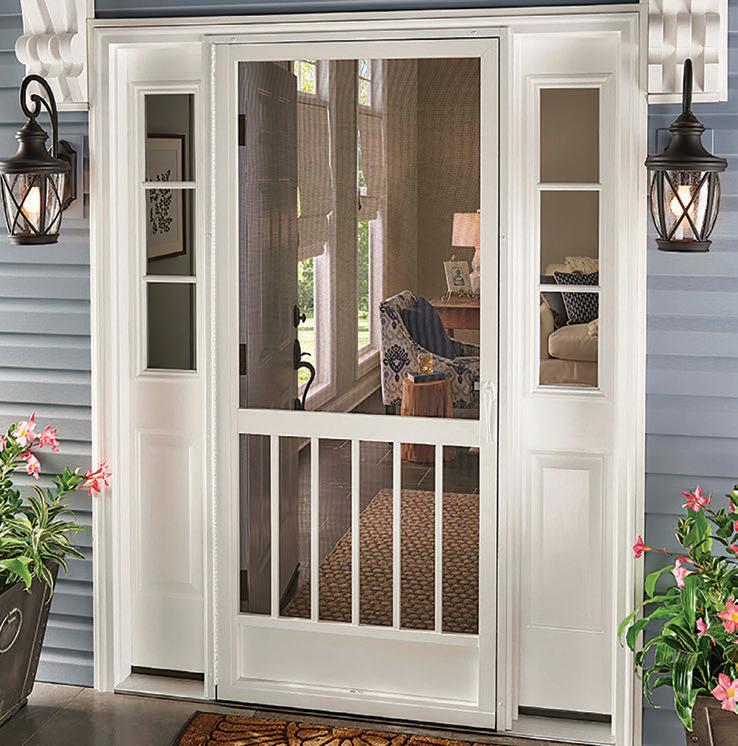
PCA PRODUCTS SCREEN DOOR SOLUTIONS
Are you tired of your screen door sagging, warping and splitting at the edges? PCA Products claims to have “the last screen door you’ll buy”— manufactured to withstand over 740 lbs. with a heavy aluminum frame, corner keys, and a self-locking screen system. With over 70 styles, 6 colors to choose from, each hand-built screen door is powdercoated to withstand weather and be virtually maintenance-free. These decorative screen doors are made in the USA using materials that withstand the harshest environments and backed by a limited lifetime warranty.
www.pcaproducts.com
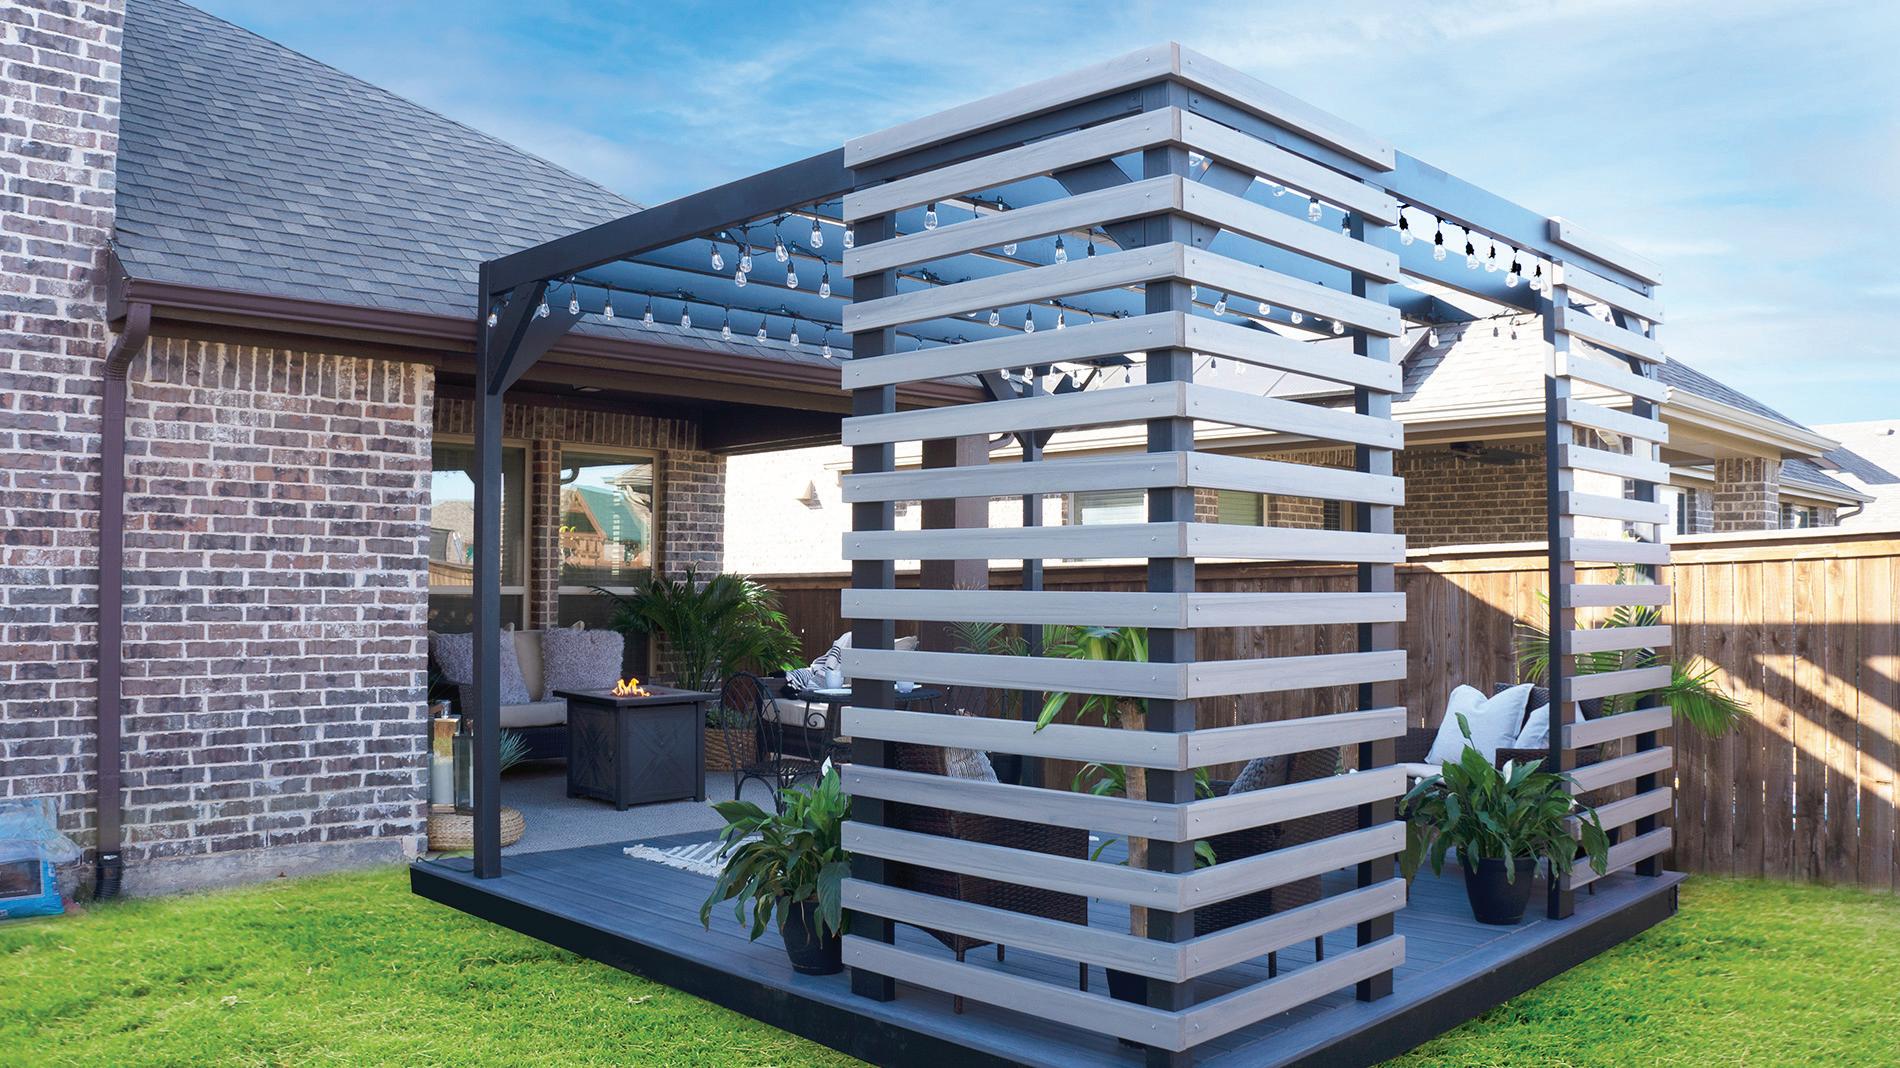
FORTRESS BUILDING PRODUCTS STEEL PERGOLAS
Fortress pergolas combine steel’s unmatched weatherability and low maintenance qualities with a modern aesthetic. Highly versatile, Fortress pergolas can be configured in infinite ways and can be employed across any type of outdoor surface to define usable space. Fortress pergolas sidestep issues associated with moisture absorption, one of the most common reasons for decomposition in standard wood pergolas. The sleek structural steel is dual-layer protected against fire, corrosion, twisting, insects and rot. Customers can select from two freestanding pergola styles available for download. Each style can be assembled in countless configurations to accommodate ever-expanding backyard functions. Customers that have worked with wood or framed a wall with steel studs and track will feel at home constructing a steel pergola system. No specialized tools are required. The assembly is backed by a 25-year limited manufacturer warranty.
fortressbp.com/pergolas
YELLAWOOD TREATED STAIR COMPONENTS
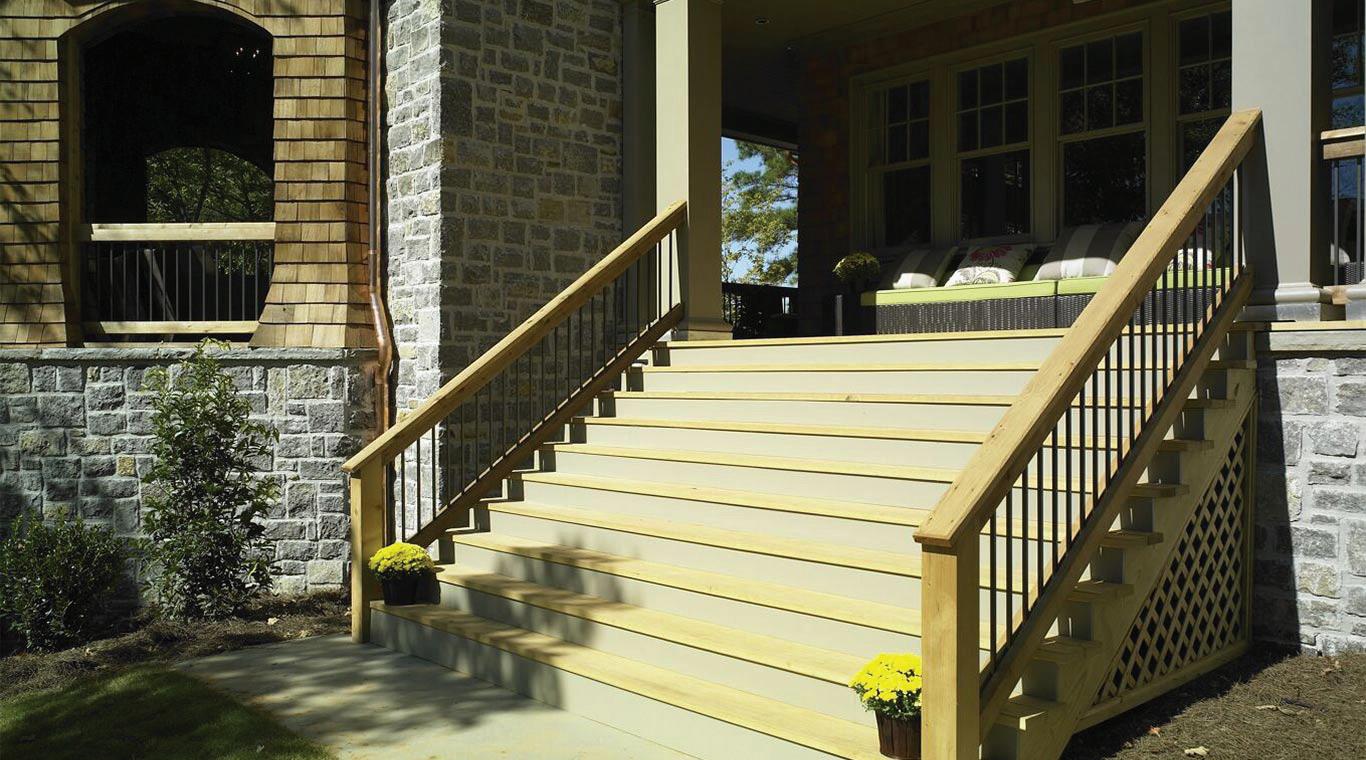
Few things rival the frustration of cutting step stringers from a 2x12. Why waste time calculating the rise and run of each step when it’s already been done for you? With YellaWood pre-cut, pressuretreated step stringers, just take a few quick measurements and do some simple math, and the job is practically done. Need some ready-to-install stair treads? Yellawood also offers bullnose step treads with a grooved surface to provide improved traction, while V-channels on the bottom help minimize cupping. The single bullnose edge gives your step a routed look without the headache of routing each step on site.
www.yellawood.com
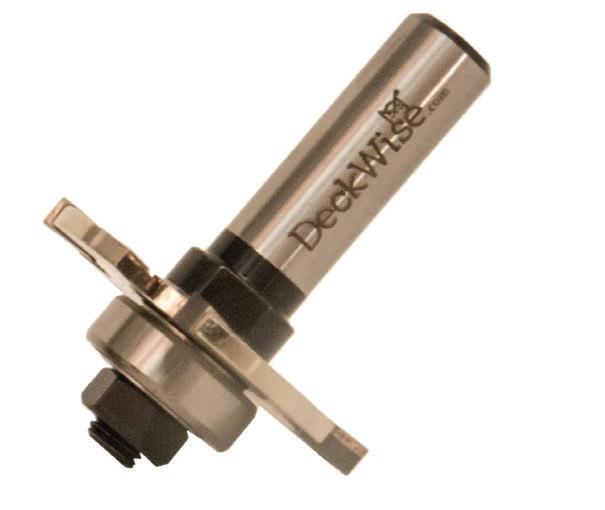
DECKWISE DECK BOARD ROUTER BIT
Traditional square-edge boards usually require deck screws for installation, but the DeckWise Router Bit is a 4-wing slot cutter specifically designed to create a perfectly symmetrical groove in the boards to accept Deckwise Ipe Clip Hidden Deck Fasteners. The 4-wing design provides a smooth cut for creating slots and grooves in decking material including exotic hardwoods, thermally treated softwoods, and composites. The bit fits most standard router devices.
www.deckwise.com
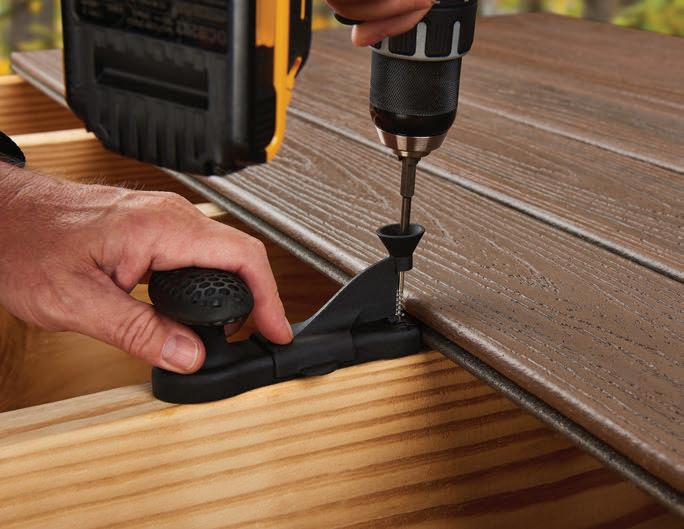
TREX UNIVERSAL FASTENER INSTALLATION TOOL
Trex Universal Fasteners are self-gapping hardware that attach two grooved deck boards together so no screw heads are visible on the walking surface. Trex’s new Universal Fastener Installation Tool features a nose cone to ensure you hit the head of the screw every time, a handle that allows for both pushing and pulling, and a handy bit holder in the bottom.
www.trex.com
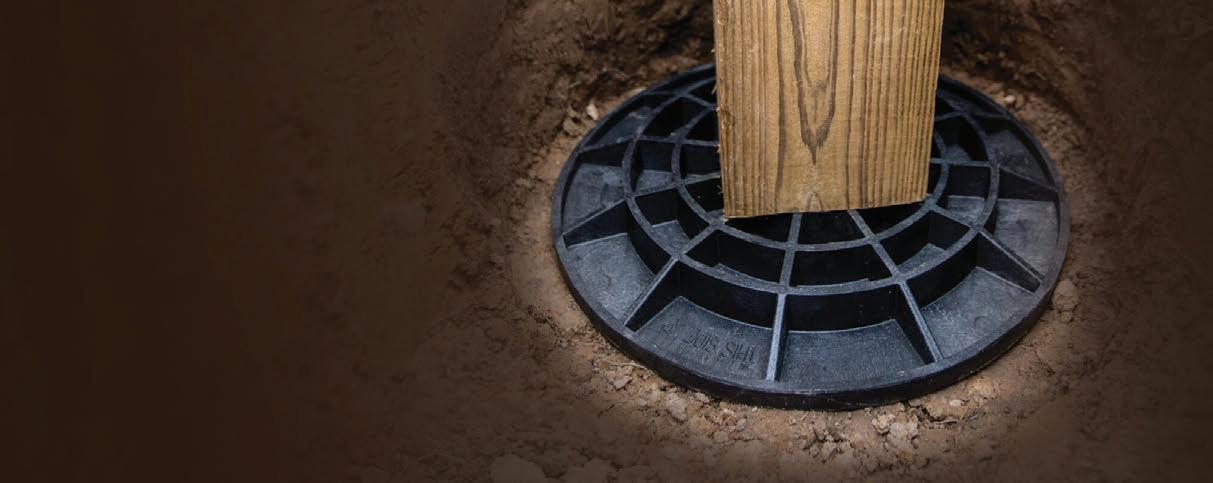
FOOTINGPAD
For decks, post-frame buildings, and other post-supported structures, FootingPad structural post foundations are engineered to meet or exceed the load capacity of concrete, while being lightweight and easy to handle. Compared to concrete—which is heavy, requires mixing and curing time, and is prone to cracking—FootingPad footings are easy to handle, guaranteed to perform, and allow you to complete projects faster. Footings work by spreading the load of a structure over a larger soil surface area. If overloaded, soil will give way and the footing sinks. This is true for footings made of any material, including concrete. FootingPad footings are guaranteed to exceed the load capacity of all soil types when using the correct size for your application. A 10- and 12-in. FootingPad will support a 4×4 or larger post, and a 16-in. FootingPad will support a 6×6 or larger post. (Allowable loads are determined by the type of supporting soil.) The product is made up of a proprietary blend of polypropylene and fiberglass and is impervious to the elements.


