11 minute read
GUTTER TALK


SKILL LEVEL 3
HARD
GUTTER TALK By Tom Matthews
What do professional gutter installers have that the average homeowner doesn’t? Expensive roll-forming machines, for starters.
All gutters can be categorized as seamless or sectional. Seamless gutters are installed by professionals using specialized machinery that shapes a roll of sheet metal into a continuous, straight length of gutter to fit the house. The only seams are found at corner miters and downspouts. Seamless gutters are considered more durable because the seams of sectional gutters can weaken years down the road. As outdoor temperatures fluctuate, the constant expansion and contraction of the gutters tends to crack the sealant at the sectional joints. If this happens, the seams have to be re-caulked from the inside with a special gutter sealant.
A seamless gutter won’t have the same maintenance issues as one with seams. Furthermore, the seams of sectional gutters are visible, which some homeowners don’t like for aesthetic reasons.
For homes in areas prone to leaf accumulation, professional gutter installers offer another advantage: seamless covers to match your seamless gutters. While the gutters protect your home by handling the rain, the covers protect the gutters by guarding them from leaves, pine straw, twigs,
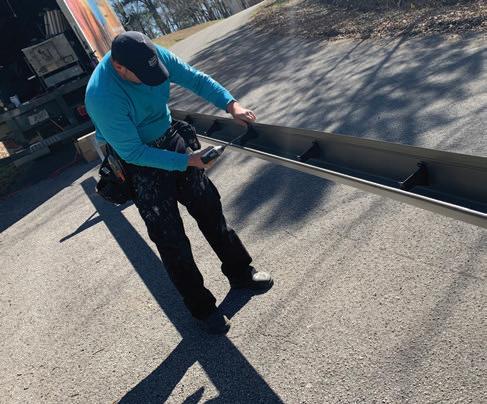
s Pro installer Tommy Mooney of The Ultimate Gutter Guard Company in Birmingham, Alabama, uses a gutter machine to form a continuous straight run with no seams.
and other such organic matter than can clog them and prevent proper drainage.
The professional installation method is to measure the roof-line, then feed sheet-metal into the shaping machines to form a rigid K-profile gutter, which is cut to the exact length needed. Next, the installers pre-attach the gutter hangers and end caps, and cut out any downspout openings as needed. The gutter cap is machine-formed in the same manner to the length needed.
It was nice to see these guys’ attention to detail. For example, after they cut a valley opening in the gutter cover, the installers fit it with a rain screen spray-painted to match the gutter. By the way, that’s another advantage of professional gutter installation — more available color options than the typical white-painted sectional systems available from most “big box” stores.
In the end, the home gets a slick-looking, seamless, covered system that blends well into the roof line. The Gutter Guard allows the gutters to collect roof runoff while preventing leaf buildup. And believe me — for anyone living in a tree-towered neighborhood, gutter covers are a MUST to reduce maintenance.
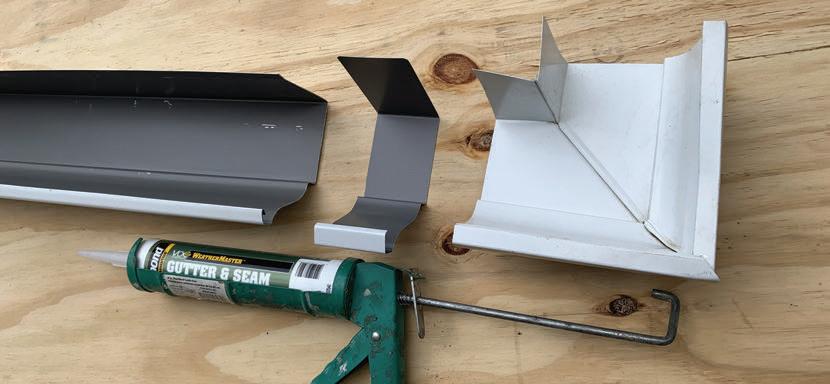
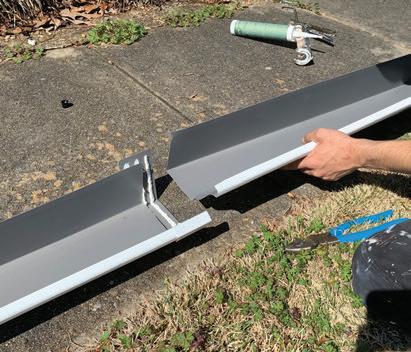
s For any gutter installation job, it helps to assemble the components on the ground and make as many modifications as possible before carrying it to roof level.
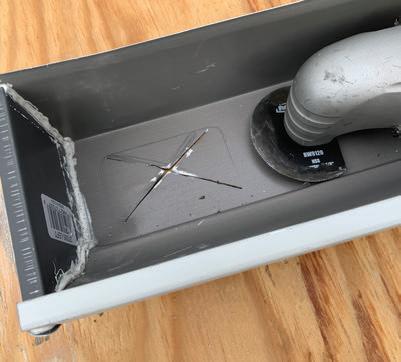
This rain screen will be located below a roof valley. s
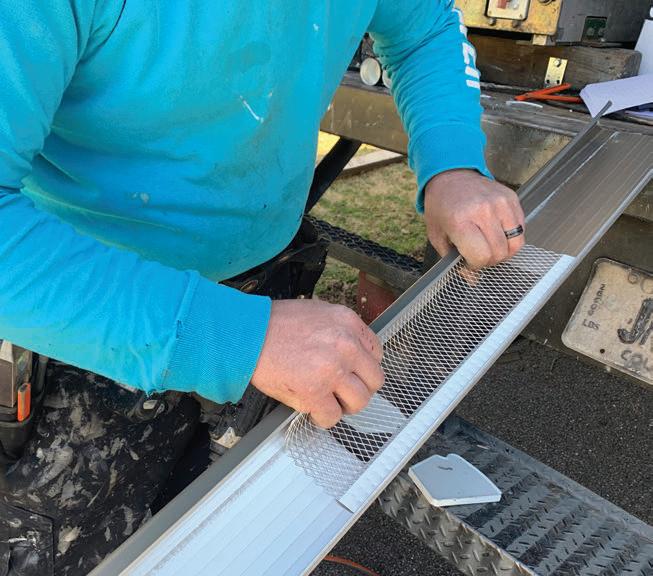
s The screen gets painted to match the gutter and cover.
SECTIONAL GUTTERS
Seamless gutters are very nice, but you’ll also have to pay for professional installation, which is considerably more expensive than the DIY approach. For small installations and budget-friendly repairs, you can pick up lengths of sectional gutter and downspouts at most “big box” stores and assemble them using folding aluminum “seamer” pieces plus gutter sealant to glue the sections.
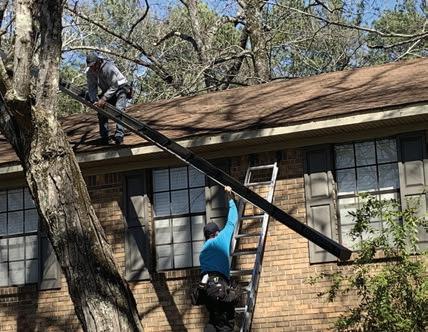
We recommend DIY’ers limit their gutter installation adventures to first-level roof lines. For multi-level homes, your safest move is to call a pro.
Sectional gutters can be particularly helpful on additions such as carports and porch roofs. They can also come in handy for repairs, such as when a bad storm tears a gutter section off your house. In the case of storm damage, you can carefully cut away the damaged gutter section and replace it with a length of sectional gutter joined with an aluminum seamer piece and quality gutter sealant.
You can also retrofit your gutters (seamless
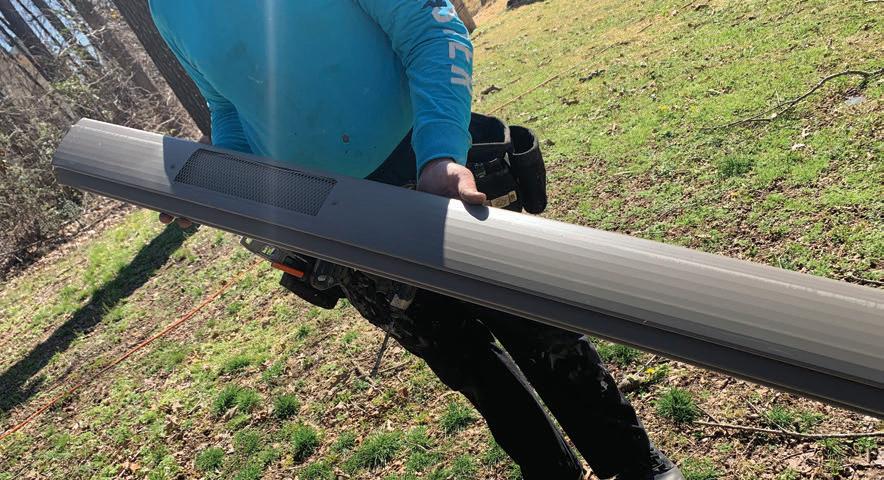
s Once assembled, large sections of the gutter can be installed at one time
s The cover is cut to match and installed right on top of the gutter.

s Gutter covers prevent debris accumulation from clogging the gutters. or sectional) with a variety of different guttercover products to prevent leaves and debris from building up and causing clogs.
However, if you’re not comfortable working at heights or you have a multi-level house, then professional installation is the smart way to go.
DIY TIPS FOR SECTIONAL GUTTERS
PLANNING
First step is to sketch out your gutter system on paper so you can quantify the various components required. Measure your roof line to determine the number of 10-ft. sections of gutter. Measure your wall height to calculate the number and length of downspouts you’ll need.
Next, account for the number of seamers (which are placed at joints between gutter sections), end caps, inside or outside corner miters, downspout elbows, and end drops which direct water from the gutter to the downspouts (plus flanges for the end drops). All these components will be sold at your gutter-supply store. Gutter sealant is required to seal all the joints. You’ll also need sheet-metal screws to connect the downspout sections, and downspout bands to fasten against the house.
LADDERS
It’s a good idea to attach a ladder stabilizer to the top of your ladder. It prevents the ladder from swaying while you stand on it. The stabilizer also provides a 10-in. standoff
s Sectional gutters are assembled using aluminum seamer pieces to join the sections.

from the roof line, which makes it easy to work on the fascia and gutter without obstruction. The stabilizer rests on the roof, rather than on the shingles, gutter, or fascia to avoid any accidental damage from that ladder contact.
PREASSEMBLY
To limit your time working atop the ladder, the safest approach is to assemble as much of the gutter system on the ground as possible. But keep the sections small enough to carry up the ladder safely.
A sectional gutter requires an “end-drop” at each downspout location. You can carefully cut an end-drop in the bottom of the gutter or attach a sectional end-drop.
To join the end-drop to the gutter—or to join any gutter section to another— requires a “seamer.” The seamer is a

s All joints must be sealed with a quality gutter sealant.
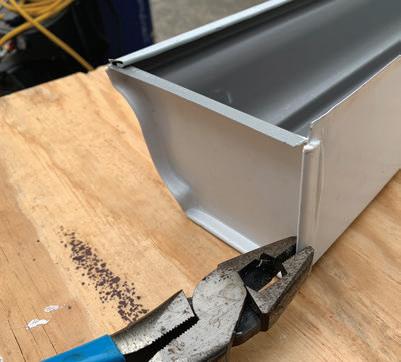
s Crimp the connections together with pliers.
s Assemble as much of the gutter on the ground as possible. Paint the gutter prior to hanging it.
s A buzz-cutter (AKA oscillating multitool) with a metal-cutting blade is handy device for cutting end-drops into a gutter when necessary.
piece of aluminum that matches the gutter in size and shape. First thoroughly apply gutter sealant to the side of the seamer piece that will contact the gutter from below. Butt the gutter sections together, then wrap the seamer around the joint from below. Bend the front of the seamer so it hooks over the front edges of the butted gutters. The back edge of the seamer extends above the rear of the seam, and you fold this metal flap over the edge of the gutter sections. Use pliers to crimp the front and rear lip of the seamer tightly onto the gutter. Cover the seam inside the gutter with a generous bead of sealant.
A gutter’s end cap will be shaped and sized to match the gutter. Install it by caulking the edges with gutter sealant and pushing the end of the gutter into the seams of the end cap.
It’s also a good idea to install the end-drop flanges into the gutter section while it’s still on the ground. The flanges provide a mounting
s Cut away the flaps from the enddrop hole, apply sealant to the rim of the flange outlet, and insert it into the hole flush with the bottom of the gutter. The downspout connects to the flange outlet.

CUTTING TO SIZE
When assembling the gutter and downspouts, you will likely have to cut some of the materials to length. One method is to clamp the gutter sections to a couple of saw horses and cut using a hacksaw. A pair of metal snips can also do the job, but it can be tough to keep the cuts clean and straight.
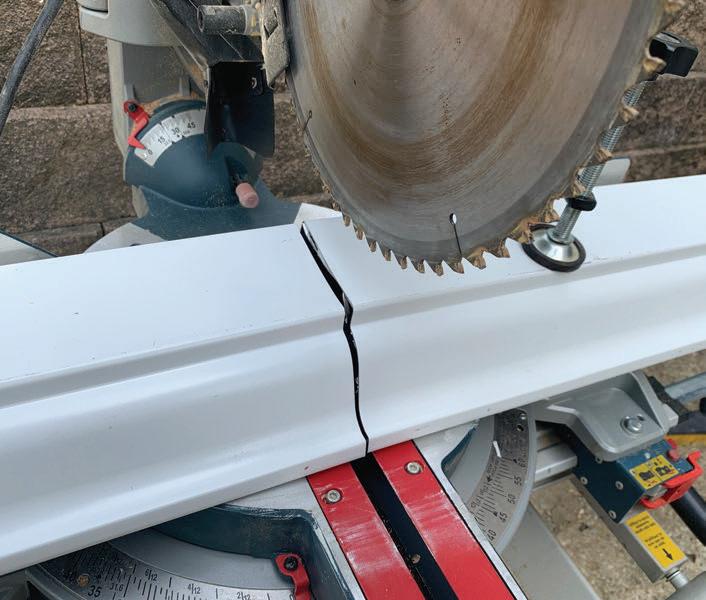
Another option is to use a 12-in. miter saw with a fine-toothed blade turned backwards. The speed of the blade combined with the backwards teeth make a straight, clean cut with very little effort. When cutting gutter material on the miter saw, turn the section upside down so the blade enters the underside of the gutter rather than the top edges. After cutting, be sure to return the blade to its original cutting direction so nobody uses the backward blade when not intended.
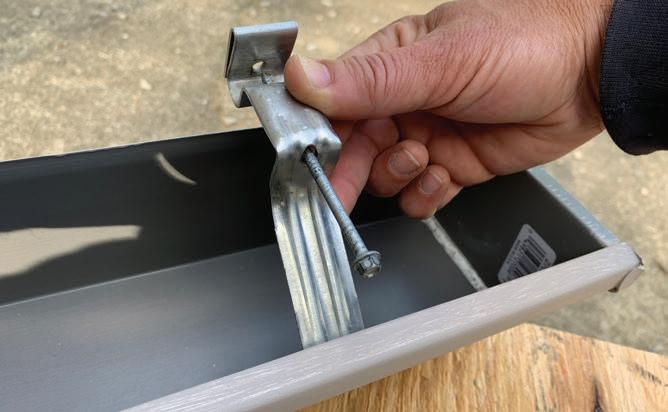
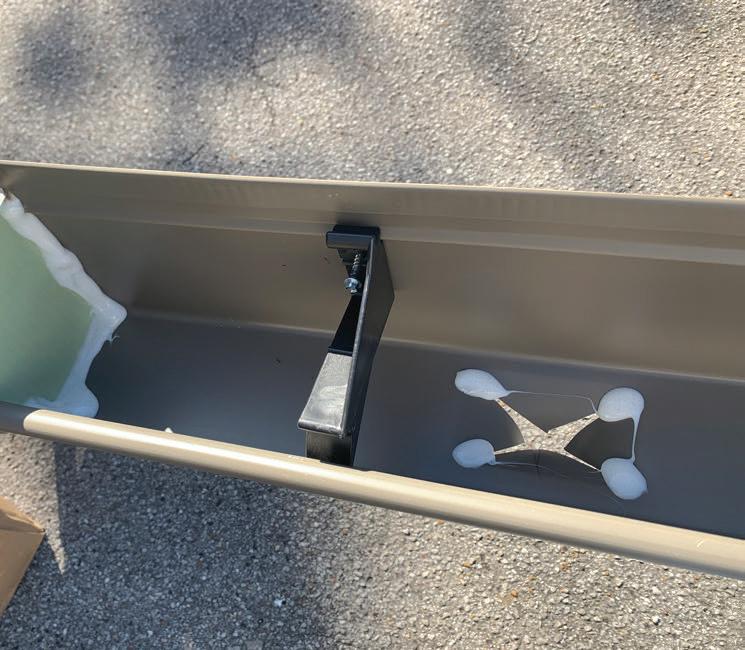
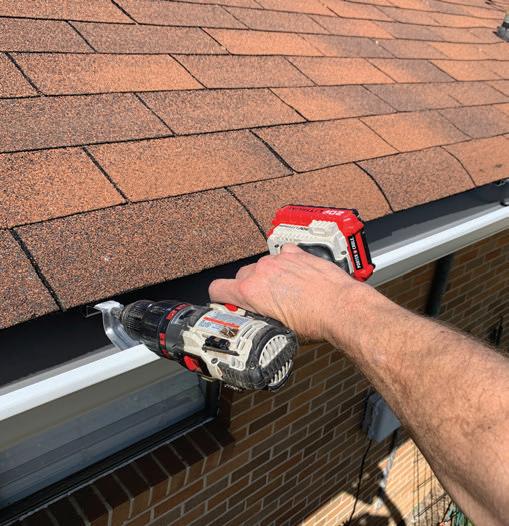
s Attach “hidden” gutter hangers every couple of feet. place for the downspouts, which will be installed after the gutter is in place.
These days, gutters are fastened to the house using the hidden hangers with integrated screws. Clip the hangers in place every couple of feet along the length of the section. Make sure to locate a fastener near the end of each section to minimize stress at the joint locations.
Before installing a gutter section, give the sealant a few hours to dry and gain some rigidity at the joints.
INSTALLATION
Mark gutter layout on the house fascia with a chalk line. At one corner, mark the highest point of the gutter run 1-1/4 in. below the roof line (or drip edge flashing if installed). Unreel the chalk line and move the gutter to the opposite end of the fascia. At that corner, first level the string, and then drop the downspout end of the gutter about 1 inch per 20 feet and snap the chalk line. This achieves a slope that helps gravity pull water to the downspout locations.
Note that gutter sections longer than 35 feet should have a downspout at each end. In this case, make two separate chalk lines, pitching the gutter from the center to each downspout.
Drive the screws of the hidden hangers into the fascia, being careful not to drive them too tight, which can bend the hangers and distort the gutter’s shape. If you don’t have a solid wood fascia to hold the fasteners, you will need to locate the rafter tails. These 2x framing members should be located every 16 inches behind the fascia. Mark the tails along the chalk line and predrill the fastener holes to prevent splitting the wood with the gutter screws.
DOWNSPOUTS
Once your gutters are installed, the downspouts are your final piece of the puzzle. Use screws and sealant to fasten a flange outlet inside the hole of each end drop.
Duct-tape an elbow section onto each flange outlet. Use a straight edge to follow the path of the elbow to the wall where the second elbow will be located. Tape the second elbow in place on the wall.
Avoid over-tightening the gutter hangers, which will crush the gutter s
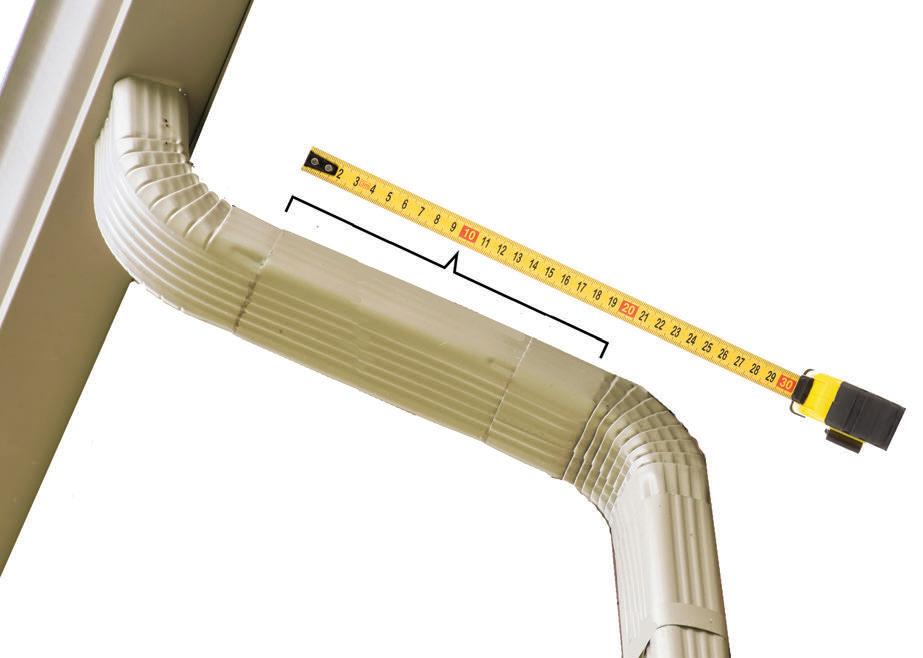
s The elbows and downspouts will have one end crimped. The smaller, crimped ends fit into the larger ends of the lower sections to form a slip joint. Account for the overlapping slip joint when measuring.
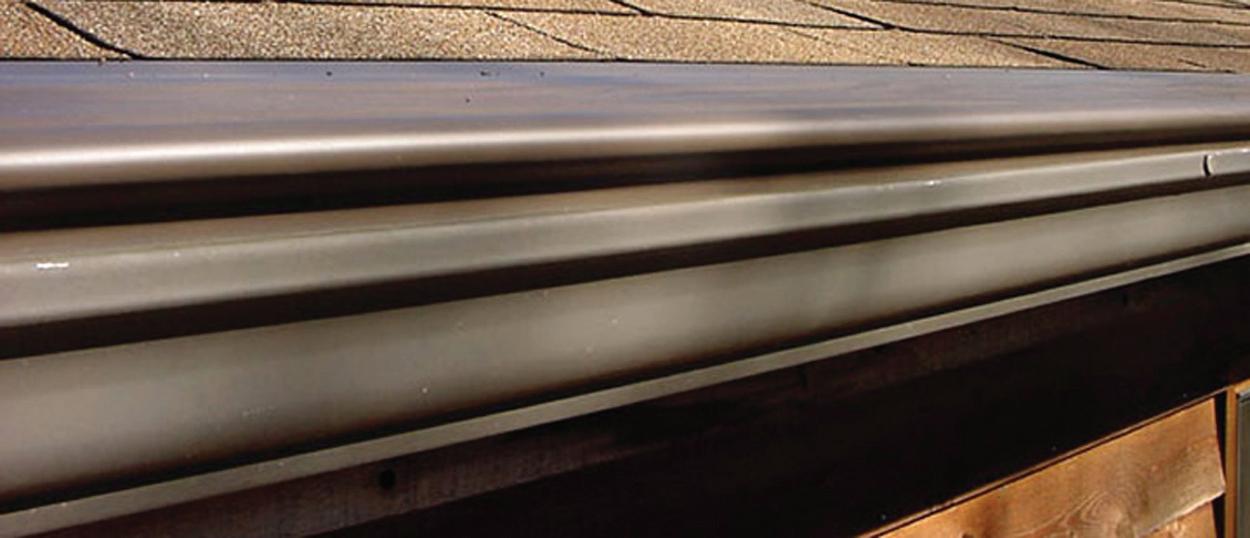
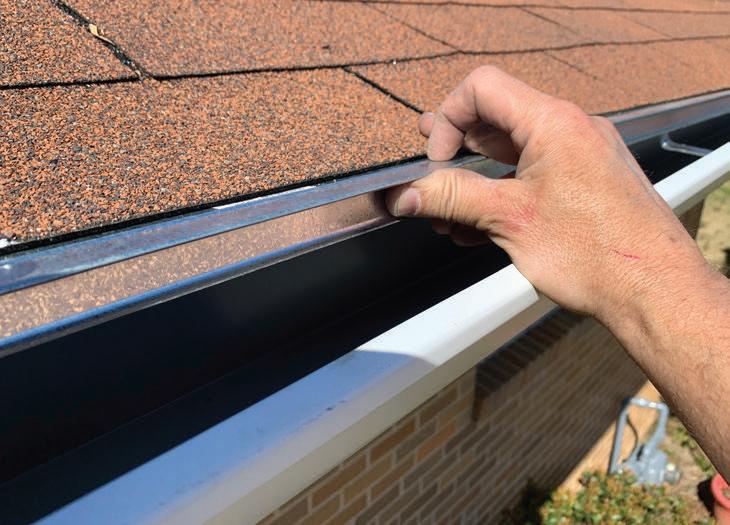
The drip edge flashing at the roof line should overlap the edge of the gutter to direct water into the trough.
Measure the downspout section needed to install between the two elbows. Each downspout and elbow has one end crimped; the larger end fits over the smaller end to form a slip joint. Account for the overlapping slip joint when measuring—usually about 1 inch of downspout overlapping the elbow at each end.
Assemble your downspout at ground level, driving two primed aluminum screws into predrilled holes at each joint. Avoid leaks by making sure the upper downspout sections tuck into the lower sections.
Nail or screw the downspouts snugly against the wall using two flexible downspout bands per each 10-foot section. Duct tape will hold the downspout stationary while fastening.
Attach a front or side elbow at the bottom of the downspout.
Finally, use drain extensions or splash blocks to direct water away from the building foundation. H
s